

Philips SPC1300NC-27 User Manual

SPC1300NC
Register your product and get support at
www.philips.com/welcome
User manual

Congratulations on your purchase and welcome to Philips!
To fully benefit from the support that Philips offers, register
your product at www.philips.com/welcome
2
EN
Your WebCam

Please check that the following items are packed in the Philips
SPC1300NC box.They are provided to help you set up and use
your Philips SPC1300NC.
Philips SPC1300NC Installation CD-ROM
WebCam including manual
SPC 1300 NC
Installation CD v.1.00
9082 100 03367
What’s in the box?
What’s in the box
EN
3

1 Snapshot button
Enables you to take photos without using your mouse.
2 Focus ring
For manually adjusting the focus of the lens.
3 Rotating foot
For manually changing the vertical angle of the WebCam.
4 Clamp with rubber rims / camera foot
For attaching the WebCam to your (flat panel) PC monitor or
laptop screen.
The clamp can be folded when the WebCam is placed on a
desk or (large) desktop monitor.
5 USB connector
For connecting the WebCam to the USB port of the laptop or
desktop PC.
The WebCam will derive its power from the laptop or desktop
PC when a USB connection is made.
6 Digital microphone
For adding voice and sound when video calling and video
recording.
7 Power LED
Lights up blue when the WebCam is in use.
Chapter
EN
4
Legend of functions
1
7
2
6
3
4
5

Chapter
EN
5
Contents
3 What’s in the box?
4 Legend of functions
5 Contents
6 Welcome
7 Things you should know
7 Safety precautions
7 Copyright
8 Installation
8 Installing the WebCam software
10 Connecting the WebCam to your PC / laptop
11 WebCam settings
11 General settings
12 Video settings
15 Audio settings
16 Features settings
19 Operating the WebCam
19 VLounge
19 Selecting your WebCam
20 Capturing images / making video recordings
21 Instant messaging and Internet calling
(video chatting, video calling and V0IP)
22 Motion detection
24 Broadcasting your videos over the Internet
25 Technical specifications
26 Important information
26 Disclaimer
26 FCC compliance
27 Environmental information
27 System requirements
27 Disclaimer of warranty
27 Limitations of damages

Chapter
EN
6
The Philips SPC1300NC WebCam you have just purchased is
manufactured to the highest standards and will give you years of
trouble-free use. Brilliant images and blazing colors, that's what
you get with the SPC1300NC WebCam.
After installation, the new WebCam can be used for all sorts of
applications, such as:
• Video: use the Philips SPC1300NC WebCam for video chatting
and video calling.The WebCam works with Skype, Windows
®
Live Messenger, Yahoo! Messenger,
AOL Messenger, QQ and other free instant messenging and
VoIP (Voice over Internet Protocol) services;
• Video e-mail / Video capture: create your own video
presentations, video mail, product demonstrations, training
videos, Internet clips etc.;
• Snapshot images: use images in presentations, create postcards,
or send them via e-mail.
• Editing and special effects: after recording the images you want
with the Philips SPC1300NC WebCam, the images can be easily
edited using image or video editing programs.
The following sections in this manual give a step-by-step
description of the installation process and explain how to use the
Philips SPC1300NC WebCam.
Welcome

Chapter
EN
7
Please read the following instructions carefully, and retain them for
future reference. It may be helpful to have the instructions for use
for the PC at hand for reference.
Safety precautions
Observe the following guidelines to ensure that the WebCam will
operate safely and to prevent defects.
• Do not use your WebCam in environments outside the
following range: temperature: 0°C to 40°C, relative humidity:
45% ~ 85%.
• Do not use or store your WebCam in/under:
– direct sunlight exposure;
– very humid and dusty environment;
– near any kind of heat sources.
• If your WebCam gets wet, dry it with soft cloth as soon as
possible.
• If the lens is dirty, Do NOT touch the lens with your fingers.
• Clean the outside of the WebCam with a soft cloth.
• Do NOT use cleaning fluids based on alcohol, methylated spirit,
ammonia, etc.
• Do NOT attempt to disassemble or repair your WebCam by
yourself. Do not open the WebCam. In the event of technical
difficulties return it to your Philips retailer.
• Do NOT use your WebCam in the water.
•
Protect the WebCam from oil, vapour, steam, moisture, and dust.
• Never point the WebCam lens at the sun.
Copyright
Copyright©2003 by Philips Consumer Electronics B.V. All rights
reserved. No part of this publication may be reproduced,
transmitted, transcribed, stored in a retrieval system or translated
into any language or computer language, in any form or by any
means, electronic, mechanical, magnetic, optical, chemical, manual
or otherwise, without prior written permission from Philips.
Brands and product names are trademarks or registered
trademarks of their respective companies.
Things you should know
Chapter
EN
8
Installation
Installing the WebCam software
The software supplied only works on PCs with the operating
systems Microsoft
®
Windows®XP and Vista.
Notes!
– Unplug all your USB devices (except USB keyboard and
USB mouse) before you start.
– Do not plug in your WebCam yet. Run the Installation CD-ROM
first.
– Have your Windows
®
CD-ROM at hand.
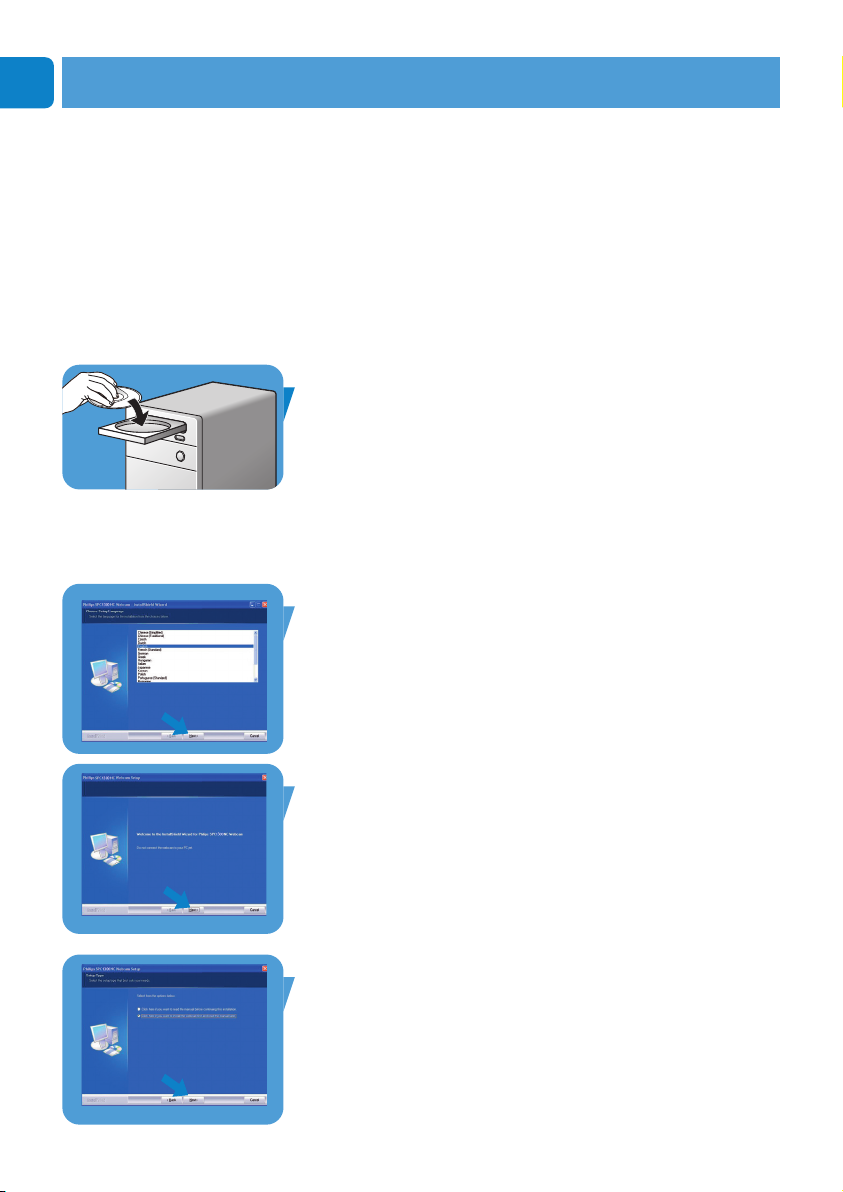
1 Place the installation CD-ROM in your PC’s / laptop’s
CD-ROM / DVD drive.
> After a couple of seconds the ‘Language selection’ screen
appears.
Note!
If the ‘Language selection’ screen does not appear automatically,
open ‘My computer’, double click on the CD, then double click on
the 'Setup.exe' icon.
2 Select your language.
> Installation continues automatically.
> The ‘Welcome’ screen appears.
3 Click ‘Next’ to continue.
> The ‘Manual’ screen appears.
4 Select the first option if you wish to read the user manual
before continuing installation.You can print out the manual
so you will have it at hand during the rest of the installation
process.
After you read or printed the user manual, continue
installation by selecting the second option.
Chapter
EN
9
Or:
Select the second option if you wish to continue installation.
Click ‘Next’ to continue.
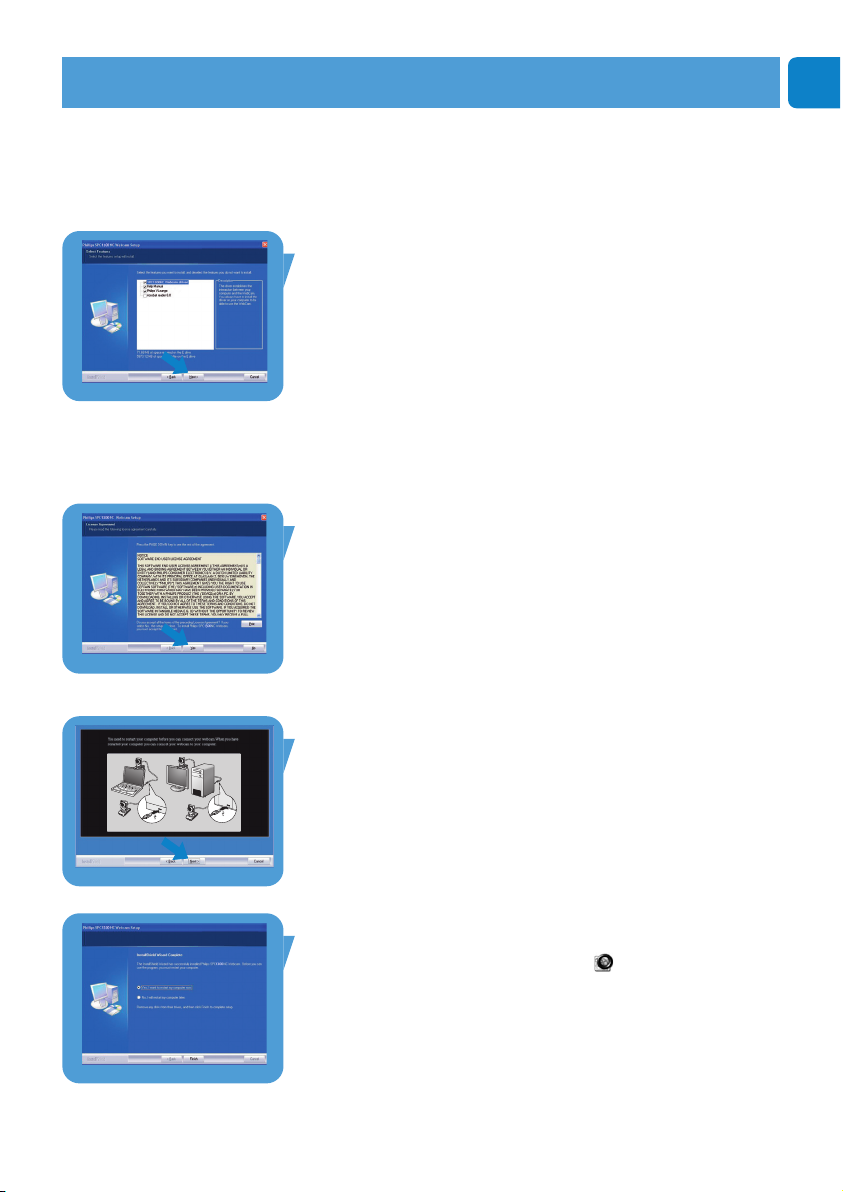
> The ‘Installation’ screen appears.The items that can be installed
are shown on the left side of the screen.An explanation of
each item is given on the right side.
All required items are selected by default.
5 Click the 'Next' button if you wish to install all items.
Or:
If there are certain items you do not wish to install, check
the boxes before these items.
Select at least ‘SPC1300NC WebCam Driver’ and ‘Philips
VLounge’. Click the 'Next' button.
> The following software license agreement appears.
6 Click on 'Yes' to continue the installation.
> The following screen appears.
7 Click 'Next' to continue.
> The ’Reboot’ screen appears.
8 Select ‘Ye s’, then click ‘Finish’ to restart your PC / laptop.
> The V(ideo)-Lounge desktop shortcut ‘’ will be installed after
installation.
> Via VLounge you have access to all camera-related software. See
‘Operating the WebCam’.
9 You can now connect your WebCam.
Installation
 Loading...