

Page 1
USER MANUAL
0
1
4
7
2
5
6
8
9
3
R
M2M1 M3
9
1
2
4
6
8
3
5
7
M1
M2
M3
0
8
7
6
1
5
2
3
4
9
10
11
12
™
skip 100
•
Convenient Access to
13 Memories
Thank you for choosing this Philips telephone. Your Skip 100 is a
telephone with the facility to store 13 telephone numbers. It can be used as a
main telephone or as an extension telephone.
Items supplied:
• Base unit
• Handset with coiled cord
• Line cord
• This user manual
• Wall mount bracket/Desk stand
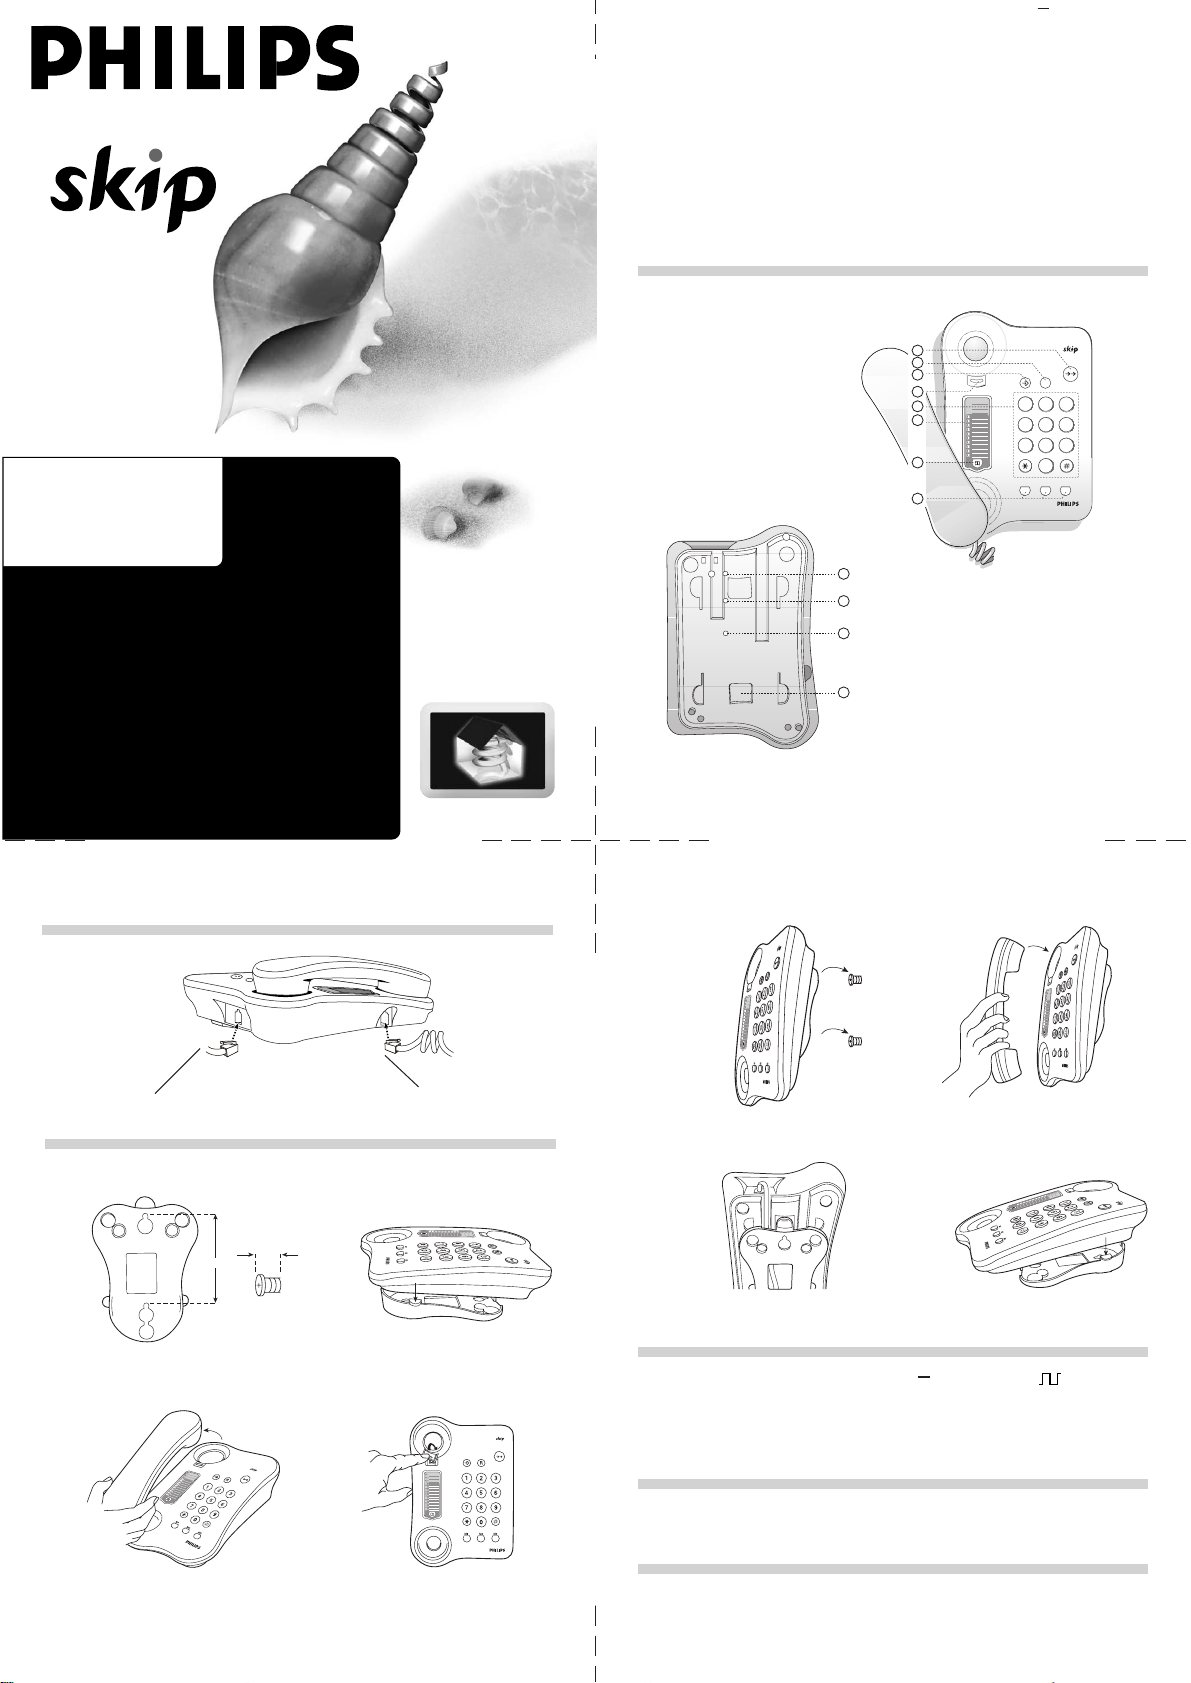
Location of Buttons, Controls and Connectors
1. Wall mount hook
2. Memo card
3. Memo button
4. Memories button
M1, M2, M3
5. Dialling keypad
6. Store button
7. R button
8. Redial button
9. Ringer volume switch
10. Recall Switch TBR/ELR
11. Tone/Pulse switch
12. Recess for fixing the
wall mount bracket
•
Cable Management
•
Easy Wallmount
Installation
Connect the telephone line cord
Wall Mounting
8.5cm
5mm
Connect the handset coiled cord.
5. Slide the bracket onto the nails 6. Hang back the set
7.
The telephone can also be used on desk
8.
3140 025 20890
1. Drill 2 holes according to the dimension
of the wall mounting bracket and place 2
nails into the wall
3. Take off the handset.
2. Insert the wall mount bracket into the
recess as shown
4. Pull out the wall mount hook and turn
it 180 degrees and snap the wall mount
hook back into place
Setting the dialling mode
Set the tone/pulse switch to "TONE" mode or "PULSE" depending on
which dialling system is used in your exchange. If you are in doubt the dialling
system used, set the telephone to the "TONE"-dialling mode and attempt to
make a call. If the dialling-tone does not cease, then reset the telephone to
"PULSE"-dialling mode. It should then be possible to make a call.
Setting the ringer volume
Adjust the ringer volume to Hi or low by setting the Ringer Hi/Low switch
according to need.
Setting recall mode
Set the Recall mode switch to T (Flash recall) or E (Earth recall) according
to the specification of your exchange. If in doubt, contact your network operator.
Page 2
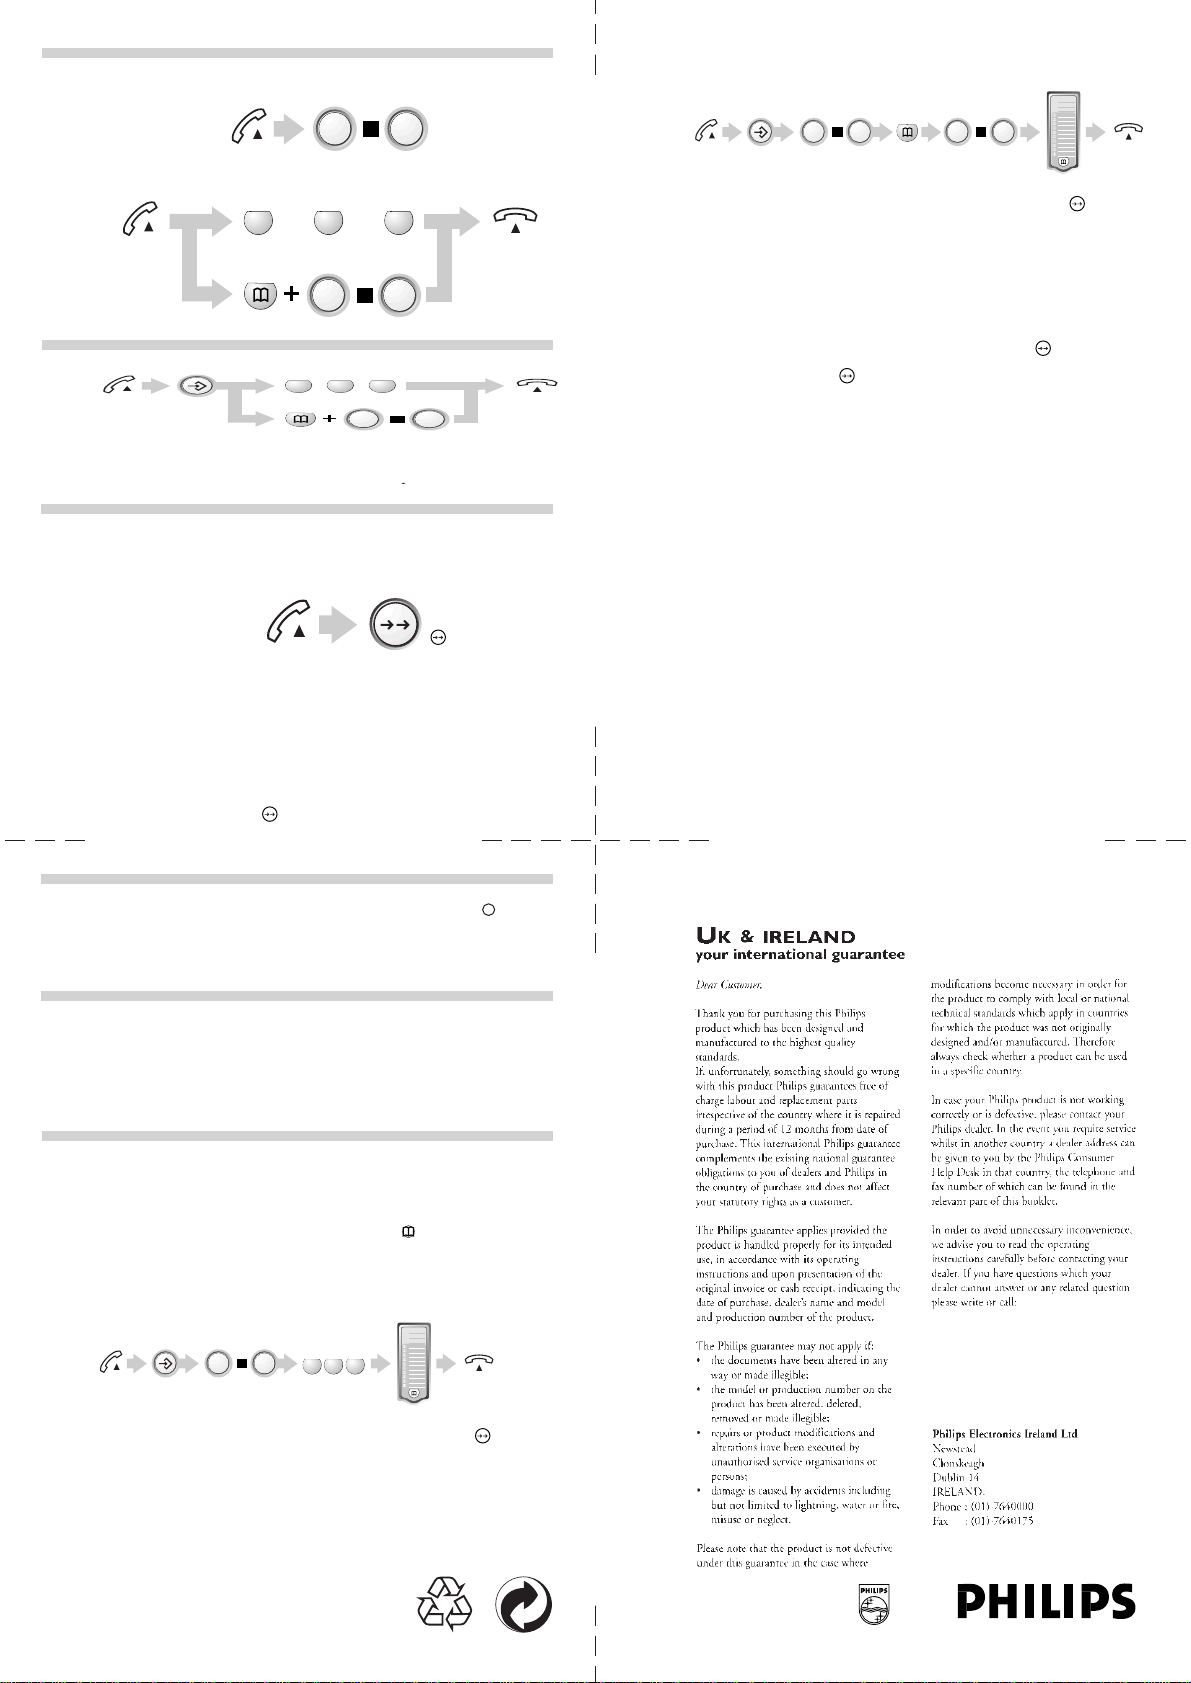
Making a call
...
0
9
9
1
2
4
6
8
3
5
7
M1
M2
M3
0
...
0
9
Make a call either by manual or memory
Manual Dialling
...
0
Dial the number
9
Memory Dialling
M1 M2 M3
To dial memories stored
in M1...M3, Press M1...M3
...
0
To dial memories stored, press memo key and the number
9
Erasing memory
M1 M2 M3
Press M1, M2, M3
...
0
Press store and the number
Press the memo key and then the number
9
Operation
On this telephone there are the following features:
The Last number redial feature
The last number you dialled will be automatically stored in the redial memory.
Lift the handset and wait
for the dialling tone.
The last number will be redialled automatically.
Notes: The last number dialled will remain stored in the memory until another number has
been dialled, allowing the Last Number Redial procedure to be repeated as many times
as required.
The telephone number can only be automatically redialled if it does not consist more
than 32 digits.
The Last Number Redial facility cannot be used if a another dialling tone is given
before allowing further dialling, e.g. for international calls, or when dialling an external
call through a private exchange. In these circumstances you must dial manually the
initial digits and press the button after the second dial tone.
Press the
button.
Storing numbers in the memories M1, M2 & M3
1. Lift the handset.
2. Press the Store button.
3. Dial the desired telephone number (inserting pauses, if required, by means of the button.)
4. First press the Memo button and then the numeric button 0..9 under which you wish to store the
number.
5. Note the name which corresponds to the digit button on the memo card.
6. Replace the handset.
Notes: If you have stored an incorrect number, start again at step 2.
A telephone number may not consist of more than 16 digits including pauses, otherwise
it cannot be stored under one memory location.
In case of storing a telephone number which generate a secondary dialling tone before
allowing further dialling e.g. an international subscriber's number, it may be necessary
to include a pause in the number sequence by pressing the button. This pause
is used to wait for another dialling tone. If this is not long enough, you can extend the
pause by pressing the button two or three times consecutively.
Your stored numbers will be erased if you disconnected your telephone from the wall.
Approved use
This telephone is approved for connection to direct exchange lines of the Public Switched
Telephone Network (PSTN) and compatible PBXs (please ask your supplier for an up-to-date
list) but not for connection in the following manner:
• as an extension to a payphone
• on a shared service line or 1+1 carrier system.
This apparatus has been approved for the use of the following facilities:
• Simple Telephone facility
• Loop Disconnect signalling
• Multi-Frequency signalling
• Automatic storage of last number dialled
• Operation in the absence of proceed indication
• Automatic dialling
• Making 999 calls to the British Telecom emergency services
• Timed Line Break Recall.
Any other usage will invalidate the approval of the apparatus if as a result it then ceases to
conform to the standards against which the approval was granted. It cannot be guaranteed that
this apparatus will operate correctly under all possible conditions of connection to compatible
PBXs. Any cases of difficulty should be referred in the first instance to your supplier. This
apparatus is suitable for connection to PBXs that return secondary proceed indication.
Please note that when connection is made to any PBX, the last number redial facility must not be used.
The number of telephones that may be connected:
If you connect too many telephones to your line they may not ring correctly. To determine the
number of telephones that can be satisfactorily connected to your line, add together the Ringer
Equivalence Numbers (RENs) of all the equipment you wish to connect. If this number exceeds
four, your telephone may not ring. Your Philips telephone has a REN of one. BT telephones have
a REN of one unless otherwise marked.
Mixed mode dialling
If the telephone is set to "PULSE" dialling mode, you can use the * button to
switch from "PULSE" to "TONE" dialling. This procedure makes it possible to
access public service such as `telephone banking' even though your telephone is
connected to a "PULSE" dialling exchange.
Special Network Services
* and # and R buttons
This button is required to operate some special public or private exchange services.
Please consult your local network operator for further details concerning the
network-services provided.
Notes: Philips reserves the right to make styling changes to this model without prior notification.
Memory feature
In the telephone memory you can store thirteen telephone numbers which can
subsequently be dialled automatically. Three of these can be stored under the
memory buttons M1 - M2 - M3 and the remaining ten under the numeric
buttons 0..9. The numbers under the M1..M3 buttons can be dialled directly, but
to dial the other numbers you must first press the button. For this reason
it is useful to store emergency numbers or numbers you use most under the
M1...M3 buttons. Note these numbers on the memo card.
Storing numbers in the memories M1, M2 & M3
M1
M2
M3
1
...
0
1. Lift the handset.
2. Press the Store button.
3. Dial the desired telephone number (inserting pauses, if required, by means of the button).
4. Press the M button under which you wish to store this number.
5. Note the name which corresponds to the M button on the memo card.
6. Replace the handset.
M1M3M2
9
2
3
4
5
6
7
8
9
0
Philips Consumer Help Desk
Unit 4, Elmwood, Chineham Business Park,
Crockford Lane, Basingstoke, Hampshier
RG24 BWG, United Kingdom.
Phone :0645 282828
Fax :01256 707335
 Loading...