

Page 1
Explanation of Controls
SBC HCI05
English
SBC HCI05
Attention : Headphone does not work as
stand-alone system. It could be used as
replacement of the headphone ( receiver ) of
the model SBC HC100. Or it could be used as
an additional headphone ( receiver ) for
compatible models. ( please see list).
SBC HClOO
SBC HCI20 SBC HC520
SBC HC360 SBC 3925
SBC HC380
SBC 3940
List is for reference only. System compatibility are
subjected to change without prior notice.To ensure,
please check with your local Philips agent or Philips sale
organization.
SBC HC500
SBC 3930
SBC 3935
Instruction for use IR headphone
1. Introduction
CONGRATULATIONS! You have just bought a most
sophisticated stereo Infra Red (IR) headphone.This
headphone gives you complete freedom to enjoy your
music, without the inconvenience and limitations of
headphone cables.To ensure the best performance of
your stereo IR headphone, please read this document
carefully.
2. Features
• Receives stereo audio signal from your IR transmitter
without wires.
• Uses high-frequency IR rays to carry audio signal,
ensuring clear, sharp reception.
height or slightly higher than the reception height of
the !R headphone.
2. Position the LEDs towards the listening area, ensuring
that there are no obstacles in between.
3. Switch the IR headphone on.
4. Set the volume control to maximum on the IR
headphone.
5. While listening to your IR headhone. adjust the
volume of the signal source to the headphone's
maximum acceptable sound level.
S.Adjust volume control of the IR stereo headphone to a
comfortable listening level.
7. Specifications
System
Carrier frequency
Modulation
Power supply headphone
Frequency range
S/N ratio
Distortion
Channel separation
Infra Red (IR)
Left channel 2.3 MHz
Right channel 2.8 MHz
FM
2 X R3(AAA) batteries
20 - 20.000 Hz
>50 dB
<0.5% THD
>40 dB
Figure 2
3. What is included
In this set the following components are
included :
1. IR stereo headphone
2. Instructions for use
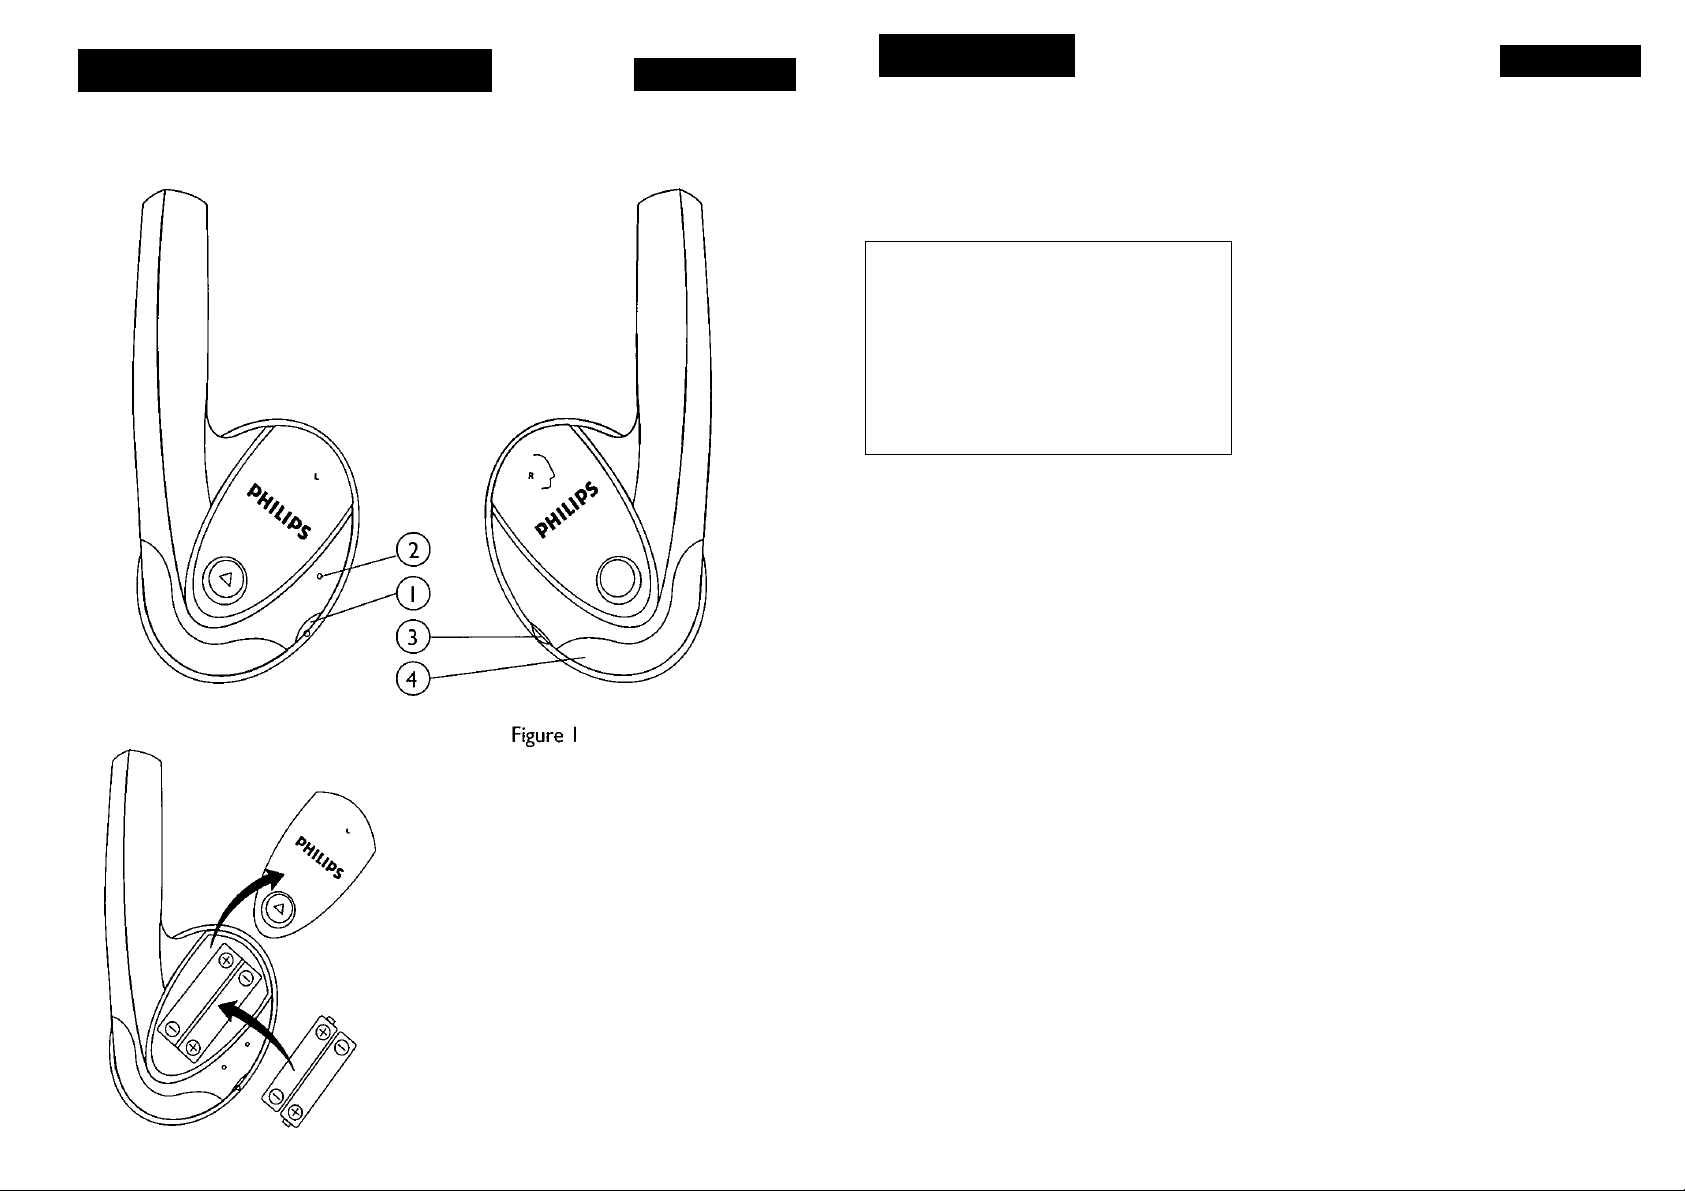
4. Explanation of controls
On the IR stereo headphone receiver (see
figure I)
1. Power on/off switch.
2. Power on/off LED indicator.
3. Volume control.
4. IR sensors, to receive IR light from the transmitter.
5. Installation
I. Insert two batteries {R3.AAA) into the battery
compartments as shown in figure 2, ensuring that the
polarity is correct.
6. Operation
I. Switch on the IR transmitter and place it at the same
 Loading...