

Page 1

Philips GoGear audio video player
SA5225 SA5245
SA5247 SA5285
SA5287
Quick start guide
Install
1
Connect
2
and Charge
3
Transfer
4
Enjoy
Page 2

Need help?
Please visit
www.philips.com/welcome
where you can access to a full set of supporting materials
such as user manual, the latest software upgrades and answers
to frequently asked questions.
Page 3

Need help?
Look up our Support Centre website
www.philips.com/welcome
Besoin d’aide ?
Visitez la page Web de notre centre
d’assistance à l’adresse
www.philips.com/welcome
Page 4

¿Necesita ayuda?
Consulte nuestra página Web de Soporte técnico,
www.philips.com/welcome
Support?
Besuchen Sie unser Support Center auf
www.philips.com/welcome
Page 5

Contents
EN
2 Is there a manual?
2 Register your product
2 Don’t forget about upgrades
3 What’s in the box
4 Overview of controls and
connections
5 Install
5 Connect and charge
5 Connect to PC
6 Read the battery level indication
of your player
6 Transfer
6 Transfer music and pictures with
8
Windows Media Player 11
Download, convert and transfer
videos with the Stream Ripper
of the MediaConverter™
10 Enjoy
10 Turn on and play
10 Main menu
10 Navigate the menu
11 Music mode
12 Listen to audiobooks
12 Add audiobooks to the SA52
12 Select audiobook by book title
12 Audiobook controls
13 Video
13 Video play
13 Fast forward / backward control
13 Radio
13 Auto tune
14 Play a preset radio station
14 Recordings
14 Make recordings
14 Play recordings
15 Troubleshooting
15 How do I reset my player?
15 Need help?
16 Disposal of your old product
and the integrated battery
1
Page 6

Is there a manual?
You have a detailed user manual and FAQ on the CD by-packed with your player. You can also
download the same le from this website: www.philips.com/support
Register your product
Since it is possible for you to upgrade your product, we recommend that you register your
product on www.philips.com/welcome so we can inform you as soon as new free upgrades
become available.
Don’t forget about upgrades
We know you will enjoy your product for a long time. For best performance, we recommend that
you regularly check in to www.philips.com/support for free updates of the latest software and
Firmware Manager for your product. These downloads will help you to optimize your product’s
performance and to take advantage of our future support of new audio formats.
Enjoy your new music experience.
2
Page 7
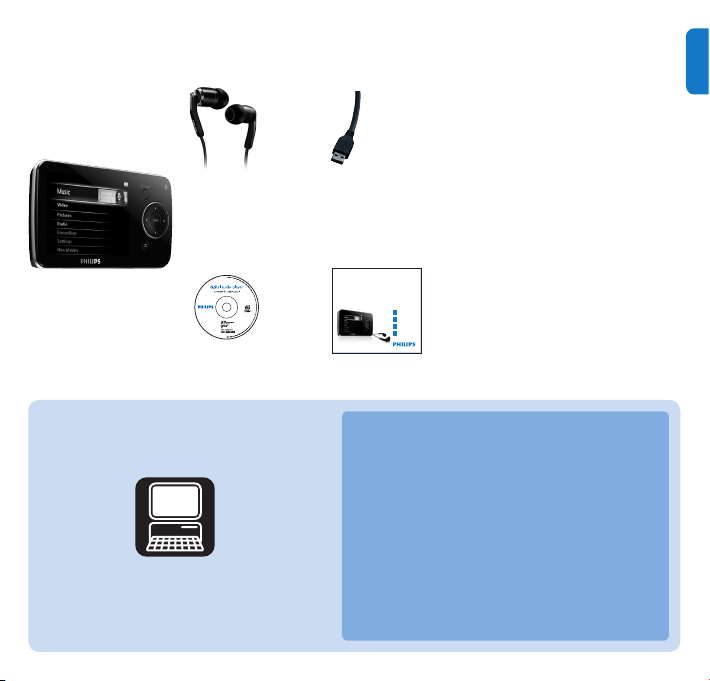
What’s in the box
Philips GoGear audio video player
Quick start guide
1
2
3
4
Install
Connect
and Charge
Transfer
Enjoy
SA5225 SA5225BT
SA5245 SA5245BT
SA5247 SA5247BT
SA5285 SA5285BT
SA5287 SA5287BT
EN
What else you'll need:
CD-ROM
Computer
Headphones
USB cable
Quick start guide
A computer with:
Windows XP (SP2 or above) or Vista
Pentium III 800MHz processor or higher
CD-ROM drive
128 MB RAM
500MB Hard Disk space
USB Port
Internet connection (preferable)
Microsoft Internet Explorer 6.0 or later
3
Page 8
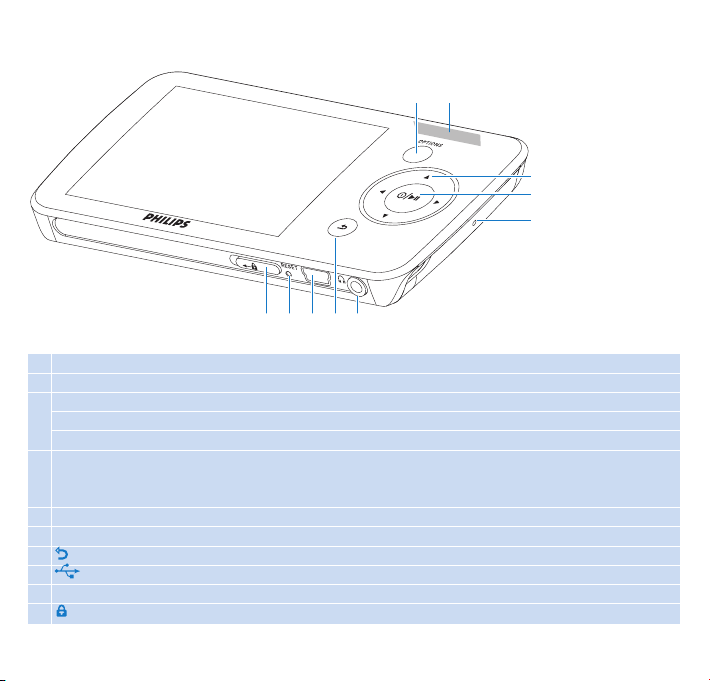
Overview of controls and connections
A
B
C
D
E
F
H
IJ G
A OPTIONS Offers a selection of options, depending on the current menu
B -VOLUME+ Increases/decreases volume (hold to increase/decreases fast)
C 1 Skips back (hold to quick skip)
2 Skips forward (hold to quick skip)
3/4 Scrolls up/down (hold to quick scroll)
D z / 2; On / Off
E MIC Microphone
F p Headphones jack
G O Back one level (hold to return to root menu)
H USB connector
I RESET
J slider Hold slider to lock/unlock all keys (except -VOLUME+)
Play/Record / Pause
Conrm selection
4
Page 9
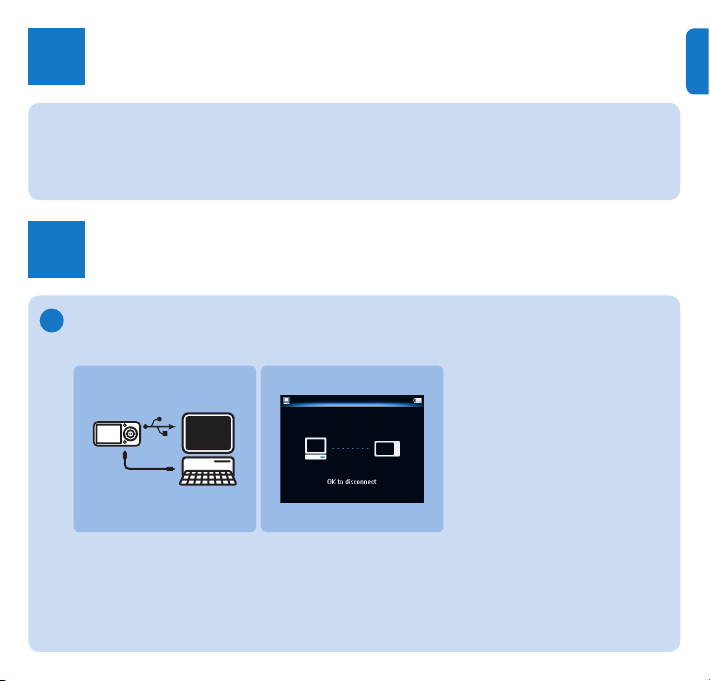
Install
1
Insert the CD supplied with your product into the CD ROM drive of your PC.
1
Follow the on-screen instructions to complete the installation of Windows Media
2
Player, Philips Device Manager and MediaConverter™ for Philips. The
MediaConverter™ for Philipsconverts video clips into suitable formats for the player.
Connect and charge
2
Connect to PC
A
When you connect the player to the PC, it automatically charges.
Before you use the player for the rst time, charge it for at least 5 hours.
1
The battery has a 100% charge after 4 hours and an 80% charge after 2 hours.
>
Connect the supplied USB cable to the mini USB port at the bottom of the player, the
2
other end to your PC.
The player will start to charge as soon as it is connected to your PC .
>
EN
5
Page 10
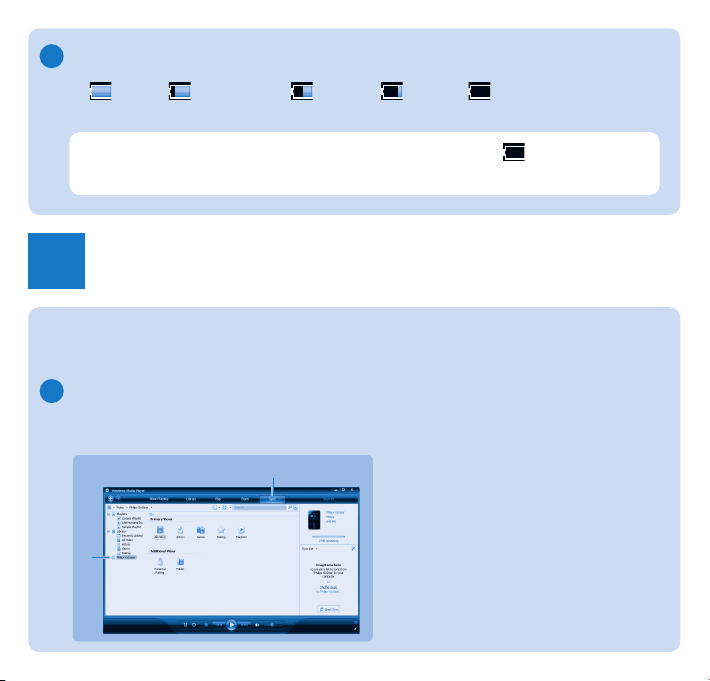
Read the battery level indication of your player
B
The approximate power levels of your battery are indicated as follows:
Full Two-thirds full Half full Low Empty
Note When the batteries are almost empty, the battery screen
saves all settings and unnished recordings and switches off in less than 60 seconds.
Transfer
3
You can transfer music and picture les to your player using Windows Media Player.
See Organize and transfer music and pictures with Windows Media Player 11
section of the user manual for more details.
A
Transfer music and pictures with Windows Media Player 11
Download Windows Media Player11:
http://www.microsoft.com/windows/windowsmedia/player/11/default.aspx
3
4
6
blinks. The player
Page 11
Start Windows Media Player 11.
1
Connect the player to your computer using the supplied USB cable.
2
Once the player is connected, the sync tab changes as shown ( ) and the device and
3
its contents become visible in Windows Media Player 11(see gure above).
Windows Media Player 11will automatically start synchronizing the contents of your
4
music library to your player.
For details on how to set synchronization options in Windows Media Player 11,
pls refer to the user manual.
EN
7
Page 12
B
Download, convert and transfer videos with
the Stream Ripper of the MediaConverter™
Important
DRM protected videos that you have downloaded (purchased) from the Internet must
have a bit rate of e 800kbps so you can transfer them to the player. You can obtain
the licence for DRM protected videos when you play the videos on your PC that is
connected to the Internet. You can move DRM protected videos with downloaded
licence to the VIDEO folder of your player by 'drag & drop' in Window Explorer.
Important
To use the Stream Ripper feature and avoid download error messages, install the 'FLV
codec' on your PC. (Tip: If you enter 'download FLV codec' in your Internet search
engine, you can nd websites that offer a download of the FLV codec.)
Use the Internet Explorer to open the website from where you want to download
1
the video.
The Stream Ripper software supports downloads from the following websites:
video.google.com
•
myspace.com
•
youtube.com
•
While playing the video on the website, move your mouse cursor over the video until
2
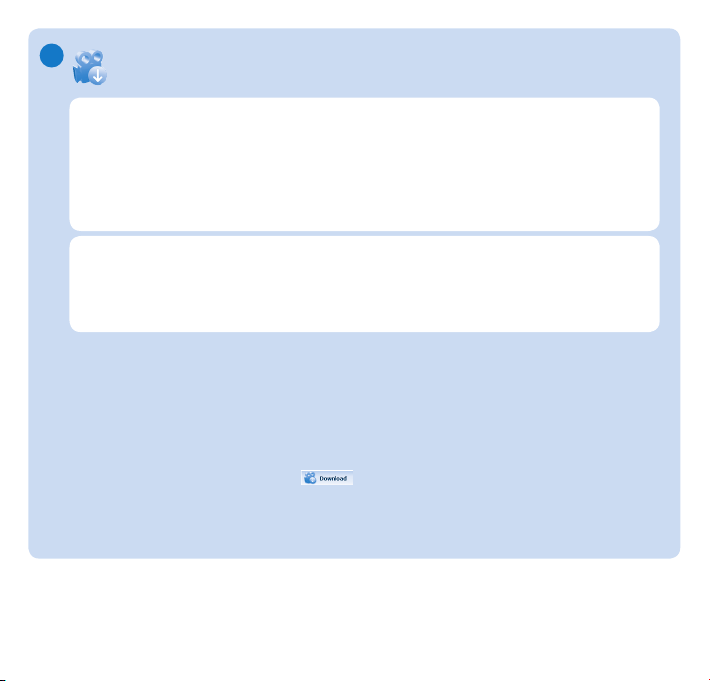
you see the Stream Ripper icon in the top left hand side corner, then click
Download.
When the video is downloaded the MediaConverter™ opens and shows the downloaded
>
video.
8
Page 13
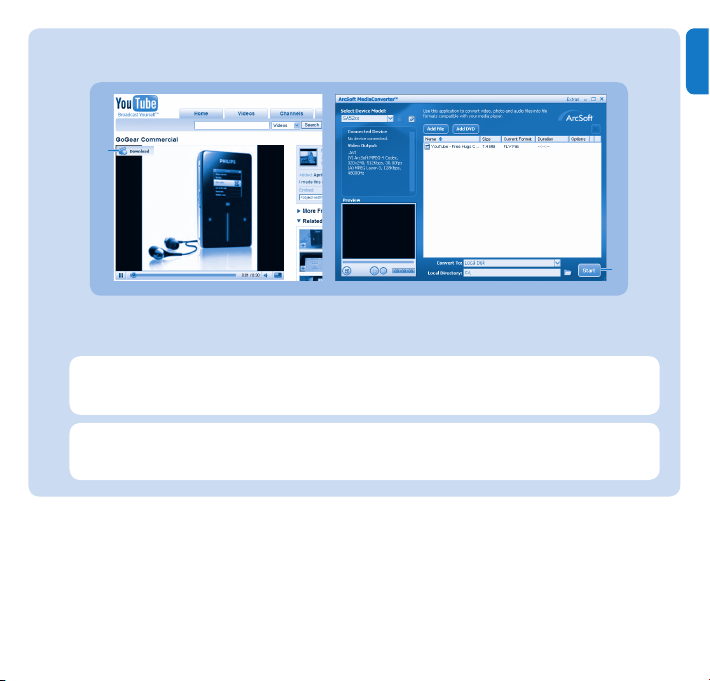
In the MediaConverter™ window, click Start to start the conversion and transfer
3
of the video.
2
EN
The progress of conversion and transfer is shown.
>
All the converted files will be transferred to the player.
Tip You can also select the les in Windows Explorer and then drag and drop
them into the MediaConverter™ for Philips screen.
Note If needed, the les will rst be converted to a format that can be played on the
player.
3
9
Page 14
Enjoy
4
Turn on and play
A
To turn on, press z/2; until the display shows the Philips logo.
To turn off, press and hold z/2; until the display shows ‘Bye’.
B
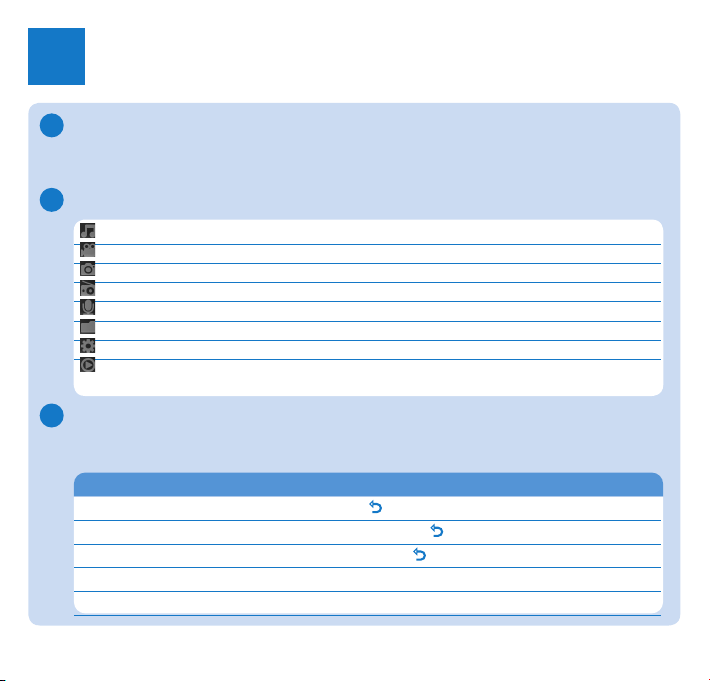
Main menu
Music Play digital music tracks
Video Watch videos
Pictures View pictures
Radio Listen to FM radio
Recording Create or listen to recordings
Folders View folders
Settings Customize the settings of your player
Now playing Go to the play screen
Last played Resume play
C
Navigate the menu
Your player has an intuitive menu navigation system to guide you through various settings
and operations.
Goal Action
Return to previous menu Press O
Return to main menu
Browse through menus Press 2;or O
Scroll through a list Press 3or 4
Select an option Press OPTION
Press and hold O
10
Page 15
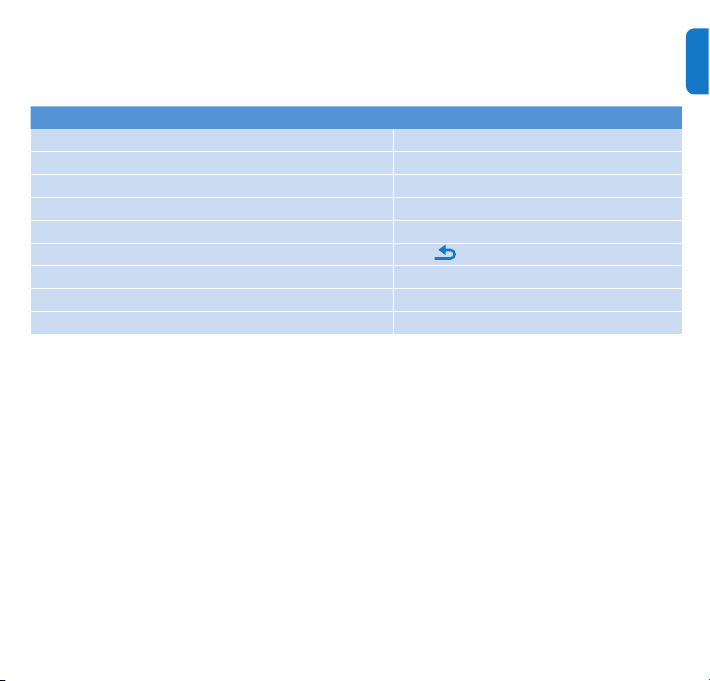
Music mode (also play mode for recordings)
The player offers the following music mode options:
Goal Action
Play / Pause music
Skip to next audio file
Return to previous audio file
Fast rewind
Fast forward
Return to browsing menu
Increase volume Press Vol +
Decrease volume Press Vol -
Access options menu Press OPTIONS
Press 2;
Press 2
Press 1
Press and hold 2
Press and hold 1
Press key
EN
11
Page 16
Listen to audiobooks
The player supports books in audio format. The use of this feature requires that you download the
AudibleManager from audible.com. With the AudibleManager you can manage the digital contents
of your audiobooks.
Visit audible.com and register. The onscreen instructions guide you through the
AudibleManager software download process.
Add audiobooks to the SA52
On your computer, launch AudibleManager.
1
Drag and drop your audiobooks to the SA52.
2
Select audiobook by book title
From the main menu of the SA52, select to enter music mode.
1
Press 3 or 4, then 2; to select Audiobooks.
2
Press 3 or 4, then 2; to select option Book titles or Authors.
3
Press 3 or 4, then 2; to make further selections.
4
Press 3 or 4 to select title, then 2; to play.
5
To exit, press O.
Audiobook controls
The player offers the following audiobook mode controls:
Goal Action
Play / Pause
Skip forward to beginning of new section/chapter
Skip back to beginning of current section/chapter
Fast skip forward through audiobook
Fast skip back through audiobook
Access options menu Press OPTIONS
Return to browsing menu Press O
Increase volume Press VOL +
Decrease volume Press VOL -
Press 2;
Press 2
Press 1
Press and hold 2
Press and hold 1
12
Page 17
Video
Video play
You can play video clips that are stored on the player.
From the main menu, select to enter Video mode.
1
A list of video files stored on the player is displayed.
>
Press 3 or 4 to select the le and press 2; to play.
2
Short press to go back to the previous menu, and long press to return to the main
3
menu.
Fast forward / backward control
The player enables you to scan videos in fast forward / backward mode.
Fast forward / backward
Long press 2 to select 4x normal speed.
1
Press 2; anytime to resume normal speed play.
>
While in 4x normal speed mode, press 2 to cycle through the following speed options: 8x
2
normal speed > 16x normal speed > 4x normal speed…
Radio
From the main menu, select to enter radio mode.
Connect the headphones
The supplied headphones serve as a radio antenna. Ensure you connect the headphones properly
for an optimal reception.
Auto tune
From the Radio menu , select Auto tune.
1
The radio automatically tunes radio stations and saves the frequencies to presets.
>
The radio can store up to 20 radio station to presets.
EN
13
Page 18
Play a preset radio station
From the Radio menu , select Presets.
1
Press 3/4 to select preset, 2; to start playing.
2
Press 1/2 to change to another preset.
3
To ne tune frequency, quick press 3/4.
4
To search for the next stronger signal, long press 3/4.
5
To exit radio, long press .
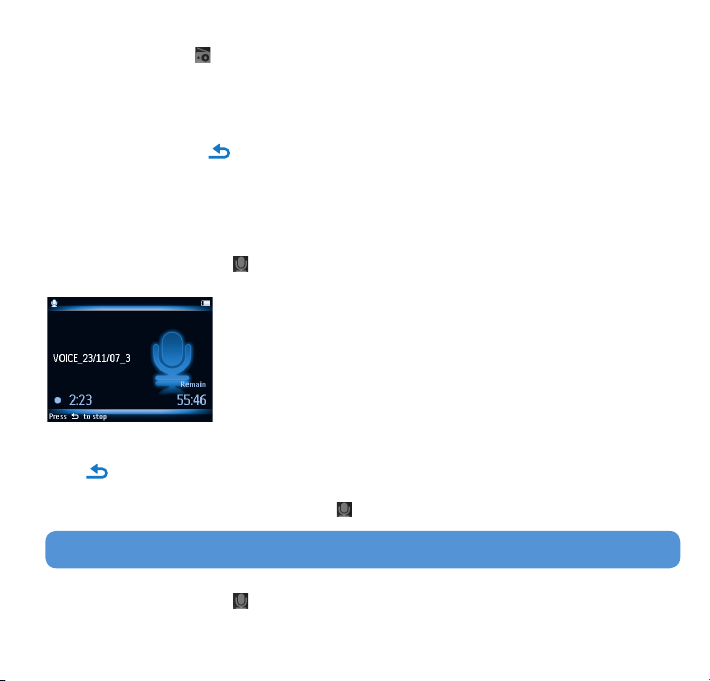
Recordings
You can record audio with the player.
Make recordings
From the main menu, select .
1
Press 3 or 4 to select the Start voice recording, then 2; to start.
2
The player records and shows the recording display.
>
Press 2; to pause.
3
Press to stop and save the recording.
4
Your recordings are saved in the Recordings library on the player.
>
You can nd the voice recordings le under > Recordings Library > Voice recordings.
5
Tip You can pause and restart a recording anytime with 2;.
Play recordings
From the main menu, select > Recordings Library > Voice recordings.
1
Press 3 or 4 to select the recording you want to hear.
2
Press 2; to play.
3
14
Page 19

Troubleshooting
How do I reset my player?
Insert a small pin or other sharp object into the reset hole located at the bottom of the player.
Hold until the player shuts down.
If none of the above works, then you may have to use the Device
Manager to recover your player:
Launch the Philips Device Manager at Start > Programs > Philips Digital Audio Player
1
> SA52XX > Philips SA52XX Device Manager on your PC.
Press and hold the VOL+ button while your player is connecting to the PC.
2
Keep holding the key until the Philips Device Manager acknowledges your player and goes
3
into recovery mode.
Click the Repair button and follow the instructions given by the Device Manager.
4
After the player has been repaired, disconnect it from your PC and re-start.
5
Need help?
User Manual
See the user manual on the CD-ROM that is supplied with this player.
Online
Go to www.philips.com/welcome
EN
15
Page 20
Disposal of your old product and the integrated battery
All our products are designed and manufactured with high quality materials and components, which can be recycled and reused.
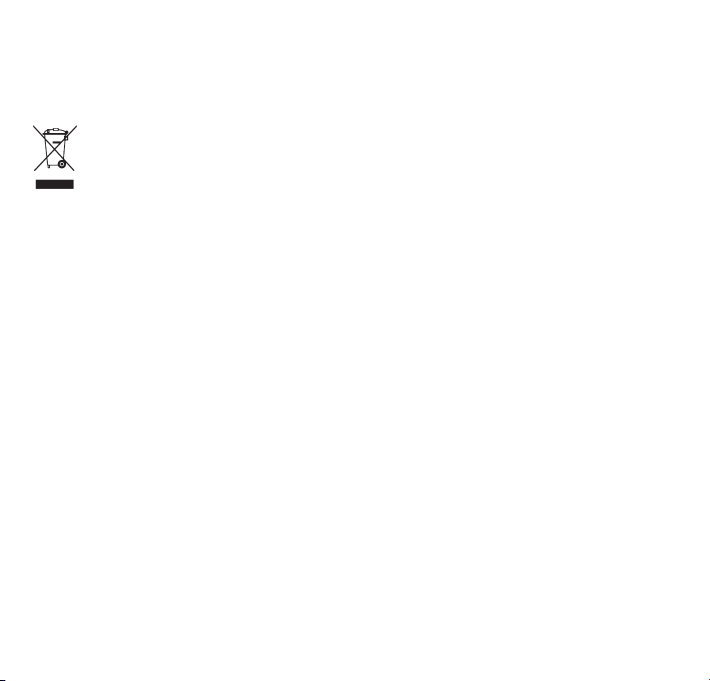
The crossed-out wheel bin symbol on a product means that the product is subject to the European Directive 2002/96/
EC. This symbol can also be used in combination with a chemical symbol, which means that the product complies with
the environmental directive for that chemical.
Never dispose of your product with other household waste. Inform yourself or ask your dealer about local
environmentally safe recycling regulations. The correct disposal of your old product helps prevent potentially negative
consequences for the environment and human health.
Your product contains a built-in rechargeable batter y covered by the European Directive 2006/66/EC, which cannot be disposed
with normal household waste.
To safeguard the functionality and safety of your product, always bring your product to an ofcial collection point or ser vice centre
where a professional can remove / replace the batter y as shown in the user manual.
Please inform yourself about the local rules on separate collection of batteries because the correct disposal will help prevent
negative consequences for the environmental and human health.
16
Page 21
Specifications are subject to change without notice.
Trademarks are the property of Koninklijke Philips Electronics N.V. or
their respective owners
© 2008 Koninklijke Philips Electronics N.V.
All rights reserved.
www.philips.com
Printed in China
wk8465
 Loading...