

Page 1

9000 series
S91XX / S90X X
Page 2
Page 3

3
4
5
6
7
8
14
15
17
16
18
19 20
21
22
23
24
25
1
2
9
11
12
13
10
12345678910111213
Page 4

Page 5

1
2
141516
1
2
3
1718192021
222324
25
Page 6

26
27
2
1
28293031323334
20 sec.
35
20 sec.3620 sec.
373839
40
41
2
1
424344
45
464748
49
Page 7

50
515253545556575859
2yrs
60
1
3
2
616263
3
1
2
64
65
2
1
66
67
Page 8

Page 9

English 6
Bahasa Indonesia 27
Bahasa Melayu 50
Tiếng Việt
ภาษาไทย
繁體中文
74
92
110
Page 10

English
6
Introduction
Congratulations on your purchase and welcome to Philips! To fully
benefit from the support that Philips offers, register your product at
www.philips.com/welcome.
Please read this user manual, as it contains information about the
features of this shaver as well as some tips to make shaving easier
and more enjoyable.
General description (Fig.1)
1 Protection cap for cleansing brush attachment
2 Click-on cleansing brush attachment
3 Comb for beard styler attachment
4 Click-on beard styler attachment
5 Click-on trimmer attachment
6 Click-on shaving unit
7 On/off button
8 Socket for small plug
9 Exclamation mark
10 Replacement reminder
11 Battery charge indicator
12 Travel lock symbol
13 Cleaning reminder
14 SmartClean system
15 Cap of SmartClean system
16 On/off button
17 Replacement symbol
18 Cleaning symbol
19 Ready symbol
20 Charge symbol
21 Cleaning cartridge for SmartClean system
22 Supply unit
23 Small plug
24 Retaining ring holder
25 Pouch
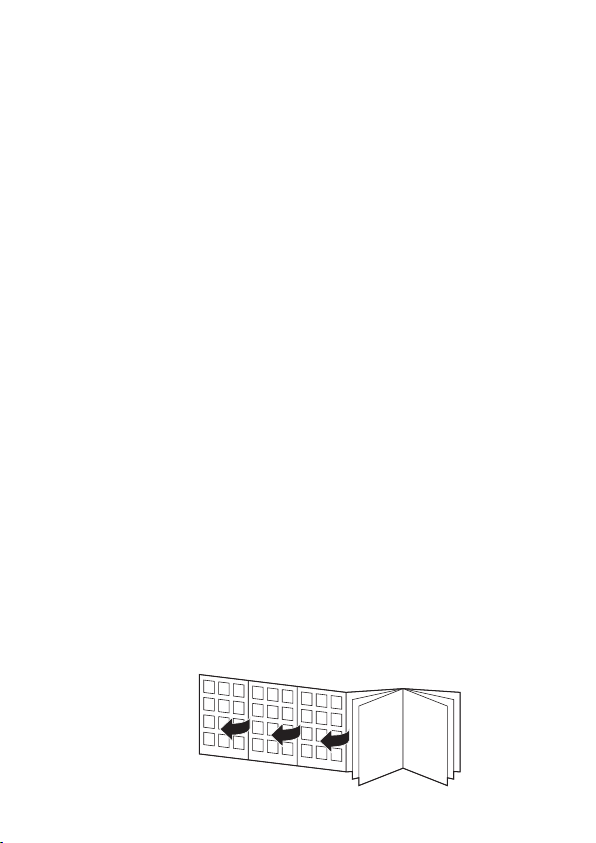
The accessories supplied may vary for different products. The box
shows the accessories that have been supplied with your appliance.
English
Page 11

English
Important safety information
Read this important information carefully before you use the
appliance and its accessories and save it for future reference. The
accessories supplied may vary for different products.
Danger
- Keep the supply unit dry (Fig. 2).
Warning
- To charge the battery, only use the detachable supply unit (type
HQ8505) provided with the appliance.
- The supply unit contains a transformer. Do not cut off the supply
unit to replace it with another plug, as this causes a hazardous
situation.
- This appliance can be used by children aged from 8 years and
above and persons with reduced physical, sensory or mental
capabilities or lack of experience and knowledge if they have been
given supervision or instruction concerning use of the appliance in
a safe way and understand the hazards involved. Children shall
not play with the appliance. Cleaning and user maintenance shall
not be made by children without supervision.
- Always unplug the shaver before you clean it under the tap.
- Always check the appliance before you use it. Do not use the
appliance if it is damaged, as this may cause injury. Always replace
a damaged part with one of the original type.
- Do not open the appliance to replace the rechargeable battery.
Caution
- Never immerse the cleaning system or the charging stand in water
and do not rinse it under the tap (Fig. 2).
- Never use water hotter than 80°C to rinse the shaver.
- Only use this appliance for its intended purpose as shown in the
user manual.
- For hygienic reasons, the appliance should only be used by one
person.
- Never use compressed air, scouring pads, abrasive cleaning agents
or aggressive liquids such as petrol or acetone to clean the
appliance.
7
Page 12

English
8
- If your shaver comes with a cleaning system, always use the
original Philips cleaning fluid (cartridge or bottle, depending on the
type of cleaning system).
- Always place the cleaning system on a stable, level and horizontal
surface to prevent leakage.
- If your cleaning system uses a cleaning cartridge, always make
sure the cartridge compartment is closed before you use the
cleaning system to clean or charge the shaver.
- When the cleaning system is ready for use, do not move it to
prevent leakage of cleaning fluid.
- Water may drip from the socket at the bottom of the shaver when
you rinse it. This is normal and not dangerous because all
electronics are enclosed in a sealed power unit inside the shaver.
- Do not use the supply unit in or near wall sockets that contain an
electric air freshener to prevent irreparable damage to the supply
unit.
Electromagnetic fields (EMF)
- This Philips appliance complies with all applicable standards and
regulations regarding exposure to electromagnetic fields.
General
- This shaver is waterproof (Fig. 3). It is suitable for use in the bath or
shower and for cleaning under the tap. For safety reasons, the
shaver can therefore only be used without cord.
- The appliance is suitable for mains voltages ranging from 100 to
240 volts.
- The supply unit transforms 100-240 volts to a safe low voltage of
less than 24 volts.
The display
Note: Before you use the shaver for the first time, remove the
protective foil from the display (Fig. 4).
Charging
Quick charge: When you connect the shaver to the wall socket, the
lights of the battery charge indicator light up one after another
Page 13

English
repeatedly. When the shaver contains enough energy for one shave,
the bottom light of the battery charge indicator starts to flash slowly.
While the shaver continues to charge, first the bottom light of the
battery charge indicator flashes and then lights up continuously (Fig.
5). Then the second light flashes and lights up continuously, and so
on until the shaver is fully charged.
Battery fully charged
When the battery is fully charged, all lights of the battery charge
indicator light up white continuously (Fig. 6).
Note: This appliance can only be used without cord. When you press
the on/off button during or after charging, you hear a sound to
indicate that the shaver is still connected to the wall socket.
Note: When the battery is full, the display switches off automatically
after 30 minutes.
Battery low
When the battery is almost empty, the bottom light of the battery
charge indicator flashes orange and you hear a sound (Fig. 7).
Remaining battery charge
The remaining battery charge is shown by the lights of the battery
charge indicator that light up continuously.
Cleaning reminder
Clean the shaver after every shave for optimal performance. When
you switch off the appliance, the cleaning reminder flashes to remind
you to clean the appliance (Fig. 8).
Travel lock
You can lock the appliance when you are going to travel. The travel
lock prevents the appliance from being switched on by accident.
Activating the travel lock
1 Press the on/off button for 3 seconds to enter the travel lock
mode (Fig. 9).
9
Page 14

English
10
While you activate the travel lock, the travel lock symbol lights up
white continuously. When the travel lock is activated, the
appliance produces a sound and the travel lock symbol flashes
(Fig. 10).
Deactivating the travel lock
1 Press the on/off button for 3 seconds.
The travel lock symbol flashes and then lights up continuously
(Fig. 10). The appliance is now ready for use again.
Note: You can also deactivate the travel lock by connecting the
appliance to the wall socket.
Replacement reminder
For maximum shaving performance, we advise you to replace the
shaving heads every two years (Fig. 60).
The appliance is equipped with a replacement reminder which
reminds you to replace the shaving heads. The shaving unit symbol
lights up white continuously, the arrows flash white and the appliance
beeps to indicate that you have to replace the shaving heads (Fig. 11).
Note: After replacing the shaving heads, you need to reset the
replacement reminder by pressing the on/off button for 7 seconds.
Exclamation mark
Overheating
If the appliance overheats during charging, the exclamation mark
flashes orange (Fig. 12). When this happens, the shaver switches off
automatically. Charging continues once the temperature of the
appliance has decreased to the normal level.
Blocked shaving heads
If the shaving heads are blocked, the exclamation mark lights up
orange continuously (Fig. 13). The replacement reminder and the
cleaning reminder flash white alternately and you hear a sound. In
this case, the motor cannot run because the shaving heads are soiled
or damaged.
Page 15

English
If the shaving heads are soiled, you have to clean them. If the shaving
heads are damaged, you have to replace them.
Charging
Charge the shaver before you use it for the first time and when the
display indicates that the battery is almost empty. The battery charge
is indicated by the lights of the battery charge indicator on the
display.
When you connect the shaver to the wall socket, you hear a sound.
Charging takes approx. 1 hour. A fully charged shaver has a shaving
time of up to 50 minutes.
Note: You cannot use the appliance while it is charging.
Charging with the supply unit
1 Make sure the appliance is switched off.
2 Put the supply unit in the wall socket and put the small plug in the
appliance (Fig. 14).
3 After charging, remove the supply unit from the wall socket and
pull the small plug out of the appliance.
Charging in the SmartClean system (specific types only)
1 Put the small plug in the back of the SmartClean system.
2 Put the supply unit in the wall socket.
3 Press the top cap to be able to place the shaver in the holder
('click') (Fig. 15).
4 Hold the shaver upside down above the holder. Make sure the
front of the shaver points towards the SmartClean system (Fig. 16).
5 Place the shaver in the holder (1), tilt the shaver backwards (2) and
press down the top cap to connect the shaver (‘click’) (3) (Fig. 17).
Note: The battery symbol starts to flash to indicate that the appliance
is charging. When the battery is fully charged, the battery symbol
lights up continuously.
11
Page 16

English
12
Using the appliance
Note: This appliance can only be used without cord.
Switching the appliance on and off
- To switch on the appliance, press the on/off button once (Fig. 18).
The display lights up for a few seconds.
- To switch off the appliance, press the on/off button once.
The display lights up for a few seconds and shows the remaining
battery charge.
Shaving
Skin adaptation period
Your first shaves may not bring you the result you expect and your
skin may even become slightly irritated. This is normal. Your skin and
beard need time to adapt to any new shaving system. To allow your
skin to adapt to this new appliance, we advise you to shave regularly
(at least 3 times a week) and exclusively with this appliance for a
period of 3 weeks.
Shaving tips
- To ensure the best result, we advise you to pre-trim your beard if
you have not shaved for 3 days or longer.
- Move the shaving heads over your skin in circular movements.
Dry shaving
1 Switch on the appliance.
2 Move the shaving heads over your skin in circular movements (Fig.
19).
Note: Circular movements provide better shaving results than
straight movements.
3 Clean the appliance after use (see 'Cleaning and maintenance').
Wet shaving
You can also use this appliance on a wet face with shaving foam or
shaving gel.
To shave with shaving foam or shaving gel, follow the steps below:
Page 17

English
1 Apply some water to your skin (Fig. 20).
2 Apply shaving foam or shaving gel to your skin (Fig. 21).
3 Rinse the shaving unit under the tap to ensure that the shaving
unit glides smoothly over your skin (Fig. 22).
4 Switch on the appliance.
5 Move the shaving heads over your skin in circular movements (Fig.
19).
Note: Rinse the shaving unit regularly to ensure that it continues to
glide smoothly over your skin.
6 Dry your face.
7 Clean the appliance after use (see 'Cleaning and maintenance').
Note: Make sure you rinse all foam or shaving gel off the
appliance.
Using the click-on attachments
Note: The accessories supplied may vary for different products. The
box shows the accessories that have been supplied with your
appliance.
Removing or attaching the click-on attachments
1 Make sure the appliance is switched off.
2 Pull the attachment straight off the appliance (Fig. 23).
Note: Do not twist the attachment while you pull it off the
appliance.
3 Insert the lug of the attachment into the slot in the top of the
appliance. Then press down the attachment to attach it to the
appliance (‘click’) (Fig. 24).
Using the trimmer attachment
You can use the trimmer attachment to groom your sideburns and
moustache.
1 Attach the attachment to the appliance (‘click’) (Fig. 24).
2 Switch on the appliance.
The display lights up for a few seconds.
3 Hold the trimmer attachment perpendicular to the skin and move
the appliance downwards while you exert gentle pressure (Fig. 25).
13
Page 18

English
14
4 Clean the attachment after use (see 'Cleaning and maintenance').
Using the beard styler attachment with comb
You can use the beard styler attachment with the comb attached to
style your beard at one fixed setting, but also at different length
settings. You can also use it to pre-trim any long hairs before shaving
for a more comfortable shave.
The length settings on the beard styler attachment correspond to the
remaining hair length after cutting and range from 1 to 5mm.
1 Attach the attachment to the appliance ('click') (Fig. 26).
2 Slide the comb straight into the guiding grooves on both sides of
the beard styler attachment (‘click’) (Fig. 27).
3 Press the length selector and then push it to the left or right to
select the desired hair length setting (Fig. 28).
4 Switch on the appliance.
5 Move the appliance upwards while you exert gentle pressure.
Make sure the front of the comb is in full contact with the skin (Fig.
29).
6 Clean the attachment after use (see 'Cleaning and maintenance').
Using the beard styler attachment without comb
You can use the beard styler attachment without the comb to contour
your beard, moustache, sideburns or neckline to a length of 0.5mm.
1 Pull the comb off the beard styler attachment.
Note: Grab the comb in the center to pull it off the beard styler
attachment. Do not pull at the sides of the comb (Fig. 30).
2 Switch on the appliance.
3 Hold the beard styler attachment perpendicular to the skin and
move the appliance downwards while you exert gentle pressure
(Fig. 31).
4 Clean the attachment after use (see 'Cleaning and maintenance').
Using the cleansing brush attachment
Use the rotating cleansing brush attachment with your daily cleansing
cream. The cleansing brush attachment removes oil and dirt,
contributing to a healthy and oil-free skin.
Page 19

English
1 Attach the attachment to the appliance ('click') (Fig. 32).
2 Moisten the attachment with water (Fig. 33).
Note: Do not use the appliance with a dry brush attachment, as
this can irritate the skin.
3 Moisten your face with water and apply a cleanser to your face
(Fig. 34).
4 Place the attachment on your cheek.
5 Switch on the appliance.
6 Gently move the attachment across your skin from the nose
towards the ear (Fig. 35). Do not push the attachment too hard
onto the skin to make sure the treatment remains comfortable.
Do not cleanse the sensitive area around your eyes.
7 After approx. 20 seconds move the appliance to your other cheek
and start cleansing this part of your face (Fig. 36).
8 After approx. 20 seconds move the appliance to your forehead
and start cleansing this part of your face. Gently move the brush
head from left to right (Fig. 37).
Note: We advise you to not overdo the cleansing and to not
cleanse any zone longer than 20 seconds.
9 After the treatment, rinse and dry your face (Fig. 38).Your face is
now ready for the next step of your daily skincare routine.
10 Clean the attachment after use (see 'Cleaning and maintenance').
15
Cleaning and maintenance
The accessories supplied may vary for different products. The box
shows the accessories that have been supplied with your appliance.
Cleaning the shaver in the SmartClean system
The SmartClean system comes in two types. The features available
on your SmartClean system differ per type:
- SmartClean system Basic has one phase: the rinsing phase (Fig.
39).
- SmartClean system Plus has two phases: the rinsing phase and the
drying phase (Fig. 40).
Page 20

English
16
Preparing the SmartClean system for use
Caution: Do not tilt the SmartClean system to prevent leakage (Fig.
41).
Note: Hold the SmartClean system while you prepare it for use.
Note: If you clean the shaver in the SmartClean system once a week,
the SmartClean cartridge lasts approximately three months.
1 Put the small plug in the back of the SmartClean system.
2 Put the supply unit in the wall socket.
3 Press the button on the side of the SmartClean system (1) and lift
the top part of the SmartClean system (2) (Fig. 42).
4 Pull the seal off the cleaning cartridge (Fig. 43).
5 Place the cleaning cartridge in the SmartClean system (Fig. 44).
6 Push the top part of the SmartClean system back down (‘click’)
(Fig. 45).
Using the SmartClean system
Caution: Always shake excess water off the shaver before you
place it in the SmartClean system (Fig. 46).
1 Press the top cap to be able to place the shaver in the holder
('click') (Fig. 15).
2 Hold the shaver upside down above the holder. Make sure the
front of the shaver points towards the SmartClean system (Fig. 16).
3 Place the shaver in the holder (1), tilt the shaver backwards (2) and
press down the top cap to connect the shaver ('click') (3) (Fig. 17).
The battery symbol starts to flash, which indicates that the shaver
is charging.
4 Press the on/off button on the SmartClean system to start the
cleaning program (Fig. 47).
During the rinsing phase, the rinsing symbol flashes. When the
rinsing phase is done (after approx. 10 minutes), the rinsing symbol
lights up continuously.
SmartClean system Plus only: After the rinsing phase, the drying
phase starts automatically. During this phase, the drying symbol
Page 21

English
flashes. When the drying phase is done (after approx. 4 hours), the
drying symbol lights up continuously (Fig. 48).
When the cleaning program is done, the ready symbol lights up
continuously (Fig. 49).
30 minutes after the cleaning program and charging have been
completed, the SmartClean system switches off automatically.
The battery symbol lights up continuously to indicate that the
shaver is fully charged (Fig. 49). Charging takes approx. 1 hour.
5 SmartClean system Basic only: To let the shaver dry, you can
leave it in the SmartClean system until your next shave. You can
also remove the shaver from the SmartClean system, shake off
excess water, open the shaving unit and let the shaver air dry.
Note: If you press the on/off button of the SmartClean system during
the cleaning program, the program aborts. In this case, the rinsing or
drying symbol goes out.
Note: If you remove the supply unit from the wall socket during the
cleaning program, the program aborts.
Replacing the cartridge of the SmartClean system
Replace the cleaning cartridge when the replacement symbol flashes
orange or when you are no longer satisfied with the cleaning result. If
you clean the shaver in the SmartClean system once a week, the
SmartClean cartridge lasts approximately three months.
1 Press the button on the side of the SmartClean system (1) and lift
the top part of the SmartClean system (2) (Fig. 42).
2 Remove the cleaning cartridge from the SmartClean system and
pour out any remaining cleaning fluid (Fig. 50).
You can simply pour the cleaning fluid down the sink.
3 Throw away the empty cleaning cartridge.
4 Unpack the new cleaning cartridge and pull off the seal (Fig. 43).
5 Place the cleaning cartridge in the SmartClean system (Fig. 44).
6 Push the top part of the SmartClean system back down (‘click’)
(Fig. 45).
17
Page 22

English
18
Cleaning the shaver under the tap
Clean the shaver after every shave for optimal performance.
Caution: Be careful with hot water. Always check if the water is not
too hot, to prevent burning your hands.
Never dry the shaving unit with a towel or tissue, as this may
damage the shaving heads.
1 Switch on the shaver.
2 Rinse the shaving unit under a warm tap (Fig. 22).
3 Switch off the shaver. Pull the shaving head holder off the bottom
part of the shaving unit (Fig. 51).
4 Rinse the hair chamber under the tap (Fig. 52).
5 Rinse the shaving head holder under a warm tap (Fig. 53).
6 Carefully shake off excess water and let the shaving head holder
dry.
7 Attach the shaving head holder to the bottom part of the shaving
unit (‘click’) (Fig. 54).
Cleaning the click-on attachments
Note: Never dry the trimmer or beard styler attachments with a towel
or tissue, as this may damage the trimming teeth.
Cleaning the trimmer attachment
Clean the trimmer attachment every time you have used it.
1 Switch on the appliance with the trimmer attachment attached.
2 Rinse the attachment under a warm tap (Fig. 55).
3 After cleaning, switch off the appliance.
4 Carefully shake off excess water and let the attachment dry.
Tip: For optimal performance, lubricate the teeth of the attachment
with a drop of sewing machine oil regularly.
Cleaning the beard styler attachment
Clean the beard styler attachment every time you have used it.
1 Pull the comb off the beard styler attachment.
Note: Grab the comb in the centre to pull it off the beard styler
attachment. Do not pull at the sides of the comb (Fig. 30).
Page 23

English
2 Switch on the appliance.
3 Rinse the beard styler attachment and the comb separately under
a warm tap (Fig. 56).
4 After cleaning, switch off the appliance.
5 Carefully shake off excess water and let the beard styler
attachment and comb dry.
6 For optimal performance, lubricate the teeth of the attachment
with a drop of sewing machine oil regularly.
Cleaning the cleansing brush attachment
Clean the cleansing brush attachment every time you have used it.
1 Switch off the appliance.
2 Detach the brush head from the brush base (Fig. 57).
3 Clean the parts thoroughly with warm water and soap.
4 Dry the cleansing brush attachment with a towel.
Storage
1 Store the appliance in the pouch supplied (Fig. 58).
Note: Make sure the appliance is dry before you store it in the
pouch.
2 Put the protection cap on the cleansing brush attachment to
protect it from dirt accumulation (Fig. 59).
Replacement
Replacing the shaving heads
For maximum shaving performance, we advise you to replace the
shaving heads every two years (Fig. 60). Replace damaged shaving
heads immediately. Always replace the shaving heads with original
Philips shaving heads (see 'Ordering accessories').
Replacement reminder
The replacement reminder indicates that the shaving heads need to
be replaced.The shaving unit symbol lights up continuously, the
arrows flash white and you hear a beep when you switch off the
shaver (Fig. 11).
19
Page 24

English
20
1 Switch off the appliance.
2 Pull the shaving head holder off the bottom part of the shaving
unit (Fig. 51).
3 Place the retaining ring holder on the retaining ring (1), turn it
anticlockwise (2) and lift it off the shaving head (3) (Fig. 61).
Remove the retaining ring from the retaining ring holder and
repeat this process for the other retaining rings.
4 Remove the shaving heads from the shaving head holder (Fig. 62).
Throw away the used shaving heads immediately to avoid mixing
them with the new shaving heads.
5 Place the shaving heads in the shaving head holder (Fig. 63).
Note: Make sure the notches on both sides of the shaving heads fit
exactly onto the projections in the shaving head holder.
6 Place the retaining ring holder on the retaining ring (1), place it on
the shaving head (2) and turn it clockwise (3) to reattach the
retaining ring (Fig. 64). Repeat this process for the other retaining
rings.
-
Each retaining ring has two recesses that fit exactly into the
projections of the shaving head holder. Turn the ring clockwise
until your hear a click to indicate that the ring is fixed (Fig. 65).
Note: Hold the shaving head holder in your hand when you
reinsert the shaving heads and reattach the retaining rings (Fig.
66). Do not place the shaving head holder on a surface when you
do this, as this may cause damage.
7 Attach the shaving head holder to the bottom part of the shaving
unit (‘click’) (Fig. 54).
8 To reset the replacement reminder, press and hold the on/off
button for approx. 7 seconds (Fig. 67). Wait until you hear two
beeps.
Replacing the cleansing brush attachment
The brush head should be replaced every 3 months or earlier if the
brush hairs are deformed or damaged (Fig. 57).
Page 25

English
21
Ordering accessories
To buy accessories or spare parts, visit
www.shop.philips.com/service or go to your Philips dealer. You can
also contact the Philips Consumer Care Centre in your country (see
the worldwide guarantee leaflet for contact details).
The following accessories and spare parts are available:
- SH90 Philips shaving heads
- HQ110 Philips shaving head cleaning spray
- RQ111 Philips beard styler attachment
- RQ585 Philips cleansing brush attachment
- RQ560/RQ563 Philips cleansing brush heads
- JC301/JC302/JC303/JC304/JC305 cleaning cartridge
- HQ8505 supply unit
Note: The availability of the accessories may differ by country.
Recycling
- Do not throw away the product with the normal household waste
at the end of its life, but hand it in at an official collection point for
recycling. By doing this, you help to preserve the environment.
- This product contains a built-in rechargeable battery which shall
not be disposed of with normal household waste. We strongly
advise you to take your product to an official collection point or a
Philips service centre to have a professional remove the
rechargeable battery.
- Follow your country’s rules for the separate collection of electrical
and electronic products and rechargeable batteries. Correct
disposal helps prevent negative consequences for the
environment and human health.
Removing the rechargeable shaver battery
Only remove the rechargeable battery when you discard the
shaver. Before you remove the battery, make sure that the
shaver is disconnected from the wall socket and that the
battery is completely empty.
Page 26

English
22
Take any necessary safety precautions when you handle
tools to open the shaver and when you dispose of the
rechargeable battery.
Be careful, the battery strips are sharp.
1 Insert the screwdriver into the slot between the front and back
panel in the bottom of the appliance. Remove the back panel.
2 Remove the front panel.
3 Unscrew the two screws at the top of the inner panel and remove
the inner panel.
4 Remove the rechargeable battery with a screwdriver.
Guarantee and support
If you need information or support, please visit
www.philips.com/support or read the separate worldwide guarantee
leaflet.
Guarantee restrictions
The shaving heads (cutters and guards) are not covered by the terms
of the international guarantee because they are subject to wear.
Troubleshooting
This chapter summarizes the most common problems you could
encounter with the appliance. If you are unable to solve the problem
with the information below, visit www.philips.com/support for a list
of frequently asked questions or contact the Consumer Care Center in
your country.
Shaver
Problem Possible cause Solution
The appliance
does not work
when I press the
on/off button.
The appliance is still
attached to the wall
socket. For safety
reasons, the
appliance can only
be used without
cord.
Unplug the appliance and
press the on/off button to
switch on the appliance.
Page 27

Problem Possible cause Solution
English
23
The rechargeable
The travel lock is
The appli
ance does not
shave as well as
it used to.
Hairs or dirt obstruct
To clean the shaving heads
battery is empty.
activated.
The shaving unit is
soiled or damaged
to such an extent
that the motor
cannot run.
The shaving heads
are damaged or
worn.
the shaving heads.
Recharge the battery (see
'Charging').
Press the on/off button for
3 seconds to deactivate the
travel lock.
Clean the shaving heads
thoroughly or replace
them. Also see 'Hairs or dirt
obstruct the shaving heads'
for a detailed description of
how to clean the shaving
heads thoroughly.
Replace the shaving heads
(see 'Replacement').
Clean the shaving heads in
the regular way (see
'Cleaning and
maintenance') or clean
them thoroughly.
thoroughly, remove the
shaving heads from the
shaving head holder one
by one (see
'Replacement'). Then
separate the cutter from its
guard and rinse each
matching set under the tap.
After rinsing, place the
cutter back into its
corresponding guard.
Finally, put the shaving
heads back into the
shaving head holder (see
'Replacement').
Page 28

English
24
Problem Possible cause Solution
I replaced the
shaving heads,
but the display
still shows the
replacement
reminder.
A shaving unit
symbol has
suddenly
appeared on the
display.
An exclamation
mark has
suddenly
appeared on the
display while the
appliance is
charging.
An exclamation
mark, the
replacement
reminder and
the cleaning
reminder have
suddenly
appeared on the
display.
The shaving heads
You have not reset
the appliance.
This symbol
reminds you to
replace the shaving
heads.
The appliance is
overheated.
The shaving heads
are damaged.
are soiled.
Reset the appliance by
pressing the on/off button
for approx. 7 seconds.
Replace the shaving heads
(see 'Replacement').
Disconnect the appliance
from the wall socket for
approx. 10 minutes.
Replace the shaving heads
(see 'Replacement').
Clean the shaving heads
(see 'Cleaning and
maintenance'). Also see
'Hairs or dirt obstruct the
shaving heads' for a
detailed description of how
to clean the shaving heads
thoroughly.
Page 29

Problem Possible cause Solution
English
25
Water is leaking
from the bottom
of the appliance.
During cleaning,
water may collect
between the inner
body and the outer
shell of the
appliance.
This is normal and not
dangerous because all
electronics are enclosed in
a sealed power unit inside
the appliance.
SmartClean system
Problem Possible cause Solution
The SmartClean
system does not
work when I
press the on/off
button.
The shaver is not
entirely clean
after I clean it in
the SmartClean
system.
The cleaning
The cleaning
The SmartClean
system is not
connected to the
wall socket.
You have not
placed the shaver in
the SmartClean
system properly, so
there is no electrical
connection
between the
SmartClean system
and the shaver.
cartridge needs to
be replaced.
cartridge is empty.
The replacement
symbol flashes to
indicate that you
have to replace the
cleaning cartridge.
Put the small plug in the
SmartClean system and put
the supply unit in the wall
socket.
Press down the top cap
(‘click’) to ensure a proper
connection between the
shaver and the SmartClean
system.
Replace the cleaning
cartridge.
Place a new cleaning
cartridge in the SmartClean
system.
Page 30
English
26
Problem Possible cause Solution
You have used
The drain of the
The shaver is not
fully charged
after I charge it
in the
SmartClean
system.
another cleaning
fluid than the
original Philips
cleaning cartridge.
cleaning cartridge is
blocked.
You have not
placed the shaver in
the SmartClean
system properly, so
there is no electrical
connection
between the
SmartClean system
and the shaver.
Only use the original
Philips cleaning cartridge.
Remove the cartridge from
the SmartClean system and
push the hairs down the
drain with a toothpick.
Press down the top cap
(‘click’) to ensure a proper
connection between the
shaver and the SmartClean
system.
Page 31

Bahasa Indonesia
Pendahuluan
Selamat atas pembelian Anda dan selamat datang di Philips! Untuk
memanfaatkan sepenuhnya dukungan yang ditawarkan Philips,
daftarkan produk Anda di www.philips.com/welcome.
Baca petunjuk penggunaan ini yang berisi informasi mengenai
berbagai fitur serta sejumlah saran agar lebih mudah
dan menyenangkan dalam menggunakan alat cukur ini.
Keterangan umum (Gbr. 1)
1 Tutup pelindung sambungan sikat pembersih
2 Sambungan sikat pembersih click-on
3 Sisir pelengkap sambungan penata jenggot
4 Sambungan penata jenggot click-on
5 Sambungan pemangkas click-on
6 Unit cukur click-on
7 Tombol on/off
8 Soket untuk steker kecil
9 Tanda seru
10 Pengingat penggantian
11 Persentase daya baterai
12 Simbol kunci perjalanan
13 Peringatan pembersihan
14 Sistem SmartClean
15 Tutup sistem SmartClean
16 Tombol on/off
17 Simbol penggantian
18 Simbol pencucian
19 Simbol siap
20 Simbol mengisi daya
21 Kartrid pembersih untuk sistem SmartClean
22 Unit catu daya
23 Steker kecil
24 Dudukan cincin penahan
25 Kantung
Aksesori yang disertakan dapat berbeda-beda, tergantung pada
produk. Kemasan menunjukkan aksesori yang telah disertakan
dengan peralatan Anda.
27
Bahasa Indonesia
Page 32

Bahasa Indonesia
28
Informasi keselamatan penting
Baca informasi penting ini dengan saksama sebelum menggunakan
alat dan aksesorinya, simpanlah untuk referensi di kemudian hari.
Aksesori yang disertakan dapat berbeda-beda, tergantung pada
produk.
Bahaya
- Usahakan unit catu daya tetap kering (Gbr. 2).
Peringatan
- Untuk mengisi daya baterai, hanya gunakan unit catu daya yang
dapat dilepas (tipe HQ8505) yang disertakan dengan alat ini.
- Unit catu daya terdiri atas transformator. Jangan memotong unit
catu daya dan menggantinya dengan steker lain, karena hal ini
menimbulkan situasi berbahaya.
- Alat ini dapat digunakan oleh anak-anak minimal berusia 8 tahun
ke atas dan orang dengan cacat fisik, indera atau kecakapan
mental yang kurang atau kurang pengalaman dan pengetahuan
jika mereka diberi pengawasan atau petunjuk mengenai cara
penggunaan alat yang aman dan mengerti bahayanya. Anak-anak
dilarang memainkan alat ini. Anak-anak tidak boleh membersihkan
dan memelihara alat ini tanpa pengawasan.
- Selalu cabut steker dari alat cukur sebelum membersihkannya di
bawah keran.
- Selalu periksa alat sebelum Anda menggunakannya. Jangan
gunakan alat jika telah rusak, karena dapat menyebabkan cedera.
Selalu ganti komponen yang rusak dengan yang asli.
- Jangan membuka alat untuk mengganti baterai isi-ulang.
Perhatian
- Jangan sekali-kali merendam sistem pembersih atau dudukan
pengisi daya di dalam air atau membilasnya di bawah keran (Gbr.
2).
- Jangan gunakan air dengan suhu di atas 80 °C untuk membilas
alat cukur.
- Hanya gunakan alat ini untuk keperluan yang dimaksud di
petunjuk pengguna.
Page 33

Bahasa Indonesia
- Untuk alasan higienis, alat sebaiknya hanya digunakan oleh satu
orang saja.
- Jangan sekali-kali menggunakan udara bertekanan, sabut gosok,
bahan pembersih abrasif atau cairan agresif seperti bensin atau
aseton untuk membersihkan alat.
- Jika alat cukur Anda dilengkapi dengan sistem pembersih, selalu
gunakan cairan pembersih Philips asli (kartrid atau botol,
tergantung tipe sistem pembersihnya).
- Selalu letakkan sistem pembersih pada permukaan datar yang
stabil dan rata untuk mencegah kebocoran.
- Jika sistem pembersih Anda menggunakan kartrid pembersih,
selalu pastikan bahwa wadah kartrid tersebut tertutup sebelum
Anda menggunakan sistem pembersih atau mengisi daya alat
cukur.
- Saat sistem pembersih siap digunakan, jangan pindahkan alat agar
tidak terjadi kebocoran cairan pembersih.
- Air mungkin menetes keluar dari soket di bagian bawah alat cukur
saat Anda membilasnya. Hal ini normal dan tidak berbahaya
karena semua perangkat elektronik terlindungi dalam unit daya
tertutup di dalam alat cukur.
- Jangan menggunakan unit catu daya di atau di dekat stopkontak
yang tersambung dengan penyegar udara elektrik untuk
mencegah kerusakan permanen pada unit catu daya.
29
Medan elektromagnet (EMF)
- Alat Philips ini mematuhi semua standar dan peraturan yang
berlaku terkait paparan terhadap medan elektromagnet.
Umum
- Alat cukur ini kedap air (Gbr. 3). Alat ini cocok untuk digunakan di
bak mandi atau shower dan untuk membersihkan di bawah keran.
Untuk keamanan, alat cukur ini hanya dapat dioperasikan tanpa
kabel.
- Alat ini cocok untuk tegangan listrik berkisaran 100 hingga 240
volt.
- Unit catu daya mengubah tegangan 100-240 volt ke tegangan
rendah yang aman kurang dari 24 volt.
Page 34

Bahasa Indonesia
30
Layar
Catatan: Sebelum Anda menggunakan alat cukur untuk pertama kali,
lepaskan kertas timah pelindung dari layar (Gbr. 4).
Pengisian daya
Pengisian daya cepat: Ketika Anda menancapkan alat cukur ke
stopkontak dinding, lampu indikator daya baterai akan menyala
secara bergantian. Bila alat cukur berisi cukup daya untuk sekali
bercukur, lampu di bagian bawah indikator daya baterai mulai
berkedip pelan.
Ketika alat cukur terus mengisi daya, pertama-tama lampu di bagian
bawah indikator daya baterai akan berkedip kemudian menyala
terus-menerus (Gbr. 5). Lalu lampu kedua berkedip dan menyala
secara terus-menerus, dan seterusnya sampai alat cukur terisi penuh.
Baterai terisi penuh
Setelah baterai terisi penuh, semua lampu indikator daya baterai
akan menyala putih terus-menerus (Gbr. 6).
Catatan: Alat ini hanya dapat digunakan tanpa kabel. Jika Anda
menekan tombol on/off selama atau setelah mengisi daya, Anda
akan mendengar bunyi untuk menunjukkan bahwa alat cukur masih
tersambung ke stopkontak dinding.
Catatan: Saat baterai penuh, layar akan mati secara otomatis setelah
30 menit.
Baterai tinggal sedikit
Bila daya baterai hampir habis, lampu di bagian bawah indikator daya
baterai berkedip oranye dan Anda akan mendengar suara (Gbr. 7).
Daya baterai yang tersisa
Daya baterai yang tersisa ditunjukkan oleh lampu indikator daya
baterai yang terus menyala.
Peringatan pembersihan
Bersihkan alat cukur setiap kali setelah mencukur agar performanya
optimal. Saat mematikan alat, pengingat pembersihan akan berkedip
untuk mengingatkan Anda agar alat (Gbr. 8).
Page 35

Bahasa Indonesia
31
Travel lock (kunci perjalanan)
Anda dapat mengunci alat saat Anda akan bepergian. Kunci
perjalanan mencegah alat agar tidak dihidupkan tanpa sengaja.
Mengaktifkan kunci perjalanan
1 Tekan tombol on/off selama 3 detik untuk masuk ke mode (Gbr. 9)
kunci perjalanan.
Apabila Anda mengaktifkan kunci perjalanan, simbol kunci
perjalanan akan menyala putih terus-menerus. Ketika kunci
perjalanan diaktifkan, alat akan berbunyi dan simbol kunci
perjalanan berkedip (Gbr. 10).
Menonaktifkan kunci perjalanan
1 Tekan tombol on/off selama 3 detik.
Simbol kunci perjalanan akan berkedip kemudian menyala terusmenerus (Gbr. 10). Alat telah siap untuk digunakan kembali.
Catatan: Anda juga dapat menonaktifkan kunci perjalanan dengan
menyambungkan alat ke stopkontak dinding.
Pengingat penggantian
Untuk memperoleh performa pencukuran maksimal, sebaiknya Anda
mengganti kepala cukur setiap dua tahun (Gbr. 60).
Alat ini dilengkapi dengan pengingat penggantian yang akan
mengingatkan Anda untuk mengganti kepala cukur. Simbol unit cukur
terus menyala putih, panah berkedip putih, dan alat berbunyi biip
untuk menunjukkan bahwa Anda harus mengganti kepala (Gbr. 11)
cukur.
Catatan: Setelah mengganti kepala cukur, Anda harus mengatur ulang
pengingat penggantian dengan menekan tombol on/off selama 7
detik.
Tanda seru
Pemanasan berlebih
Jika peralatan menjadi terlalu panas saat pengisian daya, tanda seru
akan berkedip oranye (Gbr. 12). Jika hal ini terjadi, alat cukur akan
Page 36

Bahasa Indonesia
32
otomatis mati. Pengisian akan dilanjutkan begitu suhu alat turun
kembali ke tingkat normal.
Kepala cukur tersumbat
Jika kepala cukur tersumbat, tanda seru akan menyala oranye secara
terus-menerus (Gbr. 13). Pengingat penggantian dan pengingat
pembersihan berkedip putih bergantian dan Anda mendengar suara.
Dalam hal ini, motor tidak dapat dijalankan karena kepala cukur kotor
atau rusak.
Jika kepala cukur kotor, harus dibersihkan. Jika kepala cukur rusak,
harus diganti.
Pengisian daya
Isi daya alat cukur sebelum Anda menggunakannya untuk pertama
kali dan saat layar menunjukkan bahwa baterai hampir habis. Daya
baterai yang tersisa ditunjukkan oleh lampu indikator daya baterai
pada layar.
Jika Anda menancapkan alat cukur ke stopkontak dinding, Anda akan
mendengar suara.
Waktu pengisian daya kurang lebih 1 jam. Alat cukur yang terisi penuh
dapat digunakan selama hingga 50 menit.
Catatan: Anda tidak dapat menggunakan alat ketika mengisi daya.
Mengisi baterai dengan unit catu daya
1 Pastikan alat telah dimatikan.
2 Tancapkan unit catu daya di stopkontak dinding dan tancapkan
steker kecil ke alat (Gbr. 14).
3 Setelah pengisian daya selesai, cabut unit catu daya dari
stopkontak dinding dan lepaskan steker kecil dari alat.
Mengisi daya pada sistem SmartClean (hanya tipe tertentu)
1 Pasangkan steker kecil di belakang sistem SmartClean.
2 Masukkan unit catu daya ke stopkontak dinding.
3 Tekan penutup atas agar dapat memasang alat cukur pada
dudukan ('klik') (Gbr. 15).
Page 37

Bahasa Indonesia
4 Pegang alat cukur secara terbalik di atas dudukannya. Pastikan
bagian depan alat cukur mengarah ke sistem (Gbr. 16) SmartClean.
5 Pasang alat cukur pada dudukan (1), miringkan alat cukur ke
belakang (2) dan tekan tutup atas untuk menyambungkan alat
cukur (‘klik’) (3) (Gbr. 17).
Catatan: Simbol baterai mulai berkedip, yang menunjukkan
bahwa alat cukur sedang diisi daya. Bila baterai terisi penuh, simbol
baterai akan terus menyala.
Menggunakan alat
Catatan: Alat ini hanya dapat digunakan tanpa kabel.
Menghidupkan dan mematikan alat
- Untuk menghidupkan alat, tekan tombol daya satu kali (Gbr. 18).
Layar akan menyala selama beberapa detik.
- Untuk mematikan alat, tekan tombol on/off satu kali.
Layar akan menyala selama beberapa detik dan menampilkan sisa
daya baterai.
Mencukur
Masa adaptasi kulit
Hasil cukuran pertama Anda mungkin tidak memuaskan dan kulit
Anda bahkan mengalami sedikit iritasi. Hal ini normal. Kulit dan
jenggot Anda perlu waktu agar terbiasa dengan sistem pencukur
baru. Untuk membiasakan kulit Anda dengan alat baru ini, kami
sarankan Anda bercukur secara rutin (minimal 3 kali seminggu) dan
hanya dengan alat ini selama 3 minggu.
Tips mencukur
- Untuk mendapatkan hasil terbaik, sebaiknya pangkaslah janggut
terlebih dahulu bila belum bercukur selama 3 hari atau lebih.
- Gerakkan kepala cukur pada kulit Anda dengan gerakan memutar.
Pencukuran kering
1 Hidupkan alat tersebut.
33
Page 38

Bahasa Indonesia
34
2 Gerakkan kepala cukur di kulit Anda dengan gerakan memutar
(Gbr. 19).
Catatan: Gerakan melingkar memberikan hasil pencukuran yang
lebih baik daripada gerakan lurus.
3 Bersihkan alat setelah selesai digunakan (lihat 'Pembersihan dan
perawatan').
Pencukuran basah
Anda juga dapat menggunakan alat ini pada muka yang basah oleh
busa atau gel cukur.
Untuk bercukur dengan busa atau gel cukur, ikuti langkah-langkah di
bawah:
1 Basahi kulit (Gbr. 20) Anda dengan sedikit air.
2 Oleskan busa atau gel cukur pada kulit (Gbr. 21) Anda.
3 Bilas unit cukur di bawah keran untuk memastikan unit cukur
meluncur mulus di atas kulit (Gbr. 22) Anda.
4 Hidupkan alat tersebut.
5 Gerakkan kepala cukur di kulit Anda dengan gerakan memutar
(Gbr. 19).
Catatan: Bilas unit cukur secara teratur untuk memastikannya tetap
meluncur mulus di atas kulit Anda.
6 Keringkan wajah Anda.
7 Bersihkan alat setelah selesai digunakan (lihat 'Pembersihan dan
perawatan').
Catatan: Pastikan Anda membilas semua busa atau gel cukur dari
alat.
Menggunakan sambungan click-on
Catatan: Aksesori yang disertakan dapat berbeda-beda, tergantung
pada produk. Kemasan menunjukkan aksesori yang telah disertakan
dengan peralatan Anda.
Melepas atau memasang sambungan click-on
1 Pastikan alat telah dimatikan.
2 Tarik sambungan lurus dari alat (Gbr. 23) sampai terlepas.
Page 39

Bahasa Indonesia
Catatan: Jangan memutar sambungan saat Anda mencabutnya
dari alat.
3 Masukkan tonjolan sambungan ke dalam lubang pada bagian atas
alat. Kemudian tekan sambungan ke bawah untuk memasangnya
ke alat (‘klik’) (Gbr. 24).
Menggunakan sambungan pemangkas
Anda dapat menggunakan sambungan pemangkas untuk merapikan
cambang dan kumis.
1 Pasang sambungan ke alat (‘klik’) (Gbr. 24).
2 Hidupkan alat tersebut.
Layar akan menyala selama beberapa detik.
3 Pegang sambungan pemangkas tegak lurus pada kulit dan geser
alat ke bawah sambil menekan (Gbr. 25) lembut.
4 Bersihkan sambungan setelah digunakan (lihat 'Pembersihan dan
perawatan').
Menggunakan sambungan penata jenggot dengan sisir
Anda dapat menggunakan sambungan penata jenggot dengan sisir
terpasang untuk menata jenggot Anda dalam satu setelan tetap,
tetapi juga dengan setelan panjang yang berbeda. Anda juga dapat
menggunakannya untuk memangkas terlebih dahulu rambut panjang
sebelum mencukur untuk pencukuran yang lebih nyaman.
Setelan panjang pada sambungan penata jenggot menunjukkan
panjang rambut yang tersisa setelah dipotong, dan berkisar antara 1
hingga 5 mm.
1 Pasang sambungan ke alat ('klik') (Gbr. 26).
2 Geser sisir lurus ke alur pemandu di kedua sisi sambungan penata
jenggot (‘klik’) (Gbr. 27).
3 Tekan pemilih panjang lalu tekan ke kiri atau kanan untuk memilih
setelan (Gbr. 28) panjang rambut yang diinginkan.
4 Hidupkan alat tersebut.
5 Geser alat ke atas sambil menekan lembut. Pastikan bagian depan
sisir menyentuh kulit (Gbr. 29) sepenuhnya.
35
Page 40

Bahasa Indonesia
36
6 Bersihkan sambungan setelah digunakan (lihat 'Pembersihan dan
perawatan').
Menggunakan sambungan penata jenggot tanpa sisir
Anda dapat menggunakan sambungan penata jenggot tanpa sisir
untuk membentuk garis jenggot, kumis, cambang, atau garis leher
hingga sepanjang 0,5 mm.
1 Tarik sisir dari sambungan penata jenggot untuk melepas.
Catatan: Pegang sisir di tengah untuk menariknya dari sambungan
penata jenggot. Jangan tarik di sisi sisir (Gbr. 30).
2 Hidupkan alat tersebut.
3 Pegang sambungan penata jenggot tegak lurus pada kulit dan
geser alat ke bawah sambil menekan (Gbr. 31) lembut.
4 Bersihkan sambungan setelah digunakan (lihat 'Pembersihan dan
perawatan').
Menggunakan sambungan sikat pembersih
Gunakan sambungan sikat pembersih berputar dengan krim
pembersih sehari-hari Anda. Sambungan sikat pembersih
membersihkan minyak dan kotoran, sehingga kulit menjadi sehat dan
bebas minyak.
1 Pasang sambungan ke alat (‘klik') (Gbr. 32).
2 Basahi sambungan dengan sedikit air (Gbr. 33).
Catatan: Basahi alat dengan air. Jangan gunakan alat dengan
sambungan sikat kering, karena bisa menimbulkan iritasi pada
kulit.
3 Basahi wajah Anda dengan air dan oleskan pembersih di wajah
(Gbr. 34) Anda.
4 Tempatkan sambungan di pipi Anda.
5 Hidupkan alat tersebut.
6 Geser sambungan secara perlahan di kulit Anda dari hidung
hingga ke telinga (Gbr. 35). Jangan menekan sambungan terlalu
keras di kulit agar perawatan tetap nyaman.
Jangan bersihkan area sensitif di sekeliling mata Anda.
Page 41

Bahasa Indonesia
7 Setelah kira-kira 20 detik, pindahkan alat ke pipi yang lain dan
mulai membersihkan bagian ini di wajah (Gbr. 36) Anda.
8 Setelah kira-kira 20 detik, pindahkan alat ke kening dan mulai
membersihkan bagian ini di wajah Anda. Geser kepala sikat secara
perlahan dari kiri ke kanan (Gbr. 37).
Catatan: Kami sarankan Anda untuk tidak melakukan pembersihan
secara berlebihan dan tidak membersihkan zona mana pun lebih
dari 20 detik.
9 Setelah perawatan, bilas dan keringkan wajah (Gbr. 38). Wajah
Anda kini siap untuk langkah berikutnya dari perawatan kulit rutin
harian Anda.
10 Bersihkan sambungan setelah digunakan (lihat 'Pembersihan dan
perawatan').
Pembersihan dan perawatan
Aksesori yang disertakan dapat berbeda-beda, tergantung pada
produk. Kemasan menunjukkan aksesori yang telah disertakan
dengan peralatan Anda.
Membersihkan alat cukur dalam sistem SmartClean
Sistem SmartClean ditawarkan dalam tiga tipe. Fitur yang tersedia
pada sistem SmartClean Anda mungkin berbeda tergantung tipenya:
- Sistem SmartClean Basic memiliki satu tahap: tahap (Gbr. 39)
pembilasan.
- Sistem SmartClean Plus terdiri dari dua tahap: tahap pembilasan
dan tahap (Gbr. 40) pengeringan.
Mempersiapkan penggunaan sistem SmartClean
Perhatian: Jangan miringkan sistem SmartClean untuk menghindari
kebocoran (Gbr. 41).
Catatan: Pegang sistem SmartClean sambil mempersiapkan
penggunaannya.
Catatan: Jika Anda membersihkan alat cukur dengan sistem
SmartClean sekali seminggu, kartrid SmartClean bertahan kurang
lebih tiga bulan.
1 Pasangkan steker kecil di belakang sistem SmartClean.
37
Page 42

Bahasa Indonesia
38
2 Masukkan unit catu daya ke stopkontak dinding.
3 Tekan tombol pada sisi sistem SmartClean (1) dan tarik bagian atas
sistem SmartClean (2) (Gbr. 42).
4 Tarik pengunci dari kartrid (Gbr. 43) pembersih.
5 Tempatkan kartrid pembersih pada sistem (Gbr. 44) SmartClean.
6 Dorong bagian atas sistem SmartClean kembali ke bawah (‘klik’)
(Gbr. 45).
Menggunakan sistem SmartClean
Perhatian: Selalu pastikan Anda mengibaskan sisa air dari alat
cukur sebelum menempatkannya pada sistem (Gbr. 46)
SmartClean.
1 Tekan penutup atas agar dapat memasang alat cukur pada
dudukan ('klik') (Gbr. 15).
2 Pegang alat cukur secara terbalik di atas dudukannya. Pastikan
bagian depan alat cukur mengarah ke sistem (Gbr. 16) SmartClean.
3 Pasang alat cukur pada dudukan (1), miringkan alat cukur ke
belakang (2) dan tekan tutup atas untuk menyambungkan alat
cukur ('klik') (3) (Gbr. 17).
Simbol baterai mulai berkedip, yang menunjukkan bahwa alat
cukur sedang diisi daya.
4 Tekan tombol on/off pada sistem SmartClean untuk memulai
program (Gbr. 47) pembersihan.
Selama tahap pembilasan, simbol bilas akan berkedip. Begitu
tahap pembilasan selesai (setelah sekitar 10 menit), simbol bilas
akan menyala terus-menerus.
Sistem SmartClean Plus saja: Setelah tahap pembilasan, tahap
pengeringan otomatis dimulai. Selama tahap ini, simbol
pengeringan akan berkedip. Begitu tahap pengeringan selesai
(setelah sekitar 4 jam), simbol pengeringan akan menyala terusmenerus (Gbr. 48).
Setelah program pembersihan selesai, simbol siap akan menyala
terus-menerus (Gbr. 49).
Page 43

Bahasa Indonesia
30 menit setelah program membersihkan dan mengisi daya
selesai, sistem SmartClean akan mati otomatis.
Simbol baterai akan terus menyala menunjukkan bahwa daya alat
cukur terisi (Gbr. 49) penuh. Waktu pengisian daya kurang lebih 1
jam.
5 Sistem SmartClean Basic saja: Agar alat cukur kering, Anda dapat
membiarkannya dalam sistem SmartClean hingga waktu
pencukuran berikutnya. Anda juga dapat melepas alat cukur dari
sistem SmartClean, mengibaskan sisa air, membuka unit cukur dan
membiarkan unit cukur mengering di udara terbuka.
Catatan: Jika Anda menekan tombol on/off pada sistem SmartClean
selama program pembersihan, program akan dihentikan. Dalam hal
ini, simbol pembilasan atau pengeringan akan mati.
Catatan: Jika Anda mencabut unit catu daya dari stopkontak dinding
selama program pembersihan, program akan dihentikan.
39
Mengganti kartrid sistem SmartClean
Ganti kartrid pembersih ketika simbol penggantian berkedip oranye
atau ketika Anda tidak lagi puas dengan hasil pembersihan. Jika Anda
membersihkan alat cukur dengan sistem SmartClean sekali seminggu,
kartrid SmartClean bertahan kurang lebih tiga bulan.
1 Tekan tombol pada sisi sistem SmartClean (1) dan tarik bagian atas
sistem SmartClean (2) (Gbr. 42).
2 Lepaskan kartrid pembersih dari sistem SmartClean dan tuangkan
ke luar semua cairan (Gbr. 50) pembersih yang tersisa.
Anda tinggal menuangkan cairan pembersih di bak cuci.
3 Buang kartrid pembersih kosong.
4 Buka kemasan kartrid pembersih baru dan tarik lepas pengunci
(Gbr. 43) kartrid.
5 Tempatkan kartrid pembersih pada sistem (Gbr. 44) SmartClean.
6 Dorong bagian atas sistem SmartClean kembali ke bawah (‘klik’)
(Gbr. 45).
Page 44

Bahasa Indonesia
40
Membersihkan alat cukur di bawah keran
Bersihkan alat cukur setiap kali setelah mencukur agar performanya
optimal.
Perhatian: Berhati-hatilah saat menggunakan air panas. Selalu
pastikan air tidak terlalu panas, untuk mencegah luka bakar pada
tangan Anda.
Jangan sekali-kali mengeringkan unit cukur dengan handuk atau
kertas tisu, karena dapat merusak kepala cukur.
1 Hidupkan alat cukur.
2 Bilas unit cukur di bawah keran (Gbr. 22) air panas.
3 Matikan alat cukur. Lepaskan dudukan kepala cukur dari bagian
bawah unit (Gbr. 51) pencukur.
4 Bilas ruang rambut di bawah keran (Gbr. 52).
5 Bilas dudukan kepala cukur di bawah keran (Gbr. 53) air panas.
6 Kibaskan kelebihan air dengan hati-hati dan biarkan dudukan
kepala cukur kering.
7 Pasang dudukan kepala cukur ke bagian bawah unit cukur (‘klik’)
(Gbr. 54).
Membersihkan sambungan click-on
Catatan: Jangan sekali-kali mengeringkan pemangkas atau
sambungan penata jenggot dengan handuk atau kertas tisu, karena
dapat merusak gigi pemangkas.
Membersihkan sambungan pemangkas
Bersihkan sambungan pemangkas setiap kali Anda selesai
menggunakannya.
1 Hidupkan alat dengan sambungan pemangkas terpasang.
2 Bilas sambungan di bawah keran (Gbr. 55) air panas.
3 Setelah membersihkan, matikan alat.
4 Dengan hati-hati kibaskan sisa air dan biarkan sambungan kering.
Tip: Agar performa optimal, lumasi gigi sambungan dengan setetes
minyak mesin jahit secara rutin.
Membersihkan sambungan penata jenggot
Bersihkan sambungan penata jenggot setiap kali selesai digunakan.
Page 45

Bahasa Indonesia
1 Tarik sisir dari sambungan penata jenggot untuk melepas.
Catatan: Pegang sisir di tengah untuk menariknya dari sambungan
penata jenggot. Jangan tarik di sisi sisir (Gbr. 30).
2 Hidupkan alat tersebut.
3 Bilas sambungan penata jenggot dan sisir secara terpisah di
bawah keran (Gbr. 56) air panas.
4 Setelah membersihkan, matikan alat.
5 Perlahan kibaskan kelebihan air dan biarkan sambungan penata
jenggot dan sisir sampai kering.
6 Agar performa optimal, lumasi gigi sambungan dengan setetes
minyak mesin jahit secara rutin.
Membersihkan sambungan sikat pembersih
Bersihkan sambungan sikat pembersih setiap kali selesai digunakan.
1 Matikan alat.
2 Lepaskan kepala sikat dari alas (Gbr. 57) sikat.
3 Bersihkan semua bagian secara menyeluruh dengan air hangat
dan sabun.
4 Keringkan sambungan sikat pembersih dengan handuk.
Penyimpanan
1 Simpan alat di dalam kantung yang disertakan (Gbr. 58).
Catatan: Pastikan alat kering sebelum disimpan di dalam kantung.
2 Pasang tutup pelindung pada sambungan sikat pembersih untuk
melindunginya dari kotoran yang menumpuk (Gbr. 59).
41
Penggantian
Mengganti kepala cukur
Untuk memperoleh performa pencukuran maksimal, sebaiknya Anda
mengganti kepala cukur setiap dua tahun (Gbr. 60). Segera ganti
kepala cukur yang rusak. Selalu ganti kepala cukur dengan kepala
(lihat 'Memesan aksesori') cukur Philips yang asli.
Page 46

Bahasa Indonesia
42
Pengingat penggantian
Pengingat penggantian menunjukkan bahwa kepala cukur perlu
diganti.Simbol unit cukur akan terus menyala, tanda panah berkedip
putih dan Anda akan mendengar bunyi bip saat mematikan alat cukur
(Gbr. 11).
1 Matikan alat.
2 Lepaskan dudukan kepala cukur dari bagian bawah unit (Gbr. 51)
pencukur.
3 Pasang dudukan cincin penahan pada cincin penahan (1), putar
berlawanan arah jarum jam (2) dan tarik lepas dari kepala cukur (3)
(Gbr. 61).
Lepaskan cincin penahan dari dudukan cincin penahan dan ulangi
proses ini untuk cincin penahan lainnya.
4 Lepaskan kepala cukur dari dudukan (Gbr. 62) kepala cukur.
Segera buang kepala cukur bekas agar tidak tercampur dengan
kepala cukur baru.
5 Pasang kepala cukur yang baru pada dudukan (Gbr. 63) kepala
cukur.
Catatan: Pastikan lekuk di kedua sisi kepala cukur benar-benar pas
dengan tonjolan pada pegangan kepala pencukur.
6 Pasang dudukan cincin penahan pada cincin penahan (1), pasang
di kepala cukur (2) dan putar searah jarum jam (3) untuk
memasang kembali cincin (Gbr. 64) penahan. Ulangi proses ini
pada cincin penahan lainnya.
-
Setiap cincin penahan memiliki dua ceruk yang pas dengan
tonjolan pada dudukan kepala cukur. Putar cincin searah jarum
jam hingga terdengar bunyi klik yang menunjukkan cincin
terpasang (Gbr. 65) kuat.
Catatan: Pegang dudukan kepala cukur dengan tangan ketika
Anda memasukkan kepala cukur dan memasang kembali cincin
(Gbr. 66) penahan. Jangan letakkan dudukan kepala cukur di
permukaan ketika melakukannya, karena dapat menyebabkan
kerusakan.
Page 47

Bahasa Indonesia
7 Pasang dudukan kepala cukur ke bagian bawah unit cukur (‘klik’)
(Gbr. 54).
8 Untuk mengatur ulang pengingat penggantian, tekan dan tahan
tombol on/off selama kurang-lebih 7 detik (Gbr. 67). Tunggu
sampai Anda mendengar dua biip.
Mengganti sambungan sikat pembersih
Kepala sikat harus diganti setiap 3 bulan atau lebih cepat bila bulu
sikat berubah bentuk atau rusak (Gbr. 57).
Memesan aksesori
Untuk membeli aksesori atau suku cadang, buka
www.shop.philips.com/service atau kunjungi dealer Philips terdekat.
Anda juga dapat menghubungi Pusat Layanan Konsumen Philips di
negara Anda (lihat informasi dalam leaflet garansi di seluruh untuk
perincian kontak).
Aksesori dan komponen berikut tersedia:
- Kepala cukur Philips SH90
- Semprotan pembersih kepala cukur Philips HQ110
- Sambungan penata jenggot Philips RQ111
- Sambungan sikat pembersih Philips RQ585
- Kepala sikat pembersih Philips RQ560/RQ563
- Kartrid pembersih JC301/JC302/JC303/JC304/JC305
- Unit catu daya HQ8505
Catatan: Ketersediaan aksesori berbeda-beda menurut negara.
43
Mendaur ulang
- Jangan membuang produk bersama limbah rumah tangga biasa
jika sudah tidak bisa dipakai lagi, tetapi serahkan ke tempat
pengumpulan barang bekas yang resmi untuk didaur ulang.
Dengan melakukan ini, Anda turut membantu melestarikan
lingkungan.
Page 48

Bahasa Indonesia
44
- Produk ini berisi baterai isi ulang internal yang tidak boleh dibuang
bersama dengan sampah rumah tangga biasa. Kami sangat
menganjurkan agar Anda membawa produk ke lokasi
pengumpulan resmi atau ke pusat servis Philips untuk melepas
baterai isi ulang oleh teknisi profesional.
- Patuhi peraturan di negara Anda untuk pengumpulan terpisah
untuk produk listrik dan elektronik serta baterai isi-ulang.
Pembuangan secara benar akan membantu mencegah dampak
negatif terhadap lingkungan dan kesehatan manusia.
Melepas baterai isi ulang alat cukur
Hanya keluarkan baterai isi ulang ketika Anda membuang
alat cukur. Sebelum mengeluarkan baterai, pastikan bahwa
alat cukur telah dicabut dari stopkontak dinding dan daya
baterai benar-benar habis.
Lakukan semua tindakan pencegahan yang diperlukan
ketika menggunakan alat untuk membuka alat cukur dan
ketika membuang baterai isi ulang.
Berhati-hatilah, strip baterai tajam.
1 Masukkan obeng ke dalam selot antara panel muka dan belakang
di bagian bawah alat. Lepaskan panel belakang.
2 Lepaskan panel depan.
3 Lepaskan kedua sekrup di bagian atas panel dalam dan lepaskan
panel dalam.
4 Lepaskan baterai isi-ulang dengan obeng.
Garansi dan dukungan
Jika Anda memerlukan informasi atau dukungan, silakan kunjungi
www.philips.com/support atau baca pamflet garansi internasional
terpisah.
Batasan garansi
Kepala pencukur (unit pemotong dan pelindung) tidak tercakup oleh
ketentuan garansi internasional karena tergantung pada pemakaian.
Page 49

Bahasa Indonesia
Mengatasi masalah
Bab ini merangkum masalah yang paling umum terjadi pada alat
Anda. Jika Anda tidak dapat menyelesaikan masalah dengan
informasi di bawah, kunjungi www.philips.com/support untuk daftar
pertanyaan umum atau hubungi Pusat Layanan Konsumen di negara
Anda.
Alat cukur
Masalah Kemungkinan
penyebab
Solusi
45
Alat tidak mau
hidup sewaktu
saya menekan
tombol on/off.
Baterai isi ulangnya
Kunci perjalanan
Alat tidak menc
ukur sebaik
biasanya.
Alat masih
tertancap ke
stopkontak dinding.
Demi alasan
keamanan, alat
hanya dapat
dioperasikan tanpa
kabel.
habis.
diaktifkan.
Unit cukur kotor
atau rusak
sedemikian rupa
sehingga motor
tidak dapat
berfungsi.
Kepala cukur rusak
atau aus.
Cabut alat dari stopkontak
lalu tekan tombol on/off
untuk menghidupkan alat.
Isi ulang baterai (lihat
'Pengisian daya').
Tekan tombol on/off
selama 3 detik untuk
menonaktifkan kunci
perjalanan.
Bersihkan kepala cukur
secara menyeluruh atau
ganti. Lihat juga 'Rambut
atau kotoran menyumbat
kepala cukur' untuk
keterangan terperinci
tentang cara
membersihkan kepala
cukur secara menyeluruh.
Ganti kepala cukur (lihat
'Penggantian').
Page 50

Bahasa Indonesia
46
Masalah Kemungkinan
Solusi
penyebab
Rambut atau
Untuk membersihkan
Saya sudah
mengganti
kepala cukur,
tapi layar masih
menampilkan
pengingat
penggantian.
Simbol unit
cukur tiba-tiba
muncul di layar.
Tanda seru tibatiba muncul di
layar saat
mengisi daya
alat.
kotoran akan
menghambat
kepala cukur.
Anda belum
mengatur ulang
alat.
Simbol ini
mengingatkan Anda
untuk mengganti
kepala cukur.
Peralatan terlalu
panas.
Bersihkan kepala cukur
seperti (lihat 'Pembersihan
dan perawatan') biasa atau
bersihkan secara
menyeluruh.
kepala cukur secara
menyeluruh, lepaskan
kepala cukur dari dudukan
kepala cukur satu demi
satu (lihat 'Penggantian').
Kemudian pisahkan mata
pisau dari pelindungnya
dan bilas setiap set yang
cocok di bawah keran.
Setelah dibilas, pasang
kembali mata pisau ke
pelindung yang sesuai.
Terakhir, pasang kembali
kepala cukur ke dudukan
(lihat 'Penggantian') kepala
cukur.
Atur ulang alat dengan
menekan tombol on/off
kira-kira selama 7 detik.
Ganti kepala cukur (lihat
'Penggantian').
Cabut alat dari stopkontak
dinding selama sekitar 10
menit.
Page 51

Bahasa Indonesia
47
Masalah Kemungkinan
Solusi
penyebab
Tanda seru,
pengingat
penggantian dan
pengingat
pembersihan
tiba-tiba muncul
di layar.
Kepala cukur kotor. Bersihkan kepala cukur
Keluar air dari
bagian bawah
alat.
Kepala cukur rusak. Ganti kepala cukur (lihat
Saat membersihkan,
mungkin akan ada
sisa air antara
bagian dalam
badan dan bagian
luar alat.
'Penggantian').
(lihat 'Pembersihan dan
perawatan'). Lihat juga
'Rambut atau kotoran
menyumbat kepala cukur'
untuk keterangan terperinci
tentang cara
membersihkan kepala
cukur secara menyeluruh.
Hal ini normal dan tidak
berbahaya karena semua
rangkaian elektronik
berada di dalam unit catu
daya tertutup di dalam alat.
Sistem SmartClean
Masalah Kemungkinan
penyebab
Sistem
SmartClean tidak
berfungsi
sewaktu saya
menekan tombol
on/off.
Sistem SmartClean
tidak terhubung ke
stopkontak dinding.
Solusi
Pasang steker kecil di
sistem SmartClean dan
tancapkan unit catu daya
ke stopkontak dinding.
Page 52

Bahasa Indonesia
48
Masalah Kemungkinan
penyebab
Alat cukur tidak
benar-benar
bersih setelah
saya
membersihkan
nya dengan
sistem
SmartClean.
Kartrid pembersih
Kartrid pembersih
Anda telah
Saluran kuras kartrid
Anda belum
memasang alat
cukur ke sistem
SmartClean dengan
benar, sehingga
tidak ada aliran
listrik antara Sistem
SmartClean dan alat
cukur.
perlu diganti.
kosong. Simbol
penggantian
berkedip
menandakan Anda
harus mengganti
kartrid pembersih.
menggunakan
cairan pembersih
selain kartrid
pembersih Philips
asli.
pembersih
tersumbat.
Solusi
Tekan tutup atas ('klik')
untuk memastikan
sambungan yang benar
antara alat cukur dan
sistem SmartClean.
Ganti kartrid pembersih.
Pasang kartrid pembersih
baru pada sistem
SmartClean.
Hanya gunakan kartrid
pembersih Philips asli.
Lepaskan kartrid dari
sistem SmartClean dan
dorong rambut ke bawah
melalui saluran kuras
dengan tusuk gigi.
Page 53

Bahasa Indonesia
49
Masalah Kemungkinan
penyebab
Alat cukur tidak
terisi penuh
setelah saya
mengisinya pada
sistem
SmartClean.
Anda belum
memasang alat
cukur ke sistem
SmartClean dengan
benar, sehingga
tidak ada aliran
listrik antara Sistem
SmartClean dan alat
cukur.
Solusi
Tekan tutup atas ('klik')
untuk memastikan
sambungan yang benar
antara alat cukur dan
sistem SmartClean.
Page 54

Bahasa Melayu
50
Pengenalan
Tahniah atas pembelian anda dan selamat menggunakan Philips!
Untuk memanfaatkan sepenuhnya sokongan yang ditawarkan oleh
Philips, daftar produk anda di www.philips.com/welcome.
Sila baca manual pengguna ini, kerana ia mengandungi maklumat
berkenaan ciri-ciri pencukur ini serta beberapa petua untuk
membuatkan pencukuran lebih mudah dan lebih menyeronokkan.
Gambaran umum (Raj. 1)
1 Tukup pelindung untuk alat tambahan berus pembersih
2 Alat tambahan berus pembersih mudah dipasang
3 Alat tambahan sikat untuk penggaya janggut
4 Alat tambahan penggaya janggut mudah dipasang
5 Alat tambahan perapi mudah dipasang
6 Unit pencukur mudah dipasang
7 Butang on/off
8 Soket untuk plag kecil
9 Tanda seru
10 Peringatan penggantian
11 Penunjuk pengecasan bateri
12 Simbol kunci kembara
13 Peringatan pembersihan
14 Sistem SmartClean
15 Tukup sistem SmartClean
16 Butang on/off
17 Simbol penggantian
18 Simbol pembersihan
19 Simbol Sedia
20 Simbol Pengecasan
21 Membersihkan kartrij untuk sistem SmartClean
22 Unit bekalan
23 Plag kecil
24 Pemegang gelung penahan
25 Kantung
Aksesori yang dibekalkan mungkin berbeza-beza untuk berlainan
produk. Kotak di bawah menunjukkan aksesori yang telah dibekalkan
bersama perkakas anda.
Bahasa Melayu
Page 55

Bahasa Melayu
Maklumat keselamatan penting
Baca maklumat penting ini dengan teliti sebelum anda menggunakan
perkakas dan aksesorinya dan simpan untuk rujukan pada masa
hadapan. Aksesori yang dibekalkan mungkin berbeza-beza untuk
berlainan produk.
Bahaya
- Pastikan unit bekalan sentiasa kering (Raj. 2).
Amaran
- Untuk mengecas bateri, hanya gunakan unit bekalan boleh
ditanggalkan (jenis HQ8505) yang disediakan dengan perkakas.
- Unit bekalan mengandungi pengubah. Jangan putuskan unit
bekalan untuk menggantikannya dengan palam lain, kerana ini
menyebabkan situasi berbahaya.
- Perkakas ini boleh digunakan oleh kanak-kanak berumur 8 tahun
dan ke atas dan orang yang kurang keupayaan fizikal, deria atau
mental atau kurang pengalaman dan pengetahuan jika mereka
diberi pengawasan dan arahan berkaitan penggunaan perkakas
secara selamat dan memahami bahaya yang mungkin berlaku.
Kanak-kanak tidak sepatutnya bermain dengan perkakas ini.
Pembersihan dan penyelenggaraan oleh pengguna tidak harus
dilakukan oleh kanak-kanak tanpa pengawasan.
- Setiap kali anda hendak membersihkan pencukur di bawah paip,
pastikan plagnya telah ditanggalkan.
- Pastikan anda memeriksa perkakas setiap kali sebelum anda
menggunakannya. Jangan gunakan perkakas jika rosak, kerana ini
boleh menyebabkan kecederaan. Bahagian yang rosak hendaklah
digantikan dengan jenis yang asli sahaja.
- Jangan buka alat tersebut untuk menggantikan bateri boleh cas
semula.
Awas
- Jangan sekali-kali rendam sistem pembersih ini atau dirian
pengecasan dalam air dan jangan bilasnya di bawah paip (Raj. 2).
- Jangan sekali-kali gunakan air yang lebih panas daripada 80°C
untuk membilas pencukur tersebut.
51
Page 56

Bahasa Melayu
52
- Hanya gunakan perkakas ini untuk tujuan dimaksudkan seperti
ditunjukkan dalam manual pengguna.
- Atas sebab-sebab kebersihan, perkakas ini hendaklah hanya
digunakan oleh seorang sahaja.
- Jangan sekali-kali gunakan udara termampat, pad penyental,
agen pembersih yang melelas atau cecair yang agresif seperti
alkohol atau aseton untuk membersihkan perkakas.
- Jika pencukur anda disertakan dengan sistem pembersih, sentiasa
gunakan cecair pembersih asli Philips (kartrij atau botol,
bergantung pada jenis sistem pembersih).
- Letakkan sistem pembersih pada permukaan yang stabil, rata dan
mendatar sahaja untuk mengelakkan kebocoran.
- Jika sistem pembersih anda menggunakan kartrij pembersih,
sentiasa pastikan petak kartrij tertutup sebelum anda
menggunakan sistem pembersih untuk membersihkan atau
mengecas pencukur.
- Apabila sistem pembersih siap untuk digunakan, jangan
alihkannya bagi mengelakkan cecair pembersih daripada bocor.
- Air mungkin menitis dari soket di bawah pencukur apabila anda
membilasnya. Ini adalah biasa dan tidak berbahaya kerana semua
alat elektronik dilindungi dalam unit kuasa yang kedap dalam
pencukur.
- Jangan gunakan unit bekalan di atau berdekatan dengan soket
dinding yang mengandungi penyegar udara elektrik untuk
mencegah kerosakan yang tidak boleh dibaiki kepada unit
bekalan.
Medan elektromagnet (EMF)
- Perkakas Philips ini mematuhi semua piawaian dan peraturan
yang berkaitan dengan pendedahan kepada medan
elektromagnet.
Am
- Pencukur ini kalis air (Raj. 3). Ia sesuai untuk digunakan dalam tab
mandi dan di bawah pancuran dan untuk dibersihkan di bawah
paip. Atas sebab-sebab keselamatan, pencukur ini hanya boleh
digunakan tanpa kord.
Page 57

Bahasa Melayu
- Perkakas ini sesuai untuk voltan sesalur kuasa antara 100 hingga
240 volt.
- Unit bekalan mengubah 100-240 volt kepada voltan rendah dan
selamat tidak melebihi 24 volt.
Paparan
Catatan: Sebelum anda menggunakan perkakas pada kali pertama,
tanggalkan kerajang pelindung daripada paparan (Raj. 4).
Pengecasan
Pengecasan pantas: Apabila anda sambungkan pencukur ke soket
dinding, lampu penunjuk cas bateri akan terus menyala satu demi
satu secara berulang. Apabila pencukur mengandungi cukup tenaga
untuk satu cukuran, lampu bawah penunjuk cas bateri mula berkelip
dengan perlahan.
Semasa pencukur terus mengecas, lampu bawah pertama penunjuk
cas bateri bernyala dan kemudian menyala putih secara berterusan
(Raj. 5). Kemudian lampu kedua berkelip dan terus menyala dan
seterusnya sehingga pencukur dicas sepenuhnya.
Bateri telah dicas sepenuhnya
Apabila bateri telah dicas sepenuhnya, semua lampu penunjuk
pengecasan bateri akan menyala putih secara berterusan (Raj. 6).
Catatan: Perkakas ini hanya boleh digunakan tanpa kord. Apabila
anda tekan butang hidup/mati semasa atau selepas pengecasan,
anda akan mendengar bunyi yang menunjukkan pencukur masih
disambungkan ke soket dinding.
Catatan: Apabila bateri penuh, paparan akan dimatikan secara
automatik selepas 30 minit.
Bateri lemah
Apabila bateri hampir kosong, lampu bawah penunjuk cas bateri
berkelip jingga dan anda akan mendengar bunyi (Raj. 7).
Baki cas bateri
Baki cas bateri ditunjukkan oleh lampu penunjuk pengecasan bateri
yang menyala secara berterusan.
53
Page 58

Bahasa Melayu
54
Peringatan pembersihan
Bersihkan pencukur selepas setiap cukuran untuk prestasi yang
optimum. Apabila anda mematikan perkakas, peringatan
pembersihan akan berkelip bagi mengingatkan anda untuk
membersihkan perkakas (Raj. 8).
Kunci kembara
Anda boleh mengunci perkakas apabila anda hendak mengembara.
Kunci kembara mencegah perkakas daripada dihidupkan tanpa
sengaja.
Mengaktifkan kunci kembara
1 Tekan butang hidup/mati selama 3 saat untuk memasuki mod (Raj.
9) kunci kembara.
Apabila anda mengaktifkan kunci kembara, simbol kunci kembara
akan menyala putih secara berterusan. Apabila kunci kembara
diaktifkan, prosedur perkakas mengeluarkan bunyi dan simbol
kunci kembara akan berkelip (Raj. 10).
Menyahaktifkan kunci kembara
1 Tekan butang hidup/mati selama 3 saat.
Simbol kunci kembara akan berkelip dan kemudian menyala
secara berterusan (Raj. 10). Perkakas kini sedia untuk digunakan
semula.
Catatan: Anda juga boleh menyahaktifkan kunci kembara dengan
menyambungkan perkakas ke sesalur kuasa dinding.
Peringatan penggantian
Untuk prestasi pencukuran yang maksimum, kami menasihatkan agar
anda menggantikan kepala pencukur setiap dua tahun (Raj. 60).
Perkakasan dilengkapi dengan peringatan penggantian yang
mengingatkan anda untuk menggantikan kepala pencukur. Simbol
unit pencukur menyala putih secara berterusan, anak panah berkelip
putih dan perkakasan berbunyi bip untuk menandakan anda perlu
menggantikan kepala (Raj. 11) pencukur.
Page 59

Bahasa Melayu
Catatan: Selepas menggantikan kepala pencukur, anda perlu
menetapkan semula peringatan penggantian dengan menekan
butang hidup/mati selama 7 saat.
55
Tanda seru
Pemanasan lampau
Jika perkakas menjadi terlampau panas semasa pengecasan, tanda
seru akan berkelip jingga (Raj. 12). Apabila ini berlaku, pencukur mati
secara automatik. Pengecasan akan diteruskan setelah suhu perkakas
telah dikurangkan kepada suhu biasa.
Kepala pencukur yang tersumbat
Jika kepala pencukur disekat, tanda seru akan bernyala jingga secara
berterusan (Raj. 13). Peringatan penggantian dan peringatan
pembersihan berkelip putih secara berselang-seli dan anda
mendengar bunyi. Dalam keadaan ini, motor tidak dapat berjalan
kerana kepala pencukur kotor atau rosak.
Jika kepala pencukur kotor, anda hendaklah membersihkannya. Jika
kepala pencukur rosak, anda perlu menggantikannya.
Pengecasan
Caskan pencukur sebelum anda menggunakannya buat pertama kali
dan apabila paparan menunjukkan bateri hampir kosong. Cas bateri
ditunjukkan oleh lampu penunjuk peratus pengecasan bateri pada
paparan.
Apabila anda sambungkan pencukur kepada soket dinding, anda
mendengar bunyi.
Pengecasan mengambil masa lebih kurang 1 jam. Pencukur yang
dicas penuh mempunyai masa pencukuran sehingga kira-kira 50
minit.
Catatan: Anda tidak boleh menggunakan perkakas semasa ia sedang
dicas.
Mengecas dengan unit bekalan
1 Pastikan perkakas dimatikan.
Page 60

Bahasa Melayu
56
2 Pasang unit bekalan ke soket dinding dan pasang palam kecil ke
perkakas (Raj. 14).
3 Selepas mengecas, tanggalkan unit bekalan daripada soket
dinding dan cabut plag kecil keluar dari perkakas.
Mengecas dalam sistem SmartClean (jenis tertentu sahaja)
1 Letakkan plag kecil di bahagian belakang sistem SmartClean.
2 Pasangkan unit bekalan ke soket dinding.
3 Tekan tukup atas supaya anda boleh meletakkan pencukur ke
dalam pemegang ('klik') (Raj. 15).
4 Pegang pencukur di atas pemegang secara terbalik. Pastikan
bahagian hadapan pencukur menghadap ke sistem (Raj. 16)
SmartClean.
5 Letakkan pencukur di dalam pemegang (1), sendengkan pencukur
ke belakang (2) dan tekan tukup atas untuk menyambungkan
pencukur (‘klik’) (3) (Raj. 17).
Catatan: Simbol bateri akan mula berkelip, menandakan
bahawa perkakasan sedang mengecas. Setelah bateri dicas
sepenuhnya, simbol bateri akan menyala berterusan.
Menggunakan perkakas
Catatan: Perkakas ini hanya boleh digunakan tanpa kord.
Menghidupkan atau mematikan perkakas
- Untuk menghidupkan perkakas, tekan butang on/off sekali (Raj.
18).
Paparan menyala selama beberapa saat.
- Untuk mematikan perkakas, tekan butang hidup/mati sekali.
Paparan akan menyala selama beberapa saat dan menunjukkan
baki pengecasan bateri.
Page 61

Bahasa Melayu
Pencukuran
Tempoh penyesuaian kulit
Cukuran pertama anda mungkin tidak memberikan hasil yang anda
jangkakan dan kulit anda mungkin menjadi sedikit direngsa. Ini
perkara biasa. Kulit dan janggut anda memerlukan masa untuk
disesuaikan dengan sebarang sistem pencukuran baru. Untuk
membolehkan kulit anda menyesuaikan dengan perkakas baru ini,
kami menasihatkan agar anda bercukur dengan kerap (sekurangkurangnya 3 kali seminggu) dan secara eksklusif dengan perkakas ini
untuk tempoh 3 minggu.
Tip pencukuran
- Untuk memastikan hasil terbaik, kami menasihatkan agar anda
rapikan dahulu janggut anda jika anda belum bercukur selama 3
hari atau lebih.
- Gerakkan kepala pencukur pada kulit anda dalam gerakan
bulatan.
Pencukuran kering
1 Hidupkan perkakas.
2 Gerakkan kepala pencukur pada kulit anda dalam gerakan bulatan
(Raj. 19).
Catatan: Gerakan bulatan memberi hasil pencukuran yang lebih
baik daripada gerakan lurus.
3 Bersihkan perkakas selepas digunakan (lihat 'Pembersihan dan
penyenggaraan').
Pencukuran basah
Anda juga boleh menggunakan perkakas ini pada muka yang basah
dengan busa cukur atau gel cukur.
Untuk mencukur dengan busa cukur atau gel cukur, ikuti langkah di
bawah:
1 Bubuh sedikit air pada kulit anda (Raj. 20).
2 Bubuh busa cukur atau gel cukur pada kulit (Raj. 21) anda.
3 Bilas unit pencukur di bawah paip untuk memastikan unit
pencukur meluncur dengan licin melalui kulit (Raj. 22) anda.
57
Page 62

Bahasa Melayu
58
4 Hidupkan perkakas.
5 Gerakkan kepala pencukur pada kulit anda dalam gerakan bulatan
(Raj. 19).
Catatan: Bilas unit pencukur secara tetap untuk memastikan ia
meluncur dengan licin pada kulit anda.
6 Keringkan muka anda.
7 Bersihkan perkakas selepas digunakan (lihat 'Pembersihan dan
penyenggaraan').
Catatan: Pastikan anda membilas semua busa atau gel cukur
keluar daripada perkakas.
Menggunakan alat tambahan mudah dipasang
Catatan: Aksesori yang dibekalkan mungkin berbeza-beza untuk
berlainan produk. Kotak di bawah menunjukkan aksesori yang telah
dibekalkan bersama perkakas anda.
Mengalih keluar atau memasang alat tambahan mudah dipasang
1 Pastikan perkakas dimatikan.
2 Tarik alat tambahan dengan lurus daripada perkakas (Raj. 23).
Catatan: Jangan pulas alat tambahan semasa anda menariknya
keluar dari perkakas.
3 Masukkan cuping alat tambahan ke dalam ruang di bahagian atas
perkakas. Kemudian tekan alat tambahan untuk memasangnya
pada perkakas (‘klik’) (Raj. 24).
Menggunakan alat tambahan perapi
Anda boleh menggunakan alat tambahan perapi untuk merapikan
jambang dan misai anda.
1 Pasang alat tambahan pada perkakas (‘klik’) (Raj. 24).
2 Hidupkan perkakas.
Paparan menyala selama beberapa saat.
3 Pegang alat tambahan pencukur secara serenjang ke kulit dan
gerakkan perkakas ke bawah sementara anda mengenakan
tekanan (Raj. 25) lembut.
Page 63

Bahasa Melayu
4 Bersihkan lekapan selepas digunakan (lihat 'Pembersihan dan
penyenggaraan').
Menggunakan alat tambahan penggaya janggut dengan sikat
Anda boleh menggunakan alat tambahan penggaya janggut dengan
sikat terpasang padanya untuk mengayakan janggut anda pada satu
tetapan yang ditentukan, tetapi juga pada tetapan kepanjangan yang
berbeza. Anda juga boleh menggunakannya untuk praperapian
sebarang bulu yang panjang sebelum bercukur untuk mendapatkan
pencukuran yang lebih selesa.
Tetapan kepanjangan pada alat tambahan penggaya janggut
sepadan dengan kepanjangan baki rambut selepas pemotongan dan
mempunyai kepanjangan dari 1 hingga 5mm.
1 Pasang alat tambahan pada perkakas ('klik') (Raj. 26).
2 Luncurkan sikat terus ke dalam alur pemandu pada kedua-dua
belah alat tambahan penggaya janggut (‘klik’) (Raj. 27).
3 Tekan pemilih kepanjangan lalu tekankannya ke kiri atau ke kanan
untuk memilih tetapan (Raj. 28) kepanjangan rambut yang
dikehendaki.
4 Hidupkan perkakas.
5 Gerakkan perkakas ke atas sementara anda mengenakan tekanan
lembut. Pastikan bahagian depan sikat bersentuh sepenuhnya
dengan kulit (Raj. 29).
6 Bersihkan lekapan selepas digunakan (lihat 'Pembersihan dan
penyenggaraan').
Menggunakan alat tambahan penggaya janggut tanpa sikat
Anda boleh menggunakan alat tambahan penggaya janggut tanpa
sikat untuk membentuk janggut, misai, jambang atau garis leher anda
sehingga 0.5mm.
1 Tarik sikat keluar dari alat tambahan penggaya janggut.
Catatan: Pegang sikat di bahagian tengah untuk menanggalkannya
daripada alat tambahan penggaya janggut. Jangan tarik sisi sikat
(Raj. 30).
2 Hidupkan perkakas.
59
Page 64

Bahasa Melayu
60
3 Pegang alat tambahan penggaya janggut secara serenjang ke kulit
dan gerakkan perkakas ke bawah sementara anda mengenakan
tekanan (Raj. 31) lembut.
4 Bersihkan lekapan selepas digunakan (lihat 'Pembersihan dan
penyenggaraan').
Menggunakan alat tambahan berus pembersih
Gunakan alat tambahan berus pembersih berputar dengan krim
pembersih harian anda. Alat tambahan berus pembersih
mengeluarkan minyak dan kotoran, menjadikan kulit sihat dan bebas
minyak.
1 Pasang alat tambahan pada perkakas ('klik') (Raj. 32).
2 Lembapkan alat tambahan dengan air (Raj. 33).
Catatan: Jangan gunakan perkakas dengan alat tambahan berus
yang kering, kerana ia boleh merengsa kulit.
3 Lembapkan muka anda dengan air dan sapukan pembersih pada
muka (Raj. 34) anda.
4 Letakkan alat tambahan pada pipi anda.
5 Hidupkan perkakas.
6 Gerakkan alat tambahan dengan perlahan merentasi kulit anda
dari hidung ke arah telinga (Raj. 35). Jangan tekan alat tambahan
terlalu kuat ke atas kulit untuk memastikan rawatan sentiasa
selesa.
Jangan bersihkan kawasan sensitif di sekeliling mata anda.
7 Selepas kira-kira 20 saat gerakkan perkakas ke pipi lain anda dan
mula membersihkan bahagian muka (Raj. 36) anda.
8 Selepas kira-kira 20 saat gerakkan perkakas ke dahi anda dan
mula membersihkan bahagian muka anda. Gerakkan kepala berus
dengan cermat dari kiri ke kanan (Raj. 37).
Catatan: Kami menasihatkan anda supaya tidak berlebihanlebihan dalam melakukan pembersihan dan jangan bersihkan
mana-mana zon lebih daripada 20 saat.
9 Selepas rawatan, bilas dan keringkan muka (Raj. 38) anda.
Sekarang muka anda bersedia untuk langkah seterusnya dalam
rutin penjagaan kulit harian anda.
Page 65

Bahasa Melayu
10 Bersihkan lekapan selepas digunakan (lihat 'Pembersihan dan
penyenggaraan').
61
Pembersihan dan penyenggaraan
Aksesori yang dibekalkan mungkin berbeza-beza untuk berlainan
produk. Kotak di bawah menunjukkan aksesori yang telah dibekalkan
bersama perkakas anda.
Membersihkan pencukur di dalam sistem SmartClean
Sistem SmartClean disediakan dalam dua jenis. Ciri-ciri yang tersedia
dalam sistem SmartClean anda berbeza bagi setiap jenis:
- Sistem SmartClean Basic mempunyai satu fasa: fasa (Raj. 39) bilas.
- SmartClean system Plus mempunyai dua fasa: fasa bilas dan fasa
(Raj. 40) pengeringan.
Menyediakan sistem SmartClean untuk penggunaan
Awas: Jangan sendengkan sistem SmartClean untuk mengelakkan
kebocoran (Raj. 41).
Catatan: Pegang sistem SmartClean semasa anda menyediakannya.
Catatan: Jika anda membersihkan pencukur di dalam sistem
SmartClean seminggu sekali, kartrij SmartClean bertahan lebih kurang
tiga bulan.
1 Letakkan plag kecil di bahagian belakang sistem SmartClean.
2 Pasangkan unit bekalan ke soket dinding.
3 Tekan butang di bahagian sisi sistem SmartClean (1) dan angkat
bahagian atas sistem SmartClean (2) (Raj. 42).
4 Tanggalkan kedap katrij (Raj. 43) pembersih.
5 Letakkan kartrij pembersih di dalam sistem (Raj. 44) SmartClean.
6 Tolak bahagian atas sistem SmartClean ke bawah semula (‘klik’)
(Raj. 45).
Menggunakan sistem SmartClean
Awas: Pastikan anda keluarkan air berlebihan daripada pencukur
setiap kali sebelum anda meletakkannya dalam sistem (Raj. 46)
SmartClean.
Page 66

Bahasa Melayu
62
1 Tekan tukup atas supaya anda boleh meletakkan pencukur ke
dalam pemegang ('klik') (Raj. 15).
2 Pegang pencukur di atas pemegang secara terbalik. Pastikan
bahagian hadapan pencukur menghadap ke sistem (Raj. 16)
SmartClean.
3 Letakkan pencukur di dalam pemegang (1), sendengkan pencukur
ke belakang (2) dan tekan tukup atas untuk menyambungkan
pencukur ('klik') (3) (Raj. 17).
Simbol bateri akan mula berkelip, menandakan pencukur sedang
dicas.
4 Tekan butang hidup/mati pada sistem SmartClean untuk
memulakan program (Raj. 47) pembersihan.
Semasa proses pembilasan, simbol pembilasan berkelip. Apabila
fasa membilas selesai (selepas lebih kurang 10 minit), simbol bilas
akan menyala secara berterusan.
Sistem SmartClean Plus sahaja: Selepas fasa bilas, fasa
pengeringan bermula secara automatik. Semasa fasa ini, simbol
pengeringan berkelip. Apabila fasa mengering selesai (selepas
lebih kurang 4 jam), simbol pengeringan akan menyala secara
berterusan (Raj. 48).
Apabila program pembersihan selesai, simbol sedia akan menyala
secara berterusan (Raj. 49).
30 minit selepas program pembersihan dan pengecasan selesai,
sistem SmartClean akan dimatikan secara automatik.
Simbol bateri akan menyala berterusan untuk menunjukkan
bahawa pencukur telah dicas (Raj. 49) sepenuhnya. Pengecasan
mengambil masa lebih kurang 1 jam.
5 Sistem SmartClean Basic sahaja: Untuk membiarkan pencukur
kering, anda boleh membiarkannya di dalam sistem SmartClean
sehingga pencukuran seterusnya. Anda juga boleh mengalih
keluar pencukur daripada sistem SmartClean, membuang lebihan
air, membuka unit pencukur dan membiarkan pencukur
dianginkan.
Page 67

Bahasa Melayu
Catatan: Jika anda menekan butang hidup/mati pada sistem
SmartClean semasa program pembersihan, program akan dihentikan.
Dalam kes ini, simbol bilas atau kering akan terpadam.
Catatan: Jika anda mencabut unit bekalan dari soket dinding semasa
program pembersihan, program akan terbantut.
Menggantikan kartrij sistem SmartClean
Gantikan kartrij pembersihan apabila simbol penggantian berkelip
jingga atau apabila anda tidak lagi berpuas hati dengan hasil
pembersihan. Jika anda membersihkan pencukur di dalam sistem
SmartClean seminggu sekali, kartrij SmartClean bertahan lebih kurang
tiga bulan.
1 Tekan butang di bahagian sisi sistem SmartClean (1) dan angkat
bahagian atas sistem SmartClean (2) (Raj. 42).
2 Keluarkan kartrij pembersihan kosong dari sistem SmartClean dan
tuang baki cecair (Raj. 50).
Anda juga boleh menuangkan cecair pembersihan ke dalam sink.
3 Buang kartrij pembersihan yang kosong.
4 Buka bungkusan kartrij pembersihan yang baru dan tanggalkan
kedap (Raj. 43).
5 Letakkan kartrij pembersih di dalam sistem (Raj. 44) SmartClean.
6 Tolak bahagian atas sistem SmartClean ke bawah semula (‘klik’)
(Raj. 45).
Membersihkan pencukur di bawah paip air
Bersihkan pencukur selepas setiap cukuran untuk prestasi yang
optimum.
Awas: Berhati-hati dengan air panas. Sentiasa periksa agar air
tidak begitu panas, untuk mencegah tangan anda daripada luka
terbakar.
Jangan keringkan unit pencukur dengan tuala atau tisu, kerana ini
akan merosakkan kepala alat pencukur.
1 Hidupkan alat pencukur.
2 Bilas unit pencukur di bawah paip air panas (Raj. 22).
63
Page 68

Bahasa Melayu
64
3 Matikan pencukur. Tarik pemegang kepala pencukur keluar
daripada bahagian bawah unit (Raj. 51) pencukur.
4 Bilas ruang bulu di bawah paip air (Raj. 52).
5 Bilas pemegang kepala pencukur di bawah air paip (Raj. 53) suam.
6 Dengan berhati-hati kibas lebihan air dan biarkan pemegang
kepala pencukur mengering.
7 Pasang pemegang kepala pencukur ke bahagian bawah unit
pencukur (‘klik’) (Raj. 54).
Membersihkan alat tambahan mudah pasang
Catatan: Jangan sekali-kali keringkan alat tambahan perapi atau
penggaya janggut dengan tuala atau tisu kerana ini boleh
merosakkan gigi perapian.
Membersihkan alat tambahan perapi
Bersihkan alat tambahan perapi setiap kali selepas anda
menggunakannya.
1 Hidupkan perkakas dengan alat tambahan perapi terpasang
padanya.
2 Bilas alat tambahan di bawah air paip (Raj. 55) panas.
3 Selepas pembersihan, matikan perkakas.
4 Dengan berhati-hati, buang lebihan air dan biarkan alat tambahan
mengering.
Petua: Untuk prestasi optimum, lincirkan gigi alat tambahan dengan
setitik minyak mesin jahit secara tetap.
Membersihkan alat tambahan penggaya janggut
Bersihkan alat tambahan penggaya janggut setiap kali selepas anda
menggunakannya.
1 Tarik sikat keluar dari alat tambahan penggaya janggut.
Catatan: Pegang sikat di bahagian tengah untuk menanggalkannya
daripada alat tambahan penggaya janggut. Jangan tarik sisi sikat
(Raj. 30).
2 Hidupkan perkakas.
3 Bilas alat tambahan penggaya janggut dan sikat berasingan di
bawah pili (Raj. 56) air panas.
Page 69

Bahasa Melayu
4 Selepas pembersihan, matikan perkakas.
5 Dengan berhati-hati, buang lebihan air dan biarkan alat tambahan
penggaya janggut dan sikat mengering.
6 Untuk prestasi optimum, lincirkan gigi alat tambahan dengan setitik
minyak mesin jahit secara tetap.
65
Membersihkan alat tambahan berus pembersih
Bersihkan alat tambahan berus pembersih setiap kali selepas anda
menggunakannya.
1 Matikan perkakas.
2 Tanggalkan kepala berus dari tapak (Raj. 57) berus.
3 Bersihkan bahagian sebersih-bersihnya menggunakan air suam
dan sabun.
4 Keringkan alat tambahan berus pembersih menggunakan tuala.
Penyimpanan
1 Simpan perkakas dalam kantung yang dibekalkan (Raj. 58).
Catatan: Pastikan perkakas kering sebelum anda menyimpannya
dalam kantung.
2 Pasang tukup pelindung pada alat tambahan berus pembersih
untuk melindunginya dari mengumpul (Raj. 59) kotoran.
Penggantian
Menggantikan kepala pencukur
Untuk prestasi pencukuran yang maksimum, kami menasihatkan agar
anda menggantikan kepala pencukur setiap dua tahun (Raj. 60).
Gantikan kepala pencukur yang rosak dengan segera. Sentiasa
gantikan kepala pencukur dengan kepala pencukur asli Philips (lihat
'Memesan aksesori').
Peringatan penggantian
Peringatan penggantian menandakan bahawa kepala pencukur perlu
digantikan.Simbol unit pencukur akan menyala secara berterusan,
anak panah akan berkelip putih dan anda akan mendengar bunyi bip
apabila anda mematikan pencukur (Raj. 11).
Page 70

Bahasa Melayu
66
1 Matikan perkakas.
2 Tarik pemegang kepala pencukur keluar daripada bahagian bawah
unit (Raj. 51) pencukur.
3 Letakkan pemegang gelung penahan pada gelung penahan (1),
pusingkannya melawan arah jam (2) dan angkatnya keluar dari
kepala pencukur (3) (Raj. 61).
Keluarkan gelung penahan dari pemegang gelung penahan dan
ulangi proses ini untuk gelung penahan yang lain.
4 Keluarkan kepala pencukur daripada pemegang (Raj. 62) kepala
cukuran.
Buang kepala pencukur terpakai dengan segera untuk
mengelakkan daripada mencampurnya dengan kepala pencukur
baru.
5 Letakkan kepala pencukur ke dalam pemegang (Raj. 63) kepala
cukuran.
Catatan: Pastikan takuk pada kedua-dua belah kepala pencukur
muat dengan tepat pada bahagian unjuran dalam pemegang
kepala pencukur.
6 Letakkan pemegang gelung penahan pada gelung penahan(1),
letakkannya pada kepala pencukur (2) dan pusingkannya
mengikut arah jam (3) untuk menyambungkan semula gelung (Raj.
64) penahan. Ulangi proses ini untuk gelung penahan yang lain.
-
Setiap gelung penahan mempunyai dua ruang ceruk yang muat
dengan tepat dalam unjuran pemegang kepala pencukur. Putar
gelung mengikut arah jam sehingga anda mendengar klik untuk
menandakan gelung dipasang (Raj. 65).
Catatan: Pegang pemegang kepala pencukur pada tangan anda
apabila anda memasukkan semula kepala pengering dan pasang
semula gelang (Raj. 66) penahan. Jangan tempatkan pemegang
kepala pencukur pada permukaan apabila anda melakukannya,
kerana ini boleh menyebabkan kerosakan.
7 Pasang pemegang kepala pencukur ke bahagian bawah unit
pencukur (‘klik’) (Raj. 54).
Page 71

Bahasa Melayu
8 Untuk menetapkan semula peringatan penggantian, tekan dan
tahan butang hidup/mati kira-kira 7 saat (Raj. 67). Tunggu
sehingga anda mendengar dua bip.
Menggantikan alat tambahan berus pembersih
Kepala berus perlu digantikan setiap 3 bulan atau lebih awal jika
rambut berus berubah bentuk atau rosak (Raj. 57).
Memesan aksesori
Untuk membeli aksesori atau alat ganti, lawati
www.shop.philips.com/service atau pergi ke penjual Philips anda.
Anda juga boleh menghubungi Pusat Penjagaan Pengguna Philips di
negara anda (lihat risalah jaminan seluruh dunia untuk maklumat
perhubungan).
Aksesori dan alat ganti yang berikut boleh didapati:
- Kepala pencukur SH90 Philips
- HQ110 Philips semburan pembersih kepala pencukur
- Alat tambahan penggaya janggut Philips RQ111
- Alat tambahan berus pembersih Philips RQ585
- Kepala berus pembersih Philips RQ560/RQ563
- Kartrij pembersih JC301/JC302/JC303/JC304/JC305
- Unit bekalan HQ8505
Catatan: Ketersediaan aksesori mungkin berbeza mengikut negara.
Kitar semula
- Jangan buang produk bersama sampah rumah biasa di akhir
hayatnya, sebaliknya bawanya ke pusat pungutan rasmi untuk
dikitar semula. Dengan berbuat demikian, anda membantu untuk
memelihara persekitaran.
- Produk ini mengandungi bateri boleh cas semula bina dalam yang
tidak harus dibuang bersama sampah rumah biasa. Kami
menasihatkan anda untuk membawa produk anda ke pusat
pungutan rasmi atau pusat khidmat Philips supaya bateri boleh
cas semula itu dikeluarkan oleh seorang profesional.
67
Page 72

Bahasa Melayu
68
- Ikuti peraturan negara anda bagi pemungutan produk elektrik dan
elektronik serta bateri kitar semula secara berasingan.
Pembuangan secara betul membantu mengelakkan akibat negatif
bagi kesihatan manusia dan persekitaran.
Mengeluarkan bateri boleh cas semula
Hanya keluarkan bateri boleh cas semula apabila anda
membuang pencukur. Sebelum anda mengeluarkan bateri,
pastikan bahawa pencukur ditanggalkan daripada soket
dinding dan bahawa bateri kosong sepenuhnya.
Lakukan sebarang langkah berjaga-jaga yang perlu apabila
anda mengendalikan alat untuk membuka pencukur dan
apabila anda membuat bateri boleh cas semula.
Berhati-hati, jalur bateri sangat tajam.
1 Masukkan pemutar skru ke dalam slot di antara panel hadapan
dan belakang pada bahagian bawah perkakas. Tanggalkan panel
belakang.
2 Keluarkan panel hadapan.
3 Buka dua skru di bahagian atas panel dalaman dan tanggalkan
panel dalaman.
4 Tanggalkan bateri boleh dicas semula menggunakan pemutar
skru.
Jaminan dan sokongan
Jika anda memerlukan maklumat atau sokongan, sila lawati
www.philips.com/support atau baca risalah jaminan sedunia yang
berasingan.
Sekatan jaminan
Kepala pencukur (pemotong dan adangan) tidak diliputi oleh terma
jaminan antarabangsa kerana ia terdedah kepada kelusuhan.
Penyelesai Masalah
Bab ini meringkaskan masalah paling lazim yang anda mungkin
hadapi dengan alat ini. Jika anda tidak dapat menyelesaikan masalah
Page 73

Bahasa Melayu
dengan maklumat di bawah, lawati www.philips.com/support untuk
mendapatkan senarai soalan lazim atau hubungi Pusat Penjagaan
Pengguna di negara anda.
Pencukur
Masalah Punca yang
berkemungkinan
Penyelesaian
69
Perkakas tidak
berfungsi
apabila saya
menekan butang
hidup/mati.
Bateri boleh cas
Kunci kembara kini
Perkakas ini
tidak mencukur
sebaik seperti
sebelum ini.
Perkakas masih
dipasang pada
soket dinding. Atas
sebab-sebab
keselamatan,
perkakas tersebut
hanya boleh
digunakan tanpa
kord.
semula telah habis.
aktif.
Unit pencukur kotor
atau rosak begitu
sekali sehingga
motor tidak dapat
berjalan.
Kepala pencukur
rosak atau lusuh.
Tanggalkan palam
perkakas dan tekan
butang hidup/mati
untuk menghidupkan
perkakas.
Cas semula bateri (lihat
'Pengecasan').
Tekan butang hidup/mati
selama 3 saat untuk
menyahaktifkan kunci
kembara.
Bersihkan kepala pencukur
dengan menyeluruh atau
gantikannya. Turut lihat
'Rambut atau kotoran
menghalang kepala
pencukur' untuk
mendapatkan perihalan
terperinci cara
membersihkan kepala
pencukur dengan lengkap.
Gantikan kepala pencukur
(lihat 'Penggantian').
Page 74

Bahasa Melayu
70
Masalah Punca yang
Penyelesaian
berkemungkinan
Rambut atau
Untuk membersihkan
Saya
menggantikan
kepala pencukur,
namun paparan
masih
menunjukkan
peringatan
penggantian.
Unit simbol
pencukur tibatiba muncul
pada paparan.
kotoran
menghalang kepala
pencukur.
Anda belum
mereset perkakas.
Simbol ini
mengingatkan anda
untuk
menggantikan
kepala pencukur.
Bersihkan kepala pencukur
dengan cara (lihat
'Pembersihan dan
penyenggaraan') biasa
atau bersihkan
sepenuhnya.
kepala pencukur,
tanggalkan kepala
pencukur daripada
pemegang kepala
pencukur satu per satu
(lihat 'Penggantian').
Kemudian asingkan
pemotong daripada
adangan pencukur dan
bilas setiap set sepadan di
bawah paip air. Selepas
dibilas, letakkan kembali
pemotong ke dalam adang
yang sepadan. Akhir sekali,
pasang semula kepala
pencukur ke dalam
pemegang (lihat
'Penggantian') kepala
pencukur.
Reset perkakas dengan
menekan butang
hidup/mati selama kira-kira
7 saat.
Gantikan kepala pencukur
(lihat 'Penggantian').
Page 75

Bahasa Melayu
71
Masalah Punca yang
berkemungkinan
Tanda seru tibatiba muncul
pada paparan
semasa perkakas
sedang
mengecas.
Tanda seru,
peringatan
penggantian dan
peringatan pem
bersihan
mungkin muncul
tiba-tiba pada
paparan.
Kepala pencukur
Air bocor dari
bahagian bawah
perkakas.
Perkakas telah
terlampau panas.
Kepala pencukur
rosak.
kotor.
Semasa
pembersihan, air
mungkin terkumpul
di antara badan
dalaman dan
kerangka luaran
perkakas.
Penyelesaian
Tanggalkan perkakas
daripada soket dinding
selama kira-kira 10 minit.
Gantikan kepala pencukur
(lihat 'Penggantian').
Bersihkan kepala pencukur
(lihat 'Pembersihan dan
penyenggaraan'). Turut
lihat 'Rambut atau kotoran
menghalang kepala
pencukur' untuk
mendapatkan perihalan
terperinci cara
membersihkan kepala
pencukur dengan lengkap.
Ini adalah biasa dan tidak
berbahaya kerana semua
elektronik dilindungi dalam
unit kuasa yang kedap
dalam perkakas.
Page 76

Bahasa Melayu
72
Sistem SmartClean
Masalah Punca yang
berkemungkinan
Penyelesaian
Sistem
SmartClean tidak
berfungsi
apabila saya
menekan butang
hidup/mati.
Pencukur tidak
benar-benar
bersih selepas
saya
membersihkan
nya di dalam
sistem
SmartClean.
Kartrij pembersih
Kartrij pembersih
Anda telah
Sistem SmartClean
tidak disambungkan
ke soket dinding.
Anda tidak
menempatkan
pencukur di dalam
sistem
SmartClean dengan
betul, oleh itu tidak
terdapat
sambungan elektrik
di antara sistem
SmartClean dan
pencukur.
perlu digantikan.
kosong. Simbol
penggantian
berkelip bagi
menandakan
bahawa anda perlu
menggantikan kartrij
pembersih.
menggunakan
cecair pembersih
yang bukan
daripada kartrij
pembersih Philips
tulen.
Pasang palam kecil ke
dalam sistem SmartClean
dan pasang unit bekalan ke
soket dinding.
Tekan tukup atas (‘klik’)
untuk memastikan
sambungan yang baik di
antara pencukur dan
sistem SmartClean.
Gantikan kartrij pembersih.
Letakkan kartrij
pembersihan baru dalam
sistem SmartClean.
Gunakan kartrij pembersih
Philips yang tulen sahaja.
Page 77

Bahasa Melayu
73
Masalah Punca yang
berkemungkinan
Saluran kartrij
Pencukur tidak
bercas
sepenuhnya
selepas saya
mengecasnya di
dalam sistem
SmartClean.
pembersih disekat.
Anda tidak
menempatkan
pencukur di dalam
sistem
SmartClean dengan
betul, oleh itu tidak
terdapat
sambungan elektrik
di antara sistem
SmartClean dan
pencukur.
Penyelesaian
Keluarkan kartrij daripada
sistem SmartClean dan
tekan rambut ke dalam
saliran dengan pencungkil
gigi.
Tekan tukup atas (‘klik’)
untuk memastikan
sambungan yang baik di
antara pencukur dan
sistem SmartClean.
Page 78

Tiếng Việt
74
Giơi thiêu
Chúc mừng bạn đa mua hang và chào mừng bạn đến với Philips! Để có được lợi ích
đầy đủ từ sự hỗ trợ do Philips cung cấp, hãy đăng ký sản phẩm tại
www.philips.com/welcome.
Vui lòng đọc hướng dẫn sử dụng này, vì hướng dẫn có thông tin về các tính năng
của máy cạo râu này, cũng như một số mẹo giúp cạo râu dễ dàng và thoải mái hơn.
Mô ta tông quat (Hinh 1)
1 Nắp bảo vệ cho phụ kiện bàn chải làm sạch
2 Phụ kiện bàn chải làm sạch bấm bật
3 Lược của phụ kiện tạo kiểu râu
4 Phụ kiện tạo kiểu râu bấm bật
5 Phụ kiện đầu tỉa bấm bật
6 Bộ phận cạo dễ tháo ráp
7 Nut On/off (bât/tăt)
8 Ổ cắm cho phích cắm nhỏ
9 Dấu chấm than
10 Bộ phận nhắc thay thế
11 Chỉ báo sạc pin
12 Biểu tượng khóa du lịch
13 Nhăc chui rưa
14 Hệ thống SmartClean
15 Nắp của hệ thống SmartClean
16 Nut On/off (bât/tăt)
17 Biểu tượng thay thế
18 Biểu tượng làm sạch
19 Biểu tượng sẵn sàng
20 Biểu tượng sạc
21 Mô-đun làm sạch cho hệ thống SmartClean
22 Bộ nguồn
23 Phích cắm nhỏ
24 Giá đỡ vòng giữ
25 Bao da
Phụ kiện đi kèm có thể khác nhau cho những sản phẩm khác nhau. Hộp cho biết
các phụ kiện được đi kèm với thiết bị của bạn.
Ti ng Vi t
Page 79

Tiếng Việt
Thông tin quan trọng về an toàn
Đọc kỹ thông tin quan trọng này trước khi sử dụng thiết bị cùng phụ kiện và cất giữ
để tiện tham khảo sau này. Phụ kiện đi kèm có thể khác nhau cho những sản phẩm
khác nhau.
Nguy hiểm
- Giữ bộ nguồn khô ráo (Hinh 2).
Canh bao
- Để sạc pin, chỉ sử dụng bộ nguồn có thể tháo rời (kiểu HQ8505) đi kèm với
thiết bị.
- Bộ nguồn chứa một biến áp. Không tháo bo bộ nguồn nay đê thay băng phích
cắm khác, vi làm như vậy se gây ra tinh huông nguy hiêm.
- Trẻ em từ 8 tuổi trở lên và những người bị suy giảm năng lực về thể chất, giác
quan hoặc tâm thần, hoặc thiếu kiến thức và kinh nghiệm có thể sử dụng thiết
bị này nếu họ được giám sát hoặc hướng dẫn sử dụng thiết bị theo cách an toàn
và hiểu được các mối nguy hiểm liên quan. Không để trẻ em chơi đùa với thiết
bị. Không nên để trẻ em thực hiện vệ sinh và bảo dưỡng khi không có sự giám
sát.
- Luôn rut phich căm điên ra khoi may trươc khi rưa may dươi voi nươc.
- Luôn kiểm tra thiết bị trước khi sử dụng. Không sử dụng nếu thiết bị này bị hư
hỏng, vì như vậy có thể gây ra chấn thương. Luôn thay thế bộ phận bị hỏng với
bộ phận cùng loại và đúng tiêu chuẩn.
- Không mở thiết bị để thay pin sạc.
Chú ý
- Không nhúng hệ thống làm sạch hoặc đế sạc vào nước và không rửa dưới vòi
nước (Hinh 2).
- Không sử dụng nước nóng quá 80°C để rửa máy cạo râu.
- Chỉ sử dụng thiết bị này cho mục đích sử dụng đã định như mô tả trong hướng
dẫn sử dụng.
- Để đảm bảo vệ sinh, thiết bị chỉ nên được sử dụng bởi một người.
- Không sử dụng khí nén, miếng tẩy rửa, chất tẩy rửa có tính ăn mòn hoặc những
chất lỏng mạnh như xăng hay axeton để lau chùi thiết bị.
- Nếu máy cạo râu của bạn đi kèm với một hệ thống làm sạch, hãy luôn dùng
dung dịch làm sạch Philips chính hãng (hộp hoặc bình, tùy thuộc vào loại hệ
thống làm sạch).
75
Page 80

Tiếng Việt
76
- Luôn đặt hệ thống làm sạch trên một mặt phẳng cân bằng, chắc chắn và nằm
ngang để tránh rò rỉ.
- Nếu hệ thống làm sạch của bạn dùng mô-đun làm sạch, hãy đảm bảo ngăn chứa
mô-đun đã đóng trước khi bạn sử dụng hệ thống làm sạch để vệ sinh hoặc sạc
máy cạo râu.
- Khi hệ thống làm sạch đã sẵn sàng cho việc làm sạch, không di chuyển máy để
tránh rò rỉ dung dịch làm sạch.
- Nươc co thê rỉ ra tư đui căm phia dươi may khi ban rưa may. Điêu nay la binh
thương va không nguy hiêm bơi vi tât ca cac bô phân điên tư đêu đươc đong kin
trong lơp vo bao vê bên trong may.
- Không sử dụng bộ nguồn trong hoặc gần ổ cắm tường có cắm máy xịt thơm
phòng để tránh thiệt hại không thể khắc phục được cho bộ nguồn.
Điện từ trường (EMF)
- Thiết bị Philips này tuân thủ tất cả các tiêu chuẩn và quy định hiện hành liên
quan đến mức phơi nhiễm điện từ trường.
Tổng quát
- Máy cạo râu này có khả năng chịu được nước (Hinh 3). Nó thích hợp với việc
sử dụng khi tắm và rửa dưới vòi nước. Vì lý do an toàn, máy cạo râu chỉ có thể
được vận hành không dây.
- Máy này thích hợp để sử dụng với điện áp từ 100 đến 240 vôn.
- Bộ nguồn biên điện ap tư 100-240 vôn xuông mưc điên ap thâp an toan dươi
24 vôn.
Man hinh hiên thi
Lưu ý: Trước khi sử dụng máy cạo râu lần đầu tiên, hãy gỡ màng bảo vệ ra khỏi
màn hình (Hinh 4).
Cách sạc pin
Sạc nhanh: Khi bạn cắm máy cạo râu vào ổ điện, các đèn của chỉ báo mức pin sẽ
sáng luân phiên liên tục. Khi máy cạo râu có đủ điện cho một lần cạo, đèn dưới
cùng của chỉ báo mức pin sẽ bắt đầu nhấp nháy chậm.
Trong khi máy cạo râu tiếp tục sạc, đầu tiên, đèn dưới cùng của chỉ báo mức pin sẽ
nhấp nháy, sau đó sẽ sáng liên tục (Hinh 5). Sau đó, đèn thứ hai sẽ nhấp nháy và
sáng liên tục, và cứ tiếp tục như vậy cho đến khi máy cạo râu được sạc đầy.
Page 81

Tiếng Việt
77
Pin đa đươc sac đây
Khi pin được sạc đầy, tất cả đèn của chỉ báo mức pin sẽ sáng trắng liên tục (Hinh 6).
Lưu ý: Thiết bị này chỉ có thể được sử dụng không dây. Khi nhấn nút on/off (bật/tắt)
trong hoặc sau khi sạc, bạn sẽ nghe thấy âm báo cho biết máy cạo râu vẫn đang
được kết nối với ổ điện.
Lưu ý: Khi pin đã đầy, màn hình tự động tắt sau 30 phút.
Pin yếu
Khi pin gần hết, đèn dưới cùng của chỉ báo mức pin sẽ nhấp nháy màu cam và bạn
sẽ nghe thấy âm báo (Hinh 7).
Mức pin còn lại
Mức pin còn lại được chỉ báo bởi các đèn của chỉ báo mức pin sáng liên tục.
Nhăc chui rưa
Làm sạch máy cạo râu sau mỗi lần cạo để có hiệu suất tối ưu. Khi bạn tắt thiết bị,
chỉ báo nhắc làm sạch sẽ nhấp nháy để nhắc bạn làm sạch thiết bị (Hinh 8).
Khoa du lich
Bạn có thể khóa thiết bị khi đi du lịch. Khoa du lịch đê ngăn viêc tinh cơ khơi đông
thiết bị.
Bật khóa du lịch
1 Nhấn nút on/off (bật/tắt) khoảng 3 giây để chuyển sang chế độ (Hinh 9) khóa
du lịch.
Trong khi bạn kích hoạt khóa du lịch, biểu tượng khóa du lịch sẽ sáng trắng liên
tục. Khi khóa du lịch được kích hoạt, thiết bị sẽ phát âm báo và biểu tượng khóa
du lịch sẽ nhấp nháy (Hinh 10).
Tăt khoa du lich
1 Nhấn nut on/off (bât/tăt) trong 3 giây.
Biểu tượng khóa du lịch nhấp nháy, sau đó sáng liên tục (Hinh 10). Thiết bị bây
giờ đã sẵn sàng để sử dụng trở lại.
Lưu ý: Bạn cũng có thể tắt khóa du lịch bằng cách nối thiết bị với ổ điện.
Page 82

Tiếng Việt
78
Bộ phận nhắc thay thế
Để có hiệu suất cao tối đa, chúng tôi khuyên bạn nên thay đầu cao hai năm (Hinh
60) một lần.
Thiết bị được trang bị chỉ báo nhắc thay thế sẽ nhắc bạn thay đầu cạo. Biểu tượng
bộ phận cạo sáng trắng liên tục, các mũi tên nhấp nháy màu trắng và thiết bị phát
tiếng bíp để cho biết bạn cần phải thay đầu (Hinh 11) cạo.
Lưu ý: Sau khi thay các đầu cạo, bạn cần thiết lập lại bộ phận nhắc thay thế bằng
cách nhấn nút on/off (bật/tắt) trong 7 giây.
Dấu chấm than
Quá nhiệt
Nếu thiết bị quá nóng trong khi sạc, dấu chấm than sẽ nhấp nháy màu cam (Hinh
12). Khi điều này xảy ra, máy cạo râu sẽ tự động tắt. Quá trình sạc sẽ tiếp tục sau
khi nhiệt độ của thiết bị giảm xuống mức bình thường.
Đâu cao bị tắc
Nếu đầu cạo bị tắc, dấu chấm than sẽ sáng màu cam liên tục (Hinh 13). Chỉ báo
nhắc thay thế và nhắc làm sạch luân phiên nhấp nháy màu trắng và bạn nghe thấy
âm báo. Trong trường hợp này, mô-tơ không thể chạy vì đầu cạo bị bẩn hoặc hư
hỏng.
Nếu đầu cạo bị bẩn, bạn có để làm sạch chúng. Nếu đầu cạo bị hư hỏng, bạn có để
thay chúng.
Cách sạc pin
Hãy sạc máy cạo râu trước khi sử dụng lần đầu tiên và khi màn hình chỉ báo rằng
pin gần hết. Mức pin được chỉ báo bởi các đèn của chỉ báo mức pin trên màn hình.
Khi cắm máy cạo râu vào ổ điện, bạn có thể nghe thấy âm báo.
Thơi gian sac pin mât khoang 1 giơ. Một máy cạo râu đã được sạc đầy pin có thể
hoạt độngtrong thời gian tối đa 50 phút.
Lưu ý: Bạn không thể sử dụng thiết bị trong khi sạc.
Sạc bằng bộ nguồn
1 Đảm bảo thiết bị đã được tắt.
2 Cắm bộ nguồn vào ổ điện và cắm phích cắm nhỏ vào thiết bị (Hinh 14).
Page 83

Tiếng Việt
3 Sau khi sạc, hãy rút bộ nguồn ra khỏi ổ điện và rút phích cắm nhỏ ra khỏi thiết
bị.
79
Sạc bằng hệ thống SmartClean (chỉ có ở một số kiểu cụ thể)
1 Cắm phích cắm nhỏ vào mặt sau của hệ thống SmartClean.
2 Cắm bộ nguồn vào ổ điện.
3 Ấn nắp phía trên cùng để có thể đặt máy cạo râu vào bộ phận giữ (nghe tiếng
'click') (Hinh 15).
4 Giữ máy cạo râu lộn ngược phía trên bộ phận giữ. Đảm bảo mặt trước của máy
cạo râu hướng về phía hệ thống (Hinh 16) SmartClean.
5 Đặt máy cạo râu vào bộ phận giữ (1), nghiêng máy cạo râu về phía sau (2) và
ấn nắp trên cùng xuống để cắm máy cạo râu (nghe tiếng ‘click’) (3) (Hinh 17).
Lưu ý: Biểu tượng pin bắt đầu nhấp nháy để cho biếtthiết bị đang sạc. Khi pin đã
được sạc đầy, biểu tượng pin sẽ sáng liên tục.
Sư dung thiết bị
Lưu ý: Thiết bị này chỉ có thể được sử dụng không dây.
Bật và tắt thiết bị
- Để bật thiết bị, nhấn nút on/off (bật/tắt) một lần (Hinh 18).
Màn hình bật sáng trong vài giây.
- Để tắt thiết bị, nhấn nút on/off (bật/tắt) lần nữa.
Màn hình sẽ sáng trong vài giây và hiển thị mức pin còn lại.
Cao râu
Giai đoạn thay đổi thích nghi của da
Các lần cạo đầu tiên có thể không mang lại kết quả bạn mong đợi và da bạn thậm
chí có thể hơi bị kích ứng. Đây là hiện tượng bình thường. Da và râu bạn cần thời
gian để thích nghi với bất kỳ hệ thống cạo râu mới nào. Để cho phép da bạn thích
nghi với thiết bị mới này, chúng tôi khuyên bạn nên cạo râu thường xuyên (ít nhất 3
lần mỗi tuần) và chỉ cạo bằng thiết bị này trong khoảng thời gian 3 tuần.
Mẹo cạo râu
- Để đảm bảo hiệu quả tốt nhất, chúng tôi khuyên bạn nên cắt tỉa râu trước nếu
bạn chưa cạo râu trong 3 ngày hoặc lâu hơn.
- Di chuyển đầu cạo trên da theo di chuyển xoay vòng.
Page 84

Tiếng Việt
80
Cạo râu khô
1 Bật thiết bị.
2 Di chuyển đầu cạo trên da theo di chuyển (Hinh 19) xoay vòng.
Lưu ý: Di chuyên xoay vòng mang lại kết quả cạo tốt hơn so với di chuyển theo
chiều thẳng đứng.
3 Làm sach thiết bị sau khi sư dung (xem 'Vệ sinh và bảo dưỡng').
Cạo râu ướt
Bạn cũng có thể sử dụng thiết bị này trên mặt ướt với bọt hoặc kem cạo râu.
Để cạo râu với bọt cạo râu hoặc kem cạo râu, hãy thực hiện theo các bước dưới
đây:
1 Cho một chút nước lên da (Hinh 20).
2 Bôi bọt hoặc kem cạo râu lên da (Hinh 21).
3 Rửa bộ phận cạo dưới vòi nước để đảm bảo bộ phận cạo trượt trơn tru trên da
(Hinh 22).
4 Bật thiết bị.
5 Di chuyển đầu cạo trên da theo di chuyển (Hinh 19) xoay vòng.
Lưu ý: Rửa bộ phận cạo dưới vòi nước thường xuyên để đảm bảo bộ phận cạo
tiếp tục trượt trơn tru trên da.
6 Lau khô mặt.
7 Làm sach thiết bị sau khi sư dung (xem 'Vệ sinh và bảo dưỡng').
Lưu ý: Nhớ rửa sạch bọt hoặc kem cạo râu trên thiết bị.
Sử dụng các phụ kiện dễ tháo ráp
Lưu ý: Phụ kiện đi kèm có thể khác nhau cho những sản phẩm khác nhau. Hộp cho
biết các phụ kiện được đi kèm với thiết bị của bạn.
Tháo hoặc lắp các phụ kiện
1 Đảm bảo thiết bị đã được tắt.
2 Kéo thẳng phụ kiện ra khỏi thiết bị (Hinh 23).
Lưu ý: Không vặn phụ kiện khi kéo phụ kiện cạo ra khỏi thiết bị.
3 Lắp vấu của phụ kiện vào khe ở phía trên cùng của thiết bị. Sau đó, ấn phụ kiện
xuống để gắn phụ kiện vào thiết bị (nghe tiếng ‘click’) (Hinh 24).
Sử dụng phụ kiện đầu tỉa
Bạn có thể sử dụng phụ kiện đầu tỉa để cắt tỉa tóc mai và ria.
Page 85

Tiếng Việt
1 Gắn phụ kiện vào thiết bị (nghe tiếng ‘click’) (Hinh 24).
2 Bật thiết bị.
Màn hình bật sáng trong vài giây.
3 Giữ phụ kiện đầu tỉa vuông góc với da và di chuyển thiết bị xuống trong khi ấn
(Hinh 25) nhẹ.
4 Làm sạch phụ kiện sau khi sử dụng (xem 'Vệ sinh và bảo dưỡng').
81
Sử dụng phụ kiện tạo kiểu râu cùng với lược
Bạn có thể sử dụng phụ kiện tạo kiểu râu cùng với lược được gắn kèm để tạo kiểu
cho râu ở một cài đặt cố định, nhưng cũng có thể ở các cài đặt độ dài khác nhau.
Bạn cũng có thể sử dụng phụ kiện này để cắt tỉa trước những sợi râu dài trước khi
cạo, để cạo râu thoải mái hơn.
Cài đặt độ dài trên phụ kiện tạo kiểu râu tương ứng với độ dài râu còn lại sau khi
cắt và nằm trong khoảng từ 1 đến 5mm.
1 Gắn phụ kiện vào thiết bị (nghe tiếng 'click') (Hinh 26).
2 Trượt thẳng lược vào các rãnh dẫn ở cả hai bên của phụ kiện tạo kiểu râu (nghe
tiếng ‘click’) (Hinh 27).
3 Nhấn nút chọn độ dài, sau đó ấn nút sang phải hoặc trái để chọn cài đặt (Hinh
28) độ dài bạn muốn.
4 Bật thiết bị.
5 Di chuyển thiết bị lên trên trong khi ấn nhẹ. Đảm bảo mặt trước của lược tiếp
xúc hoàn toàn với da (Hinh 29).
6 Làm sạch phụ kiện sau khi sử dụng (xem 'Vệ sinh và bảo dưỡng').
Sử dụng phụ kiện tạo kiểu râu không có lược
Bạn có thể sử dụng phụ kiện tạo kiểu râu không có lược để tạo đường viền cho râu,
ria mép, tóc mai hoặc đường viền quanh gáy của bạn đến độ dài 0,5mm.
1 Kéo lược ra khỏi phụ kiện tạo kiểu cho râu.
Lưu ý: Cầm lược ở giữa để kéo lược ra khỏi phụ kiện tạo kiểu râu. Không kéo ở
hai bên lược (Hinh 30).
2 Bật thiết bị.
3 Giữ phụ kiện tạo kiểu râu vuông góc với da và di chuyển thiết bị xuống trong
khi ấn (Hinh 31) nhẹ.
4 Làm sạch phụ kiện sau khi sử dụng (xem 'Vệ sinh và bảo dưỡng').
Page 86

Tiếng Việt
82
Sử dụng phụ kiện bàn chải làm sạch
Sử dụng phụ kiện bàn chải làm sạch xoay với kem làm sạch hàng ngày của bạn. Phụ
kiện bàn chải làm sạch loại bỏ dầu và bụi bẩn, góp phần mang lại làn da khỏe mạnh
và sạch dầu.
1 Gắn phụ kiện vào thiết bị (nghe tiếng 'click') (Hinh 32).
2 Dùng nước (Hinh 33) làm ướt phụ kiện.
Lưu ý: Không sử dụng thiết bị cùng với phụ kiện bàn chải khô, vì làm như vậy có
thể gây kích ứng da.
3 Dùng nước làm ướt mặt và thoa sữa rửa mặt lên mặt (Hinh 34).
4 Đặt phụ kiện lên má.
5 Bật thiết bị.
6 Nhẹ nhàng di chuyển phụ kiện trên da từ vùng mũi lên vùng tai (Hinh 35).
Không ấn phụ kiện quá mạnh lên da để đảm bảo duy trì việc cạo thoải mái.
Không làm sạch vùng da nhạy cảm xung quanh mắt bạn.
7 Sau khoảng 20 giây, hãy di chuyển thiết bị sang má kia và bắt đầu làm sạch vùng
mặt (Hinh 36) này.
8 Sau khoảng 20 giây, hãy di chuyển thiết bị lên trán và bắt đầu làm sạch vùng mặt
này. Nhẹ nhàng di chuyển đầu bàn chải từ trái sang phải (Hinh 37).
Lưu ý: Chúng tôi khuyên bạn không nên làm sạch quá mức và không làm sạch
bất kỳ vùng nào quá 20 giây.
9 Sau khi cạo xong, hãy rửa sạch và lau khô mặt (Hinh 38). Mặt bạn giờ đây đã
sẵn sàng cho bước tiếp theo trong quy trình chăm sóc da hàng ngày.
10 Làm sạch phụ kiện sau khi sử dụng (xem 'Vệ sinh và bảo dưỡng').
Vệ sinh và bảo dưỡng
Phụ kiện đi kèm có thể khác nhau cho những sản phẩm khác nhau. Hộp cho biết
các phụ kiện được đi kèm với thiết bị của bạn.
Làm sạch máy cạo râu bằng hệ thống SmartClean
Có hai loại hệ thống SmartClean. Các tính năng sẵn có trên hệ thống SmartClean
của bạn có thể khác nhau, tùy theo loại:
- Hệ thống SmartClean Basic có một giai đoạn: giai đoạn (Hinh 39) rửa sạch.
- Hệ thống SmartClean Plus có hai giai đoạn: giai đoạn rửa sạch và giai đoạn
(Hinh 40) làm khô.
Page 87

Tiếng Việt
Chuẩn bị sử dụng hệ thống SmartClean
Chú ý: Không nghiêng hệ thống SmartClean để tránh rò rỉ (Hinh 41).
Lưu ý: Cầm hệ thống SmartClean trong khi bạn chuẩn bị hệ thống để sử dụng.
Lưu ý: Nếu bạn làm sạch máy cạo râu trong hệ thống SmartClean mỗi tuần một
lần, mô-đun SmartClean có thể dùng trong khoảng ba tháng.
1 Cắm phích cắm nhỏ vào mặt sau của hệ thống SmartClean.
2 Cắm bộ nguồn vào ổ điện.
3 Nhấn nút trên mặt bên của hệ thống SmartClean (1) và nâng bộ phận trên
cùng của hệ thống SmartClean (2) (Hinh 42).
4 Kéo gioăng ra khỏi mô-đun (Hinh 43) làm sạch.
5 Đặt mô-đun làm sạch vào hệ thống (Hinh 44) SmartClean.
6 Ấn bộ phận trên cùng của hệ thống SmartClean xuống dưới (nghe tiếng ‘click’)
(Hinh 45).
Sử dụng hệ thống SmartClean
Chú ý: Luôn lắc sạch nước còn thừa ra khỏimáy cạo râu trước khi đặt máy vào
hệ thống (Hinh 46) SmartClean.
1 Ấn nắp phía trên cùng để có thể đặt máy cạo râu vào bộ phận giữ (nghe tiếng
'click') (Hinh 15).
2 Giữ máy cạo râu lộn ngược phía trên bộ phận giữ. Đảm bảo mặt trước của máy
cạo râu hướng về phía hệ thống (Hinh 16) SmartClean.
3 Đặt máy cạo râu vào bộ phận giữ (1), nghiêng máy cạo râu về phía sau (2) và
ấn nắp trên cùng xuống để cắm máy cạo râu (nghe tiếng 'click') (3) (Hinh 17).
Biểu tượng pin bắt đầu nhấp nháy, cho biết máy cạo râu đang sạc.
4 Nhấn nút on/off (bật/tắt) trên hệ thống SmartClean để bắt đầu chương trình
(Hinh 47) làm sạch.
Trong giai đoạn rửa sạch, biểu tượng rửa sạch sẽ nhấp nháy. Khi giai đoạn rửa
sạch hoàn tất (sau khoảng 10 phút), biểu tượng rửa sạch sẽ sáng liên tục.
Ch có h th ng SmartClean Plus: Sau giai đoạn rửa sạch, giai đoạn làm khô
sẽ bắt đầu tự động. Trong giai đoạn này, biểu tượng làm khô sẽ nhấp nháy. Khi
giai đoạn làm khô hoàn tất (sau khoảng 4 giờ), biểu tượng làm khô sẽ sáng liên
tục (Hinh 48).
83
Page 88

Tiếng Việt
84
Khi chương trình làm sạch hoàn tất, biểu tượng sẵn sàng sẽ sáng liên tục (Hinh
49).
30 phút sau khi chương trình làm sạch và quá trình sạc hoàn tất, hệ thống
SmartClean sẽ tự động tắt.
Biểu tượng pin sẽ sáng liên tục để cho biết máy cạo râu đã được sạc (Hinh 49)
đầy. Thơi gian sac pin mât khoang 1 giơ.
5 Chỉ có ở hệ thống SmartClean Basic: Bạn có thể để máy cạo râu trong hệ
thống SmartClean cho đến lần cạo tiếp theo để máy có thể khô ráo hẳn. Bạn
cũng có thể lấy máy cạo râu ra khỏi hệ thống SmartClean, lắc sạch nước còn
thừa, mở bộ phận cạo và để gió hong khô máy cạo râu.
Lưu ý: Nếu bạn nhấn nút on/off (bật/tắt) của hệ thống SmartClean trong khi chạy
chương trình làm sạch, chương trình sẽ ngừng chạy. Trong trường hợp này, biểu
tượng rửa hoặc làm khô sẽ tắt.
Lưu ý: Nếu bạn rút bộ nguồn ra khỏi ổ điện trong khi chạy chương trình làm sạch,
chương trình sẽ ngừng chạy.
Thay mô-đun của hệ thống SmartClean
Hãy thay mô-đun làm sạch khi biểu tượng thay thế nhấp nháy màu cam hoặc khi
bạn không còn hài lòng với kết quả làm sạch nữa. Nếu bạn làm sạch máy cạo râu
trong hệ thống SmartClean mỗi tuần một lần, mô-đun SmartClean có thể dùng
trong khoảng ba tháng.
1 Nhấn nút trên mặt bên của hệ thống SmartClean (1) và nâng bộ phận trên
cùng của hệ thống SmartClean (2) (Hinh 42).
2 Tháo mô-đun làm sạch ra khỏi hệ thống SmartClean và đổ phần dung dịch
(Hinh 50) làm sạch còn lại ra.
Bạn có thể đổ dung dịch làm sạch vào bồn rửa.
3 Vứt bỏ mô-đun làm sạch đã cạn.
4 Mở gói mô-đun làm sạch mới và kéo gioăng (Hinh 43) ra.
5 Đặt mô-đun làm sạch vào hệ thống (Hinh 44) SmartClean.
6 Ấn bộ phận trên cùng của hệ thống SmartClean xuống dưới (nghe tiếng ‘click’)
(Hinh 45).
Rửa máy cạo râu dưới vòi nước
Làm sạch máy cạo râu sau mỗi lần cạo để có hiệu suất tối ưu.
Page 89

Tiếng Việt
Chú ý: Nên thận trọng với nước nóng. Luôn kiểm tra xem nước có nóng quá
không, để tránh bỏng tay.
Không dung khăn bông hay khăn giây đê lau khô bô phân cao vi chung co thê lam
hư các đầu cao.
1 Bật máy cạo râu.
2 Rửa bộ phận cạo dưới vòi nước (Hinh 22) ấm.
3 Tắt máy cạo râu. Kéo bộ phận giữ đầu cạo ra khỏi phần phía dưới cùng của bộ
phận (Hinh 51) cạo.
4 Rửa sạch ngăn chưa râu toc dưới vòi nước (Hinh 52).
5 Rửa bộ phận giữ đầu cạo dưới vòi nước (Hinh 53) ấm.
6 Cẩn thận lắc sạch nước còn thừa và để cho bộ phận giữ đầu cạo khô.
7 Gắn bộ phận giữ đầu cạo vào phần phía dưới cùng của bộ phận cạo (nghe tiếng
‘click’) (Hinh 54).
85
Làm sạch các phụ kiện dễ tháo ráp
Lưu ý: Không dùng khăn bông hoặc khăn giấy để lau khô các phụ kiện đầu tỉa hoặc
tạo kiểu râu vì chúng có thể làm hư răng tỉa.
Làm sạch phụ kiện đầu tỉa
Vệ sinh phụ kiện đầu tỉa sau môi lân sư dung.
1 Bật thiết bị có gắn phụ kiện đầu tỉa.
2 Rửa phụ kiện dưới vòi nước (Hinh 55) ấm.
3 Sau khi làm sạch, tắt thiết bị.
4 Cẩn thận lắc sạch nước còn thừa và để cho phụ kiện khô.
Meo: Để có hiệu suất tối ưu, hãy thường xuyên bôi trơn các răng của phụ kiện bằng
một giọt dầu máy khâu.
Làm sạch phụ kiện tạo kiểu râu
Vệ sinh phụ kiện tạo kiểu râu sau mỗi lần sử dụng.
1 Kéo lược ra khỏi phụ kiện tạo kiểu cho râu.
Lưu ý: Cầm lược ở giữa để kéo lược ra khỏi phụ kiện tạo kiểu râu. Không kéo ở
hai bên lược (Hinh 30).
2 Bật thiết bị.
3 Rửa phụ kiện tạo kiểu râu và lược riêng rẽ dưới vòi nước (Hinh 56) ấm.
4 Sau khi làm sạch, tắt thiết bị.
Page 90

Tiếng Việt
86
5 Cẩn thận lắc sạch nước còn thừa và để cho phụ kiện tạo kiểu râu và lược khô.
6 Để có hiệu suất tối ưu, hãy thường xuyên bôi trơn các răng của phụ kiện bằng
một giọt dầu máy khâu.
Làm sạch phu kiện bàn chải làm sạch
Vệ sinh phụ kiện bàn chải làm sạch sau mỗi lần sử dụng.
1 Tắt thiết bị.
2 Tháo đầu bàn chải ra khỏi đế (Hinh 57) bàn chải.
3 Vệ sinh kỹ các bộ phận bằng nước ấm và xà phòng.
4 Dùng khăn lau khô phụ kiện bàn chải làm sạch.
Bảo quản
1 Cất giữ thiết bị trong bao đi kèm (Hinh 58).
Lưu ý: Đảm bảo thiết bị khô trước khi cất vào túi.
2 Lắp nắp bảo vệ vào phụ kiện bàn chải làm sạch để bảo vệ phụ kiện tránh bụi
bẩn tích tụ (Hinh 59).
Thay thế phu kiên
Thay cac đâu cao
Để có hiệu suất cao tối đa, chúng tôi khuyên bạn nên thay đầu cao hai năm (Hinh
60) một lần. Thay ngay những đầu cạo bị hư hỏng. Luôn thay đâu caobăng đâu
(xem 'Đăt mua phu kiên') cao Philips chính hãng.
Bộ phận nhắc thay thế
Chỉ báo nhắc thay thế cho biết cần thay đầu cạo.Biểu tượng bộ phận cạo sẽ sáng
liên tục, các mũi tên nhấp nháy màu trắng và bạn sẽ nghe thấy tiếng bíp khi tắt máy
cạo râu (Hinh 11).
1 Tắt thiết bị.
2 Kéo bộ phận giữ đầu cạo ra khỏi phần phía dưới cùng của bộ phận (Hinh 51)
cạo.
3 Đặt giá kẹp vòng giữ lên vòng giữ (1), xoay giá kẹp ngược chiều đồng hồ (2) và
nâng nó ra khỏi đầu cạo (3) (Hinh 61).
Tháo vòng giữ ra khỏi giá kẹp vòng giữ và lặp lại quá trình này cho các vòng giữ
khác.
Page 91

Tiếng Việt
4 Tháo đầu cạo ra khỏi bộ phận giữ (Hinh 62) đầu cạo.
Vứt bỏ ngay đầu cạo đã qua sử dụng để tránh làm lẫn với đầu cạo mới.
5 Lắp đầu cạo vào bộ phận giữ (Hinh 63) đầu cạo.
Lưu ý: Đảm bảo các khía ở cả hai bên của đầu cạo vừa khớp chính xác trên các
phần nhô ra trong bộ phận giữ đầu cạo.
6 Đặt giá kẹp vòng giữ lên vòng giữ (1), đặt giá kẹp trên đầu cạo (2) và xoay theo
chiều kim đồng hồ (3) để gắn lại vòng (Hinh 64) giữ. Lặp lại quá trình này cho
các vòng giữ khác.
-
Mỗi vòng giữ có hai khe trống vừa khít vào các phần nhô ra của bộ phận giữ
đầu cạo. Xoay vòng theo chiều kim đồng hồ cho đến khi nghe tiếng 'click'
cho biết vòng đã được gắn cố định (Hinh 65).
Lưu ý: Giữ bộ phận giữ đầu cạo trong tay khi bạn lắp lại đầu cạo và gắn lại vòng
(Hinh 66) giữ. Không đặt bộ phận giữ đầu cạo trên bề mặt khi bạn thực hiện
thao tác này, vì làm như vậy có thể gây hư hỏng.
7 Gắn bộ phận giữ đầu cạo vào phần phía dưới cùng của bộ phận cạo (nghe tiếng
‘click’) (Hinh 54).
8 Để đặt lại chỉ báo nhắc nhở thay thế, hãy nhấn và giữ nút on/off (bật/tắt) trong
khoảng 7 giây (Hinh 67). Chờ cho đến khi bạn nghe thấy hai tiếng bíp.
Thay phụ kiện bàn chải làm sạch
Nên thay đầu bàn chải 3 tháng một lần hoặc sớm hơn nếu lông bàn chải bị biến
dạng hoặc bị hư hỏng (Hinh 57).
Đăt mua phu kiên
Để mua đồ phụ tùng hoặc các linh kiện, truy cập www.shop.philips.com/service
hoặc tới đại lý Philips của bạn. Bạn cũng có thể liên hệ với Trung tâm Chăm sóc
Người tiêu dùng của Philips ở nước bạn (xem tờ quảng cáo bảo hành toàn cầu để
biết thêm chi tiết liên hệ).
Cac phu kiện và phụ tùng sau đây hiên đang co săn:
- Đầu cạo Philips SH90
- Bình xịt để rửa đầu dao cạo Philips HQ110
- Phụ kiện tạo kiểu râu Philips RQ111
- Phụ kiện bàn chải đánh răng Philips RQ585
- Đầu bàn chải làm sạch PhilipsRQ560/RQ563
87
Page 92

Tiếng Việt
88
- Mô-đun làm sạchJC301/JC302/JC303/JC304/JC305
- Bộ nguồn HQ8505
Lưu ý: Tính sẵn có của các phụ kiện có thể khác nhau, tùy theo quốc gia.
Tái chế
- Không vứt sản phẩm cùng chung với rác thải gia đình thông thường khi ngừng sử
dụng nó mà hãy đem thiết bị đến điểm thu gom chính thức để tái chế. Làm như
vậy sẽ giúp bảo vệ môi trường.
- Sản phẩm này có chứa pin sạc tích hợp không được vứt bỏ cùng với rác sinh
hoạt thông thường. Chúng tôi khuyên bạn nên đưa sản phẩm của bạn đến điểm
thu gom chính thức hoặc trung tâm dịch vụ của Philips để được chuyên gia giúp
đỡ tháo pin sạc.
- Tuân thủ theo quy định của quốc gia bạn về việc thu gom riêng các sản phẩm
điện, điện tử và pin có thể sạc lại. Vứt bỏ đúng cách sẽ giúp phòng tránh các
hậu quả xấu cho môi trường và sức khỏe con người.
Thao pin sạc của máy cạo râu
Chỉ tháo pin sạc khi vứt bỏ máy cạo râu. Trước khi tháo pin, hãy đảm
bảo máy cạo râu đã được ngắt khỏi ổ điện và pin hết điện hoàn toàn.
Thực hiện mọi biện pháp phòng ngừa an toàn cần thiết khi bạn thao tác
với các dụng cụ để mở máy cạo râu và khi vứt bỏ pin sạc.
Hay cân thân, cac dai pin rât sắc ben.
1 Cắm tô vít vào khe giữa mặt trước và mặt sau ở phía dưới cùng của thiết bị.
Tháo mặt sau.
2 Tháo bảng phía trước.
3 Tháo hai ốc vít ở phía trên cùng của mặt trong và tháo mặt trong.
4 Tháo pin sạc ra bằng tô vít.
Bảo hành và hỗ trợ
Nếu bạn cần thông tin hoặc hỗ trợ, vui lòng truy cập www.philips.com/support
hoặc đọc tờ bảo hành toàn cầu riêng biệt,
Các giới hạn về bảo hành
Các đầu cạo (lưỡi cắt và bảo vệ) không được bảo hành theo các điều khoản bảo
hành quốc tế vì chúng có thể bị mài mòn.
Page 93

Tiếng Việt
Cach khăc phuc sư cô
Chương nay tom tăt cac sư cô thường gặp phai nhất vơi thiết bị này. Nếu bạn
không thể giải quyết vấn đề với những thông tin sau, hãy truy cập
www.philips.com/support để xem một danh sách các câu hỏi thường gặp
hoặc liên hệ Trung tâm Chăm sóc Người tiêu dùng tại quốc gia của bạn.
May cao râu
Sự cố Nguyên nhân co thê Giai phap
89
Thiết bị không hoạt
động khi nhấn
bật/tắt.
Pin sạc hết điện. Sạc pin (xem 'Cách sạc pin').
Khóa di chuyển đã được
Thiết bịkhông cạo
tốt như trước đây.
Râu tóc dài hoặc bụi
Thiết bị vẫn đang được
cắm vào ổ điện. Vì lý do
an toàn, thiết bị chỉ có
thể được sử dụng khi
không có dây.
kích hoạt.
Bộ phận cạo bị bẩn
hoặc bị hư hỏng tới
mức mô-tơ không thể
chạy.
Cac đâu cao đa bi hư
hong hay bi mon.
bẩn làm cản trở việc
cạo.
Rút phích cắm điện ra khỏi thiết
bị và nhấn nút on/off (bật/tắt) để
bật thiết bị.
Nhấn nút on/off (bật/tắt) trong 3
giây để tắt chế độ khóa du lịch.
Làm sạch kỹ đầu cạo hoặc thay
đầu cạo. Ngoài ra, hãy xem mục
‘Râu tóc hoặc bụi bẩn làm tắc
đầu cạo' để biết mô ta chi tiêt về
cách làm sạch kỹ đầu cạo.
Thay đầu cạo (xem 'Thay thế
phu kiên').
Làm sạch đầu cạo theo cách
(xem 'Vệ sinh và bảo dưỡng')
thông thường hoặc làm sạch kỹ.
Page 94

Tiếng Việt
90
Sự cố Nguyên nhân co thê Giai phap
Để làm sạch kỹ đầu cạo, hãy
Tôi đã thay đầu cạo,
nhưng màn hình vẫn
hiển thị nhắc thay
thế.
Biểu tượng bộ phận
cạo đột nhiên xuất
hiện trên màn hình.
Dấu chấm than đột
nhiên xuất hiện trên
màn hình trong khi
thiết bị đang sạc.
Dấu chấm than,
nhắc thay thếvà
nhắc làm sạch đột
nhiên xuất hiện trên
màn hình.
Đầu cạo bị bẩn. Làm sạch đầu cạo (xem 'Vệ sinh
Nước rỉ ra từ đáy
thiết bị.
Bạn chưa đặt lại thiết bị. Đặt lại thiết bị bằng cách nhấn
Biểu tượng này nhắc
bạn thay đầu cạo.
Thiết bị quá nóng. Rút thiết bị ra khỏi ổ điện trong
Đầu cạo bị hư hỏng. Thay đầu cạo (xem 'Thay thế
Trong quá trình làm
sạch, nước có thể tích
tụ ở giữa phần thân bên
trong và vỏ bên ngoài
của thiết bị.
tháo đầu cạo ra khỏi bộ phận giữ
đầu cạo từng chiếc một (xem
'Thay thế phu kiên'). Sau đó,
tách lưỡi cắt ra khỏi bộ phận bảo
vệ và rửa từng bộ dưới vòi nước.
Sau khi rửa, hãy lắp lưỡi cắt trở
lại bộ phận bảo vệ tương ứng.
Cuôi cung, lắp đầu cạo trở lại bộ
phận giữ (xem 'Thay thế phu
kiên') đầu cạo.
nút on/off (bật/tắt) trong khoảng
7 giây.
Thay đầu cạo (xem 'Thay thế
phu kiên').
khoảng 10 phút.
phu kiên').
và bảo dưỡng'). Ngoài ra, hãy
xem mục ‘Râu tóc hoặc bụi bẩn
làm tắc đầu cạo' để biết mô ta
chi tiêt về cách làm sạch kỹ đầu
cạo.
Điều này là bình thường và
không nguy hiểm vì tất cả các chi
tiết điện tử được bọc trong bộ
nguồn kín bên trong thiết bị.
Page 95

Hệ thống SmartClean
Sự cố Nguyên nhân co thê Giai phap
Tiếng Việt
91
Hệ thống
SmartClean không
hoạt động khi tôi
nhấn nút on/off
(bật/tắt).
Máy cạo râu không
sạch hoàn toàn sau
khi được làm sạch
trong hệ thống
SmartClean.
Cần thay thế mô-đun
Mô-đun làm sạch đã
Bạn đã sử dụng dung
Lỗ thoát nước của mô-
Máy cạo râu không
được sạc đầy sau khi
tôi sạc máy trong hệ
thống SmartClean.
Hệ thống SmartClean
không được kết nối với
ổ điện.
Bạn đã đặt máy cạo râu
vào hệ thống
SmartClean không đúng
cách, vì vậy, không có
kết nối điện giữa hệ
thống SmartClean và
máy cạo râu.
làm sạch.
cạn. Biểu tượng thay thế
nhấp nháy để cho biết
bạn cần phải thay môđun làm sạch.
dịch làm sạch không
phải là mô-đun làm sạch
chính hãng của Philips.
đun làm sạch bị tắc.
Bạn đã đặt máy cạo râu
vào hệ thống
SmartClean không đúng
cách, vì vậy, không có
kết nối điện giữa hệ
thống SmartClean và
máy cạo râu.
Cắm phích cắm nhỏ vào hệ
thống SmartClean và cắm bộ
nguồn vào ổ điện.
Ấn nắp trên cùng xuống (nghe
tiếng 'click') để đảm bảo kết nối
đúng cách giữa máy cạo râu và
hệ thống SmartClean.
Thay mô-đun làm sạch.
Lắp mô-đun làm sạch mới vào
hệ thống SmartClean.
Chỉ sử dụng mô-đun làm sạch
chính hãng của Philips.
Tháo mô-đun ra khỏi hệ thống
SmartClean và ấn râu tóc xuống
lỗ thoát bằng que tăm.
Ấn nắp trên cùng xuống (nghe
tiếng 'click') để đảm bảo kết nối
đúng cách giữa máy cạo râu và
hệ thống SmartClean.
Page 96

ภาษาไทย
92
ข้อมูลเบื้องต้น
ขอแสดงความยินดีกับผลิตภัณฑ์ใหม่และต้อนรับเข้าสู่โลกของฟิลิปส์!
เพื่อให้คุณได้รับประโยชน์อย่างเต็มที่จากบริการที่ Philips มอบให้
โปรดลงทะเบียนผลิตภัณฑ์ของคุณที่ www.philips.com/welcome
โปรดอ่านคู่มือการใช้เล่มนี้เนื่องจากมีข้อมูลเกี่ยวกับคุณสมบัติของเครื่องโกนหนวดนี้
รวมทั้งเคล็ดลับบางส่วนที่จะช่วยให้การโกนหนวดของคุณเป็นไปอย่างง่ายดายและเพลิดเพลิน
มากยิ่งขึ้น
คุณสมบัติทั่วไป (รูปที่ 1)
1 ฝาครอบป้องกันสำหรับอุปกรณ์เสริมแปรงทำความสะอาด
2 อุปกรณ์เสริมแปรงทำความสะอาดแบบคลิก
3 อุปกรณ์เสริมหวีสำหรับจัดแต่งเครา
4 อุปกรณ์เสริมจัดแต่งเคราแบบคลิก
5 อุปกรณ์เสริมที่กันจอนแบบคลิก
6 ชุดหัวโกนแบบคลิก
7 ปุ่มเปิด/ปิด
8 ช่องสำหรับปลั๊กขนาดเล็ก
9 เครื่องหมายอัศเจรีย์
10 การแจ้งเตือนการเปลี่ยน
11 สัญญาณไฟแสดงการชาร์จแบตเตอรี่
12 สัญลักษณ์การล็อคขณะพกพา
13 สัญญาณเตือนการทำความสะอาด
14 SmartClean System
15 ฝาครอบของ SmartClean System
16 ปุ่มเปิด/ปิด
17 สัญลักษณ์การเปลี่ยน
18 สัญลักษณ์การทำความสะอาด
19 สัญลักษณ์พร้อมใช้งาน
20 สัญลักษณ์แสดงการชาร์จ
21 ตลับทำความสะอาดสำหรับ SmartClean System
22 ชุดอุปกรณ์
23 ปลั๊กขนาดเล็ก
24 แหวนยึดที่ใส่
25 กระเป๋า
อุปกรณ์เสริมที่ให้มาอาจแตกต่างกันไปตามผลิตภัณฑ์
อุปกรณ์เสริมที่มีมาพร้อมกับเครื่องของคุณจะแสดงไว้ที่กล่อง
Page 97

ภาษาไทย
ข้อมูลความปลอดภัยที่สำคัญ
โปรดอ่านข้อมูลที่สำคัญอย่างละเอียดก่อนใช้งานเครื่องรวมทั้งอุปกรณ์เสริมและเก็บคู่มือไว้เพื่
อใช้อ้างอิงต่อไป อุปกรณ์เสริมที่ให้มาอาจแตกต่างกันไปตามผลิตภัณฑ์
อันตราย
เก็บชุดอุปกรณ์ไว้ในที่แห้ง (รูปที่ 2)
คำเตือน
ในการชาร์จแบตเตอรี่ ให้ใช้แต่ชุดอุปกรณ์ที่สามารถถอดออกได้ (ประเภท HQ8505)
ที่มาพร้อมกับเครื่อง
ชุดอุปกรณ์นี้ประกอบด้วยตัวแปลงไฟ อย่าตัดชุดอุปกรณ์แล้วเปลี่ยนหัวปลั๊กใหม่
เพราะจะก่อให้เกิดอันตรายร้ายแรงขึ้น
เครื่องนี้สามารถใช้โดยเด็กอายุ 8 ปีขึ้นไป รวมถึงบุคคลที่มีสภาพร่างกายไม่สมบูรณ์
ประสาทสัมผัสไม่สมบูรณ์ หรือสภาพจิตใจไม่ปกติ
หรือขาดประสบการณ์และความรู้ความเข้าใจ
โดยจะต้องอยู่ในการควบคุมดูแลหรือได้รับคำแนะนำในการใช้งานที่ปลอดภัยและเข้าใจถึ
งอันตรายที่เกี่ยวข้องในการใช้งาน ห้ามให้เด็กเล่นเครื่องนี้
ไม่ควรให้เด็กทำความสะอาดและดูแลรักษา โดยไม่มีการควบคุมดูแล
ถอดปลั๊กเครื่องโกนหนวดทุกครั้งก่อนทำความสะอาดด้วยก๊อกน้ำ
ตรวจสอบอุปกรณ์ทุกครั้งก่อนใช้
อย่าใช้อุปกรณ์หากเกิดความเสียหายเนื่องจากอาจทำให้ผู้ใช้ได้รับบาดเจ็บ
เปลี่ยนชิ้นส่วนที่เสียหายใหม่ด้วยชิ้นส่วนประเภทเดียวกันเสมอ
อย่าเปิดเครื่องเพื่อเปลี่ยนแบตเตอรี่ที่ชาร์จใหม่ได้
ข้อแนะนำ
ห้ามแช่ระบบทำความสะอาดหรือแท่นชาร์จในน้ำ และห้าม ล้างด้วยก๊อกน้ำ (รูปที่ 2)
ห้ามล้างเครื่องโกนหนวดด้วยน้ำที่ร้อนกว่า 80°C
ใช้อุปกรณ์เครื่องนี้ตามจุดประสงค์ของอุปกรณ์ตามที่แสดงไว้ในคู่มือผู้ใช้เท่านั้น
เพื่อสุขลักษณะที่ถูกต้อง ควรใช้อุปกรณ์เครื่องนี้โดยบุคคลเดียวเท่านั้น
ห้ามใช้ระบบอากาศอัด แผ่นใยขัด สารทำความสะอาดที่มีผงขัด
หรือของเหลวที่เป็นอันตราย เช่น
น้ำมันเบนซินหรืออะซิโตนในการทำความสะอาดอุปกรณ์
หากเครื่องโกนหนวดของคุณมีระบบทำความสะอาด ให้ใช้น้ำยาทำความสะอาดของ
Philips (แบบกล่องหรือขวด ขึ้นอยู่กับประเภทของระบบทำความสะอาด) เสมอ
วางระบบทำความสะอาดบนพื้นผิวแนวนอนเรียบเสมอกันอยู่เสมอเพื่อป้องกันการรั่ว
หากระบบทำความสะอาดของคุณใช้กล่องทำความสะอาด
ให้ตรวจสอบว่าช่องกล่องปิดอยู่เสมอก่อนที่คุณจะใช้ระบบทำความสะอาดเพื่อทำความสะ
อาดหรือชาร์จเครื่องโกนหนวด
93
Page 98

ภาษาไทย
94
เมื่อระบบทำความสะอาดพร้อมใช้แล้ว
อย่าขยับเขยื้อนเพื่อป้องกันไม่ให้น้ำยาทำความสะอาดรั่วออกมา
น้ำอาจหยดออกจากเต้ารับที่ด้านล่างของเครื่องโกนหนวดเมื่อคุณล้างเครื่อง
นี่เป็นเรื่องปกติและไม่เป็นอันตรายเนื่องจากส่วนอิเล็กทรอนิกส์ทั้งหมดจะถูกห่อหุ้มไว้ในห
น่วยกำลังไฟที่ซีลไว้ภายในเครื่องโกนหนวด
ห้ามใช้ชุดอุปกรณ์บริเวณใกล้เคียงเต้ารับบนผนังที่มีเครื่องปรับอากาศไฟฟ้าเพื่อหลีกเลี่ยง
ความเสียหายที่ร้ายแรงกับชุดอุปกรณ์
สนามแม่เหล็กไฟฟ้า (EMF)
อุปกรณ์ Philips
เครื่องนี้สอดคล้องกับมาตรฐานและกฎข้อบังคับที่เกี่ยวข้องทั้งหมดเกี่ยวกับการสัมผัสกับส
นามแม่เหล็กไฟฟ้า
ทั่วไป
เครื่องโกนหนวดเครื่องนี้ กันน้ำได้ (รูปที่ 3) เหมาะสำหรับใช้ในอ่างอาบน้ำหรือฝักบัว
และสามารถทำความสะอาดด้วยก๊อกน้ำ เพื่อความปลอดภัย
เครื่องโกนหนวดสามารถใช้ได้โดยไม่ได้เสียบสายชาร์จไว้เท่านั้น
อุปกรณ์เครื่องนี้เหมาะสำหรับแรงดันไฟฟ้าตั้งแต่ 100 ถึง 240 โวลต์
ชุดอุปกรณ์สามารถแปลงแรงดันไฟฟ้าขนาด 100240 โวลต์เป็นแรงดันไฟต่ำกว่า 24
โวลต์ที่มีความปลอดภัยได้
หน้าจอ
หมายเหตุ: ก่อนใช้งานเครื่องโกนหนวดเป็นครั้งแรก
ให้ลอกแผ่นฟอยล์กันรอยขีดข่วนออกจากหน้าจอ (รูปที่ 4)
การชาร์จ
การชาร์จด่วน: เมื่อคุณเชื่อมต่อเครื่องโกนหนวดกับเต้ารับบนผนัง
ไฟแสดงสถานะการชาร์จแบตเตอรี่แต่ละดวงจะสว่างติอต่อกันซ้ำๆ
เมื่อเครื่องโกนหนวดมีไฟเพียงพอที่จะโกนหนวดหนึ่งครั้ง
ไฟด้านล่างของไฟแสดงสถานะการชาร์จแบตเตอรี่จะเริ่มกะพริบอย่างรวดเร็ว
ขณะที่เครื่องโกนหนวดกำลังชาร์จอยู่
ไฟด้านล่างของไฟแสดงสถานะการชาร์จจะกะพริบและสว่างต่อเนื่องก่อน (รูปที่ 5)
จากนั้นไฟดวงที่สองจะกะพริบและติดสว่างขึ้นอย่างต่อเนื่อง
และต่อเนื่องไปจนกว่าเครื่องโกนหนวดจะชาร์จไฟจนเต็ม
แบตเตอรี่ชาร์จไฟเต็มแล้ว
เมื่อแบตเตอรี่ชาร์จไฟเต็มแล้ว
สัญญาณไฟการชาร์จแบตเตอรี่ทั้งหมดจะติดสว่างเป็นสีขาวอย่างต่อเนื่อง (รูปที่ 6)
Page 99

ภาษาไทย
หมายเหตุ: เครื่องนี้สามารถใช้งานได้แบบไร้สายเท่านั้น
เมื่อคุณกดปุ่มเปิด/ปิดในระหว่างหรือหลังการชาร์จไฟแล้ว
คุณจะได้ยินเสียงที่แสดงว่าเครื่องโกนหนวดยังเชื่อมต่อกับเต้ารับบนผนังอยู่
หมายเหตุ: เมื่อแบตเตอรี่เต็มแล้ว จอแสดงผลจะปิดสวิตช์โดยอัตโนมัติหลังจาก 30 นาที
แบตเตอรี่เหลือน้อย
เมื่อแบตเตอรี่ใกล้หมด
ไฟที่ด้านล่างของสัญญาณไฟแสดงการชาร์จแบตเตอรี่จะเริ่มกะพริบเป็นสีส้มและคุณจะได้ยิ
นเสียงดังขึ้น (รูปที่ 7)
ระดับการชาร์จที่เหลือในแบตเตอรี่
ระดับชาร์จที่เหลือในแบตเตอรี่จะแสดงโดยสัญญาณไฟการชาร์จแบตเตอรี่ที่ติดสว่างขึ้นอย่าง
ต่อเนื่อง
สัญญาณเตือนการทำความสะอาด
ทำความสะอาดเครื่องโกนหนวดทุกครั้งหลังใช้งานเพื่อการโกนหนวดที่ดี
เมื่อคุณปิดสวิตช์เครื่อง
สัญญาณเตือนทำความสะอาดจะกะพริบเพื่อเตือนให้คุณทำความสะอาดเครื่อง (รูปที่ 8)
ระบบล็อคสำหรับพกพา
คุณสามารถล็อคเครื่องได้เมื่อคุณเดินทาง
การล็อคขณะพกพาจะช่วยป้องกันการเปิดเครื่องโดยไม่ได้ตั้งใจ
การเปิดใช้งานระบบล็อคเครื่องโกนหนวดขณะพกพา
1 กดปุ่มเปิด/ปิดค้างไว้ 3 วินาทีเพื่อเข้าสู่โหมดล็อคเครื่อง (รูปที่ 9)
เมื่อคุณเปิดใช้งานการล็อคขณะพกพา
สัญลักษณ์การล็อคขณะพกพาจะติดสว่างเป็นสีขาวอย่างต่อเนื่อง
เมื่อการล็อคขณะพกพาทำงาน เครื่องจะส่งเสียง
และสัญลักษณ์การล็อคขณะพกพาจะกะพริบ (รูปที่ 10)
การปิดระบบล็อคเครื่องโกนหนวดขณะพกพา
1 กดปุ่มเปิด/ปิดค้างไว้ 3 วินาที
สัญลักษณ์การล็อคขณะพกพาจะกะพริบ แล้วมีไฟติดสว่างอย่างต่อเนื่อง (รูปที่ 10)
เครื่องพร้อมใช้งานอีกครั้งได้ทันที
หมายเหตุ: คุณสามารถปิดใช้งานการล็อคขณะพกพาได้
โดยการเชื่อมต่อเครื่องเข้ากับเต้ารับบนผนัง
95
Page 100

ภาษาไทย
96
การแจ้งเตือนการเปลี่ยน
เพื่อให้การโกนเป็นไปอย่างมีประสิทธิภาพสูงสุด
เราขอแนะนำให้คุณเปลี่ยนชุดหัวโกนทุกสองปี (รูปที่ 60)
เครื่องนี้มีการแจ้งเตือนการเปลี่ยนซึ่งจะช่วยเตือนให้คุณเปลี่ยนหัวโกน
สัญลักษณ์ชุดหัวโกนสว่างเป็นสีขาวต่อเนื่อง หัวลูกศรกะพริบสีขาว และเครื่องส่งเสียงบีพ
แสดงว่าคุณต้องเปลี่ยนหัวโกน (รูปที่ 11)
หมายเหตุ: หลังจากการเปลี่ยนชุดหัวโกน
คุณต้องรีเซ็ตการเตือนการเปลี่ยนโดยกดปุ่มเปิด/ปิดค้างไว้ 7 วินาที
เครื่องหมายอัศเจรีย์
ความร้อนสูงเกินไป
หากเครื่องร้อนเกินไปในระหว่างการชาร์จ เครื่องหมายอัศเจรีย์จะกะพริบเป็นสีส้ม (รูปที่ 12)
ในกรณีนี้ เครื่องโกนหนวดจะปิดโดยอัตโนมัติ
การชาร์จไฟจะดำเนินต่อไปเมื่อเครื่องมีอุณหภูมิลดลงกลับสู่อุณหภูมิปกติ
หัวโกนติดขัด
หากหัวโกนติดขัด เครื่องหมายอัศเจรีย์จะติดสว่างเป็นสีส้มอย่างต่อเนื่อง (รูปที่ 13)
การเตือนให้เปลี่ยนและการเตือนให้ทำความสะอาดกะพริบเป็นสีขาวสลับกัน และได้ยินเสียง
ในกรณีนี้ มอเตอร์ไม่ทำงานเนื่องจากชุดหัวโกนสกปรกหรือเสียหาย
หากหัวโกนสกปรก คุณจำเป็นต้องทำความสะอาดชุดหัวโกน หากหัวโกนได้รับความเสียหาย
คุณจำเป็นต้องเปลี่ยนชุดหัวโกน
การชาร์จแบตเตอรี่
ชาร์จเครื่องโกนหนวดก่อนการใช้งานครั้งแรก และเมื่อจอแสดงผลระบุว่าแบตเตอรี่ใกล้หมด
ระดับชาร์จแบตเตอรี่จะแสดงด้วยไฟแสดงการชาร์จแบตเตอรี่บนจอแสดงผล
เมื่อคุณเชื่อมต่อเครื่องโกนเข้ากับเต้ารับบนผนัง คุณจะได้ยินเสียง
การชาร์จไฟใช้เวลาประมาณ 1 ชั่วโมง เมื่อชาร์จแบตเตอรี่เครื่องโกนหนวดเต็มแล้ว
จะใช้งานได้นานถึง 50 นาที
หมายเหตุ: คุณไม่สามารถใช้งานเครื่องขณะที่ชาร์จไฟอยู่ได้
การชาร์จด้วยชุดอุปกรณ์
1 ตรวจดูให้แน่ใจว่าปิดสวิตช์เครื่องแล้ว
2 เสียบชุดอุปกรณ์เข้ากับเต้ารับบนผนัง แล้วเสียบปลั๊กเล็กเข้ากับเครื่อง (รูปที่ 14)
3 หลังจากชาร์จไฟ ให้ถอดชุดอุปกรณ์ออกจากเต้ารับบนผนัง
และถอดปลั๊กขนาดเล็กออกจากเครื่อง
 Loading...