

Philips Respironics BiPAP autoSV Advanced System One Provider Manual
Therapy
Info
Bi-Flex
Setup
EXIT
Info
Reminder
Setup
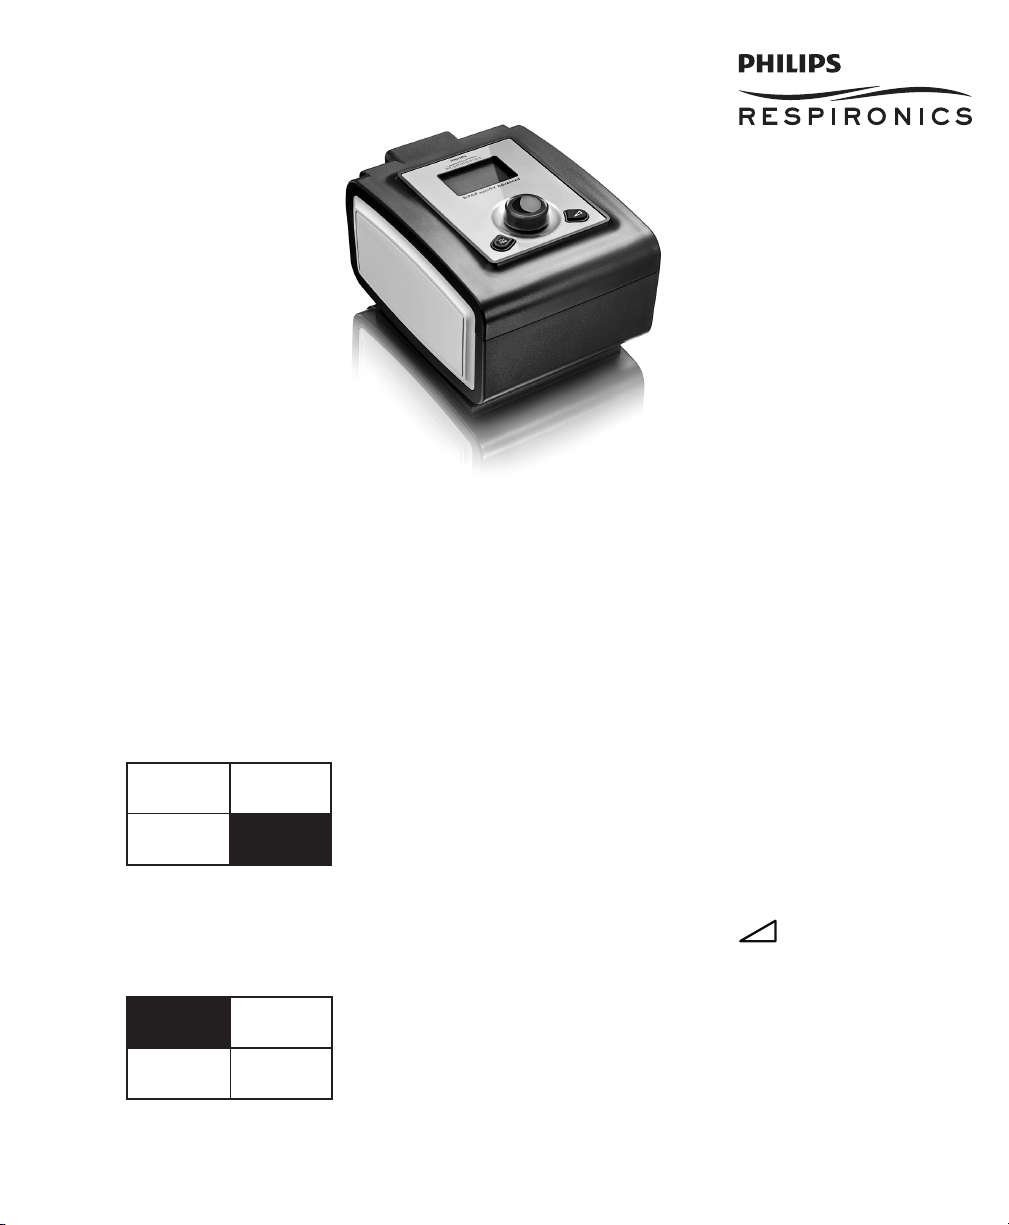
BiPAP autoSV Advanced System One
PROVIDER GUIDE
IMPORTANT! Remove this guide before giving the device to the patient. Only medical professionals should adjust pressure settings.
This guide must be used with the User Manual when used by a medical professional. Read and understand the User Manual,
the Provider Guide, and all accessory manuals before setting up the device. This guide provides you with instructions on how
to access and navigate the provider screens used to modify device settings.
Note: The screens shown throughout this guide are examples only. Actual screens may vary slightly.
Accessing the Provider Mode Screens
Accessing provider mode unlocks settings that cannot be modied by the user. To access provider mode:
1. Supply Power to the device. First, plug the socket end of the AC power cord into the power supply. Then plug the
pronged end of the AC power cord into an electrical outlet that is not controlled by a wall switch. Finally, plug the power
supply cord’s connector into the power inlet on the back of the device.
2. Once the device is powered, the Main Menu appears, shown below. Turn the wheel to toggle between the four options
and highlight “Setup”.
Main Menu
Note: “Bi-Flex” shown above may also display a blank screen or “Rise Time” depending on your settings.
3. Once “Setup” is highlighted, press and hold both the Control Wheel and the Ramp Button on the device for at least
5 seconds.
4. You will hear a quick double beep and the Provider Menu will appear, shown below. You are now in provider mode.
Provider Menu
- 1 -

Navigating the Provider Mode Screens
Back
Reminder off 30 90
180 270 365
Reminder
Setup
Back
Max pressure 4 - 25.0
EPAP min 4 - Max pres
EPAP max EPAP min - Max Pres
PS min 0 - (Max Pres - Max EPAP)
PS max PS min - (Max Pres - Min EPAP)
BPM Off Auto 4 - 30
Ti 0.5 - 3.0
Flex type None Bi-Flex
Bi-Flex 1 2 3
Rise time 0 1 2 3
Ramp time 0:00 - 0:45
Ramp start 4 - EPAP Min
Tubing Type Lock on off
Tubing Type 15 22
SYSTEM ONE resistance 0 X1 X2 X3 X4 X5
Lock SYSTEM ONE on off
SYSTEM ONE humidification on off
Humidifier 0 1 2 3 4 5
Auto on on off
Patient disconnect alarm 0 15 60
Apnea alarm 0 10 20 30 40
Low min vent alarm 0 - 99
Show AHI/leak/PB on off
Language EN ES
Humidifier LED Backlight on off
Setup parameter displayed None Leak RR MinVent Vte
Back
To navigate these display screens:
Turn the wheel to toggle between options and settings on the screen. Press the wheel to choose an option or setting that is
highlighted. If you choose “Back” on any screen, it will take you back to the previous screen.
Note: Choosing “EXIT” from the Provider Screen will exit provider mode and the device will return to the Home Screen
in the patient mode.
Note: Provider mode will time out after 30 seconds of inactivity. The device will then automatically exit the provider
mode and return to the Home Screen in the patient mode.
Provider Mode Screen Descriptions
The following sections will describe the options available under the 3 choices from the Provider Screen (Reminder, Setup, and Info).
Reminder Screen
From the Provider Menu, highlight “Reminder” and press the wheel. The following Reminder screen will appear.
Reminder Screen
• Reminder - You can set a reminder on this screen that will let patients know when it is time to perform a certain task,
such as replacing the mask. You can select one of the following settings: Off (no reminder is set), or you can set the device
to display a reminder after 30, 90, 180, 270, or 365 days.
Note: You can set a specic patient reminder message using the EncorePro software, and put this message on the SD
Card or send it to the patient’s device via a modem.
Setup Screen
From the Provider screen, highlight “Setup” and press the wheel. The following Setup screen will appear.
Setup Screen
Note: The screen will only show a few lines at a time. As you rotate the Wheel to toggle over different options the
screen will slide up and down accordingly. If the text is too long to completely t on the screen, it will scroll horizontally
across the screen when highlighted.
- 2 -

• Max pressure - This screen displays the current Maximum pressure setting. You can adjust the setting from 4 to 25 cm
H2O in 0.5 increments.
• EPAP min - This screen allows you to modify the Minimum EPAP setting. The setting specied here will be the minimum
level of pressure applied during the expiratory breath phase. You may adjust the setting from 4 cm H2O to the Maximum
pressure setting.
• EPAP max - This screen allows you to modify the Maximum EPAP setting. The setting you specify here will be the
maximum level of pressure applied during the expiratory breath phase. You may adjust the setting from the Minimum
EPAP setting to the Maximum pressure setting.
• PS min - This screen allows you to modify the Minimum Pressure Support setting. This setting is the minimum difference
that is permitted between IPAP and EPAP. You may adjust the setting from 0 cm H2O to the difference between the
maximum pressure setting minus the maximum EPAP setting.
• PS max - This screen allows you to modify the Maximum Pressure Support setting. The maximum pressure support is the
maximum difference that is permitted between IPAP and EPAP. You may adjust the setting from PS min to the difference
between the maximum pressure setting minus the minimum EPAP setting.
• BPM - This screen allows you to modify the Breaths Per Minute setting. You can choose between Off, Auto, or 4 through
30 in 1 BPM increments.
Note: This setting only displays if PS max is greater than zero.
• Ti - This screen allows you to modify the Inspiratory Time setting. You may adjust the setting from 0.5 to 3.0 seconds in
0.1 increments. This setting only displays if PS max is greater than zero and BPM is not set to Off or Auto.
• Flex type - This screen displays the comfort mode setting. You can select None or Bi-Flex.
• Bi-Flex - You can modify the Flex setting (1, 2 or 3) on this screen if you enabled Bi-Flex. The Bi-Flex comfort feature
allows you to adjust the level of air pressure relief that the patient feels when exhaling during therapy. The setting of “1”
provides a small amount of pressure relief, with higher numbers providing additional relief.
• Rise time - Rise time is the time it takes for the device to change from the expiratory pressure setting to the inspiratory
pressure setting. This screen allows you to adjust the rise time so you can nd the desired setting. A setting of “0” is the fastest
rise time, while “3” is the slowest. This is only available if Flex type is set to None and PS max is greater than zero.
• Ramp time - This enables you to modify the Ramp time setting in 5 minute increments. The range for this setting is 0 (off)
to 45 minutes.
Note: This setting only displays if EPAP min is greater than 4 cm H2O.
• Ramp start - You can increase or decrease the ramp starting pressure in 0.5 cm H2O increments. You may adjust the
setting from 4 cm H2O to the EPAP min setting.
Note: This setting only displays if Ramp time is not zero and EPAP min is greater than 4 cm H2O.
• Tubing type lock - This enables you to lock the Tubing type setting if you do not want the patient to change it.
Note: If you lock this setting, the device defaults to a setting of 22, and the patient will not see the Tubing type setting.
• Tubing type - This setting allows you to select the correct size diameter tubing that you are using with the device. You
can choose either (22) for the Respironics 22 mm tubing, or (15) for the optional Respironics 15 mm tubing.
• SYSTEM ONE resistance ( ) - This setting allows you to adjust the level of air pressure relief based on the specic
Respironics mask. Each Respironics mask may have a “System One” resistance control setting. System One resistance
compensation can be turned off by choosing the setting “0”.
Note: The patient also has access to this setting, if Lock SYSTEM ONE is off.
• Lock SYSTEM ONE - This enables you to lock the “System One” resistance control setting if you do not want the
patient to change it.
Note: If you lock this setting, the patient will see a “lock” icon next to the setting.
• SYSTEM ONE humidication - System One humidity control maintains a consistent mask humidity by monitoring and
adjusting for changes in room temperature and room humidity. You can enable or disable this feature. If the System One
humidity control has been disabled, the classic style of basic temperature controlled heated humidication will be used.
This will only display if the humidier is attached.
- 3 -
• Humidier - This setting allows you to choose the desired humidity setting: 0, 1, 2, 3, 4 or 5. If the System One humidity
control has been disabled, the classic style of basic temperature controlled heated humidication will be used and the
display will show: 0, C1, C2, C3, C4 or C5 for these settings. This will only display if the humidier is attached. Please refer
to the humidier manual if using a humidier.
• Auto on - You can enable or disable this feature if you want the device to automatically turn the airow on whenever the
patient applies the interface (mask) to their airway.
• Patient disconnect alarm - You can enable this feature by choosing 15 or 60 seconds. The alarm will sound when a
large, continuous air leak is detected in the circuit for longer than the specied setting. You can disable this feature by
choosing “0”.
• Apnea alarm - This feature detects the cessation of spontaneous breathing. You can enable or disable the alarm by
choosing 0 (off), 10, 20, 30, or 40 seconds. The alarm will sound when the time between patient-triggered breaths is
greater or equal to the specied setting.
• Low min vent alarm - You can enable or disable this feature by choosing 0 (off) to 99 LPM (liters per minute) in 1 LPM
increments. The alarm will sound when the calculated minute ventilation is less than or equal to the specied setting.
• Show AHI/leak/PB - You can select whether or not the Apnea/Hypopnea index, System Leak averages, and Periodic
Breathing averages are displayed on the Patient Info screens.
• Language - This feature allows you to choose which language to display on the interface. You can choose English (EN) or
Spanish (ES).
• Humidier LED Backlight/Ramp Backlight - You can enable or disable the LED backlight for the humidier number
settings and Ramp button on the device.
Note: If the humidier is not attached, this feature will display as “Ramp Backlight” and control the LED backlight for the
Ramp button only.
Note: If the Humidier LED Backlight is enabled or disabled, the humidier icon will always remains on (if humidier is
attached and heat is being applied), but will dim after 30 seconds of inactivity.
• Setup parameter displayed - You can select which measured parameters will display on the Monitor Pressure screen.
You can choose from None, Leak, RR, MinVent, or Vte. The following table describes each measured parameter. The
measured parameters that display on the Monitor Pressure screen only appear one at a time.
Pa r a m e t e r De s c r i P t i o n
Leak ( )
Respiratory Rate (RR) This is the average of the previous 6 breaths. If the mode supports machine-triggered breaths, this
Minute Ventilation
(MinVent)
Exhaled Tidal Volume
(Vte)
The estimated leak is the average leak value for the last 6 breaths. The display is updated at the
end of each breath.
display will be the total breathing rate (spontaneous breaths + machine breaths). The display is
updated at the end of each breath.
The estimated Exhaled Minute Ventilation is based on the average of the last 6 breaths. The display
is updated at the end of each breath.
The estimated Exhaled Tidal Volume is obtained by the integration of patient ow. The display is
updated at the end of each breath.
- 4 -
Info Screen
Info
Back
Oximetry
Device Settings
Monitor Params
Phone-in
Compliance VIC
Therapy hours
Blower hours
Days > 4
Large leak
AHI
Periodic breathing
90% EPAP
Average PS
Reset data
Machine hours
Back
From the Provider screen, highlight “Info” and press the wheel. The following Info screen will appear.
Info Screen
Note: The screen will only show a few lines at a time. As you rotate the Wheel to toggle over different options the
screen will slide up and down accordingly. If the text is too long to completely t on the screen, it will scroll horizontally
across the screen when highlighted.
• Oximetry - This screen displays the Oximetry parameters.
Note: This option is only shown when an Oximetry module is attached.
WARNING: The data displayed here and stored on the device SD card is not considered to be diagnostic and is not to
be used in the diagnosis of a patient’s condition.
• Device Settings - This screen allows you to view the current device settings. The following will display: Maximum
pressure i n cm H2O, EPAP min in cm H2O, EPAP max in cm H2O, Breaths Per Minute in BPM, PS min in cm H2O, and PS
max in cm H2O.
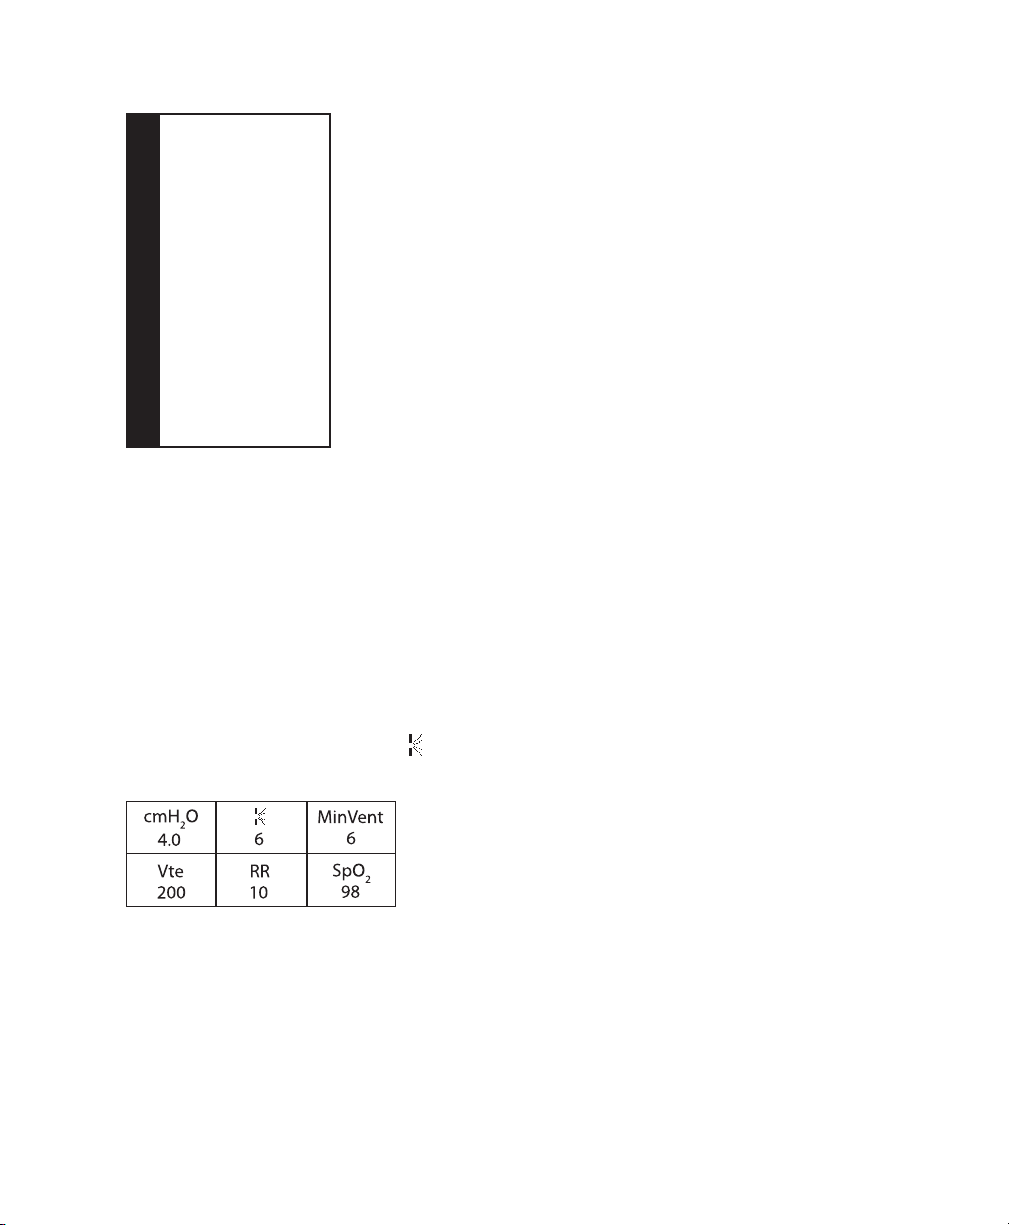
• Monitor Parameters - This screen displays all available measured therapy parameters. The following will display:
Estimated Patient Pressure in cm H2O, Leak ( ) in LPM, Minute Ventilation (MinVent) in LPM, Tidal Volume (Vte) in ml,
Respiratory Rate (RR) in BPM, and the pulse oximetry (SpO2) measurement if available on the device. Example shown
below.
Note: This screen will only display if the blower is on.
• Phone-in - This screen displays the total therapy hours for the device, the total blower hours, and the total number
of days used when the sessions were greater than 4 hours since the device was last reset. This screen also displays a
compliance check number you can use to validate that the data provided to you is the data taken from this screen.
• Compliance VIC (Visual Inspection Check) - This screen displays the start day and the total number of days used
when the sessions were greater than 4 hours. This screen also displays a check code number you can use to validate that
the data provided to you is the data taken from this screen.
- 5 -
 Loading...