

Philips PET723-05 User Manual
Register your product and get support at
www.philips.com/welcome
User manual
PET723Portable DVD player

Important notes for users in the U.K.
Mains plug
This apparatus is fitted with an approved 13 Amp plug. To change a fuse in
this type of plug proceed as follows:
1. Remove fuse cover and fuse.
2. Fix new fuse which should be a BS1362 3 Amp, A.S.T.A. or BSI
approved type.
3. Refit the fuse cover.
If the fitted plug is not suitable for your socket outlets, it should be cut off
and an appropriate plug fitted in its place. If the mains plug contains a
fuse, this should have a value of 3 Amp. If a plug without a fuse is used,
the fuse at the distribution board should not be greater than 3 Amp.
Note: The severed plug must be disposed of to avoid a possible shock hazard should it be inserted into a 13 Amp socket elsewhere.
How to connect a plug
The wires in the mains lead are coloured with the following code: blue =
neutral (N), brown = live (L). As these colours may not correspond with the
colour markings identifying the terminals in your plug, proceed as follows:
• Connect the blue wire to the terminal marked N or coloured black.
• Connect the brown wire to the terminal marked L or coloured red.
• Do not connect either wire to the earth terminal in the plug, marked E
(or e) or coloured green (or green and yellow).
Before replacing the plug cover, make certain that the cord grip is clamped
over the sheath of the lead - not simply over the two wires.
Copyright in the U.K.
Recording and playback of material may require consent. See Copyright Act
1956 and The Performer’s Protection Acts 1958 to 1972.
2

English
2
3
4
5
1
8
9
7
6
SOURCE MENU
Congratulations on your purchase and welcome to Philips!
To fully benefit from the support that Philips offers, register your product
at www.philips.com/welcome.
FUNCTIONAL OVERVIEW
Main unit controls ( see figure 1)
1 3, 4, 1, 2 ...........Navigate in a menu.
OK .........................Start or interrupt playback.
Left of player ( see figure 1)
2 p.............................Headphone jack.
3 MMC/SD................SD card slot.
4 AV OUT..................Audio/Video output jack.
5 VOL +/-...................Volume control.
6 DC 9V .....................Power supply socket.
CHG.........................Charge indicator.
...........(1 / 2) Press and hold to search backward/forward in a
disc at different speeds.
...........(1 / 2) Press briefly to skip to previous/next chapter,
track or title.
.........................Confirm a selection.
.........................Power indicator (The indicator will turn off automatically
about five seconds after you press a key).
Right of player ( see figure 1)
7 OFF PWR ON ........Switch the power on/off.
Top of player ( see figure 1)
8 SOURCE .................Switch between DVD and SD modes.
9 MENU.....................Display the MENU page.
1
English
3
English
FUNCTIONAL OVERVIEW
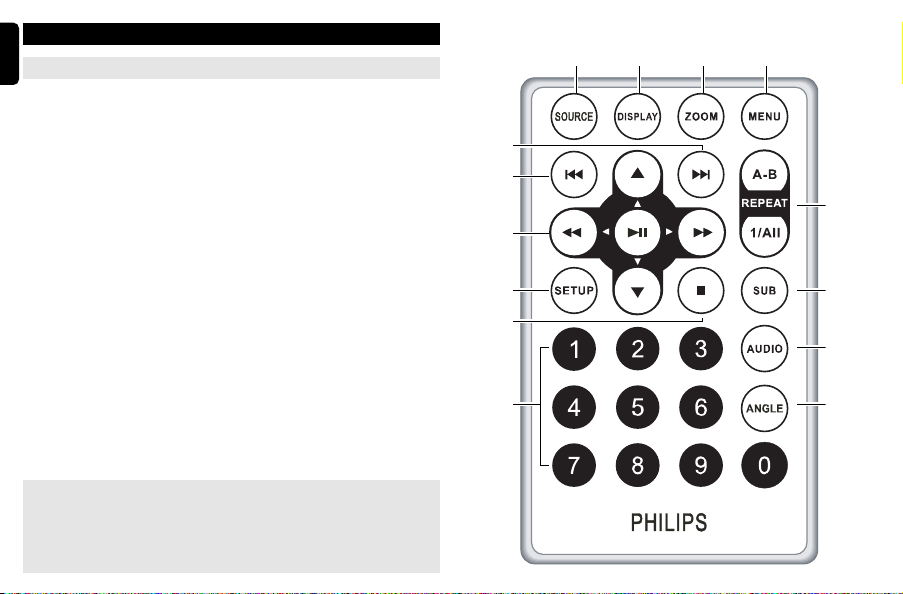
Remote controls ( see figure 2)
1 SOURCE .................Switch between DVD and SD modes.
2 DISPLAY ................Display information on TFT during playback.
3 ZOOM.....................Enlarge or reduce a picture or active image on the TFT.
4 MENU.....................Enter or exit the disc contents menu.
5 §............................Skip to the next chapter, track or title.
6 J( ............................Skip to the previous chapter, track or title.
7 3, 4, 11 , 22 .....Navigate in a menu.
;
...........................Confirm a selection.
2
................................Start or interrupt playback.
8 SETUP ....................Enter or exit the system menu.
9 9 .............................Stop playback
0 0-9...........................Numeric Keypad
! REPEAT 1/ALL.......Repeat a chapter/track/title.
A-B... ......................Repeat playback of a specific section on a disc.
@ SUB ........................Select a subtitle language.
# AUDIO ....................Select an audio language when playing a DVD disc or
$ ANGLE....................Select DVD camera angle
.....(11 / 22) search backward/forward in a disc at
different speeds.
select an audio mode (Stereo, Mono-Left or Mono-Right)
when playing a VCD/CD disc.
CAUTION
Use of controls or adjustments or performance of procedures
other than herein may result in hazardous radiation exposure
or other unsafe operation.
4
2
1234
5
6
11
7
8
12
9
13
10
14

INTRODUCTION
Your portable DVD player
Your portable DVD player plays digital video discs conforming to the universal
DVD Video standard. With it, you will be able to enjoy full-length movies with
true cinema picture quality, and stereo or multichannel sound (depending on the
disc and on your playback set-up).
The unique features of DVD-Video, such as selection of soundtrack and subtitle
languages, and of different camera angles (again depending on the disc), are all
included.
What’s more, parental lock lets you decide which discs your children will be able
to see. You will find your player remarkably easy to use with the On-Screen
Display and player display in combination with the remote control.
Unpacking
First check and identify the contents of your package, as listed below:
• Portable DVD player • Remote Control
• Car adaptor (12V) • Audio / Video cable
• User Manual • Warranty
• AC power adaptor, DSA-9W-09 F (DVE), AY4132 (PHILIPS) or AY4193 (PHILIPS)
Placement
• Place the player on a firm, flat surface.
• Keep away from domestic heating equipment and direct sunlight.
• If the player cannot read CDs/DVDs correctly, try using a commonly available
cleaning CD/DVD to clean the lens before taking the player to be repaired.
Other cleaning methods may destroy the lens.
• Always keep the disc door closed to avoid dust on the lens.
• The lens may cloud over when the player is suddenly moved from cold to warm
surroundings. It is then not possible to play a CD/DVD. Leave the player in a
warm environment until the moisture evaporates.
INTRODUCTION
About Built-in Rechargeable Battery
Precautions related to battery recharge
1 Once the battery is fully discharged, immediately recharge it (regardless of
whether you plan to use the battery or not) in order to maximize the battery
life. When the power is low, the battery icon will be shown on the upperright corner of the TFT for warning.
2 To charge the battery, please directly connect this DVD player to AC mains
and the charge indicator will turn on.
Using and maintaining your rechargeable batteries
1 Please make sure you always use only the AC adapter included with the
player to recharge your batteries.
2 Recharge efficiency will degrade when the environmental temperature drops
3 The lasting time of the fully charged battery when a headphone is connected
o
F (10oC) or exceed 95oF (35oC).
below 50
to the DVD player is approximately 2 hours.
English
5
English
INTRODUCTION
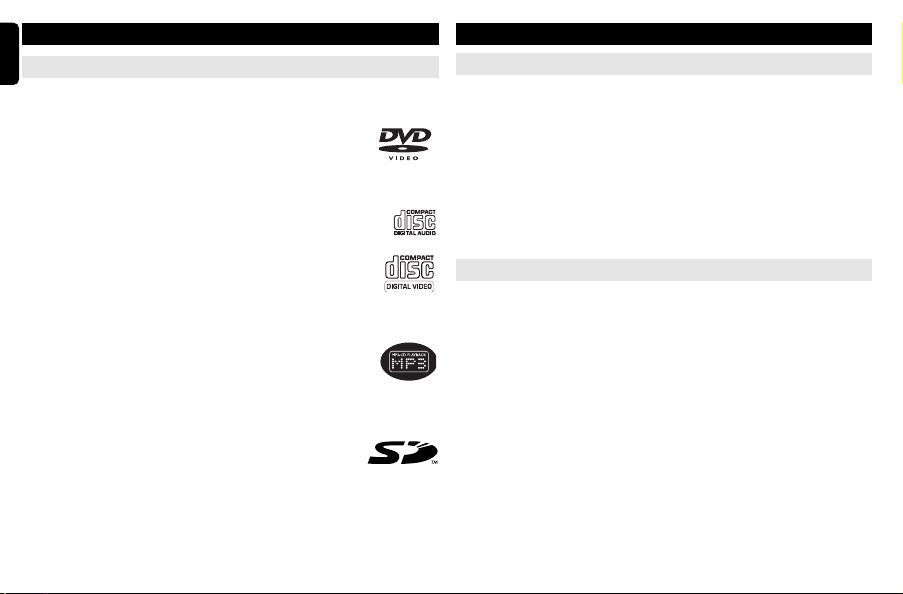
Playable disc formats
In addition to DVD-Video disc, you will also be able to play all Video CDs and
audio CDs (including CD-R, CD-RW, DVD
±R and DVD±RW).
DVD-Video
Depending on the material on the disc (a movie, video clips, a
drama series, etc.) these discs may have one or more Titles, and
each Title may have one or more Chapters. To make access easy and convenient,
your player lets you move between Titles, and also between Chapters.
CD with JPEG files
You can also view JPEG still photos on this player.
Video CD
Depending on the material on the disc (a movie, video clips, a drama
series, etc.) these discs may have one or more Tracks, and tracks
may have one or more indexes, as indicated on the disc case.To make access
easy and convenient, your player lets you move between tracks and between
indexes.
Audio CD / MP3 CD
Audio CDs / MP3-CD contain music tracks only. You can play
them in the conventional way through a stereo system using the
keys on the remote control and/or main unit, or via the TV using the On Screen
Display (OSD).
About SD Memory Card
SD Memory Card is a slim and compact bridge media linking
various kinds of digital equipment through its easy connectivity.
The card's control circuitry allows data to be read and written (in its protection
area) only when appropriate external devices are detected. Using decoder software, an SD Memory Card-compatible device can play music, video clips and
more without a drive mechanism like those in CD and DVD players.
6
GENERAL INFORMATION
Power Sources
This unit operates on a supplied AC adapter and car adapter.
• Make sure that the input voltage of the AC adaptor is in line with the local
voltage. Otherwise, the AC adaptor and unit may be damaged.
• Do not touch the AC adaptor with wet hands to prevent electric shock.
• When connecting with car power (cigarette lighter) adaptor, be sure the
input voltage of the adaptor is identical with car voltage.
• Unplug the AC adaptor from the outlet when the unit is not used for long periods of time.
• Hold the plug to disconnect the AC adaptor. Do not pull the power cord.
Safety and maintenance
• Do not disassemble the unit for laser rays are dangerous to eyes.
Any service should be done by qualified service personnel.
• Unplug the AC adaptor to cut the power if liquid or objects get inside the unit.
• Take care not to drop the unit or subject it to strong shocks, which may
cause malfunction.
• Important (for models with by-packed headphones): Schneider guarantees compliance with the maximum sound power of its audio players as
determined by relevant regulatory bodies only with the original model of provided headphones. In case this one needs replacement, we recommend that
you contact your retailer to order a model identical to that of the original provided by Philips.
• Traffic safety: do not use while driving or cycling as you may cause an accident
• Do not expose to excessive heat caused by heating equipment or
direct sunlight.
 Loading...