

Page 1
Portable DVD player
with Dual Display Screens
Register your product and get support at
www.philips.com/welcome
User manual
PET711
Page 2

1. Important
1.1 Safety instructions
1.2 Environmental information
1.3 Power Sources
1.4 Hearing Safety
2. Introduction
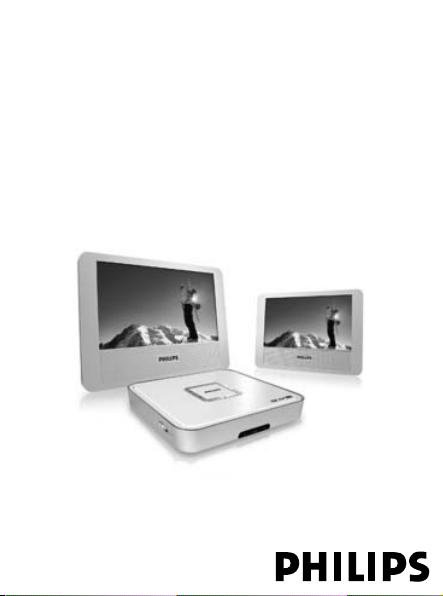
2.1 Your portable DVD player
2.2 Unpacking
2.3 Overview
2.3.1 Main unit controls
2.3.2 Display controls
2.3.3 Remote Control
3. Prepration
3.1 Install the DVD player in car
3.2 Connect AV cable
3.3 Connect power cable
3.3.1 Power connection for the
screens
3.3.2 Power connection for the
DVD player
3.4 Insert battery into remote
control
3.5 Connect headphones
4. Basic functions
4.1 Power on
4.2 Select On-Screen-Display(OSD)
language
4.3 Load discs
4.4 Play discs
4.5 Adjust volume
4.6 Adjust display
5. Special functions
5.1 Change audio language (for
DVD)
5.2 Change subtitle (for DVD)
5.3 Change view angle (for DVD)
5.4 Change audio mode (for VCD/
CD)
5.5 Zoom (for DVD, VCD and
picture CD)
5.6 Repeated play
5.7 Random play (for audio/MP3
CD)
5.8 Rotate pictures (for picture
CD)
6. Setup operation
7. Specifi cations
8. Maintenance
8.1 General
8.2 Handling discs
8.3 On handling the LCD screen
9. Troubleshooting
Page 3

1. Important
1.1 Safety instructions
• Read these instructions.
• Keep these instructions.
• Heed all warnings.
• Follow all instructions.
• Do not use this apparatus near water.
• Clean only with dry cloth.
• Do not block any ventilation openings. Install in accordance with
the manufacturer's instructions.
• Do not install near any heat sources such as radiators, heat registers, stoves, or other apparatus (including amplifiers) that produce
heat.
• Do not defeat the safety purpose of the polarized or groundingtype plug. A polarized plug has two blades with one wider than the
other. A grounding type plug has two blades and a third grounding
prong. The wide blade or the third prong are provided for your
safety. If the provided plug does not fit into your outlet, consult an
electrician for replacement of the obsolete outlet.
• Protect the power cord from being walked on or pinched, particularly at plugs, convenience receptacles, and the point where they
exit from the apparatus.
• Only use attachments/accessories specified by the manufacturer.
• Use only with the cart, stand, tripod, bracket, or table specified by
the manufacturer or sold with the apparatus. When a cart is used,
use caution when moving the cart/apparatus combination to avoid
injury from tip-over.
• Unplug this apparatus during lightning storms or when unused for
long periods of time.
• Refer all servicing to qualified ser vice personnel. Servicing is
required when the apparatus has been damaged in any way, such
as power-supply cord or plug is damaged, liquid has been spilled
Page 4

or objects have fallen into the apparatus, the apparatus has been
exposed to rain or moisture, does not operate normally, or has
been dropped.
• Battery usage: CAUTION To prevent battery leakage which may
result in bodily injury, property damage, or damage to the unit:
• Install all batteries correctly, + and – as marked on the unit.
• Do not mix batteries (old and new or carbon and alkaline, etc.).
• Remove batteries when the unit is not used for a long time.
• Apparatus shall not be exposed to dripping or splashing.
• Do not place any sources of danger on the apparatus
(e.g. liquid filled objects, lighted candles).
• This product may contain lead and mercury. Disposal of these
materials may be regulated due to environmental considerations.
For disposal or recycling information, please contact your local
authorities or the Electronic Industries Alliance: www.eiae.org.
1.2 Environmental information
All unnecessary packaging has been omitted. We have tried
to make the packaging easy to separate into three materials:
cardboard (box), polystyrene foam (buffer) and polyethylene (bags,
protective foam sheet.) Your system consists of materials which can
be recycled and reused if disassembled by a specialized company.
Please observe the local regulations regarding the disposal of packaging materials, exhausted batteries and old equipment.
Disposal of your old product
Your product is designed and manufactured with high
quality materials and components, which can be recycled
and reused.
When this crossed-out wheeled bin symbol is attached
Page 5

to a product it means the product is covered by the European
Directive 2002/96/EC.
Please inform yourself about the local separate collection system for
electrical and electronic products. Please act according to your local
rules and do not dispose of your old products with your normal
household waste. The correct disposal of your old product will help
prevent potential negative consequences for the environment and
human health.
Page 6

1.3 Power Sources
This unit operates on a supplied AC adapter or car adapter.
• Make sure that the input voltage of the AC adaptor is in line with
the local voltage. Otherwise, the AC adaptor and unit maybe damaged.
• Do not touch the AC adaptor with wet hands to prevent electric
shock.
• When connecting with car power (cigarette lighter) adaptor, be
sure the input voltage of the adaptor is identical with car voltage.
• Unplug the AC adaptor from the outlet when the unit is not used
for long periods of time.
• Hold the plug to disconnect the AC adaptor. Do not pull the
power cord.
Please always use supplied AC/DC adapter (AY4130).
Page 7

1.4 Hearing Safety
Listen at a moderate volume
• Using headphones at a high volume can impair your hearing. This
product can produce sounds in decibel ranges that may cause
hearing loss for a normal person, even for exposure less than a
minute. The higher decibel ranges are offered for those that may
have already experienced somehearing loss.
• Sound can be deceiving. Over time your hearing “comfort level”
adapts to higher volumes of sound. So after prolonged listening,
what sounds “normal” can actually be loud and harmful to yourhearing. To guard against this, set your volume to a safe level before
your hearing adapts and leave it there.
• Excessive sound pressure from earphones and headphones can cause
hearing loss.
To establish a safe volume level:
• Set your volume control at a low setting.
• Slowly increase the sound until you can hear it comfortably and
clearly, without distor tion.
Listen for reasonable periods of time:
• Prolonged exposure to sound, even at normally "safe" levels, can
also cause hearing loss.
• Be sure to use your equipment reasonably and take appropriate
breaks.
Be sure to observe the following guidelines when using your headphones:
• Listen at reasonable volumes for reasonable periods of time.
• Be careful not to adjust the volume as your hearing adapts.
Page 8

• Do not turn up the volume so high that you can't hear what's
around you.
• You should use caution or temporarily discontinue use in potentially hazardous situations.
• Do not use headphones while operating a motorized vehicle,
cycling, skateboarding, etc.; it may create a traffic hazard and is illegal in many areas.
• Important (for models with by-packed headphones): Philips guarantees compliance with the maximum sound power of itsaudio
players as determined by relevant regulator y bodies onlywith the
original model of provided headphones. In case this oneneeds
replacement, we recommend that you contact yourretailer to
order a model identical to that of the originalprovided by Philips.
• Traffic safety: do not use while driving or cycling as you maycause
an accident.
Page 9

2. Introduction
Congratulations on your purchase and welcome to Philips! To fully
benefit from the support that Philips offers, register your product
at www.philips.com/welcome.
2.1 Your portable DVD player
Your por table DVD player plays digital video discs conforming to
the universal DVD Video standard. With it, you can play movies
with true cinema picture quality and stereo or multi-channel sound
(depending on disc and playback set-up).
You can also select sound track, subtitle languages, and different
angle of view (again depending on DVD disc). Besides, you can set
parental control to prevent your children to see certain discs.
You can play the following discs on the DVD player:
• DVD video disc
• MP3 CDs • Audio CDs
• CD with JPEG files
• Video CDs
2.2 Unpacking
Check and identify the contents of your package:
• Portable DVD player • 7" LCD screen x 2
• Remote control • AC power adaptor
• Car adaptor (12V) • AV cable x 2
• Car pouch x 2 • Y-type power cord
Page 10

2.3 Overview
Use the controls only as stated in the user manual.
2.3.1 Main unit controls
5
6
8
9
11
1
2
3
4
7
10
13
14
12
Page 11

1 3, 4 Move cursor up / down
2 J( )K Skip to previous/next chapter, track or title
3 2; Start or interrupt play
4 MENU Enter or exit DVD menu
5 9 Stop play
SETUP
6
7 p Headphones jack
– VOL +
8
POWER B
9
10 POWER/IR Power/Remote sensor indicator
11 OPEN Open disc door to insert or remove disc
12 AV out 1 and 2
Audio/Video output jacks
13 DC OUT DC power output to the two screens
14 DC IN Power supply socket
2.3.2 Display controls
Move cursor to left/right
Enter or exit system setup menu
Adjust headphone volume
Turn DVD player on/off
Page 12

1
23
6
7
8
4
5
Page 13

1 DISPLAY Setup screen display
2 POWER ON/OFF
Turn the screen on/off
3 1, 2 Adjust display value of the screen
4 p Headphone jack
– VOL +
5
Adjust volume
6 DC IN Power supply from the DVD player
7 Audio In L(left) and R(right)
Audio/Video input jacks
8 VIDEO IN
Video input jack
2.3.3 Remote Control
1
2
3
4
5
6
7
8
9
10
DVD MENU
OSD
MUTE
11
TITLE
12
13
14
15
16
Page 14

1 SETUP Enter or exit system menu
2 3, 4, 1, 2 Move cursor up / down / left / right.
OK Confirm selection
3 OSD Access available functions
4 J( Skip to previous chapter, track or title.
5 PLAY/PAUSE 2;
Start / pause / resume play
6 MUTE Turn off sound
7 Numeric Keypad 0 - 9
Input numbers.
8 SUBTITLE Select a subtitle language for DVD disc.
9 RETURN Return to the PBC (playback control) menu of
VCD disc
10 A-B Setup repeated play of a specific section
11 DVD MENU Return to main menu of DVD disc
12 TITLE Return to title menu of DVD disc
13 )K Skip to the next chapter, track or title
14 STOP
9
Stop play
15 AUDIO Select an audio language when playing a DVD
disc or select an audio mode (Stereo, Mono-Left or
Mono-Right) when playing a VCD/CD disc
16 ZOOM Enlarge or reduce picture or active image size
Page 15

3. Prepration
3.1 Install the DVD player in car
1 Strap the car pouches over your car seat headrest.
2 Insert the DVD player and the two screens into the pouches.
3 Close the buckle and adjust the belt until it fits tightly around the
headrest.
DVD Player
Screen
Screen
Tip: You can place the main DVD player at anywhere in the car as long as
the cables length allows. Fasten the pouch straps if you do not put the
DVD player inside the pouch.
Page 16

3.2 Connect AV cable
There are two AV cables supplied, one for each screen is to be used.
1 Connect AV cable to the DVD player and to the screen as the
figure shown below.
Note: Match the color of the AV cable with the jacks: the yellow
cable is for the yellow video jack, the red/white cable is for the
red/white audio jacks.
Page 17

3.3 Connect power cable
3.3.1 Power connection for the screens
1 Plug the green end of the supplied Y-type power cord to the DVD
player first, then plug the other side with two ends to the two-
screens (see figure below).
Page 18

3.3.2 Power connection for the DVD player
option 1: using car adaptor
1 Connect the car cigarette adaptor to the DVD player and to the
Car Cigeratte Lighter. (see figure below)l
Car Cigarette Lighter Socket
Option 2: Using AC adapter
1 Connect the AC adapter to the DVD player and the main power
supply (see figure below).
AC outlet
DVD Player
Page 19

3.4 Insert battery into remote control
For first time use:
Pull out the protective plastic tab.
For change battery:
1 Open the battery compartment cover.
2 Insert 1 x CR2025 3V lithium battery.
3 Close the cover.
3.5 Connect headphones
Plug the headphones into the p jack of your
DVD player or screen.
DVD Player
Screen
Page 20

4. Basic functions
4.1 Power on
1 Power on the DVD player and the two screens by:
– Switch the POWER switch on the DVD player to ON position.
– Press the POWER ON/OFF button on the screens.
4.2 Select On-Screen-Display(OSD) language
English is the default language for screen display. You can change the
display language by:
1 Press SETUP.
2 Press 1, 2, 3, 4 to select General >
Language.
3 Select the language and press OK
4.3 Load disc
1 Press OPEN on the DVD player.
2 Insert the disc with label side facing up/front.
3 Close the CD door. Play starts automatically.
4.4 Play disc
1 When a disc is loaded, playback starts automatically.
For DVD video disc
Use 1, 2, 3, 4 to select an item from the DVD disc menu, such as
play now, select languages and subtitle, then press OK to start play.
For (Super) Video CDs
If PBC (Play Back Control) is on, the disc index menu is displayed
on the screen.
• Use numeric keypad 0-9 to input your selection or select a play
option.
• Press RETURN to return to the previous menu.
Page 21

For MP3 CDs
Use 1, 2, 3, 4 to select folder and MP3 file, then press OK to
start play.
For Picture CDs
Use 1, 2, 3, 4 to select folder and JPEG file, then press OK to
view the picture.
2 During play, press J( or § briefly to select the previous or next
title/track/chapter.
• To go directly to any title, track or chapter, enter the correspond-
ing number using the numerical keys (0-9)
3 Keep pressing J( or § to initiate fast backward/forward search-
ing. When 2x is shown on screen, press J( or § briefly to change
speed to 4x, 8x, 16x, 32x or to resume normal play.
• You may also press 2; to resume normal play.
4 Press 2; to pause. To resume play, press 2; again
5 Press 9 to stop.
4.5 Adjust volume
1 Use the rotar y volume switch on the left
side of the DVD player to adjust head-
phone volume.
Use the the rotary volume switch on the
left side of the screens to increase or decrease play volume.
4.6 Adjust display
1 Press DISPLAY on the screen(s) repeat-
edly to select:
Brightness: to adjust the brightness (
of the screen
)
Page 22

Contrast: to adjust the contrast ( )of thescreen
Display ratio: 16:9 display mode ( ) or 6:9 display mode ( )
2 Press 1 or 2 to change value..
Page 23

5. Special functions
5.1 Change audio language (for DVD)
Some DVD contain two or more audio languages for selection. You can
change language by:
1 Press AUDIO repeatedly.
5.2 Change subtitle (for DVD)
If the disc contains two or more subtitle languages, you can
1 Press SUBTITLE. repeatedly to select the subtile language.
5.3 Change view angle (for DVD)
If the disc contains different angle of view information, you can
1 Press OSD.
2 Press 1, 2, 3, 4 to select ANGLE, then press OK to confirm.
5.4 Select audio mode (for VCD/CD)
You can select an audio mode (Stereo, Mono-Left or Mono-Right) when
playing a VCD/CD disc:
1 Press AUDIO repeatedly.
5.5 Zoom in/out (for DVD, VCD and picture CD)
You can zoom in video image or pictures, to pan through it, and to zoom
out as well.
1 Press ZOOM repeatedly to zoom in or out:
Video: 2x, 3x, 4x, 1/2, 1/3, 1/4 or normal
JPEG: 125%, 150%, 200%, 50%, 75% or normal.
2 When video image or picture is enlarged, press 1, 2, 3, 4 to pan
through it.
Page 24

5.6 Repeated play
A-B repeat
1 Press A-B to set the starting point .
2 Press A-B again to set the ending point.
• The DVD player star ts play the loop repeatedly.
3 Press A-B to cancel repeat play.
Repeat 1/all (For audio/MP3 CD)
1 Press OSD.
2 Press 1, 2, 3, 4 to select Repeat 1 or Repeat all, then press
OK to confirm.
5.7 Random play (for audio/MP3 CD)
1 Press OSD.
2 Press 1, 2, 3, 4 to select Shuffle "On" or "Off", then press OK
to confirm.
5.8 Rotate pictures (for picture CD)
1 Press OSD.
2 Press 1 to rotate the picture clockwise.
Press 2 to rotate the picture anti-clockwise.
3 Press OSD again to exit rotate mode.
Page 25

6. Setup operation
You can change the following default settings of the DVD player by:
1 Press SETUP. A list of features is shown.
2 Press 3 4 to highlight the selection.
3 Press 2 to enter its sub-menu
• Press 1 to return to the previous menu.
4 Press OK to confirm.
5 Press SETUP to exit.
The SETUP menu includes:
General
Language Set On Screen Display (OSD) languages
PBC settings Set Playback Control function ON/OFF. This fea-
Parental Set parental options
Set password Change password (default: 9999)
Factory settings
Video
TV Display Set screen display aspect ratio
TV standard Set video output format to TV system
Audio
Dolby Set Dolby output
Digital (SPDIF)
ture is available for Super VCD.
Restore factory settings
Set digital output format
Page 26

7. Specifi cations
Dimensions – DVD player 204 x 168 x 33 mm
8.0 x 6.6 x 1.3inches
– Screens 204 x 168 x 33 mm
8.0 x 6.6 x 1.3 inches
Weight - DVD player 1.9 kg / 4.2 pounds
– Screens 1.9 kg / 4.2 pounds x 2
Power supply DC 12V 2.0A
Power Consumption <20W
Operating temperature range 0 - 50°C
Laser wavelength 650nm
Video system NTSC / PAL / AUTO
PHILIPS reserves the right to make design and
specifi cation changes for product improvement
without prior notice.
Modifi cations not authorized by the manufacturer
may void users authority to operate this device.
All rights reserved.
Page 27

8. Maintenance
8.1 General
• Do not use any cleaning agents containing alcohol, ammonia, ben-
zene, or abrasives as these may harm the player.
• Take care not to drop the unit or subject it to strong shocks,which
may cause malfunction.
• Do not touch the lens!
8.2 Handling discs
• Do not attach paper or tape to the disc.
• Keep the disc away from direct sunlight or
heat sources.
• Store the disc in a disc case after playback.
• To clean, wipe the disc outwards from the center with a soft, lint-
free clean cloth
8.3 On handling the LCD screen
The LCD is manufactured using high precision technology. You may,
however, see tiny black points and/or bright points(red, blue, green)
that continuously appear on the LCD. This is a normal result of the
manufacturing process and does not indicate a malfunction.
Page 28

9. Troubleshooting
If you encounter problems when using this DVD player, check the
following points before requesting service. If the problem remains
unsolved, go to the Philips web site www.welcome.philips.com/
us_en/, or contact Philips (see Contact information). When you
contact Philips, ensure that your micro system is nearby and the
model number and serial number are available.
To keep the warranty valid, never try to repair the system yourself.
Symptom
Screen shows 'no
Signal'.
No power
Distorted picture
Completely distorted picture /
no colour in the
TV screen
Remedy
• Check if the DVD player has been powered
on.
• Check if the AV cable is properly connected.
• Check if both plugs of the mains cord are
properly connected.
• Check if there is power at the AC outlet by
plugging in another appliance.
• Check if battery pack is inserted appropriately.
• Check if car adaptor is connected appropriately.
• Check the disc for fingerprints and clean with
a soft cloth, wiping from centre to edge.
• Sometimes a small amount of picture distortion may appear. This is not a malfunction.
The NTSC/PAL setting may be in the wrong
status. Match your TV’s setting with the player’s
setting.
Page 29

No sound
Disc can’t be
played
The player does
not respond to the
remote control
Distorted or
B/W picture with
DVD
Player does
not respond
to all operating
commands during
playback
Player feels warm
• Check if both plugs of the mains cord are
properly connected.
• Check if there is power at the AC outlet by
plugging in another appliance.
• Check if battery pack is inserted appropriately.
• Check if car adaptor is connected appropriately.
• Check the disc for fingerprints and clean with
a soft cloth, wiping from centre to edge.
• Sometimes a small amount of picture distortion may appear. This is not a malfunction.
The NTSC/PAL setting may be in the wrong
status. Match your TV’s setting with the player’s
setting.
check the AV cable connection
• Ensure the disc label is upwards.
• Clean the disc.
• Check if the disc is defective by trying another disc.
Page 30

Copyright information
The making of unauthorized copies of copy-protected material, including computer programmes, files, broadcasts and sound recordings, may be an infringement of copyrights and constitute a criminal offence. This equipment should not
be used for such purposes.
Important notes for users in the U.K.
Mains plug
This apparatus is fi tted with an approved 13 Amp plug. To
change a fuse in this type of plug proceed as follows:
1 Remove fuse cover and fuse.
2 Fix new fuse which should be a BS1362 5 Amp, A.S.T.A. or BSI ap-
proved type.
3 Refi t the fuse cover.
If the fi tted plug is not suitable for your socket outlets, it
should be cut off and an appropriate plug fi tted in its place.
If the mains plug contains a fuse, this should have a value
of 5 Amp. If a plug without a fuse is used, the fuse at the
distribution board should not be greater than 5 Amp.
Note: The severed plug must be disposed of to avoid a possible
shock hazard should it be inserted into a 13 Amp socket
elsewhere.
How to connect a plug
The wires in the mains lead are coloured with the following
code: blue = neutral (N), brown = live (L).
Page 31

• As these colours may not correspond with the colour markings
identifying the terminals in your plug, proceed as follows:
– Connect the blue wire to the terminal marked N or co-
loured black.
– Connect the brown wire to the terminal
marked L or coloured red.
– Do not connect either wire to the ear th terminal in the
plug, marked E (or e) or coloured green (or green and yellow).
Before replacing the plug cover, make certain that the cord
grip is clamped over the sheath of the lead - not simply over
the two wires.
Copyright in the U.K.
Recording and playback of material may require consent. See
Copyright Act 1956 and The Performer’s Protection Acts 1958
to 1972.
 Loading...