

Page 1

PCA646VC
USB PC Camera
Installation manual
Page 2

1
Introduction
Brilliant images and blazing colours.That’s what the Philips USB PC
Camera PCA646VC gives you. Forget about installing grabber cards
and separate power supplies.You don’t need them.Power is supplied
direct to the camera through the USB cable and the camera returns
audio and video straight to your PC!
This booklet describes the quick and easy way to:
• install the camera;
• install the software;
• record your own videos;
• and take your own pictures.
Congratulations on purchasing the Philips USB PC Camera
PCA646VC.This new digital camera is the most advanced way of
recording high-quality movies or still pictures quickly and easily on
your PC or laptop computer. After installation, the new camera can be
used for all sorts of applications,such as:
• Video e-mail: This new digital camera uses the patented compression
technology of the ‘Videogram Creator’ software.Thanks to this
compression algorithm,the video files remain very small so they can
be sent via the corporate network or the Internet.
• Video conferences: The camera and the driver software are suitable
for many popular video conferencing packages,including NetMeeting
by Microsoft,VDOPhone and ProShare by Intel.
• Snapshots and video photos: Use photos and images in
presentations,create postcards,or send them via e-mail or on diskette.
Add sound to the snapshots to add a personal message or to explain
the picture.
• Video Capture: Create your own video presentations,video-mail,
product demonstrations,training videos, Internet clips etc .
• Video editing and special effects: After recording the video images
you want with the Philips USB PC Camera,the images can be easily
edited using other programs or devices which support the AVI file
format.
Congratulations again on choosing the Philips USB PC Camera.The
following sections in this manual give a step-by-step description of the
installation process and explain how to use the USB PC Camera.
1
Page 3

2
Preparation
This manual describes how to install the hardware and software and
how to create your first video recording.
2.1 Contents of the box
Check to see if the following items are in the box:
• the Philips USB PC Camera PCA646VC;
• clover-leaf shaped base to support the camera;
• the CD-ROM containing the Philips installation software, application
software package and electronic software manual;
• this installation manual.
2.2 Your first video recording in five easy steps
The fastest way to get results is to perform the following steps:
1
Unpack the box
2
Put the CD-ROM in your CD-ROM player,and let the InstallShield
Wizard install the driver software and the application software (see
Section 3:“Camera and software installation”)
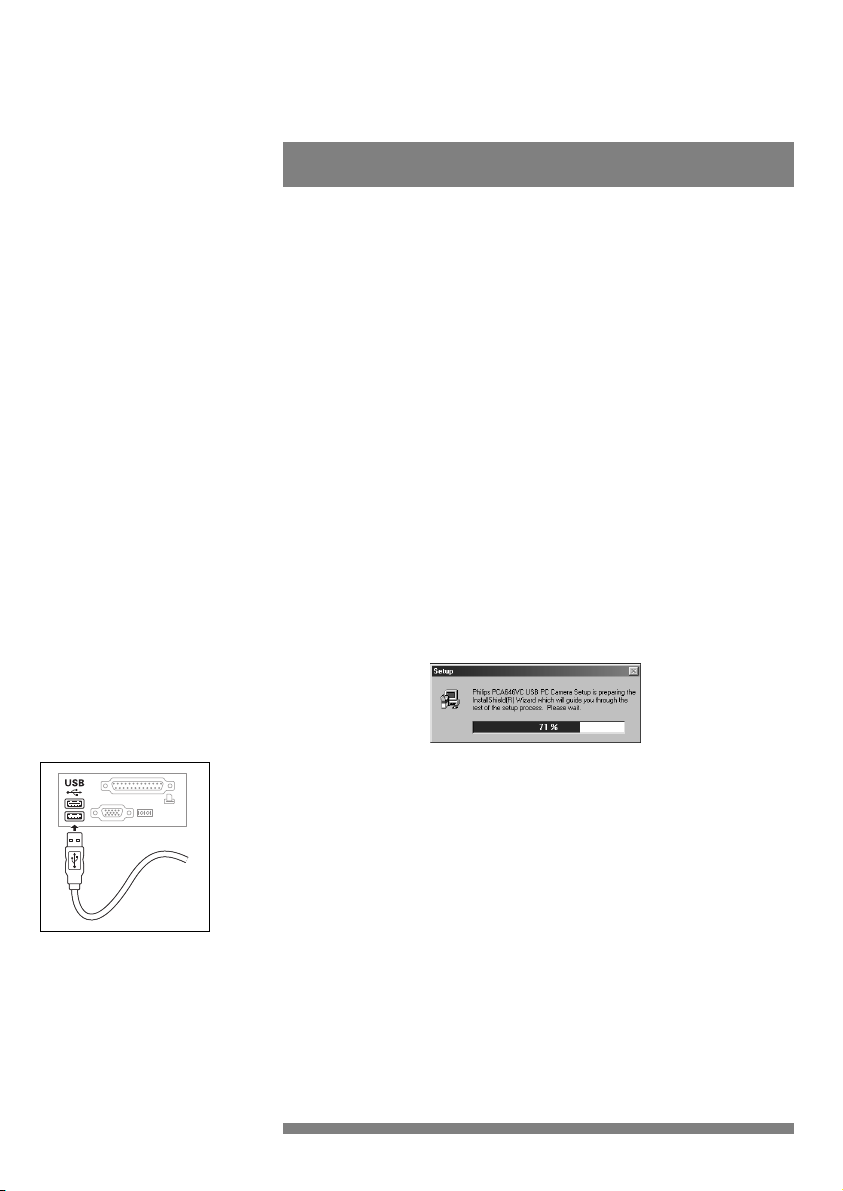
3
Connect the camera to the USB port (marked with the
USB-logo: )
4
Start the video application (see Section 4:“The Videogram Creator
software”)
5
Have fun!
2
Page 4
3
Camera and software installation
3.1 Installing the software for the Philips camera
The Philips USB PC Camera works with any application that uses the
Video for Windows format (AVI format).As an example of a powerful
video software package,we have included the fully functional
‘Videogram Creator’ software on the CD-ROM. Please read Section 4
for a brief introduction to the use of this software.
In order to ensure the video and audio performance your camera has
been designed for,we have included an InstallShield Wizard on the
CD-ROM.Please follow these directions for the camera driver
installation exactly, and make sure that you have your Windows 98
CD-ROM at hand.
1
Unplug all your USB devices (except USB keyboard or USB
mouse) before you start.
2
Insert the Philips PCA646VC software CD-ROM into the CD-ROM
drive.
3
Click “start”, then click “run”,type:“X:\setup.exe”, where X stands for
the drive name of your CD-ROM drive.
4
Let the InstallShield Wizard guide you through the setup procedure.
5
When the camera software is installed,the InstallShield Wizard will ask
you to connect the camera to the USB port.
6
Windows98 will automatically detect your camera.When asked for the
Windows98 CD-ROM,insert it into the drive and click “OK”.Exit the
Windows 98 Set-up screen if it appears.After completing the
installation of the camera,the InstallShield Wizard will ask you for the
Philips PCA646VC software CD-ROM.
7
To install the video application software, press the ‘Applications’
button,and follow the instructions on your screen.
8
After the installation of the Videogram Creator software you will be
able to start the camera set-up wizard and test your new camera.
Make sure that the correct input audio device is selected (“Philips CIF
Digital Camera;Audio (Microphone)”), especially if you have a sound
card installed.
9
You are now ready to start working with your Philips USB Camera.
Have fun!
3
Page 5
4
The “Videogram Creator” software
The Philips USB PC Camera PCA646VC can be used with many video
software applications,for instance the ‘Videogram Creator’ software
on the CD-ROM.This application allows you to compress captured
video files,embed the Videogram Player inside the file,and play it back
on any Windows 3.1x / 95 / 98 or Windows NT system as an .EXE file
without having to install the Player on the target system.This is perfect
for sending Videograms by e-mail.The compression is so great that a
1-minute Videogram including the Player fits on a standard 3.5”,
1.44 MB diskette.
4.1 Installing the Videogram Creator software
Please see Section 3 for the installation procedure.
Note: You will find an extensive software manual in Adobe Acrobat
format on the CD-ROM.Please read this electronic manual for a
complete description of the Videogram Creator software.The
following short software description is only meant to get you started
in the amazing world of PC video applications.
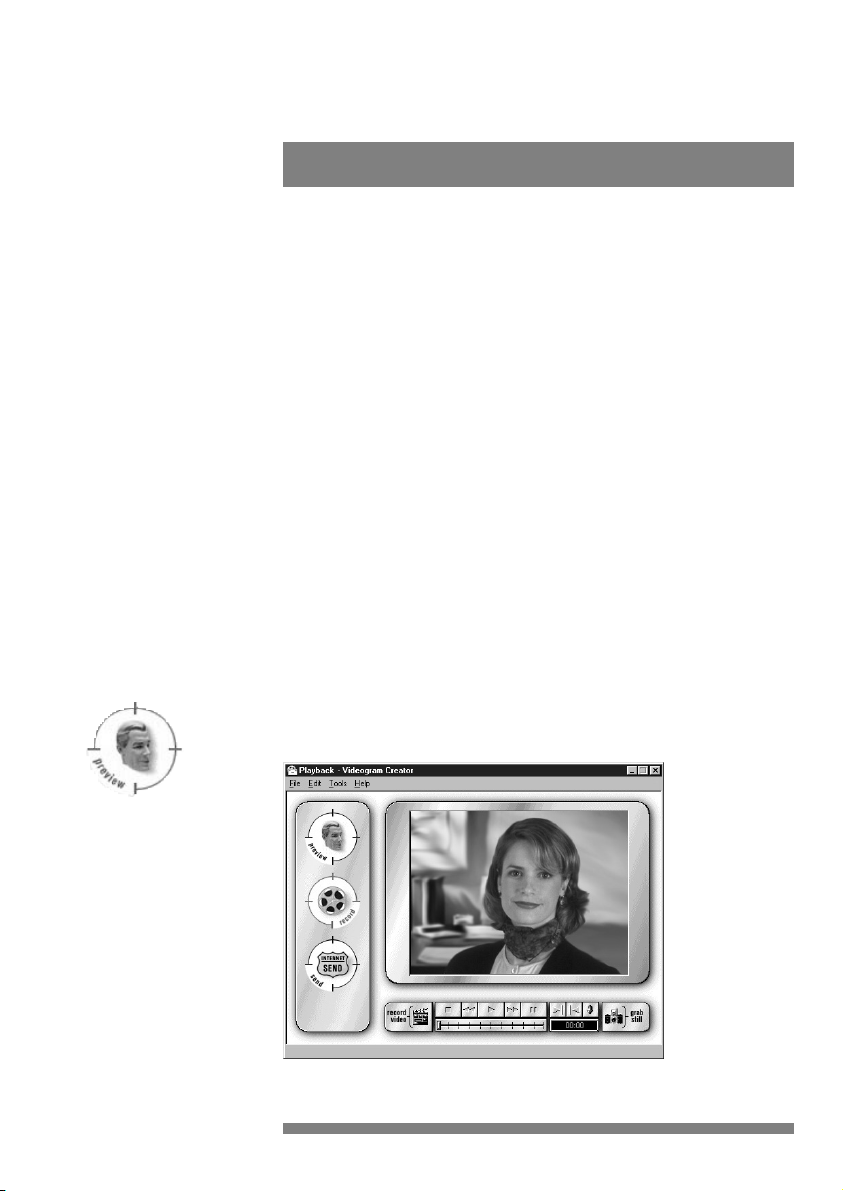
4.2 Using the Videogram Creator software
STEP 1:
Start the ‘Videogram Creator’ software / Preview mode
4
Page 6
After starting the ‘Videogram Creator’ software, you will see the ‘live’
camera image. Move the camera about, adjust the lighting and turn the
red lens ring to focus.You will immediately see the effect of this on
your screen.Adjust the sound and image settings by clicking on ‘Edit’ in
the menu bar and selecting the ‘Video Settings’ option.Consult the
electronic manual on the CD-ROM for a detailed explanation of all the
possible settings.
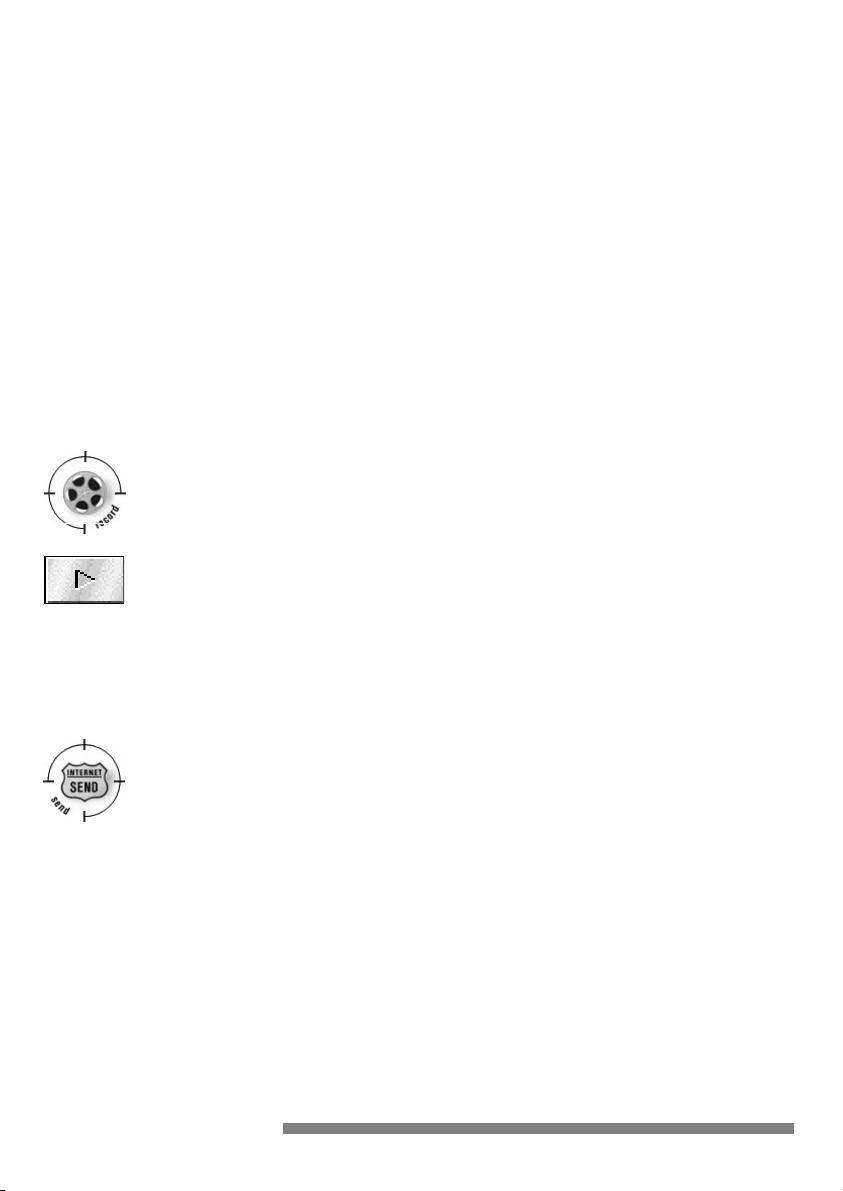
STEP 2:
Recording video images
1
Click on the ‘Record’ icon.A three-second countdown displays on
your monitor,then the recording begins.
2
Click on the left mouse button or the ‘Esc’ key to stop recording.
3
Press the ‘Play’ button on the Tool Bar under the video window to see
what you recorded.
STEP 3:
Sending and/or saving a Videogram
1
Click on the ‘Send’ icon and type a name in the dialog box.
2
Click on the ‘Send’ button to create the Videogram.
3
Click on the ‘Send’ button again. If the e-mail software is MAPI
compatible, a mail window will automatically appear on the screen.
Enter the e-mail address of the person to whom you want to send the
Videogram and then send the e-mail.Even if your e-mail software is
not MAPI compatible you can send a Videogram by first saving the
Videogram as a file and then adding this file to the e-mail as an
attachment.
5
Page 7

What is MAPI and do I need a MAPI compliant e-mail
system?
MAPI stands for Messaging Application Programming Interface. This
interface allows different applications to interact using e-mail
messaging.Microsoft Exchange, Eudora Pro, Pronto 97, and Z-mail Pro
are all examples of MAPI Compliant e-mail systems.Netscape, Internet
Explorer,Emissar y and America Online (AOL) are all examples of nonMAPI-compliant e-mail systems.
• If you have a MAPI-compliant e-mail system, an e-mail window will
automatically appear when you are ready to send a Videogram.
• You do not need to have a MAPI-compliant e-mail system in order to
send Videograms.You can still send Videograms by first saving the
Videogram to a file, and then attaching the saved file to your e-mail
message.
Aiming the camera
The position of the camera and the amount of light available are
important factors in determing the quality of the video images.
Preferably you should position the camera at eye level,less than a
metre away from what you want to record.Ensure that as much light
as possible is illuminating the object you want to record.
Focusing
Rotate the red ring around the lens to focus the image.
6
Page 8
5
Settings
The camera properties (audio and video) can only be changed from
within an application.
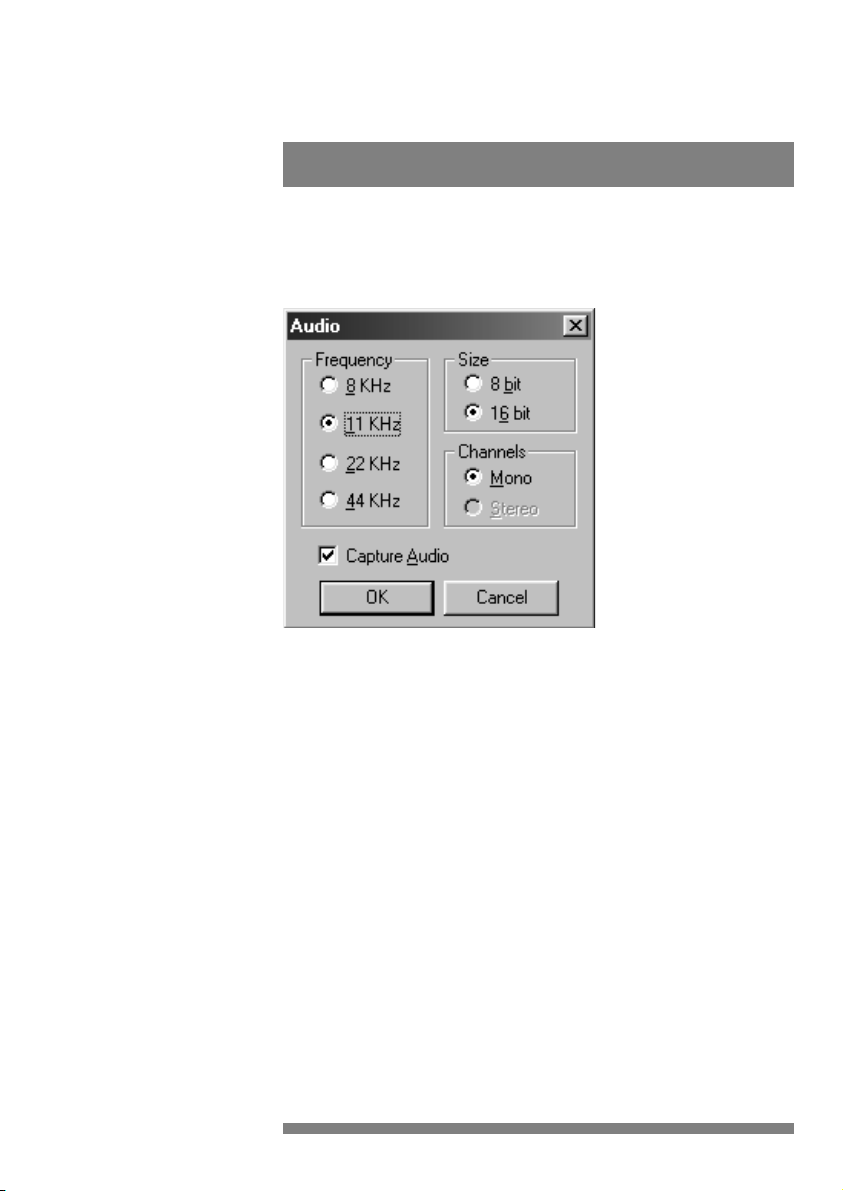
5.1 Sound properties
Access to the sound properties is dependent on the application
software.But usually it will look something like this when you open a
‘Sound Settings’ option.
The camera microphone can only generate a mono audio signal.
Applications may offer you a choice of other audio qualities,but bear
in mind that a mono microphone can never create stereo sounds!
Note: The USB microphone of the camera works independently from
the sound card.Should you want to use the camera microphone as
your sound source for applications,the application might ask you for
the ‘Recording Device’ setting.Select the ‘USB Audio Device’ from the
device list as your input device.Otherwise, your sound card will
produce the sounds for the video instead of the camera microphone.
5.2 Camera properties
The Philips USB PC Camera is very user-friendly and can be used
intuitively. The video options can be adjusted in the ‘Camera Property
Pages’.Access to this property page is dependent on the application
software.For instance, with one program you would choose ‘Options’
/ ‘Video Source’ from the menu bar to open the property page.
7
Page 9

However, in other applications you may have to open the ‘Preferences’
menu or the ‘Video Options’ menu.
Access the camera property page (its location in the menus differs per
application) and you will see three tabs with user changeable settings.
Most applications can show a ‘live’ video image on your monitor.
Always use this option to see the effect of changed settings on your
screen.
5.2.1 Camera Property Pages
5.2.1.1 WhiteBalance/Exposure
The first tab is ‘WhiteBalance/Exposure’.The upper half of the page
controls the White Balance , and the lower half of the page controls
the Exposure settings.
White Balance
The white balance setting automatically controls the different colour
components in the picture to obtain the most natural colour
reproduction.
When the mode setting is in freeze mode,the automatic white balance
control is switched off.The actual colour setting remains stable and is
not influenced by the internal controls of the camera.Put the white
balance in freeze mode when you have a colourful scene and stable
lighting conditions.
8
Page 10

To obtain a perfect colour reproduction,act as follows:
1
Choose auto mode;
2
Hold a piece of white paper in front of the camera;
3
After a few seconds,switch from auto to freeze mode.
Now the colour setting remains constant.When light conditions
change it is recommended that you put the white balance mode on
auto again.
In auto mode the control speed setting determines the speed of
automatic adjustment to changing light conditions.Experiment with
this setting until you find one to your liking.
In manual mode you can determine manually the amount of red and
blue in the picture.Try a few settings at your leisure, but you will find
that the auto setting is best in most cases.
Exposure
The exposure setting determines the amount of light that will fall onto
the video sensor chip.In auto exposure mode the camera
automatically adjusts the exposure gain and shutter speed.The control
speed setting determines the speed of automatic adjustment to
changing light conditions.Experiment with this setting to find one you
like.
In freeze mode all existing settings are frozen.
In manual mode you can control the gain and shutterspeed settings
manually.Try a few settings at your leisure. The auto setting will be best
in most cases.Both freeze and manual exposure mode disable the
controls for contrast and backlight compensation in the next tab
(marked Image Controls).
The Flickerless option must only be used under flickering 50 Hz light
conditions (like fluorescent or neon lamps) to prevent flickering or
strangely coloured video images.If this option is used under normal
lighting conditions the video image will tend to be overexposed.
9
Page 11

5.2.1.2 Image Controls
The second tab is marked ‘Image Controls’.It is divided into the
subsections Framerate, Image Controls, and Defaults.
Framerate
The framerate setting determines the number of pictures per second
in the video stream.
The set of framerates from which the user may choose depends on
the currently selected video format and available bandwidth on the
USB bus (the number of devices connected to your USB port and the
amount of data they transport). The buttons for invalid framerates will
be automatically greyed out and cannot be selected.
Image Controls
Here you will find the slider controls for brightness, contrast,and
gamma correction.
Note that both Freeze and Manual Exposure mode settings in the
previous tab disable the controls for contrast and backlight
compensation.Try a few settings to find one you like.
With the colour enable checkbox,you can switch from colour images
to black&white and back.
Turn on the backlight compensation to improve the image quality
when you have a scene where the background has a high illumination
level (for instance when you sit in front of a window).
10
Page 12

Defaults
If you like a particular setting for one application or light condition,and
another setting for a different one,you can use the Restore and Save
buttons to save and restore these preferred settings.Should you wish
to restore all standard settings,click on the Restore button under
Factory Defaults.
5.2.1.3 Capture Source
The third tab is ‘Capture Source’.
Usually this setting has only one option when the USB PC Camera is
the only video source connected to your computer. However,if more
than one video source is connected to your system,then this is where
you switch between them.
11
Page 13

6
TWAIN applications
The Philips PCA646VC USB PC Camera is TWAIN compatible (like
most scanners are),so you can use the camera as an input device for
application software that uses TWAIN as a data source.(e.g. photo
editing software).
6.1 Capturing images
from within applications
In TWAIN compatible applications
you will see the Philips PC
Camera listed as an available
TWAIN data source among your
other TWAIN sources (e.g.
scanners).Just pick the Philips PC
Camera as your source to acquire
camera pictures directly into your
application.Then choose ‘Acquire’
to launch the camera viewfinder
that displays the moving video picture.Click on the ‘Capture’ option
under the viewfinder for capturing a still image.
6.2 Capture settings
To the right of the ‘Capture’ button in the View Finder, you will find the
‘Adjustments...’ button for changing the settings. This adjustments menu
contains a first tab marked ‘Files’,next to three setting tabs that are
similar to those of section 5,but differ slightly for the TWAIN
interface.
6.2.1 Files tab
The Files tab is divided into two
main functions:“Image Save” and
“Shutter sound”.
Image Save
• In the “Image Save” section you
can set the Auto Capture function
with an appropriate interval time.
This function triggers the
capturing of images at regular
adjustable intervals.
12
Page 14

• Leave “Incremental File Save” unchecked if you want to overwrite the
previous image when capturing a new one.If you check this box,the
picture data is saved under the selected filename but extended with
one or more digits.This digit is incremented for each new image so
that the previous images will not be overwritten.
• After “Filename” you can type a name for the captured images,or
browse until you find a suitable name to use.Use “Filetype” to choose
between four supported file formats:JPG, BMP,TIFF or FlashPix.
Shutter sound
• And finally;choose a file name for the shutter sound that should be
made while capturing an image.Normally this is a clicking sound that
resembles the sound of a photo camera.Uncheck the Play Shutter
Sound box to disable the shutter sound.
6.2.2 WhiteBalance/Exposure
The second tab is ‘WhiteBalance/Exposure’.The upper half of the page
controls the White Balance and the lower half the Exposure settings.
White Balance
The white balance setting automatically controls the different colour
components in the picture to obtain the most natural colour
reproduction.
13
Page 15

When the mode setting is in freeze mode,the automatic white balance
control is switched off.The actual colour setting remains stable and is
not influenced by the internal controls of the camera.Put the white
balance in freeze mode when you have a colourful scene and stable
lighting conditions.
To obtain a perfect colour reproduction,act as follows:
1
Choose auto mode;
2
Hold a piece of white paper in front of the camera;
3
After a few seconds,switch from auto to freeze mode.
Now the colour setting remains constant.When light conditions
change it is recommended that you put the white balance mode on
auto again.
In auto mode the control speed setting determines the speed of
automatic adjustment to changing light conditions.Experiment with
this setting until you find one to your liking.
In manual mode you can determine manually the amount of red and
blue in the picture.Try a few settings at your leisure, but you will find
that the auto setting is best in most cases.
Exposure
The exposure setting determines the amount of light that will fall onto
the video sensor chip.In auto exposure mode the camera
automatically adjusts the exposure gain and shutter speed.The control
speed setting determines the speed of automatic adjustment to
changing light conditions.Experiment with this setting to find one to
your liking.
In freeze mode all existing settings are frozen.
In manual mode you can control the gain and shutterspeed settings
manually.Try a few settings at your leisure. The auto setting will be best
in most cases.Both freeze and manual exposure mode disable the
controls for contrast and backlight compensation in the next tab
(marked Image Controls).
14
Page 16

The Flickerless option must only be used under flickering 50 Hz light
conditions (like fluorescent or neon lamps) to prevent flickering or
strangely coloured video images.If this option is used under normal
lighting conditions the video image will tend to be overexposed.
6.2.3 Image Controls
The third tab is marked ‘Image Controls’. It is divided into the
subsections Image Controls and Defaults.
Image Controls
Here you will find the slider controls for brightness, contrast,and
gamma correction.
Note that both Freeze and Manual Exposure mode settings in the
previous tab disable the controls for contrast and backlight
compensation.Try a few settings to find one you like.
With the colour enable checkbox,you can switch from colour images to
black&white and back.
Turn on the backlight compensation to improve the image quality when
you have a scene where the background has a high illumination level (for
instance when you sit in front of a window).
15
Page 17

Defaults
If you like a particular setting for one application or light condition and
another setting for a different one,you can use the Restore and Save
buttons to save and restore these preferred settings.Should you wish
to restore all standard settings,click on the Restore button under
Factory Defaults.
6.2.4 Capture Source / Format
The fourth tab is called:‘Source / Format’. It is divided into the
subsections ‘Select a Source’,‘Digital Image Format’, and ‘Framerate’.
Select a Source
Usually this setting has only one option when the Philips PC Camera is
the only video source connected to your computer. However,if more
than one video source is connected to your system,then this is where
you switch between them.
Digital Image Format
This setting determines the picture size of the ‘live’ video stream.It
also determines the size of the captured still picture.
The larger the ‘live’ picture size,the more data needs to be processed
by your computer.So this may have an effect on the number of
available framerates.
16
Page 18

Framerate
The framerate setting determines the number of pictures per second
in the video stream.
The set of framerates from which the user may choose depends on
the currently selected video image format and the available bandwidth
on the USB bus (the number of devices connected to your USB port
and the amount of data they transport). The buttons for invalid
framerates will be automatically greyed out and cannot be selected.
17
Page 19

7
Frequently Asked Questions (FAQs)
Q: My system “hangs” during the reboot phase when Windows
98 tries to set up personalized settings for Multimedia.
A: You probably plugged in your camera before running the install
procedure.Unplug the camera,restart your computer and start the
installation Wizard.
Q: My PC does not start any more when the camera is
connected.
A: It is very likely that your BIOS is not compatible with the USB
standard.Contact your PC supplier for an updated BIOS.
Q: With additional USB peripherals installed my PC seems to
be unstable (blue screens).
A: Check if Phoenix Plugworks is one of your applications.You need to
have version 1.1 or higher for proper operation with Windows98.
Q: Where can I find application software for this camera?
A: The Videogram Creator application is included on the CD-ROM.With
this application,you can create off-line video-messages and pictures.
For Internet video connections,you can use Microsoft’s NetMeeting
(downloadable from the Internet or available on the Microsoft
Windows98 Installation CD-ROM). And for video-conferencing
through modem-connections via telephone lines,you may consider
using programs like VDOPhone.
Visit the Philips web-site for the latest information on available
application software packages for the USB PC Camera,and for
information on how to obtain these software packages.
Our URL:www.pcstuff.philips.com
Q: No USB Device: My Windows98 Device Manager reports ‘No
USB device’ even though I have a physical USB port.
A: In the Windows 98 Device Manager (My Computer,click on the right
mouse-button,Properties, Device Manager tab),no section with the
name ‘Universal serial bus controller’ is visible.
Check whether your BIOS enables the USB port by rebooting your
computer, then enter your BIOS setup and look for a text such as
‘USB function’.
This should be enabled.
18
Page 20

Q: No Video: My application doesn’t show any video.
A: There are several reasons for not having video:
1.Check whether the USB PC camera is connected to a USB port
2.Check whether the ‘Microsoft WDM Image Capture’ is the current
capture source.It is possible, in systems with other devices, that this
other device is the selected capture source.
3.If more than one USB capture device is connected to the PC,check
whether the correct USB capture device is selected.
Q: No ‘Microsoft WDM Image Capture’:‘Microsoft WDM Image
Capture’ is not available as image capture source.
A: All USB Image devices do need the ‘Microsoft WDM Image Capture’ as
capture source.Check whether this capture source is enabled.(Start,
Settings,Control Panel, MultiMedia, Device tab,Video Capture Devices
entry.Double click the ‘Microsoft WDM Image Capture’ entry.
A property page will pop-up.The option ‘Use the video capture device’
should be selected).
Q: Why does my application crash when I unplug the camera
from the USB port?
A: Should you unplug the camera while it is providing an audio stream to
an application on your computer,the computer might crash.Always
close applications that use audio from the camera microphone before
unplugging your Philips USB PC Camera to avoid problems.
Q: Video works, but no audio is recorded: My application doesn’t
produce any audio.
A: There are several reasons for not having audio:
1.The camera microphone can only produce a mono audio signal.
Check whether the application uses this setting.If not, adjust the
audio setting to mono.
2.Check whether the USB PC camera microphone is selected as the
current recording device (Start, Settings,Control Panel,MultiMedia,
Audio tab.In the recording section,the ‘CIF Digital camera, Audio
(Micr)’ should be selected).
19
Page 21

Q: No audio (USB timer outside specification).
A: If you cannot hear any audio,and have tried every troubleshooting tip
in the user guide and the on-line help to no avail,the USB hardware in
your computer may be the cause of the problem. In most cases it will
be the USB timer clock that is not stable enough for streaming audio
applications.
Q: System lockup: My camera stops responding (black or frozen
picture or LED off) for no obvious reason.
A: Switch off the Hardware Accelerator of your video card (click on:My
computer, right mouse button/properties/Performance tab/Graphics
button,Set “Hardware Acceleration” to “None”).
Contact your video display card manufacturer to obtain the latest
video card drivers.See the video display card’s documentation for
more information.
Q: Picture Flicker: My video picture is flickering.
A: This could happen in office environments with 50Hz fluorescent
lighting in combination with certain framerates. There are two
solutions:
1.Check the ‘Flickerless’ button.This button is located in the
‘WhiteBal./Exposure’ property page.This property page is accessible
from within the application you are using.
2.Uncheck the ‘Flickerless’ button. Only the framerates ‘5’,‘10’ and ‘20’
are flickerless.
Q: I see picture quality distortion at 3.75 frames/second. (USB
timer outside specification).
A: When streaming video at a frame rate of 3.75 frames/second,you may
experience distortion of the video picture. This is being caused by the
USB hardware in your computer. In most cases,it will be the USB
timer clock that is not stable enough for streaming video applications.
Use a higher frame rate to avoid picture distortions.
Q: ‘Unable to draw this data format’:The message ‘Unable to
draw this data format’ appears.
A: This can happen when the selected stream format (I420) could not be
processed due to a missing codec.Re-install the camera driver
software to install the missing codec.
20
Page 22

About Videograms
A recorded Videogram sent by e-mail or on diskette can be played on
any 486-computer or better,running Windows 3.x/95/98/NT or OS/2.
The Videograms can be viewed on almost any computer system
(except for the Apple Macintosh).However, due to the large quantity
of image data that is passed to the computer by the camera while
creating a video recording,higher requirements are placed on the
computer recording the images.The system requirements are only a
guideline. In general, the better the computer (processor,
motherboard,hard disk,RAM, video card),the better the results.
About the camera installation
• Always use the Philips driver CD-ROM to install the proper camera
drivers as described below. Do not
before installing the Philips drivers.Should you do this,Windows98 will
install its own drivers that might be less compatible with the camera
than the Philips drivers.You must have Windows98 running and have
the Windows98 CD-ROM at hand.
• Your USB controller should be working correctly.You can check this in
the Windows98 Device Manager (Click on the My Computer icon on
your desktop,click on Properties with your right mouse-button,then
click on the Device Manager tab). A section with the name ‘Universal
serial bus controller’ should be visible.Click on this device and
Windows98 will tell you if this part of your computer system is
operating correctly.
connect the camera to a USB port
About USB
You can connect the camera to any USB port on your computer.You
do not have to switch off the computer. USB ports are ‘hot swappable’,
meaning you don’t have to restart Windows98 every time you connect
a new USB device.The USB driver will detect the camera as new
hardware.It can be used within a few seconds without restarting the
computer.
Should you unplug the camera while it is actively providing an audio or
video stream to an application on your computer, the computer might
crash.To avoid problems,first close all applications that use audio from
the camera microphone,or which stream video before unplugging
your Philips USB PC Camera.
21
Page 23

Driver software check
You can determine if the camera is installed correctly,and if it is being
recognized by the operating system by checking the Device Manager
menu in System Properties.
1
Access this menu by clicking with the right mouse button on the icon
‘My Computer’ in the top left-hand corner on your desktop,then click
on Properties. Alternatively,click on Start / Settings / Control Panel,
then double-click on System to access this menu.
2
Click on the Device Manager tab to see the list of installed devices.
If the USB PC Camera has been installed correctly and it is plugged
into a USB port, you should see the following devices in the list
(double-click on the devices to see their specifications):
- Imaging Device
• Philips CIF Digital Camera;
Video
- Sound, video and game
controllers
• Philips CIF Digital Camera;
Audio (Microphone)
- Universal serial bus
controller
• Philips Composite A/V
Device;CIF Digital Camera
If you unplug the camera from the USB port these devices will
disappear from the list (and can therefore no longer be used by any
application on your computer until you reconnect the USB camera).
WEB SITE
If you have any other questions or problems,please visit our web site
www.pcstuff.philips.com for new or updated information.
22
Page 24

8
Technical specifications
Optical
Sensor 1/4” CCD
Pixels 512 (H) x 582 (V)
Illumination 30 - 50000 lux
Integrated lens 3.0mm,F2.8
Resolutions/Performance
Output resolution Pixels (H x V) Frame rate [frames/sec]
CIF 352 x 288 Up to 15
SIF 320 x 240 Up to 15
SSIF 240 x 180 Up to 15
QCIF 176 x 144 Up to 30
QSIF 160 x 120 Up to 30
SQCIF 128 x 96 Up to 30
QQCIF 88 x 72 Up to 30
SQSIF 80 x 60 Up to 30
Camera adjustment parametres
Framerate/format,contrast,brightness,backlight compensation,colour on/off,variable
gamma,white-balance, exposure control
Interfacing
Cable 2m
Minimum system requirements
Processor Pentium 166 MHz
RAM 16 MB
OS Windows98
CD-ROM drive Required
USB interface Required
USB speakers or audio card with speakers
Software
Windows98 drivers
Videogram Creator
Audio
Microphone Integrated
Output Digital via USB
Supported audio formats mono,8 / 16 / 24 bit,8 / 11.025 / 12 / 16 / 22.05 / 24 / 32 /
Weight
Approx.160 gr
Dimensions
100 x 71 x 60.5 (L x W x H)
Ambient temperature
Operating 0 to 45oC
Storage -25 to 70oC
Power supply
• The power is supplied via the USB-cable
• Compliant with general USB spec for power requirement
• Three modes for power supply:
1.Suspend (max 500µA)
2.Default (max 100 mA)
3.Configured (full operation) (max 500 mA)
44.1 / 48 kHz
23
Page 25

9
Regulations,Warnings & Maintenance
9.1 FCC compliance
This device complies with Part 15 of the FCC Rules.
Operation is subject to the following two conditions:
1
this device may not cause harmful interference, and
2
this device must accept any interference received, including
interference that may cause undesired operation.
NOTE: This equipment has been tested and found to comply with the
limits for a Class B digital device,pursuant to Part 15 of the FCC
Rules.These limits are designed to provide reasonable protection
against harmful interference in a residential installation.This equipment
generates,uses and can radiate radio frequency energy and, if not
installed and used in accordance with the instructions,may cause
harmful interference to radio communications.However, there is no
guarantee that interference will not occur in a particular installation.If
this equipment does cause harmful interference to radio or television
reception,which can be determined by turning the equipment off and
on,the user is encouraged to try to correct the interference by one
or more of the following measures:
• Reorient or relocate the receiving antenna.
• Increase the separation between the equipment and receiver.
• Connect the equipment to an outlet on a circuit different from that to
which the receiver is connected.
• Consult the dealer or an experienced radio/TV technician for help.
Any unauthorized modification to this equipment could result in the
revocation of the authorization to operate the equipment.
24
Page 26

9.2 Warnings & Maintenance
If you observe the following guidelines,you will prevent
defects and the camera will operate safely.
• Clean the outside of the camera with a soft cloth.
• Do NOT use cleaning fluids based on alcohol,methylated spirit,
ammonia,etc..
• Avoid direct contact between the camera and water.
• If the lens has to be cleaned,use a special lens-cleaning tissue,available
at any camera store.
• You can only use the camera indoors.
• Keep the camera free from oil,vapour,steam,moisture,and dust.
• Keep the camera away from a heater,lighting equipment,and direct
sunlight.
• Never direct the lens of your camera toward the sun.
Subject to changes without notice.
© Philips Consumer Electronics BV 1999
25
 Loading...