

Philips MRD300/99, MRD300/98 User Manual
MRD300
p
r
(
)
MA GNAV OX
SMART. VERY SMART.
Printed in China
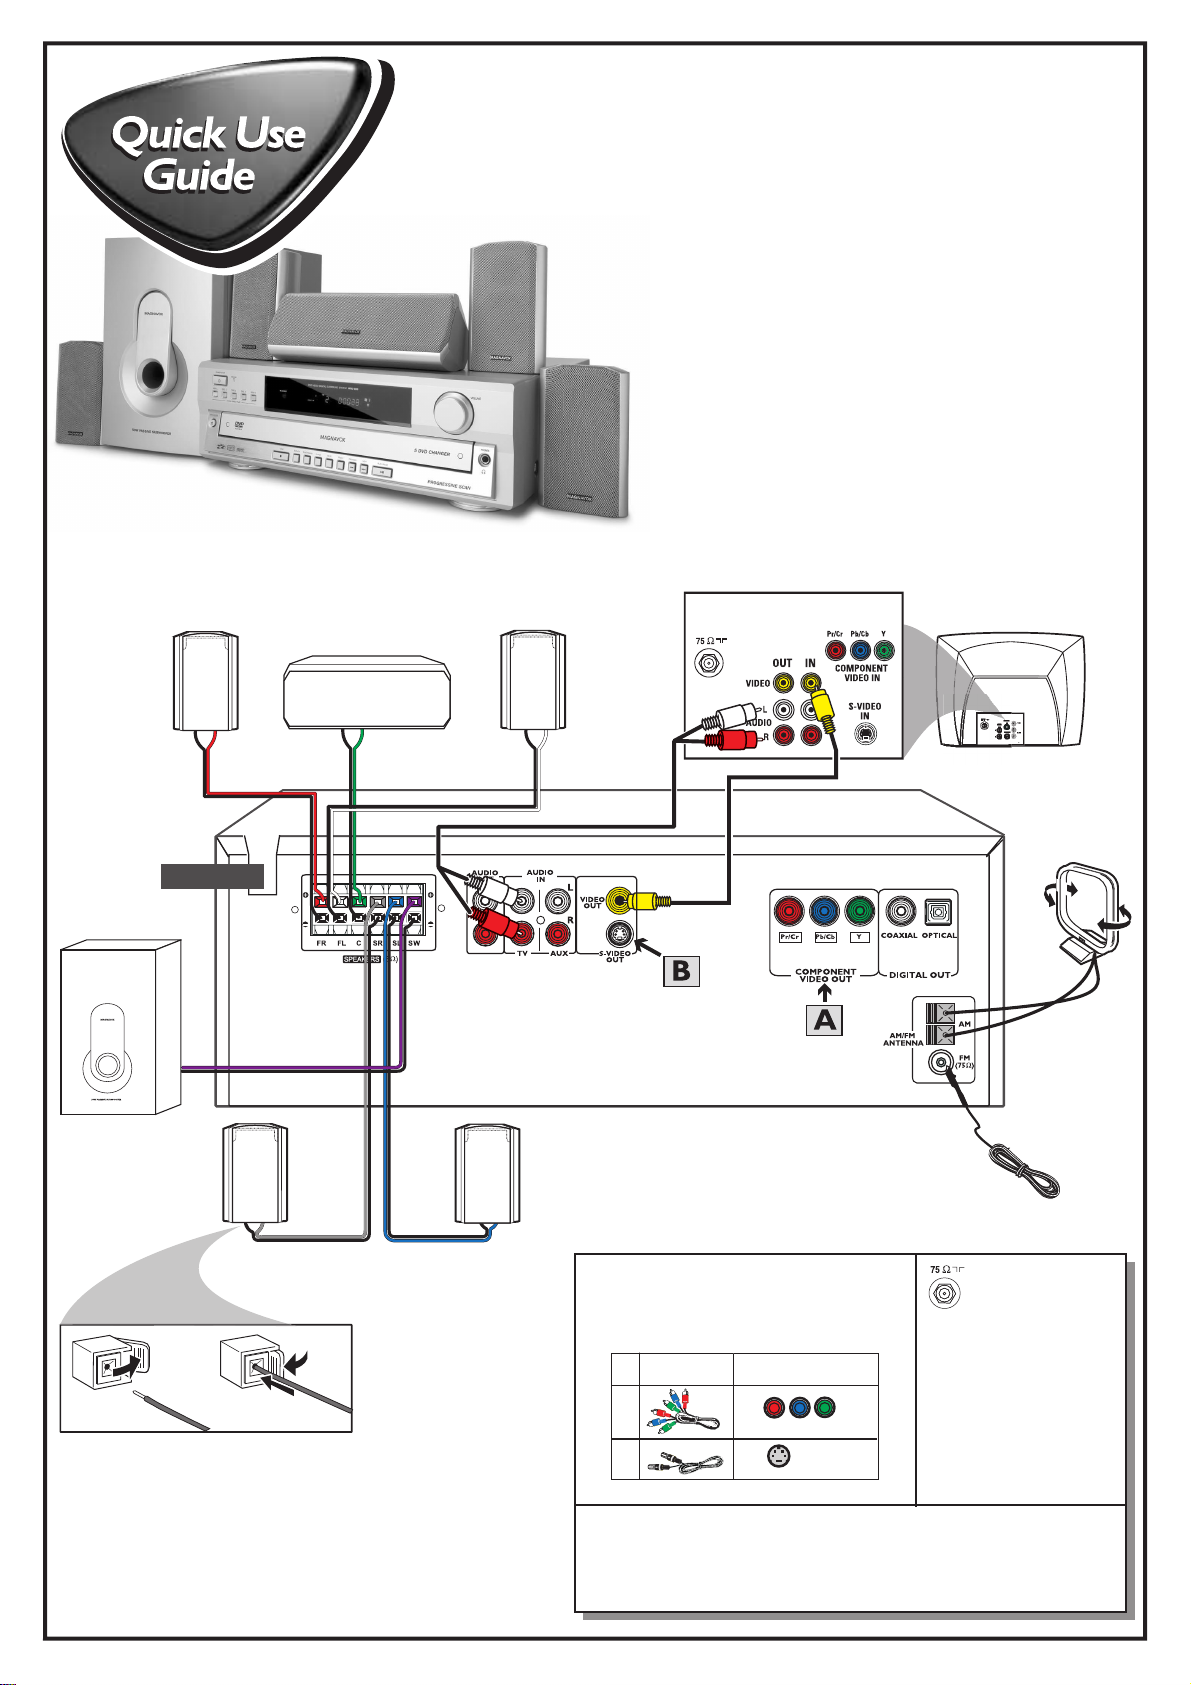
First connect ...
Passive
Subwoofer
Front Speaker
(Right)
Center Speaker
Front Speaker
(Left)
Rear of TV
(example only)
AM Loop
Antenna
FM Antenna
Rear S
Surround Right
eake
PUSH
OUT
1
Connecting Speaker Cable
2
PUSH
IN
... then play
Rear Speaker
(Surround Left)
Helpful Hints
To obtain a better picture quality effect, you can
choose to connect an extra video connection if
your TV has the same input connector: A or B.
Use this
video cable(s)
A
not supplied
B
When listening to TV programs, press TV•AUX button at the front panel
of the DVD system to select ‘AUDIO IN-TV’ in order for the sound to be
heard.
For connecting to a VCR, see page 9 in the owner’s manual for more details.
If your TV has
this video input jack(s)
COMPONENT VIDEO IN
S-VIDEO
IN
If your TV has only
a single Antenna In
jack, you will need an
ANTENNA IN
accessory RF
modulator. The RF modulator
converts the video from the
DVD system so it can play
through the TV’s Antenna
connector. Refer to your
owner’s manual for proper
connection (refer to page 9 in
the owner’s manual.)
(see next page)

1
AV IN
OPEN•CLOSE
1
4
5
STANDBY
POWER
ON•OFF
ON
DISC 1 DISC 2 DISC 3 DISC 4 DISC 5
5 DISC DIRECT PLAY
3
2
1
5
4
8
7
0
>10
MUTE
DISPLAY
SET UP
PREV
PLAY/PAUSE NEXT
í
REW
à
LANGUAGE
SUBTITLE N/P DIM
REPEAT
A/B SHUFFLE PROGRAM
DISC SKIP DISC NO SLOW/MEM
LISTENING AUDIOST/MONO
iR SENSOR
PROGRESSIVE
STOP SELECTMUTE PREVIOUS
SOURCE
3
SLEEP
6
9
VOL
SELECT
MENU
OK
OPEN/
CLOSE
ë
ÉÅ
STOP FF
Çá
GOTOZOOMANGLETITLE
CD MODE
DVD VIDEO DIGITAL SURROUND SYSTEM
TUNER•BAND TV•AUX NEXT PLAY•PAUSE
SCAN
DVD
Make sure your DVD system and
TV are connected and turned on!
1 Press POWER ON•OFF at the front panel to turn the power on.
2 Turn on the TV and select the correct Video In mode.
3 Press OPEN•CLOSE 0 at the front panel of the DVD system and load a
4 Playback will start automatically. If not, press ÉÅ button.
5 To stop playback, press STOPÇ.
VOLUME
5 DVD CHANGER
PROGRESSIVE SCAN
5 DVD CHANGER
PHONES
4
CHANNEL
3
2
Playing a disc
You can also press the SOURCE button on the remote until “DISC X” appears on the display panel.
You should see the blue Philips DVD background screen on the TV (if no disc in the DVD system).
disc, then press the OPEN•CLOSE 0 again to close the disc tray.
Make sure the disc label is facing up. For double-sided discs, load the side you want to play face up.
If a disc menu appears, use 3 4 1 2 buttons on the remote to make the necessary selection, then
press OK to confirm. Or, use the numeric keypad on the remote to select features. Follow the
instructions given in the disc menu.
Region Codes
DVDs must be labeled for ALL regions or Region 1, in order
to play on this DVD system.
No picture!!
Check the AV (Audio/Video) mode on
your TV.
* Usually this channel is between the lowest and
highest channels and may be called FRONT,
A/V IN, or VIDEO.
* Or, you may go to channel 1 on your TV, then
press the Channel down button repeatedly
until you see the Video In channel.
* Or, your TV remote control may have a button
or switch that chooses different video modes.
* Do not use channel 3 or 4 on the TV unless
you are using an RF modulator.
* See your TV manual for more details.
ALL
1
DVD system Video Output Selection for
Proper Playback
1) Press SETUP button.
The Setup Menu main page appears on the TV
screen.
2) Select ‘GENERAL SETUP,’ then press OK.
3) Press 4 button to select ‘VIDEO OUT,’
then press 2 button.
4) Press 3 / 4 button to select and highlight:
S-VIDEO - if you use the S-Video
connection.
CR CB Y - if you use the Component
Video Pr/Cr Pb/Cb Y connection.
5) Press OK button to confirm.
The SETUP button to clear the screen when
completed.
Note: If you have problem access to the Setup Menu, use the VIDEO OUT for connecting the
DVD system to your TV (VIDEO IN). This connection enables you to access to the SETUP
MENU and make the selection for the type of video output (S-VIDEO or CR CB Y).
SETUP MENU - - MAIN PAGE
GENERAL SETUP
SPEAKER SETUP
AUDIO SETUP
PREFERENCES
EXIT SETUP
TV DISPLAY
GOTO GENERAL SETUP PAGE
ANGLE MARK
OSD LANG
VIDEO OUT
SCR SAVER
MAIN PAGE
SET VIDEO OUTPUT
- - GENERAL PAGE - -
S-VIDEO
CR CB Y
Detailed playback features and additional functions are described in the
accompanying owner’s manual.
User guide
SMART. VERY SMART.
MRD300
Need help? Call us!
Magnavox representatives are ready to help you with any
questions about your new product. We can guide you
through Connections, First-time Setup, or any of the Features.
We want you to start enjoying your new product right away!
CALL US BEFORE YOU CONSIDER
RETURNING THE PRODUCT!
Visit us on the web at www.magnavox.com
DVD VIDEO DIGITAL SURROUND SYSTEM
T
R
A
O
N
T
!
E
D
I
S
W
N
H
I
Y
1-800-705-2000
or
P
M
I
Return
your Warranty
Registration Card
within 10 days
S
E
E
1

CAUTION
RISK OF ELECTRIC SHOCK
DO NOT OPEN
CAUTION: TO REDUCE THE RISK OF ELECTRIC SHOCK, DO NOT
REMOVE COVER (OR BACK). NO USER-SERVICEABLE PARTS
INSIDE. REFER SERVICING TO QUALIFIED SERVICE PERSONNEL.
Return your Warranty Registration card today to
ensure you receive all the benefits you’re entitled to.
• Once your Magnavox purchase is registered, you’re eligible
to receive all the privileges of owning a Magnavox product.
Warranty
Verification
Registering your product within 10 days
confirms your right to maximum
protection under the terms and
conditions of your Magnavox warranty.
Owner
Confirmation
Your completed Warranty Registration
Card serves as verification of ownership
in the event of product theft or loss.
Congratulations on your purchase,
and welcome to the “family!”
• So complete and return the Warranty Registration Card
enclosed with your purchase at once, and take advantage
of these important benefits.
Model
Registration
Returning your Warranty Registration
Card right away guarantees you’ll
receive all the information and special
offers which you qualify for as the
owner of your model.
I
T
O
A
N
R
T
S
I
G
E
R
S
Y
Hurry!
A
D
0
N
E
E
D
E
D
W
I
T
H
I
1
N
Know these
ssaaffeettyy
symbols
Dear Magnavox product owner:
Thank you for your confidence in Magnavox.You’ve selected one of the best-built,
best-backed products available today. And we’ll do everything in our power to
keep you happy with your purchase for many years to come.
As a member of the Magnavox “family,” you’re entitled to protection by one of the
most comprehensive warranties and outstanding service networks in the industry.
What’s more, your purchase guarantees you’ll receive all the information and
special offers for which you qualify, plus easy access to accessories from our
convenient home shopping network.
And most importantly you can count on our uncompromising commitment to
your total satisfaction.
All of this is our way of saying welcome – and thanks for investing in a
Magnavox product.
Sincerely,
Lawrence J. Blanford
President and Chief Executive Officer
P.S. Remember, to get the most from your Magnavox product, you must
return your Warranty Registration Card within 10 days. So please
mail it to us right now!
This “bolt of lightning” indicates
uninsulated material within your unit
t
the safety of everyone in your household,
please do not remove product covering.
s
prevent operating and maintenance problems.
WARNING:
SHOCK HAZARD, DO NOT EXPOSE THIS
EQUIPMENT TO RAIN OR MOISTURE.
CAUTION:
match wide blade of plug to wide slot, and
fully insert.
For Customer Use
Enter below the Serial No. which is located
on the rear of the cabinet. Retain this
information for future reference.
Model No. ___________________________
may cause an electrical shock. For
The “exclamation point” calls attention
to features for which you should read
the enclosed literature closely to
TO PREVENT FIRE OR
To prevent electric shock,
MAC5097
2
Serial No. ____________________________
Visit our World Wide Web Site at http://www.magnavox.com

Index
English -------------------------------------------------------- 6
Español ------------------------------------------------------ 31
English
Español
INDEX
3
IMPORTANT SAFETY INSTRUCTIONS
1.
Read these instructions.
2.
Keep these instructions.
3.
Heed all warnings.
4.
Follow all instructions.
5.
Do not use this apparatus near water.
6.
Clean only with dry cloth.
7.
Do not block any ventilation openings.Install in
accordance with the manufacturer´s instructions.
8.
Do not install near any heat sources such as
radiators, heat registers, stoves, or other apparatus
(including amplifiers) that produce heat.
9.
Do not defeat the safety
purpose of the polarized or
grounding-type plug. A polarized plug
has two blades with one wider than
the other. A grounding type plug has two blades and a third
grounding prong.The wide blade or the third prong are
provided for your safety. If the provided plug does not fit
into your outlet, consult an electrician for replacement of
the obsolete outlet.
AC Polarized
Plug
11.
Only use attachments/accessories specified by the
manufacturer.
12.
13.
Unplug this apparatus during lightning storms or when
unused for long periods of time.
14.
Refer all servicing to qualified service personnel.
Servicing is required when the apparatus has been
damaged in any way, such as power-supply cord or plug is
damaged, liquid has been spilled or objects have fallen into
the apparatus, the apparatus has been exposed to rain or
moisture, does not operate normally, or has been dropped.
15.
Battery usage
leakage which may result in bodily injury, proper ty damage,
or damage to the unit:
●
Install all batteries correctly, + and - as marked on the unit.
●
Do not mix batteries (old and new or carbon and
alkaline, etc.).
Use only with the cart, stand, tripod,
bracket, or table specified by the manufacturer
or sold with the apparatus. When a car t is used,
use caution when moving the cart/apparatus
combination to avoid injury from tip-over.
CAUTION
– To prevent battery
10.
Protect the power cord from being walked on or
pinched, particularly at plugs, convenience receptacles, and
the point where they exit from the apparatus.
“NOTE TO CATV SYSTEM INSTALLER :
THIS REMINDER IS PROVIDED TO CABLE GROUND
SHALL BE CONNECTED TO THE GROUNDING
SYSTEM OF THE BUILDING, AS CLOSE TO THE POINT
OF CABLE ENTRY AS PRACTICAL.”
●
Remove batteries when the unit is not used for a long time.
16. This appliance shall not be exposed to dripping or
splashing water and that no object filled with liquid such
as vases shall be placed on the apparatus.
17. Power Lines – An outdoor antenna should be located
away from power lines.
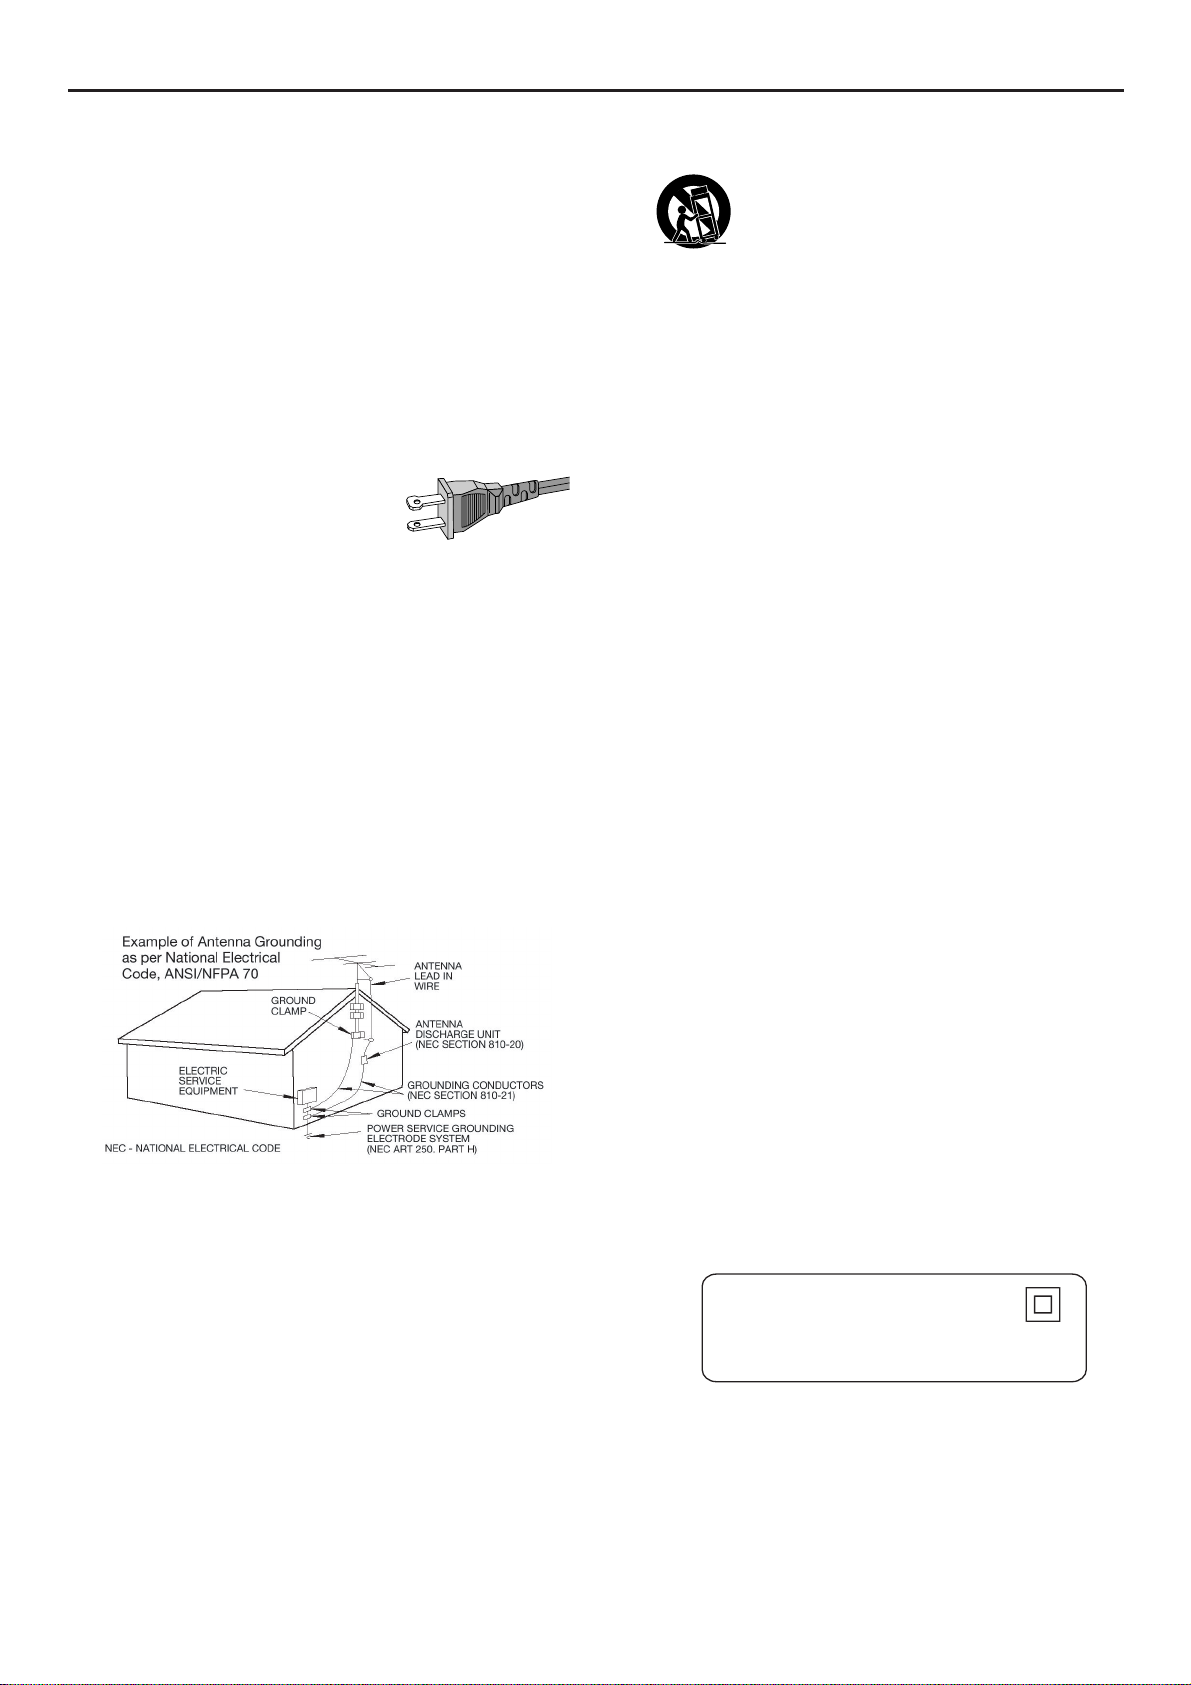
18. Outdoor Antenna Grounding – If an outside antenna
is connected to the product, be sure that the antenna
system is grounded so as to provide some protection
against voltage surges and built up static charges.
Section 810 of the National Electrical Code, ANSI / NFPA
70 provides information with respect proper grounding
of the mast and supporting structure, grounding of the
lead-in wire to an antenna discharge unit, size of
grounding conductors, location of antenna-discharge
unit, connection to grounding electrodes, and
requirements for the grounding electrode. See Figure
Class II equipment symbol
This symbol indicates that the unit has
a double insulation system
4

Important Notes
Canada
English:
This digital apparatus does not exceed the Class
B limits for radio noise emissions from digital
apparatus as set out in the Radio Interference
Regulations of the Canadian Department of
Communications.
Manufactured under license from Dolby Laboratories.
“Dolby”. “Pro-Logic” and the double-D symbol are
trademarks of Dolby Laboratories. Confidential
Unpublished Works. ©1992-1999 Dolby Laboratories, Inc.
All rights reserved.
This product incorporates copyright protection technology
that is protected by method claims of certain U.S. patents
and other intellectual property rights owned by Macrovision
Corporation and other rights owners. Use of this copyright
protection technology must be authorized by Macrovision
Corporation, and is intended for home and other limited
viewing uses only unless otherwise authorized by
Macrovision Corporation. Reverse engineering or
disassembly is prohibited.
Laser
Type Semiconductor laser GaAIAs
Wave length 650nm
Output Power 7mW
Beam divergence 60 degree
The set complies with the FCC-Rules, Part 15
and with 21 CFR 1040.1. Operation is subject
to the following two conditions:
1. This device may not cause harmful
interference, and
2. This device must accept any interference
received, including interference that may
cause undesired operation.
NOTE:
PICTURES SHOWN MAY BE DIFFERENT BETWEEN
COUNTRIES.
NEVER MAKE OR CHANGE CONNECTIONS WITH THE
POWER SWITCHED ON.
CAUTION
Use of controls or adjustments or
performance of procedures other than
herein may result in hazardous radiation
exposure or other unsafe operation.
ATENCIÓN
El uso de mando o ajustes o la ejecucción de
métodos que no sean los aquí descritos
puede ocasionar peligro de exposición a
radiación.
IMPORTANT NOTES
5

Contents
English
Introduction and General
Information
Features ............................................................................... 7
Supplied accessories ......................................................... 7
Environmental information.............................................. 7
Installation ........................................................................... 7
Maintenance........................................................................ 7
Connections
Step 1: Connecting antennas........................................... 8
AM Indoor Loop Antenna ........................................................... 8
FM Indoor Antenna .......................................................................8
Step 2: Connecting the speakers and
passive subwoofer ............................................................. 8
3. Connecting a TV ............................................................ 9
Connecting additional equipment.................................. 9
1) Listening to the playback of other equipment.................. 9
2) Using the VCR for recording DVDs .................................... 9
3) Digital Recording (Coaxial or Optical) ..............................9
Functional Overview
Front panel........................................................................ 10
Remote Control ....................................................... 11–12
Disc Operations
Discs information ............................................................ 19
Disc playback .................................................................... 19
Basic playback controls ..................................................... 19–20
Resuming playback from the last stopped point
(DVD only)...................................................................................
Repeat play mode ....................................................................... 20
Repeat playback a specific section/passage continuously .. 20
Fast searching for a particular passage .................................. 20
Special DVD/VCD features ........................................... 20
Using the DVD title menu........................................................ 20
Using the DVD root menu ....................................................... 20
Changing the audio/subtitle language for the
current disc only.........................................................................
Viewing from another angle ..................................................... 21
Searching for a particular title, chapter or elapsed time ... 21
Zooming in ................................................................................... 21
Playing in slow motion mode................................................... 21
Using the Playback Control (PBC) feature (VCD only) .... 21
Special CD features ........................................................21
Playing CDs only ......................................................................... 21
Shuffle play mode........................................................................ 22
Program favorite tracks ............................................................ 22
Playing MP3/Picture disc (Kodak, JPEG) ..................... 22
Supported MP3 format ............................................................. 22
20
21
Preparations
Inserting batteries into the remote control.............. 13
Switching on the system ................................................ 13
Setting up the surround sound system ...................... 13
Placing the speakers ................................................................... 13
Changing the speakers’ sound level........................................ 14
Activating/Deactivating progressive scan mode ....... 14
System Setup (DVD) ......................................................14
Selecting the color system that matches the
connected TV ..............................................................................
Selecting the type of video output ......................................... 15
Selecting the On Screen Display (OSD) language............... 15
Changing the TV display ............................................................ 15
Selecting the language for Audio/Subtitle/Disc Menu ......... 16
Changing and testing the speakers setting............................ 16
Setting the digital output .......................................................... 16
Changing the sound channel .................................................... 17
Balancing the volume level through setting the
dynamic range .............................................................................
Activating the camera angle indication .................................. 17
Activating screen saver ............................................................. 17
Restoring the original settings ................................................. 17
Setting the parental control level ............................................ 18
Changing the parental control password .............................. 18
14
17
Radio Reception
Tuning to radio stations ................................................. 23
Presetting radio stations ................................................ 23
Listening to preset radio stations ................................ 23
Other Functions
Volume control ................................................................ 24
Adjusting the speakers’ tones and channels.............. 24
Dimming the display screen ..........................................24
Selecting Listening mode ...............................................24
Sleep timer setting ..........................................................24
Specifications .............................................25
Troubleshooting ......................................26
Glossary ............................................................27
Limited Warranty..................................28
6
CONTENTS

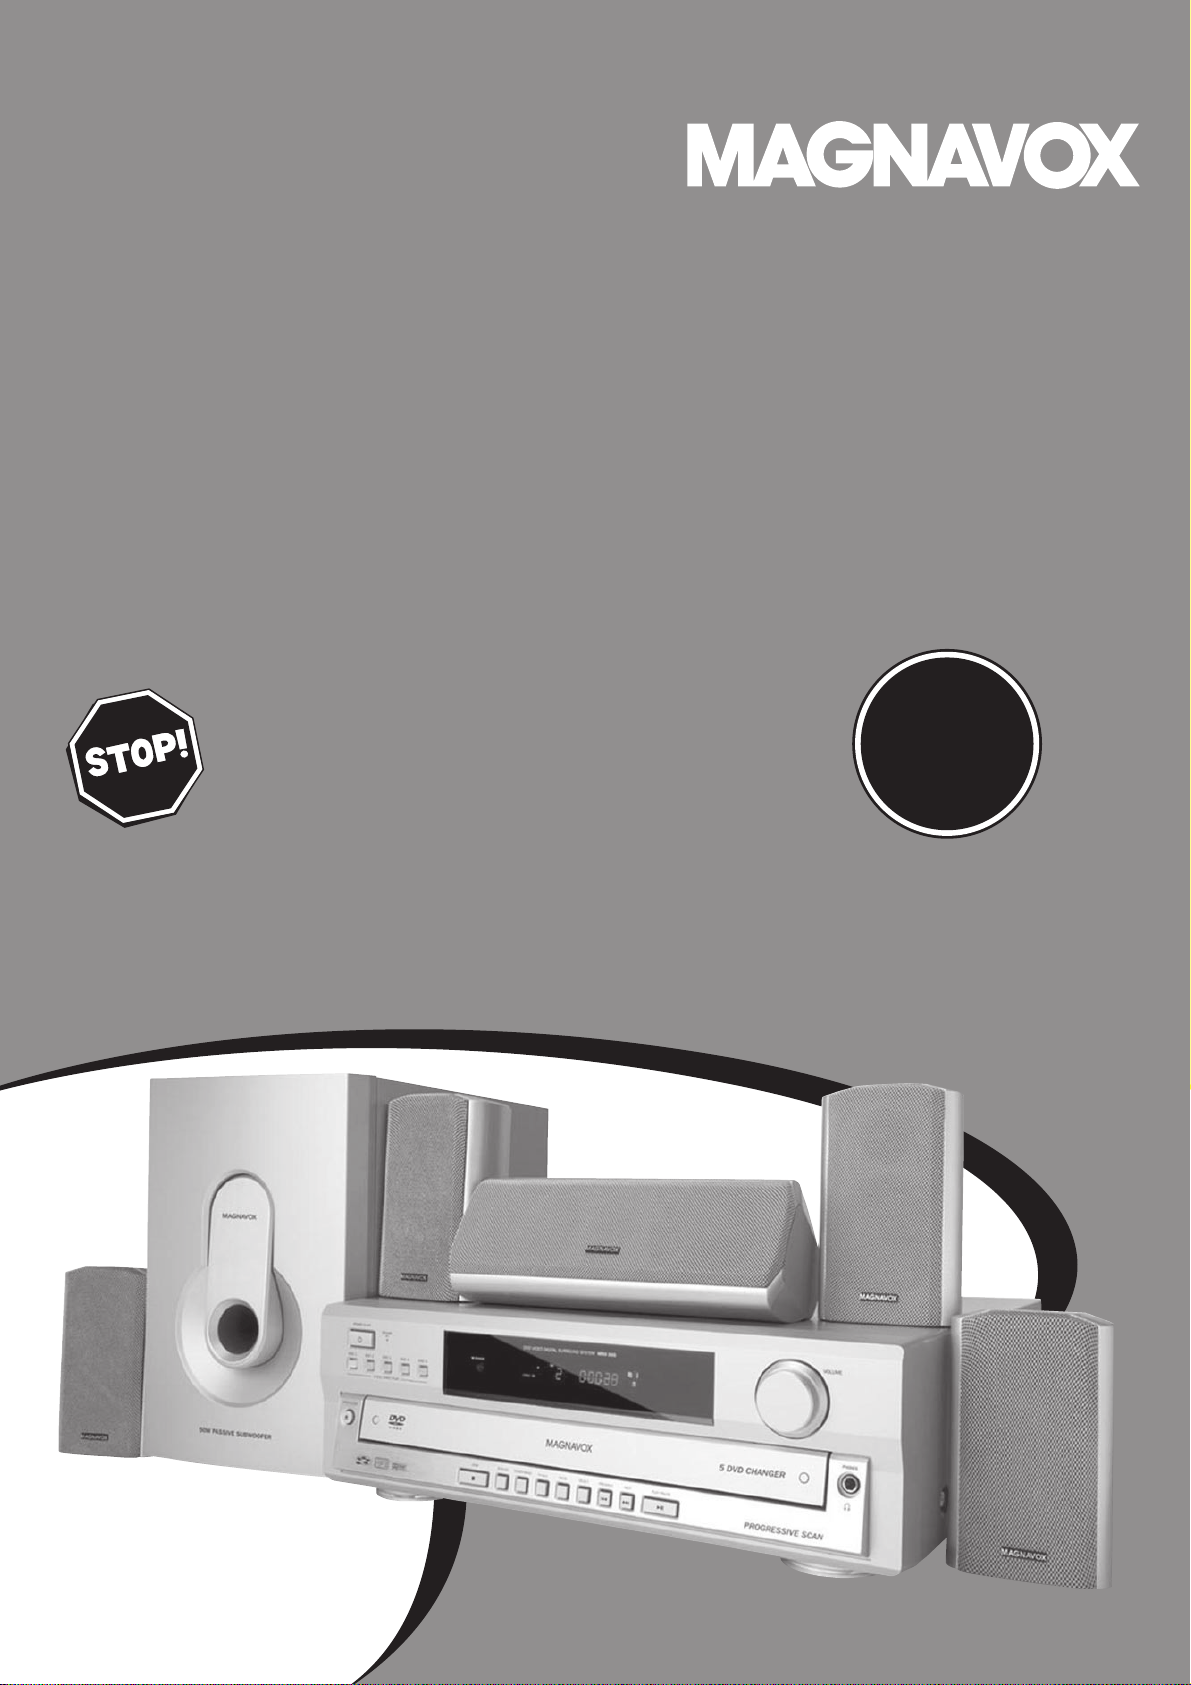
Introduction and General Information
Features
Your complete 7-piece 300-Watt DVD Digital Home
Cinema System creates the same dynamic sound qualities
that you find in full-fledged cinemas and incorporates some
of the best features in home theater technology.
Features include:
Built-in DolbyR Digital decoder, supporting Dolby
ProLogic
Use the Home Cinema Audio System for a movie-theater
surround sound experience.
Additional Component Connections
Connect other audio and audio/visual equipments to the
DVD system so you can use the system’s surround sound
speakers.
Night Mode
Compress the dynamic range, reduce the differences in the
loudness of sound outputs. You are able to play the disc at
the same volume level without disturbing others.
Parental Control (Rating Level)
Set a ratings level so your children cannot watch a DVD
that has a rating higher than you set.
Sleep Timer
Enable the system to switch to standby mode automatically
at a preset time.
Progressive Scan
Provides a flicker free image with the highest effect on film
based sources. It can double the vertical resolution of the
picture to 525 lines every time the picture is refreshed. To
enjoy the full quality potential offered by
progressive scan feature, a progressive scan TV is
required.
Supplied accessories
– Remote control with two AAA batteries
– AM loop antenna and FM wire antenna
– Audio cable (white/red)
– Composite video cable (yellow)
– Component video cables (red/blue/green)
– Five satellite speakers, including five speaker cables
– Passive subwoofer, including cable
– This instruction booklet and Quick Use Guide
Environmental information
All unnecessary packaging has been omitted. We have tried
to make the packaging easy to separate into three materials:
cardboard (box), polystyrene foam (buffer) and
polyethylene (bags, protective foam sheet.)
Your system consists of materials which can be recycled
R
and reused if disassembled by a specialized company. Please
observe the local regulations regarding the disposal of
packaging materials, exhausted batteries and old equipment.
Installation
● Place the player on a flat, hard, and stable surface.
● There must be sufficient room in front of the player for the
drawer to open.
● In a cabinet, allows about 10cm (4 inches) of free space all
around the player for adequate ventilation.
● Do not expose your player to extreme temperatures or
humidity.
Maintenance
● When a disc becomes dirty, clean
it with a cleaning cloth. Wipe the
disc from the center out, in a
straight line.
● Do not expose the player,
batteries or discs to humidity, rain,
sand or excessive heat (caused by
heating equipment or direct
sunlight.) Always keep the disc
tray closed to avoid dust on the lens.
● Do not use solvents such as benzene, thinner, commercially
available cleaners, or anti-static spray intended for analog
discs.
● The lens may cloud over when the player is suddenly
moved from cold to warm surroundings, making it
impossible to play a disc. Leave the player in the warm
environment until the moisture evaporates.
English
If any item is damaged or missing, contact your retailer.
INTRODUCTION AND GENERAL INFORMATION
7
 Loading...