

Page 1

MCW770
Wireless PC Link Micro
Custom Installation
MCW770
Contents
Manual installation of the driver
for the wireless USB adapter, the
Philips Media Manager software
and the network setup ___________ 2
Installation of an additional audio
system or recovery if audio system
PC link settings are lost ________ 3–4
Installation of an additional PC server
or recovery of PC link settings
on your PC __________________ 4–5
Integration of MC W770 into an
existing (home) network _______ 6–9
Network utilities _______________ 10–13
Check connection ______________10
Change of USB port using the
MC W770 _________________ 10–11
Change of the wireless channel
___12–13
Using a different wireless network
adapter ______________________ 14–19
Page 2
2
English
Custom installation
Beside the Quick
installation there are also
Custom installation
menus for setting up
more complex
configurations.
– Integration of MC
W770 into an
existing network
– Add an additional
audio system
– Add an additional PC server
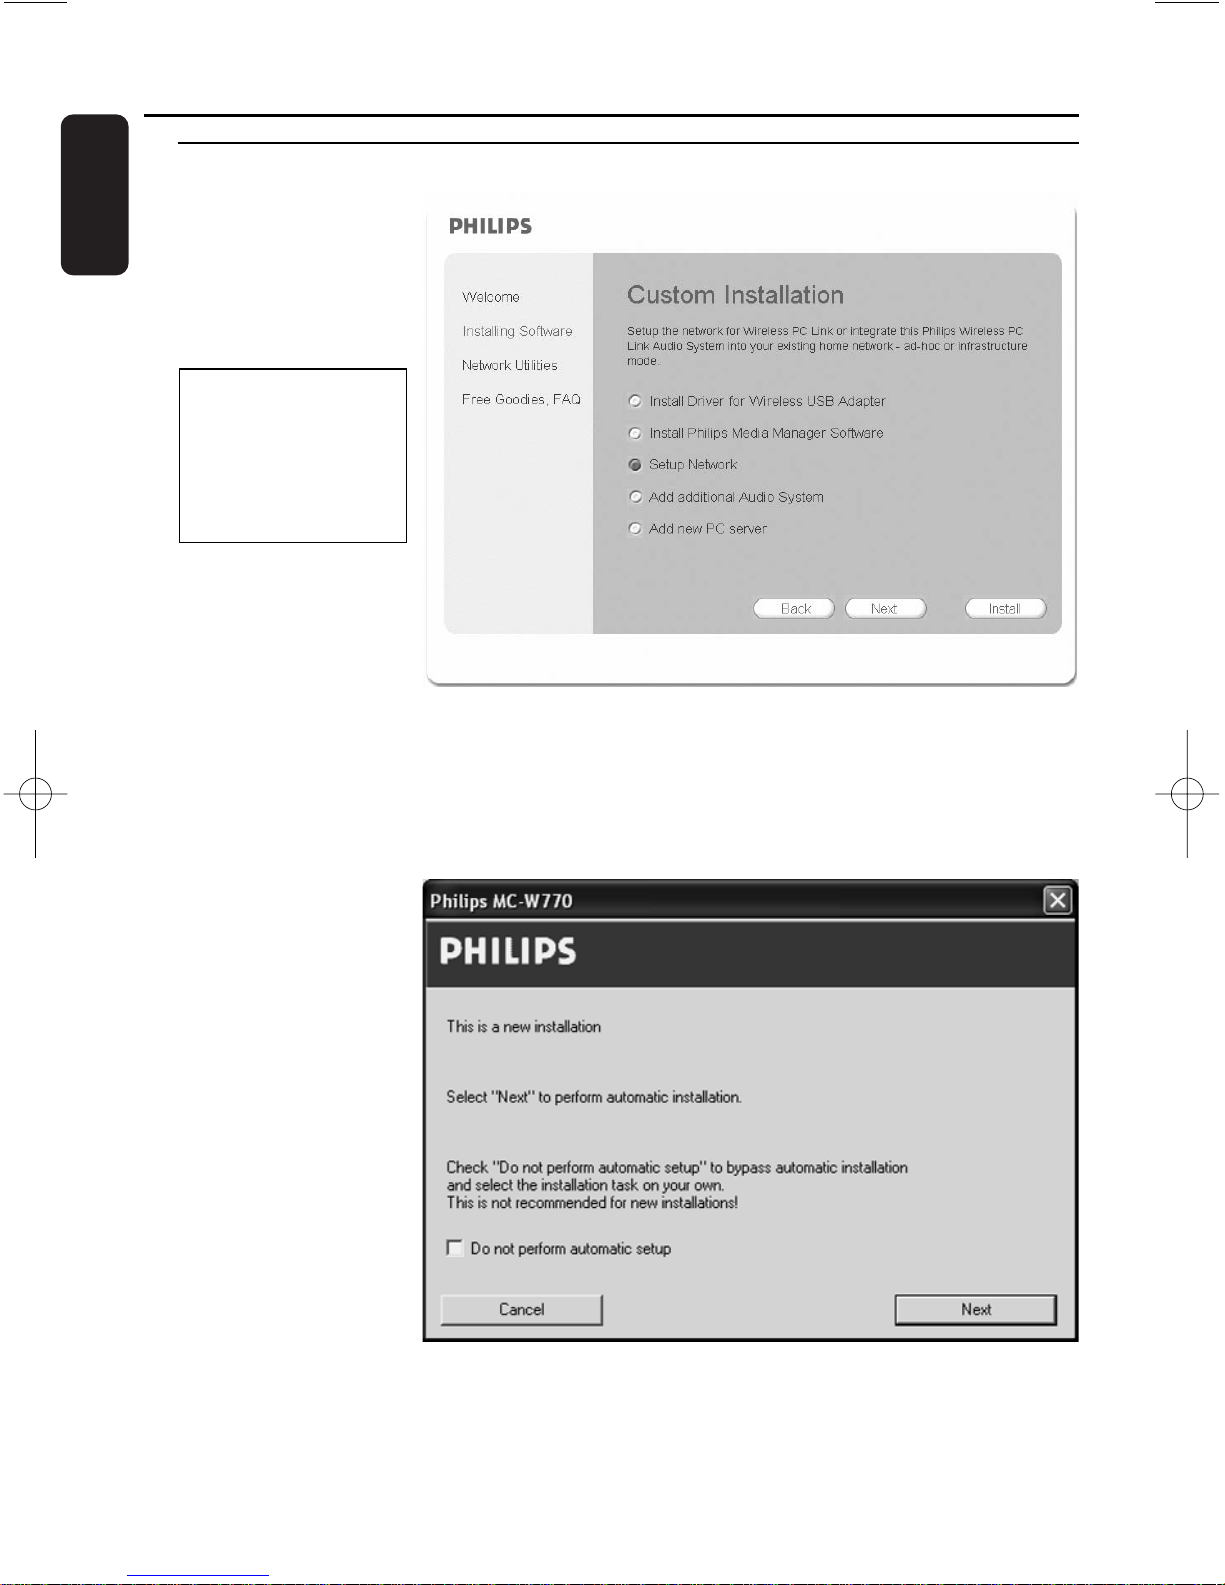
Manual installation of the driver for the wireless USB adapter, the Philips Media
Manager software and the network setup
These 3 installation steps perform the same functionality and have the same behaviour as the
quick installation (see
“Quick installation”) in a
single piece, except for
the following additional
window, which will
appear during the
network setup:
● Do not select Do not
perform automatic
setup for this type of
installation as this is necessary only to integrate the MC W770 into an existing network as
described later. Just click on Next to proceed.
Custom Installation Wireless PC link
Please use this kind of
installation only if you
are experienced in
setting up networks
with additional options:
Page 3
3
English
Installation of an additional audio system or recovery if audio system PC link
settings are lost
If you want to add an additional MC W770 or an equivalent audio system into your existing
MC W770 network, you can connect them to the same PC server without changing the
settings of the current PC link installation.This procedure can also be used when the PC link
settings have been lost on the audio set.
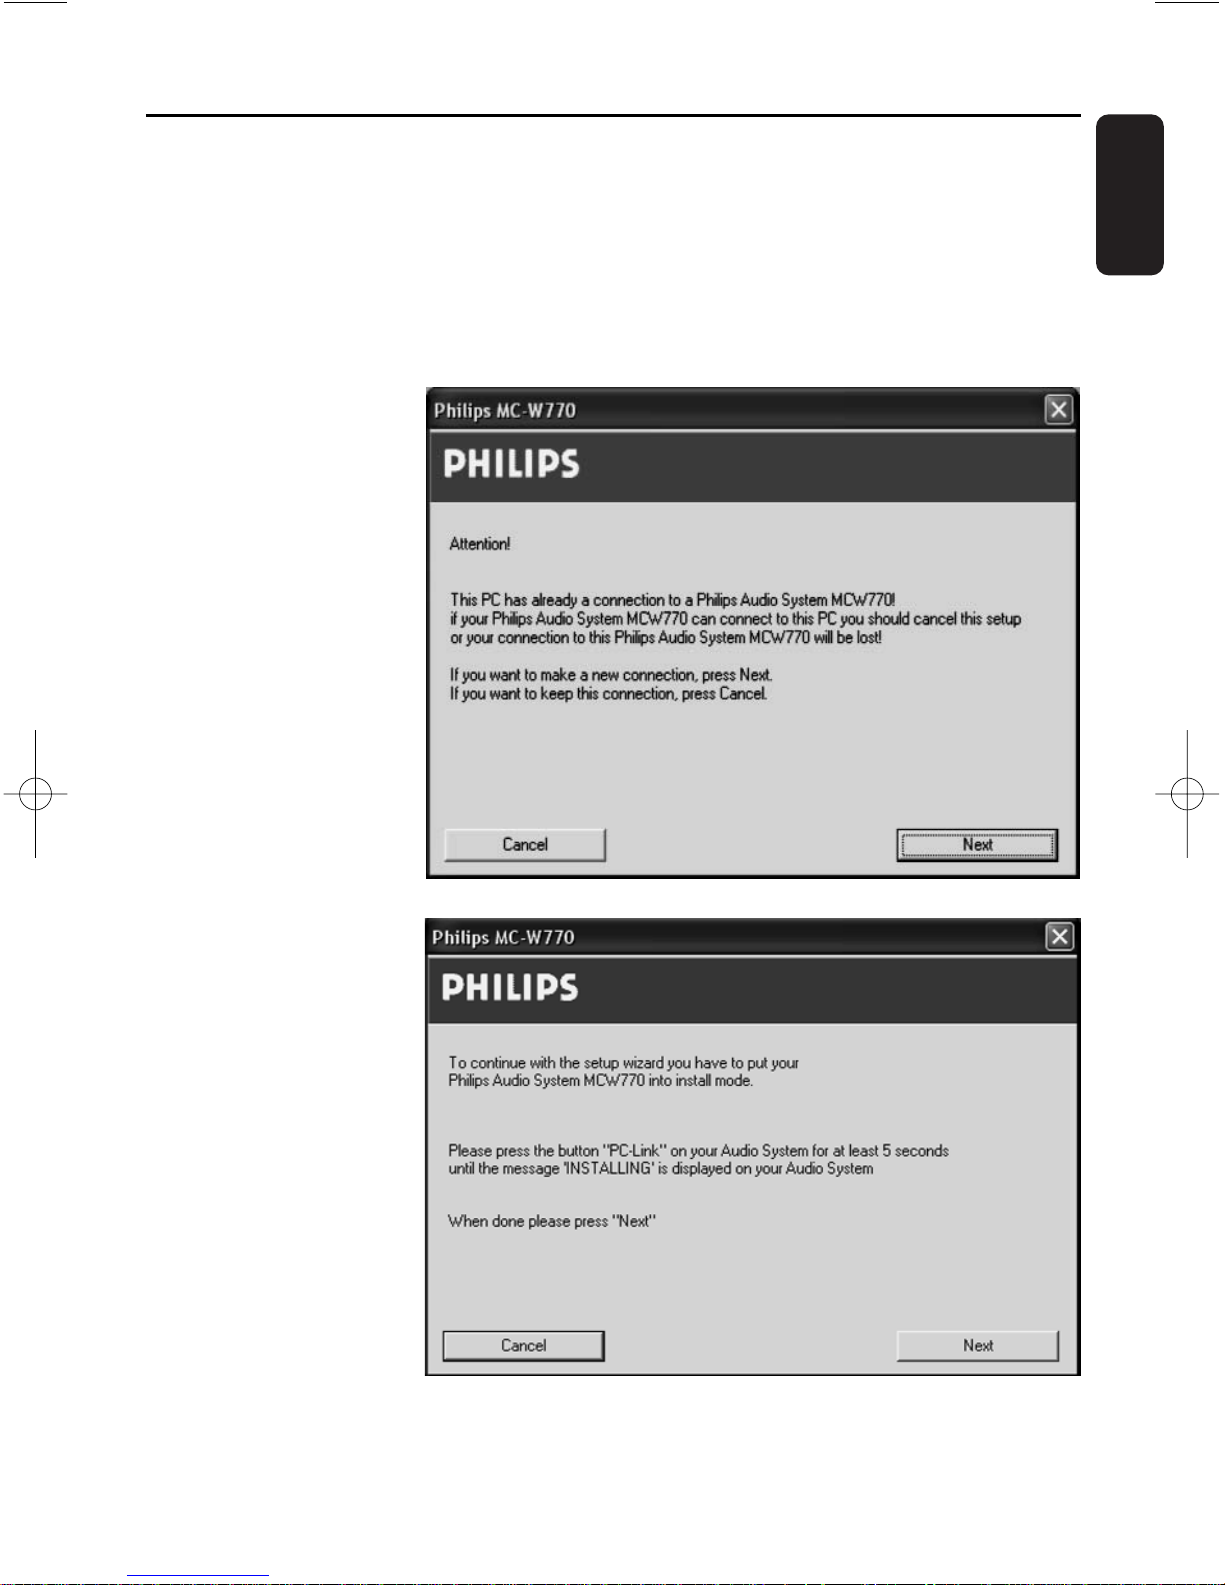
1 Select Add additional Audio System in the Custom Installation menu and click on Install.
2 ➜ The PC checks the
PC link configuration
and the following
window appears:
Click on Next to
continue.
3 ➜ After some time the
following window will
appear:
Wireless PC link Custom Installation
Page 4
4
English
4 Press PC LINK A on the additional audio system for at least 5 seconds until INSTALLING is
scrolled on the set.
➜ The set searches for a connection to the PC.This can require up to about a minute. When
the connection is established, Next is activated.
Note: If the additional audio system is not an MC W770, please look at the user manual of the
device on how to enter the installation mode.
Click on Next.
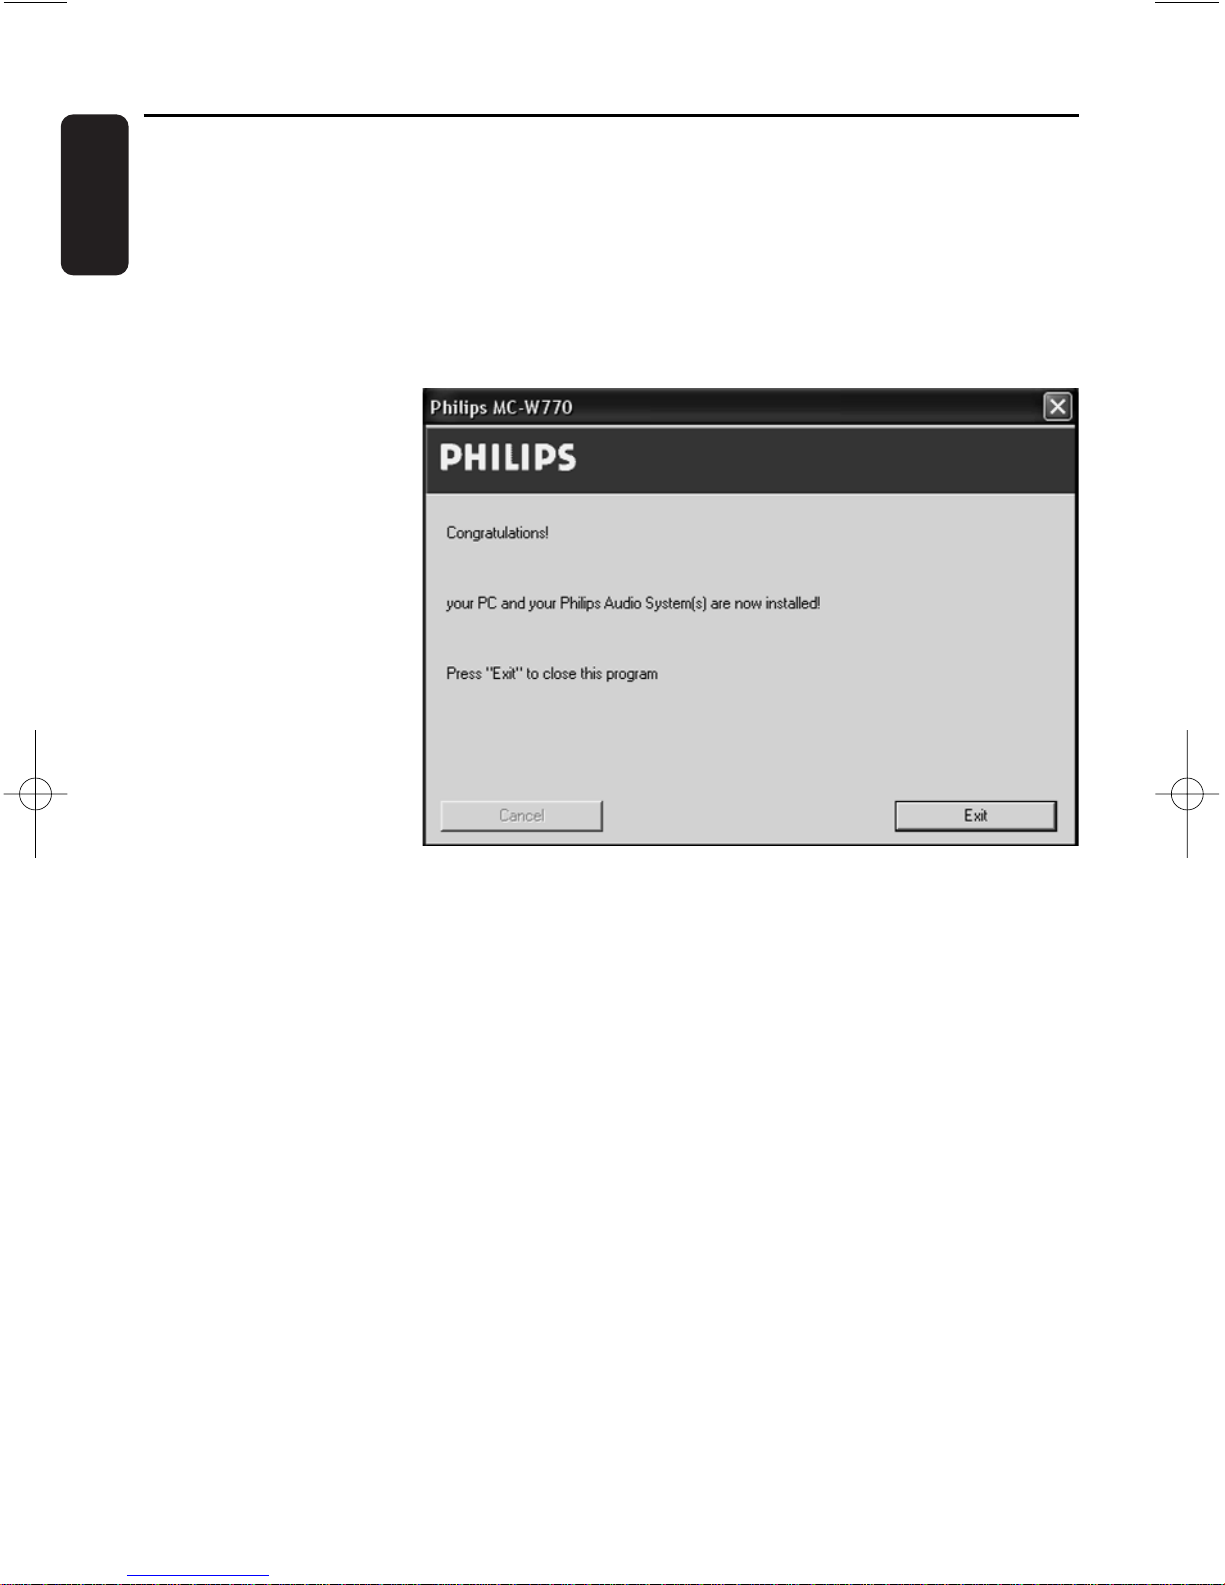
5 ➜ The installation steps
will be executed
automatically by the
PC. Afterwards PC
LINK and
COMPLETED are
displayed on the set
and the following
window will appear:
Click on Exit and the
installation is finished.
Installation of an additional PC server or recovery of PC link settings on your PC
If you want to use your MC W770(s) together with more than one PC, you have to install the
Philips Media Manager Software and the PC link setting on your PC. A wireless USB adapter is
required. If you want to use a different network adapter as bypacked with the MC W770
proceed according to chapter “Using a different wireless network adapter” (Please note that a
proper function cannot be guaranteed by using a different network adapter).This procedure
can also be used when your PC link settings on your PC are lost or destroyed.
If you use the bypacked wireless USB adapter proceed as follows:
1 Enter the Custom installation menu on PC side, select Add New PC server and click on
Install.
➜ You will be asked if you want to install the driver for the wireless USB adapter.
2 If the driver is not installed and you want to use it: Click on Ye s.
➜ The drivers will be installed and the PC has to be rebooted.
If the wireless USB adapter is already installed: Click on No.
Custom Installation Wireless PC link
Page 5
5
English
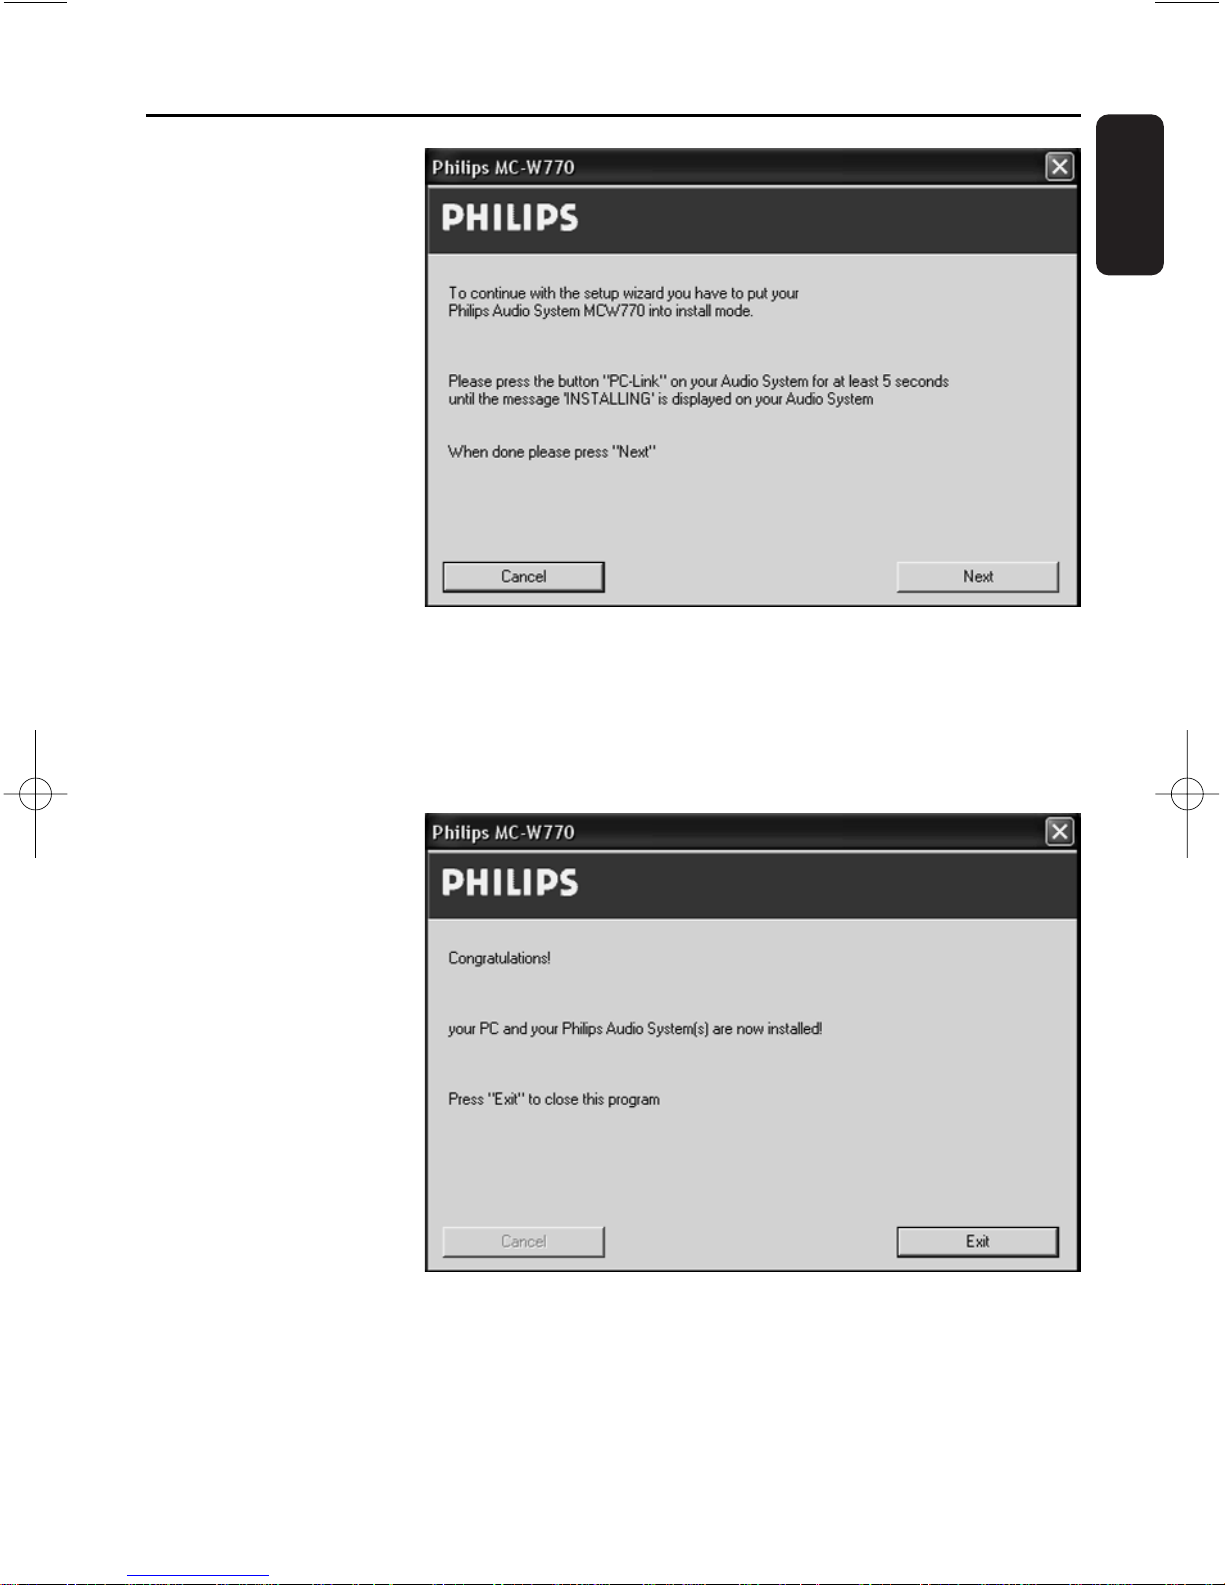
3 If you have clicked on
No or the driver
installation is finished,
the Philips Media
Manager Software will
be installed.Then the PC
is rebooted and PC
configurations are
checked. Finally the
following window will
appear:
4 Press PC LINK A on the audio system for at least 5 seconds until INSTALLING is scrolled on
the set.
➜ The set searches for a connection to the PC.This can require up to about a minute. When
the connection is
established, Next is
activated. Click on
Next.
5 ➜ The following
window will appear:
Click on Exit and the
installation is finished.
Wireless PC link Custom Installation
Page 6
6
English
Integration of MC W770 into an existing (home) network
You can also install the MC W770 in any other, perhaps existing network, which is compliant to
the Wi-Fi or IEEE802.11b,g rules. Please use this kind of installation only if you are
experienced in handling wireless networks and experienced in setting up these
networks! In general there are 2 types of network modes: ad-hoc mode (used for direct
connections to PC’s) and infrastructure mode (used when you have accesspoint(s) in your
network). Both modes are supported.
Before starting this installation process:
– There should be a PC in the network having the dedicated Philips Media Manager Software
installed.Therefore install the Philips Media Manager software from the installation CD only.
– The wireless USB adapter has to be already installed and connected on the PC you use for
installation.
–You should have the
wireless settings for
your network like
SSID and WEP keys
available.
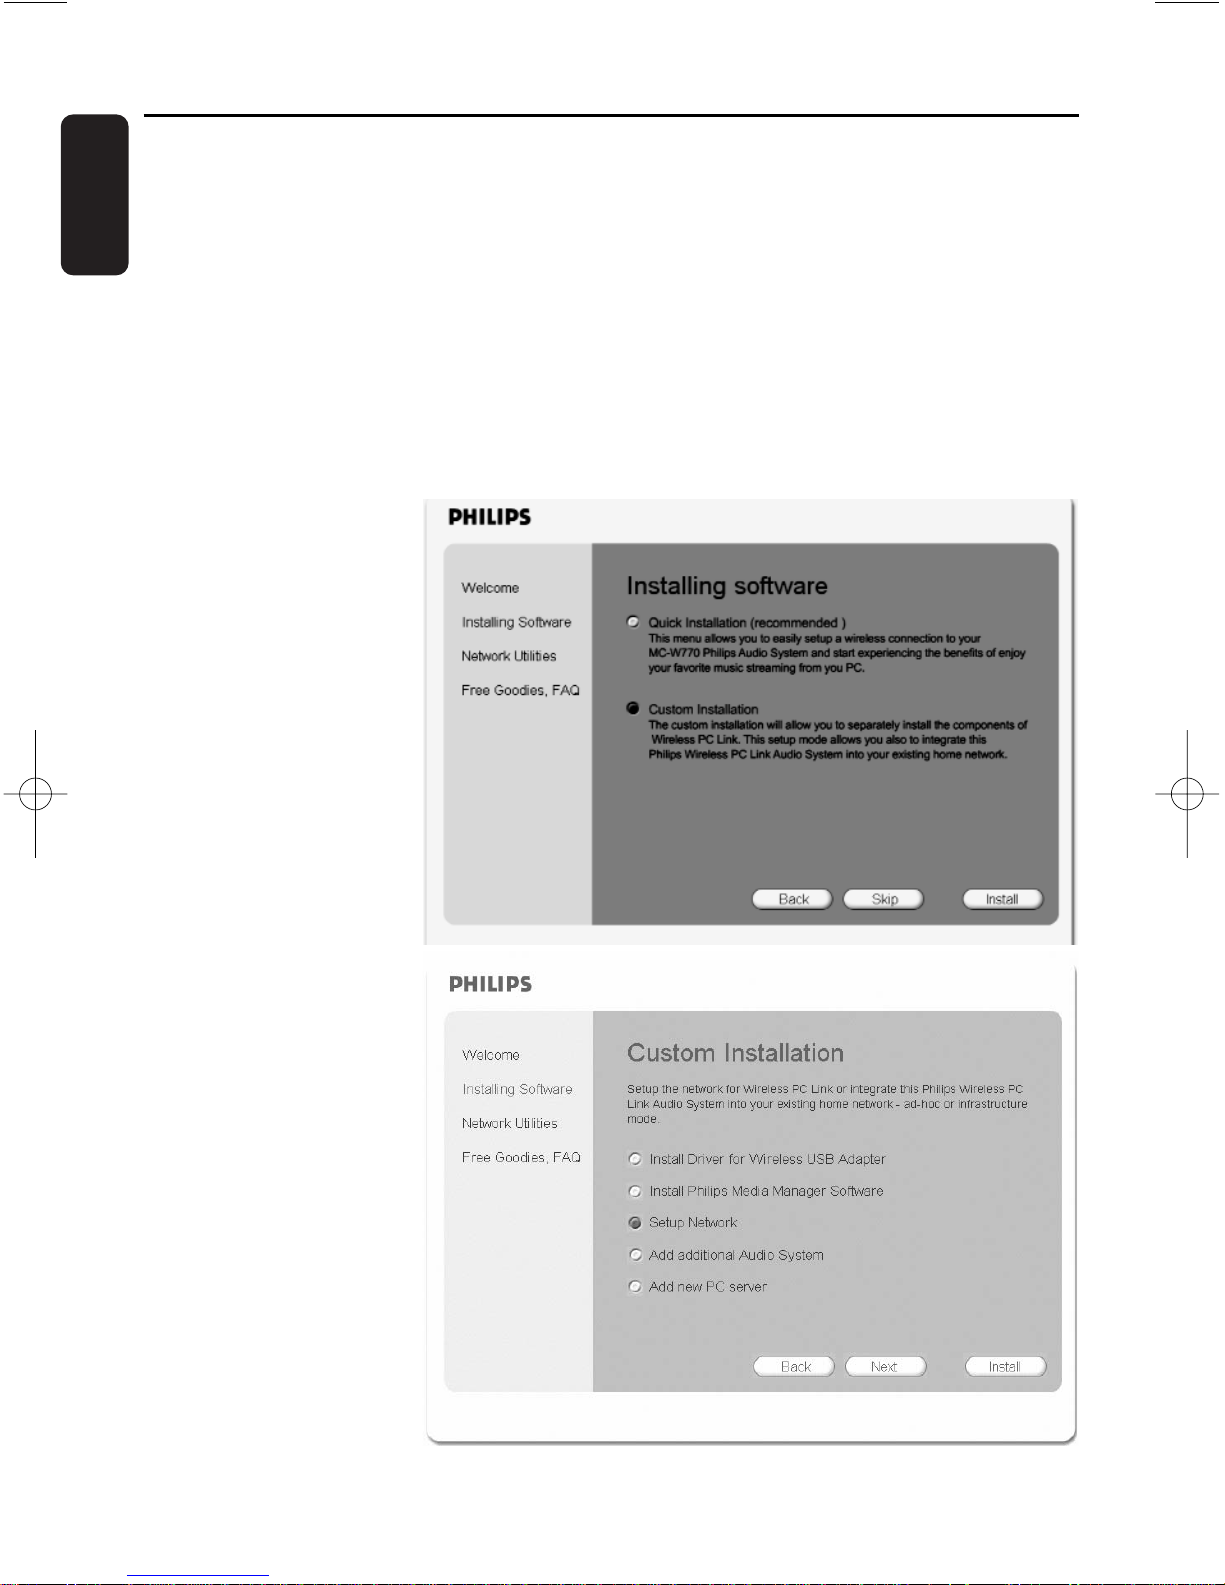
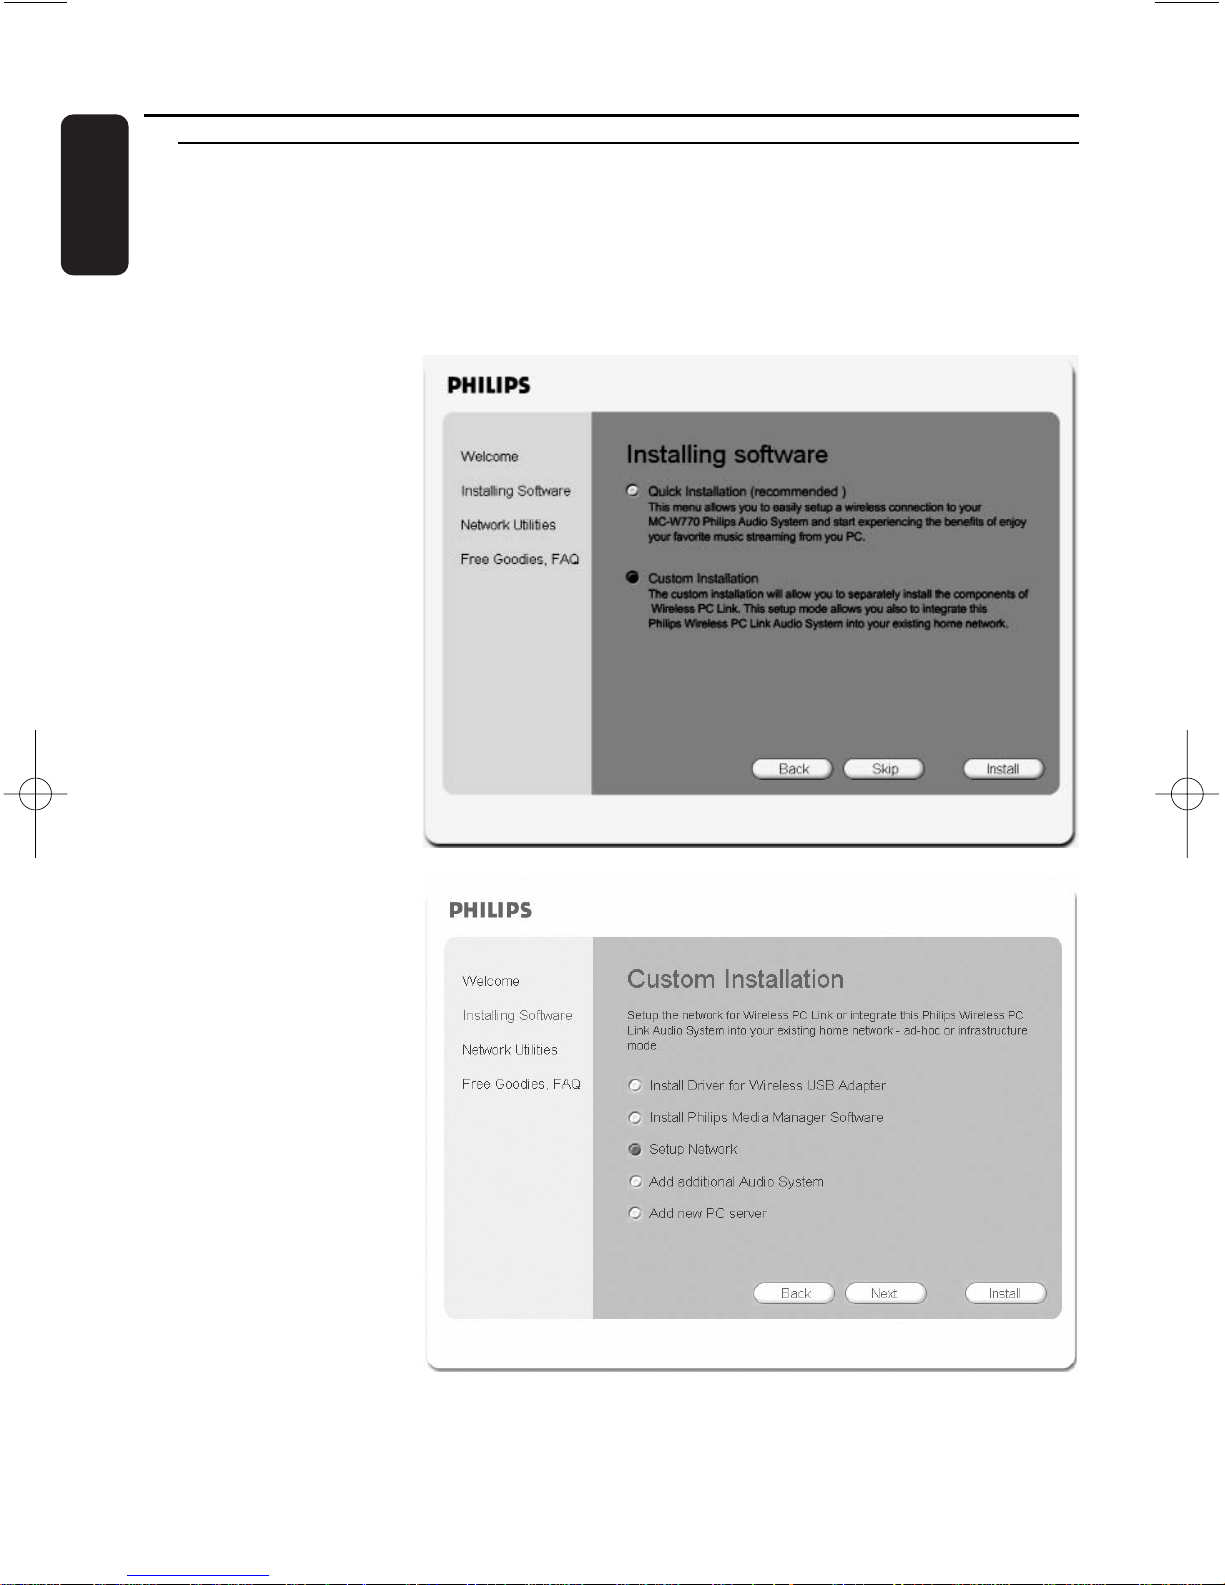
1 Insert the installation
disc.The installation
guide will appear
automatically. If it does
not, start the installation
manually by running
setup_.exe from the
installation CD. Follow
the installation process
until the following
window appears:
Select Custom
Installation and click on
Install.
2 ➜ The following window
appears.
Select Setup Network
and click again on Install.
Custom Installation Wireless PC link
Page 7
7
English
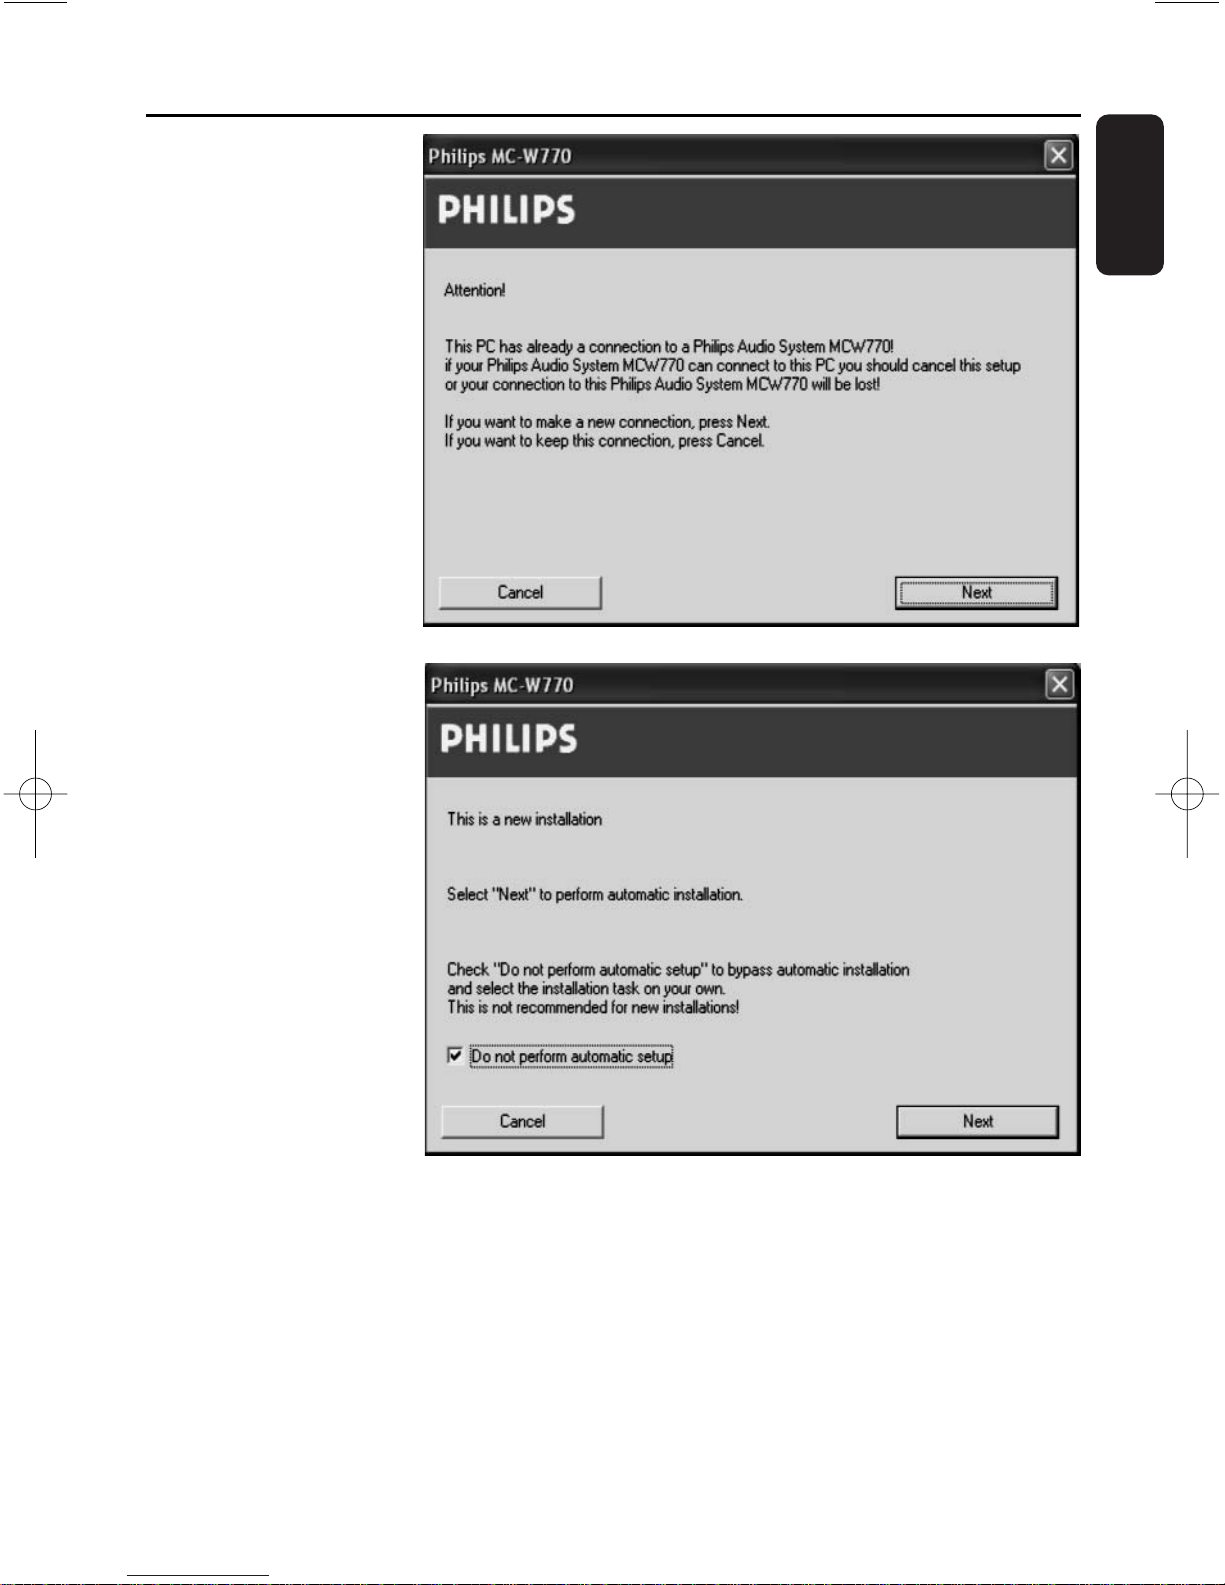
3 ➜ The PC checks the
PC link configuration
and, depending on
the PC configuration,
the following window
will appear:
Following the
procedure will not
change your PC link
settings. Click on Next.
4 ➜ The following
window appears:
Tick the option Do not
perform automatic
setup and then click on
Next.
Wireless PC link Custom Installation
Page 8
8
English
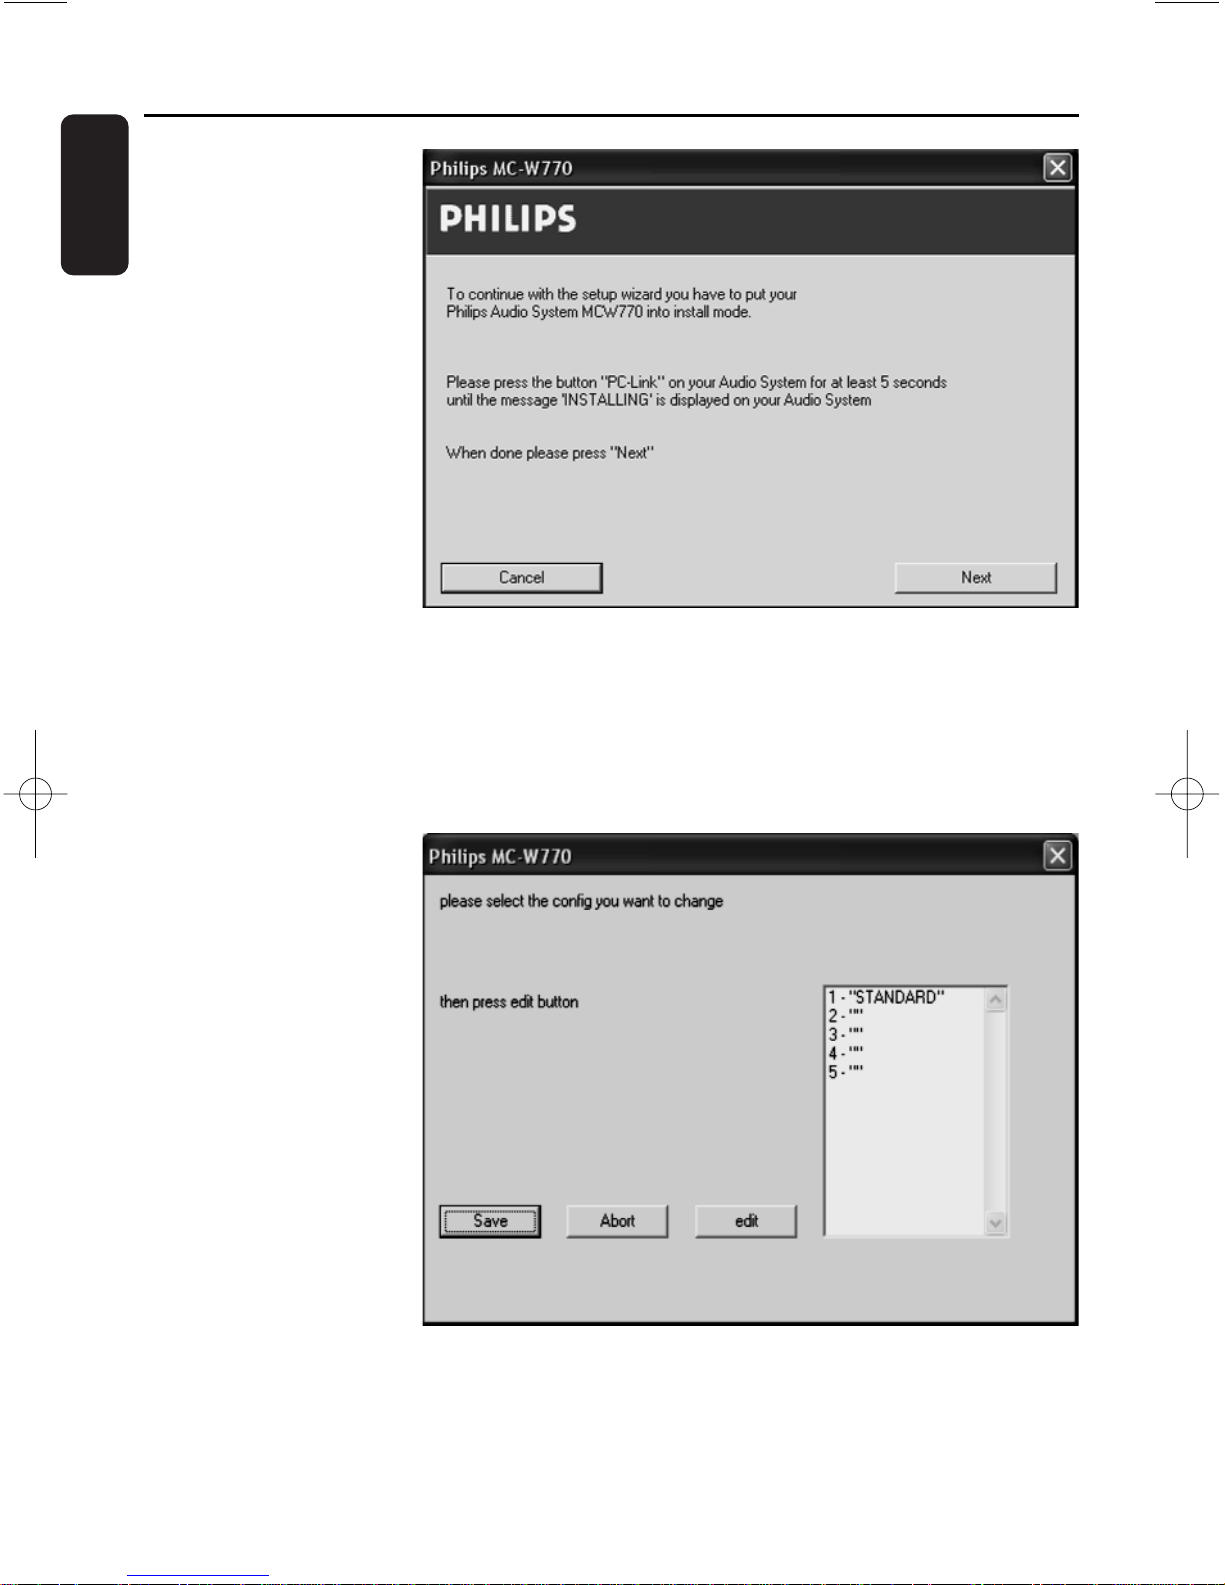
5 ➜ The installation
procedure configures
your network
settings. Afterwards
the following window
appears:
6 Press PC LINK A on your MC W770 for at least 5 seconds until INSTALLING is scrolled on
the set.
➜ The set searches for a connection to the PC.This can require up to about a minute. When
the connection is established, Next is activated.Click on Next.
7 ➜ The PC will read out
the network
configurations.The
following window will
appear.
Select a network
configuration, in the best
case an empty one (“”).
You should not select
STANDARD. Up to
5 network
configurations are
possible. In case all
network configurations
are used already, select
one that you don’t use
anymore. Click on edit.
Custom Installation Wireless PC link
Page 9
9
English
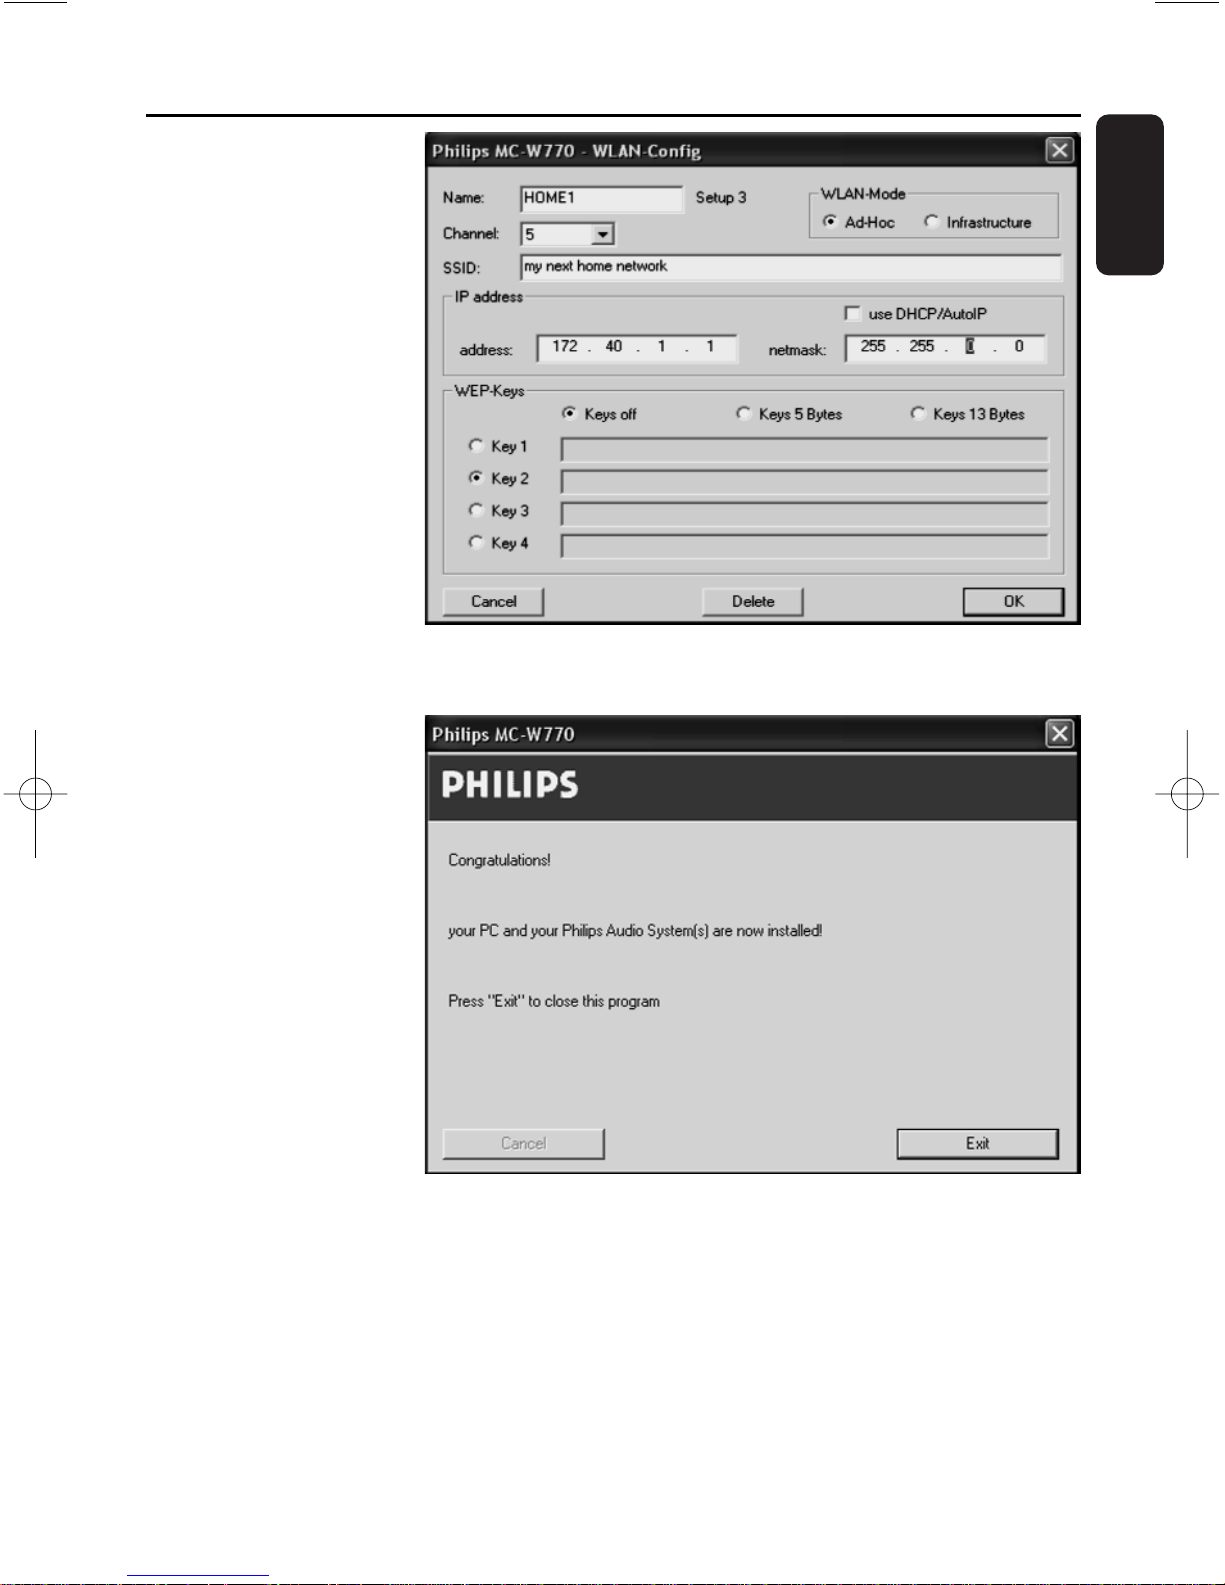
8 ➜ If you have selected
edit, the following
window appears.
Enter your wireless
settings and click on
OK.Then click on Save
in the previous window.
It is recommended to
use WEP keys
encryption for network
security reasons.
Note:The active network
you have to select from
the MCW770 (refer to
the chapter ‘How to
select another network’)
9 ➜ The new network
configurations are
stored in the MC
W770 and the
wireless settings on
your PC are
reconfigured.
Afterwards the
following window
appears:
The installation is
finished, click on Exit to
leave the installation
programme.
10 Your MC W770 is now able to connect to your network. Please note that music can only be
played from PCs in the same network having the dedicated Philips Media Manager Software
installed.
Wireless PC link Custom Installation
Page 10
10
English
Network utilities
Check connection
Perform a quick check of your wireless PC link connection.
Change of USB port using the MC W770
The installation of the MC W770 is optimised for the USB port used during installation.
Therefore the supplied wireless USB adapter should be connected only to this specific USB
port.
Changing the USB port can have the following disadvantages (Windows XP, 2000 and newer):
– Connecting MC W770 to your PC can require up to 2 minutes
– In some cases a new installation of wireless USB adapter driver can be necessary
If you nevertheless want to change the USB por t (e.g. because you are using a USB hub),
proceed as described below.
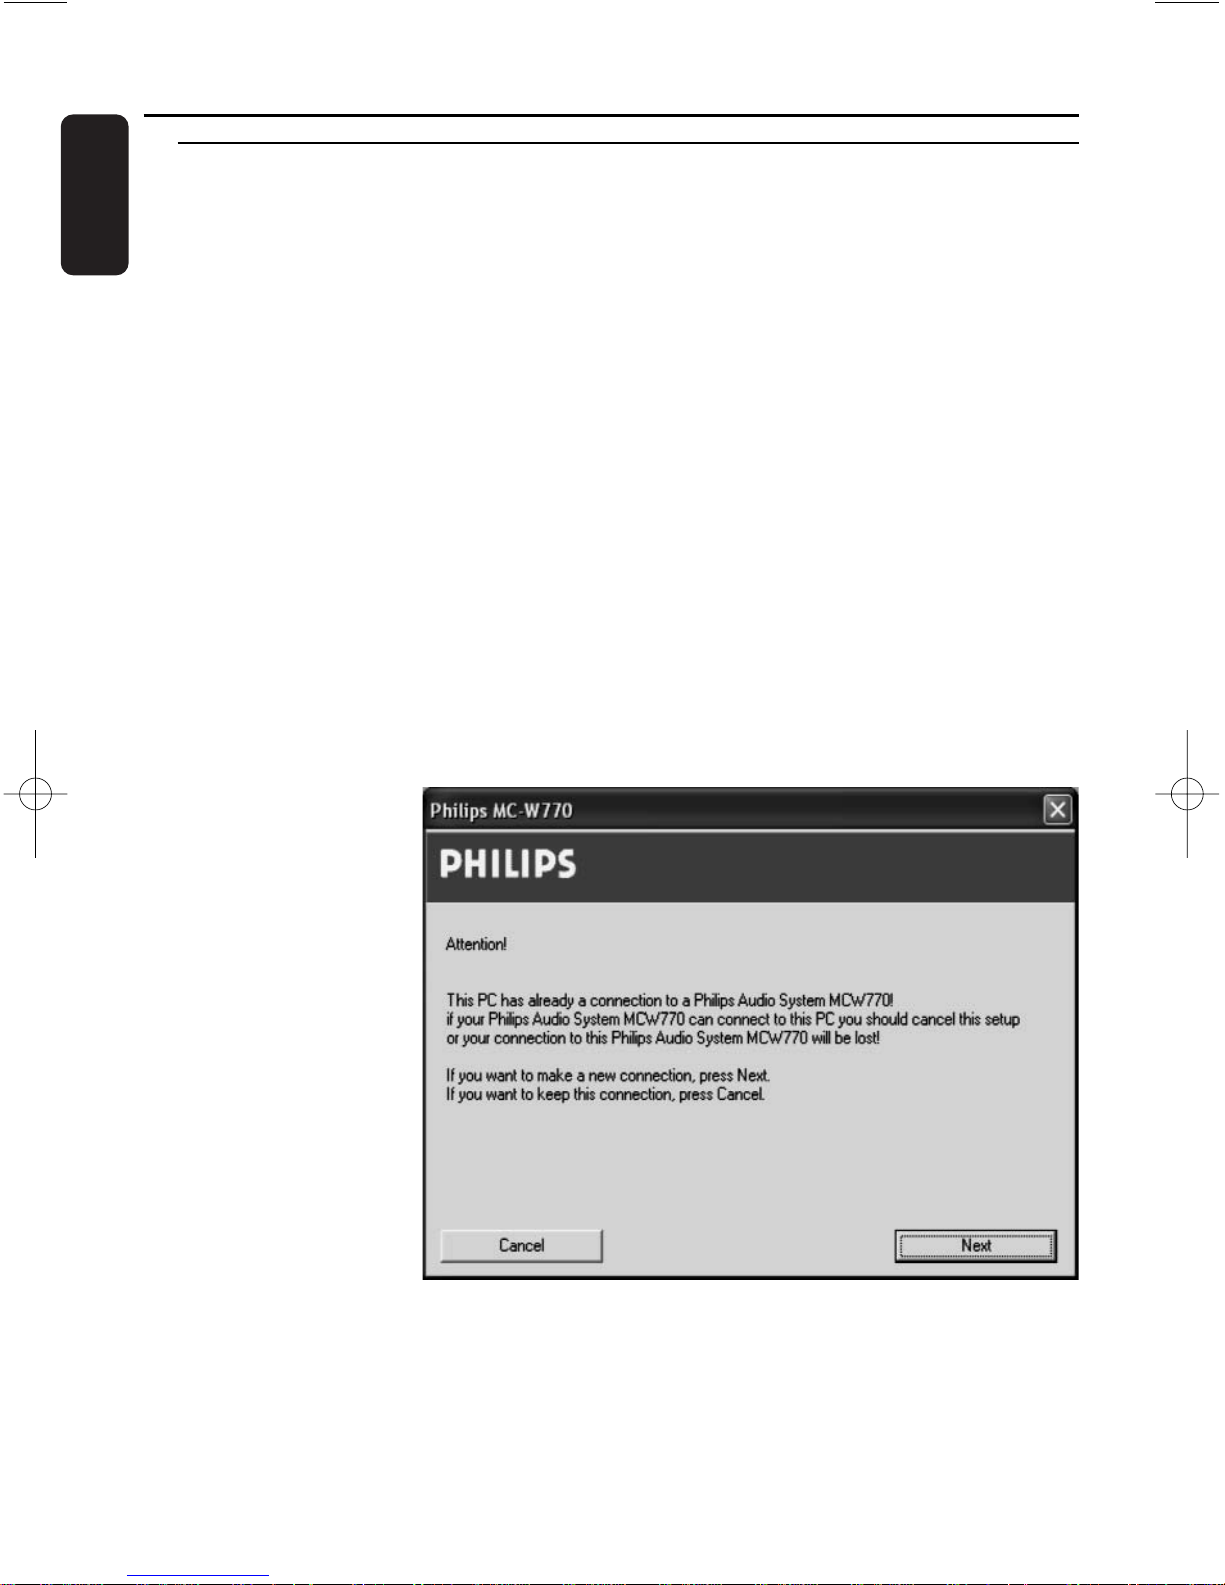
1 Connect the wireless USB adapter to the new USB port.
➜ Windows will recognise it and will load the appropriate drivers. Windows may display a
warning that the driver is not approved by Microsoft (message differs with Windows
version). Ignore the message and continue with the installation.
00
If the correct driver is not found, cancel and use Installation of the wireless USB adapter
in Custom installation first.
2 Enter Network
Utilities, select Install
different USB port
and click on Start.
➜ The configuration on
PC side is checked
and, depending on
the PC configuration,
the following window
will appear:
Click on Next to
continue.
Wireless PC link
Page 11
11
English
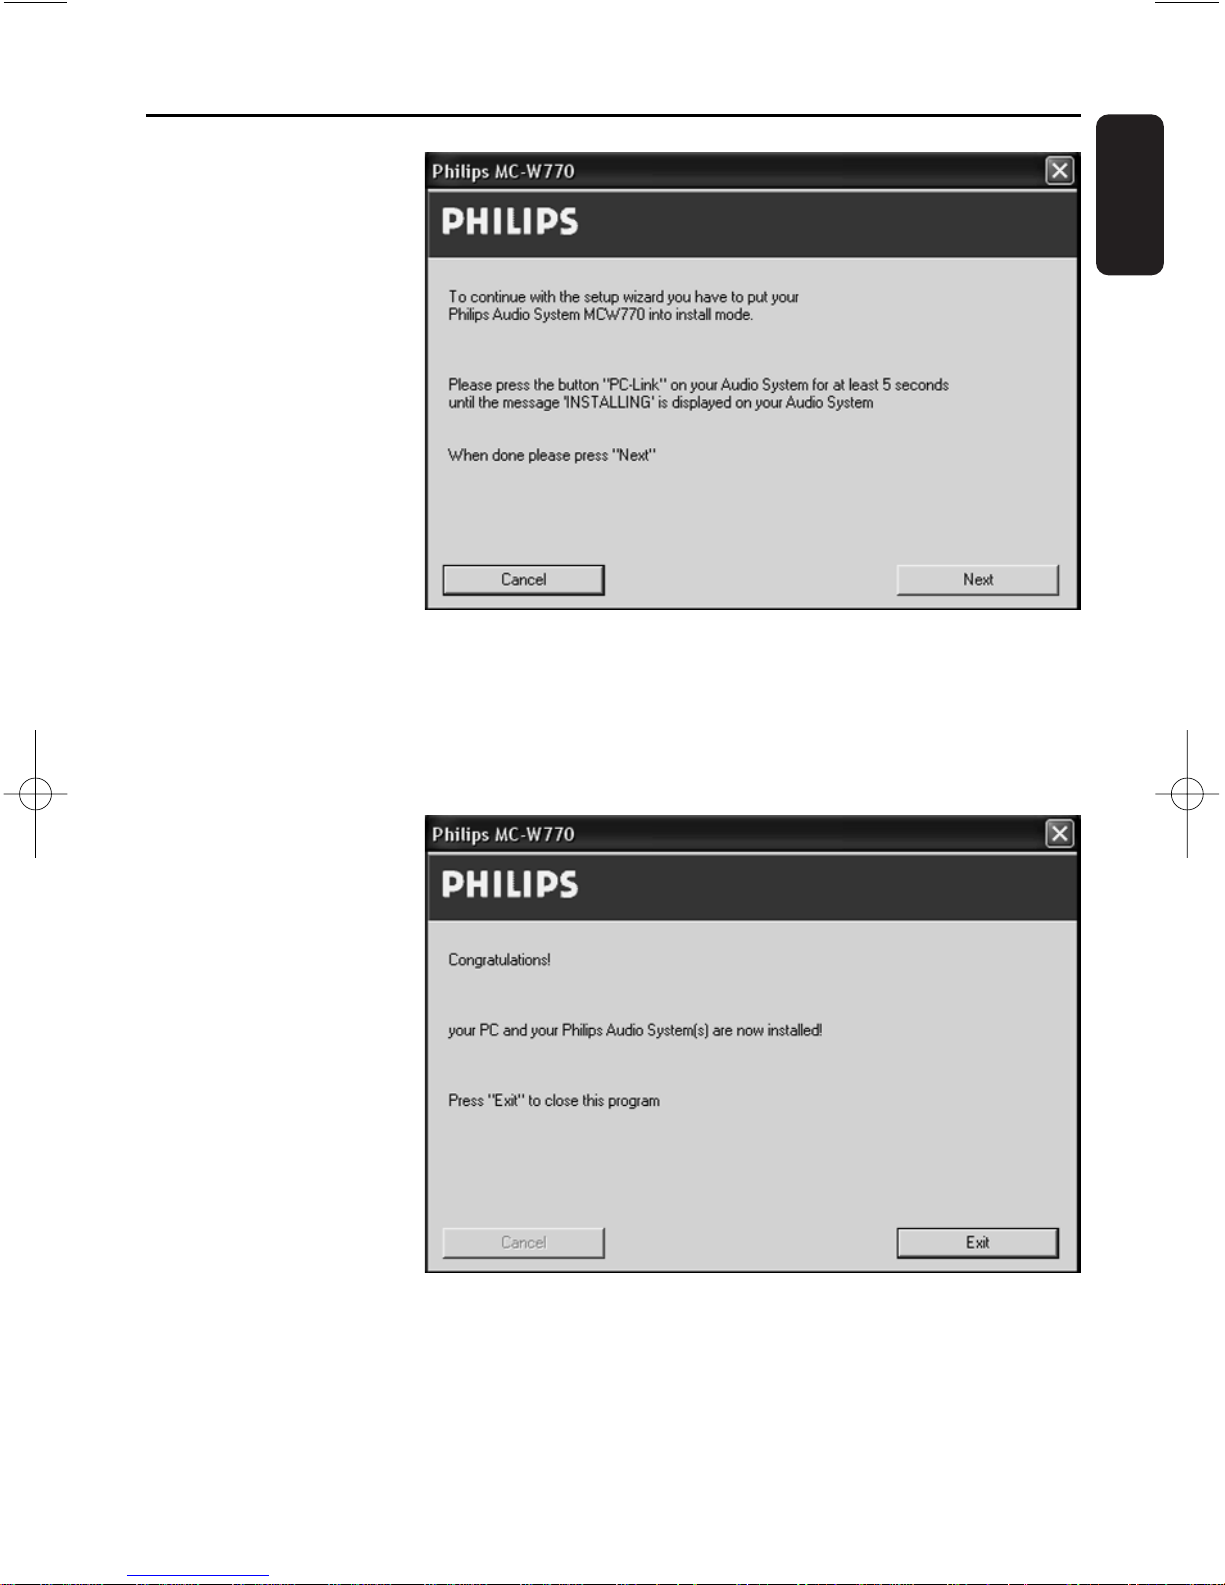
3 ➜ The network settings
are reconfigured and
the following window
will appear:
4 Press PC LINK A on your MC W770 for at least 5 seconds until INSTALLING is scrolled on
the set.
➜ The set searches for a connection to the PC.This can require up to about a minute. When
the connection is established, Next is activated.Click on Next.
5 ➜ The PC will connect
to your MC W770
and read out the
presets and update
your installation.The
following window will
appear:
Click on Exit and the
installation is finished.
Wireless PC link
Page 12
12
English
Change of the wireless channel
The wireless PC link uses the worldwide standardised so-called 2.4GHz ISM band.The wireless
PC link can use different transmission channels and it might be necessary to change to another
channel in order to optimise link quality.
1 Enter Network Utilities, select Change transmission channel and click on Start.
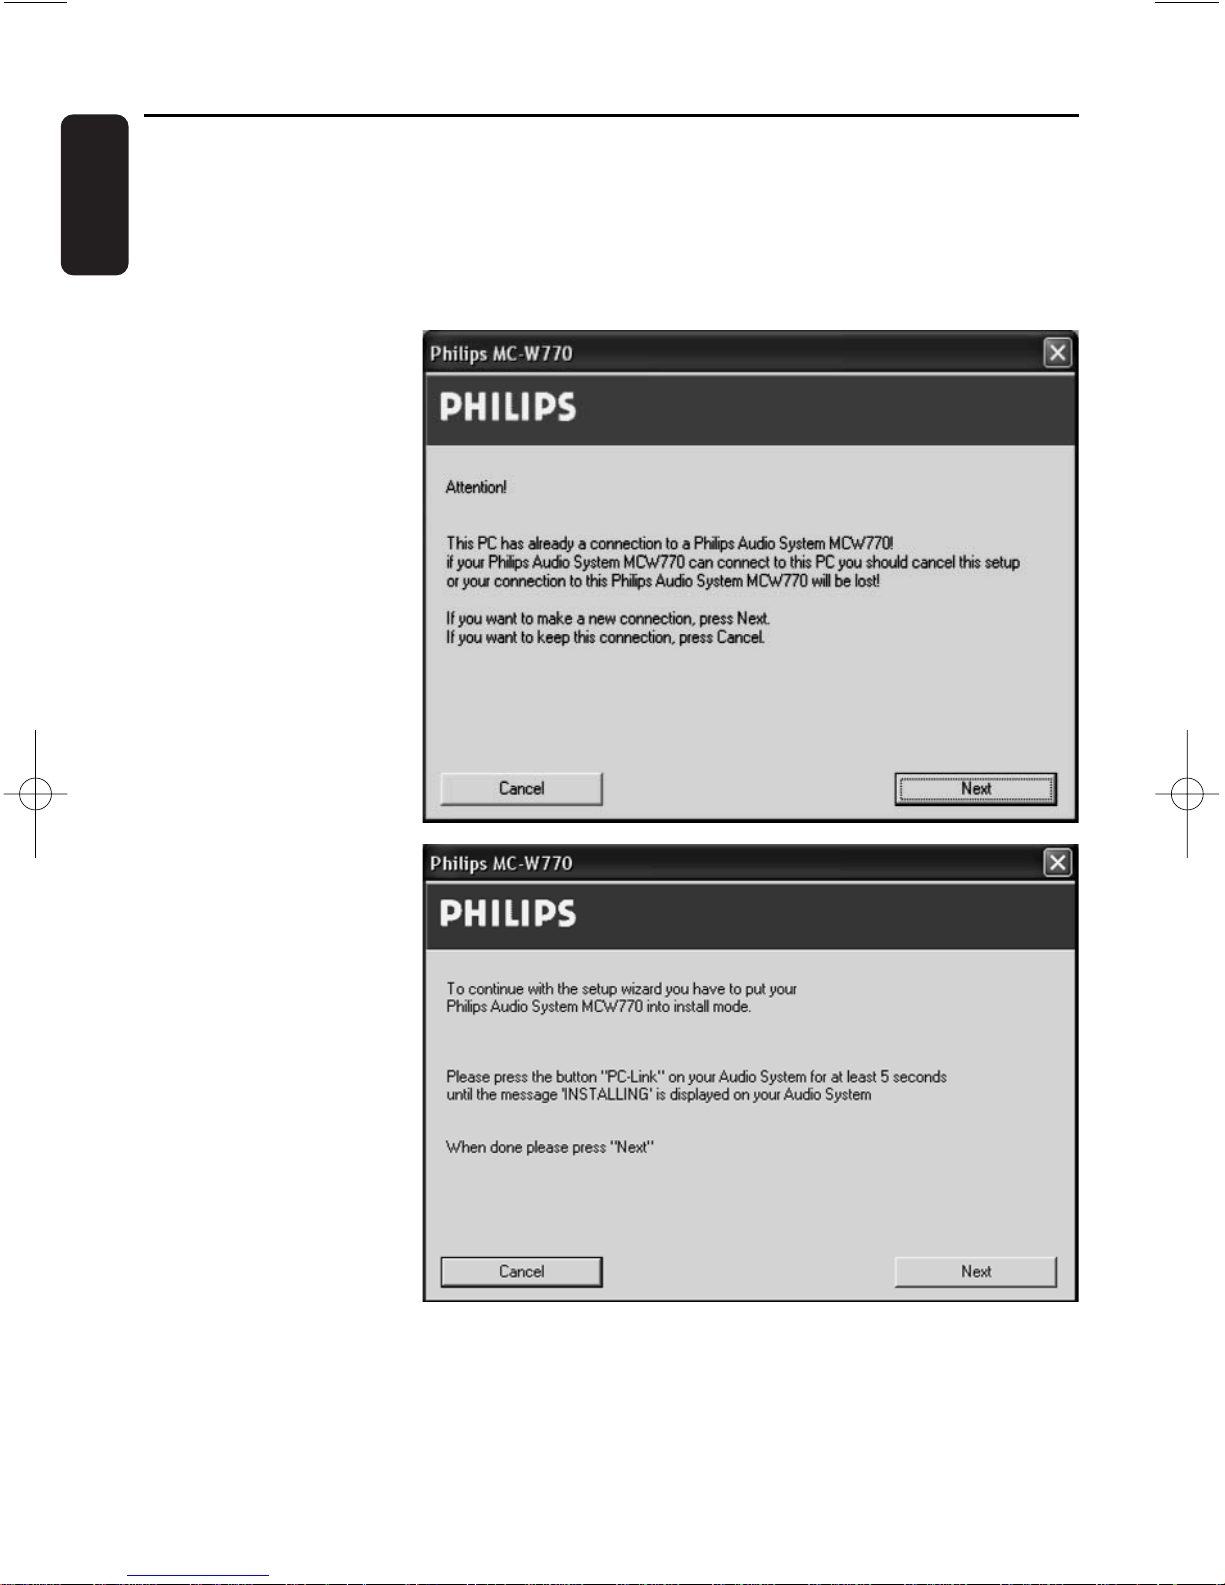
2 ➜ The configuration on
PC side is checked
and the following
window will appear:
Click on Next to
confirm.
3 ➜ The settings are
reconfigured and the
following window will
appear:
Wireless PC link
Page 13
13
English
4 Press PC LINK A on your MC W770 for at least 5 seconds until INSTALLING is scrolled on
the set.
➜ The set searches for a connection to the PC.This can require up to about a minute. When
the connection is established, Next is activated. Click on Next.
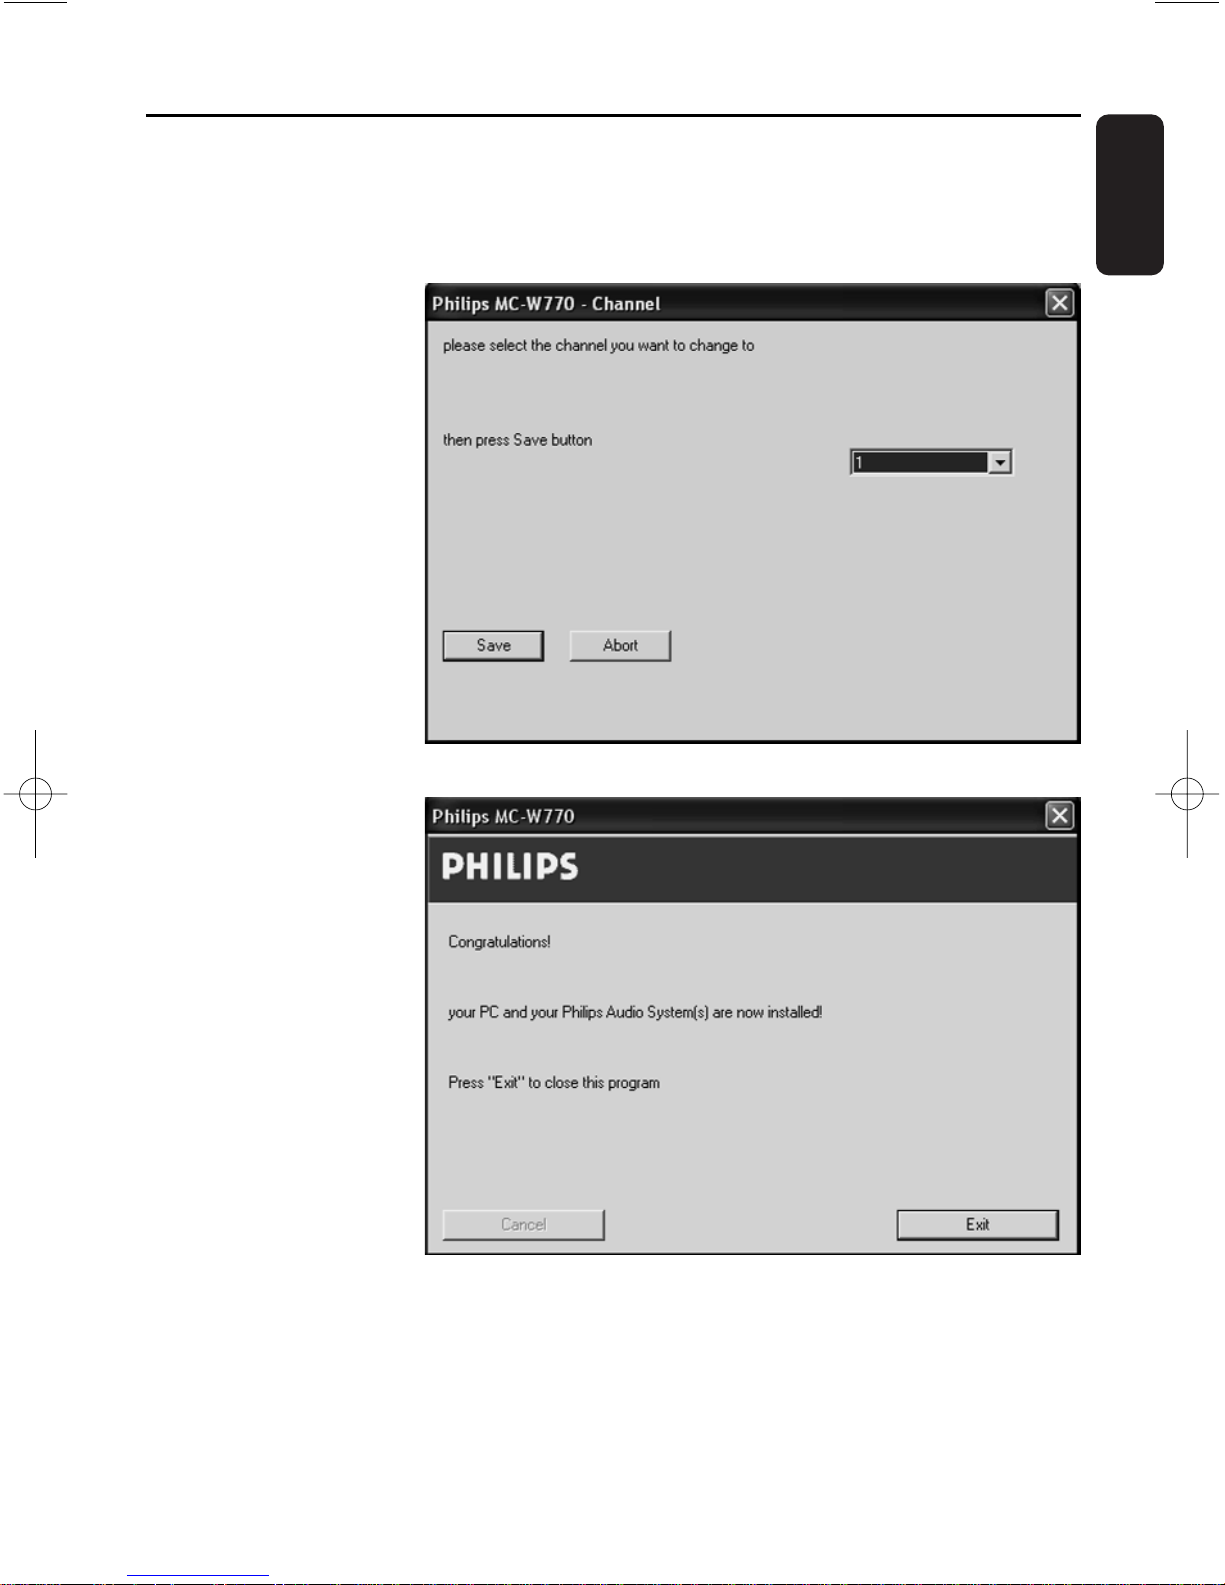
5 ➜ The following
window for selecting
a channel will appear:
Select a random
channel.We
recommend using
channel 1, 6, or 11. In
any case the new
selected channel should
be different from the
current setting.
Click on Save to
confirm.
6 ➜ The network settings
are changed and the
following window will
appear:
Click on Exit and the
installation is finished.
Wireless PC link
Page 14
14
English
Using a different wireless network adapter
The following steps describe how you can use a wireless network adapter different to the one
bypacked with the MC W770 to set up the MC W770 with that adapter.Your network adapter
should be installed already, connected to the PC and ready for wireless function. Nevertheless
please note that a proper function cannot be guaranteed by using a different network adapter.
1 Insert the installation disc into the CD-ROM drive of your PC.
➜ The installation guide
will appear
automatically. If it
does not, start the
installation manually
by running
setup_.exe from
the installation CD.
Follow the installation
process until the
following window
appears:
Select Custom
Installation and click
on Install.
2 ➜ The following window
appears.
Select Setup Network
and click on Install again.
Wireless PC link
Page 15
15
English
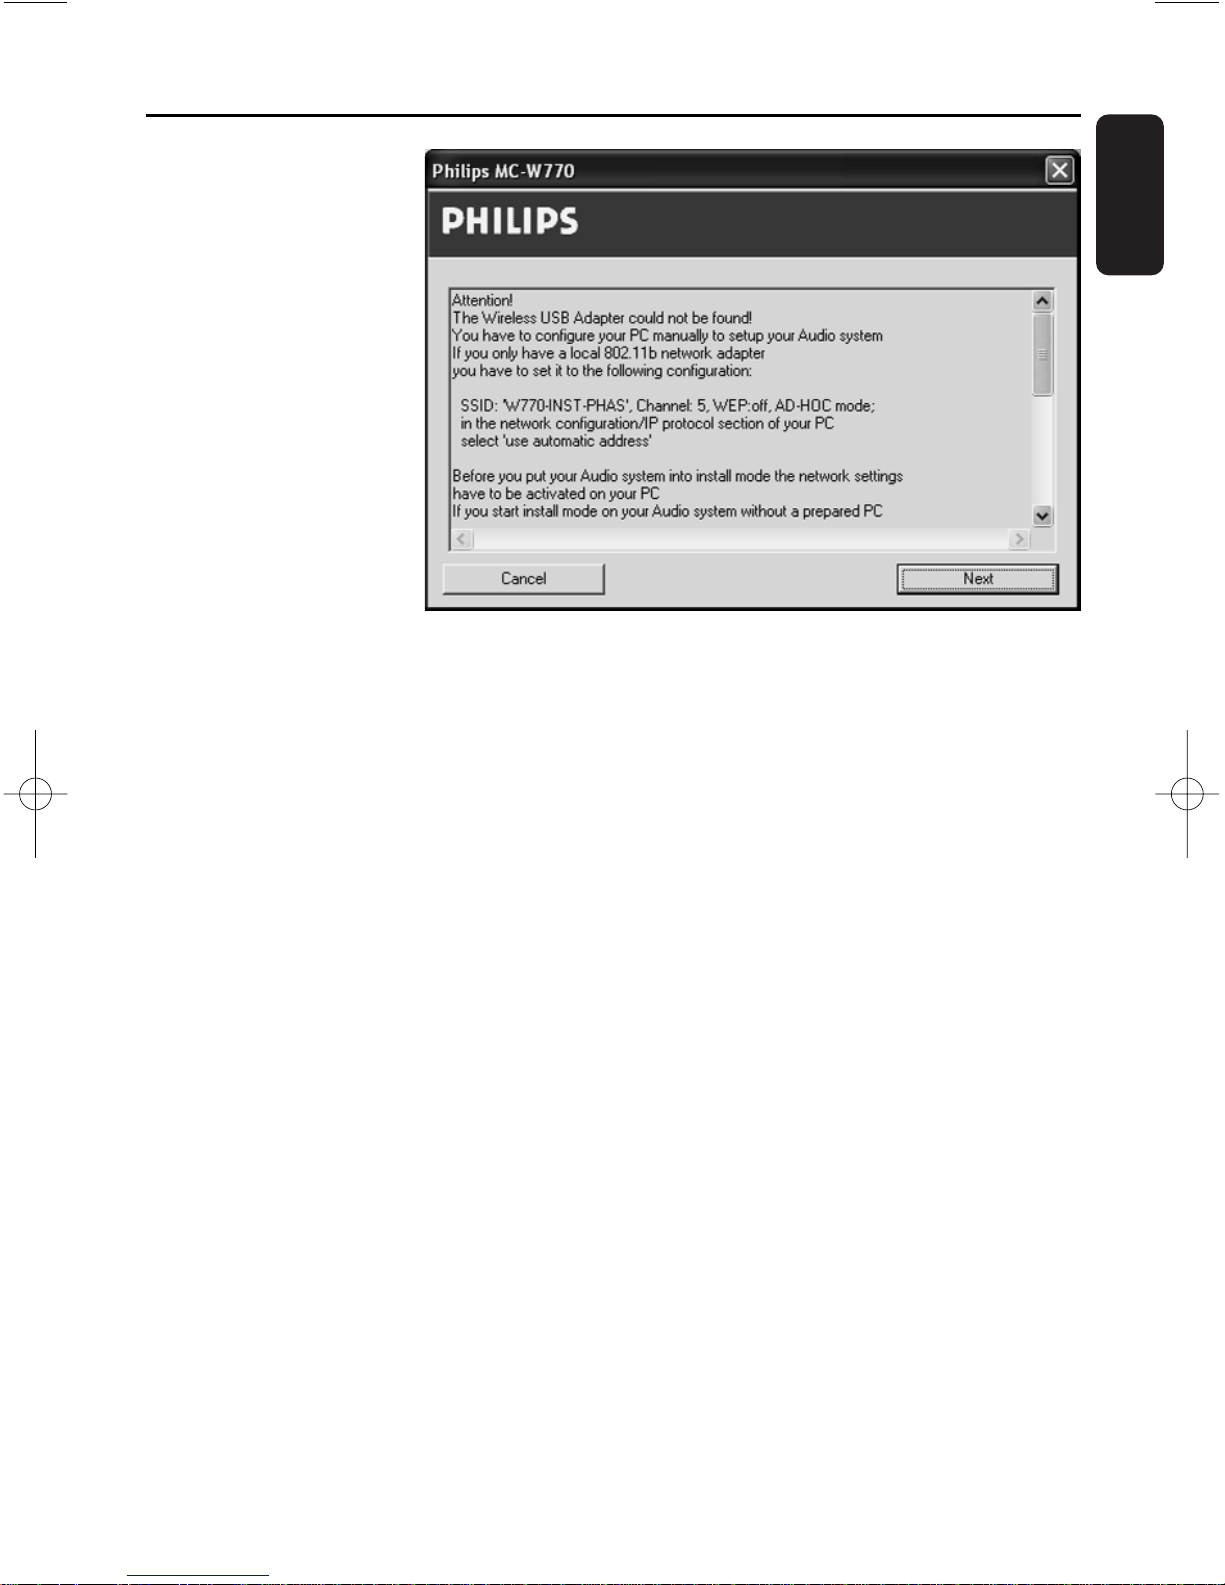
3 ➜ The network setup
programme starts.
This will first look for
the installed wireless
USB adapter which
was delivered with
the set. If this adapter
is not found, the
following window
appears:
4 You have to set up the installation network for the MC W770 with your network adapter.The
installation network has the following parameter:
SSID:W770-INST-PHAS
Channel: 5
WEP: off
AD-HOC mode
Use the utility of your network adapter to set up these settings.
Note: Before setting up your network adapter to the MC W770 installation network, you might write
down the current network settings used by your adapter, which you will probably want to use for
MC W770 as network settings in normal operation.
5 Further settings have to be made in Windows Network configuration setup. Select Windows
Start/Settings/Network Connections.
6 ➜ The overview of your network adapter appears.
Wireless PC link
Page 16
16
English
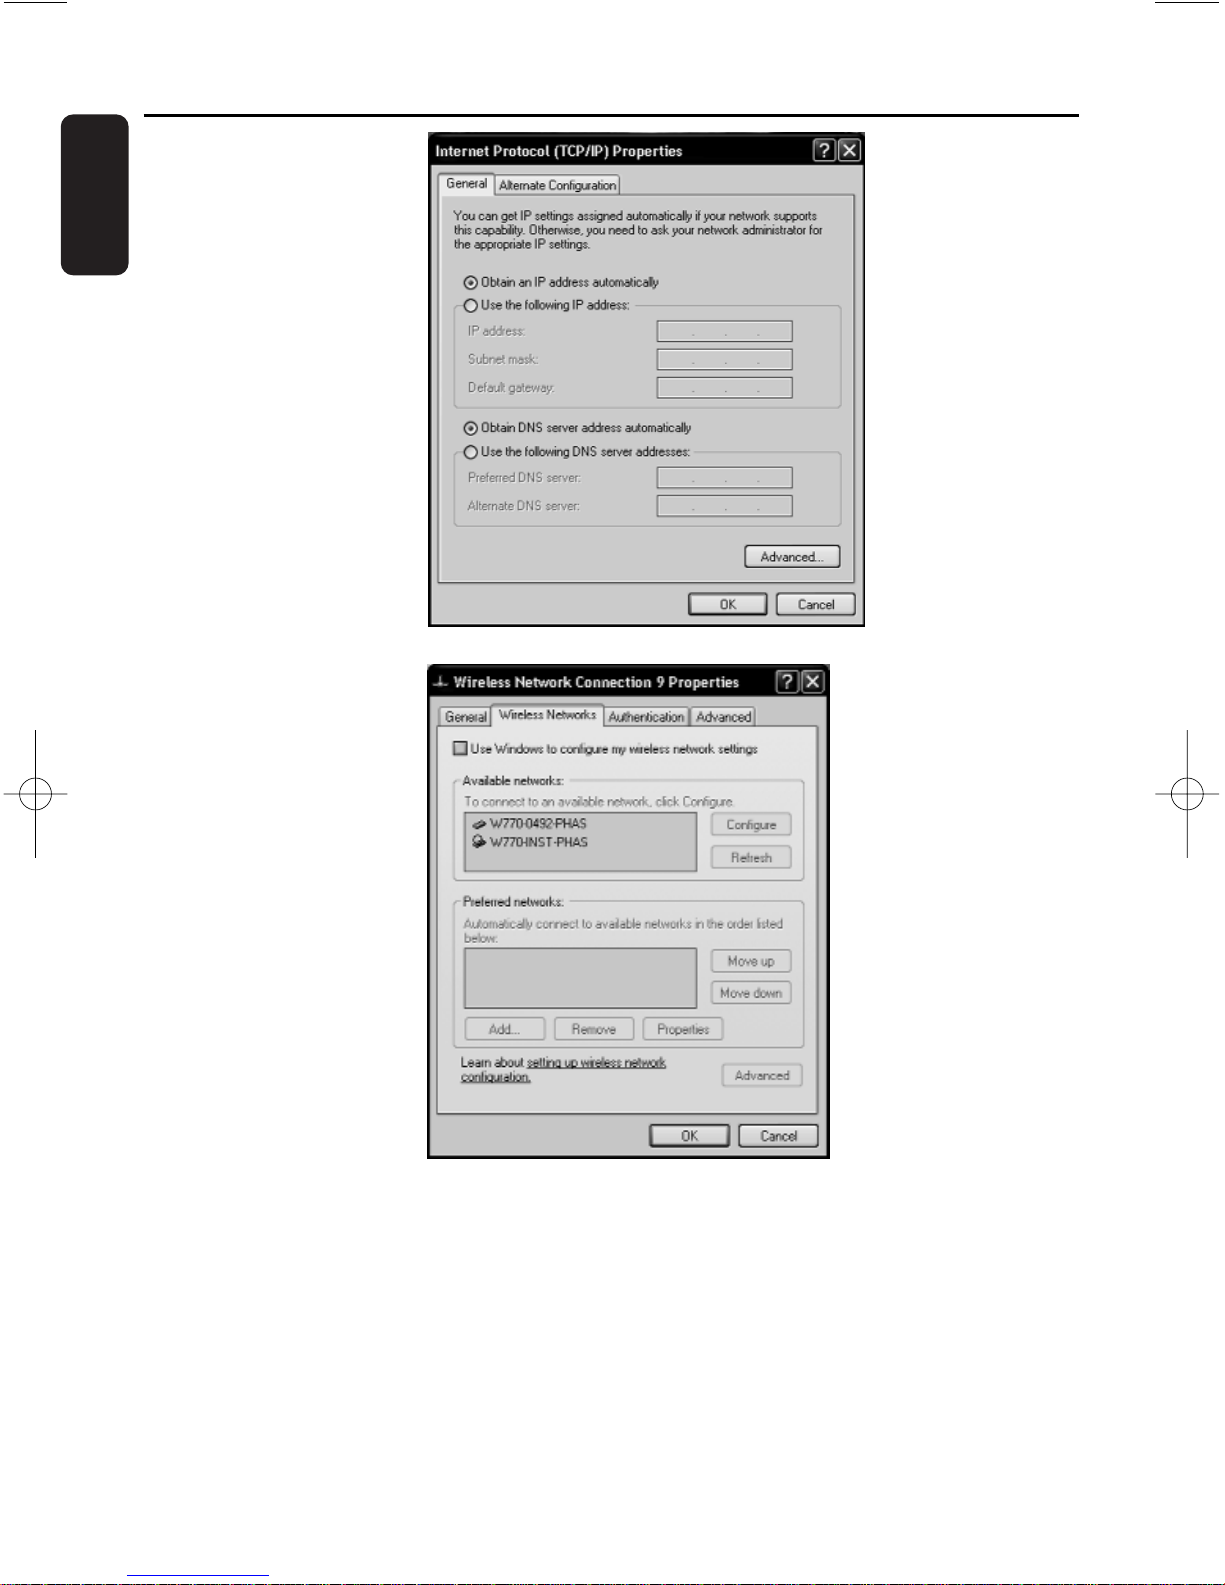
7 ➜ Set in the
Properties window
of your network
adapter the option
Obtain an IP
address
automatically.
Click on OK.
➜ In Windows XP:
under Properties
select the Wireless
Networks tab and
deselect the option
Use Windows to
configure my
wireless network
settings.
Click on OK.
8 Your wireless network adapter is now ready for installation with the MC W770. With the utility
software of your wireless adapter you might check once more if the correct installation
network with the correct network parameter is set up and activated.
9 Now you have to activate the Expert Install mode on your MC W770. Press PC LINK A on
your MC W770 to select the PC as source.
Wireless PC link
Page 17
17
English
10 Press PC LINK A on your MC W770 for at least 5 seconds until INSTALLING is scrolled on
the set.
11 Press HOME on your MC W770 for at least 2 seconds until EXPERT INSTALL is scrolled on
the set.
12 Click on Next in the
network setup
programme on your PC.
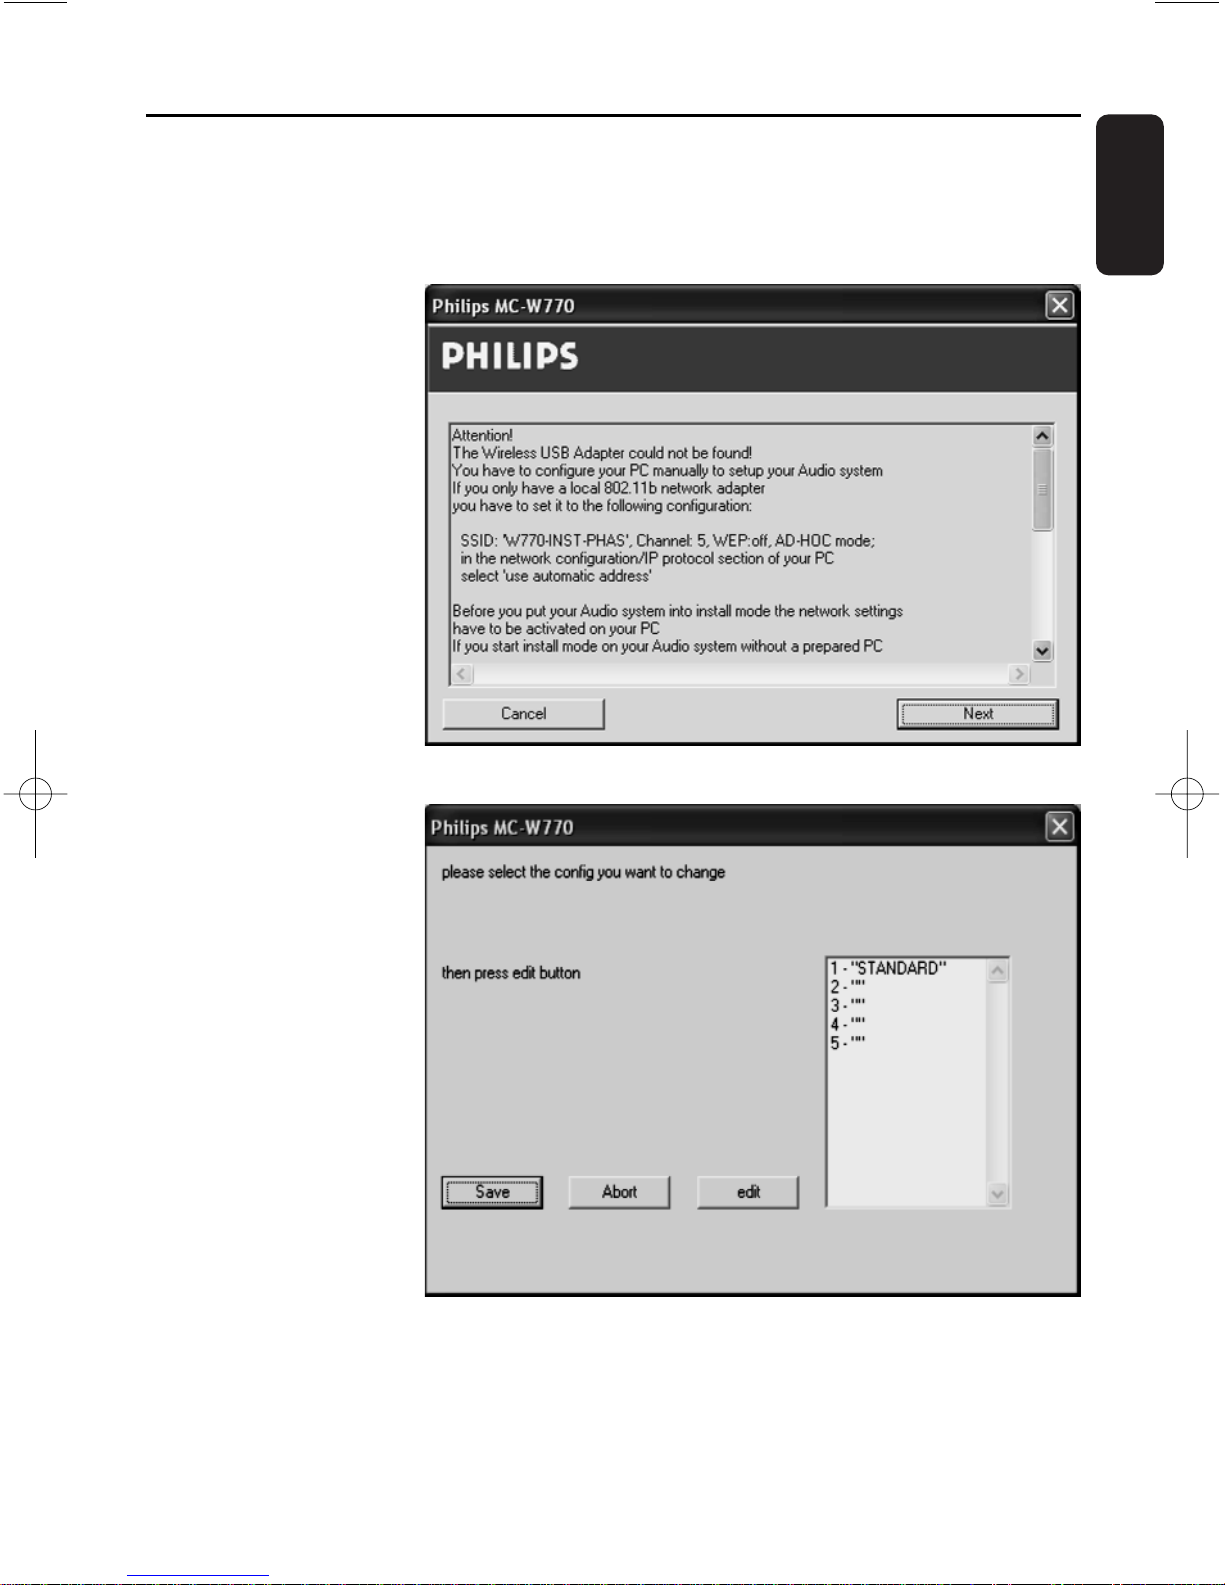
13 ➜ The network setup
programme now
searches for the
MC W770 and reads
out the current
network
configurations from
your set.The
following window will
appear.
Select a network
configuration you want
to change, in the best
case an empty one (“”).
You should not change
STANDARD. Click on
edit.
Wireless PC link
Page 18
18
English
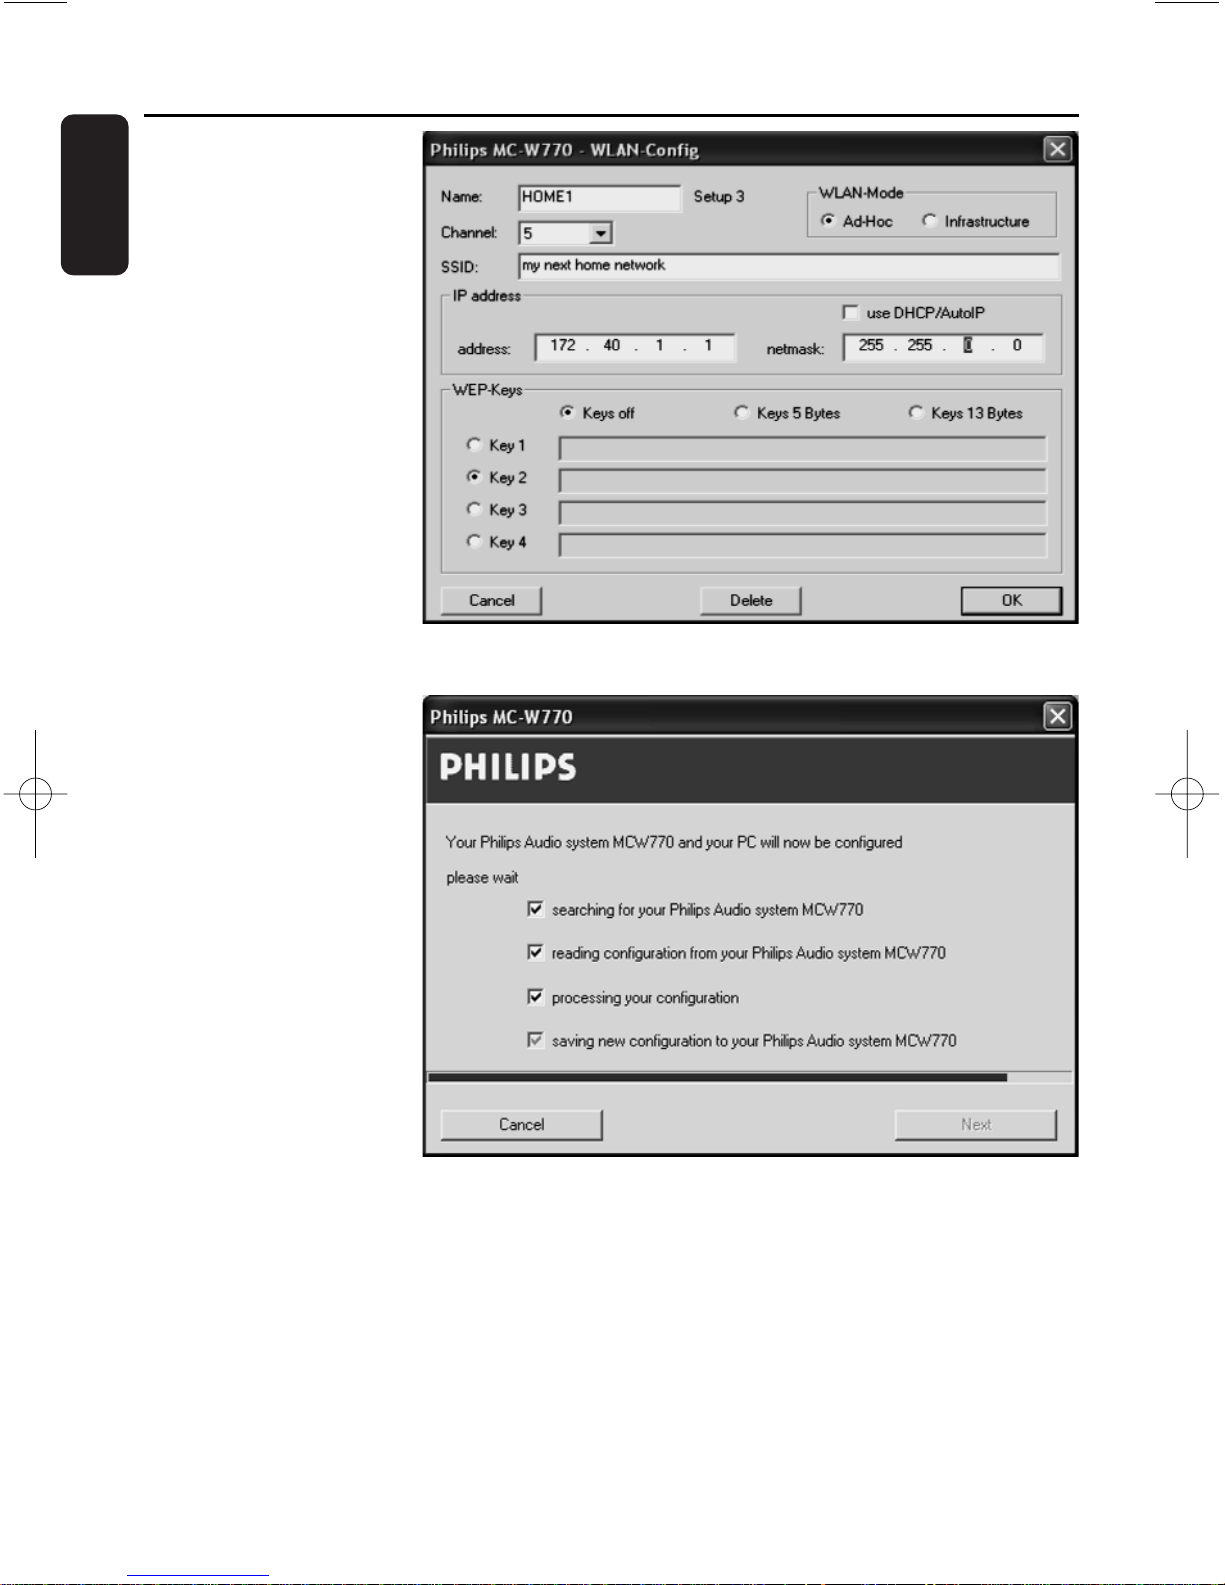
14 ➜ The following
window appears.
Enter the network
parameter of your
network and click on
OK.Then click on Save
in the previous window.
It is recommended to
use WEP keys
encryption for network
security reasons.
15 ➜ The following
window appears:
The network parameter
will be transferred now
to the MC W770 and
stored as one network
configuration in the set.
Wireless PC link
Page 19
19
English
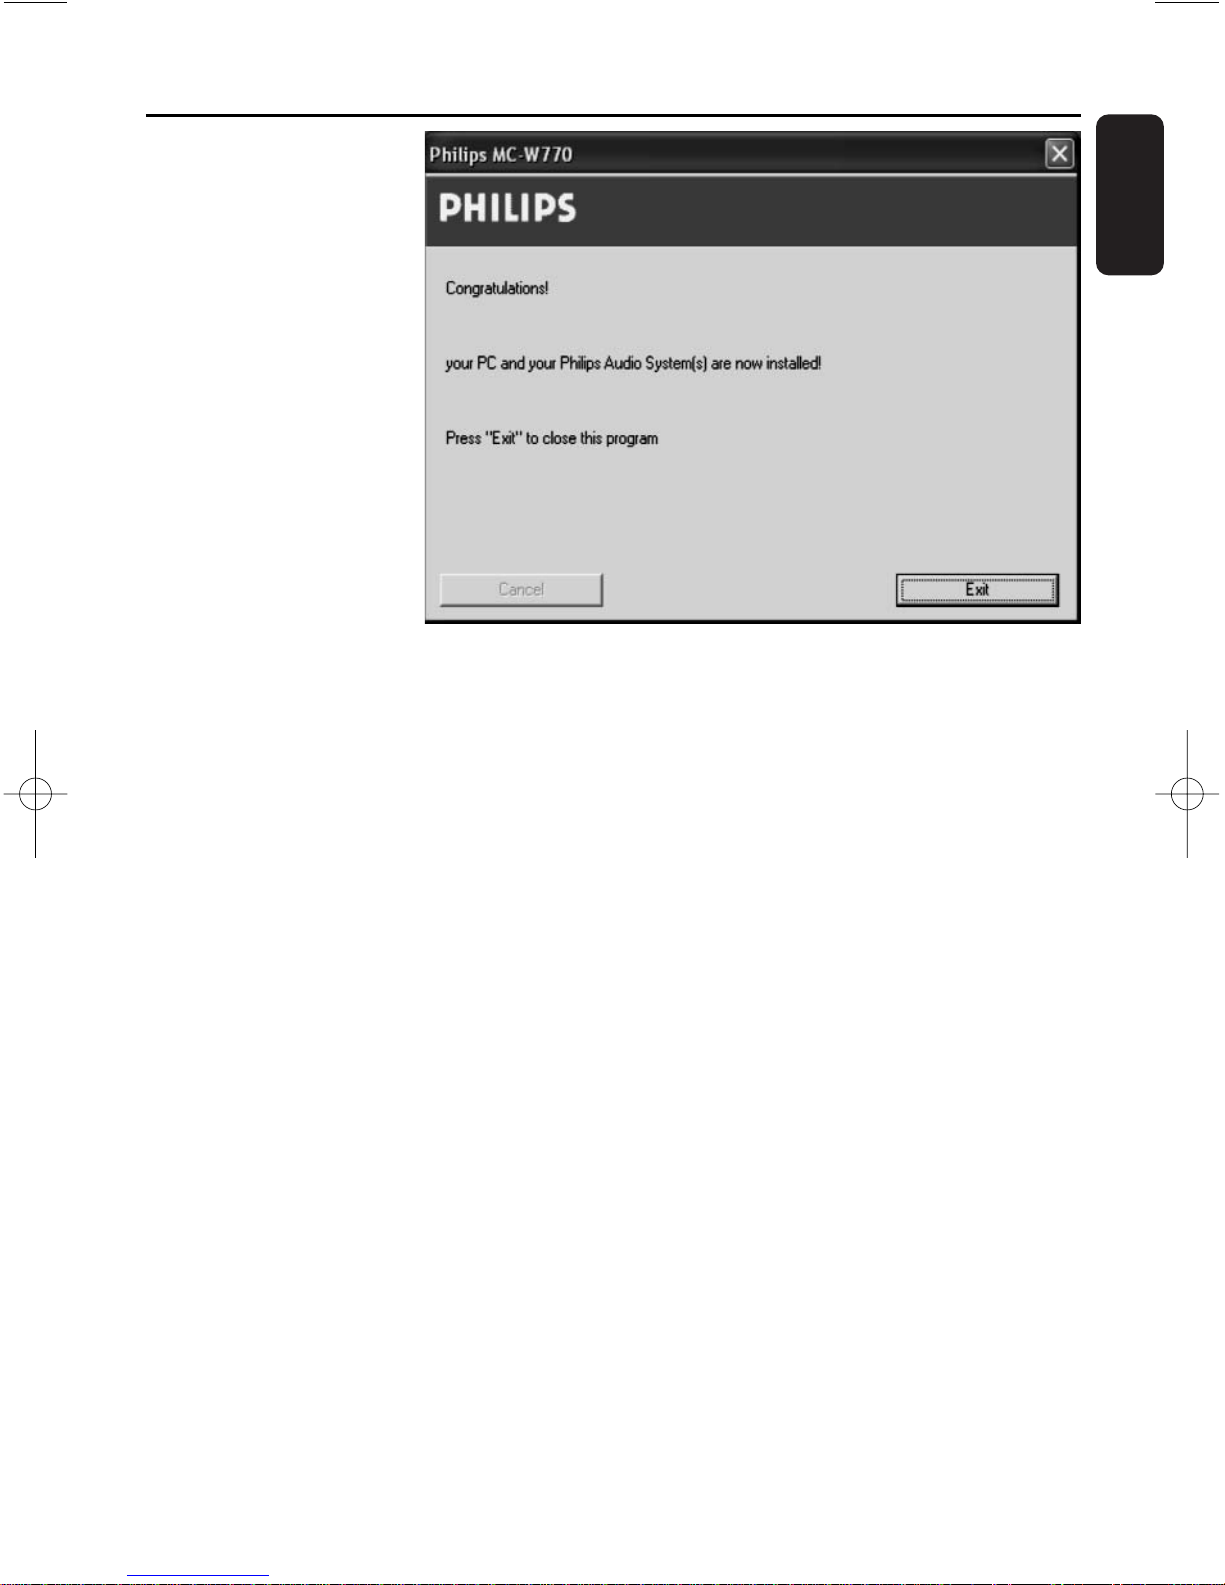
16 ➜ The new network
settings are stored in
the MC W770 and
ready for using in
normal operation of
the set.The following
window appears:
Click on Exit to close
the network setup
programme on the PC.
17 The MC W770 will automatically exit the Exper t Install mode and will go into normal
operation. It will setup a network for normal operation.
18 Now you have to set up your PC wireless adapter to the network which has just been stored
to the MC W770, so both can connect in normal mode too (the wireless adapter is still set up
for Expert Install mode).To do this, use your wireless adapters utility software again. For correct
function, the IP address of the PC has to be set properly too.
19 On PC installation software press Next/Next/Finish to exit the PC installation.
20 Please do not forget that for successful operation the Philips Media Manager Software has to be
set up too and operate on a PC which is part of the network you have just set up.
If more than one network configuration is stored into the MC W770, you might select the one
which has just been set up (see How to select another network in chapter “PC link
function”). Otherwise (one network configuration stored into the MC W770) the audio set will
connect to network/PC and your PC link is fully operational.
Wireless PC link
Page 20
MCW770
Wireless PC Link Micro
THANK YOU FOR CHOOSING PHILIPS!
NEED HELP FAST?
Read your Quick-Use guide and/or owner's manual first for quick tips
that make using your Philips product more enjoyable. If you have read
your instructions and still need assistance,
you may access our online help at
www.p4c.philips.com
or call 1-888-PHILIPS(744-5477) while with your
product.
User manual
Manuel d'utilisation
Manual del usuario
Page 21
Registering your model with PHILIPS makes you eligible for all of the valuable benefits
listed below, so don't miss out. Complete and return your Product Registration Card at
once to ensure
Return your Product Registration Card today
to get the very most from your purchase.
*Proof of
Purchase
Returning the enclosed
card guarantees that your
date of purchase will be
on file, so no additional
paperwork will be
required from you to
obtain warranty service.
*
Product Safety
Notification
By registering your
product, you'll receive
notification - directly from
the manufacturer - in the
rare case of a product
recall or safety defect.
*Additional
Benefits of
Product
Ownership
Registering your product
guarantees that you'll
receive all of the
privileges to which you're
entitled, including special
money-saving offers.
t
This “bolt of lightning”
indicates uninsulated
material within your unit
may cause an electrical shock. For the
safety of everyone in your household,
please do not remove product
covering.
s
The “exclamation point” calls
attention to features for
which you should read the
enclosed literature closely to prevent
operating and maintenance problems.
WARNING: TO PREVENT FIRE OR
SHOCK HAZARD, DO NOT
EXPOSE THIS EQUIPMENT TO RAIN
OR MOISTURE.
CAUTION: To prevent electric
shock, match wide blade of plug to
wide slot, fully insert.
ATTENTION: Pour éviter les
choc électriques, introduire la lame la
plus large de la fiche dans la borne
correspondante de la prise et pousser
jusqu’au fond.
For Customer Use
Enter below the Serial No. which is
located on the rear of the cabinet. Retain
this information for future reference.
Model No. _______________________
Serial No. ________________________
Know these
safety symbols
CAUTION
RISK OF ELECTRIC SHOCK
DO NOT OPEN
CAUTION: TO REDUCE THE RISK OF ELECTRIC SHOCK, DO NOT
REMOVE COVER (OR BACK). NO USER-SERVICEABLE PARTS
INSIDE. REFER SERVICING TO QUALIFIED SERVICE PERSONNEL.
Page 22
Congratulations on your purchase,
and welcome to the “family!”
Dear PHILIPS product owner:
Thank you for your confidence in PHILIPS.You’ve selected one of the bestbuilt, best-backed products available today.We’ll do everything in our
power to keep you happy with your purchase for many years to come.
As a member of the PHILIPS “family,” you’re entitled to protection by one
of the most comprehensive warranties and outstanding service networks
in the industry.What’s more, your purchase guarantees you’ll receive all the
information and special offers for which you qualify, plus easy access to
accessories from our convenient home shopping network.
Most importantly, you can count on our uncompromising commitment to
your total satisfaction.
All of this is our way of saying welcome - and thanks for investing in a
PHILIPS product.
P.S.To get the most from your PHILIPS purchase,
be sure to complete and return your Product
Registration Card at once.
Visit our World Wide Web Site at http://www.philips.com
Page 23
4
Canada
English: (Canadian ICES-003)
This digital apparatus does not exceed the Class B limits
for radio noise emissions from digital apparatus as set
out in the Radio Interference Regulations of the
Canadian Department of Communications.
Français: (La norme NMB-003 du Canada)
Cet appareil numérique n'émet pas de bruits
radioélectriques dépassant les limites applicables aux
appareils numériques de Classe B prescrites dans le
Règlement sur le Brouillage Radioélectrique édicté par
le Ministère des Communications du Canada.
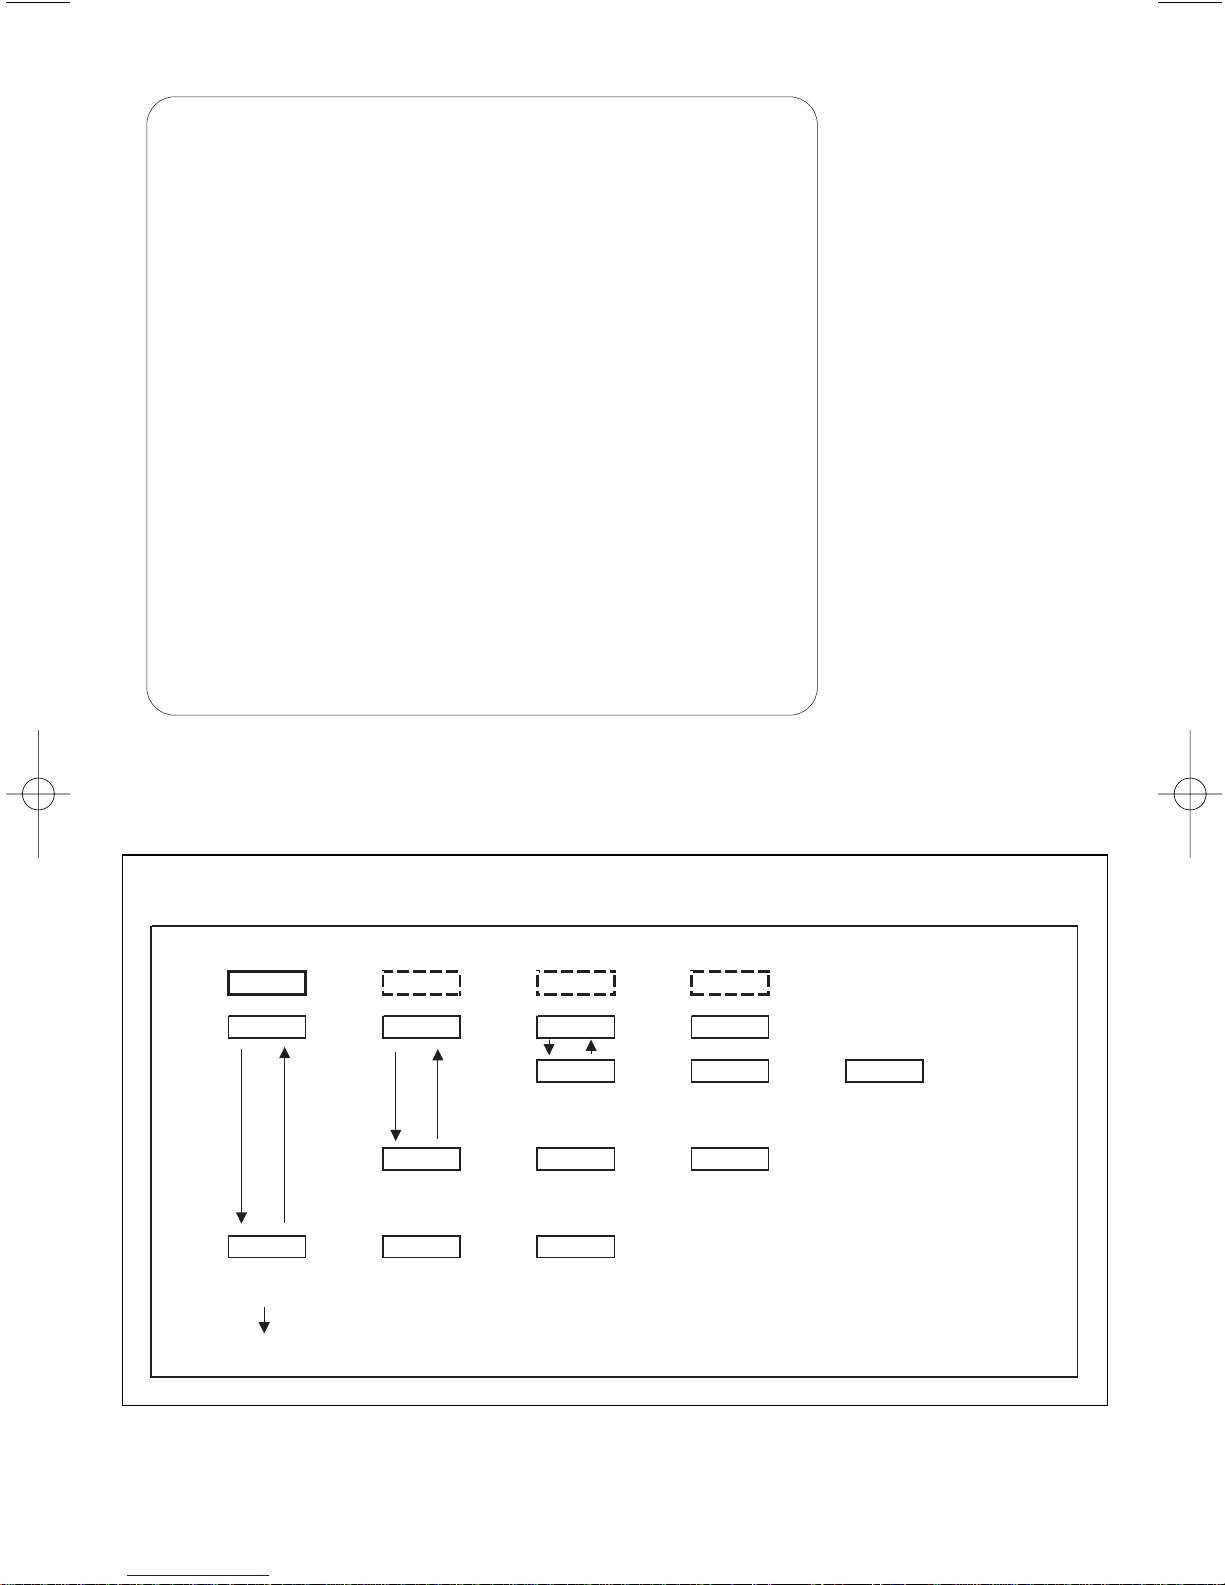
1 See page 19 / Voir page 57 / Véase la página 95
NAVIGATION (Example only)
Server 1 Server 1 Server 1 Server 1 :
9
65
ALBUM 9: ARTIST 9: GENRE 9: ........ 9: T1 9: T2....
Pop 9: Jazz 9: Classic
65 65 65
T1,T2,T3.. ------- T1,T2,T3.. ------- T1,T2,T3... :
9
Madonna 9: Pink 9: Dido
65 65 65
9
T1,T2,T3 ------- T1,T2,T3 ------- T1,T2,T3 :
Album 1 9: Album2 9: Album3
65 65 65
T1,T2,T3 ------- T1,T2,T3 ------- T1,T2,T3 :
9
9
PLAY T2.. :
Page 24
Index
EnglishFrançais
5
English
___________________________________
8
Français
________________________________
41
Español
Español
_________________________________
79
CAUTION
Use of controls or adjustments or performance of procedures other than
herein may result in hazardous radiation exposure or other unsafe operation.
DANGER
Invisible laser radiation when open.
AVOID DIRECT EXPOSURE TO BEAM.
CAUTION
Changes or modifications not expressly approved by Philips could void your
authority to operate this transmitter.
Class II equipment symbol
This symbol indicates that the unit has a double
insulation system.
Page 25
6
The set complies with the FCC-
Rules, Part 15 and with 21 CFR
1040.10. Operation is subject to the
following two conditions:
1.This device may not cause
harmful interference, and
2.This device must accept any
interference received, including
interference that may cause
undesired operation.
This equipment has been tested and
found to comply with the limits for a
Class B digital device, pursuant to Part
15 of the FCC Rules.These limits are
designed to provide reasonable
protection against harmful interference
in a residential installation.This
equipment generates, uses, and can
radiate radio frequency energy and, if
not installed and used in accordance
with the instructions, may cause harmful
interference to radio communications.
However, there is no guarantee that
interference will not occur in a
particular installation. If this equipment
does cause harmful interference to
radio or television reception, which can
be determined by turning the
equipment off and on, the user is
encouraged to try to correct the
interference by one or more of the
following measures:
– Reorient or relocate the receiving
antenna.
– Increase the separation between the
equipment and the receiver.
– Connect the equipment into an
outlet on a circuit different from that
to which the receiver is connected.
– Consult the dealer or an
experienced radio/TV technician for
help.
IMPORTANT NOTE:
FCC Radiation Exposure
Statement:
This equipment complies with FCC
radiation exposure limits set forth for
an uncontrolled environment.This
equipment should be installed and
operated with minimum distance 20cm
between the radiator and your body.
This transmitter must not be colocated or operating in conjunction
with any other antenna or transmitter.
Tested To Comply
With FCC Standards
FOR HOME OR OFFICE USE
Page 26
1. Read these instructions.
2. Keep these instructions.
3. Heed all warnings.
4. Follow all instructions.
5. Do not use this apparatus near
water.
6. Clean only with dry cloth.
7. Do not block any ventilation
openings. Install in accordance with
the manufacturer´s instructions.
8. Do not install near any heat sources
such as radiators, heat registers, stoves, or
other apparatus (including amplifiers) that
produce heat.
9. Do not defeat the
safety purpose of the
polarized or
grounding-type plug.
A polarized plug has two blades with one
wider than the other. A grounding type plug
has two blades and a third grounding prong.
The wide blade or the third prong are
provided for your safety. If the provided plug
does not fit into your outlet, consult an
electrician for replacement of the obsolete
outlet.
10.
Protect the power cord from being
walked on or pinched, particularly at plugs,
convenience receptacles, and the point
where they exit from the apparatus.
11.
Only use attachments/accessories
specified by the manufacturer.
12.
Use only with the cart, stand,
tripod, bracket, or table specified
by the manufacturer or sold with
the apparatus. When a car t is
used, use caution when moving
the cart/apparatus combination
to avoid injury from tip-over.
13 .
Unplug this apparatus during lightning
storms or when unused for long periods of
time.
14 .
Refer all servicing to qualified service
personnel. Servicing is required when the
apparatus has been damaged in any way,
such as power-supply cord or plug is
damaged, liquid has been spilled or objects
have fallen into the apparatus, the apparatus
has been exposed to rain or moisture, does
not operate normally, or has been dropped.
15.
Battery usage CAUTION – To
prevent battery leakage which may result in
bodily injury, property damage, or damage
to the unit:
● Install all batteries correctly, + and - as
marked on the unit.
● Do not mix batteries (old and new or
carbon and alkaline, etc.).
● Remove batteries when the unit is not used
for a long time.
IMPORTANT SAFETY INSTRUCTIONS
AC Polarized
Plug
16. Apparatus shall not be exposed to
dripping or splashing.
17. Do not place any sources of danger
on the apparatus (e.g. liquid filled
objects, lighted candles).
18. This product may contain lead and mercury.
Disposal of these materials may be regulated
due to environmental considerations.
For disposal or recycling information,
please contact your local authorities
or the Electronic Industries Alliance :
www.eiae.org.
EL 6475-E005: 04/01
Page 27
Technical data
_________________
10
General information
Supplied accessories
_______________
10
Environmental information
__________
11
Maintenance
_____________________
11
Disc handling
____________________
11
Setup
__________________________
11
Remote control
Remote control usage
_____________
12
Remote control keys
___________
12–13
Controls and connections
On the back
_____________________
14
On the front
__________________
14–15
Installation
Speaker connections
_______________
16
Antenna connections
______________
16
AM antenna
__________________
16
FM antenna
___________________
16
Installing a PC server
______________
17
Connecting an additional appliance
___
17
Power
__________________________
17
Wireless PC link
PC LINK function
_________________
18
How to display the current
server name
__________________
18
How to select another PC server __18
How to select another network
___
18
Tr ack navigation and playback
________
19
During playback
_______________
19
Basic functions
Switching on, switching to standby
____
20
Demonstration mode
______________
20
Setting the clock
__________________
21
Displaying the clock
_______________
21
Dim mode
______________________
21
Volume control
___________________
22
Volume adjustment
_____________
22
MUTE
_______________________
22
Sound control
____________________
22
DSC
________________________
22
VEC
________________________
22
Playback
Playable discs
____________________
23
Loading discs
____________________
23
Playing discs
_____________________
24
Direct selection and playback
of one particular disc
___________
24
Playback of all loaded discs
_______
24
To stop playback
__________________
24
Interrupting and resuming playback
___
24
Playback features
Selecting and searching
_____________
25
Selecting a track when playback is
stopped
_____________________
25
Selecting a track during playback
___
25
Searching for a passage during
playback
_____________________
25
Additional selecting and searching (on
MP3-CDs only)
__________________
25
Selecting an album when playback is
stopped
_____________________
25
Selecting an album during playback _25
Selecting a track in the album
_____
25
Album and track name display (on
MP3-CDs only)
__________________
26
SHUFFLE and REPEAT
_____________
26
Repeating a track, a disc or a
program
_____________________
26
SHUFFLE - Playing tracks in
random order
_________________
26
Programming track numbers
________
27
Clearing the program
______________
27
Contents
8
English
Page 28
Tuner
Tuning to radio stations
____________
28
Storing radio stations
___________
28–29
Storing by using “Plug and Play”
___
28
Storing by automatic programming _29
Storing by manual programming
___
29
Tuning to preset radio stations
_______
29
Deleting a preset radio station
_______
29
Timer
Wake-up timer
________________
30–31
Timer setting
__________________
30
Activating or deactivating
the timer
_____________________
31
Checking the timer setting
________
31
Sleep timer
______________________
31
Tr oubleshooting
_____________
32–33
Frequently asked questions
__
34–39
Contents
9
English
Page 29

Technical data
Subject to modification without notice.
General
AC Power
______________
120V / 60 Hz
Power consumption
Active
______________________
55 W
Standby
___________________
< 10 W
Eco Power Standby
_________
< 0.5 W
Dimensions,
w × h × d
________
175 × 285 × 340 mm
6.9 × 11.2 × 13.4 inches
Weight (without speakers)
__
5.5 kg, 8.8 lb
Amplifier
Output power
________
2 x 150 W MPO
2 x 70 W RMS (6 Ω, 1kHz, 10% THD)
Frequency response _50–20000 Hz, -3dB
S/N ratio
_____________
≥ 75 dBA (IEC)
Input sensitivity
AUX/CDR IN
___________
500 mV/1V
Output
Impedance speakers
__________
≥ 6 Ω
Impedance headphones __32 Ω – 1000 Ω
CD changer
Number of programmable tracks
____
99
Frequency range
____
50–20000 Hz, -3dB
S/N ratio
_____________
≥ 75 dBA (IEC)
Channel separation
____
≥ 60 dB (1 kHz)
MPEG 1 Layer 3 (MP3-CD) __MPEG AUDIO
MP3-CD bit rate
_________
32-256 kbps
128 kbps advised
Sampling frequencies
___
32, 44.1, 48 kHz
Wireless PC LINK
Wireless standard
____________
802.11b
Frequency range
____
50–20000 Hz, -3dB
S/N ratio
_____________
≥ 75 dBA (IEC)
Total harmonic distortion
_____
0.3% (1 kHz)
Tuner
Wave range
FM
________________
87.5–108 MHz
100
kHz Grid
AM
________________
530–1700 kHz
10
kHz Grid
Number of presets
_______________
40
Antenna
FM
_____________________
75 Ω wire
AM
_________________
Loop antenna
Speakers
System
_____________
3 way, Bass reflex
Impedance
_____________________
6 Ω
Woofer
____________________
1 x 6.5
"
Tw eeter
_____________________
1 x 2"
Dimensions,
w × h × d
________
175 × 285 × 248 mm
6.9 × 11.2 × 9.7 inches
Weight
____________
3.1 kg, 4.96 lb each
Supplied accessories
– PC link software installer CD-ROM
– Wireless USB adapter and
extension cable
– Remote control and 2 batteries, size AA
–2 loudspeaker boxes including
2 speaker cables
– AM loop antenna
– FM wire antenna
–Power cable
Technical data / General information
10
English
Page 30
Environmental information
All redundant packing material has been
omitted.We have done our utmost to
make the packaging easily separable into
three mono materials: cardboard (box),
polystyrene foam (buffer) and polyethylene
(bags, protective foam sheet).
Your unit consists of materials which can be
recycled if disassembled by a specialised
company. Please observe the local
regulations regarding the disposal of packing
materials, exhausted batteries and old
equipment.
Maintenance
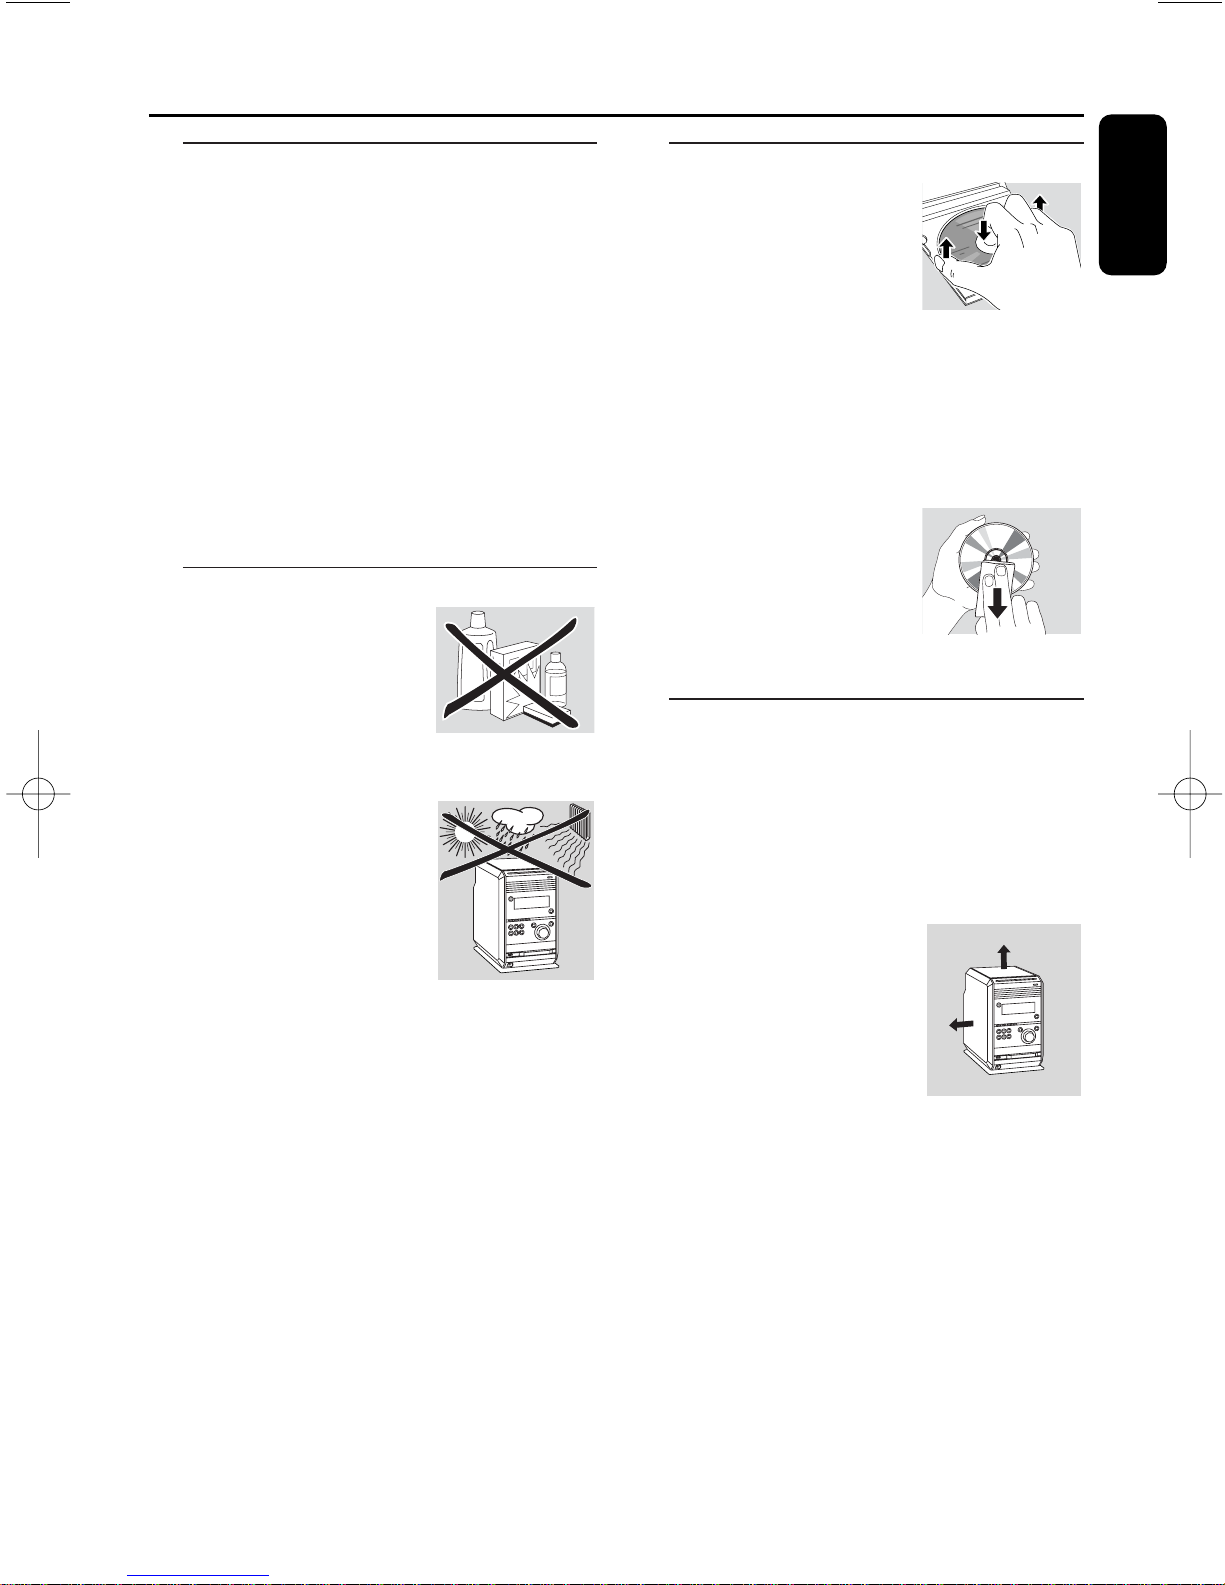
Clean the unit with a
soft, slightly dampened,
lint-free cloth. Do not
use any cleaning agents
as they may have a
corrosive effect.
Do not expose the unit,
batteries or discs to
humidity, rain, sand or
excessive heat (caused by
heating equipment or
direct sunlight).
Always keep the trays of
your unit closed to protect the lens from
dust. If the unit fails to read discs correctly
use a commonly available cleaning-CD to
clean the lens before submitting the unit to
repair. Other cleaning methods may destroy
the lens.
The lens may cloud over when the unit is
moved from cold to warm surroundings.
Playing a disc is not possible then. Leave the
unit in a warm environment until the
moisture evaporates.
Disc handling
To take a disc out of
its box easily, press the
centre spindle while lifting
it. After use, always take
the disc out of the unit
and store it in the disc case.
Never attach a sticker to a disc. If you want
to provide a disc with an inscription use a
soft felt-tipped pen and write only on the
printed side.
To clean a disc, wipe it
in a straight line from the
centre towards the edge
using a soft, lint-free cloth.
Any cleaning agents may
damage the disc!
Setup
Place the unit on a flat, hard and stable
surface.
Do not position the unit on top of other
equipment that might heat it up (e.g.
receiver or amplifier).
Place the apparatus in a
location with adequate
ventilation to prevent
internal heat build up.
Allow at least 10 cm
(4 inches) clearance
from the rear and the
top of the unit and 5 cm (2 inches)
from each side.
The apparatus shall not be exposed to
dripping or splashing.
Do not place any sources of danger on the
apparatus (e.g. liquid filled objects, lighted
candles).
Do not block any ventilation openings.
General information
11
English
5 cm
2 inches
5 cm
2 inches
10 cm
4 inches
10 cm
4 inches
Page 31
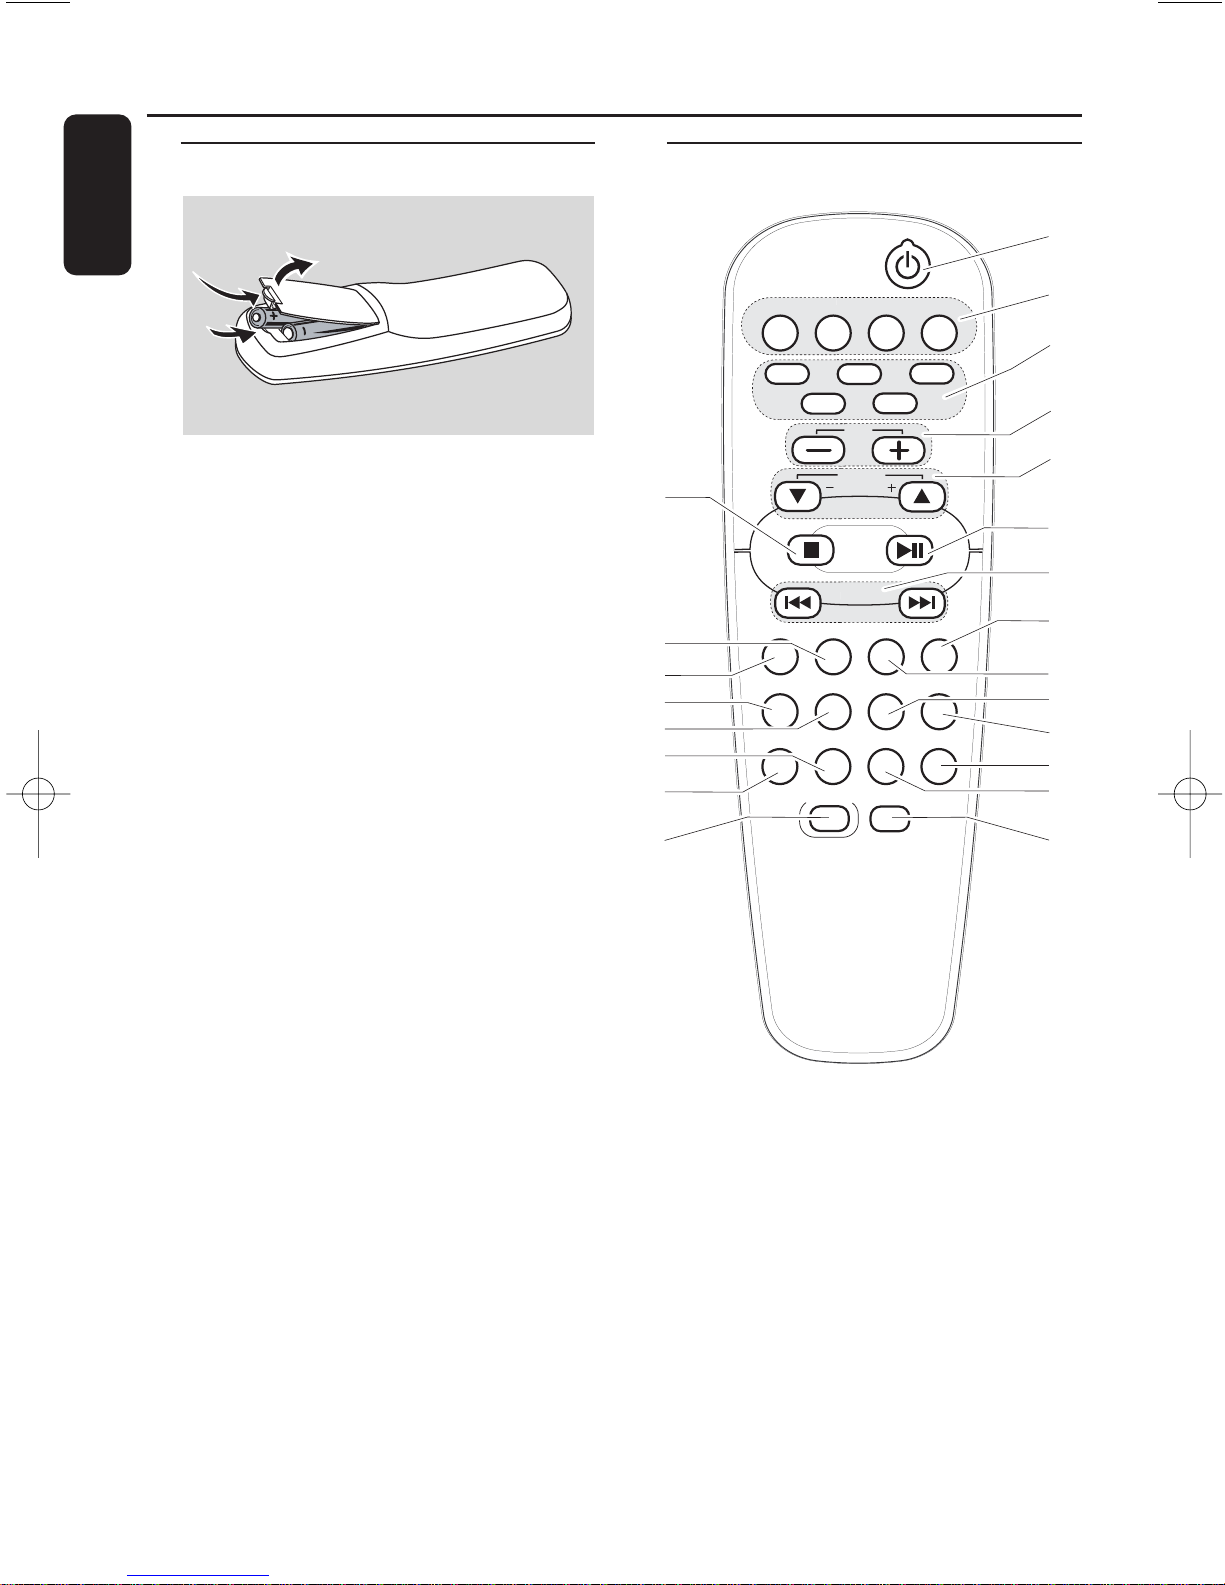
Remote control usage
1 Open the battery compartment of the
remote control and insert 2 alkaline
batteries, type AA (R06, UM-3).
2 Close the battery compartment.
Do not use old and new or different types
of batteries in combination.
Remove batteries if they are empty or if the
remote control will not be used for a long
time.
Batteries contain chemical substances,
so they should be disposed of properly.
The buttons on the remote control work
the same way as the corresponding ones
on the unit.
Important!
Always select the source you wish to
control first by pressing one of the source
keys on the remote control (e. g. CD,
TUNER).Then select the desired function
(e.g. 4, ¢, ÉÅ).
The remote control remains tuned to the
selected source until another source button
on the remote control is pressed.
Remote control keys
Remote control
12
English
AUX PC LINK
1
#
2
3
4
7
6
@
!
$
%
*
^
&
¡
)
™
0
(
TUNERCD
SHUFFLEPROGRAM
TIMERCLOCKSLEEP
DSC VECDIM
MUTE
CD1
CD2
CD3
CD5
CD4
ALBUM
VOL
9
REPEAT
RDS/NEWS
TIMER ON/OFF
8
DISPLAY
5
HOME
BROWSE
Page 32

1 2
switches the unit to (Eco Power) standby
2 Source buttons
CD
selects the CD changer
TUNER
selects the tuner and toggles between the
wavebands: TUNER FM and TUNER AM
AUX
selects the input for an additional connected
appliance and toggles between the input
sensitivities: AUX (high level input sensitivity)
and AUX CDR (low level input sensitivity)
PC LINK A
selects the connected PC as source
3 CD1, CD2, CD3, CD4, CD5
selects a disc tray and starts playback
4 VOLUME-, VOLUME+
decreases/increases the volume level
5 ALBUM ∞ BROWSE-,
ALBUM 5 BROWSE+
CD: selects the previous/next album on an
MP3-CD
TUNER: selects the previous/next preset
radio station
PC LINK: selects the previous/next level
CLOCK or TIMER: sets the hours
6 Ç
stops playback
7 ÉÅ
starts and interrupts playback
8 4, ¢
CD:
– selects the previous/next track
– searches backward/forward (press and
hold the button) within the current track
TUNER:
–
tunes to a lower/higher radio frequency
(press and hold the button for more than a
half second)
CLOCK or TIMER: sets the minutes
PC LINK: selects the previous/next item
9 DISPLAY
CD: displays the album and track name on
an MP3-CD
PC LINK: switches between displaying the
elapsed playing time, the track name and
the file name
0 SHUFFLE
plays tracks in random order
! PROGRAM
enters the program menu
@ REPEAT
repeats a track, a disc or programmed track(s)
# SLEEP
sets the sleep timer
$ CLOCK
– displays the set time
– enters the clock setting mode (press and
hold for more than 2 seconds)
% TIMER
– displays the timer setting
– enters the timer setting mode (press
and hold for more than 2 seconds)
^ TIMER ON/OFF
switches the timer on/off
& VEC
selects predefined surround sound settings
* DSC
selects predefined sound settings
( DIM
controls the brightness of the display
) RDS/NEWS
no function on this unit
¡ HOME
PC LINK: returns to the first level of the
file structure
™ MUTE
switches the sound off temporarily
Remote control
13
English
Page 33
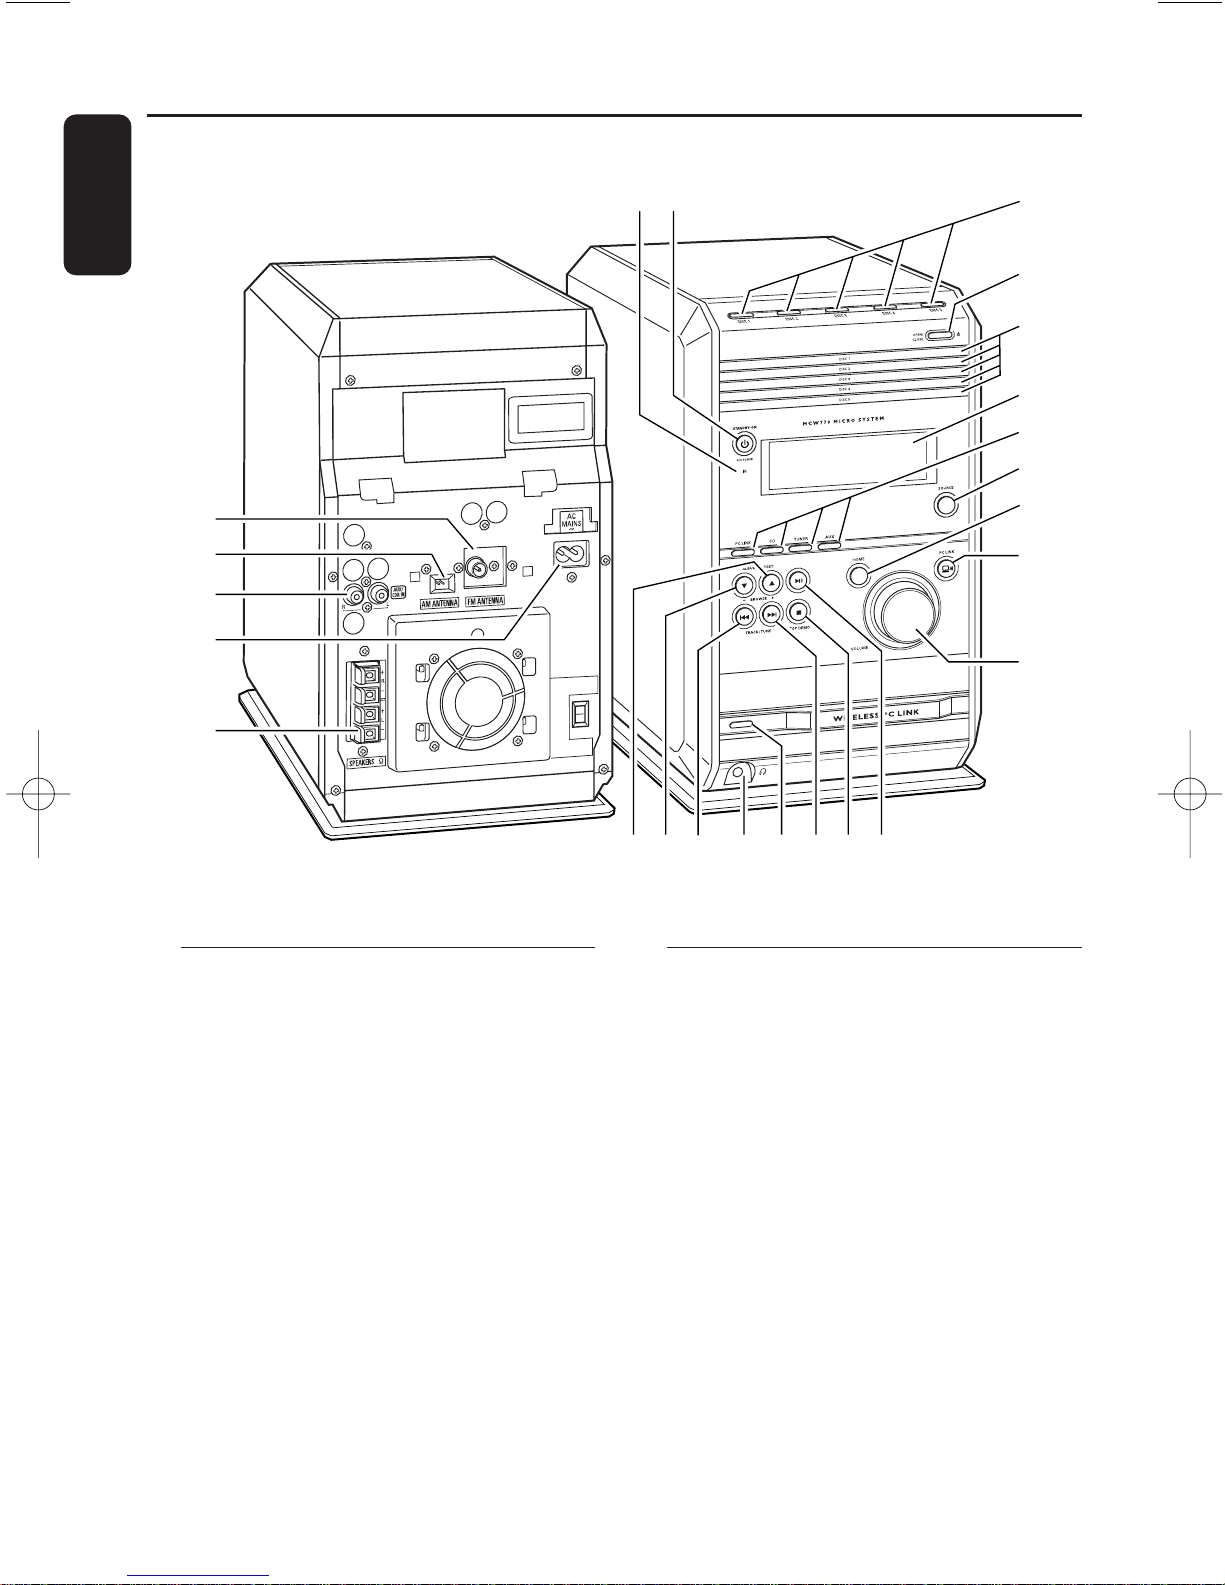
On the back
1 SPEAKERS 6 Ω L/R
connect to the supplied speakers
2 AC MAINS ~
After all other connections have been
made, connect the power cord to the
wall outlet.
3 AUX/CDR IN R/L
connect to the analog audio output of an
additional appliance
4 AM ANTENNA
connect the supplied loop antenna here
5 FM ANTENNA
connect the supplied wire antenna here
On the front
6 DISC 1, DISC 2, DISC 3, DISC 4,
DISC 5
selects a disc tray and starts playback
7 OPEN/CLOSE /
opens/closes the disc tray
8 disc trays
9 STANDBY-ON 2
switches the unit to (Eco Power) standby
Controls and connections
14
English
6
1
2
3
5
4
6
7
8
!
#
@
%
$
^
9
0
≤
£
™
¡
&
*(
)
Page 34

0 iR
sensor for the infrared remote control
Note: Always point the remote control
towards this sensor.
! display
@ source control lights
when a source is active the respective
control light lights up
# SOURCE
toggles between the sources:
CD: the CD changer is selected
TUNER FM: the FM tuner waveband is
selected
TUNER AM: the AM tuner waveband is
selected
AUX: the high level input sensitivity for an
additional connected appliance is selected
AUX CDR: the low level input sensitivity for
an additional connected appliance is
selected
$ HOME
PC LINK: returns to the first level of the
file structure
% PC LINK A
selects the connected PC as source
^ VOLUME rotary
adjusts the volume
& ÉÅ
starts and interrupts playback
* STOP DEMO Ç
– stops playback
– deactivates/activates the demonstration
mode (press and hold the button for
5 seconds)
( ¢
CD:
– selects the next track
– searches forward (press and hold the
button) within the current track
TUNER: tunes to a higher radio frequency
(press and hold the button for more than
a half second)
CLOCK or TIMER: sets the minutes
PC LINK: selects the next item
) WIRELESS PC LINK control light
lights up and blinks when PC LINK data
are transferred
¡ p
3.5 mm headphone socket
Note: Connecting the headphones will switch
off the speakers.
™ 4
CD:
– selects the previous track
– searches backward (press and hold the
button) within the current track
TUNER: tunes to a lower radio frequency
(press and hold the button for more than
a half second)
CLOCK or TIMER: sets the minutes
PC LINK: selects the previous item
£ ALBUM/PRESET ∞ BROWSE-
CD: selects the previous album on an
MP3-CD
TUNER: selects the previous preset radio
station
PC LINK: selects the previous level
CLOCK or TIMER: sets the hours
≤ ALBUM/PRESET 5 BROWSE+
CD: selects the next album on an
MP3-CD
TUNER: selects the next preset radio
station
PC LINK: selects the next level
CLOCK or TIMER: sets the hours
Controls and connections
15
English
Page 35
Warning:
Never make or change connections
with the power supply switched on.
Speaker connections
Use the supplied speakers only. Using
other speakers can damage the unit or
the sound quality will be negatively
affected.
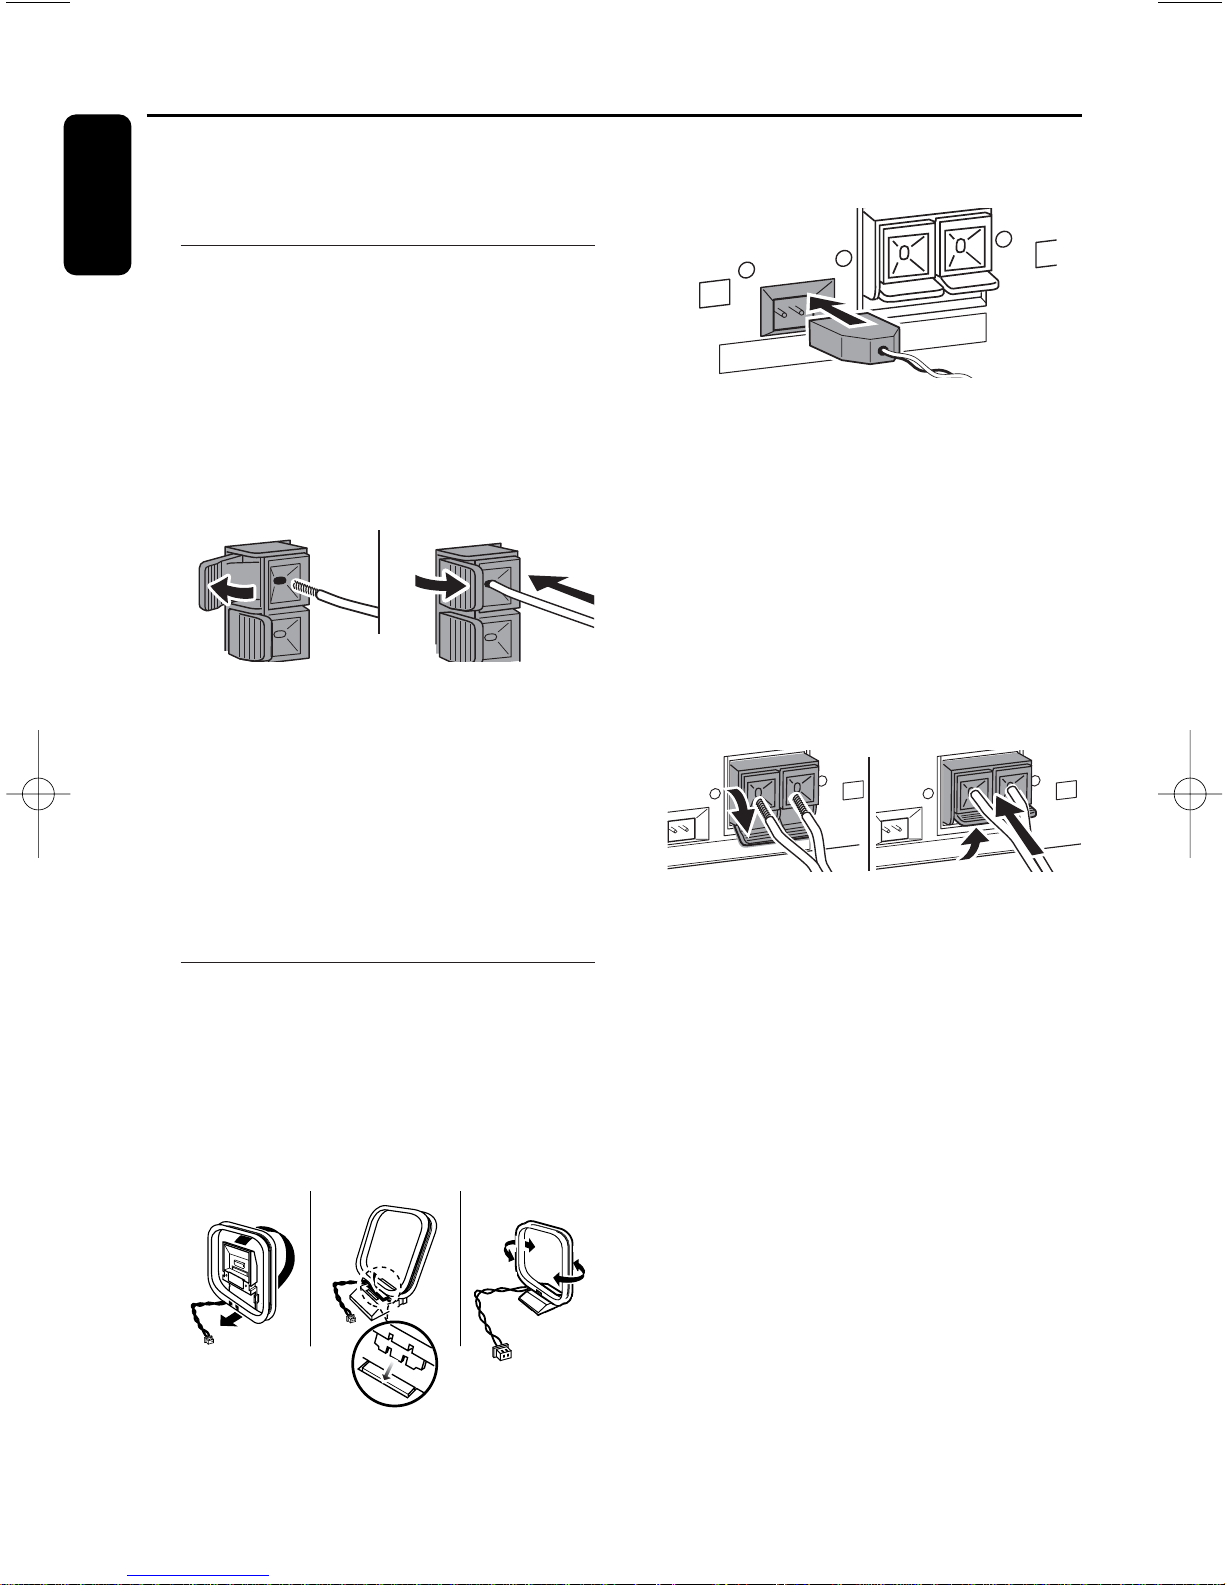
● Connect the cable of the left speaker to L
(red and black), and the cable of the right
speaker to R (red and black) as follows:
Press the clip of the red terminal and fully
insert the stripped portion of the colored
(or marked) speaker cable into the socket,
then release the clip.
Press the clip of the black terminal and fully
insert the stripped portion of the black (or
unmarked) speaker cable into the socket,
then release the clip.
Antenna connections
AM antenna
The supplied loop antenna is for indoor use
only.
1 Assemble the loop antenna as shown
below.
2 Fit the plug of the loop antenna to
AM ANTENNA as shown below.
3 Adjust the position of the antenna for best
reception (as far away as possible from the
TV,VCR or other radiation sources).
FM antenna
The supplied wire antenna can only be used
to receive nearby stations. For better
reception we recommend using a cable
antenna system or an outdoor antenna.
1 Open the FM ANTENNA click-fits by
pushing the lever down as shown below.
2 Insert each wire of the antenna into one
hole.
3 Close the click-fits using the lever.
4 Move the antenna in different positions for
optimal reception (as far away as possible
from the TV,VCR or other radiation
sources).
AM ANTENNA FM ANTENNA
Installation
16
English
AM ANTENNA FM ANTENNA
Page 36
Installing a PC server
See chapter Wireless PC Link “Quick
installation”.
Connecting an additional
appliance
It is possible to use an additional appliance,
e.g.TV,VCR or CD recorder with the unit.
You can choose between high level input
sensitivity (e.g. for a connected TV or VCR)
and low level input sensitivity (e.g. for a
connected CD recorder).
1 Insert the red plug of a cinch cable to the
red socket AUX IN R and the white plug to
the white socket AUX IN L.
2 Connect the other end of the cinch cable
to the audio outputs of the additional
appliance.
3 Press SOURCE on the unit repeatedly until
AUX is selected.
➜ AUX: the high level input sensitivity for an
additional connected appliance is
selected.
To select the low level input sensitivity press
and hold for more than 2 seconds
SOURCE on the unit until AUX CDR is
selected.
➜ AUX CDR: the low level input sensitivity
for an additional connected appliance is
selected.
To toggle the input sensitivity press
SOURCE again for 2 seconds on the unit.
or
Press AUX on the remote control
repeatedly until the desired input sensitivity
(AUX or AUX CDR) is displayed.
Note: It is not possible to connect a turntable
directly to AUX IN L/R. If you wish to use a
turntable, you have to connect an
RIAA-amplifier to AUX IN L/R on the unit.
Then connect the turntable to the
RIAA-amplifier.
Power
The model and serial numbers are
located on the rear of the unit.
1 Check whether the power voltage as
shown on the type plate corresponds to
your local power voltage. If it does not,
consult your dealer or service organization.
2 Make sure all connections have been
made before switching on the power
supply.
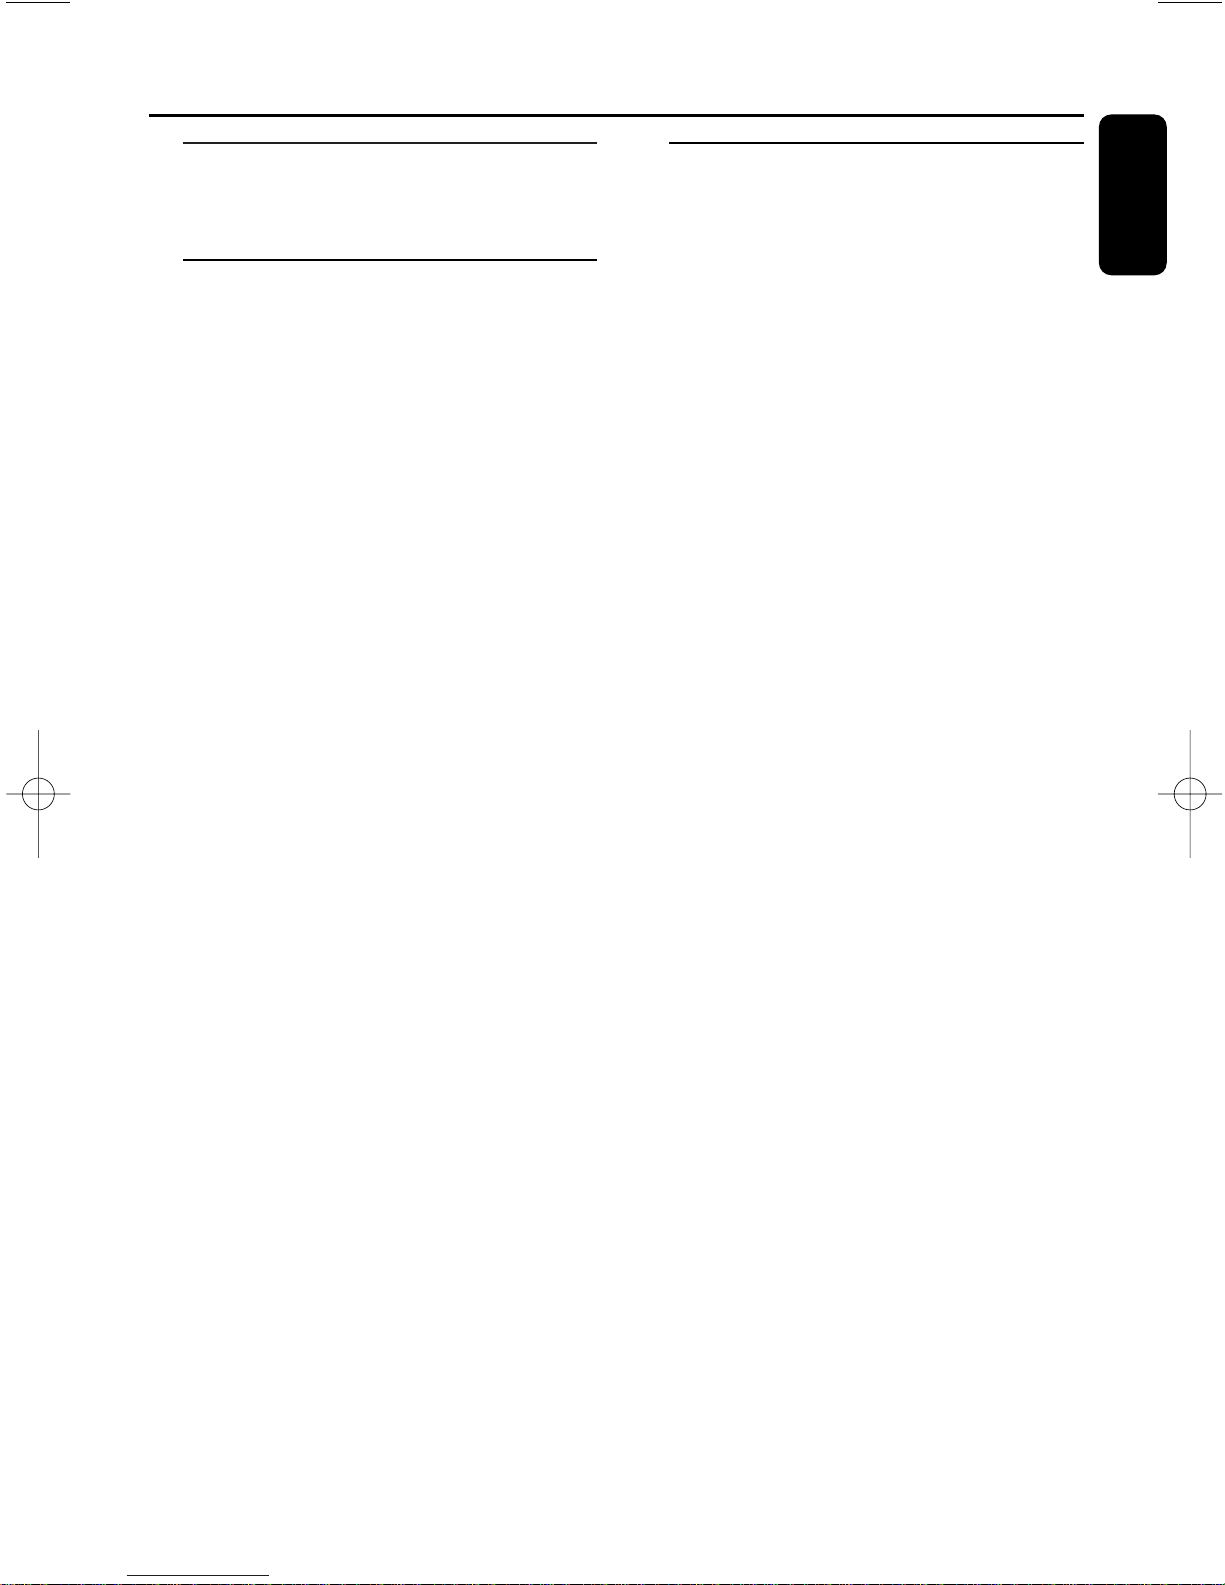
3 Connect the power cable supplied to
AC MAINS ~ and to the wall socket.This
switches on the power supply.
00
When the power cable is connected for the
first time to the wall socket TUNER and
AUTO INSTALL - PRESS PLAY is
displayed. Press either ÉÅ on the unit to
store all available radio stations automatically
(see also chapter “Storing radio stations”) or
if you do not wish to store them now press
Ç on the unit to exit.
When the unit is switched to standby, it is
still consuming some power. To disconnect
the unit from the power completely,
remove the power plug from the wall
socket.
To avoid overheating of the unit a
safety circuit has been built in.
Therefore your unit may disconnect
under extreme conditions. If this
happens, switch the unit off and let it
cool down before reusing it.
Installation
17
English
Page 37
18
English
IMPORTANT !
For preparation, please refer to
the “Wireless PC Link Quick
Installation” and
www.philips.com/support.
PC LINK function
PC LINK enables you to playback your
music collection from the PC via the set.
Before playback can be started the
connection to an installed network/server
must be started. Make sure the wireless
USB adapter is connected or another
network connection is working properly.
1 Switch on your PC and wait until the PC
boot is ready.
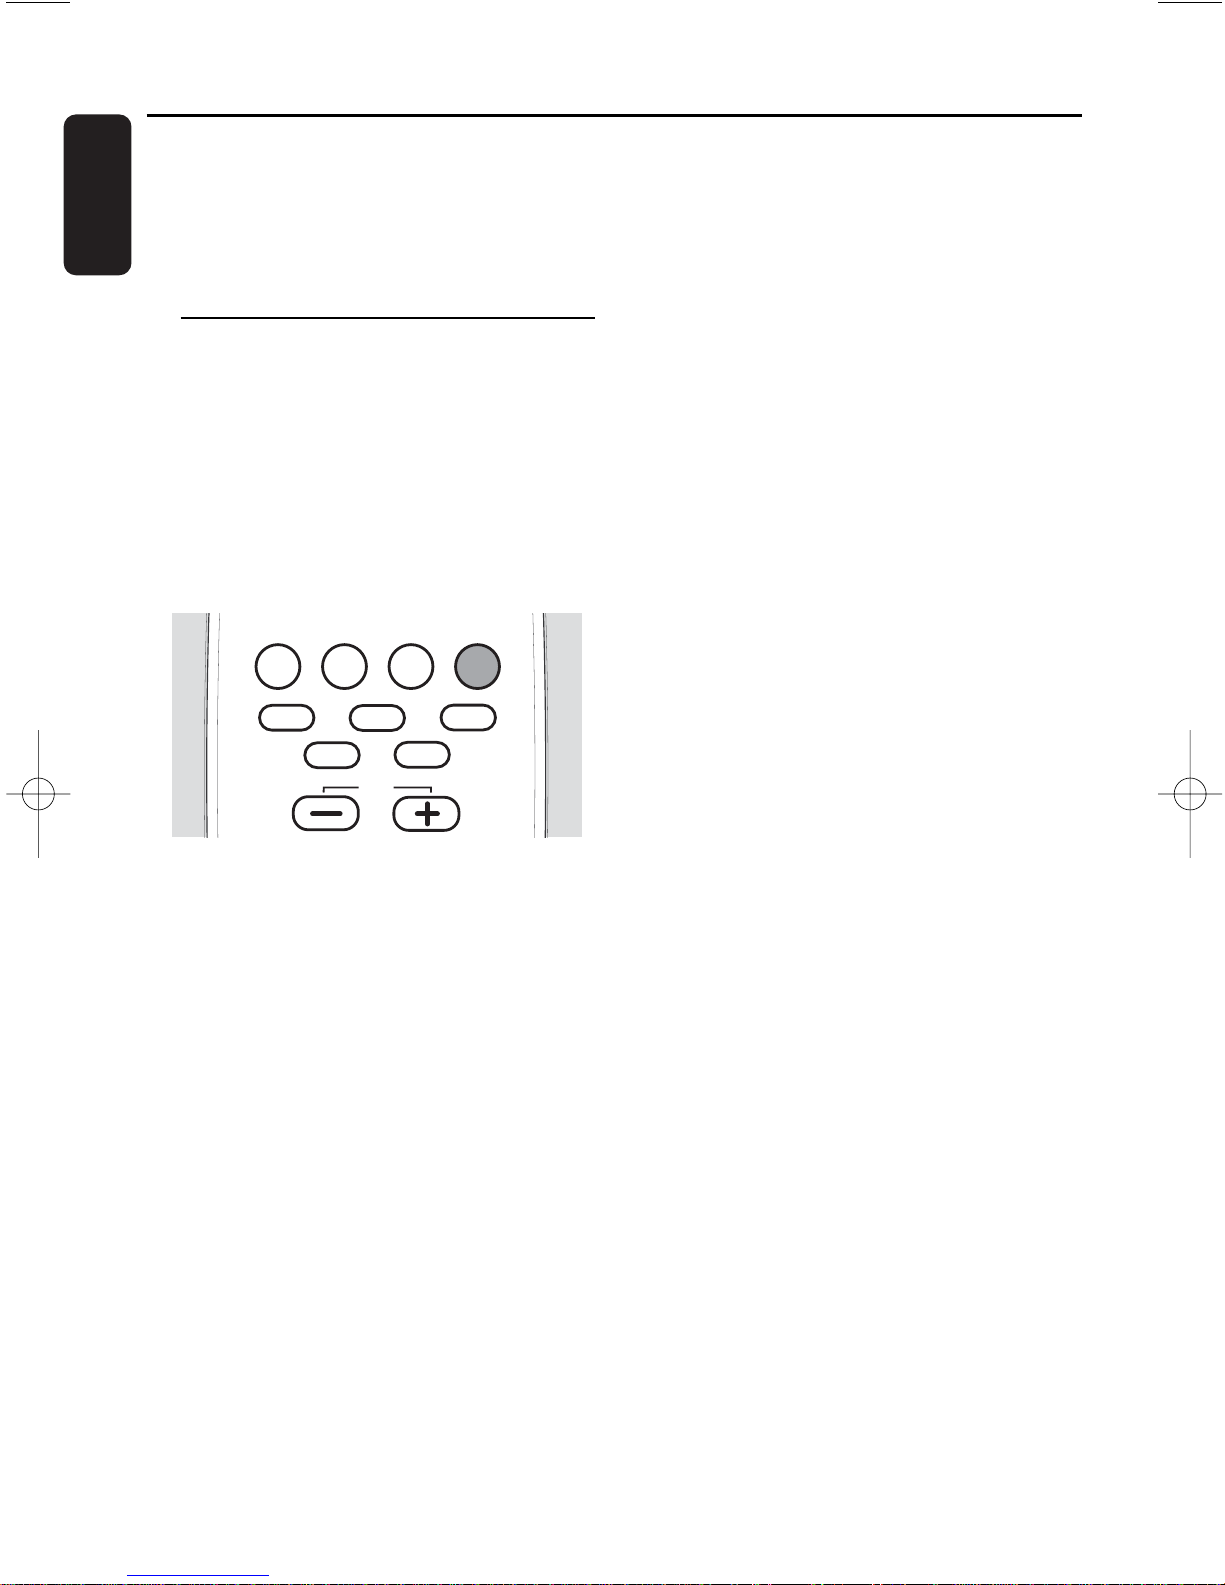
2 Press PC LINK A to select the PC as
source.
➜ PC LINK is displayed.
➜ SERVER is displayed and the last active
server name is scrolled.
➜ The last active server name is displayed
and CONNECTING is scrolled.
Note: If no PC server is installed PC LINK is
displayed and NOT INSTALLED is scrolled.
Install the PC server (see “Wireless PC Link
Quick Installation”).
3 As soon as the connection is established:
➜ PC LINK is displayed and a track name
is scrolled.
Note:The last played track will have been
stored and will be selected automatically.
However, if you switch from one PC server to
another, the first track will be selected.
How to display the current server
name
00
To display the current server name press
PC LINK A while the display is neither
showing a server name nor a network
name.
➜ SERVER is displayed and the current
server name is scrolled.
How to select another PC server
00
To switch between further installed
PC servers (see
www.philips.com/support) press
PC LINK A.
➜ SERVER is displayed and the next server
name is scrolled.
To select the displayed server press 4 or
¢ as often as necessary while a server
name is shown.To confirm the selected
server press ALBUM ∞.
How to select another network
1 To switch between further installed
PC networks (see
www.philips.com/support) press
PC LINK A and then ALBUM 5 to enter
the network display.
To select the displayed network press 4
or ¢ as often as necessary while a
network name is shown.To confirm the
selected network press ALBUM ∞.
Note: If the network is not available the first
server name is displayed and
NO CONNECTION
is scrolled.
2 After connecting the network a PC server
will be selected automatically.
➜ The server name is displayed and
CONNECTING is scrolled.
Note: If no connection has been detected the
server name is displayed and NO
CONNECTION is scrolled.
AUX PC LINKTUNERCD
CD2
CD
3
CD5
CD4
CD
1
VOL
Wireless PC link playback
Page 38
19
English
Track navigation and playback
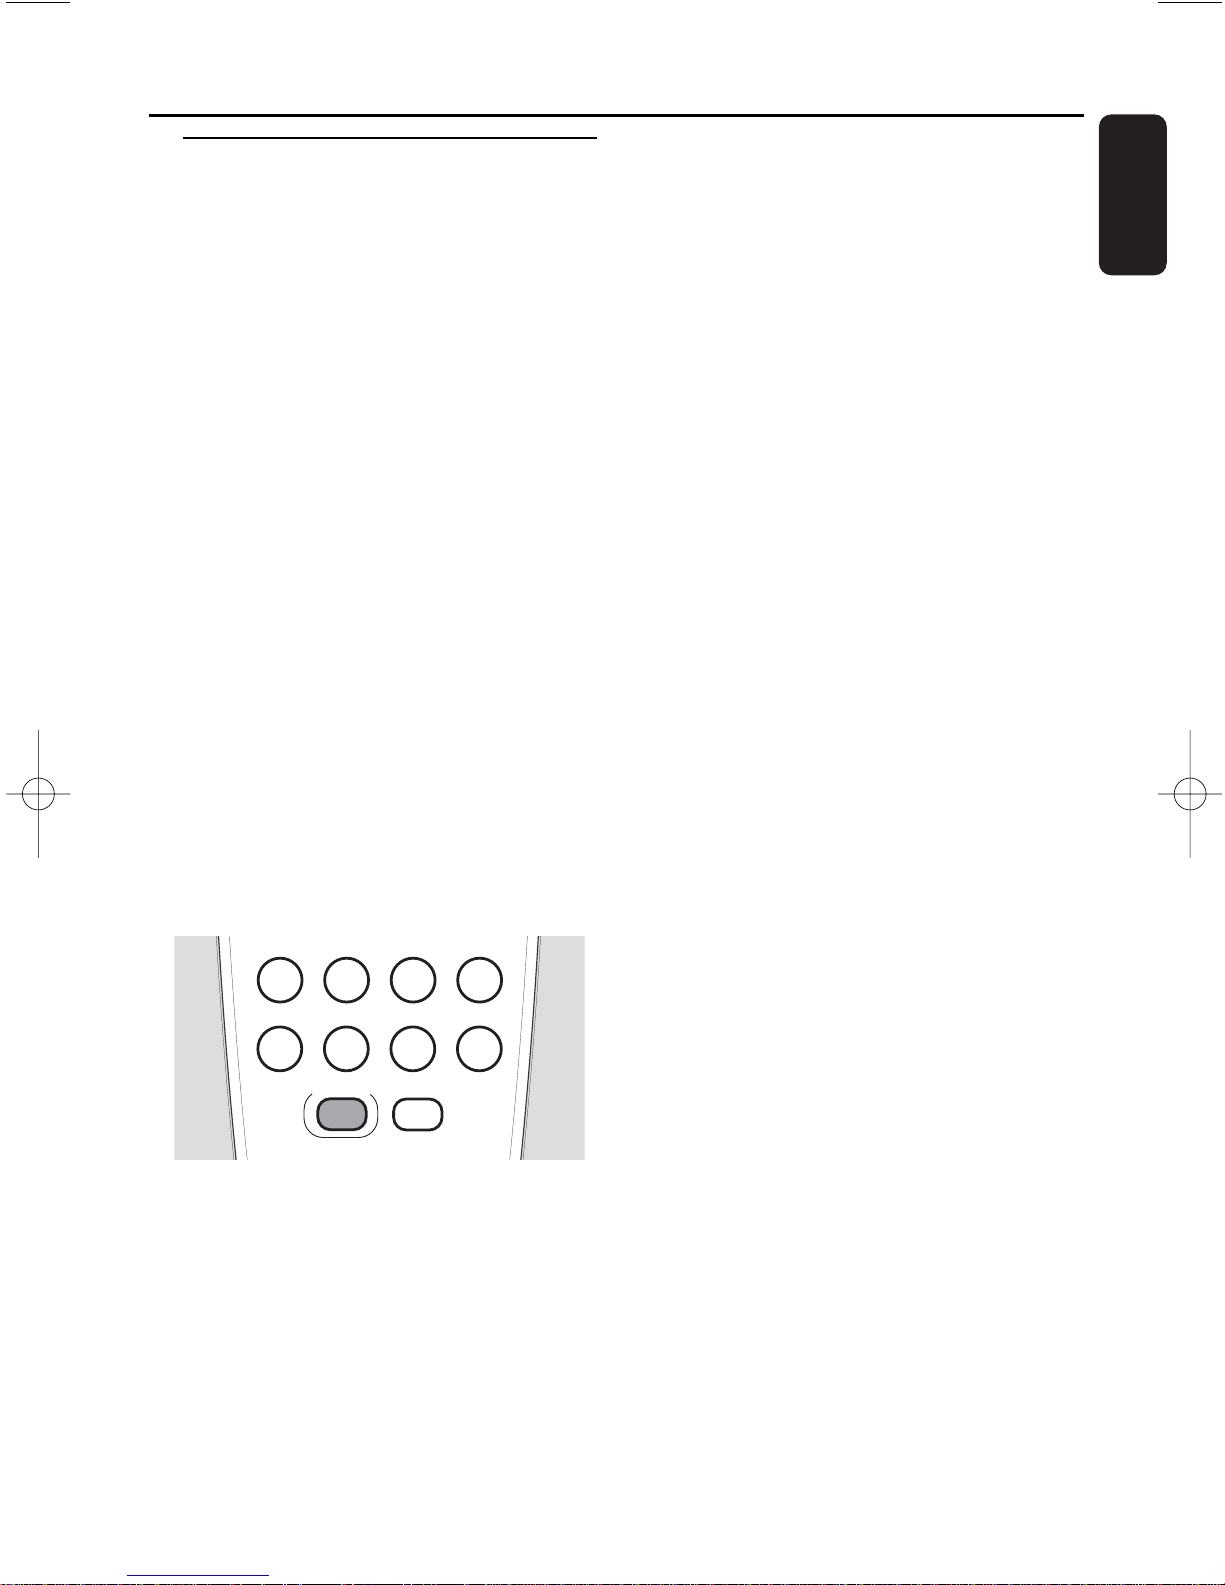
(See illustration on page 4, User
manual)
For easier finding of a desired track you can
navigate as follows:
BROWSE -: goes down one level
BROWSE +: goes up one level
4: skips to the previous item on the
same level
¢: skips to the next item on the same
level
1 Press BROWSE+ or BROWSE -
repeatedly to select the desired level.
➜ The selected level (e.g. ALBUM) and the
name of the selected item (e.g. first
album name) are displayed.
2 Press 4 or ¢ repeatedly to select an
item within the selected level.
➜ The name of the selected level (e.g. first
album name) and the name of the
selected item are displayed.
00
To return to the first level of the file
structure press HOME.
Note:The set will exit from the navigation
mode if no button is pressed within
30 seconds.
3 Press ÉÅ to start playback.
➜ PC LINK is displayed and the track
name is scrolled.
➜ PC LINK and the elapsed playing time
are displayed.
During playback
00
To switch between display of elapsed
playing time, track name and file name press
DISPLAY on the remote control repeatedly.
00
To find a particular passage in backwards or
forwards direction within the current track
press and hold 4 or ¢ and release the
key at the desired passage.
00
Press 4 or ¢ to skip to the beginning
of the previous or next track on the
selected disc.
00
To shuffle tracks press SHUFFLE on the
remote control.
➜ PC LINK is displayed and e.g. SHUFFLE
TRACKS is scrolled.
To deactivate the function press SHUFFLE
on the remote control again.
00
To repeat tracks press REPEAT on the
remote control repeatedly to select either:
➜ REPEAT TRACK:The current track is
played repeatedly.
➜ REPEAT ALL: All tracks in the current
setting are played repeatedly.
To return to normal playback, press
REPEAT on the remote control repeatedly
until REPEAT OFF is displayed.
4 Press STOP Ç to stop playback.
HOME
Wireless PC link playback
TIMERCLOCKSLEEP
TIMER ON/OFF
RDS/NEWS
DSC VECDIM
MUTE
Page 39
20
English
Switching on, switching to
standby
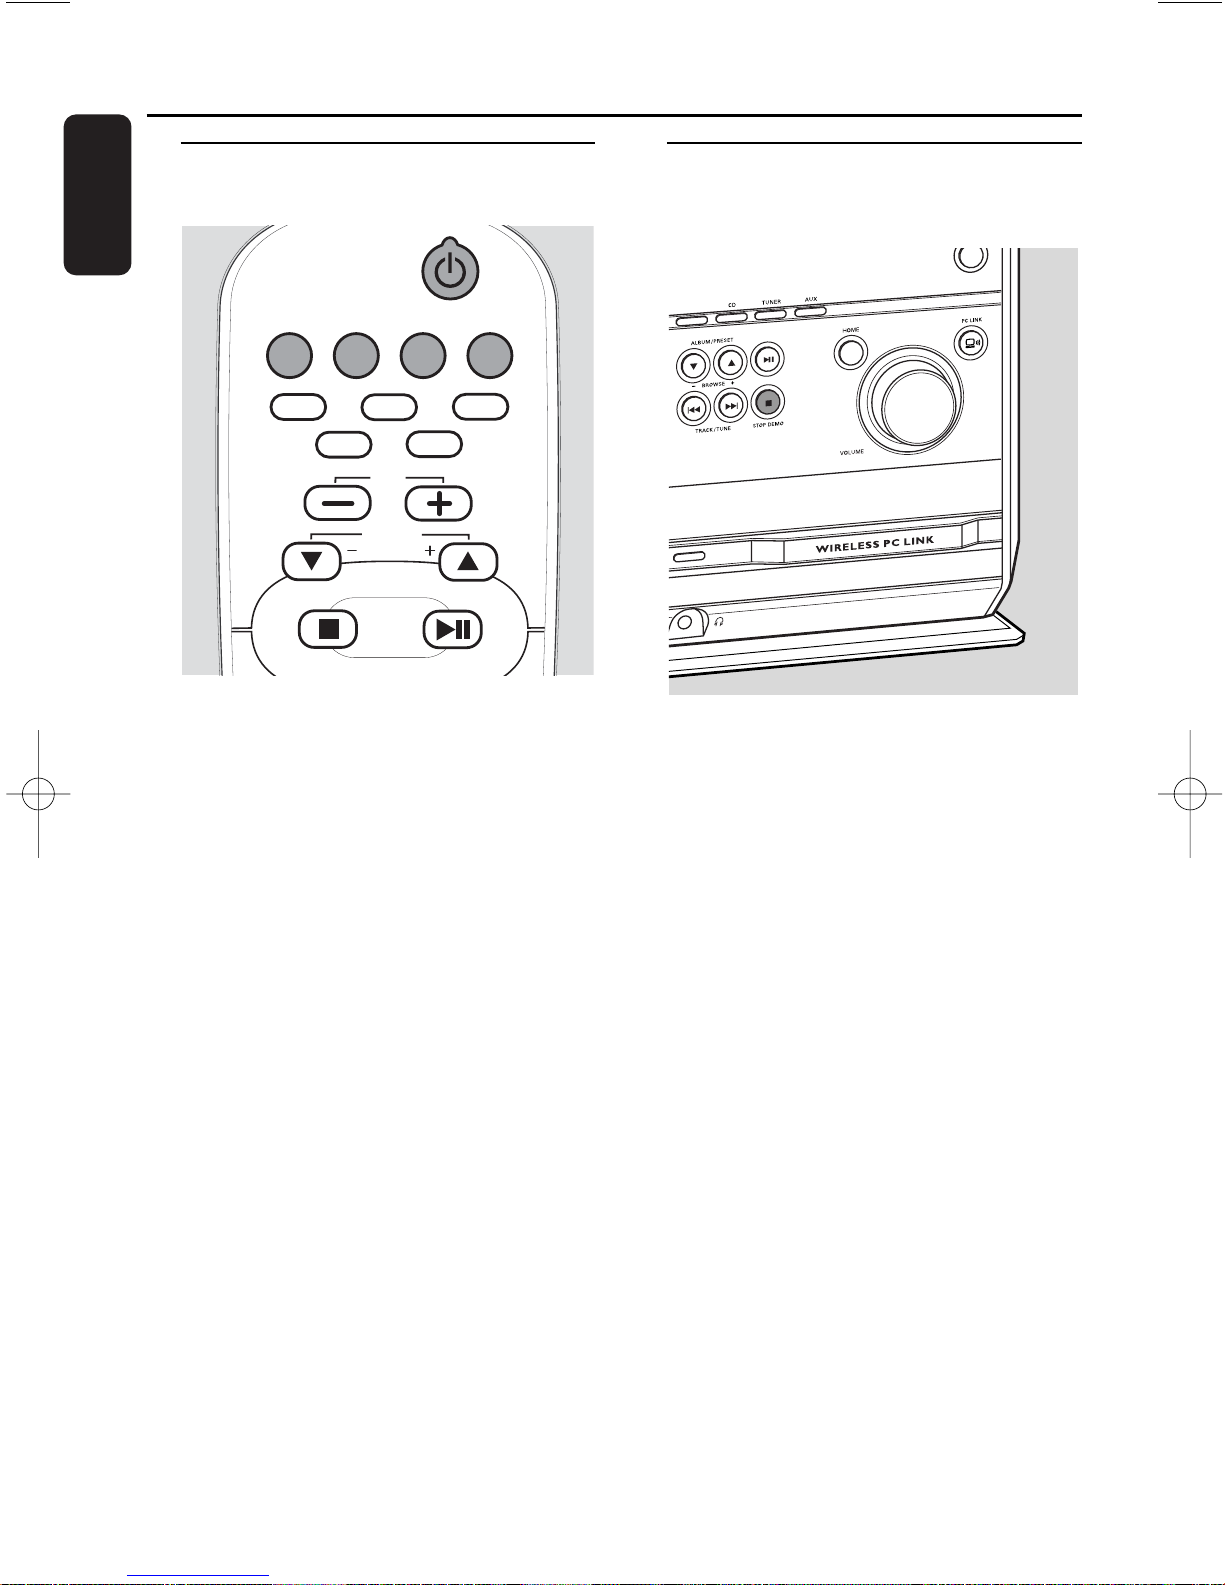
● To switch the unit to an active mode
press one of the source keys on the remote
control (CD,TUNER, AUX, PC LINK)
or
select a source by pressing SOURCE on the
unit repeatedly until CD, TUNER or AUX is
displayed,
or
select the PC as source by pressing
PC LINK A on the unit.
● To switch the unit to standby press
and hold STANDBY-ON 2 for more than
2 seconds.
➜ The clock is displayed.
● To switch the unit to Eco Power
standby press STANDBY-ON 2.
Demonstration mode
The demonstration mode displays various
features of the unit.
● To activate the demonstration mode
press and hold STOP DEMO
Ç for
5 seconds during standby or Eco Power
standby on the unit until DEMO ON is
displayed.
● To deactivate the demonstration
mode press and hold STOP DEMO
Ç
again on the unit for 5 seconds until
DEMO OFF is displayed.
Basic functions
VOL
CD
AUX PC LINKTUNERCD
3
1
CD2
CD
CD4
CD5
ALBUM
BROWSE
Page 40
21
English
Setting the clock
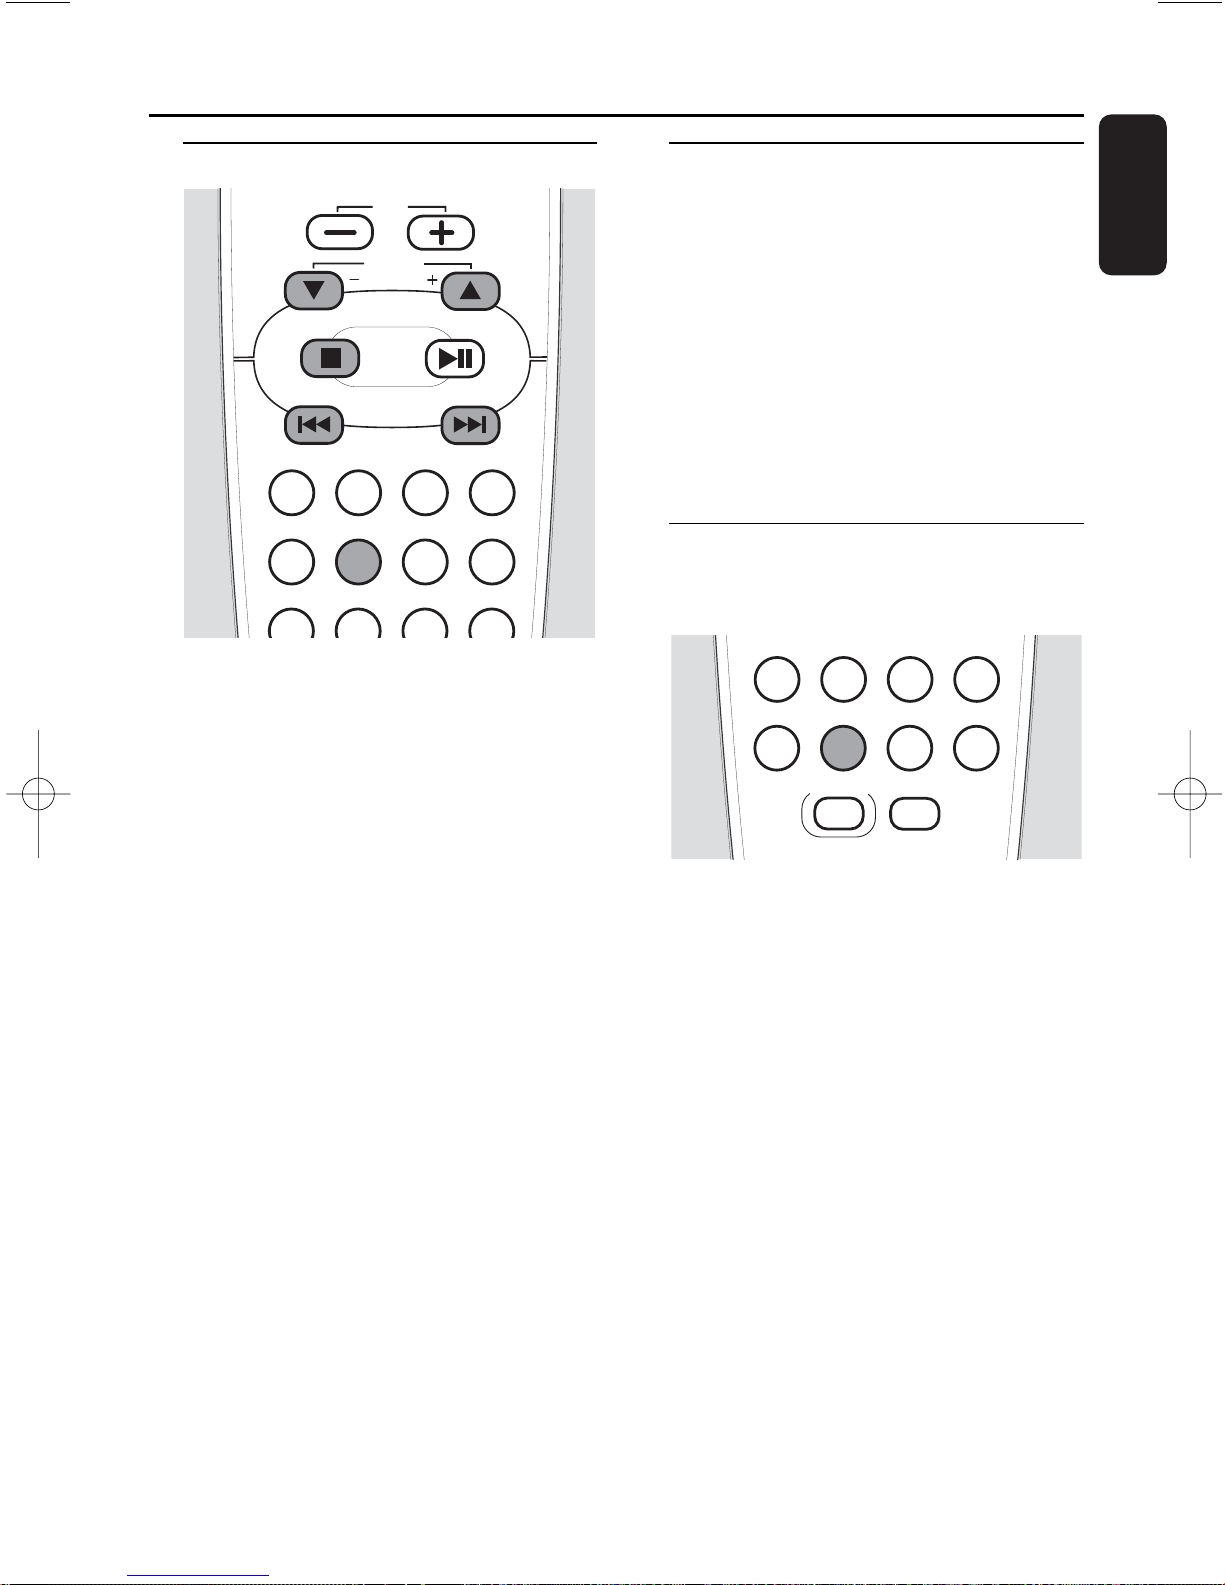
1 Press and hold CLOCK on the remote
control for more than 2 seconds.
➜ SET CLOCK is displayed, the hours and
minutes digits start blinking.
2 Press ALBUM 5 or ALBUM ∞ on the
remote control repeatedly to set the hour.
3 Press 4 or ¢ on the remote control
repeatedly to set the minutes.
4 Press CLOCK on the remote control to
confirm the setting.
➜ The clock shows the set time.
00
To exit without storing the clock setting
press STOP
Ç.
Notes:
The clock setting will be erased when the
system is disconnected from the power supply.
The unit will exit from the clock setting
mode if no button is pressed within
90 seconds.
Displaying the clock
This function shows the set time.
● In any mode (except in clock or timer
setting) press CLOCK on the remote
control repeatedly to switch between the
clock display and the normal display.
Note: If you press a button during the clock
display that changes the display, the
information related to the pressed button will
be shown briefly.Afterwards the clock will be
displayed again.
Dim mode
With this function you can control the
brightness of the display.
● In standby mode press DIM on the
remote control repeatedly to switch
between:
➜ The clock is displayed with half
brightness.
➜ The clock is displayed with full brightness.
● Select a source (CD, AUX,TUNER or
PC LINK) and press DIM on the remote
control repeatedly to switch between:
➜ DIM 1: indicator lights on, display full
brightness, spectrum analyser off
➜ DIM 2: indicator lights on, display half
brightness, spectrum analyser on
➜ DIM 3: indicator lights off, display half
brightness, spectrum analyser off
➜ DIM OFF: indicator lights on, display full
brightness, spectrum analyser on
Basic functions
TIMERCLOCKSLEEP
DSC VECDIM
MUTE
RDS/NEWS
TIMER ON/OFF
HOME
VOL
ALBUM
BROWSE
SHUFFLEPROGRAMREPEAT DISPLAY
TIMERCLOCKSLEEP
TIMER ON/OFF
DSC VECDIMRDS/NEWS
Page 41
22
English
Volume control
Volume adjustment
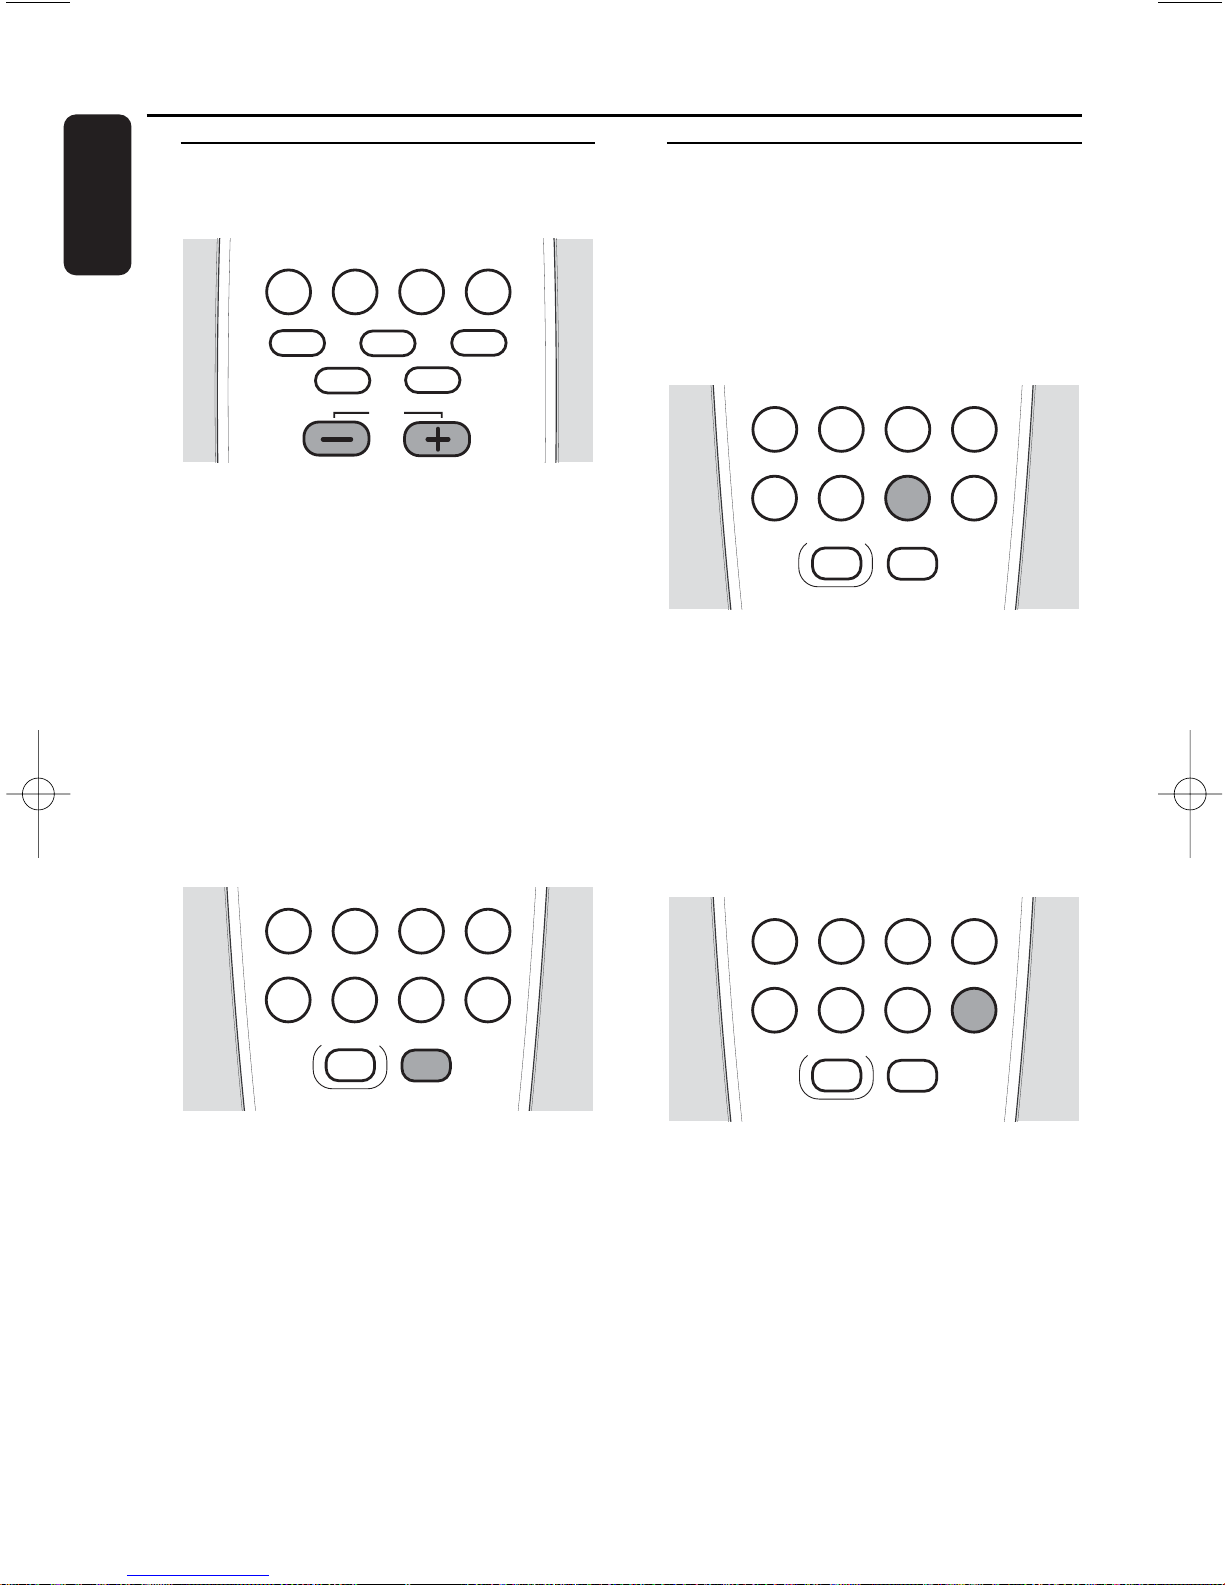
● Adjust the volume by using the VOLUME
rotary on the unit or by pressing
VOLUME+ or VOLUME- on the remote
control.
➜ VOLUME and the actual value (between 1
and 39) are displayed.
➜ VOLUME MIN is the minimum volume
level. VOLUME MAX is the maximum
volume level.
MUTE
You can temporarily switch off the sound
without switching off the unit.
1 Press MUTE on the remote control to
switch off the sound.
➜ The selected source and MUTE are
displayed. Playback will be continued
without sound.
2 Press MUTE on the remote control again
to switch on the sound again.
Sound control
In order to reach an optimal sound, you can
adjust only one of the following sound
controls at a time: DSC or VEC.
DSC
Digital Sound Control enables you to
select predefined sound settings.
● Press DSC repeatedly to select the desired
sound setting.
➜ The selected source and either POP,
ROCK, JAZZ or OPTIMAL are displayed.
VEC
Virtual Environment Control enables you
to select predefined surround sound
settings.
● Press VEC repeatedly to select the desired
surround sound setting.
➜ The selected source and either CYBER,
HALL, CONCERT or CINEMA are
displayed.
Basic functions
VOL
HOME
HOME
HOME
CD
AUX PC LINKTUNERCD
3
1
CD2
CD4
CD
CD5
TIMERCLOCKSLEEP
TIMER ON/OFF
TIMERCLOCKSLEEP
TIMER ON/OFF
RDS/NEWS
DSC VECDIM
MUTE
RDS/NEWS
DSC VECDIM
MUTE
TIMERCLOCKSLEEP
TIMER ON/OFF
RDS/NEWS
DSC VECDIM
MUTE
Page 42
23
English
Playable discs
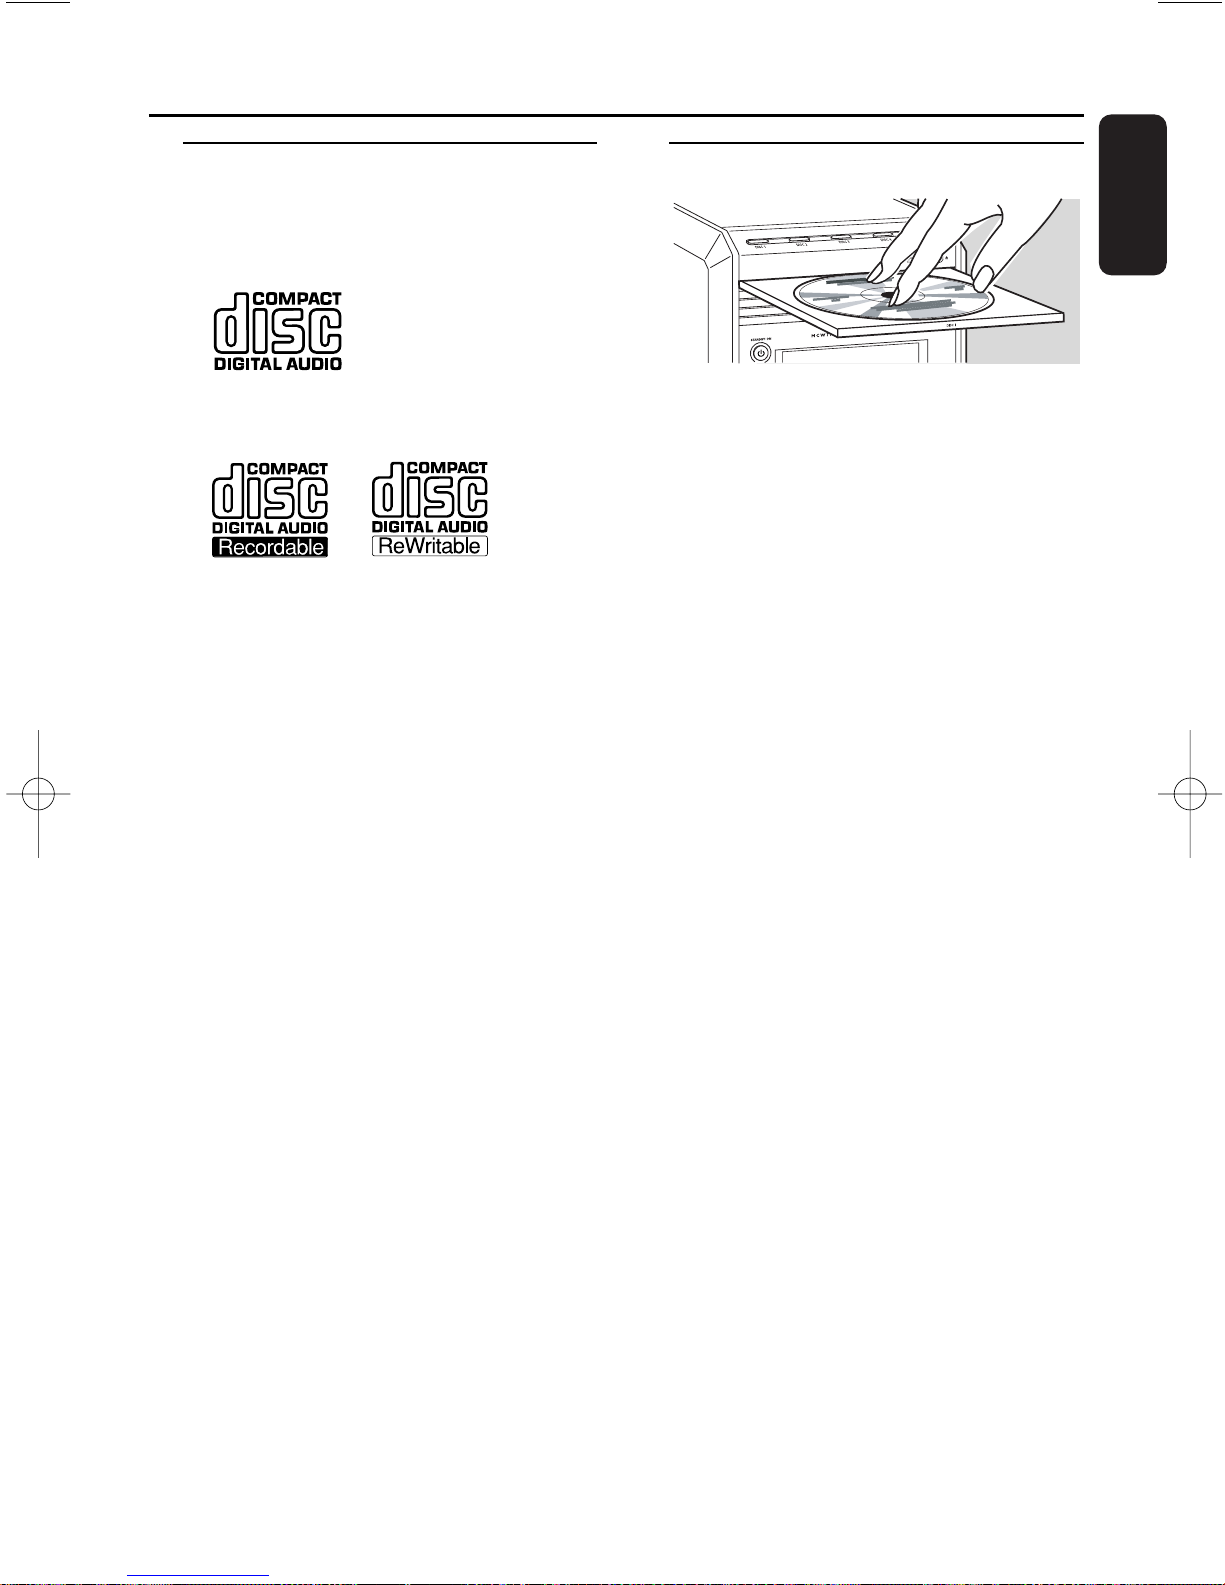
For playback on this unit you can use the
following discs (logos shown below):
– All pre-recorded audio CDs
– All finalised audio CDR and
CDRW discs
– MP3-CDs (CD-ROMs with MP3 tracks)
Supported MP3 disc formats
The following formats are supported on
this unit:
– Disc format: ISO 9660, Joliet or
UDF 1.5
– Sampling frequencies: 32 kHz,
44.1 kHz, 48 kHz
– Bit rates: 32–256 kbps, variable bit
rates
– ID3-tag:V1.1,V2.2,V2.3,V2.4
– Maximum number of titles: 999
(depending on the length of the file
name)
– Maximum number of albums:99
Important!
1) This system is designed for regular
discs.Therefore, do not use any
accessories such as disc stabiliser rings
or disc treatment sheets, etc. as offered
on the market, because they may cause
jamming of the changer mechanism.
2) Do not load more than one disc
into one disc tray.
3) CDs encoded with copyright
protection technologies by some record
companies may be unplayable by this
product.
Loading discs
1 Press OPEN/CLOSE / on the unit.
➜ CD and SELECT DISC are displayed.
2 Press one of the disc keys (DISC 1, DISC 2,
DISC 3, DISC 4, or DISC 5) on the unit to
select the desired disc tray to be opened.
➜ CD 1 (or 2, 3, 4, 5) and OPEN 1 (or 2,
3, 4, 5) are displayed and the selected
tray is opened.
3 Load a disc with the printed side up. For
double sided discs, load the side you want
to play facing down.
4 Press OPEN/CLOSE / again on the unit to
close the tray.
➜ The tray is closed and CD 1 (or 2, 3, 4,
5) and READING are displayed.
➜ If an unfinalised disc is inser ted DISC
NOT FINALIZED will be displayed.
➜ CD 1 (or 2, 3, 4, 5), the total number of
tracks and the total playing time of the
disc are displayed.
MP3-CD only:
➜ CD 1 (or 2, 3, 4, 5) and READING are
displayed. Due to the large number of
tracks this could take up to 2 minutes.
➜ The first album name is scrolled.
➜ The current album number and the first
track number are displayed. If no album
has been found A00 will be displayed.
00
To load further discs into the other trays
repeat steps 1–4.
Note: Only one tray can be opened at a time. If a
tray is opened and you try to open another, the
already opened tray will be closed first before the
other tray opens.
Playback
Page 43
24
English
Playing discs
Direct selection and playback of one
particular disc
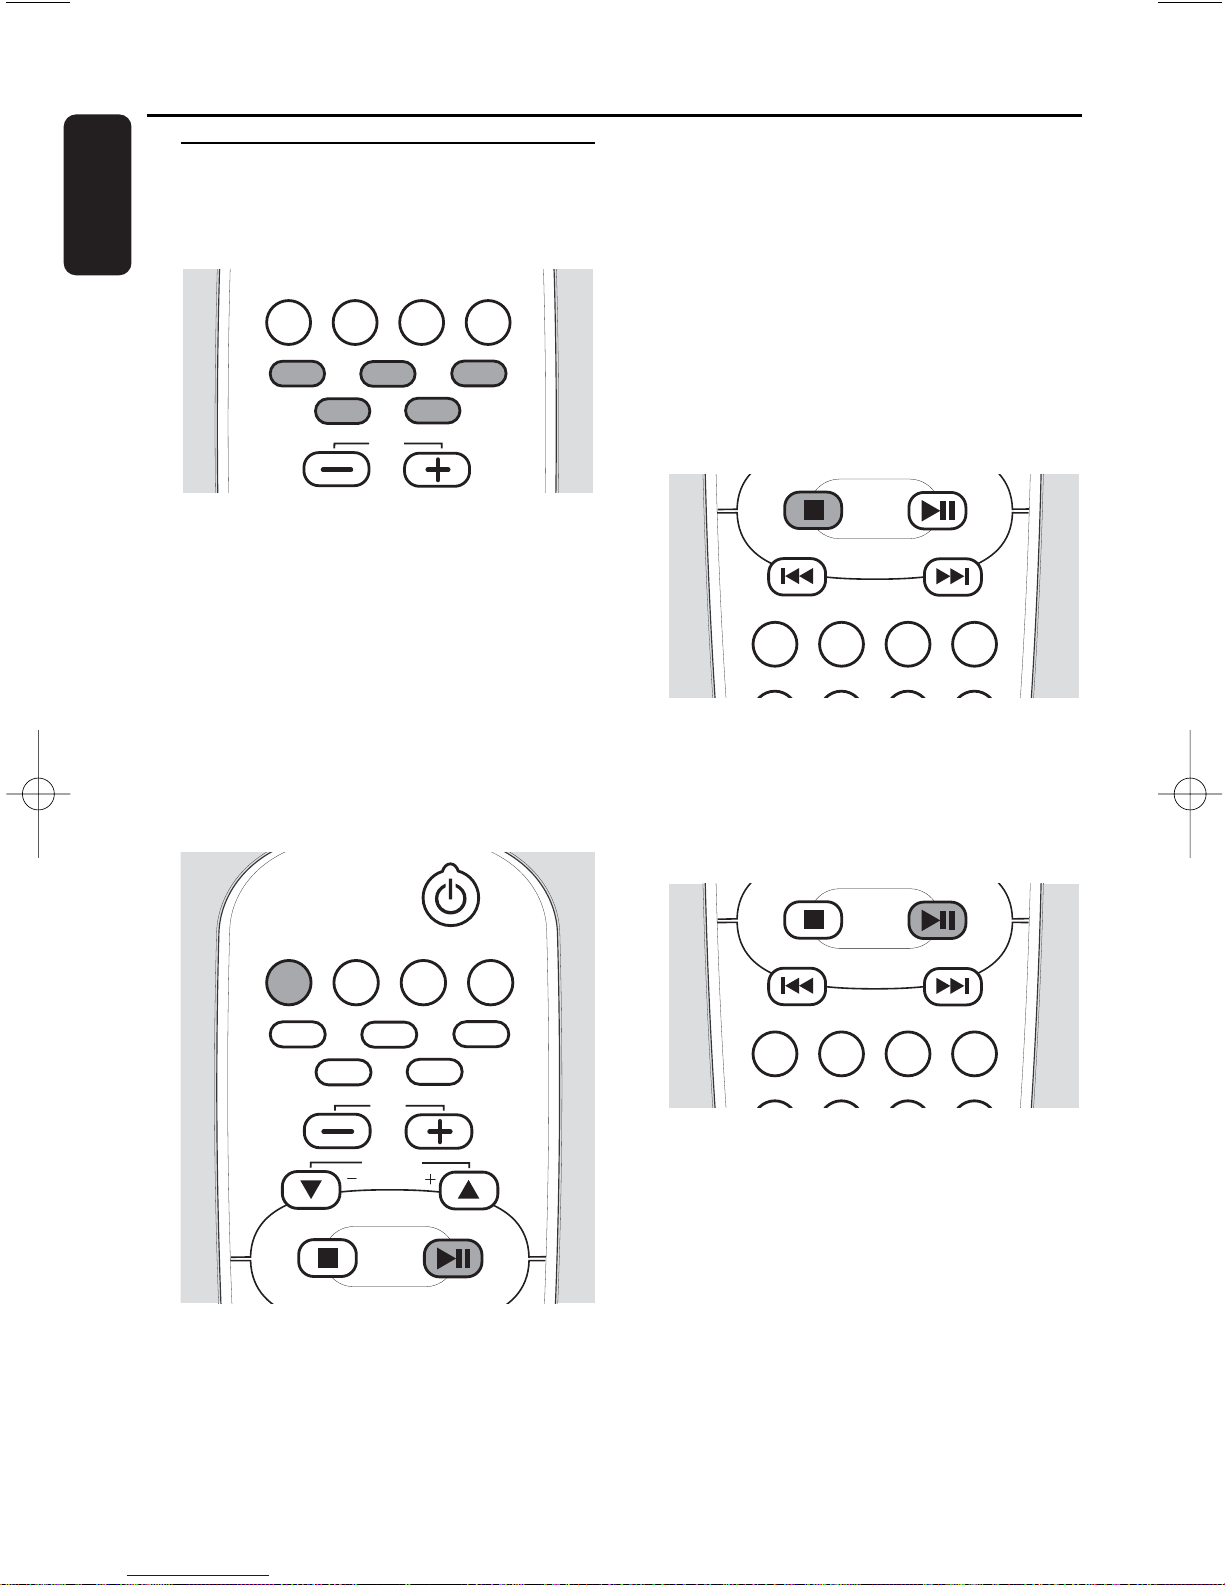
● Press one of the disc keys DISC 1, DISC 2,
DISC 3, DISC 4, or DISC 5 on the unit or
CD 1, CD 2, CD 3, CD 4, or CD 5 on the
remote control to start playback of the
desired disc in the selected tray.
➜ CD 1 (or 2, 3, 4, 5), the current track
number and elapsed playing time are
displayed.A flashing CD symbol indicates
the active disc tray.
Playback of all loaded discs
1 Press SOURCE on the unit repeatedly until
CD is selected or press CD on the remote
control.
2 Press ÉÅ to start playback.
➜ Playback starts from the first track of the
current disc. All loaded discs will be
played. If one of the trays is empty, the
next available disc will be selected.
➜ CD 1 (or 2, 3, 4, 5), the current track
number and elapsed playing time are
displayed.A flashing CD symbol indicates
the active disc tray.
To stop playback
● Press STOP Ç to stop playback.
➜ Playback stops. If no key is pressed for
30 minutes the unit will switch to
standby.
Interrupting and resuming playback
1 Press ÉÅ during playback to interrupt
playback.
➜ The playing time where playback was
interrupted will blink.
2 Press ÉÅ again to resume playback.
Playback
VOL
AUX PC LINKTUNERCD
CD2
CD
3
CD5
CD4
CD
1
ALBUM
BROWSE
VOL
AUX PC LINKTUNERCD
CD
1
CD4
CD2
CD5
CD
3
SHUFFLEPROGRAMREPEAT DISPLAY
TIMERCLOCKSLEEP TIMER ON/OFF
SHUFFLEPROGRAMREPEAT DISPLAY
TIMERCLOCKSLEEP TIMER ON/OFF
Page 44
25
English
Selecting and searching
Selecting a track when playback is
stopped
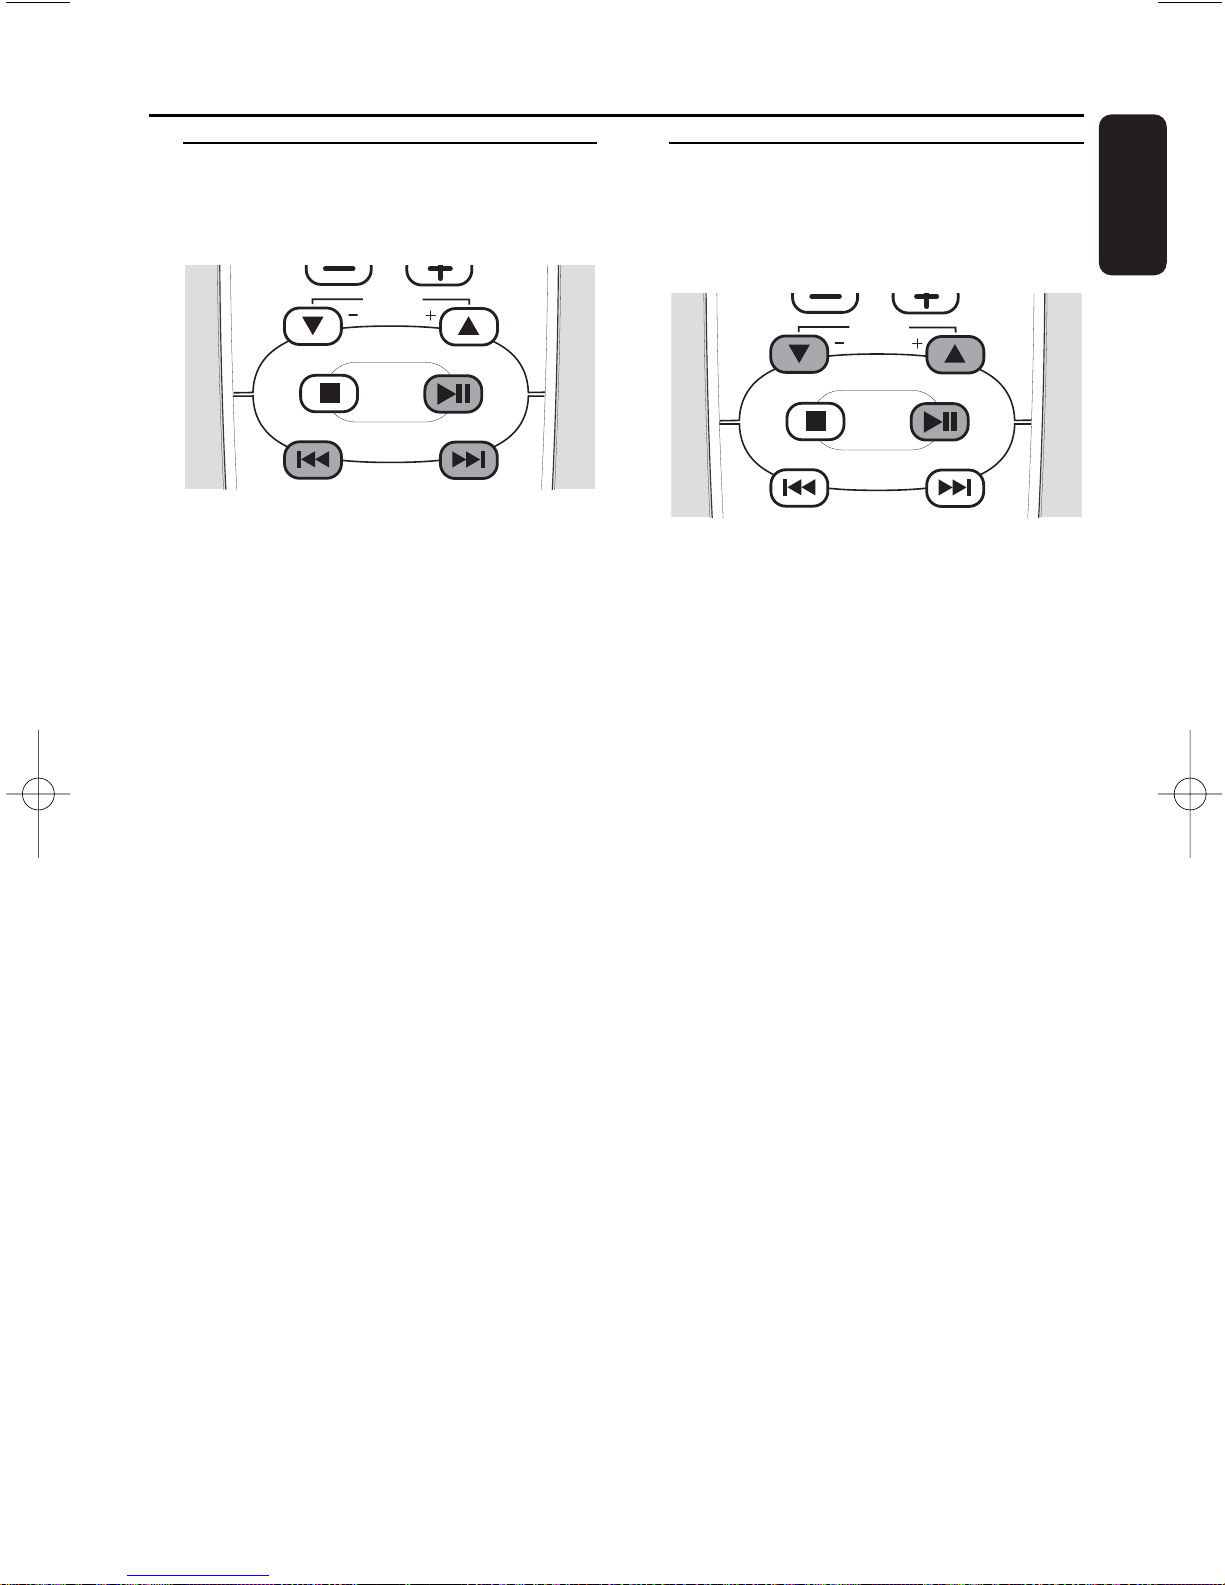
1 Press 4 or ¢ repeatedly to skip to the
desired track number.
2 Press ÉÅ to start playback.
➜ Playback starts with the selected track.
Selecting a track during playback
✐ Press 4 or ¢ to skip to the beginning
of the previous or next track on the
selected disc.
➜ Playback continues with the selected
track.
Searching for a passage during
playback
1 Press and hold 4 or ¢ to find a
particular passage in backwards or forwards
direction within the current track.
➜ Searching is star ted and playback
continues with reduced volume.
2 Release the key at the desired passage.
➜ Normal playback continues.
Note: During SHUFFLE, pressing 4 will not
affect the current playback.
Additional selecting and
searching (on MP3-CDs only)
Selecting an album when playback is
stopped
● Press ALBUM 5 or ALBUM ∞ repeatedly to
find the album number you wish to select.
➜ CD 1 (or 2, 3, 4, 5), the album name,
followed by the artist name and track
name are scrolled.
➜ The album number and the first track
number are displayed.
00
To start playback of the entire album press ÉÅ.
Selecting an album during playback
● Press ALBUM 5 or ALBUM ∞ repeatedly
to skip to the beginning of the previous or
next album on the selected disc.
➜ Playback continues with the first track of
the selected album if you do not press
the key again.
➜ CD 1 (or 2, 3, 4, 5), the album name,
followed by the track number and
elapsed playing time are displayed.
Selecting a track in the album
● Press 4 or ¢ repeatedly to skip to the
desired track.
➜ CD 1 (or 2, 3, 4, 5) is displayed and the
track name is scrolled.
➜ If you pressed 4 or ¢ when playback
was stopped:The album number and the
selected track number are displayed.
➜ If you pressed 4 or ¢ during
playback:The track number and the
elapsed playing time will be displayed.
Playback features
ALBUM
BROWSE
ALBUM
BROWSE
Page 45
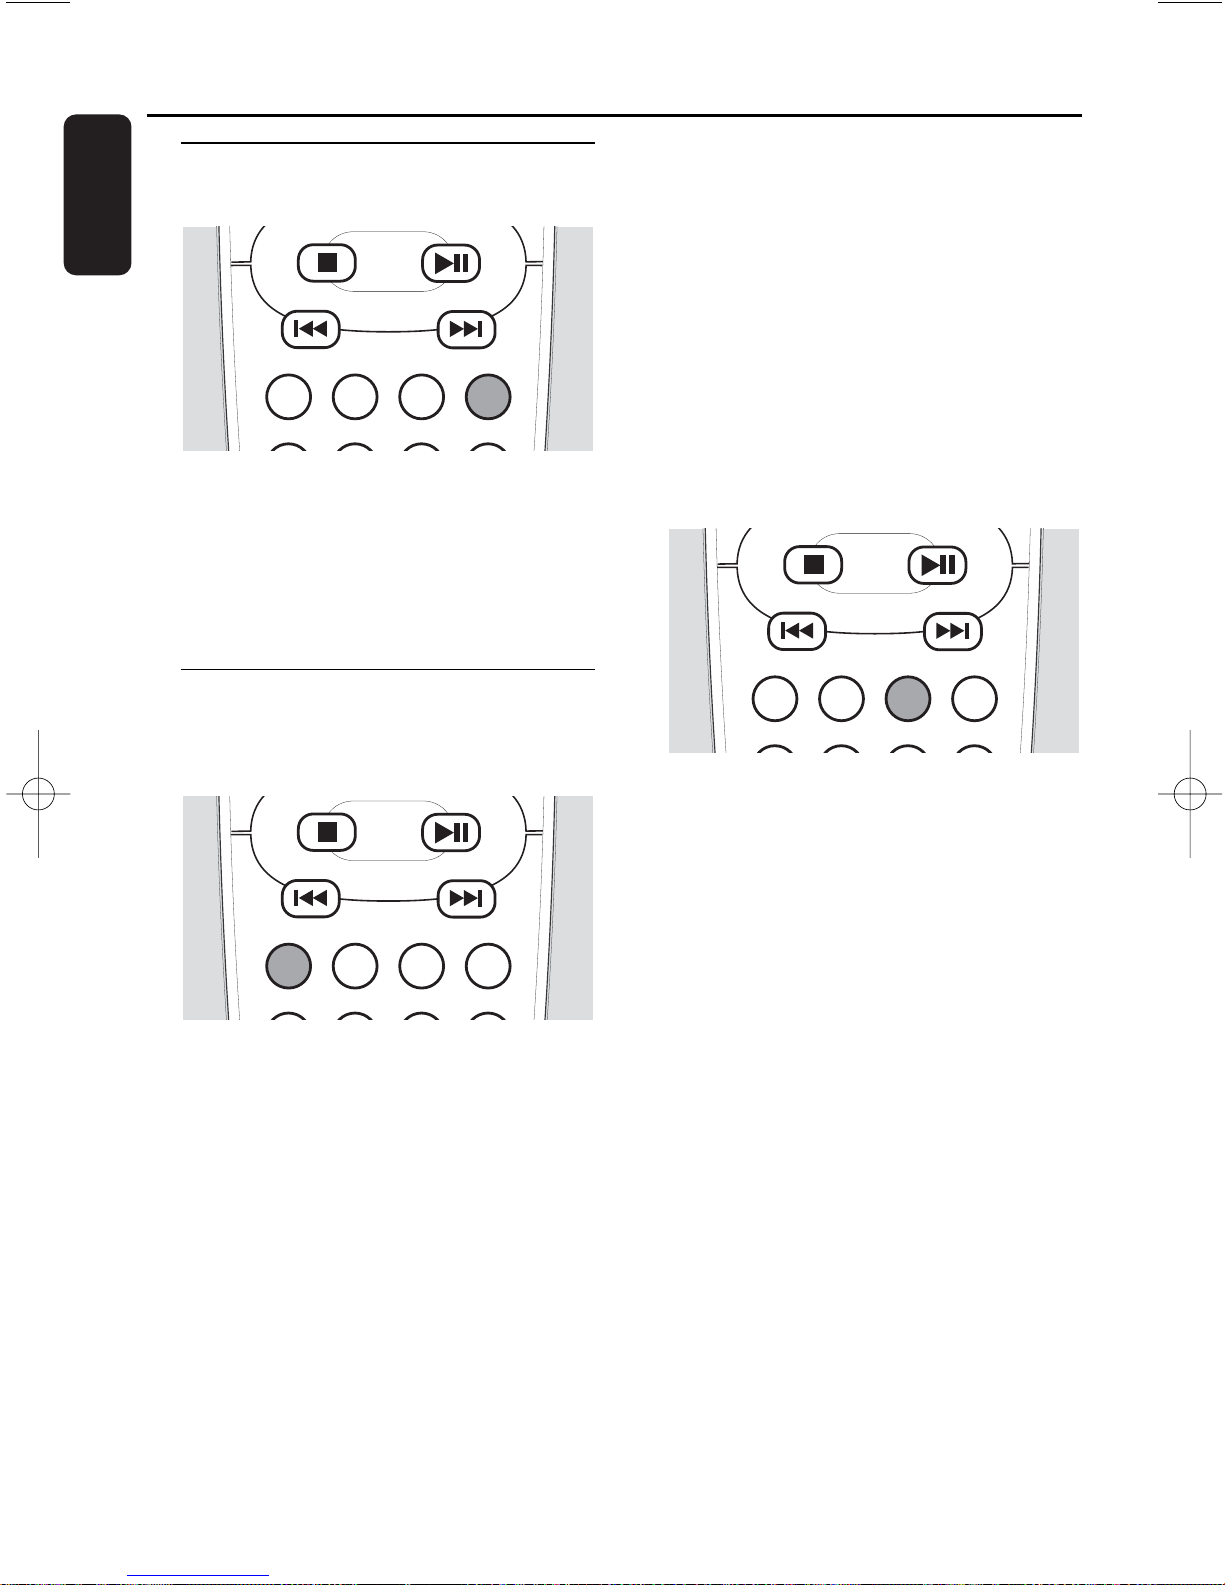
26
English
Album and track name
display (on MP3-CDs only)
● During playback press DISPLAY on the
remote control to see the following
information, which will be scrolled once (if
available):
➜ Album name
➜ Tr ack name
SHUFFLE and REPEAT
Repeating a track, a disc or a
program
1 During playback press REPEAT on the
remote control repeatedly to select either:
➜ REPEAT TRACK:The current track is
played repeatedly.
➜ REPEAT DISC:The entire selected disc is
played repeatedly.
➜ REPEAT PROG TRACK:The current
programmed track is played repeatedly
(only if the program mode is active).
➜ REPEAT ALL PROG: All progammed tracks
are played repeatedly (only if the
program mode is active).
2 Playback starts in the chosen mode.
3 To return to normal playback, press
REPEAT on the remote control repeatedly
until OFF is displayed.
Notes:
Not all REPEAT modes are possible during
SHUFFLE or while playing a program.
Pressing OPEN/CLOSE
/ also cancels the
REPEAT mode.
SHUFFLE - Playing tracks in random
order
● Press SHUFFLE on the remote control to
activate the function.
➜ SHUFFLE is shown and all tracks of all
loaded discs will be played in random
order.The random play will start from
the current disc. After all tracks on this
disc have been shuffled, the unit will
change to the next available disc. If
progamme mode is active, the
programmed tracks only will be played in
random order.
00
To deactivate the function press SHUFFLE
on the remote control again.
➜ SHUFFLE goes off and the function is
deactivated.
Note: Pressing OPEN/CLOSE
/ also cancels
the SHUFFLE mode.
Playback features
SHUFFLEPROGRAMREPEAT DISPLAY
TIMERCLOCKSLEEP TIMER ON/OFF
SHUFFLEPROGRAMREPEAT DISPLAY
TIMERCLOCKSLEEP TIMER ON/OFF
SHUFFLEPROGRAMREPEAT DISPLAY
TIMERCLOCKSLEEP TIMER ON/OFF
Page 46
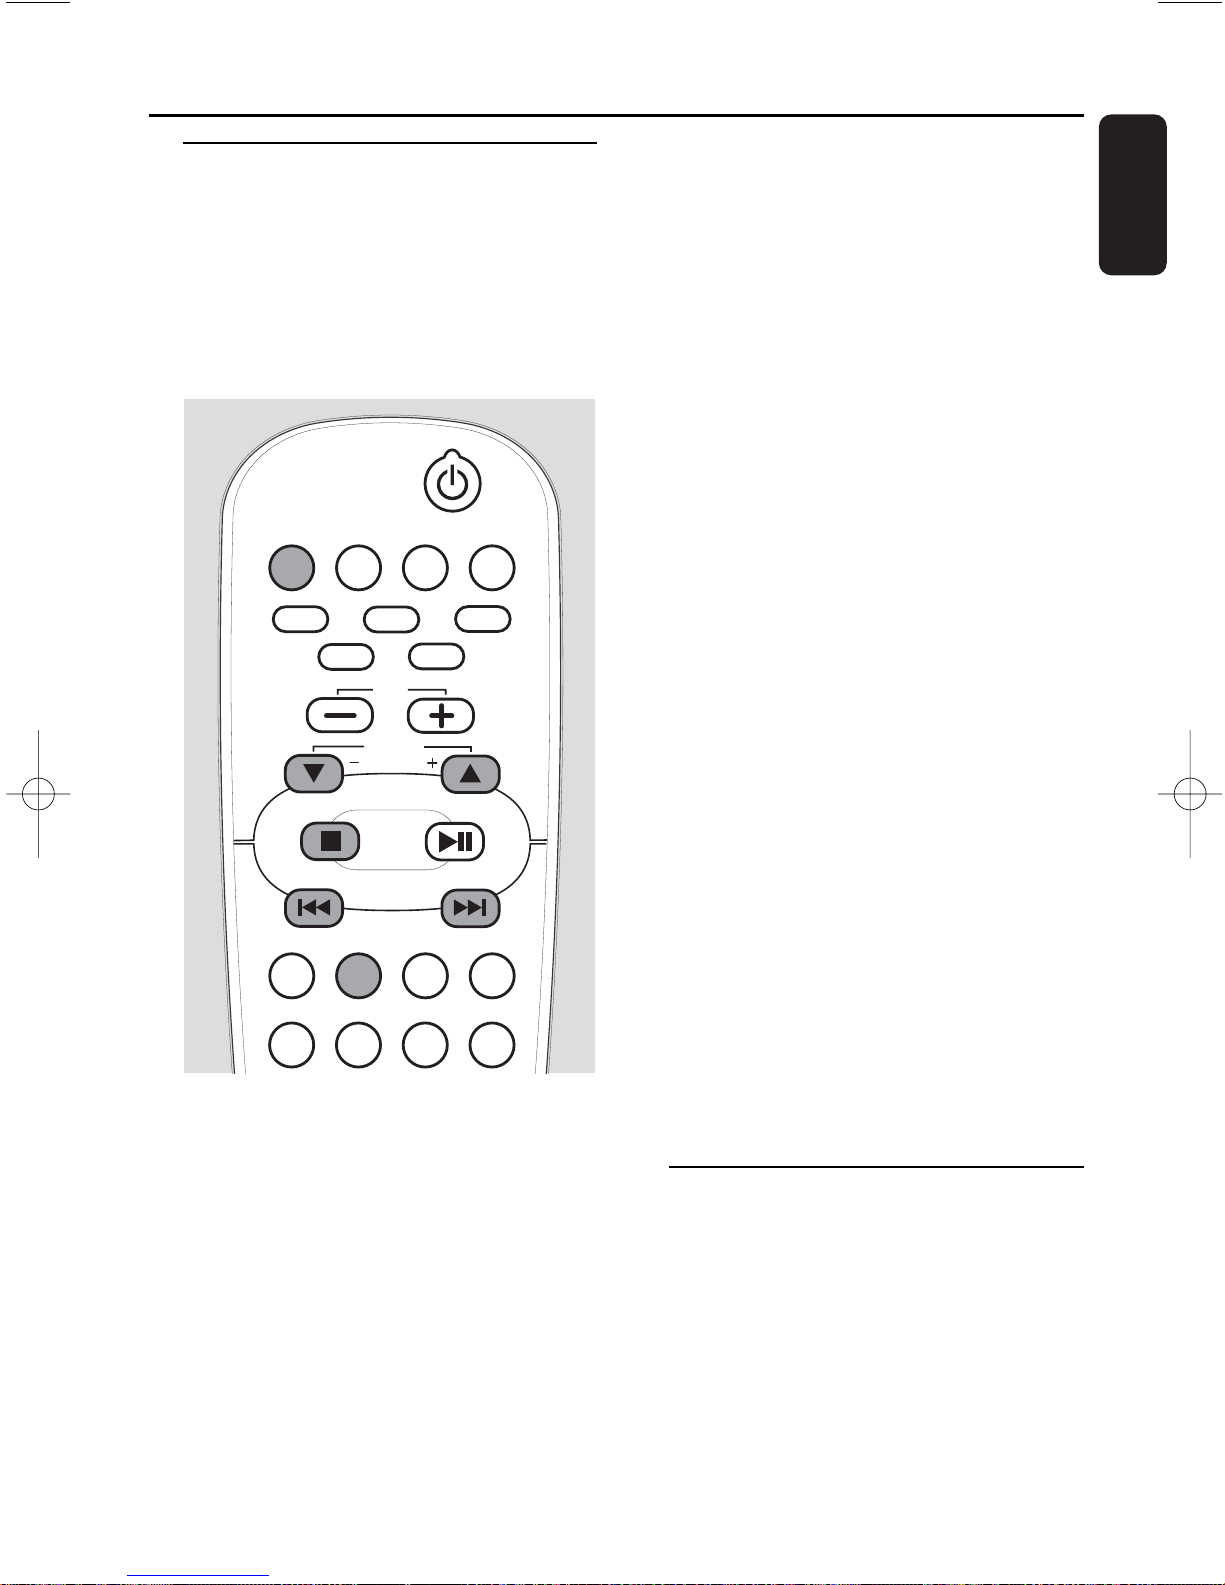
27
English
Programming track numbers
Programming tracks is possible when
playback is stopped.You can select up to 99
tracks (also MP3 tracks) and store them in
the memory. Programming is possible from
the current selected disc only.Therefore
you cannot combine MP3 tracks and audio
tracks or tracks from more than one CD.
1 Load the desired disc in the disc tray.
2 In case a source other than CD is active
(e.g.TUNER) press SOURCE on the unit
repeatedly until CD is selected or press CD
on the remote control.
3 Press PROGRAM on the remote control to
enter the program menu.
➜ PROGRAM starts blinking.
Note: If no button is pressed within 20 seconds the
unit will automatically exit from the program menu.
4 Press 4 or ¢ repeatedly to select the
desired track.
MP3-CD only:
Press ALBUM 5 or ALBUM ∞ to find the
album number you wish to select and then
press 4 or ¢ repeatedly to skip to the
desired track.
5 Press PROGRAM on the remote control to
store your selection in the memory.
➜ CD 1 (or 2, 3, 4, 5), P with the total
number of tracks programmed and the
total playing time are displayed.
➜ The number of the programmed track
and PROG are displayed.
MP3-CD only:
➜ CD 1 (or 2, 3, 4, 5) and P with the total
number of tracks programmed are
displayed.
➜ The album number and track number of
the programmed track are displayed.
6 Repeat steps 4–5 to select and store other
tracks.
Notes:
If you try to store more than 99 tracks,
PROGRAM FULL will be displayed.
If the total playing time of the program has
reached 100 minutes --:-- is displayed
instead of the total playing time.
7 Press STOP Ç once to end programming.
00
To start playback of the program
press ÉÅ.
Clearing the program
1 If necessary press STOP Ç to stop playback.
2
Press STOP Ç again to clear the program.
➜ PROGRAM goes off and PROGRAM
CLEARED is scrolled.
Note:The program will be also erased if you open
the disc tray, if you switch to another source or if
you disconnect the unit from power supply.
Playback features
AUX PC LINKTUNERCD
CD2
CD
3
CD5
CD4
CD
1
SHUFFLEPROGRAMREPEAT DISPLAY
TIMERCLOCKSLEEP TIMER ON/OFF
ALBUM
BROWSE
VOL
Page 47
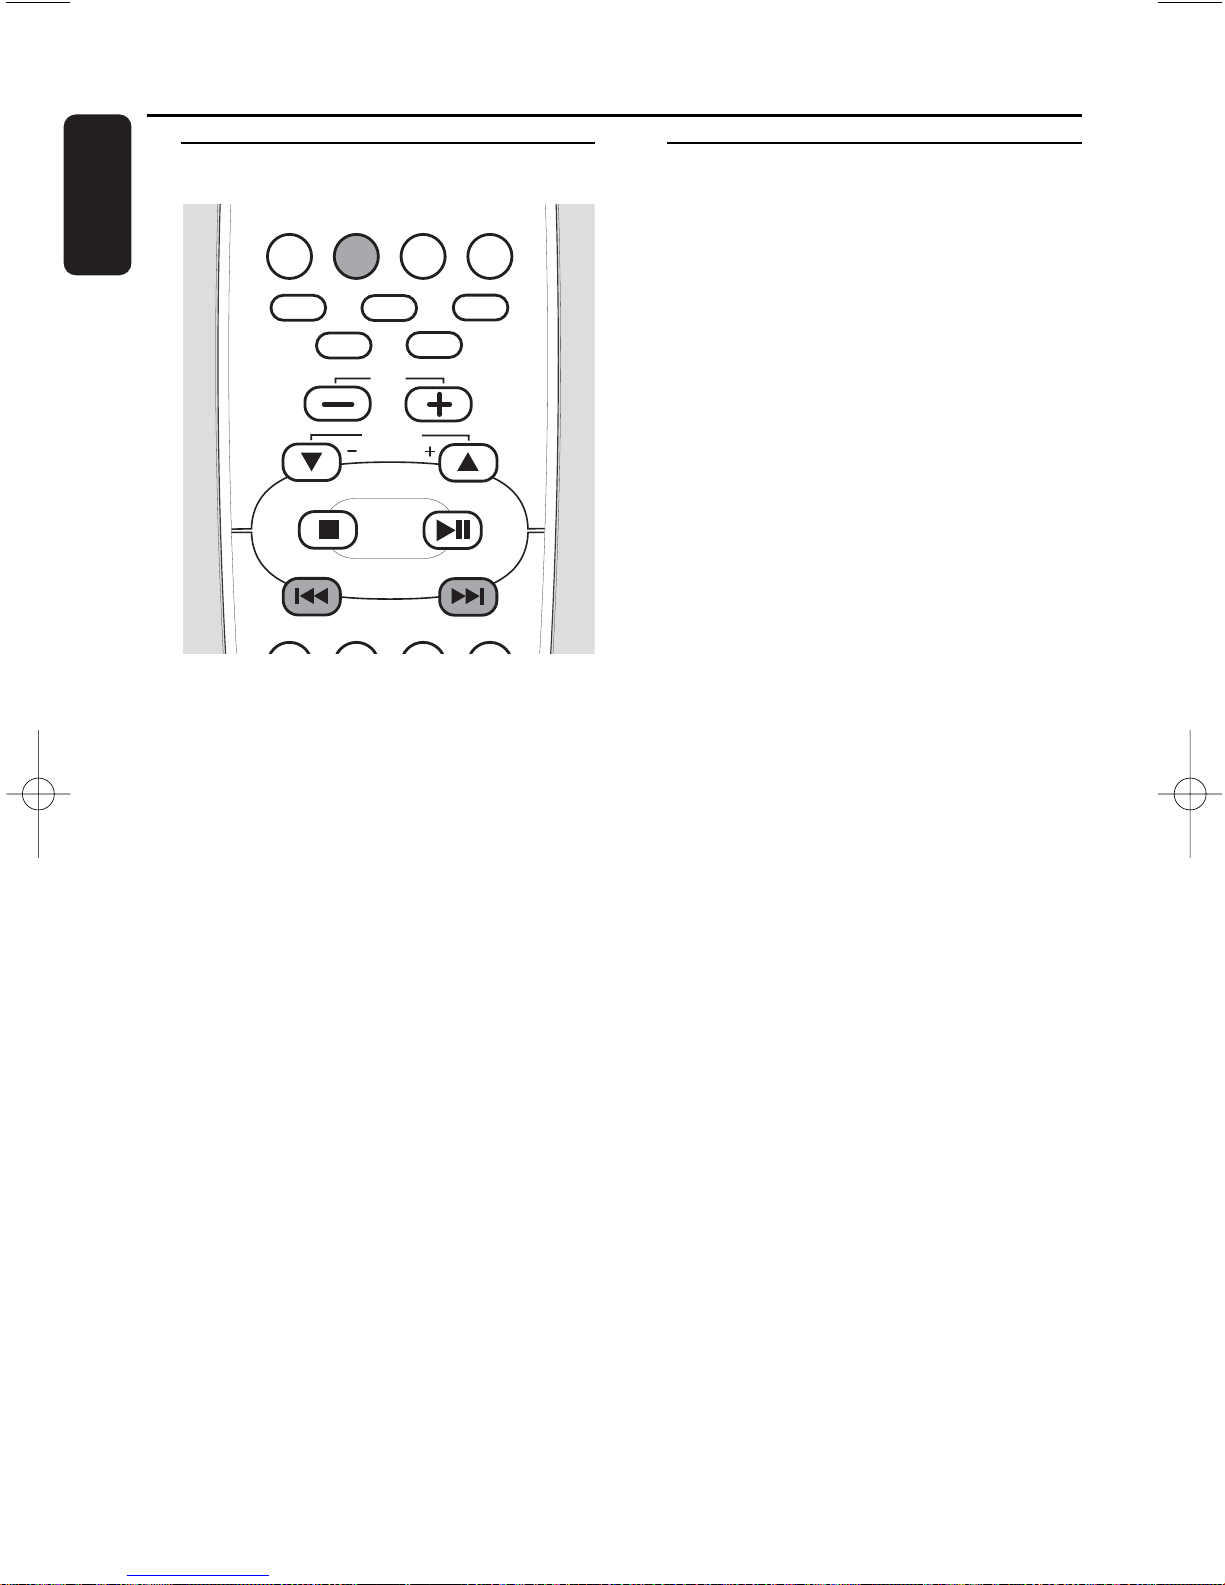
28
English
Tuning to radio stations
1 Press SOURCE on the unit repeatedly or
press TUNER on the remote control
repeatedly until the desired waveband
(TUNER FM or TUNER AM) is displayed.
2 Press and hold 4 or ¢ for more than
a half second, then release.
➜ The unit automatically tunes to the next
station with sufficient signal strength.
➜ = lights up when receiving a stereo
signal (in FM waveband only).
3 Repeat step 2 until you find the desired
station.
00
To tune to a station with a weak signal
press 4 or ¢ briefly and repeatedly
until an optimal reception is found.
Storing radio stations
You can store up to 40 radio stations in the
memory, starting from FM and followed by AM
wavebands. Stations can be stored automatically
or manually, or by using the “Plug and Play”
function. If no button is pressed within 20
seconds the unit will exit from the storing
mode.
Storing by using “Plug and Play”
You can store all available radio stations
automatically. Attention:All previously
stored radio stations will be replaced.
1 Connect the unit to the power supply.
➜ TUNER and AUTO INSTALL - PRESS
PLAY are displayed.
or
In standby mode press and hold ÉÅ on
the unit until TUNER and AUTO INSTALL
PRESS PLAY are displayed.
2 Press ÉÅ on the unit to start the
installation.
➜ TUNER INSTALL is displayed and
automatic searching and storing starts.
➜
During searching TUNER AUTO is displayed.
➜ As soon as a radio station is found and
stored the frequency and the waveband
will be displayed.
➜ Once completed, the last tuned radio
station will be played.
Note: If no stereo signal is detected CHECK
ANTENNA is displayed.
Tuner
VOL
AUX PC LINKTUNERCD
1
CD
CD4
CD2
CD5
CD
3
ALBUM
BROWSE
SHUFFLEPROGRAMREPEAT DISPLAY
Page 48
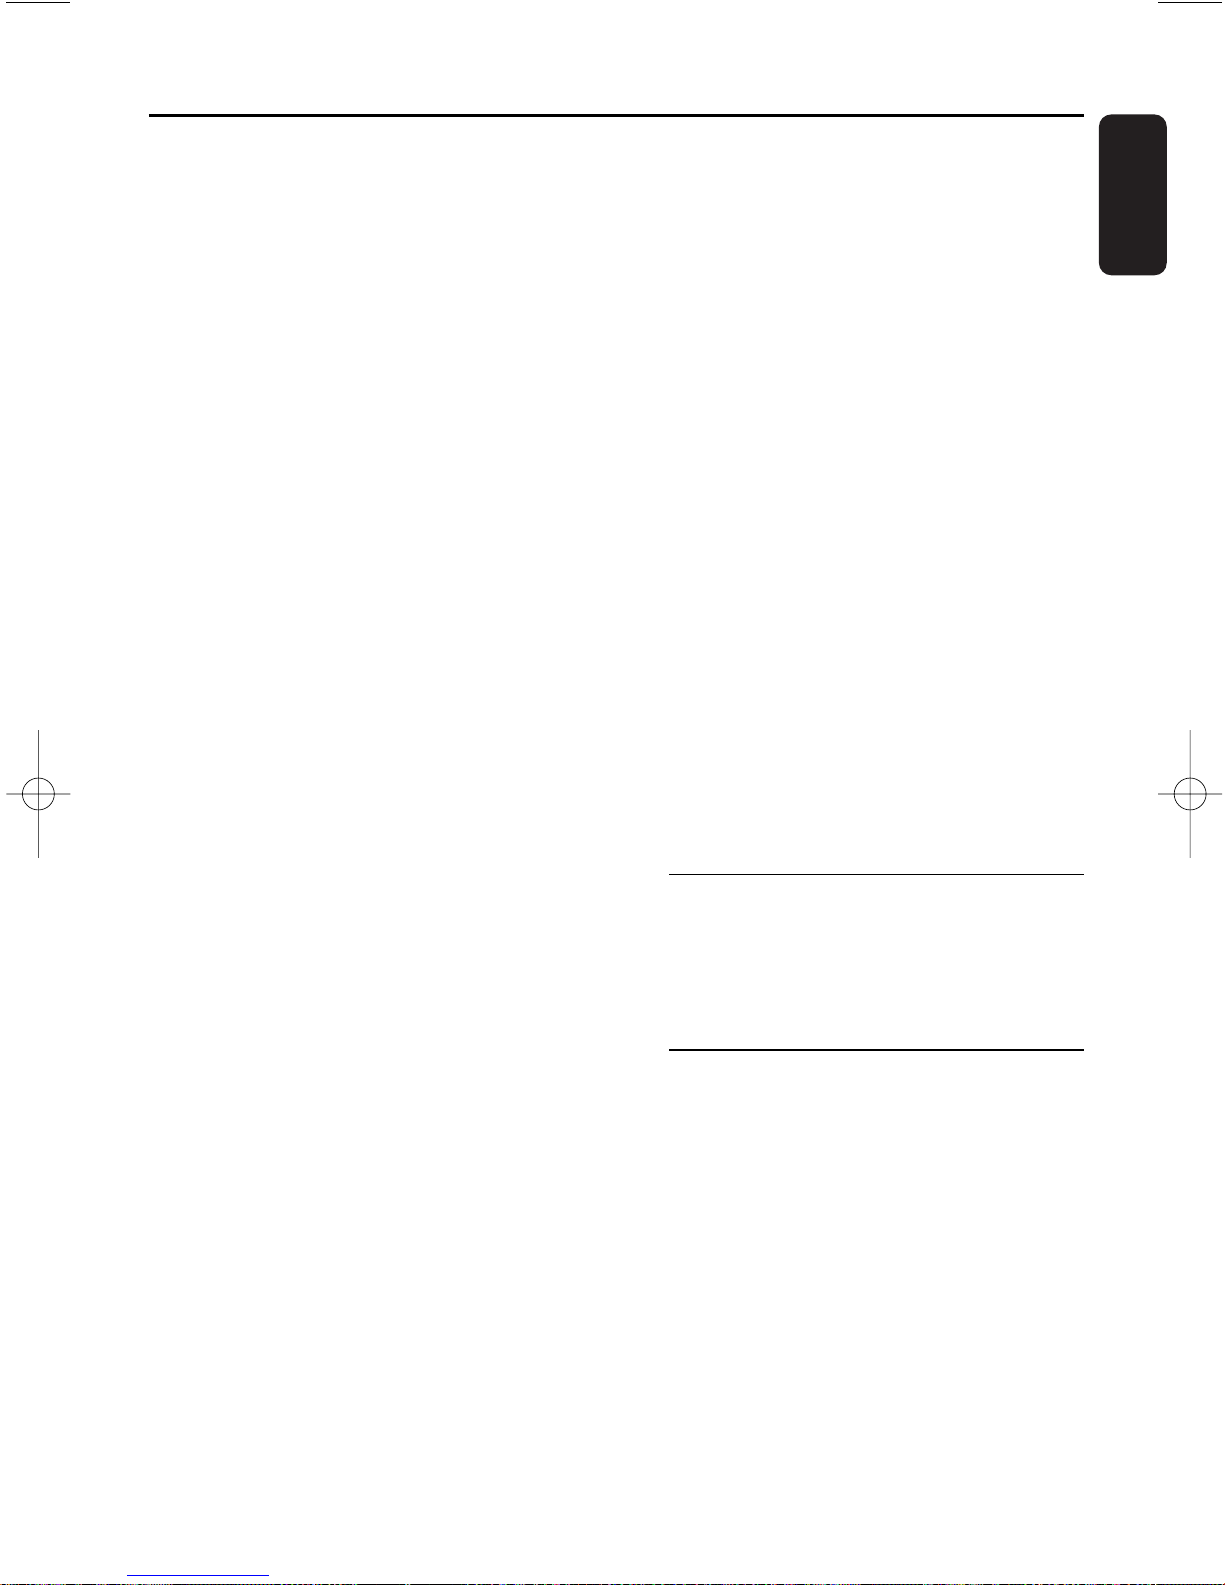
29
English
Storing by automatic programming
You can start the automatic programming
from a selected preset number. If no preset
number is selected, automatic programming
will start at preset number 1 and all your
former presets will be overridden.
1 Press SOURCE on the unit repeatedly or
press TUNER on the remote repeatedly
until the desired waveband (TUNER FM or
TUNER AM) is displayed.
2 Press ALBUM 5 or ALBUM ∞ to select a
preset number.
3 Press and hold PROGRAM on the remote
control until AUTO is displayed.
➜ PROG starts blinking. All available radio
stations are stored automatically.
➜ PROG goes off, the preset number, the
waveband and the frequency of the last
preset station are displayed briefly.
00
To exit automatic programming press
STOP
Ç.
Notes: If a radio station has been already
stored in one of the presets, it will not be
stored again under another preset number.
Strong stations of the selected waveband
will always automatically be first to be
programmed, followed by the weak stations.
Storing by manual programming
You can use manual programming to store
your favourite radio stations only.
1 Tune to your desired radio station (see
“Tuning to radio stations”).
2 Press PROGRAM on the remote control
for less than 1 second.
➜ PROG and the current preset number
start blinking.
00
To allocate the radio station to another
preset number press ALBUM 5 or
ALBUM ∞.
3 Press PROGRAM on the remote control
again to confirm the setting.
➜ PROG goes off.The preset number, the
waveband and the frequency of the
preset station are displayed.
00
To store further radio stations repeat the
steps 1–3.
00
To exit manual programming press
STOP
Ç.
Tuning to preset radio
stations
● In tuner mode, press PRESET 5 or
PRESET ∞ until the preset number of the
desired station is displayed.
Deleting a preset radio
station
1 Tune to the preset radio station to be
deleted.
2 Press and hold STOP Ç for more than
2 seconds.
➜ PRESET DELETED is scrolled and the
current preset radio station is deleted.
➜ All other preset radio stations with
higher numbers are decreased by one.
Tuner
Page 49
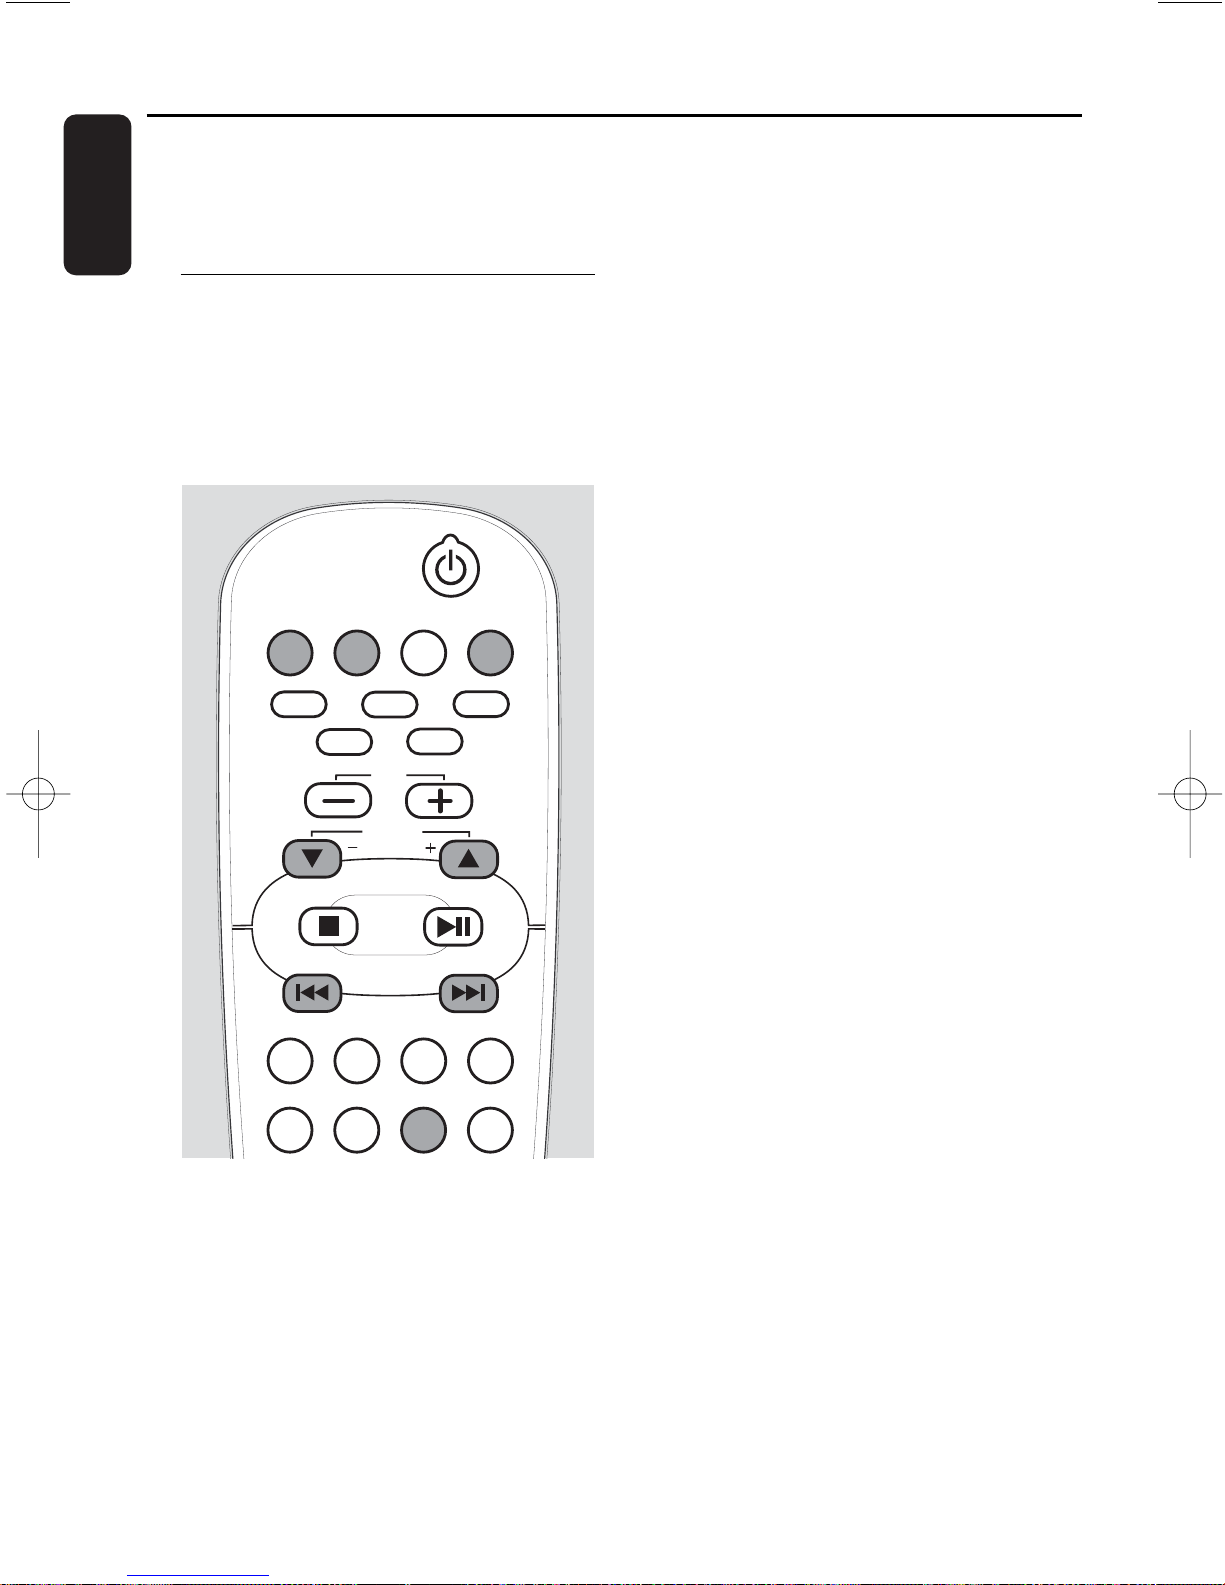
30
English
You can select different timer functions
which will be activated at a chosen time.
Make sure the clock is set before
using one of these features.
Wake-up timer
The unit can be used as an alarm clock,
whereby the selected source (TUNER, CD
or PC LINK) starts playback at a preset
time.
Timer setting
Note:The unit will exit from the timer setting
mode if no button is pressed within
90 seconds.
1 Press and hold for more than 2 seconds
TIMER on the remote control.
➜ X star ts blinking, SET TIMER is
displayed and the hours and minutes
digits start blinking.
2 Press SOURCE on the unit repeatedly or
press CD,TUNER or PC LINK A on the
remote control to select the source you
want to be woken up with.
➜ The selected source will be lighted.
3 Press ALBUM 5 or ALBUM ∞ repeatedly
to set the hour.
4 Press 4 or ¢ repeatedly to set the
minutes.
00
To exit without storing the timer setting
press STOP
Ç.
5 Press TIMER on the remote control to
confirm the setting.
➜ X remains shown, TIMER ON, the
selected source and the unit start time
are displayed.
➜ At the preset time the selected sound
source will be played for 30 minutes. If
no button is pressed within this time, the
unit switches to standby.
➜ When the wake-up timer is triggered,
the volume will increase gradually to the
last tuned volume level.
If CD is selected:
The first track of the disc in the last
selected CD tray will be played. If this
tray is empty, the unit will search for the
next available disc. If all trays are empty,
the unit will switch to tuner.
If TUNER is selected:
The last tuned radio station will be
played.
If PC LINK is selected:
The last played track on the last selected
server will be played. If there is no PC
connection detected, the set will switch
to tuner.
Timer
AUX PC LINKTUNERCD
CD2
CD
3
CD5
CD4
CD
1
SHUFFLEPROGRAMREPEAT DISPLAY
TIMERCLOCKSLEEP TIMER ON/OFF
ALBUM
BROWSE
VOL
Page 50
31
English
Activating or deactivating the timer
● Press TIMER ON/OFF on the remote
control repeatedly to activate or deactivate
the timer.
➜ TIMER ON, the last set source and start
time are displayed and the timer is
activated.
➜ TIMER OFF is displayed and the timer is
deactivated.
Checking the timer setting
● Press for less than 2 seconds TIMER on the
remote control to check the timer setting.
➜ TIMER ON, the last set source and start
time are displayed.
Sleep timer
You can set a certain period of time after
which the unit will switch to standby.
1 Press SLEEP on the remote control
repeatedly to select the desired period of
time (in minutes). Selection as follows:
➜ SLEEP 15MIN, SLEEP 30MIN, SLEEP
45MIN, SLEEP 60MIN, SLEEP 90MIN,
SLEEP 120MIN, SLEEP OFF.
2 As soon as the desired period of time is
displayed, do not press SLEEP again.
➜ During the last 10 seconds before
switching to standby a countdown is
displayed: SLEEP 10, SLEEP 9,…
SLEEP 1, SLEEP.
➜ Then the unit switches to standby.
● To deactivate the sleep timer press SLEEP
on the remote control until SLEEP OFF is
displayed or press STANDBY-ON 2.
Timer
SHUFFLEPROGRAMREPEAT DISPLAY
TIMERCLOCKSLEEP
TIMER ON/OFF
DSC VECDIMRDS/NEWS
SHUFFLEPROGRAMREPEAT DISPLAY
TIMERCLOCKSLEEP
TIMER ON/OFF
DSC VECDIMRDS/NEWS
SHUFFLEPROGRAMREPEAT DISPLAY
TIMERCLOCKSLEEP
TIMER ON/OFF
DSC VECDIMRDS/NEWS
Page 51
32
English
WARNING
Under no circumstances should you try to repair the unit
yourself as this will invalidate the warranty. Do not open
the unit as there is a risk of electric shock.
If a fault occurs, first check the points listed before taking
the unit for repair. If you are unable to solve a problem by
following these hints, consult your dealer or service center.
Laser safety
This unit employs a laser. Only a qualified service person
should remove the cover or attempt to service this device,
due to possible eye injury.
Problem Solution
No power – Make sure the power cable is connected properly.
– Press STANDBY-ON 2 on the unit to switch it to standby.
No sound or sound – Adjust the volume.
of poor quality – Disconnect the headphones.
– Make sure the speakers are connected properly.
– Correct the sound settings on the unit.
– Make sure the unit is not muted.
No reaction to controls – Disconnect the unit from power supply, reconnect after
a few seconds.
The remote control –Point the remote control directly towards the IR sensor on the
does not work properly unit.
– Remove batteries, wait 10 seconds and insert them
correctly or insert new batteries.
– Reduce the distance between remote control and unit.
–Always select the source you wish to control first by pressing
one of the source keys on the remote control (e. g. CD,
TUNER).Then select the desired function (e.g. á, à, É).
Permanent feature – Press and hold for 5 seconds STOP Ç on the unit until
display on the unit DEMO OFF is displayed to switch off the demonstration mode.
(demonstration mode)
The timer is not – Set the clock correctly.
working – Press TIMER ON/OFF on the remote control to activate the
timer.
Troubleshooting
Page 52
33
English
Problem Solution
Poor radio reception – Direct the antenna for optimum reception.
– Make sure the antenna is not positioned near a radiation
source such as a TV,VCR, etc.
NO DISC indication or – Make sure the disc is not scratched or dirty. Replace or clean
disc cannot be played the disc.
– Make sure the disc is inserted printed side up.
– Make sure either a prerecorded audio CD, a finalised CDR(W)
or an MP3-CD is inserted.
– Make sure the CD is not encoded with copyright protection
technologies, as some do not conform to the Compact Disc
standard.
PC LINK and CHECK – Make sure your PC is switched on.
CONNECTION indication – Check the wireless connection between your PC and the unit
(see “Quick installation of the wireless connection to a
PC server”).
– Make sure the wireless USB adapter is connected or
another network connection works properly.
Troubleshooting
Page 53
Important
Do not plug in the wireless USB adapter into a USB port
of your computer, but start with the software installation
first from the CD-ROM.After the necessary driver software
has been installed you will be asked by the installation
software to plug in the wireless USB adapter.This order of
installation will ensure the proper function of your wireless
USB adapter.
Wireless USB adapter
Question Answer
I have plugged in the wireless In order that you can install the correct driver
USB adapter and completed software for the wireless USB adapter,
the installation in Windows please do the following:
without installing the software
1 Open Windows Start Menu/Settings/
from the bypacked CD-ROM first. Control Panel/System/Hardware/
What should I do? Device Manager
2 Select Other Devices and delete the
USB WLAN device.
3 Unplug the wireless USB adapter.
4 Start the installation from the CD-ROM
with unplugged wireless USB adapter!
5 You will be asked during the installation to
plug in the adapter again.
I have followed the instructions for Possibly you have a problem with the
use and the instructions shown on quality of the wireless link.We propose using
the installation software exactly the extension cable which is delivered with
but cannot successfully install. the MC W770 Philips audio system and
placing the wireless USB adapter as close as
possible to the front side of the MC W770.
Start the installation again.
Since I have changed the USB port Your installation was optimised for the
for the wireless USB adapter I first USB por t used. In order to decrease
have longer connection times from connection time for the new USB port,
my MC W770 audio system to the you have to configure the new USB port
PC. for your PC link network. Select from the
CD-ROM setup the Network Utilities
and then the Install different USB port
menu. Follow the instructions of the setup
programme. For more information please refer
to the IFU chapter “Change of USB por t using
the MC W770”,
(www.philips.com/support)
34
English
Frequently asked questions
Page 54
I have lost my bypacked wireless You can order the wireless USB adapter
USB adapter, what can I do? at your local Philips Service organisation.
The MC W770 PC link mode will also work
with most other WiFi cer tified wireless
adapters. But you have to perform a complete
new setup, and a big part of the network setup
has to be done manually. First install the new
wireless adapter according to its manual. Use
the MC W770 installation disc and select
Setup Network. Continue the installation
according IFU chapter “Using a different
wireless network adapter”,
(www.philips.com/support)Your stored
music files will not get lost.
Philips Media Manager
Software Question Answer
Why can the tracks stored in my Through PC link you have access only to
PC not be played even though those music files which are in the library of the
I have successfully installed PC link? Philips Media Manager software. Please see the
chapter ‘Preparation for wireless PC Link
playback function,’ this describes how you can
add MP3 music files to the Philips Media
Manager.
How can I organise my tracks in Edit the Album,Title and other ID3 Tag
the music library and in the information of your MP3 files with the
MC W770 PC Link view? Philips Media Manager software, so you can
group your songs accordingly.To edit ID3
information select the track(s) you’d like to
edit, right click and select the ‘Edit Media
Information...’ from the popup menu.
How can I get a newer version You can download the latest version of the
of the Philips Media Manager? Philips Media Manager from
http://www.my.philips.com
Can I use other music archiving You can use another music archiving system
software than Philips Media other than Philips Media Manager under
Manager? condition that it provides an Universal Plug and
Play (UPnP
TM
) server interface.
35
English
Frequently asked questions
Page 55
Universal Plug and Play
Question Answer
What is Universal Plug and Play? Universal Plug and Play (UPnPTM) allows easy
interoperability of devices supporting this
network techology. UPnP
TM
builds on standard
networking technologies and provides
standardized protocols for a wide variety of
home and small business devices.
What does Universal Plug and Play MC W770 implements the UPnPTMtechnology
mean for MC W770? to get access, navigate and stream audio from a
UPnP
TM
music server.
Network setup and system configuration
Question Answer
Can I have more than one Yes, you can add more than one PC (server)
PC (server) to connect to this to your audio system’s configuration.
audio system? Start the CD-ROM installation on a PC which
you want to add to your audio system
and choose Add new PC server from the
Custom Installation menu. Follow the
instructions of the setup programme. For more
information please refer to the IFU chapter
“Installation of an additional PC server or
recovery of PC link settings on your PC”,
(www.philips.com/support)
Can I have more than one network Yes, you can connect your audio system
to connect to this audio system? to more than one network. Each network
configuration has to be added to your audio
system using the installation CD. For more
information please refer to the IFU chapter
“Integration of MC W770 into an existing
(home) network”,
(www.philips.com/support) When
installed, browse through the installed
networks using the 4, ¢ keys while the
display shows NETWORK in the first line.The
network’s name is scrolled in the second
display line. Select a network by pressing the
∞
key on your set.
36
English
Frequently asked questions
Page 56
What maximum number of You can install 5 different networks.
networks can be installed with
Philips audio system MC W770?
Can I have more than one Philips Yes, you can connect more than one Philips
audio system MC W770 to connect audio system MC W770 to your PC.
to my PC? In the CD-ROM installation select
Custom Installation and then the Add
additional Audio System menu. Follow the
instructions of the setup programme. For more
information please refer to the IFU chapter
“Installation of an additional audio system or
recovery if audio system PC link settings are
lost.” (www.philips.com/support)
Can I use my built-in wireless LAN Yes, you can use the built in wireless Lan card
card in my PC to set up the of your PC, but you have to setup in Windows
communication with the audio a network with this network adapter first.
system? Then use the Custom Installation menu
from the CD-ROM setup and choose
Network Setup to add the same network
configuration to the audio system. Follow the
instructions of the setup programme. For more
information please refer to the IFU chapter
“Using a different wireless network adapter”,
(www.philips.com/support)
I want to use the PC link function The MC W770 is meant to be used with the
in a wireless network which is bypacked wireless adapter. However, it is
already installed.What can I do? possible to use the MC W770 together with
most other WiFi cer tified wireless adapters as
well as in infrastructure mode networks using
Access Point. Use the Custom Installation
menu from the CD-ROM setup and choose
Network Setup. In this advanced setup
mode you can add to your audio system the
network configuration of your home network.
Please note that in this network at least
one PC needs the Philips Media Manager
installed and active. For more information
please refer to the IFU chapter “Integration of
MC W770 into an existing (home) network”,
(www.philips.com/support)
37
English
Frequently asked questions
Page 57
Connection problems and problems with link quality
Question Answer
I have successfully installed my Please check if your PC is still running and if the
MC W770, the wireless USB wireless USB adapter is installed correctly.
adapter and the software, and it The MC W770 PC link uses radio waves
worked nicely until recently. Now I to link between the PC and audio device.
have placed the MC W770 in a The output power is limited by legal
different room, and it is not able to regulations, and therefore also the distance
connect anymore.The display in which the PC link works is limited. Usually
shows NO CONNECTION.What can the PC link function works inside a typical
I do? single family house without problems. But the
radio-waves are dampened especially by walls,
ceilings and also by metal in your furniture.
Some golden rules to improve your link
quality:The PC and the MC W770 should not
be placed more than one floor and two walls
from each other. (This depends strongly on the
wall material).The wireless USB adapter
should be placed more than 20 cm (8 inches)
away from metal plates, e.g. it should not be
placed on top of your PC or your monitor,
or even too close to them. Use the extension
cable to get some distance from your PC.Tr y
different positions for the wireless USB
adapter, some centimetres (inches) can already
help! Try the same with your MC W770.
My PC Link has already worked It is possible that in your area or close
nicely, but since recently this is neighbourhood a new network has been
no longer the case. installed. Use the installation CD to switch
to another channel.
How can the transmission There is an easy way to change the network
channel be changed? transmission channel, by using the Change
transmission channel network utility
from the installation CD-ROM. For more
information please refer to the IFU chapter
“Change of the wireless channel”,
(www.philips.com/support)
38
English
Frequently asked questions
Page 58
When I press the PC LINK A button, If you receive this message you might need to
the display shows NO CONNECTION. restart your Philips Media Manager.To do this,
What can I do? click on on the taskbar and select
‘Shutdown Philips Media Manager’.
Restart the application from the Windows
Start menu.
Can PC link work when the PC PC link cannot work when the PC
is in standby? is switched off or in standby.
UPnPTMis a certification mark of the UPnP
TM
Implementers Corporation.
39
English
Frequently asked questions
Page 59

40
Philips, P.O. Box 671539, Marietta, GA. 30006-0026
One (1) Year Labor and Parts Repair
PHILIPS LIMITED WARRANTY
PHILIPS CONSUMER ELECTRONICS warrants this
product against defect in material or workmanship, subject to
any conditions set forth as follows:
PROOF OF PURCHASE:
You must have proof of the date of purchase to receive warranted repair on the product.A sales receipt or other document showing the product and the date that you purchased the
product as well as the authorized retailer included, is considered such proof.
COVERAGE:
(If this product is determined to be defective)
LABOR: For a period of one (1) year from the date of purchase,
Philips will repair or replace the product, at its option, at no
charge, or pay the labor charges to any Philips authorized repair
facility. After the period of one (1) year, Philips will no longer be
responsible for charges incurred.
PARTS: For a period of one (1) year from the date of purchase,
Philips will supply, at no charge, new or rebuilt replacement
parts in exchange for defective parts, through a Philips authorized service center.
Note: If Philips is unable to provide service in your area, receipt
of the paid service can be submitted for consideration of adjustment or full reimbursement at Philips discretion.
EXCLUDED FROM WARRANTY COVERAGE
Your warranty does not cover:
• Labor charges for installation or setup of the product, adjustment of customer controls on the product, and installation
or repair of antenna systems outside of the product.
•Product repair and/or part replacement because of improper
installation, connections to improper voltage supply, abuse,
neglect, misuse, accident, unauthorized repair or other cause
not within the control of Philips.
•A product that requires modification or adaptation to enable
it to operate in any country other than the country for
which it was designed, manufactured, approved and/or authorized, or repair of products damaged by these modifications.
• Damage occurring to product during shipping when improperly packaged or cost associated with packaging.
•Product lost in shipment and no signature verification of
receipt can be provided.
•A product used for commercial or institutional purposes
(including but not limited to rental purposes).
•Products sold AS IS or RENEWED.
CARRY-IN / SHIP-IN WARRANTY
For Carry-In warranty repair, take the product to a Philips
authorized service center for repair.When the product has
been repaired, you must pick up the unit at the center.
For Ship-In warranty repair, ship the product to a Philips authorized service center for repair in its original carton and packing
material. If you do not have the original carton or packing material, have your product professionally packed for shipping. Ship
product via a traceable carrier. When it is necessary for you to
ship the product to Philips for repair, you will pay the shipping
cost for shipment to Philips. Philips will pay the shipping costs
when returning the product to you.
TO OBTAIN WARRANTY SERVICE IN THE U.S.A.,
PUERTO RICO, OR U.S.VIRGIN ISLANDS…
Contact Philips Customer Care Center at:
1-888-PHILIPS (1-888-744-5477)
TO OBTAIN WARRANTY SERVICE IN CANADA…
1-800-661-6162 (French Speaking)
1-888-PHILIPS (1-888-744-5477) - (English or Spanish
Speaking)
REPAIR OR REPLACEMENT AS PROVIDED UNDER THIS
WARRANTY IS THE EXCLUSIVE REMEDY FOR THE CONSUMER. PHILIPS SHALL NOT BE LIABLE FOR ANY INCIDENTAL OR CONSEQUENTIAL DAMAGES FOR BREACH OF
ANY EXPRESS OR IMPLIED WARRANTY ON THIS PRODUCT. EXCEPT TO THE EXTENT PROHIBITED BY APPLICABLE
LAW,ANY IMPLIED WARRANTY OF MERCHANTABILITY OR
FITNESS FOR A PARTICULAR PURPOSE ON THIS PRODUCT
IS LIMITED IN DURATION TO THE DURATION OF THIS
WARRANTY.
Some states do not allow the exclusions or limitation of incidental or consequential damages, or allow limitations on how
long an implied warranty lasts, so the above limitations or exclusions may not apply to you. In addition, if you enter into a service contract agreement with the PHILIPS partnership within
ninety (90) days of the date of sale, the limitation on how long
an implied warranty lasts does not apply.
This warranty gives you specific legal rights. You may have other rights which vary from state/province to state/province.
(Warranty: 4835 710 27175)
Page 60

Page 61
PDCC-LC/JW-435
English
Meet Philips at the Internet
http://www. philips.com
W
MC W770
CLASS 1
LASER PRODUCT
3141 075 20451
Need more help or information on installation? Visit:
Ayez besoin de plus d'aide ou d'information sur l'installation? Merci de
visiter notre site internet:
¿Problemas de Instalación? Para más información, por favor visite nuestra
página web:
www.philips.com/support
Français Español
 Loading...