

Page 1
MCD139B
Quick Start Guide
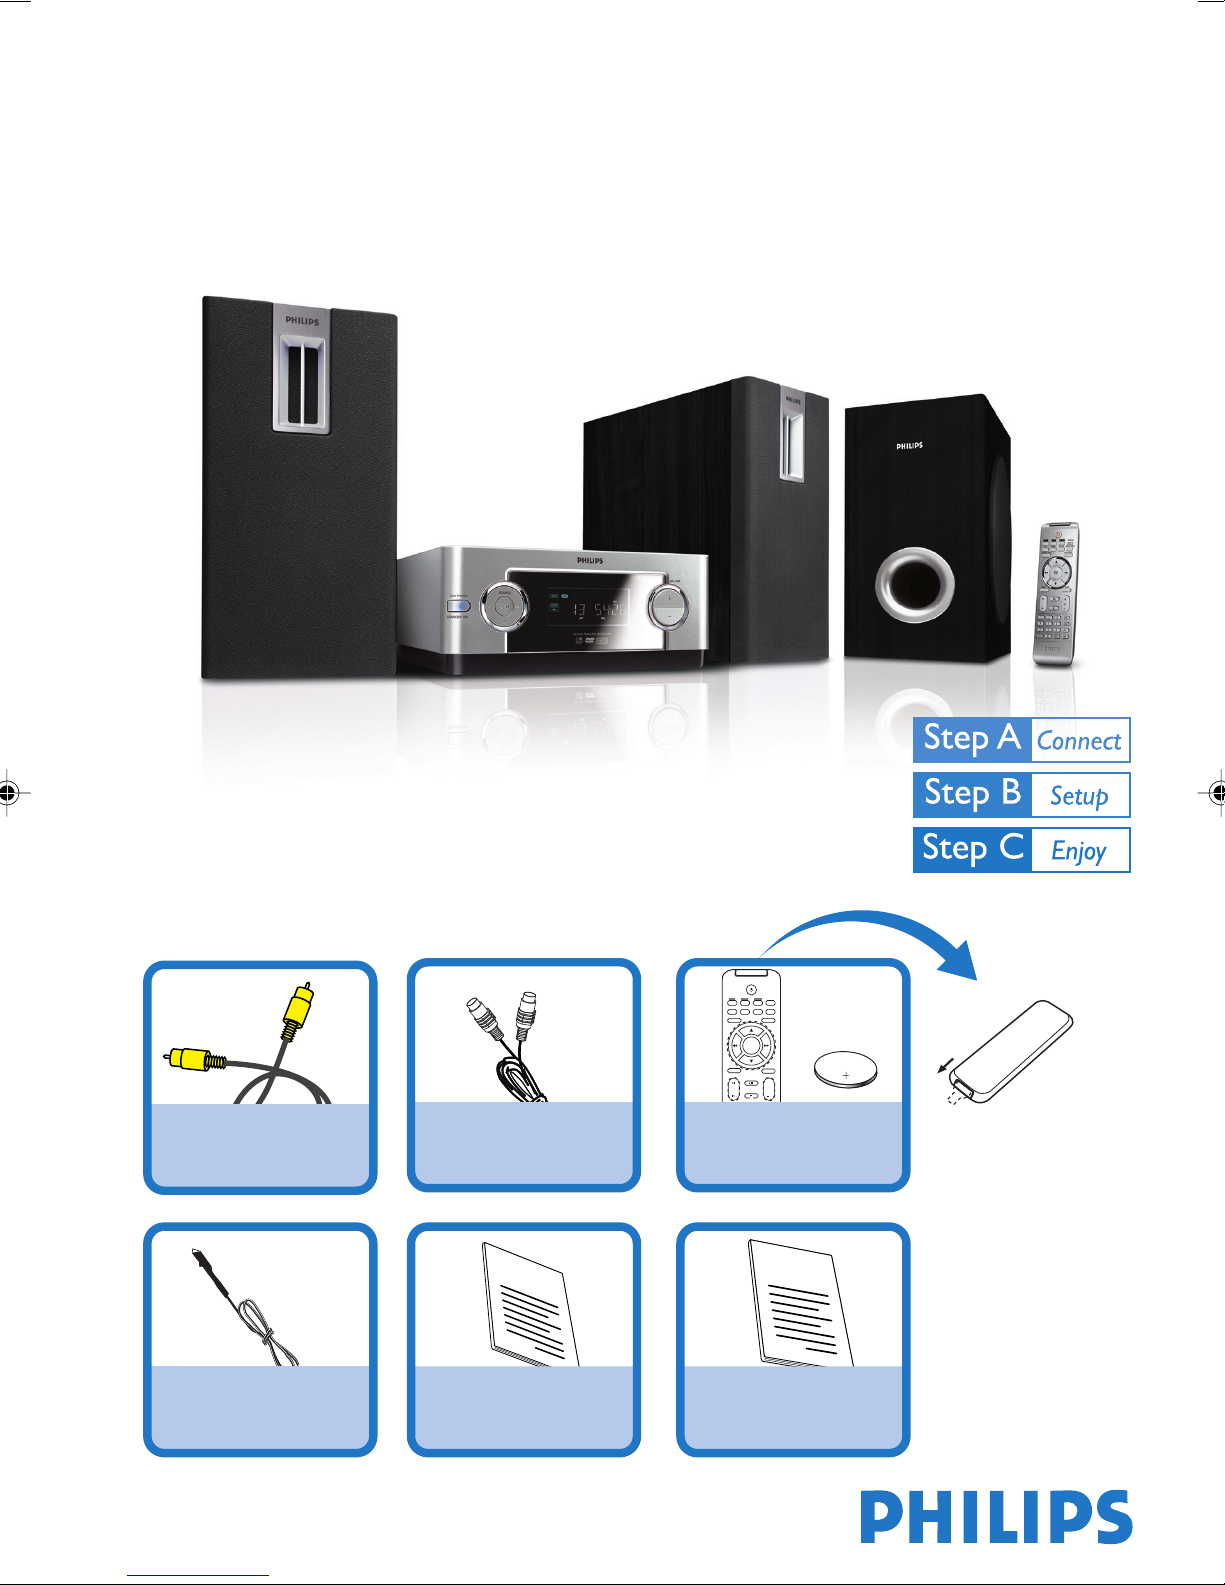
What’s in the Box?
You should find these items upon opening the box.
Composite video cable
FM wire antenna
DIN cable
Quick Start Guide
Quick start guide
TUNER
DISPLAY
DISC AUX
OSD
SLEEP/TIMER
MODE
CLOCKA-B
DISC MENU
SYSTEM MENU
OK
AUDIO MUTE
+
VOL
GOTO
1
2
3
ZOOM
4
5
6
DSC
7
8
9
PROG
SUBTITLE
DBB
0
Remote control with one
CR2025 battery loaded
1
User Manual
CR2025
Remove the insulation plastic tab
before use
2
User manual
Page 2
Important!
– This set can only be operated after the
supplied DIN cable has been connected.
Tips
– See the User Manual for other TV
connection options.
–For connecting to a Progressive Scan
TV, refer to the user manual for proper
connections and detailed setup.
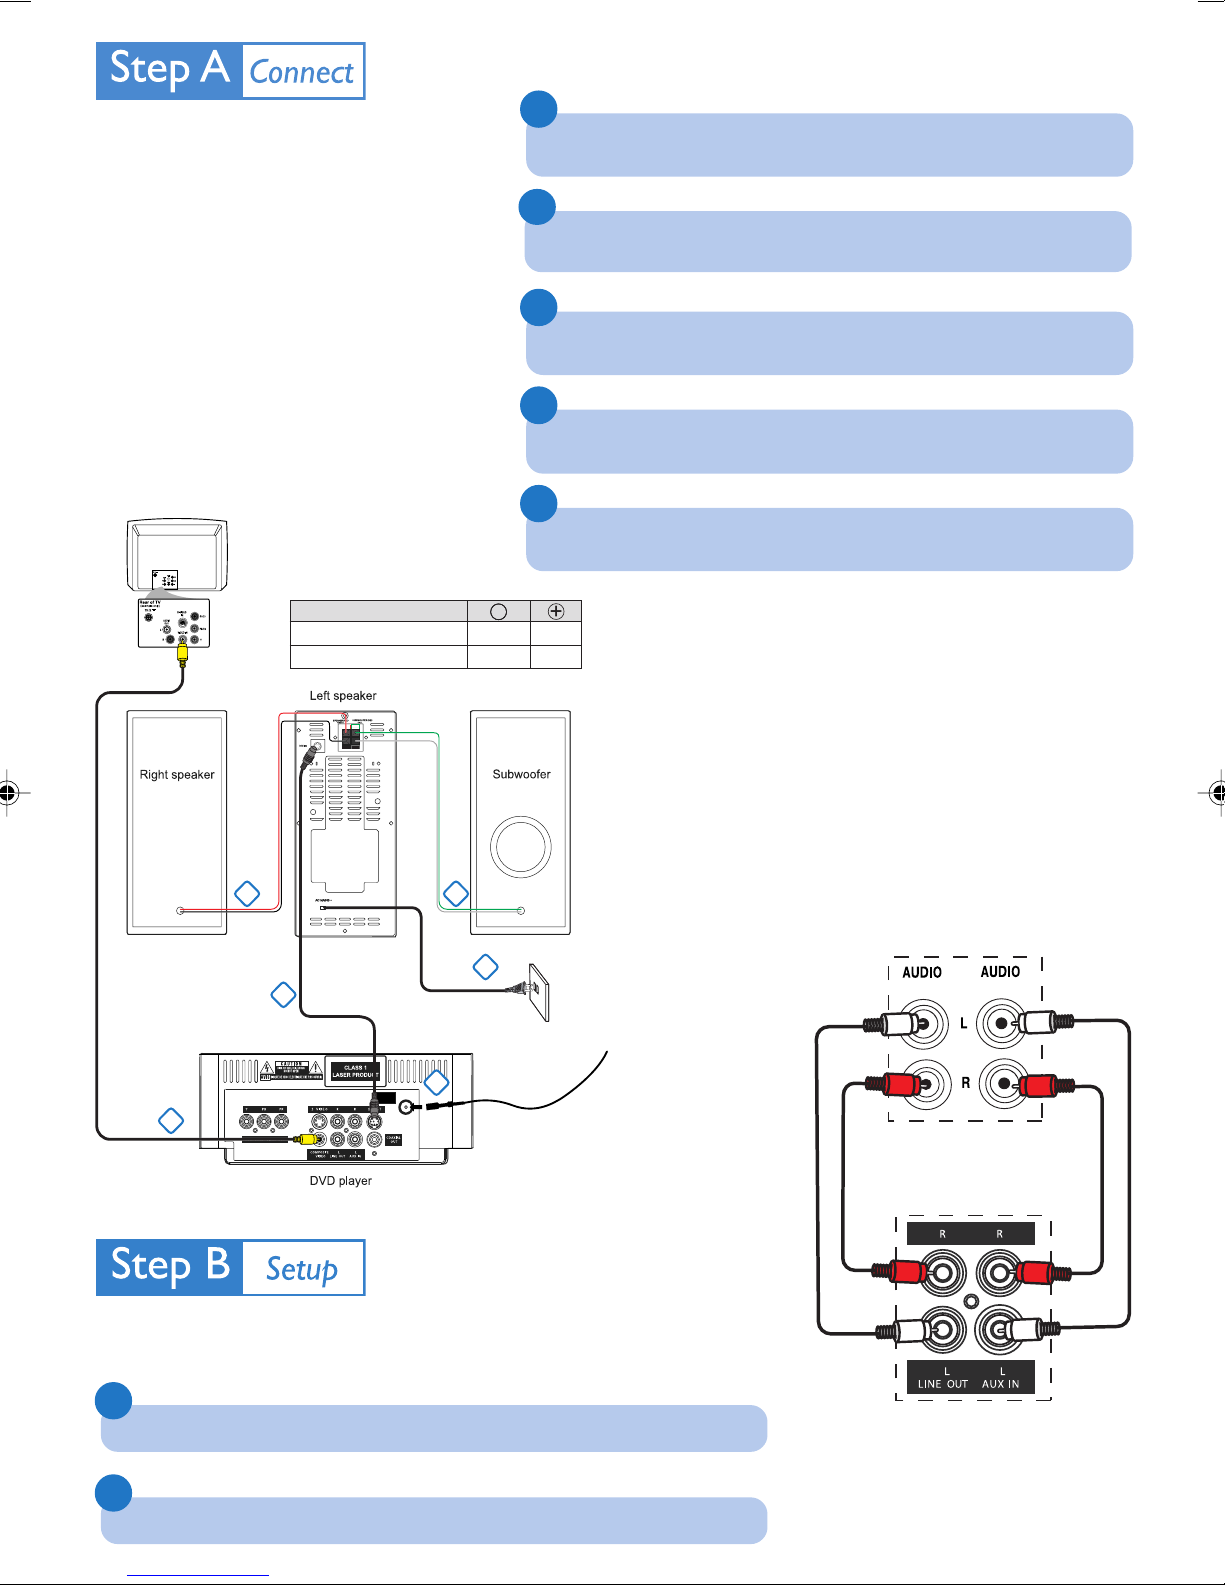
1
Connect the speaker wires of the right speaker and subwoofer to the
left speaker.
2
Connect the supplied FM wire antenna.
3
Connect the left speaker and the DVD player by using the supplied
DIN cable.
4
Connect the DVD player to your TV using the supplied composite video
cable.
––
Black
White
5
Connect the AC power cord to the wall socket.
+
Red
Green
A To listen to TV channels through this system, use the
audio cable (white/red, not supplied) to connect
AUX IN (L/R) jacks to the corresponding AUDIO
TV
Speakers
Right Speaker
Subwoofer
OUT jacks on the TV set.
● Before starting operation, press AUX on the
remote control to select “AUX” to activate the
input source.
B To listen to disc playback of this system through TV,
use the audio cable (white/red, not supplied) to
connect LINE OUT (L/R) jacks to the corresponding
1 1
5
3
4
ANTENNA
FM
(75Ω)
AC Power Cord
2
FM wire antenna
AUDIO IN jacks on the TV set.
IN
TV
OUT
Setting up the TV
1
Press SOURCE (DISC on the remote) to select disc source.
2
Turn on the TV and set it to the correct Video In channel.
B
A
DVD player
Page 3
Setting the clock
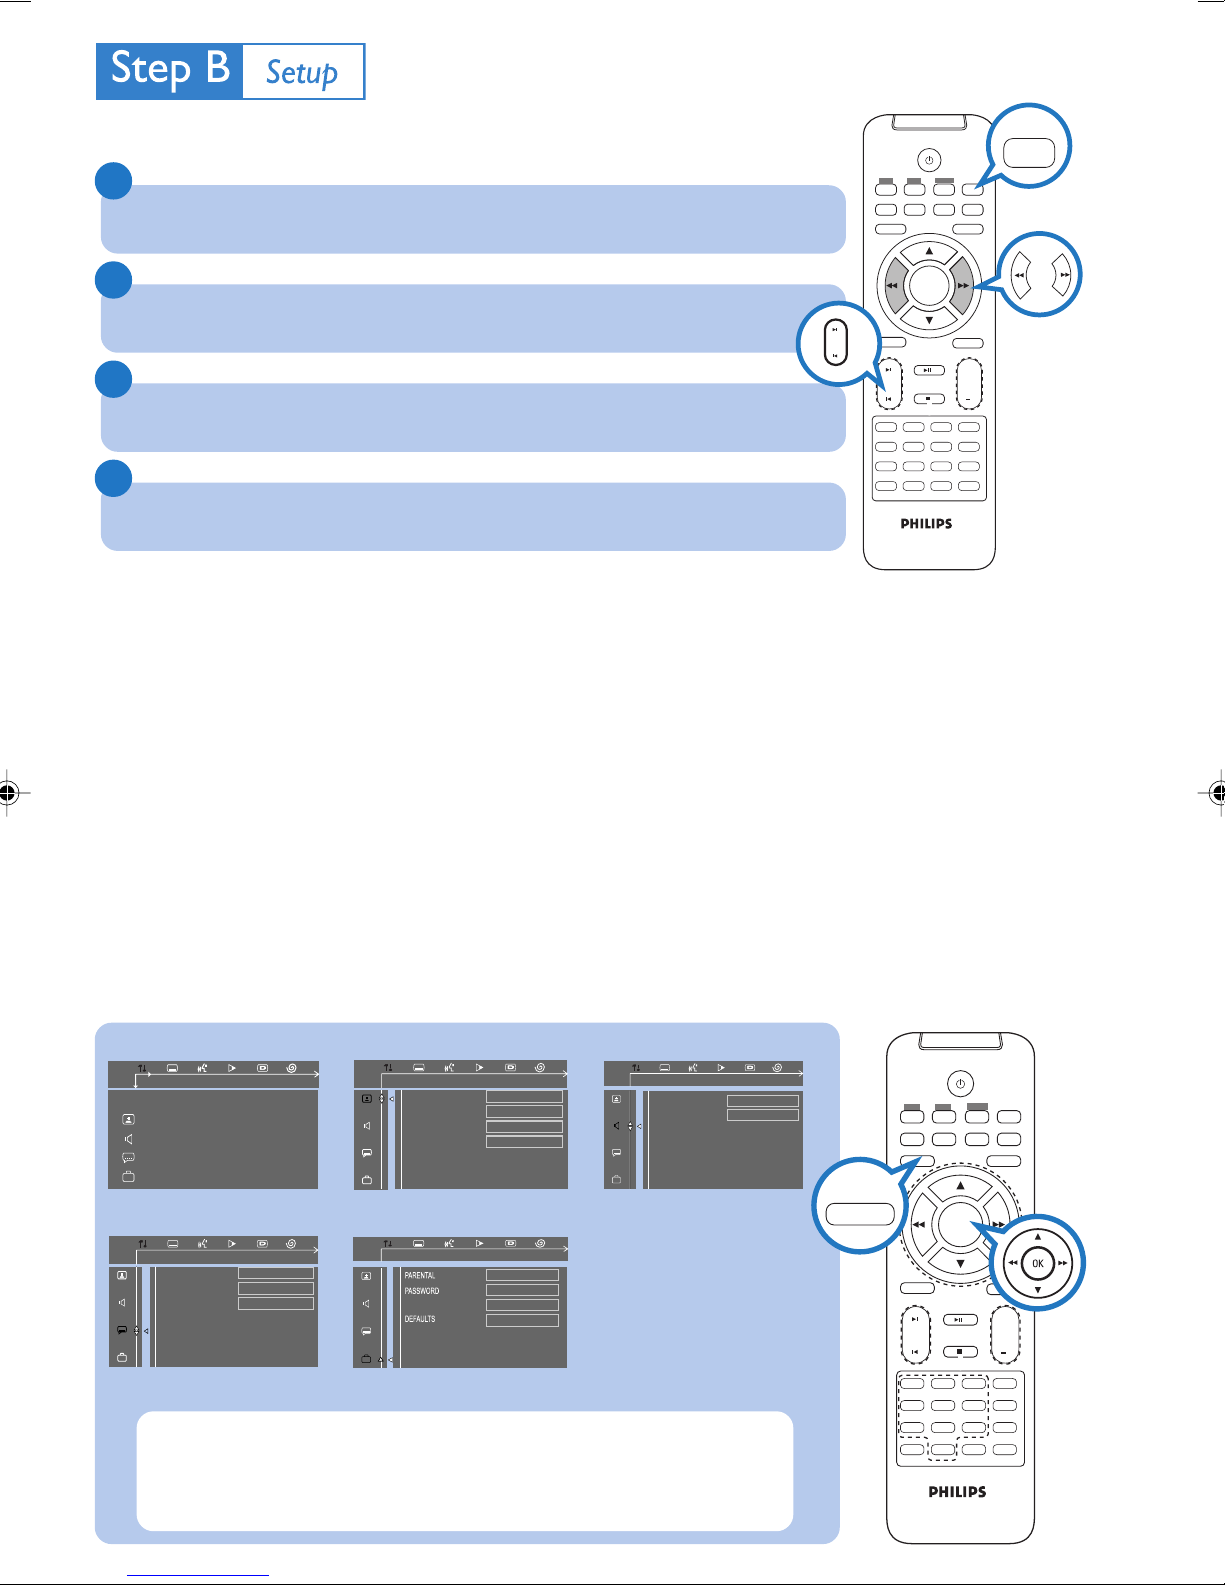
1
In standby or power on mode, press and hold CLOCK on the remote control.
The clock digits flash on the display.
DISC AUX
SYSTEM MENU
CLOCK
TUNER
DISPLAY
OSD
SLEEP/TIMER
MODE
CLOCKA-B
DISC MENU
2
Press ¡ / ™ repeatedly to set the hours.
3
Press à / á repeatedly to set the minutes.
4
Press CLOCK again to store the setting.
Setting DVD menu options
IMPORTANT!
If the progressive scan feature is activated but the connected TV does not support
progressive signals or the video cables are not connected accordingly, see the user
manual for proper progressive scan setup or deactivate the progressive scan
feature as below:
1) Turn off your TV progressive scan mode then turn on to interlaced mode.
2) Select “OFF” in PROGRESSIVE menu of the system setup menu to turn off
progressive scan, then press SYSTEM MENU on the remote to exit the system
menu.
Or To turn off progressive scan, you may also first open the disc door, then hold
down
™ on the front panel, and press numeric key “1” on the remote.
OK
AUDIO MUTE
1
2
3
4
5
6
7
8
PROG
9
SUBTITLE
0
+
VOL
GOTO
ZOOM
DSC
DBB
SETUP MENU
AUDIO
SUBTITLE
DISC MENU
ENGLISH
ENGLISH
ENGLISH
GOTO LANGUAGE SETUP PAGE
TV DISPLAY
TV TYPE
PROGRESSIVE
SCREEN SAVER
GOTO PICTURE SETUP PAGE
OSD LANG
GOTO FEATURE SETUP PAGE
Tip
See chapters "Getting Started" and "DVD menu operations" in the
User Manual for detailed descriptions.
NORMAL/PS
MULTI
OFF
ON
8 ADULT
CHANGE
ENGLISH
RESET
NIGHT MODE
TEST TONE
GOTO SOUND SETUP PAGE
OFF
OFF
SYSTEM MENU
DISC AUX
SYSTEM MENU
TUNER
MODE
CLOCKA-B
OK
AUDIO MUTE
1
2
3
5
4
7
PROG
6
8
9
SUBTITLE
0
DISPLAY
SLEEP/TIMER
DISC MENU
+
VOL
GOTO
ZOOM
DSC
DBB
OSD
Page 4
Playing a disc
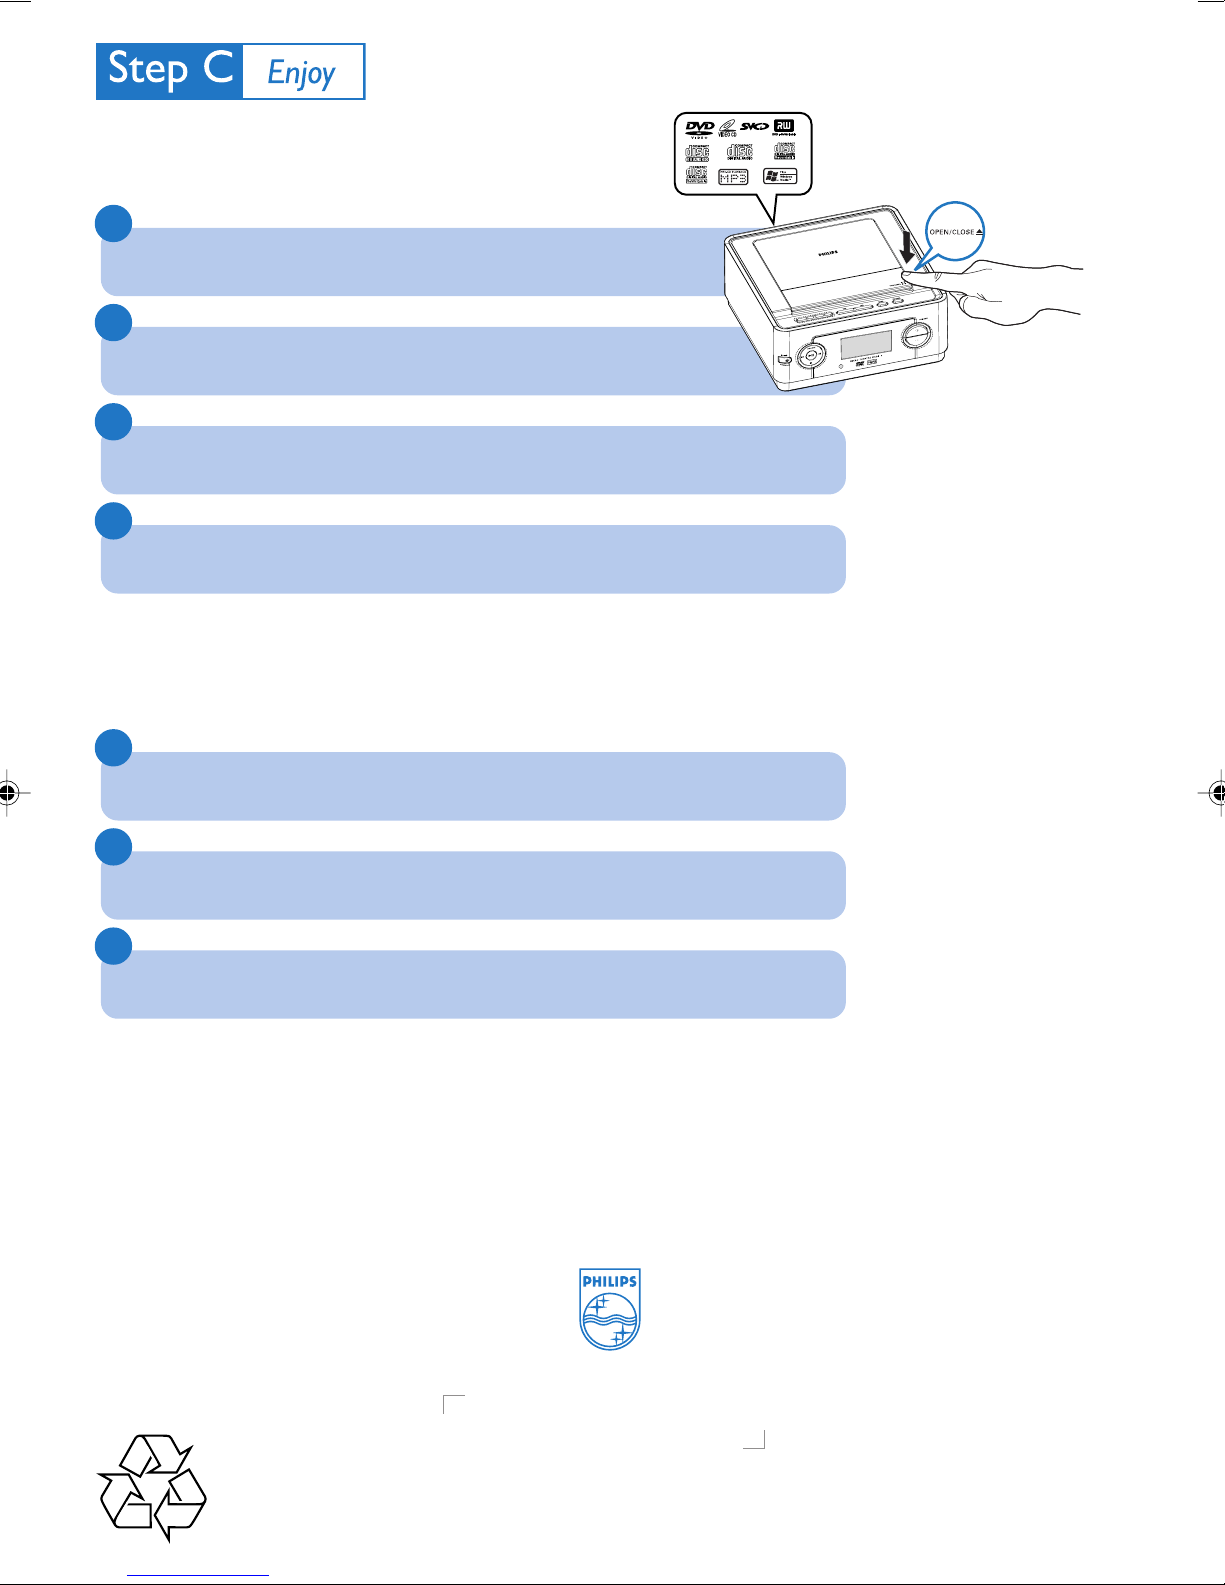
1
Push OPEN /CLOSEç to open the disc door.
2
Load in a disc with the label side facing up, then close the disc door.
G
IN
N
U
T
3
3
Playback will start automatically. If not, pressÉÅ.
4
To stop playback, press 9.
Programming and tuning to radio stations
1
Press SOURCE (TUNER on the remote) to select tuner source (FM).
2
Press PROGAM on the set for more than two seconds to program all available stations in
order of waveband.
3
Press ¡ / ™ (Numberic keys on the remote) until the desired preset station is displayed.
To s witch on the system,
press STANDBY ONB/
SOURCE on the set, or
DISC/TUNER/AUX on the
remote.
Tip
Detailed playback features and
additional functions are described in the
accompanied user manual.
2007 C Koninklijie Philips Electronics
N.V. All rights reserved.
http://www.philips.com
Notes for the remote control:
– First, select the source you wish to
control by pressing one of the source
select keys on the remote control
(DISC or AUX, for example).
– Then select the desired function
( 2;, í, ë for example).
PDCC-JH-0652
 Loading...