

Page 1
Register your product and get support at
www.philips.com/welcome
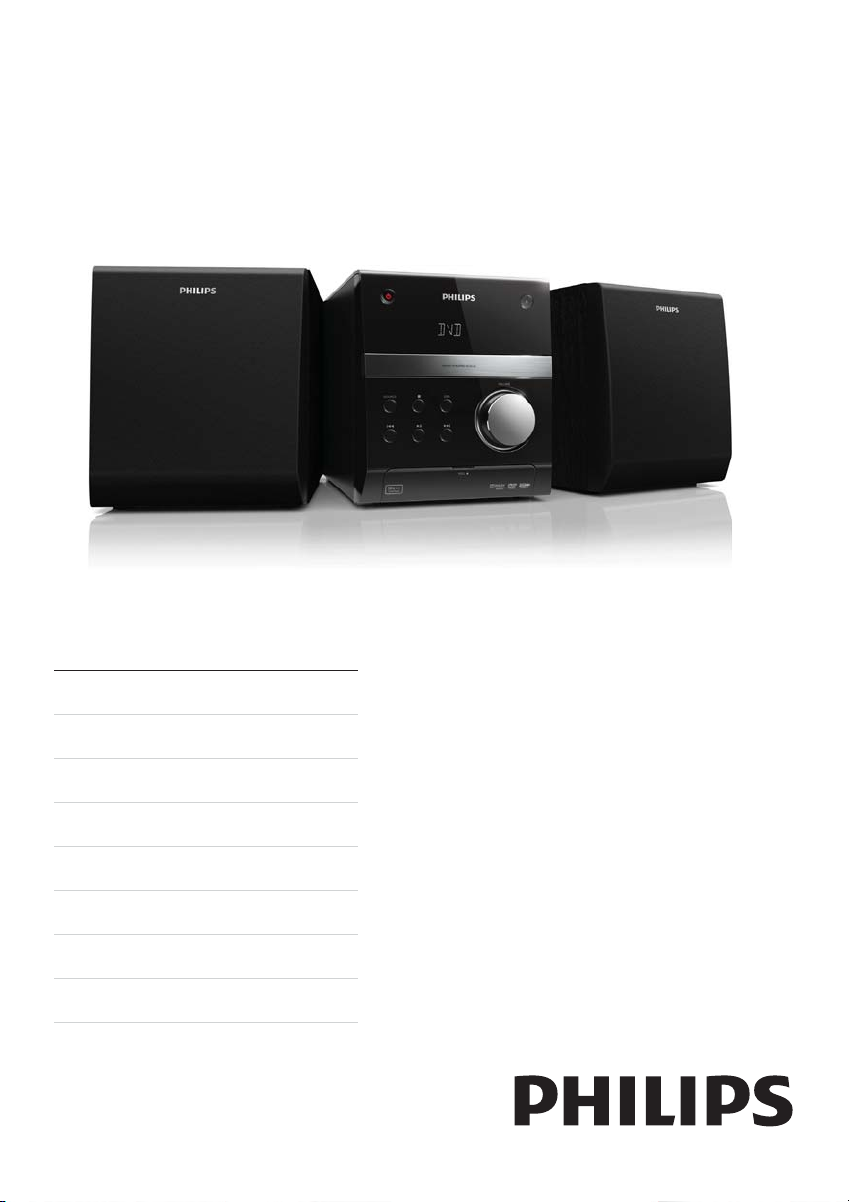
MCD135
EN User manual 3
CS Příručka pro uživatele 25
EL Εγχειρίδιο χρήσης 47
HU Felhasználói kézikönyv 71
PL Instrukcja obsługi 93
RO Manual de utilizare 117
SK Príručka užívateľa 139
TR Kullanım kılavuzu 161
Page 2
Producent zastrzega możliwość
wprowadzania zmian technicznych.
ČESKA REPUBLIKA
Výstraha! Tento přístroj pracuje s
laserovým paprskem. Při nesprávné
manipulaci s přístrojem (v rozporu
s tímto návodem) můże dojít k
nebezpečnému ozáření. Proto přístroj
za chodu neotevírejte ani nesnímejte
jeho kryty. Jakoukoli opravu vždy svěřte
specializovanému servisu.
Nebezpečí! Při sejmutí krytů a odjištění
bezpečnostních spínačů hrozí nebezpečí
neviditelného laserového záření!
Chraňte se před přímým zásahem
laserového paprsku.
Záruka: Pokud byste z jakéhokoli důvodu
přístroj demontovali, vždy nejdříve
vytáhněte síťovou zástrčku.
Přístroj chraňte před jakoukoli vlhkostí i
před kapkami vody.
MAGYARORSZÁG
Minőségtanúsítás
A garanciajegyen feltüntetett forgalombahozó
vállalat a 2/1984. (III.10.) BkM-IpM együttes
rendelet értelmében tanúsítja, hogy ezen
készülék megfelel a műszaki adatokban
megadott értékeknek.
Figyelem! A meghibásodott készüléket –
beleértve a hálózati csatlakozót is – csak
szakember (szerviz) javíthatja. Ne tegye ki a
készüléket esőnek vagy nedvesség hatásának!
Garancia
A forgalombahozó vállalat a termékre 12
hónap garanciát vállal.
Névleges feszültség .........................100 - 240 V
Névleges frekvencia ..............................50/60 Hz
Teljesítmény
maximális ....................................................... 25 W
készenléti állapotban ..............................<1 W
Érintésvédelmi osztály II.
Tömeg .................................................................3.9 kg
SLOVAK REPUBLIC
Prístroj sa nesmie používat’ v mokrom
a vlhkom prostredí! Chránte pred
striekajúcou a kvapkajúcou vodou!
Befoglaló méretek
szélesség .................................................152 mm
magasság ..................................................170 mm
mélység .....................................................210 mm
Rádiórész vételi tartomány
URH ......................................87,5 – 108,0 MHz
Erősítő rész
Kimeneti teljesítmény ..........2 x 25W RMS
Page 3
Contents
1 Important 4
Know these safety symbols 4
Hearing safety 4
Others 5
2 Congratulations 6
Feature introduction 6
What’s in the box 6
Overview of the main unit 7
3 Before use 8
Place the player 8
Install/replace the battery of remote
control 9
4 Connect 9
Connect speakers 9
Connect TV 10
Connect a USB storage device 10
Connect power 10
5 Get started 11
Turn on 11
Set the clock 11
Find the correct video input channel 11
Select the correct TV system 11
Select a language for on-screen display 11
7 Other features 15
Listen to FM radio 15
Play audio from an external device 16
Listen through headphone 16
Turn on/off automatically 16
8 Setup 17
Interface for setup menu 17
Change a setting 17
System setup 17
Language setup 18
Audio setup 18
Video setup 18
9 Product information 19
Specifications 19
Supported disc formats 20
USB playability information 20
10 Troubleshooting 21
11 Notice 23
Copyright notice 23
Trademark notice 23
English
6 Play 12
Basic operation 12
Play a disc 12
Play recored files 12
Control the play 14
Search by time or title/chapter/track
number 15
Adjust sound 15
EN
3
Page 4
1 Important
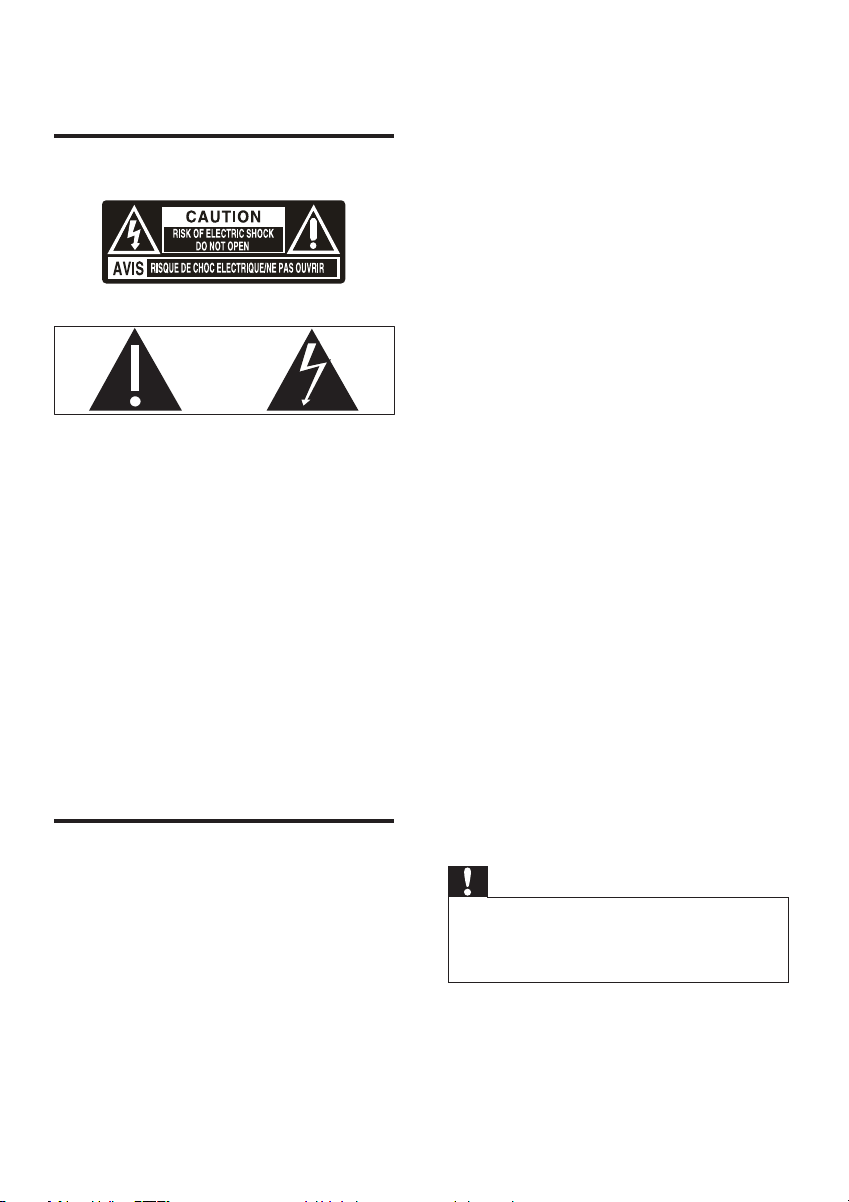
Know these safety symbols
Sound can be deceiving. Over time your •
hearing ‘comfort level’ adapts to higher
volumes of sound. So after prolonged
listening, what sounds ‘normal’ can
actually be loud and harmful to your
hearing. To guard against this, set your
volume to a safe level before your hearing
adapts and leave it there.
This ‘bolt of lightning’ indicates uninsulated
material within your unit may cause an
electrical shock. For the safety of everyone
in your household, please do not remove
product covering.
The ‘exclamation point’ calls attention to
features for which you should read the
enclosed literature closely to prevent
operating and maintenance problems.
WARNING: To reduce the risk of fire or
electric shock, this apparatus should not be
exposed to rain or moisture and objects filled
with liquids, such as vases, should not be
placed on this apparatus.
CAUTION: To prevent electric shock, match
wide blade of plug to wide slot, fully insert.
Hearing safety
To establish a safe volume level:
Set your volume control at a low setting. •
Slowly increase the sound until you can •
hear it comfortably and clearly, without
distortion.
Listen for reasonable periods of time:
Prolonged exposure to sound, even •
at normally ‘safe’ levels, can also cause
hearing loss.
Be sure to use your equipment •
reasonably and take appropriate breaks.
Be sure to observe the following guidelines
when using your headphones.
Listen at reasonable volumes for •
reasonable periods of time.
Be careful not to adjust the volume as •
your hearing adapts.
Do not turn up the volume so high that •
you can’t hear what’s around you.
You should use caution or temporarily •
discontinue use in potentially hazardous
situations. Do not use headphones while
operating a motorized vehicle, cycling,
skateboarding, etc.; it may create a traffic
ha zard and is illegal in many areas .
Listen at a moderate volume.
Using headphones at a high volume can •
impair your hearing. This product can
produce sounds in decibel ranges that
may cause hearing loss for a normal
person, even for exposure less than a
minute. The higher decibel ranges are
offered for those that may have already
experienced some hearing loss.
4
EN
Caution
Use of controls or adjustments or •
performance of procedures other than herein
may result in hazardous radiation exposure or
other unsafe operation.
Page 5
Others
Any changes or modifications made to this
device that are not expressly approved by
Philips Consumer Lifestyle may void the user’s
authority to operate the equipment.
This product complies with the radio
interference requirements of the European
Community.
Your product is designed and manufactured
with high quality materials and components,
which can be recycled and reused.
negative consequences for the environmental
and human health.
Environmental information
All unnecessary packaging has been omitted.
We have tried to make the packaging easy to
separate into three materials: cardboard (box),
polystyrene foam (buffer) and polyethylene
(bags, protective foam sheet.)
Your system consists of materials which can
be recycled and reused if disassembled by
a specialized company. Please observe the
local regulations regarding the disposal of
packaging materials, exhausted batteries and
old equipment.
This apparatus includes this label:
English
When this crossed-out wheeled bin symbol
is attached to a product it means that the
product is covered by the European Directive
2002/96/EC.
Please inform yourself about the local separate
collection system for electrical and electronic
products.
Please act according to your local rules and
do not dispose of your old products with your
normal household waste. Correct disposal of
your old product helps to prevent potential
negative consequences for the environment
and human health.
Your product contains batteries covered by
the European Directive 2006/66/EC, which
cannot be disposed with normal household
waste.Please inform yourself about the local
rules on separate collection of batteries
because correct disposal helps to prevent
Class II equipment symbol
This symbol indicates that the unit has a
double insulation system.
EN
5
Page 6
2 Congratulations
Congratulations on your purchase, and
welcome to Philips! To fully benefit from the
support that Philips offers, register your product
at www.philips.com/welcome.
If you contact Philips, you will be asked for the
model and serial number of this product. The
model number and serial number are on the
back of the main unit. Write the numbers here:
Model No. __________________________
Serial No. ___________________________
Feature introduction
This player can
play videos, audios, and display pictures •
fr om d is cs a nd U SB s to ra ge d evi ces
For the details of supported media, refer to
“Specifications”.
Region Code
You can play DVD discs marked with the
following region code.
DVD region code Countries
Europe
Sound effect
This player supports the sound output by
DSC (Digital Sound Effect) and DBB (Dynamic
Bass Boost).
What’s in the box
Check and identify the contents of your
package:
Main unit•
2 speakers•
Remote control•
Audio and video cables (white, red and •
yellow connectors)
USB cable (100 mm)•
MP3 link cable (3.5 mm plug)•
Power cord•
User manual•
Quick star t guide•
To fully enjoy the features, you need the
following cables.
Component video cables •
Contact local retailers to purchase these
additional cables.
6
EN
Page 7
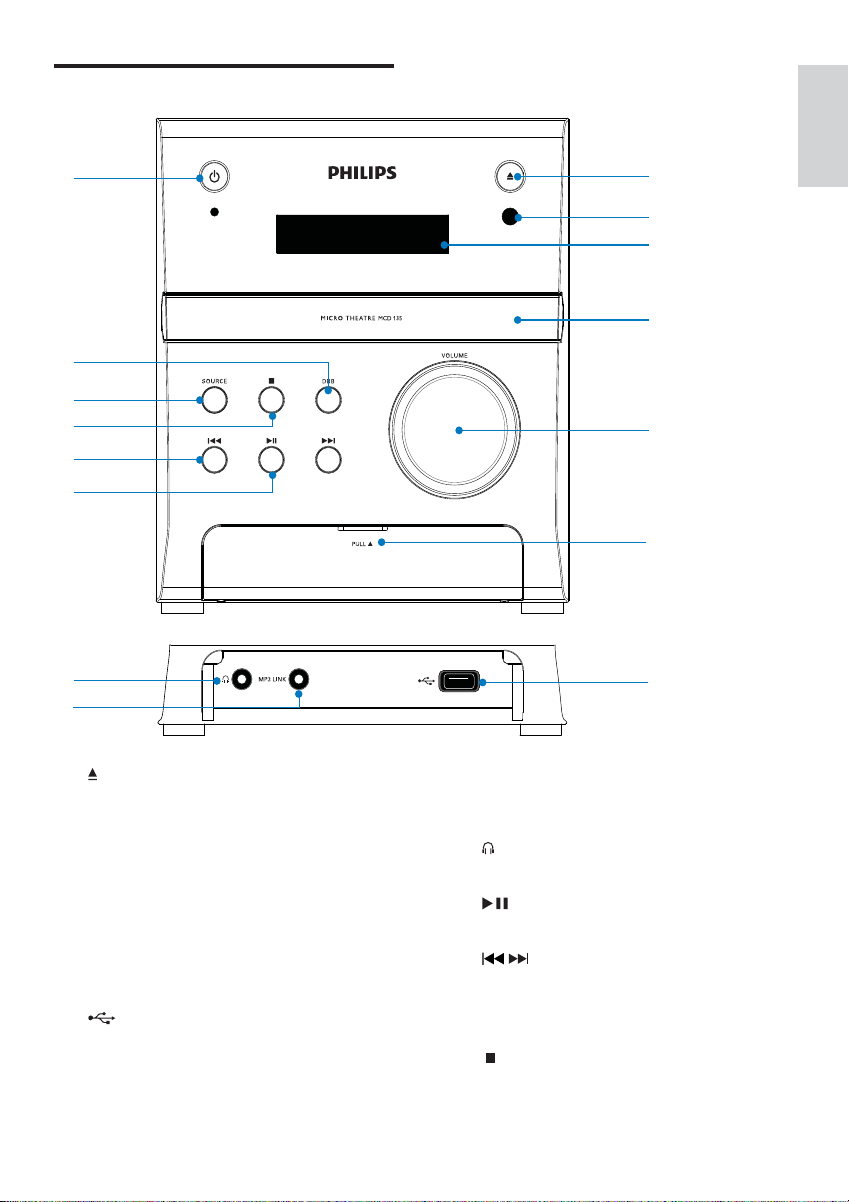
Overview of the main unit
g
English
o
n
m
l
k
j
i
h
a
b
c
d
e
f
a
Eject or close the disc compartment. •
b IR sensor
c VFD display
d Disc compartment
e VOLUME
Increase/decrease the volume level. •
f Pull to open
g
Connect a USB storage device. •
h MP3 LINK
Connect an MP3 link cable (3.5 mm •
plug).
i
Socket for headphones. •
j
Start, pause or resume the play. •
k
/
Skip to the previous or next title, •
chapter, track, or file.
Search fast backward or forward. •
l
Stop the play.•
EN
7
Page 8
m SOURCE
Select a media source (disc, USB •
storage device, FM tuner, or external
device connected through MP3 link
cable).
n DBB
Enable or disable the DBB (Dynamic •
Bass Boost) feature.
o
Turn on or off the unit.•
Switch to standby mode. •
3 Before use
Place the player
Note
Place this player on a flat, hard, and stable •
surface.
Never place this player in an enclosed cabinet,
•
nor on any other electrical equipment.
Keep this player away from direct sunlight,
•
naked flames, or heat.
Do not block any ventilation openings.
•
Apparatus shall not be exposed to dripping or •
splashing.
Do not place any sources of danger on the
•
player (for example, liquid filled objects, lighted
candles).
Install this player near the AC outlet where the
•
AC power plug can be easily reached.
To avoid magnetic interference or unwanted
•
noise, never place the main unit and speakers
too close to any radiation devices.
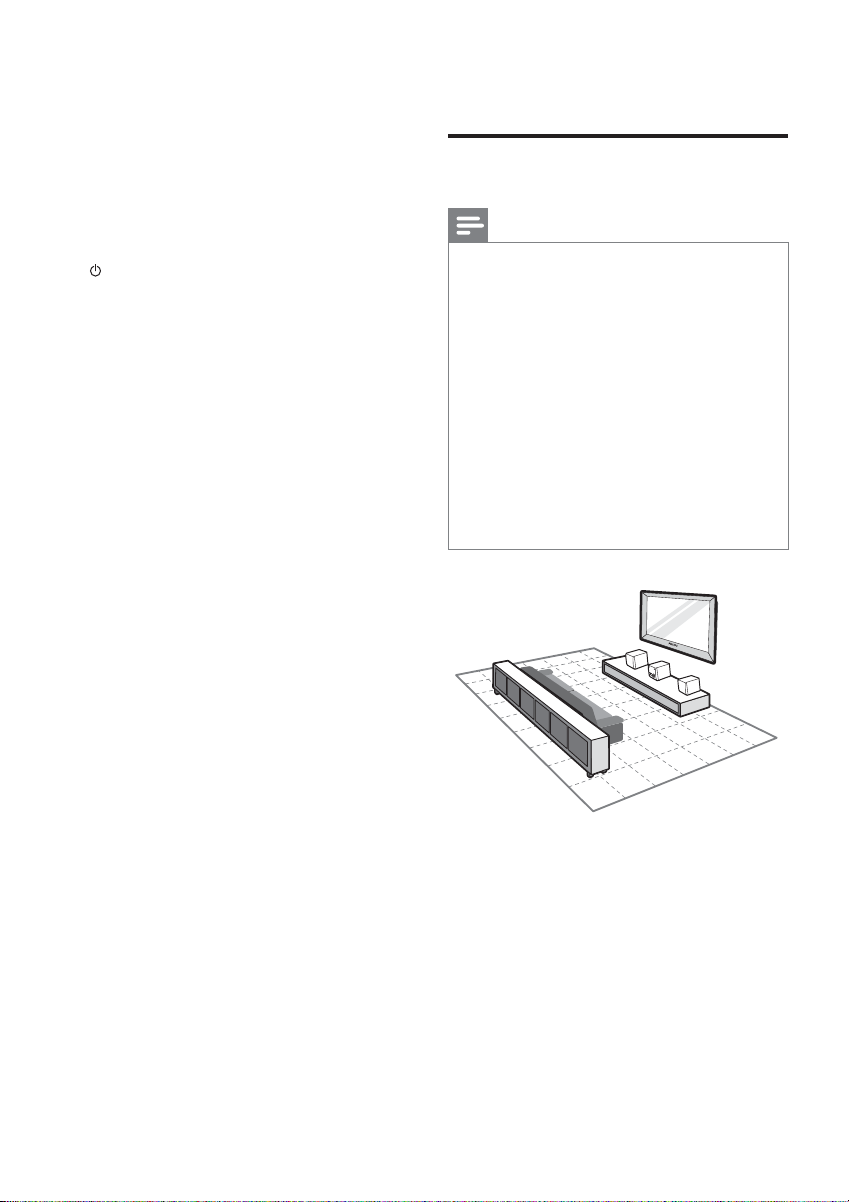
1 Place the player near to the TV.
2 Place the left and right speakers at equal
distance from the TV and at an angle
of approximately 45 degrees from the
listening position.
8
EN
Page 9
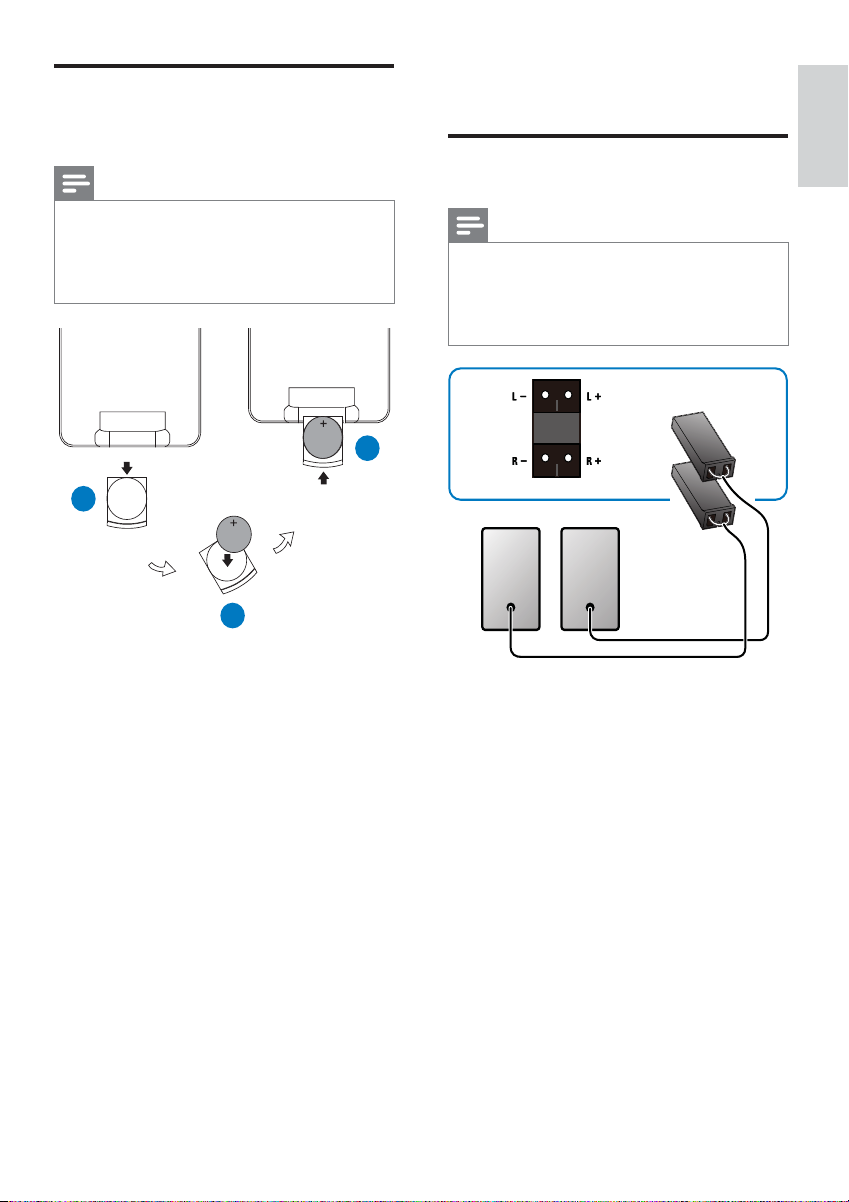
Install/replace the battery of
remote control
Note
4 Connect
English
Connect speakers
Risk of explosion! Keep batteries away from •
heat, sunshine or fire. Never discard batteries
in fire.
Remove the battery if the remote control is
•
not to be used for an extended period of time.
3
1
1 Pull out the battery tray.
2 Insert one lithium CR2025 battery with
correct polarity (+/-) as indicated.
3 Push and close the battery tray.
2
Note
For the best sound quality, use the supplied •
speakers only.
Connect speakers with the same or
•
higher impedance only. Refer to “Product
information” > “Specifications” for details.
EN
9
Page 10
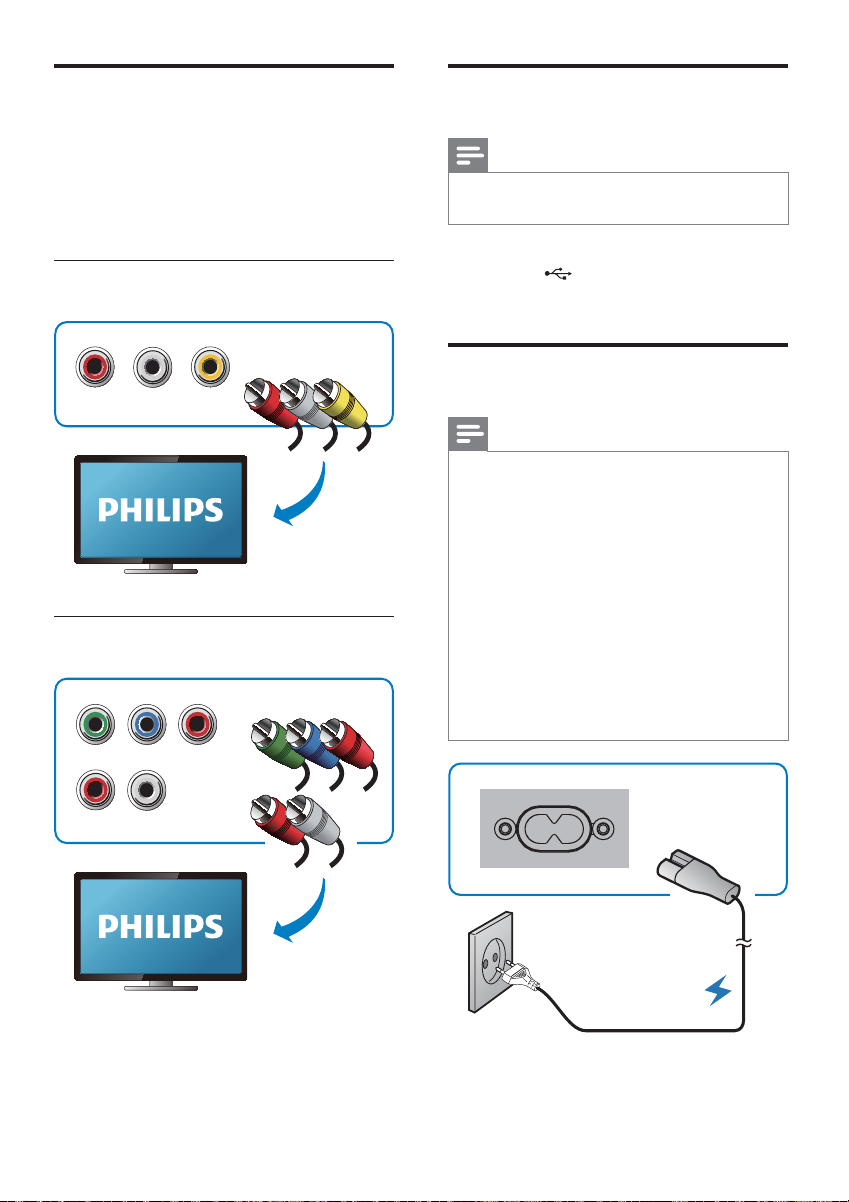
Connect TV
Connect the audio and video cables to
the output sockets on the player and the
corresponding input sockets on your TV.
Select the best video connection that your TV
supports.
Option 1: Connect through a
composite video cable
VIDEO R
L
Option 2: Connect through
component video cables
Pb/Cb
Pr/CrY
Connect a USB storage device
Note
For the best data transmission, use the •
supplied USB cable only.
1 Connect the supplied USB cable to:
the •
jack on the main unit.
the plug of your USB storage device. •
Connect power
Note
Where the MAINS plug or an appliance •
coupler is used as the disconnect device,
the disconnect device shall remain readily
operable.
Risk of product damage! Make sure that the
•
power supply voltage corresponds to the
voltage printed on the back of the main unit.
Before you connect the AC power cord,
•
make sure that you have complete all other
connections.
Protect the power cord from being walked on
•
or pinched, particularly at plugs, convenience
receptacles, and the points where they exit
from the apparatus.
Unplug this apparatus during lightning storms
•
or when unused for long periods of time.
R
L
Connect a progressive scan TV through
component video cables for higher quality
video.
10
EN
Page 11
5 Get started
Turn on
Press .
1
The player switches to the last selected »
source.
Note
If no source is played within 15 minutes, the •
player switches to standby mode.
If no operation is performed within 15 minutes
•
in standby mode, the player switches to Ecopower standby mode.
Press
• to switch the player to standby mode.
Set the clock
The player uses the 24-hour time format.
1 In standby mode, press and hold
DISPLAY/CLOCK for 2 seconds.
The hour digits blink. »
2 Press / to set the hour.
3 Press DISPLAY/CLOCK again.
The minute digits blink. »
4 Press / to set the minute.
5 Press DISPLAY/CLOCK to confirm the
setup.
Find the correct video input
channel
Turn on the player.
1
2 Press DISC to select the disc source.
Turn on the TV and switch to the •
correct video-in channel.
Note
See the user manual of your TV for how to •
switch between video-in channels.
Select the correct TV system
This player is compatible with both NTSC
and PAL. If the picture is abnormally displayed
with the default setting, select a TV system that
matches your TV. (Refer to “Setup” > “System
setup” > [TV SYSTEM] for details)
Select a language for onscreen display
English and Russian are the default language
options for this setting. (See “Setup” >
“Language setup” > [OSD LANGUAGE] for
details)
English
EN
11
Page 12
6 Play
Caution
Risk of damage to the player! During play, •
never move the unit.
Never put any object other than a disc into the
•
disc compartment.
Never look at the laser beam inside the player.
•
Never play discs with accessories such as disc •
stabilizer rings or disc treatment sheets.
When “[INVALID KEY]” is displayed after
an operation, it indicates that this operation
is unavailable for the current media or at the
current time.
Play recored files
You can play DivX/MP3/WMA/JPEG files that
are copied onto a CD-R/RW, recordable DVD,
or USB storage device.
Note
You can only play DivX videos that are rented •
or purchased with DivX® registration code of
this player. (See “Setup” > “Language setup” >
[DIVX[R] VOD])
Subtitle files with the following file extensions
•
(.srt, .smi, .sub, .ssa, .ass) are supported but not
displayed in the file list.
The subtitle filename has to be the same
•
as the filename of the DivX video (the file
extension excluded).
The DivX video file and the subtitle files must
•
be saved under the same directory.
Basic operation
The listed operations are applicable for all
supported media.
Function Action
Press
.
.
/ .
Stop play Press
Pause or resume play Press
Skip to the previous/next
title, chapter, track, or file
Play a disc
1
Press DISC to select the disc source.
2 Press to eject the disc tray.
3 Place a disc onto the disc tray with the
printed side upward, and then press
4 The player starts playing automatically.
To start the play manually, press •
To play a DVD that has a rating •
level higher than your setting, enter
the 4-digit password first. (Refer
to “Setup” > “System setup” >
[PASSWORD] and [RATING])
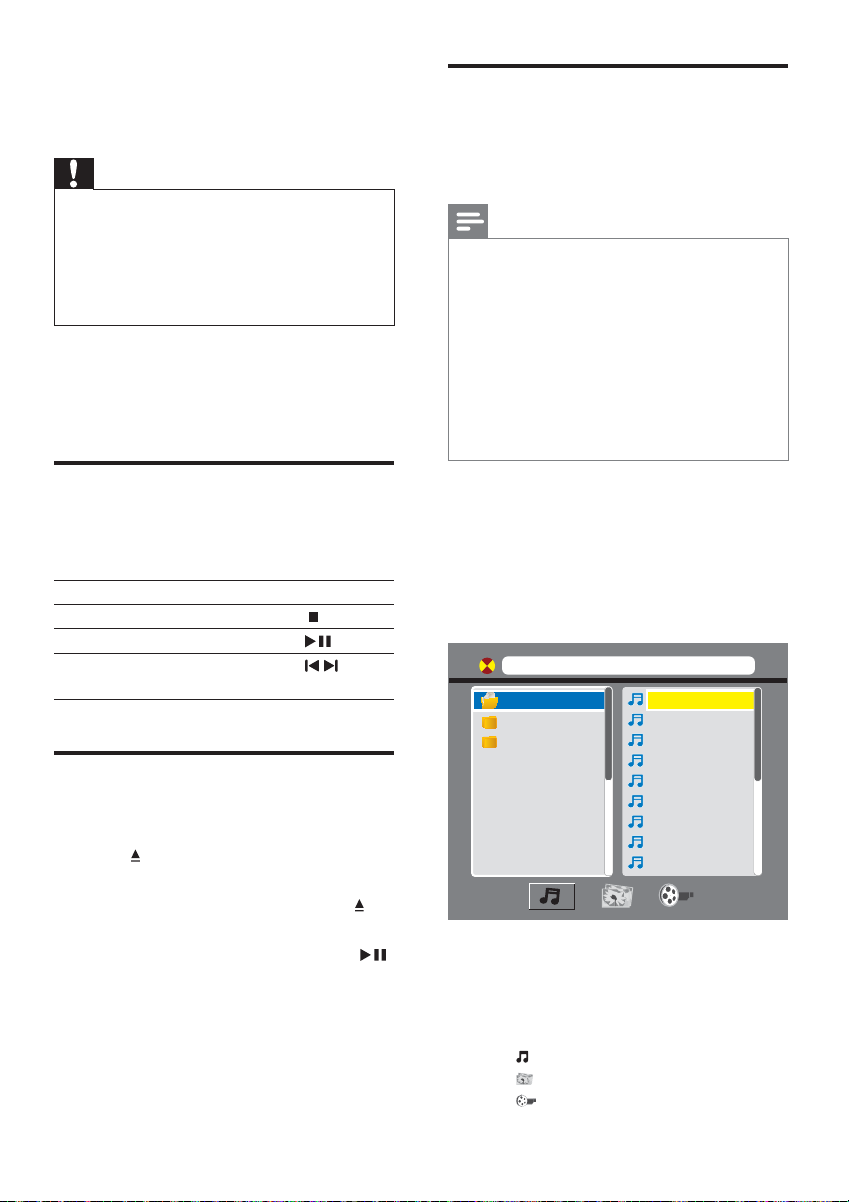
1 Select a source.
For a USB storage device, press • USB.
For a disc, press • DISC.
2 Insert the USB storage device or disc.
The player starts playing automatically. »
The play interface is displayed. »
[C : ] 000001.MP3
01.C:
02.MP3
03.WMA
.
.
On the top: the name of current file and •
the name of current folder
On the left: the folder list •
On the right: the file list •
At the bottom: the category icons •
•
for music
•
for photos
•
for videos
01.000001
02.000002
03.000003
04.000004
05.000005
06.000006
07.000007
08.000008
09.000009
12
EN
Page 13
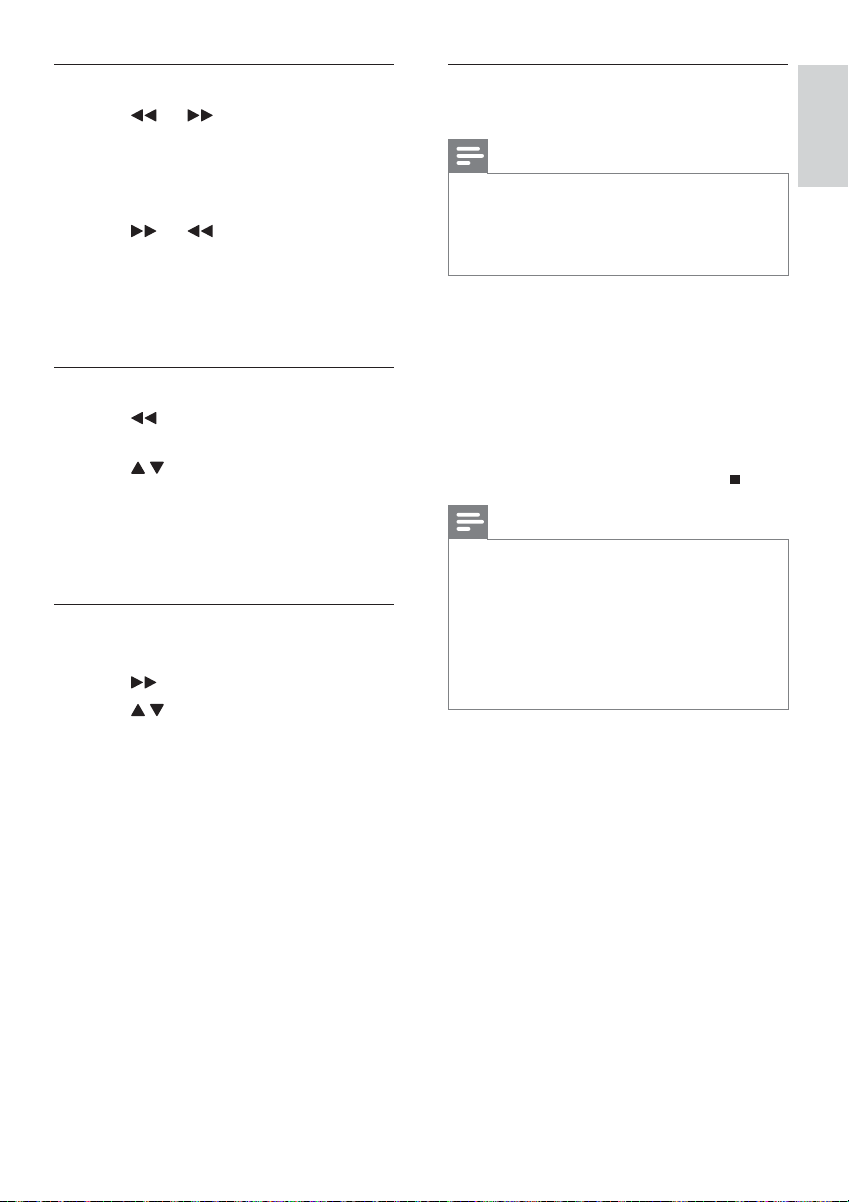
Access a category
1 Press (or ) repeatedly until a
category icon is highlighted.
If there is no file under a certain •
category, the category icon can not
be highlighted.
2 Press (or ) to highlight the
selected category icon.
3 Press OK to confirm.
The folders that contain the files of this »
category are listed.
Access a folder
1 Press repeatedly until a folder name is
highlighted.
2 Press / to highlight the selected folder
name.
3 Press OK to confirm.
The files of the selected category in »
the folder are listed.
Play a file
1 Access the selected folder.
2 Press to highlight a file name.
3 Press / to highlight the selected file
name.
4 Press OK to confirm.
The selected file starts playing. »
The player stops playing automatically »
at the end of the last file of same
category.
Play slideshow and music
simultaneously
Note
Make sure that the USB storage device or the •
disc contains both WMA/MP3 files and JPEG
photos.
See “Setup” > “System setup” for slideshow
•
settings.
1 Play a WMA/MP3 file.
2 Access the photo category.
3 Access a photo folder.
4 Select a photo file.
5 Press OK to start the slideshow.
The slideshow stops after all photos •
are displayed for one time.
To stop the slideshow, press •
Note
This player can only display digital camera •
pictures with JPEG-EXIF format, which is
widely used in digital cameras. It cannot display
Motion JPEG, nor pictures in formats other
than JPEG. Sound clips associated with pictures
cannot be displayed either.
If the JPEG photo is not recorded with an
•
“exif ” type file, it is displayed as a “blue
mountain” thumbnail picture.
English
.
EN
13
Page 14
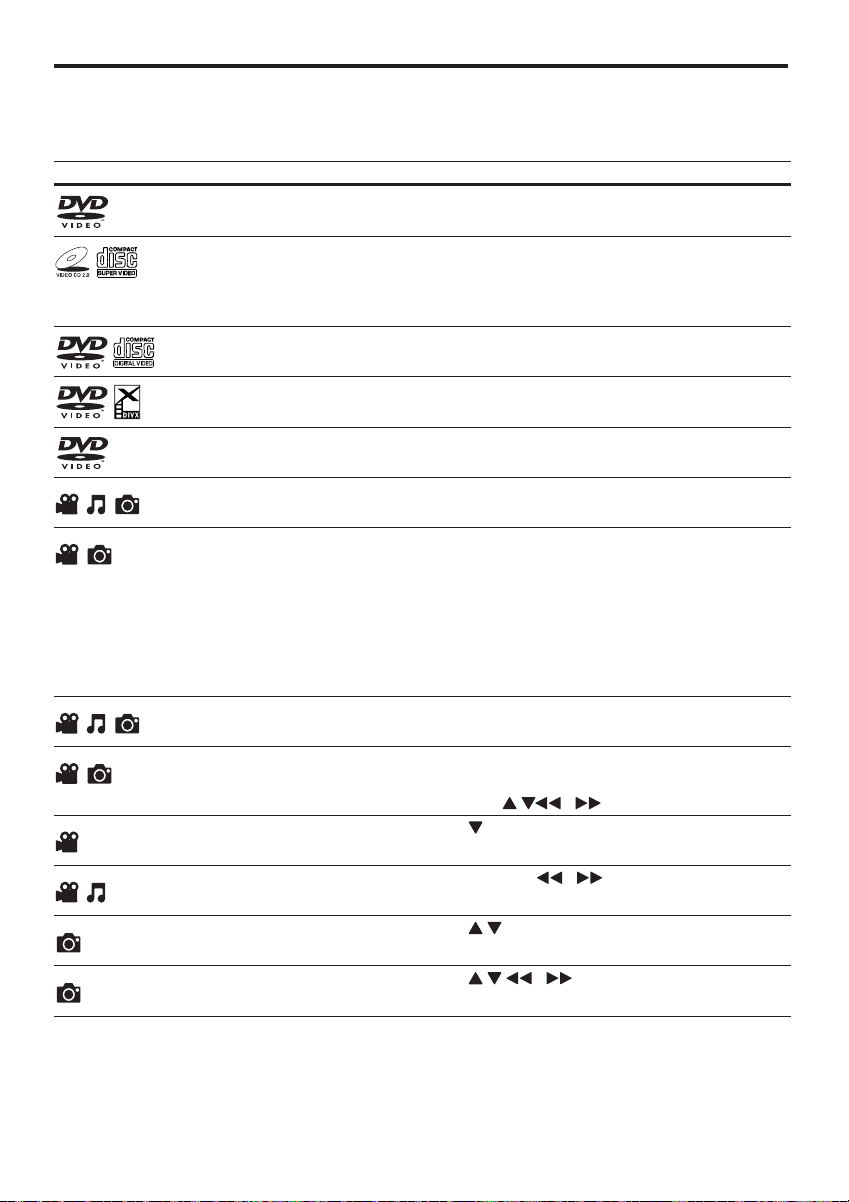
Control the play
Follow the instructions to control the play.
Media Function Action
Return to the disc menu Press DISC MENU repeatedly.
Enable/disable the PBC
(playback control) feature
Select an audio language or
audio channel
Select a subtitle language Press SUBTITLE repeatedly.
Press DISC MENU repeatedly.
Press AUDIO repeatedly.
Select a camera angle Press ANGLE repeatedly.
Select a play mode (repeat and
random play)
Repeat a specific section within a
chapter or track
Display the play information Press DISPLAY.
Press MODE repeatedly.
1 Press REPEAT A-B to select the start point.
2 Press REPEAT A-B again to select the end
Zoom in or out Press ZOOM repeatedly.
Slow down the play Press repeatedly to select a play speed.
Search backward or forward fast Press and hold / for 2 seconds to select
Preview photos Press / to highlight a file name in the file list.
a speed.
Rotate a photo Press / / / .
Enable PBC to display the PBC menu, and •
then use the numeric buttons to enter your
choice.
point.
The selected section starts play »
repeatedly.
To resume normal play, press • REPEAT
A-B until [REP OFF] is displayed.
To pan through an enlarged image, •
press
/ / .
14
EN
Page 15
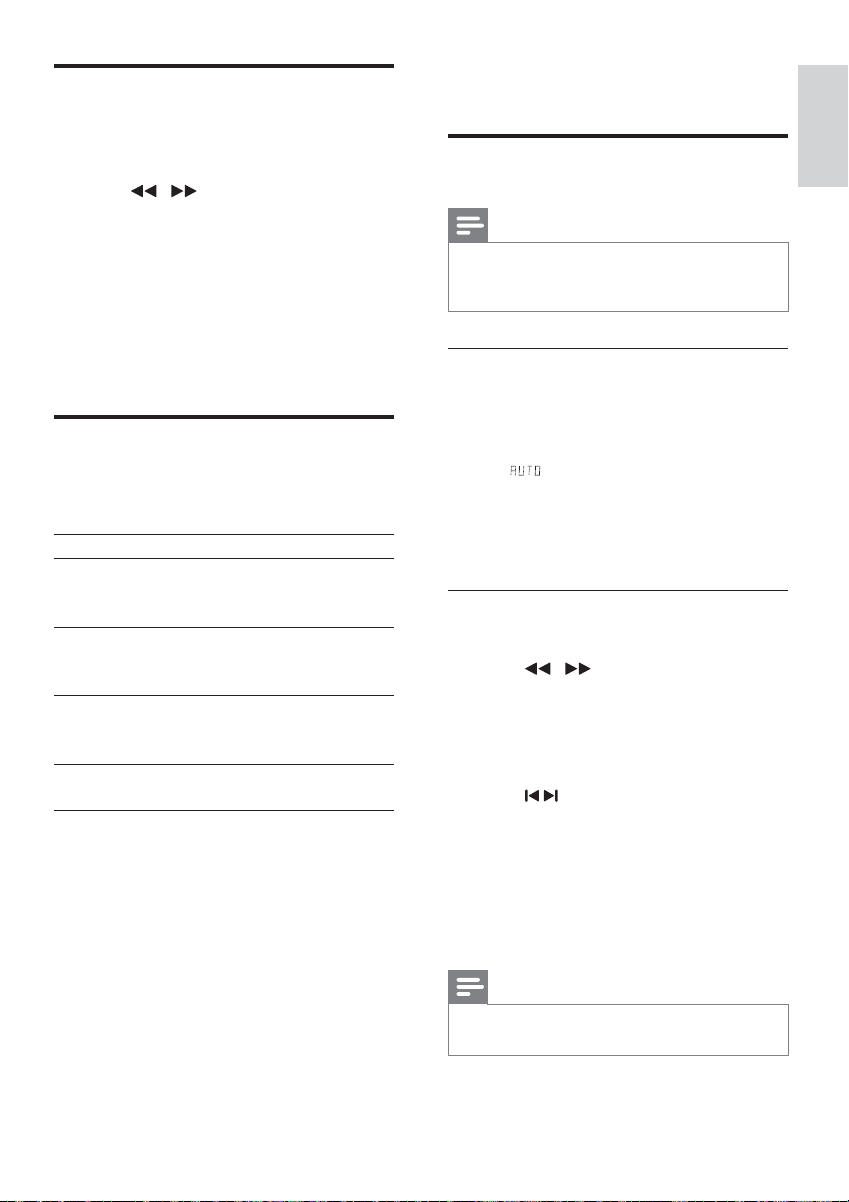
Search by time or title/
chapter/track number
During play, press GOTO.
1
2 Press / to highlight the title
number, chapter number, track number,
or time field.
3 Use the numeric buttons to enter the
number or time digits.
4 Press OK to confirm.
» [GOTO] is displayed.
Play starts automatically. »
Adjust sound
You can adjust the volume level and select
sound effects.
Function Action
Increase/decrease the
volume level
Select a preset sound
effect (POP, ROCK,
JAZZ, and CLASSIC)
Enable/disable the
DBB (Dynamic Bass
Boost) feature
Mute/unmute the
speakers
Press + VOL -; turn
VOLUME clockwise
or anti-clockwise.
Press DSC
repeatedly.
Press DBB.
Press MUTE.
7 Other features
Listen to FM radio
Note
A maximum of 10 radio stations can be stored. •
Fully extend the FM antenna for better •
reception.
Program radio stations automatically
1 Press TUNER.
2 Press and hold ANGLE/PROG for 2
seconds.
AUTO
»
blinks.
Available stations are programmed. »
The first programmed radio station is »
broadcast automatically.
Program radio stations manually
1 Press TUNER.
2 Press / repeatedly to tune to a
radio station.
3 Press ANGLE/PROG.
The sequence number blinks with the »
current frequency displayed.
4 Press / to allocate a sequence number
from 01 to 10 to this radio station.
5 Press ANGLE/PROG to confirm.
The sequence number and the current »
frequency are displayed.
6 Repeat steps 2-5 to program more
stations.
English
Note
To overwrite a programmed station, store •
another station with its sequence number.
EN
15
Page 16
Tune to a programmed radio station
1 Press TUNER.
2 Press / (or / ) repeatedly to select
a programmed radio station.
Play audio from an external
device
You can use this player to play audio from an
external device.
1 Connect the MP3 link cable to
the • MP3 LINK jack of this player
the audio output jack (usually •
headphone jack) of the external
device.
2 Press MP3-LINK.
3 Play the external device (see the user
manual of this device for details).
Listen through headphone
Plug a headphone into the socket.
4 Press SLEEP/TIMER again.
The minute digits blink. »
5 Press / to set the minute.
6 Press SLEEP/TIMER to confirm the time
for auto power on.
»
7 Press / to select
blinks.
If you want to set the power-off time, »
press
/ to select
auto power off), and then repeat steps
2-6.
OFF TIME
SOURCE
(time for
.
8 Press SLEEP/TIMER.
9 Press / to select a media source
(DISC, USB, or FM).
For the tuner source, you still •
need to press
programmed radio station.
/ to select a
10 Press OK.
The clock time is displayed. »
11 Press SLEEP/TIMER to activate the timer.
»
is displayed.
The player turns on/off at the set time. »
To deactivate the timer, press • SLEEP/
TIMER again.
Turn on/off automatically
You can set a time for automatic power on and
off.
Note
Make sure that you have set the clock before •
this setup.
1 In standby mode, press and hold SLEEP/
TIMER.
»
(time for auto power on)
blinks.
2 Press SLEEP/TIMER.
The hour digits blink. »
3 Press / to set the hour.
16
EN
Use the sleep timer
The player can also turn off automatically
after a preset period (10-90 minutes with an
interval of 10 minutes).
1 During play, press SLEEP/TIMER
repeatedly to select a period.
SLEEP
»
is displayed.
2 To deactivate the sleep timer, press
SLEEP/TIMER repeatedly until
is displayed.
SLEEP OFF
Page 17
8 Setup
System setup
Interface for setup menu
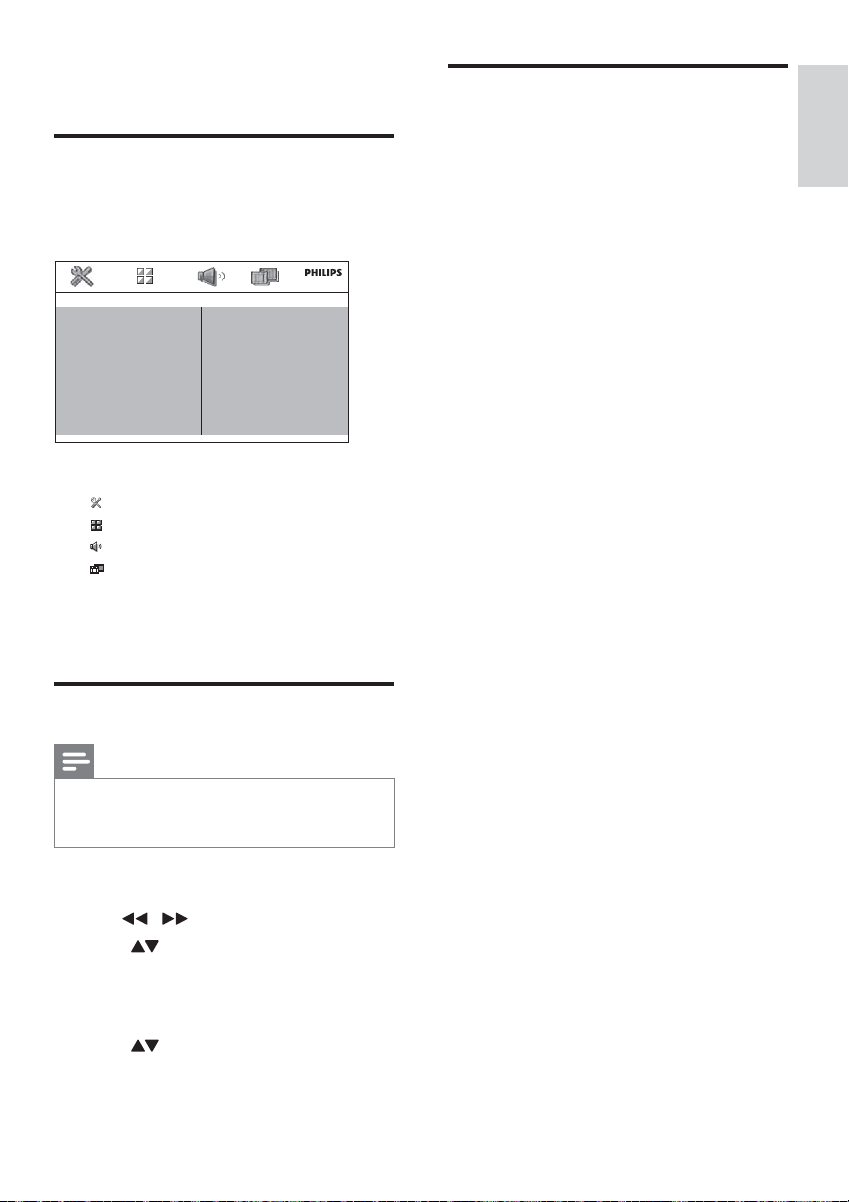
After you press SETUP, the interface for setup
menu is displayed as follows.
SYSTEM SETUP
SCREEN SAVER
PICTURE MUSIC
SLIDE TIME
SLIDE EFFECT
PASSWORD
RATING
DEFAULT
On the top: Icons for main menus
•
for [SYSTEM SETUP] menu
•
for [LANGUAGE SETUP] menu
•
for [AUDIO SETUP] menu
•
for [VIDEO SETUP] menu
In the middle: Name of the current main menu
On the left: Items under the current menu
On the right: Setting options
Change a setting
Note
If a menu item or setting option is grayed out, •
it means that the setting cannot be changed at
the current state.
1 Press SETUP.
To access another main menu, press •
/ to select its icon.
2 Press to select a menu item.
3 Press OK.
If a dialog box is displayed, follow the •
instructions to operate.
4 Press to select your setting option.
5 Press OK to confirm.
To exit the menu, press • SETUP.
[SCREEN SAVER]
Protect the TV screen from damage due to
over exposure to static image.
• [ON] - Enable the screen saver.
• [OFF] - Disable the screen saver.
[PICTURE MUSIC]
The player can play a slideshow and music
simultaneously.
• [ON] - Enable this feature.
• [OFF] - Disable this feature.
[SLIDE TIME]
Set the time interval (15 seconds, 30 seconds,
or 45 seconds) between two slides.
[SLIDE EFFECT]
Select an effect for slide display.
[PASSWORD]
Set a password to restrict the play of rated
discs to children. The default password is
“0000”. You can change the 4-digit password.
1 Press SETUP.
2 Select [SYSTEM SETUP] >
[PASSWORD], and then press OK.
3 Enter the current password with the
numeric keys (0-9), and then press OK.
If you forget the password, enter •
“0000”.
4 Enter the new password.
5 Press OK to confirm.
[RATING]
Select a rating level to restrict the play of discs
that are not suitable for children. To play a
disc that has the rating level higher than your
setting, you must enter the 4-digit password.
These discs must be recorded with rating
levels.
[DEFAULT]
Reset all settings to factory default, except for
the settings of [PASSWORD] and [RATING].
English
EN
17
Page 18
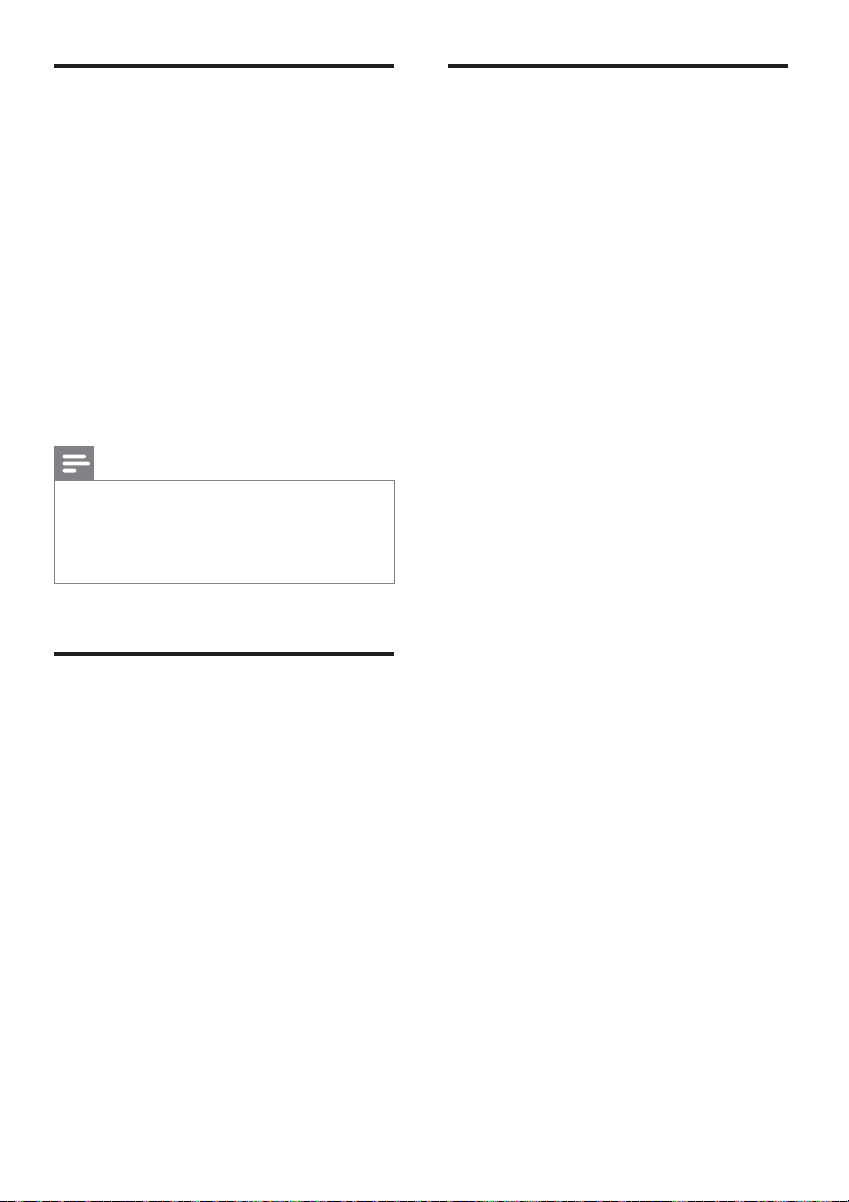
Language setup
Video setup
[OSD LANGUAGE]
Select a language for on-screen-display
messages.
[MENU LANG]
Select a language for disc menu.
[DIVX SUBTITLE]
Select a character set that supports the
subtitle of your DivX video.
[DIVX[R] VOD]
Display the DivX
[REGISTER CODE]).
Note
Go to www.divx.com/vod for how to register •
your player and rent or purchase DivX videos.
DivX videos rented or purchased with this
•
registration code can be played only on this
player.
®
registration code (behind
Audio setup
[TV SYSTEM]
Select a TV system that matches your TV.
[TV TYPE]
Select a display ratio that matches your TV
screen.
[DOWNMIX]
Compress multi-channel Dolby digital sound
to 2-channel surround sound ([LT/RT]) or
stereophonic sound ([STEREO]).
[NIGHT MODE]
Equalize loud sound and soft sound. Enable
this feature to watch DVD movies at a low
volume at night.
[DYNAMIC RANGE]
Set a dynamic range for sound output.
18
EN
Page 19
9 Product
information
Note
Product information is subject to change •
without prior notice.
Specifications
Tuner (FM)
Tuning Range 87.5 - 108MHz
Tuning grid 50KHz
Sensitivity - Mono, 26dB
S/N Ratio
Sensitivity - Stereo, 46dB
S/N Ratio
Search Selectivity >28dBf
Total Harmonic
Distortion
Signal to Noise Ratio >55dB
<22 dBf
<43 dBf
<2%
English
Amplifier
Rated Output
Power
Frequency
Response
Signal to Noise
Ratio
Aux Input 500 mV RMS 600 ohm
2 X 25 W RMS
40 Hz - 20000 Hz, ±3 dB
> 65 dB
Disc
Laser Type Semiconductor
Disc Diameter 12 cm/8 cm
Video Decoding MPEG-1 / MPEG-2 / DivX
Video DAC 12 Bits
Signal System PAL / NTSC
Video Format 4:3 / 16:9
Video S/N > 48 dB
Audio DAC 24 Bits / 96 kHz
Total Harmonic
Distortion
Frequency
Response
S/N Ratio > 65 dBA
Video Resolution 720 X 480 X 30;
< 0.8% (1 kHz)
4 Hz - 20 kHz (44.1 kHz)
4 Hz - 22 kHz (48 kHz)
4 Hz - 24 kHz (96 kHz)
720 X 576 X 25
Speakers
Speaker
Impedance
Speaker Driver Full range speaker
Sensitivity > 80 dB/m/W±4dB/
6 ohm
m/W
General information
AC power 100 - 240 V~, 50/60 Hz
Operation Power
Consumption
Eco Standby Power
Consumption
Composite Video
Output
Headphone output 2 X 15 mW, 32 ohm
USB Direct Version 2.0
Dimensions
- Main Unit
(W x H x D)
- Speaker Box
(W x H x D)
Weight
- With Packing
- Main Unit
25 W
< 1 W
1.0 Vp-p, 75 ohm
152 X 170 X 210 mm
152 X 170 X 200 mm
5.3 kg
3.9 kg
EN
19
Page 20

Supported disc formats
USB playability information
Digital Video Discs (DVDs)•
Video CDs (VCDs)•
Super Video CDs (SVCDs)•
Digital Video Discs + Rewritable •
(DVD+RW)
Compact Discs (CDs)•
Picture (Kodak, JPEG) files on CDR(W)•
®
DivX•
disc on CD-R(W)
DivX 3.11•
WMA•
Supported MP3-CD formats:
ISO 9660•
Max. title/album name: 24 characters•
Max. title number plus album: 255.•
Max. nested directory: 8 levels•
Max. album number: 130•
Max. MP3 track number: 5000•
Supported sampling frequencies for MP3 •
disc: 32 kHz, 44.1 kHz, 48 kHz
Supported Bit-rates of MP3 disc are: 32, •
64, 96, 128, 192, 256 (kbps)
The following formats are not supported:•
Files like *.VMA , *.AAC, *.DLF, •
*.M3U
*.PLS, *.WAV•
Discs recorded in Joliet format•
MP3 Pro and MP3 with ID3 tag•
Compatible USB devices:
USB flash memory (USB 2.0 or USB1.1)•
USB flash players (USB 2.0 or USB1.1)•
memory cards (requires an additional •
card reader to work with this apparatus)
Supported formats:
USB or memory file format FAT12, •
FAT16, FAT32 (sector size: 512 bytes)
MP3 bit rate (data rate): 32-320 Kbps and •
variable bit rate
WMA v9 or earlier•
Directory nesting up to a maximum of 8 •
levels
Number of albums/ folders: maximum 99•
Number of tracks/titles: maximum 999•
ID3 tag v2.0 or later•
File name in Unicode UTF8 (maximum •
length: 128 bytes)
Unsupported formats:
Empty albums: An empty album is an •
album that does not contain MP3/WMA
files.
Unsupported file formats are skipped. For •
example, Word documents (.doc) or MP3
files with extension .dlf are ignored and
not played.
AAC, WAV, PCM audio files•
DRM protected WMA files (.wav, .m4a, •
.m4p, .mp4, .aac)
WMA files in Lossless format•
20
EN
Page 21
10 Troubleshooting
Caution
Never remove the casing of this apparatus. •
To keep the warranty valid, never try to repair
the system yourself.
If you encounter problems when using this
apparatus, check the following points before
requesting service. If the problem remains
unsolved, go to the Philips web site (www.
Philips.com/support). When you contact Philips,
ensure that your apparatus is nearby and the
model number and serial number are available.
No power
Ensure that the AC cord of the apparatus •
is connected properly.
Ensure that there is power at the AC •
outlet.
As a power-saving feature, the system •
switches off automatically 15 minutes
after track play reaches the end and no
control is operated.
No disc detected
Insert a disc. •
Check if the disc is inserted upside down. •
Wait until the moisture condensation at •
the lens has cleared.
Replace or clean the disc. •
Use a finalized CD or correct format disc. •
No picture
Check the video connection. •
Turn on the TV to the correct Video-In •
channel.
Progressive scan is activated but the TV •
does not suppor t progressive scan.
Black and white or distorted picture
The disc does not match the TV color •
system standard (PAL/NTSC).
Sometimes a slight picture distortion may •
appear. This is not a malfunction.
Clean the disc. •
A distorted picture may appear during •
progressive scan setup.
The aspect ratio of the TV screen cannot be
changed even though you have set the TV
display format.
The aspect ratio is fixed on the loaded •
DVD disc.
The aspect ratio may not be changed for •
some TV systems.
No sound or poor sound
Adjust the volume. •
Disconnect the headphones. •
Check that the speakers are connected •
correctly.
Remote control does not work
Before you press any function button, •
first select the correct source with the
remote control instead of the main unit.
Reduce the distance between the remote •
control and the player.
Inser t the battery with its polarities (+/– •
signs) aligned as indicated.
Replace the battery. •
Aim the remote control directly at the •
sensor on the front of the player.
Disc does not play
Inser t a readable disc with the label side •
facing you.
Check the disc type, color system and •
regional code. Check for any scratches or
smudges on the disc.
Press •SYSTEM MENU to exit the system
setup menu.
Disable the password for parental control •
or change the rating level.
Moisture has condensed inside the •
system. Remove the disc and leave the
system turned on for about an hour.
Disconnect and reconnect the AC power
plug, and then turn on the system again.
As a power-saving feature, the system •
turns off automatically 15 minutes after
disc play reaches the end and no control
is operated.
English
EN
21
Page 22

DivX video files cannot be played.
Make sure that the DivX video file is •
complete.
Make sure that the file extension is •
correct.
Due to Digital Rights issue, the DRM- •
protected video files stored on a
USB storage device cannot be played
through an analog video connection
(e.g. composite, component, and scart).
Transfer the video content onto a
supported disc to play these files.
Poor radio reception
Increase the distance between the •
apparatus and your TV or VCR.
Fully extend the FM antenna. •
Connect an outdoor FM antenna instead. •
Audio or subtitle languages cannot be set
The disc is not recorded with sound or •
subtitles in multiple languages.
The audio or subtitle language setting is •
prohibited on the disc.
Cannot display some files in USB device
The number of folders or files in the USB •
device has exceeded a cer tain limit. This
phenomenon is not a malfunction.
The formats of these files are not •
supported.
USB device not supported
The USB storage device is incompatible •
with the player. Try another one.
Timer does not work
Set the clock correctly. •
Switch on the timer. •
Clock/timer setting erased
Power has been interrupted or the power •
cord has been disconnected.
Reset the clock/timer. •
22
EN
Page 23
11 Notice
Copyright notice
This item incorporates copy protection
technology that is protected by U.S. patents
and other intellectual property rights of
Rovi Corporation. Reverse engineering and
disassembly are prohibited.
Trademark notice
Manufactured under license from Dolby
Laboratories. Dolby and the double-D symbol
are trademarks of Dolby Laboratories.
DivX®, DivX Certified® and associated logos
are trademarks of DivX, Inc. and are used
under license.
DivX Certified
premium content.
®
to play DivX video, including
English
‘DVD Video’ is a trademark of DVD Format/
Logo Licensing Corporation.
ABOUT DIVX VIDEO: DivX® is a digital video
format created by DivX, Inc. This is an official DivX
Certified
com for more information and software tools to
convert your files into DivX video.
ABOUT DIVX VIDEO-ON-DEMAND: This
DivX Certified
in order to play purchased DivX Video-onDemand (VOD) movies. To obtain your
registration code, locate the DivX VOD
section in your device setup menu. Go to vod.
divx.com for more information on how to
complete your registration.
®
device that plays DivX video. Visit divx.
®
device must be registered
EN
23
Page 24
© 2011 Koninklijke Philips Electronics N.V.
All rights reserved.
MCD135_58_UM_V1.0
 Loading...