

Philips HX8911-04 Instruction manual

HealthyWhite+


1
1
2
3
4
5
6
7
8
9


ENGLISH 6
DANSK 18
SUOMI 30
NORSK 42
SVENSKA 54
HealthyWhite+

6
ENGLISH
Introduction
Congratulations on your purchase and welcome to Philips!
To fully benet from the support that Philips offers, register your product
at www.philips.com/welcome.
Important
Read this user manual carefully before you use the
appliance and save it for future reference.
Danger
- Keep the charger away from water.
Do not place or store it over or near water
contained in a bathtub, washbasin, sink etc.
Do not immerse the charger in water or any other
liquid. After cleaning, make sure the charger is
completely dry before you connect it to the mains.
Warning
- The mains cord cannot be replaced. If the mains
cord is damaged, discard the charger.
- Always have the charger replaced with one of the
original type in order to avoid a hazard.
- Do not use the charger outdoors or near
heated surfaces.
- If the appliance is damaged in any way
(brush head, toothbrush handle or charger),
stop using it. This appliance contains no
serviceable parts. If the appliance is damaged,
contact the Consumer Care Centre in your
country (see chapter ‘Guarantee and support’).

ENGLISH 7
- This appliance can be used by children aged from
8 years and above and persons with reduced
physical, sensory or mental capabilities or lack of
experience and knowledge if they have been
given supervision or instruction concerning use of
the appliance in a safe way and understand the
hazards involved. Children shall not play with the
appliance. Cleaning and user maintenance shall
not be made by children unless they are older
than 8 and supervised.
Caution
- Do not clean the brush head, the handle or the
charger in the dishwasher.
- If you have had oral or gum surgery in the
previous 2 months, consult your dentist before
you use the toothbrush.
- Consult your dentist if excessive bleeding occurs
after using this toothbrush or if bleeding continues
to occur after 1 week of use. Also consult your
dentist if you experience discomfort or pain when
you use the Sonicare.
- The Sonicare toothbrush complies with the safety
standards for electromagnetic devices. If you have
a pacemaker or other implanted device, contact
your physician or the device manufacturer of the
implanted device prior to use.
- If you have medical concerns, consult your doctor
before you use the Sonicare.

ENGLISH8
- This appliance has only been designed for cleaning
teeth, gums and tongue. Do not use it for any
other purpose. Stop using the appliance and
contact your doctor if you experience any
discomfort or pain.
- The Sonicare toothbrush is a personal care device
and is not intended for use on multiple patients in
a dental practice or institution.
- Stop using a brush head with crushed or bent
bristles. Replace the brush head every 3 months
or sooner if signs of wear appear. Do not use
other brush heads than the ones recommended
by the manufacturer.
- If your toothpaste contains peroxide, baking
soda or bicarbonate (common in whitening
toothpastes), thoroughly clean the brush head
with soap and water after each use.
This prevents possible cracking of the plastic.
Electromagnetic elds (EMF)
This Philips appliance complies with all applicable standards and
regulations regarding exposure to electromagnetic elds.

ENGLISH 9
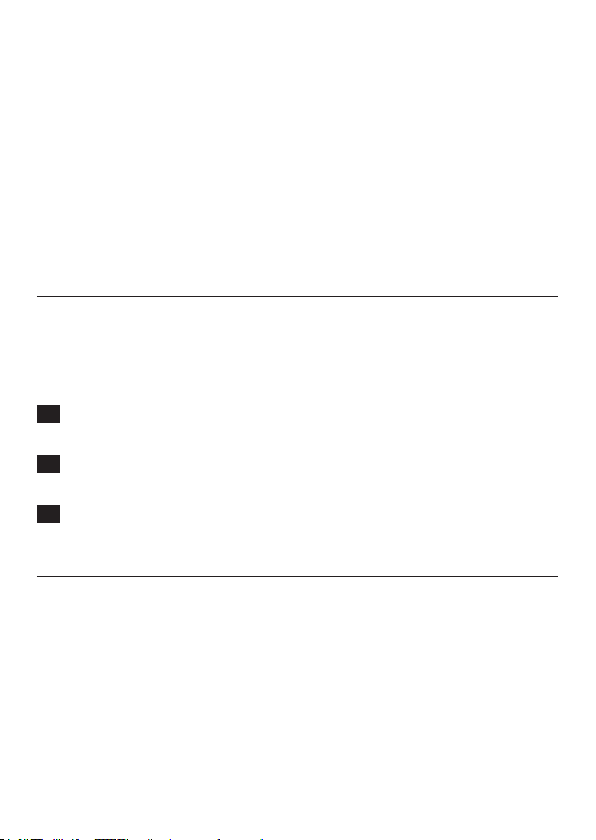
General description (Fig. 1)
1 Hygienic travel cap
2 Brush head
3 Handle
4 Power on/off and mode button
5 Intensity level indicator
6 Intensity level button (+ and -)
7 Mode indicator
8 Battery level indicator
9 Charger
Note: The content of the box may vary based on the model purchased.
Preparing for use
Attaching the brush head
1 Align the brush head so the bristles face the front of the
handle. (Fig. 2)
2 Firmly press the brush head down onto the metal shaft
until it stops.
Note: Philips Sonicare brush heads are imprinted with icons to easily
identify your brush head.
Charging the appliance
1 Put the plug of the charger in a wall socket.
2 Place the handle on the charger (Fig. 3).
, The ashing light of the battery level indicator indicates that the
toothbrush is charging.
Note: It can take up to 48 hours to fully charge the battery,
but the Philips Sonicare may be used before it is fully charged.

ENGLISH10
Using the appliance
Brushing instructions
1 Wet the bristles and apply a small amount of toothpaste.
2 Place the toothbrush bristles against the teeth at a slight angle
(45 degrees), pressing rmly to make the bristles reach the gumline
or slightly beneath the gumline. (Fig. 4)
Note: Keep the center of the brush in contact with the teeth at all times.
3 Press the power on/off and mode button to switch on the
Philips Sonicare.
4 Apply light pressure to maximise Philips Sonicare’s effectiveness
and let the Philips Sonicare toothbrush do the brushing for you.
Do not scrub.
5 Gently move the brush head slowly across the teeth in a small back
and forth motion so the longer bristles reach between your teeth.
Continue this motion throughout the brushing cycle.
6 To clean the inside surfaces of the front teeth, tilt the brush handle
semi-upright and make several vertical overlapping brushing strokes
on each tooth (Fig. 5).
Note: To make sure you brush evenly throughout the mouth, divide your
mouth into 4 sections using the Quadpacer feature (see chapter ‘Features’).
7 Brush each section for 30 seconds for a total brushing time of
2 minutes. Start with section 1 (outside top teeth) and then brush
section 2 (inside top teeth). Continue with section 3
(outside bottom teeth) and nally brush section 4
(inside bottom teeth) (Fig. 6).
8 After you have completed the brushing cycle, you can spend
additional time brushing the chewing surfaces of your teeth and
areas where staining occurs. You can also brush your tongue, with
the toothbrush switched on or off, as you prefer (Fig. 7).
ENGLISH 11
The Philips Sonicare is safe to use on:
- Braces (brush heads wear out sooner when used on braces).
- Dental restorations (llings, crowns, veneers)
Note: Ensure that braces or dental restorations are properly adhered and not
compromised. If not, braces or dental restorations may be damaged when
they come into contact with the brush head.
Note: When the Philips Sonicare is used in clinical studies, the default
2-minute Clean mode with high intensity must be selected. The handle should
be fully charged and the Easy-start feature deactivated.
Brushing modes
Clean mode
The ultimate in plaque removal (default mode).
White mode
To brighten and polish your front teeth.
1 Press the power on/off and mode button to switch on the
Philips Sonicare.
2 Press the power on/off and mode button again before
2.5 seconds to switch to White mode.
3 Press the power on/off and mode button after 2.5 seconds to
pause the Philips Sonicare.
Intensity levels
- Low: 1 LED indicator light
- Medium: 2 LED indicator lights
- High: 3 LED indicator lights
Note: To adjust the intensity level to the next higher or lower level, press the
+ intensity level button to increase intensity or the - intensity level button to
decrease intensity at any time during the brushing cycle.

ENGLISH12
Battery status (when handle is not on charger)
- A ashing yellow battery level indicator indicates a low charge.
- A ashing green batter y level indicator indicates a moderate charge.
- A solid green batter y level indicator indicates a full charge.
Note: If you hear 5 beeps and the battery level indicator ashes yellow,
this means that you have to recharge the battery. When the battery is
completely empty, the Philips Sonicare switches off. Place the Philips Sonicare
on the charger to charge it (Fig. 3).
Note: To keep the battery fully charged at all times, you may keep the
Philips Sonicare on the charger when not in use.
Features
Smartimer
The Smartimer indicates that your brushing cycle is complete when it
automatically switches off the toothbrush at the end of the brushing
cycle. Dental professionals recommend brushing no less than 2 minutes
twice a day.
Easy-start
- The Easy-start feature gently increases power over the rst
14 brushings to help you get used to brushing with the Philips Sonicare.
- This Philips Sonicare comes with the Easy-star t feature deactivated.
Activating or deactivating the Easy-start feature:
Place the handle in the plugged-in charger.
- To activate Easy-start:
Press and hold the power on/off and mode button for 2 seconds.
You hear 2 beeps and the battery level indicator lights up green to
indicate that the Easy-start feature has been activated.
- To deactivate Easy-start:
Press and hold the power on/off and mode button for 2 seconds.
You hear 1 beep and the battery level indicator lights up yellow to
indicate that the Easy-start feature has been deactivated.

ENGLISH 13
Note: Each of the rst 14 brushings must last at least 1 minute to move
through the Easy-start ramp-up cycle properly.
Note: Use of the Easy-start feature beyond the initial ramp-up period is not
recommended and reduces the effectiveness of the Philips Sonicare
toothbrush in removing plaque.
Quadpacer
- The Quadpacer is an inter val timer that has a shor t beep and
pause to remind you to brush the 4 sections of your mouth evenly
and thoroughly. Depending on the brushing mode you have selected,
the Quadpacer beeps at different intervals during the brushing
cycle (Fig. 6).
Activating or deactivating the Quadpacer feature:
Place the handle in the plugged-in charger.
- To activate Quadpacer: Press and hold the intensity level button
down (-) for 2 seconds. You hear 2 beeps and the battery level
indicator lights up green to indicate that the Quadpacer feature has
been activated.
- To deactivate Quadpacer: Press and hold the intensity level button
down (-) for 2 seconds. You hear 1 beep and the battery level
indicator lights up yellow to indicate that the Quadpacer feature has
been deactivated.
Charger conrmation
When the charger conrmation feature is activated, the handle beeps and
vibrates briey when it is placed on the charger base. This Philips Sonicare
model comes with the charger conrmation feature deactivated.
Activating or deactivating the charger conrmation
feature:
Place the handle on the charger.
- To activate charger conrmation: Press and hold the intensity level
button up (+) for 2 seconds. You hear 2 beeps and the battery level
indicator lights up green twice to indicate that the charger
conrmation feature has been activated.
ENGLISH14
- To deactivate charger conrmation: Press and hold the intensity level
button up (+) for 2 seconds. You hear 1 beep and the battery level
indicator lights up yellow once to indicate that the charger
conrmation feature has been deactivated.
Cleaning
The Philips Sonicare should be cleaned regularly to remove toothpaste
and other residue. Failure to clean the Philips Sonicare may result in an
unhygienic product and damage to it may occur.
Do not clean brush heads, the handle or the charger in the dishwasher.
Toothbrush handle
1 Remove the brush head and rinse the metal shaft area with warm
water. Make sure you remove any residual toothpaste (Fig. 8).
Do not push on the rubber seal on the metal shaft with sharp objects,
as this may cause damage.
2 Wipe the entire surface of the handle with a damp cloth.
Brush head
1 Rinse the brush head and bristles after each use (Fig. 9).
2 Remove the brush head from the handle and rinse the brush head
connection with warm water at least once a week.
Charger
1 Unplug the charger before you clean it.
2 Wipe the surface of the charger with a damp cloth. Make sure you
remove any toothpaste or other residue from the charger surfaces.

ENGLISH 15
Storage
If you are not going to use the product for a long time, unplug it, clean it
(see chapter ‘Cleaning’) and store it in a cool and dry place away from
direct sunlight.
Replacement
Brush head
- Replace Philips Sonicare brush heads every 3 months to achieve
optimal results.
- Use only Philips Sonicare replacement brush heads.
Recycling
- This symbol on a product means that the product is covered by
European Directive 2012/19/EU (Fig. 10).
- This symbol means that the product contains a built-in rechargeable
battery covered by European Directive 2006/66/EC which cannot be
disposed of with normal household waste. Follow the instructions in
section ‘Removing the rechargeable battery’ to remove the
battery (Fig. 11).
- Inform yourself about the local separate collection system for
electrical and electronic products and rechargeable batteries.
Follow local rules and never dispose of the product and rechargeable
batteries with normal household waste. Correct disposal of old
products and rechargeable batteries helps prevent negative
consequences for the environment and human health.

ENGLISH16
Removing the rechargeable battery
Only remove the rechargeable battery when you discard the appliance.
Make sure the battery is completely empty when you remove it.
To remove the rechargeable battery, you need a towel or cloth, a
hammer and a at-head (standard) screwdriver. Observe basic safety
precautions when you follow the procedure outlined below. Be sure to
protect your eyes, hands, ngers, and the surface on which you work.
1 To deplete the rechargeable battery of any charge, remove the
handle from the charger, switch on the Philips Sonicare and
let it run until it stops. Repeat this step until you can no longer
switch on the Philips Sonicare.
2 Remove and discard the brush head. Cover the entire handle
with a towel or cloth (Fig. 12).
3 Hold the top of the handle with one hand and strike the handle
housing 1 cm above the bottom end. Strike rmly with a hammer
on all 4 sides to eject the end cap (Fig. 13).
You may have to hit on the end several times to break the
internal snap connections.
4 Remove the end cap from the toothbrush handle. If the end cap
does not release easily from the housing, repeat step 3 until the
end cap is released (Fig. 14).
5 Holding the handle upside down, press the shaft down on a hard
surface. If the internal components do not easily release from the
housing, repeat step 3 until the internal components are
released. (Fig. 15)
6 Remove the rubber battery cover (Fig. 16).
7 Wedge the screwdriver between the battery and the black frame at
the bottom of the internal components. Then pry the screwdriver
away from the battery to break the bottom of the black
frame (Fig. 17).

ENGLISH 17
8 Insert the screwdriver between the bottom of the battery and the
black frame to break the metal tab connecting the battery to the
green printed circuit board. This will release the bottom end of the
battery from the frame (Fig. 18).
9 Grab the battery and pull it away from the internal components to
break the second metal battery tab (Fig. 19).
Be aware of the sharp edges of the battery tabs so as to avoid
injury to your ngers.
10
Cover the battery contacts with tape to prevent any electrical short
from residual battery charge. The rechargeable battery can now be
recycled and the rest of the product discarded appropriately.
Guarantee and support
If you need information or support, please visit www.philips.com/
support or read the separate worldwide guarantee leaet.
Guarantee restrictions
The terms of the international guarantee do not cover the following:
- Brush heads.
- Damage caused by use of unauthorised replacement parts.
- Damage caused by misuse, abuse, neglect, alterations or unauthorised
repair.
- Normal wear and tear, including chips, scratches, abrasions,
discolouration or fading.

DANSK18
Introduktion
Tillykke med dit køb og velkommen til Philips!
For at få fuldt udbytte af den support, Philips tilbyder, skal du registrere dit
produkt på www.philips.com/welcome.
Vigtigt
Læs denne brugsvejledning omhyggeligt igennem,
inden apparatet tages i brug, og gem den til eventuelt
senere brug.
Fare
- Hold opladeren væk fra vand, og undlad at
placere eller opbevare den over eller tæt på vand
i badekar, håndvask og lign. Opladeren må aldrig
kommes ned i vand eller anden væske.
Efter rengøringen skal du sørge for, at opladeren
er helt tør, inden du tilslutter strømmen.
Advarsel
- Netledningen kan ikke udskiftes. Hvis netledningen
bliver beskadiget, skal opladeren kasseres.
- Opladeren skal udskiftes med en original type for
at undgå fare.
- Opladeren må ikke bruges udendørs eller tæt på
varme ader.
- Hvis apparatet har en defekt (børstehoved,
håndgreb eller oplader), må det ikke anvendes.
Dette apparat har ingen udskiftelige reservedele.
Hvis apparatet beskadiges, skal du kontakte dit
lokale Philips Kundecenter (se afsnittet
“Reklamationsret og support”).

DANSK 19
-
Dette apparat må bruges af børn fra 8 år og
opefter samt af personer med nedsatte fysiske,
sensoriske eller mentale evner eller manglende
viden eller erfaring, hvis de er blevet vejledt eller
instrueret i brug af apparatet på en sikker måde og
forstår de involverede risici. Børn må ikke lege med
apparatet. Rengøring og brugervedligeholdelse må
ikke foretages af børn, medmindre de er over 8 år
og under opsyn.
Forsigtig
- Kom aldrig børstehoved, håndgreb eller oplader
i opvaskemaskinen.
- Hvis du er blevet opereret i mund eller tandkød
inden for de seneste 2 måneder, skal du spørge
din tandlæge til råds, før du bruger tandbørsten.
- Kontakt din tandlæge, hvis tandkødet bløder
voldsomt efter brug af tandbørsten, eller hvis der
stadig forekommer blødninger efter 1 uges brug.
Kontakt også din tandlæge, hvis du oplever ubehag
eller smerte, når du anvender Sonicare.
- Sonicare-tandbørsten overholder de gældende
sikkerhedsregler for elektromagnetisk udstyr.
Hvis du har en pacemaker eller andre implantater,
skal du kontakte din læge eller producenten af
implantatet inden brug.
- Hvis du har helbredsproblemer, skal du spørge din
læge til råds, før du begynder at bruge Sonicare.

DANSK20
- Dette apparat er kun beregnet til rensning af
tænder, tandkød og tunge. Det må ikke anvendes
til andre formål. Hold op med at bruge apparatet
og søg læge, hvis du oplever ubehag eller smerte.
- Sonicare-tandbørsten er beregnet til personligt
hjemmebrug og ikke til brug af et større antal
patienter på tandlægeklinikker eller institutioner.
- Stop brug af børstehovedet, hvis børsterne er
beskadigede eller bøjede. Udskift børstehovedet
hver 3. måned eller oftere, hvis der er tegn på slid.
Brug ikke andre børstehoveder end dem, der er
anbefalet af producenten.
- Hvis din tandpasta indeholder peroxid, natron
eller bikarbonat (almindeligt i blegende
tandpastaer), skal børstehovedet renses grundigt
med vand og sæbe, hver gang tandbørsten har
været i brug, for at forebygge revner i
plastmaterialet.
Elektromagnetiske felter (EMF)
Dette Philips-apparat overholder alle branchens gældende standarder og
regler angående eksponering for elektromagnetiske felter.

DANSK 21
Generel beskrivelse (g. 1)
1 Hygiejnisk beskyttelseshætte
2 Børstehoved
3 Håndgreb
4 On/off- og indstillingsknap
5 Indikatorens intensitetsniveau
6 Intensitetsniveauknap (+ og -)
7 Indikator for tilstand
8 Indikator for batteriniveau
9 Oplader
Bemærk: Indholdet af æsken kan variere alt efter den købte model.
Klargøring
Montering af børstehovedet
1 Placér børstehovedet således, at børstehårene vender mod
håndtagets front. (g. 2)
2 Tryk børstehovedet fast ned på metalskaftet, indtil det ikke kan
komme længere.
Bemærk: Philips Sonicare-børstehoveder har påtrykte ikoner,
så du nemt kan identicere dit børstehoved.
Opladning
1 Sæt stikket til opladeren i en stikkontakt.
2 Sæt håndgrebet i opladeren (g. 3).
, Det blinkende lys på batteriniveauindikatoren viser,
at tandbørsten oplades.
Bemærk: Det kan tage op til 48 timer at oplade batteriet helt,
men Philips Sonicare kan bruges, før den er fuldt opladet.
 Loading...