

Page 1
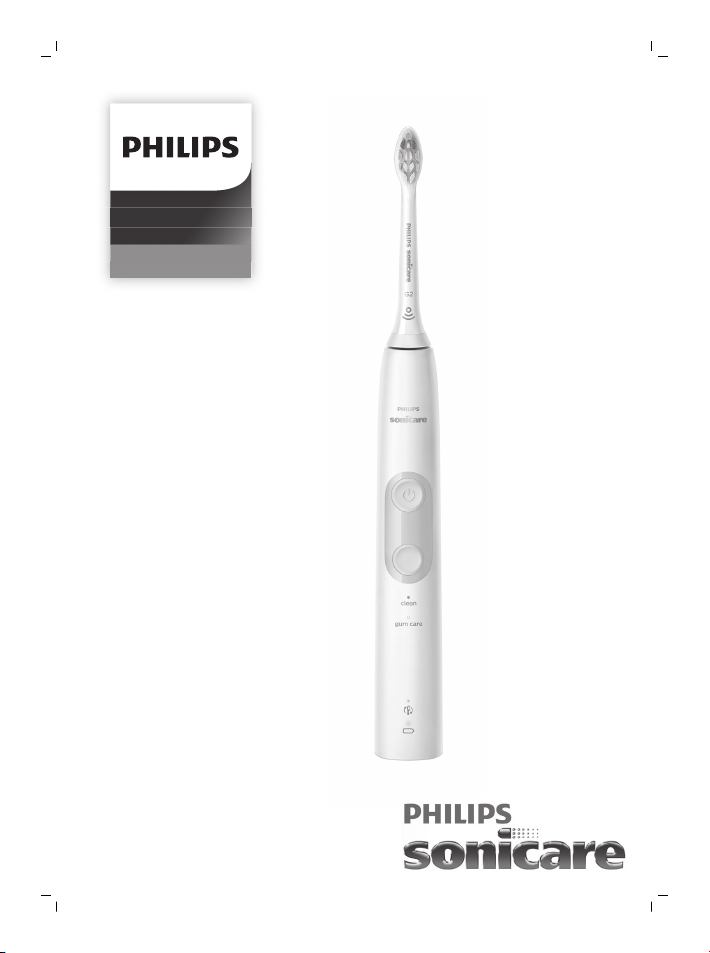
ProtectiveClean
4500/5100
EN: User manual
RU: Руководство пользователя
KZ: Пайдаланушы нұсқаулығы
Page 2
1
2
10
4
3
5
6
7
8
9
1
Page 3

Page 4

English 6
Čeština 20
Eesti 34
Hrvatski 47
Latviešu 61
Lietuviškai 74
Magyar 88
Polski 103
Română 119
Slovenščina 134
Slovensky 148
Srpski 163
Български 175
Русский 191
Українська 205
Қазақша
218
Page 5

English
6
Important
Read this user manual carefully before you use the appliance and
save it for future reference.
Danger
-
Keep the charger away from water. Do not
place or store it over or near water
contained in a bathtub, washbasin, sink etc.
Do not immerse the charger in water or any
other liquid. After cleaning, make sure the
charger is completely dry before you
connect it to the mains.
Warning
-
The mains cord cannot be replaced. If the
mains cord is damaged, discard the charger.
-
Always have the charger replaced with one
of the original type in order to avoid a
hazard.
-
Do not use the charger outdoors or near
heated surfaces.
English
Page 6

English
-
If the appliance is damaged in any way
(brush head, toothbrush handle or charger),
stop using it. This appliance contains no
serviceable parts. If the appliance is
damaged, contact the Consumer Care
Center in your country (see chapter
'Warranty and support').
-
This appliance can be used by children and
persons with reduced physical, sensory or
mental capabilities or lack of experience
and knowledge if they have been given
supervision or instruction concerning use of
the appliance in a safe way and understand
the hazards involved. Cleaning and user
maintenance shall not be made by children
without supervision.
-
Children shall not play with the appliance.
7
Caution
-
Do not clean the brush head, the handle or
the charger in the dishwasher.
-
If you have had oral or gum surgery in the
previous 2 months, consult your dentist
before you use the toothbrush.
Page 7

English
8
-
Consult your dentist if excessive bleeding
occurs after using this toothbrush or if
bleeding continues to occur after 1 week of
use. Also consult your dentist if you
experience discomfort or pain when you use
the Philips Sonicare.
-
The Philips Sonicare toothbrush complies
with the safety standards for
electromagnetic devices. If you have a
pacemaker or other implanted device,
contact your physician or the device
manufacturer of the implanted device prior
to use.
-
If you have medical concerns, consult your
doctor before you use the Philips Sonicare.
-
This appliance has only been designed for
cleaning teeth, gums and tongue. Do not
use it for any other purpose. Stop using the
appliance and contact your doctor if you
experience any discomfort or pain.
Page 8

English
-
The Philips Sonicare toothbrush is a
personal care device and is not intended for
use on multiple patients in a dental practice
or institution.
-
Stop using a brush head with crushed or
bent bristles. Replace the brush head every
3 months or sooner if signs of wear appear.
Do not use other brush heads than the ones
recommended by the manufacturer.
-
If your toothpaste contains peroxide, baking
soda or bicarbonate (common in whitening
toothpastes), thoroughly clean the brush
head with soap and water after each use.
This prevents possible cracking of the
plastic.
Electromagnetic fields (EMF)
This Philips appliance complies with all applicable standards and
regulations regarding exposure to electromagnetic fields.
Radio Equipment Directive
- Radio Equipment in this product operates at 13.56 MHz
- Maximum RF power transmitted by the Radio Equipment is
30.16dBm
9
Introduction
Congratulations on your purchase and welcome to Philips! To fully
benefit from the support that Philips offers, register your product at
www.philips.com/welcome.
Page 9

English
10
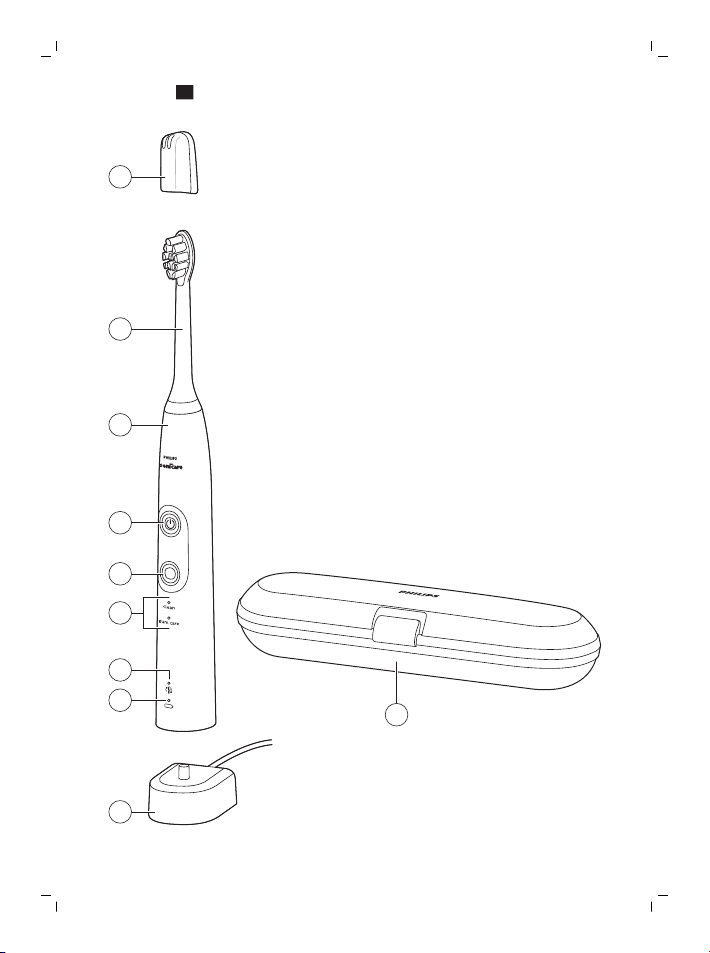
Your Philips Sonicare (Fig. 1)
1 Hygienic travel cap
2 Smart brush head(s)*
3 Handle
4 Power on/off button
5 Mode/intensity button
6 Mode light
7 Brush head replacement reminder light
8 Battery indication
9 Charging base
10 Travel case (specific types only)*
*Note: The content of the box may vary based on the model
purchased.
Brush heads
Your Philips Sonicare comes with one or more brush heads which are
designed to deliver superior results for your oral care needs.
Philips Sonicare BrushSync Technology
Your smart brush heads use a microchip to sync with your handle,
enabling brush head replacement reminder. For more information
regarding the brush head replacement reminder, see 'Features'.
This symbol indicates the brush head is equipped with BrushSync
technology. (Fig. 2)
Brushing modes
To toggle between modes press the mode button located below the
on/off button.
Your power toothbrush is equipped with either 2 or 3 brushing
modes, depending on your model.The following modes are available:
Clean mode
Clean is a 2-minute mode. It gives you a thorough and complete
clean and is recommended to be used with the C2 Optimal Plaque
Control brush head.
Page 10
English
White mode
White is a 2-minute 30-seconds mode, recommended to be used
with the W2 Optimal White brush head.
Gum Care mode
Gum Care is a 3-minute mode, recommended to be used with the G2
Optimal Gum Care brush head.
Using your Philips Sonicare
Brushing instructions
1 Press the brush head onto the handle in such a way that the
bristles will face the front of the handle. (Fig. 3)
2 Firmly press the brush head down onto the metal shaft until it
stops.
Note: It is normal to see a slight gap between the brush head and
the handle.
3 Wet the bristles. (Fig. 4)
4 Apply a small amount of toothpaste on the bristles. (Fig. 5)
5 Place the toothbrush bristles against the teeth at a slight angle (45
degrees), pressing firmly to make the bristles reach the gumline or
slightly beneath the gumline. (Fig. 6) A change in vibration (and a
slight change in sound) alerts you when you apply too much
pressure while brushing.
Note: Keep the center of the brush in contact with the teeth at all
times.
6 Press the power on/off button to turn on the Philips Sonicare. (Fig.
7)
7 Gently keep the bristles placed on the teeth and in the gumline.
Brush your teeth with small back and forth motion so the bristles
reach between the teeth. (Fig. 8)
Note: The bristles should slightly flare. Do not scrub.
8 To clean the inside surfaces of the front teeth, tilt the brush handle
semi-upright and make several vertical overlapping brushing
strokes on each tooth. (Fig. 9)
11
Page 11

English
12
9 To make sure you brush evenly throughout the mouth, divide the
mouth into 4 sections using the Quadpacer feature. (Fig. 10) The
quadpacer feature beeps after 30 seconds.
10 Brush for the full 2 minutes following the Quadpacer. (Fig. 11) After
2 minutes, the toothbrush will automatically shut off.
In white mode, after 2 minutes the handle will continue to brush
for 30 seconds so that you can brighten and polish your front
teeth.
In gum care mode, after 2 minutes the handle will continue to
brush for an additional minute so you can gently stimulate and
massage your gums.
- After you have completed the brushing cycle, you can spend
additional time brushing the chewing surfaces of your teeth and
areas where staining occurs. (Fig. 12)
Your Philips Sonicare toothbrush is safe to use on:
- Braces (brush heads wear out sooner when used on braces)
- Dental restorations (fillings, crowns, veneers)
Note: When the Philips Sonicare toothbrush is used in clinical studies,
it must be used in the Clean mode (for plaque and gum health claims)
or in White mode (for whitening claims) at high intensity with
EasyStart turned off.
Features
- EasyStart
- Brush head replacement reminder
- Pressure sensor
- Quadpacer
EasyStart
This Philips Sonicare model comes with the EasyStart feature
activated. The EasyStart feature gently increases the power over the
first 14 brushings to help you get used to the brushing with the Philips
Sonicare. The EasyStart feature works in all modes.
To deactivate EasyStart see 'Activating or deactivating features'.
Page 12

English
13
Brush head replacement reminder
Your Philips Sonicare is equipped with BrushSync technology that
tracks the wear of your brush head. (Fig. 13)
1 When attaching a new smart brush head for the first time the
brush head replacement reminder light blinks green three times.
This confirms you have a Philips brush head with BrushSync
technology.
2 Over time, based on the pressure you apply and the amount of
time used, the handle will track brush head wear in order to
determine the optimal time to change your brush head. This
feature gives you the guarantee for the best cleaning and care of
your teeth.
3 When the brush head replacement reminder light lights up amber,
you should replace your brush head.
To deactivate the brush head replacement reminder see 'Activating or
deactivating features'.
Pressure sensor
Your Philips Sonicare is equipped with an advanced sensor that
measures the pressure you apply while brushing. If you apply too
much pressure, the toothbrush will provide immediate feedback to
indicate that you need to reduce the pressure. This feedback is given
by a change in vibration and therefore brushing sensation.
To deactivate the pressure sensor see 'Activating or deactivating
features'.
Quadpacer
The Quadpacer is an interval timer that has a short beep and pause
to remind you to brush the different sections of your mouth.
Depending on the brushing mode you have selected (see 'Brushing
modes'), the Quadpacer beeps at different intervals during the
brushing cycle.
Activating or deactivating features
You can activate or deactivate the following features of your
toothbrush:
Page 13

English
14
- EasyStart
- Brush head replacement reminder
- Pressure sensor
To activate or deactivate these features, follow the instructions
below:
EasyStart
1 Put the handle on the plugged-in charger.
2 Press and hold the power on/off button while the handle remains
on the charger.
3 Keep the power on/off button pressed until you hear a single
short beep (after 2 seconds).
4 Release the power on/off button.
-
Triple tone of low-med-high means the EasyStart feature has
been activated. The brush head replacement light and battery
light will also blink green 3 times in unison to confirm activation.
-
Triple tone of high-med-low means the EasyStart feature has
been deactivated. The brush head replacement light and
battery light will also blink amber 3 times in unison to confirm
deactivation.
Note: To achieve clinical efficacy, EasyStart needs to be deactivated.
Brush head replacement reminder
1 Put the handle on the plugged-in charger.
2 Press and hold the power on/off button while the handle remains
on the charger.
3 Keep the power on/off button pressed until you hear a series of
two short beeps (after 4-5 seconds).
4 Release the power on/off button.
-
Triple tone of low-med-high means the Brush head
replacement reminder feature has been activated. The brush
head replacement light and battery light will also blink green 3
times in unison to confirm activation.
Page 14

English
-
Triple tone of high-med-low means the Brush head
replacement reminder feature has been deactivated. The brush
head replacement light and battery light will also blink amber 3
times in unison to confirm deactivation.
Pressure sensor
1 Put the handle on the plugged-in charger.
2 Press and hold the power on/off button while the handle remains
on the charger.
3 Keep the power on/off button pressed until you hear a series of
three short beeps (after 6-7 seconds).
4 Release the power on/off button.
-
Triple tone of low-med-high means the pressure sensor feature
has been activated. The brush head replacement light and
battery light will also blink green 3 times in unison to confirm
activation.
-
Triple tone of high-med-low means the pressure sensor feature
has been deactivated. The brush head replacement light and
battery light will also blink amber 3 times in unison to confirm
deactivation.
If you continue holding the power on/off button after the three short
beeps, the activate/deactivate sequence repeats.
Battery status and charging
1 Put the plug of the charger in an electrical outlet.
2 Place the handle on the charger.
-
The charger will emit 2 short beeps to confirm that the handle is
placed properly.
-
The flashing light of the battery level indicator shows that the
toothbrush is charging.
-
When handle is fully charged on the charger, the battery light
shows solid green for 30 seconds and switches off.
Note: Your toothbrush comes pre-charged for first use. After first use,
charge for at least 24 hours.
15
Page 15

English
16
Battery status (when handle is not on charger)
When removing the Philips Sonicare from the charger, the battery
light at the bottom of the toothbrush will indicate the status of the
battery life.
- Solid green LED: full battery
- Flashing green LED: medium battery
- Flashing amber LED and three beeps: low battery
- Flashing amber LED and two sets of five beeps: No brushing
sessions left (charge toothbrush)
Cleaning
Note: Do not clean the brush head, handle or travel case in the
dishwasher.
Toothbrush handle
1 Remove the brush head and rinse the metal shaft area with warm
water. Make sure you remove any residual toothpaste (Fig. 14).
Note: Do not push on the rubber seal on the metal shaft with
sharp objects, as this may cause damage.
2 Wipe the entire surface of the handle with a damp cloth.
Note: Do not use isopropyl rubbing alcohol, vinegar or bleach to
clean handle as this may cause discoloration.
Brush head
1 Rinse the brush head and bristles after each use (Fig. 15).
2 Remove the brush head from the handle and rinse the brush head
connection with warm water at least once a week.
Charger
1 Unplug the charger before you clean it.
2 Wipe the surface of the charger with a damp cloth.
Storage
If you are not going to use your Philips Sonicare for an extended
period of time, unplug the charger from the wall socket, clean it and
store it in a cool and dry place away from direct sunlight.
Page 16

English
Locating the model number
Look on the bottom of the Philips Sonicare toothbrush handle for the
model number (HX682x/HX683x).
Recycling
- This symbol means that this product shall not be disposed of with
normal household waste (2012/19/EU) (Fig. 24).
- This symbol means that this product contains a built-in
rechargeable battery which shall not be disposed of with normal
household waste (Fig. 25) (2006/66/EC). Please take your product
to an official collection point or a Philips service center to have a
professional remove the rechargeable battery.
- Follow your country’s rules for the separate collection of electrical
and electronic products and rechargeable batteries. Correct
disposal helps prevent negative consequences for the
environment and human health.
Removing the rechargeable battery
Warning: Only remove the rechargeable battery when you discard the
appliance. Make sure the battery is completely empty when you
remove it.
To remove the rechargeable battery, you need a towel or cloth, a
hammer and a flat-head (standard) screwdriver. Observe basic safety
precautions when you follow the procedure outlined below. Be sure
to protect your eyes, hands, fingers, and the surface on which you
work.
1 To deplete the rechargeable battery of any charge, remove the
handle from the charger, turn on the Philips Sonicare and let it run
until it stops. Repeat this step until you can no longer turn on the
Philips Sonicare.
2 Remove and discard the brush head. Cover the entire handle with
a towel or cloth (Fig. 16).
3 Hold the top of the handle with one hand and strike the handle
housing 0.5 inch above the bottom end. Strike firmly with a
hammer on all 4 sides to eject the end cap (Fig. 17).
17
Page 17

English
18
Note: You may have to hit on the end several times to break the
internal snap connections.
4 Remove the end cap from the toothbrush handle. If the end cap
does not release easily from the housing, repeat step 3 until the
end cap is released (Fig. 18).
5 Holding the handle upside down, press the shaft down on a hard
surface. If the internal components do not easily release from the
housing, repeat step 3 until the internal components are released
(Fig. 19).
6 Remove the rubber battery cover.
7 Wedge the screwdriver between the battery and the black frame
at the bottom of the internal components. Then pry the
screwdriver away from the battery to break the bottom of the
black frame (Fig. 20).
8 Insert the screwdriver between the bottom of the battery and the
black frame to break the metal tab connecting the battery to the
green printed circuit board. This will release the bottom end of the
battery from the frame (Fig. 21).
9 Grab the battery and pull it away from the internal components to
break the second metal battery tab (Fig. 22).
Caution: Be aware of the sharp edges of the battery tabs so as to
avoid injury to your fingers.
10 Cover the battery contacts with tape to prevent any electrical short
from residual battery charge. The rechargeable battery can now be
recycled and the rest of the product discarded appropriately (Fig.
23).
Warranty and support
If you need information or support, please visit
www.philips.com/support or read the international warranty leaflet.
Warranty restrictions
The terms of the international warranty do not cover the following:
- Brush heads.
- Damage caused by use of unauthorized replacement parts.
Page 18

English
- Damage caused by misuse, abuse, neglect, alterations or
unauthorized repair.
- Normal wear and tear, including chips, scratches, abrasions,
discoloration or fading.
19
Page 19

Čeština
20
Důležité
Před použitím přístroje si pečlivě přečtěte tuto uživatelskou příručku a
uschovejte ji pro budoucí použití.
Nebezpečí
-
Chraňte nabíječku před kontaktem svodou.
Nepokládejte a neuskladňujte nabíječku
vblízkosti vody, například u vany
snapuštěnou vodou, umyvadla, dřezu apod.
Neponořujte nabíječku do vody ani jiné
kapaliny. Před připojením nabíječky
knapájení se ujistěte, že je po čištění zcela
suchá.
Varování
-
Napájecí kabel nelze vyměnit. Pokud je
napájecí kabel poškozen, je nutné vyřadit
nabíječku zprovozu.
-
Nabíječku nechte vždy vyměnit za originální
typ, aby nevzniklo žádné riziko.
-
Nepoužívejte nabíječku venku aniblízko
horkých povrchů.
Čeština
Page 20

Čeština
-
Pokud dojde kjakémukoli poškození
přístroje (hlavice, rukojeť nebo nabíječka),
přestaňte jejpoužívat. Tento přístroj
neobsahuje žádné opravitelné součásti.
Pokud dojde kjeho poškození, obraťtese
nastředisko péče ozákazníky vevaší zemi
(viz „Záruka a podpora“).
-
Přístroj mohou používat děti a osoby se
sníženými fyzickými, smyslovými nebo
duševními schopnostmi nebo nedostatkem
zkušeností a znalostí, pokud jsou pod
dohledem nebo byly poučeny obezpečném
používání přístroje a rozumí všem rizikům
spojeným spoužíváním přístroje. Děti nesmí
provádět bez dozoru čištění auživatelskou
údržbu.
-
Děti si spřístrojem nesmí hrát.
21
Upozornění
-
Nemyjte hlavici kartáčku, rukojeť ani
nabíječku vmyčce nádobí.
Page 21

Čeština
22
-
Pokud jste vposledních 2 měsících
podstoupili operaci zubu či dásní, poraďte
se před použitím zubního kartáčku se svým
zubním lékařem.
-
Pokud po použití kartáčku dochází
kvýraznému krvácení nebo pokud krvácení
neustává po 1týdnu používání, obraťte se
na svého zubního lékaře. Se zubním lékařem
se poraďte také vpřípadě, že se při
používání zubního kartáčku Sonicare cítíte
nepříjemně nebo pociťujete bolest.
-
Zubní kartáček Philips Sonicare splňuje
bezpečnostní standardy pro
elektromagnetická zařízení. Pokud máte
kardiostimulátor nebo jiné implantované
zařízení, před použitím se poraďte slékařem
nebo svýrobcem implantovaného zařízení.
-
Máte-li zdravotní pochybnosti, obraťte se
před použitím kartáčku Philips Sonicare na
svého lékaře.
Page 22

Čeština
-
Tento přístroj je určen pouze kčištění zubů,
dásní a jazyka. Nepoužívejte jej kžádnému
jinému účelu. Pokud je vám používání
nepříjemné nebo máte pocity bolesti, ihned
přístroj přestaňte používat a obraťte se na
svého lékaře.
-
Zubní kartáček Philips Sonicare je přístroj
určený kosobní péči a není určen pro
použitíuvíce pacientů ve stomatologické
ordinaci nebo instituci.
-
Jsou-li vlákna na hlavě kartáčku poškozená
nebo ohnutá, přestaňte hlavu kartáčku
používat. Výměnu hlavy kartáčku provádějte
každé 3 měsíce nebo častěji, pokud se
objeví známky opotřebení. Nepoužívejte jiné
hlavice kartáčku než ty, které jsou
doporučeny výrobcem.
-
Pokud používáte zubní pastu sobsahem
peroxidu, jedlé sody nebo bikarbonátu
(běžně se vyskytují vbělicích zubních
pastách), po každém použití důkladně
očistěte hlavici kartáčku mýdlem a vodou.
Tím předejdete praskání plastu.
23
Page 23

Čeština
24
Elektromagnetická pole (EMP)
Tento přístroj Philips odpovídá všem platným normám a předpisům
týkajícím se elektromagnetických polí.
Směrnice o rádiových zařízeních
- Rádiové zařízení vtomto výrobku pracuje na frekvenci 13,56MHz.
- Maximální radiofrekvenční výkon přenášený rádiovým zařízením je
30,16dBm.
Úvod
Společnost Philips Vám gratuluje ke koupi a vítá Vás! Chcete-li
využívat všech výhod podpory nabízené společností Philips,
zaregistrujte svůj výrobek na stránkách www.philips.com/welcome.
Váš kartáček Philips Sonicare (obr. 1)
1 Hygienická cestovní krytka
2 Inteligentní hlav(y)* kartáčku
3 Rukojeť
4 Vypínač
5 Přepínač režimů/intenzity
6 Kontrolka režimu
7 Kontrolka připomenutí výměny hlavy kartáčku
8 Indikátor baterie
9 Nabíjecí základna
10 Cestovní pouzdro (pouze některé typy)*
*Poznámka: Obsah balení se může lišit vzávislosti na zakoupeném
modelu.
Hlavy kartáčků
Kartáček Philips Sonicare je dodáván sjednou nebo více hlavami
kartáčků navržených tak, aby zajistily vynikající výsledky při péči
oústa.
Technologie Philips Sonicare BrushSync
Vaše inteligentní hlavy kartáčku využívají mikročip ksynchronizaci
srukojetí, čímž umožňují připomenutí výměny hlavy kartáčku. Další
informace ovýměně hlavy kartáčku najdete vkapitole „Funkce“.
Page 24

Čeština
Tento symbol indikuje, že hlava kartáčku je vybavena technologií
BrushSync. (obr. 2)
Režimy čištění
Režim přepnete stisknutím tlačítka režimů, který je umístěn pod
vypínačem.
Vzávislosti na modelu je zubní kartáček vybaven buď 2 nebo 3
různými režimy. Kdispozici jsou následující režimy:
Režim Clean
Režim Clean je 2minutový. Zajistí vám důkladně aúplné vyčištění
zubů adoporučuje se používat shlavou kartáčku C2 Optimal Plaque
Control.
Režim White
Režim White je nastaven na 2minuty a30sekund adoporučuje se
používat shlavou kartáčku W2 Optimal White.
Režim Gum Care
Režim Gum Care je nastaven na 3minuty adoporučuje se používat
shlavou kartáčku G2 Optimal Gum Care.
Použití kartáčku Philips Sonicare
Pokyny kčištění zubů
1 Nasaďte hlavu kartáčku přitlačením na rukojeť tak, aby vlákna
směřovala kpřední straně rukojeti (obr. 3).
2 Hlavici kartáčku pevně zasuňte na kovovou hřídel, dokud se
nezarazí.
Poznámka: Malá mezera patrná mezi hlavou kartáčku a rukojetí je
normální.
3 Navlhčete štětiny (obr. 4).
4 Naneste na štětiny malé množství zubní pasty. (obr. 5)
5 Přiložte štětiny kartáčku kzubům podmírným úhlem (45stupňů)
apevně přitiskněte. Štětiny se díky tomu dostanou kokraji dásní,
nebo mírně podněj. (obr. 6) Změna vibrací (a malá změna zvuku)
vás při čištění upozorní, že vyvíjíte přílišný tlak.
25
Page 25

Čeština
26
Poznámka: Udržujte střed kartáčku ve stálém kontaktu se zuby.
6 Zapněte kartáček Philips Sonicare stisknutím tlačítka pro
zapnutí/vypnutí. (obr. 7)
7 Držte kartáček tak, abyse štětiny jemně dotýkaly zubů aokrajů
dásní. Čistěte si zuby krátkými pohyby sem atam, aby se štětiny
dostaly mezi zuby. (obr. 8)
Poznámka: Štětiny by se měly jemně rozestupovat. Zuby
nedrhněte.
8 Chcete-li vyčistit vnitřní plochu předních zubů, nakloňte rukojeť
kartáčku napůl svisle anakaždém zubu proveďte několik svislých
překrývajících se tahů kartáčkem. (obr. 9)
9 Abyste rovnoměrně vyčistili všechny zuby, rozdělte ústa na 4části
pomocí funkce Quadpacer. (obr. 10) Funkce Quadpacer bude pípat
po 30sekundách.
10 Podle funkce Quadpacer si čistěte zuby celé 2minuty. (obr. 11) Po
2minutách se zubní kartáček automaticky vypne.
Vrežimu bělení bude rukojeť po 2minutách pokračovat
včištění po dobu 30sekund, abyste si mohli zesvětlit avyleštit
přední zuby.
Vrežimu péče odásně bude rukojeť po 2minutách pokračovat
včištění další minutu, abyste si mohli jemně stimulovat
amasírovat dásně.
- Po dokončení cyklu čištění můžete strávit chvíli čištěním žvýkacích
ploch zubů amíst, kde se vyskytují skvrny. (obr. 12)
Zubní kartáček Philips Sonicare lze bezpečně používat kčištění:
- Rovnátek (při použití kčištění rovnátek se hlavice kartáčků rychleji
opotřebovávají)
- Opravných dentálních materiálů (výplní, korunek, fazet)
Poznámka: Při použití zubního kartáčku Philips Sonicare vklinických
studiích je potřeba používat vrežimu Clean (kodstranění plaku
azlepšování zdraví dásní) nebo vrežimu White (kvybělení zubů)
vysokou intenzitu. Funkce EasyStart přitom musí být vypnutá.
Page 26

Čeština
27
Funkce
- EasyStart
- Připomenutí výměny hlavy kartáčku
- Snímač tlaku
- Quadpacer
EasyStart
Model kartáčku Philips Sonicare se dodává saktivovanou funkcí
EasyStart. Funkce EasyStart jemně zvyšuje sílu prvních 14čištění,
abyste si zvykli na čištění skartáčkem Philips Sonicare. Funkce
EasyStart funguje ve všech režimech.
Chcete-li deaktivovat funkci EasyStart, viz kapitolu „Aktivace nebo
deaktivace funkcí“.
Připomenutí výměny hlavy kartáčku
Kartáček Philips Sonicare je vybaven technologií BrushSync, která
sleduje opotřebení hlavy kartáčku. (obr. 13)
1 Při prvním nasazování nové inteligentní hlavy kartáčku zabliká
kontrolka připomenutí výměny hlavy kartáčku třikrát zeleně. To je
potvrzení, že máte hlavu kartáčku Philips stechnologií BrushSync.
2 Rukojeť bude průběžně sledovat opotřebení hlavy kartáčku
vzávislosti na tlaku vyvíjeném při čištění adélce čištění, aby určila
optimální čas pro její výměnu. Tato funkce vám dá záruku
nejlepšího čištění apéče ozuby.
3 Hlavu kartáčku byste měli vyměnit vokamžiku, kdy se rozsvítí
oranžová kontrolka připomenutí výměny hlavy kartáčku.
Chcete-li deaktivovat připomenutí výměny hlavy kartáčku, viz kapitolu
„Aktivace nebo deaktivace funkcí“.
Snímač tlaku
Kartáček Philips Sonicare je vybaven vyspělým snímačem, který měří
tlak vyvíjený při čištění zubů. Pokud použijete příliš velký tlak, zubní
kartáček vás okamžitě upozorní, že je potřeba tlak snížit. Tato zpětná
vazba bude předána změnou vibrace, která způsobí změnu pocitu při
čištění.
Page 27

Čeština
28
Chcete-li deaktivovat snímač tlaku, viz kapitolu „Aktivace nebo
deaktivace funkcí“.
Quadpacer
Quadpacer je intervalový časovač, který vám pomocí krátkého pípnutí
apozastavení pomůže zvládnout vyčistit všechny části ústní dutiny.
Vzávislosti na zvoleném režimu (viz kapitolu „Režimy čištění“) vydává
funkce Quadpacer během čištění zvukové signály vrůzných
intervalech.
Aktivace nebo deaktivace funkcí
Následující funkce zubního kartáčku můžete aktivovat nebo
deaktivovat:
- EasyStart
- Připomenutí výměny hlavy kartáčku
- Snímač tlaku
Chcete-li aktivovat nebo deaktivovat tyto funkce, postupujte podle
následujících pokynů:
EasyStart
1 Nasaďte rukojeť na zapojenou nabíječku.
2 Ponechte rukojeť na nabíječce astiskněte apodržte tlačítko pro
vypnutí/zapnutí.
3 Držte tlačítko pro zapnutí/vypnutí stisknuté, dokud neuslyšíte
jedno krátké pípnutí (po 2sekundách).
4 Uvolněte tlačítko pro zapnutí/vypnutí.
-
Trojitý vzrůstající tón znamená, že funkce EasyStart byla
aktivována. Aktivaci potvrdí také kontrolka připomenutí výměny
hlavy kartáčku akontrolka baterie, které společně třikrát zeleně
zablikají.
-
Trojitý klesající tón znamená, že funkce EasyStart byla
deaktivována. Deaktivaci potvrdí také kontrolka připomenutí
výměny hlavy kartáčku akontrolka baterie, které společně
třikrát oranžově zablikají.
Poznámka: Pro dosažení klinické účinnosti musí být funkce EasyStart
deaktivována.
Page 28

Čeština
Připomenutí výměny hlavy kartáčku
1 Nasaďte rukojeť na zapojenou nabíječku.
2 Ponechte rukojeť na nabíječce astiskněte apodržte tlačítko pro
vypnutí/zapnutí.
3 Držte tlačítko pro zapnutí/vypnutí stisknuté, dokud neuslyšíte sérii
dvou krátkých pípnutí (po 4–5sekundách).
4 Uvolněte tlačítko pro zapnutí/vypnutí.
-
Trojitý vzrůstající tón znamená, že funkce připomenutí výměny
hlavy kartáčku byla aktivována. Aktivaci potvrdí také kontrolka
připomenutí výměny hlavy kartáčku akontrolka baterie, které
společně třikrát zeleně zablikají.
-
Trojitý klesající tón znamená, že funkce připomenutí výměny
hlavy kartáčku byla deaktivována. Deaktivaci potvrdí také
kontrolka připomenutí výměny hlavy kartáčku akontrolka
baterie, které společně třikrát oranžově zablikají.
Snímač tlaku
1 Nasaďte rukojeť na zapojenou nabíječku.
2 Ponechte rukojeť na nabíječce astiskněte apodržte tlačítko pro
vypnutí/zapnutí.
3 Držte tlačítko pro zapnutí/vypnutí stisknuté, dokud neuslyšíte sérii
tří krátkých pípnutí (po 6–7sekundách).
4 Uvolněte tlačítko pro zapnutí/vypnutí.
-
Trojitý vzrůstající tón znamená, že funkce snímače tlaku byla
aktivována. Aktivaci potvrdí také kontrolka připomenutí výměny
hlavy kartáčku akontrolka baterie, které společně třikrát zeleně
zablikají.
-
Trojitý klesající tón znamená, že funkce snímače tlaku byla
deaktivována. Deaktivaci potvrdí také kontrolka připomenutí
výměny hlavy kartáčku akontrolka baterie, které společně
třikrát oranžově zablikají.
29
Pokud budete tlačítko pro zapnutí/vypnutí držet stisknuté ipo třech
krátkých pípnutích, zopakuje se sekvence aktivace/deaktivace.
Page 29

Čeština
30
Stav baterie a nabíjení
1 Zapojte zástrčku nabíječky do elektrické zásuvky.
2 Postavte rukojeť na nabíječku.
-
Nabíječka vydá 2krátká pípnutí na potvrzení, že rukojeť je
umístěna správně.
-
Blikající světlo indikátoru stavu baterie ukazuje, že se zubní
kartáček nabíjí.
-
Když je rukojeť na nabíječce plně nabitá, indikátor stavu baterie
svítí nepřerušovaně zeleně po dobu 30sekund apotom se
vypne.
Poznámka: Zubní kartáček se dodává předem nabitý pro první použití.
Po prvním použití přístroj nabíjejte alespoň 24hodin.
Stav baterie (když rukojeť není vnabíječce)
Při snímání zubního kartáčku Philips Sonicare znabíječky bude
kontrolka baterie na spodní části zubního kartáčku udávat stav
odpovídající životnosti baterie.
- Nepřerušovaně svítící zelená LED: plně nabitá baterie
- Blikající zelená LED: středně nabitá baterie
- Blikající oranžová LED atři pípnutí: vybitá baterie
- Blikající oranžová LED advě sady pěti pípnutí: Zbývající životnost
již není dostačující ani pro jedno vyčištění zubů (zubní kartáček je
třeba nabít).
Čištění
Poznámka: Nemyjte hlavu kartáčku, rukojeť ani cestovní pouzdro
vmyčce.
Rukojeť kartáčku
1 Sundejte hlavu kartáčku akovovou hřídel opláchněte teplou
vodou. Důsledně odstraňte zbytky zubní pasty (obr. 14).
Poznámka: Na gumové těsnění na kovové hřídeli netlačte ostrými
předměty. Mohli byste ho poškodit.
2 Utřete celý povrch rukojeti vlhkým hadříkem.
Page 30

Čeština
Poznámka: Kčištění rukojeti nepoužívejte izopropylalkohol, ocet
ani bělidlo, mohlo by dojít ke změně barvy.
Hlavice kartáčku
1 Hlavici kartáčku a vlákna opláchněte po každém použití (obr. 15).
2 Alespoň jednou za týden vyjměte hlavici kartáčku zrukojeti a
opláchněte konektor hlavice kartáčku teplou vodou.
Nabíječka
1 Před čištěním nabíječku odpojte zesítě.
2 Utřete celý povrch nabíječky vlhkým hadříkem.
Skladování
Pokud kartáček Philips Sonicare nebudete delší dobu používat,
odpojte nabíječku zesíťové zásuvky, očistěte ji a uložte na chladném
a suchém místě mimo dosah slunečních paprsků.
Umístění čísla modelu
Číslo modelu zubního kartáčku Philips Sonicare najdete na spodní
části jeho rukojeti (HX682x/HX683x).
Recyklace
- Tento symbol znamená, že výrobek nelze likvidovat sběžným
komunálním odpadem (2012/19/EU) (obr. 24).
- Symbol na výrobku znamená, že tento výrobek obsahuje
vestavěný dobíjecí akumulátor, který nemůže být likvidován
společně sběžným domácím odpadem (obr. 25) (2006/66/ES).
Odneste prosím výrobek do oficiálního sběrného dvora nebo do
servisního střediska společnosti Philips apožádejte tamního
odborníka ovyjmutí nabíjecí baterie.
- Dodržujte předpisy vaší země týkající se sběru tříděného odpadu
elektrických a elektronických výrobků a také akumulátorů.
Správnou likvidací pomůžete zabránit negativním dopadům na
životní prostředí a lidské zdraví.
31
Page 31

Čeština
32
Vyjmutí dobíjecího akumulátoru
Varování: Až budete přístroj likvidovat, vyjměte zněj akumulátor. Před
vyjmutím akumulátoru se ujistěte, že je úplně prázdný.
Chcete-li vyjmout nabíjecí baterii, potřebujete ručník nebo utěrku,
kladívko a plochý (obyčejný) šroubovák. Při provádění níže
popsaného postupu dodržujte základní bezpečnostní opatření.
Chraňte si oči, ruce, prsty a povrch, na kterém pracujete.
1 Chcete-li dobíjecí baterii zcela vybít, vyjměte rukojeť znabíječky,
zapněte kartáček Philips Sonicare a nechte jej vchodu, dokud se
nezastaví. Tento krok opakujte, dokud již není možné kartáček
Philips Sonicare zapnout.
2 Sejměte a vyhoďte hlavici kartáčku. Přikryjte celou rukojeť
ručníkem nebo hadříkem (obr. 16).
3 Podržte horní část rukojeti jednou rukou a klepněte na kryt rukojeti
1cm nad dolní částí. Klepněte silně kladívkem na všechny 4 strany,
čímž otevřete kryt (obr. 17) konce.
Poznámka: Možná budete muset udeřit několikrát, abyste rozlomili
vnitřní spojovací díly.
4 Demontujte kryt konce zrukojeti kartáčku. Pokud nedojde ke
snadnému uvolnění krytu konce, opakujte krok3, dokud není kryt
konce uvolněn (obr. 18).
5 Držte rukojeť dnem vzhůru a zatlačte hřídelí proti tvrdému
povrchu. Pokud nedojde ke snadnému uvolnění vnitřních součástí
zkrytu, opakujte krok3, dokud nejsou vnitřní součásti uvolněny
(obr. 19).
6 Sejměte pryžový kryt baterie.
7 Vkliňte šroubovák mezi baterii a černý kryt na spodní straně
vnitřních součástí. Poté páčením šroubováku od baterie zlomte
spodní část černého rámu (obr. 20).
8 Vložením šroubováku mezi spodní část baterie a černý rámeček
dojde ke zlomení kovového jazýčku připojení baterie kzelené
desce splošnými spoji. Tím dojde kuvolnění spodního konec
baterie zrámu (obr. 21).
Page 32

Čeština
9 Uchopte baterii a vytáhněte ji zvnitřních součástí. Zlomíte tak
druhý kovový jazýček (obr. 22) baterie.
Upozornění: Dávejte pozor na ostré hrany jazýčků baterie, aby
nedošlo k poranění prstů.
10 Zalepte kontakty baterie páskou, čímž zabráníte vzniku
elektrického výboje ze zbytkového nabití baterie. Dobíjecí baterii
nyní lze recyklovat azbytek výrobku náležitě zlikvidovat (obr. 23).
Záruka a podpora
Potřebujete-li další informace či podporu, navštivte web
www.philips.com/support nebo si prostudujte záruční list s
mezinárodní platností.
Omezení záruky
Podmínky mezinárodní záruky se nevztahují na následující:
- hlavy kartáčků,
- poškození způsobené neoprávněnou výměnu součástí,
- poškození způsobené nesprávným použitím, úmyslné poškození,
nedostatečná péče, úpravy nebo neoprávněné opravy,
- běžné opotřebení, například odštípnutí, škrábance, oděrky,
odbarvení nebo vyblednutí.
33
Page 33

Eesti
34
Oluline
Enne seadme kasutamist lugege seda kasutusjuhendit hoolikalt ja
hoidke see edaspidiseks alles.
Oht
-
Ärge tehke laadijat märjaks. Ärge pange ega
hoidke seda vee läheduses, näiteks vett täis
vanni, pesukausi, valamu vms kohal. Ärge
kunagi kastke laadijat vette ega mingisse
muusse vedelikku. Pärast puhastamist
veenduge, et laadija oleks täiesti kuiv enne
vooluvõrku ühendamist.
Hoiatus
-
Toitejuhe ei ole asedatav. Kui toitejuhe on
kahjustatud, kõrvaldage laadija kasutusest.
-
Ohtlike olukordade vältimiseks vahetage
laadija alati välja originaali vastu.
-
Ärge kasutage laadijat õues ega kuumade
pindade läheduses.
Eesti
Page 34

Eesti
-
Kui seade (harjapea, käepide või laadija) on
kahjustatud, lõpetage selle kasutamine.
Sellel seadmel pole ühtki hooldatavat osa.
Kui seade on kahjustatud, võtke ühendust
oma riigi klienditeeninduskeskusega (vt ptk
„Garantii ja tugi”).
-
Seda seadet tohivad kasutada füüsiliste,
vaimsete või meelepuuetega isikud või
isikud, kellel puuduvad kogemused ja
teadmised, kui neid valvatakse või neile on
antud juhised seadme ohutu kasutamise
kohta ja nad mõistavad sellega seotud ohte.
Lapsed ei tohi seadet järelevalveta
puhastada ega hooldada.
-
Lapsed ei tohi seadmega mängida.
Ettevaatust
-
Ärge puhastage harjapead, käepidet ega
laadijat nõudepesumasinas.
-
Kui teil on olnud viimase kahe kuu jooksul
suuõõne või igemete operatsioon, pidage
enne hambaharja kasutamist hambaarstiga
nõu.
35
Page 35

Eesti
36
-
Võtke ühendust oma hambaarstiga, kui teil
tekib pärast hambaharja kasutamist liigne
verejooks või kui veritsemine jätkub pärast
esimest kasutusnädalat. Kui te kogete
Philips Sonicare'i kasutamisel valu või
ebamugavust, konsulteerige oma
hambaarstiga.
-
Philips Sonicare’i hambahari vastab
elektromagnetilistele seadmetele
kehtestatud ohutusstandarditele. Juhul kui
te kasutate südamestimulaatorit või mõnda
muud meditsiinilist seadet, võtke enne
hambaharja kasutamist ühendust oma arsti
või siirdatud seadme tootjaga.
-
Kui teil on meditsiinilisi küsimusi, võtke enne
Philips Sonicare’i hambaharja kasutama
hakkamist ühendust oma arstiga.
-
See seade on loodud vaid hammaste,
igemete ja keele puhastamiseks. Ärge
kasutage seda teisteks otstarveteks. Kui
kogete valu või ebamugavust, lõpetage
seadme kasutamine ning võtke ühendust
oma arstiga.
Page 36

Eesti
-
Philips Sonicare’i hambahari on personaalne
hügieenitarve ega ole mõeldud üldiseks
kasutamiseks hambaravikabinetis või asutuses.
-
Ärge kasutage kõverdunud või paindunud
harjastega harjapäid. Vahetage harjapäid iga
kolme kuu tagant või varem - pärast seda
kui ilmnevad kulumisnähud. Kasutage ainult
neid harjapäid, mida tootja soovitab.
-
Kui teie hambapasta sisaldab peroksiidi,
söögisoodat või bikarbonaati (levinud
komponendid valgendavates
hambapastades), peske harjapead pärast
igat kasutuskorda põhjalikult seebi ja veega.
Nii väldite plastikusse võimalike pragude
tekkimist.
Elektromagnetväljad (EMF)
See Philipsi seade vastab kõikidele kokkupuudet elektromagnetiliste
väljadega käsitlevatele kohaldatavatele standarditele ja
õigusnormidele.
Raadiosideseadmete direktiiv
- Selle toote raadiosideseadmed töötavad sagedusel 13,56MHz.
- Raadiosideseadme maksimaalne edastatav raadiosageduslik
võimsus on 30,16dBm.
37
Page 37

Eesti
38
Sissejuhatus
Õnnitleme ostu puhul ja tervitame Philipsi poolt! Philipsi pakutava
tootetoe eeliste täielikuks kasutamiseks registreerige oma toode
veebisaidil www.philips.com/welcome.
Philips Sonicare (joonis 1)
1 Hügieeniline reisivutlar
2 Nutikas harjapea*
3 Käepide
4 Toitenupp
5 Režiimi-/tugevusnupp
6 Režiimituluke
7 Harjapea asendamise meeldetuletuse tuluke
8 Aku märgutuli
9 Laadimisalus
10 Reisikarp (ainult mõnel mudelil)*
*Märkus. Karbi sisu võib varieeruda vastavalt ostetud mudelile.
Harjapead
Philips Sonicare'i komplekti kuulub üks või mitu harjapead, mis
tagavad suurepärase suuhügieeni.
Philips Sonicare BrushSync Technology
Nutikad harjapead kasutavad käepidemega sünkroonimiseks
mikrokiipi, mis võimaldab kasutada harjapea väljavahetamise
meeldetuletust. Täpsemad andmed harjapea väljavahetamise
meeldetuletuse kohta on esitatud peatükis „Funktsioonid“.
See sümbol näitab, et harjapeal on kasutatud BrushSynci
tehnoloogiat. (joon. 2)
Harjamisrežiimid
Režiimide vahetamiseks vajutage toitenupu all paiknevat
režiiminuppu.
Elektrilisel hambaharjal on olenevalt mudelist 2 või 3 harjamisrežiimi.
Kasutada saab järgmisi režiime:
Page 38

Eesti
Režiim Clean
Clean on 2-minutiline režiim. See tagab põhjaliku ja täieliku
puhastuse ning seda on soovitatav kasutada harjapeaga C2 Optimal
Plaque Control.
Režiim White
White on 2 minutit ja 30 sekundit kestev režiim, mida soovitatakse
kasutada harjapeaga W2 Optimal White.
Režiim Gum Care
Gum Care on 3-minutiline režiim, mida soovitatakse kasutada
harjapeaga G2 Optimal Gum Care.
Philips Sonicare hambaharja kasutamine
Harjamisjuhised
1 Vajutage harjapea käepidemele, nii et harjased on käepideme
esiküljega samas suunas. (joon. 3)
2 Vajutage harjapea kindla liigutusega metallvarrele, kuni see
kinnitub.
Märkus. Harjapea ja käepideme vahel olev väike pilu on
normaalne.
3 Tehke harjased märjaks. (joon. 4)
4 Kandke harjastele natuke hambapastat. (joon. 5)
5 Pange hambaharja harjased väikese nurga all (45 kraadi) vastu
hambaid ja vajutage harjased kindlalt vastu igemeserva või sellest
veidi allapoole. (joon. 6) Vibratsiooni muutus (ja väike helimuutus)
annab märku, kui harjamissurve on liiga tugev.
Märkus. hoidke harja keskosa kogu aeg vastu hambaid.
6 Philips Sonicare'i sisselülitamiseks vajutage toitenuppu. (joon. 7)
7 Hoidke harjaseid õrnalt hammastel ja igemepiiril. Harjake hambaid
lühikeste tagasi- ja edasiliigutustega, nii et harjased ulatuvad
hammaste vahele. (joon. 8)
Märkus. Harjased peaksid kergelt laiali minema. Ärge hõõruge.
39
Page 39

Eesti
40
8 Esihammaste sisekülgede puhastamiseks kallutage harja käepidet
pooleldi ülespoole ja tehke igal hambal mitu vertikaalset kattuvat
harjamisliigutust.
9 Kogu suu ühtlaseks harjamiseks jagage suu Quadpaceri
funktsiooni abil nelja ossa. (joon. 10) Quadpaceri funktsioon
edastab pärast 30 sekundit helisignaali.
10 Harjake 2 minutit, järgides Quadpacerit. (joon. 11) Pärast 2 minutit
lülitub hambahari automaatselt välja.
Režiimil White jätkab käepide pärast 2-minutilist harjamist veel
30 sekundit, et saaksite esihambaid heledamaks muuta ja
poleerida.
Režiimil Gum Care jätkab käepide pärast 2-minutilist harjamist
veel ühe minuti, et saaksite õrnalt igemeid stimuleerida ja
masseerida.
- Pärast harjamist võite üle harjata hammaste mälumispinnad ja
tumedamad alad. (joon. 12)
Teie Philips Sonicare'i hambahari sobib kasutamiseks:
- breketitel (harjapead kuluvad breketitel kasutamisel kiiremini);
- hambaparandustel (plommid, kroonid, laminaadid).
Märkus. Kliinilistes uuringutes tuleb Philips Sonicare'i hambaharja
kasutada režiimil Clean (katu ja igemete tervis) või White
(valgendamine), kõrge intensiivsustasemega ja väljalülitatud
EasyStarti funktsiooni korral.
Omadused
- EasyStart
- harjapea väljavahetamise meeldetuletus
- Surveandur
- Quadpacer
EasyStart
Sellel Philips Sonicare'i mudelil on EasyStarti funktsioon sisse
lülitatud. Philips Sonicare'iga harjumiseks suurendab EasyStarti
Page 40

Eesti
funktsioon järkjärgult esimese 14 harjamise jooksul võimsust.
EasyStarti funktsioon töötab kõikidel režiimidel.
EasyStarti väljalülitamiseks vt ptk „Funktsioonide sisse- ja
väljalülitamine“.
harjapea väljavahetamise meeldetuletus
Philips Sonicare'il on kasutatud BrushSynci tehnoloogiat, mis jälgib
harjapea kulumist. (joon. 13)
1 Uue nutika harjapea kinnitamisel vilgub harjapea väljavahetamise
meeldetuletuse märgutuli kolm korda roheliselt. See kinnitab, et
Philipsi harjapeal on kasutatud BrushSynci tehnoloogiat.
2 Olenevalt harjamissurvest ja kasutusajast jälgib käepide harjapea
kulumist ning määrab optimaalse väljavahetamise aja. See
funktsioon tagab hammaste parima puhastuse ja hoolduse.
3 Kui harjapea väljavahetamise meeldetuletuse märgutuli süttib
kollaselt, tuleb harjapea välja vahetada.
Harjapea väljavahetamise meeldetuletuse väljalülitamiseks vt ptk
„Funktsioonide sisse- ja väljalülitamine“.
Surveandur
Philips Sonicare'il on täiustatud andur, mis mõõdab harjamissurvet.
Liiga tugeva surve korral annab hambahari kohe märku, kui survet
tuleb vähendada. Sellisel juhul muutub vibratsioon ja seega ka
harjamise tunne.
Surveanduri väljalülitamiseks vt ptk „Funktsioonide sisse- ja
väljalülitamine“.
Quadpacer
Quadpacer on pausidega taimer, mis tuletab lühikese helisignaali ja
pausiga meelde, et harjaksite ühtlaselt ja põhjalikult suu erinevaid osi.
Olenevalt valitud harjamisrežiimist (vt ptk „Harjamisrežiimid“) edastab
Quadpacer harjamistsükli ajal eri välpade järel helisignaale.
41
Funktsioonide sisse- ja väljalülitamine
Järgmisi hambaharja funktsioone on võimalik sisse ja välja lülitada:
- EasyStart
Page 41

Eesti
42
- harjapea väljavahetamise meeldetuletus
- surveandur
Nende funktsioonide sisse- ja väljalülitamiseks järgige järgmisi
juhiseid:
EasyStart
1 Pange käepide pistikupessa ühendatud laadurile.
2 Vajutage toitenuppu, kui käepide on laaduril.
3 Hoidke toitenuppu allavajutatuna, kuni kostab lühike helisignaal
(pärast 2 sekundit).
4 Vabastage toitenupp.
-
Madal-keskmine-kõrge toon tähendab, et EasyStarti funktsioon
on sisse lülitatud. Sisselülitamise kinnitamiseks vilguvad
harjapea väljavahetamise märgutuli ja aku märgutuli koos 3
korda roheliselt.
-
Kõrge-keskmine-madal toon tähendab, et EasyStarti
funktsioon on välja lülitatud. Väljalülitamise kinnitamiseks
vilguvad harjapea väljavahetamise märgutuli ja aku märgutuli
koos 3 korda kollaselt.
Märkus. Kliinilise tõhususe saavutamiseks tuleb EasyStart välja
lülitada.
harjapea väljavahetamise meeldetuletus
1 Pange käepide pistikupessa ühendatud laadurile.
2 Vajutage toitenuppu, kui käepide on laaduril.
3 Hoidke toitenuppu allavajutatuna, kuni kostab kahe lühikese
helisignaali seeria (pärast 4–5 sekundit).
4 Vabastage toitenupp.
-
Madal-keskmine-kõrge toon tähendab, et harjapea
väljavahetamise meeldetuletuse funktsioon on sisse lülitatud.
Sisselülitamise kinnitamiseks vilguvad harjapea väljavahetamise
märgutuli ja aku märgutuli koos 3 korda roheliselt.
Page 42

Eesti
-
Kõrge-keskmine-madal toon tähendab, et harjapea
väljavahetamise meeldetuletuse funktsioon on välja lülitatud.
Väljalülitamise kinnitamiseks vilguvad harjapea väljavahetamise
märgutuli ja aku märgutuli koos 3 korda kollaselt.
Surveandur
1 Pange käepide pistikupessa ühendatud laadurile.
2 Vajutage toitenuppu, kui käepide on laaduril.
3 Hoidke toitenuppu allavajutatuna, kuni kostab kolme lühikese
helisignaali seeria (pärast 6–7 sekundit).
4 Vabastage toitenupp.
-
Madal-keskmine-kõrge toon tähendab, et surveanduri
funktsioon on sisse lülitatud. Sisselülitamise kinnitamiseks
vilguvad harjapea väljavahetamise märgutuli ja aku märgutuli
koos 3 korda roheliselt.
-
Kõrge-keskmine-madal toon tähendab, et surveanduri
funktsioon on välja lülitatud. Väljalülitamise kinnitamiseks
vilguvad harjapea väljavahetamise märgutuli ja aku märgutuli
koos 3 korda kollaselt.
Kui jätkate toitenupu vajutamist pärast kolme lühikest helisignaali,
kordub sisse- ja väljalülitamise jada.
Aku olek ja laadimine
1 Pange laaduri pistik pistikupessa.
2 Pange käepide laadurile.
-
Kui käepide on õigesti laadurile pandud, kostab 2 lühikest
helisignaali.
-
Aku laetustaseme näidu märgutuli vilgub hambaharja laadimise
ajal.
-
Kui käepide on laaduril täis laetud, põleb aku märgutuli 30
sekundit roheliselt ja lülitub välja.
Märkus. Hambahari on esmakordseks kasutamiseks eellaetud. Pärast
esmakordset kasutamist laadige seadet vähemalt 24 tundi.
43
Page 43

Eesti
44
Aku seisund (kui käepide ei ole laaduril)
Kui eemaldate Philips Sonicare'i laadurilt, näitab hambaharja
alumises osas olev aku märgutuli aku seisundit.
- põlev roheline märgutuli: täis aku
- vilkuv roheline märgutuli: aku keskmine laetustase
- vilkuv kollane märgutuli ja kolm helisignaali: tühi aku
- vilkuv kollane märgutuli ja kaks viie helisignaali seeriat: harjamine
ei ole võimalik (laadige hambaharja)
Puhastamine
Märkus. Ärge puhastage harjapead, käepidet ega reisikotti
nõudepesumasinas.
Hambaharja käepide
1 Eemaldage harjapea ja loputage metallvõlli sooja veega.
Kontrollige, et harjal ei ole hambapasta (joon. 14) jääke.
Märkus. Ärge vajutage metallvarre kummitihendile terava
esemega, kuna see võib tihendit kahjustada.
2 Pühkige kogu käepideme pinda niiske lapiga.
Märkus. Ärge kasutage käepideme puhastamiseks
isopropüülalkoholi, äädikat ega valgendajat, sest see võib
põhjustada värvimuutusi.
Harjapea
1 Loputage harjapead ja harjaseid pärast iga kasutamist (joon. 15).
2 Võtke vähemalt kord nädalas harjapea käepideme küljest lahti ja
loputage ühenduskohta sooja veega.
Laadija
1 Enne laadija puhastamist võtke laadija seinakontaktist välja.
2 Pühkige kogu laadija pind üle niiske lapiga.
Hoiundamine
Kui te ei kavatse oma Philips Sonicare'i pikemat aega kasutada,
eemaldage laadija seinakontaktist, puhastage see ning pange hoiule
jahedasse ja kuiva kohta, eemale otsesest päikesevalgusest.
Page 44

Eesti
45
Mudeli numbri asukoht
Philips Sonicare'i hambaharja mudeli number (HX682x/HX683x) on
käepideme all.
Ringlussevõtt
- See sümbol tähendab, et seda toodet ei tohi visata tavaliste
olmejäätmete hulka (2012/19/EL) (joon. 24).
- See sümbol tähendab, et käesolev toode sisaldab sisseehitatud
akupatareid, mida ei tohi visata tavaliste olmejäätmete hulka (joon.
25) (2006/66/EÜ). Viige toode Philipsi ametlikku kogumispunkti
või teeninduskeskusesse, et akupatarei asjatundjal eemaldada
lasta.
- Järgige oma riigi elektriliste ja elektrooniliste toodete ning
akupatareide lahuskogumist reguleerivaid eeskirju. Õigel viisil
kasutusest kõrvaldamine aitab ära hoida kahjulikke tagajärgi
keskkonnale ja inimeste tervisele.
Laetava aku eemaldamine
Hoiatus. Eemaldage akupatarei seadmest vaid siis, kui seadme
kasutusest kõrvaldate. Enne aku eemaldamist kontrollige, et see oleks
täiest tühi.
Akupatarei eemaldamiseks vajate rätikut või riiet, haamrit ja lapiku
peaga peaga (tavalist) kruvikeerajat. Järgige allkirjeldatud toimingute
läbiviimisel elementaarseid ohutusnõudeid. Ärge unustage kaitsta
oma silmi, käsi, sõrmi ja töötamiseks kasutatavat pinda.
1 Laetava aku täielikuks tühjendamiseks eemaldage käepide
laadurilt, lülitage Philips Sonicare sisse ja laske sel kuni
seiskumiseni töötada. Korrake seda sammu, kuni Philips Sonicare'i
ei saa enam sisse lülitada.
2 Eemaldage harjapea ja kõrvaldage see kasutuselt. Katke kogu
käepide käteräti või lapiga (joon. 16).
3 Hoidke ühe käega käepideme ülaosast ja lööge vastu käepideme
korpust (umbes 1 cm kauguselt alaservast). Otsakorgi (joon. 17)
vabastamiseks lööge haamriga tugevalt vastu kõiki nelja külge.
Märkus. Võib juhtuda, et sisemiste plõksühenduste vabastamiseks
tuleb otsale lüüa mitu korda.
Page 45

Eesti
46
4 Eemaldage otsakork hambaharja käepidemelt. Kui otsakork ei tule
korpuse küljest kergesti lahti, korrake sammu 3 kuni otsakork
vabaneb (joon. 18).
5 Hoidke käepidet tagurpidi ja vajutage võlli vastu kõva pinda. Kui
sisemised komponendid ei tule korpuse küljest kergesti lahti,
korrake sammu 3 kuni sisemised komponendid vabanevad (joon.
19).
6 Eemaldage aku kummikate.
7 Suruge kruvikeeraja aku ja sisemiste komponentide alumises osas
oleva musta raami vahele. Seejärel kangutage kruvikeerajat aku
küljest eemale, et murda musta raami (joon. 20) põhi.
8 Akut ja rohelist trükkplaati ühendava metallklemmi vabastamiseks
suruge kruvikeeraja aku alumise osa ja musta raami vahele. Nii
tuleb aku alumine osa raami (joon. 21) küljest lahti.
9 Võtke akust kinni ja tõmmake seda aku teise metallklemmi (joon.
22) vabastamiseks sisemistest komponentidest eemale.
Ettevaatust! Sõrmevigastuste vältimiseks pidage meeles, et
akuklemmide servad on teravad.
10 Katke aku kontaktid teibiga, et vältida jääklaengust põhjustatud
lühist. Nüüd saab laetava aku ringlusse võtta ja ülejäänud toote
nõuetekohaselt (joon. 23) kasutuselt kõrvaldada.
Garantii ja tootetugi
Kui vajate teavet või abi, külastage Philipsi veebilehte
www.philips.com/support või lugege läbi üleilmne garantiileht.
Garantiipiirangud
Järgnevatele osadele ei kehti rahvusvaheline garantiiaeg:
- Harjapead
- Tootja poolt mittelubatud asendusosade kasutamisest tingitud
kahjustused.
- Kahju, mille põhjuseks on seadme väär või halb kasutamine,
hooldamata jätmine, kohandamine või lubamatu parandamine.
- Normaalne kulumine ja kahjustumine, sealhulgas täkked, kriimud,
hõõrdumine, värvimuutused või luitumine.
Page 46

Hrvatski
Važno
Prije uporabe aparata pažljivo pročitajte ovaj korisnički priručnik i
spremite ga za buduće potrebe.
Opasnost
-
Punjač držite dalje od vode. Nemojte ga
stavljati ili spremati iznad ili blizu vode u
kadi, umivaoniku, sudoperu itd. Punjač
nemojte uranjati u vodu ili neku drugu
tekućinu. Nakon čišćenja provjerite je li
punjač potpuno suh prije nego što ga
ukopčate u napajanje.
Upozorenje
-
Kabel napajanja se ne može zamijeniti. Ako
je kabel napajanja oštećen, bacite punjač.
-
Punjač obavezno zamijenite originalnim
kako biste izbjegli moguće opasnosti.
-
Punjač nemojte upotrebljavati na
otvorenom ili blizu zagrijanih površina.
47
Hrvatski
Page 47

Hrvatski
48
-
Ako je aparat oštećen na bilo koji način
(glava četkice, drška ili punjač četkice za
zube), prestanite ga koristiti. Aparat ne
sadrži dijelove koje je potrebno servisirati.
Ako je uređaj oštećen, kontaktirajte
Korisnički centar u svojoj državi (pogledajte
poglavlje 'Jamstvo i podrška').
-
Ovaj aparat mogu koristiti djeca i osobe sa
smanjenim fizičkim ili mentalnim
sposobnostima te osobe koje nemaju
dovoljno iskustva i znanja, pod uvjetom da
su pod nadzorom ili da su primili upute u
vezi rukovanja aparatom na siguran način te
razumiju moguće opasnosti. Djeca bez
nadzora ne smiju obavljati čišćenje i
korisničko održavanje.
-
Djeca se ne smiju igrati aparatom.
Oprez
-
Glavu četkice, dršku i punjač nemojte prati u
perilici posuđa.
Page 48

Hrvatski
-
Ako ste imali operaciju zubi ili desni u
protekla 2 mjeseca, savjetujte se sa
stomatologom prije uporabe četkice za
zube.
-
Obratite se svom stomatologu ako obilno
krvarite nakon uporabe četkice za zube ili
ako se krvarenje nastavi i nakon jednog
tjedna uporabe. Također se posavjetujte sa
stomatologom ako osjetite nelagodu ili bol
tijekom upotrebe četkice za zube Philips
Sonicare.
-
Četkica za zube Philips Sonicare usklađena
je sa sigurnosnim standardima za
elektromagnetske uređaje. Ako imate srčani
stimulator ili drugi implantirani uređaj,
obratite se svom liječniku ili proizvođaču
implantiranog uređaja prije uporabe četkice.
-
Ako vas brinu zdravstvene posljedice,
obratite se svojem liječniku prije uporabe
četkice Philips Sonicare.
49
Page 49

Hrvatski
50
-
Ovaj uređaj namijenjen je isključivo čišćenju
zuba, desni i jezika. Nemojte ga
upotrebljavati za druge svrhe. Prestanite
upotrebljavati uređaj i obratite se liječniku
ako osjetite nelagodu ili bol.
-
Četkica za zube Philips Sonicare je uređaj za
osobnu higijenu i njime se ne smije koristiti
više pacijenata u stomatološkoj ordinaciji ili
ustanovi.
-
Glavu četkice prestanite upotrebljavati ako
joj se vlakna slome ili saviju. Glavu četkice
mijenjajte svaka 3 mjeseca ili ranije ako se
pojave znakovi istrošenosti. Koristite samo
glave četkice koje preporučuje proizvođač.
-
Ako vaša pasta za zube sadržava peroksid,
sodu bikarbonu ili drugi bikarbonat
(uobičajeno u pastama za izbjeljivanje),
temeljito operite glavu četkice sapunom i
vodom nakon svake uporabe. Time se
sprječava moguće napuknuće plastike.
Elektromagnetska polja (EMF)
Ovaj aparat tvrtke Philips sukladan je svim primjenjivim standardima i
propisima povezanima s izloženosti elektromagnetskim poljima.
Page 50

Hrvatski
51
Direktiva o radio opremi
- Radio oprema u ovom proizvodu radi na frekvenciji od 13,56 MHz
- Maksimalna RF snaga koju prenosi radio oprema je 30,16 dBm
Uvod
Čestitamo na kupnji i dobro došli u Philips! Kako biste potpuno
iskoristili podršku koju nudi tvrtka Philips, registrirajte svoj proizvod na
www.philips.com/welcome.
Četkica Philips Sonicare (sl. 1)
1 Higijenska kapica za putovanja
2 Pametno prepoznavanje glave(a)* četkice
3 Drška
4 Gumb za uključivanje/isključivanje
5 Gumb za način rada/jačinu
6 Indikator načina rada
7 Indikator podsjetnika za zamjenu glave četkice
8 Indikator baterije
9 Baza za punjenje
10 Putna torbica (samo određeni modeli)*
*Napomena: Sadržaj pakiranja može se razlikovati ovisno o
kupljenom modelu.
Glave četkice
Četkica Philips Sonicare isporučuje se s jednom ili više glava četkice
koje su dizajnirane tako da omoguće postizanje vrhunskih rezultata
potrebnih za vašu oralnu njegu.
Philips Sonicare BrushSync Technology
Pametne glave vaše četkice koriste mikročip za sinkronizaciju s
ručkom, omogućujući podsjetnik za zamjenu glave četkice. Više
informacija o podsjetniku za zamjenu glave četkice saznajte u
odjeljku „Značajke”.
Ovaj simbol označava da glava četkice radi s pomoću BrushSync
tehnologije. (sl. 2)
Page 51

Hrvatski
52
Načini četkanja
Za prebacivanje između načina rada pritisnite gumb za način rada koji
se nalazi ispod gumba on/of (uključi/isključi).
Vaša električna četkica ima 2 ili 3 načina rada, ovisno o modelu koji
imate. Dostupni su sljedeći načini rada:
Način rada Clean (Čišćenje)
Način rada Clean (Čišćenje) traje 2 minute. On vam osigurava
temeljito i potpuno čišćenje i preporuka je da se koristi s glavom
četkice C2 Optimal Plaque Control.
Način rada White (izbjeljivanje)
White (Izbjeljivanje) je način rada koji traje 2 minute i 30 sekundi, za
koji se preporučuje glava četkice W2 Optimal White.
Način rada Gum Care (njega desni)
Gum Care (njega desni) način je rada koji traje 3 minute, za koji se
preporučuje glava četkice G2 Optimal Gum Care.
Uporaba četkice Philips Sonicare
Upute za četkanje
1 Glavu četkice pritisnite na ručku tako da vlakna budu okrenuta u
smjeru prednje strane drške. (sl. 3)
2 Glavu četkice čvrsto pritišćite prema dolje na metalnu osovinu sve
dok se ne zaustavi.
Napomena: Uobičajeno je vidjeti blagi razmak između glave
četkice i drške.
3 Smočite vlakna. (sl. 4)
4 Nanesite malu količinu paste za zube na vlakna. (sl. 5)
5 Prislonite vlakna četkice na zube pod određenim kutom (45
stupnjeva), čvrsto pritišćući kako bi četkice dosegle liniju desni ili
malo ispod linije desni. (sl. 6) Promjena vibracije (i mala promjena
zvuka) upozorava vas kada previše pritišćete tijekom četkanja.
Napomena: Središnji dio četkice cijelo vrijeme držite u kontaktu sa
zubom.
Page 52

Hrvatski
6 Pritisnite gumb za uključivanje/isključivanje kako biste uključili
četkicu Philips Sonicare. (sl. 7)
7 Vlakna držite lagano pritisnutima na zube i rub desni. Četkajte
zube kratkim pokretima naprijed i natrag tako da vlakna dosegnu
između zubi. (sl. 8)
Napomena: Vlakna bi se trebala lagano raširiti. Nemojte grubo
četkati.
8 Da biste očistili unutarnje površine prednjih zubi, nagnite ručku
četkice poluuspravno i izvršite nekoliko vertikalnih preklapajućih
pokreta na svakom zubu. (sl. 9)
9 Kako biste ravnomjerno iščetkali cijela usta, podijelite usta u 4
dijela s pomoću značajke (sl. 10) Quadpacer. Značajka Quadpacer
daje zvučni signal nakon 30 sekundi.
10 Pune dvije minute četkanja slijedi aktivaciju značajke Quadpacer.
(sl. 11) Četkica za zube automatski će se isključiti nakon dvije
minute.
U načinu rada White (Izbjeljivanje), nakon 2 minute ručka će
nastaviti s četkanjem narednih 30 sekundi tako da možete
posvijetliti i polirati prednje zube.
U načinu rada Gum care (Njega desni), nakon 2 minute ručka će
nastaviti s četkanjem još jednu minutu tako da možete nježno
stimulirati i masirati svoje desni.
- Nakon što dovršite ciklus četkanja, možete provesti dodatno
vrijeme na četkanje površina za žvakanje vaših zubi i područja gdje
se pojavljuju (sl. 12) mrlje.
53
Vaša Philips Sonicare četkica za zube se može sigurno koristiti na
sljedećem:
- ortodontskim aparatićima (glave četkice brže će se istrošiti ako se
upotrebljavaju na ortodontskim aparatićima)
- materijalima koji se koriste u stomatologiji (plombama, krunicama,
navlakama)
Napomena: Ako se četkica za zube Philips Sonicare rabi u kliničkim
ispitivanjima, mora se koristiti u načinu rada Clean (Čišćenje) (za
tvrdnje koje se odnose na naslage i zdravlje desni) ili White
Page 53

Hrvatski
54
(Izbjeljivanje) (za tvrdnje o izbjeljivanju) pri visokom intenzitetu uz
isključenu značajku EasyStart (lagano pokretanje).
Značajke
- EasyStart
- Podsjetnik za zamjenu glave četkice
- Senzor pritiska
- Quadpacer
EasyStart
Ovaj model Philips Sonicare isporučuje se s aktiviranom značajkom
EasyStart (lagano pokretanje). Funkcija EasyStart (lagano pokretanje)
malo smanjuje snagu prvih 14 četkanja kako bi vam pomogla da se
naviknete na četkanje uređajem Philips Sonicare. Značajka EasyStart
radi u svim načinima rada.
Kako biste deaktivirali značajku EasyStart (lagano pokretanje)
pogledajte odjeljak „Aktivacija ili deaktivacija značajki”.
Podsjetnik za zamjenu glave četkice
Vaša četkica Philips Sonicare opremljena je BrushSync tehnologijom
koja prati trošenje glave (sl. 13) četkice.
1 Kada prvi puta pričvršćujete novu pametnu glavu četkice, svjetlo
podsjetnika za promjenu glave četkice tri puta zatreperi u zelenoj
boji. Ovo je potvrda da imate glavu četkice tvrtke Philips koja radi s
pomoću BrushSync tehnologije.
2 Tijekom vremena, ovisno o pritisku koji primjenjujete i količini
vremena uporabe, ručka će pratiti trošenje glave četkice kako bi
odredila pravo vrijeme za promjenu glave četkice. Ova značajka
pruža vam jamstvo najboljih rezultata čišćenja i njege vaših zuba.
3 Ako indikator podsjetnika za zamjenu glave četkice počne svijetliti
žutom bojom, trebali biste zamijeniti glavu četkice.
Kako biste deaktivirali podsjetnik za zamjenu glave četkice pogledajte
odjeljak „Aktivacija ili deaktivacija značajki”.
Senzor pritiska
Četkica Philips Sonicare opremljena je naprednim senzorom koji mjeri
pritisak primijenjen tijekom četkanja. Ako primijenite prevelik pritisak,
Page 54

Hrvatski
četkica za zube odmah će vam dati povratne informacije o tome da
trebate smanjiti pritisak. Ova povratna informacija dolazi putem
promjene vibracija, a s time i osjećaja četkanja.
Kako biste deaktivirali senzor pritiska pogledajte odjeljak „Aktivacija ili
deaktivacija značajki”.
Quadpacer
Quadpacer je tajmer za mjerenje intervala koji vas kratkim zvučnim
signalom i pauzom podsjeća na četkanje različitih segmenata usta.
Ovisno o odabranom načinu (pogledajte odjeljak „Načini četkanja”),
Quadpacer se tijekom ciklusa četkanja oglašava zvučnim signalom u
različitim intervalima.
Aktivacija ili deaktivacija značajki
Možete aktivirati ili deaktivirati sljedeće značajke svoje četkice za
zube:
- EasyStart
- Podsjetnik za zamjenu glave četkice
- Senzor pritiska
Kako biste aktivirali ili deaktivirali ove značajke, slijedite upute u
nastavku:
EasyStart
1 Stavite dršku na ukopčani punjač.
2 Pritisnite i zadržite gumb on/of (uključi/isključi) dok je ručka
ostavljena na punjaču.
3 Gumb on/off (uključi/isključi) držite pritisnutim dok ne začujete
jedan kratki zvučni signal (nakon 2 sekunde).
4 Otpustite gumb on/of (uključi/isključi).
-
Trostruki, nizak-srednji-visok zvuk označava da je značajka
EasyStart (lagano pokretanje) aktivirana. Aktivaciju potvrđuje
istovremeno paljenje svjetla zamjenske glave četkice i svjetla
stanja baterije koje zatreperi 3 puta u zelenoj boji.
55
Page 55

Hrvatski
56
-
Trostruki, visok-srednji-nizak zvuk označava da je značajka
EasyStart (lagano pokretanje) deaktivirana. Deaktivaciju
potvrđuje istovremeno paljenje svjetla zamjenske glave četkice
i svjetla stanja baterije koje zatreperi 3 puta u žutoj boji.
Napomena: Kako biste postigli medicinsku razinu učinkovitosti,
značajku EasyStart morate deaktivirati.
Podsjetnik za zamjenu glave četkice
1 Stavite dršku na ukopčani punjač.
2 Pritisnite i zadržite gumb on/of (uključi/isključi) dok je ručka
ostavljena na punjaču.
3 Gumb on/off (uključi/isključi) držite pritisnutim dok ne začujete niz
od dva kratka zvučna signala (nakon 4 do 5 sekundi).
4 Otpustite gumb on/of (uključi/isključi).
-
Trostruki, nizak-srednji-visok zvuk označava da je značajka
podsjetnika za zamjenu glave četkice aktivirana. Aktivaciju
potvrđuje istovremeno paljenje svjetla zamjenske glave četkice
i svjetla stanja baterije koje zatreperi 3 puta u zelenoj boji.
-
Trostruki, visok-srednji-nizak zvuk označava da je značajka
podsjetnika za zamjenu glave četkice deaktivirana. Deaktivaciju
potvrđuje istovremeno paljenje svjetla zamjenske glave četkice
i svjetla stanja baterije koje zatreperi 3 puta u žutoj boji.
Senzor pritiska
1 Stavite dršku na ukopčani punjač.
2 Pritisnite i zadržite gumb on/of (uključi/isključi) dok je ručka
ostavljena na punjaču.
3 Gumb on/off (uključi/isključi) držite pritisnutim dok ne začujete niz
od tri kratka zvučna signala (nakon 6 do 7 sekundi).
4 Otpustite gumb on/of (uključi/isključi).
-
Trostruki, nizak-srednji-visok zvuk označava da je značajka
senzora pritiska aktivirana. Aktivaciju potvrđuje istovremeno
paljenje svjetla zamjenske glave četkice i svjetla stanja baterije
koje zatreperi 3 puta u zelenoj boji.
Page 56

Hrvatski
-
Trostruki, visok-srednji-nizak zvuk označava da je značajka
senzora pritiska deaktivirana. Deaktivaciju potvrđuje
istovremeno paljenje svjetla zamjenske glave četkice i svjetla
stanja baterije koje zatreperi 3 puta u žutoj boji.
Ako nakon tri kratka zvučna signala nastavite držati gumb on/off
(uključi/isključi), ponavlja se redoslijed aktivacije/deaktivacije.
Status baterije i punjenje
1 Utikač punjača ukopčajte u zidnu utičnicu.
2 Stavite dršku na punjač.
-
Punjač će emitirati 2 kratka zvučna signala kao potvrdu da je
ručka pravilno postavljena.
-
Treperenje indikatora razine napunjenosti baterije naznačuje
da se četkica puni.
-
Kad je ručka na punjaču potpuno napunjena, svijetlo stanja
baterije svijetli u zelenoj boji neprekidno 30 sekundi prije nego
što se isključi.
Napomena: Vaša četkica za zube isporučuje se prethodno napunjena
za prvo korištenje. Nakon prve uporabe punite je najmanje 24 sata.
Status baterije (kada drška nije na punjaču)
Pri uklanjanju četkice Philips Sonicare iz punjača, svijetlo baterije na
dnu četkice za zube označit će status stanja baterije.
- Neprekidno zeleno LED svjetlo: baterija puna
- Trepereće zeleno LED svjetlo: baterija srednje puna
- Trepereće žuto LED svjetlo i tri zvučna signala: baterija prazna
- Trepereće žuto LED svjetlo i dva niza od pet zvučnih signala: nije
preostalo ni za jedno četkanje (napunite četkicu za zube)
57
Čišćenje
Napomena: Glavu četkice, dršku ili putnu torbicu ne čistite u perilici
posuđa.
Page 57

Hrvatski
58
Drška četkice za zube
1 Odvojite glavu četkice i isperite metalnu osovinu toplom vodom.
Pobrinite se da uklonite svu preostalu zubnu pastu (sl. 14).
Napomena: Nemojte koristiti oštre predmete za guranje gumene
brtve na metalnu osovinu jer to može prouzročiti oštećenja.
2 Cijelu površinu drške obrišite vlažnom tkaninom.
Napomena: Dršku ili glavu četkice nemojte čistiti izopropilnim
alkoholom, octom ili izbjeljivačem jer bi to moglo prouzročiti
gubitak boje.
Glava četkice
1 Glavu četkice i vlakna isperite nakon svake uporabe (sl. 15).
2 Odvojite glavu četkice od drške i mjesto spajanja glave četkice
operite toplom vodom barem jednom tjedno.
Punjač
1 Iskopčajte punjač prije čišćenja.
2 Obrišite površinu punjača mokrom krpom.
Pohrana
Ako dulje vrijeme ne namjeravate rabiti četkicu Philips Sonicare,
iskopčajte punjač iz zidne utičnice, očistite ga i pohranite na hladno i
suho mjesto, daleko od izravne sunčeve svjetlosti.
Lociranje broja modela
Broj modela nalazi se na dnu drške četkice za zube Philips Sonicare
(HX682x/HX683x).
Recikliranje
- Ovaj simbol znači da se ovaj proizvod ne smije odlagati zajedno s
običnim kućanskim otpadom (2012/19/EU) (sl. 24).
- Ovaj simbol znači da proizvod sadržava ugrađenu punjivu bateriju
koja se ne odlaže s uobičajenim kućanskim otpadom (sl. 25)
(2006/66/EC). Svoj proizvod odnesete na službeno mjesto za
prikupljanje otpada ili u servisni centar tvrtke Philips kako bi
stručnjak uklonio punjivu bateriju.
Page 58

Hrvatski
- Pridržavajte se pravila vaše zemlje o odvojenom prikupljanju
električnih i elektroničkih proizvoda i punjivih baterija. Pravilno
odlaganje otpada pomaže u sprječavanju negativnih posljedica za
okoliš i ljudsko zdravlje.
Uklanjanje punjive baterije
Upozorenje: Uklonite punjivu bateriju tek kada uklonite uređaj.
Pobrinite se da baterija bude potpuno prazna dok je uklanjate.
Za uklanjanje punjive baterije, treba Vam ručnik ili krpa, čekić i odvijač
s plosnatom glavom (standardni). Pridržavajte se sigurnosnih
preduvjeta kad slijedite dolje navedeni postupak. Obavezno zaštitite
oči, ruke, prste i površinu na kojoj radite.
1 Kako biste potpuno ispraznili punjivu bateriju, izvadite dršku iz
punjača, uključite četkicu Philips Sonicare i ostavite je da radi dok
se ne zaustavi. Ponavljajte taj postupak sve dok se četkica Philips
Sonicare više ne može uključiti.
2 Uklonite i bacite glavu četkice. Pokrijte cijelu ručku ručnikom ili
krpom (sl. 16).
3 Držite gornji dio ručke jednom rukom i udarite kućište ručke 1,25
cm iznad donjeg kraja. Udarite čvrsto čekićem na sve 4 strane da
izbacite krajnji čep (sl. 17).
Napomena: Možda ćete morati nekoliko puta udariti krajnji dio
kako biste prekinuli unutrašnje spojeve.
4 Uklonite krajnji čep s ručke četkice za zube. Ako se krajnji čep ne
otpušta lako s kućišta, ponovite korak 3 dok krajnji čep ne bude
pušten (sl. 18).
5 Držeći ručku naopako, pritisnite osovinu na tvrdu površinu. Ako se
unutarnji dijelovi ne otpuštaju lako s kućišta, ponavljajte korak 3
dok se ne otpuste (sl. 19) unutarnji dijelovi.
6 Izvadite gumeni poklopac odjeljka za bateriju.
7 Uglavite odvijač između baterije i crnog okvira na dnu unutarnjih
dijelova. Onda nategnite odvijač dalje od baterije da slomite donji
dio crnog okvira (sl. 20).
59
Page 59

Hrvatski
60
8 Umetnite odvijač između donjeg dijela baterije i crnog okvira da
slomite metalnu pločicu koja spaja bateriju sa zelenom tiskanom
pločicom sklopa. To će otpustiti donji kraj baterije sa okvira (sl. 21).
9 Uhvatite bateriju i povucite je od unutarnjih dijelova da slomite
drugu metalnu pločicu (sl. 22) baterije.
Oprez: Pazite na oštre rubove jezičaca baterije kako biste izbjegli
ozljede prstiju.
10 Pokrijte kontakte baterije trakom da spriječite kratko spajanje
struje od preostalog punjenja baterije. Punjiva baterija se sada
može reciklirati a ostatak proizvoda se može odbaciti na
odgovarajući način (sl. 23).
Jamstvo i podrška
Ako su Vam potrebne informacije ili podrška, molimo posjetite
www.philips.com/support ili pročitajte brošuru o međunarodnom
jamstvu.
Međunarodno jamstvo ne pokriva sljedeće:
- Glave četkice.
- Oštećenje uzrokovano uporabom nedopuštenih zamjenskih
dijelova.
- Oštećenje uzrokovano pogrešnom/lošom uporabom,
zanemarivanjem, izmjenama ili neovlaštenim popravkom.
- Uobičajeno habanje i trošenje, uključujući okrhnuća, ogrebotine,
abrazije, promjenu boje ili blijeđenje.
Page 60

Latviešu
Svarīgi!
Pirms ierīces lietošanas uzmanīgi izlasiet šo lietošanas pamācību un
saglabājiet to, lai vajadzības gadījumā varētu ieskatīties tajā arī
turpmāk.
Bīstami
-
Sargiet lādētāju no ūdens! Nelietojiet un
neglabājiet to pie vai virs vannas,
mazgājamās bļodas, izlietnes un citiem ar
ūdeni pildītiem traukiem. Neiegremdējiet
lādētāju ūdenī vai citā šķidrumā. Pēc
tīrīšanas pārliecinieties, vai lādētājs ir pilnībā
izžuvis, pirms to pievienot elektrotīklam.
Brīdinājums
-
Strāvas vadu nav iespējams nomainīt. Ja
strāvas vads ir bojāts, lādētāju izmetiet/vairs
nelietojiet.
-
Vienmēr nomainiet lādētāju pret oriģinālā
tipa ierīci, lai izvairītos no bīstamām
situācijām.
-
Neizmantojiet lādētāju ārpus telpām vai
karstu virsmu tuvumā.
61
Latviešu
Page 61

Latviešu
62
-
Ja kāda ierīces daļa (zobu sukas uzgalis,
rokturis vai uzlādes ierīce) ir bojāta,
pārtrauciet to lietot. Šajā ierīcē nav daļu,
kuru apkopi var veikt lietotājs. Ja ierīce ir
bojāta, sazinieties ar klientu apkalpošanas
centru savā valstī (skatiet nodaļu “Garantija
un apkope”).
-
Šo ierīci var izmantot bērni un personas ar
ierobežotām fiziskajām, sensorajām vai
garīgajām spējām vai bez pieredzes un
zināšanām, ja tiek nodrošināta uzraudzība
vai norādījumi par drošu ierīces lietošanu un
panākta izpratne par iespējamo bīstamību.
Bērni bez uzraudzības nedrīkst tīrīt ierīci vai
veikt tās tehnisko apkopi.
-
Bērni nedrīkst rotaļāties ar ierīci.
Ievērībai
-
Nemazgājiet sukas uzgali, rokturi vai
lādētāju trauku mazgāšanas mašīnā.
-
Ja pēdējo divu mēnešu laikā jums ir bijušas
mutes vai smaganu operācijas, pirms ierīces
lietošanas konsultējieties ar zobārstu.
Page 62

Latviešu
-
Konsultējieties ar zobārstu, ja pēc zobu
sukas lietošanas sākas intensīva asiņošana
vai ja asiņošana turpinās pēc 1nedēļu ilgas
lietošanas. Tāpat konsultējieties ar zobārstu,
ja izjūtat diskomfortu vai sāpes, izmantojot
Sonicare.
-
Philips Sonicare zobu suka atbilst
elektromagnētisko ierīču drošības
standartiem. Ja jums ir
elektrokardiostimulators vai cita implantēta
ierīce, pirms lietošanas konsultējieties ar
ārstu vai implantētās ierīces ražotāju.
-
Ja jums radušās šaubas, pirms Philips
Sonicare lietošanas konsultējieties ar ārstu.
-
Šī ierīce ir paredzēta tikai zobu, smaganu un
mēles tīrīšanai. Neizmantojiet to citiem
nolūkiem. Pārtrauciet lietot ierīci un
sazinieties ar ārstu, ja rodas diskomforts vai
sāpes.
-
Philips Sonicare zobu suka ir personīgās
higiēnas ierīce, un tā nav paredzēta
lietošanai vairākiem pacientiem
zobārstniecības praksē vai iestādē.
63
Page 63

Latviešu
64
-
Pārtrauciet lietot sukas uzgali ar saspiestiem
vai saliektiem sariem. Nomainiet sukas
uzgali ik pēc 3mēnešiem vai agrāk, ja tai
parādās nolietojuma pazīmes. Lietojiet tikai
ražotāja ieteiktos sukas uzgaļus.
-
Ja jūsu zobu pastas sastāvā ir ūdeņraža
pārskābe, cepamā soda vai bikarbonāts
(bieži sastopams balinošajās zobu pastās),
rūpīgi iztīriet sukas uzgali ar ziepēm un
ūdeni pēc katras lietošanas reizes. Tā
novērsīsiet iespējamu plastmasas
saplaisāšanu.
Elektromagnētiskie lauki (EML)
Šī Philips ierīce atbilst visiem piemērojamiem standartiem un
noteikumiem, kas attiecas uz elektromagnētisko lauku iedarbību.
Radioiekārtu direktīva
- Šajā ierīcē izmantotā radioiekārta darbojas 13,56 MHz diapazonā.
- Radioiekārtas pārraidītās radiofrekvences maksimālā jauda ir
30,16dBm.
Ievads
Apsveicam ar pirkumu un laipni lūdzam Philips! Lai pilnvērtīgi
izmantotu Philips piedāvātā atbalsta iespējas, reģistrējiet produktu
vietnē www.philips.com/welcome.
Philips Sonicare lietošana (1. attēls)
1 Higiēnisks ceļojuma vāciņš
2 Viedais(-ie) sukas uzgalis(-i)*
3 Rokturis
Page 64

Latviešu
4 Ieslēgšanas/izslēgšanas poga
5 Režīms/intensitātes taustiņš
6 Režīma indikators
7 Sukas uzgaļa maiņas atgādinājuma indikators.
8 Baterijas rādījumi
9 Uzlādes pamatne
10 Ceļojumu futrālis (tikai noteiktiem modeļiem)*
*Piezīme: Iepakojuma saturs var atšķirties atkarībā no iegādātā
modeļa.
Sukas uzgaļi
Philips Sonicare komplektā ir viens vai vairāki sukas uzgaļi, kas
konstruēti, lai panāktu teicamu mutes dobuma tīrīšanu atbilstoši jūsu
vajadzībām.
Philips Sonicare BrushSync tehnoloģija
Jūsu viedais sukas uzgalis izmanto mikroshēmu, lai sinhronizētos ar
rokturi, tā ieslēdzot sukas uzgaļa maiņas atgādinājuma indikatoru.
Sīkākai informācijai par sukas uzgaļa maiņas atgādinājuma indikatoru,
skatiet „Funkcijas”.
Šis simbols norāda, ka sukas uzgalis ir aprīkots ar BrushSync
tehnoloģiju. (att. 2)
Zobu tīrīšanas režīmi
Lai pārslēgtos starp režīmiem, nospiediet režīma pogu, kas atrodas
zem ieslēgšanas/izslēgšanas pogas.
Elektriskajai zobu sukai ir 2vai 3 dažādi zobu tīrīšanas režīmi atkarībā
no modeļa. Ir pieejami tālāk norādītie režīmi.
Tīrīšanas režīms
Tīrīšanas režīms ilgst 2minūtes. Tas nodrošina rūpīgu un pilnīgu
tīrīšanu, un to ieteicams lietot ar C2 Optimal Plaque Control sukas
uzgali.
Balināšanas režīms
White (balināšana) ir 2minūtes un 30sekundes ilgs režīms, ko
ieteicams lietot ar W2 Optimal White sukas uzgali.
65
Page 65

Latviešu
66
Smaganu aprūpes režīms
Gum Care (smaganu aprūpe) ir 3minūtes ilgs režīms, ko ieteicams
lietot ar G2 Optimal Gum Care sukas uzgali.
Philips Sonicare lietošana
Zobu tīrīšanas norādījumi
1 Spiediet sukas uzgali rokturī tā, lai sari būtu vērsti tajā pašā
virzienā, kādā vērsta roktura (att. 3) priekšpuse.
2 Stingri uzspiediet sukas uzgali uz metāla vārpstas, līdz tas atduras.
Piezīme. Parasti ir redzama neliela atstarpe starp sukas uzgali un
rokturi.
3 Samitriniet sarus. (att. 4)
4 Uzklājiet nelielu zobu pastas daudzumu uz sariem. (att. 5)
5 Novietojiet zobu sukas sarus pret zobiem nelielā leņķī (45grādi),
stingri piespiežot, lai sari sniegtos līdz smaganu līnijai vai mazliet
zem tās. (att. 6) Vibrācijas izmaiņas (un nelielas skaņas izmaiņas)
brīdina, ja tīrāt ar pārāk lielu spiedienu.
Piezīme. Visu laiku saglabājiet birstes centru saskarē ar zobiem.
6 Nospiediet ieslēgšanas/izslēgšanas pogu, lai ieslēgtu Philips zobu
suku Sonicare (att. 7).
7 Saudzīgi piespiediet sarus pie zobiem un smaganu līnijas. Tīriet
zobus, sukas uzgali lēni virzot turp un atpakaļ, lai garākie sari
aizsniegtos starp zobiem. (att. 8)
Piezīme. Sariem jābūt nedaudz ieliektiem. Neberziet.
8 Lai iztīrītu priekšzobu iekšējās virsmas, paceliet birstes rokturi
daļēji uz augšu un veiciet vairākas vertikālas tīrīšanas kustības uz
katra zoba. (att. 9)
9 Lai nodrošinātu vienmērīgu zobu tīrīšanu, sadaliet muti 4 daļas,
izmantojot Quadpacer funkciju. (att. 10) Quadpacer funkcija
atskaņo pīkstienu pēc 30 sekundēm.
10 Tīriet zobus 2 pilnas minūtes, sekojot Quadpacer (att. 11) norādēm.
Zobu suka automātiski izslēgsies pēc 2 minūtēm.
Page 66

Latviešu
Balināšanas režīmā pēc 2 minūtēm rokturis turpinās tīrīt zobus
30 sekundes, lai varat padarītu gaišākus un nopulēt
priekšzobus.
Smaganu aprūpes režīmā pēc 2 minūtēm rokturis turpinās tīrīt
zobus vēl vienu minūti, lai varat saudzīgi stimulēt un masēt
smaganas.
- Pēc tīrīšanas cikla pabeigšanas varat veltīt papildu laiku, lai notīrītu
zobu košļāšanas virsmas un zonas, kur rodas (att. 12) izmaiņas
zobu krāsā.
Philips zobu birsti Sonicare var droši lietot ar:
- skavām (sukas uzgaļi nolietojas ātrāk, ja tiek izmantoti uz skavām);
- zobu restaurācijas materiāliem (plombām, kronīšiem, plāksnītēm).
Piezīme. Izmantojot Philips Sonicare zobu suku klīniskos pētījumos, tā
jālieto tīrīšanas režīmā (prasībām par aplikumu vai smaganu veselību)
vai balināšanas režīmā (prasībām par balināšanu) augstā intensitātē
un ar izslēgtu EasyStart funkciju.
Funkcijas
- EasyStart
- Sukas uzgaļa maiņas atgādinājuma indikators
- Spiediena sensors
- Quadpacer
EasyStart
Šim Philips Sonicare modelim ir aktivizēta EasyStart funkcija.
EasyStart funkcija pakāpeniski palielina jaudu pirmo 14tīrīšanas reižu
laikā, lai jūs pierastu pie tīrīšanas ar Philips Sonicare. EasyStart
funkcija darbojas visos režīmos.
Lai izslēgtu EasyStart, skatiet „Funkciju aktivizēšana vai
deaktivizēšana”.
Sukas uzgaļa maiņas atgādinājuma indikators
Philips Sonicare zobu suka ir aprīkota ar BrushSync tehnoloģiju, kas
reģistrē sukas uzgaļa (att. 13) nolietojumu.
67
Page 67

Latviešu
68
1 Uzliekot jaunu viedo sukas uzgali pirmo reizi, sukas uzgaļa maiņas
atgādinājuma indikators mirgo trīs reizes zaļā krāsā. Tas apstiprina,
ka jums ir Philips sukas uzgalis ar BrushSync tehnoloģiju.
2 Laika gaitā, ņemot vērā tīrīšanas spiedienu un tīrīšanas ilgumu,
rokturis reģistrēs sukas uzgaļa nolietojumu, lai noteiktu optimālo
brīdi sukas uzgaļa nomaiņai. Šī funkcija garantē vislabāko tīrīšanu
un kopšanu jūsu zobiem.
3 Kad sukas uzgaļa maiņas atgādinājuma indikators iedegas
dzeltenā krāsā, sukas uzgalis ir jānomaina.
Lai deaktivizētu sukas uzgaļa maiņas atgādinājuma indikatoru, skatiet
„Funkciju aktivizēšana vai deaktivizēšana”.
Spiediena sensors
Philips Sonicare ir progresīvs sensors, kas mēra tīrīšanas spiedienu. Ja
spiediens ir pārāk liels, zobu suka nekavējoties reaģēs, lai norādītu, ka
jums jāsamazina spiediens. Ierīce reaģē, mainot vibrācijas un attiecīgi
zobu tīrīšanas radīto sajūtu.
Lai izslēgtu spiediena sensoru, skatiet „Funkciju aktivizēšana vai
deaktivizēšana”.
Quadpacer
Quadpacer ir intervāla taimeris, kas ar īsu pīkstienu un pauzi atgādina,
ka jums jāiztīra dažādās mutes dobuma daļas. Atkarībā no izvēlētā
tīrīšanas režīma (sk. „Zobu tīrīšanas režīmi”) Quadpacer tīrīšanas ciklā
pīkst ar atšķirīgiem laika intervāliem.
Funkciju aktivizēšana vai deaktivizēšana
Jūs varat aktivizēt vai deaktivizēt tālāk norādītās zobu sukas funkcijas.
- EasyStart
- Sukas uzgaļa maiņas atgādinājuma indikators
- Spiediena sensors
Lai aktivizētu vai deaktivizētu šīs funkcijas izpildiet tālākās norādes.
EasyStart
1 Novietojiet rokturi uz elektrotīklam pievienota lādētāja.
Page 68

Latviešu
2 Nospiediet un turiet nospiestu ieslēgšanas/izslēgšanas pogu,
kamēr rokturis atrodas lādētājā.
3 Turiet nospiestu ieslēgšanas/izslēgšanas pogu, līdz dzirdat vienu
īsu pīkstienu (pēc 2 sekundēm).
4 Atlaidiet ieslēgšanas/izslēgšanas pogu.
-
Trīskāršs zems–vidējs–augsts tonis norāda, ka EasyStart
funkcija ir aktivizēta. Sukas uzgaļa maiņas atgādinājuma
indikators un baterijas indikators arī vienlaicīgi iemirgosies 3
reizes zaļā krāsā, lai apstiprinātu aktivizēšanu.
-
Trīskāršs augsts–vidējs–zems tonis norāda, ka EasyStart
funkcija ir deaktivizēta. Sukas uzgaļa maiņas atgādinājuma
indikators un baterijas indikators arī vienlaicīgi iemirgosies 3
reizes dzeltenā krāsā, lai apstiprinātu deaktivizēšanu.
Piezīme. Lai panāktu klīnisku iedarbību, EasyStart funkcijai jābūt
deaktivizētai.
Sukas uzgaļa maiņas atgādinājuma indikators
1 Novietojiet rokturi uz elektrotīklam pievienota lādētāja.
2 Nospiediet un turiet nospiestu ieslēgšanas/izslēgšanas pogu,
kamēr rokturis atrodas lādētājā.
3 Turiet nospiestu ieslēgšanas/izslēgšanas pogu, līdz dzirdat virknē
divus īsus pīkstienus (pēc 4–5 sekundēm).
4 Atlaidiet ieslēgšanas/izslēgšanas pogu.
-
Trīskāršs zems–vidējs–augsts tonis norāda, ka sukas uzgaļa
maiņas atgādinājuma indikators ir aktivizēts. Sukas uzgaļa
maiņas atgādinājuma indikators un baterijas indikators arī
vienlaicīgi iemirgosies 3 reizes zaļā krāsā, lai apstiprinātu
aktivizēšanu.
-
Trīskāršs augsts–vidējs–zems tonis norāda, ka sukas uzgaļa
maiņas atgādinājuma indikators ir deaktivizēts. Sukas uzgaļa
maiņas atgādinājuma indikators un baterijas indikators arī
vienlaicīgi iemirgosies 3 reizes dzeltenā krāsā, lai apstiprinātu
deaktivizēšanu.
Spiediena sensors
1 Novietojiet rokturi uz elektrotīklam pievienota lādētāja.
69
Page 69

Latviešu
70
2 Nospiediet un turiet nospiestu ieslēgšanas/izslēgšanas pogu,
kamēr rokturis atrodas lādētājā.
3 Turiet nospiestu ieslēgšanas/izslēgšanas pogu, līdz dzirdat virknē
trīs īsus pīkstienus (pēc 6–7 sekundēm).
4 Atlaidiet ieslēgšanas/izslēgšanas pogu.
-
Trīskāršs zems–vidējs–augsts tonis norāda, ka spiediena
sensora funkcija ir aktivizēta. Sukas uzgaļa maiņas
atgādinājuma indikators un baterijas indikators arī vienlaicīgi
iemirgosies 3 reizes zaļā krāsā, lai apstiprinātu aktivizēšanu.
-
Trīskāršs augsts–vidējs–zems tonis norāda, ka spiediena
sensora funkcija ir deaktivizēta. Sukas uzgaļa maiņas
atgādinājuma indikators un baterijas indikators arī vienlaicīgi
iemirgosies 3 reizes dzeltenā krāsā, lai apstiprinātu
deaktivizēšanu.
Ja turpināt turēt ieslēgšanas/izslēgšanas pogu nospiestu pēc trim
īsiem pīkstieniem, aktivizēšanas/deaktivizēšanas process atkārtojas.
Baterijas statuss un uzlādēšana
1 Ievietojiet lādētāja kontaktdakšu elektriskajā ligzdā.
2 Uzlieciet zobu sukas rokturi uz lādētāja.
-
Lādētājs atskaņos 2 īsus pīkstienus, lai apstiprinātu, ka rokturis
ir ievietots pareizi.
-
Baterijas līmeņa indikatora mirgojošā lampiņa norāda, ka zobu
birste tiek uzlādēta.
-
Kad rokturis lādētājā ir pilnībā uzlādēts, baterijas indikators deg
zaļā krāsā 30sekundes un tad izslēdzas.
Piezīme. Pirmajai lietošanas reizei zobu suka tiek piegādāta uzlādēta.
Pēc pirmās lietošanas reizes uzlādējiet vismaz 24 stundas.
Akumulatora statuss (kad rokturis nav ievietots lādētājā)
Kad noņemat Philips Sonicare zobu suku no lādētāja, baterijas
indikators zobu sukas apakšā norādīs baterijas uzlādes statusu.
- Izgaismojas zaļā krāsā: baterija pilna.
Page 70

Latviešu
- Mirgo zaļā krāsā: baterija daļēji pilna.
- Mirgo dzeltenā krāsā, un atskan trīs pīkstieni: zems baterijas
līmenis.
- Mirgo dzeltenā krāsā, un divas reizes atskan piecu pīkstienu sērija:
zobus vairs nevarēsit tīrīt (zobu suka ir jāuzlādē)
Tīrīšana
Piezīme. Nemazgājiet sukas uzgali, rokturi vai ceļojuma futrāli trauku
mazgājamajā mašīnā.
Zobu sukas rokturis
1 Noņemiet sukas uzgali un noskalojiet metāla vārpstas zonu ar siltu
ūdeni. Pārliecinieties, ka zobu pastas (att. 14) pārpalikumi ir notīrīti.
Piezīme. Nestumiet gumijas blīvi uz metāla vārpstas ar asiem
priekšmetiem, jo varat to sabojāt.
2 Noslaukiet visu roktura virsmu ar mitru drānu.
Piezīme. Roktura tīrīšanai neizmantojiet izopropilspirtu, etiķi vai
balinātāju, jo virsmas materiāls var zaudēt krāsu.
Sukas uzgalis
1 Noskalojiet sukas uzgali un sarus pēc katras lietošanas reizes (att.
15).
2 Noņemiet sukas uzgali no roktura un vismaz vienreiz nedēļā
noskalojiet sukas uzgaļa savienojumu.
Lādētājs
1 Pirms lādētāja tīrīšanas atvienojiet to no strāvas.
2 Noslaukiet lādētāja virsmu ar mitru drānu.
71
Glabāšana
Ja ilgāku laikposmu neizmantosiet Philips Sonicare, atvienojiet
lādētāju no elektrības kontaktligzdas, notīriet to un glabājiet vēsā,
sausā vietā, kas nav pakļauta tiešas saules gaismas iedarbībai.
Modeļa numura atrašanās vieta
Modeļa numurs ir norādīts Philips Sonicare zobu sukas roktura
apakšā (HX682x/HX683x).
Page 71

Latviešu
72
Otrreizējā pārstrāde
- Šis simbols nozīmē, ka produktu nedrīkst likvidēt kopā ar
parastajiem sadzīves atkritumiem (2012/19/ES) (att. 24).
- Šis simbols nozīmē, ka šajā produktā ir iebūvēts atkārtoti
uzlādējams akumulators, kuru nedrīkst likvidēt kopā ar parastiem
sadzīves atkritumiem (att. 25) (2006/66/EK). Lūdzu, nododiet
produktu oficiālā savākšanas punktā vai „Philips” pakalpojumu
centrā, lai profesionālis izņemtu atkārtoti uzlādējamo akumulatoru.
- Ievērojiet vietējos noteikumus par elektrisko un elektronisko
produktu un atkārtoti uzlādējamo bateriju atsevišķu savākšanu.
Pareiza produktu likvidēšana palīdz novērst kaitīgu iedarbību uz
vidi un cilvēku veselību.
Atkārtoti uzlādējamās baterijas izņemšana
Brīdinājums. Uzlādējamo bateriju izņemiet tikai tad, kad izmetat ierīci.
Izņemot bateriju, pārliecinieties, ka tā ir pilnīgi tukša.
Lai izņemtu uzlādējamo bateriju, nepieciešams dvielis vai drāna,
āmurs un plakangala (standarta) skrūvgriezis. Ievērojiet pamata
piesardzības pasākumus, veicot tālāk norādīto procedūru. Noteikti
aizsargājiet acis, rokas, pirkstus un darba virsmu.
1 Lai pilnībā iztukšotu atkārtoti uzlādējamo bateriju, noņemiet
rokturi no lādētāja, ieslēdziet Philips Sonicare un ļaujiet ierīcei
darboties, līdz tā apstājas. Atkārtojiet šo darbību, līdz Philips
Sonicare vairs nevar ieslēgt.
2 Noņemiet un izmetiet sukas uzgali. Apklājiet visu rokturi ar dvieli
vai drānu (att. 16).
3 Turiet roktura augšgalu ar vienu roku un iesitiet pa roktura korpusu
aptuveni 1cm virs apakšdaļas. Iesitiet ar āmuru pa visām 4pusēm,
lai izņemtu vāciņu (att. 17).
Piezīme. Iespējams, būs jāiesit vairākas reizes, lai salauztu iekšējos
savienojumus.
4 Noņemiet vāciņu no zobu sukas roktura. Ja vāciņu nevar viegli
noņemt no korpusa, atkārtojiet 3.darbību, līdz vāciņš ir noņemts
(att. 18).
Page 72

Latviešu
5 Turot rokturi otrādi, spiediet to lejup pret cietu virsmu. Ja iekšējie
komponenti netiek viegli atbrīvoti no korpusa, atkārtojiet
3.darbību, līdz iekšējie komponenti ir atbrīvoti (att. 19).
6 Noņemiet gumijoto baterijas nodalījuma vāku.
7 Iespiediet skrūvgriezi starp bateriju un melno rāmi iekšējo
elementu apakšā. Pēc tam spiediet skrūvgriezi prom no baterijas,
lai salauztu melnā rāmja (att. 20) apakšdaļu.
8 Ievietojiet skrūvgriezi starp baterijas apakšdaļu un melno rāmi, lai
salauztu metāla cilni, kas savieno bateriju ar zaļo drukātās shēmas
plati. Šādi tiks atdalīta baterijas apakšdaļa no rāmja (att. 21).
9 Satveriet bateriju un izvelciet to ārā no iekšējiem komponentiem,
lai salauztu otro metāla baterijas cilni (att. 22).
Ievērībai! Uzmanieties no baterijas ciļņu asajām malām, lai
nesavainotu pirkstus.
10 Pārklājiet baterijas kontaktus ar lenti, lai novērstu elektrisko
īsslēgumu no atlikušā baterijas lādiņa. Uzlādējamo bateriju tagad
iespējams otrreizēji pārstrādāt un atbilstoši (att. 23) atbrīvoties no
pārējās ierīces.
Garantija un atbalsts
Ja nepieciešama informācija vai atbalsts, lūdzu, apmeklējiet vietni
www.philips.com/support vai lasiet starptautiskās garantijas bukletu.
Garantijas ierobežojumi
Starptautiskās garantijas nosacījumi nesedz tālāk minēto.
- Sukas uzgaļi.
- Bojājumi, ko izraisījusi neapstiprinātu rezerves daļu izmantošana.
- Bojājumi, kas radušies nepareizas, ļaunprātīgas lietošanas,
nolaidības, pārveidojumu vai neatļauta remonta dēļ.
- Parastās darbības radīts nodilums un bojājumi, piemēram, robi,
skrāpējumi, švīkas, nolupusi vai izbalējusi krāsa.
73
Page 73

Lietuviškai
74
Svarbu
Prieš pradėdami naudoti prietaisą atidžiai perskaitykite šį vartotojo
vadovą ir saugokite jį, nes jo gali prireikti ateityje.
Pavojus
-
Saugokite įkroviklį nuo vandens. Nedėkite ir
nelaikykite jo virš ar šalia vandens pripiltos
vonios, praustuvo, plautuvės ir pan.
Nemerkite įkroviklio į vandenį ar kitokį skystį.
Nuvalę įsitikinkite, kad įkroviklis yra visiškai
sausas, ir tik tada junkite į maitinimo tinklą.
Įspėjimas
-
Maitinimo laido pakeisti negalima. Jei
maitinimo laidas apgadintas, įkroviklį
išmeskite.
-
Visada keiskite įkroviklį originalaus tipo kitu,
kad išvengtumėte pavojaus.
-
Nenaudokite įkroviklio lauke arba netoli
įkaitusių paviršių.
Lietuviškai
Page 74

Lietuviškai
-
Jei prietaisas kokiu nors būdu apgadintas
(šepetėlio galvutė, dantų šepetėlio
rankenėlė arba įkroviklis), jo nebenaudokite.
Šiame prietaise nėra dalių, kurioms
reikalinga priežiūra. Jei prietaisas
apgadintas, kreipkitės į klientų aptarnavimo
centrą savo šalyje (žr. skyrių „Garantija ir
pagalba“).
-
Šį prietaisą gali naudoti vaikai ir asmenys,
kurių fiziniai, jutimo ir protiniai gebėjimai yra
silpnesni, taip pat asmenys, neturintys
patirties ir žinių su sąlyga, kad jie bus
išmokyti saugiai naudotis prietaisu ir bus
prižiūrimi siekiant užtikrinti, jog jie saugiai
naudotų prietaisą, ir supažindinti su
susijusiais pavojais. Neleiskite vaikams be
priežiūros valyti ar atlikti priežiūrą.
-
Neleiskite vaikams žaisti su šiuo prietaisu.
75
Dėmesio!
-
Neplaukite šepetėlio galvutės, rankenėlės ar
kroviklio indaplovėje.
Page 75

Lietuviškai
76
-
Jei per pastaruosius 2 mėnesius jums buvo
atlikta burnos ertmės arba dantenų
operacija, prieš naudodamiesi dantų
šepetėliu, pasitarkite su savo odontologu.
-
Jei išsivalius dantis šiuo šepetėliu pradeda
stipriai kraujuoti arba jei kraujavimas tęsiasi
panaudojus 1 savaitę, pasikonsultuokite su
odontologu. Taip pat pasitarkite su dantų
gydytoju, jei naudodami „Philips Sonicare“
jaučiate diskomfortą ar skausmą.
-
Šis „Philips Sonicare“ dantų šepetėlis
atitinka elektromagnetinių prietaisų saugos
standartus. Jei jums implantuotas širdies
stimuliatorius ar kitas prietaisas, prieš
naudodamiesi pasitarkite su savo gydytoju
ar implantuoto prietaiso gamintoju.
-
Jei jums kilo su medicina susijusių klausimų,
prieš naudodami „Philips Sonicare“
pasitarkite su gydytoju.
Page 76

Lietuviškai
-
Šis prietaisas skirtas valyti tik dantis,
dantenas ir liežuvį. Nenaudokite jo jokiu kitu
tikslu. Nustokite naudoti prietaisą ir
susisiekite su gydytoju, jei jaučiate
diskomfortą ar skausmą.
-
„Philips Sonicare“ dantų šepetėlis yra
asmeninė priežiūros priemonė, neskirta
keliems pacientams namuose ar įstaigose.
-
Nebenaudokite šepetėlio galvutės, jei jos
šereliai suspausti ar sulinkę. Šepetėlio
galvutę keiskite kas 3 mėnesius arba
dažniau, jei atsiranda susidėvėjimo požymių.
Naudokite tik gamintojo rekomenduojamas
šepetėlių galvutes.
-
Jei dantų pastoje yra peroksido, geriamosios
sodos ar bikarbonato (dažnos balinančių
dantų pastų sudedamosios dalys), kiekvieną
kartą panaudoję kruopščiai išplaukite
šepetėlio galvutę muilu ir vandeniu. Taip bus
užkirstas kelias galimiems plastiko
įtrūkimams.
Elektromagnetiniai laukai (EML)
„Philips“ prietaisas atitinka visus taikomus standartus ir normas dėl
elektromagnetinių laukų poveikio.
77
Page 77

Lietuviškai
78
Radijo įrangos direktyva
- Šio produkto radijo įranga veikia 13,56 MHz dažniu
- Maksimali radijo įrangos perduodama RD galia yra 30,16 dBm
Įvadas
Sveikiname įsigijus „Philips“ gaminį ir sveiki atvykę! Norėdami
pasinaudoti visa „Philips“ siūloma pagalba, savo gaminį
užregistruokite adresu www.philips.com/welcome.
„Philips Sonicare“ naudojimas (1 pav.)
1 Higieninis kelioninis dangtelis
2 Išmanioji šepetėlio galvutė (-ės)*
3 Rankena
4 Maitinimo įjungimo / išjungimo mygtukas
5 Režimo / intensyvumo mygtukas
6 Režimo indikatorius
7 Šepetėlio galvutės keitimo priminimo indikatorius
8 Baterijos rodmuo
9 Įkrovimo stovas
10 Kelioninis dėklas (tik tam tikruose modeliuose)*
*Pastaba. Dėžutės turinys gali skirtis pagal modelį.
Šepetėlių galvutės
„Philips Sonicare“ tiekiamas su viena arba keliomis šepetėlio
galvutėmis, kurios skirtos puikiems burnos priežiūros rezultatams
pasiekti.
„Philips Sonicare BrushSync“ technologija
Jūsų išmaniojoje šepetėlio galvutėje naudojamas mikrolustas
sinchronizavimui su rankenėle, taip sudaroma šepetėlio galvutės
pakeitimo priminimo galimybė. Išsamesnę informaciją apie šepetėlio
galvutės pakeitimo priminimą žr. „Funkcijos“.
Šis simbolis reiškia, kad šepetėlio galvutė aprūpinta „BrushSync“
technologija. (pav. 2)
Page 78

Lietuviškai
79
Dantų valymo režimai
Norėdami perjungti režimus, paspauskite režimo mygtuką, esantį
žemiau įjungimo ir išjungimo mygtuko.
Jūsų elektrinis dantų šepetėlis turi 2 arba 3 skirtingus valymo režimus,
priklausomai nuo modelio. Galimi tolesni režimai:
Režimas „Clean“ (Valymas)
Įjungtas 2 minučių valymo režimas. Jis užtikrina kruopštų ir visišką
dantų išvalymą ir jį rekomenduojama naudoti su „C2 Optimal Plaque
Control“ šepetėlio galvute.
Balinimo režimas
„White“ yra 2 minučių 30 sekundžių režimas, jį rekomenduojama
naudoti su „W2 Optimal White“ šepetėlio galvute.
Dantų priežiūros režimas
„Gum Care“ yra 3 minučių režimas, jį rekomenduojama naudoti su „G2
Optimal Gum Care“ šepetėlio galvute.
„Philips Sonicare“ naudojimas
Dantų valymo nurodymai
1 Užspauskite šepetėlio galvutę ant rankenėlės, kad šeriai būtų
nukreipti į rankenėlės (pav. 3) priekį.
2 Stipriai spauskite šepetėlio galvutę ant metalinio velenėlio, kol ji
užsifiksuos.
Pastaba. Tarp šepetėlio galvutės ir rankenėlės gali būti matomas
mažas tarpelis.
3 Sudrėkinkite šerius (pav. 4).
4 Ant šerių (pav. 5) užtepkite nedidelį kiekį dantų pastos.
5 Dantų šepetėlio šerelius priglauskite prie dantų ir pasukę nedideliu
(45 laipsnių) kampu spauskite tvirtai, kad šepetėlio šereliai siektų
dantenas (pav. 6), arba būtų netoli jų. Pasikeitusi vibracija (ir
nedidelis garso pasikeitimas) įspėja jus, kad valydami dantis per
daug spaudžiate.
Page 79

Lietuviškai
80
Pastaba. Pasistenkite, kad šepetėlio galvutės centras visada liestų
dantis.
6 Paspauskite maitinimo įjungimo ir išjungimo mygtuką, kad
įjungtumėte „Philips Sonicare (pav. 7)“.
7 Šepetėlio šerelius švelniai spauskite prie dantų ir dantenų. Dantis
valykite nedideliais judesiais pirmyn ir atgal, kad šeriai pasiektų
tarpdančius (pav. 8).
Pastaba. Šereliai apačioje turėtų praplatėti. Netrinkite.
8 Norėdami nuvalyti vidinę priekinių dantų pusę, pakreipkite
šepetėlio rankenėlę į beveik vertikalią padėtį ir ant kiekvieno
danties (pav. 9) atlikite kelis vertikalius persidengiančius valymo
judesius.
9 Norėdami įsitikinti, kad tolygiai išvalėte visus dantis, padalykite
burną į 4 dalis naudodami „Quadpacer“ funkciją (pav. 10).
„Quadpacer“ funkcija po 30 sekundžių įjungia pyptelėjimą.
10 Valykite visas 2 2 minutes pagal „Quadpacer“. (pav. 11) Po 2 minučių
dantų šepetėlis bus automatiškai išjungtas.
Balinimo režimu, po 2 minučių rankenėlė dar valys 30
sekundžių, kad galėtumėte blizginti ir poliruoti priekinius dantis.
Dantenų priežiūros režimu, po 2 minučių rankenėlė dar valys
papildomą minutę, kad galėtumėte švelniai stimuliuoti ir
masažuoti dantenas.
- Kai baigsite valymo ciklą, galite skirti papildomo laiko ir nuvalyti
kramtomąjį dantų paviršių bei vietas, kur kaupiasi (pav. 12)
apnašos.
Jūsų „Philips Sonicare“ dantų šepetėlį saugu naudoti:
- kabėms (valant kabes, šepetėlio galvutės greičiau susidėvi)
- dantų rekonstrukcijoms (plomboms, karūnėlėms, apvalkalams)
Pastaba. Kai „Philips Sonicare“ dantų šepetėlis naudojamas
klinikiniuose tyrimuose, jį būtina naudoti „Clean“ (Valymo) režimu
(tiriant apnašų valymą ir dantenų sveikatą), arba „White“ (Balinimo)
režimu (tiriant balinimą), dideliu intensyvumu, „EasyStart“ išjungus.
Page 80

Lietuviškai
Funkcijos
- „EasyStart“
- Šepetėlio galvutės keitimo priminimas
- Spaudimo jutiklis
- „Quadpacer“
„EasyStart“
Šis „Philips Sonicare“ modelis tiekiamas su įjungta „EasyStart“
funkcija. Per pirmuosius 14 dantų valymų „EasyStart“ funkcija švelniai
didina galingumą, kad priprastumėte prie dantų valymo naudojant
„Philips Sonicare“. „EasyStart“ funkcija veikia visais režimais.
Norėdami išjungti „EasyStart“, žr. „Funkcijų įjungimas arba išjungimas“.
Šepetėlio galvutės keitimo priminimas
Jūsų „Philips Sonicare“ aprūpinta „BrushSync“ technologija, kuri seka
šepetėlio galvutės (pav. 13) dėvėjimąsi.
1 Kai pirmą kartą prijungiama nauja išmanioji galvutė, šepetėlio
galvutės keitimo priminimo lemputė tris kartus žaliai sumirksi. Taip
patvirtinama, kad jūs turite „Philips“ šepetėlio galvutę, aprūpintą
„BrushSync“ technologija.
2 Laikui bėgant, priklausomai nuo naudojamo spaudimo ir
naudojimo laiko, rankenėlė seks šepetėlio galvutės nusidėvėjimą,
kad būtų nustatytas optimalus laikas jūsų šepetėlio galvutei keisti.
Ši funkcija suteikia jums geriausio jūsų dantų valymo ir priežiūros
garantiją.
3 Kai šepetėlio galvutės keitimo priminimo indikatorius šviečia
gintarine spalva, šepetėlio galvutę turėtumėte pakeisti.
Norėdami išjungti šepetėlio galvutės pakeitimo priminimą, žr.
„Funkcijų įjungimas arba išjungimas“.
Spaudimo jutiklis
„Philips Sonicare“ įdiegtas pažangus jutiklis, kuris jums valantis dantis
matuoja, kaip stipriai spaudžiate dantų šepetėlį. Jei spaudžiate per
stipriai, dantų šepetėlis tuojau pat praneš, kad turite mažiau spausti.
Šis grįžtamasis ryšys pateikiamas pasikeitusia vibracija, taigi ir dantų
valymosi pojūčiu.
81
Page 81

Lietuviškai
82
Norėdami įjungti spaudimo jutiklį, žr. „Funkcijų įjungimas arba
išjungimas“.
„Quadpacer“
„Quadpacer“ yra intervalo laikmatis, kuris trumpu pyptelėjimu ir
pristabdymu primena valyti skirtingas burnos sritis. Priklausomai nuo
jūsų pasirinkto dantų valymo režimo (žr. „Valymo režimai“),
„Quadpacer“ per dantų valymo ciklą pypsi skirtingais intervalais.
Funkcijų įjungimas arba išjungimas
Galite įjungti arba išjungti tolesnes jūsų dantų šepetėlio funkcijas:
- „EasyStart“
- Šepetėlio galvutės keitimo priminimas
- Spaudimo jutiklis
Norėdami įjungti arba išjungti šias funkcijas, vykdykite toliau
pateikiamas instrukcijas:
„EasyStart“
1 Padėkite rankenėlę ant prijungto kroviklio.
2 Nuspauskite ir laikykite maitinimo įjungimo ir išjungimo mygtuką
rankenėlei esant ant įkroviklio.
3 Laikykite maitinimo įjungimo ir išjungimo mygtuką nuspaustą, kol
išgirsite vieną trumpą pyptelėjimą (po 2 sekundžių).
4 Atleiskite maitinimo įjungimo ir išjungimo mygtuką.
-
Trigubas žemas-vidutinis-aukštas tonas reiškia, kad „EasyStart“
funkcija įjungta. Galvutės keitimo lempute ir baterijos lemputė
taip pat unisonu 3 kartus mirktelės žaliai, kad būtų patvirtintas
įjungimas.
-
Trigubas aukštas-vidutinis-žemas tonas reiškia, kad „EasyStart“
funkcija išjungta. Galvutės keitimo lempute ir baterijos lemputė
taip pat unisonu 3 kartus mirktelės geltonai, kad būtų
patvirtintas išjungimas.
Pastaba. Kad būtų galima pasiekti klinikinį veiksmingumą, „EasyStart“
turi būti išjungta.
Page 82

Lietuviškai
Šepetėlio galvutės keitimo priminimas
1 Padėkite rankenėlę ant prijungto kroviklio.
2 Nuspauskite ir laikykite maitinimo įjungimo ir išjungimo mygtuką
rankenėlei esant ant įkroviklio.
3 Laikykite maitinimo įjungimo ir išjungimo mygtuką nuspaustą, kol
išgirsite dviejų trumpų pyptelėjimų seriją (po 4–5 sekundžių).
4 Atleiskite maitinimo įjungimo ir išjungimo mygtuką.
-
Trigubas žemas-vidutinis-aukštas tonas reiškia, kad galvutės
keitimo priminimo funkcija įjungta. Galvutės keitimo lempute ir
baterijos lemputė taip pat unisonu 3 kartus mirktelės žaliai, kad
būtų patvirtintas įjungimas.
-
Trigubas aukštas-vidutinis-žemas tonas reiškia, kad galvutės
keitimo priminimo funkcija išjungta. Galvutės keitimo lempute ir
baterijos lemputė taip pat unisonu 3 kartus mirktelės geltonai,
kad būtų patvirtintas išjungimas.
Spaudimo jutiklis
1 Padėkite rankenėlę ant prijungto kroviklio.
2 Nuspauskite ir laikykite maitinimo įjungimo ir išjungimo mygtuką
rankenėlei esant ant įkroviklio.
3 Laikykite maitinimo įjungimo ir išjungimo mygtuką nuspaustą, kol
išgirsite trijų trumpų pyptelėjimų seriją (po 6–7 sekundžių).
4 Atleiskite maitinimo įjungimo ir išjungimo mygtuką.
-
Trigubas žemas-vidutinis-aukštas tonas reiškia, kad spaudimo
jutiklio funkcija įjungta. Galvutės keitimo lempute ir baterijos
lemputė taip pat unisonu 3 kartus mirktelės žaliai, kad būtų
patvirtintas įjungimas.
-
Trigubas aukštas-vidutinis-žemas tonas reiškia, kad spaudimo
jutiklio funkcija išjungta. Galvutės keitimo lempute ir baterijos
lemputė taip pat unisonu 3 kartus mirktelės geltonai, kad būtų
patvirtintas išjungimas.
83
Jei vis dar laikysite maitinimo įjungimo ir išjungimo mygtuką po trijų
trumpų pyptelėjimų, įjungimo ir išjungimo seka kartojama.
Page 83

Lietuviškai
84
Baterijos būsena ir įkrovimas
1 Įkiškite įkroviklio kištuką į elektros lizdą.
2 Rankenėlę uždėkite ant įkroviklio.
-
Iš įkroviklio pasigirs 2 trumpi pyptelėjimai patvirtinimui, kad
rankenėlės padėtis tinkama.
-
Mirksinti baterijos lygio indikatoriaus lemputė informuoja apie
vykstantį dantų šepetėlio krovimą.
-
Kai rankenėlė visiškai įkrauta ant įkroviklio, baterijos lemputė 30
sekundžių šviečia žaliai, paskui išjungiama.
Pastaba. Jūsų dantų šepetėlis tiekiamas įkraunamas naudojimui
pirmą kartą. Pirmą kartą panaudoję, įkraukite mažiausiai 24 valandas.
Baterijos būsena (kai rankenėlė ne ant įkroviklio)
Nuėmus „Philips Sonicare“ nuo įkroviklio, baterijos lemputė dantų
šepetėlio apačioje rodys likusį baterijos įkrovos lygį.
- Šviesos diodas nuolat šviečia žaliai: baterija visiškai įkrauta
- Šviesos diodas mirksi žaliai: baterija vidutiniškai įkrauta
- Šviesos diodas mirksi oranžine spalva ir pasigirsta trys
pyptelėjimai: baterija senka
- Šviesos diodas mirksi geltona spalva ir du kartus pasigirsta po
penkis pyptelėjimus: neliko dantų valymo seansų (įkraukite dantų
šepetėlį).
Valymas
Pastaba. Šepetėlio galvutės, rankenėlės ar kelioninio dėklo neplaukite
indaplovėje.
Dantų šepetėlio rankenėlė
1 Šepetėlio galvutę nuimkite ir plotą apie metalinį velenėlį
nuskalaukite šiltu vandeniu. Būtinai pašalinkite visus dantų pastos
(pav. 14) likučius.
Pastaba. Metalinio velenėlio guminio tarpiklio nespauskite aštriais
daiktais, nes galite jį sugadinti.
2 Nuvalykite rankenėlės paviršių drėgna šluoste.
Pastaba. Šepetėlio rankenėlės ir galvutės nevalykite izopropilo
alkoholiu, actu ar balikliu, nes dėl to gali pasikeisti spalva.
Page 84

Lietuviškai
85
Šepetėlio galvutė
1 Išskalaukite šepetėlio galvutę ir šerelius kiekvieną kartą panaudoję
(pav. 15).
2 Bent kartą per savaitę nuimkitešepetėlio galvutę nuo rankenėlės ir
nuskalaukite šepetėlio galvutės jungtį šiltu vandeniu.
Įkroviklis
1 Prieš valydami prietaisą, išjunkite jį iš elektros tinklo.
2 Nuvalykite įkroviklio paviršių drėgna šluoste.
Laikymas
Jei „Philips Sonicare“ neketinate naudoti ilgesnį laiką, įkroviklį
atjunkite nuo sieninio lizdo, nuvalykite ir laikykite vėsioje, sausoje, nuo
tiesioginių saulės spindulių apsaugotoje vietoje.
Kaip rasti modelio numerį
Modelio numerį (HX682x / HX683x) žr. „Philips Sonicare“ dantų
šepetėlio rankenėlės apačioje.
Perdirbimas
- Šis simbolis reiškia, kad gaminio negalima išmesti kartu su
įprastomis buitinėmis atliekomis (2012/19/ES) (pav. 24).
- Šis simbolis reiškia, kad šiame gaminyje yra įmontuotas
pakartotinai įkraunamas maitinimo elementas, kurio negalima
išmesti su įprastomis buitinėmis atliekomis (pav. 25) (2006/66/EB).
Prašome perduoti jūsų gaminį į oficialų surinkimo punktą arba
„Philips“ priežiūros centrą, kad pakartotinai įkraunamą bateriją
pašalintų specialistai.
- Laikykitės jūsų šalyje galiojančių taisyklių, kuriomis
reglamentuojamas atskiras elektros ir elektronikos gaminių bei
įkraunamų maitinimo elementų surinkimas. Tinkamas tokių
gaminių utilizavimas padės išvengti neigiamo poveikio aplinkai ir
žmonių sveikatai.
Page 85

Lietuviškai
86
Pakartotinai įkraunamos baterijos išėmimas
Įspėjimas. Įkraunamą maitinimo elementą išimkite tik tada, kai
išmetate prietaisą. Išimdami maitinimo elementą užtikrinkite, kad jis
būtų visiškai išeikvotas.
Norint išimti pakartotinai įkraunamą bateriją, reikės rankšluosčio arba
audeklo, plaktuko ir plokščio (standartinio) atsuktuvo. Atlikdami toliau
nurodytus veiksmus, laikykitės pagrindinių saugos taisyklių. Būtinai
apsaugokite akis, rankas, pirštus ir paviršių, ant kurio dirbate.
1 Norėdami pašalinti visą įkraunamos baterijos įkrovą, nuimkite
rankenėlę nuo įkroviklio, įjunkite „Philips Sonicare“ ir leiskite veikti,
kol sustos. Kartokite šį veiksmą tol, kol nebegalėsite įjungti „Philips
Sonicare“.
2 Nuimkite ir pašalinkite šepetėlio galvutę. Uždenkite visą rankenėlę
rankšluosčiu arba audeklu (pav. 16).
3 Viena ranka laikykite viršutinę rankenėlės dalį ir trinktelėkite per
rankenėlės korpusą maždaug 0,5 colio atstumu nuo apatinės
dalies. Stipriai trinktelėkite plaktuku iš visų 4 pusių, kad
nuimtumėte galinį dangtelį (pav. 17).
Pastaba. Gali prireikti papildomų smūgių, kad atsilaisvintų vidiniai
fiksatoriai.
4 Nuimkite galinį dangtelį nuo dantų šepetėlio rankenėlės. Jei galinis
dangtelis lengvai neatsilaisvina nuo korpuso, kartokite 3 veiksmą
tol, kol jis atsilaisvins (pav. 18).
5 Laikydami rankenėlę viršutine dalimi žemyn, velenėlį spauskite
žemyn į kietą paviršių. Jei vidiniai komponentai lengvai
neatsilaisvina nuo korpuso, kartokite 3 veiksmą tol, kol jie
atsilaisvins (pav. 19).
6 Nuimkite guminį baterijos dangtelį.
7 Įstatykite atsuktuvą tarp baterijos ir juodo rėmo vidinių
komponentų apačioje. Tada lenkite atsuktuvą nuo baterijos, kad
sulaužytumėte juodo rėmo (pav. 20) dugną.
Page 86

Lietuviškai
8 Įstatykite atsuktuvą tarp baterijos apačios ir juodo rėmo, kad
nulaužtumėte metalinį liežuvėlį, jungiantį bateriją su žalia
daugiasluoksne spausdintine plokšte. Taip apatinis baterijos galas
bus atlaisvintas nuo rėmo (pav. 21).
9 Suimkite bateriją ir traukite iš vidinių komponentų, kad nulūžtų
antras metalinis baterijos liežuvėlis (pav. 22).
Atsargiai! Saugokitės aštrių baterijos liežuvėlių kraštų ir
nesusižeiskite pirštų.
10 Užklijuokite baterijos kontaktus juosta, kad užkirstumėte kelią
trumpajam jungimui, esant liekamajai baterijos įkrovai. Dabar
pakartotinai įkraunamą bateriją galima perdirbti, o likusią produkto
dalį tinkamai (pav. 23) išmesti.
Garantija ir pagalba
Jei reikia informacijos ar pagalbos, apsilankykite
www.philips.com/support arba perskaitykite tarptautinės garantijos
lankstinuką.
Garantijos apribojimai
Tarptautinės garantijos nuostatos netaikomos:
- šepetėlių galvutėms;
- gedimams, kurie įvyko naudojant neoriginalias dalis;
- apgadinimams dėl netinkamo naudojimo, piktnaudžiavimo,
nerūpestingumo, keitimo ar neteisėto taisymo;
- įprastam nusidėvėjimui: nuskilimams, įbrėžimams, nusitrynimams,
spalvos pakitimui ar išblukimui.
87
Page 87

Magyar
88
Fontos
A készülék első használata előtt figyelmesen olvassa el a használati
útmutatót, és őrizze meg későbbi használatra.
Veszély
-
Tartsa a töltőt víztől távol. Ne helyezze vízzel
teli fürdőkád, mosdókagyló, mosogató stb.
közelébe vagy fölé. Ne merítse a töltőt vízbe
vagy más folyadékba. Tisztítás után,
hálózatra való csatlakoztatás előtt
ellenőrizze, hogy a töltő teljesen
megszáradt-e.
Vigyázat!
-
A hálózati kábel nem cserélhető. Sérülése
esetén a töltő nem használható.
-
A kockázatok elkerülése érdekében a töltőt
mindig eredeti típusúra cseréltesse ki.
-
Ne használja a töltőegységet szabadtéren
vagy felmelegedett felületek közelében.
Magyar
Page 88

Magyar
-
Ne használja tovább, ha a készülék
bármilyen módon károsodott (fogkefefej,
fogkefenyél, töltő). A készülék nem
tartalmaz a felhasználó által javítható
alkatrészt. Ha a készülék meghibásodott,
lépjen kapcsolatba az Ön országában
illetékes vevőszolgálattal (lásd a „Jótállás és
támogatás” fejezetet).
-
A készüléket gyermekek és csökkent fizikai,
érzékelési vagy szellemi képességekkel
rendelkező, vagy a készülék
működtetésében járatlan személyek is
használhatják, amennyiben ezt felügyelet
mellett teszik, illetve ismerik a készülék
biztonságos működtetésének módját és az
azzal járó veszélyeket. A tisztítást és a
felhasználó által is végezhető karbantartást
nem végezhetik gyermekek felügyelet
nélkül.
-
Ne engedje, hogy gyermekek játsszanak a
készülékkel.
89
Page 89

Magyar
90
Figyelem!
-
Ne tisztítsa a fogkefefejet, a
fogkefemarkolatot vagy a töltőegységet
mosogatógépben.
-
Ha az elmúlt 2 hónapban szájsebészeti
műtétje volt, előbb kérje ki fogorvosa
tanácsát, mielőtt a készüléket használná.
-
Forduljon fogorvosához, ha a fogkefe
használata során túlzott vérzés jelentkezik,
vagy ha a vérzés 1 heti használat után sem
szűnik. Abban az esetben is forduljon
fogorvosához, ha kényelmetlen érzést vagy
fájdalmat érez a Philips Sonicare használata
során.
-
A Philips Sonicare fogkefék megfelelnek az
elektromágneses eszközökre vonatkozó
biztonsági szabványoknak. Ha szívritmusszabályozója vagy egyéb beépített
gyógyászati eszköze van, használat előtt
forduljon kezelőorvosához vagy a
gyógyászati eszköz gyártójához.
Page 90

Magyar
-
Ha egészségügyi aggálya merül fel, forduljon
orvosához a Philips Sonicare fogkefe
használata előtt.
-
A készüléket kizárólag a fogak, az íny és a
nyelv tisztítására tervezték. Ne használja
más célra. Kellemetlen érzés vagy fájdalom
esetén ne használja tovább a készüléket, és
keresse fel orvosát.
-
A Philips Sonicare fogkefe a személyes
higiénia fenntartásának eszköze. Ne
használja több különböző páciensnél
fogászati gyakorlatban vagy fogászati
intézményben.
-
Ne használja tovább a fogkefefejet, ha a
sörték töröttek vagy hajlottak.
Háromhavonta cserélje a fogkefefejet,illetve
ha kopás jelei mutatkoznak, akkor
hamarabb cserélje. Csak a gyártó által
ajánlott fogkefefejjel használja a készüléket.
91
Page 91

Magyar
92
-
Ha a fogkrém peroxidot, szódabikarbónát
vagy bikarbonátot tartalmaz (fehérítő
fogkrémeknél jellemző), minden egyes
használat után alaposan tisztítsa meg a
fogkefefejet szappanos vízzel. Ezáltal
megelőzhető a műanyag repedezése.
Elektromágneses mezők (EMF)
Ez a Philips készülék az elektromágneses terekre érvényes összes
vonatkozó szabványnak és előírásnak megfelel.
Rádióberendezésre vonatkozó irányelv
- Az ebben a készülékben található rádióberendezés 13,56 MHz-en
üzemel.
- A rádióberendezés maximális rádiófrekvenciás átviteli
teljesítménye 30,16 dBm.
Bevezetés
Köszönjük, hogy Philips terméket vásárolt, és üdvözöljük a Philips
világában! A Philips által biztosított támogatás teljes körű
igénybevételéhez regisztrálja a terméket a
www.philips.com/welcome címen.
A Philips Sonicare fogkefe (1. ábra)
1 Higiénikus utazótok
2 Intelligens fogkefefej(ek)*
3 Markolat
4 Be-/kikapcsoló gomb
5 Üzemmód/intenzitás gomb
6 Üzemmód jelzőfény
7 Fogkefefej csereemlékeztető jelzőfénye.
8 Akkumulátor jelzése
9 Töltőalap
10 Utazótok (csak bizonyos típusoknál)*
Page 92

Magyar
*Megjegyzés: A doboz tartalma a megvásárolt típustól függően
eltérő lehet.
Fogkefefejek
A Philips Sonicare fogkeféhez egy vagy több fogkefefej tartozik,
amelyekkel kiemelkedő szájápolási eredmények érhetők el.
Philips Sonicare BrushSync technológia
Az intelligens fogkefefejek egy mikrochip segítségével szinkronizálják
adataikat a markolattal, így téve lehetővé a fogkefefej
csereemlékeztető funkcióját. Bővebben a fogkefefej
csereemlékeztető funkcióról tekintse meg „A funkciók” részt.
Ez a jel azt mutatja, hogy a fogkefefej rendelkezik a BrushSync
technológiával. (ábra 2)
Fogmosási üzemmódok
Az üzemmódok közötti váltáshoz nyomja meg a be-/kikapcsoló
gomb alatt található Mode (Üzemmód) gombot.
Az elektromos fogkefe típustól függően 2 vagy 3 különböző
üzemmódot kínál. Az alábbi üzemmódok használhatók:
Clean (Tisztítás) üzemmód
A Clean (Tisztítás) egy 2 percig tartó üzemmód. Alapos és teljes körű
tisztítást nyújt, és a C2 Optimal Plaque Control fogkefefejjel ajánlott
használni.
White (Fehérítés) üzemmód
A White (Fehérítés) egy 2 perc 30 másodperces üzemmód, amelyhez
a W2 Optimal White fogkefefej ajánlott.
Fogínyápoló üzemmód
A Fogínyápoló üzemmód egy 3 perces üzemmód, amelyhez a G2
Optimal Gum Care fogkefefej ajánlott.
93
Page 93

Magyar
94
A Philips Sonicare fogkefe használata
Utasítások fogmosáshoz
1 Nyomja a fogkefefejet a markolatra úgy, hogy a sörtéka markolat
(ábra 3) elülső fele felé mutassanak.
2 Nyomja le határozottan a fogkefe fejét a fém tengelyre ütközésig.
Megjegyzés: Teljesen normális, ha van egy kis rés a fogkefefej és a
nyél között.
3 Nedvesítse meg a sörtéket. (ábra 4)
4 Tegyen kis mennyiségű fogkrémet a sörtékre. (ábra 5)
5 Helyezze a fogkefe sörtéit a fogához úgy, hogy az kissé (45 fokban)
a fogíny széle felé dőljön. Határozottan nyomja a fogkefét az
ínyvonalhoz, vagy az ínyvonal (ábra 6) alá, hogy a sörték hozzá
tudjanak férni. A rezgés megváltozása (és a hang enyhe változása)
figyelmezteti Önt, amikor fogmosás közben túl nagy nyomást
fejtett ki.
Megjegyzés: Mindvégig tartsa a fogkefe közepét a fogakon.
6 A be-/kikapcsoló gombbal kapcsolja be a Philips Sonicare
készüléket. (ábra 7)
7 Óvatosan tartsa a sörtéket a fogakon és a fogíny peremén. Mosson
fogat a fogkefefej finom előre-hátra mozgatásával, hogy a sörték a
fogak közé is bejussanak. (ábra 8)
Megjegyzés: A sörtéknek enyhén meg kell hajolniuk. Ne dörzsölje a
fogakat.
8 Az első fogak belső felületének megtisztításához tartsa a fogkefe
markolatát félig függőlegesen, majd függőleges
tisztítómozdulatokkal haladjon át az összes fogon. (ábra 9)
9 Ahhoz, hogy a fogmosás egyenletes legyen a szájüreg minden
részén, ossza fel a szájüreget 4 részre a Quadpacer funkcióval.
(ábra 10) A Quadpacer funkció 30 másodperc után hangjelzést ad.
10 Mossa fogait a teljes 2 percen keresztül a Quadpacer jelzéseit
követve. (ábra 11) 2 perc elteltével a fogkefe automatikusan
kikapcsolódik.
Page 94

Magyar
White (Fehérítés) üzemmódban 2 perc után a markolat további
30 másodpercig működik, hogy az első fogakat fényessé és
ragyogóvá változtathassa.
Fogínyápoló üzemmódban 2 perc után a markolat további 1
percig működik, hogy a fogínyeket gyengéden stimulálhassa és
masszírozhassa.
- A fogmosási ciklus befejezése után további időt fordíthat a fogak
rágófelületeinek és a foltos felületek mosására. (ábra 12)
Biztonságosan használhatja a Philips Sonicare fogkeféjét:
- Fogszabályozón (ebben az esetben a fogkefe sörtéi hamarabb
elkopnak)
- Fogászati pótlásokon (tömés, korona, héj)
Megjegyzés: A Philips Sonicare fogkefe klinikai tanulmányokban való
használatakor azt nagy intenzitás mellett, az Egyszerű bevezető
program kikapcsolt állapotában, Clean (Tisztítás) üzemmódban
(lepedékeltávolítással és ínyápolással kapcsolatban), illetve White
(Fehérítés) üzemmódban (fehérítéssel kapcsolatban) kell használni.
Jellemzők
- Egyszerű bevezető program
- Fogkefefej csereemlékeztetője
- Nyomásérzékelő
- Quadpacer
Egyszerű bevezető program
A Philips Sonicare modellnél gyárilag be van kapcsolva az Egyszerű
bevezető program funkció. Az Egyszerű bevezető program funkció
enyhén növeli a teljesítményt az első 14 fogmosás során, hogy
hozzászokhasson a Philips Sonicare termékkel való fogmosáshoz. Az
Egyszerű bevezető program funkció minden üzemmódban működik.
Az Egyszerű bevezető program kikapcsolásához tekintse meg „A
funkciók bekapcsolása vagy kikapcsolása” részt.
95
Page 95

Magyar
96
Fogkefefej csereemlékeztetője
A Philips Sonicare fogkefe a BrushSync technológiával figyeli a
fogkefefej (ábra 13) kopását.
1 Amikor először csatlakoztat egy új intelligens fogkefefejet, akkor a
fogkefefej csereemlékeztető jelzőfénye háromszor zölden villan.
Ez azt jelzi, hogy a BrushSync technológiát tartalmazó Philips
fogkefefejjel rendelkezik.
2 Az idő múlásával az alkalmazott nyomástól és a használati időtől
függően a markolat nyomon követi a fogkefefej elhasználódását,
hogy meghatározza a fogkefefej lecserélésének optimális idejét.
Ezzel a funkcióval elérheti, hogy fogai mindig a legjobb tisztítást és
ápolást kaphassák.
3 Amikor a fogkefefej csereemlékeztető fénye sárgán kezd világítani,
cserélje ki a fogkefefejet.
A fogkefefej csereemlékeztető funkciójának kikapcsolásához tekintse
meg „A funkciók bekapcsolása vagy kikapcsolása” részt.
Nyomásérzékelő
A Philips Sonicare fogkefe egy fejlett nyomásérzékelőt is tartalmaz,
amely fogmosás közben figyeli az alkalmazott nyomást. Ha túl nagy
nyomást alkalmaz, a fogkefe azonnali visszajelzést ad, és
figyelmezteti, hogy csökkentse a nyomást. A visszajelzés azt jelenti,
hogy megváltozik a rezgés, és emiatt a fogmosás érzete.
A nyomásérzékelő kikapcsolásához tekintse meg „A funkciók
bekapcsolása vagy kikapcsolása” részt.
Quadpacer
A Quadpacer egy időközi időzítő, mely rövid sípoló hangjelzéssel és
leállással emlékezteti, hogy szája különböző régióiban megmossa a
fogait. A kiválasztott fogmosási üzemmódtól függően (lásd:
„Fogmosási üzemmódok”) a Quadpacer eltérő időközönként sípol
fogmosás közben.
A funkciók bekapcsolása vagy kikapcsolása
A fogkefe következő funkcióit tudja be- vagy kikapcsolni:
- Egyszerű bevezető program
Page 96

Magyar
- Fogkefefej csereemlékeztetője
- Nyomásérzékelő
A funkciók be- vagy kikapcsolásához kövesse az alábbi utasításokat:
Egyszerű bevezető program
1 Helyezze a markolatot a hálózatra csatlakoztatott töltőre.
2 Nyomja meg és tartsa lenyomva a be-/kikapcsoló gombot úgy,
hogy a markolat a töltőn maradjon.
3 Tartsa lenyomva a be-/kikapcsoló gombot az egyszeri rövid
hangjelzésig (2 másodperc múlva).
4 Engedje el a be-/kikapcsoló gombot.
-
A háromszoros, alacsony-közepes-magas sorrendű hangjelzés
azt mutatja, hogy az Egyszerű bevezető program be van
kapcsolva. A fogkefefej csereemlékeztető jelzőfénye és az
akkumulátor jelzőfénye háromszor egyszerre felvillan zölden a
bekapcsolás visszajelzéséhez.
-
A háromszoros, magas-közepes-alacsony sorrendű hangjelzés
azt mutatja, hogy az Egyszerű bevezető program ki van
kapcsolva. A fogkefefej csereemlékeztető jelzőfénye és az
akkumulátor jelzőfénye háromszor egyszerre felvillan sárgán a
kikapcsolás visszajelzéséhez.
Megjegyzés: A klinikai hatékonyság eléréséhez az Egyszerű bevezető
program funkciót ki kell kapcsolni.
Fogkefefej csereemlékeztetője
1 Helyezze a markolatot a hálózatra csatlakoztatott töltőre.
2 Nyomja meg és tartsa lenyomva a be-/kikapcsoló gombot úgy,
hogy a markolat a töltőn maradjon.
3 Tartsa lenyomva a be-/kikapcsoló gombot a kétszeri rövid
hangjelzésig (4-5 másodperc múlva).
4 Engedje el a be-/kikapcsoló gombot.
-
A háromszoros, alacsony-közepes-magas sorrendű hangjelzés
azt mutatja, hogy a fogkefefej csereemlékeztetője be van
kapcsolva. A fogkefefej csereemlékeztető jelzőfénye és az
akkumulátor jelzőfénye háromszor egyszerre felvillan zölden a
bekapcsolás visszajelzéséhez.
97
Page 97

Magyar
98
-
A háromszoros, magas-közepes-alacsony sorrendű hangjelzés
azt mutatja, hogy a fogkefefej csereemlékeztetője ki van
kapcsolva. A fogkefefej csereemlékeztető jelzőfénye és az
akkumulátor jelzőfénye háromszor egyszerre felvillan sárgán a
kikapcsolás visszajelzéséhez.
Nyomásérzékelő
1 Helyezze a markolatot a hálózatra csatlakoztatott töltőre.
2 Nyomja meg és tartsa lenyomva a be-/kikapcsoló gombot úgy,
hogy a markolat a töltőn maradjon.
3 Tartsa lenyomva a be-/kikapcsoló gombot a háromszori rövid
hangjelzésig (6-7 másodperc múlva).
4 Engedje el a be-/kikapcsoló gombot.
-
A háromszoros, alacsony-közepes-magas sorrendű hangjelzés
azt mutatja, hogy a nyomásérzékelő be van kapcsolva. A
fogkefefej csereemlékeztető jelzőfénye és az akkumulátor
jelzőfénye háromszor egyszerre felvillan zölden a bekapcsolás
visszajelzéséhez.
-
A háromszoros, magas-közepes-alacsony sorrendű hangjelzés
azt mutatja, hogy a nyomásérzékelő ki van kapcsolva. A
fogkefefej csereemlékeztető jelzőfénye és az akkumulátor
jelzőfénye háromszor egyszerre felvillan sárgán a kikapcsolás
visszajelzéséhez.
Ha a három rövid hangjelzés után is nyomva tartja a be-/kikapcsoló
gombot, akkor a be-/kikapcsolási sorozat megismétlődik.
Az akkumulátor állapotát és a töltést jelző fény
1 Csatlakoztassa a töltőegység hálózati dugóját egy fali aljzatba.
2 Helyezze a markolatot a töltőegységre.
-
A töltő 2 rövid hangjelzéssel jelzi, hogy a markolatot
megfelelően helyezte rá.
-
Az akkumulátor töltöttségi szintjének villogó jelzése mutatja,
hogy a fogkefe töltődik.
Page 98

Magyar
-
Amikor a markolat teljesen feltöltődött a töltőn, akkor az
akkumulátor jelzőfénye 30 másodpercig folyamatosan zölden
világít, majd elalszik.
Megjegyzés: A fogkefe az első használatra előtöltve érkezik. Az első
használat után töltse legalább 24 órán keresztül.
Akku állapota (amikor a markolat nincs a töltőn)
Amikor kiveszi a Philips Sonicare készüléket a töltőből, akkor a
fogkefe alján található akkumulátor jelzőfény az akkumulátor
töltöttségét mutatja.
- Folyamatos zöld fény: teljesen feltöltött akkumulátor
- Villogó zöld fény: közepesen feltöltött akkumulátor
- Villogó sárga fény és három hangjelzés: kevéssé feltöltött
akkumulátor
- Villogó sárga fény és kétszer öt hangjelzés: Már egy fogmosáshoz
sem elegendő (töltse fel a fogkefét)
Tisztítás
Megjegyzés: Ne tisztítsa a fogkefefejet, a fogkefenyelet vagy az
utazótokot mosogatógépben.
Fogkefe markolata
1 Távolítsa el a fogkefefejet, majd öblítse le a fém tengely területét
meleg vízzel. Ügyeljen arra, hogy eltávolítsa a készüléken maradt
fogkrémet (ábra 14).
Megjegyzés: Ne nyomja meg a fémtengelyen lévő gumitömítést
éles tárgyakkal, mivel azzal sérülést okozhat.
2 A markolat teljes felületét nedves ruhával törölje le.
Megjegyzés: Ne használjon izopropil-alkoholt, ecetet vagy
fehérítőt a nyél tisztításához, mert az elszíneződést okozhat.
Fogkefefej
1 Öblítse le a fogkefefejet és a sörtéket minden egyes használat
(ábra 15) után.
2 Hetente legalább egyszer távolítsa el a fogkefefejet a markolatról,
és a fogkefefej csatlakozását öblítse le meleg vízzel.
99
Page 99

Magyar
100
Töltő
1 Tisztítás előtt húzza ki a töltő hálózati dugóját a fali aljzatból.
2 A töltő felületét törölje le nedves ruhával.
Tárolás
Ha hosszabb ideig nem használja Philips Sonicare fogkeféjét, húzza ki
a töltőt a hálózati aljzatból, tisztítsa meg, majd tegye hűvös, száraz,
közvetlen napfénytől védett helyre.
A modellszám helye
A modellszám (HX682x/HX683x) a Philips Sonicare fogkefe
markolatának alján található.
Újrahasznosítás
- Ez a szimbólum azt jelenti, hogy a termék nem kezelhető normál
háztartási hulladékként (2012/19/EU) (ábra 24).
- Ez a szimbólum azt jelenti, hogy a termék beépített újratölthető
akkumulátort tartalmaz, amelyet nem szabad háztartási
hulladékként (ábra 25) kezelni (2006/66/EK). Kérjük, hogy vigye el
a készüléket egy hivatalos gyűjtőhelyre vagy egy Philips
szervizközpontba, hogy szakember távolítsa el az akkumulátort.
- Tartsa be az elektromos és elektronikus termékek, akkumulátorok
és egyszer használatos elemek külön történő hulladékgyűjtésére
vonatkozó országos előírásokat. A megfelelő hulladékkezelés
segítséget nyújt a környezettel és az emberi egészséggel
kapcsolatos negatív következmények megelőzéséhez.
Az akkumulátor eltávolítása
Figyelmeztetés: Az akkumulátort csak akkor távolítsa el, ha leselejtezi
a készüléket. Az akkumulátor eltávolítása előtt győződjön meg arról,
hogy teljesen lemerült.
Az újratölthető akkumulátor eltávolításához törülközőre vagy
törlőruhára, kalapácsra és lapos fejű (normál) csavarhúzóra van
szükség. Kövesse az alapvető óvintézkedéseket az alábbi lépések
követésekor. Tartsa be az alapvető óvintézkedéseket az alábbi
Page 100

Magyar
lépések követésekor. Gondoskodjon a szem, a kéz, az ujjak és a
munkafelület védelméről.
1 Az akkumulátorok teljes lemerítéséhez vegye le a nyelet a
töltőegységről, kapcsolja be a Philips Sonicare fogkefét, és
működtesse mindaddig, amíg az magától le nem áll. Ismételje a
fenti lépést addig, amíg már nem tudja újra bekapcsolni a Philips
Sonicare fogkefét.
2 Távolítsa el és dobja ki a fogkefefejet. Az egész markolatot takarja
le törölközővel vagy ruhával (ábra 16).
3 A markolat tetejénél fogva tartsa a készüléket, és üsse meg a
markolatburkolatot 1,25 cm-rel az alsó vége felett. Határozottan
üsse meg kalapáccsal a készülék mind a 4 oldalát a zárósapka
(ábra 17) eltávolításához.
Megjegyzés: Lehet, hogy többször rá kell ütni a markolat végére
ahhoz, hogy eltörjenek a belső pattintható csatlakozók.
4 Távolítsa el a zárósapkát a fogkefe markolatáról. Ha a zárósapka
nem távolítható el könnyen a burkolatról, ismételje meg a 3. lépést,
amíg a zárósapka ki nem lazul (ábra 18).
5 Tartsa a fogkefemarkolatot fejjel lefelé, és nyomja le a tengelyt egy
kemény felületre. Ha a belső alkatrészek nem távolíthatók el
könnyen a burkolatból, ismételje meg a 3. lépést, amíg a belső
alkatrészek ki nem lazulnak (ábra 19).
6 Távolítsa el a gumi elemtartó fedelet.
7 Illesszen csavarhúzót az akkumulátort és a belső egység alsó
részén található fekete keret közé. Ezután emelje meg a
csavarhúzót az akkumulátortól távolodó irányba, hogy a fekete
keret (ábra 20) alja eltörjön.
8 Helyezze be a csavarhúzót az akkumulátor alsó része és a fekete
keret közé, hogy az akkumulátort és a zöld nyomtatott áramköri
lapot összekötő fém fül eltörjön. Ez felengedi az akkumulátor alsó
részét a keretről (ábra 21).
9 Fogja meg az akkumulátort, és húzza kifelé a belső alkatrészek
közül, hogy a második fémfül (ábra 22) eltörjön.
Figyelem! Ügyeljen arra, hogy az akkumulátorfülek éles szélei ne
okozzanak sérülést az ujjain.
101
 Loading...