How it Works
Log In / Sign Up
Buy Points
How it Works
FAQ
Contact Us
Questions and Suggestions
Users
Philips
Loading...
H
HX8032-07
HX8032/23
HX8032/64
HX8032/94
HX8071/10
2
HX8072
2
HX8111
14
HX8111-02
10
HX8111/12
8
HX8111-33
HX8140
HX8141
3
HX8154
HX8154-70
2
HX8181
2
HX8210-22
HX8211
5
HX8211/02
9
HX8211/06
2
HX8211 Sonicare AirFloss
HX8220/02
HX8221-02
2
HX8222/02
HX8232/08
HX8234/08
HX8240
HX8241
2
HX8241/02
HX8254/70
7
HX8255-02
HX8261-01
2
HX8271-20
HX8272-20
HX8273-20
HX8274/20
HX8281
HX8281-02
HX8331
4
HX8331-01
3
HX8331-02
HX8331/11
7
HX8331/12
6
HX8332/11
7
HX8332/12
HX8332/13
2
HX8332/30
HX8341/01
HX8341/11
8
HX8372-51
HX8381/21
8
HX8381-51
HX8382/13
2
HX8382/14
HX8391-02
2
HX8424
2
HX8424/30
2
HX8431-02
HX8431-03
2
HX8432
3
HX8432/03
3
HX8432-26
HX8438
2
HX8438-01
2
HX843803
4
HX8460/01
2
HX8462
HX8462-01
2
HX8491-01
HX8491-03
2
HX8492-01
HX8492-03
HX8494-01
HX8494-03
HX8911
2
HX8911/01
5
HX8911/02
10
HX8911-04
HX8911/30
8
HX8911/35
3
HX8911/99
7
HX8912/02
8
HX8915/01
HX8918/10
2
HX8923-34
2
HX8931
HX9002
6
HX9002-07
2
HX9002-10
HX9002/23
HX9002/64
HX9002/66
HX9003
HX9003-64
2
HX9004
3
HX9004-07
HX9006/84
HX9012
HX9012/07
HX9012/10
2
HX9014/10
2
Loading...
Loading...
Nothing found
HX8381/21
Leaflet
3 pgs
513.23 Kb
0
User manual
56 pgs
871.5 Kb
0
User manual
28 pgs
1.05 Mb
0
User manual
48 pgs
1.7 Mb
0
User manual
86 pgs
969.31 Kb
0
User manual
40 pgs
4.37 Mb
0
User manual
32 pgs
1.43 Mb
0
User manual
20 pgs
2.11 Mb
0
Table of contents
Loading...
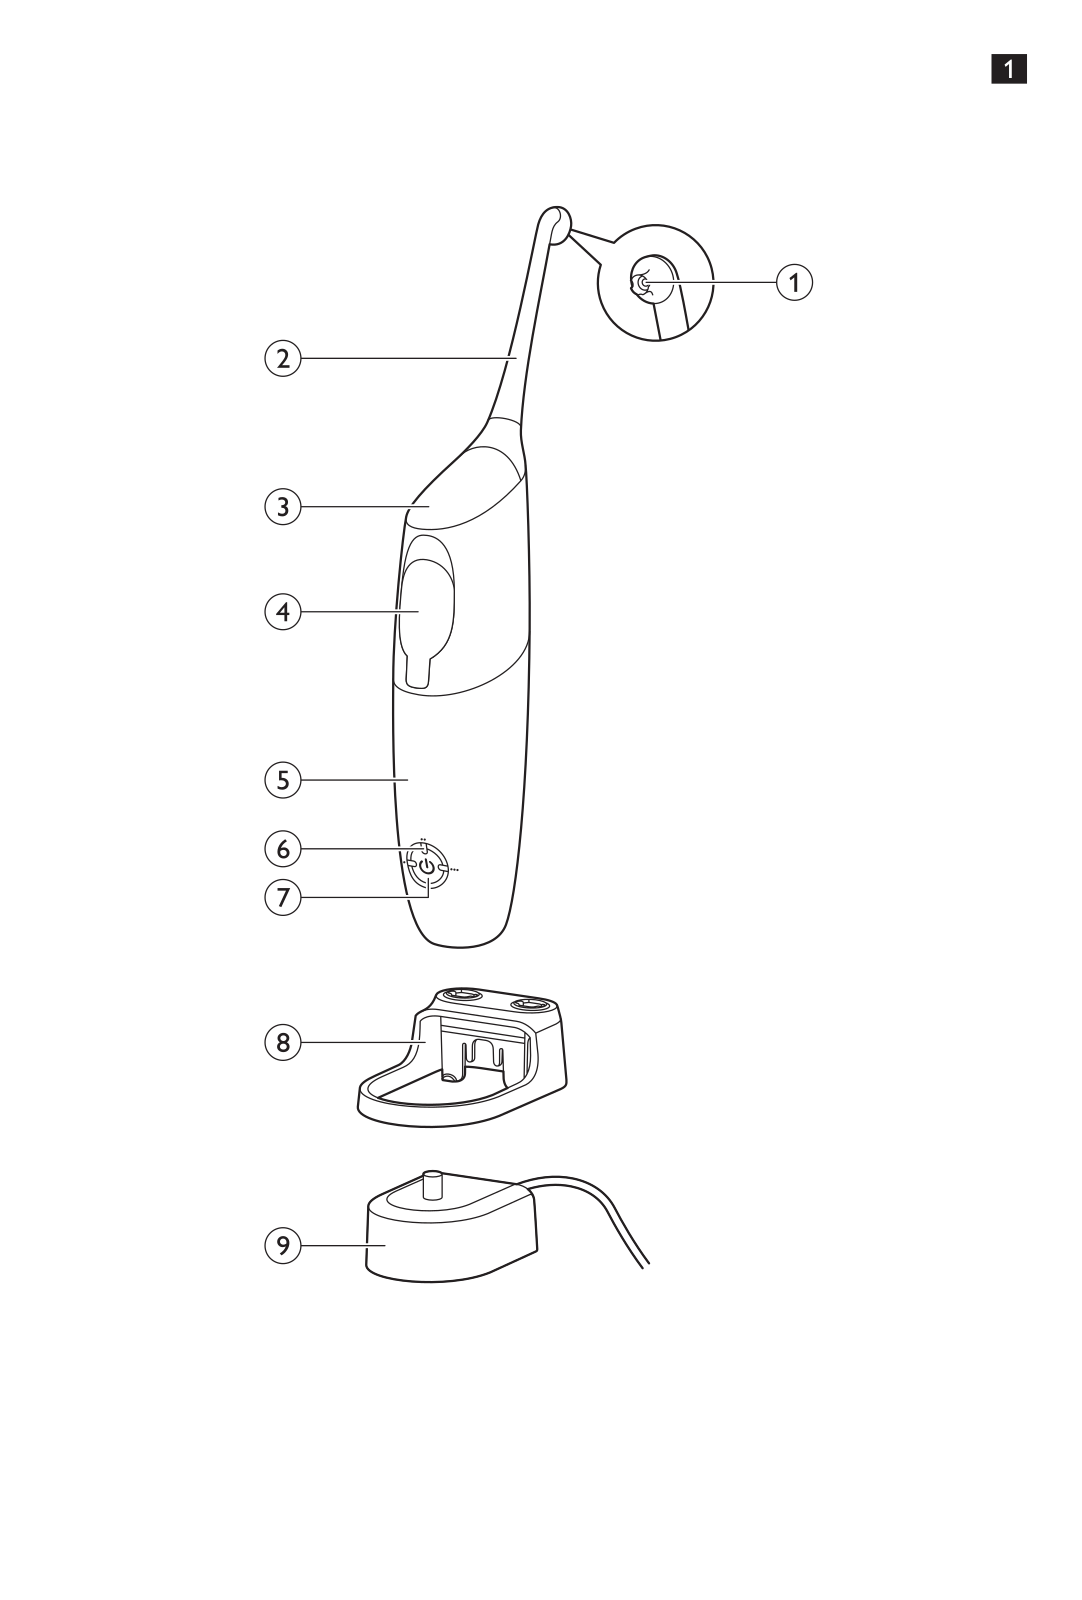
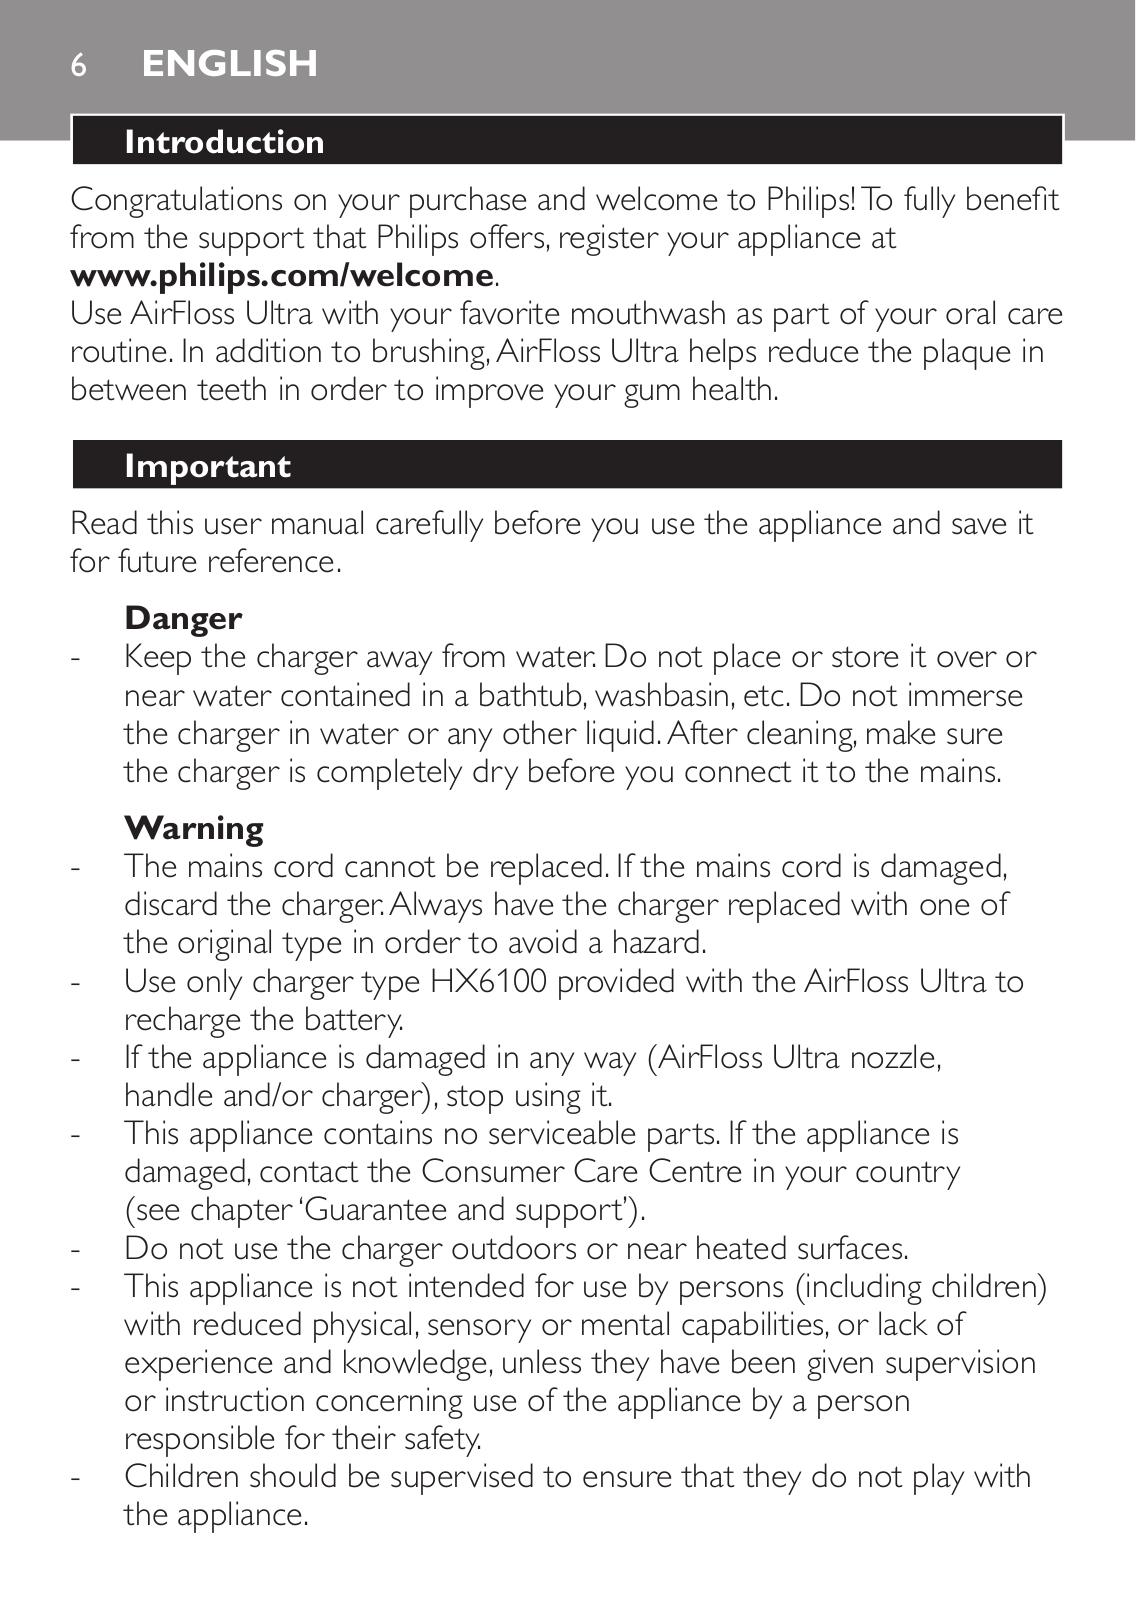
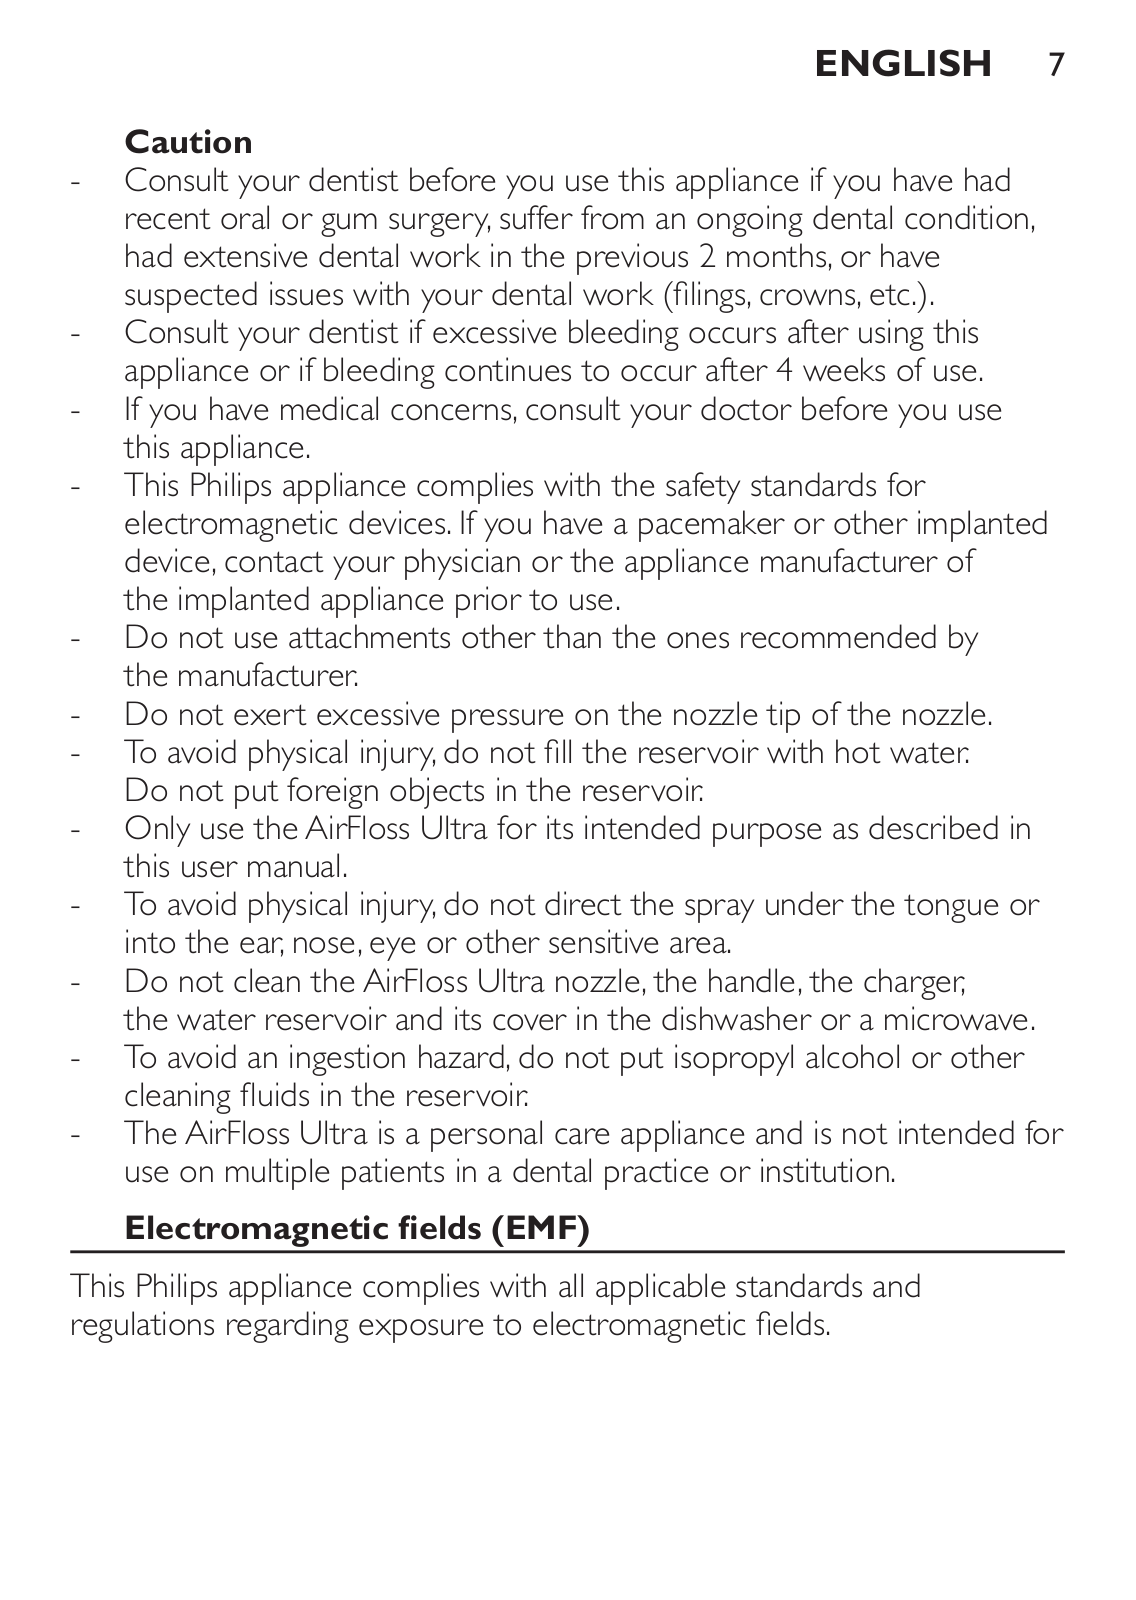
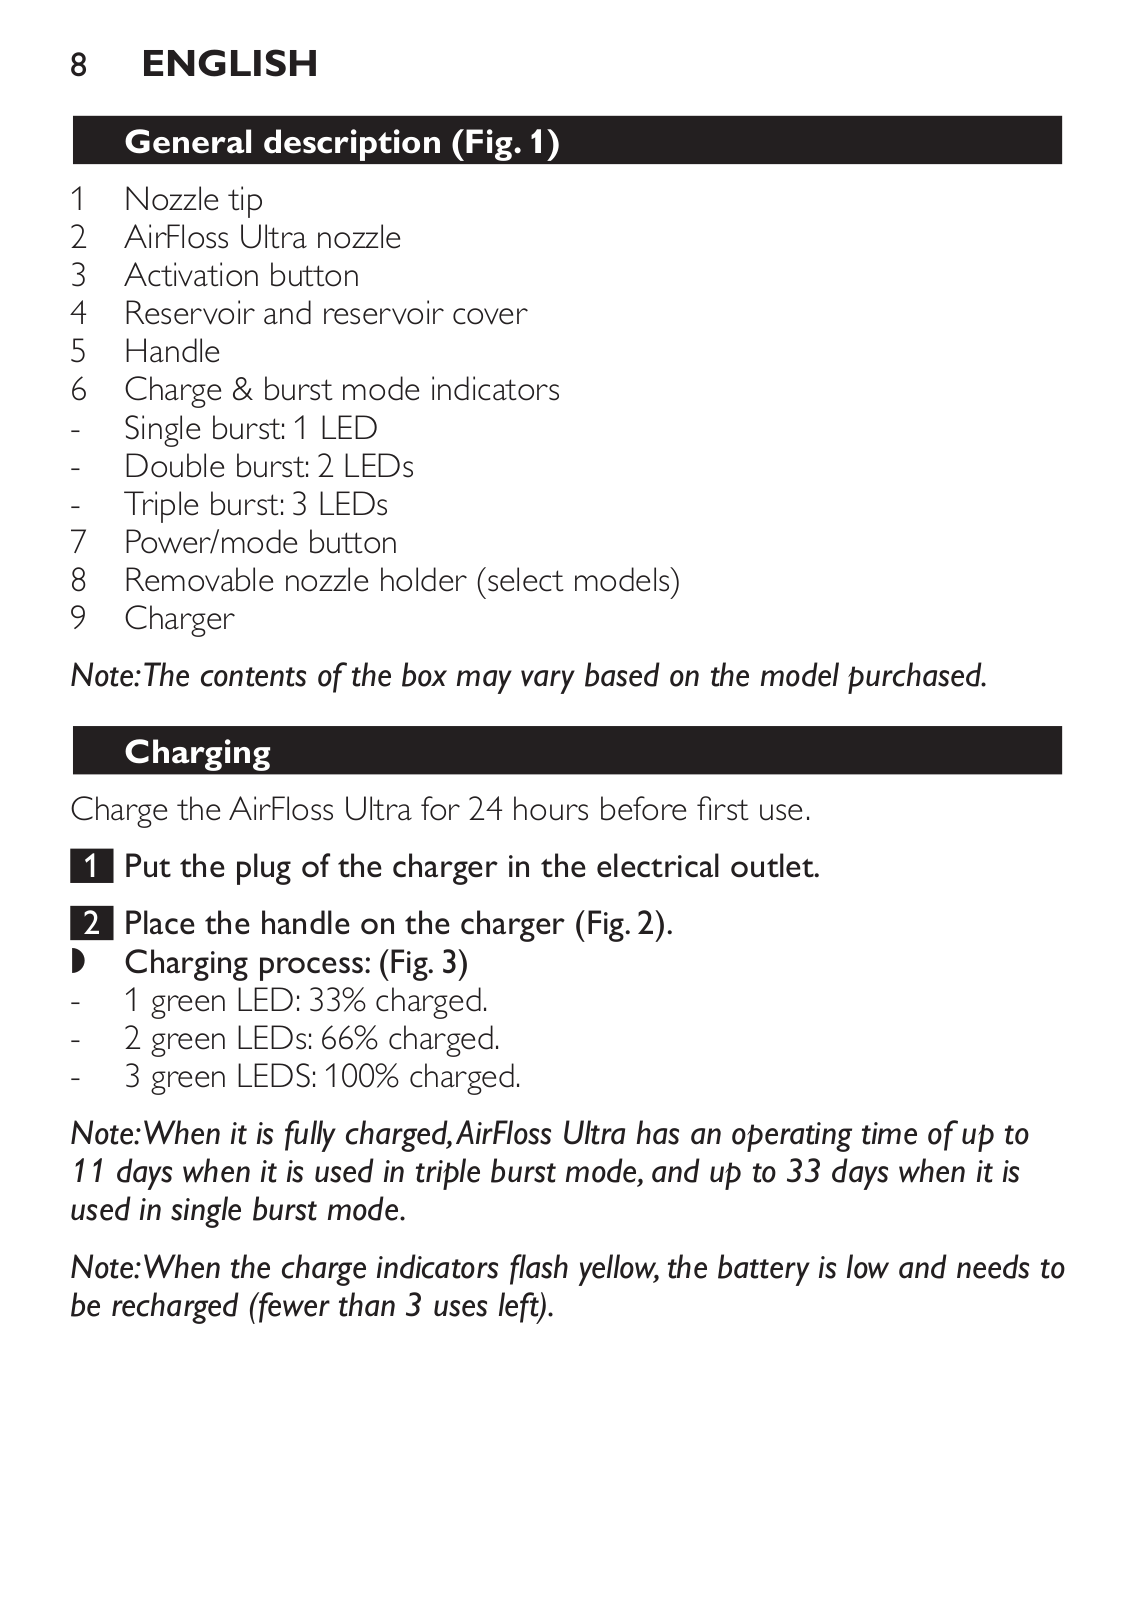
Philips HX8381/21, HX8341/11, HX8332/11, HX8331/12, HX8331/11 User manual
...
Philips User manual
Download
Specifications and Main Features
Frequently Asked Questions
User Manual
Download
Loading...
+
28
hidden pages
Unhide
You need points to download manuals.
1 point = 1 manual.
You can buy points or you can get point for every manual you upload.
Buy points
Upload your manuals
 Loading...