

Page 1
Register your product and get support at
www.philips.com/welcome
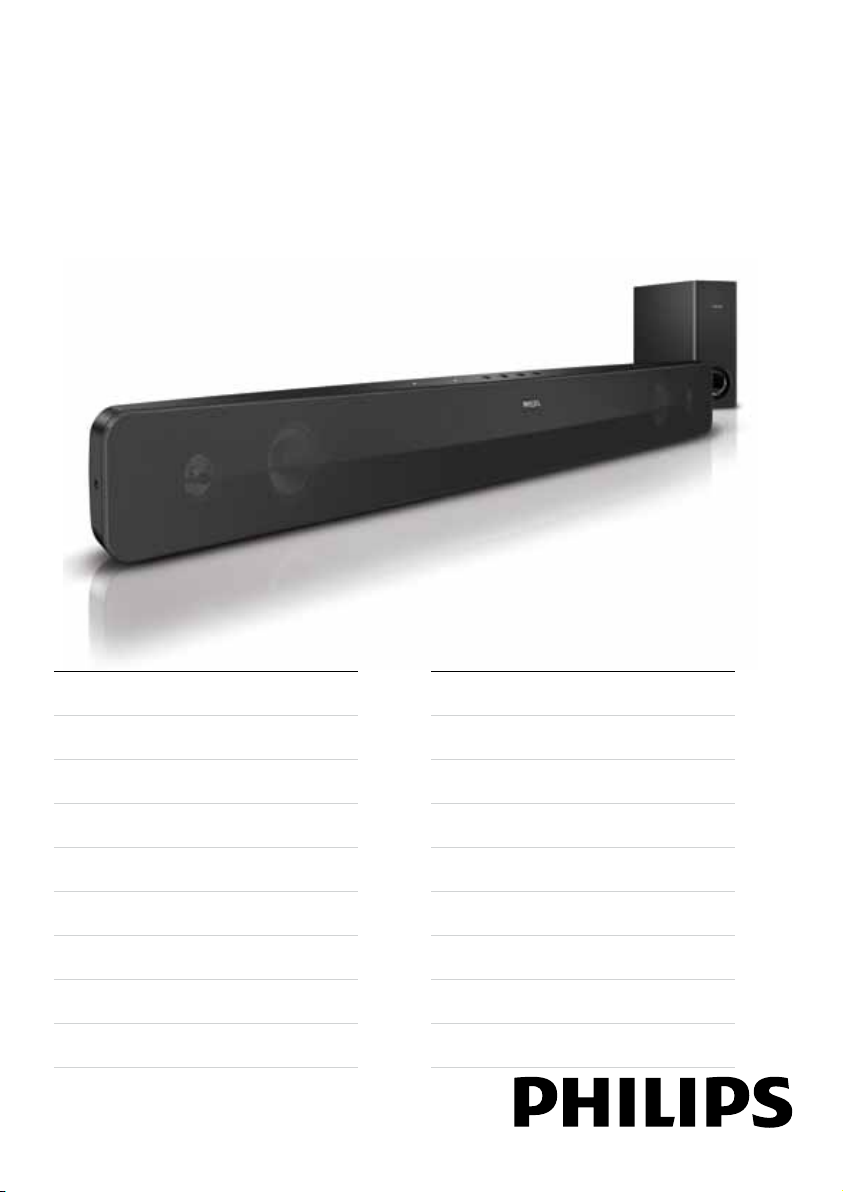
HTS3121
EN User manual
DA Brugervejledning
DE Benutzerhandbuch
EL Εγχειρίδιο χρήσης
ES Manual del usuario
FI Käyttöopas
FR Mode d’emploi
IT Manuale utente
NL Gebruiksaanwijzing
NO Brukerhåndbok
PT Manual do utilizador
SV Användarhandbok
TR Kullanım kılavuzu
CS Příručka pro uživatele
HU Felhasználói kézikönyv
PL Instrukcja obsługi
RO Manual de utilizare
SK Príručka užívateľa
Page 2

Page 3

Contents
1 Notice 2
Compliance 2
Mains fuse (UK only) 2
Trademarks 2
2 Important 3
Safety 3
Product care 4
Disposal of your old product and batteries 4
Contact us 4
3 Your SoundBar 5
Main unit 5
Remote control 5
4 Connect your SoundBar 7
Connectors 7
5 Use your SoundBar 8
Before you start 8
Play audio from TV or other devices 8
Adjust the volume 8
Choose your sound 8
Apply factory settings 9
English
6 Wall mount your SoundBar 9
7 Product specications 10
EN
1
Page 4
©
1 Notice
Trademarks
Compliance
This product is in compliance with the essential
requirements and other relevant provisions of
Directives 2006/95/EC (Low Voltage), 2004/108/
EC (EMC).
Mains fuse (UK only)
This product is tted with an approved moulded
plug. Should it become necessary to replace the
mains fuse, this must be replaced with a fuse of
the same value as indicated on the plug (example
10A).
1 Remove fuse cover and fuse.
2 The replacement fuse must comply with BS
1362 and have the ASTA approval mark. If
the fuse is lost, contact your dealer in order
to verify the correct type.
3 Ret the fuse cover.
Note
To conform with the EMC directive
•
(200 4/108/EC), the mains plug on this produc t
must not be detached from the mains cord.
Manufactured under license under U.S. Patent
#’s: 5,451,942; 5,956,674; 5,974,380; 5,978,762;
6,487,535 & other U.S. and worldwide patents
issued & pending. DTS and the Symbol are
registered trademarks & DTS Digital Surround
and the DTS logos are trademark s of DTS, Inc.
Product includes sof tware.
Reserved.
DTS, Inc. All Rights
Dolby, Pro Logic and the double-D symbol are
trademarks of Dolby Laboratories.
2
EN
Page 5

2 Important
Read and understand all instructions before you
use your SoundBar. If damage is caused by failure
to follow instructions, the warranty does not apply.
Safety
Risk of electric shock or re!
• Never expose the product and accessories
to rain or water. Never place liquid
containers, such as vases, near the product.
If liquids are spilt on or into the product,
disconnect it from the power outlet
immediately. Contact Philips Consumer
Care to have the product checked before
use.
• Never place the product and accessories
near naked ames or other heat sources,
including direct sunlight.
• Never insert objects into the ventilation
slots or other openings on the product.
• Where the mains plug or an appliance
coupler is used as the disconnect device,
the disconnect device shall remain readily
operable.
• Disconnect the product from the power
outlet before lightning storms.
• When you disconnect the power cord,
always pull the plug, never the cable.
Risk of short circuit or re!
• Before you connect the product to the
power outlet, ensure that the power
voltage matches the value printed on the
back or bottom of the product. Never
connect the product to the power outlet if
the voltage is different.
Risk of injury or damage to the SoundBar!
• For wall-mountable products, use only the
supplied wall mount bracket. Secure the
wall mount to a wall that can suppor t the
combined weight of the product and the
wall mount. Koninklijke Philips Electronics
N.V. bears no responsibility for improper
wall mounting that results in accident, injury
or damage.
• Never place the product or any objects
on power cords or on other electrical
equipment.
• If the product is transpor ted in
temperatures below 5°C, unpack the
product and wait until its temperature
matches room temperature before
connecting it to the power outlet.
Risk of overheating!
• Never install this product in a conned
space. Always leave a space of at least four
inches around the product for ventilation.
Ensure curtains or other objects never
cover the ventilation slots on the product.
Risk of contamination!
• Danger of explosion if battery is incorrectly
replaced. Replace only with the same or
equivalent type.
• Remove battery if it is exhausted or if the
remote control is not to be used for a long
time.
• Battery contains chemical substances, it
should be disposed of properly.
Risk of swallowing batteries!
• The product/remote control may contain a
coin type battery, which can be swallowed.
Keep the battery out of reach of children at
all times!
English
EN
3
Page 6

Product care
Contact us
Only use microber cloth to clean the product.
Disposal of your old product
and batteries
Your product is designed and manufactured with
high quality materials and components, which can
be recycled and reused.
When this crossed-out wheeled bin symbol is
attached to a product it means that the product
is covered by the European Directive 2002/96/
EC. Please inform yourself about the local separate
collection system for electrical and electronic
products.
Please act according to your local rules and do not
dispose of your old products with your normal
household waste.
Correct disposal of your old product helps to
prevent potential negative consequences for the
environment and human health.
Warning
Risk of electric shock. Never remove the
•
casing of the product.
To keep the warranty valid, never try to repair the
product yourself.
If you have problems using this product, register
your product and get support at www.philips.com/
welcome.
If you contact Philips, you will be asked for the
model and serial number of your product. The
model number and serial number are on the
back or bottom of your product. Write the
numbers here:
Model No. __________________________
Serial No. ___________________________
Your product contains batteries covered by the
European Directive 2006/66/EC, which cannot be
disposed with normal household waste.
Please inform yourself about the local rules on
separate collection of batteries because correct
disposal helps to prevent negative consequences
for the environmental and human health.
4
EN
Page 7

5
1
3
4
7
6
2
3 Your SoundBar
3
21
4
5
6
Remote control
Congratulations on your purchase, and welcome
to Philips! To fully benet from the support that
Philips offers, register your SoundBar at
www.philips.com/welcome.
Main unit
a (Standby-On)
• Switch the SoundBar on.
• When the SoundBar is on standby, the
standby indicator is red.
b SOURCE
Select an audio source.
c +/- (Volume)
Increase or decrease volume.
d LED indicator
Blink when a remote control button is
pressed.
e Source indicators
Light up when the source is selected.
f Sound mode indicators
• DTS: Light up when you play a source
with DTS.
• DOLBY D: Light up when you play a
source with Dolby Digital.
• DVS: Light up when you select DVS
mode.
English
a (Standby-On)
• Switch the SoundBar on.
• When the SoundBar is on standby, the
standby indicator is red.
b Source buttons
• AUX: Switch your audio source to the
AUX connection.
• OPTICAL: Switch your audio source
to the optical connection.
• COA XIAL: Switch your audio source
to the coaxial connection.
• MP3 LINK: Switch your audio source
to the MP3 link connection.
EN
5
Page 8

3
1
2
c SURROUND
• Switch to DVS mode or stereo mode.
• Press and hold to set night mode.
d TREBLE +/-
Increase or decrease treble.
e VOL +/-
Increase or decrease volume.
f BASS +/-
Increase or decrease bass.
g MUTE
Mute or restore volume.
Replace battery
Warning
The product/remote control may contain a
•
coin type battery, which can be swallowed.
Keep the battery out of reach of children at
all times!
Caution
The batter y contains perchlorate material,
•
handle it with care. For information see www.
dtsc.ca.gov/hazardouswaste/perchlorate.
1 Open the battery compartment.
2 Inser t one CR2025 battery, with the
polarity (+/-) as indicated.
3 Close the battery compar tment.
EN
6
Page 9

3
1 2
4 Connect your
MP3
LINK
Bottom connectors
SoundBar
This section helps you connect your SoundBar to
a TV and other devices. For information about the
basic connections of the SoundBar and accessories,
see the Quick start guide.
Note
Refer to the type plate at the back or bottom
•
of the product for identication and supply
ratings.
• Before you make or change any connections,
ensure that all devices are disconnected from
the power outlet.
Connectors
Side connector
MP3 LINK
Audio input from an MP3 player.
English
a DIGITAL IN-OPTICAL
Connect to the optical audio output on a
TV or digital device.
b DIGITAL IN-COAXIAL
Connect to the coaxial audio output on a
TV or digital device.
c AUDIO IN-AUX L/R
Connect to the analog audio output on a
TV or analog device.
Back connector
SUBWOOFER
Connect to the subwoofer.
7
EN
Page 10

5 Use your SoundBar
Choose your sound
This section helps you use the SoundBar to play
audio from connected devices.
Before you start
Check that you make the necessary connections.
Play audio from TV or other devices
Press the Source buttons to select the audio
output of the connected device.
Adjust the volume
To increase or decrease volume, press VOL +/-.
• The LED indicator on the front panel lights
up for ve seconds when the volume is set
to maximum.
To mute sound, press MUTE.
» The LED indicator on the front panel
blink continuously.
• To restore the sound, press MUTE again or
press VOL +/-.
This section helps you choose the ideal sound for
your video or music.
Change treble or bass
Change the high frequency (treble) or low
frequency (bass) settings of the SoundBar to suit
your video or music.
Press TREBLE +/- or BASS +/- to increase or
decrease treble or bass.
• The LED indicator on the front panel lights
up for ve seconds when the treble or bass
is set to maximum.
Change virtual surround mode
DVS (Dolby Virtual Speaker) technolog y
creates a highly compelling 5.1-channel listening
experience from as few as two speakers.
Press SURROUND to switch DVS mode or
stereo mode.
» In DVS mode, the DVS indicator lights
up on the top panel.
Change night mode
For quiet listening, decrease the volume of loud
sounds when you play discs. Night mode is only
available for Dolby encoded DVD and Blu-ray
discs.
Press and hold SURROUND to switch night
mode on or off.
» When the night mode is on, the
8
EN
indicators dim.
Page 11

Apply factory settings
6 Wall mount your
You can reset your SoundBar to the default
settings programmed at the factory.
In AUX mode, press TREBLE+, VOL-, and BASS+
within three seconds.
» When the restore factor y settings
process is complete, the standby
indicator blinks ve times. Your SoundBar
automatically switches off and back on
again.
SoundBar
For detailed steps about how to wall mount your
SoundBar, refer to Quick start guide.
Note
You can remove the three rubber feet at the
•
bottom of the SoundBar before wall mount.
• If the rubber feet are removed, you cannot
place them back again at the bottom of the
So undBa r.
English
EN
9
Page 12

7 Product
specifications
Note
Specication and design are subject to change
•
without notice.
Amplier
• Total output power: 120W RMS (30%
THD)/ 90W RMS (10% THD)
• Frequency response: 20 Hz-20 kHz / ±3dB
• Signal-to-noise ratio: > 65 dB (CCIR) /
(A-weighted)
• Input sensitivity:
• AUX: 1.0 V
• MP3 LINK: 0.5 V
Audio
• S/PDIF Digital audio input:
• Coaxial: IEC 60958-3
• Optical: TOSLINK
Main Unit
• Power supply: 110-240 V~; 50-60 Hz
• Power consumption: 30 W
• Standby power consumption: ≤ 1 W
• Impedance: 3 ohm woofer, 4 ohm tweeter
• Speaker drivers: 65 mm (2. 5”) woofer, 38
mm (1.5”) tweeter
• Frequency response: 150 Hz ~ 20 kHz
• Dimensions (WxHxD): 945 x 93 x 58 mm
• Weight: 1.7 kg
Subwoofer
• Impedance: 3 ohm
• Speaker drivers: 165 mm (6.5”) woofer
• Frequency response: 20 Hz-150 Hz
• Dimensions (WxHxD): 123 x 309 x 369
mm
• Weight: 3.81 kg
• Cable length: 4 m
Wall Mount
• Dimensions (WxHxD): 260 x 40 x 15 mm
• Weight: 0.16 kg
10
EN
Page 13

© 2011 Koninklijke Philips Electronics N.V.
All rights reserved.
sgptt_1114/12_v1
 Loading...