

Philips HR2357/05 User Manual
2 ENGLISH
Congratulations on your purchase, and welcome to Philips!
To fully benet from the support that Philips offers, register your product at
www.Philips.com/welcome.
Read this user manual carefully before you install and use the unit. Save it for future
reference.
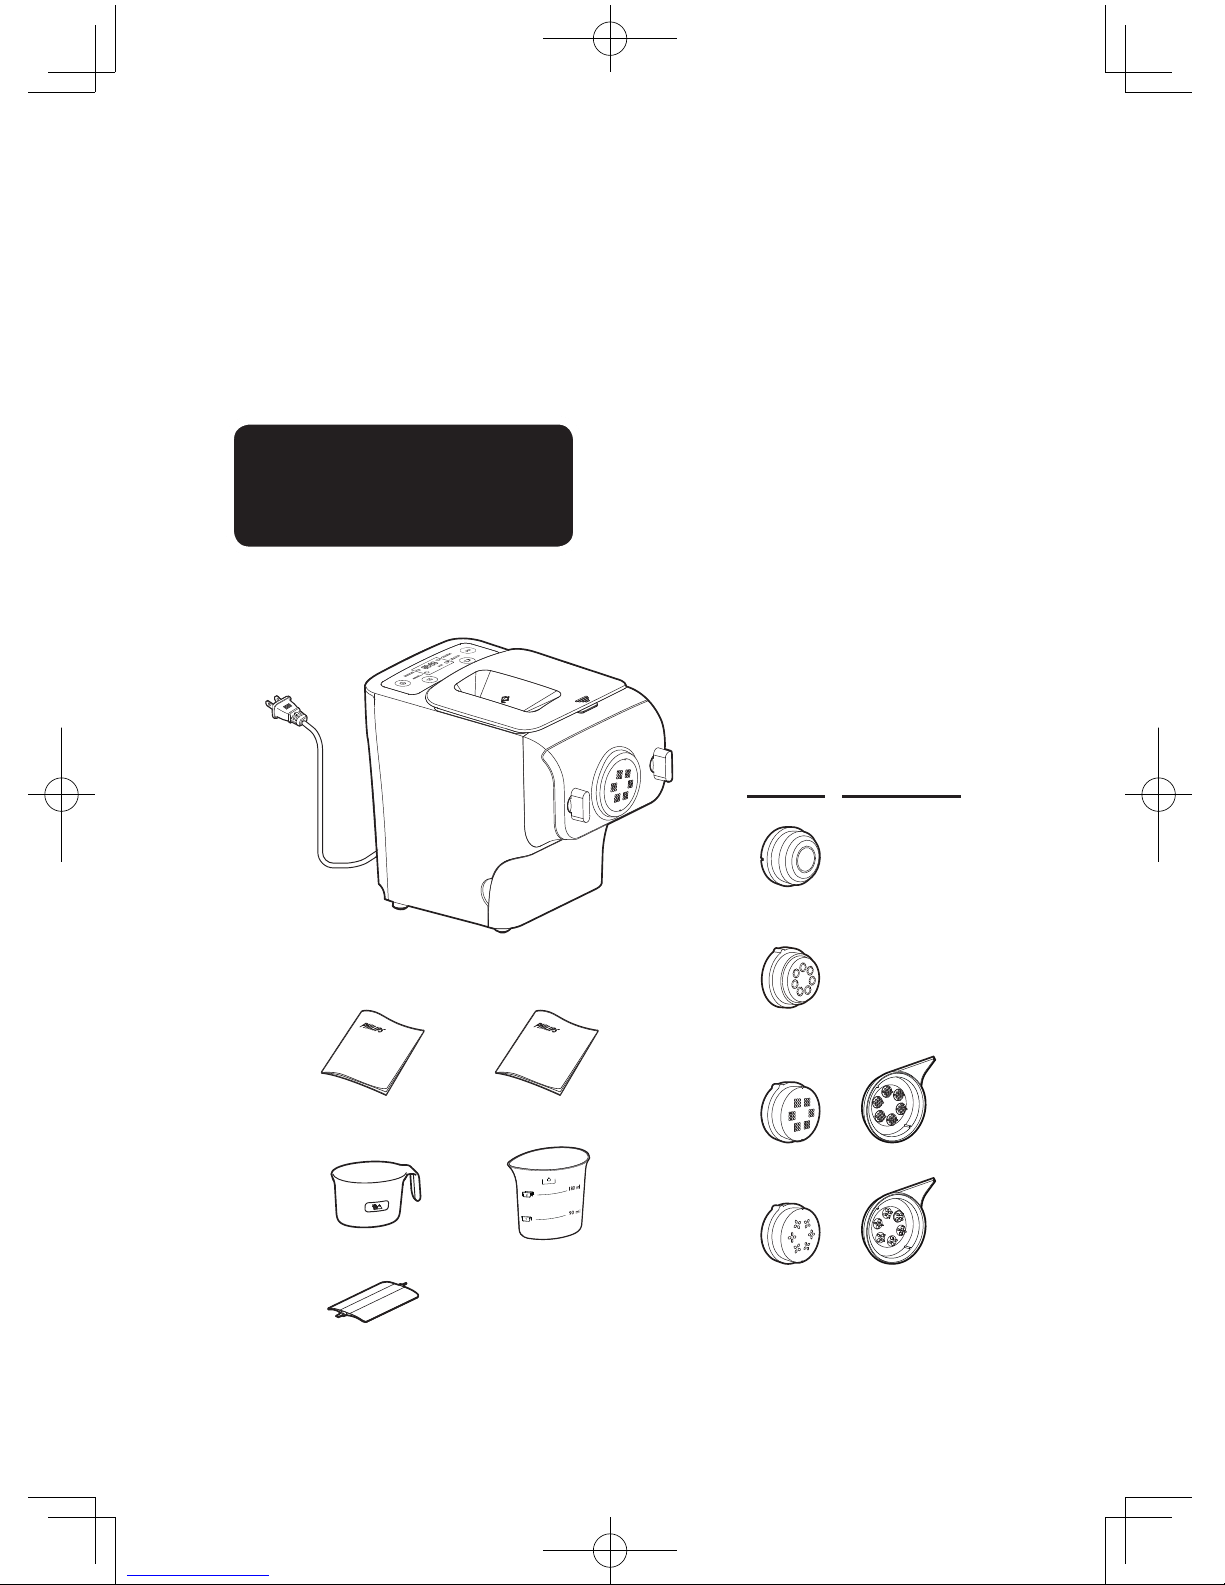
What's in the box
Shaping
discs
Cleaning tools
Lasagna/
Dumpling
Penne
Spaghetti
Assembled on
the appliance
upon purchase
Fettuccine
Water cup
User manual Recipe book
Main unit
Flour cup
Flat cleaning tool
Use the at
cleaning tool
Use the at
cleaning tool
12 ENGLISH
Important
Using the pasta
maker
Preparing the ingredients
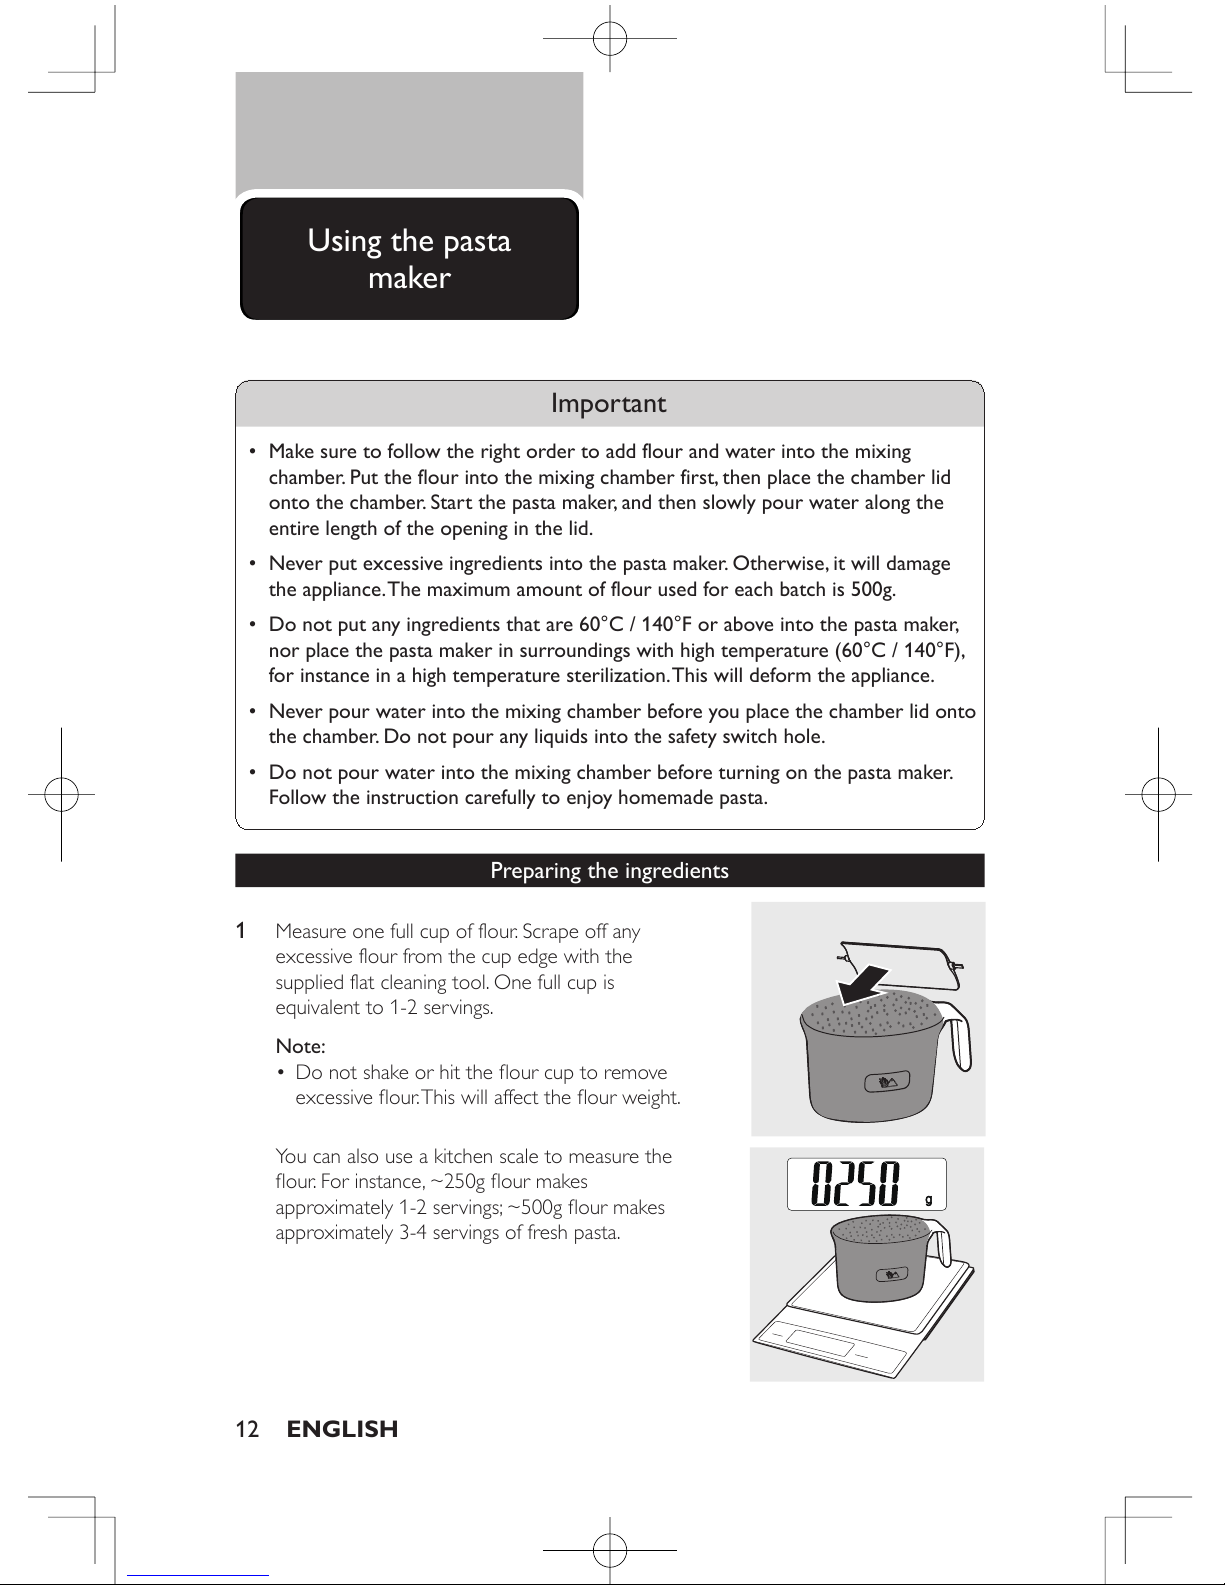
1
Measure one full cup of flour. Scrape off any
excessive flour from the cup edge with the
supplied flat cleaning tool. One full cup is
equivalent to 1-2 servings.
Note:
• Do not shake or hit the our cup to remove
excessive our. This will affect the our weight.
You can also use a kitchen scale to measure the
our. For instance, ~250g our makes
approximately 1-2 servings; ~500g our makes
approximately 3-4 servings of fresh pasta.
• Make sure to follow the right order to add flour and water into the mixing
chamber. Put the flour into the mixing chamber first, then place the chamber lid
onto the chamber. Start the pasta maker, and then slowly pour water along the
entire length of the opening in the lid.
• Never put excessive ingredients into the pasta maker. Otherwise, it will damage
the appliance. The maximum amount of flour used for each batch is 500g.
• Do not put any ingredients that are 60°C / 140°F or above into the pasta maker,
nor place the pasta maker in surroundings with high temperature (60°C / 140°F),
for instance in a high temperature sterilization. This will deform the appliance.
• Never pour water into the mixing chamber before you place the chamber lid onto
the chamber. Do not pour any liquids into the safety switch hole.
• Do not pour water into the mixing chamber before turning on the pasta maker.
Follow the instruction carefully to enjoy homemade pasta.
ENGLISH 13
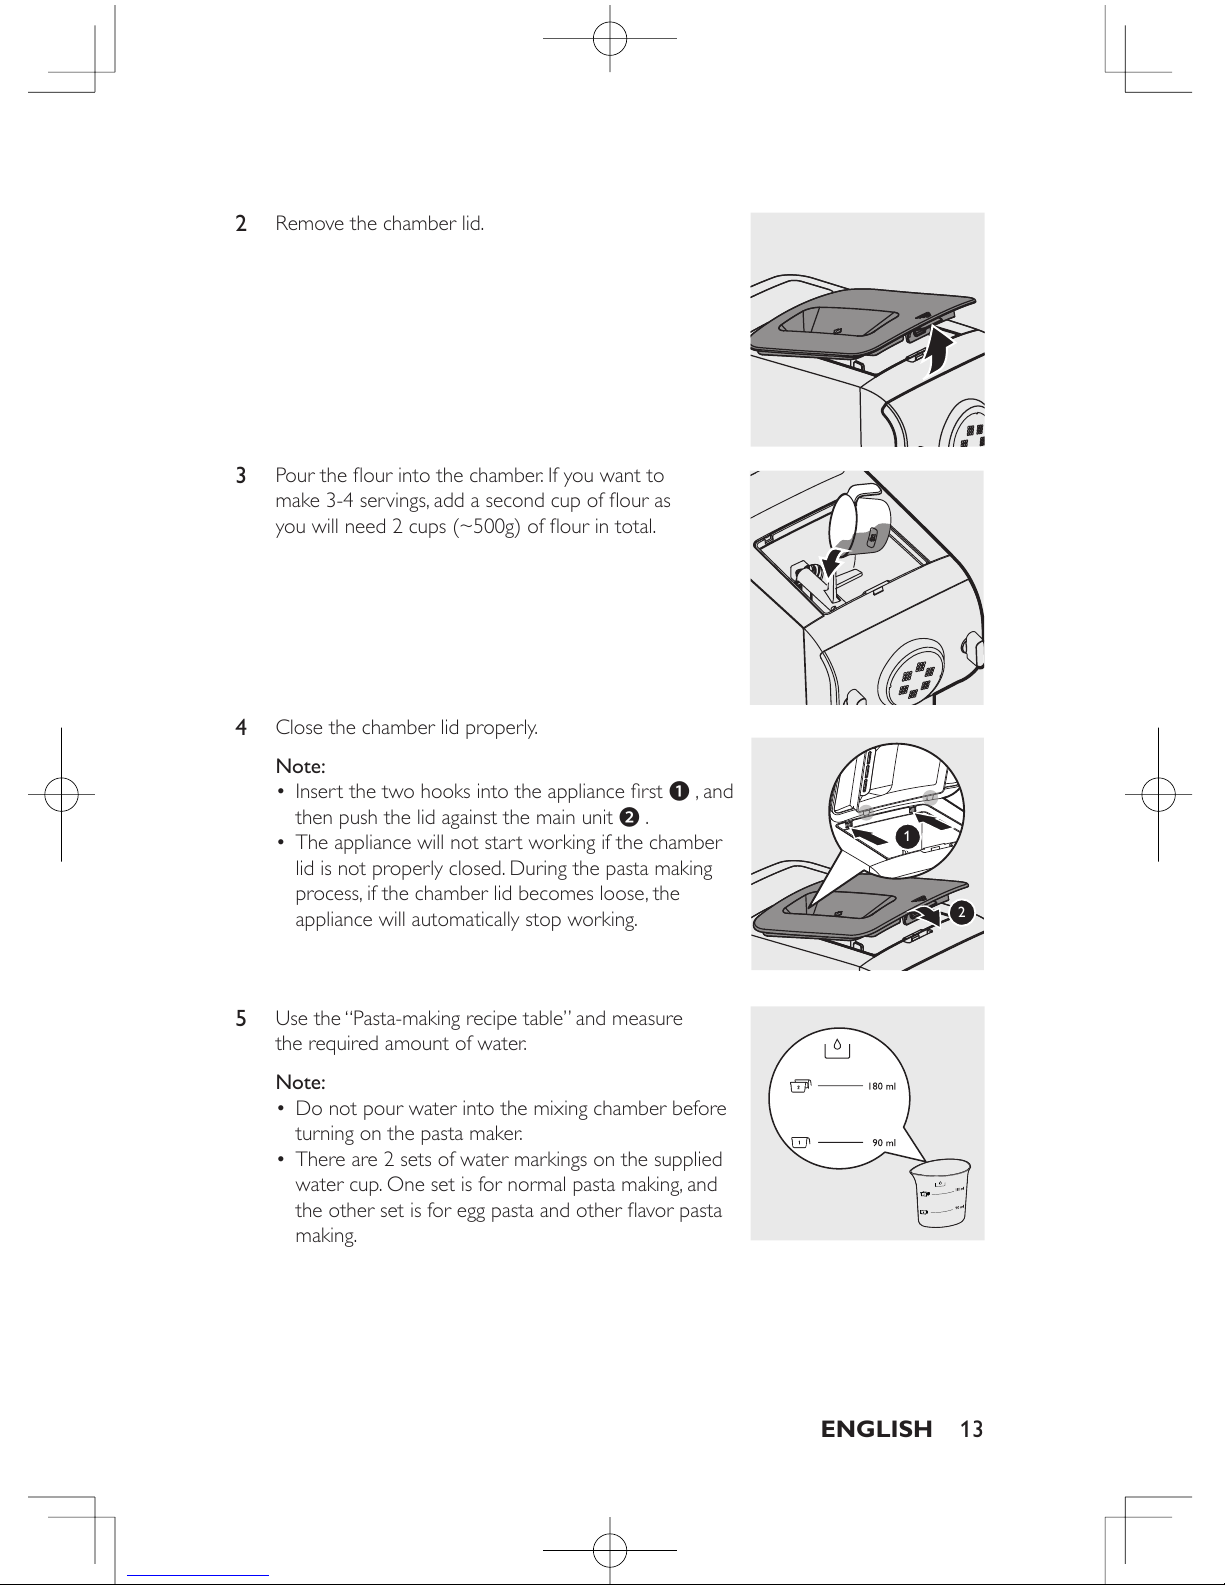
2
Remove the chamber lid.
3
Pour the our into the chamber. If you want to
make 3-4 servings, add a second cup of our as
you will need 2 cups (~500g) of our in total.
4
Close the chamber lid properly.
Note:
• Insert the two hooks into the appliance rst ❶, and
then push the lid against the main unit ❷.
• The appliance will not start working if the chamber
lid is not properly closed. During the pasta making
process, if the chamber lid becomes loose, the
appliance will automatically stop working.
5
Use the “Pasta-making recipe table” and measure
the required amount of water.
Note:
• Do not pour water into the mixing chamber before
turning on the pasta maker.
• There are 2 sets of water markings on the supplied
water cup. One set is for normal pasta making, and
the other set is for egg pasta and other avor pasta
making.
1
2
 Loading...