

Philips HR1799, HR1797, HR1791 User Manual
HR1799, HR1797, HR1791
4206 100 33950 18-05-2005 16:32 Page 1

2
4206 100 33950 18-05-2005 16:32 Page 2

ENGLISH 4
BAHASA INDONESIA 20
HR1799, HR1797, HR1791
4206 100 33950 18-05-2005 16:32 Page 3

Introduction
The appliance is equipped with a motor protection
device that will SWITCH OFF the motor in case of
a motor jam (which might occur during heavy
processing jobs or if the appliance is not used in
accordance wih the instructions). If this happens,
SWITCH OFF and UNPLUG the appliance first,
then check if the quantity of ingredients you are
processing does not exceed the quantity
mentioned in the directions for use, or if something
is blocking the blades.Then press the button at the
bottom of the appliance and continue processing.
We advise you to process large quantities of
ingredients in a series of smaller batches. DO NOT
exceed the processing time indicated in the
directions for use when processing a batch.
Safety notice
Always unplug the appliance from the mains
before assembling, disassembling or making
adjustments to any of the accessories.
Keep the appliance out of the reach of children.
The motor only starts if the blender jar or the mill
attachment has been correctly assembled onto
the motor unit.
Make sure the blade unit is securely fastened onto
the mill beaker before you screw the mill
attachment onto the motor unit.
Never touch the blade unit when it is assembled
on the appliance and the appliance is plugged in.
Avoid touching the cutting edges of the blade
units when cleaning them.They are very sharp
and you could easily cut your fingers on them.
ENGLISH4
4206 100 33950 18-05-2005 16:32 Page 4

Important
◗ Read these instructions for use carefully and
look at the illustrations before using the
appliance.
◗ Keep these instructions for future reference.
◗ Check if the voltage indicated on the
appliance corresponds to the local mains
voltage (110-127V or 220-240V) before you
connect the appliance.
◗ Never use any accessories or parts from
other manufacturers or that have not been
specifically advised by Philips.Your guarantee
will become invalid if such accessories or
parts have been used.
◗ Do not exceed the maximum level indicated
on the accessories.
◗ Do not exceed the quantities and preparation
times indicated in the table.
◗ Never remove accessories or parts from the
motor unit while the appliance is running.
Always unplug the appliance first.
◗ Never use the accessories to switch the
appliance on and off!
◗ Never let the appliance run unattended.
◗ Do not use the appliance if the mains cord,
the plug or other parts are damaged.
◗ If the mains cord of this appliance is damaged,
it must always be replaced by Philips or a
service centre authorised by Philips in order
to avoid hazardous situations.
◗ Let hot ingredients cool down before
chopping them or pouring them into the jar
(max. temperature 80cC/175cF), especially for
recipes that require large quantities of oil or fat.
ENGLISH 5
4206 100 33950 18-05-2005 16:32 Page 5
◗ To avoid spillage, never fill the jar beyond the
maximum level indication (1.5 litres),
particularly not if you are blending hot liquids
(maximum 1.1 litres).
◗ To avoid spillage, always insert the stopper
into the lid before you start processing.
◗ Never reach into the jar with your fingers or
an object while the appliance is running or
when the appliance is connected to the mains.
◗ If the ingredients stick to the wall of the
blender, switch the appliance off, unplug the
appliance and loosen the ingredients from the
wall by adding liquid or using a spatula.
Preparing the appliance for use
Wash all accessories and detachable parts (see
'Cleaning').
C
◗ Wind excess mains cord round the base of
the appliance.
Using the appliance
Blender
◗ The blender is intended for:
- Blending fluids, e.g. dairy products, sauces, fruit
juices, soups, mixed drinks, shakes.
- Mixing soft ingredients, e.g. pancake batter or
mayonnaise.
- Pureeing cooked ingredients, e.g. for making
baby food.
ENGLISH6
4206 100 33950 18-05-2005 16:32 Page 6
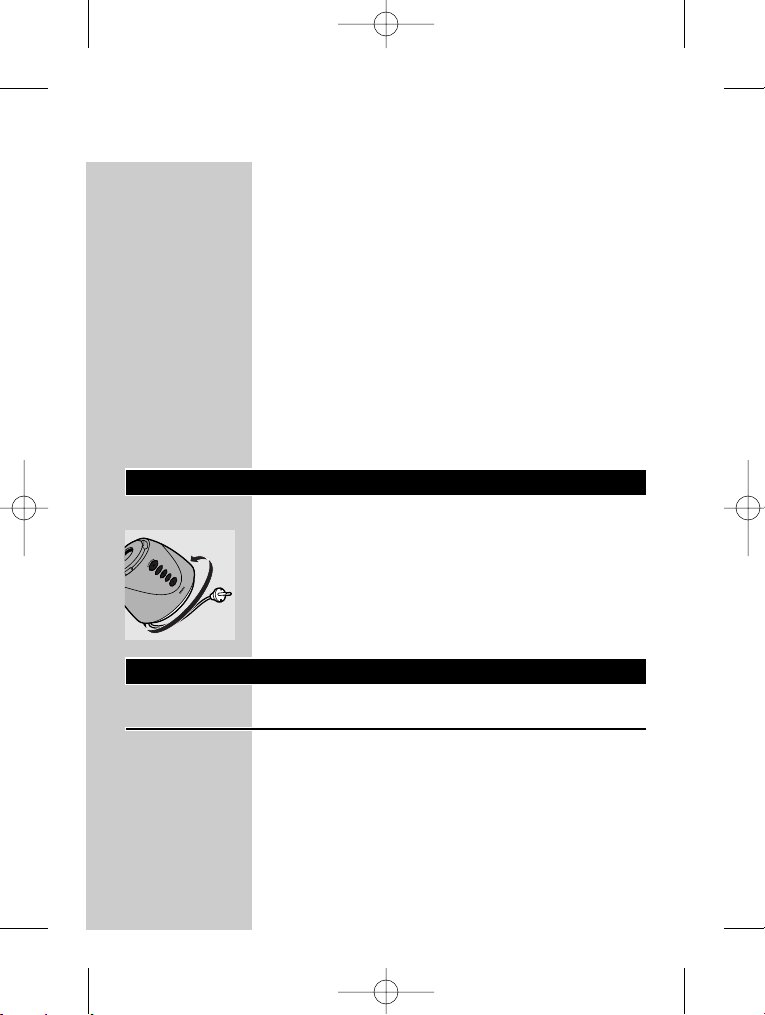
C
1 Place the rubber sealing ring on the rim of
the blade unit.
C
2 Mount the blade unit onto the jar by
turning it firmly in the direction of the
arrow.
C
3 Mount the jar onto the motor unit. Fasten
it by turning it in the direction of the
arrow.The jar is properly fixed when the
notch in its lower rim is in line with the
line above the buttons on the motor
housing.
Do not exert too much pressure on the handle
of the jar.
4 Open the lid by pressing the projection on
the side of the handle.
C
◗ To remove the lid, open it and then pull it
upwards.
Only remove the lid for cleaning purposes.
5 Put the ingredients in the jar.
Never fill the jar with ingredients that have a
temperature of over 80cC.
ENGLISH 7
4206 100 33950 18-05-2005 16:32 Page 7
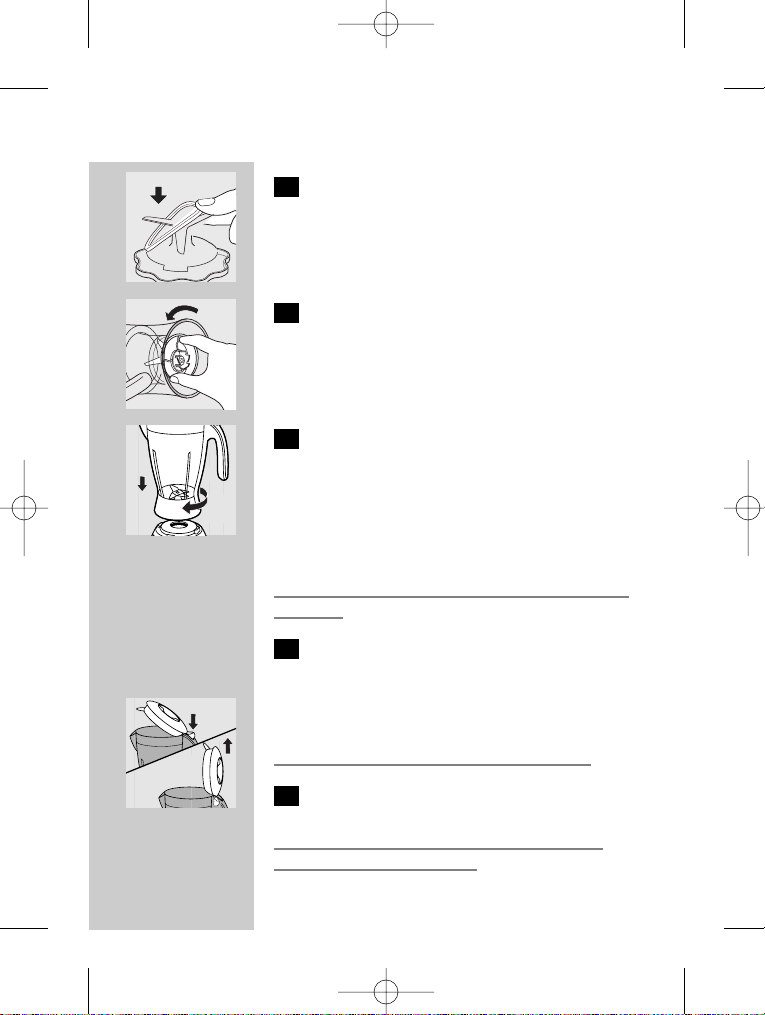
1
2
6 Close the lid
C
7 Insert the stopper into the lid.
To avoid spillage, always insert the stopper into
the lid before you start processing.
8 Put the mains plug in the wall socket.
C
9 Select the required setting by pressing the
appropriate button and the appliance will
switch on automatically.
◗ The speed buttons allow you to choose the
right speed to obtain optimal results. See the
table for the recommended speeds.
C
◗ Press the pulse button (M-button) a few times
to let the appliance run for only a few econds
at a time.The appliance will stop when you
release the button. Press the pulse button as
often as is necessary.
ENGLISH8
Speed
speed 1
speed 2
speed 3
Ingredients
liquid ingredients (e.g. chocolate milk,
milk with fruit, mayonnaise)
heavier ingredients e.g. a combination of
liquid and solid ingredients (e.g. tomato
sauce or pate)
heavy, mainly solid ingredients (e.g. ice
cubes, soups, beans, etc.)
4206 100 33950 18-05-2005 16:32 Page 8
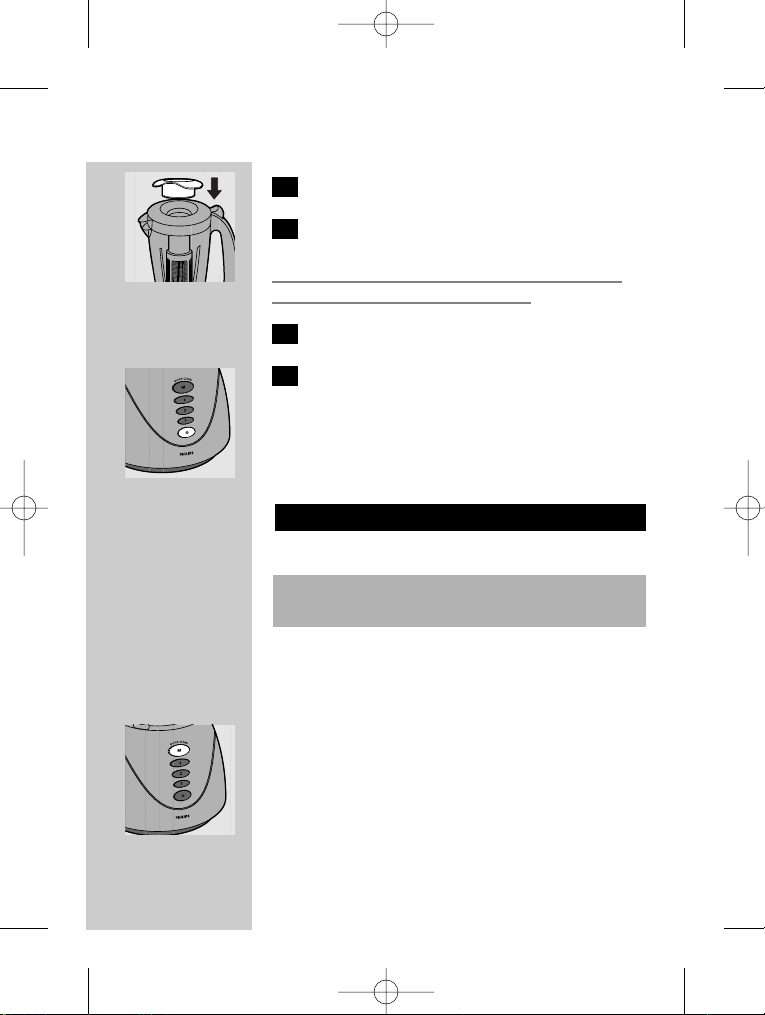
Always switch the appliance off before you open
the lid.
10 Press the 0-switch to switch the appliance
off.
Never switch the appliance on or off by turning
the jar.
Recipes can be found in the 'Recipes' chapter below.
Tips
To avoid spillage, never fill the jar above the
maximum level indication (1.5 litres), particularly
not if you are blending hot liquids (maximum 1.1
litres).
◗ If you are blending foaming liquids, never fill
the jar beyond the 1.2 l indication.
C
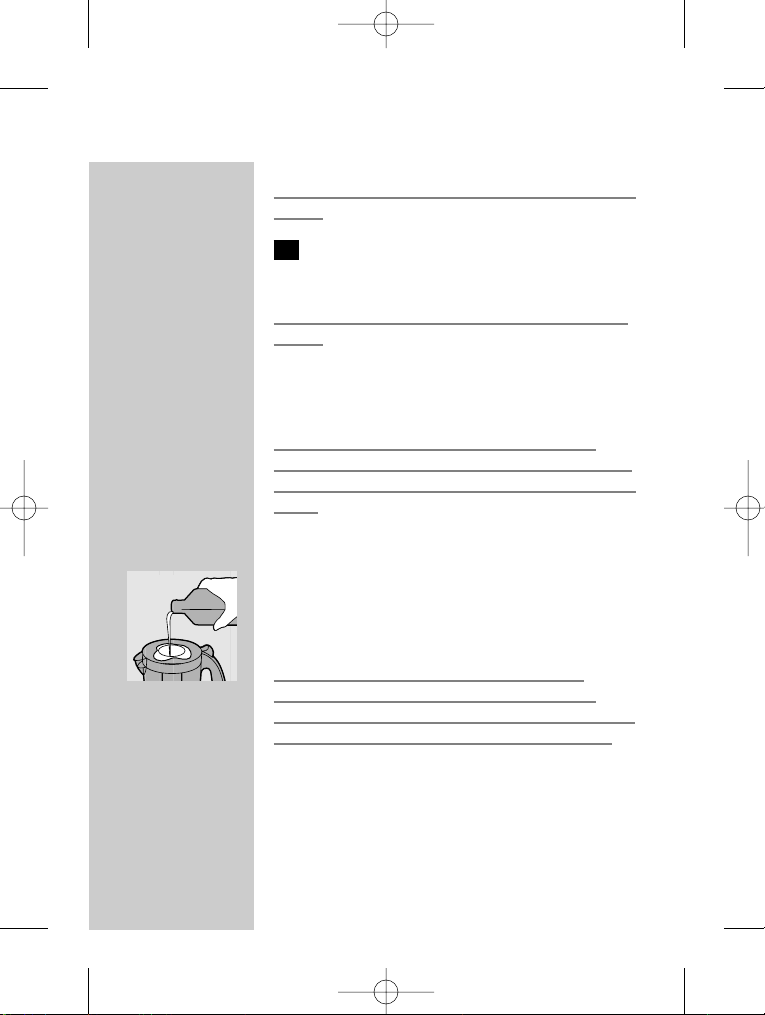
◗ Liquid ingredients (e.g. oil) can be poured into
the blender jar through the opening in the lid
while the appliance is running.
Do not let the blender run for more than
3 minutes at a time. If you have not finished
blending after 3 minutes, switch the appliance off
for one minute before you continue blending.
◗ Dry ingredients must not be processed for
more than 1 minute.
ENGLISH 9
4206 100 33950 18-05-2005 16:32 Page 9

◗ Cut solid ingredients into smaller pieces
before putting them in the blender jar. Do not
process a large quantity of solid ingredients at
the same time. Process these ingredients in a
series of small batches instead.
◗ If you are not satisfied with the result when
blending solid ingredients, switch the blender
off and press the pulse button (M-button) a
few times to let the blender run briefly.You
can also stir the ingredients with a spatula
(not while the blender is running!) or pour
out some of the contents of the jar and
process smaller amounts.
◗ To crush ice cubes, drop max. 5 cubes per
batch through the opening in the lid onto the
rotating blades.
◗ To make tomato juice, cut the tomatoes in
four and drop the pieces through the opening
in the lid onto the rotating blades.
Never reach into the jar with your fingers or an
object (e.g. a spatula) while the blender is running.
◗ If you are processing solid and liquid
ingredients at the same time, pour the liquid
ingredients in the jar before switching the
appliance on.Add the solid ingredients while
the appliance is running.
Filter (HR1797 only)
◗ You can use the filter accessory to obtain
extra finely blended sauces, fresh fruit juices
or cocktails.All pips and skins will be caught in
the filter.
ENGLISH10
4206 100 33950 18-05-2005 16:32 Page 10
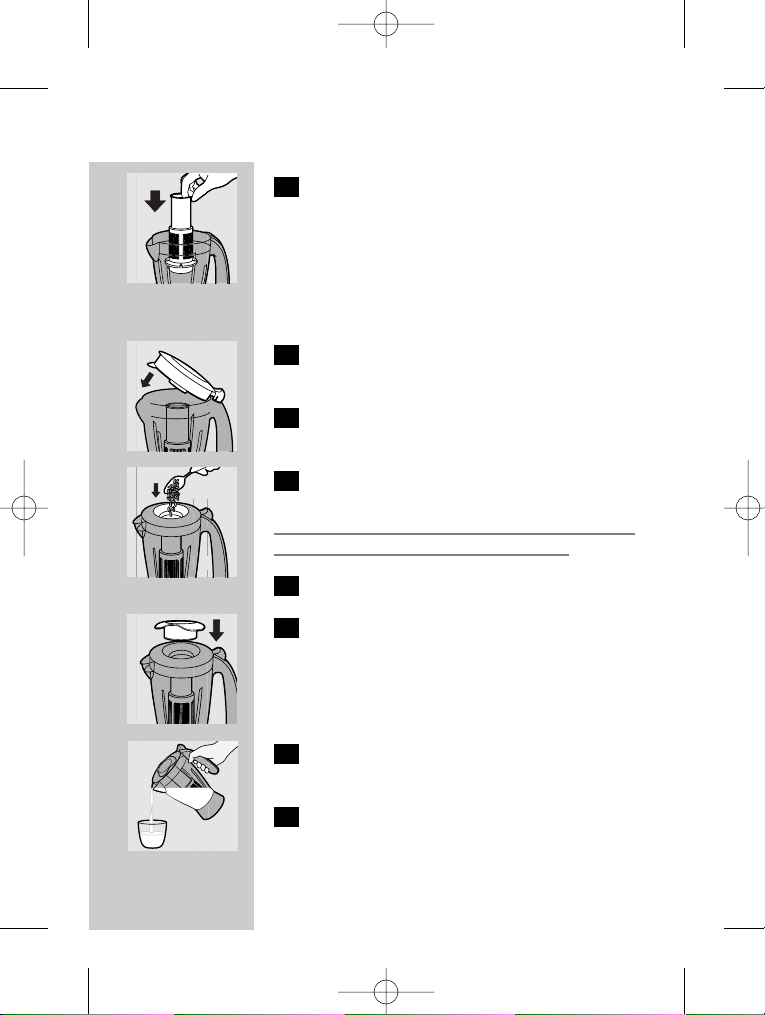
C
1 Make sure the appliance is unplugged.
Remove the blender jar from the appliance
and put the filter in the blender jar.
Make sure the filter is properly fitted onto the
bottom of the jar.The grooves of the filter and the
ribs inside the blender jar will help you put the
filter in the right position.
C
2 Put the lid on the jar to fix the filter in its
proper position.
3 Put the blender jar back on the motor unit
and insert the plug into the wallsocket.
C
4 Put the ingredients in the filter through the
opening in the lid.
Never fill the filter beyond its metal par t. Do not
use the filter to process hot ingredients.
5 Add water or another liquid.
C
6 Insert the stopper into the opening in the
lid and switch the appliance on. Select the
highest speed and let the appliance run for
max. 40 seconds.
C
7 Switch the appliance off. Pour out the
drink through the spout of the blender jar.
8 For optimal results, put the jar with the
remaining ingredients back onto the
appliance and let it run for a few more
seconds.
ENGLISH 11
4206 100 33950 18-05-2005 16:32 Page 11

9 Pour out the rest of the drink.
Tips
◗ Particularly when you are processing large
quantities, we advise you not to put all the
ingredients in the filter at the same time. Start
processing a small quantity, let the appliance
run for a moment, switch it off and then add
another small quantity. Repeat this procedure
until you have processed all the ingredients.
◗ For making soy milk:
Soak soy beans for 4 hours before processing
them.You can process max. 50 g. of dry soy beans
with max. 500 ml. water at a time.
Do not process this recipe more than 2 times. If
you want to proces more, the appliance has to
cool down first.
◗ For making fruit juices and cocktails:
For the best results, add approx. 300 ml water (or
another liquid if you are making e.g. cocktails, etc.)
to 150 g fruit.
Mill
◗ The mill attachment can be used for grinding
and chopping ingredients such as
peppercorns, sesame seeds, rice, wheat,
coconut flesh, nuts (shelled), coffee beans, soy
beans, dried peas, cheese, breadcrumbs, etc.
Always process cloves, star anise and aniseed
together with other ingredients. If processed
separately, these ingredients may attack the
plastic materials of the appliance.
ENGLISH12
4206 100 33950 18-05-2005 16:32 Page 12
 Loading...