

Philips HQ7820/16, HQ7820 User Manual

ENGLISH 4
POLSKI 14
ROMÂNĂ 24
РУССКИЙ 35
ČESKY 48
MAGYAR 59
SLOVENSKY 70
УКРАЇНСЬКА 81
HRVATSKI 92
EESTI 102
LATVISKI 112
LIETUVIŠKAI 123
SLOVENŠČINA 133
БЪЛГАРСКИ 144
SRPSKI 156
HQ7820

Important
Read these instructions for use carefully before
using the appliance and save them for future
reference.
◗ Only use the powerplug supplied.
◗ The powerplug transforms 100-240 volts to a
safe low voltage of less than 24 volts.
◗ The powerplug contains a transformer. Do
not cut off the powerplug to replace it with
another plug, as this will cause a hazardous
situation.
◗ Do not use a damaged powerplug.
◗ If the powerplug is damaged, always have it
replaced by one of the original type in order
to avoid a hazard.
C
◗ Make sure the powerplug does not get wet.
◗ Charge, store and use the appliance at a
temperature between 5cC and 35cC.
◗ Do not recharge the shaver in a closed pouch.
C
◗ The appliance complies with the
internationally approved IEC safety regulations
and can be safely cleaned under the tap.
Be careful with hot water. Always check if the
water is not too hot, to prevent your hands from
getting burnt.
◗ Always unplug the shaver before cleaning it
under the tap.
◗ Noise level: Lc = 61 dB [A]
ENGLISH4
Charging
Make sure the appliance is switched off before
you start charging it.
When you charge the shaver for the first time or
after a long period of disuse, let it charge
continuously for 4 hours. Charging normally takes
approx. 8 hours.
You can also shave without charging by
connecting the shaver to the mains.
Do not leave the appliance connected to the
mains for more than 24 hours.
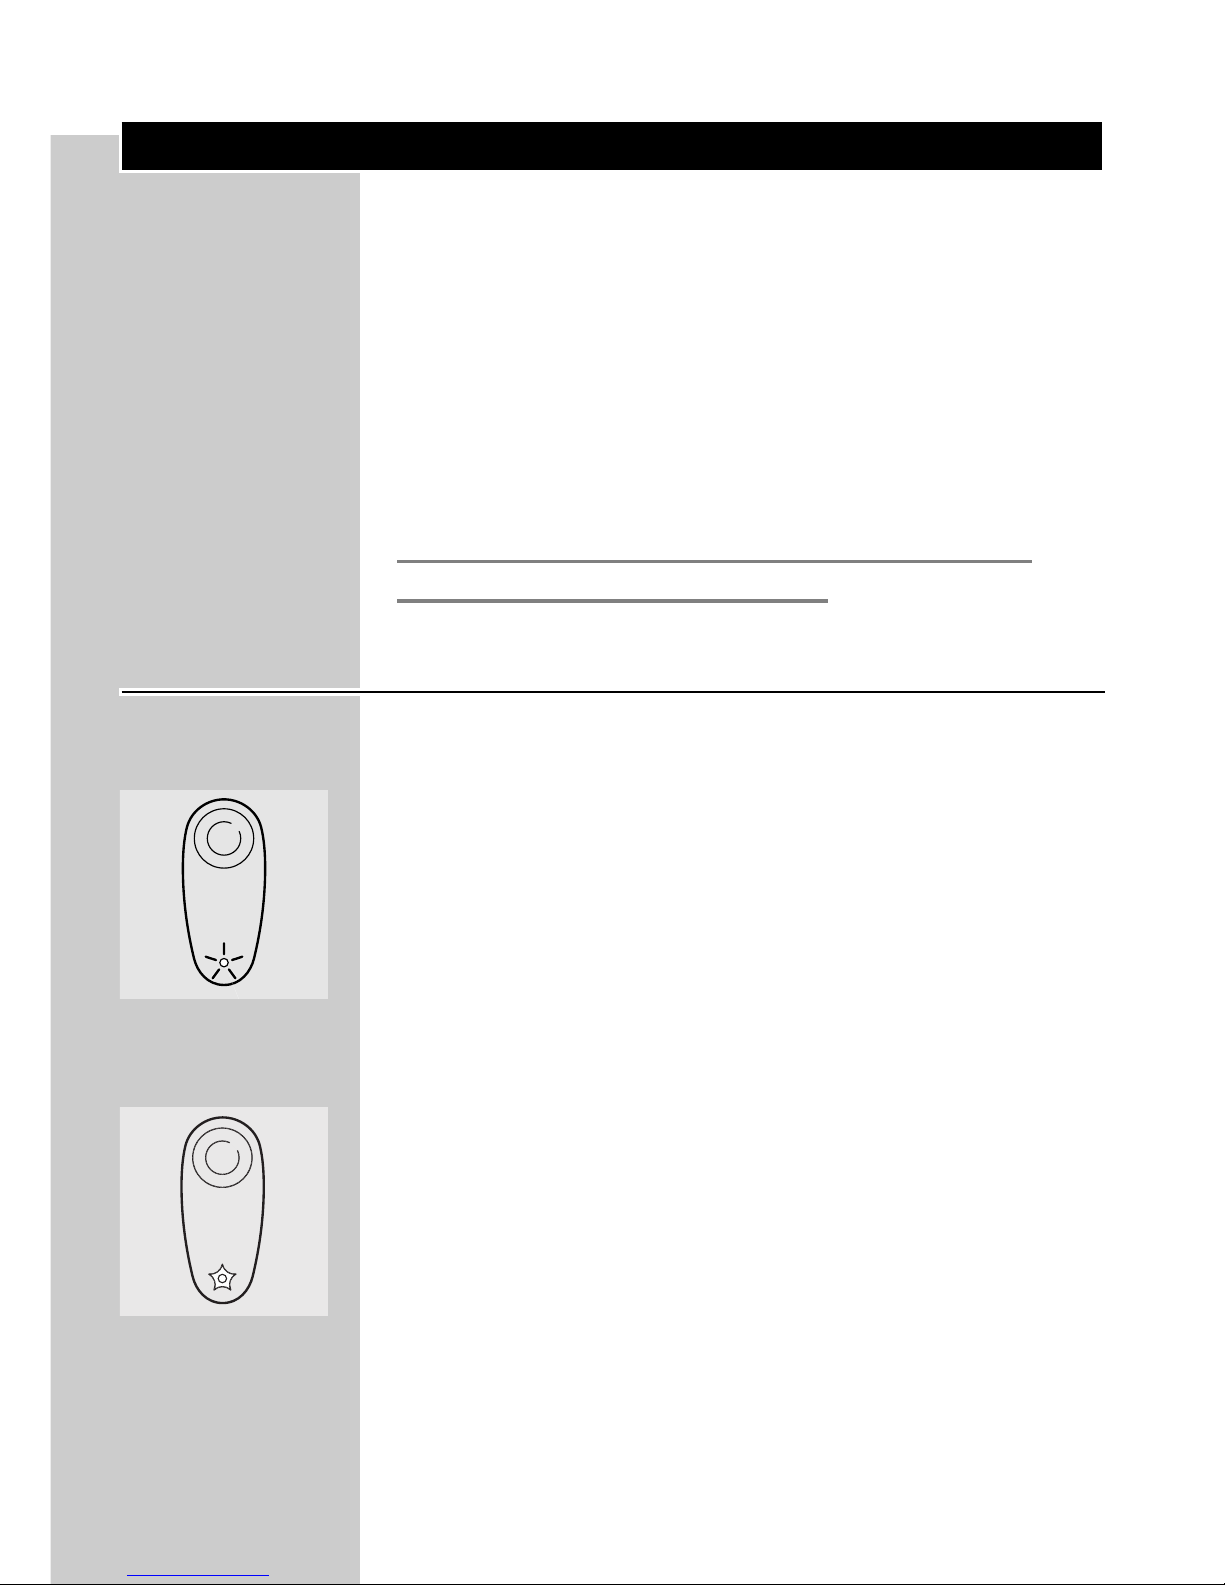
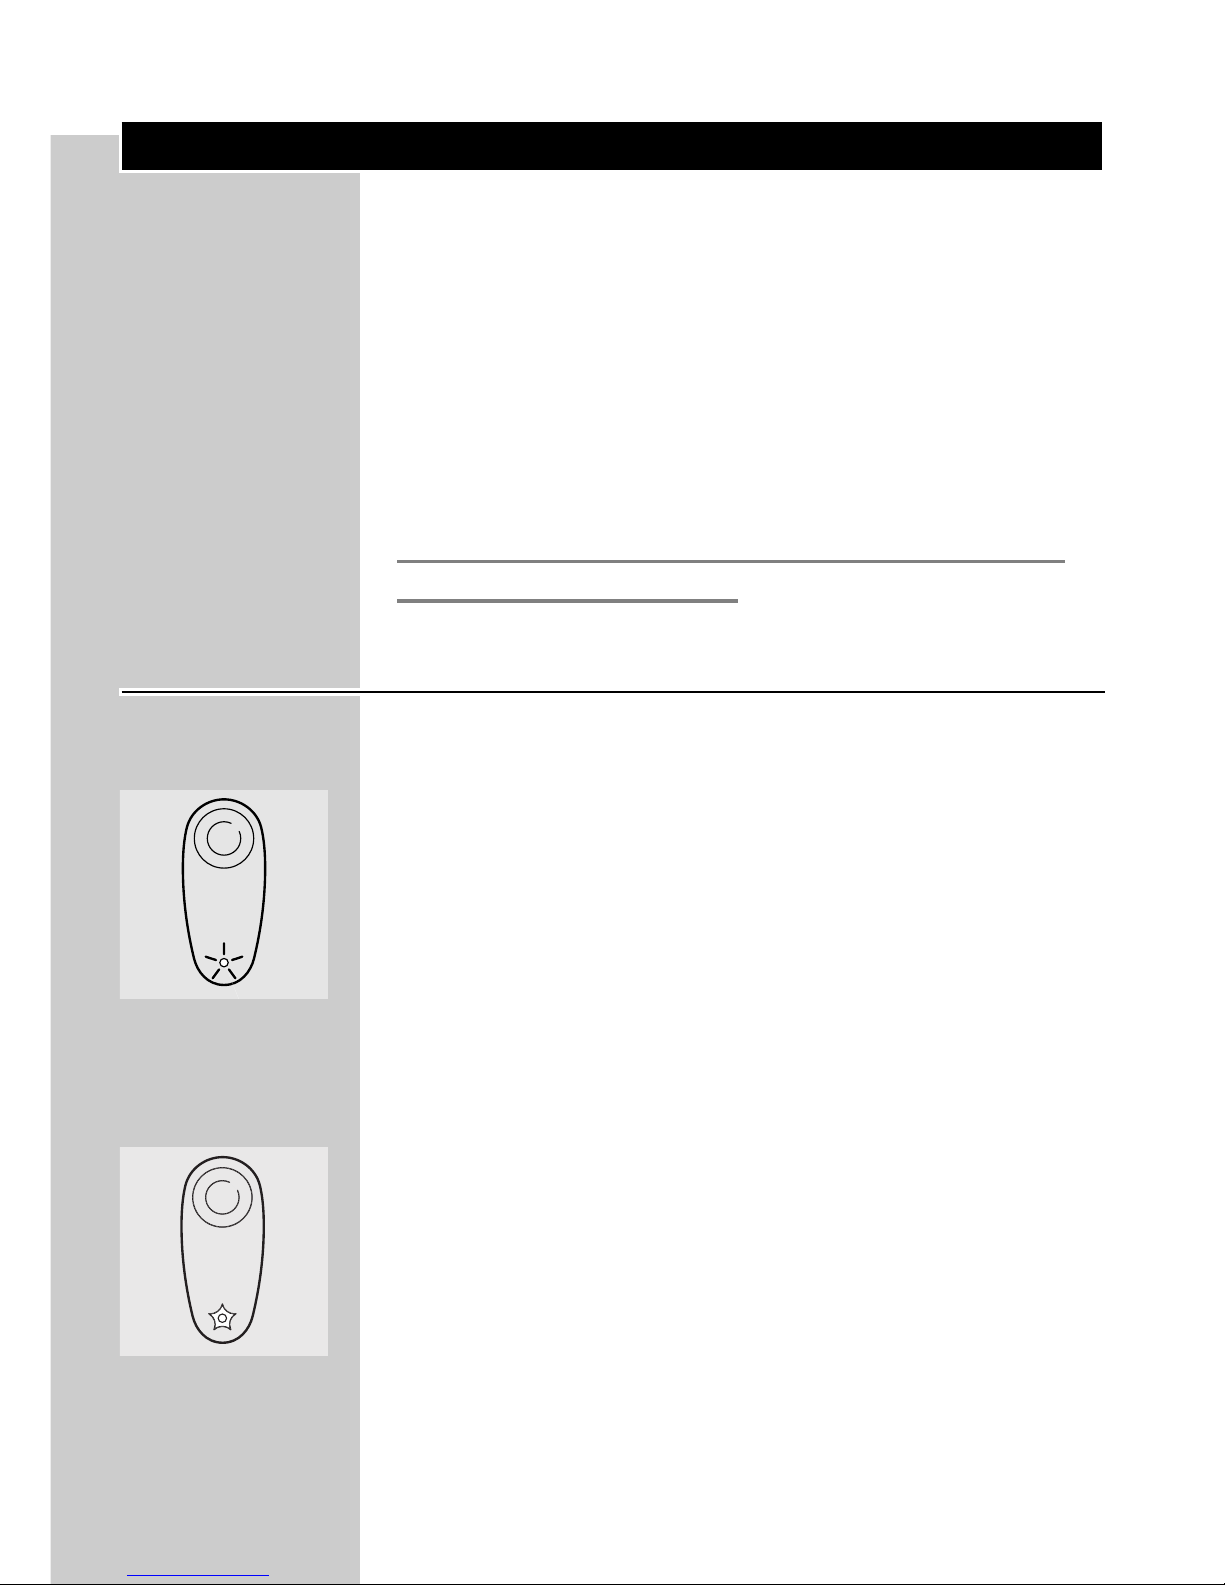
Charge indications
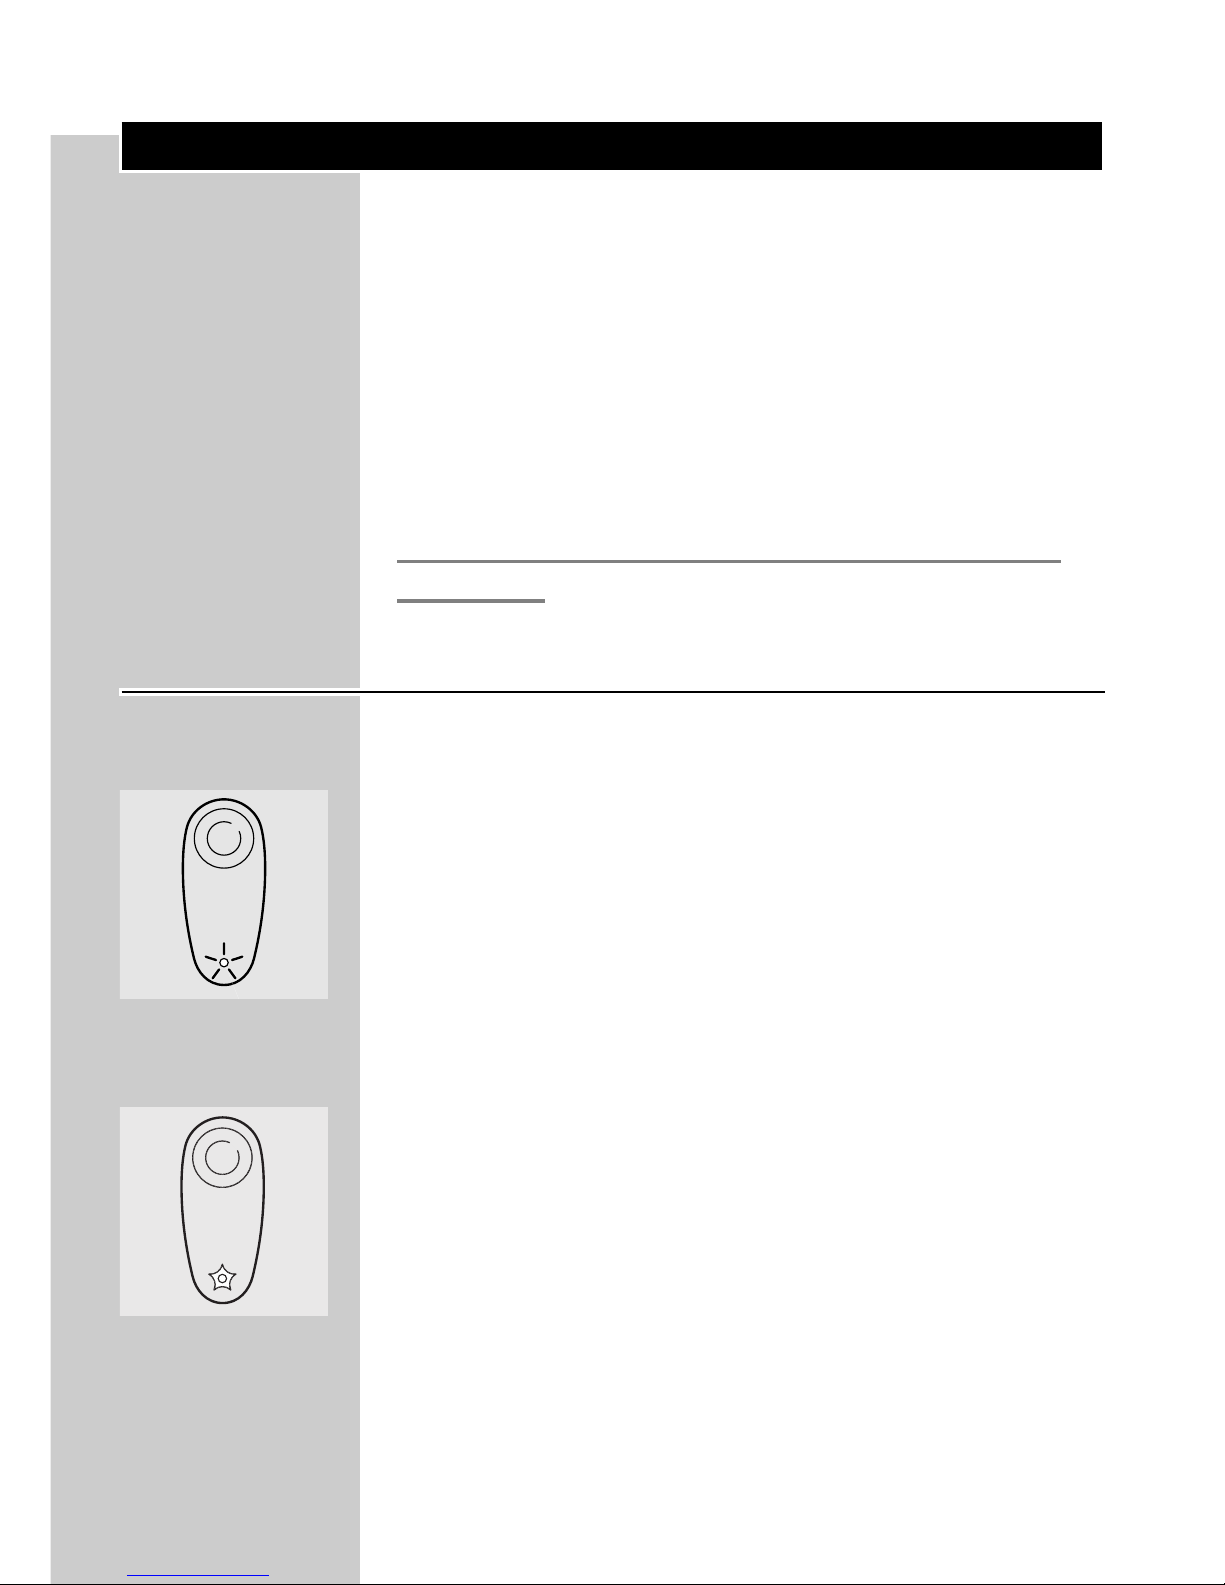
Charging
C
◗ As soon as you start charging the empty
shaver, the green pilot light goes on.
Batteries fully charged
C
◗ When the batteries have been fully charged,
the green pilot light starts blinking.
ENGLISH 5

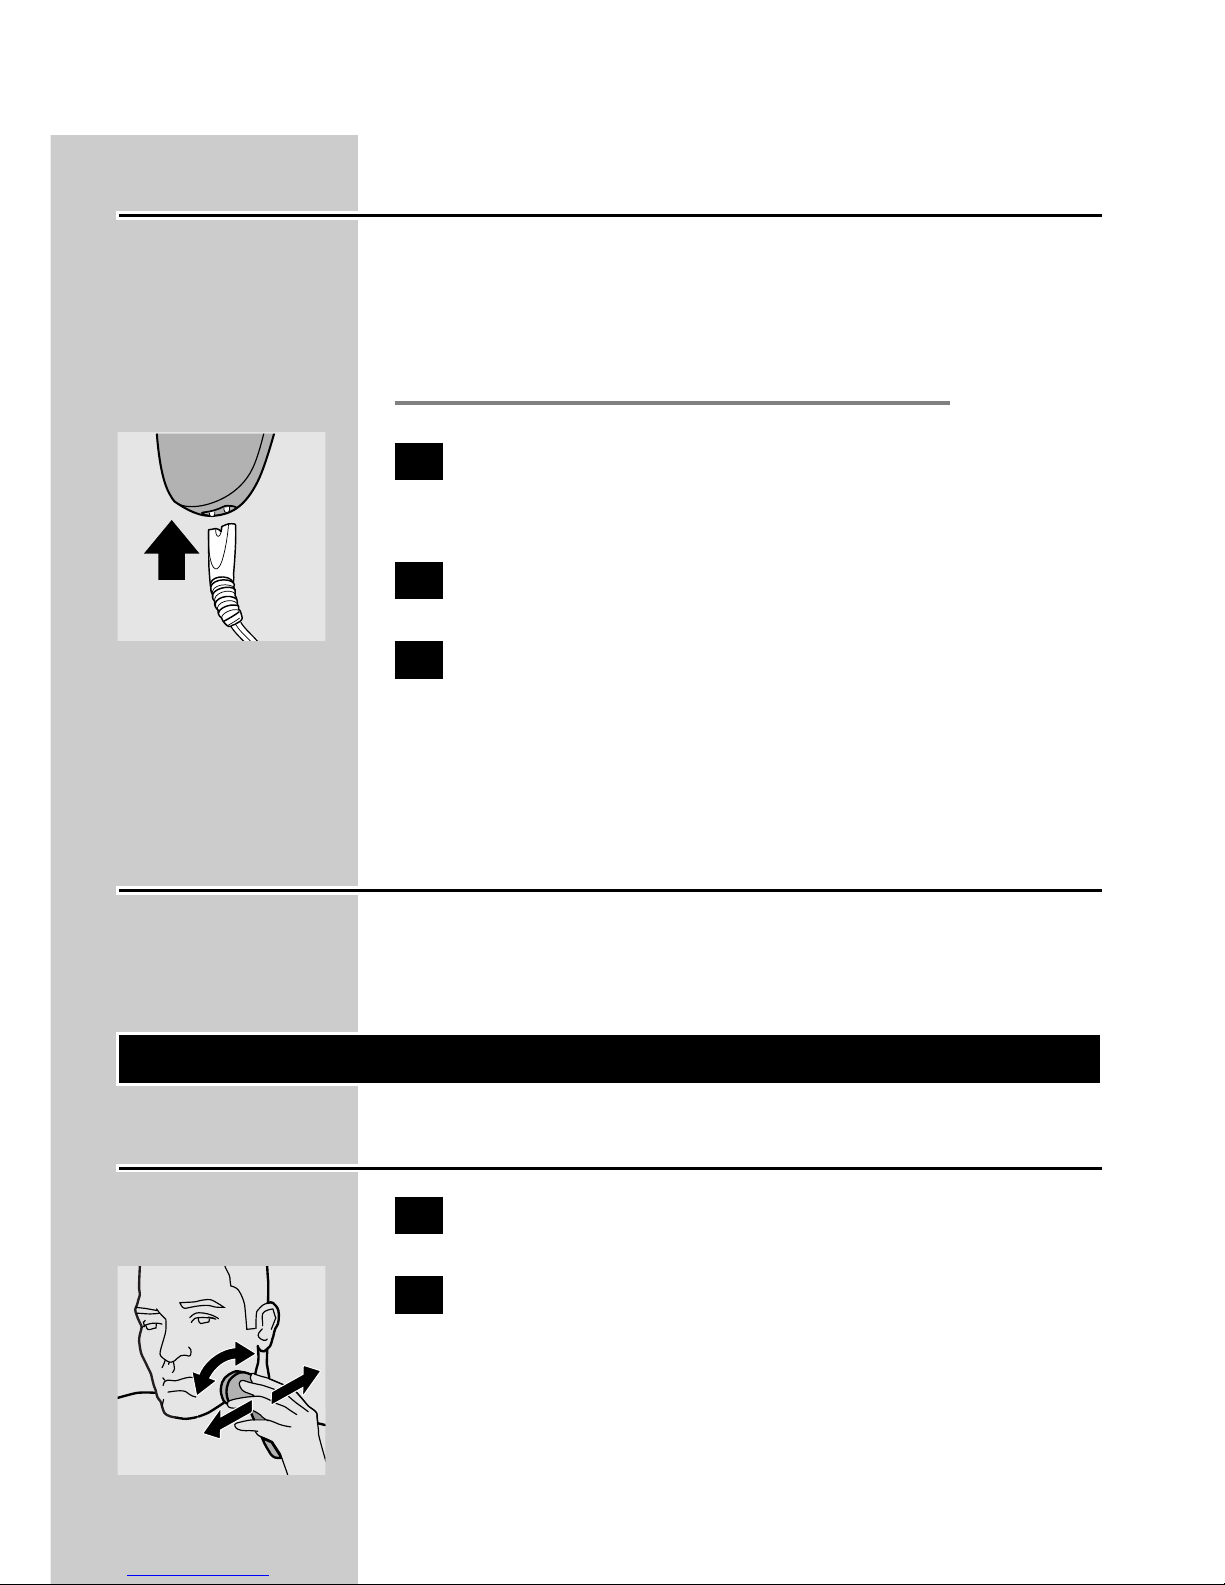
Charging the appliance
Charge the appliance when the motor stops or
starts running slower.
Do not recharge the shaver in a closed pouch.
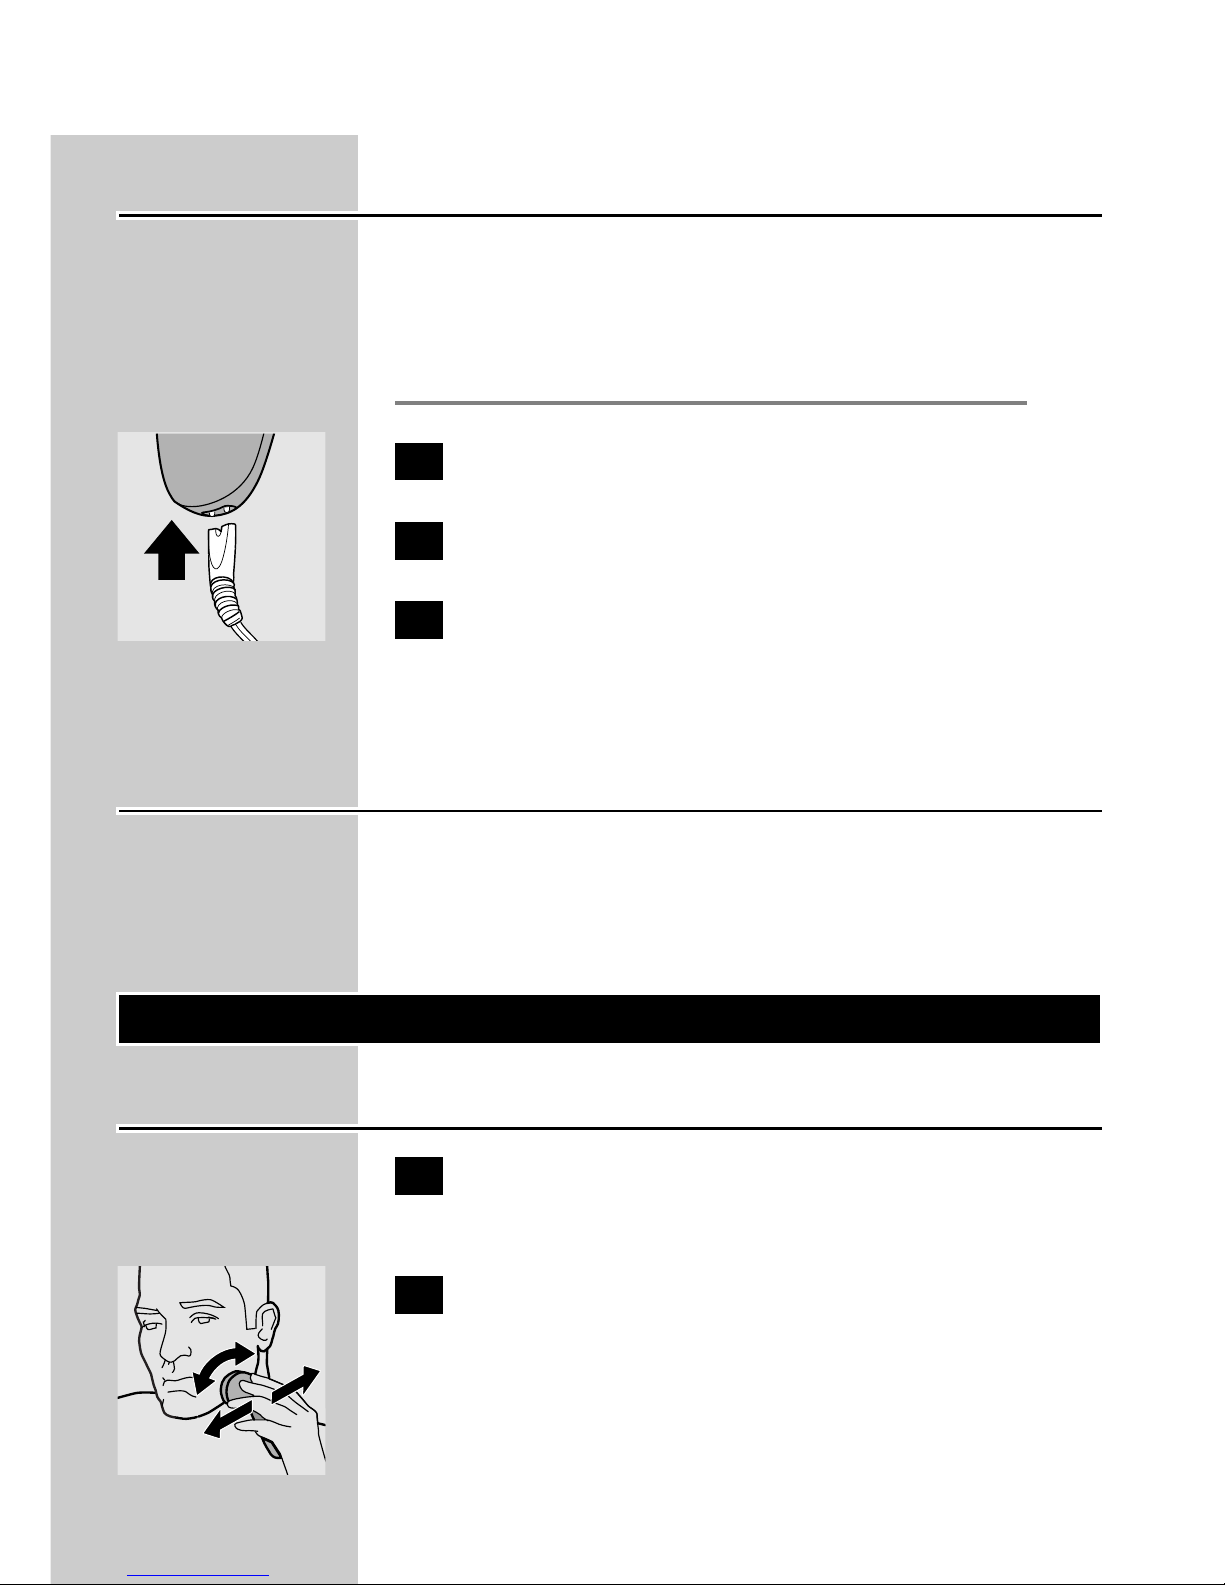
C
1 Put the appliance plug in the shaver.
2 Put the powerplug in the wall socket.
3 Remove the powerplug from the wall
socket and pull the appliance plug out of
the shaver when the batteries have been
fully charged.
Cordless shaving time
A fully charged shaver has a cordless shaving time
of up to 70 minutes.
Using the appliance
Shaving
1 Switch the shaver on by pressing the on/off
button once.
C
2 Move the shaving heads quickly over your
skin, making both straight and circular
movements.
Shaving on a dry face gives the best results.
Your skin may need 2 or 3 weeks to get
accustomed to the Philips system.
ENGLISH6

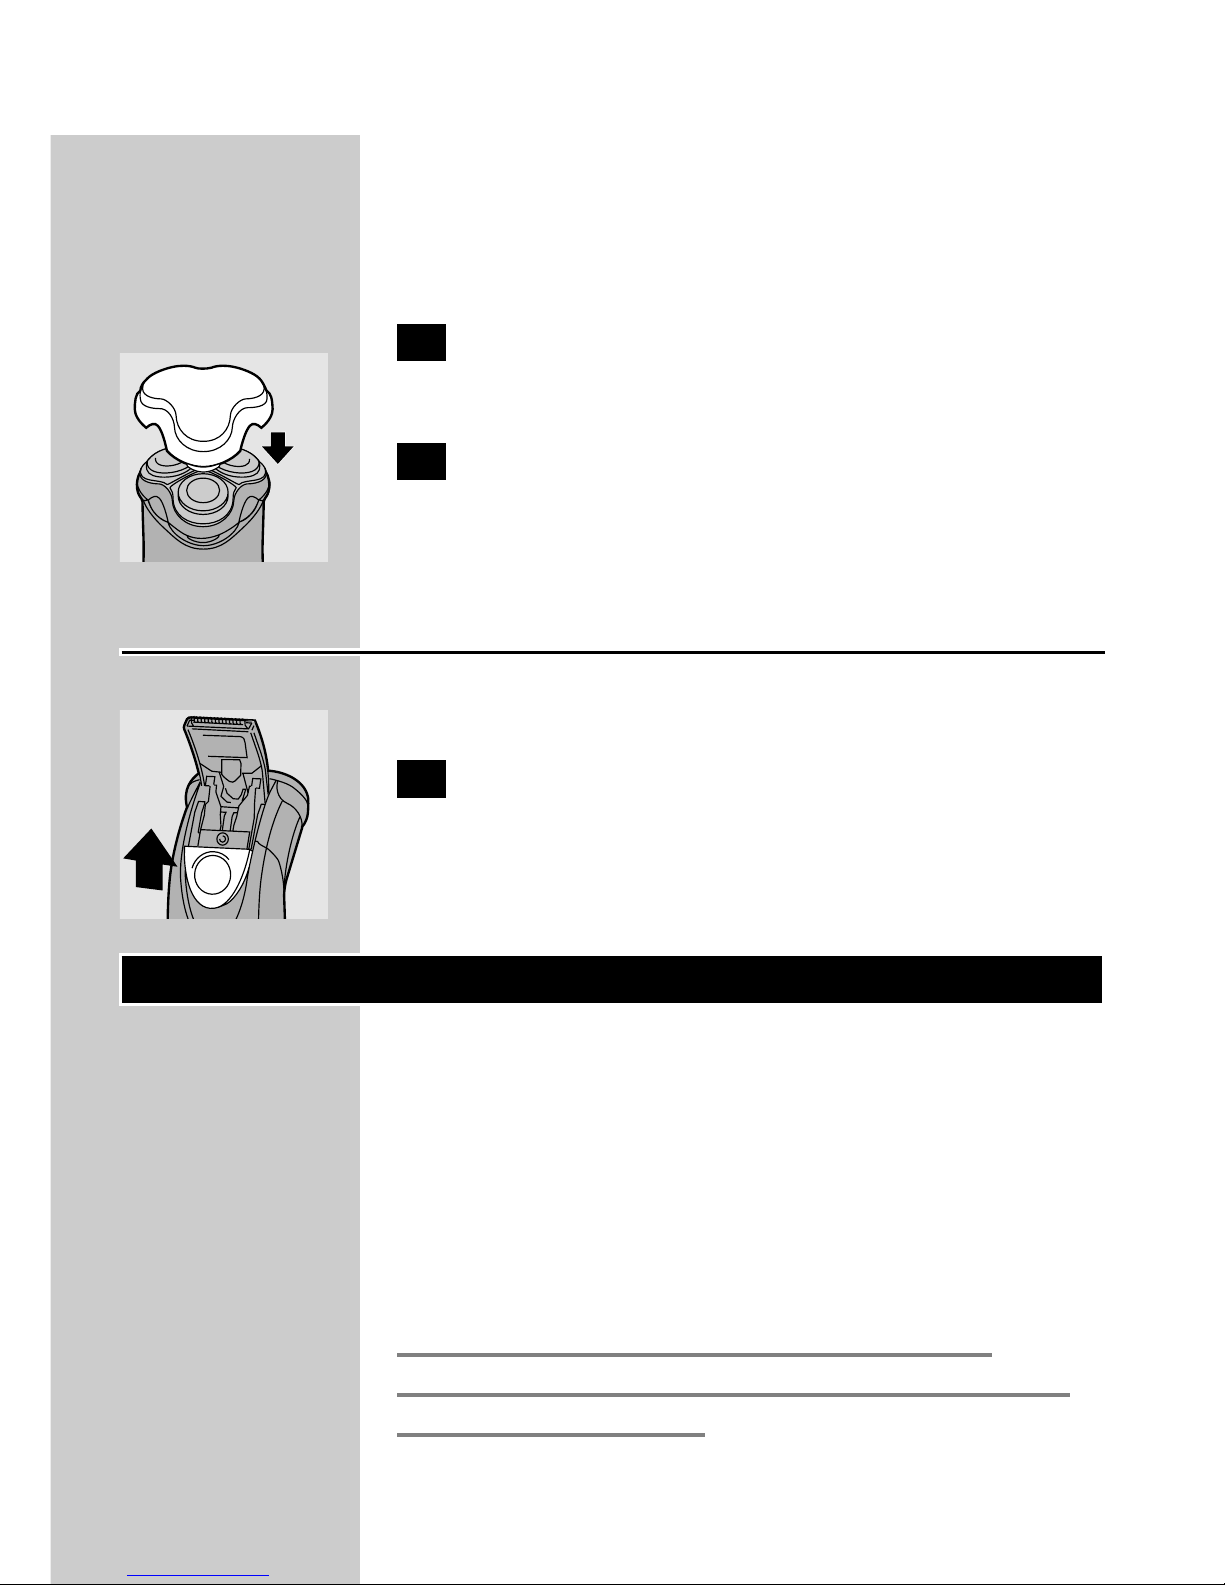
3 Switch the shaver off by pressing the on/off
button once.
C
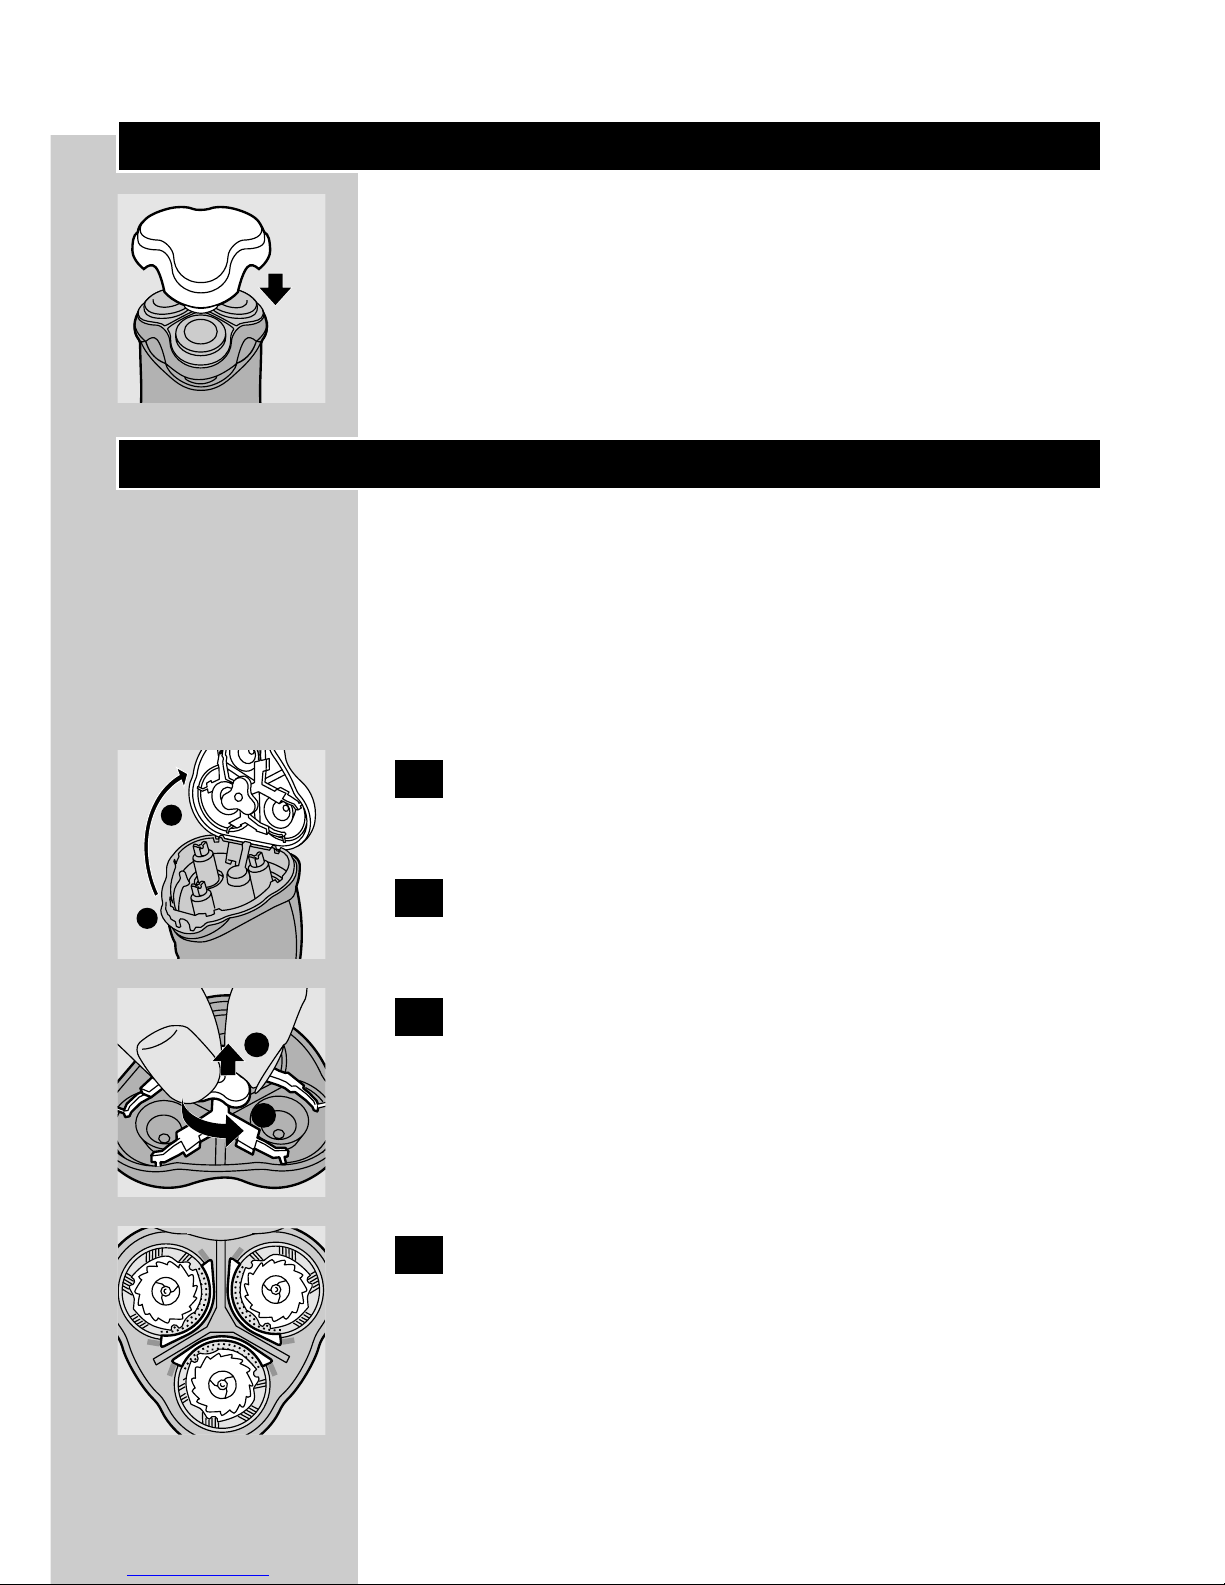
4 Put the protection cap on the shaver every
time you have used it, to prevent damage.
Trimming
For grooming sideburns and moustache.
C
1 Open the trimmer by pushing the slide
upwards.
The trimmer can be activated while the motor is
running.
Cleaning and maintenance
Regular cleaning guarantees better shaving
performance.
The easiest and most hygienic way to clean the
appliance is to rinse the shaving unit and the hair
chamber with hot water every time you have
used the shaver.
Be careful with hot water. Always check if the
water is not too hot, to prevent your hands from
getting burnt.
Every day: shaving unit and hair chamber
1 Switch the shaver off, remove the
powerplug from the wall socket and pull
the appliance plug out of the shaver.
ENGLISH 7
C
2 Press the release button (1) and open the
shaving unit (2).
C
3 Clean the shaving unit and the hair
chamber by rinsing them under a hot tap
for some time.
4 Close the shaving unit and shake off excess
water.
Never dry the shaving unit with a towel or tissue
as this may damage the shaving heads.
C
5 Open the shaving unit again and leave it
open to let the appliance dry completely.
You can also clean the hair chamber without
water by using the brush supplied.
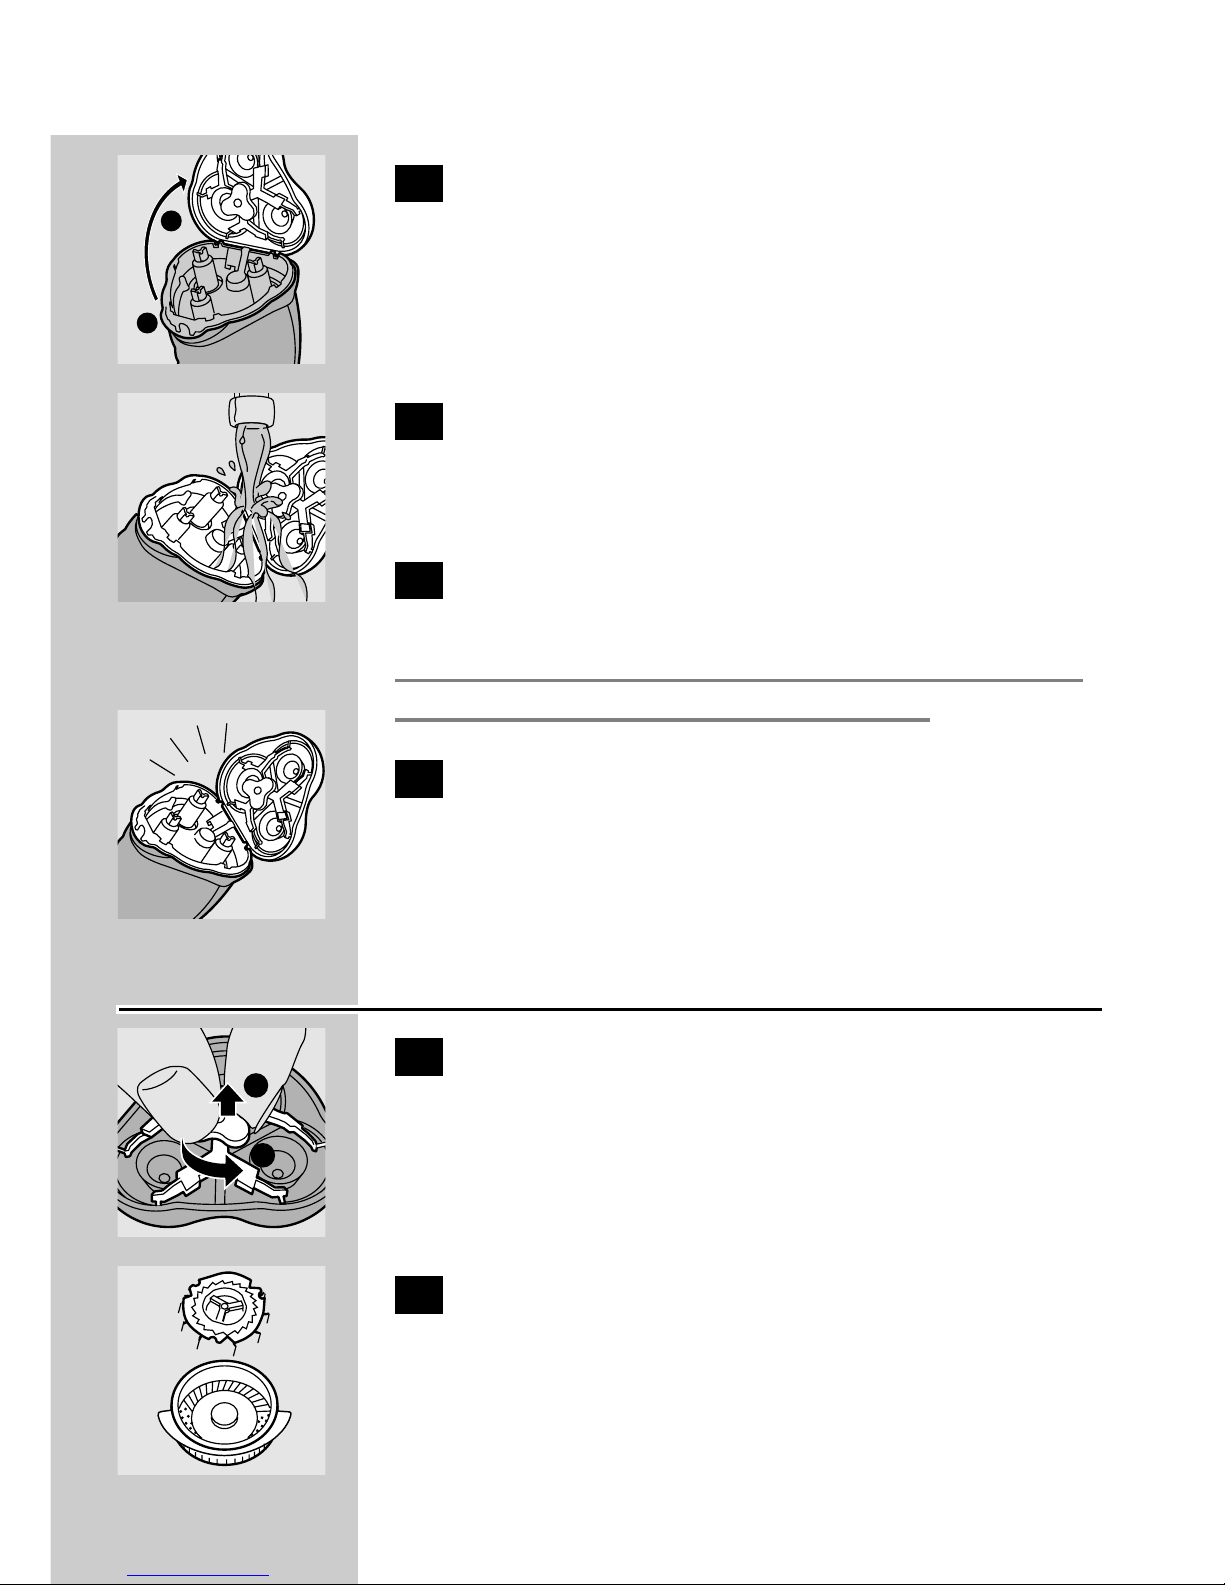
Every six months: shaving heads
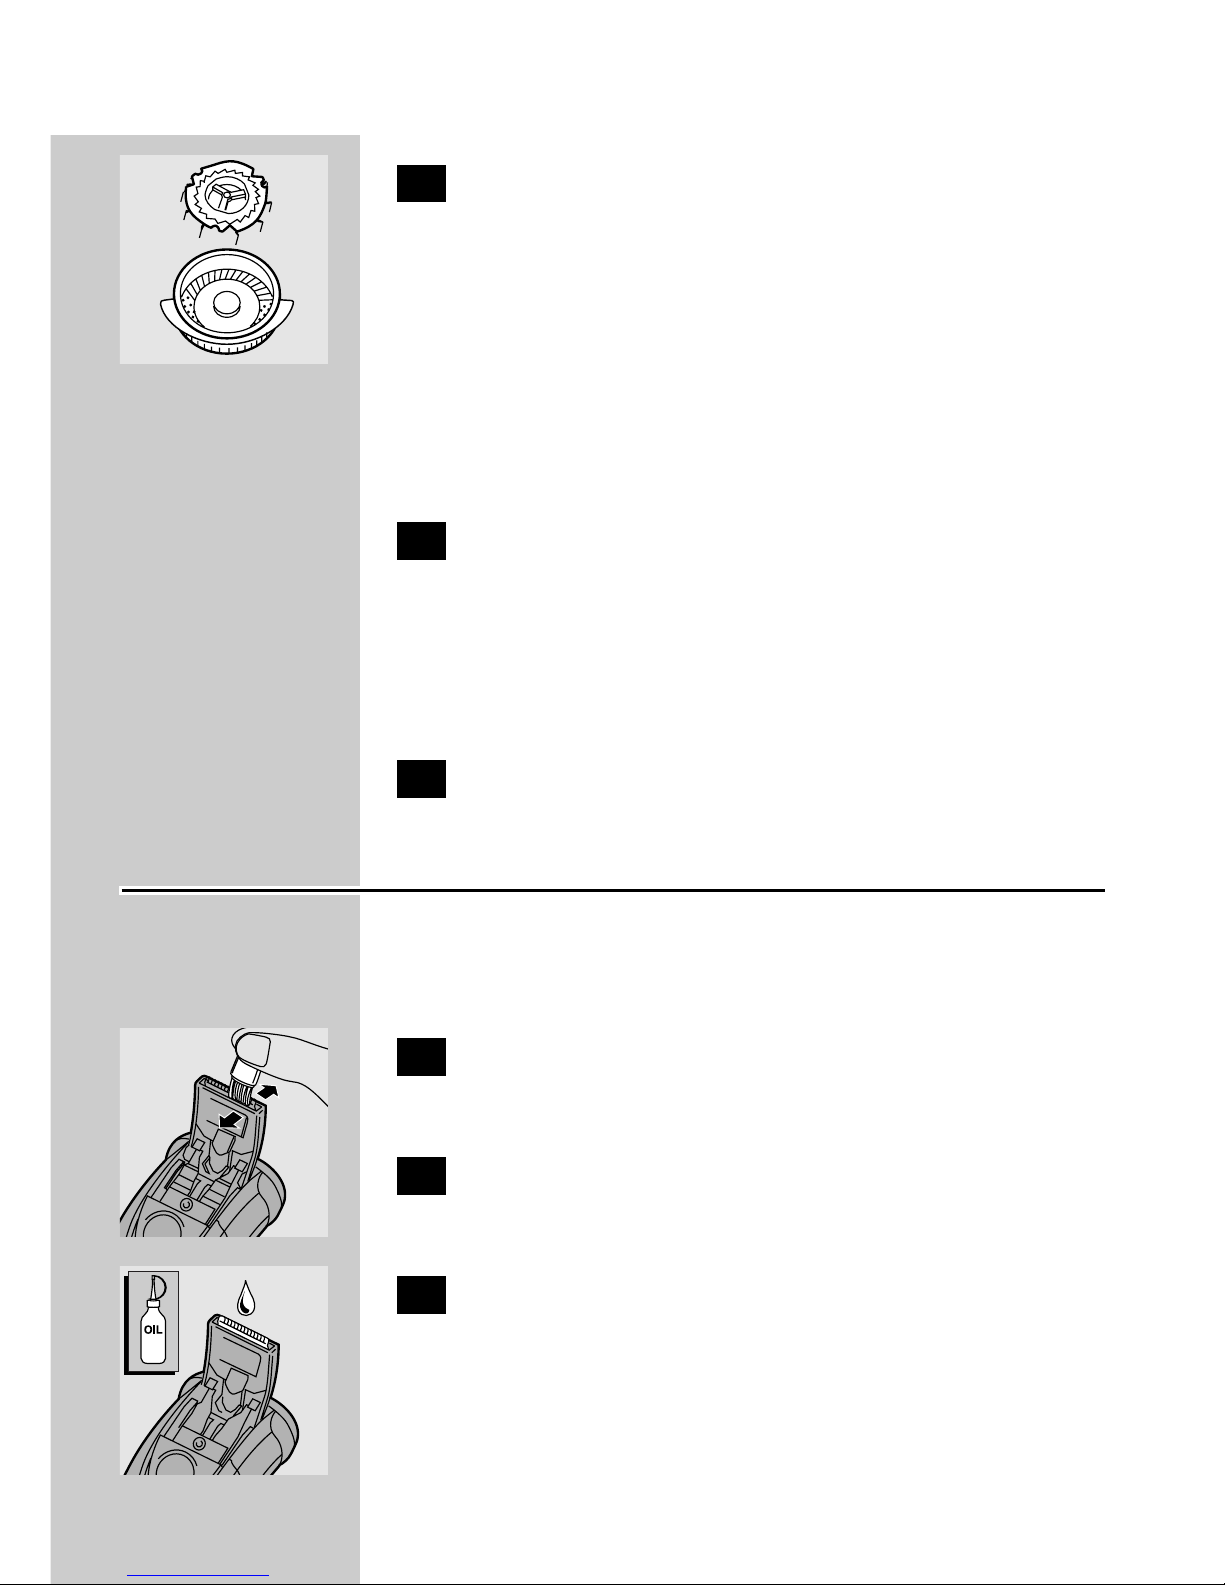
C
1 Open the shaving unit, turn the wheel
anticlockwise (1) and remove the retaining
frame (2).
C
2 Clean the cutters and guards with the
brush supplied.
Do not clean more than one cutter and guard at
a time, since they are all matching sets. If you
accidentally mix up the cutters and guards, it may
ENGLISH8
1
2
1
2
take several weeks before optimal shaving
performance is restored.
3 Put the shaving heads back into the shaving
unit. Put the retaining frame back into the
shaving unit, press the wheel (1) and turn it
clockwise (2) (also see chapter
'Replacement').
4 Close the shaving unit.
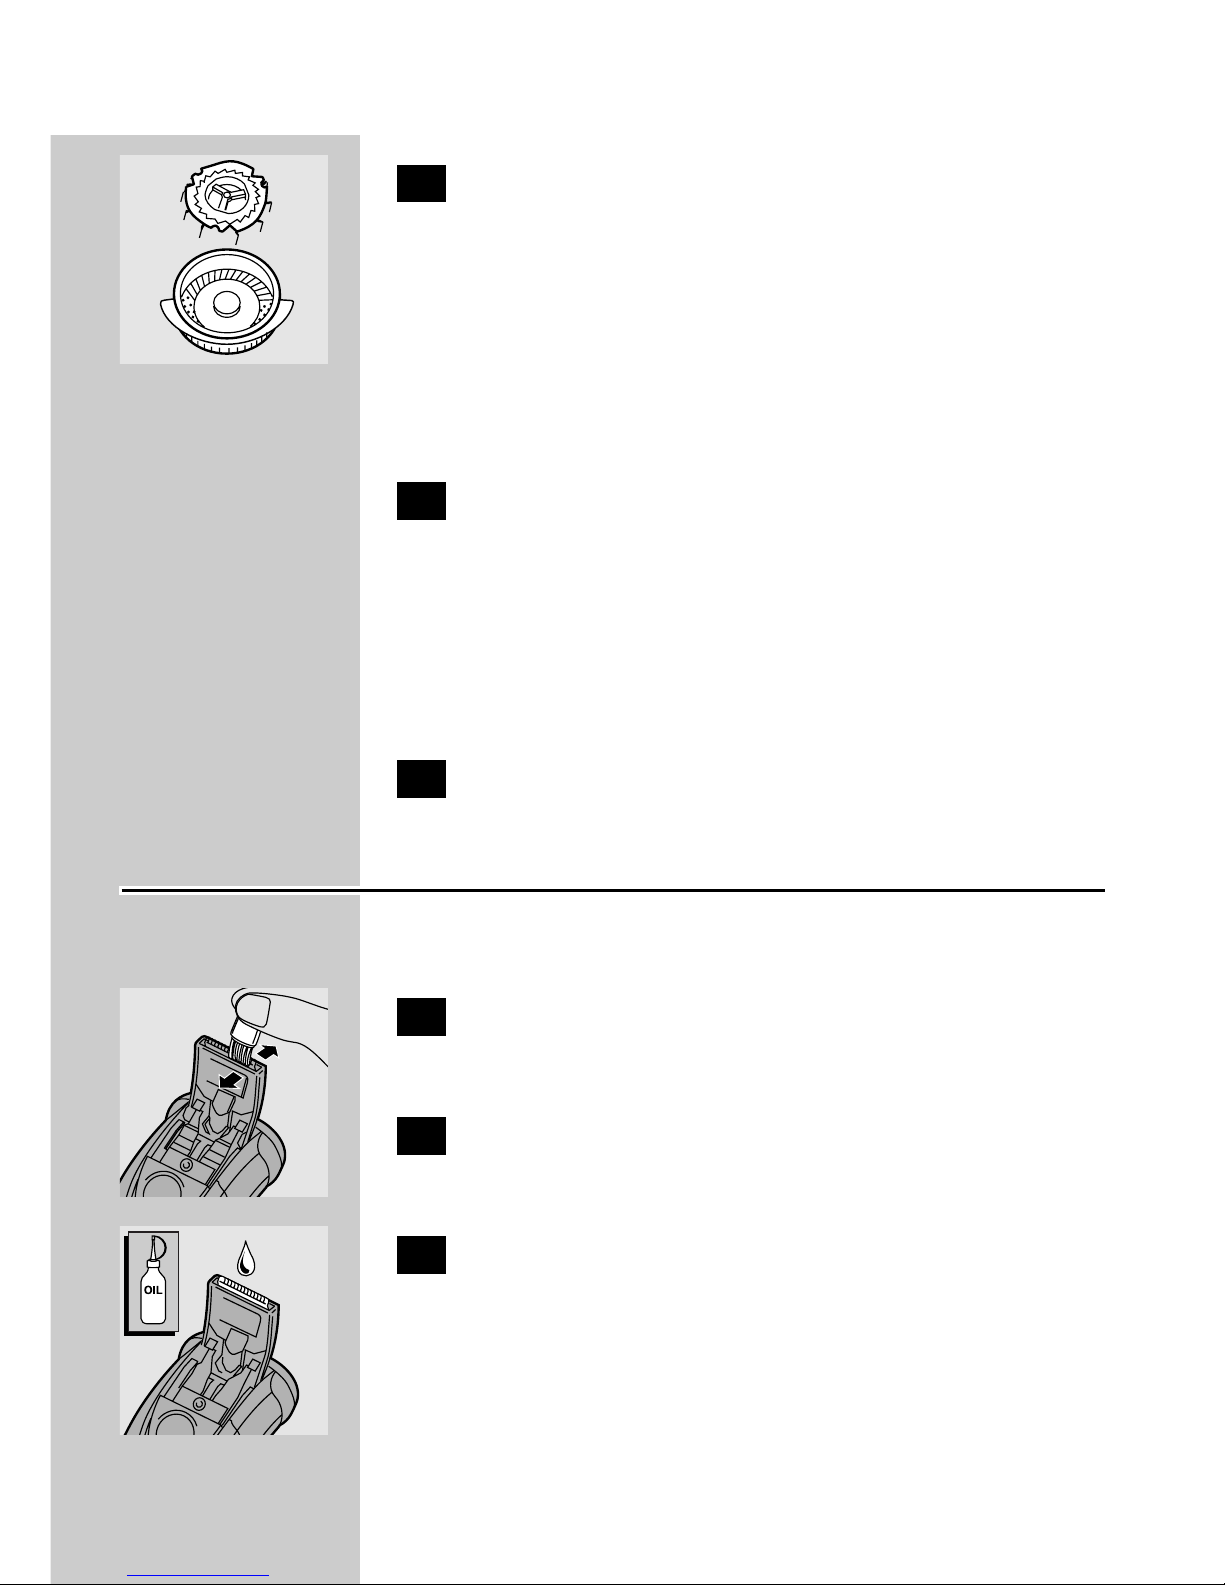
Trimmer
Clean the trimmer every time you have used it.
1 Switch the shaver off, remove the
powerplug from the wall socket and pull
the appliance plug out of the shaver.
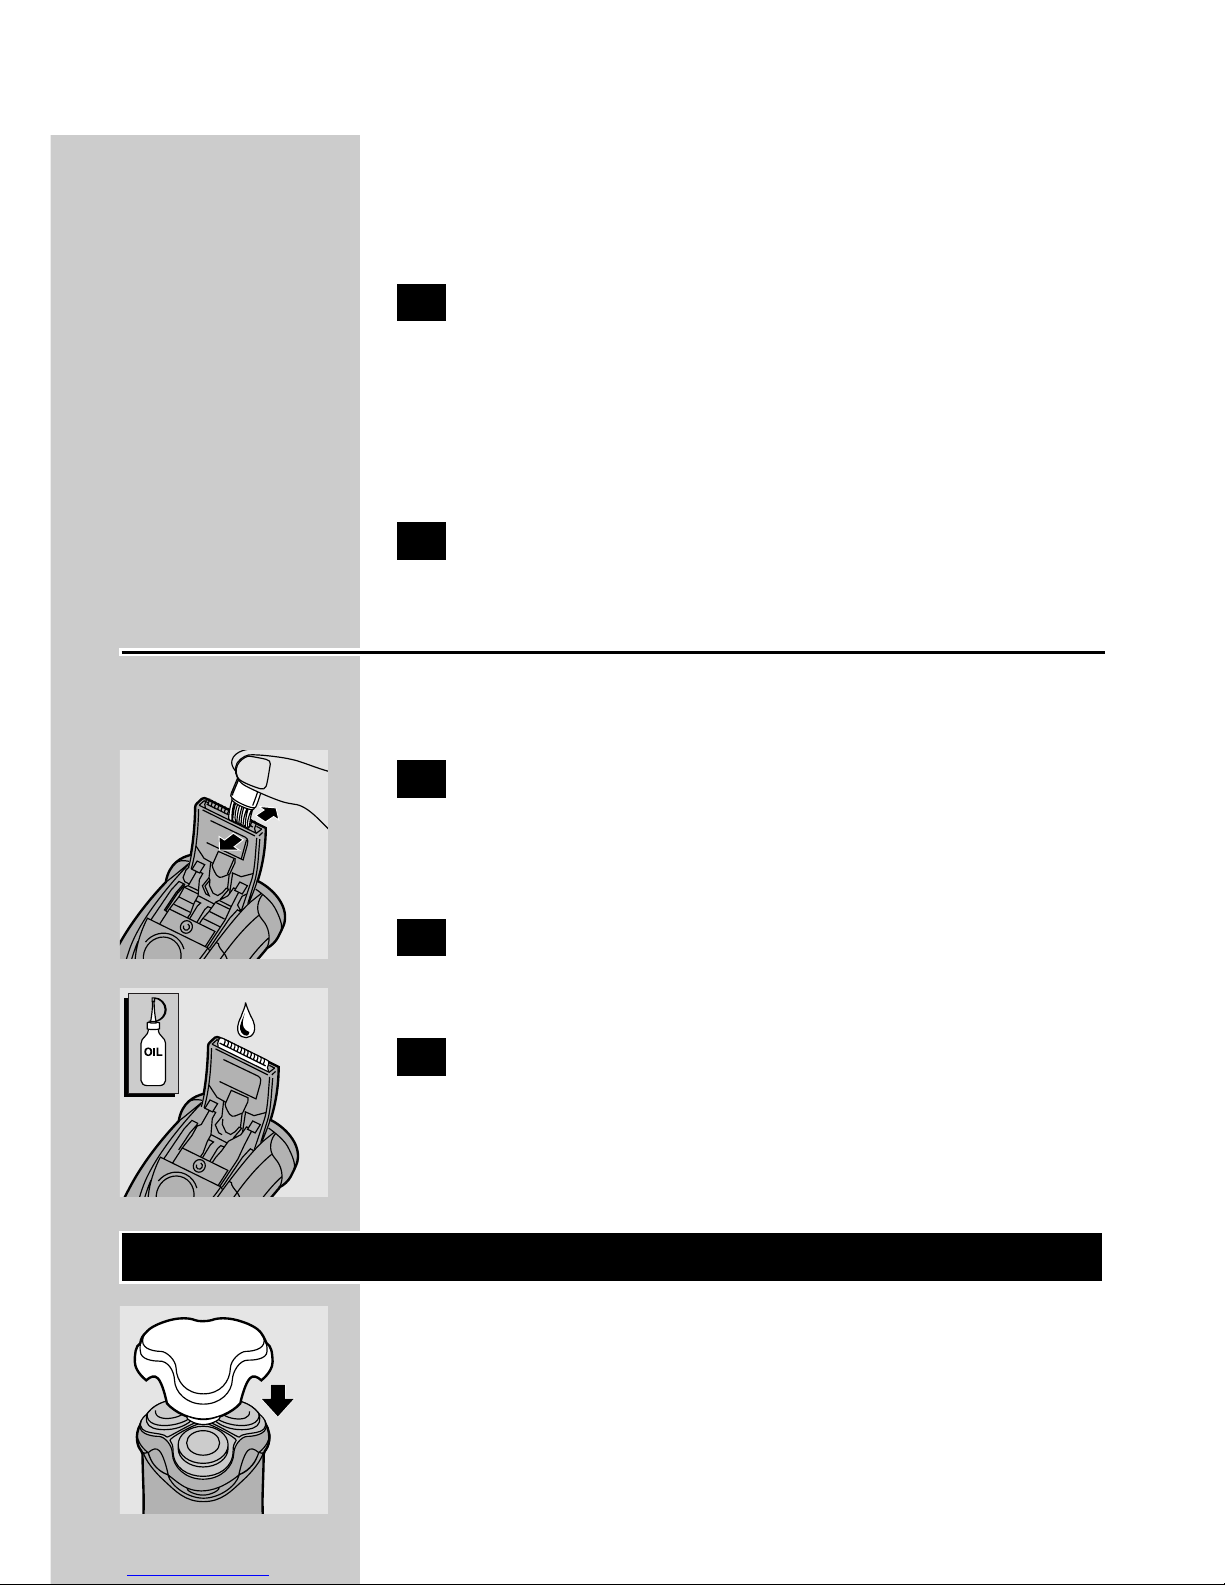
C
2 Clean the trimmer with the brush
supplied.
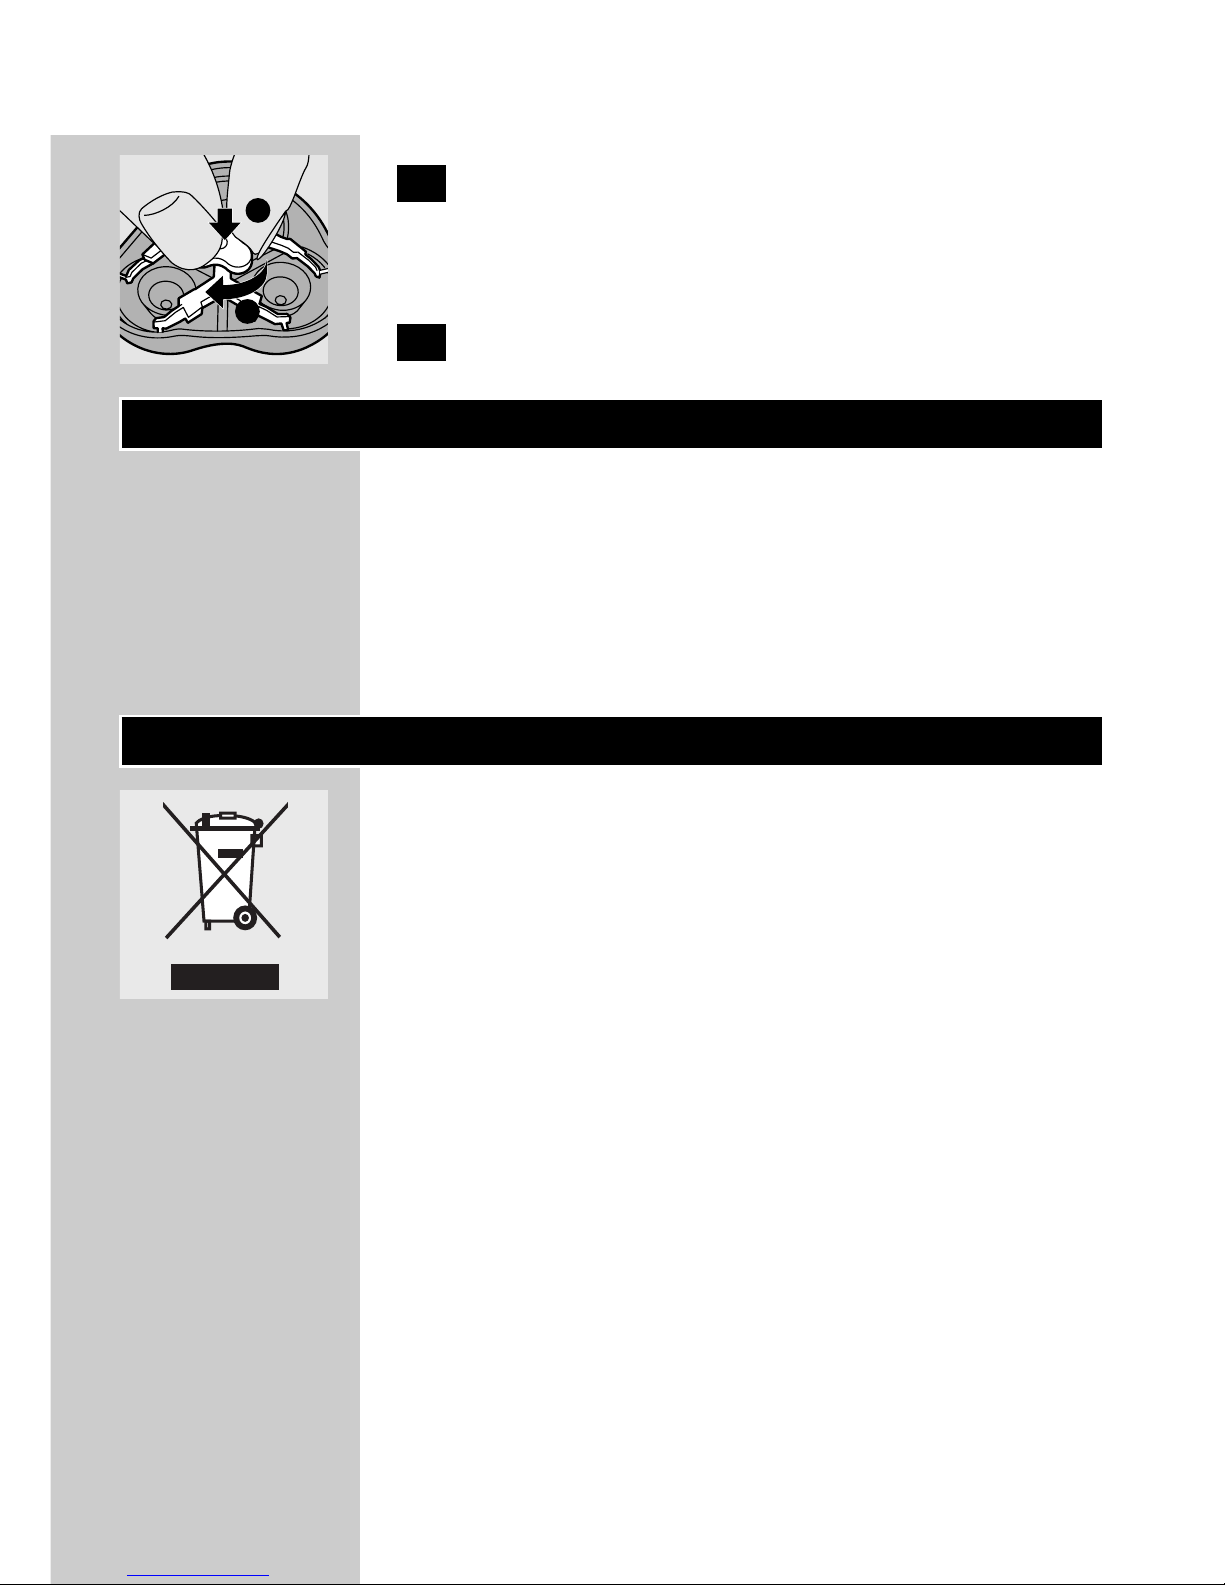
C
3 Lubricate the trimmer teeth with a drop
of sewing machine oil every six months.
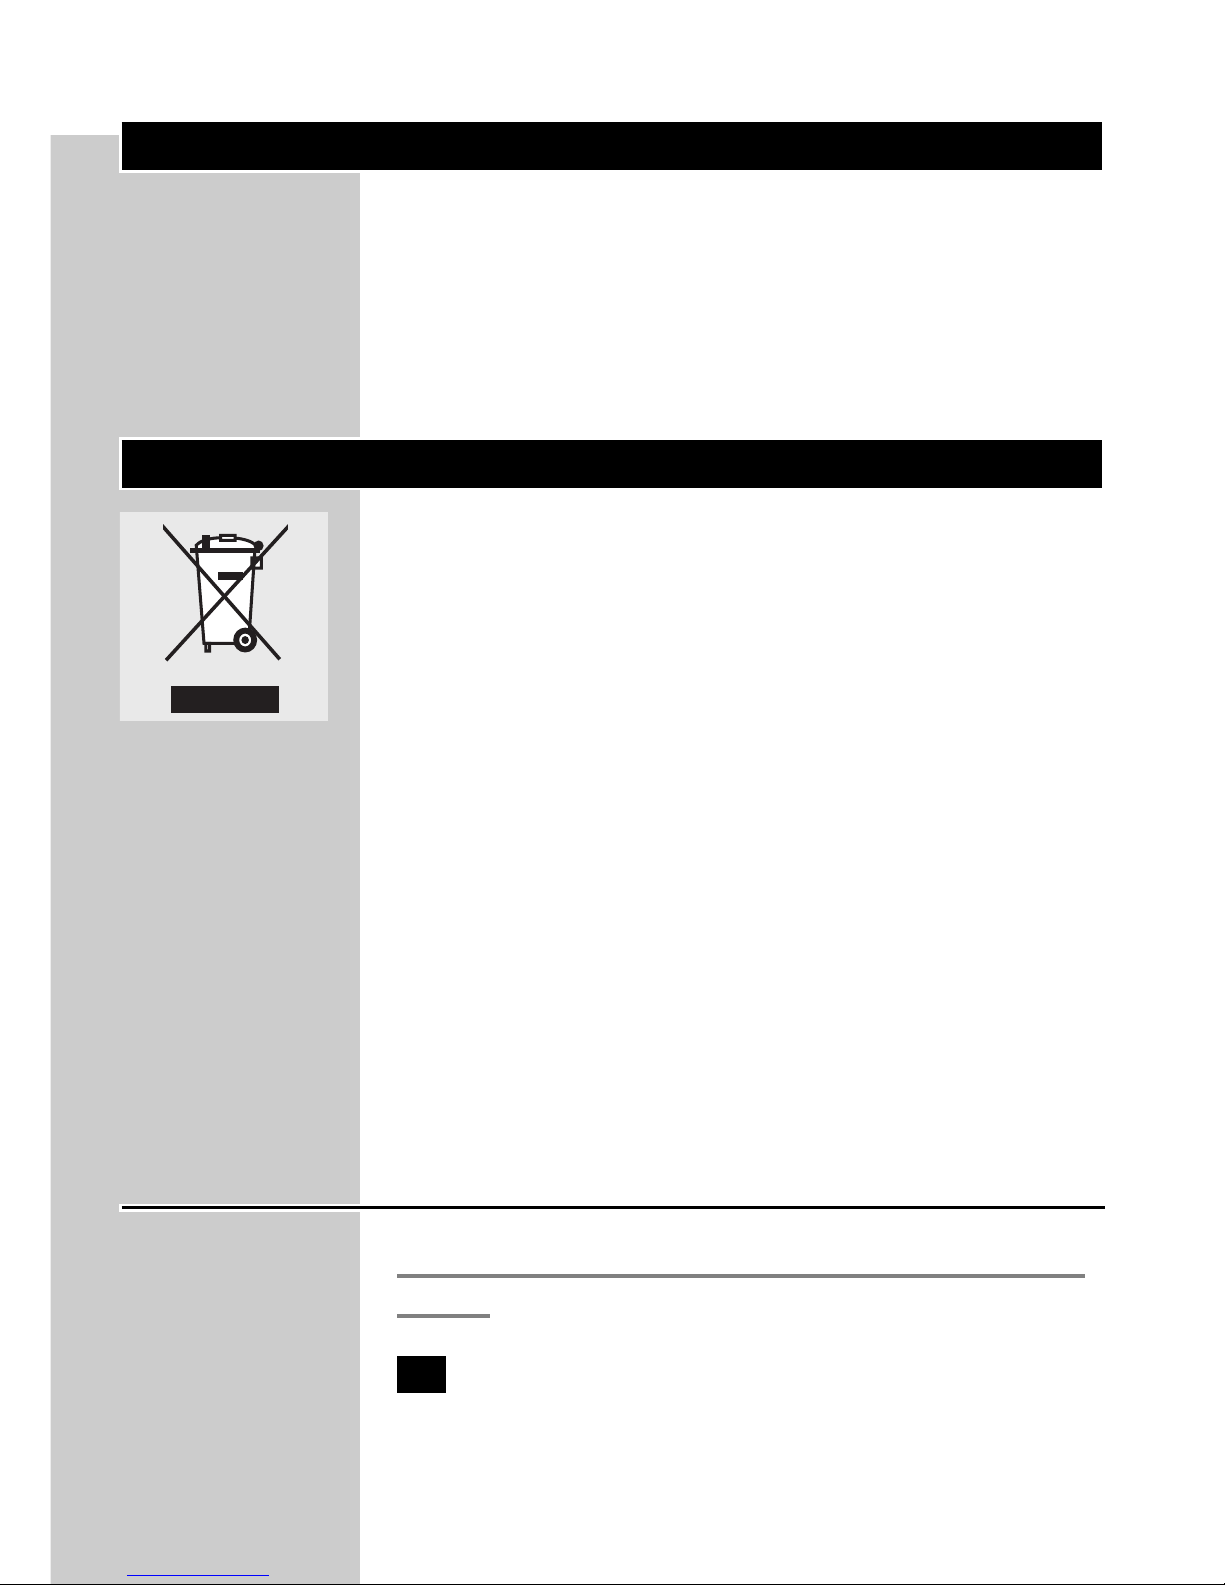
Storage
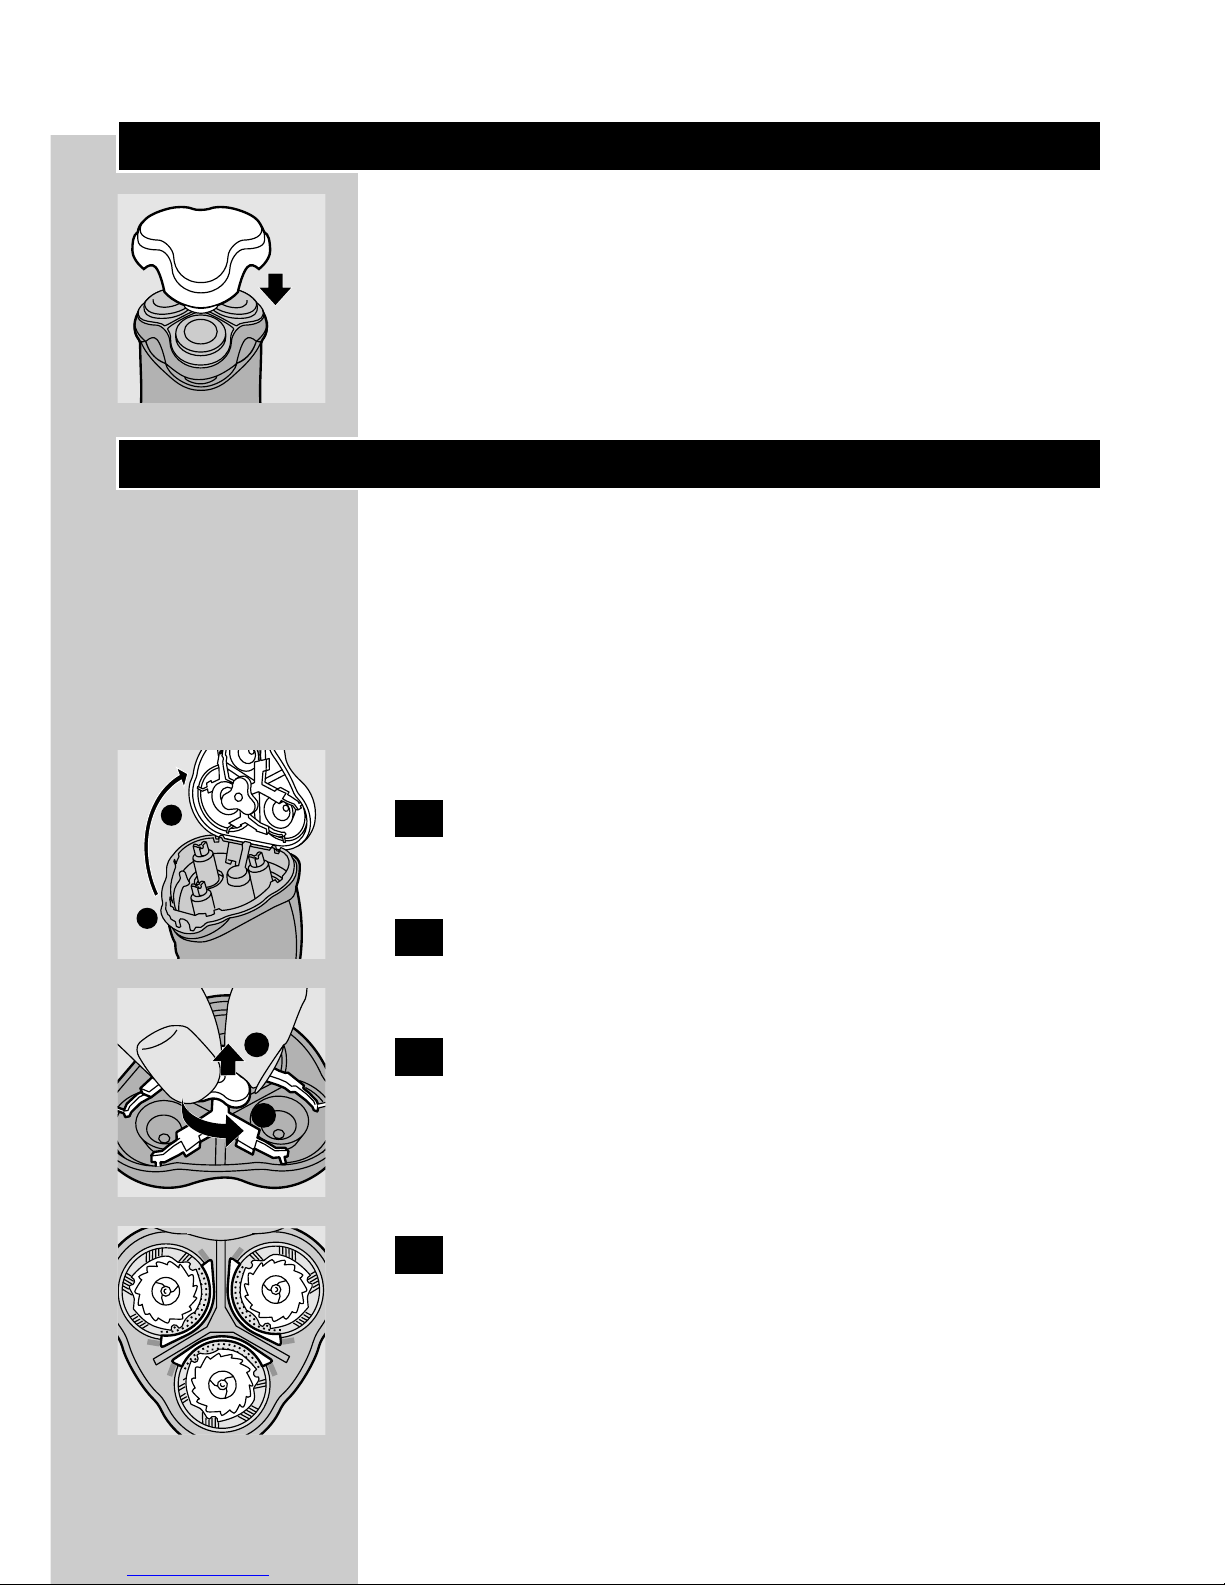
C
◗ Put the protection cap on the shaver to
prevent damage.
◗ The appliance can be stored in the pouch
supplied.
ENGLISH 9

Replacement
Replace the shaving heads every two years for
optimal shaving results.
Replace damaged or worn shaving heads with
HQ6 Philips Quadra shaving heads only.
1 Switch the shaver off, remove the
powerplug from the wall socket and pull
the appliance plug out of the shaver.
C
2 Press the release button (1) and open the
shaving unit (2).
C
3 Turn the wheel anticlockwise (1) and
remove the retaining frame (2).
C
4 Remove the shaving heads and place new
ones in the shaving unit in such a way that
the parts with the small holes point
towards the centre of the shaving unit.
Make sure that the projections of the shaving
heads fit exactly into the recesses.
C
5 Put the retaining frame back into the
shaving unit, press the wheel (1) and turn it
clockwise (2).
6 Close the shaving unit.
ENGLISH10
1
2
1
2
1
2
Accessories
The following accessories are available:
- HQ8000 powerplug.
- HQ6 Philips Quadra shaving heads.
- HQ110 Philips shaving head cleaner (shaving
head cleaning spray).
Environment
C
◗ Do not throw the appliance away with the
normal household waste at the end of its life,
but hand it in at an official collection point for
recycling. By doing this you will help to
preserve the environment.
The built-in rechargeable battery contains
substances that may pollute the environment.
Always remove the battery before discarding the
appliance or handing it in at an official collection
point. Dispose of the battery at an official
collection point for batteries. If you have trouble
removing the battery, you can also take the
appliance to a Philips service centre, which will
remove the battery for you and will dispose of it
in an environmentally safe way.
Disposal of the batteries
Only remove the batteries if they are completely
empty.
1 Remove the powerplug from the wall
socket and pull the appliance plug out of
the shaver.
ENGLISH 11

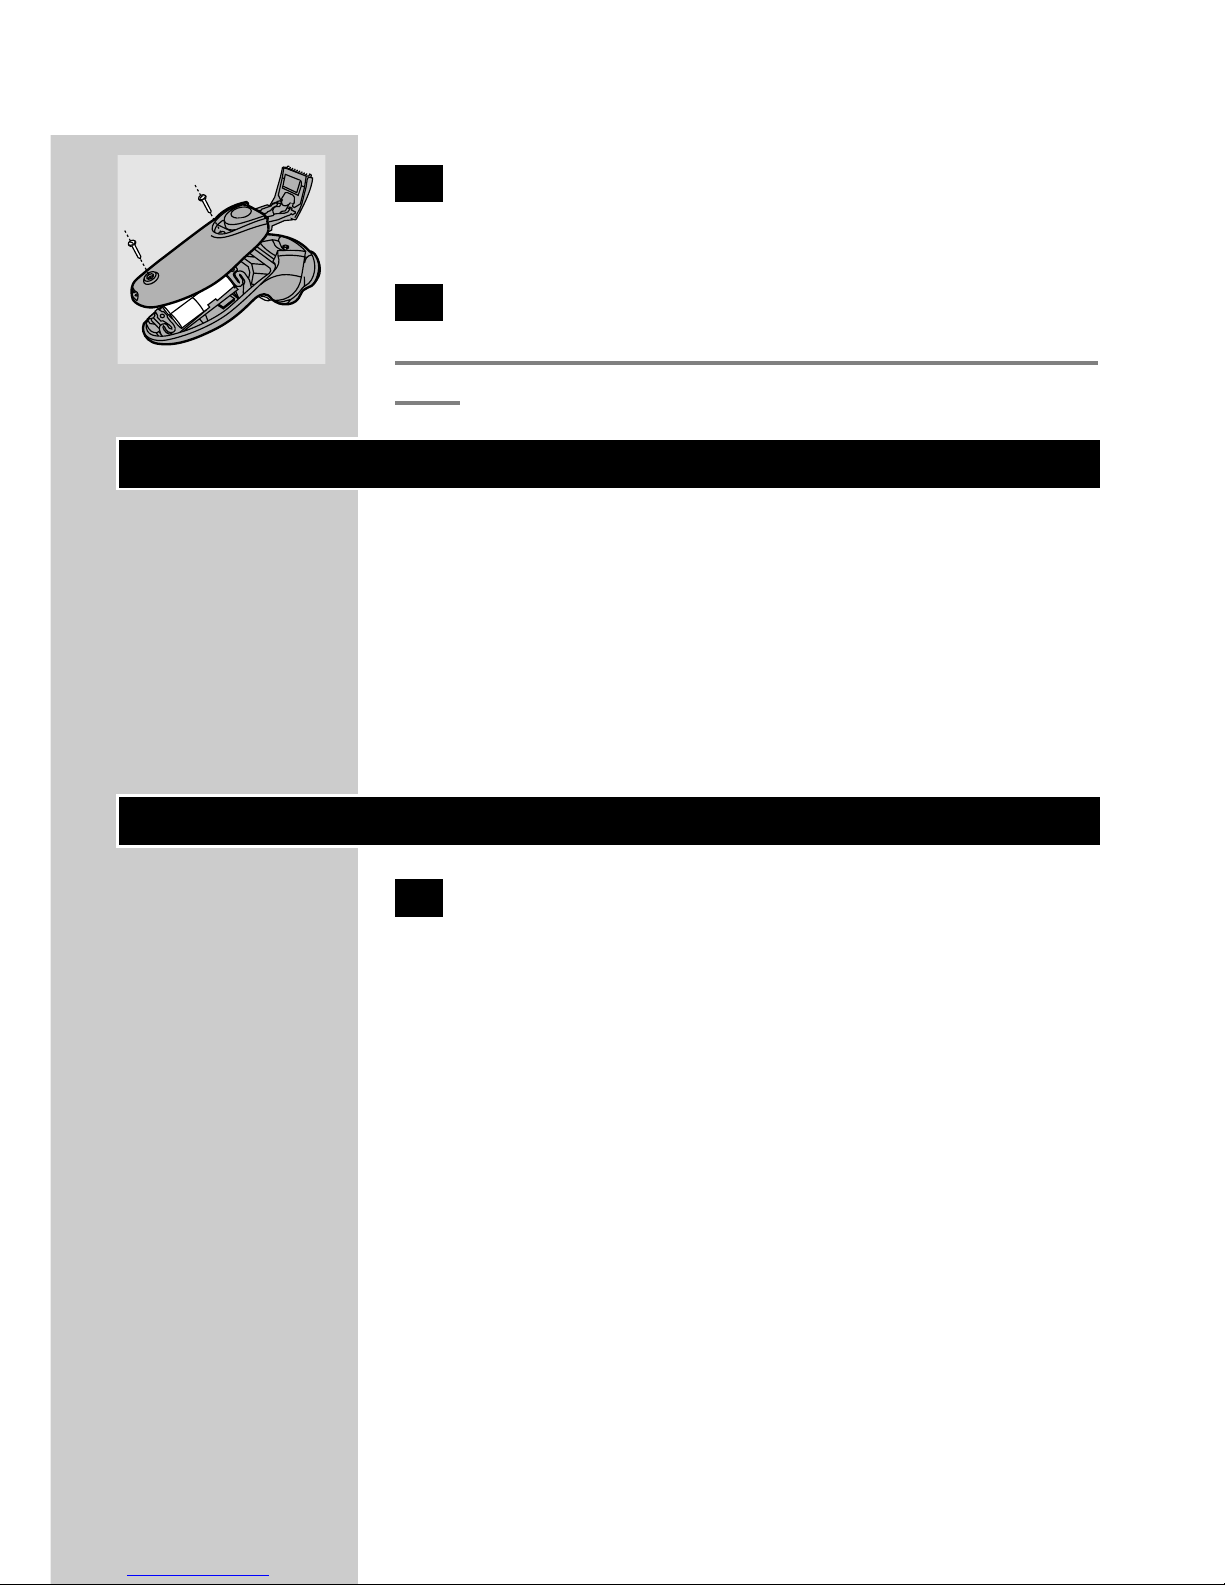
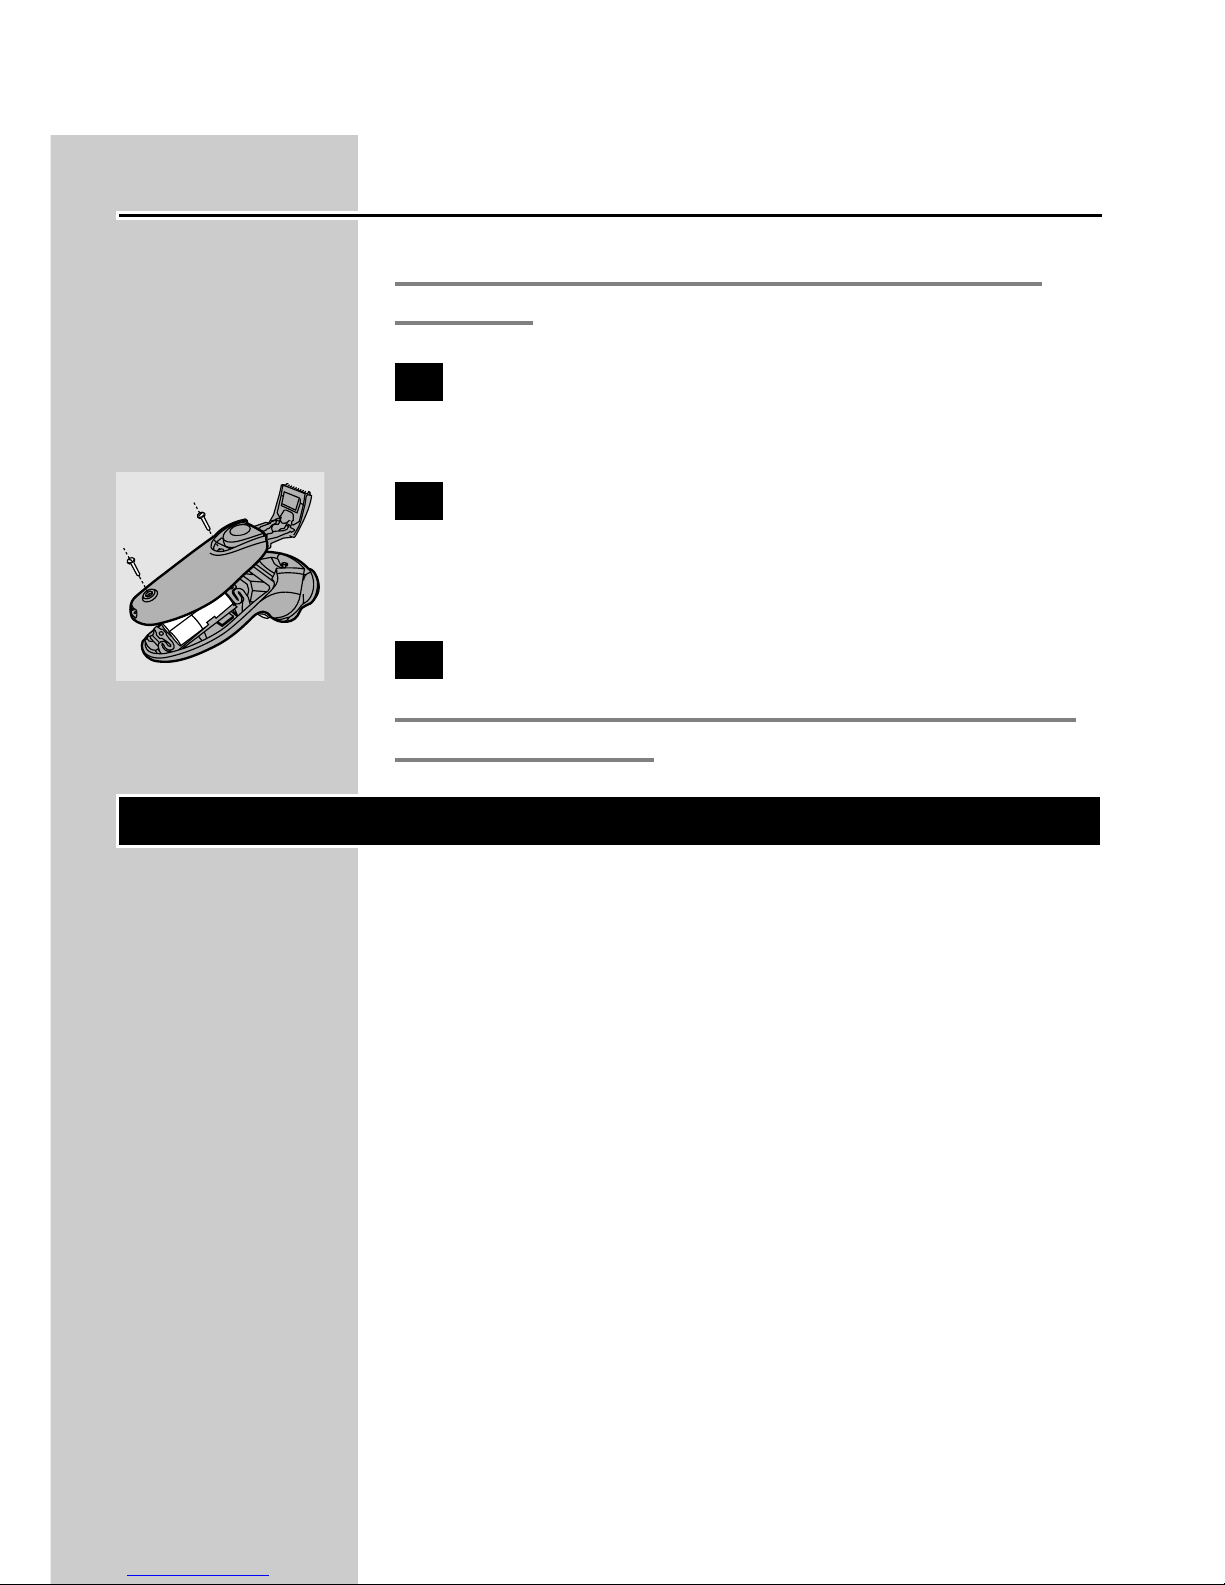
C
2 Let the shaver run until it stops, open the
trimmer, undo the screws and open the
shaver.
3 Remove the batteries.
Do not connect the shaver to the mains again
after the batteries have been removed.
Guarantee & service
If you need information or if you have a
problem, please visit the Philips Web site at
www.philips.com or contact the Philips Customer
Care Centre in your country (you will find its
phone number in the worldwide guarantee
leaflet). If there is no Customer Care Centre in
your country, turn to your local Philips dealer or
contact the Service Department of Philips
Domestic Appliances and Personal Care BV.
Troubleshooting
1 Reduced shaving performance
B
Cause 1: the shaving heads are dirty.
B
The shaver has not been rinsed long enough or
the water used was not hot enough.
◗ Clean the shaver thoroughly before you
continue shaving (see chapter 'Cleaning and
maintenance' and chapter 'Replacement').
B
Cause 2: long hairs are obstructing the shaving
heads.
ENGLISH12

◗ Clean the cutters and guards with the brush
supplied. See chapter 'Cleaning and
maintenance' and chapter 'Replacement'.
B
Cause 3: the shaving heads are damaged or worn.
◗ Replace the shaving heads. See chapter
'Replacement'.
2 The shaver does not work when the on/off
button is pressed
B
Cause 1: the batteries are empty.
◗ Recharge the batteries. See chapter 'Charging'.
B
Cause 2: the shaver is not connected to the mains.
◗ Put the powerplug in the wall socket.
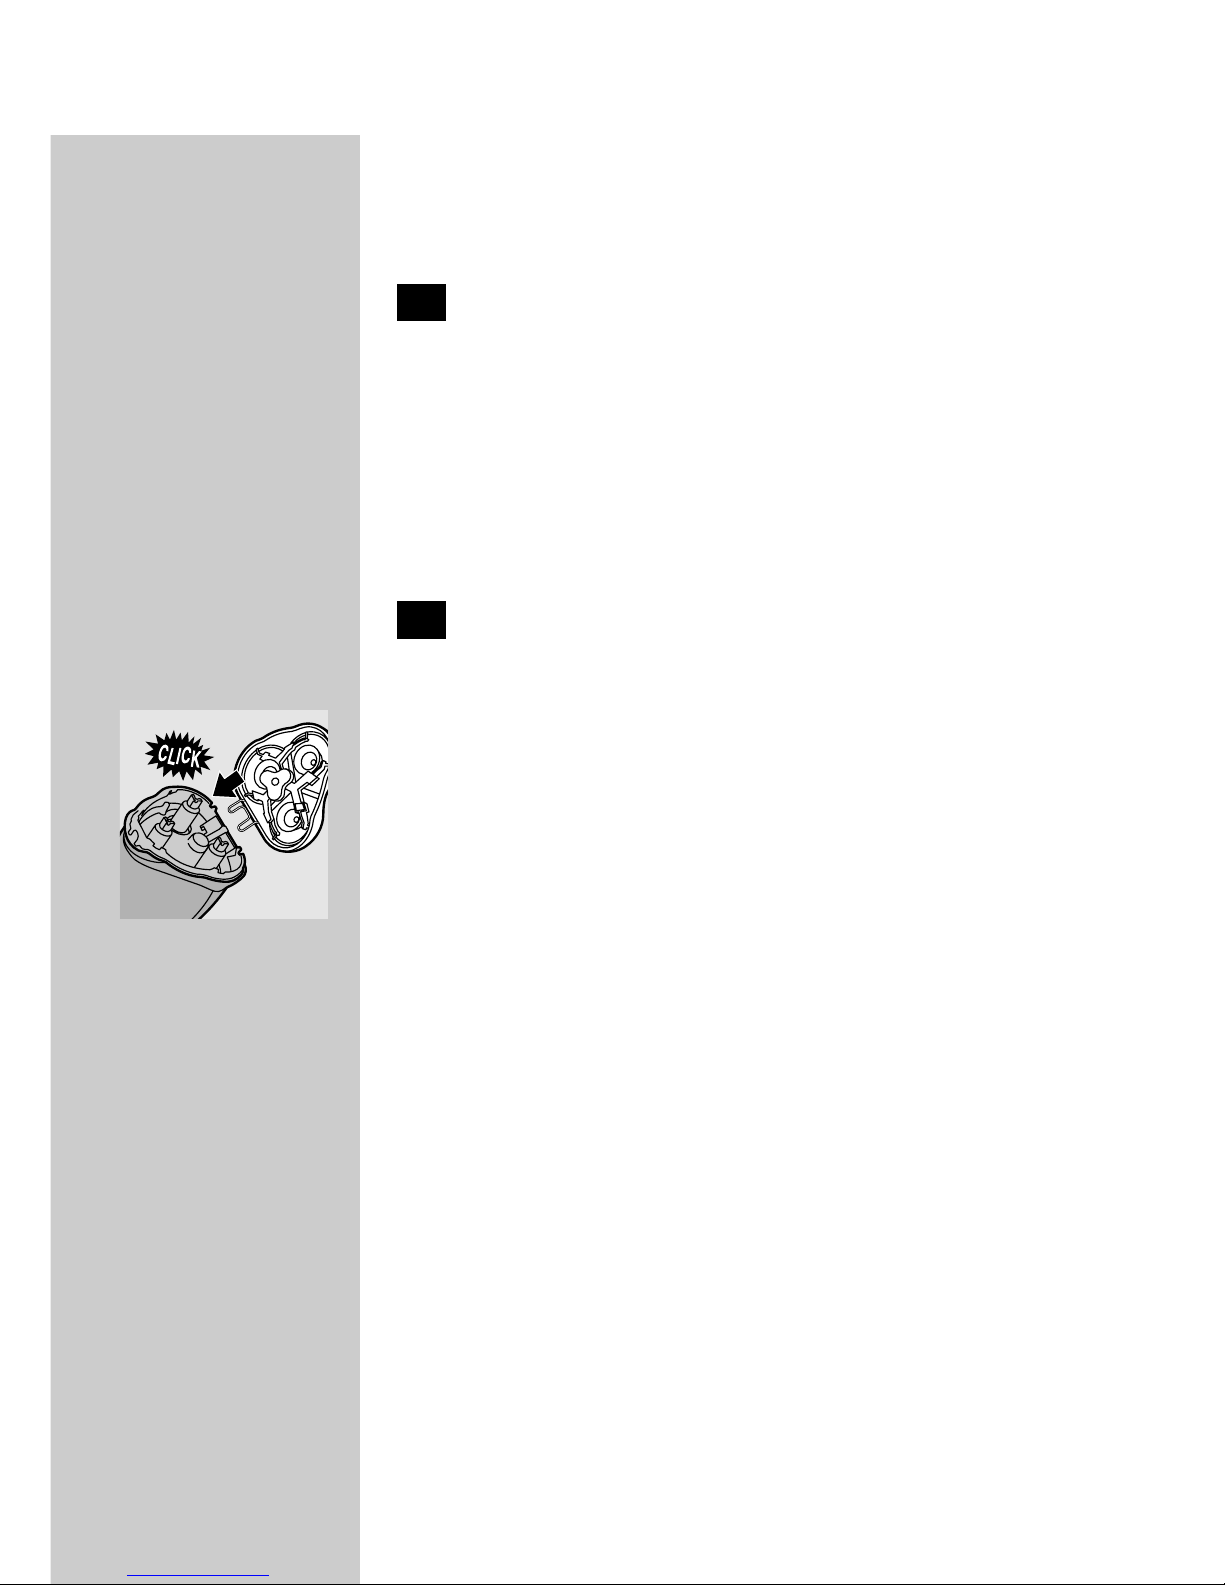
3 The shaving unit has come off the shaver
B
Cause: the shaving unit has not been placed
correctly.
C
◗ If the shaving unit becomes detached from the
shaver, check whether the hinge spring is still
properly attached, i.e. has not come loose and
does not show any cracks or damage. If the
hinge spring is still properly attached, the
shaving unit can be easily put back on the
shaver again. However, if the hinge spring has
come loose, is cracked or damaged, please
contact your Philips dealer or the nearest
Philips service centre to avoid damage to your
shaver.
ENGLISH 13

Ważne
Przed pierwszym użyciem urządzenia zapoznaj się
dokładnie z instrukcją jego obsługi i zachowaj ją na
przyszłość, do ewentualnej konsultacji.
◗ W celu naładowania akumulatorów używaj
wyłącznie załączonej do urządzenia ładowarki.
◗ Zasilacz przekształca napięcie 100-240 V na
bezpieczne niskie napięcie niższe niż 24 V.
◗ Wtyczka zasilacza zawiera transformator.
Odcięcie wtyczki celem wymiany jej na nową
może spowodować niebezpieczeństwo.
◗ Nie używaj uszkodzonego zasilacza.
◗ Jeśli uszkodzona jest wtyczka przewodu
zasilającego, wówczas, aby uniknąć
niebezpieczeństwa należy zawsze zastąpić ją
wtyczką oryginalną
C
◗ Sprawdź, czy zasilacz jest zupełnie suchy.
◗ Ładuj, przechowuj i używaj urządzenie w
temperaturze pomiędzy 5cC a 35cC.
◗ Nie ładuj golarki w zamkniętej saszetce.
C
◗ Niniejsze urządzenie spełnia międzynarodowe,
zatwierdzone normy bezpieczeństwa IEC i
można je myć pod kranem.
Postępuj ostrożnie z gorącą wodą. Zawsze
sprawdzaj, czy jej temperatura jest odpowiednia
dla kontaktu z rękami.
◗ Zanim zaczniesz czyścić golarkę pod kranem,
zawsze wyjmij wtyczkę z gniazdka sieciowego.
◗ Poziom hałasu: Lc = 61 dB [A]
POLSKI14
Ładowanie
Przed rozpoczęciem ładowania należy sprawdzić,
czy urządzenie jest wyłączone.
Zanim zaczniesz korzystać z golarki lub jeśli przez
długi czas nie była ona używana, musisz ładować ją
nieprzerwanie przez 4 godziny. Pełne ładowanie
zajmie około 8 godzin.
Możesz także używać golarki bez ładowania,
podłączając ją bezpośrednio do sieci.
Nie zostawiaj urządzenia podłączonego do sieci
na dłużej, niż 24 godziny.
Wskaźniki ładowania
Ładowanie
C
◗ W momencie rozpoczęcia ładowania
rozładowanej golarki zaświeci się zielona
lampka kontrolna.
Akumulatory są całkowicie
naładowane.
C
◗ Z chwilą pełnego naładowania golarki zaczyna
migotać zielona lampka kontrolna.
POLSKI 15
Ładowanie urządzenia
Gdy urządzenie zacznie pracować wolniej lub
zatrzyma się, należy je naładować.
Nie ładuj golarki zamkniętej w saszetce.
C
1 Włóż małą wtyczkę przewodu zasilającego
do golarki.
2 Podłącz ładowarkę do sieci.
3 Po całkowitym naładowaniu akumulatorów
należy wyjąć wtyczkę zasilania z gniazdka
ściennego oraz wyjąć małą wtyczkę z
golarki.
Czas bezprzewodowej pracy
W pełni naładowana golarka gwarantuje do 70
minut bezprzewodowej pracy.
Golenie
Golenie
1 Włącz golarkę, wciskając włącznik.
C
2 Przesuwaj głowice po skórze, wykonując
zarówno proste, jak i okrężne ruchy.
Najlepsze efekty golenia osiąga się na skórze
suchej.
POLSKI16
Skóra Twojej twarzy potrzebuje pewnego czasu
(2-3 tygodni), by przyzwyczaić się do nowego
systemu golenia.
3 Wyłącz golarkę przez jednokrotne
wciśnięcie przycisku off/on.
C
4 Po każdym użyciu załóż na golarkę
ochronną osłonkę, zabezpieczającą głowice
golące przed uszkodzeniem mechanicznym.
Trymer
Służy do przystrzygania wąsów i bokobrodów.
C
1 Otwórz trymer przesuwając suwak do
góry.
Trymer może być używany po uprzednim
włączeniu urządzenia.
Czyszczenie i konserwacja
Regularne oczyszczanie golarki gwarantuje lepsze
efekty golenia.
Najprostszym i najbardziej higienicznym
sposobem czyszczenia urządzenia jest opłukanie
gorącą wodą po każdym użyciu golarki modułu
golącego i komory na ścięte włosy.
Postępuj ostrożnie z gorącą wodą. Zawsze
sprawdzaj, czy jej temperatura jest odpowiednia
dla kontaktu z rękami.
POLSKI 17

Codziennie: część goląca i komora na ścięty
zarost
1 Wyłącz golarkę, wyjmij ładowarkę z
gniazdka ściennego oraz wtyczkę z golarki.
C
2 Wciśnij przycisk blokujący (1) i otwórz
moduł golący (2).
C
3 Przez jakiś czas płucz moduł golący i
komorę na ścięty zarost pod gorącą
bieżącą wodą.
4 Zamknij moduł golący i strząśnij pozostałą
wodę.
Nidy nie wycieraj modułu golącego ręcznikiem lub
chusteczką - możesz uszkodzić głowice golące.
C
5 Otwórz ponownie część golącą i pozostaw
ją tak do wyschnięcia.
Komorę na ścięty zarost można też czyścić na
sucho, używając specjalnej załączonej szczoteczki.
Co sześć miesięcy: głowice golące
C
1 Otwórz moduł golący, obróć kółkiem w
kierunku przeciwnym do ruchu
wskazówek zegara (1) i wyjmij obsadę (2).
POLSKI18
1
2
1
2
C
2 Za pomocą dołączonej szczoteczki oczyść
nożyki i osłonki.
Nie myj jednorazowo więcej niż jednego ostrza i
jednej głowicy, ponieważ tworzą one dopasowane
zestawy. Jeśli przypadkowo pomieszasz ostrza i
głowice, potrwa kilka tygodni, zanim ponownie
przywrócisz optymalną skuteczność golenia.
3 Ponownie załóż głowice golące do modułu
golącego. Następnie załóż obsadę na moduł
golący, wciśnij kółko (1) i obróć nim w
kierunku zgodnym z kierunkiem ruchu
wskazówek zegara (2) (patrz: rozdział
"Wymiana").
4 Zamknij część golącą.
Trymer
Oczyszczaj trymer po każdym użyciu.
1 Wyłącz golarkę, wyjmij ładowarkę z
gniazdka ściennego oraz wtyczkę z golarki.
C
2 Trymer oczyść dołączoną do golarki
szczoteczką.
C
3 Co 6 miesięcy należy naoliwić ząbki
trymera kroplą oleju maszynowego.
POLSKI 19
Przechowywanie
C
◗ Załóż na golarkę ochronną pokrywę, by
uniknąć uszkodzenia.
◗ Urządzenie może być przechowywane w
załączonym pokrowcu.
Wymiana
Aby zapewnić optymalne funkcjonowanie
urządzenia, co dwa lata wymieniaj głowice golące.
Uszkodzone lub zużyte głowice golące wymieniaj
jedynie na głowice golące HQ6 Philips Quadra.
1 Wyłącz golarkę, wyjmij zasilacz z gniazda
ściennego oraz wtyczkę z golarki.
C
2 Wciśnij przycisk blokujący (1) i otwórz
moduł golący (2).
C
3 Obróć kółkiem w kierunku przeciwnym
do ruchu wskazówek zegara (1) i wyjmij
obsadę (2).
C
4 Zdejmij zużyte głowice golące i na część
golącą załóż nowe, tak aby elementy
zawierające małe otwory skierowane były
w kierunku środka części golącej.
Upewnij się, czy części wystające głowic pasują
dokładnie w zagłębienia.
POLSKI20
1
2
1
2
C
5 Załóż obsadę na moduł golący, wciśnij
kółko (1) i obróć nim w kierunku zgodnym
z kierunkiem ruchu wskazówek zegara (2).
6 Zamknij część golącą.
Akcesoria
Dostępne są następujące akcesoria:
- Zasilacz HQ8000
- Głowice golące HQ6 Philips Quadra.
Ochrona środowiska
C
◗ Nie wyrzucaj zużytego urządzenia wraz ze
zwykłymi odpadkami/śmieciami. Zanieś je do
specjalnego punktu zbierającego odpadki do
utylizacji w celu ich utylizacji.W ten sposób
pomożesz chronić środowisko naturalne.
Wbudowany akumulator zawiera substancje
mogące zanieczyszczać środowisko.Akumulator
powinien być usunięty i oddany do punktu skupu
przed wyrzuceniem urządzenia po jego zużyciu.
Produkt może zostać oddany do punktu
serwisowego Philips, który zadba o odpowiednią
utylizację urządzenia i akumulatora.
Usuwanie akumulatorów
Wyrzucaj tylko zupełnie wyczerpane akumulatory.
1 Wyjmij zasilacz z gniazdka ściennego oraz
wyjmij małą wtyczkę z golarki.
POLSKI 21
1
2
C
2 Uruchom golarkę i poczekaj, aż przestanie
pracować, odkręć śrubki i otwórz golarkę.
3 Wyjmij akumulatory.
Po wyjęciu akumulatorów nie podłączaj golarki do
sieci.
Gwarancja i serwis
Jeśli potrzebne Ci są informacje lub napotykasz
jakiś problem, skontaktuj się z Biurem Obsługi
Klienta (numer telefonu znajdziesz w Karcie
Gwarancyjnej), lub też z najbliższym punktem
serwisowym sprzętu AGD, autoryzowanym przez
firmę Philips.
Rozwiązywanie problemów
1 Zmniejszona wydajność golenia
B
Przyczyna 1: głowice golące są zanieczyszczone.
B
Golarka nie była dostatecznie długo płukana lub
woda nie była wystarczająco ciepła.
◗ Przed kontynuowaniem golenia dokładnie
oczyść golarkę (patrz: rozdział "Czyszczenie i
konserwacja" i rozdział "Wymiana").
B
Przyczyna 2: długie włoski blokują głowice golące.
◗ Za pomocą dołączonej szczoteczki oczyść
nożyki i osłonki. Patrz: rozdział "Czyszczenie i
konserwacja" i rozdział "Wymiana".
B
Przyczyna 3: głowice golące są uszkodzone lub
zużyte.
POLSKI22
◗ Wymień głowice golące. Patrz: rozdział
"Wymiana".
2 Po wciśnięciu włącznika golarka nie działa.
B
Przyczyna 1: akumulatorki są nienaładowane.
◗ Naładuj akumulatory. Patrz: rozdział
"Ładowanie".
B
Przyczyna 2: Golarka nie jest dołączona do sieci.
◗ Podłącz ładowarkę do sieci.
3 Moduł golący zsunął się z golarki.
B
Przyczyna: Nie został założony prawidłowo moduł
golący.
C
◗ Jeśli część goląca odłączyła się od golarki,
sprawdź czy sprężyna jest odpowiednio
zamontowana, na przykład czy nie poluzowała
się i czy nie widać na niej pęknięć lub
uszkodzeń. Jeśli sprężyna jest odpowiednio
zamocowana, część golącą można łatwo
ponownie założyć na golarkę. Jeśli jednak
sprężyna poluzowała się, jest pęknięta lub
uszkodzona, grozi uszkodzeniem całej golarki.
W takim przypadku powinieneś skontaktować
się ze swoim sprzedawcą lub najbliższym
punktem serwisowym firmy Phililps.
POLSKI 23

Important
Citiţi aceste instrucţiuni cu atenţie înainte de
utilizarea aparatului şi păstraţi-le pentru consultări
ulterioare.
◗ Folosiţi doar încărcătorul furnizat.
◗ Încărcătorul transformă o tensiune de 100-
240 volţi într-o tensiune sigură sub 24 volţi.
◗ Încărcătorul este dotat cu un transformator.
Nu încercaţi să înlocuiţi fişa de conectare
pentru a evita provocarea unor accidente.
◗ Nu folosiţi un încărcător deteriorat.
◗ Dacă încărcătorul se deteriorează, înlocuiţi-l
întotdeauna cu unul original pentru a evita
orice accident.
C
◗ Evitaţi contactul încărcătorului cu apa.
◗ Încărcaţi, depozitaţi şi utilizaţi aparatul la o
temperatură între 5cC şi 35cC.
◗ Nu încărcaţi aparatul în etui.
C
◗ Aparatul corespunde normelor de securitate
internaţionale IEC şi poate fi curăţat sub jet
de apă.
Aveţi grijă ca apa să nu fie foarte fierbinte pentru
a nu vă frige.
◗ Scoateţi întotdeauna ştecherul din priză
înainte de a curăţa aparatul.
◗ Nivel de zgomot: Lc = 61 dB [A]
ROMÂNĂ24
Încărcare
Înainte de a începe încărcarea, aparatul trebuie să
fie oprit.
Când încărcaţi aparatul pentru prima oară sau
după o perioadă mai lungă de timp, lăsaţi-l să se
încarce timp de 4 ore. În mod normal încărcarea
durează 8 ore.
Puteţi folosi aparatul fără să-l încărcaţi,
conectându-l la priză.
Nu lăsaţi aparatul conectat la priză mai mult de
24 de ore.
Indicaţii de încărcare
Încărcare
C
◗ Imediat ce începeţi să încărcaţi aparatul, ledul
verde se va aprinde.
Acumulator complet încărcat
C
◗ Când acumulatorul este complet încărcat,
ledul verde începe să clipească.
ROMÂNĂ 25
Încărcarea aparatului
Încărcaţi aparatul când se opreşte motorul sau
funcţionează mai lent.
Nu reîncărcaţi aparatul într-o borsetă închisă.
C
1 Introduceţi fişa în aparatul de bărbierit.
2 Puneţi încărcătorul în priză.
3 Scoateţi încărcătorul din priză şi fişa din
aparat când acumulatorul este complet
încărcat.
Perioadă de funcţionare fără cablu
Un aparat de ras complet încărcat oferă o
autonomie de funcţionare de până la 70 de
minute.
Utilizarea aparatului
Bărbierire
1 Porniţi aparatul apăsând o dată pe butonul
pornire/oprire.
C
2 Faceţi rapid mişcări drepte şi circulare cu
capetele de bărbierire pe suprafaţa pielii.
Bărbierirea pe o piele uscată asigură cele mai
bune rezultate.
ROMÂNĂ26

Pielea dumneavoastră ar putea necesita 2-3
săptămâni până să se obişnuiască cu sistemul
Philips.
3 Opriţi aparatul de ras apăsând butonul
pornire/oprire o dată.
C
4 Puneţi capacul de protecţie pe aparat după
utilizare pentru a evita deteriorarea
acestuia.
Dispozitiv de tundere
Pentru îngrijirea perciunilor şi a mustăţii.
C
1 Deschideţi dispozitivul de tundere
împingând în sus butonul culisant.
Dispozitivul de tundere poate fi activat în timp ce
motorul funcţionează.
Curăţare şi întreţinere
O curăţare regulată asigură cele mai bune
rezultate de bărbierire.
Modul cel mai simplu şi mai igienic de a curăţa
aparatul este să clătiţi unitatea de bărbierire şi
compartimentul de colectare a părului după
fiecare utilizare.
Aveţi grijă ca apa să nu fie foarte fierbinte pentru
a nu vă frige.
ROMÂNĂ 27

În fiecare zi: unitatea de bărbierire şi
compartimentul pentru păr
1 Opriţi aparatul, scoateţi încărcătorul din
priză şi fişa din aparat.
C
2 Apăsaţi butonul de decuplare (1) pentru a
deschide unitatea de bărbierire (2).
C
3 Curăţaţi unitatea de bărbierire şi
compartimentul de colectare a părului
clătindu-le cu apă fierbinte de la robinet.
4 Închideţi unitatea şi scuturaţi excesul de
apă.
Nu ştergeţi niciodată unitatea cu un prosop sau
un şerveţel deoarece aţi putea deteriora capetele.
C
5 Deschideţi din nou unitatea de bărbierire
şi lăsaţi-o deschisă pentru a se usca
complet.
Puteţi curăţa compartimentul pentru păr fără apă
folosind peria furnizată.
O dată la şase luni: capete de bărbierire
C
1 Deschideţi unitatea de bărbierire, răsuciţi
rotiţa în sens invers acelor de ceasornic
(1) şi scoateţi cadrul de susţinere (2).
ROMÂNĂ28
1
2
1
2
C
2 Curăţaţi cuţitele şi sitele de protecţie cu
periuţa furnizată.
Cuţitele şi sitele de protecţie sunt pereche, de
aceea curăţaţi pe rând câte un set. Dacă
amestecaţi din greşeală cuţitele cu sitele, s-ar
putea să dureze câteva săptămâni până ce
aparatul va tăia din nou la performanţa optimă
anterioară.
3 Puneţi capetele de bărbierire înapoi în
unitate. Montaţi cadrul pe unitate, apăsaţi
rotiţa (1) şi răsuciţi-o în sensul acelor de
ceasornic (2) (consultaţi capitolul
"Înlocuire").
4 Închideţi unitatea de bărbierire.
Dispozitiv de tundere
Curăţaţi dispozitivul de tundere de fiecare dată
când îl folosiţi.
1 Opriţi aparatul, scoateţi încărcătorul din
priză şi fişa din aparat.
C
2 Curăţaţi dispozitivul de tundere cu
ajutorul periuţei furnizate.
C
3 Ungeţi dinţii dispozitivului de tundere cu
puţin ulei pentru maşina de cusut o dată la
şase luni.
ROMÂNĂ 29
Depozitare
C
◗ Acoperiţi aparatul de ras cu capacul de
protecţie pentru a preveni deteriorarea.
◗ Aparatul poate fi depozitat în husa furnizată.
Înlocuire
Înlocuiţi capetele de bărbierire o dată la doi ani
pentru rezultate optime.
Înlocuiţi capetele de bărbierire stricate sau
deteriorate doar cu capetele de bărbierire Philips
Quadra HQ6.
1 Opriţi aparatul, scoateţi încărcătorul din
priză şi fişa din aparat.
C
2 Apăsaţi butonul de decuplare (1) pentru a
deschide unitatea de bărbierire (2).
C
3 Răsuciţi rotiţa în sens invers acelor de
ceasornic (1) şi scoateţi cadrul de
susţinere (2).
C
4 Scoateţi capetele de bărbierire şi
poziţionaţi-le pe cele noi în unitatea de
bărbierire, în aşa fel încât zonele cu orificii
să fie îndreptate spre centrul unităţii.
Aveţi grijă să potriviţi corect capetele de
bărbierire în nişele corespunzătoare.
ROMÂNĂ30
1
2
1
2
C
5 Repoziţionaţi cadrul de susţinere în
unitatea de bărbierire, apăsaţi rotiţa (1) şi
răsuciţi-o în sensul acelor de ceasornic (2).
6 Închideţi unitatea de bărbierire.
Accesorii
Următoarele accesorii sunt disponibile:
- Încărcător HQ8000.
- Capete de bărbierire Philips Quadra HQ6.
- Curăţător cap de bărbierire Philips HQ110
(spray de curăţare cap de bărbierire).
Protejarea mediului
C
◗ Nu aruncaţi aparatul în gunoiul menajer la
sfârşitul duratei de funcţionare, ci duceţi-l la
un punct de colectare autorizat pentru
reciclare. În acest fel, veţi ajuta la protejarea
mediului înconjurător.
Acumulatorul reîncărcabil conţine substanţe ce
pot polua mediul înconjurător. Scoateţi
acumulatorul înainte de a arunca aparatul şi
duceţi-l la un punct de colectare oficial. Dacă nu
reuşiţi să scoateţi acumulatorul, îl puteţi duce la un
centru service Philips, unde va fi scos şi aruncat în
conformitate cu normele privind protejarea
mediului.
ROMÂNĂ 31
1
2
Aruncarea acumulatorului
Scoateţi acumulatorul doar dacă este complet
descărcat.
1 Scoateţi încărcătorul din priză şi trageţi fişa
de conectare din aparat.
C
2 Lăsaţi aparatul de bărbierit să funcţioneze
până se opreşte, deschideţi dispozitivul de
tundere, desfaceţi şuruburile şi aparatul.
3 Scoateţi acumulatorul.
Aparatul nu trebuie conectat la priză după ce aţi
scos acumulatorul.
Garanţie şi service
Pentru informaţii suplimentare sau în cazul altor
probleme, vă rugăm să vizitaţi site-ul Philips
www.philips.com sau să contactaţi
Departamentul Clienţi din ţara dumneavoastră
(veţi găsi numărul de telefon în garanţia
internaţională). Dacă în ţara dumneavoastră nu
există un astfel de departament, contactaţi
furnizorul dumneavoastră Philips sau
Departamentul Service pentru Aparate
Electrocasnice şi Produse de Îngrijire Personală
Philips.
ROMÂNĂ32
 Loading...