

Page 1

ENGLISH 4
POLSKI 25
ROMÂNĂ 48
РУССКИЙ 70
ČESKY 95
MAGYAR 117
УКРАЇНСЬКА 139
SLOVENŠČINA 162
HQ7762, HQ7760
Page 2
Introduction
The shaver comes with two different kinds of
NIVEA FOR MEN cartridges: Extra Fresh Shaving
Gel for a fresh sensation during and after shaving
and Moisturising Shaving Lotion for sensitive skin.
This gives you the opportunity to tr y them out
and discover which one suits your skin type best.
Important
Read these instructions for use carefully before
using the appliance and save them for future
reference.
◗ Only use the powerplug and the charging
stand supplied.
◗ The powerplug transforms 100-240 volts to a
safe low voltage of less than 24 volts.
◗ The powerplug contains a transformer. Do
not cut off the powerplug to replace it with
another plug, as this will cause a hazardous
situation.
◗ Do not use a damaged powerplug or charging
stand.
◗ If the powerplug or charging stand is
damaged, always have it replaced by one of the
original type in order to avoid a hazard.
◗ Charge, store and use the appliance at a
temperature between 5cC and 35cC.
C
◗ Make sure the powerplug does not get wet.
◗ Never immerse the charging stand in water
nor rinse it under the tap.
◗ Do not leave the shaver in the plugged-in
charging stand for more than 24 hours.
ENGLISH4
Page 3
C
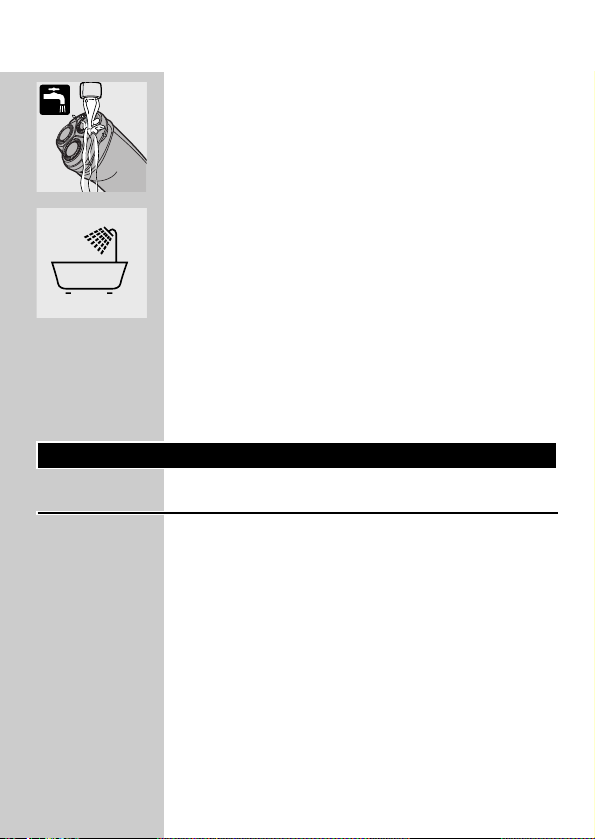
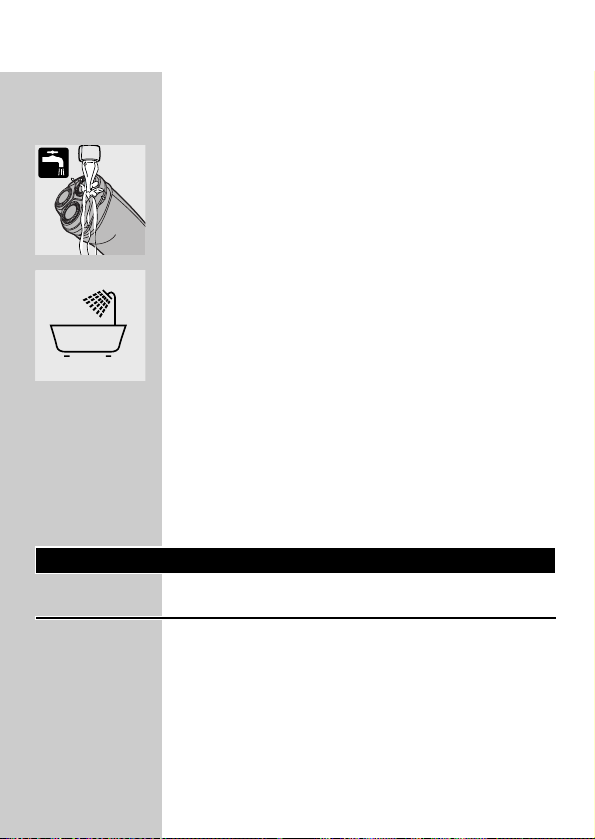
◗ The appliance is watertight and can be
cleaned under the tap.
Be careful with hot water. Always check if the
water is not too hot, to prevent your hands from
getting burnt.
C
◗ The appliance complies with the
internationally approved IEC safety regulations
and can be safely used in the bath or shower.
◗ Check if the gel and lotion supplied with the
appliance contain ingredients (see back of
cartridge) to which you are allergic before
you start using the appliance. Do not use the
gel and/or lotion if you are allergic to one or
more ingredients.
◗ Noise level: Lc = 63 dB [A]
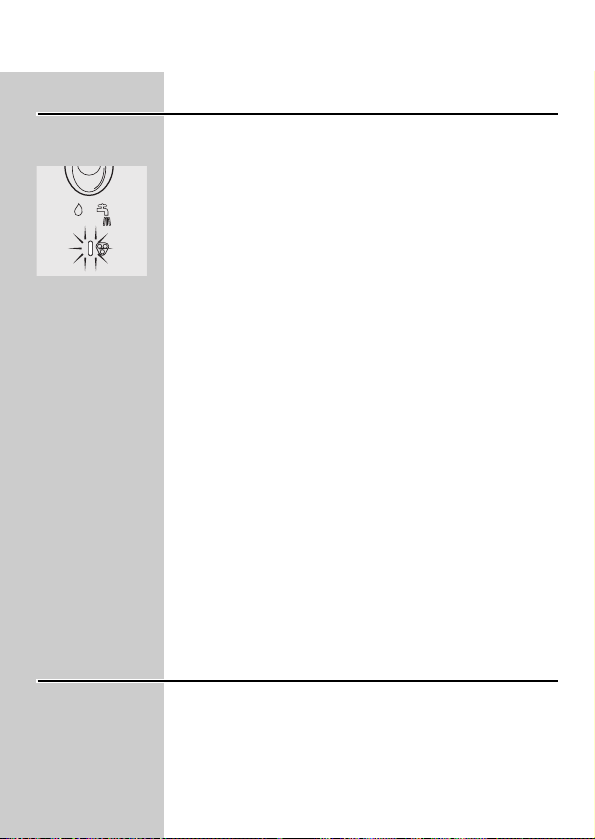
The display
Living Light Display
This model features the unique Living Light
display.This 3D colour LED display gives you all
the information you need with special 'living light'
effects.
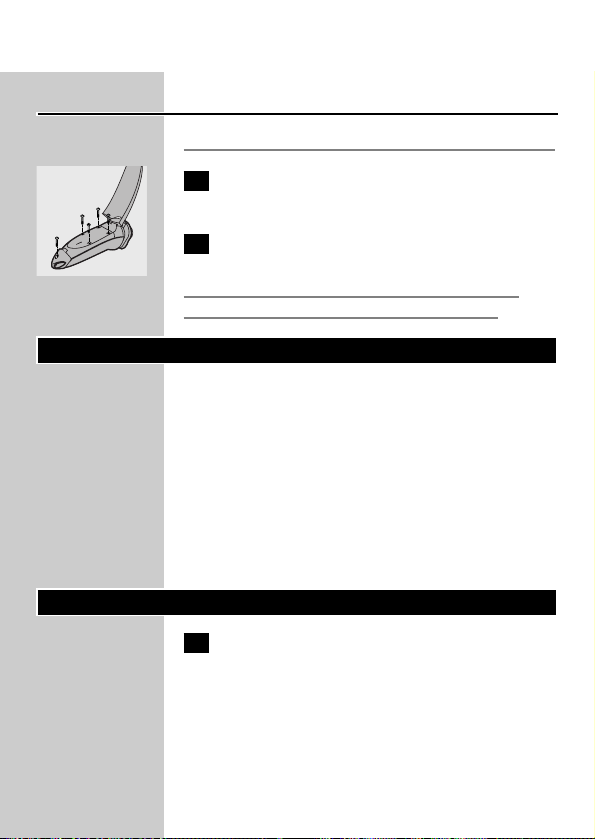
◗ Remove any sticker or protective foil from
the Living Light Display.
ENGLISH 5
Page 4
Demonstration program
The appliance has a unique demonstration
program.
1 Press the on/off button for 7 seconds.
The demonstration will start automatically.
◗ When the demonstration starts, all indications
light up at the same time.Then all indications
of the shaver are shown separately for
3 seconds in the following order:
„ Charging/Battery full indication
Ê Shaving
± Shaving gel indication
 Cleaning reminder
Ê Shaving
± Shaving gel indication
„ Battery low indication
 Cleaning reminder/„ Battery low indication
ΠShaving head check indication
B
The whole demonstration program lasts
approx. 1 minute (including intervals).
2 You can stop the demonstration by
pressing the on/off button.
Indications during use
All indications mentioned below are shown
during every shaving session and they are always
displayed in the same order, which makes it very
easy for you to maintain a regular shaving ritual
ENGLISH6
Page 5
As a result, some symbols will light up even when
you have already taken the appropriate action.
B
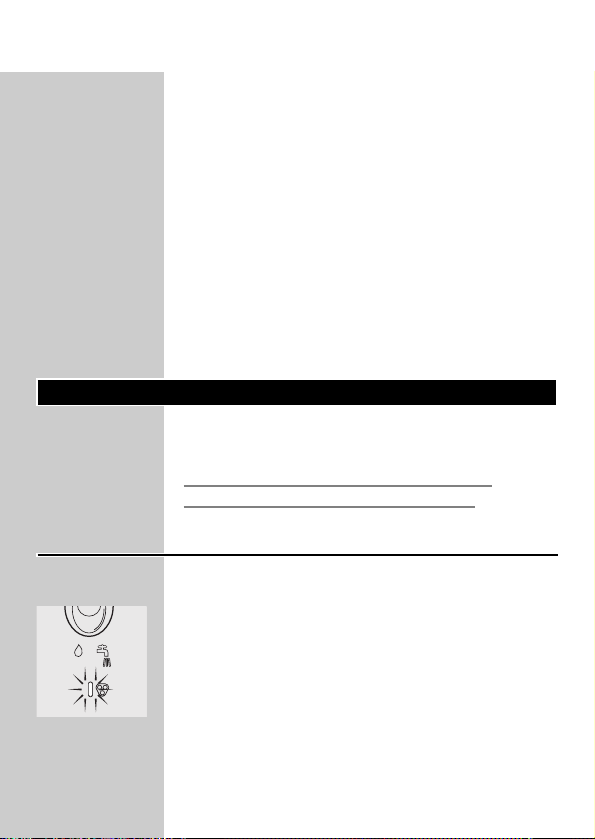
When you switch the appliance on, the shaving gel
indication blinks three times. If you have already
applied enough shaving gel or lotion, you can
ignore this indication.
B
When you switch the appliance off, the cleaning
reminder is displayed.This cleaning reminder
consists of a green tap (lights up) and a green
water jet (blinks). If you have already cleaned the
shaver before switching it off, you can ignore the
cleaning reminder.
Charging
Charging takes approx. 8 hours.
Do not leave the shaver in the plugged-in
charging stand for more than 24 hours.
Charge indications
Battery running low
C
◗ When the battery is running low, the battery
light burns red during shaving.
◗ When you switch the shaver off while the
battery is nearly empty, the battery light blinks
red twice.This will happen four times with
brief pauses in between.
◗ When you start charging the shaver while
battery is running low, the battery light blinks
red for max. 24 minutes.
ENGLISH 7
Page 6
Battery fully charged
◗ During charging the battery light blinks
green until the battery is fully charged
(approx. 8 hours).
◗ The battery light burns green continuously
when the battery is fully charged.
Charging the appliance
Charge the shaver before using it for the first time
and when the shaver indicates that the battery is
running low.
1 Insert the small plug into the charging
stand and put the powerplug in the wall
socket.
C
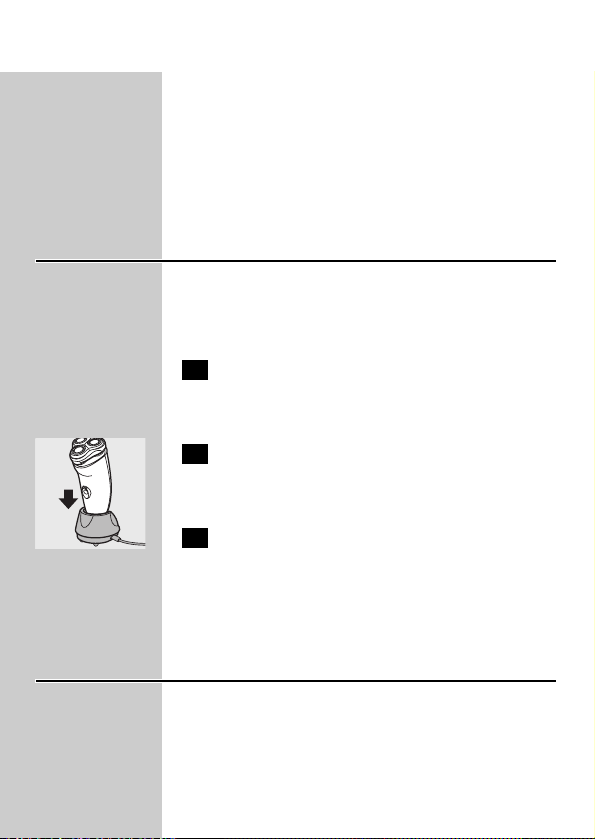
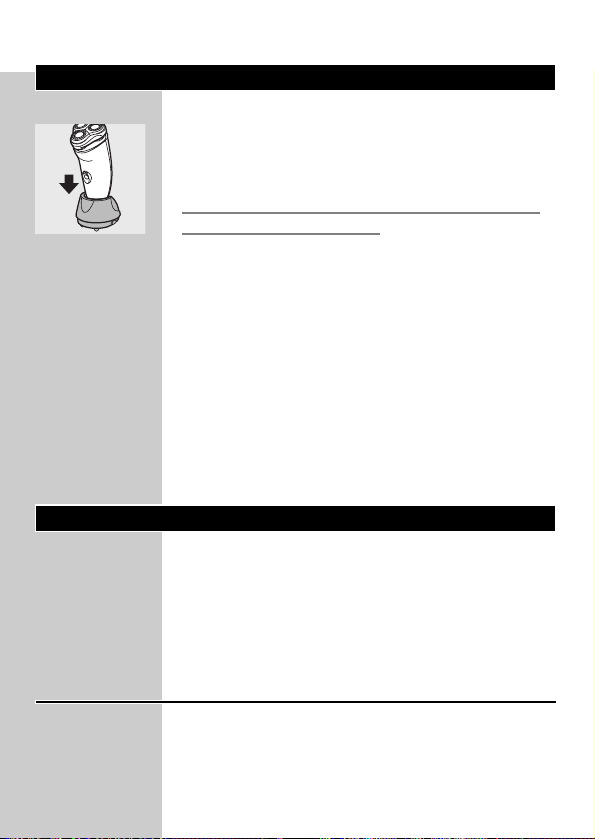
2 Place the shaver in the charging stand.
The shaver automatically switches off when it is
placed in the charging stand.
3 Remove the powerplug from the wall
socket and pull the small plug out of the
charging stand when the battery has been
fully charged.You can then leave the
appliance in the charging stand.
Cordless shaving time
A fully charged shaver has a cordless shaving time
of up to 55 minutes.
ENGLISH8
Page 7

Cartridges
Cartridges with NIVEA FOR MEN shaving
gel/lotion are available in boxes containing five
cartridges and one small plastic pump.
The NIVEA FOR MEN shaving gel/lotion in the
cartridges will keep for 32 months when stored
at temperatures between 0cC and +40cC.
Only use Philips NIVEA FOR MEN Cool Skin
(HQ170 and HQ171) cartridges.
One Philips NIVEA FOR MEN Cool Skin
cartridge contains enough gel/lotion for approx.
10 shaves.
For hygienic reasons, we advise you to insert a
new pump when you start using a new set of five
cartridges.
Do not throw the pump away when you replace
an empty cartridge.You will need it for all five
cartridges.
Remove the shaving gel/lotion cartridge from the
appliance when you are not going to use the
shaver for more than one week.
When you have run out of shaving gel/lotion
cartridges and you do not know where to buy
them, contact the Customer Care Centre in your
country (see 'Guarantee & service').
ENGLISH 9
Page 8

Inserting cartridges
C
1 When you start using a new set of
cartridges, take the pump out of its bag
and push it into a cartridge until it locks
into position with a click.
C
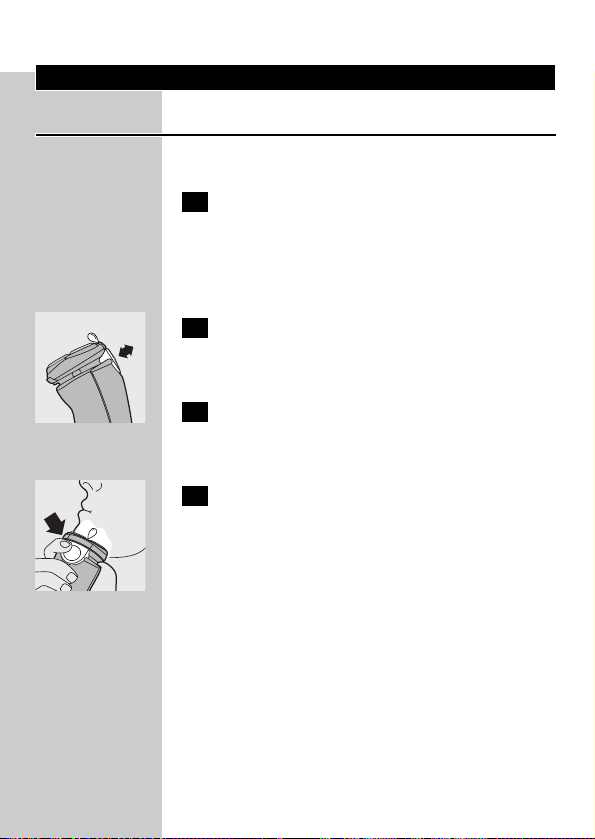
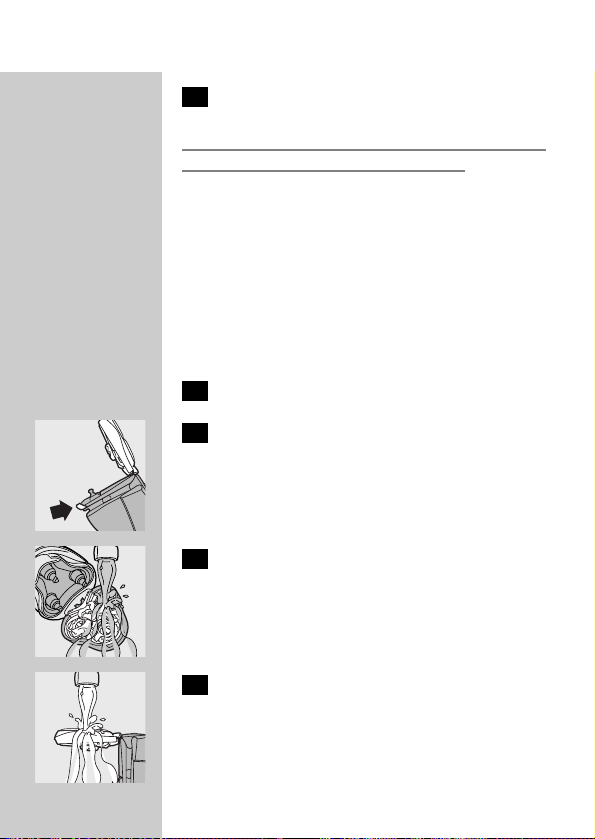
2 Press the release button and open the
cover of the cartridge compartment.
C
3 Slide the cartridge with the pump into the
shaver. It only fits properly if the white side
of the pump is pointing upwards.
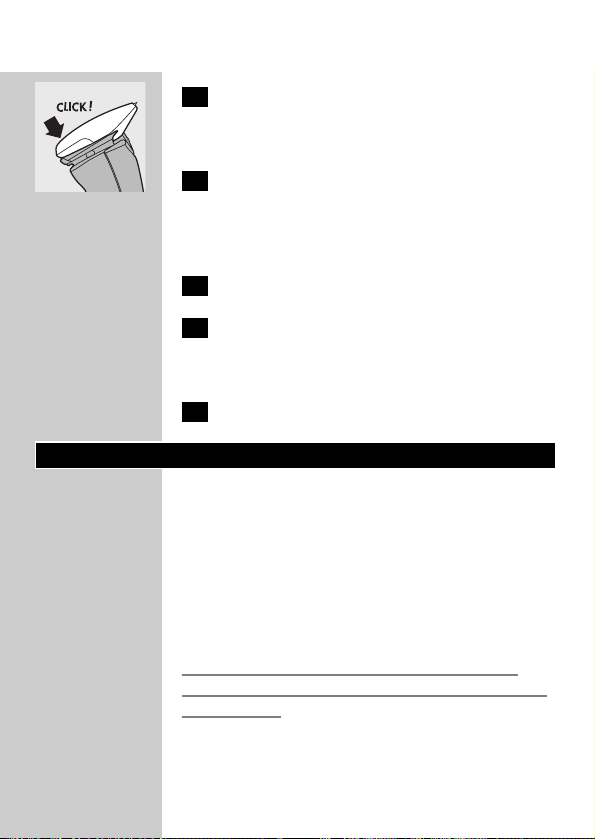
4 Close the cover (you will hear a click).
5 Press the yellow pump button a few times
until the NIVEA FOR MEN shaving
gel/lotion appears.The shaver is now ready
for use.
Replacing cartridges
Do not throw the pump away when you replace
an empty cartridge.You will need it for the other
cartridges.
C
1 Press the release button and open the
cover of the cartridge compartment.
ENGLISH10
2
1
2
1
Page 9

2 Remove the empty cartridge and pull out
the pump.
C
3 Push the pump into a new cartridge until it
locks into position with a click.
C
4 Slide the cartridge with the pump into the
shaver. It only fits properly if the white side
of the pump is pointing upwards. Close the
cover.
Storing cartridges
C
◗ You can conveniently store the other
cartridges by attaching them to the wall
holder supplied.The holder has suction caps
which allow you to attach it to the wall easily.
In this way you always have the cartridges
close at hand, which is very convenient,
especially when you shave in the shower.
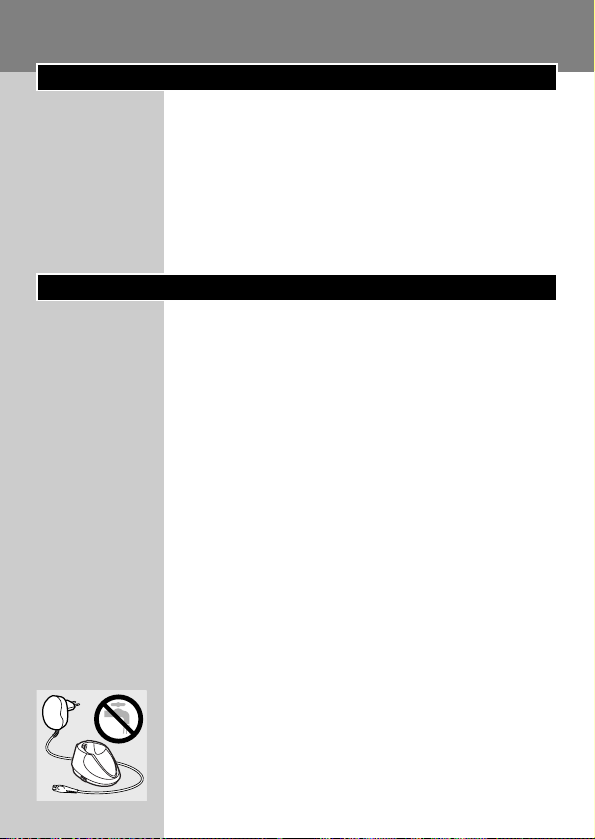
NB:The wall holder is only suitable for storing
cartridges. Never hang or place the shaver on the
wall holder. If you do, the shaver may fall!
ENGLISH 11
Page 10
Using the appliance
Shaving
Switching the shaver on
1 Switch the shaver on by pressing the on/off
button once.
The yellow teardrop-shaped shaving gel light ±
blinks 3 times to indicate that shaving gel/lotion
can be applied.
C
2 Press the yellow pump button to apply
NIVEA FOR MEN shaving gel/lotion to
your skin.
3 Move the shaving heads over your skin,
making both straight and circular
movements.
C
4 While shaving, press the pump button
frequently to apply more NIVEA FOR
MEN shaving gel/lotion so that the shaver
keeps gliding smoothly over your face.
Do not press the shaver too hard against your
skin while shaving. If you prefer, you can wet your
face before shaving.
◗ For the best shaving results,shaving gel/lotion
should be pumped up frequently.
◗ The shaver will not perform optimally when
used without shaving gel/lotion.
◗ Your skin may need 2 or 3 weeks to get
accustomed to the Philips system.
ENGLISH12
Page 11

Switching the shaver off
1 Switch the shaver off by pressing the on/off
button once.
The cleaning reminder  (green tap symbol with
blinking water jet) lights up for 6 seconds to
indicate that the shaver should be cleaned.
2 Clean the shaver (see chapter 'Cleaning
and maintenance').
Rinse the shaver after each shave. Remove the
cartridge if you are not going to use the appliance
for more than one week.
C
3 Put the protection cap on the shaver every
time you have used it, to prevent damage.
Trimming
For grooming sideburns and moustache.
Attaching the trimmer
1 Switch the shaver off.
Clean the shaver before you attach the trimmer
(see chapter 'Cleaning and maintenance').
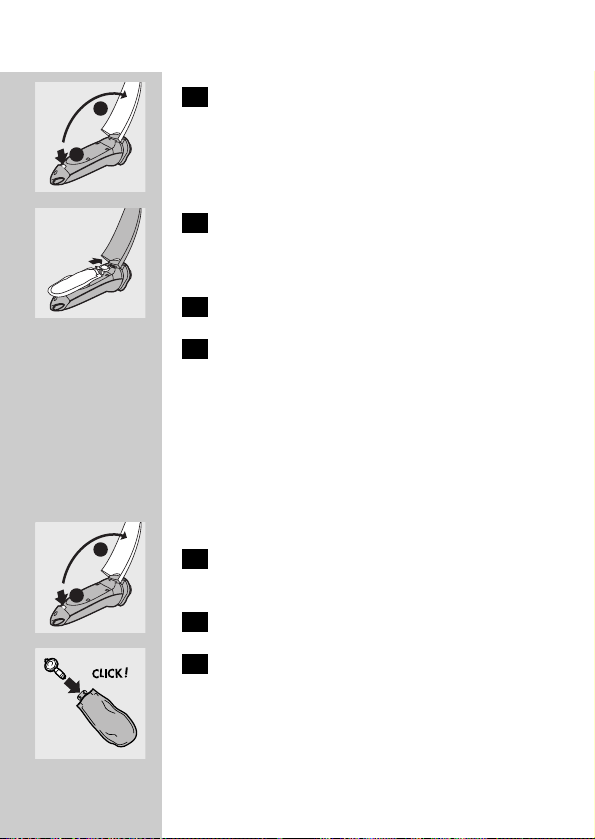
C
2 Press the release button (1) and pull the
shaving unit off the shaver (2).
C
3 Tilt the trimmer slightly backwards.
ENGLISH 13
2
1
Page 12
C
4 Fit the trimmer onto the shaver (you will
hear a click).The trimmer is now ready for
use.
5 Activate the trimmer by pressing the
on/off button once.
Removing the trimmer
1 Switch the shaver off.
2 Remove the trimmer by pressing the
release button again and pulling the
trimmer off the shaver.
3 Put the shaving unit back onto the shaver.
Cleaning and maintenance
Regular cleaning guarantees better shaving
performance.
To maintain optimal shaving performance and to
keep the shaver clean, you have to thoroughly
rinse the shaving unit and hair chamber with hot
water after every shave.
Be careful with hot water. Always check if the
water is not too hot, to prevent your hands from
getting burnt.
ENGLISH14
Page 13
Cleaning reminder
◗ When you have switched the shaver off, the
cleaning reminder  (green tap symbol with
blinking water jet) lights up for 6 seconds to
remind you that the shaver should be cleaned.
◗ If the red shaving unit symbol Œ and the
cleaning reminder  light up together, the
shaving heads have become so dirty or
damaged that they might cause the motor to
become blocked. If the shaving heads are dirty,
you have to clean them. If the shaving heads
are damaged, you have to replace them (see
chapter 'Replacement').
B
We advise you to avoid this situation by cleaning
the shaving heads regularly.
Cleaning
The shaver reminds you that it needs to be
cleaned by showing the cleaning reminder  after
every shaving session.
Shaving unit: Quick Clean after every
shave
1 Make sure the appliance is switched on.
2 Keep the shaving unit closed.
C
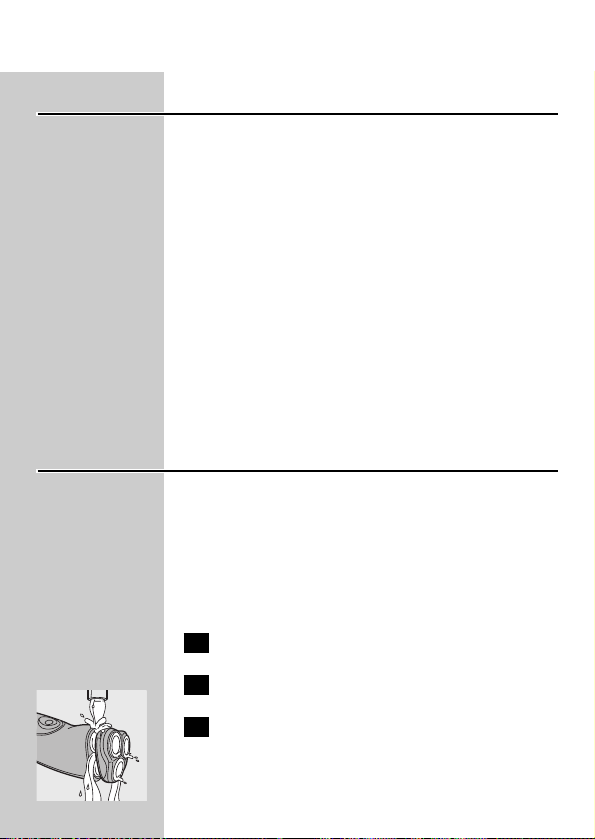
3 Rinse the shaving unit and the hair
chamber under a hot tap by letting the
water run through the openings below the
shaving unit for at least 30 seconds.
ENGLISH 15
Page 14
4 Shake off excess water.
Never dry the shaving unit with a towel or tissue
as this may damage the shaving heads.
Shaving unit and hair chamber: every
week
We advise you to clean the appliance thoroughly
at least once a week to maintain optimal shaving
performance.
You can also follow this procedure when the
shaving heads have to be cleaned.
1 Switch the shaver off.
C
2 Press the release button to open the
shaving unit.
C
3 Rinse the inside of the shaving unit.
C
4 Rinse the outside of the shaving unit.
ENGLISH16
2
Page 15
C
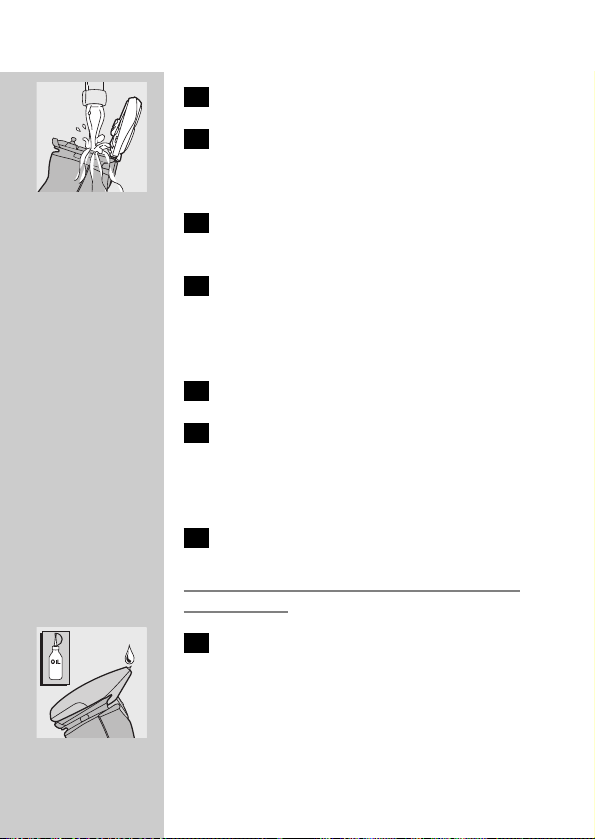
5 Rinse the hair chamber.
6 Make sure the inside of the shaving unit
and the hair chamber have been cleaned
properly.
7 Close the shaving unit and shake off excess
water.
8 Open the shaving unit again and leave it
open to let the appliance dry completely.
Charging stand
1 Unplug the charging stand.
2 Clean the charging stand with a moist
cloth.
Trimmer
1 Clean the outside of the trimmer with the
brush supplied after every use.
The trimmer can also be cleaned by rinsing it
under the tap.
C
2 If the trimmer is used frequently, lubricate
the trimmer teeth with a drop of sewing
machine oil every six months.
ENGLISH 17
Page 16
Storage
Charging stand
C
◗ The shaver can be stored in the charging
stand, even when it is wet.
Always unplug the charging stand before storing
the wet or dry shaver in it.
Pouch
◗ The shaver can be stored in the pouch
supplied.There is also room for two NIVEA
FOR MEN Cool Skin cartridges.The pouch
will provide extra protection during travel.
Hanging cord
◗ The shaver can also be stored by hanging it
from the hanging cord supplied. Storing the
shaver by means of the hanging cord ensures
optimal drying conditions.
Replacement
Replace the shaving heads every two years for
optimal shaving results.
Replace damaged or worn shaving heads with
HQ177 Philips Cool Skin shaving heads only.
Shaving head check indication
After two years of use the red shaving unit
symbol Πwill blink for 30 seconds during
7 shaves to indicate that you should check the
ENGLISH18
Page 17

condition of the shaving heads.This indication is
based on an average shaving time of 3 minutes
per shave.When the shaving head symbol blinks,
all other symbols and lights are out.When the
shaver is switched off, the shaving unit symbol
disappears.
When the red shaving unit symbol starts blinking,
you should check the shaving heads for possible
damage. If the shaving heads are damaged in any
way, they must be replaced in order to obtain
optimal shaving results.
Replacing the shaving heads
1 Switch the shaver off.
C
2 Press the release button to open the
shaving unit.
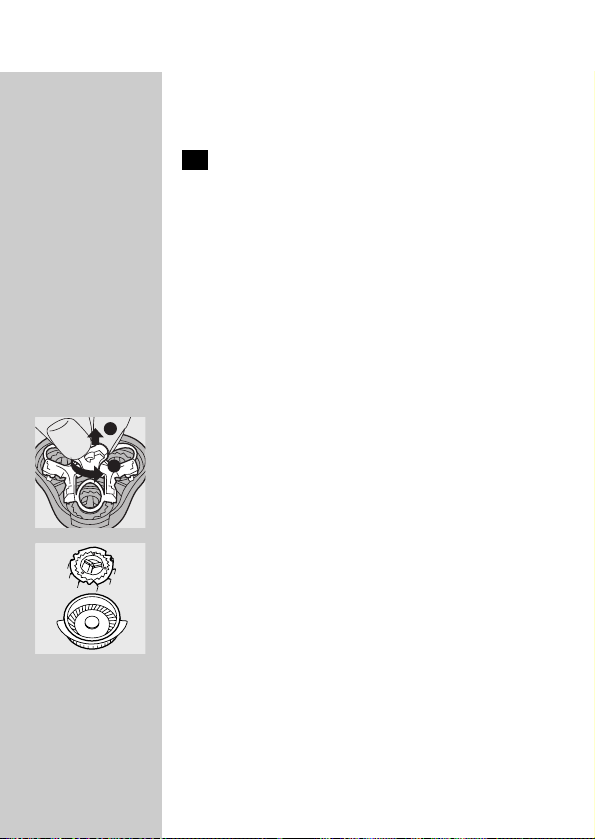
C
3 Turn the wheel anticlockwise (1) and
remove the retaining frame (2).
C
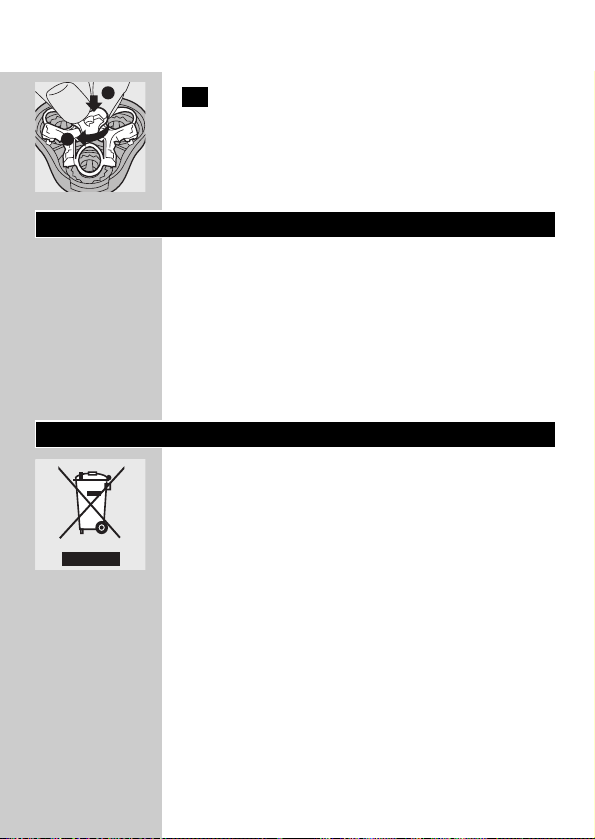
4 Remove the shaving heads and place new
ones in the shaving unit.
ENGLISH 19
2
1
Page 18
C
5 Put the retaining frame back into the
shaving unit, press the wheel (1) and turn it
clockwise (2).
Accessories
The following accessories are available:
- HQ8000/800 powerplug.
- HQ177 Philips Cool Skin shaving heads.
- HQ170 NIVEA FOR MEN Cool Skin
Moisturising Shaving Lotion.
- HQ171 NIVEA FOR MEN Cool Skin Extra
Fresh Shaving Gel.
Environment
C
◗ Do not throw the appliance away with the
normal household waste at the end of its life,
but hand it in at an official collection point for
recycling. By doing this you will help to
preserve the environment.
The built-in rechargeable battery contains
substances that may pollute the environment.
Always remove the battery before discarding the
appliance or handing it in at an official collection
point. Dispose of the battery at an official
collection point for batteries. If you have trouble
removing the battery, you can also take the
appliance to a Philips service centre, which will
remove the battery for you and will dispose of it
in an environmentally safe way.
ENGLISH20
1
2
Page 19
Disposal of the battery
Only remove the battery if it is completely empty.
C
1 Let the shaver run until it stops, undo the
screws and open the shaver.
2 Remove the battery.
Do not put the shaver back into the charging
stand after the battery has been removed.
Guarantee & service
If you need information or if you have a problem,
please visit the Philips website at www.philips.com
or contact the Philips Customer Care Centre in
your country (you will find its phone number in
the worldwide guarantee leaflet). If there is no
Customer Care Centre in your country, turn to
your local Philips dealer or contact the Service
Department of Philips Domestic Appliances and
Personal Care BV.
Troubleshooting
1 The shaving heads do not move smoothly
over the skin.
B
Cause: not enough shaving gel/lotion has been
applied.
◗ Press the pump button a few times until
sufficient NIVEA FOR MEN shaving gel/lotion
ENGLISH 21
Page 20
has been released to allow the shaving heads
to move smoothly over your face again.
2 Reduced shaving performance.
B
Cause 1: the shaving heads are dirty.
The shaver has not been cleaned immediately
after use and/or has not been rinsed long enough
and/or the water used to rinse the shaver was
not hot enough.
◗ Clean the shaver thoroughly before you
continue shaving. See chapter 'Cleaning and
maintenance'.
B
Cause 2: long hairs are obstructing the shaving
heads.
◗ Press the release button to open the shaving
unit.
C
◗ Turn the wheel anticlockwise (1) and remove
the retaining frame (2).
C
◗ Clean the cutters and guards.
Do not clean more than one cutter and guard at
a time, since they are all matching sets. If you
accidentally mix up the cutters and guards, it may
take several weeks before optimal shaving
performance is restored.
◗ Remove the hairs with the brush supplied.
◗ Put the shaving heads back into the shaving
unit. Put the retaining frame back into the
shaving unit, press the wheel and turn it
clockwise.
ENGLISH22
2
1
Page 21

◗ To prevent long hairs from obstructing the
shaving heads, remove the shaving heads once
a month and clean them with the brush
supplied.
B
Cause 3: the shaving heads are damaged or worn.
◗ Replace the shaving heads. See chapter
'Replacement'.
3 The shaver does not work when the on/off
button is pressed.
B
Cause 1: the battery is empty.
◗ Recharge the battery. See chapter 'Charging'.
B
Cause 2: dried-up shaving gel/lotion is blocking the
shaving heads.
◗ Clean the shaving heads thoroughly. See
chapter 'Cleaning and maintenance'.
B
Cause 3: the shaving heads are damaged.
◗ Replace the shaving heads. See chapter
'Replacement'.
4 The cover of the cartridge compartment
cannot be closed,
B
Cause 1: the cartridge has not been inserted
correctly.
ENGLISH 23
Page 22

◗ Insert the cartridge correctly. It only fits
properly into the shaver if the white side of
the pump is pointing upwards.
B
Cause 2: the cartridge has not been pushed far
enough into the shaver.
◗ Press the cartridge until it is properly seated.
5 The NIVEA FOR MEN shaving gel/lotion
has changed colour or has turned watery.
B
Cause: the NIVEA FOR MEN shaving gel/lotion
has not been stored at the right temperature.
◗ Insert a new cartridge.
6 Skin irritation occurs.
B
Cause 1: your skin has not yet become
accustomed to this shaving system.
◗ Allow 2-3 weeks for your skin to get
accustomed to this shaving system.
B
Cause 2: the shaving gel/lotion irritates your skin.
◗ Try the other type of NIVEA FOR MEN
cartridge.
◗ Wet your face before shaving with the shaving
gel/lotion.
If the irritation does not disappear within
24 hours, we advise you to stop using the shaving
gel/lotion.
ENGLISH24
Page 23
POLSKI 25
Wstęp
Niniejsza golarka dostarczana jest z dwoma
różnymi wkładami NIVEA FOR MEN: żelem do
golenia Extra Fresh, zapewniającym wrażenie
świeżości po goleniu oraz nawilżającym płynem
do golenia, przeznaczonym dla skóry wrażliwej.
Wypróbowanie ich pozwala zdecydować, który
wkład najbardziej odpowiada twojej skórze.
Ważne
Przeczytaj instrukcję zanim zaczniesz używać
golarkę i zachowaj ja w przyszłości na wszelki
wypadek.
◗ Korzystaj wyłącznie z dołączonego zasilacza
oraz podstawki ładującej.
◗ Zasilacz pracuje w zakresie 100-240 V aby
zapewnić niskonapięciowe zasilanie mniej niż
24 V.
◗ Wtyczka zasilacza zawiera transformator.
Odcięcie wtyczki celem wymiany jej na nową
może spowodować niebezpieczeństwo.
◗ Nie korzystaj z uszkodzonego zasilacza lub
uszkodzonej podstawki.
◗ Jeśli uszkodzone są wtyczka lub stanowisko
ładowania, wówczas,aby uniknąć
niebezpieczeństwa, należy zawsze zastąpić je
częścią oryginalną.
◗ Ładuj, przechowuj i używaj urządzenie w
temperaturze pomiędzy 5cC a 35cC.
C
◗ Sprawdź, czy zasilacz jest zupełnie suchy.
◗ Nigdy nie zanurzaj podstawki ładującej w
wodzie ani nie spłukuj jej pod kranem.
Page 24
26
◗ Golarki założonej na podstawkę ładującą i
podłączonej do sieci nie pozostawiaj na dłużej
niż 24 godziny.
C
◗ Urządzenie jest wodoszczelne i można je
czyścić pod kranem.
Bądź ostrożny z gorącą wodą. Zawsze sprawdzaj
żeby woda nie była zbyt gorąca aby zabezpieczyć
dłonie przed oparzeniem.
C
◗ Niniejsze urządzenie spełnia wymagania
międzynarodowych przepisów
bezpieczeństwa IEC i można go bezpiecznie
używać w łazience i oraz kabinie
prysznicowej.
◗ Zanim zaczniesz korzystać z urządzenia,
sprawdź, czy dołączone do niego żel i płyn nie
zawierają składników (wymienione są na
odwrocie wkładu), na które jesteś uczulony.
Nie używaj żelu ani płynu, jeśli jesteś uczulony
choćby na jeden z ich składników.
◗ Poziom hałasu: Lc = 63 dB [A]
Wyświetlacz
Wyświetlacz Living Light
Niniejszy model wyposażony jest w oryginalny
wyświetlacz Living Light. Kolorowy wyświetlacz z
efektem 3D, zbudowany z diod LED dostarcza
pełnej niezbędnej informacji ze specjalnymi
efektami typu "żywe światło".
◗ Usuń wszelkie naklejki i folię ochronną z
wyświetlacza Living Light.
POLSKI
Page 25

27
Program demonstracyjny
Urządzenie wyposażone jest w oryginalny
program demonstracyjny.
1 Przez około 7 sekund trzymaj wciśnięty
przycisk on/off.
Demonstracja rozpocznie się automatycznie.
◗ Po rozpoczęciu demonstracji wyświetlą się
jednocześnie wszystkie wskaźniki. Przez trzy
następne sekundy będą oddzielnie
pokazywane wszystkie wskaźniki w
następującym porządku:
„ Wskaźnik ładowania/naładowanego
akumulatora.
Ê Wskaźnik golenia
± Wskaźnik żelu do golenia
 Przypomnienie o potrzebie oczyszczania
urządzenia
Ê Wskaźnik golenia
± Wskaźnik żelu do golenia
„ Wskaźnik rozładowania baterii
 Przypomnienie o potrzebie oczyszczenia /
„ Wskaźnik rozładowania akumulatora
Œ Wskaźnik kontroli głowicy golącej
B
Cały program demonstracyjny trwa około 1 minuty
(wraz z przerwami).
2 Demonstrację można zatrzymać poprzez
wciśnięcie przycisku on/off.
POLSKI
Page 26

28
Wskazówki podczas używania
Wszystkie wymienione niżej wskazówki
wyświetlane są podczas golenia, w tej samej
kolejności, umożliwiając utrzymywanie
regularnego systemu golenia.
Niektóre symbole pojawiają się nawet wtedy, gdy
już podjąłeś odpowiednie działanie.
B
Po włączeniu urządzenia trzykrotnie migocze
wskaźnik żelu do golenia. Jeśli użyłeś już
wystarczająco dużo żelu lub płynu, możesz
wskaźnik ten zignorować.
B
Po wyłączeniu urządzenia wyświetlane jest
przypomnienie o potrzebie oczyszczenia golarki.
Wskazanie przypomnienia o potrzebie
czyszczenia oznaczone jest symbolami zielonego
kranu (podświetlonego) oraz zielonego strumienia
wody (migoczącego). Jeśli oczyściłeś golarkę przed
jej wyłączeniem możesz przypomnienie to
zignorować.
Ładowanie
Pełne ładowanie zajmie około 8 godzin.
Golarki założonej na podstawkę ładującą i
podłączonej do sieci nie pozostawiaj na dłużej ni
24 godziny.
POLSKI
Page 27
29
Wskaźnik naładowania akumulatora
Akumulatory wyczerpują się
C
◗ Gdy akumulator jest już niemal całkowicie
wyczerpany, lampka akumulatora świeci się
podczas golenia w kolorze czerwonym.
◗ Gdy akumulator jest już prawie całkowicie
wyczerpany, po wyłączeniu golarki lampka
akumulatora migocze dwukrotnie w kolorze
czerwonym.Następuje czterokrotne
wyświetlenie tej informacji, z krótkimi
przerwami pomiędzy kolejnymi sygnałami.
◗ Rozpoczęcie ładowania przy wyczerpanym
akumulatorze jest komunikowane poprzez
migające czerwone światło i trwa do 24 minut
od rozpoczęcia ładowania.
Ładowanie
◗ Podczas ładowania lampka akumulatora
migocze w kolorze zielonym do chwili
całkowitego naładowania golarki
(przez ok. 8 godzin).
◗ Gdy akumulator jest już całkowicie
naładowany, lampka akumulatora świeci się w
kolorze zielonym w sposób ciągły.
Ładowanie akumulatora
Naładuj golarkę przed pierwszym jej użyciem oraz
wtedy, gdy wskaźnik golarki informuje o
rozładowaniu się akumulatora.
POLSKI
Page 28

30
1 Wetknij małą wtyczkę do podstawki
ładującej oraz zasilacz - do gniazdka
sieciowego.
C
2 Umieść golarkę w podstawce ładującej.
Po umieszczeniu golarki w podstawce ładującej
urządzenie automatycznie wyłącza się.
3 Gdy akumulator został w pełni
naładowany, wyjmij zasilacz z gniazdka
sieciowego oraz wyciągnij małą wtyczkę z
podstawki ładującej. Możesz pozostawić
urządzenie w podstawce.
Czas bezprzewodowej pracy
W pełni naładowana golarka może pracować
bezprzewodowo nie dłużej niż 55 minut.
Wkłady
Wkłady z żelem/płynem do golenia NIVEA FOR
MEN dostępne są w sprzedaży w pudełkach,
zawierających pięć wkładów i jedną małą pompkę
z tworzywa.
Żel/płyn do golenia NIVEA FOR MEN,
przechowywany w temperaturach od 0cC do
+40cC zachowuje trwałość przez 32 miesiące.
Korzystaj wyłącznie z wkładów NIVEA FOR MEN
Cool Skin (HQ170 i HQ171).
POLSKI
Page 29

31
Jeden wkład Philips NIVEA FOR MEN Cool Skin
zawiera ilość żelu/płynu obliczoną na ok. 10.krotne
golenie.
Dla zachowania właściwej higieny zalecamy
zakładanie nowej pompki w momencie
rozpoczęcia używania nowego zestawu pięciu
wkładów.
Nie wyrzucaj pompki po wymianie pustego
wkładu. Będziesz jej potrzebował dla wszystkich
pięciu wkładów.
Jeśli nie zamierzasz korzystać z golarki przez
ponad tydzień, wyjmij z urządzenia wkład z
żelem/płynem do golenia.
W celu kupienia nowych wkładów po
wyczerpaniu się wkładów z żelem/płynem do
golenia - po wyczerpaniu się poprzednich skontaktuj się z Centrum Obsługi Klienta (patrz
"Gwarancja i serwis").
Zakładanie wkładów
C
1 Aby skorzystać z nowego wkładu,wyjmij
pompkę z torebki i wepchnij ją do niego,
musisz usłyszeć kliknięcie, oznaczające
zablokowanie pompki w odpowiedniej
pozycji.
POLSKI
Page 30
32
C
2 Wciśnij przycisk zwalniania i otwórz
pokrywę przedziału na wkłady.
C
3 Wciśnij wkład wraz z pompką do golarki.
Biała strona pompki musi być skierowana
ku górze.
4 Zamknij pokrywę (usłyszysz kliknięcie).
5 Kilkakrotnie wciśnij żółty przycisk pompki,
aż pojawi się żel/płyn do golenia NIVEA
FOR MEN.Teraz golarka jest gotowa do
użycia.
Wymiana wkładów
Nie wyrzucaj pompki po wymianie pustego
wkładu. Będziesz jej potrzebował jej dla innych
wkładów.
C
1 Wciśnij przycisk zwalniania i otwórz
pokrywę przedziału na wkłady.
2 Wyjmij pusty wkład i wyciągnij pompkę.
C
3 Wciśnij pompkę do nowego wkładu,aż
zablokuje się w odpowiednim położeniu,
sygnalizując to charakterystycznym
kliknięciem.
POLSKI
2
1
2
1
Page 31

33
C
4 Wciśnij wkład wraz z pompką do golarki.
Biała strona pompki musi być skierowana
ku górze. Zamknij pokrywę.
Przechowywanie wkładów
C
◗ Zapasowe wkłady możesz przechowywać w
dostarczonym uchwycie ściennym.Dysponuje
on przyssawkami, umożliwiającymi
zamocowanie go do ściany. Dzięki temu masz
zawsze wkłady pod ręką; jest to bardzo
wygodne szczególnie wtedy, gdy golisz się pod
prysznicem.
Uwaga: Uchwyt ścienny przeznaczony jest tylko i
wyłącznie do przechowywania wkładów. Nigdy nie
zawieszaj, ani nie zakładaj golarki na tym uchwycie
Golarka może wtedy łatwo spaść na podłogę!
Sposób używania
Golenie
Włączanie golarki
1 Włącz golarkę, wciskając włącznik.
Żółta lampka (w kształcie łezki) żelu do golenia
± migocze 3 razy, co wskazuje na gotowość do
dozowania żelu/płynu.
POLSKI
Page 32

34
C
2 Aby móc dozować żel/płyn do golenia
NIVEA FOR MEN na skórę, wciśnij żółty
przycisk pompki.
3 Przesuwaj głowice golące po skórze,
wykonując ruchy proste oraz okrężne.
C
4 Aby móc dozować więcej żelu/płynu do
golenia NIVEA FOR MEN na skórę,
wciskaj często przycisk pompki podczas
golenia; zapewni to łagodne przesuwanie
się głowic po skórze.
Podczas golenia nie przyciskaj golarki zbyt mocno
do skóry. Przed goleniem możesz nawilżyć twarz.
◗ Aby uzyskać najlepsze rezultaty golenia, należy
często pompować płyn/żel.
◗ Bez płynu/żelu do golenia golarka nie będzie
funkcjonowała w sposób optymalny.
◗ Skóra Twojej twarzy potrzebuje pewnego
czasu (2-3 tygodni), by przyzwyczaić się do
nowego systemu golenia.
Wyłączanie golarki
1 Wyłącz golarkę przez jednokrotne
wciśnięcie przycisku off/on.
Przypomnienie o potrzebie czyszczenia  (symbol
zielonego kranu z migoczącym strumieniem
wody) świeci się przez 6 sekund; oznacza to,że
należy oczyścić golarkę.
POLSKI
Page 33

35
2 Oczyść golarkę (patrz: rozdział
"Czyszczenie i konserwacja").
Po każdym goleniu opłucz golarkę. Jeśli nie
zamierzasz korzystać z urządzenia dłużej niż przez
ponad tydzień, wyjmij z niego wkład.
C
3 Po każdym użyciu załóż na golarkę
ochronną osłonkę, zabezpieczającą głowice
golące przed uszkodzeniem mechanicznym.
Trymer
Do kształtowania bokobrodów i wąsów.
Zakładanie trymera
1 Wyłącz urządzenie.
Przed założeniem trymera musisz oczyścić golarkę
(patrz: rozdział "Czyszczenie i konserwacja").
C
2 Wciśnij przycisk blokujący (1) i wyciągnij z
golarki moduł golący (2).
C
3 Lekko przechyl trymer do tyłu.
C
4 Wsuń trymer na golarkę (usłyszysz
kliknięcie).Teraz trymer jest gotowy do
użycia.
5 Włącz trymer wciskając jeden raz przycisk
on/off.
POLSKI
2
1
Page 34

36
Zdejmowanie trymera
1 Wyłącz urządzenie.
2 Zdejmij trymer, wciskając ponownie
przycisk zwalniający i wyciągając trymer z
golarki.
3 Ponownie zamontuj moduł golący na
golarce.
Czyszczenie i konserwacja
Regularne oczyszczanie golarki gwarantuje lepsze
efekty golenia.
Optymalnym sposobem konserwacji i czyszczenia
urządzenia jest opłukanie gorącą wodą modułu
golącego oraz komory na ścięte włosy - po
każdym goleniu.
Bądź ostrożny z gorącą wodą. Zawsze sprawdzaj
żeby woda nie była zbyt gorąca aby zabezpieczy
dłonie przed oparzeniem.
Przypomnienie o czyszczeniu
◗ Po wyłączeniu golarki wyświetla się przez
5 sekund przypomnienie o potrzebie
czyszczenia  (symbol zielonego kranu z
migoczącym strumieniem wody) , sygnalizuje
on konieczność oczyszczenia urządzenia.
◗ Jeśli świecą się jednocześnie czerwony symbol
POLSKI
Page 35

37
golarki Πoraz symbol przypomnienia o
czyszczeniu  oznacza to wyraźny stopień
zabrudzenia lub uszkodzenia głowic golących,
który może spowodować zatrzymanie się
silnika. Brudne głowice golące musisz
koniecznie oczyścić. Uszkodzone głowice
golące musisz koniecznie wymienić (patrz:
rozdział 'Wymiana').
B
Zalecamy unikanie takich sytuacji poprzez
regularne czyszczenie głowic golących.
Czyszczenie
Po każdej sesji golenia golarka przypomina o
potrzebie oczyszczenia przez wyświetlenie tego
przypomnienia Â.
Moduł golący: krótkie czyszczenie po
każdym goleniu
1 Sprawdź, czy urządzenie jest włączone.
2 Moduł golący musi być zamknięty.
C
3 Opłucz moduł golący i komorę na ścięte
włosy pod strumieniem bieżącej wody, tak
aby przepływała ona przez otwory pod
modułem golącym przez co najmniej
30 sekund.
4 Wytrząśnij nadmiar wody.
Nidy nie wycieraj modułu golącego ręcznikiem lub
chusteczką - możesz uszkodzić głowice golące.
POLSKI
Page 36

38
Moduł golący i komora na ścięte
włosy: co tydzień
Zalecamy dokładne czyszczenie urządzenia co
najmniej raz w tygodniu - pozwoli to utrzymać
optymalne rezultaty golenia.
Postępować według tego przepisu możesz
również w przypadku konieczności oczyszczenia
głowic golących.
1 Wyłącz urządzenie.
C
2 Wciśnij przycisk blokujący, aby otworzyć
element golący.
C
3 Opłucz wnętrze modułu golącego.
C
4 Opłucz zewnętrzną część modułu
golącego.
C
5 Opłucz komorę na ścięte włosy.
6 Upwnij się że moduł golący i komora na
scięte włosy są dobrze oczyszczone.
7 Zamknij moduł golący i strząśnij pozostałą
wodę.
POLSKI
2
Page 37

39
8 Zostaw otwarty moduł golący do
wyschniecia.
Podstawka ładująca
1 Odłącz od sieci podstawkę ładującą.
2 Oczyść podstawkę ładującą wilgotną
szmatką.
Trymer
1 Po każdym użyciu oczyść zewnętrzną
część trymera dołączoną do niego
szczoteczką.
Trymer można również czyścić, opłukując go pod
kranem.
C
2 Jeśli trymer jest w częstym użyciu, zwilżaj
jego ząbki co 6 miesięcy kroplą oleju do
maszyn do szycia.
Przechowywanie
Podstawka ładująca
C
◗ Golarkę można przechowywać w podstawce
ładującej nawet jeśli jest ona mokra.
Przed założeniem mokrej lub suchej golarki do
podstawki ładującej zawsze odłączaj podstawk
od sieci.
POLSKI
Page 38

40
Saszetka
◗ Golarkę można przechowywać w dołączonej
do urządzenia saszetce. Jest w niej również
miejsce na dwa wkłady NIVEA FOR MEN
Cool Skin. Saszetka będzie stanowić
dodatkowe zabezpieczenie urządzenia w
podróży.
Wieszak
◗ Golarkę można również przechowywać,
zawieszając ją na dołączonym wieszaku.
Przechowywanie golarki na wieszaku
zapewnia optymalne warunki suszenia jej.
Wymiana
Aby zapewnić optymalne funkcjonowanie
urządzenia, co dwa lata wymieniaj głowice golące.
Uszkodzone lub zużyte głowice golące wymieniaj
jedynie na oryginalne głowice golące HQ177
Philips Cool Skin.
Wskaźnik kontroli głowic golących
Po dwóch latach korzystania z urządzenia przez
30 sekund będzie migotać czerwony symbol Œ
modułu golącego = podczas siedmiu kolejnych
sesji golenia i będzie to wskazaniem konieczności
sprawdzenia stanu głowic golących.Wskazanie to
opiera się na założeniu, że średni czas golenia
wynosi 3 minuty. Gdy symbol głowicy golącej
migocze, wyłączone są wszystkie pozostałe
POLSKI
Page 39

41
symbole i lampki. Gdy golarka jest wyłączona,
znika symbol modułu golącego.
Jeśli zaczyna migotać czerwony symbol modułu
golącego, należy wówczas sprawdzić głowice
golące pod kątem ich ewentualnego uszkodzenia.
Uszkodzone w jakikolwiek sposób głowice golące
należy wymienić, aby móc uzyskiwać optymalne
rezultaty golenia.
Wymiana głowic
1 Wyłącz urządzenie.
C
2 Wciśnij przycisk blokujący, aby otworzyć
element golący.
C
3 Obróć kółkiem w kierunku przeciwnym
do ruchu wskazówek zegara (1) i wyjmij
obsadę (2).
C
4 Zdejmij głowice golące z modułu golącego
i załóż nowe.
POLSKI
2
1
Page 40

42
C
5 Załóż obsadę na moduł golący, wciśnij
kółko (1) i obróć nim w kierunku zgodnym
z kierunkiem ruchu wskazówek zegara (2).
Akcesoria
Poniższe akcesoria są dostępne:
- HQ8000/800 zasilacz
- Głowice golące HQ177 Philips Cool Skin
- Nawilżający płyn do golenia HQ170 NIVEA
FOR MEN Cool Skin
- Odświeżający żel do golenia HQ171 NIVEA
FOR MEN Cool Skin Extra Fresh
Dbamy o nasze środowisko naturalne
C
◗ Nie wyrzucaj urządzenia po jego zużyciu wraz
z resztą odpadków, urżądzenie powinno
zostać oddane do punktu surowców
wtórnych.To prosty sposób dbania o nasze
naturalne środowisko.
Wbudowany akumulator zawiera substancje,
które mogą zanieczyszczać środowisko naturalne.
Zawsze usuwaj akumulator przed wyrzuceniem
urządzenia.Akumulator powinien zostać oddany
do punktu surowców wtórnych.W przypadku
problemów z usunięciem akumulatora nalezy
zwrócić sie do serwisu Philipsa, tam możesz
pozostawić wyeksploatowane urządzenie do
utylizacji.
POLSKI
1
2
Page 41

43
Usuwanie akumulatora
Wyrzucaj akumulatory tylko wtedy,gdy są
kompletnie wykorzystane.
C
1 Uruchom golarkę i poczekaj, aż przestanie
pracować, odkręć śrubki i otwórz golarkę.
2 Wyjmij akumulator
Po wyjęciu akumulatora nie umieszczaj ponownie
golarki w podstawce ładującej.
Gwarancja i serwis
Jeśli chcesz skorzystać z serwisu lub potrzebujesz
informacji, bądź jeśli masz jakiś problem, odwiedź
naszą stronę w Internecie: www.philips.com lub
skontaktuj się z Biurem Obsługi Klienta firmy
Philips (numer telefonu znajdziesz w ulotce
gwarancyjnej).
Rozwiązywanie problemów
1 Głowice golące nie przesuwają się łagodnie
po skórze.
B
Przyczyna: Zastosowano niewystarczającą ilość
żelu/płynu.
◗ Kilkakrotnie wciśnij żółty przycisk pompki, aż
uwolni sie wystarczająca ilość żelu/płynu do
golenia NIVEA FOR MEN, co umożliwi
POLSKI
Page 42

44
delikatne przesuwanie się po skórze głowic
golących.
2 Zmniejszona wydajność golenia
B
Przyczyna 1: głowice golące są zanieczyszczone.
Golarka nie została oczyszczona natychmiast po
użyciu i/lub nie była płukana wystarczająco długo,
i/lub do płukania golarki nie użyto dostatecznie
gorącej wody.
◗ Zanim przystąpisz do golenia, dokładnie
oczyść golarkę. Patrz:rozdział "Czyszczenie i
konserwacja".
B
Przyczyna 2: długie włoski blokują głowice golące.
◗ Wciśnij przycisk blokujący, aby otworzyć
element golący.
C
◗ Obróć kółkiem w kierunku przeciwnym do
ruchu wskazówek zegara (1) i wyjmij obsadę
(2).
C
◗ Wyczyść osłonki i nożyki.
Nie myj jednorazowo więcej niż jednego ostrza i
jednej głowicy, ponieważ tworzą one dopasowane
zestawy. Jeśli przypadkowo pomieszasz ostrza i
głowice, potrwa kilka tygodni,zanim ponownie
przywrócisz optymalną skuteczność golenia.
◗ Usuń włoski załączoną do golarki szczoteczką.
◗ Załóż ponownie obsadę na moduł golący,
wciśnij kółko i obróć nim w kierunku
POLSKI
2
1
Page 43

45
zgodnym z kierunkiem ruchu wskazówek
zegara.
◗ Aby nie dopuścić do zatykania głowic golących
przez długie włosy, wyjmuj głowice golące co
najmniej raz w miesiącu i oczyszczaj je za
pomocą dołączonej szczoteczki.
B
Przyczyna 3: głowice golące są zużyte lub
uszkodzone.
◗ Wymień głowice golące. Patrz: rozdział
"Wymiana".
3 Golarka nie działa, gdy wciśnięty jest
przycisk on/off.
B
Przyczyna 1: rozładowany jest akumulator.
◗ Naładuj akumulator. Patrz:rozdział
"Ładowanie".
B
Przyczyna 2:Wyschnięty żel/płyn do golenia
blokuje głowice golące.
◗ Dokładnie oczyść głowice golące. Patrz:
rozdział "Czyszczenie i konserwacja".
B
Przyczyna 3: Uszkodzone są głowice golące.
◗ Wymień głowice golące. Patrz: rozdział
"Wymiana".
POLSKI
Page 44

46
4 Przykrywka pojemnika na wkłady musi być
otwarta
B
Przyczyna 1: Nie został założony prawidłowo
wkład.
◗ Włóż poprawnie wkład. Pasuje on do golarki
tylko wtedy, gdy biała strona pompki
skierowana jest ku górze.
B
Przyczyna 2:Wkład nie został wciśnięty
wystarczająco daleko w głąb golarki.
◗ Wciśnij wkład dokładnie w jego miejsce.
5 Żel/płyn do golenia NIVEA FOR MEN
zmienił barwę lub stał się wodnisty.
B
Przyczyna: Żel/płyn do golenia NIVEA FOR MEN
nie był przechowywany w odpowiedniej
temperaturze.
◗ Załóż nowy wkład.
6 Wystąpiło podrażnienie skóry.
B
Przyczyna 1: Skóra nie jest przyzwyczajona do
tego rodzaju golenia.
◗ Poczekaj 2-3 tygodnie, aż skóra przyzwyczai
się do niego.
B
Przyczyna 2: Płyn/żel do golenia podrażnia skórę.
POLSKI
Page 45

47
◗ Wypróbuj inny typ wkładu NIVEA FOR MEN.
◗ Zwilż twarz przed goleniem żelem/płynem do
golenia.
Jeśli w ciągu 24 godzin podrażnienie nie ustąpi
zalecamy zaprzestać stosowania żelu/płynu do
golenia.
POLSKI
Page 46

Introducere
Aparatul de bărbierit este dotat cu două tipuri
diferite de cartuşe NIVEA FOR MEN: Gel de
Bărbierit Extra Fresh ce conferă o senzaţie de
prospeţime în timpul şi după bărbierire şi Loţiune
de Bărbierit Hidratantă pentru o piele sensibilă.
Astfel, aveţi posibilitatea să le încercaţi pe
amândouă şi să descoperiţi care se potriveşte cel
mai bine pielii dumneavoastră.
Important
Citiţi aceste instrucţiuni cu atenţie înainte de
utilizarea aparatului şi păstraţi-le pentru consultări
ulterioare.
◗ Folosiţi doar încărcătorul şi suportul de
încărcare furnizat.
◗ Încărcătorul transformă o tensiune de
100-240 volţi într-o tensiune sigură sub
24 volţi.
◗ Încărcătorul este dotat cu un transformator.
Nu încercaţi să înlocuiţi fişa de conectare
pentru a evita provocarea unor accidente.
◗ Nu folosiţi un încărcător sau un suport
deteriorat.
◗ Dacă încărcătorul se deteriorează,înlocuiţi-l
întotdeauna cu unul original pentru a evita
orice accident.
◗ Încărcaţi, depozitaţi şi utilizaţi aparatul la o
temperatură între 5cC şi 35cC.
C
◗ Evitaţi contactul încărcătorului cu apa.
◗ Nu introduceţi suportul de încărcare în apă şi
nici nu-l clătiţi la robinet.
ROMÂNĂ48
Page 47

49
◗ Nu lăsaţi aparatul în suportul de încărcare
conectat la priză mai mult de 24 de ore.
C
◗ Aparatul este etanş şi poate fi curăţat sub jet
de apă.
Aveţi grijă ca apa să nu fie foarte fierbinte pentru
a nu vă frige.
C
◗ Aparatul corespunde normelor de securitate
internaţionale IEC şi poate fi folosit la duş.
◗ Verificaţi dacă gelul şi loţiunea furnizate cu
aparatul conţin ingrediente (a se vedea pe
spatele cartuşului) la care sunteţi alergic,
înainte de a folosi aparatul. Nu folosiţi gelul
şi/sau loţiunea, în caz contrar.
◗ Nivel de zgomot: Lc = 63 dB [A]
Afişaj
Afişaj luminos
Acest model este dotat cu un afişaj luminos
deosebit.Afişajul color tridimensional vă oferă
toate informaţiile de care aveţi nevoie prin efecte
luminoase.
◗ Îndepărtaţi orice abţibild sau folie protectoare
de pe afişajul luminos.
ROMÂNĂ
Page 48

50
Program demonstrativ
Aparatul are un program demonstrativ special.
1 Ţineţi apăsat butonul pornire/oprire timp
de 7 secunde.
Demonstraţia va porni automat.
◗ Când aceasta începe, toate indicatoarele se
aprind.Acestea sunt apoi prezentate separat
timp de 3 secunde, în următoarea ordine:
„ Indicator încărcare completă/în curs
Ê Bărbierire
± Indicator gel de bărbierit
 Avertizor de curăţare
Ê Bărbierire
± Indicator gel de bărbierit
„ Indicator acumulator descărcat
 Avertizor de curăţare/„ Indicator acumulator
descărcat
Œ Indicator verificare cap de bărbierire
B
Programul demonstrativ durează în jur de 1 minut.
2 Puteţi întrerupe demonstraţia de la
butonul pornire/oprire.
Indicaţii în timpul utilizării
Toate simbolurile descrise mai jos sunt afişate în
timpul fiecărei şedinţe de bărbierire, în aceeaşi
ordine, ceea ce vă permite să respectaţi o
anumită rutină de bărbierire.
ROMÂNĂ
Page 49

51
Ca urmare, unele simboluri se vor aprinde chiar
dacă aţi urmat deja instrucţiunile în mod
corespunzător.
B
Când porniţi aparatul, indicatorul gel de bărbierire
clipeşte de trei ori. Dacă aţi aplicat o cantitate
suficientă de gel sau loţiune, puteţi ignora simbolul.
B
Când opriţi aparatul, va fi afişat avertizorul de
curăţare. Avertizorul de curăţare este reprezentat
simbolic printr-un robinet verde (ce se aprinde) şi
picături de apă verzi (ce clipesc). Dacă aţi curăţat
aparatul înainte de a-l opri, puteţi ignora
avertizorul de curăţare.
Încărcare
În mod normal, încărcarea durează 8 ore.
Nu lăsaţi aparatul în suportul de încărcare
conectat la priză mai mult de 24 de ore.
Indicaţii de încărcare
Acumulator descărcat
C
◗ Când acumulatorul este descărcat, ledul
acumulatorului se aprinde în roşu în timpul
bărbieririi.
◗ Când opriţi aparatul de bărbierit, iar
acumulatorul este aproape descărcat, ledul
roşu clipeşte de două ori.Acest lucru se va
repeta de patru ori cu mici pauze.
ROMÂNĂ
Page 50

52
◗ Când începeţi încărcarea aparatului descărcat,
ledul roşu al acumulatorului va clipi timp de
maxim 24 de minute.
Acumulator complet încărcat
◗ În timpul încărcării, ledul verde clipeşte până
când acesta se încarcă (aprox. 8 ore).
◗ Când acumulatorul este complet încărcat,
ledul verde rămâne aprins.
Încărcarea aparatului
Încărcaţi aparatul înainte de prima utilizare şi când
este descărcat.
1 Introduceţi fişa în suport şi conectaţi
încărcătorul la priză.
C
2 Puneţi aparatul pe suportul de încărcare.
Aparatul se opreşte automat când îl puneţi pe
suport.
3 Scoateţi încărcătorul din priză şi fişa din
aparat când acumulatorul este complet
încărcat. Puteţi apoi lăsa aparatul pe
suport.
Perioadă de funcţionare fără cablu
Un aparat de ras complet încărcat oferă o
autonomie de funcţionare de până la 55 de
minute.
ROMÂNĂ
Page 51

Cartuşe
Cartuşele cu gel/loţiune de ras NIVEA FOR MEN
sunt disponibile în cutii cu 5 cartuşe şi o pompiţă
din plastic.
Gelul/loţiunea de ras NIVEA FOR MEN din
cartuşe expiră în 32 de luni, dacă sunt depozitate
la temperaturi între 0cC şi +40cC.
Folosiţi doar cartuşe Philips NIVEA FOR MEN
Cool Skin (HQ170 şi HQ171)
Gelul/loţiunea dintr-un cartuş Philips NIVEA FOR
MEN Cool Skin ajunge pentru 10 bărbieriri.
Din motive igienice, vă sfătuim să introduceţi o
pompiţă nouă la fiecare set nou de cinci cartuşe.
Nu aruncaţi pompiţa când înlocuiţi un cartuş gol.
O puteţi refolosi pentru toate cele cinci cartuşe.
Scoateţi cartuşul de gel/loţiune din aparat, dacă
nu-l folosiţi timp de o săptămână.
Când vi se termină cartuşele şi nu ştiţi de unde să
achiziţionaţi altele, contactaţi Departamentul
Clienţi din ţara dumneavoastră (vezi "Garanţie şi
service").
53ROMÂNĂ
Page 52

54
Introducerea cartuşelor
C
1 Când începeţi un nou set de cartuşe,
scoateţi pompiţa din ambalaj şi fixaţi-o în
cartuş.
C
2 Apăsaţi butonul de decuplare şi deschideţi
capacul compartimentului cartuşului.
C
3 Culisaţi cartuşul cu pompa în aparat.Aveţi
grijă ca porţiunea albă a pompiţei să fie
orientată în sus.
4 Închideţi capacul (clic).
5 Apăsaţi butonul galben al pompiţei de
câteva ori până când iese gelul/loţiunea
NIVEA FOR MEN.Aparatul este gata de
utilizare.
Înlocuirea cartuşelor
Nu aruncaţi pompiţa când înlocuiţi un cartuş.Veţi
avea nevoie de ea şi pentru celelalte cartuşe.
C
1 Apăsaţi butonul de decuplare şi deschideţi
capacul compartimentului cartuşului.
2 Scoateţi cartuşul gol şi scoateţi pompiţa.
ROMÂNĂ
1
2
2
1
Page 53

55
C
3 Împingeţi pompiţa într-un nou cartuş până
auziţi un clic.
C
4 Culisaţi cartuşul cu pompa în aparat.Aveţi
grijă ca porţiunea albă a pompiţei să fie
orientată în sus. Închideţi capacul.
Depozitarea cartuşelor
C
◗ Puteţi depozita celelalte cartuşe în suportul
de perete furnizat. Suportul este dotat cu
ventuze care vă permit fixarea uşoară a
acestuia.Astfel, aveţi cartuşele la îndemână, în
special când vă bărbieriţi la duş.
NB: Suportul de perete este potrivit pentru
depozitarea cartuşelor. Nu poziţionaţi niciodat
aparatul de ras pe suportul de perete, pentru a
nu cădea.
ROMÂNĂ
Page 54

Utilizarea aparatului
Bărbierire
Pornirea aparatului
1 Porniţi aparatul apăsând o dată pe butonul
pornire/oprire.
Ledul galben pentru gelul de ras ± clipeşte de
3 ori pentru a indica faptul că gelul/loţiunea poate
fi aplicată.
C
2 Apăsaţi butonul galben al pompiţei pentru
a aplica gelul/loţiunea NIVEA FOR MEN.
3 Faceţi rapid mişcări drepte şi circulare cu
capetele de bărbierire pe suprafaţa pielii.
C
4 În timpul bărbieririi, apăsaţi frecvent
butonul pompiţei pentru aplicarea
gelului/loţiunii NIVEA FOR MEN şi pentru
a permite aparatului să alunece lin pe piele.
Nu presaţi aparatul prea tare pe piele. Dacă
doriţi, vă puteţi umezi faţa înainte de bărbierire.
◗ Aplicaţi frecvent gelul/loţiunea de ras pe piele
pentru obţinerea celor mai bune rezultate.
◗ Aparatul nu oferă rezultate optime dacă îl
folosiţi fără gel/loţiune de ras.
◗ Pielea dumneavoastră ar putea necesita
2-3 săptămâni până să se obişnuiască cu
sistemul Philips.
56 ROMÂNĂ
Page 55

57
Oprirea aparatului de ras
1 Opriţi aparatul de ras apăsând butonul
pornire/oprire o dată.
Avertizorul de curăţare  (simbolul robinet verde
cu picăturile de apă ce clipesc) se aprinde timp de
6 secunde pentru a vă indica faptul că aparatul
trebuie curăţat.
2 Curăţaţi aparatul (a se vedea capitolul
"Curăţare şi întreţinere").
Clătiţi aparatul de bărbierit după fiecare utilizare.
Scoateţi cartuşul dacă nu folosiţi aparatul timp de
o săptămână.
C
3 Puneţi capacul de protecţie pe aparat după
utilizare pentru a evita deteriorarea
acestuia.
Dispozitiv de tundere
Pentru îngrijirea perciunilor şi a mustăţii.
Ataşarea dispozitivului de tundere
1 Opriţi aparatul.
Curăţaţi aparatul înainte de montarea
dispozitivului de tundere (a se vedea capitolul
"Curăţare şi întreţinere").
C
2 Apăsaţi butonul de decuplare (1) şi
scoateţi unitatea de bărbierire de pe
aparat (2).
ROMÂNĂ
2
1
Page 56

58
C
3 Înclinaţi dispozitivul de tundere spre spate.
C
4 Fixaţi dispozitivul de tundere pe aparat
(clic). Dispozitivul de tundere poate fi
folosit.
5 Activaţi dispozitivul de tundere apăsând
butonul pornire/oprire o dată.
Scoaterea dispozitivului de tundere
1 Opriţi aparatul.
2 Scoateţi dispozitivul de tundere apăsând
butonul de decuplare şi trăgându-l din
aparat.
3 Remontaţi unitatea de bărbierire.
Curăţare şi întreţinere
O curăţare regulată asigură cele mai bune
rezultate de bărbierire.
Pentru performanţe optime de bărbierire, clătiţi
foarte bine unitatea de bărbierire şi
compartimentul pentru păr cu apă fierbinte după
fiecare utilizare.
ROMÂNĂ
Page 57

59
Aveţi grijă ca apa să nu fie foarte fierbinte pentru
a nu vă frige.
Avertizor de curăţare
◗ După ce aţi oprit aparatul, avertizorul de
curăţare  (simbol robinet verde cu picături
ce clipesc) se aprinde timp de 6 secunde
pentru a vă reaminti că aparatul trebuie
curăţat.
◗ Dacă simbolul roşu al unităţii de bărbierire Œ
şi avertizorul de curăţare  se aprind
împreună, capetele de bărbierire sunt foarte
murdare sau deteriorate, încât ar putea
determina oprirea motorul. În cazul în care
capetele de bărbierire sunt murdare, trebuie
să le curăţaţi. Dacă sunt deteriorate, trebuie
să le înlocuiţi (a se vedea "Înlocuire").
B
Vă sfătuim să evitaţi aceste situaţii curăţând
capetele de bărbierire regulat.
Curăţare
Aparatul de bărbierit vă indică faptul că trebuie
să-l curăţaţi, afişând avertizorul de curăţare Â
după fiecare şedinţă de bărbierire.
Unitate de bărbierire: Curăţare
Rapidă după fiecare utilizare
1 Aparatul trebuie să fie pornit.
2 Unitatea de bărbierire trebuie să fie
închisă.
ROMÂNĂ
Page 58

60
C
3 Clătiţi unitatea de bărbierire şi
compartimentul de colectare a firelor de
păr cu apă fierbinte, lăsând apa să curgă
prin orificiile de sub unitate timp de cel
puţin 30 de secunde.
4 Scuturaţi surplusul de apă.
Nu ştergeţi niciodată unitatea cu un prosop sau
un şerveţel deoarece aţi putea deteriora capetele.
Unitate de bărbierire şi
compartiment pentru păr: în fiecare
săptămână
Este indicat să curăţaţi aparatul foarte bine cel
puţin o dată pe săptămână, pentru menţinerea
unor performanţe optime de radere.
Puteţi urma procedura următoare când curăţaţi
capetele de bărbierire.
1 Opriţi aparatul.
C
2 Apăsaţi butonul de decuplare pentru a
deschide unitatea de bărbierire.
C
3 Clătiţi interiorul unităţii de bărbierire.
ROMÂNĂ
2
Page 59

61
C
4 Clătiţi exteriorul unităţii de bărbierire.
C
5 Clătiţi compartimentul de colectare a
părului.
6 Asiguraţi-vă că interiorul unităţii de
bărbierire şi compartimentul de colectare
a părului au fost corect curăţate.
7 Închideţi unitatea şi scuturaţi excesul de
apă.
8 Deschideţi din nou unitatea de bărbierire
şi lăsaţi-o deschisă pentru a se usca
complet.
Suport de încărcare
1 Scoateţi suportul de încărcare din priză.
2 Curăţaţi suportul cu o cârpă umedă.
Dispozitiv de tundere
1 Curăţaţi exteriorul dispozitivului de
tundere cu periuţa furnizată după fiecare
utilizare.
Dispozitivul de tundere poate fi curăţat, de
asemenea, clătindu-l sub jet de apă.
ROMÂNĂ
Page 60

62
C
2 Dacă dispozitivul de tundere este folosit
frecvent, ungeţi dinţii acestuia cu o
picătură de ulei pentru maşina de cusut, o
dată la şase luni.
Depozitare
Suport de încărcare
C
◗ Aparatul de ras poate fi depozitat pe suportul
de încărcare, chiar dacă este ud.
Scoateţi întotdeauna suportul din priză înainte de
depozitarea aparatului de ras ud sau uscat.
Etui
◗ Aparatul de ras poate fi depozitat în etuiul
furnizat, împreună cu două cartuşe NIVEA
FOR MEN Cool Skin. Etuiul va proteja
aparatul în timpul călătoriilor.
Agăţătoare
◗ Aparatul de ras poate fi depozitat atârnându-l
de agăţătoarea furnizată, acesta putându-se
astfel usca în condiţii optime.
Înlocuire
Înlocuiţi capetele de bărbierire o dată la doi ani
pentru rezultate optime.
ROMÂNĂ
Page 61

63
Înlocuiţi capetele de bărbierire uzate sau
deteriorate cu capete Philips Cool Skin HQ177.
Indicator de verificare a capetelor de
bărbierire
După doi ani de utilizare, simbolul roşu al unităţii
de bărbierire Œ va clipi 30 de secunde în timpul a
şapte şedinţe de bărbierire, pentru a vă indica
faptul că trebuie să verificaţi starea capetelor de
bărbierire. Estimarea se face pe o durată medie
de bărbierire de 3 minute pentru fiecare şedinţă.
Când simbolul capului de bărbierire clipeşte, toate
celelalte simboluri şi leduri se sting. Când opriţi
aparatul de ras, simbolul dispare.
Când simbolul roşu al unităţii de bărbierire începe
să clipească, ar trebui să verificaţi capetele de
bărbierire pentru a vă asigura că nu sunt
deteriorate. Dacă acestea prezintă deteriorări,
trebuie să înlocuiţi capetele, pentru obţinerea în
continuare a unor rezultate optime.
Înlocuirea capetelor de bărbierire
1 Opriţi aparatul.
C
2 Apăsaţi butonul de decuplare pentru a
deschide unitatea de bărbierire.
ROMÂNĂ
Page 62

64
C
3 Răsuciţi rotiţa în sens invers acelor de
ceasornic (1) şi scoateţi cadrul de
susţinere (2).
C
4 Scoateţi capetele de bărbierire şi
poziţionaţi-le pe cele noi în unitatea de
bărbierire.
C
5 Repoziţionaţi cadrul de susţinere în
unitatea de bărbierire, apăsaţi rotiţa (1) şi
răsuciţi-o în sensul acelor de ceasornic (2).
Accesorii
Următoarele accesorii sunt disponibile:
- Încărcător HQ8000/800.
- Capete de bărbierire Philips Cool Skin HQ177.
- Loţiune de Ras Hidratantă NIVEA FOR MEN
Cool Skin HQ170.
- Gel de Ras Extra Fresh NIVEA FOR MEN Cool
Skin HQ171.
ROMÂNĂ
2
1
1
2
Page 63

Protejarea mediului
C
◗ Nu aruncaţi aparatul în gunoiul menajer la
sfârşitul duratei de funcţionare, ci duceţi-l la
un punct de colectare autorizat pentru
reciclare. În acest fel,veţi ajuta la protejarea
mediului înconjurător.
Acumulatorul reîncărcabil conţine substanţe ce
pot polua mediul. Scoateţi acumulatorul când
aruncaţi aparatul. Nu aruncaţi acumulatorul în
gunoiul menajer, ci predaţi-l la un punct de
colectare oficial. Îl puteţi duce de asemenea la un
centru service Philips, unde va fi scos şi depozitat
în conformitate cu normele privind protejarea
mediului.
Aruncarea acumulatorului
Scoateţi acumulatorul doar dacă este complet
descărcat.
C
1 Lăsaţi aparatul să funcţioneze până ce se
opreşte, desfaceţi şuruburile şi deschideţi-l.
2 Scoateţi acumulatorul.
Nu puneţi aparatul pe suportul de încărcare dup
scoaterea acumulatorului.
65ROMÂNĂ
Page 64

66
Garanţie şi service
Pentru informaţii suplimentare sau în cazul altor
probleme, vă rugăm să vizitaţi site-ul Philips
www.philips.com sau să contactaţi Departamentul
Clienţi din ţara dumneavoastră (veţi găsi numărul
de telefon în garanţia internaţională). Dacă în ţara
dumneavoastră nu există un astfel de
departament, contactaţi furnizorul dumneavoastră
Philips sau Departamentul Service pentru
Aparate Electrocasnice şi Produse de Îngrijire
Personală Philips.
Depanare
1 Capetele de bărbierire nu alunecă lin pe
suprafaţa pielii.
B
Cauză: nu aţi aplicat suficient gel/loţiune de ras.
◗ Apăsaţi butonul pompei de câteva ori pentru
a aplica o cantitate suficientă de gel/loţiune
NIVEA FOR MEN şi a permite capetelor de
bărbierire să alunece uşor pe piele.
2 Performanţe scăzute de bărbierire
B
Cauza 1: capetele de bărbierire sunt murdare.
Aparatul de bărbierit nu a fost curăţat imediat
după utilizare şi/sau nu a fost spălat suficient de
bine şi cu apă fierbinte.
◗ Curăţaţi bine aparatul înainte de a continua
bărbierirea.A se vedea capitolul "Curăţare şi
întreţinere".
ROMÂNĂ
Page 65

67
B
Cauza 2: fire lungi de păr blochează capetele de
bărbierire.
◗ Apăsaţi butonul de decuplare pentru a
deschide unitatea de bărbierire.
C
◗ Răsuciţi rotiţa în sens invers acelor de
ceasornic (1) şi scoateţi cadrul de susţinere (2).
C
◗ Curăţaţi cuţitele şi sitele de protecţie.
Cuţitele şi sitele de protecţie sunt pereche, de
aceea curăţaţi pe rând câte un set. Dacă
amestecaţi din greşeală cuţitele cu sitele, s-ar
putea să dureze câteva săptămâni până ce
aparatul va tăia din nou la performanţa optimă
anterioară.
◗ Scoateţi firele de păr cu ajutorul periuţei
furnizate.
◗ Montaţi capetele de bărbierire pe unitate.
Repoziţionaţi cadrul de susţinere în unitatea
de bărbierire.Apăsaţi rotiţa şi răsuciţi-o în
sensul acelor de ceasornic.
◗ Scoateţi capetele de bărbierire o dată pe lună
şi curăţaţi-le cu periuţa furnizată pentru a
evita blocarea acestora cu fire lungi de păr.
B
Cauza 3: capetele de bărbierire sunt deteriorate
sau uzate.
◗ Înlocuiţi capetele de bărbierire.A se vedea
capitolul "Înlocuire".
ROMÂNĂ
2
1
Page 66

68
3 Aparatul de ras nu funcţionează când
butonul pornire/oprire este apăsat.
B
Cauza 1: acumulatorul este descărcat.
◗ Reîncărcaţi acumulatorul. Consultaţi capitolul
"Încărcare".
B
Cauza 2: gel/loţiune de ras uscat(ă) blochează
capetele de bărbierire.
◗ Curăţaţi bine capetele de bărbierire.A se
vedea capitolul "Curăţare şi întreţinere".
B
Cauza 3: capatele sunt deteriorate.
◗ Înlocuiţi capetele de bărbierire.A se vedea
capitolul "Înlocuire".
4 Capacul compartimentului cartuşului nu
poate fi închis.
B
Cauza 1: cartuşul nu a fost introdus corect.
◗ Introduceţi corect cartuşul. Nu se fixează
corect decât cu porţiunea albă a pompiţei în
sus.
B
Cauza 2: cartuşul nu a fost împins la maxim în
aparat.
◗ Fixaţi corect cartuşul împingându-l până la
capăt.
ROMÂNĂ
Page 67

69
5 Gelul/loţiunea NIVEA FOR MEN şi-a
schimbat culoarea sau a devenit
apos/apoasă.
B
Cauză: Gelul/loţiunea NIVEA FOR MEN nu a fost
depozitat(ă) la temperatura corectă.
◗ Introduceţi un nou cartuş.
6 Apar iritaţii pe piele
B
Cauza 1: pielea dumneavoastră nu s-a obişnuit cu
acest sistem de bărbierit.
◗ În 2-3 săptămâni pielea ar trebui să se
obişnuiască cu noul sistem de bărbierit.
B
Cauza 2: gelul/loţiunea de ras vă irită pielea.
◗ Încercaţi celălalt tip de cartuş NIVEA FOR
MEN.
◗ Umeziţi-vă faţa înainte de a aplica
gelul/loţiunea de ras.
Dacă iritaţia nu dispare în 24 de ore, vă sfătuim s
nu mai folosiţi gelul/loţiunea de ras.
ROMÂNĂ
Page 68

Введение
Бритва поставляется с двумя различными
типами картриджей NIVEA FOR MEN: Extra
Fresh Shaving Gel, с гелем, дающим ощущение
свежести во время и после бритья, и
Moisturising Shaving Lotion - с увлажняющим
лосьоном для чувствительной кожи. Это дает
вам возможность опробовать их и выбрать
наиболее подходящее средство для вашего
типа кожи.
Внимание
Прежде чем начать пользоваться прибором,
внимательно ознакомьтесь с настоящим
руководством и сохраните его в качестве
справочного материала.
◗ Для зарядки электробритвы используйте
только блок питания и зарядное
устройство, входящие в комплект поставки.
◗ Блок питания преобразует сетевое
напряжение 100-240 вольт в напряжение
питания прибора 24 вольт.
◗ Вилка шнура электропитания содержит
адаптер. Не производите замену
оригинальной вилки на какую-либо другую.
Это может привести к опасным
последствиям.
◗ Запрещается использовать неисправный
блок питания или зарядное устройство.
◗ При повреждении блока питания или
зарядного устройства всегда заменяйте их
РУССКИЙ70
Page 69

71
оригинальными блоком питания или
зарядным устройством, чтобы обеспечить
безопасную эксплуатацию прибора.
◗ Заряжайте, храните и используйте прибор
при температуре 5cC до 35cC.
C
◗ Убедитесь в том, что блок питания сухой.
◗ Запрещается погружать зарядное
устройство в воду, а также промывать его
под струей воды.
◗ Не оставляйте бритву в подключенном к
электросети зарядном устройстве более
чем на 24 часа.
C
◗ Бритва водонепроницаема и может
промываться под струей воды.
Будьте осторожны с горячей водой. Всегда
проверяйте, не слишком ли горяча вода, чтобы
уберечь ваши руки от ожога.
C
◗ Электробритва соответствует принятому
международному стандарту по технике
безопасности IEC(МЕЖДУНАРОДНАЯ
ЭЛЕКТРОТЕХНИЧЕСКАЯ КОМИССИЯ), и
ею можно пользоваться в ванной или под
душем.
◗ Прежде чем вы начинаете использовать
бритву, проверьте, не содержат ли гель и
лосьон, входящие в комплект поставки,
компоненты (см. тыльную сторону
картриджа), на которые у вас есть
аллергическая реакция. Не используйте гель
и/или лосьон, если у вас есть аллергическая
реакция на одни или несколько
компонентов.
◗ Уровень шума: Lc= 63 дБ [A]
РУССКИЙ
Page 70

72
Дисплей
ДисплейLiving Light
В данной модели имеется уникальный
светящийся дисплей отображения текущей
информации. Этот трехмерный цветной
дисплей на светодиодах дает вам всю
необходимую информацию со специальными
эффектами «загорающихся сообщений».
◗ Снимите все наклейки и защитную фольгу с
дисплея Living Light.
Демонстрационная программа
Прибор имеет уникальную демонстрационную
программу.
1 Нажмите и удерживайте в течение
7 секунд кнопку вкл./выкл.
Демонстрация начнется автоматически.
◗ В начале демонстрации все символы
загораются одновременно. Затем все
символы бритвы загораются по очереди на
3 секунды в следующем порядке:
„ Зарядка/Индикатор полной степени
зарядки аккумулятора
Ê Бритье
± Индикация бритья с гелем
 Напоминание о необходимости
выполнения очистки бритвы
Ê Бритье
± Индикация бритья с гелем
РУССКИЙ
Page 71

73
„ Индикация низкой степени зарядки
аккумулятора
 Напоминание о необходимости очистки
бритвы /„ Индикация низкой степени
зарядки аккумулятора
Œ Индикация необходимости проверки
бритвенных головок
B
Вся демонстрационная программы
продолжается приблизительно 1 минуту
(включая интервалы).
2 Демонстрационную программу можно
остановить, нажав на кнопку вкл./выкл.
Индикация при использовании бритвы
Все указанные ниже индикаторы загораются во
время каждого бритья в одном и том же
порядке, что сильно облегчает ваше
ежедневное бритье.
В результате, некоторые символы горят, даже
когда вы уже совершили соответствующее
действие.
B
Когда вы включаете бритву, три раза мигает
индикатор геля для бритья. Если вы уже
нанесли на кожу достаточное количество геля
или лосьона для бритья, вы можете не
обращать внимания на этот индикатор.
B
Когда вы выключаете бритву, появляется
напоминание о необходимости выполнения
очистки бритвы. Это напоминание о
РУССКИЙ
Page 72

74
необходимости выполнения очистки
представляет собой зеленый водопроводный
кран (горит ровным светом) и зеленую
струю воды (мигает). Если вы уже очистили
бритву перед ее выключением, то вы можете
игнорировать напоминание о необходимости
очистки бритвы.
Зарядка
Зарядка аккумулятора занимает
приблизительно 8 часов.
Не оставляйте бритву в подключенном к
электросети зарядном устройстве более чем
на 24 часа.
Индикация зарядки
Батарея разряжена
C
◗ При разрядке аккумулятора, во время
бритья световой индикатор аккумулятора
будет гореть красным светом.
◗ При выключении бритвы, когда аккумулятор
почти полностью разряжен,световой
индикатор аккумулятора мигает два раза
красным светом. Это будет повторяться
четыре раза с короткими паузами между
вспышками.
◗ Когда вы начинаете заряжать бритву с
разряженными аккумуляторами, красный
светодиод зарядки батареи мигает в
течение макс. 24 минут.
РУССКИЙ
Page 73

75
Зарядка
◗ Во время зарядки аккумулятора световой
индикатор аккумулятора будет мигать
зеленым светом до тех пор, пока
аккумулятор не зарядится полностью
(приблизительно, 8 часов).
◗ Когда аккумулятор полностью зарядится,
световой индикатор аккумулятора будет
постоянно гореть зеленым светом.
Зарядка аккумуляторов электробритвы
Зарядите аккумулятор перед первым
использованием электробритвы и заряжайте
его при сигнализации о разрядке аккумулятора.
1 Вставьте маленький штекер в зарядное
устройство, а вилку сетевого шнура
блока питания - в розетку электросети.
C
2 Установите бритву на зарядное
устройство.
При установке бритвы на зарядное устройство
она автоматически выключается.
3 Выньте вилку сетевого шнура блока
питания из розетки и отсоедините
маленький штекер шнура сетевого
адаптера от электробритвы, как только
аккумулятор полностью зарядится.
После этого вы можете оставить
электробритву в зарядном устройстве.
РУССКИЙ
Page 74

76
Время бритья без подключения к
электросети
Полностью заряженная бритва обеспечивает
время бритья без подключения к электросети
до 55 минут.
Картриджи
Картриджи с гелем для бритья/лосьоном
NIVEA FOR MEN можно приобрести в
коробках, содержащих пять картриджей и
один небольшой пластмассовый насос.
Картриджи с гелем для бритья/лосьоном
NIVEA FOR MEN можно хранить в течение
32 месяцев при температуре от 0cC до
+40cC.
Используйте только картриджи Philips NIVEA
FOR MEN Cool Skin (HQ170 и HQ171)
Один картридж
PhilipsNIVEAFORMENCoolSkinсодержит
гель/лосьон в количестве, достаточном для
10 сеансов бритья.
По гигиеническим соображениям мы советуем
вам вставлять новый насос, когда вы
собираетесь использовать новый набор из
пяти картриджей.
Не выбрасывайте насос при замене пустого
картриджа. Он потребуется вам для всех пяти
картриджей.
РУССКИЙ
Page 75

77
Если вы не планируете использовать бритву в
течение более одной недели, выньте из
бритвы картридж с гелем для
бритья/лосьоном,
Если у вас закончились картриджи с гелем для
бритья/лосьонном, и вы не знаете, где их
приобрести, обратитесь в Центр обслуживания
клиентов в вашей стране (см. раздел
«Гарантийное и сервисное обслуживание»).
Установка картриджей
C
1 Перед тем как использовать новый
набор картриджей, выньте из сумки для
хранения насос и вставьте его в
картридж до щелчка.
C
2 Нажмите кнопку фиксатора и откройте
крышку отделения для картриджа.
C
3 Вставьте картридж с насосом в бритву.
Правильная установка возможна, только
в том случае, если белая сторона насоса
направлена вверх.
4 Закройте крышку (вы должны услышать
щелчок).
РУССКИЙ
2
1
Page 76

78
5 Несколько раз нажмите желтую кнопку
насоса, чтобы выдавилось некоторое
количество геля для бритья/лосьона
NIVEA FOR MEN. Теперь электробритва
готова к работе.
Замена картриджей
Не выбрасывайте насос при замене пустого
картриджа. Он потребуется вам для других
картриджей.
C
1 Нажмите кнопку фиксатора и откройте
крышку отделения для картриджа.
2 Выньте пустой картридж и вытяните из
него насос.
C
3 Вставьте насос в новый картридж,
установив его в нужное положение,до
щелчка.
C
4 Вставьте картридж с насосом в бритву.
Правильная установка возможна, только
в том случае, если белая сторона насоса
направлена вверх. Закройте крышку
отделения для картриджа.
РУССКИЙ
2
1
Page 77

79
Хранение картриджей
C
◗ Удобно хранить запасные картриджи в
настенном держателе для картриджей,
входящем в комплект поставки. Держатель
имеет присоски, которые позволяют вам
легко закрепить его на стене. Таким
образом, вы всегда будете иметь картриджи
под рукой,что является очень удобным,
особенно когда вы бреетесь под душем.
ПРИМЕЧЕНИЕ: Держатель предназначен
только для хранения картриджей. Никогда не
вешайте на него бритву. Бритва может упасть!
Бритье
Бритье
Включение электробритвы
1 Включите бритву, нажав на кнопку
Вкл./Выкл.
Желтый символ в форме капли геля для бритья
± мигает 3 раза, информируя вас о том, что на
кожу может быть нанесен гель/лосьон для
бритья.
C
2 Нажмите желтую кнопку насоса, чтобы
нанести на кожу гель для бритья/лосьон
NIVEA FOR MEN.
3 Быстро перемещайте бритвенные
головки по коже, совершая
РУССКИЙ
Page 78

80
одновременно возвратнопоступательные и вращательные
движения.
C
4 Во время бритья часто нажимайте
кнопку насоса, чтобы наносить на кожу
побольше геля для бритья/лосьона
NIVEA FOR MEN для того, чтобы бритва
легко скользила по поверхности кожи.
Во время бритья не прижимайте бритву к
поверхности кожи слишком сильно. Вы можете
перед бритьем слегка смочить кожу водой.
◗ Для получения наилучшего результата
следует чаще выдавливать на кожу гель для
бритья/лосьон.
◗ Вы не сможете добиться оптимальных
результатов без применения геля для
бритья/лосьона.
◗ Вашей коже может потребоваться
2-3 недели для того, чтобы привыкнуть к
бритвенной системе Philips.
Выключение бритвы
1 Выключите электробритву, нажав один
раз кнопку вкл./выкл.
Напоминание о необходимости очистки
бритвы Â (зеленый водопроводный кран с
мигающей зеленой струей воды) светится в
течение 6 секунд, информируя о
необходимости выполнения очистки бритвы.
РУССКИЙ
Page 79

81
2 Очистите бритву (см. раздел «Очистка и
уход»).
После каждого бритья промывайте бритву под
струей воды. В случае, если вы не планируете
пользоваться бритвой в течение недели и
более, выньте из нее картридж.
C
3 Во избежание поломки, после
использования наденьте на бритву
защитную крышку.
Подравниватель
Для подравнивания висков и ухода за усами.
Установка подравнивателя
1 Выключите электробритву.
Прежде чем установить подравниватель,
очистите бритву (см. раздел «Очистка и
уход»).
C
2 Нажмите кнопку фиксатора (1) и
извлеките бритвенный блок (2).
C
3 Слегка наклоните подравниватель назад.
РУССКИЙ
2
1
Page 80

82
C
4 Установите подравниватель на бритву
(вы должны услышать щелчок). Теперь
подравниватель готов к работе.
5 Включите подравниватель, нажав кнопку
вкл./выкл. один раз.
Отсоединение подравнивателя
1 Выключите электробритву.
2 Снимите подравниватель, для этого
снова нажмите кнопку фиксатора и
вытяните подравниватель из бритвы.
3 Вставьте бритвенный блок обратно в
электробритву.
Очистка и уход
Регулярная очистка гарантирует наилучшие
результаты бритья.
Для получения оптимальных результатов
бритья и для поддержания чистоты бритвы, вы
должны после каждого бритья тщательно
промывать горячей водой бритвенный блок и
волососборник.
Будьте осторожны с горячей водой. Все
проверяйте, не слишком ли горяча вода, что
уберечь ваши руки от ожога.
РУССКИЙ
Page 81

83
Напоминание об очистке
◗ При выключении электробритвы
появляется напоминание о необходимости
очистки бритвы Â (зеленый
водопроводный кран с мигающей зеленой
струей воды) светится в течение 6 секунд,
информируя о необходимости очистки
бритвы.
◗ Если одновременно светится красный
символ бритвенного блока Œ и
напоминание о необходимости очистки
бритвы Â это означает, что бреющие
головки очень сильно загрязнились или
повреждены до такой степени, что могут
вызвать блокировку электродвигателя.Если
бреющие головки загрязнились, вам следует
промыть их. Если бреющие головки
повреждены, вам следует заменить их (см.
раздел «Замена»).
B
Мы рекомендуем избегать такой ситуации,
регулярно очищая бреющие головки.
Очистка
На дисплее бритвы появляется напоминание о
необходимости очистки Â после каждого
сеанса бритья.
Бритвенный блок:Быстрая очистка
после каждого бритья
1 Убедитесь в том, что бритва включена.
РУССКИЙ
Page 82

84
2 Бритвенный блок должен быть закрыт.
C
3 Промойте бритвенный блок и
волососборник под струей горячей
воды, которая должна течь через
отверстия, расположенные под
бритвенным блоком, не менее 30 секунд.
4 Встряхните бритву, чтобы удалить
оставшуюся воду.
Запрещается сушить бритвенный блок с
помощью полотенца или салфетки, так как
можно повредить бритвенные головки.
Бритвенный блок и волососборник:
очищайте каждую неделю
Мы рекомендуем для оптимальных результатов
бритья тщательно очищать электробритву не
реже, чем раз в неделю.
Вы также можете использовать эту процедуру
для очистки бреющих головок.
1 Выключите электробритву.
C
2 Откройте бритвенный блок, нажав
кнопку фиксатора.
C
3 Промойте внутренние части
бритвенного блока
РУССКИЙ
2
Page 83

85
C
4 Промойте бритвенный блок снаружи
C
5 Промойте волососборник
6 Внутренняя часть бритвенного блока и
камера волососборника должны быть
очищены надлежащим образом.
7 Закройте бритвенный блок и стряхните
воду.
8 Снова откройте бритвенный блок и
оставьте его открытым, чтобы дать
бритве полностью высохнуть.
Зарядное устройство.
1 Отсоедините зарядное устройство от
электросети.
2 Очистите зарядное устройство с
помощью влажной ткани.
Подравниватель
1 После каждого использования
подравнивателя очищайте его снаружи с
помощью щеточки, входящей в
комплект поставки прибора.
РУССКИЙ
Page 84

86
Подравниватель также можно очистит
промыв его под струей воды.
C
2 Если вы часто пользуетесь
подравнивателем, то через каждые
шесть месяцев смазывайте зубцы
подравнивателя с помощью нанесения
на них капли масла для швейных машин.
Хранение
Зарядное устройство
C
◗ Электробритва может храниться на
зарядном устройстве,даже если она мокрая.
Перед установкой мокрой или сухой
электробритвы на зарядное устройство
обязательно отсоедините зарядное
устройство от электросети.
Футляр
◗ Электробритва может храниться в футляре,
входящем в комплект поставки. В этом
футляре имеется также место для двух
картриджей NIVEA FOR MEN Cool
Skin.Футляр обеспечит дополнительную
защиту бритвы во время поездок.
Шнурок для подвешивания
электробритвы
◗ Электробритва также может храниться
подвешенной на шнурке. Хранение
электробритвы в подвешенном состоянии
РУССКИЙ
Page 85

87
обеспечивает наилучшие условия для ее
сушки.
Замена бритвенных головок
Для достижения оптимальных результатов
бритья производите замену бритвенных
головок каждые два года.
Поврежденные или изношенные бреющие
головки следует заменять только бреющими
головками HQ177 Philips Cool Skin.
Индикация необходимости выполнения
проверки бреющих головок
Через два года эксплуатации электробритвы, во
время семи сеансов бритья в течение
30 секунд будет мигать красный символ
бритвенного блока Œ напоминающий вам о
том, что нужно проверить состояние бреющих
головок. Эта индикация базируется на среднем
времени бритья, равном 3 минутам. Когда
мигает символ бритвенного блока, все
остальные символы и световые индикаторы
выключены. При выключении электробритвы
символ бритвенного блока исчезает.
Когда красный символ бритвенного блока
начинает мигать, нужно проверить состояние
бреющих головок. Если на бреющих головках
имеются какие-либо повреждения, то бреющие
головки нужно заменить для того, чтобы
добиться оптимальных результатов бритья.
РУССКИЙ
Page 86

88
Замена бритвенных головок
1 Выключите электробритву.
C
2 Откройте бритвенный блок, нажав
кнопку фиксатора.
C
3 Поверните колесико против часовой
стрелки (1) и снимите фиксирующую
рамку (2).
C
4 Выньте бритвенные головки и вставьте
новые бритвенные головки в
бритвенный блок.
C
5 Установите фиксирующую рамку
в бритвенный блок, нажмите на
колесико (1) и поверните его по
часовой стрелке (2).
Принадлежности
В продаже имеются следующие
принадлежности:
- Адаптер модель HQ8000/800
- Бреющие головки HQ177 Philips Cool Skin
РУССКИЙ
2
1
1
2
Page 87

89
- Лосьон для бритья HQ170 NIVEA FOR MEN
Cool Skin Moisturising
- Гель для бритья HQ171 NIVEA FOR MEN
Cool Skin Extra Fresh
Защита окружающей среды
C
◗ По окончании срока службы не
выбрасывайте прибор вместе с обычными
бытовыми отходами, а сдавайте в
специальные пункты приема. Поступая так
вы способствуете делу сохранения
окружающей среды.
Встроенная аккумуляторная батарея содержат
вещества, которые могут представлять
опасность для окружающей среды. Прежде
чем выбросить бритву или сдать ее в
приемный пункт утильсырья, всегда вынимайте
из нее батарею. Отнесите батарею в
официальный пункт приема. Если вам сложно
самостоятельно извлечь батарею, вы можете
отнести бритву в сервисный центр компании
«Филипс», где вам извлекут батарею и
утилизируют ее безопасным для окружающей
среды образом.
Утилизация аккумуляторной батареи
Перед удалением батарея должна быт
полностью разряжена.
РУССКИЙ
Page 88

90
C
1 Оставьте электробритву во включенном
состоянии до остановки
электродвигателя, отверните винты и
откройте электробритву.
2 Извлеките аккумуляторную батарею.
После снятия с электробритвы аккумулято
не вставляйте ее в зарядное устройство.
Информация и сервисное обслуживание
По поводу дополнительной информации или в
случае возникновения каких-либо проблем
обращайтесь на Web-сайт компании «Филипс»
по адресу www.philips.ru или в центр компании
«Филипс» по обслуживанию потребителей в
вашей стране (вы найдете его номер телефона
на международном гарантийном талоне). Если
подобный центр в вашей стране отсутствует,
обратитесь в вашу местную торговую
организацию компании «Филипс» или
сервисное отделение компании Philips
Domestic Appliances and Personal Care BV.
Поиск и устранение неисправностей
1 Бреющие головки не скользят по коже
достаточно легко.
B
Причина: на кожу было наложено
недостаточное количество геля для
бритья/лосьона.
РУССКИЙ
Page 89

91
◗ Для того чтобы бреющие головки легко
скользили по коже, несколько раз нажмите
кнопку насоса, чтобы выдавить
достаточное количество геля для
бритья/лосьона NIVEA FOR MEN.
2 Плохое качество бритья
B
Причина 1: загрязнились бритвенные головки.
Электробритва не была очищена сразу же
после использования и/или долгое время не
промывалась, и/или вода, которой промывалась
электробритва, не была достаточно горячей.
◗ Перед тем как продолжить бритье,
тщательно очистите электробритву. См.
раздел «Очистка и уход».
B
Причина 2: бритвенные головки забиты
длинными волосами.
◗ Откройте бритвенный блок, нажав кнопку
фиксатора.
C
◗ Поверните колесико против часовой
стрелки (1) и снимите фиксирующую рамку
(2).
C
◗ Очистите вращающиеся и неподвижные
ножи.
Не очищайте одновременно более одной
пары ножей, поскольку вращающийся и
неподвижный ножи каждой пары пригнаны
друг к другу. Если вы случайно перепутаете
ножи, то может потребоваться несколько
РУССКИЙ
2
1
Page 90

92
недель для того, чтобы восстановить
оптимальные характеристики бритья.
◗ Очистите бритвенные головки от волос,
пользуясь щеточкой, входящей в комплект
поставки.
◗ Установите бритвенные головки в
бритвенный блок. Установите
фиксирующую рамку в бритвенный блок,
нажмите на колесико и поверните его по
часовой стрелке.
◗ Для того, чтобы длинные волоски не
мешали нормальной работе бреющих
головок, раз в месяц снимайте бреющие
головки и очищайте их с помощью
поставляемой в комплекте щетки.
B
Причина 3: бритвенные головки повреждены
или изношены.
◗ Замените бреющие головки. См. раздел
«Замена».
3 При нажатии кнопки ON/OFF
электробритва не работает.
B
Причина 1:аккумуляторная батарея
разряжена.
◗ Зарядите батарею. См. раздел "Зарядка"
РУССКИЙ
Page 91

93
B
Причина 2: засохший гель/лосьон для бритья
блокирует бреющие головки.
◗ Тщательно очистите бреющие головки. См.
раздел «Очистка и уход».
B
Причина 3: повреждены бреющие головки.
◗ Замените бреющие головки. См. раздел
«Замена».
4 Не закрывается крышка отделения для
картриджа.
B
Причина 1: картридж был вставлен
неправильно.
◗ Вставьте картридж правильно. Он может
быть вставлен в электробритву правильно
только в том случае, если белая сторона
насоса направлена вверх.
B
Причина 2: картридж не был вставлен в
электробритву достаточно глубоко.
◗ Нажмите на картридж так, чтобы он встал
на место.
5 Гель для бритья/лосьон NIVEA FOR MEN
изменил цвет, или стал водянистым.
B
Причина: гель для бритья /лосьон NIVEA FOR
MEN хранился при неправильной
температуре.
РУССКИЙ
Page 92

94
◗ Вставьте новый картридж.
6 Возникает раздражение кожи.
B
Причина 1: ваша кожа еще не привыкла к
этой системе бритья.
◗ Для того чтобы ваша кожа привыкла к этой
системе бритья, может потребоваться 2-3
недель.
B
Причина 2: гель для бритья/лосьон
раздражает вашу кожу.
◗ Попробуйте другой тип картриджа NIVEA
FOR MEN.
◗ Перед бритьем смачивайте лицо гелем для
бритья/лосьоном.
Если раздражение не исчезает в течение
24 часов, мы советуем вам прекратит
пользоваться гелем для бритья/лосьоном.
РУССКИЙ
Page 93

Úvod
Holicí přístroj přichází se dvěma druhy náplní
NIVEA FOR MEN: Extra Fresh Shaving Gel pro
pocit čistoty během holení a po oholení a
Moisturising Shaving Lotion pro citlivou pokožku.
To vám poskytuje možnost zvolit si ten přípravek,
který vám bude nejlépe vyhovovat.
Důležité
Následující návod pečlivě přečtěte a uschovejte jej
pro případná pozdější nahlédnutí.
◗ Vždy používejte napáječ a nabíjecí podstavec,
dodávaný s přístrojem.
◗ Transformátorová zástrčka transformuje
100 až 240 V na bezpečné napětí menší než
24 V.
◗ Síťová zástrčka obsahuje transformátor. Proto
ji nikdy nesmíte zaměnit za jinou zástrčku, což
by mohlo způsobit vážnou poruchu.
◗ Nikdy nepoužívejte poškozenou
transformátorovou zástrčku nebo nabíjecí
podstavec.
◗ Pokud by byly transformátorová zástrčka
nebo nabíjecí podstavec poškozeny, je třeba je
nahradit výhradně originálními náhradními díly,
aby nevznikla nebezpečná situace.
◗ Akumulátory přístroje nabíjejte a přístroj
používejte při teplotě mezi 5cC a 35cC.
C
◗ Dbejte na to, aby transformátorová zástrčka
nenavlhla.
◗ Nabíjecí podstavec nesmíte nikdy ponořit do
vody, ani ho mýt pod tekoucí vodou.
ČESKY 95
Page 94

96
◗ Nenechávejte holicí přístroj v nabíjecím
podstavci, pokud je připojen k síti, déle než asi
24 hodin.
C
◗ Přístroj je vodotěsný a smí být myt pod
tekoucí vodou.
Buďte opatrní při použití horké vody.Vždy
předem zkontrolujte, zda není voda nadměrně
horká, abyste si neopařili prsty.
C
◗ Přístroj odpovídá mezinárodně platícím
bezpečnostním předpisům schváleným IEC a
může být bez obav používán ve vaně nebo ve
sprše.
◗ Než začnete gel/lotion dodávaný s přístrojem
používat zkontrolujte, zda neobsahuje složky
(viz zadní strana zásobníku), vůči kterým jste
alergičtí. Gel a/nebo lotion nepoužívejte
pokud jste alergičtí k jedné nebo více jeho
složkám.
◗ Hladina hluku: Lc = 63 dB (A).
Displej
Displej "Living Light"
Tento model charakterizuje unikátní použití
displeje "Living Light".Tento barevný 3D displej
vám poskytuje všechny informace, které
potřebujete, včetně efektů "living light".
◗ Z displeje Living Light sejměte ochrannou
nálepku.
ČESKY
Page 95

97
Demonstrační program
Tento přístroj má jedinečný demonstrační program.
1 Stiskněte tlačítko on/off po dobu asi
7 sekund.
Automaticky se zapojí demonstrační funkce.
◗ Když spustíte demonstrační funkci, všechny
indikátory se současně rozsvítí. Pak se všechny
indikace přístroje postupně zobrazují po
3 sekundách v následujícím pořadí.
„ Nabíjení akumulátoru/Akumulátor plně nabit
Ê Holení
± Indikace holicího gelu
 Upozornění na nutnost vyčištění
Ê Holení
± Indikace holicího gelu
„ Indikace poklesu napětí akumulátoru
 Upozornění na nutnost čištění/„ Akumulátor
téměř vybit
Œ Indikace stavu holicích hlav
B
Celý demonstrační program trvá přibližně
1 minutu (včetně intervalů).
2 Demonstrační program můžete ukončit
stiskutím tlačítka on/off.
Indikace v průběhu holení
Všechny indikace, o nichž je zmínka níže, jsou
zobrazovány během každého holení a to vždy ve
ČESKY
Page 96

98
stejném pořadí.To vám usnadní jak holení, tak i
údržbu přístroje a stane se pravidelným rituálem.
Výsledkem je, že se některé symboly zobrazí i
když jste realizovali příslušnou akci.
B
Když přístroj zapnete, blikne třikrát indikace
holicího gelu. Když jste již aplikovali dostatek
holicího gelu nebo lotionu, můžete toto upozornění
ignorovat.
B
Když přístroj vypnete, zobrazí se upozornění na
nutnost čištění.Toto upozornění se skládá ze
zeleného kohoutku (rozsvítí se) a zelené vody
(bliká). Pokud jste holicí přístroj před jeho vypnutím
již vyčistili, můžete toto upozornění ignorovat.
Nabíjení akumulátorů
Nabíjení trvá běžně asi 8 hodin.
Nenechávejte holicí přístroj v nabíjecím podstavci
pokud je připojen k síti, déle než asi 24 hodin.
Indikace nabití
Akumulátor je téměř vybitý
C
◗ Když je akumulátor na pokraji vybití,
kontrolka během holení svítí červeně.
◗ Když je akumulátor na pokraji vybití a holicí
přístroj vypnete, kontrolka dvakrát červeně
blikne.To se opakuje v krátkých přestávkách
ještě čtyřikrát.
ČESKY
Page 97

99
◗ Když začnete nabíjet holicí strojek, je-li
akumulátor téměř vybitý, bude kontrolka
baterie červeně blikat maximálně 24 minut.
Plné nabití akumulátoru
◗ V průběhu nabíjení bliká kontrolka zeleně
dokud není akumulátor plně nabit
(asi 8 hodin).
◗ Když je již akumulátor plně nabit, svítí
kontrolka trvale zeleně.
Nabíjení akumulátorů
Akumulátor nabijte před prvním použitím a vždy,
když je indikováno jeho vybití.
1 Malou zástrčku zasuňte do zásuvky v
nabíjecím podstavci a transformátorovou
zástrčku do síťové zásuvky.
C
2 Přístroj vložte do nabíjecího podstavce.
Přístroj se po vložení do nabíjecího podstavce
automaticky vypne.
3 Když je akumulátor plně nabit, vytáhněte
transformátorovou zástrčku ze síťové
zásuvky a vytáhněte i malou zástrčku ze
zásuvky na nabíjecím podstavci. Přístroj pak
můžete ponechat v nabíjecím podstavci.
Doba holení bez sítě
Plně nabitý přístroj umožňuje dobu holení až
55 minut.
ČESKY
Page 98

Zásobníky
Zásobníky s holicím gelem/lotionem NIVEA FOR
MEN jsou prodávány v obalech, který obsahuje
pět zásobníků a jedno plastové čerpadlo.
Holicí gel/lotion NIVEA FOR MEN vydrží v
zásobníku 32 měsíců, pokud je skladován při
teplotě mezi 0cC a +40cC.
Používejte výhradně zásobníky NIVEA FOR MEN
Cool Skin (HQ170 a HQ171)
Jeden zásobník NIVEA FOR MEN Cool Skin
obsahuje gel/lotion pro přibližně 10 holení.
Z hygienických důvodů doporučujeme použít
vždy po vypotřebování pěti zásobníků nové
čerpadlo.
Čerpadlo po vypotřebování zásobníku
nezahazujte, budete ho potřebovat pro všech pět
zásobníků.
Pokud nebudete holicí přístroj potřebovat po
dobu delší než týden, zásobník s gelem/lotionem z
přístroje vyjměte.
Pokud byste vypotřebovali všechny zásobníky s
gelem/lotionem a nevěděli, kde opatřit další,
obraťte se na Informační středisko firmy Philips
(viz "Záruka a servis").
100 ČESKY
Page 99

101
Vkládání zásobníků
C
1 Pokud začnete používat nový zásobník,
vyjměte z přístroje čerpadlo a zasuňte ho
do nového zásobníku až zaklapne.
C
2 Stiskněte uvolňovací tlačítko a otevřte
víčko prostoru pro zásobníky.
C
3 Zasuňte tam zásobník i s připevněným
čerpadlem. Správně zasunut je pouze
tehdy, když bílá strana čerpadla směřuje
nahoru.
4 Víčko uzavřete (zaklapne).
5 Několikrát stiskněte žluté tlačítko čerpadla
až se objeví holicí gel/lotion NIVEA FOR
MEN. Holicí přístroj je nyní připraven k
použití.
Výměna zásobníků
Čerpadlo po vypotřebování zásobníku
nezahazujte, budete ho potřebovat pro všech pět
zásobníků.
C
1 Stiskněte uvolňovací tlačítko a otevřte
víčko prostoru pro zásobníky.
ČESKY
2
1
2
1
Page 100

102
2 Vyjměte vypotřebovaný zásobník a
sejměte z něj čerpadlo.
C
3 Čerpadlo nasaďte na nový zásobník až
zřetelně zaklapne.
C
4 Zásobník s čerpadlem zasuňte do holicího
přístroje. Zásobník je správně zasunut jen
v tom případě, že bílá strana čerpadla
směřuje nahoru.Víčko uzavřete.
Uchovávání zásobníků
C
◗ Do nástěnného držáku, který je součástí
dodávky, můžete pohodlně ukládat ostatní
zásobníky. Držák je vybaven přísavkami,
kterými ho lze snadno upevnit na svislou
podložku.Tak můžete mít nové zásobníky vždy
na dosah, což je výhodné obzvláště, když se
holíte ve sprše.
Poznámka: Nástěný držák je vhodný pouze pro
ukládání zásobníků. Do držáku nikdy neumísťujte
holicí přístroj, který by z něho mohl snadno
vypadnout.
ČESKY
 Loading...