

Page 1

ENGLISH 4
SLOVENSKY 25
EESTI 47
LATVISKI 67
LIETUVIŠKAI 89
БЪЛГАРСКИ 110
SRPSKI 134
HQ7760
3
Page 2

Introduction
The shaver comes with two different kinds of
NIVEA FOR MEN cartridges: Extra Fresh Shaving
Gel for a fresh sensation during and after shaving
and Moisturising Shaving Lotion for sensitive skin.
This gives you the opportunity to tr y them out
and discover which one suits your skin type best.
Important
Read these instructions for use carefully before
using the appliance and save them for future
reference.
◗ Only use the powerplug and the charging
stand supplied.
◗ The powerplug transforms 100-240 volts to a
safe low voltage of less than 24 volts.
◗ The powerplug contains a transformer. Do
not cut off the powerplug to replace it with
another plug, as this will cause a hazardous
situation.
◗ Do not use a damaged powerplug or charging
stand.
◗ If the powerplug or charging stand is
damaged, always have it replaced by one of the
original type in order to avoid a hazard.
◗ Charge, store and use the appliance at a
temperature between 5cC and 35cC.
C
◗ Make sure the powerplug does not get wet.
◗ Never immerse the charging stand in water
nor rinse it under the tap.
◗ Do not leave the shaver in the plugged-in
charging stand for more than 24 hours.
ENGLISH4
Page 3

C
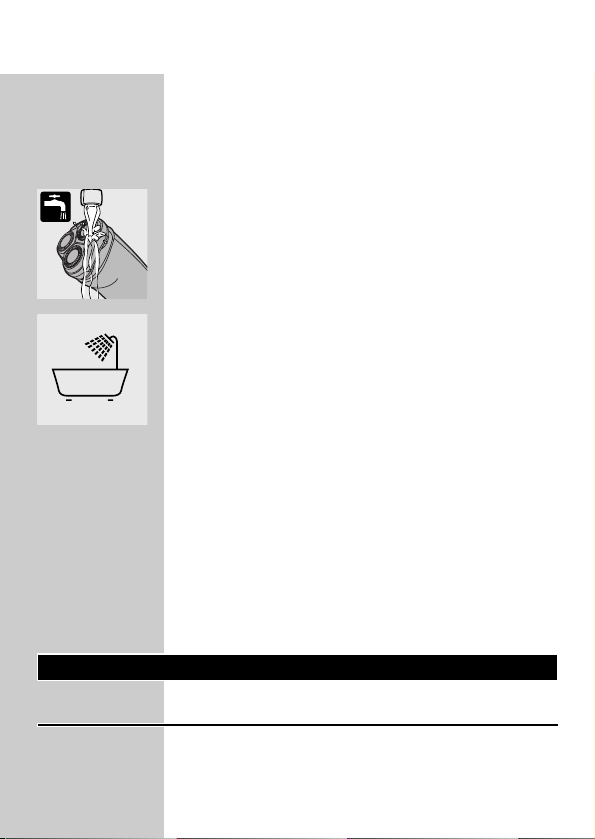
◗ The appliance is watertight and can be
cleaned under the tap.
Be careful with hot water. Always check if the
water is not too hot, to prevent your hands from
getting burnt.
C
◗ The appliance complies with the
internationally approved IEC safety regulations
and can be safely used in the bath or shower.
◗ Check if the gel and lotion supplied with the
appliance contain ingredients (see back of
cartridge) to which you are allergic before
you start using the appliance. Do not use the
gel and/or lotion if you are allergic to one or
more ingredients.
◗ Noise level: Lc = 63 dB [A]
The display
Living Light Display
This model features the unique Living Light
display.This 3D colour LED display gives you all
the information you need with special 'living light'
effects.
◗ Remove any sticker or protective foil from
the Living Light Display.
ENGLISH 5
Page 4
Demonstration program
The appliance has a unique demonstration
program.
1 Press the on/off button for 7 seconds.
The demonstration will start automatically.
◗ When the demonstration starts, all indications
light up at the same time.Then all indications
of the shaver are shown separately for 3
seconds in the following order:
„ Charging/Battery full indication
Ê Shaving
± Shaving gel indication
 Cleaning reminder
Ê Shaving
± Shaving gel indication
„ Battery low indication
 Cleaning reminder/„ Battery low indication
ΠShaving head check indication
B
The whole demonstration program lasts approx. 1
minute (including intervals).
2 You can stop the demonstration by
pressing the on/off button.
Indications during use
All indications mentioned below are shown
during every shaving session and they are always
displayed in the same order, which makes it very
easy for you to maintain a regular shaving ritual
ENGLISH6
Page 5
As a result, some symbols will light up even when
you have already taken the appropriate action.
B
When you switch the appliance on, the shaving gel
indication blinks three times. If you have already
applied enough shaving gel or lotion, you can
ignore this indication.
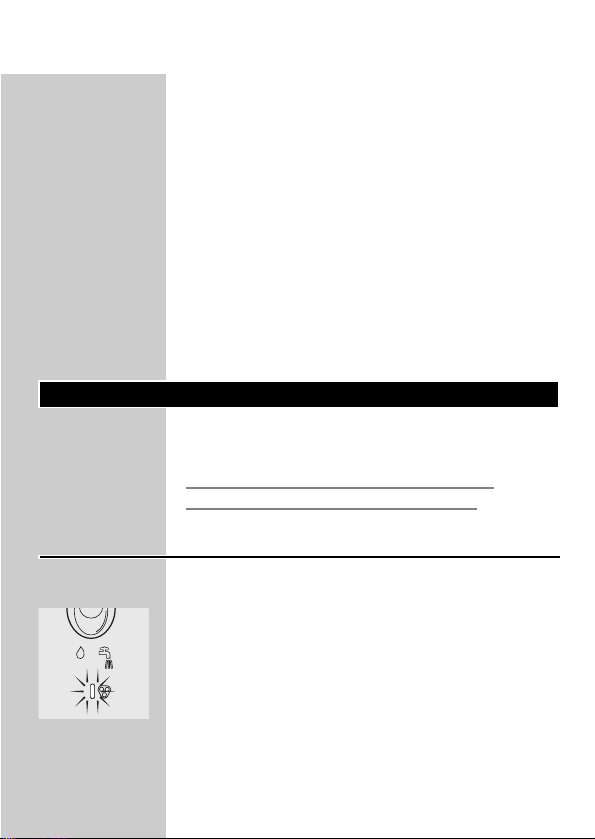
B
When you switch the appliance off, the cleaning
reminder is displayed.This cleaning reminder
consists of a green tap (lights up) and a green
water jet (blinks). If you have already cleaned the
shaver before switching it off, you can ignore the
cleaning reminder.
Charging
Charging takes approx. 8 hours.
Do not leave the shaver in the plugged-in
charging stand for more than 24 hours.
Charge indications
Battery running low
C
◗ When the battery is running low, the battery
light burns red during shaving.
◗ When you switch the shaver off while the
battery is nearly empty, the battery light blinks
red twice.This will happen four times with
brief pauses in between.
◗ When you start charging the shaver while
battery is running low, the battery light blinks
red for max. 24 minutes.
ENGLISH 7
Page 6

Battery fully charged
◗ During charging the battery light blinks green
until the battery is fully charged (approx. 8
hours).
◗ The battery light burns green continuously
when the battery is fully charged.
Charging the appliance
Charge the shaver before using it for the first time
and when the shaver indicates that the battery is
running low.
1 Insert the small plug into the charging
stand and put the powerplug in the wall
socket.
C
2 Place the shaver in the charging stand.
The shaver automatically switches off when it is
placed in the charging stand.
3 Remove the powerplug from the wall
socket and pull the small plug out of the
charging stand when the battery has been
fully charged.You can then leave the
appliance in the charging stand.
Cordless shaving time
A fully charged shaver has a cordless shaving time
of up to 55 minutes.
ENGLISH8
Page 7

Cartridges
Cartridges with NIVEA FOR MEN shaving
gel/lotion are available in boxes containing five
cartridges and one small plastic pump.
The NIVEA FOR MEN shaving gel/lotion in the
cartridges will keep for 32 months when stored
at temperatures between 0cC and +40cC.
Only use Philishave NIVEA FOR MEN Cool Skin
(HQ170 and HQ171) cartridges.
One Philishave NIVEA FOR MEN Cool Skin
cartridge contains enough gel/lotion for approx.
10 shaves.
For hygienic reasons, we advise you to insert a
new pump when you start using a new set of five
cartridges.
Do not throw the pump away when you replace
an empty cartridge.You will need it for all five
cartridges.
Remove the shaving gel/lotion cartridge from the
appliance when you are not going to use the
shaver for more than one week.
When you have run out of shaving gel/lotion
cartridges and you do not know where to buy
them, contact the Customer Care Centre in your
country (see 'Guarantee & service').
ENGLISH 9
Page 8

Inserting cartridges
C
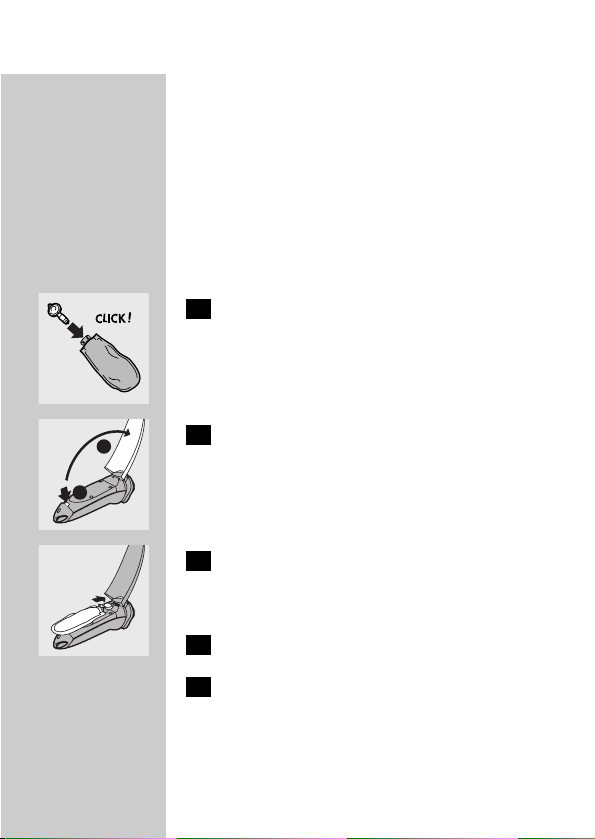
1 When you start using a new set of
cartridges, take the pump out of its bag
and push it into a cartridge until it locks
into position with a click.
C
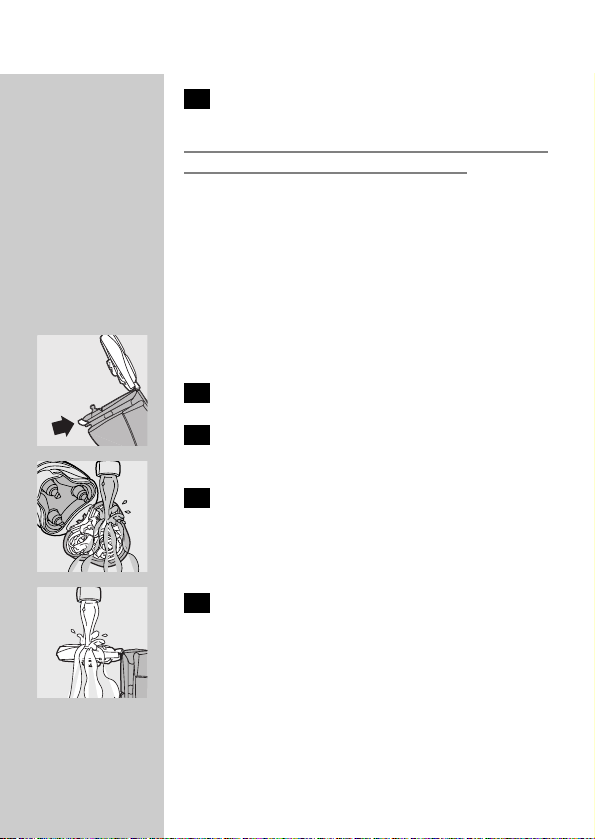
2 Press the release button and open the
cover of the cartridge compartment.
C
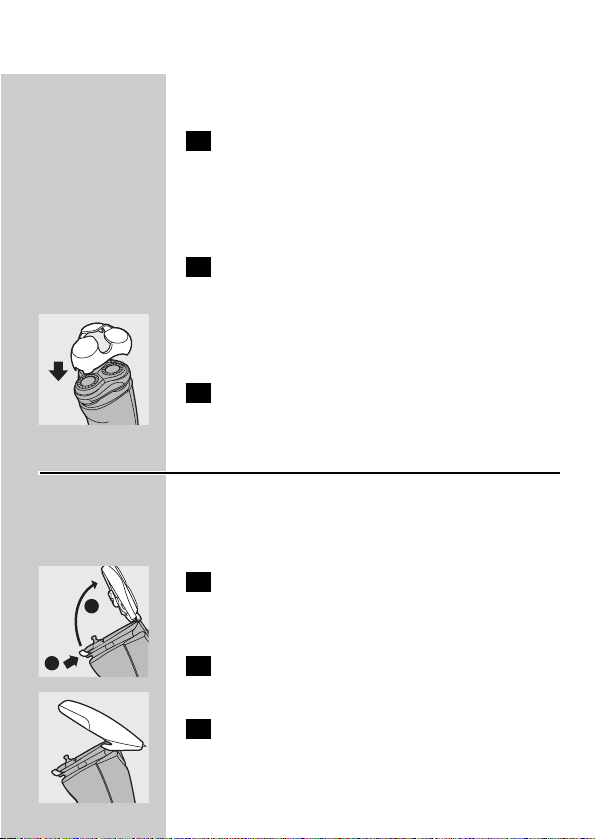
3 Slide the cartridge with the pump into the
shaver. It only fits properly if the white side
of the pump is pointing upwards.
4 Close the cover (you will hear a click).
5 Press the yellow pump button a few times
until the NIVEA FOR MEN shaving
gel/lotion appears.The shaver is now ready
for use.
Replacing cartridges
Do not throw the pump away when you replace
an empty cartridge.You will need it for the other
cartridges.
C
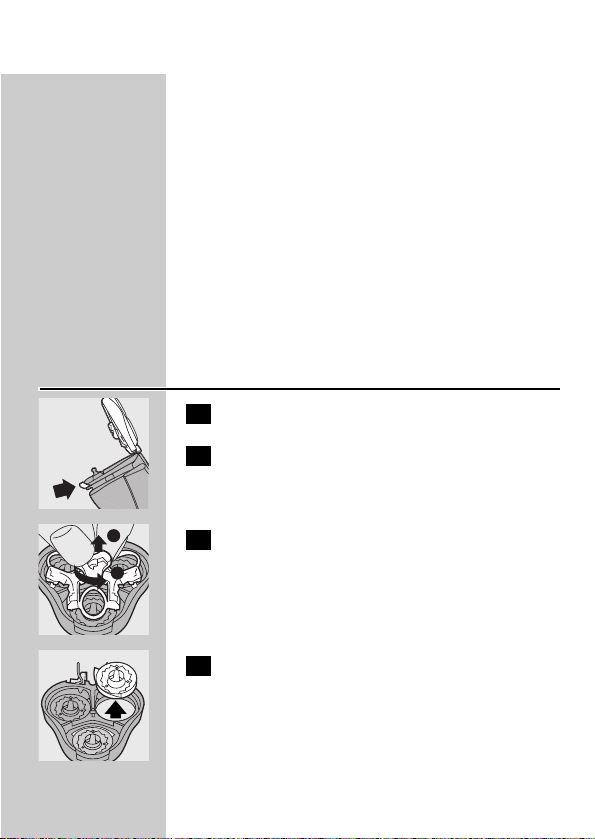
1 Press the release button and open the
cover of the cartridge compartment.
ENGLISH10
2
1
2
1
Page 9

2 Remove the empty cartridge and pull out
the pump.
C
3 Push the pump into a new cartridge until it
locks into position with a click.
C
4 Slide the cartridge with the pump into the
shaver. It only fits properly if the white side
of the pump is pointing upwards. Close the
cover.
Storing cartridges
C
◗ You can conveniently store the other
cartridges by attaching them to the wall
holder supplied.The holder has suction caps
which allow you to attach it to the wall easily.
In this way you always have the cartridges
close at hand, which is very convenient,
especially when you shave in the shower.
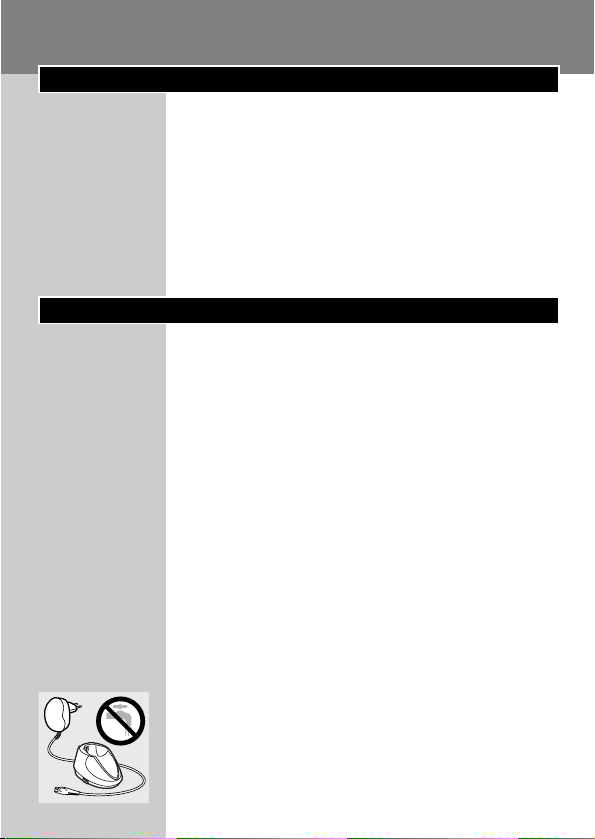
NB:The wall holder is only suitable for storing
cartridges. Never hang or place the shaver on the
wall holder. If you do, the shaver may fall!
ENGLISH 11
Page 10

Using the appliance
Shaving
Switching the shaver on
1 Switch the shaver on by pressing the on/off
button once.
The yellow teardrop-shaped shaving gel light ±
blinks 3 times to indicate that shaving gel/lotion
can be applied.
C
2 Press the yellow pump button to apply
NIVEA FOR MEN shaving gel/lotion to
your skin.
3 Move the shaving heads over your skin,
making both straight and circular
movements.
C
4 While shaving, press the pump button
frequently to apply more NIVEA FOR
MEN shaving gel/lotion so that the shaver
keeps gliding smoothly over your face.
Do not press the shaver too hard against your
skin while shaving. If you prefer, you can wet your
face before shaving.
◗ For the best shaving results,shaving gel/lotion
should be pumped up frequently.
◗ The shaver will not perform optimally when
used without shaving gel/lotion.
◗ Your skin may need 2 or 3 weeks to get
accustomed to the Philishave system.
ENGLISH12
Page 11
Switching the shaver off
1 Switch the shaver off by pressing the on/off
button once.
The cleaning reminder  (green tap symbol with
blinking water jet) lights up for 6 seconds to
indicate that the shaver should be cleaned.
2 Clean the shaver (see chapter 'Cleaning
and maintenance').
Rinse the shaver after each shave. Remove the
cartridge if you are not going to use the appliance
for more than one week.
C
3 Put the protection cap on the shaver every
time you have used it, to prevent damage.
Trimming
For grooming sideburns and moustache.
Attaching the trimmer
1 Switch the shaver off.
Clean the shaver before you attach the trimmer
(see chapter 'Cleaning and maintenance').
C
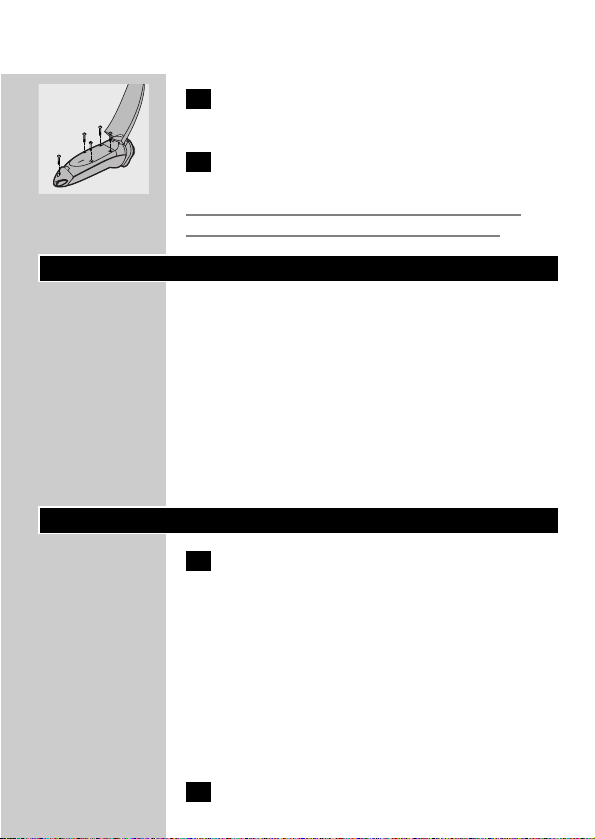
2 Press the release button (1) and pull the
shaving unit off the shaver (2).
C
3 Tilt the trimmer slightly backwards.
ENGLISH 13
2
1
Page 12

C
4 Fit the trimmer onto the shaver (you will
hear a click).The trimmer is now ready for
use.
5 Activate the trimmer by pressing the
on/off button once.
Removing the trimmer
1 Switch the shaver off.
2 Remove the trimmer by pressing the
release button again and pulling the
trimmer off the shaver.
3 Put the shaving unit back onto the shaver.
Cleaning and maintenance
Regular cleaning guarantees better shaving
performance.
To maintain optimal shaving performance and to
keep the shaver clean, you have to thoroughly
rinse the shaving unit and hair chamber with hot
water after every shave.
Be careful with hot water. Always check if the
water is not too hot, to prevent your hands from
getting burnt.
ENGLISH14
Page 13
Cleaning reminder
◗ When you have switched the shaver off, the
cleaning reminder  (green tap symbol with
blinking water jet) lights up for 6 seconds to
remind you that the shaver should be cleaned.
◗ If the red shaving unit symbol Œ and the
cleaning reminder  light up together, the
shaving heads have become so dirty or
damaged that they might cause the motor to
become blocked. If the shaving heads are dirty,
you have to clean them. If the shaving heads
are damaged, you have to replace them (see
chapter 'Replacement').
B
We advise you to avoid this situation by cleaning
the shaving heads regularly.
Cleaning
The shaver reminds you that it needs to be
cleaned by showing the cleaning reminder  after
every shaving session.
Shaving unit: Quick Clean after every
shave
1 Make sure the appliance is switched on.
2 Keep the shaving unit closed.
C
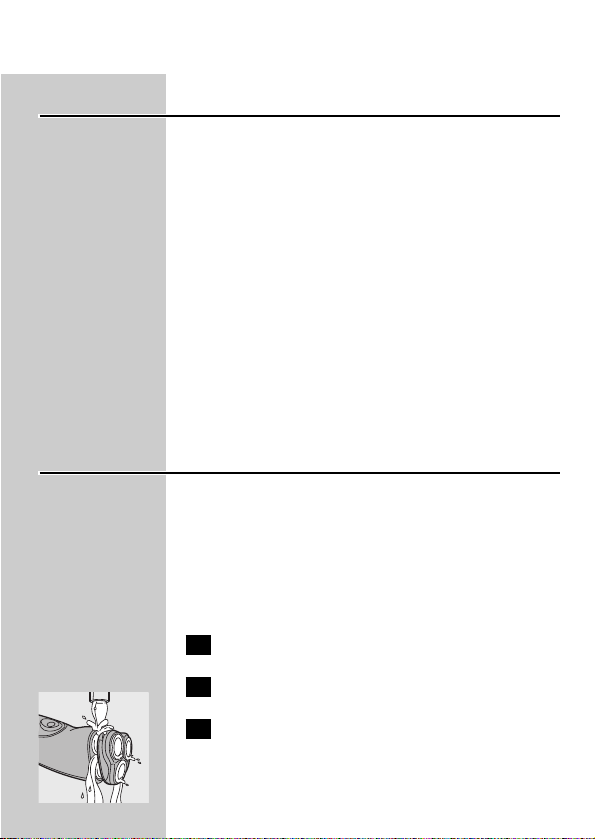
3 Rinse the shaving unit and the hair
chamber under a hot tap by letting the
water run through the openings below the
shaving unit for at least 30 seconds.
ENGLISH 15
Page 14
4 Shake off excess water.
Never dry the shaving unit with a towel or tissue
as this may damage the shaving heads.
Shaving unit and hair chamber: every
week
We advise you to clean the appliance thoroughly
at least once a week to maintain optimal shaving
performance.
You can also follow this procedure when the
shaving heads have to be cleaned.
1 Switch the shaver off.
C
2 Press the release button to open the
shaving unit.
C
3 Rinse the inside of the shaving unit.
C
4 Rinse the outside of the shaving unit.
ENGLISH16
2
Page 15

C
5 Rinse the hair chamber.
6 Make sure the inside of the shaving unit
and the hair chamber have been cleaned
properly.
7 Close the shaving unit and shake off excess
water.
8 Open the shaving unit again and leave it
open to let the appliance dry completely.
Charging stand
1 Unplug the charging stand.
2 Clean the charging stand with a moist
cloth.
Trimmer
1 Clean the outside of the trimmer with the
brush supplied after every use.
The trimmer can also be cleaned by rinsing it
under the tap.
C
2 If the trimmer is used frequently, lubricate
the trimmer teeth with a drop of sewing
machine oil every six months.
ENGLISH 17
Page 16

Storage
Charging stand
C
◗ The shaver can be stored in the charging
stand, even when it is wet.
Always unplug the charging stand before storing
the wet or dry shaver in it.
Pouch
◗ The shaver can be stored in the pouch
supplied.There is also room for two NIVEA
FOR MEN Cool Skin cartridges.The pouch
will provide extra protection during travel.
Hanging cord
◗ The shaver can also be stored by hanging it
from the hanging cord supplied. Storing the
shaver by means of the hanging cord ensures
optimal drying conditions.
Replacement
Replace the shaving heads every two years for
optimal shaving results.
Replace damaged or worn shaving heads with
HQ177 Philishave Cool Skin shaving heads only.
Shaving head check indication
After two years of use the red shaving unit
symbol Πwill blink for 30 seconds during 7
shaves to indicate that you should check the
ENGLISH18
Page 17
condition of the shaving heads.This indication is
based on an average shaving time of 3 minutes
per shave.When the shaving head symbol blinks,
all other symbols and lights are out.When the
shaver is switched off, the shaving unit symbol
disappears.
When the red shaving unit symbol starts blinking,
you should check the shaving heads for possible
damage. If the shaving heads are damaged in any
way, they must be replaced in order to obtain
optimal shaving results.
Replacing the shaving heads
1 Switch the shaver off.
C
2 Press the release button to open the
shaving unit.
C
3 Turn the wheel anticlockwise (1) and
remove the retaining frame (2).
C
4 Remove the shaving heads and place new
ones in the shaving unit.
ENGLISH 19
2
1
Page 18

C
5 Put the retaining frame back into the
shaving unit, press the wheel (1) and turn it
clockwise (2).
Accessories
The following accessories are available:
- HQ800 powerplug.
- HQ177 Philishave Cool Skin shaving heads.
- HQ170 NIVEA FOR MEN Cool Skin
Moisturising Shaving Lotion.
- HQ171 NIVEA FOR MEN Cool Skin Extra
Fresh Shaving Gel.
Environment
The built-in rechargeable battery contains
substances that may pollute the environment.
Disposal of the battery
Remove the battery when you discard the
appliance. Do not throw the battery away with
the normal household waste, but hand it in at an
official collection point.You can also take the
appliance to a Philips service centre, which will
remove the battery for you and will dispose of it
in an environmentally safe way.
Only remove the battery if it is completely empty.
ENGLISH20
1
2
Page 19
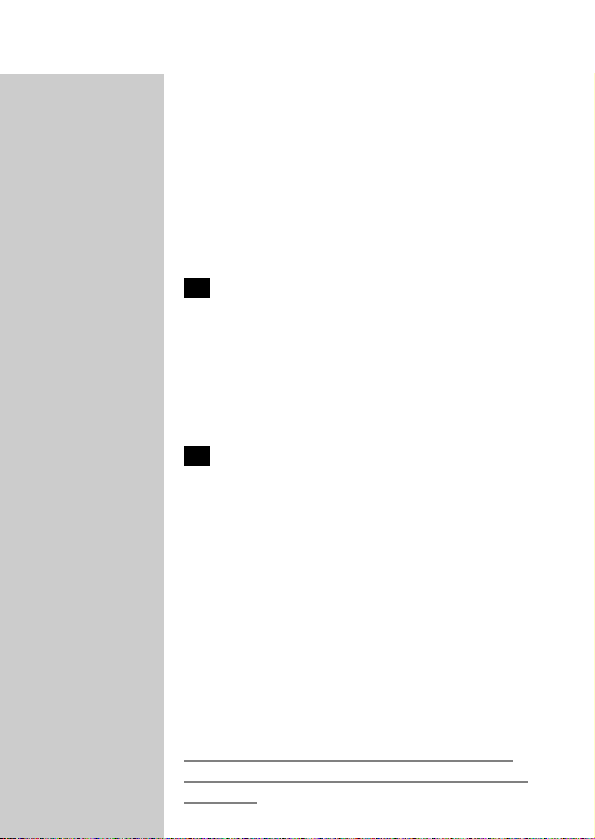
C
1 Let the shaver run until it stops, undo the
screws and open the shaver.
2 Remove the battery.
Do not put the shaver back into the charging
stand after the battery has been removed.
Guarantee & service
If you need information or if you have a
problem, please visit the Philips website at
www.philips.com or contact the Philips Customer
Care Centre in your country (you will find its
phone number in the worldwide guarantee
leaflet). If there is no Customer Care Centre in
your country, turn to your local Philips dealer or
contact the Service Depar tment of Philips
Domestic Appliances and Personal Care BV.
Troubleshooting
1 The shaving heads do not move smoothly
over the skin.
B
Cause: not enough shaving gel/lotion has been
applied.
◗ Press the pump button a few times until
sufficient NIVEA FOR MEN shaving gel/lotion
has been released to allow the shaving heads
to move smoothly over your face again.
2 Reduced shaving performance
ENGLISH 21
Page 20

B
Cause 1: the shaving heads are dirty.
The shaver has not been cleaned immediately
after use and/or has not been rinsed long enough
and/or the water used to rinse the shaver was
not hot enough.
◗ Clean the shaver thoroughly before you
continue shaving. See chapter 'Cleaning and
maintenance'.
B
Cause 2: long hairs are obstructing the shaving
heads.
◗ Press the release button to open the shaving
unit.
C
◗ Turn the wheel anticlockwise (1) and remove
the retaining frame (2).
C
◗ Clean the cutters and guards.
Do not clean more than one cutter and guard at
a time, since they are all matching sets. If you
accidentally mix up the cutters and guards, it may
take several weeks before optimal shaving
performance is restored.
◗ Remove the hairs with the brush supplied.
◗ Put the shaving heads back into the shaving
unit. Put the retaining frame back into the
shaving unit, press the wheel and turn it
clockwise.
◗ To prevent long hairs from obstructing the
shaving heads, remove the shaving heads once
ENGLISH22
2
1
Page 21

a month and clean them with the brush
supplied.
B
Cause 3: the shaving heads are damaged or worn.
◗ Replace the shaving heads. See chapter
'Replacement'.
3 The shaver does not work when the on/off
button is pressed.
B
Cause 1: the battery is empty.
◗ Recharge the battery. See chapter 'Charging'.
B
Cause 2: dried-up shaving gel/lotion is blocking the
shaving heads.
◗ Clean the shaving heads thoroughly. See
chapter 'Cleaning and maintenance'.
B
Cause 3: the shaving heads are damaged.
◗ Replace the shaving heads. See chapter
'Replacement'.
4 The cover of the cartridge compartment
cannot be closed
B
Cause 1: the cartridge has not been inserted
correctly.
ENGLISH 23
Page 22
◗ Insert the cartridge correctly. It only fits
properly into the shaver if the white side of
the pump is pointing upwards.
B
Cause 2: the cartridge has not been pushed far
enough into the shaver.
◗ Press the cartridge until it is properly seated.
5 The NIVEA FOR MEN shaving gel/lotion
has changed colour or has turned watery.
B
Cause: the NIVEA FOR MEN shaving gel/lotion
has not been stored at the right temperature.
◗ Insert a new cartridge.
6 Skin irritation occurs
B
Cause 1: your skin has not yet become
accustomed to this shaving system.
◗ Allow 2-3 weeks for your skin to get
accustomed to this shaving system.
B
Cause 2: the shaving gel/lotion irritates your skin.
◗ Try the other type of NIVEA FOR MEN
cartridge.
◗ Wet your face before shaving with the shaving
gel/lotion.
If the irritation does not disappear within 24
hours, we advise you to stop using the shaving
gel/lotion.
ENGLISH24
Page 23
Úvod
Spolu s holiacim strojčekom nájdete v originálnom
balení holiaceho strojčeka dve rôzne náplne
NIVEA FOR MEN: gél na holenie Extra Fresh
Shaving Gel pre svieži pocit počas a po holení,
azvlhčujúcu emulziu na holenie Moisturising
Shaving Lotion na citlivú pleť. Môžete si tak
vyskúšať ich účinok azistiť, ktorá vyhovuje Vašej
pokožke viac.
Dôležité upozornenie
Pred použitím zariadenia si pozorne prečítajte
tento návod na použitie.
◗ Používajte len dodaný adaptér a stojan na
nabíjanie.
◗ Adaptér transformuje napätie 100-240 V na
bezpečné napätie 24 V.
◗ Súčasťou adaptéra je transformátor.
Neoddeľte adaptér, aby ste ho nahradili iným
typom zástrčky, lebo spôsobíte nebezpečnú
situáciu.
◗ Nepoužívajte poškodený adaptér ani stojan na
nabíjanie.
◗ Ak je adaptér, alebo stojan na nabíjanie
poškodený, vymeňte ho jedine originálnym
príslušenstvom, aby ste sa vyhli
nebezpečenstvu.
◗ Zariadenie nabíjajte, odkladajte a používajte
pri teplote 5 až 35°C.
C
◗ Dbajte, aby sa adaptér nedostal do styku s
vodou.
SLOVENSKY 25
Page 24
◗ Stojan na nabíjanie neponárajte do vody, ani
ho neoplachujte pod tečúcou vodou.
◗ Ak je stojan na nabíjanie pripojený do siete,
nenechávajte v ňom holiaci strojček dlhšie ako
24 hodín.
C
◗ Holiaci strojčekje vodotesnýa môžete ho
umývať pod tečúcou vodou.
Dajte pozor na horúcu vodu. Najskôr vždy
skontrolujte, či nie je príliš horúca,aby ste si
nepopálili ruky.
C
◗ Holiaci strojčekvyhovuje medzinárodným
normámIEC a môžete ho bezpečne používať
vo vani, alebo v sprche.
◗ Pred použitím holiaceho
strojčekaskontrolujte, či holiaci gél alebo
emulzia neobsahujú látky (zloženie je uvedené
na zadnej strane náplne), na ktoré ste
alergický.Ak ste na niektoré zložky gélu
a/alebo emulzie alergický, nepoužívajte ich.
◗ Deklarovaná hodnota emisie hluku tohto
spotrebiča je 63 dB(A), čo predstavuje hladinu
A akustického výkonu vzhľadom na
referenčný akustický výkon 1 pW.
Displej
Displej Living Light
Tento model je vybavený jedinečným displejom
Living Light.Tento 3D farebný LED displej Vám
poskytuje všetky potrebné informácie.
SLOVENSKY26
Page 25
◗ Z displeja odstráňte všetky nálepky a
ochrannú fóliu.
Demonštračný program
Zariadenie Vám poskytuje jedinečný
demonštračný program.
1 Na 7 sekúnd stlačte vypínač.
Automaticky sa spustí demonštračný program.
◗ Keď sa začne demonštračný program, naraz sa
zobrazia všetky symboly. Potom sa na 3
sekundy zobrazí každý symbol samostatne v
nasledujúcom poradí:
„ Nabíjanie batérie/Plne nabitá batéria
Ê Holenie
± Skontrolovať gél/emulziu na holenie
 Upozornenie na čistenie
Ê Holenie
± Skontrolovať gél/emulziu na holenie
„ Vybitá batéria
 Upozornenie na čistenie/„ Vybitá batéria
Œ Kontrola holiacich hláv
B
Celý demonštračný program trvá asi 1minutu
(vrátene prestávok).
2 Demonštračný program môžete
kedykoľvek prerušiť stlačením vypínača.
SLOVENSKY 27
Page 26
Symboly zobrazované počas holenia
Všetky nasledujúce symboly sa zobrazujú počas
holenia a zobrazia sa vždy v rovnakom poradí, aby
ste si pri holení vytvorili opakujúci sa rituál.
Môže sa stať, že ak aj určitú činnosť vykonáte, na
displeji sa zobrazí príslušný symbol činnosti.
B
Keď zapnete holiaci strojček, trikrát blikne symbol
„Skontrolovať gél/emulziu na holenie.Ak je v
náplni dostatočné množstvo gélu alebo emulzie,
symbol ignorujte.
B
Keď holiaci strojček vypnete, trikrát blikne symbol
„Upozornenie na čistenie. Zobrazísa zelený
symbol vodovodného kohútika a začne blikať
zelený symbol prúdu vody.Ak ste už vyčistili
strojček, môžete toto upozornenie ignorovať.
Nabíjanie
Nabíjanie trvá približne 8 hodín.
Ak je stojan na nabíjanie pripojený do siete
nenechávajte v ňom holiaci strojček dlhšie ako 24
hodín.
SLOVENSKY28
Page 27

Indikácia nabíjania
Vybitá batéria
C
◗ Ak je batéria takmer vybitá, počas holenia
svieti červený symbol batérie.
◗ Keď vypnete holiaci strojček a batéria je
takmer vybitá, dvakrát blikne červený symbol
batérie. Blikanie sa s krátkymi prestávkami
zopakuje štyrikrát.
◗ Keď začnete nabíjať holiaci strojček s takmer
vybitou batériou, ešte asi 24 minúty bude
blikať červený symbol batérie.
Plne nabitá batéria
◗ Počas nabíjania bliká zelený symbol batérie
(približne 8 hodín), kým batéria nie je nabitá.
◗ Keď je batéria nabitá,zelený symbol batérie
svieti neprerušovane.
Nabíjanie batérie
Batériu nabite pred prvým použitím holiaceho
strojčeka a keď sa na displeji zobrazí symbol
batéria takmer vybitá.
1 Koncovku kábla zasuňte do otvoru v
stojane na nabíjanie a adaptér pripojte do
siete.
C
2 Holiaci strojček postavte do stojana na
nabíjanie.
Keď strojček postavíte do stojana pripojeného do
siete, automaticky sa vypne.
SLOVENSKY 29
Page 28
3 Keď nabijete batériu na plnú kapacitu,
odpojte zo siete adaptér a koncovku kábla
zo stojana na nabíjanie. Potom môžete
zariadenie v stojane nechať.
Holenie bez pripojenia do siete
Holiaci strojček s úplne nabitou batériou
umožňuje 55 minút holenia bez pripojenia do
siete.
Náplne s holiacim gélom/emulziou
Náplne s gélom/emulziou na holenie NIVEA FOR
MEN sa predávajú v balení obsahujúcom päť
náplní a malú plastovú dávkovaciu pumpičku.
Gél/emulziu na holenie NIVEA FOR MEN
skladujte pri teplotách 0 až +40°C a spotrebujte
do 32 mesiacov.
Používajte len originálne náplne Philishave NIVEA
FOR MEN Cool Skin (HQ170 a HQ171).
Jedna náplň Philishave NIVEA FOR MEN Cool
Skin vystačí na približne 10 holení.
Z hygienických dôvodov Vám odporúčame pri
použití nového balenia náplní použiť aj novú
dávkovaciu pumpičku.
Keď sa náplň spotrebuje a meníte ju za novú,
neodhadzujte dávkovaciu pumpičku. Budete ju
potrebovať pre všetkých päť náplní.
SLOVENSKY30
Page 29
Ak holiaci strojček nebudete viac ako týždeň
používať, vyberte zo strojčeka náplň s
gélom/emulziou na holenie.
Ak ste minuli všetky náplne a neviete, kde kúpiť
nové, kontaktujte Centrum starostlivosti o
zákazníka vo Vašej krajine (viď „Záruka a servis).
Vkladanie náplní
C
1 Keď otvoríte nové balenie náplní, vyberte
pumpičku z obalu a zasuňte ju do novej
náplne tak, aby úplne zapadla (kliknutie).
C
2 Uvoľnite a otvorte kryt priestoru pre
náplne na holiacom strojčeku.
C
3 Náplň s nasadenou dávkovacou pumpičkou
zasuňte do strojčeka. Biela strana
pumpičky musí byť pritom otočená nahor.
4 Zatvorte kryt (kliknutie).
5 Opakovane stlačte žlté tlačidlo pumpičky
na holiacom strojčeku, kým sa neobjaví
malé množstvo gélu/emulzie na holenie
NIVEA FOR MEN. Strojček je pripravený
na holenie.
SLOVENSKY 31
2
1
Page 30

Výmena náplní
Keď sa náplň vyprázdni a potrebujete ju vymeníť
za novú, neodhadzujte dávkovaciu pumpičku.
Budete ju potrebovať pre všetkých päť náplní z
jedného balenia.
C
1 Uvoľnite a otvorte kryt priestoru pre
náplne na holiacom strojčeku.
2 Vyberte prázdnu náplň a pumpičku z
náplne.
C
3 Pumpičku zasuňte do novej náplne tak, aby
úplne zapadla (kliknutie).
C
4 Náplň s nasadenoudávkovacou pumpičkou
zasuňte do strojčeka. Biela strana
pumpičky musí byť pritom otočená nahor.
Zatvorte kryt (kliknutie).
Odkladanie náplní
C
◗ Ostatnénáplne si môžete pohodlne odložiť
tak, že ich zavesíte na držiak.Na stenu držiak
ľahko pripevníte pomocou prísaviek.Takto
budete mať náplne vždy poruke, čo je
výhodné, hlavne ak sa holíte v sprche.
Poznámka: Držiak je vhodný len na odkladanie
náplní. Nikdy naň nezaveste holiaci strojček
Holiaci strojček môže totiž spadnúť a poškodiť sa!
SLOVENSKY32
2
1
Page 31

Použitie holiaceho strojčeka
Holenie
Zapnutie holiaceho strojčeka
1 Aby ste holiaci strojček zapli,stlačte raz
vypínač.
Na displeji trikrát blikne symbol v tvare kvapky
žltej farby ±, aby ste skontrolovali, či je v náplni
gél/emulzia na holenie.
C
2 Stlačením žltého tlačidla pumpičky môžete
aplikovať na pokožku gél/emulziu na
holenie NIVEA FOR MEN.
3 Holiacimi hlavami robte po pokožke rovné
aj krúživé pohyby.
C
4 Počas holenia stláčaním tlačidla pumpičky
pravidelne nanášajte gél/emulziu na
holenieNIVEA FOR MEN, aby sa holiaci
strojček hladko pohyboval po pokožke
Vašej tváre.
Počas holenia nepritláčajte holiaci strojček ku
pokožke veľmi silno.Ak chcete, môžete si pred
holením pokožku navlhčiť.
◗ Optimálny výsledok holenia dosiahnete, ak
budete pravidelne nanášať gél/emulziu na
holenie.
◗ Ak sa gél/krém na holenie v zásobníku minul,
výsledok holenia nebude optimálny.
◗ Môže trvať 2-3 týždne, kým si Vaša pokožka
zvykne na holiaci systém Philishave.
SLOVENSKY 33
Page 32

Vypnutie holiaceho strojčeka
1 Holiaci strojček vypnete jedným stlačením
hlavného vypínača.
Na displeji sa na 6 sekúnd rozsvieti symbol
„Upozornenie na čistenie  (zelený kohútik a
blikajúci prúd vody), ktorý naznačuje, že treba
vyčistiť holiaci strojček.
2 Holiaci strojček vyčistite podľa pokynov v
kapitole „Čistenie a údržba”.
Po každom použití holiaci strojček opláchnite.Ak
holiaci strojček nebudete viac ako týždeň
používať, vyberte zo strojčeka náplň gélu/emulzie
na holenie.
C
3 Aby ste predišli prípadnému poškodeniu
holiaceho strojčeka, po každom použití
nasaďte na holiace hlavy ochranný kryt.
Zastrihávanie
Na úpravu bokombrady a fúzov.
Pripojenie zastrihovača
1 Vypnite zariadenie.
Pred nasadením zastrihovača holiaci strojček
očistite (viď kapitola „Čistenie a údržba”.).
C
2 Stlačte uvoľňovacie tlačidlo (1) a odpojte
holiacu jednotku od holiaceho strojčeka
(2).
SLOVENSKY34
2
1
Page 33

C
3 Zastrihovač mierne nakloňte dozadu.
C
4 Zastrihovač nasaďte na holiaci strojček
(kliknutie).Teraz je strojček pripravený na
zastrihávanie.
5 Zastrihovač zapnete stlačením vypínača.
Odpojenie zastrihovača
1 Vypnite zariadenie.
2 Stlačte uvoľňovacie tlačidlo a odpojte
zastrihovač od holiaceho strojčeka.
3 Holiacu jednotku nasaďte späť na strojček.
Čistenie a údržba
Pravidelné čistenie zabezpečuje lepšie výsledky
holenia.
Aby ste zabezpečili optimálny chod a čistotu
holiaceho strojčeka, musíte po každom holení
holiacu jednotku a komôrku na chĺpky dôkladne
opláchnuť horúcou vodou.
Dajte pozor na horúcu vodu. Najskôr vždy
skontrolujte, či nie je príliš horúca,aby ste si
nepopálili ruky.
SLOVENSKY 35
Page 34

Upozornenie na čistenie
◗ Keď vypnete holiaci strojček, na 6 sekúnd sa
zobrazí symbol upozornenie na čistenie Â
(symbolkohútika zelenej farby a blikajúci prúd
vody), ktorý Vás upozorňuje, aby ste strojček
vyčistili.
◗ Ak sa súčasne objaví červený symbol holiacej
hlavy Œ a upozornenie na čistenie Â, znamená
to, že holiace hlavy sú natoľko znečistené,
alebo poškodené, že by mohli spôsobiť
zablokovanie motora.Očistite ich, alebo, ak sú
poškodené, vymeňte (viď kapitola „Výmena).
B
Odporúčame Vám, aby ste predchádzali tejto
situácii pravidelným čistením holiacich hláv.
Čistenie
Po každom holení Vám holiaci strojček
prostredníctvom symbolu upozornenia na čistenie
 pripomenie, že ho máte vyčistiť.
Holiaca jednotka: Rýchle čistenie po
každom holení
1 Vypnite holiaci strojček.
2 Holiacu jednotku ponechajte zatvorenú.
C
3 Holiacu jednotku a komôrku na chĺpky
vyčistite tak, že necháte aspoň 30 sekúnd
prúdiť cez otvory pod holiacou hlavou
teplú vodu.
SLOVENSKY36
Page 35

4 Z holiacej jednotky otraste vodu.
Holiacu jednotku nesmiete sušiť pomocou
uteráka ani inej tkaniny, pretože by ste mohli
poškodiť holiace hlavy.
Holiaca jednotka a komôrka na
chĺpky: každý týždeň
Aspoň raz týždenne Vám odporúčame strojček
dôkladne vyčistiť, aby ste dosahovali optimálne
výsledky holenia.
Podľa tohto návodu môžete postupovať vždy, keď
treba očistiť holiace hlavy.
1 Vypnite holiaci strojček.
C
2 Stlačte uvoľňovacie tlačidlo a otvorte
holiacu jednotku.
C
3 Opláchnite vnútro holiacej jednotky.
C
4 Opláchnite vonkajšok holiacej jednotky.
SLOVENSKY 37
2
Page 36

C
5 Opláchnite komôrku na chĺpky.
6 Skontrolujte, či jevnútro holiacej jednotky
a komôrka na chĺpky riadne vyčistená.
7 Uzatvorte holiacu jednotku a otraste z nej
prebytočnú vodu.
8 Holiacu jednotku znovu otvorte a nechajte
celé zariadenie riadne osušiť.
Stojan na nabíjanie
1 Stojan na nabíjanie odpojte zo siete.
2 Stojan očistite navlhčenou tkaninou.
Zastrihovač
1 Po každom použití očistite zastrihovač
dodanou kefkou.
Zastrihovač môžete očistiť aj prúdom vody.
C
2 Ak zastrihovač používate častejšie, každých
šesť mesiacov namažte jeho zuby kvapkou
oleja na šijacie stroje.
SLOVENSKY38
Page 37

Odkladanie
V stojane na nabíjanie
C
◗ Holiaci strojček môžete odkladať do stojana
na nabíjanie aj vtedy, keď je mokrý.
Skôr, ako odložíte mokrý, alebo suchý holiaci
strojček do stojana na nabíjanie, odpojte stojan zo
siete.
V cestovnom puzdre
◗ Holiaci strojček môžete odkladať do puzdra.
Je v ňom priestor aj pre dve náplne NIVEA
FOR MEN Cool Skin. Cestovné puzdro slúži
na lepšiu ochranu strojčeka na cestách.
Visiac na závesnej šnúrke
◗ Holiaci strojček môžete odkladať aj tak, že ho
zavesíte za šnúrku.Je to najlepší spôsob, ako
nechať strojček osušiť.
Výmena
Aby ste dosiahli optimálne výsledky holenia,
vymeňte raz za dva roky holiace hlavy.
Poškodené,alebo opotrebované holiace hlavy
nahraďte jedine holiacimi hlavami HQ167 Philips
Cool Skin.
Symbol kontroly holiacich hláv
Po dvoch rokoch používania bude počas siedmych
holení 30 sekúnd blikať červený symbol Kontrola
SLOVENSKY 39
Page 38

holiacich hláv Œ, ktorý vás upozorní, aby ste
skontrolovali stav holiacich hláv. Zobrazenie tohto
symbolu vychádza z predpokladu, že holenie trvá
priemerne 3 minuty. Keď bliká symbol holiacej
hlavy, žiadne iné symboly nesvietia. Keď strojček
vypnete, symbol zmizne.
Ak začne blikať červený symbol holiacej jednotky,
skontrolujte, či holiace hlavy nie sú poškodené. Ak
sú holiace hlavy poškodené, treba ich vymeniť, aby
ste opäť dosahovali optimálny výsledok holenia.
Výmena holiacich hláv
1 Vypnite holiaci strojček.
C
2 Stlačte uvoľňovacie tlačidlo na otvorenie
holiacej jednotky.
C
3 Koliesko otočte proti smeru pohybu
hodinových ručičiek (1) a vyberte
prítlačnýrám (2).
C
4 Vo vnútri holiacej jednotky vymeňte
opotrebované holiace hlavy za nové.
SLOVENSKY40
2
1
Page 39

C
5 Prítlačnýrám vložte späť do holiacej
jednotky, stlačte koliesko (1) a otočte ním
v smere pohybu hodinových ručičiek (2).
Príslušenstvo
V predajnej siete jemožné zakúpiť nasledujúce
príslušenstvo:
- Adaptér HQ800.
- Náhradné holiace hlavy HQ177 Philishave Cool
Skin.
- Emulziu na holenie HQ170 NIVEA FOR MEN
Cool Skin Moisturising Shaving Lotion.
- Gél na holenie HQ171 NIVEA FOR MEN Cool
Skin Extra Fresh Shaving Gel.
Životné prostredie
Zabudovaná dobíjateľná batéria obsahujú látky,
ktoré môžu spôsobiť znečistenie životného
prostredia.
Odstránenie batérie
Kým holiaci strojček vyhodíte, vyberte z neho
batériu. Batériu neodhadzujte spolu s bežným
odpadom, ale zaneste ju na určené zberné miesto.
Holiaci strojček môžete tiež zaniesť do servisného
centra Philips, kde Vám pomôžu batériu vybrať a
odstrániť ju spôsobom bezpečným pre životné
prostredie.
SLOVENSKY 41
1
2
Page 40

Batériu odstráňte len ak je úplne vybitá.
C
1 Holiaci strojček nechajte bežať, kým
nezastane, odskrutkujte skrutky a otvorte
ho.
2 Vyberte batériu.
Ak ste z holiaceho strojčeka vybrali batériu, už ho
nevkladajte do stojana na nabíjanie.
Záruka a servis
Ak potrebujete informácie, alebo máte problém,
prosíme Vás, aby ste navštívili www stránku
spoločnosti Philips - www.philips.com,alebo sa
obrátili na Centrum služieb zákazníkom
spoločnosti Philips vo Vašej krajine (telefónne číslo
Centra nájdete v priloženom celosvetovo
platnom záručnom liste). Ak sa vo Vašej krajine
toto Centrum nenachádza, obráťte sa na
miestneho predajcu výrobkov Philips, alebo
kontaktujte Oddelenie služieb Philips - divízia
domáce spotrebiče a osobná starostlivosť.
Riešenie problémov
1 Holiace hlavy sa po povrchu pokožky
nepohybujú hladko.
B
Príčina: Nepoužili ste dostatok gélu/emulzie na
holenie.
SLOVENSKY42
Page 41

◗ Stlačte niekoľkokrát žlté tlačidlo pumpičky,
aby ste vytlačili potrebné množstvo
gélu/emulzie na holenie NIVEA FOR MEN, aby
sa holiace hlavy hladko pohybovali po povrchu
pokožky.
2 Znížená účinnosť holenia
B
Príčina 1: holiace hlavy sú znečistené.
Neočistili ste holiaci strojček hneď po použití,
neopláchli ste ho riadne vodou a/alebo voda
počas oplachovania nebola dostatočne teplá.
◗ Riadne očistite holiaci strojček a až potom
pokračujte v holení (viď kapitola "Čistenie a
údržba").
B
Príčina 2: dlhé chlpy zavadzajú holiacim hlavám.
◗ Stlačte uvoľňovacie tlačidlo a otvorte holiacu
jednotku.
C
◗ Koliesko otočte proti smeru pohybu
hodinových ručičiek (1) a vyberte
prítlačnýrám (2).
C
◗ Vyčistite holiace nože a kryty holiacej hlavy.
Čistite iba jeden nôž a kryt naraz, pretože tvoria
sadu.Ak ich omylom pomiešate, môže trvať
niekoľko týždňov, kým opäť dosiahnu optimálny
výkon.
◗ Chĺpky odstráňte priloženou kefou.
◗ Holiace hlavy vráťte späť do holiacej jednotky.
Prítlačný rám vložte späť do holiacej jednotky,
SLOVENSKY 43
2
1
Page 42

stlačte koliesko a otočte ním v smere pohybu
hodinových ručičiek.
◗ Aby ste predišli blokovaniu holiacich hláv
dlhými chĺpkami, raz mesačne vyberte holiace
hlavy a očistite ich dodanou kefkou.
B
Príčina 3: holiace hlavy sú poškodené, alebo
opotrebované.
◗ Vymeňte holiace hlavy (viď kapitola
"Výmena").
3 Po stlačení vypínača holiaci strojček
nepracuje.
B
Príčina 1: batéria je vybitá.
◗ Dobite batériu (viď kapitola "Nabíjanie").
B
Príčina 2: zasušený gél/emulzia na holenie blokuje
holiace hlavy.
◗ Riadne očistite holiace hlavy (viď kapitola
„Čistenie a údržba).
B
Príčina 3: holiace hlavy sú poškodené.
◗ Vymeňte holiace hlavy (viď kapitola
"Výmena").
4 Kryt priestoru na náplne sa nedá zatvoriť.
SLOVENSKY44
Page 43

B
Príčina 1: náplň ste nevložili správne.
◗ Vložte riadne náplň. Náplň s dávkovacou
pumpičkou treba vložiť tak,aby biela strana
pumpičky bola obrátená nahor.
B
Príčina 2: náplň ste nezasunuli dostatočne hlboko
do holiaceho strojčeka.
◗ Náplň riadne zasuňte (kliknutie).
5 Gél/emulzia na holenie NIVEA FOR MEN
zmenil farbu, alebo konzistenciu.
B
Príčina: gél/emulzia na holenie NIVEA FOR MEN
nebola skladovaná pri správnej teplote.
◗ Vložte novú náplň.
6 Po holení je pokožka podráždená
B
Príčina 1:Vaša pokožka si ešte nezvykla na tento
spôsob holenia.
◗ Doprajte Vašej pokožke 2-3 týždne čas, aby si
privykla na tento spôsob holenia.
B
Príčina 2: gél/emulzia na holenie dráždi Vašu
pokožku.
◗ Skúste použiť druhý prípravok NIVEA FOR
MEN.
SLOVENSKY 45
Page 44

◗ Pred holením navlhčite pokožku
gélom/emulziou na holenie.
Ak podráždenie nezmizne do 24 hodín
odporúčam Vám, aby ste tento gél/emulziu na
holenie nepoužívali.
SLOVENSKY46
Page 45

Sissejuhatus
Pardliga on kaasas kaks erinevat NIVEA FOR
MEN kassetti: Extra Fresh Shaving gel annab
nahale värskuse raseerimise ajal ja pärast seda
ning Moisturing Shaving Lotion on ettenähtud
tundlikule nahale. Proovige, kumb neist sobib teie
nahatüübiga.
Tähtis
Enne seadme ühendamist vooluvõrku lugege
tähelepanelikult kasutusjuhend läbi ja hoidke alles
edaspidiseks.
◗ Kasutage ainult kaasasolevat pistikut ja
laadimisalust.
◗ Pistik muundab 100-240 voldise
voolutugevuse trafo abil turvaliseks 24voldiseks vooluks.
◗ Pistikul on voolumuundur. Ärge lõigake seda
ära, et asendada teise pistikuga, see võib
põhjustada ohtlikke olukordi.
◗ Ärge kasutage vigastatud pistikut ega
laadimisalust.
◗ Ohtlike olukordade vältimiseks vahetage alati
vigastatud pistik või laadimisalus ainult
originaalmudeli vastu.
◗ Hoidke, laadige ja kasutage seadet
temperatuurivahemikus 5cC ja 35cC.
C
◗ Toitepistik ei tohi märjaks saada.
◗ Ärge kunagi kastke laadimisalust vette ega
loputage seda voolava veega.
◗ Ärge jätke pardlit vooluvõrku ühendatud
laadimisalusele kauemaks kui 24 tundi.
EESTI 47
Page 46

C
◗ Seade on veekindel ja seda võib pesta voolava
veega.
Olge tulise veega ettevaatlik. Kontrollige alati, et
vesi poleks liiga tuline ega tekitaks kätele
põletushaavu.
C
◗ Seade on varustatud rahvusvaheliselt
tunnustatud IEC turvaregulatsiooniga ning
seda võib kasutada nii vannis kui dushi all.
◗ Enne seadme kasutama hakkamist kontrollige,
kas te ei ole seadmega kaasasoleva geeli või
raseerimisvedeliku koostisosade suhtes
allergiline (vt kasseti taga). Ärge kasutage geeli
ja/või raseerimisvedelikku, kui teil on ühe või
mitme koostisosa suhtes allergia.
◗ Müra tase: Lc = 63 dB [A]
Displei
Living Light displei
Sellel mudelil on ainulaadne Living Light displei.
See 3D värviline LED displei annab teile kogu info
spetsiaalse `living light` efekti abil.
◗ Eemaldage kõik kleebised ja kaitsekiled Living
Light displeilt.
Demonstreerimisprogramm
Seadmel on ainulaadne
demonstreerimisprogramm.
EESTI48
Page 47

1 Vajutage sisse/välja nuppu 7 sekundit.
Demonstreerimine algab automaatselt.
◗ Kui demonstreerimine algab, sütivad kõik
märgutuled korraga.Seejärel sütivad pardli
märgutuled järgmises järjestuses:
„ Laadimis-/aku täislaetuse märgutuli
Ê Raseerimine
± Raseerimisgeeli märgutuli
 Puhastamise meeldetuletus
Ê Raseerimine
± Raseerimisgeeli märgutuli
„ Aku on tühi
 Puhastamise meeldetuletus/„ aku on tühi
Œ Pardlipeade kontrollimise märgutuli
B
Kogu demonstreerimisprogramm kestab ligi 1
minuti (intervallid k.a.).
2 Demonstreerimise võite katkestada,kui
vajutate sisse/välja nuppu.
Märgutuled kasutamise ajal
Kõik allpool nimetatud märgutuled on nähtavad
iga raseerimiskorra ajal ning neid kuvatakse samas
järjestuses, mis teeb teie tavapärase
raseerimistoimingu väga lihtsaks.
Selle tulemuseks sütib mõni sümbol vaatamata
sellele, et olete juba vastava toimingu läbi viinud.
B
Kui lülitate seadme sisse, vilgub raseerimisgeeli
märgutuli kolm korda. Kui olete piisavalt lisanud
EESTI 49
Page 48

raseerimisgeeli või -vedelikku, võite märgutuld
ignoreerida.
B
Kui lülitate seadme välja, kuvatakse puhastamise
meeldetuletust. See kujutab rohelist kraani (sütib)
ja rohelist veejuga (vilgub). Kui pardel on enne
väljalülitamist juba puhtaks tehtud, võite seda
meeldetuletust ignoreerida.
Laadimine
Laadimine kestab ligi 8 tundi.
Ärge jätke pardlit vooluvõrku ühendatud alusele
kauemaks kui 24 tundi.
Laadimise märgutuled
Aku saab tühjaks
C
◗ Kui aku hakkab tühjaks saama,põleb
raseerimise ajal punane aku märgutuli.
◗ Kui lülitate pardli välja,kui aku on peaaegu
tühi, vilgub punane aku tuli kaks korda. See
kordub vahepausidega neli korda.
◗ Kui hakkate tühjenevat akut laadima,vilgub
punane aku tuli maksimaalselt 24 minutit.
Aku on täis
◗ Laadimise ajal vilgub roheline aku tuli, kuni aku
on laetud (ligi 8 tundi).
◗ Kui aku on laetud,põleb roheline tuli pidevalt.
EESTI50
Page 49

Seadme laadimine
Pardlit peab laadima enne seadme esmakasutust
ja siis, kui märgutuli annab aku tühjakssamisest
märku.
1 Sisestage väike pistik laadimisalusesse ja
pange toitepistik seina pistikupessa.
C
2 Pange pardel laadimisalusele.
Pardel lülitub automaatselt välja, kui ta on
laadimisalusele pandud.
3 Kui aku on laetud,eemaldage pistik seina
pistikupesast ja tõmmake väike pistik
laadimisalusest välja. Seadme võite jätta
laadmisalusele.
Voolutoiteta raseerimisaeg
Laetud pardliga saab voolutoiteta raseerida kuni
55 minutit.
Kassetid
Kassetid NIVEA FOR MEN raseerimsgeeli/vedelikuga on saadaval karpides, milles on viis
kassetti ja üks väike plastikpump.
Kassettides olevat NIVEA FOR MEN
raseerimisgeeli/-vedelikku võib säilitada 32 kuud,
kui hoiutemperatuur on 0cC ja +40cC vahel.
EESTI 51
Page 50

Kasutage ainult Philshave NIVEA FOR MEN Cool
Skin (HQ170 ja HQ171) kassette.
Üks Philishave NIVEA FOR MEN Cool Skin
kassett sisaldab rasserimisgeeli/-vedelikku, millest
piisab 10 raseerimiskorraks.
Soovitame teil uut viit kassetti kasutama hakates
sisestada ka uus pump.
Ärge visake pumpa minema, kui asendate tühja
kasseti uuega. Pumpa läheb teil veel viie kasseti
jaoks vaja.
Eemaldage raseerimisgeeli/-vedeliku kassett
seadmelt, kui te ei kasuta seadet enam kui üks
nädal.
Kui raseerimisgeeli/-vedeliku kassetid on otsas ja
te ei tea kust uusi hankida, pöörduge oma riigis
oleva kodumasinate hoolduskeskuse poole (vt
`Garantii & teenindusÍ).
Kassettide sisestamine
C
1 Kui alustate uute kassettide kasutamist,
võtke pump kotist välja ja lükake kassetti,
kuni ta lukustub klõpsatusega oma kohale.
EESTI52
Page 51

C
2 Vajutage vabastusnuppu ja avage
kassetipesa kaas.
C
3 Libistage kassett pardlisse. Kui pumba valge
serv on ülespoole, mahub kassett täpselt
pardlisse.
4 Sulgege kaas (kostab klõpsatus).
5 Vajutage mitu korda kollast pumba nuppu,
kuni NIVEA FOR MEN raseerimisgeeli/vedelikku hakkab välja tulema.
Kassettide vahetamine
Ärge visake pumpa minema, kui asendate tühja
kasseti uuega. Pumpa läheb teil veel teiste
kassettide jaoks vaja.
C
1 Vajutage vabastusnuppu ja avage
kassetipesa kaas.
2 Eemaldage tühi kassett ja tõmmake pump
välja.
C
3 Lükake pump uude kassetti, kuni kostab
klõpsatus.
EESTI 53
2
1
2
1
Page 52

C
4 Libistage kassett pardlisse. Kui pumba valge
serv on ülespoole, mahub kassett täpselt
pardlisse. Sulgege kaas.
Kassettide hoidmine
C
◗ Ülejäänud kassette on mugav hoida seadmega
kaasasolevas seinahoidikus. Hoidiku iminupud
võimaldavad hoidikut lihtsal moel seinale
kinnitada. Siis on kassetid alati käepärast, eriti
kui ajate habet vannitoas.
NB! Seinahoidik on ettenähtud ainult kassettide
hoidmiseks. Ärge riputage ega pange sinna pardlit
See võib sealt maha kukkuda!
Seadme kasutamine
Raseerimine
Pardli sisse lülitamine
1 Lülitage pardel sisse vajutades ühe korra
ON/OFF lülitile.
Kollane tilgakujuline raseerimisgeeli sümbol ±
vilgub 3 korda ja annab märku, et tuleb kasutada
raseerimisgeeli/-vedelikku.
C
2 Vajutage kollast pumba nuppu, et nahale
NIVEA FOR MEN raseerimisgeeli/vedelikku lasta.
EESTI54
Page 53

3 Liigutage pardlipäid mööda nahka nii
sirgete kui ringikujuliste liigutustega.
C
4 Raseerimise ajal vajutage aegajalt pumba
nuppu, et NIVEA FOR MEN
raseerimisgeel/-vedelik muudaks
habemeajamistoimingu meeldivaks ja
ühtlaseks.
Ärge vajutage pardlit vastu nahka liiga tugevasti.
Soovi korral võite nägu enne raseerimist niisutada.
◗ Parima raseerimistulemuse saavutamiseks
pumbake raseerimisgeeli/-vedelikku sageli.
◗ Pardel ei täida oma ülesannet optimaalselt, kui
te ei kasutata raseerimisgeeli/-vedelikku.
◗ Teie nahal võib Philishave süsteemiga
harjumiseks kuluda 2-3 nädalat.
Pardli väljalülitamine
1 Vajutage sisse/välja nupule üks kord, et
pardlit välja lülitada.
Puhastamise meeldetuletus  (roheline veekraani
sümbol vilkuva veejoaga) sütib 6 sekundiks ja
tuletab meelde, et pardlit tuleb pesta.
2 Puhastage pardel (vt pt ÍPuhastamine ja
hooldus`).
Loputage pardlit pärast iga kasutuskorda.
Eemaldage kassett, kui te ei kasuta seadet enam
kui üks nädal.
C
3 Vigastuste vältimiseks pange pardlile pärast
iga kasutuskorda kaitsekaas peale.
EESTI 55
Page 54

Piiramine
Põskhabeme ja vuntside piiramine
Piirli ühendamine
1 Lülitage seade välja.
Enne piirli ühendamist tehke pardel puhtaks (vt pt
`Puhastamine ja hooldus`).
C
2 Vajutage vabastusnuppu (1) ja tõmmake
pardlipea seadmelt maha (2).
C
3 Kallutage piirlit veidi tahapoole.
C
4 Paigaldage piirel pardlisse (kostab
klõpsatus). Piirel on nüüd kasutamiseks
valmis.
5 Vajutage sisse/välja nuppu ühe korra ja
aktiveerige piirel.
Piirli eemaldamine
1 Lülitage seade välja.
2 Vajutage vabastusnuppu veelkord,
vabastage piirel ja tõmmake see pardlist
välja.
3 Pange pardlipea tagasi pardlisse.
EESTI56
2
1
Page 55

Puhastamine ja hooldus
Seadme regulaarne puhastamine tagab parema
raseerimistulemuse.
Selleks, et optimaalne raseerimistulemus säiliks ja
pardel puhas oleks, tuleb pärast iga kasutuskorda
pardlipead ja karvakambrit tulise veega loputada.
Olge tulise veega ettevaatlik. Kontrollige, et vesi ei
oleks liiga tuline, vastasel korral võite põletushaavu
saada.
Puhastamise meeldetuletus
◗ Kui olete seadme välja lülitanud,sütib
puhastamise meeldetuletus  (roheline
veekraani sümbol vilkuva veejoaga) 6
sekundiks ja tuletab meelde, et pardel vajab
puhastamist.
◗ Kui sütivad koos punane pardlipea sümbol Œ
ja puhastamise meeldetuletus Â, on pardlipead
nii määrdunud või vigastatud, et võivad
põhjustada mootori peatumise. Kui pardlipead
on mustad, tuleb need puhastada. Kui aga
vigastatud, tuleb välja vahetada (vt pt
`VahetamineÍ).
B
Soovitame ohtlike olukordade vältimiseks
pardlipäid korrapäraselt puhastada.
Seadme puhastamine
Pardel tuletab vastava sümboliga  meelde, et
pärast iga kasutuskorda tuleb seadet puhastada.
EESTI 57
Page 56

Pardlipea:Quick Clean pärast iga
kasutuskorda
1 Veeduge, et seade on sisse lülitatud.
2 Hoidke pardlipead suletuna.
C
3 Loputage pardlipead ja karvakambrit tulise
veekraani all nii, et vesi voolaks vähemalt
30 sekundit allpool olevatest avaustest läbi
4 Liigne vesi raputage välja.
Ärge kunagi kasutage paberist käterätte või
salvrätikuid, sest need võivad rikkuda pardlipäid.
Iga nädal: pardlipea ja karvakamber
Soovitame vähemalt kord nädalas optimaalse
raseerimistulemuse saavutamiseks seadet
põhjalikult puhastada.
Kui pardlipead vajavad puhastamist, läbige sama
toiming.
1 Lülitage pardel välja.
C
2 Vajutage vabastusnuppu ja avage pardlipea.
C
3 Loputage pardlipea sisepind.
EESTI58
2
Page 57

C
4 Loputage pardlipea välispind.
C
5 Loputage karvakamber.
6 Kontrollige, et pardlipea sisepind ja
karvakamber oleksid korralikult puhtad.
7 Sulgege pardlipea ja raputage vesi maha.
8 Avage pardlipea,jätke see avatuks ja laske
seadmel täielikult ära kuivada.
Laadimisalus
1 Võtke laadimisalus vooluvõrgust välja.
2 Puhastage laadimisalust niiske lapiga.
Piirel
1 Puhastage piirli välispinda pärast iga
kasutuskorda kaasasoleva harjaga.
Piirlit võib ka kraani all loputada.
C
2 Kui kasutate piirlit sageli,määrige piirli
hambaid iga kuue kuu tagant tilga
õmblusmasinaõliga.
EESTI 59
Page 58

Hoidmine
Laadimisalus
C
◗ Pardlit võib hoida laadmisalusel, isegi kui seade
on niiske.
Võtke alati laadimisalus vooluvõrgust välja, enne
kui panete sinna niiske või kuiva pardli.
Vutlar
◗ Pardlit võib hoida kaasasolevas vutlaris. Seal
on ruumi ka kahe NIVEA FOR MEN Cool
Skin kasseti jaoks.Vutlaris on mugav seadet
reisile kaasa võtta.
Riputusaas
◗ Pardli võib kaasasoleva riputusaasa külge
rippuma panna. Rippudes on seade alati
korralikult kuiv.
Vahetamine
Parima habemeajamistulemuse tagamiseks
vahetage lõikepäid iga kahe aasta tagant.
Vahetage vigastatud või kulunud lõikpead ainult
HQ177 Philishave Cool Skin lõikepeadega.
Lõikepea märgutuli
Pärast kaheaastast seadme kasutamist hakkab
lõikepea sümbol Œ vilkuma ja teeb seda 30
sekundit 7 raseerimiskorra ajal, näidates,et
EESTI60
Page 59

peaksite kontrollima lõikepeade seisundit. Seda
põhineb arvestusel, et igaks raseerimiskorraks
kulub keskmiselt 3 minutit. Kui lõikepea sümbol
vilgub, kustuvad kõik teised sümbolid ja
märgutuled. Kui seade on välja lülitatud, kaob
lõikepea sümbol.
Kui punane lõikepea sümbol hakkab vilkuma, tuleb
kontrollida, kas lõikepead ei ole vigastatud. Kui see
nii on, vahetage optimaalse raseerimistulemuse
tagamiseks lõikepead.
Lõikepeade vahetus
1 Lülitage seade välja.
C
2 Eemaldage pardlipea pardlist vajutades
vabastusnuppu.
C
3 Keerake ratast vastupäeva (1) ja eemaldage
tugiraam (2).
C
4 Eemaldage lõikepead ja asendage uutega.
EESTI 61
2
1
Page 60

C
5 Pange tugiraam tagasi pardlipeasse,
vajutage ratast (1) ja keerake päripäeva (2).
Lisavarustus
On võimalik järgmine lisavarustus:
- HQ800 pistik
- HQ177 Philishave Cool Skin lõikepead
- HQ170 NIVEA FOR MEN Cool Skin niisutav
raseerimisvedelik
- HQ171 NIVEA FOR MEN Cool Skin Extra
värskendav raseerimisgeel
Keskkonnakaitse
Sissemonteeritud aku sisaldab ümbritsevat
keskkonda saastavaid ained.
Akude kasutusest kõrvaldamine
Eemaldage pardlist akud, kui olete otsustanud
seadme kasutusest kõrvaldada. Ärge viske akusid
muu olmeprahi hulka, vaid viige need
spetsiaalsesse kogumiskohta.Võite akud viia ka
Philipsi hoolduskeskusse, sealsed töötajad
hävitavad akud keskkonnasõbralikul moel.
Eemaldage seadmest vaid täiesti tühi aku.
C
1 Laske pardlil seiskumiseni töötada,
vabastage kruvid ja avage pardel.
EESTI62
1
2
Page 61

2 Eemaldage aku.
Ärge pange pardlit tagasi laadimisalusele pärast
aku eemaldamist.
Garantii ja teenindus
Kui Te vajate teenuseid või informatsiooni või teil
on tekkinud probleeme, külastage Philips internetlehte www.philips.com või võtke ühendus Philipsi
hoolduskeskusega oma riigis (telefoninumbrid
leiate garantiitalongilt). Kui Teie riigis ei ole
hoolduskeskust, pöörduge oma Philipsi toodete
müüja poole või võtke ühendus Philipsi
koduseadmete Teeninduskeskusega.
Vead ja nende kõrvaldamine
1 Lõikepead ei saa mööda nahka sujuvalt
liigutada.
B
Põhjus: ei ole väljastatud piisavalt raseerimisgeeli/vedelikku.
◗ Vajutage pumba nuppu mitu korda, kuni piisav
kogus NIVEA FOR MEN raseerimisgeeli/vedelikku on välja tulnud ja lõikepead liiguvad
mööda nahka jälle sujuvalt.
2 Habemeajamine ei ole piisavalt efektiivne
B
Põhjus 1: lõikepead on umbes.
EESTI 63
Page 62

Pardlit ei ole pärast kasutuskorda puhastatud
ja/või ei ole piisavalt kaua loputatud ja/või ei ole
loputusvesi küllalt tuline olnud.
◗ Enne raseerimise jätkamist puhastage pardlit
põhjalikult.Vt pt `Puhastamine ja hooldamineÍ.
B
Põhjus 2: pikad karvad on ummistanud lõikpea.
◗ Vajutage vabastusnuppu ja avage pardlipea.
C
◗ Keerake ratast vastupäeva (1) ja eemaldage
tugiraam (2).
C
◗ Puhastage terad ja võred.
Puhastage korraga vaid ühe lõikepea tera ja võre,
muidu võivad tera ja võred segi minna. Iga tera on
teritatud oma võre jaoks. Kui terad ja võred
omavahel segi lähevad, võib kuluda mitu nädalat,
enne kui raseerimiskvaliteet taasub.
◗ Eemaldage karvad kaasasoleva harjaga.
◗ Pange lõikepead tagasi pardlipeasse. Pange
tugiraam tagasi lõikepeasse, vajutage ratast ja
keerake päripäeva.
◗ Et pikad karvad ei ummistaks lõikepead,
eemaldage lõikepead kord kuus ja puhastage
kaasasoleva harjaga.
B
Põhjus 3: lõikepead on vigastatud või kulunud.
◗ Vahtage lõikepead.Vt pt `Lõikepea
vahetamine`.
EESTI64
2
1
Page 63

3 Sisse/välja nuppu on vajutatud, kuid pardel
ei hakka tööle.
B
Põhjus 1: aku on tühi.
◗ Laadige aku.Vt pt `Laadimine`.
B
Põhjus 2: kuivanud raseerimisgeel/-vedelik takistab
lõikepeade tööd.
◗ Puhastage lõikepead korralikult puhtaks.Vt pt
`Puhastamine ja hooldusÍ.
B
Põhjus 3: lõikepead on vigastatud.
◗ Vahetage lõikepead.Vt pt `Lõikepea
vahetamine`.
4 Kassetipesa kaas ei lähe kinni.
B
Põhjus 1: kassett ei ole korralikult sisestatud.
◗ Sisestage kassett korralikult.See sobib
seadmesse ainult siis, kui pumba valge serv on
suunatud ülespoole.
B
Põhjus 2: kassett ei ole pardlisse pandud piisavalt
kaugele.
◗ Vajutage kassetti, kuni see täpselt kohale
sobib.
5 NIVEA FOR MEN raseerimisgeel/-vedelik
on värvi muutnud või vesiseks läinud.
EESTI 65
Page 64

B
Põhjus: NIVEA FOR MEN raseerimisgeeli/vedelikku on hoitud valel temperatuuril.
◗ Sisestage uus kassett.
6 Tekib nahaärritus.
B
Põhjus 1: teie nahk ei ole veel harjunud selle
raseerimissüsteemiga.
◗ Laske 2-3 nädalat nahal harjuda selle
raseerimissüsteemiga.
B
Põhjus 2: raseerimisgeel/-vedelik ärritab teie
nahka.
◗ Proovige teist tüüpi NIVEA FOR MEN
kassette.
◗ Niisutage nägu enne raseerimist
geeli/vedelikuga.
Kui nahaärritus ei kao 24 tunni jooksul, soovitame
raseerimisgeeli/-vedeliku kasutamine katkestada.
EESTI66
Page 65

Ievads
Skuvekļa komplektā ir iekļauti divu veidu NIVEA
FOR MEN skūšanās līdzekļi: Extra Fresh skūšanās
želeja atsvaidzinošai sajūtai skūšanās laikā un pēc
tās un mitrinošs skūšanās losjons jutīgai ādai. Jums
ir iespēja tos izmēģināt un atrast piemērotāko
savai ādai.
Svarīgi
Lūdzu izlasiet šīs pamācības pirms ierīces
lietošanas un saglabājiet tās turpmākām uzziņām.
◗ Lietojiet tikai komplektā iekļauto
kontaktspraudni un uzlādēšanas statīvu.
◗ Kontaktspraudnis pārveido 100-240 voltu
spriegumu par drošu, zemu spriegumu, kas
nepārsniedz 24 voltus.
◗ Kontaktspraudnī ir iebūvēts elektrostrāvas
pārveidotājs. Nenoņemiet kontaktspraudni, lai
aizstātu to ar citu, - tas var būt bīstami.
◗ Nelietojiet bojātu kontaktspraudni vai
uzlādēšanas statīvu.
◗ Ja kontaktspraudnis vai uzlādēšanas statīvs ir
bojāts, aizstājiet to ar tāda paša modeļa
piederumu, lai izvairītos no bīstamām
situācijām.
◗ Uzlādējiet, glabājiet un lietojiet ierīci 5cC līdz
35cC temperatūrā.
C
◗ Raugieties, lai kontaktspraudnis nesamirkst.
◗ Nekādā gadījumā neiegremdējiet uzlādēšanas
statīvu ūdenī un neskalojiet to tekošā ūdenī.
◗ Neatstājiet skuvekli elektrotīklam pievienotā
uzlādēšanas statīvā ilgāk par 24 stundām.
LATVISKI 67
Page 66

C
◗ Ierīce ir ūdensdroša, un to var skalot tekošā
ūdenī.
Uzmanieties, lietojot karsto ūdeni. Lai
neapplaucētu rokas, vienmēr pārbaudiet, vai ūdens
nav pārāk karsts.
C
◗ Ierīce atbilst starptautiski atzītajiem IEC
drošības noteikumiem un to var droši lietot
dušā vai vannā.
◗ Pirms ierīces lietošanas pārbaudiet, vai ierīces
komplektā iekļauto skūšanās želejas un losjona
sastāvā ir sastāvdaļas (sk. maisiņa aizmuguri),
pret kurām jums ir alerģija. Nelietojiet
skūšanās želeju un/vai losjonu, ja viena vai
vairākas sastāvdaļas izraisa alerģiju.
◗ Trokšņa līmenis: Lc = 63 dB [A]
Ekrāns
Kustīgās gaismas ekrāns
Šajā modelī ir iebūvēts oriģināls kustīgās gaismas
ekrāns. Šis trīsdimensiju ekrāns sniedz visu
vajadzīgo informāciju ar īpašiem kustīgās gaismas
efektiem.
◗ Noņemiet no kustīgās gaismas ekrāna visas
uzlīmes vai aizsargplēvi.
LATVISKI68
Page 67

Demonstrācijas programma
Šai ierīcei ir unikāla demonstrācijas programma.
1 Turiet slēdzi piespiestu septiņas sekundes.
Demonstrācija tiks sākta automātiski.
◗ Sākoties demonstrācijai, vienlaikus izgaismojas
visas norādes. Pēc tam visas skuvekļa norādes
tiek trīs sekundes parādītas atsevišķi šādā
secībā:
„ uzlāde/uzlādētas akumulatoru baterijas
norāde;
Ê skūšanās;
± skūšanās želejas norāde;
 tīrīšanas atgādinājums;
Ê skūšanās;
± skūšanās želejas norāde;
„ zema akumulatoru baterijas enerģijas līmeņa
norāde;
 tīrīšanas atgādinājums/„ zema akumulatoru
baterijas enerģijas līmeņa norāde;
Œ skuvekļa galviņu pārbaudes norāde.
B
Demonstrācijas programma ilgst aptuveni vienu
minūti (ieskaitot intervālus).
2 Demonstrāciju var apturēt, piespiežot
slēdzi.
Lietošanas laikā redzamās norādes
Visas turpinājumā minētās norādes tiek nemainīgā
secībā parādītas katra skūšanās seansa laikā,
LATVISKI 69
Page 68

tādējādi veicinot regulāras skūšanās ieradumu
veidošanos.
Daži simboli izgaismojas pat tad, ja attiecīgā
darbība jau ir veikta.
B
Ieslēdzot ierīci, skūšanās želejas norāde iemirgojas
trīs reizes. Ja jau ir uzklāts pietiekams daudzums
skūšanās želejas/losjona, varat ignorēt šo norādi.
B
Izslēdzot ierīci, parādās tīrīšanas atgādinājums.
Tīrīšanas atgādinājuma simbols ir zaļš ūdens krāns
(izgaismojas) un zaļa ūdens strūkla (mirgo). Ja
pirms izslēgšanas skuveklis jau ir iztīrīts, varat
ignorēt tīrīšanas atgādinājumu.
Uzlādēšana
Uzlāde ilgst aptuveni astoņas stundas.
Neatstājiet skuvekli elektrotīklam pievienot
uzlādēšanas statīvā ilgāk par 24 stundām.
Uzlādes norādījumi
Akumulatoru baterijas enerģijas
līmenis samazinās
C
◗ Kad akumulatoru baterijas enerģijas līmenis
samazinās, skūšanās laikā akumulatoru
baterijas signāllampiņa spīd sarkanā krāsā.
◗ Ja izslēdzat skuvekli, kad akumulatoru baterija
ir gandrīz izlādējusies, akumulatoru baterijas
signāllampiņa divreiz iemirgojas.Tas notiek
četras reizes ar īsiem intervāliem.
LATVISKI70
Page 69

◗ Ja sākat uzlādēt skuvekli, kamēr akumulatoru
baterijas enerģijas līmenis samazinās,
akumulatoru baterijas signāllampiņa mirgo
sarkanā krāsā ne ilgāk par 24 minūtēm.
Pilnīgi uzlādēta akumulatoru baterija
◗ Uzlādes laikā akumulatoru baterijas
signāllampiņa mirgo zaļā krāsā, līdz
akumulatoru baterija ir pilnīgi uzlādēta
(aptuveni astoņas stundas).
◗ Kad akumulatoru baterija ir pilnīgi uzlādēta,
akumulatoru baterijas signāllampiņa
nepārtraukti spīd zaļā krāsā.
Ierīces uzlāde
Uzlādējiet skuvekli, pirms lietojat to pirmo reizi un
kad skuveklis norāda, ka akumulatoru baterijas
enerģijas līmenis samazinās.
1 Iespraudiet elektrovada kontakttapu
uzlādēšanas statīvā un kontaktspraudni
sienas kontaktrozetē.
C
2 Ievietojiet skuvekli uzlādēšanas statīvā.
Ievietojot skuvekli uzlādēšanas statīvā, tas
automātiski izslēdzas.
3 Kad akumulatoru baterija ir pilnīgi
uzlādēta, izvelciet elektrovada
kontaktspraudni no sienas kontaktrozetes
un kontakttapu no uzlādēšanas statīva.Pēc
tam varat atstāt ierīci uzlādēšanas statīvā.
LATVISKI 71
Page 70

Skūšanās ilgums bez strāvas pievada
Skūšanās ilgums bez strāvas pievada ar pilnīgi
uzlādētu skuvekli ir līdz 55 minūtēm.
Maisiņi
Maisiņi ar NIVEA FOR MEN skūšanās
želeju/losjonu ir pieejami kārbās, kurās atrodas
pieci maisiņi un viens mazs plastmasas sūknītis.
NIVEA FOR MEN skūšanās želeju/losjonu
maisiņos var uzglabāt 32 mēnešus, ja tie tiek
glabāti 0cC līdz +40cC temperatūrā.
Izmantojiet tikai Philishave NIVEA FOR MEN
Cool Skin (HQ 170 un HQ 171 modeļa)
maisiņus.
Viens Philishave NIVEA FOR MEN Cool Skin
maisiņš satur aptuveni 10 skūšanās reizēm
vajadzīgo želejas/losjona daudzumu.
Higiēnas apsvērumu dēļ iesakām ievietot jaunu
sūknīti, kad sākat lietot jaunu piecu maisiņu
komplektu.
Nomainot tukšu maisiņu, neizmetiet sūknīti.Tas
būs nepieciešams visiem pieciem maisiņiem.
Ja nelietosiet skuvekli ilgāk par nedēļu, izņemiet
skūšanās želejas/losjona maisiņu no ierīces.
LATVISKI72
Page 71

Ja skūšanas želejas/losjona maisiņi ir izlietoti un
nezināt, kur tos iespējams iegādāties, vērsieties
Philips pakalpojumu centrā savā valstī (sk. nodaļu
„Garantija un apkope„).
Maisiņu ievietošana
C
1 Sākot jauna maisiņu komplekta lietošanu,
izņemiet sūknīti no iesaiņojuma un bīdiet
to maisiņā, līdz tas nostiprinās, atskanot
klikšķim.
C
2 Piespiediet atbrīvošanas taustiņu un
atveriet maisiņa nodalījuma vāciņu.
C
3 Iebīdiet maisiņu un sūknīti skuveklī.Tas ir
ievietots pareizi, ja sūknīša baltā puse ir
vērsta uz augšu.
4 Aizveriet vāciņu (atskan klikšķis).
5 Vairākas reizes piespiediet dzelteno
sūknīša taustiņu, līdz parādās NIVEA FOR
MEN želeja/losjons.Tagad skuveklis ir
gatavs lietošanai.
LATVISKI 73
2
1
Page 72

Maisiņu nomaiņa
Nomainot tukšu maisiņu, neizmetiet sūknīti.Tas
būs nepieciešams pārējiem maisiņiem.
C
1 Piespiediet atbrīvošanas taustiņu un
atveriet maisiņa nodalījuma vāciņu.
2 Izņemiet tukšo maisiņu un izvelciet sūknīti.
C
3 Iebīdiet sūknīti jaunā maisiņā, līdz tas
nostiprinās, atskanot klikšķim.
C
4 Iebīdiet maisiņu un sūknīti skuveklī.Tas ir
ievietots pareizi, ja sūknīša baltā puse ir
vērsta uz augšu.Aizveriet vāciņu.
Maisiņu uzglabāšana
C
◗ Pārējos maisiņus var ērti uzglabāt, novietojot
komplektā iekļautajā sienas tureklī.Tureklim ir
nelieli gumijas piesūcekņi, kas ļauj to vienkārši
piestiprināt pie sienas.Tādējādi maisiņi
vienmēr atradīsies tuvumā, kas ir ļoti ērti, it
īpaši, ja skujaties dušā.
Uzmanību! Sienas tureklis ir paredzēts tikai
maisiņu uzglabāšanai. Nekādā gadījumā nekariniet
un nenovietojiet skuvekli uz sienas turekļa, jo tas
var nokrist!
LATVISKI74
2
1
Page 73

Ierīces lietošana
Skūšanās
Skuvekļa ieslēgšana
1 Lai ieslēgtu skuvekli, vienreiz piespiediet
slēdzi.
Dzeltenā pilienveida skūšanās želejas signāllampiņa
± trīs reizes iemirgojas, lai norādītu, ka var uzklāt
skūšanās želeju/losjonu.
C
2 Piespiediet dzelteno sūknīša taustiņu, lai
ādai uzklātu NIVEA FOR MEN skūšanās
želeju/losjonu.
3 Gan ar taisnām, gan apļveida kustībām ātri
virziet skuvekļa galviņas pa ādu.
C
4 Skūšanās laikā periodiski piespiediet
sūknīša taustiņu, lai uzklātu papildu NIVEA
FOR MEN skūšanās želeju/losjonu un
skuveklis vienmērīgi slīdētu pa ādu.
Skūšanās laikā nespiediet skuvekli pret ādu pārāk
stipri. Ja vēlaties, varat pirms skūšanās samitrināt
seju.
◗ Lai iegūtu vislabākos skūšanās rezultātus,
regulāri jāuzklāj skūšanās želeja/losjons.
◗ Ja netiek uzklāta skūšanās želeja/losjons,
skūšanās rezultāts būs sliktāks.
◗ Ādai var būt nepieciešamas divas vai trīs
nedēļas, lai pierastu pie Philishave skūšanas
sistēmas.
LATVISKI 75
Page 74

Skuvekļa izslēgšana
1 Lai izslēgtu skuvekli, vienreiz piespiediet
slēdzi.
Sešas sekundes tiek izgaismots tīrīšanas
atgādinājums  (zaļš ūdens krāna simbols ar
mirgojošu ūdens strūklu), lai norādītu, ka skuveklis
jāiztīra.
2 Iztīriet skuvekli (sk. nodaļu „Tīrīšana un
kopšana„).
Pēc katras skūšanās reizes izskalojiet skuvekli. Ja
nelietosiet ierīci ilgāk par nedēļu, izņemiet
skūšanās līdzekļa maisiņu.
C
3 Pēc katras skuvekļa lietošanas reizes
uzlieciet tam aizsargvāciņu, lai pasargātu to
no bojājumiem.
Trimera lietošana
Vaigubārdas un ūsu kopšanai.
Trimera pievienošana
1 Izslēdziet ierīci.
Iztīriet skuvekli pirms trimera pievienošanas (sk.
nodaļu „Tīrīšana un kopšana„).
C
2 Piespiediet atbrīvošanas taustiņu (1) un
novelciet skūšanas bloku no skuvekļa (2).
LATVISKI76
2
1
Page 75

C
3 Nedaudz palieciet trimeru atpakaļ.
C
4 Uzlieciet trimeru skuveklim (atskan
klikšķis).Tagad varat lietot trimeru.
5 Iedarbiniet trimeru, vienreiz piespiežot
slēdzi.
Trimera noņemšana
1 Izslēdziet ierīci.
2 Noņemiet trimeru, vēlreiz piespiežot
atbrīvošanas taustiņu un novelkot trimeru
no skuvekļa.
3 Uzlieciet skūšanas bloku atpakaļ uz
skuvekļa.
Tīrīšana un kopšana
Regulāra tīrīšana nodrošina labāku skūšanas
kvalitāti.
Lai saglabātu vislabākos skūšanās rezultātus un tīru
skuvekli, pēc katras skūšanās reizes ar karstu ūdeni
rūpīgi jāizskalo skūšanās bloks un matiņu
nodalījums.
LATVISKI 77
Page 76

Uzmanieties, lietojot karstu ūdeni. Lai
neapplaucētu rokas, vienmēr pārbaudiet, vai ūdens
nav pārāk karsts.
Tīrīšanas atgādinājums
◗ Izslēdzot skuvekli, sešas sekundes tiek
izgaismots tīrīšanas atgādinājums  (zaļš ūdens
krāna simbols ar mirgojošu ūdens strūklu), lai
atgādinātu, ka skuveklis jāiztīra.
◗ Ja vienlaicīgi izgaismojas sarkanais skūšanas
bloka simbols Œ un tīrīšanas atgādinājums Â,
skuvekļa galviņas ir kļuvušas tik netīras vai
nolietotas, ka tās var bloķēt motora darbību.
Ja skuvekļa galviņas ir netīras, tās jānotīra. Ja
skuvekļa galviņas ir nolietotas, tās jānomaina
(sk. nodaļu „Nomaiņa„).
B
Iesakām izvairīties no šādas situācijas, regulāri tīrot
skuvekļa galviņas.
Tīrīšana
Ar tīrīšanas atgādinājuma  parādīšanos tiek
atgādināts, ka skuveklis jātīra pēc katras lietošanas
reizes.
Skūšanas bloka ātrā tīrīšana pēc
katras skūšanās reizes
1 Pārliecinieties, ka ierīce ir ieslēgta.
2 Turiet skūšanas bloku aizvērtu.
LATVISKI78
Page 77

C
3 Izskalojiet skūšanas bloku un matiņu
nodalījumu karstā, tekošā ūdenī, vismaz 30
sekundes ļaujot ūdenim tecēt caur
atverēm zem skūšanas bloka.
4 Nopuriniet lieko ūdeni.
Nekad nesusiniet skūšanas bloku ar dvieli vai
salveti, jo tā var sabojāt skuvekļa galviņas.
Skūšanas bloka un matiņu nodalījuma
tīrīšana katru nedēļu
Lai skūšanās rezultāts būtu vislabākais, iesakām
rūpīgi iztīrīt ierīci vismaz reizi nedēļā.
Šīs darbības varat veikt arī, ja jātīra skuvekļa
galviņas.
1 Izslēdziet skuvekli.
C
2 Piespiediet atbrīvošanas taustiņu un
atveriet skūšanas bloku.
C
3 Izskalojiet skūšanas bloka iekšpusi.
C
4 Noskalojiet skūšanas bloka ārpusi.
LATVISKI 79
2
Page 78

C
5 Izskalojiet matiņu nodalījumu.
6 Raugieties, lai skūšanas bloka iekšpuse un
matiņu nodalījums tiktu rūpīgi iztīrīti.
7 Aizveriet skūšanas bloku un nopuriniet
lieko ūdeni.
8 Vēlreiz atveriet skūšanas bloku un atstājiet
to atvērtu, lai ierīce pilnīgi izžūtu.
Uzlādēšanas statīvs
1 Atvienojiet uzlādēšanas statīvu no
elektrotīkla.
2 Tīriet uzlādēšanas statīvu ar mitru drānu.
Trimers
1 Pēc katras lietošanas reizes notīriet
trimera ārpusi ar komplektā iekļauto
birstīti.
Trimeru var tīrīt arī, noskalojot to tekošā ūdenī.
C
2 Ja trimers tiek lietots regulāri, ik pēc
sešiem mēnešiem ieziediet trimera zobiņus
ar vienu pilienu šujmašīnu eļļas.
LATVISKI80
Page 79

Uzglabāšana
Uzlādēšanas statīvs
C
◗ Skuvekli var uzglabāt uzlādēšanas statīvā, pat ja
tas ir mitrs.
Pirms ievietot sausu vai mitru skuvekli uzlādēšanas
statīvā, vienmēr atvienojiet uzlādēšanas statīvu no
elektrotīkla.
Somiņa
◗ Skuvekli var uzglabāt komplektā iekļautajā
somiņā.Tajā paredzēta vieta arī diviem NIVEA
FOR MEN skūšanās līdzekļa maisiņiem.
Somiņa nodrošina ierīces īpašu aizsardzību
ceļošanas laikā.
Siksniņa glabāšanai pakarinot
◗ Skuvekli var uzglabāt arī, pakarinot aiz
komplektā iekļautās siksniņas. Uzglabājot
skuvekli, pakarinot aiz siksniņas, tiek
nodrošināti vislabākie žāvēšanas apstākļi.
Nomaiņa
Lai saglabātu skūšanas kvalitāti, ik pēc diviem
gadiem nomainiet skuvekļa galviņas.
Nomainiet bojātas vai nolietotas skuvekļa galviņas
tikai ar HQ 177 Philishave Cool Skin skuvekļa
galviņām.
LATVISKI 81
Page 80

Skuvekļa galviņu pārbaudes norāde
Pēc diviem lietošanas gadiem sarkanais skūšanas
bloka simbols Œ mirgos 30 sekundes septiņu
skūšanās reižu laikā, norādot, ka jāpārbauda
skuvekļa galviņu stāvoklis. Šīs norādes darbība ir
balstīta uz vidējo skūšanās laiku, kas ir trīs minūtes
katru skūšanās reizi. Kad mirgo skuvekļa galviņu
simbols, visi pārējie simboli un signāllampiņas
nodziest. Kad skuveklis ir izslēgts, skūšanas bloka
simbols nozūd.
Ja sarkanais skūšanas bloka simbols sāk mirgot,
jāpārbauda, vai nav bojātas skuvekļa galviņas. Ja
skuvekļa galviņas ir jebkādā veidā bojātas, tās
jānomaina, lai saglabātu vislabāko skūšanās
rezultātu.
Skuvekļa galviņu nomaiņa
1 Izslēdziet skuvekli.
C
2 Lai atvērtu skūšanas bloku, piespiediet
atbrīvošanas taustiņu.
C
3 Pagrieziet ritenīti pretēji pulksteņa rādītāju
kustības virzienam (1) un noņemiet
saturētājrāmi (2).
LATVISKI82
2
1
Page 81

C
4 Izņemiet nolietotās skuvekļa galviņas un
ievietojiet skūšanas blokā jaunas.
C
5 Uzlieciet saturētājrāmi atpakaļ uz skūšanas
bloka, piespiediet ritenīti (1) un pagrieziet
to pulksteņa rādītāju kustības virzienā (2).
Piederumi
Iespējams iegādāties šādus piederumus:
- HQ800 kontaktspraudni;
- HQ177 Philishave Cool Skin skuvekļa galviņas;
- HQ170 NIVEA FOR MEN Cool Skin mitrinošu
skūšanās losjonu;
- HQ171 NIVEA FOR MEN Cool Skin Extra
Fresh skūšanās želeju.
Vides aizsardzība
Iebūvētā akumulatoru baterija satur vielas, kas var
piesārņot vidi.
Atbrīvošanās no akumulatoru baterijas
Izmetot ierīci, izņemiet akumulatoru bateriju.
Neizmetiet akumulatoru bateriju kopā ar
parastiem mājsaimniecības atkritumiem, bet
nododiet to oficiālā savākšanas vietā. Ierīci varat arī
LATVISKI 83
1
2
Page 82

aiznest uz Philips pakalpojumu centru, kur
akumulatoru bateriju izņems un no tās atbrīvosies
videi draudzīgā veidā.
Izņemiet akumulatoru bateriju tikai tad, ja tā ir
pilnīgi izlādējusies.
C
1 Darbiniet skuvekli, līdz tas apstājas,
atskrūvējiet un atveriet skuvekļa korpusu.
2 Izņemiet akumulatoru bateriju.
Pēc tam, kad akumulatoru baterija ir izņemta
nelieciet skuvekli atpakaļ uzlādēšanas statīvā.
Garantija un apkope
Ja nepieciešama palīdzība vai informācija, lūdzu,
izmantojiet Philips mājas lapu internetā
www.philips.com vai sazinieties ar Philips
pakalpojumu centru savā valstī (tā tālruņa numurs
atrodams pasaules garantijas bukletā). Ja jūsu valstī
nav Philips pakalpojumu centra, lūdziet palīdzību
Philips produkcijas izplatītājiem vai Philips
Mājturības un personīgās higiēnas ierīču nodaļas
pakalpojumu dienestam.
Darbības traucējumu novēršana
1 Skuvekļa galviņas neslīd pa ādu vienmērīgi.
B
Iemesls: nav uzklāts pietiekams daudzums
skūšanās želejas/losjona.
LATVISKI84
Page 83

◗ Vairākas reizes piespiediet sūknīša taustiņu,
līdz tiek uzklāts pietiekams daudzums NIVEA
FOR MEN skūšanās želejas/losjona, lai
skuvekļa galviņas atkal varētu vienmērīgi slīdēt
pa ādu.
2 Nepietiekami gluda skūšana
B
Pirmais iemesls: skuvekļa galviņas ir netīras.
Skuveklis nav iztīrīts tūlīt pēc lietošanas un/vai nav
skalots pietiekami ilgi, un/vai ūdens, kurā ir skalots
skuveklis, nav bijis pietiekami karsts.
◗ Pirms turpināt skūšanos, rūpīgi iztīriet
skuvekli. Sk. nodaļu "Tīrīšana un kopšana".
B
Otrais iemesls: gari mati aizsprosto skuvekļa
galviņas.
◗ Piespiediet atbrīvošanas taustiņu un atveriet
skūšanas bloku.
C
◗ Pagrieziet ritenīti pretēji pulksteņa rādītāju
kustības virzienam (1) un noņemiet
saturētājrāmi (2).
C
◗ Notīriet asmenīšus un aizsargdetaļas.
Vienlaikus tīriet tikai vienu asmenīti un
aizsargdetaļu, lai visi asmenīšu komplekti būtu
saskaņoti. Nejauši sajaucot komplektus, būs
nepieciešamas dažas nedēļas, lai atjaunotu ierīces
nevainojamu darbību.
◗ Ar komplektā iekļauto birstīti iztīriet matus
no detaļām.
LATVISKI 85
2
1
Page 84

◗ Ielieciet skuvekļa galviņas atpakaļ skūšanas
blokā. Ielieciet saturētājrāmi atpakaļ skūšanas
blokā, piespiediet ritenīti un pagrieziet to
pulksteņrādītāju kustības virzienā.
◗ Lai garie mati neaizsprostotu skuvekļa
galviņas, vienreiz mēnesī izņemiet skuvekļa
galviņas un notīriet tās ar komplektā iekļauto
birstīti.
B
Trešais iemesls: skuvekļa galviņas ir bojātas vai
nolietotas.
◗ Nomainiet skuvekļa galviņas. Sk. nodaļu
"Nomaiņa".
3 Skuveklis nedarbojas, ja ir piespiests
slēdzis.
B
Pirmais iemesls: akumulatoru baterija ir
izlādējusies.
◗ Uzlādējiet akumulatoru bateriju. Sk. nodaļu
„Uzlādēšana„.
B
Otrais iemesls: skuvekļa galviņas aizsprosto
sažuvusi skūšanās želeja/losjons.
◗ Rūpīgi notīriet skuvekļas galviņas. Sk. nodaļu
„Tīrīšana un kopšana„.
B
Trešais iemesls: skuvekļa galviņas ir bojātas.
LATVISKI86
Page 85

◗ Nomainiet skuvekļa galviņas. Sk. nodaļu
"Nomaiņa".
4 Maisiņa nodalījuma vāciņu nevar aizvērt
B
Pirmais iemesls: maisiņš nav pareizi ievietots.
◗ Ievietojiet maisiņu pareizi.Tas ir ievietots
skuveklī pareizi,ja sūknīša baltā puse ir vērsta
uz augšu.
B
Otrais iemesls: maisiņš nav pietiekami dziļi iebīdīts
skuveklī.
◗ Spiediet maisiņu, līdz tas nostiprinās.
5 NIVEA FOR MEN skūšanās želeja/losjons
mainījis krāsu vai kļuvis ūdeņains.
B
Iemesls: NIVEA FOR MEN skūšanās želeja/losjons
nav glabāts pareizā temperatūrā.
◗ Ievietojiet jaunu maisiņu.
6 Rodas ādas kairinājums
B
Pirmais iemesls: āda vēl nav pieradusi pie šīs
skūšanās sistēmas.
◗ Ļaujiet ādai pierast pie šīs skūšanās sistēmas
2-3 nedēļu laikā.
B
Otrais iemesls: skūšanās želeja/losjons kairina ādu.
LATVISKI 87
Page 86

◗ Izmēģiniet otru NIVEA FOR MEN skūšanās
līdzekli.
◗ Pirms skujaties, izmantojot skūšanās
želeju/losjonu, samitriniet seju.
Ja kairinājums neizzūd 24 stundu laikā, iesakām
pārtraukt skūšanās želejas/losjona lietošanu.
LATVISKI88
Page 87

Įvadas
Barzdaskutę galima naudoti su dviem skirtingomis
NIVEA FOR MEN kasetėmis: Extra Fresh Shaving
Gel (ypatingai gaivus skutimosi gelis), suteikiančia
gaivumą skutimosi metu ir po skutimosi bei
Moisturising Shaving Lotion (drėkinamasis
skutimosi losjonas), skirtu jautriai odai.Tai suteikia
galimybę pabandyti ir atrasti, kuris geriausiai tinka
jūsų odai.
Svarbu žinoti
Prieš paradėdami naudoti aparatą, atidžiai
perskaitykite šias naudojimo instrukcijas ir
saugokite jas tolimesniam naudojimui.
◗ Barzdaskutės pakrovimui naudokite tik
rinkinyje esantį kištuką ir pakrovimo stovą.
◗ Kištukas transformuoja 100-240 voltų srovę į
saugią žemesnę nei 24 voltų srovę.
◗ Maitinimo laide yra transformatorius. Niekada
nepjaukite maitinimo laido, norėdami jį
pakeisti nauju, nes galite sukelti pavojingą
situaciją.
◗ Nenaudokite pažeisto kištuko ar pakrovimo
stovo.
◗ Jei yra pažeistas kištukas ar pakrovimo stovas,
kad išvengti pavojaus, visada juos keiskite tik
originaliomis detalėmis.
◗ Kraukite, saugokite ir naudokite aparatą
temperatūroje nuo 5cC iki 35cC.
C
◗ Patikrinkite, ar laidas nesudrėkęs.
LIETUVIŠKAI 89
Page 88

◗ Niekada neįmerkite pakrovimo stovo į
vandenį ir neskalaukite jo po tekančiu
vandeniu.
◗ Nepalikite aparato,įjungto į pakrovimo stovą,
ilgiau nei 24 valandas.
C
◗ Šis aparatas yra nepralaidus vandeniui ir jį
galima plauti po tekančiu vandeniu.
Būkite atsargūs su karštu vandeniu.Visada
patikrinkite, ar vanduo nėra per daug karštas, kad
nenusidegintumėte rankų.
C
◗ Aparatas atitinka patvirtintiems tarptautiniams
IEC saugumo reikalavimams ir juo galima
saugiai naudotis vonioje ar duše.
◗ Prieš pradedant naudoti aparatą, patikrinkite,
ar esančių rinkinyje gelio ir losjono sudėtyje
(žiūrėkite kasetės apačioje) yra medžiagų,
kurioms esate alergiškas. Nenaudokite gelio
ir/ar losjono jei esate alergiškas vienam ar
keliems komponentams.
◗ Triukšmo lygis: Lc = 63 dB(A)
Ekranas
Gyvas šviečiantis ekranas
Šiame modelyje yra unikalus gyvas šviečiantis
ekranas. Šis spalvotas trimatisekranas, suteikia visą
jums reikiamą informaciją, specialiai "gyvos šviesos"
efektais.
LIETUVIŠKAI90
Page 89

◗ Nuo ekrano nuimkite lipdukus ar apsauginę
plėvelę.
Demonstarcinė programa
Šiame aparate yra unukali deminstracinė
programa.
1 7 sekundes laikykite nuspaudę
įjungimo/išjungimo mygtuką.
Demonstracija prasidės automatiškai.
◗ Kai demonstracija prasideda, užsidega visų
nurodymų šviesos vienu metu.Tada visi
barzdaskutės nurodymai demonstruojami
atskirai po 3 sekundes sekančia tvarka:
„ Pakrovimas/Baterijos nurodymai
Ê Skutimas
± Skutimosi gelio nurodymai
 Valymo priminimas
Ê Skutimas
± Skutimosi gelio nurodymai
„ Baterijos sekimo nurodymai
 Valymo priminimas/„ Baterijos sekimo
nurodymai
Œ Skutimo galvutės tikrinimo nurodymai
B
Visa demonstracija trunka apie 1 minutę (su
pertraukomis)
2 Demonstraciją galite sustabdyti,
paspausdami įjungimo/išjungimo mygtuką.
LIETUVIŠKAI 91
Page 90

Nurodymai naudojimo metu
Visi nurodymai, išvardinti žemiau, rodomi
kiekvieno skutimosi metu ta pačia tvarka, kas
padeda lengviau atsiminti skutimosi eigą.
Kai kurie simboliai užsidegs tik tada, kai jūs atliksite
atitinkamus veiksmus.
B
Kai įjungsite aparatą, skutimosi gelio nurodymai
tris kartus sublykčios. Jei jūs jau pakankamai
naudojate gelį ar losjoną, nekreipkite į tai dėmesio.
B
Kai išjungiate aparatą, matote valymo priminimą.
Valymo priminimo ženklas yra žalias čiaupas
(švoečiantis) ir žalia vandens čiurkšlė (blykčioja). Jei
išvalėte aparatą prieš jį išjungdami, nekreipkite
dėmesio į priminimą.
Pakrovimas
Pakrovimas trunka maždaug 8 valandas.
Nepalikite barzdaskutės įjungtos į elektros tinklą
ilgiau nei 24 valandas.
Pakrovimo nurodymai
Baterija senka
C
◗ Kai baterija senka, skutimosi metu užsidega
raudona baterijos lemputė.
◗ Išjungus barzdaskutę, kai baterija yra beveik
tuščia, baterijos lemputė du kartus raudonai
LIETUVIŠKAI92
Page 91

sublyksi.Tai atsitinka keletą kartų su
pertraukomis.
◗ Kai pradedate krauti barzdaskutę, baterijai
senkant, raudona beterijos lemputė blyksi
maksimaliai 24 minutes.
Pilnai pakrauta baterija
◗ Pakrovimo metu baterijos lemputė blysi žaliai
iki baterija pilnai pasikrauna (maždaug 8
valandas).
◗ Baterijos lemputė nepertraukiamai šviečia
žaliai, kai baterija yra pilnai pakrauta.
Aparato pakrovimas
Aparatą kraukite prieš naudojant pirmą kartą ir
kada barzdaskutė parodo, kad baterija senka.
1 Mažą kištuką įkiškite į pakrovimo stovą ir
kištuką įkiškite į elektros lizdą.
C
2 Barzdaskutę įdėkite į pakrovimo stovą.
Barzdaskutė automatiškai išsijungs, kai tik ją
padėsite į pakrovimo stovą.
3 Kai baterijos pilnai pasikraus, iš elektros
lizdo ištraukite kištuką ir mažąjį kištuką
ištraukite iš pakrovimo stovo.Aparatą
dabar galite palikti pakrovimo stove.
Skutimasis be laido
Pilnai pakrauta barzdaskute be laido galite skustis
iki 55 minučių.
LIETUVIŠKAI 93
Page 92

Kasetės
Kasetes su NIVEA FOR MEN skutimosi
geliu/losjonu galite įsigyti dėžutėse po penkias
kasetes ir viena maža plastikine pompa.
NIVEA FOR MEN skutimosi gelį/losjoną kasetėse
galite saugoti 32 mėnesius temperatūroje nuo
0cC iki +40cC.
Naudokite tik NIVEA FOR MEN Cool Skin
(HQ170 ir HQ171) kasetes.
Vienoje NIVEA FOR MEN Cool Skin kasetėje
gelio/losjono pakanka nussiskusti maždaug 10
kartų.
Kad būtų higieniškiau, mes patariame kiekvieną
kartą, kai pradeda naudoti naują kasečių
komplektą, įstatyti naują pompą.
Kai keičiate tuščią kasetę, neišmeskite pompos. Jos
jums reikės visoms penkioms kasetėms.
Jei nesinaudojate barzdaskute ilgiau nei savaitę, iš
barzdaskutės išimkite kasetę su geliu/losjonu.
Jei baigiasi skutimosi gelio/losjono kasetės ir
nežinote, kur jų nusipirkti, susisiekite su kliantų
aptarnavimo centru savo šalyje (žiūrėkite
"Garantija ir aptarnavimas").
LIETUVIŠKAI94
Page 93

Kasetės įstatymas
C
1 Kai pradeda naudoti naują kasečių
komplektą, išimkite pompą ir įstatykite į
naują kasetę, pompą stumkite iki pasigirs
spragtelėjimas.
C
2 Paspauskite atjungimo mygtuką ir
atidarykite kasetės korpusą.
C
3 Kasetę su pompa įstumkite į barzdaskutę. Ji
bus įstumta teisingai tada, kai balta pompos
pusė bus nukreipta į viršų.
4 Uždarykite dangtelį (išgirsite
spragtelėjimą).
5 Paspaukite geltoną pompos mygtuką keletą
kartų, kol pasirodys NIVEA FOR MEN
skutimosi gelis/losjonas. Dabar barzdaskutė
yra paruošta naudojimui.
Kasečių pakeitimas
Kai keičiate tuščią kasetę, neišmeskite pompos. Jos
jums reikės kitoms kasetėms.
C
1 Paspauskite atjungimo mygtuką ir
atidarykite kasetės korpuso dangtelį.
2 Išimkite tuščią kasetę ir ištraukite pompą.
LIETUVIŠKAI 95
2
1
2
1
Page 94

C
3 Pompą įstatykite į naują kasetę, stumdami
iki pasigirs spragtelėjimas.
C
4 Kasetę su pompa įstumkite į barzdaskutę. Ji
bus įstumta teisingai tada, kai balta pompos
pusė bus nukreipta į viršų. Uždarykite
dangtelį.
Kasečių saugojimas
C
◗ Kasetes galite patogiai saugoti, pritvirtinę jas
rinkinyje esančiais laikikliais prie sienos.
Laikiklis turi pritraukiamą dangtelį, kurio
pagalba jį lengvai pritvirtinsite prie sienos. Šiuo
atveju visada turėsite kasetes po ranka, kas yra
labai patogu, kai skutatės duše.
Įsidėmėkite: laikiklis pritaikytas tik kasečių laikymui
Niekada nekabinkite barzdaskutės ant šio laikiklio
Jei pakabinsite, barzdaskutė gali nukristi!
LIETUVIŠKAI96
Page 95

Aparato naudojimas
Skutimasis
Barzdaskutės įjungimas
1 Įjunkite barzdaskutę, vieną kartą
paspausdami jungiklį.
Geltona lašo formos skutimosi gelio lempa ±
blyksi 3 kartus, pažymėdama, kad galima naudoti
skutimosi gelį/losjoną.
C
2 Paspauskite geltoną pompos mygtuką, kad
odą sudrėkintų NIVEA FOR MEN
skutimosi gelis/losjonas.
3 Skutimo galvutėmis braukite per odą,
darydami tiesius ir apvalius judesius.
C
4 Skutimosi metu dažniau paspauskite
pompą, kad odą sudrėkintų NIVEA FOR
MEN skutimosi gelis/losjonas ir
barzdaskutė lengviau slystų oda.
Skutimosi metu nespauskite barzdaskutės stipriai
prie odos. Jei norite, prieš skutantis, galite
sudrėkinti veido odą.
◗ Kad gerai nusiskustumėte, skutimosi
gelį/losjoną purkškite dažniau.
◗ Barzdaskutė optimaliai neveikia, jei
nenaudojate skutimosi gelio/losjono.
◗ Jūsų odai gali prireikti 2 - 3 savaičių tam,kad
priprastų prie "Philishave" sistemos.
LIETUVIŠKAI 97
Page 96

Barzdaskutės išjungimas
1 Išjunkite barzdaskutę, paspausdami
išjungimo/įjungimo mygtuką dar kartą.
Valymo priminimas  (žalias čiaupo simbolis su
blyksinčia vandens čiurkšle) šviečia 6 sekundes,
primindamas, kad laikas valyti barzdaskutę.
2 Išvalykite barzdaskutę (žiūrėkite skyrelį
"Valymas ir priežiūra").
Barzdaskutę plaukite po kiekvieno naudojimo. Jei
nesinaudojate barzdaskute ilgiau nei savaitę,
nuimkite kasetę.
C
3 Kad nepažeistumėte barzdaskutės,
kiekvieną kartą ant jos uždėkite apsauginį
gaubtelį.
Korektorius
Išpuoselėtoms žandenoms ir ūsams.
Korektoriaus pritvirtinimas
1 Išjunkite aparatą.
Prieš pritvirtinant korektorių, išvalykite
barzdaskutę (žiūrėkite skyrelį "Valymas ir
priežiūra").
C
2 Paspauskite atjungimo mygtuką (1) ir iš
barzdaskutės ištraukite skutimo įtaisą (2).
LIETUVIŠKAI98
2
1
Page 97

C
3 Truputį pakreipkite korektorių atgal.
C
4 Uždėkite korektorių ant barzdaskutės
(išgirsite spragtelėjimą). Dabar galite
naudoti korektorių.
5 Korektorių įjunkite, kartą paspausdami
įjungimo/išjungimo mygtuką.
Korektoriaus nuėmimas
1 Išjunkite aparatą.
2 Korektorių nuo barzdaskutės nutraukite
vėl paspausdami atjungimo mygtuką.
3 Vėl ant barzdaskutės uždėkite skutimo
įtaisą.
Valymas ir priežiūra
Reguliarus valymas užtikrina geresnį skutimą.
Kad barzdaskutė veiktų nepriekaištingai ir būtų
švari, po kiekvieno naudojimo karštu vandeniu
atidžiai išplaukite skutimo įtaisą ir plaukų skyrelį.
Būkite atsargūs su karštu vandeniu.Visada
patikrinkite, ar vanduo nėra per daug karštas, kad
nenusidegintumėte rankų.
LIETUVIŠKAI 99
Page 98

Valymo priminimas
◗ Kai išjungiate barzdaskutę, valymo priminimas
 (žalias čiaupo simbolis su blyksinčia vandens
čiurkšle) šviečia 6 sekundes, pažymėdamas,
kad laikas valyti barzdaskutę.
◗ Jei kartu šviečia raudonas skutimo įtaiso
simbolis Œ ir valymo priminimas  skutimo
galvutės yra labai nešvarios arba pažeistos ir
gali užblokuoti variklį. Jei skutimo galvutės yra
nešvarios, turite jas išvalyti. Jei skutimo
galvutės yra pažeistos, turite jas pakeisti
(žiūrėkite skyrelį "Pakeitimas").
B
Mes patariame vengti tokių situacijų ir reguliariai
valyti barzdaskutę.
Valymas
Barzdaskutė jums primins, kad ją reikia valyti,po
kiekvieno skutimosi parodydama valymo
priminimą Â
Skutimo įtaisas: greitas valymas po
kiekvieno skutimosi
1 Patikrinkite, ar aparatas yra įjungtas.
2 Skutimo įtaisą laikykite uždarytą.
C
3 Skutimo įtaisą ir plaukų skyrelį plaukite po
karštu tekančiu vandeniu, leisdami
vandeniui tekėti pro skutimo įtaiso
kiaurymes mažiausiai 30 sekundžių.
LIETUVIŠKAI100
Page 99

4 Nupurtykite likusį vandenį.
Niekada nevalykite skutimo įtaiso rankšluoščiu ar
audiniu, nes tai gali pakenkti skutimo galvutei.
Skutimo įtaisas ir plaukų skyrelis:
kiekvieną savaitę
Kad geriausiai skustumėtes, mes patariame aparatą
kruopščiai valyti mažiausiai vieną kartą per savaitę.
Taip pat valykite ir skutimo galvutes.
1 Išjunkite barzdaskutę.
C
2 Norėdami atidaryti skutimo įtaisą,
paspauskite atjungimo mygtuką.
C
3 Išplaukite skutimo įtaiso vidų.
C
4 Nuplaukite skutimo įtaiso išorę.
C
5 Išplaukite plaukų skyrelį.
6 Įsitikinkite, kad skutimo įtaiso vidus ir
plaukų skyrelis yra tinkamai išvalyti.
LIETUVIŠKAI 101
2
Page 100

7 Uždarykite skutimo įtaisą ir išpurtykite
likusį vandenį.
8 Atidarykite skutimo įtaisą ir palikite jį
atvirą, kol aparatas pilnai išdžius.
Pakrovimo stovas
1 Išjunkite pakrovimo stovą.
2 Pakrovimo stovą valykite drėgna
skepetaite.
Korektorius
1 Po kiekvieno naudojimo,rinkinyje esančiu
šepetėliu išvalykite korektorių.
Korektorių taip pat galite plauti po tekančiu
vandeniu.
C
2 Jei dažnai naudojate korektorių,kas šešis
mėnesius sutepkite korektoriaus dantukus
lašeliu mašininės alyvos .
Saugojimas
Pakrovimo stovas
C
◗ Barzdaskutę galite saugokite pakrovimo stove
net tada, kai ji yra šlapia.
Visada išjunkite stovą, kai jame saugote sausą ar
šlapią barsdaskutę.
LIETUVIŠKAI102
 Loading...