

Page 1

ENGLISH 4
DEUTSCH 15
FRANÇAIS 26
NEDERLANDS 37
ESPAÑOL 48
ITALIANO 59
PORTUGUÊS 70
TÜRKÇE 81
HQ6849
Page 2
Important
Read these instructions for use carefully before
using the appliance and save them for future
reference.
◗ Only use the mains cord supplied.
◗ Do not use a damaged mains cord.
◗ If the mains cord is damaged, always have it
replaced by one of the original type in order
to avoid a hazard.
◗ The appliance is equipped with an automatic
voltage selector and is suitable for mains
voltages ranging from 100 to 240 volts.
◗ Charge, store and use the appliance at a
temperature between 5cC and 35cC.
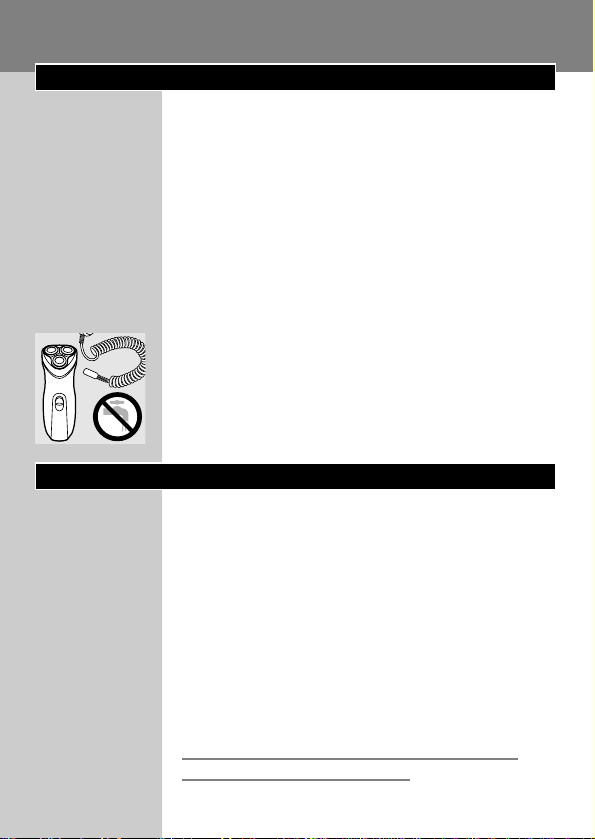
◗ Do not recharge the shaver in a closed pouch.
C
◗ Keep the appliance and the mains cord dry.
Charging
Make sure the appliance is switched off before
you start charging it.
When you charge the shaver for the first time or
after a long period of disuse, let it charge
continuously for 4 hours. Charging normally takes
approx. 1 hour.
You can also shave without charging by
connecting the shaver to the mains.
Do not leave the appliance connected to the
mains for more than 24 hours.
ENGLISH4
Page 3
Charge indications
Charging
C
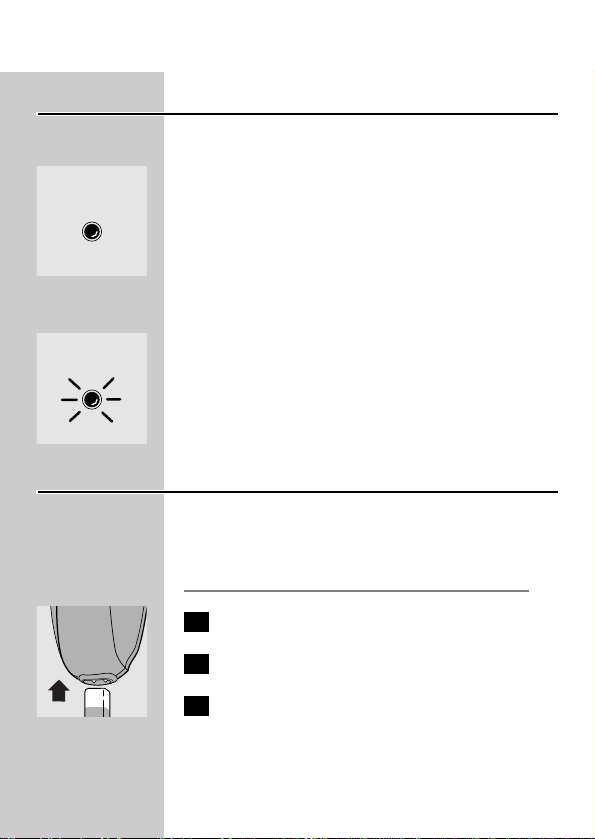
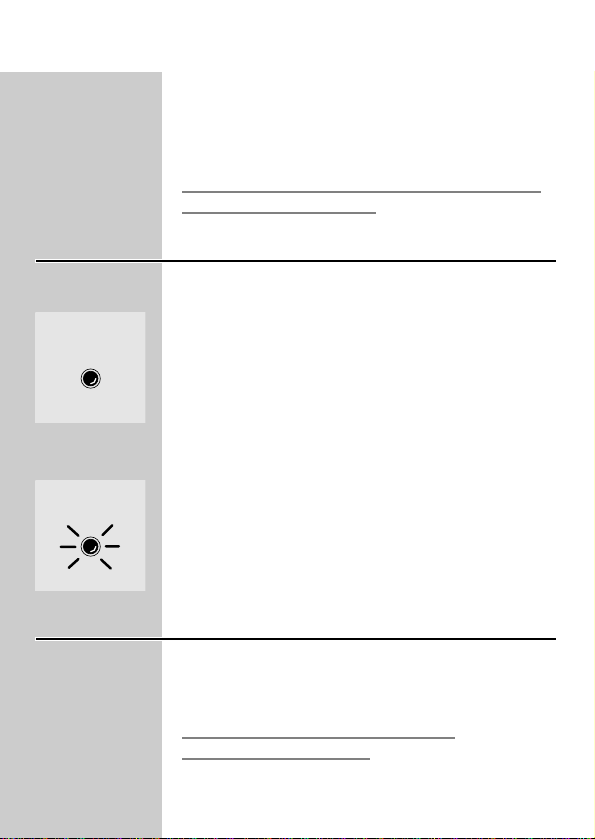
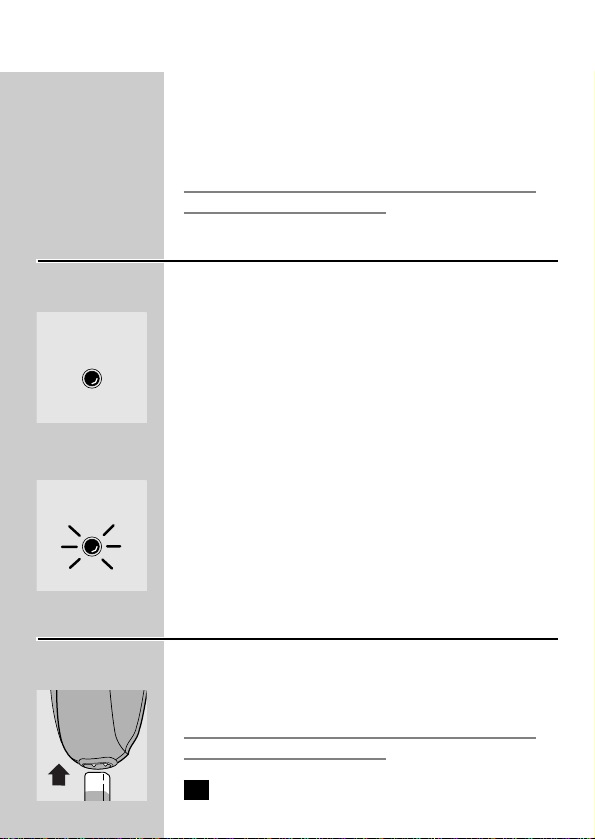
◗ As soon as you start charging the empty
shaver, the green pilot light goes on.
Battery fully charged
C
◗ When the battery has been fully charged, the
green pilot light starts blinking.
Charging the appliance
Charge the appliance when the motor stops or
starts running slower.
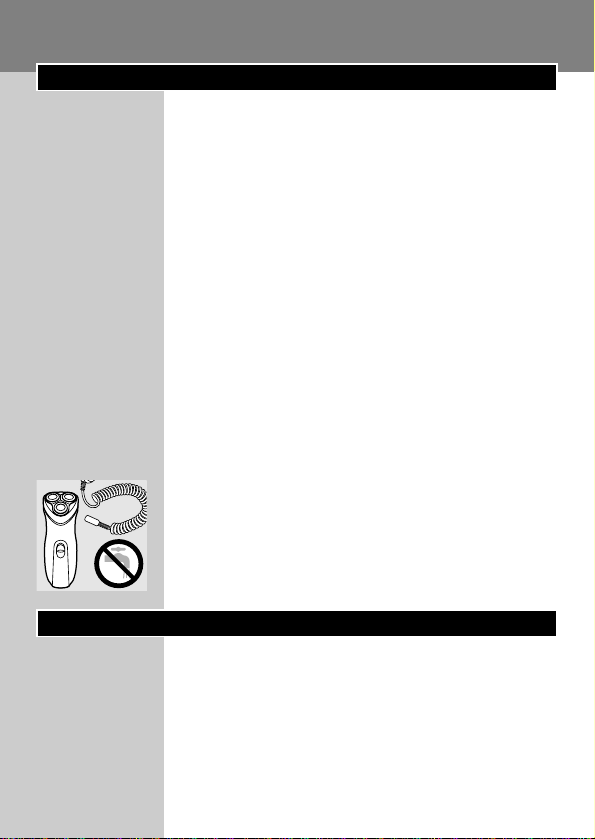
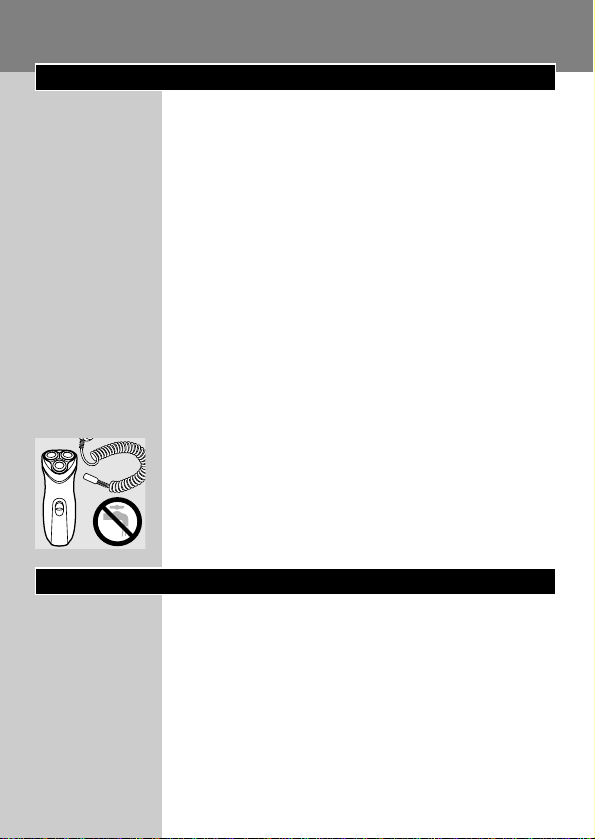
Do not recharge the shaver in a closed pouch.
C
1 Put the appliance plug in the shaver.
2 Put the mains plug in the wall socket.
3 Remove the mains plug from the wall
socket and pull the appliance plug out of
the shaver when the battery has been fully
charged.
ENGLISH 5
CHARGE
CHARGE
Page 4
Cordless shaving time
A fully charged shaver has a cordless shaving time
of up to 30 minutes.
Using the appliance
Shaving
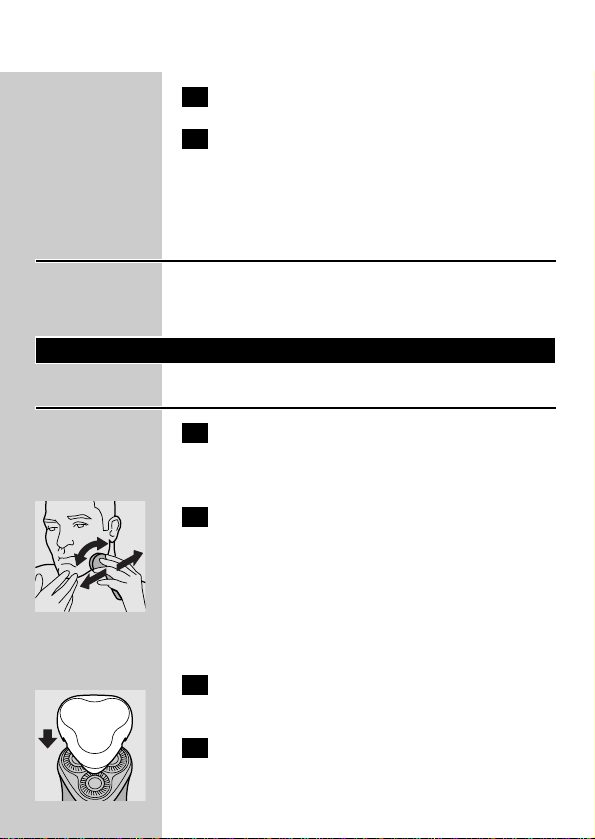
1 Switch the shaver on by pushing the on/off
slide to position I.
C
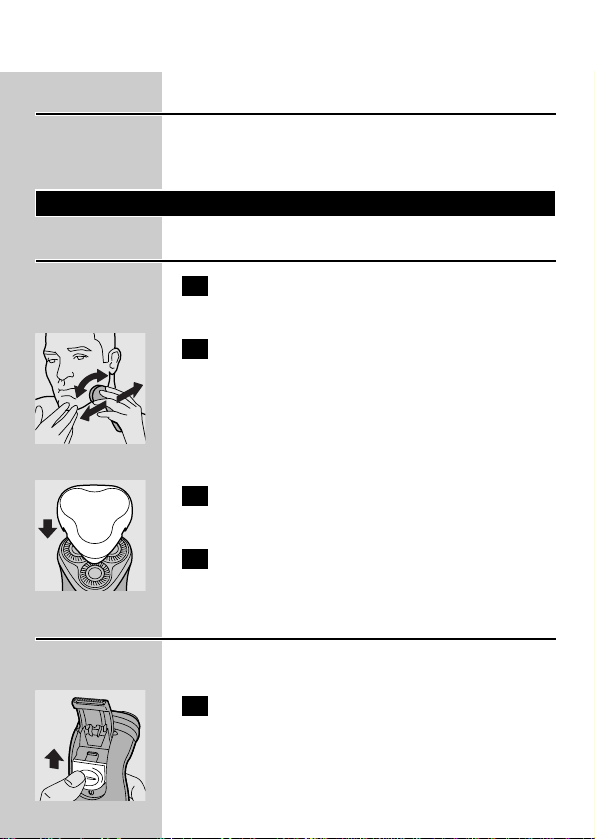
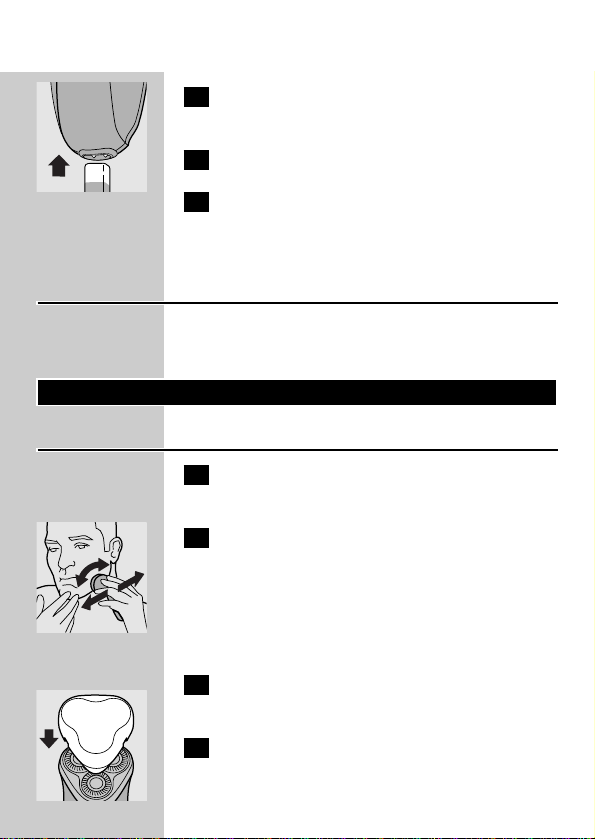
2 Move the shaving heads quickly over your
skin, making both straight and circular
movements.
Shaving on a dry face gives the best results.
Your skin may need 2 or 3 weeks to get
accustomed to the Philips system.
3 Switch the shaver off by pushing the on/off
slide to position 0.
C
4 Put the protection cap on the shaver every
time you have used it, to prevent damage.
Trimming
For grooming sideburns and moustache.
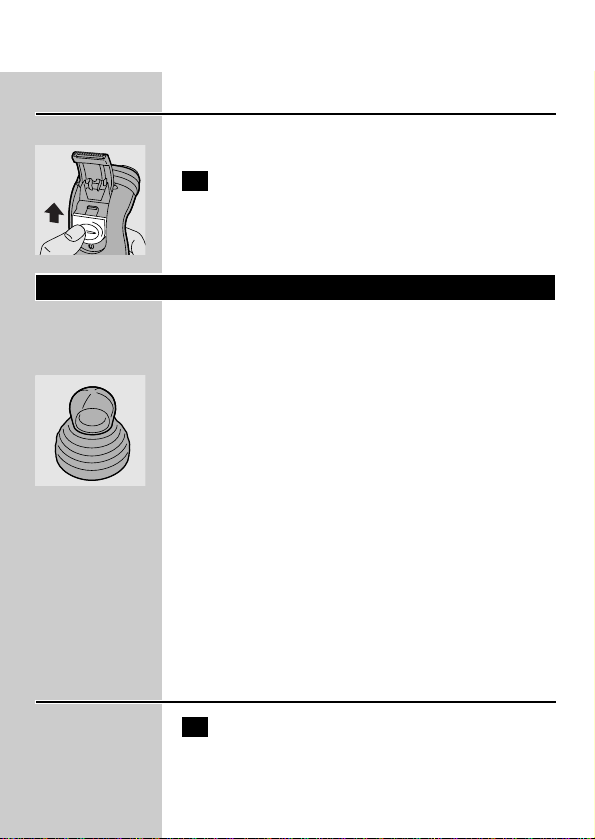
C
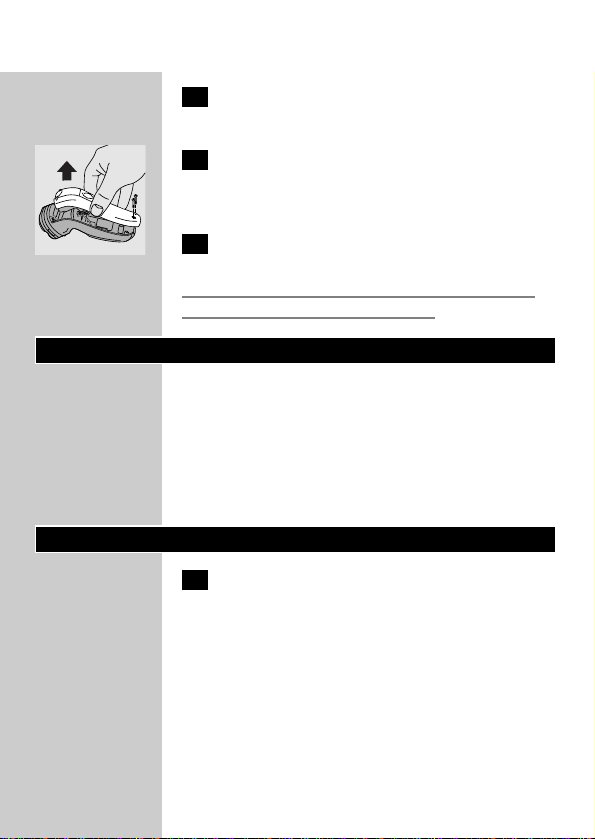
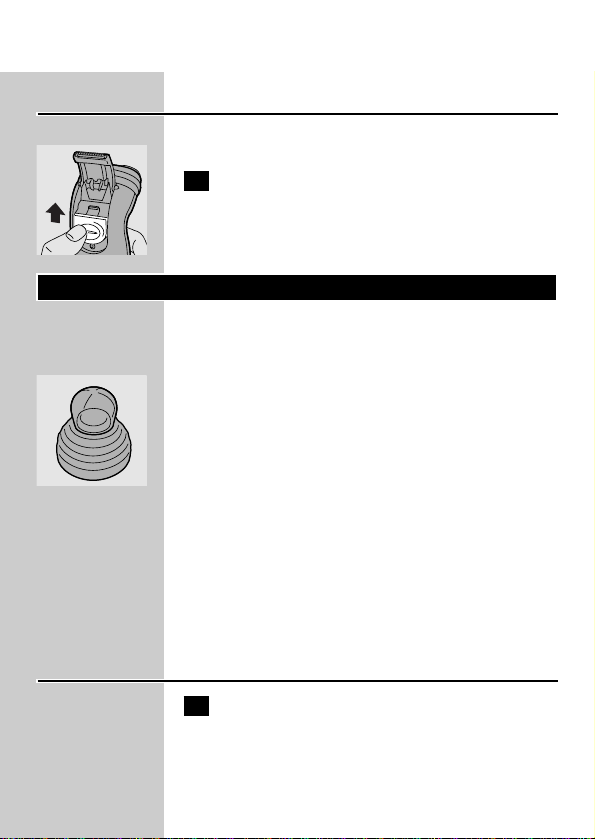
1 Open the trimmer by pushing the slide
upwards.
The trimmer can be activated while the motor is
running.
ENGLISH6
Page 5
Cleaning and maintenance
Regular cleaning guarantees better shaving
performance.
C
◗ For easy and optimal cleaning, the Philips
Action Clean (shaving head cleaner, type
HQ100) is available.Ask your Philips dealer
for information.
B
The Philips Action Clean may not be available in
all countries. Contact the Customer Care Centre in
your country about the availability of this
accessory.
You can also clean the shaver in the following
way:
Every week: shaving unit and hair chamber
1 Switch the shaver off,remove the mains
plug from the wall socket and pull the
appliance plug out of the shaver.
C
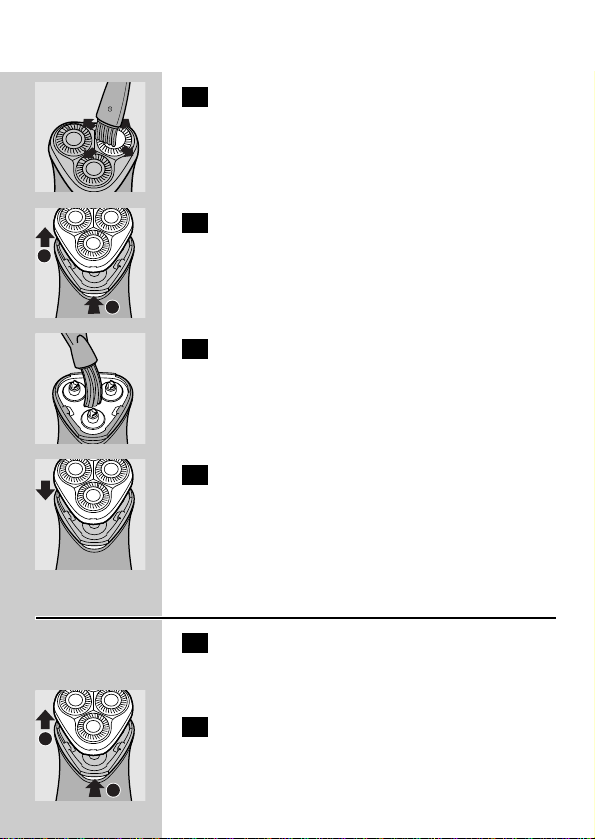
2 Clean the top of the appliance first, using
the brush supplied.
C
3 Press the release button (1) and remove
the shaving unit (2).
ENGLISH 7
2
1
Page 6
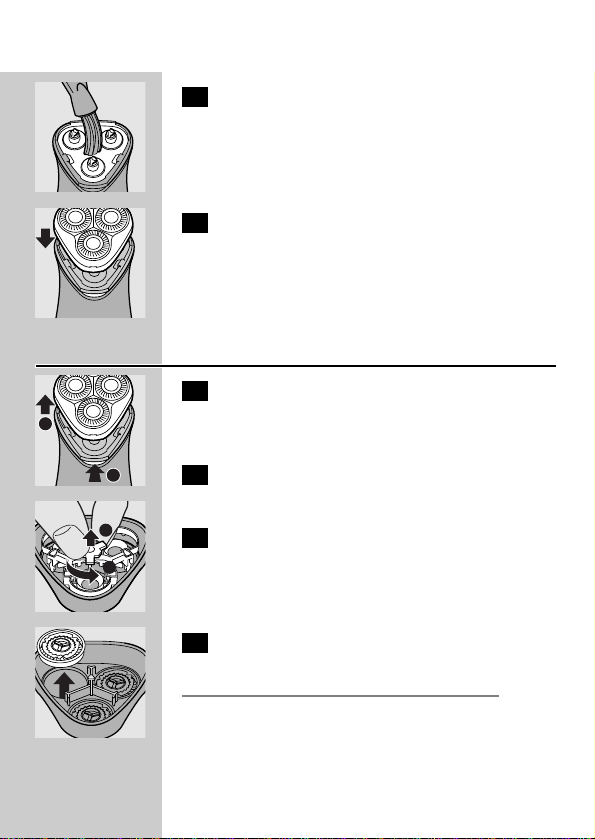
C
4 Clean the inside of the shaving unit and the
hair chamber with the brush.
C
5 Put the shaving unit back onto the shaver.
Every two months: shaving heads
1 Switch the shaver off,remove the mains
plug from the wall socket and pull the
appliance plug out of the shaver.
C
2 Press the release button (1) and remove
the shaving unit (2).
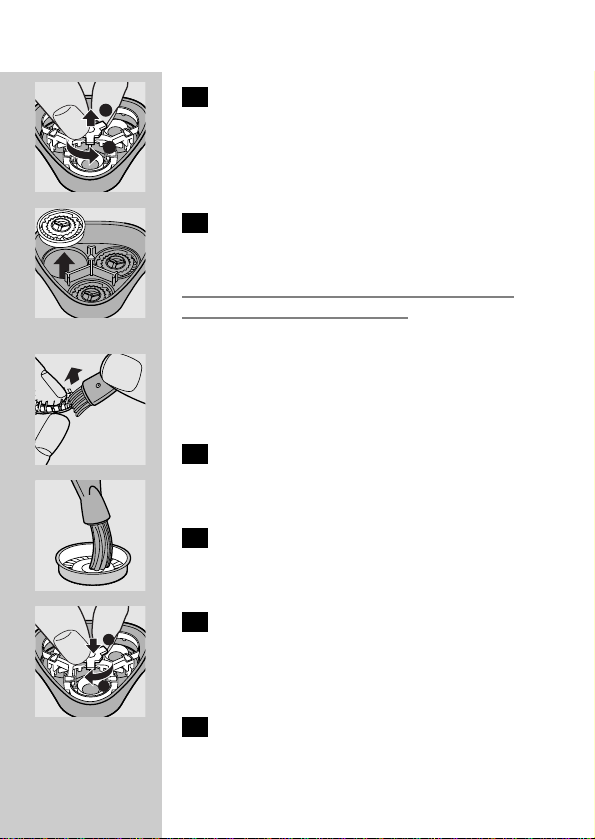
C
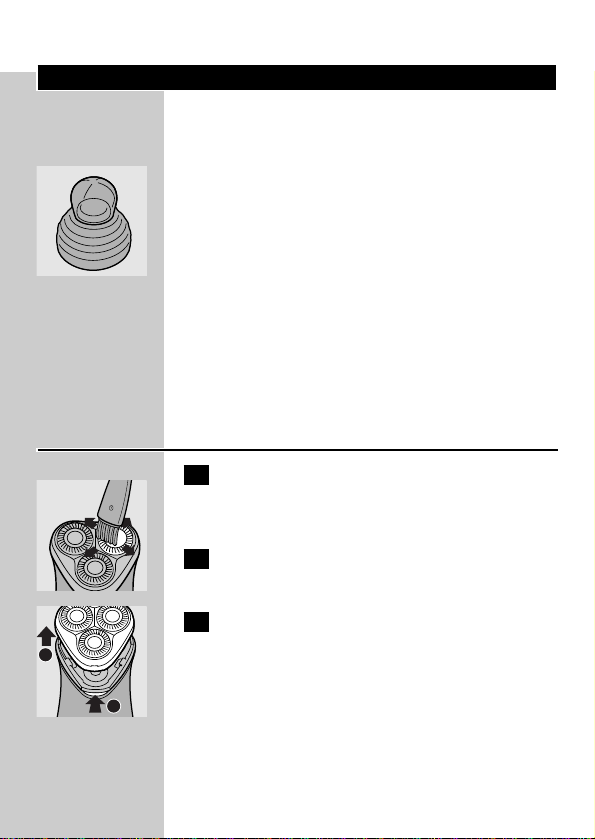
3 Turn the wheel anticlockwise (1) and
remove the retaining frame (2).
C
4 Remove and clean the shaving heads
(cutters and guards) one by one.
Do not mix up the cutters and the guards.
This is essential since each cutter has been
ground with its corresponding guard for optimal
performance. If you accidentally mix the sets up, it
could take several weeks before optimal shaving
performance is restored.
ENGLISH8
2
1
2
1
Page 7
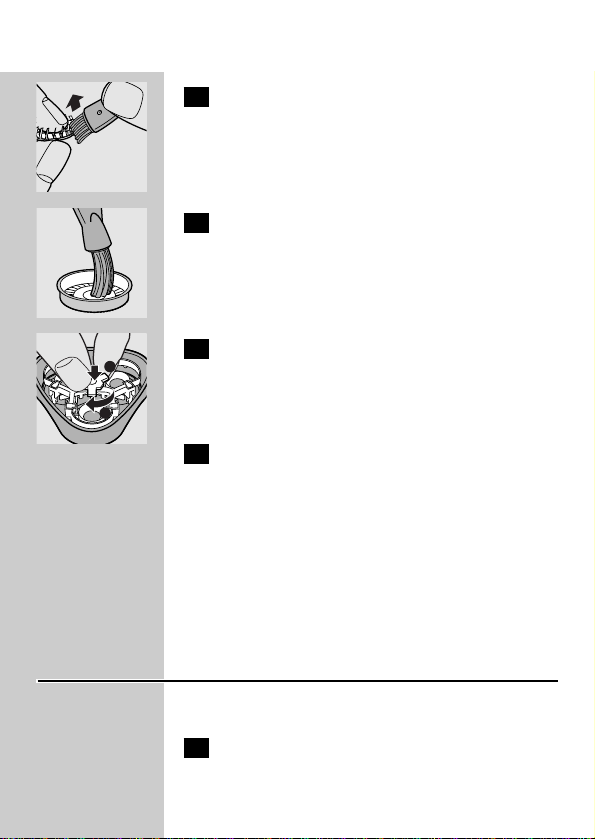
C
5 Clean the cutter with the short-bristled
side of the brush.
Brush carefully in the direction of the arrow.
C
6 Brush the guard.
C
7 Put the shaving heads back into the shaving
unit. Put the retaining frame back into the
shaving unit (1) and turn the wheel
clockwise (2).
8 Put the shaving unit back onto the shaver.
For extra thorough cleaning, clean the shaving
heads by putting them in a degreasing liquid (e.g.
alcohol) every six months.To remove the shaving
heads, follow steps 1 to 4 described above. After
cleaning, lubricate the central point on the inside
of the guards with a drop of sewing machine oil
to prevent wear of the shaving heads.
Trimmer
Clean the trimmer every time you have used it.
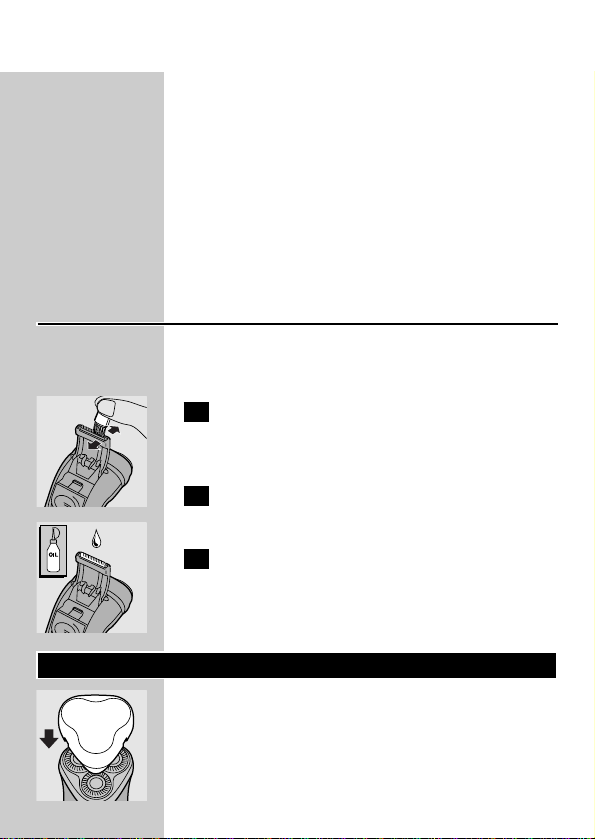
1 Switch the shaver off,remove the mains
plug from the wall socket and pull the
appliance plug out of the shaver.
ENGLISH 9
1
2
Page 8
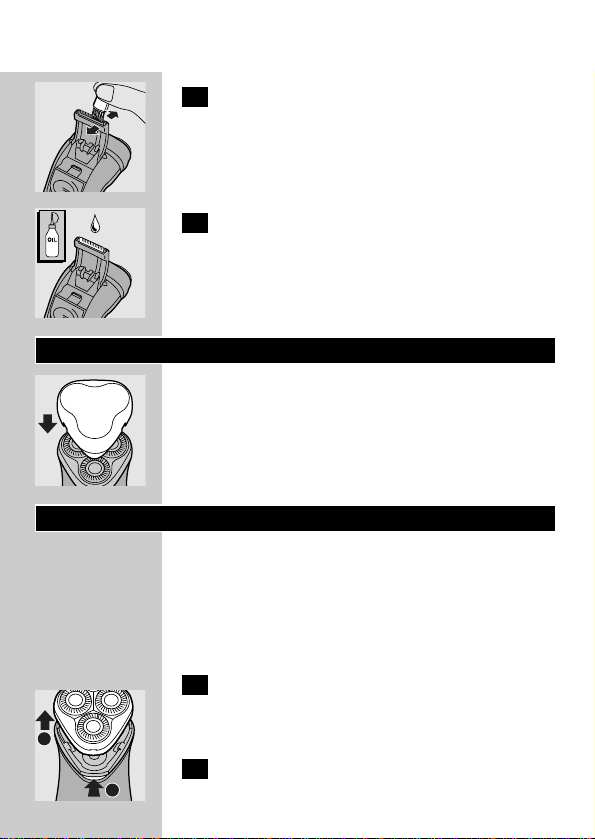
C
2 Clean the trimmer with the brush
supplied.
C
3 Lubricate the trimmer teeth with a drop
of sewing machine oil every six months.
Storage
C
◗ Put the protection cap on the shaver to
prevent damage.
◗ The appliance can be stored in the pouch
supplied.
Replacement
Replace the shaving heads every two years for
optimal shaving results.
Replace damaged or worn shaving heads with
HQ55 Philips Super Reflex shaving heads only.
1 Switch the shaver off,remove the mains
plug from the wall socket and pull the
appliance plug out of the shaver.
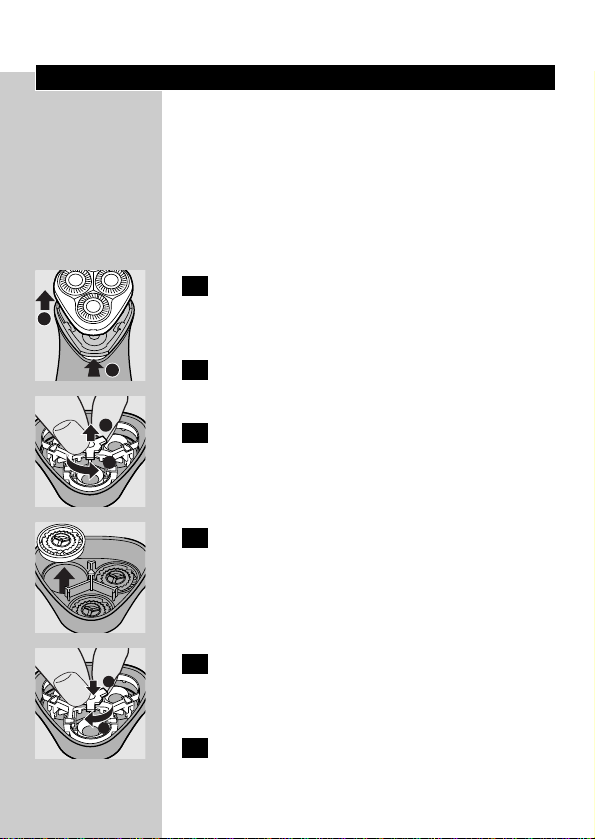
C
2 Press the release button (1) and remove
the shaving unit (2).
ENGLISH10
2
1
Page 9
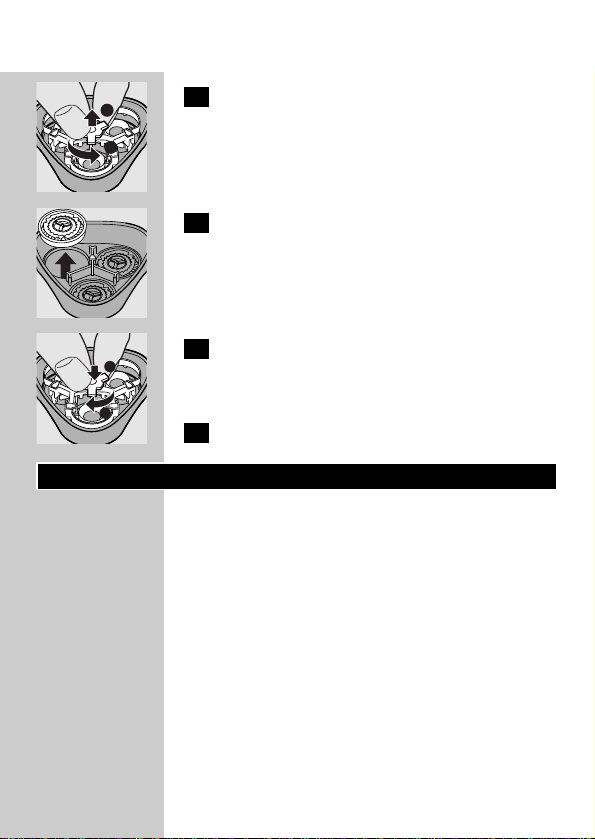
C
3 Turn the wheel anticlockwise (1) and
remove the retaining frame (2).
C
4 Remove the shaving heads and place new
ones in the shaving unit.
C
5 Put the retaining frame back into the
shaving unit (1) and turn the wheel
clockwise (2).
6 Put the shaving unit back onto the shaver.
Accessories
The following accessories are available:
- HQ55 Philips Super Reflex shaving heads.
- HQ100 Philips Action Clean (shaving head
cleaner).
- HQ101 Philips Action Clean refill (shaving head
cleaning liquid).
- HQ110 Philips shaving head cleaner (shaving
head cleaning spray).
ENGLISH 11
2
1
1
2
Page 10
Environment
C
◗ Do not throw the appliance away with the
normal household waste at the end of its life,
but hand it in at an official collection point for
recycling. By doing this you will help to
preserve the environment.
Disposal of the battery
The built-in rechargeable battery contains
substances that may pollute the environment.
Always remove the battery before discarding the
appliance or handing it in at an official collection
point. Dispose of the battery at an official
collection point for batteries. If you have trouble
removing the battery, you can also take the
appliance to a Philips service centre, which will
remove the battery for you and will dispose of it
in an environmentally safe way.
Only remove the battery if it is completely empty.
1 Remove the mains plug from the wall
socket and pull the appliance plug out of
the shaver.
C
2 Let the shaver run until it stops,undo the
screws and open the shaver.
3 Remove the battery.
Do not connect the shaver to the mains again
after the battery has been removed.
ENGLISH12
Page 11

Guarantee & service
If you need information or if you have a
problem, please visit the Philips website at
www.philips.com or contact the Philips Customer
Care Centre in your country (you will find its
phone number in the worldwide guarantee
leaflet). If there is no Customer Care Centre in
your country, turn to your local Philips dealer or
contact the Service Depar tment of Philips
Domestic Appliances and Personal Care BV.
Troubleshooting
1 Reduced shaving performance
B
Cause 1: the shaving heads are dirty.
B
The shaver has not been cleaned well enough or
has not been cleaned for a long time.
◗ Clean the shaver thoroughly before you
continue shaving.See chapter 'Cleaning and
maintenance'.
B
Cause 2: long hairs are obstructing the shaving
heads.
◗ Clean the cutters and guards with the brush
supplied. See chapter 'Cleaning and
maintenance', section 'Every two months:
shaving heads'.
B
Cause 3: the shaving heads are damaged or worn.
ENGLISH 13
Page 12

◗ Replace the shaving heads. See chapter
'Replacement'.
2 The shaver does not work when the on/off
slide is pushed to position I.
B
Cause 1: the battery is empty.
◗ Recharge the battery.See chapter 'Charging'.
B
Cause 2: the shaver is not connected to the mains.
◗ Put the mains plug in the wall socket.
ENGLISH14
Page 13
Wichtig
Lesen Sie diese Bedienungsanleitung vor dem
ersten Gebrauch des Geräts gründlich durch und
bewahren Sie sie zur späteren Einsichtnahme auf.
◗ Verwenden Sie ausschließlich das mitgelieferte
Netzkabel.
◗ Verwenden Sie auf keinen Fall ein beschädigtes
Netzkabel.
◗ Wenn das Netzkabel defekt oder beschädigt
ist, darf es nur durch ein Original-Ersatzkabel
ausgetauscht werden, um Gefährdungen zu
vermeiden.
◗ Das Gerät hat eine automatische
Spannungsanpassung und eignet sich für
Netzspannungen von 100 bis 240 Volt.
◗ Laden und benutzen Sie das Gerät bei
Temperaturen zwischen 5cC und 35cC.
Bewahren Sie es auch in diesem
Temperaturbereich auf.
◗ Nehmen Sie den Rasierer zum Laden aus der
Tasche.
C
◗ Halten Sie das Gerät und das Netzkabel stets
trocken.
Aufladen
Das Gerät muss ausgeschaltet sein, wenn Sie mit
dem Laden beginnen.
Beim erstmaligen Laden, und wenn der Rasierer
längere Zeit nicht benutzt wurde, beträgt die
Ladedauer 4 Stunden. Normalerweise sind die
Akkus nach ungefähr 1 Stunde voll aufgeladen.
DEUTSCH 15
Page 14
Sie können sich auch bei leeren Akkus rasieren,
indem Sie den Rasierer an das Stromnetz
anschließen.
Lassen Sie das Gerät nicht länger als 24 Stunden
ununterbrochen am Netz.
Ladeanzeigen
Aufladen
C
◗ Sobald Sie mit dem Laden beginnen, leuchtet
die grüne Kontrolllampe.
Akku voll aufgeladen
C
◗ Sobald der Akku voll aufgeladen ist, beginnt
die grüne Kontrolllampe zu blinken.
Laden des Geräts
Laden Sie das Gerät auf, wenn der Motor anhält
oder beginnt, langsamer als gewöhnlich zu laufen.
Laden Sie den Rasierer nicht in einer
geschlossenen Tasche auf.
DEUTSCH16
CHARGE
CHARGE
Page 15
C
1 Stecken Sie den Gerätestecker in den
Rasierer.
2 Stecken Sie das Netzteil in die Steckdose.
3 Ziehen Sie das Netzteil aus der Steckdose
und den Gerätestecker vom Rasierer,
sobald der Akku voll aufgeladen ist.
Kabellose Rasierzeit
Mit einem vollständig geladenen Rasierer können
Sie sich ca. 30 Minuten kabellos rasieren.
Benutzung des Geräts
Rasieren
1 Schalten Sie den Rasierer ein, indem Sie
den Ein-/Ausschalter auf "1" schieben.
C
2 Führen Sie die Scherköpfe mit geraden und
kreisenden Bewegungen zügig über die
Haut.
Die beste Rasur erzielen Sie bei trockener Haut.
Es kann 2 bis 3 Wochen dauern, bis sich Ihre Haut
an das Philips Schersystem gewöhnt hat.
3 Schalten Sie den Rasierer aus, indem Sie
den Ein-/Ausschalter auf "0" schieben.
C
4 Setzen Sie die Schutzkappe nach jedem
Gebrauch auf den Rasierer, um
Beschädigungen zu vermeiden.
DEUTSCH 17
Page 16
Der Langhaarschneider
Zum Trimmen von Koteletten und Schnurrbart.
C
1 Schieben Sie den Schiebeschalter aufwärts,
um den Langhaarschneider zu öffnen.
Der Langhaarschneider lässt sich bei laufendem
Motor aktivieren.
Reinigung und Wartung
Regelmäßige Reinigung sorgt für bessere Rasur
und verlängert die Nutzungsdauer des Geräts.
C
◗ Mit dem Philips "Action Clean" HQ100
können Sie alle Scherköpfe schnell und
gründlich reinigen. Fragen Sie Ihren PhilipsHändler.
B
Möglicherweise ist der Philips Action Clean
Scherkopfreiniger nicht in jedem Land erhältlich.
Das Philips Service Center in Ihrem Land kann
Ihnen Auskunft über die Verfügbarkeit dieses
Zubehörs geben.
Sie können den Rasierer auch auf folgende Weise
reinigen:
Einmal wöchentlich: Schereinheit und
Bartfangkammer
1 Schalten Sie das Gerät aus, ziehen Sie das
Netzteil aus der Steckdose und den
Gerätestecker vom Rasierer.
DEUTSCH18
Page 17

C
2 Reinigen zuerst den oberen Teil des
Rasierers mit der beiliegenden Bürste.
C
3 Drücken Sie den Entriegelungsknopf (1)
und nehmen Sie die Schereinheit ab (2).
C
4 Reinigen Sie die Schereinheit und die
Bartfangkammer von innen mit der Bürste.
C
5 Setzen Sie die Schereinheit wieder auf den
Rasierer.
Alle zwei Monate: Scherköpfe
1 Schalten Sie das Gerät aus, ziehen Sie das
Netzteil aus der Steckdose und den
Gerätestecker vom Rasierer.
C
2 Drücken Sie den Entriegelungsknopf (1)
und nehmen Sie die Schereinheit ab (2).
DEUTSCH 19
2
1
2
1
Page 18
C
3 Drehen Sie das Rädchen gegen den
Uhrzeigersinn (1) und nehmen Sie den
Scherkopfhalter heraus (2).
C
4 Nehmen Sie jeweils nur einen Scherkopf
heraus und reinigen Sie Schermesser und
Scherkorb.
Achten Sie darauf, dass Sie Schermesser und
Scherkörbe nicht vertauschen.
Das ist wichtig. Schermesser und Scherkorb sind
aufeinander eingeschliffen; werden sie
versehentlich untereinander vertauscht, kann es
einige Wochen dauern, bis die optimale
Scherleistung wieder hergestellt ist.
C
5 Reinigen Sie das Schermesser mit der
kurzborstigen Seite der Bürste.
Bürsten Sie dabei vorsichtig in Pfeilrichtung.
C
6 Bürsten Sie den Scherkorb ab.
C
7 Setzen Sie Scherköpfe und Scherkopfhalter
wieder in die Schereinheit ein (1) und
drehen Sie das Rädchen im Uhrzeigersinn
fest (2).
8 Setzen Sie die Schereinheit wieder auf den
Rasierer.
DEUTSCH20
2
1
1
2
Page 19
Für eine besonders gründliche Reinigung können
Sie die Scherköpfe alle sechs Monate in eine
fettlösende Flüssigkeit (z. B. Alkohol) tauchen.
Befolgen Sie beim Entnehmen der Scherköpfe die
oben beschriebenen Schritte 1 bis 4. Sie sollten
dann nach dem Reinigen einen Tropfen
Nähmaschinenöl in die Mitte der Scherkörbe
geben, um eine Abnutzung der Scherköpfe zu
verhindern.
Langhaarschneider
Reinigen Sie den Langhaarschneider nach jedem
Gebrauch.
1 Schalten Sie das Gerät aus, ziehen Sie das
Netzteil aus der Steckdose und den
Gerätestecker vom Rasierer.
C
2 Reinigen Sie den Langhaarschneider mit
der beiliegenden Bürste.
C
3 Ölen Sie die Zähne des
Langhaarschneiders alle sechs Monate mit
einem Tropfen Nähmaschinenöl.
Aufbewahrung
C
◗ Setzen Sie die Schutzkappe auf die
Schereinheit, um Beschädigungen zu
vermeiden.
◗ Sie können das Gerät in der mitgelieferten
Tasche aufbewahren.
DEUTSCH 21
Page 20
Austauschen der Scherköpfe
Tauschen Sie die Scherköpfe alle zwei Jahre aus,
um weiterhin optimale Rasierergebnisse zu
erzielen.
Ersetzen Sie beschädigte oder abgenutzte
Scherköpfe ausschließlich durch Philips Super
Reflex HQ55 Scherköpfe.
1 Schalten Sie das Gerät aus, ziehen Sie das
Netzteil aus der Steckdose und den
Gerätestecker vom Rasierer.
C
2 Drücken Sie den Entriegelungsknopf (1)
und nehmen Sie die Schereinheit ab (2).
C
3 Drehen Sie das Rädchen gegen den
Uhrzeigersinn (1) und nehmen Sie den
Scherkopfhalter heraus (2).
C
4 Entnehmen Sie die Scherköpfe und setzen
Sie neue Scherköpfe in die Schereinheit.
C
5 Setzen Sie den Scherkopfhalter zurück in
die Schereinheit (1) und drehen Sie das
Rädchen im Uhrzeigersinn fest (2).
6 Setzen Sie die Schereinheit wieder auf den
Rasierer.
DEUTSCH22
2
1
2
1
1
2
Page 21
Zubehör
Die folgenden Ersatz- und Zubehörteile sind
erhältlich:
- HQ55 Philips Super Reflex Scherköpfe
- HQ100 Philips Action Clean
(Scherkopfreiniger)
- HQ101 Philips Action Clean Nachfüllpackung
(Scherkopf-Reinigungsflüssigkeit)
- HQ110 Philips Shaving Head Cleaner
(Reinigungsspray für Scherköpfe)
Umweltschutz
C
◗ Geben Sie das Gerät am Ende der
Lebensdauer nicht in den normalen Hausmüll.
Bringen Sie es zum Recycling zu einer
offiziellen Sammelstelle.Auf diese Weise helfen
Sie die Umwelt zu schonen.
Den Akku entsorgen
Der integrierte Akku enthält Substanzen, welche
die Umwelt gefährden können. Entnehmen Sie
den Akku,bevor Sie das Gerät entsorgen bzw. an
einer offiziellen Sammelstelle abgeben. Geben Sie
den Akku an einer offiziellen Sammelstelle für
Batterien ab. Sollten Sie Probleme bei der
Entnahme des Akkus haben,können Sie das Gerät
auch an ein Philips Service Center geben. Dort
wird der Akku entnommen und umweltgerecht
entsorgt.
Entnehmen Sie den Akku erst, wenn er ganz leer
ist.
DEUTSCH 23
Page 22
1 Ziehen Sie das Netzteil aus der Steckdose
und den Gerätestecker vom Rasierer.
C
2 Lassen Sie den Motor des Rasierers laufen,
bis er stillsteht, lösen Sie dann die
Schrauben und öffnen Sie das Gerät.
3 Nehmen Sie den Akku heraus.
Nach Entnahme des Akkus darf das Gerät nicht
mehr am Netz betrieben werden.
Garantie und Kundendienst
Benötigen Sie weitere Informationen oder treten
Probleme auf, wenden Sie sich bitte an Ihren
Philips-Händler oder setzen Sie sich mit einem
Philips Service-Center in Ihrem Land in
Verbindung (Tel. Nr. 0180/5356767). Besuchen Sie
auch die Philips Website (www.philips.com).
Problembehebung
1 Schlechte Rasur
B
Ursache 1: Die Scherköpfe sind verschmutzt.
B
Der Rasierer wurde nicht gründlich genug oder seit
längerer Zeit nicht mehr gereinigt.
◗ Reinigen Sie den Rasierer gründlich, bevor Sie
die Rasur fortsetzen (siehe "Reinigung und
Wartung").
DEUTSCH24
Page 23

B
Ursache 2: Lange Haare behindern die Rotation
der Scherköpfe.
◗ Reinigen Sie Schermesser und Scherkörbe mit
der beliegenden Bürste (siehe "Reinigung und
Wartung",Abschnitt "Alle zwei Monate:
Scherköpfe").
B
Ursache 3: Die Scherköpfe sind beschädigt oder
abgenutzt.
◗ Wechseln Sie die Scherköpfe aus (siehe
"Austauschen der Scherköpfe").
2 Der Rasierer läuft nicht, wenn der Ein-
/Ausschalter auf Position "1" steht.
B
Ursache 1: Der Akku ist leer.
◗ Laden Sie den Akku auf (siehe "Aufladen").
B
Ursache 2: Das Gerät ist nicht an das Stromnetz
angeschlossen.
◗ Stecken Sie das Netzteil in die Steckdose.
DEUTSCH 25
Page 24
Important
Avant d'utiliser l'appareil, lisez les instructions cidessous et conservez ce mode d'emploi pour un
usage ultérieur.
◗ Utilisez exclusivement le cordon
d'alimentation fourni.
◗ N'utilisez pas un cordon d'alimentation
endommagé.
◗ Lorsque le cordon d'alimentation est
endommagé, remplacez-le par un cordon
d'origine pour éviter tout accident.
◗ Cet appareil est doté d'un sélecteur
automatique de tension. Utilisez l'appareil à
une tension entre 100 et 240 V.
◗ Chargez, rangez et utilisez l'appareil à une
température comprise entre 5cC et 35cC.
◗ Ne chargez jamais l'appareil dans un étui
fermé.
C
◗ Veillez à ce que l'appareil et le cordon
d'alimentation ne soient pas exposés à
l'humidité.
Charge
Avant de charger l'appareil, arrêtez-le.
Lorsque vous chargez l'appareil pour la première
fois ou si l'appareil n'a pas été utilisé pendant une
longue période, chargez-le pendant 4 heures au
moins. Une charge normale est de 1 heure
environ.
FRANÇAIS26
Page 25
Lorsque vous chargez l'appareil pour la première
fois ou si l'appareil n'a pas été utilisé pendant une
longue période: chargez-le pendant 4 heures.
Ne laissez cependant jamais l'appareil connecté
pendant plus de 24 heures.
Indications de charge
Charge
C
◗ Dès que vous commencez à charger le rasoir
vide, le témoin vert s'allumera.
Accumulateurs entièrement chargés
C
◗ Lorsque les accumulateurs sont entièrement
chargés, le témoin vert commence à clignoter.
Charger l'appareil
Chargez l'appareil lorsque le moteur s'arrête ou
ralentit.
Ne laissez cependant jamais l'appareil connecté
pendant plus de 24 heures.
C
1 Enfoncez la fiche dans le rasoir.
FRANÇAIS 27
CHARGE
CHARGE
Page 26
2 Branchez la fiche dans la prise de courant.
3 Enlevez la fiche de la prise de courant et
tirez la petite fiche hors du rasoir lorsque
les accumulateurs sont complètement
chargés.
Autonomie de rasage
Un rasoir entièrement chargé offre une
autonomie de rasage de 30 minutes environ.
Utilisation de l'appareil
Rasage
1 Mettez le rasoir en marche en faisant
glisser le bouton marche/arrêt sur la
position I.
C
2 Déplacez rapidement les têtes de rasage
sur la peau en effectuant des mouvements
rectilignes et circulaires.
Les meilleurs résultats de rasage sont obtenus sur
une peau sèche.
Votre peau peut avoir besoin de 2-3 semaines
pour s'habituer au système Philips.
3 Arrêtez le rasoir en faisant glisser le
bouton marche/arrêt sur la position 0.
C
4 Remettez le capot protecteur sur le rasoir
après chaque utilisation pour éviter tout
dommage.
FRANÇAIS28
Page 27
Tondeuse
Pour tailler les favoris et la moustache.
C
1 Dégagez la tondeuse en faisant glisser
l'interrupteur vers le haut.
La tondeuse peut être mise en service pendant
que le moteur fonctionne.
Nettoyage et entretien
Nettoyez régulièrement l'appareil pour obtenir de
meilleurs résultats de rasage.
C
◗ Pour un nettoyage facile et rapide des têtes,
vous pouvez utiliser l'Action Clean de Philips
(type HQ100), disponible auprès de votre
revendeur ou Centre Service Agréé Philips.
B
Il est possible que l'Action Clean de Philips ne soit
pas disponible dans tous les pays. Pour plus
d'informations, contactez le Service
Consommateurs Philips de votre pays.
Vous pouvez également nettoyer le rasoir de la
manière suivante :
Chaque semaine: unité de rasage et
compartiment à poils
1 Arrêtez l'appareil, débranchez la fiche de la
prise de courant, puis retirez la petite fiche
de l'appareil.
FRANÇAIS 29
Page 28
C
2 Nettoyez le dessus de l'appareil avec la
brosse fournie.
C
3 Appuyez sur le bouton de déverrouillage
(1) et enlevez l'unité de rasage (2).
C
4 Nettoyez l'intérieur de l'unité de rasage et
le compartiment à poils à l'aide de la
brosse fournie.
C
5 Remontez l'unité de rasage sur le rasoir.
Tous les deux mois: têtes de rasage
1 Arrêtez l'appareil, débranchez la fiche de la
prise de courant, puis retirez la petite fiche
de l'appareil.
C
2 Appuyez sur le bouton de déverrouillage
(1) et enlevez l'unité de rasage (2).
FRANÇAIS30
2
1
2
1
Page 29

C
3 Faites tourner la molette dans le sens
inverse des aiguilles d'une montre (1) et
enlevez la plaque de fermeture (2).
C
4 Enlevez et nettoyez les têtes de rasage
(couteaux et grilles) une à une.
N'intervertissez pas les couteaux et les grilles.
Les couteaux et les grilles sont affûtés par paire
ce qui leur assure des performances optimales. Si
vous les intervertissez accidentellement, plusieurs
semaines peuvent être nécessaires avant que
l'appareil ne rase à nouveau de manière optimale.
C
5 Nettoyez les couteaux avec le côté à poils
courts de la brosse.
Brossez avec précaution dans le sens de la flèche.
C
6 Brossez la grille.
C
7 Remontez les têtes de rasage sur l'unité de
rasage, fixez la plaque de fermeture sur
l'unité (1) et tournez la molette dans le
sens des aiguilles d'une montre (2).
8 Remontez l'unité de rasage sur le rasoir.
Pour un nettoyage à fond, vous pouvez nettoyer
l'unité de rasage avec un liquide dégraissant (p. ex.
alcool) tous les six mois. Suivez les étapes 1-4 ci-
FRANÇAIS 31
2
1
1
2
Page 30

dessus. N'oubliez pas de lubrifier le point central
des grilles avec une goutte d'huile pour machine à
coudre après le nettoyage.
Tondeuse
Nettoyez la tondeuse après chaque utilisation.
1 Arrêtez l'appareil, débranchez la fiche de la
prise de courant, puis retirez la petite fiche
de l'appareil.
C
2 Nettoyez la tondeuse à l'aide de la brosse
fournie.
C
3 Tous les six mois, lubrifiez la tondeuse à
l'aide d'une gouttelette d'huile pour
machine à coudre.
Rangement
C
◗ Remettez le capot de protection pour éviter
les détériorations.
◗ L'appareil peut être rangé dans l'étui fourni.
Remplacement
Pour un résultat de rasage optimal, remplacez les
têtes de rasage tous les deux ans.
FRANÇAIS32
Page 31

Remplacez les têtes endommagées ou usagées
exclusivement par des têtes Philips Super Reflex
HQ55.
1 Arrêtez l'appareil, débranchez la fiche de la
prise de courant, puis retirez la petite fiche
de l'appareil.
C
2 Appuyez sur le bouton de déverrouillage
(1) et enlevez l'unité de rasage (2).
C
3 Tournez la molette dans le sens inverse
des aiguilles d'une montre (1) et retirez la
plaque de fermeture (2).
C
4 Enlevez les têtes usagées et placez les
nouvelles têtes dans l'unité de rasage.
C
5 Fixez la plaque de fermeture sur l'unité (1)
et tournez la molette dans le sens des
aiguilles d'une montre (2).
6 Remontez l'unité de rasage sur le rasoir.
Accessoires
Les accessoires suivants sont disponibles:
- Têtes de rasage Super Reflex Philips HQ55.
- Philips Action Clean HQ100 (nettoyeur de
têtes de rasage)
FRANÇAIS 33
2
1
2
1
1
2
Page 32

- Philips Action Clean Recharge HQ101 (produit
liquide de nettoyage pour HQ100).
- Philips Spray HQ110 (spray de nettoyage de
tête de rasage).
Environnement
C
◗ Ne jetez pas l'appareil en fin de vie avec les
ordures ménagères,mais déposez-le à un
endroit prévu à cet effet par les pouvoirs
publics pour son recyclage.Vous aiderez, ainsi,
à protéger l'environnement.
Elimination des accumulateurs
Les accumulateurs rechargeables incorporés
contiennent des substances qui peuvent polluer
l'environnement. Enlevez les accumulateurs
lorsque vous mettez l'appareil au rebut. Ne les
jetez pas avec les ordures ménagères, mais
déposez-les à un endroit prévu à cet effet par les
pouvoirs publics.Vous pouvez également porter
l'appareil dans un Centre Service Agréé Philips.
Les accumulateurs y seront traités dans le respect
de l'environnement.
Eliminez les accumulateurs uniquement lorsque
ceux-ci sont entièrement déchargés.
1 Débranchez la fiche de la prise de courant
et retirez la petite fiche de l'appareil.
C
2 Laissez l'appareil fonctionner jusqu'à l'arrêt
complet du moteur, ôtez les vis et ouvrez
l'appareil.
FRANÇAIS34
Page 33

3 Enlevez les accumulateurs.
Ne raccordez plus l'appareil à la tension du
réseau une fois que les accumulateurs ont été
enlevés.
Garantie et service
Pour plus d'informations, visitez notre site
Internet: www.philips.com ou veuillez contacter le
Service Consommateurs Philips de votre pays
(vous trouverez le numéro de téléphone dans le
dépliant sur la garantie internationale). S'il n'y a
aucun Service Consommateurs Philips dans votre
pays, contactez votre distributeur ou le Service
Department of Philips Domestic Appliances and
Personal Care BV.
Dépannage
1 Les résultats de rasage se dégradent
B
Cause 1: Les têtes de rasage sont sales.
B
L'appareil n'a pas été nettoyé à fond ou il n'a pas
été nettoyé depuis longtemps.
◗ Nettoyez l'appareil à fond avant de continuer.
Reportez-vous au chapitre "Nettoyage et
entretien".
B
Cause 2: Des poils longs sont emmêlés dans les
têtes de rasage.
FRANÇAIS 35
Page 34

◗ Nettoyez les couteaux et les grilles avec la
brosse fournie.Voir chapitre "Nettoyage et
entretien", section "Tous les deux mois: têtes
de rasage".
B
Cause 3: les têtes de rasage sont abîmées ou
usagées.
◗ Remplacez les têtes de rasage.Voir chapitre
"Remplacement".
2 Le rasoir ne fonctionne pas lorsque le
bouton marche/arrêt est sur la position I.
B
Cause 1: Les accumulateurs sont vides.
◗ Rechargez le rasoir.Voir chapitre "Charge".
B
Cause 2: le rasoir n'a pas été branché.
◗ Branchez l'appareil.
FRANÇAIS36
Page 35

Belangrijk
Lees deze gebruiksaanwijzing zorgvuldig door
voordat u het apparaat gaat gebruiken. Bewaar de
gebruiksaanwijzing om hem indien nodig te
kunnen raadplegen.
◗ Gebruik uitsluitend het bijgeleverde snoer.
◗ Gebruik het netsnoer niet indien het
beschadigd is.
◗ Indien het netsnoer beschadigd is, laat het dan
altijd vervangen door een van het
oorspronkelijke type om gevaar te
voorkomen.
◗ Het apparaat is voorzien van een
automatische voltageregelaar en is geschikt
voor voltages van 100 tot 240 volt.
◗ Laad het apparaat op, bewaar het en gebruik
het bij een temperatuur tussen 5cC en 35cC.
◗ Laad het apparaat niet op in een gesloten etui.
C
◗ Houd het apparaat en het snoer droog.
Opladen
Zorg ervoor dat het apparaat uitgeschakeld is
voordat u het gaat opladen.
Wanneer u het apparaat voor de eerste keer
oplaadt of als u het lange tijd niet gebruikt heeft,
laad het apparaat dan 4 uur aaneengesloten op.
Opladen duurt normaal ongeveer 1 uur.
U kunt zich ook direct scheren, zonder eerst op
te laden, door het apparaat rechtstreeks op
netspanning aan te sluiten.
NEDERLANDS 37
Page 36

Laat het apparaat niet langer dan 24 uur op
netspanning aangesloten zitten.
Oplaadlampjes
Opladen
C
◗ Het groene lampje gaat branden zodra u het
lege scheerapparaat gaat opladen.
Accu vol
C
◗ Het groene lampje gaat knipperen wanneer de
accu volledig is opgeladen.
Het apparaat opladen
Laad het apparaat op wanneer de motor
langzamer gaat draaien of ophoudt met draaien.
Laad het scheerapparaat niet op in een gesloten
etui.
C
1 Steek het apparaatstekkertje in het
scheerapparaat.
2 Steek de stekker in het stopcontact.
NEDERLANDS38
CHARGE
CHARGE
Page 37

3 Haal de stekker uit het stopcontact en
trek het stekkertje uit het apparaat
wanneer de accu volledig is opgeladen.
Snoerloze scheertijd
Een volledig opgeladen apparaat heeft een
snoerloze scheertijd tot 30 minuten.
Gebruik
Scheren
1 Schakel het scheerapparaat in door de
aan/uitknop naar stand I te duwen.
C
2 Beweeg de scheerhoofden vlot over de
huid; maak zowel rechte als draaiende
bewegingen.
Scheren op een droog gezicht geeft het beste
resultaat.
Uw huid kan 2 tot 3 weken nodig hebben om aan
dit Philips-scheersysteem te wennen.
3 Schakel het scheerapparaat uit door de
aan/uitknop naar stand 0 te duwen.
C
4 Plaats na gebruik altijd de beschermkap op
het apparaat om beschadiging te
voorkomen.
NEDERLANDS 39
Page 38

Tondeuse
Voor het bijwerken van bakkebaarden en snor.
C
1 Klap de tondeuse uit door de schuifknop
naar boven te duwen.
U kunt de tondeuse inschakelen terwijl de motor
draait.
Schoonmaken en onderhoud
Regelmatig schoonmaken geeft een beter
scheerresultaat.
C
◗ Om uw scheerapparaat gemakkelijk en
optimaal schoon te kunnen maken is de
Philips Action Clean (HQ100
scheerhoofdreiniger) verkrijgbaar.Vraag uw
Philips-dealer om informatie.
B
De Philips Action Clean is mogelijk niet in alle
landen verkrijgbaar. Neem contact op met het
Customer Care Centre in uw land over de
verkrijgbaarheid van dit accessoire.
U kunt het apparaat ook op de volgende wijze
reinigen:
Iedere week: scheerunit en haarkamer
1 Schakel het scheerapparaat uit, haal de
stekker uit het stopcontact en trek het
apparaatstekkertje uit het apparaat.
NEDERLANDS40
Page 39

C
2 Borstel eerst de bovenkant van het
apparaat schoon met het bijgeleverde
borsteltje.
C
3 Druk op de ontgrendelknop (1) en
verwijder de scheerunit (2).
C
4 Borstel de binnenkant van de scheerunit
en de haarkamer schoon.
C
5 Plaats de scheerunit terug op het apparaat.
Elke twee maanden:scheerhoofden
1 Schakel het scheerapparaat uit, haal de
stekker uit het stopcontact en trek het
apparaatstekkertje uit het apparaat.
C
2 Druk op de ontgrendelknop (1) en
verwijder de scheerunit (2).
NEDERLANDS 41
2
1
2
1
Page 40

C
3 Draai het wieltje linksom (1) en verwijder
de opsluitplaat (2).
C
4 Verwijder en reinig de scheerhoofden
(mesjes met bijbehorende kapjes) één
voor één.
Verwissel de mesjes en de kapjes niet.
Dit is essentieel omdat de messen en kapjes op
elkaar zijn ingeslepen.Als u ze per ongeluk toch
verwisselt, kan het enkele weken duren voordat
het scheerapparaat weer optimaal scheert.
C
5 Maak het mesje schoon met de korte
haren van het borsteltje.
Borstel voorzichtig in de richting van de pijl.
C
6 Borstel het kapje schoon.
C
7 Plaats de scheerhoofden terug in de
scheerunit. Plaats de opsluitplaat terug in
de scheerunit (1) en draai het wieltje
rechtsom (2).
8 Plaats de scheerunit terug op het apparaat.
Voor extra grondige reiniging kunt u de
scheerhoofden elke zes maanden schoonmaken
met een ontvettende vloeistof (bijv.alcohol).Volg
NEDERLANDS42
2
1
1
2
Page 41

de hierboven beschreven stappen 1 t/m 4. Smeer
na het schoonmaken het centrale punt aan de
binnenzijde van de kapjes in met een druppeltje
naaimachine-olie om slijtage van de
scheerhoofden te voorkomen.
Tondeuse
Maak de tondeuse altijd na gebruik schoon.
1 Schakel het scheerapparaat uit, haal de
stekker uit het stopcontact en trek het
apparaatstekkertje uit het apparaat.
C
2 Maak de tondeuse met het bijgeleverde
borsteltje schoon.
C
3 Smeer elke zes maanden de tanden van de
tondeuse met een druppeltje naaimachineolie.
Opbergen
C
◗ Plaats de beschermkap op het apparaat om
beschadiging te voorkomen.
◗ Het apparaat kan opgeborgen worden in het
bijgeleverde etui.
Vervanging
Vervang de scheerhoofden om de twee jaar, voor
een optimaal scheerresultaat.
NEDERLANDS 43
Page 42

Vervang beschadigde of versleten scheerhoofden
uitsluitend door HQ55 Philips Super Reflex
scheerhoofden.
1 Schakel het scheerapparaat uit, haal de
stekker uit het stopcontact en trek het
apparaatstekkertje uit het apparaat.
C
2 Druk op de ontgrendelknop (1) en neem
de scheerunit van het apparaat (2).
C
3 Draai het wieltje linksom (1) en verwijder
de opsluitplaat (2).
C
4 Verwijder de scheerhoofden en plaats
nieuwe in de scheerunit.
C
5 Plaats de opsluitplaat terug in de
scheerunit (1) en draai het wieltje
rechtsom (2).
6 Plaats de scheerunit terug op het apparaat.
Accessoires
De volgende accessoires zijn verkrijgbaar:
- HQ55 Philips Super Reflex scheerhoofden
- HQ100 Philips Action Clean
(scheerhoofdreiniger)
NEDERLANDS44
2
1
2
1
1
2
Page 43

- HQ101 Philips Action Clean navulflacon
(schoonmaakvloeistof voor scheerhoofden)
- HQ110 Philips reinigingsspray voor
scheerhoofden (spuitbus)
Milieu
C
◗ Gooi het apparaat aan het einde van zijn
levensduur niet weg met het normale huisvuil,
maar lever het in op een officieel
verzamelpunt om het te laten recyclen. Op
deze wijze helpt u om het milieu te
beschermen.
Accu verwijderen
De ingebouwde accu bevat stoffen die schadelijk
kunnen zijn voor het milieu.Verwijder altijd de
accu voordat u het apparaat afdankt of inlevert
op een officieel verzamelpunt. Lever de accu in op
een officieel inzamelpunt voor batterijen.Als u
moeite heeft de accu te verwijderen, dan kunt u
het apparaat ook naar een Philips servicecentrum
brengen, waar men de accu voor u zal
verwijderen en ervoor zal zorgen dat deze op
milieuvriendelijke wijze wordt verwerkt.
Verwijder de accu alleen als deze volledig leeg is.
1 Haal de powerplug uit het stopcontact en
trek het stekkertje uit het apparaat.
C
2 Laat het apparaat lopen tot het stopt, draai
de schroeven los en maak het apparaat
open.
NEDERLANDS 45
Page 44

3 Verwijder de accu.
Sluit het scheerapparaat niet meer op
netspanning aan wanneer de accu verwijderd is.
Garantie & service
Als u informatie nodig heeft of als u een
probleem heeft, bezoek dan onze website
(www.philips.com),of neem contact op met het
Philips Customer Care Centre in uw land (u vindt
het telefoonnummer in het 'worldwide
guarantee' vouwblad).
Als er geen Customer Care Centre in uw land is,
ga dan naar uw Philips dealer of neem contact op
met de afdeling Service van Philips Domestic
Appliances and Personal Care BV.
Problemen oplossen
1 Het scheerresultaat gaat achteruit.
B
Oorzaak 1: de scheerhoofden zijn vuil.
B
Het scheerapparaat is niet goed genoeg
schoongemaakt of langere tijd niet
schoongemaakt.
◗ Maak het apparaat grondig schoon voordat u
zich er weer mee gaat scheren. Zie hoofdstuk
'Schoonmaken en onderhoud'.
B
Oorzaak 2: er zitten lange haren in de
scheerhoofden.
NEDERLANDS46
Page 45

◗ Reinig de messen en kapjes met het
bijgeleverde borsteltje. Zie 'Iedere twee
maanden: scheerhoofden' in hoofdstuk
'Schoonmaken en onderhoud'.
B
Oorzaak 3: de scheerhoofden zijn beschadigd of
versleten.
◗ Vervang de scheerhoofden. Zie hoofdstuk
'Vervanging'.
2 Het scheerapparaat werkt niet wanneer de
aan/uitknop naar stand I geduwd wordt.
B
Oorzaak 1: de accu is leeg.
◗ Laad de accu op. Zie hoofdstuk 'Opladen'.
B
Oorzaak 2: het scheerapparaat is niet op
netspanning aangesloten.
◗ Steek de stekker in het stopcontact.
NEDERLANDS 47
Page 46

Importante
Antes de usar el aparato, lea atentamente estas
instrucciones y consérvelas por si necesitara
consultarlas en el futuro.
◗ Use únicamente el cable que se suministra.
◗ No utilice un cable dañado.
◗ Si el cable de red estuviera dañado,sustitúyalo
siempre por otro del modelo original para
evitar una situación de peligro.
◗ El aparato está equipado con un selector
automático del voltaje y es apto para voltajes
de red entre 100 y 240 voltios.
◗ Cargue, guarde y utilice el aparato a una
temperatura entre 5cC y 35cC.
◗ No recargue la afeitadora dentro de la funda
cerrada.
C
◗ Mantenga el aparato y el cable secos.
Carga
Asegúrese de que el aparato está apagado antes
de empezar a cargarlo.
Al cargar la afeitadora por primera vez, o después
de un largo período sin usarla, deje que la
afeitadora se cargue durante 4 horas sin
interrupción. La afeitadora suele tardar
aproximadamente 1 hora en cargarse.
También puede afeitarse sin recargar la afeitadora
enchufándola a la red eléctrica.
ESPAÑOL48
Page 47

No deje el aparato conectado a la red más de 24
horas.
Indicaciones de carga
Carga
C
◗ En cuanto se empiece a cargar la afeitadora
descargada, el piloto verde se iluminará.
Batería completamente cargada
C
◗ Cuando la batería esté completamente
cargada, el piloto verde comenzará a
parpadear.
Cómo cargar el aparato
Cargue el aparato cuando se pare el motor o
empiece a funcionar más despacio.
No recargue la afeitadora dentro de la funda
cerrada.
C
1 Ponga la clavija del aparato en la afeitadora.
2 Conecte la clavija a un enchufe de red.
ESPAÑOL 49
CHARGE
CHARGE
Page 48

3 Desenchufe el aparato y saque la clavija de
la afeitadora cuando la batería esté
completamente cargada.
Tiempo de afeitado sin cable
Una afeitadora completamente cargada le
proporcionará un tiempo de afeitado sin cable de
hasta 30 minutos.
Cómo utilizar el aparato
Afeitado
1 Ponga en marcha la afeitadora deslizando
el botón de encendido/apagado hasta la
posición I.
C
2 Desplace los conjuntos cortantes
rápidamente sobre la piel con
movimientos rectos y circulares.
Los mejores resultados se obtienen afeitando
sobre la piel seca.
Puede que su piel necesite de 2 a 3 semanas para
acostumbrarse al sistema de afeitado Philips.
3 Apague la afeitadora deslizando el botón
de encendido/apagado hasta la posición 0.
C
4 Después de usar la afeitadora, póngale
siempre la funda de protección para evitar
daños.
ESPAÑOL50
Page 49

Cortapatillas
Para arreglar las patillas y el bigote.
C
1 Abra el cortapatillas presionando el botón
deslizante hacia arriba.
El cortapatillas se puede activar con la afeitadora
en marcha.
Limpieza y mantenimiento
Una limpieza frecuente garantiza el mejor
resultado en el afeitado.
C
◗ Para una limpieza fácil y óptima está
disponible Philips Action Clean (limpiador de
conjuntos cortantes, modelo HQ100). Para
más información, consulte con su vendedor o
distribuidor Philips.
B
Es posible que Philips Action Clean no esté
disponible en todos los países. Consulte al Servicio
de atención al cliente de su país acerca de la
disponibilidad de este accesorio.
También puede limpiar la afeitadora de la
siguiente manera:
Todas las semanas: unidad afeitadora y
cámara de recogida de pelo
1 Apague la afeitadora, saque la clavija del
enchufe de red y saque la clavija del
aparato de la afeitadora.
ESPAÑOL 51
Page 50

C
2 Limpie primero la parte superior del
aparato con el cepillo que se suministra.
C
3 Presione el botón de liberación (1) y saque
la unidad afeitadora (2).
C
4 Limpie el interior de la unidad afeitadora y
la cámara de recogida del pelo con el
cepillo.
C
5 Vuelva a colocar la unidad afeitadora en la
afeitadora.
Cada dos meses: conjuntos cortantes
1 Apague la afeitadora, saque la clavija del
enchufe de red y saque la clavija del
aparato de la afeitadora.
C
2 Presione el botón de liberación (1) y saque
la unidad afeitadora (2).
ESPAÑOL52
2
1
2
1
Page 51

C
3 Gire la ruedecilla en sentido contrario al
de las agujas del reloj (1) y saque el marco
de retención (2).
C
4 Saque y limpie los conjuntos cortantes
(cuchillas y protectores) uno a uno.
No mezcle las cuchillas y protectores entre sí.
Esto es sumamente importante, ya que cada
cuchilla ha sido afilada con su protector
correspondiente para asegurar un resultado
óptimo. Si, accidentalmente, se mezclaran entre sí
protectores y cuchillas, podrían ser necesarias
varias semanas hasta que se volviera a alcanzar de
nuevo el nivel óptimo de afeitado.
C
5 Limpie la cuchilla con el lado de cerdas
cortas del cepillo.
Cepille con cuidado siguiendo la dirección de la
flecha.
C
6 Cepille el protector.
C
7 Vuelva a colocar los conjuntos cortantes
en la unidad afeitadora.Vuelva a poner el
marco de retención en la unidad afeitadora
(1) y gire la ruedecita en el sentido de las
agujas del reloj (2).
8 Vuelva a colocar la unidad afeitadora en la
afeitadora.
ESPAÑOL 53
2
1
1
2
Page 52

Para una limpieza más profunda, limpie los
conjuntos cortantes con un líquido desengrasante
(p.ej. alcohol) cada seis meses. Para sacar los
conjuntos cortantes, siga los pasos del 1 al 4 que
se indican anteriormente. Después de limpiarlos,
lubrique el punto central del interior de los
protectores con una gota de aceite para
máquinas de coser para evitar que se deterioren
los conjuntos cortantes.
Cortapatillas
Limpie el cortapatillas cada vez que lo use.
1 Apague la afeitadora, saque la clavija del
enchufe de red y saque la clavija del
aparato de la afeitadora.
C
2 Limpie el cortapatillas con el cepillo que se
suministra.
C
3 Cada seis meses lubrique los dientes del
cortapatillas con una gota de aceite de
máquina de coser.
Cómo guardar el aparato
C
◗ Para evitar deterioros, ponga la tapa
protectora en la afeitadora.
◗ El aparato puede guardarse en la bolsa que se
suministra.
ESPAÑOL54
Page 53

Sustitución
Para lograr un resultado óptimo en el afeitado,
sustituya los conjuntos cortantes cada dos años.
Sustituya los conjuntos cortantes dañados o
gastados sólo por conjuntos cortantes Philips
Super Reflex HQ55.
1 Apague la afeitadora, saque la clavija del
enchufe de red y saque la clavija del
aparato de la afeitadora.
C
2 Presione el botón de liberación (1) y quite
la unidad afeitadora (2).
C
3 Gire la ruedecita en sentido contrario al
de las agujas del reloj (1) y quite el marco
de retención (2).
C
4 Saque los conjuntos cortantes y coloque
unos nuevos en la unidad afeitadora.
C
5 Vuelva a colocar el marco de retención en
la unidad afeitadora (1) y gire la ruedecilla
en el sentido de las agujas del reloj (2).
6 Vuelva a colocar la unidad afeitadora en el
aparato.
ESPAÑOL 55
2
1
2
1
1
2
Page 54

Accesorios
Están disponibles los siguientes accesorios:
- Conjuntos cortantes Philips Super Reflex
HQ55.
- Philips Action Clean HQ100 (para limpiar los
conjuntos cortantes).
- Recambio Philips Action Clean HQ101 (líquido
limpiador de los conjuntos cortantes).
- Limpiador Philips HQ110 (spray limpiador de
los conjuntos cortantes).
Medio ambiente
C
◗ Cuando vaya a deshacerse de este aparato, no
lo tire con la basura normal del hogar;
deposítelo en un punto de recogida oficial
para su reciclado.Al hacerlo, contribuirá a
preservar el medio ambiente.
Cómo deshacerse de la batería
La batería recargable incorporada contiene
sustancias que pueden contaminar el medio
ambiente. Quite la batería antes de deshacerse
del aparato o de depositarlo en un punto de
recogida oficial. Lleve la batería a un punto de
recogida oficial de baterías. Si tiene problemas a la
hora de extraerla, puede llevar el aparato a un
Servicio de Asistencia Técnica de Philips, donde
quitarán la batería y se desharán de ella de forma
no perjudicial para el medio ambiente.
Quite la batería sólo cuando esté completamente
descargada.
ESPAÑOL56
Page 55

1 Saque la clavija de la toma de corriente y
quite el cable de la afeitadora.
C
2 Deje que la afeitadora funcione hasta que
se pare. Luego afloje los tornillos y abra la
afeitadora.
3 Quite la batería.
La afeitadora no puede volver a enchufarse a la
red después de haber quitado la batería.
Garantía y servicio
Si necesita información o tiene algún
problema, visite la página web de Philips en
www.philips.com,o póngase en contacto con el
Servicio Philips de Atención al Cliente de su país
(hallará el número de teléfono en el folleto de la
Garantía Mundial). Si en su país no hay Servicio
Philips de Atención al Cliente, diríjase a su
distribuidor local Philips o póngase en contacto
con el Service Depar tment of Philips Domestic
Appliances and Personal Care BV.
Solución de problemas
1 Menor rendimiento en el afeitado
B
Causa 1: los conjuntos cortantes están sucios.
B
No se ha limpiado la afeitadora lo
suficientemente bien o no se ha limpiado desde
hace mucho tiempo.
ESPAÑOL 57
Page 56

◗ Limpie bien el aparato antes de seguir
afeitando. Consulte el capítulo 'Limpieza y
mantenimiento'.
B
Causa 2: hay pelos largos obstruyendo los
conjuntos cortantes.
◗ Limpie las cuchillas y los protectores con el
cepillo que se suministra. Consulte el capítulo
'Limpieza y mantenimiento', apartado "Cada
dos meses: conjuntos cortantes".
B
Causa 3: los conjuntos cortantes están gastados o
dañados.
◗ Sustituya los conjuntos cortantes. Consulte el
capítulo 'Sustitución'.
2 La afeitadora no funciona cuando se
desliza el botón de encendido/apagado a la
posición I.
B
Causa 1: la batería está descargada.
◗ Vuelva a cargar la batería. Consulte el capítulo
"Carga".
B
Causa 2: la afeitadora no está enchufada a la red.
◗ Conecte la clavija a un enchufe de red.
ESPAÑOL58
Page 57

Importante
Prima di usare l'apparecchio leggete con
attenzione queste istruzioni e conservatele per
eventuali riferimenti futuri.
◗ Utilizzate esclusivamente il cavo in dotazione.
◗ Non usate il cavo nel caso risulti danneggiato.
◗ Nel caso il cavo di alimentazione fosse
danneggiato, dovrà essere sostituito
esclusivamente con un modello originale, per
evitare situazioni a rischio.
◗ L'apparecchio è provvisto di un selettore
automatico di tensione ed è adatto per
tensioni comprese fra 100 e 240 volt.
◗ Caricate, riponete e usate l'apparecchio a una
temperatura compresa fra 5cC e 35cC.
◗ Non ricaricare l'apparecchio in un sacchetto
chiuso.
C
◗ Tenete sempre asciutti l'apparecchio e il cavo
di alimentazione.
Come caricare l'apparecchio
Prima di caricare l'apparecchio, controllate che sia
spento.
In occasione della prima ricarica o dopo un lungo
periodo di inattività, lasciate il rasoio sotto carica
per 4 ore di fila. Una normale ricarica richiede
circa 1 ora.
È possibile inoltre utilizzare l'apparecchio senza
averne ricaricato le batterie, collegandolo
direttamente alla rete.
ITALIANO 59
Page 58

Non lasciate l'apparecchio collegato alla presa di
corrente per più di 24 ore.
Istruzioni per la ricarica
Come caricare l'apparecchio
C
◗ Non appena inizierete a caricare il rasoio, si
accenderà la spia verde.
Ricarica completa della batteria
C
◗ Quando la batteria sarà completamente
carica, la spia verde inizierà a lampeggiare.
Come caricare l'apparecchio
Caricate l'apparecchio quando il motore si ferma
o inizia a funzionare più lentamente.
Non ricaricate l'apparecchio nella custodia chiusa.
C
1 Inserito lo spinotto nel rasoio.
2 Inserite la spina nella presa di corrente.
ITALIANO60
CHARGE
CHARGE
Page 59

3 Dopo aver caricato completamente la
batteria, togliete la spina dalla presa e lo
spinotto dal rasoio.
Tempo di rasatura cordless
Il rasoio completamente carico ha un'autonomia
di rasatura di 30 minuti.
Rasatura
Rasatura
1 Per accendere il rasoio, mettete il cursore
on/off in posizione I.
C
2 Muovete le testine di rasatura sulla pelle,
compiendo movimenti lineari e circolari.
Per ottenere i migliori risultati, è meglio radersi
con la pelle asciutta.
Può essere necessario un periodo di adattamento
di 2 o 3 settimane per consentire alla pelle di
abituarsi al sistema di rasatura Philips.
3 Per spegnere il rasoio, mettete il cursore
on/off in posizione 0.
C
4 Quando non usate il rasoio, mettete
l'apposito cappuccio di protezione, per
evitare di danneggiarlo.
ITALIANO 61
Page 60

Tagliabasette
Per la rifinitura di basette e baffi.
C
1 Estrarre il tagliabasette spingendolo verso
l'alto.
Il tagliabasette può essere attivato mentre il
rasoio è in funzione.
Pulizia e manutenzione
Una pulizia regolare garantisce i migliori risultati di
rasatura.
C
◗ Per una pulizia facile e ottimale utilizzare
Philips Action Clean (tipo HQ100, per la
pulizia delle testine dei rasoi). Chiedi
informazioni al rivenditore.
B
Il Philips Action Clean potrebbe non essere
disponibile in tutti i paesi. Per sapere se è
disponibile, rivolgetevi al Centro Assistenza Clienti.
Per la pulizia del rasoio, è possibile inoltre
procedere come segue:
Ogni settimana: l'unità di rasatura e la
vaschetta di raccolta peli.
1 Spegnete il rasoio, togliete la spina dalla
presa di corrente e lo spinotto dal rasoio.
C
2 Pulire la parte superiore dell'apparecchio
servendovi dello spazzolino in dotazione.
ITALIANO62
Page 61

C
3 Premete il pulsante di sgancio (1) e
togliete l'unità di rasatura.
C
4 Pulite l'interno dell'unità di rasatura e la
vaschetta di raccolta dei peli con lo
spazzolino.
C
5 Rimettete l'unità di rasatura sul rasoio.
Tagliabasette
1 Spegnete il rasoio, togliete la spina dalla
presa di corrente e lo spinotto dal rasoio.
C
2 Premete il pulsante di sgancio (1) e
togliete l'unità di rasatura.
C
3 Girate la rotella in senso antiorario (1) e
togliete il telaietto di fissaggio (2).
ITALIANO 63
2
1
2
1
2
1
Page 62

C
4 Togliete e pulite testine (lama e paralama)
una ad una.
Non scambiate le lame e le paralame.
Questa precauzione è essenziale in quanto il filo
delle lame all'interno delle griglie garantisce
prestazioni ottimali limitatamente ad ogni singolo
gruppo. Qualora i componenti venissero
accidentalmente mischiati, occorrerebbero alcune
settimane per ripristinare la funzionalità ottimale
del rasoio.
C
5 Pulite le lame servendovi della parte di
spazzolino a setole corte.
Spazzolare con cautela nel senso indicato dalla
freccia.
C
6 Spazzolate la paralama.
C
7 Rimettete le testine nell'unità di rasatura.
Rimettete il telaietto di fissaggio nell'unità
di rasatura (1) e ruotate la rotella in senso
orario (2).
8 Rimettete l'unità di rasatura sul rasoio.
Per una pulizia ancora più accurata, immergete le
testine di rasatura in un liquido sgrassante (ad
esempio alcool) ogni sei mesi. Per togliere le
testine di rasatura, seguite i punti 1-4 descritti qui
sopra. Al termine della pulizia, lubrificate il punto
centrale all'interno delle paralame con una goccia
di olio per macchina per cucine, per evitare
l'usura delle testine.
ITALIANO64
1
2
Page 63

Tagliabasette
Pulite il tagliabasette subito dopo l'uso.
1 Spegnete il rasoio, togliete la spina dalla
presa di corrente e lo spinotto dal rasoio.
C
2 Pulite il tagliabasette con lo spazzolino
fornito.
C
3 Lubrificate i dentini del tagliabasette ogni
sei mesi, utilizzando una goccia di olio per
macchina per cucire.
Come riporre l'apparecchio
C
◗ Per evitare di danneggiare l'apparecchio,
inserire il cappuccio di protezione sul rasoio.
◗ L'apparecchio può essere riposto nell'apposita
custodia.
Sostituzione
Sostituite le testine di rasatura ogni due anni per
ottenere risultati di rasatura ottimali.
Per sostituire le testine danneggiate o usurate,
utilizzate esclusivamente testine di rasatura HQ55
Philips Super Reflex.
1 Spegnete il rasoio, togliete la spina dalla
presa di corrente e lo spinotto dal rasoio.
ITALIANO 65
Page 64

C
2 Premete il pulsante di sgancio (1) e
togliete l'unità di rasatura (2).
C
3 Ruotate la rotella in senso antiorario (1) e
togliete il telaietto di fissaggio.
C
4 Togliete le testine e inserite quelle nuove
nell'unità di rasatura.
C
5 Rimettete il telaietto di fissaggio nell'unità
di rasatura (1) e ruotate la rotella in senso
orario (2).
6 Rimettete l'unità di rasatura sul rasoio.
Accessori
Sono disponibili i seguenti accessori:
- HQ55 Philips Action Reflex testine di rasatura.
- HQ100 Philips Action Clean (per pulire le
testine di rasatura).
- HQ101 Philips Action Clean ricarica (liquido
per la pulizia delle testine di rasatura).
ITALIANO66
2
1
2
1
1
2
Page 65

- HQ110 Philips Head Cleaner (spray per la
pulizia delle testine).
Ambiente
C
◗ A fine vita non gettare questo apparecchio
nella normale raccolta dei rifiuti, ma portalo
presso uno dei punti di raccolta autorizzati. In
questo modo contribuirai a preservare
l'ambiente.
Come smaltire le batterie
La batteria ricaricabile incorporata contiene
sostanze che potrebbero inquinare l'ambiente.
Togliete sempre la batteria prima di gettare
l'apparecchio o prima di portarlo presso un
centro di raccolta differenziata. Portate le batterie
presso un centro di raccolta differenziato specifico
per batterie. Se avete problemi per togliere la
batteria, potete portare l'apparecchio presso un
centro assistenza Philips: il personale provvederà a
togliere la batteria senza danneggiare l'ambiente.
Togliete la batteria solo quando è completamente
scarica
1 Togliete la spina dalla presa di
alimentazione e lo spinotto
dall'apparecchio.
C
2 Attendere che l'apparecchio si arresti,
quindi allentare le viti ed aprire il rasoio.
3 Togliete le batterie.
ITALIANO 67
Page 66

Non ricollegate l'apparecchio alla presa di
corrente dopo aver tolto le batterie.
Garanzia e Assistenza
Se avete bisogno di ulteriori informazioni o in
caso di problemi, vi preghiamo di visitare il sito
Philips www.philips.com oppure contattate il
Centro Assistenza Clienti Philips del vostro paese
(per conoscere il numero, consultate l'opuscolo
della garanzia). Qualora nel vostro paese non ci
sia un Centro Assistenza Clienti,contattate il
vostro rivenditore di fiducia oppure il Service
Department of Philips Domestic Appliances and
Personal Care BV (l'indirizzo e il numero di fax
sono riportati qui sotto).
Ricerca e risoluzione guasti
1 Prestazioni di rasatura ridotte
B
Causa 1: le testine di rasatura sono sporche.
B
Il rasoio non è stato pulito a sufficienza oppure
non è stato pulito per tanto tempo.
◗ Pulite accuratamente il rasoio prima di
continuare la rasatura.Vedere il capitolo
"Pulizia e manutenzione".
B
Causa 2. i peli lunghi stanno ostruendo le testine
di rasatura.
◗ Pulite lame e paralame con lo spazzolino
fornito.Vedere il capitolo "Pulizia e
ITALIANO68
Page 67

Manutenzione", sezione "Ogni due mesi:
testine di rasatura".
B
Causa 3: le testine di rasatura sono danneggiate o
usurate.
◗ Sostituite le testine di rasatura.Vedere il
capitolo "Sostituzione".
2 Il rasoio non funziona mettendo il cursore
on/off in posizione I.
B
Causa 1: la batteria è scarica.
◗ Ricaricate la batteria.Vedere il capitolo
"Ricarica".
B
Causa 2: il rasoio non è collegato alla presa di
corrente.
◗ Inserite la spina nella presa di corrente.
ITALIANO 69
Page 68

Importante
Antes da primeira utilização, leia estas instruções
com atenção e guarde-as para uma eventual
consulta futura.
◗ Utilize apenas o cabo de alimentação
fornecido.
◗ Se o fio estiver estragado,não use a máquina.
◗ Se o cabo de alimentação estiver estragado,
deverá sempre ser substituído por uma peça
de origem para que se evitem situações
perigosas para o utilizador.
◗ A máquina está equipada com um selector de
voltagem automático e está preparada para
voltagens entre 100 a 240 volts.
◗ Carregue, guarde e utilize a máquina numa
temperatura entre 5cC e 35cC.
◗ Não recarregue a máquina de barbear dentro
da bolsa fechada.
C
◗ A máquina e o fio devem estar sempre secos.
Carga
Antes de começar a carga, verifique se a máquina
está desligada.
Quando se carrega a máquina pela primeira vez
ou após um período prolongado de inactividade,
deve deixar-se em carga contínua durante 4
horas. A carga normal da máquina demora cerca
de 1 hora.
Poderá igualmente barbear-se sem carregar a
máquina, bastando que a ligue à corrente.
PORTUGUÊS70
Page 69

Não deixe a máquina ligada à corrente durante
mais de 24 horas seguidas.
Indicações de carga
Carga
C
◗ Logo que se começa a carregar a máquina
vazia, a lâmpada piloto verde acende-se.
Carga
C
◗ Quando a bateria atinge a carga total, a
lâmpada piloto verde começa a piscar.
Carga da máquina
Carregue a máquina quando o motor parar ou
quando começar a trabalhar mais devagar.
Não recarregue a máquina de barbear dentro da
bolsa fechada.
C
1 Introduza a ficha de ligação do aparelho na
máquina de barbear.
2 Ligue a ficha à corrente.
PORTUGUÊS 71
CHARGE
CHARGE
Page 70

3 Retire a ficha da tomada eléctrica e puxe a
ficha de ligação para fora da máquina
quando a bateria atingir a carga total.
Barbear sem fio
Uma máquina com carga total terá até 30
minutos de autonomia.
Utilização
Fazer a barba
1 Ligue a máquina empurrando o interruptor
para a posição I.
C
2 Passe as cabeças de corte rapidamente
sobre a pele, efectuando movimentos a
direito e em círculo.
Obterá melhores resultados se a pele estiver
seca.
A sua pele poderá precisar de 2 a 3 semanas para
se adaptar ao sistema de barbear Philips.
3 Desligue a máquina empurrando o
interruptor para a posição 0.
C
4 Sempre que se servir da máquina coloque-
lhe a tampa de protecção para evitar
qualquer dano.
PORTUGUÊS72
Page 71

Aparador
Para aparar as patilhas e o bigode.
C
1 Liberte o aparador empurrando o
comutador para cima.
O aparador poderá ser activado com o motor
em funcionamento.
Limpeza e manutenção
Uma limpeza regular é garantia de melhores
resultados.
C
◗ Para uma limpeza mais simples e eficaz,
adquira o Philips Action Clean (líquido de
limpeza das cabeças, tipo HQ100). Informe-se
num distribuidor Philips.
B
O Philips Action Clean poderá não se encontrar
disponível em todos os países. Contacte o Centro
de Informação ao Consumidor do seu país para
se informar sobre a disponibilidade deste
acessório.
Também poderá limpar a máquina da seguinte
forma:
Semanalmente: unidade de corte e câmara
de recolha dos pêlos
1 Desligue a máquina, retire a ficha da
tomada eléctrica e puxe a ficha de ligação
para fora da máquina.
PORTUGUÊS 73
Page 72

C
2 Limpe a parte superior da máquina com a
ajuda da escova fornecida.
C
3 Pressione o botão de desengate (1) e
retire a unidade de corte (2).
C
4 Limpe o interior da unidade de corte e a
câmara de recolha dos pêlos com a
escova.
C
5 Volte a colocar a unidade de corte na
máquina.
Aparador
1 Desligue a máquina, retire a ficha da
tomada eléctrica e puxe a ficha de ligação
para fora da máquina.
C
2 Pressione o botão de desengate (1) e
retire a unidade de corte (2).
PORTUGUÊS74
2
1
2
1
Page 73

C
3 Rode o anel para a esquerda (1) e retire a
armação de retenção (2).
C
4 Retire e limpe as cabeças de corte (lâmina
e guarda), uma a uma.
Não misture as lâminas e as guardas.
Tenha cuidado para que isto não aconteça,
porque as lâminas e as guardas formam um
conjunto que garante um rendimento adequado.
Se misturar acidentalmente os conjuntos, poderá
levar várias semanas até conseguir voltar a obter
um barbear apurado com óptimos resultados.
C
5 Limpe as lâminas utilizando as cerdas mais
curtas da escova.
Escove cuidadosamente na direcção da seta.
C
6 Escove a guarda.
C
7 Reponha as cabeças na unidade de corte.
Volte a colocar a armação de retenção na
unidade de corte (1) e rode o anel para a
direita (2).
8 Volte a colocar a unidade de corte na
máquina.
Para uma limpeza extra mais profunda, limpe as
cabeças colocando-as num líquido
PORTUGUÊS 75
2
1
1
2
Page 74

desengordurante (como álcool) de 6 em 6
meses. Para retirar as cabeças, siga as instruções 1
a 4 descritas anteriormente. Depois da limpeza,
lubrifique o ponto central do interior das guardas
com uma gota de óleo para máquinas de costura
para evitar o desgaste das cabeças.
Aparador
Limpe o aparador sempre que o utilizar.
1 Desligue a máquina, retire a ficha da
tomada eléctrica e puxe a ficha de ligação
para fora da máquina.
C
2 Limpe o aparador com a escova fornecida.
C
3 A cada seis meses, lubrifique os dentes do
aparador com uma gota de óleo para
máquinas de costura.
Arrumação
C
◗ Para evitar danos, coloque a tampa de
protecção na máquina.
◗ A máquina pode ser guardada na bolsa
fornecida.
PORTUGUÊS76
Page 75

Substituição
As cabeças de corte devem ser substituídas de
dois em dois anos para manter a eficácia da
máquina de barbear.
Substitua as cabeças estragadas ou gastas apenas
por cabeças de origem HQ55 Philips Super
Reflex.
1 Desligue a máquina, retire a ficha da
tomada eléctrica e puxe a ficha de ligação
para fora da máquina.
C
2 Pressione o botão de desengate (1) e
retire a unidade de corte (2).
C
3 Rode o anel para a esquerda (1) e retire a
armação de retenção (2).
C
4 Retire as cabeças e coloque as cabeças
novas na unidade de corte.
C
5 Reponha a armação de retenção na
unidade de corte (1) e rode o anel para a
direita (2).
6 Volte a colocar a unidade de corte na
máquina.
PORTUGUÊS 77
2
1
2
1
1
2
Page 76

Acessórios
Estão disponíveis os seguintes acessórios:
- HQ55 Cabeças Philips Super Reflex.
- HQ100 Philips Action Clean (líquido de
limpeza das cabeças).
- HQ101 Recarga Philips Action Clean (líquido
de limpeza das cabeças).
- HQ110 Philips Head Cleaner (spray para
limpeza das cabeças).
Meio ambiente
C
◗ Quando chegar a altura de se desfazer do
aparelho,não o deite fora juntamente com o
seu lixo doméstico normal. Deverá colocá-lo
num ponto de recolha oficial para efeitos de
reciclagem.Ao fazê-lo, estará a contribuir para
a preservação do meio ambiente.
Remoção da bateria
A bateria recarregável integrada contém
substâncias susceptíveis de poluirem o ambiente.
Retire sempre a bateria antes de se desfazer da
máquina ou, então, entregue-a num ponto oficial
de recolha desse tipo de resíduos.As baterias
devem ser colocadas nos ecopontos (pilhão). Se
tiver problemas para retirar a bateria, poderá
sempre dirigir-se a um concessionário autorizado
pela Philips que se encarregará de remover a
bateria e de se desfazer dela de forma a respeitar
as normas de protecção ambiental.
A bateria só deve ser retirada se estiver
totalmente vazia.
PORTUGUÊS78
Page 77

1 Desligue a ficha da tomada eléctrica e
retire a ficha de ligação para fora da
máquina.
C
2 Deixe a máquina a trabalhar até parar,
desaperte os parafusos e abra a máquina
de barbear.
3 Retire a bateria.
A máquina de barbear não deverá ser ligada
novamente à corrente depois de lhe ser retirada
a bateria.
Garantia e assistência
Se precisar de informações ou se tiver algum
problema, por favor visite a página da Philips na
Internet em www.philips.pt ou contacte o Centro
de Informação ao Consumidor Philips do seu país
(encontrará os números de telefone no folheto da
garantia mundial). Se não existir um Centro de
Informação ao Consumidor no seu país, por favor
dirija-se ao seu distribuidor Philips local ou
contacte o Departamento de Service da Philips
Domestic Appliances and Personal Care BV.
Resolução de problemas
1 Reduzida performance no barbear
B
Causa 1: As cabeças estão sujas.
B
A máquina não ficou suficientemente bem limpa
ou já não é limpa há muito tempo.
PORTUGUÊS 79
Page 78

◗ Limpe a máquina cuidadosamente antes de
continuar a fazer a barba.Vidé capítulo
'Limpeza e manutenção'.
B
Causa 2: há pêlos compridos a obstruir as
cabeças.
◗ Limpe as lâminas e as guardas com a escova
fornecida.Vidé capítulo 'Limpeza e
manutenção', secção 'De dois em dois meses:
cabeças'.
B
Causa 3: as cabeças estão estragadas ou gastas.
◗ Substitua as cabeças.Vidé capítulo
'Substituição'.
2 A máquina não trabalha quando se
empurra o interruptor para a posição I.
B
Causa 1: a bateria está vazia.
◗ Recarregue a bateria.Vidé capítulo 'Carga'.
B
Causa 2: a máquina não está ligada à corrente.
◗ Ligue a ficha à tomada eléctrica.
PORTUGUÊS80
Page 79

Önemli
Lütfen cihazı kullanmadan önce verilen talimatları
okuyun. İleride başvurmak için bu talimatları
saklayın.
◗ Cihazı, yalnızca cihazla birlikte satılan elektrik
kordonunu ile kullanın.
◗ Hasarlı elektrik kordonunu kullanmayın.
◗ Cihazın elektrik kordonu hasar görmüşse,
kesinlikle orijinal modeli ile değiştirilmelidir.
◗ Cihazda otomatik voltaj seçici fonksiyon
vardır. Cihaz 100-240 arası volt elektrik
akımlarında kullanıma uygundur.
◗ Cihazı 5cC ila 35cC arasında şarj edin,
saklayın ve kullanın.
◗ Cihazı kapalı kılıf içinde şarj etmeyiniz.
C
◗ Cihaz ve elektrik kordonunun ıslanmamasına
özen gösterin.
Şarj etme
Cihazı şarj etmeden önce kapalı konumda
olduğundan emin olun.
Cihazı ilk kez kullandığınızda veya uzun müddet
kullanmadıysanız yaklaşık 4 saat şarj edin. Normal
şarj süresi yaklaşık 1 saattir.
Cihazı şarj etmeden de hemen elektriğe
bağlayarak tıraş olabilirsiniz.
Cihazı 24 saatten fazla prizde bırakmayın.
TÜRKÇE 81
Page 80

Şarj göstergeleri
Şarj etme
C
◗ Boş tıraş makinesini şarj etmeye
başladığınızda, yeşil pilot ışık yanacaktır.
Pil tamamen dolu iken
C
◗ Pil tamamen dolduğunda, yeşil pilot ışık yanıp
sönmeye başlıyacaktır.
Cihazın şarj edilmesi
Cihazın motoru tamamen durduğunda veya
çalışması yavaşladığında cihazı şarj edin.
Cihazı saklama kılıfı içinde şarj etmeyin.
C
1 Cihazın fişini tıraş makinesine takın.
2 Cihazın fişini prize takın.
3 Güç fişini prizden çekin ve pil tamamen
dolduğunda, cihazın fişini tıraş
makinesinden çekin.
TÜRKÇE82
CHARGE
CHARGE
Page 81

Kordonsuz tıraş olma süresi
Piller tamamen dolu iken, şarjlı kullanımda 30
dakika tıraş olabilirsiniz.
Cihazın kullanımı
Tıraş olma
1 Açma/kapama sürgüsünü pozisyon 1'e
iterek, cihazı çalıştırın.
C
2 Düz ve dairesel hareketler yaparak hızlı bir
şekilde tıraş başlığını cildinizin üzerinde
dolaştırınız.
Kuru cilt üzerinde yapılan tıraş en iyi sonucu verir.
Cildinizin Philips tıraş sistemine alışması 2 ile 3
hafta sürebilir.
3 Açma/kapama sürgüsünü 0 pozisyonuna
iterek, cihazı kapatın.
C
4 Tıraş makinesinin başlıklarını her
kullanımdan sonra koruyucu kapak ile
kapatın.
Düzeltici
Favori ve bıyık düzeltmek içindir.
C
1 Sürgüyü yukarıya iterek düzelticiyi açınız.
Cihaz çalıştığında düzelticiyi aktif hale
getirebilirsiniz.
TÜRKÇE 83
Page 82

Temizlik & bakım
Cihazı düzenli olarak temizlemek daha iyi tıraş
performansını sağlar.
C
◗ Etkili ve kolay temizlik Philips Action Clean
kullanınız. (Tıraş başlığı temizleyicisi HQ100)
Daha detaylı bilgi için yetkili Philips bayilerine
başvurun.
B
Philips Action Clean (Tıraş başlığı temizleyicisi) tüm
ülkerlerde bulunmayabilir. Ülkenizdeki Tüketici
Danışma Hattını arayarak nasıl temin
edebileceğinizi sorun.
Tıraş makinasını şu şekildede temizleyebilirsiniz:
Her hafta: tıraş ünitesi ve kıl toplama
haznesi
1 Tıraş makinesini kapatın, fişini prizden
çekin, cihazın fişini cihazdanda çıkarın.
C
2 Cihazın üstünü kutudan çıkan fırçayla
temizleyin.
C
3 Ayırma düğmesine(1) basınız ve tıraş
ünitesini (2) çıkartın.
TÜRKÇE84
2
1
Page 83

C
4 Tıraş ünitesini ve kıl toplama haznesini
fırçayla temizleyin.
C
5 Tıraş ünitesini yine tıraş makinasına
yerleştiriniz.
Düzeltici
1 Tıraş makinesini kapatın, fişini prizden
çekin, cihazın fişini cihazdanda çıkarın.
C
2 Ayırma düğmesine(1) basınız ve tıraş
ünitesini (2) çıkartın.
C
3 Çarkı, saatin aksi yönünde(1) döndürünüz
ve tespit çerçevesini (2) çıkartın.
C
4 Tıraş başlıklarını (bıçak ve koruyucu
parçayı) tek tek çıkartınız ve temizleyin.
Bıçak ve koruyucu parçaları karıştırmayınız.
Bu çok önemlidir! Çünkü her bıçak, kendi
koruyucu parçası ile bilenmiştir. Mükemmel
performans elde edebilmek için bıçakları ve
koruyucu parçaları yanlışlıkla birbirine
TÜRKÇE 85
2
1
2
1
Page 84

karıştırırsanız, bıçakların tekrar eski
performanlarına ulaşması haftalarca sürebilir.
C
5 Bıçağı, fırçanın kısa kıllı tarafıyla
temizleyiniz.
Dikkatlice okun gösterdiği yöne doğru fırçalayınız.
C
6 Koruyucu parçayı fırçalayınız.
C
7 Tıraş başlıklarını tekrar tıraş ünitesine
yerleştirin.Tutucu çerçeveyi tekrar tıraş
ünitesine(1) koyun,çarka bastırarak saat
yönünde (2)çevirin.
8 Tıraş ünitesini yine tıraş makinasına
yerleştiriniz.
Derinlemesine ekstra temizlik için, tıraş başlıklarını
her altı ayda bir alkol ilede temizleyebilirsiniz.Tıraş
başlıklarını yerinden çıkarmak için yukarıdaki 1ile 4
maddelerini takip edin.Tıraş başlıklarını
temziledikten sonra koruyucuların merkez
noktasını yağlamak için bir damla makina yağı
damlatın. Bu sayede tıraş başlıklarının aşınması
önlenecektir.
TÜRKÇE86
1
2
Page 85

Düzeltici
Her kullanımdan sonra düzelticiyi temizleyiniz.
1 Tıraş makinesini kapatın, fişini prizden
çekin, cihazın fişini cihazdanda çıkarın.
C
2 Düzelticiyi fırçayla temizleyiniz.
C
3 Düzelticinin dişlerini her altı ayda bir, bir
damla dikiş makinası yağıyla yağlayınız.
Saklama
C
◗ Tıraş makinesine koruyucu kapağı takın.
◗ Cihaz, beraberinde satılan kılıf içerisinde
saklanabilir.
Değiştirme
En iyi tıraş performansı için tıraş başlıklarını iki yılda
bir değiştirin.
Hasarlı veya yıpranmış tıraş başlıkları sadece
Philips HQ55 Super Reflex tıraş başlıkları ile
değiştirilmelidir.
TÜRKÇE 87
Page 86

1 Tıraş makinesini kapatın, fişini prizden
çekin, cihazın fişini cihazdanda çıkarın.
C
2 Ayırma düğmesine (1) basınız ve tıraş
ünitesini (2) çıkartınız.
C
3 Çarkı saat yönünün tersine (1)
döndürerek, tutucu çerçeveyi (2) çıkartın.
C
4 Tıraş başlıklarını çıkartarak yeni tıraş
başlıklarını tıraş ünitesine yerleştirin.
C
5 Tespit çerçevesini tıraş ünitesine(1)
yerleştirerek saat yönünde çevirin.(2)
6 Tıraş ünitesini tekrar tıraş makinesine
takın.
Aksesuarlar
Belirtilen aksesuarlar bulunmaktadır:
- HQ55 Philips Super Reflex tıraş başlıkları
- HQ100 Philips Action Clean (tıraş başlığı
temizleyici).
- HQ101 Philips Action Clean yedek (tıraş başlığı
temizleme sıvısı).
TÜRKÇE88
2
1
2
1
1
2
Page 87

- HQ110 Philips tıraş başlığı temizleyici (tıraş
başlığı temizleme spreyi)
Çevre
C
◗ Cihazı hurdaya ayırırken, çevreye zarar
vermemek amacı ile normal ev çöpüne
kesinlikle atmayın.Özel toplama noktalarına
teslim edin.
Pilin atılması
Şarj pilleri içerdikleri kimyasallar yüzünden çevreye
zararli olabilirler. Cihazı hurdaya ayırmadan önce
mutlaka içindeki pilleri çıkartın ve özel toplama
noktalarına teslim edin. Pilleri özel toplama
noktalarında imha edin. Pilleri çıkarmakta güçlük
çekerseniz, cihazı Philips yetkili servislerine
götürüp aynı işlemi oradada yaptırabilirsiniz.
Tamamen şarj gücü bitmiş pili yerinden çıkartın.
1 Elektrik fişini duvar prizinden ve cihazın
fişini tıraş makinesinden çekin.
C
2 Duruncaya kadar cihazı çalıştırınız.Vidaları
sökünüz ve cihazı açınız.
3 Pili çıkartın.
Pili cihazdan çıkardıktan sonra, cihazın fişini prize
takmayın.
TÜRKÇE 89
Page 88

Garanti & Servis
Eğer daha fazla bilgiye ihtiyaç duyarsanız veya bir
problem yaşarsanız, lütfen Philips Web sitesini
www.philips.com.tr adresinden ziyaret ediniz veya
ülkenizde bulunan Philips Müşteri Danışma
Merkezi ile iletişime geçiniz (dünya genelindeki
telefon numaraları verilen garanti belgeleri
içerisinde bulabilirsiniz). Eğer ülkenizde Müşteri
Danışma Merkezi yoksa, yerel Philips yetkilinize
başvurun veya Philips Ev Aletleri ve Kişisel Bakım
BV Servis Depar tmanı ile iletişime geçin. 0 800
261 33 02
Sorun giderme
1 Azalan tıraş performansı
B
Sebep 1: tıraş başlıkları kirli.
B
Cihaz yeterince temiz temizlenmemiş veya uzun
bir süredir temizlenmemiş olabilir.
◗ Tıraş devam etmeden önce cihazı temizleyin.
Bkz. "Temizlik ve bakım" bölümü
B
Sebep 2: Uzun kıllar tıraş başlıklarının çalışmasını
önlüyor.
◗ Bıçakları ve koruyucu parçaları fırça ile
temizleyin. Bkz. "Temizlik ve bakım" bölümü
her iki ayda bir: tıraş başlıkları.
B
Sebep 3: tıraş başlıkları zarar görmüş veya
aşınmıştır.
TÜRKÇE90
Page 89

◗ Tıraş başlıklarını değiştirin.Bkz. " Değiştirme"
bölümü
2 Açma/kapama sürgüsü pozsiyon I'e
getirildiğinde tıraş makinesi çalışmıyor.
B
Sebeb: Pil boştur.
◗ Pili tekrar şarj edin Bkz. 'Şart etme' bölümü.
B
Sebeb 2:Cihazın fişi prize takılı değildir.
◗ Cihazın fişini prize takın.
TÜRKÇE 91
Page 90

92
Page 91

93
Page 92

4222 002 40864
94
 Loading...