

Page 1

HQ5802,5801
ENGLISH 4
FRANÇAIS 11
ESPAÑOL 18
PORTUGUÊS 25
37
43
á«Hô©dGá«Hô©dG
Page 2
Important
C
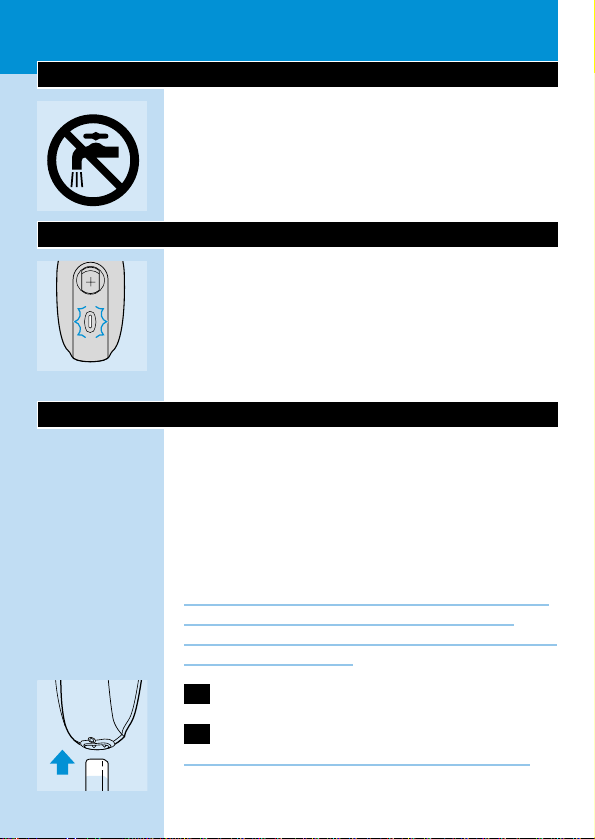
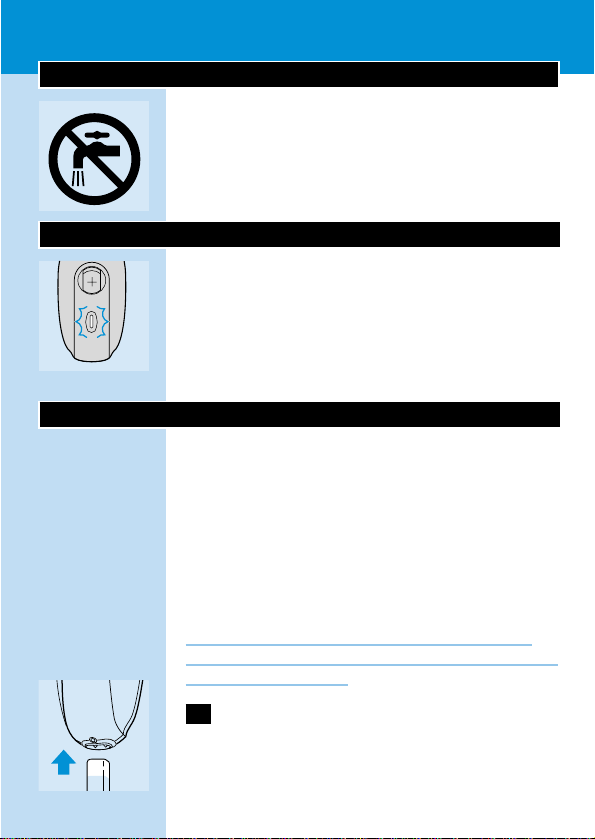
◗ Make sure the appliance and the cord do not
get wet.
◗ Only use the cord supplied.
Charge indications
C
◗ Charging
As soon as you start charging the empty shaver,
the green pilot light will go on.
A fully charged shaver has a cordless shaving time
of up to 45 minutes.
Charging
Recharge and keep the appliance at a
temperature between 5cC and 35cC.
The appliance is suitable for mains voltages
ranging from 100 to 240V.
You can also shave without charging by
connecting the shaver to the mains.
To extend the lifetime of the battery,remove the
powerplug from the wall socket and pull the
appliance plug out of the shaver when the battery
has been fully charged.
C
1 Put the appliance plug in the shaver.
2 Put the powerplug in the wall socket.
Do not recharge the shaver in a closed pouch.
ENGLISH4
Page 3
3 When charging for the first time or after a
long period of disuse:leave the shaver to
charge continuously for 12 hours.
Charging normally takes approx.8 hours.
4 Remove the powerplug from the socket
and pull the appliance plug out of the
shaver when the battery has been fully
charged.
Shaving
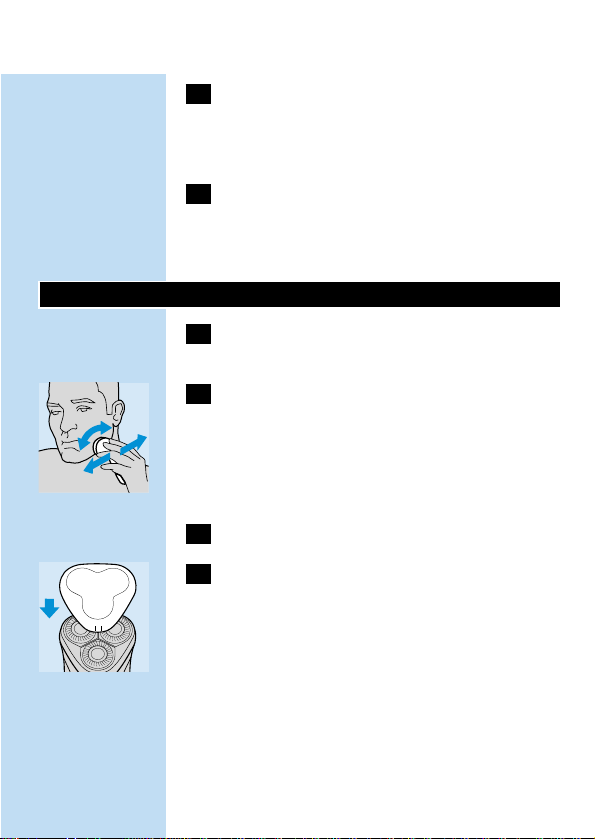
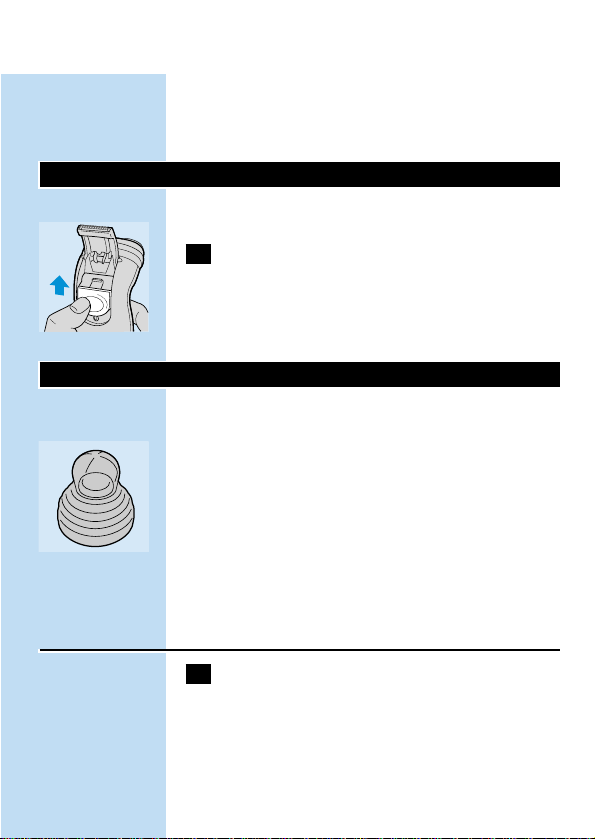
1 Switch the appliance on by sliding the
on/off button upwards.
C
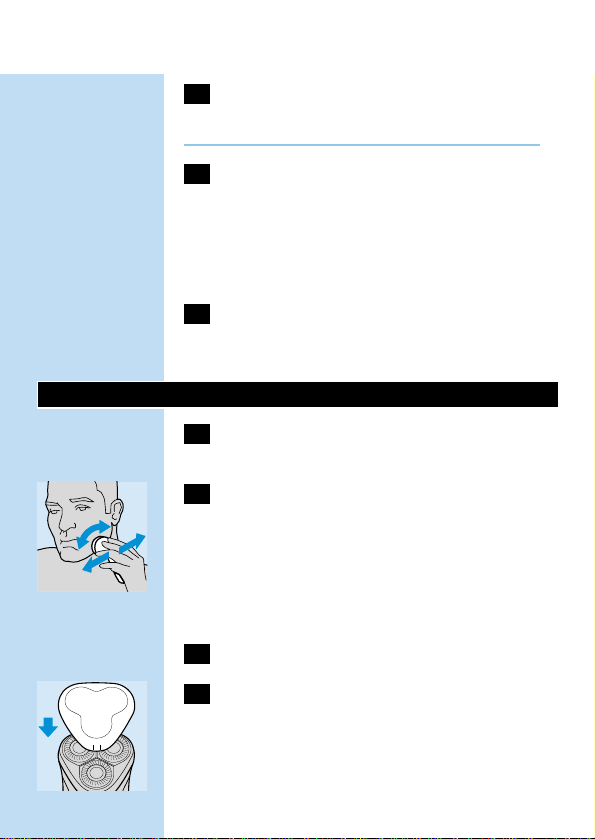
2 Move the shaving heads quickly over your
skin,making both straight and circular
movements.
Shaving on a dry face gives the best results.
Your skin may need 2 or 3 weeks to get
accustomed to the Philishave system.
3 Switch the shaver off.
C
4 Put the protection cap on the shaver to
prevent damage.
Replace the shaving heads (type HQ5 Reflex
Action) every 2 years for optimal shaving results.
ENGLISH 5
Page 4
Trimming
For grooming sideburns and moustache.
C
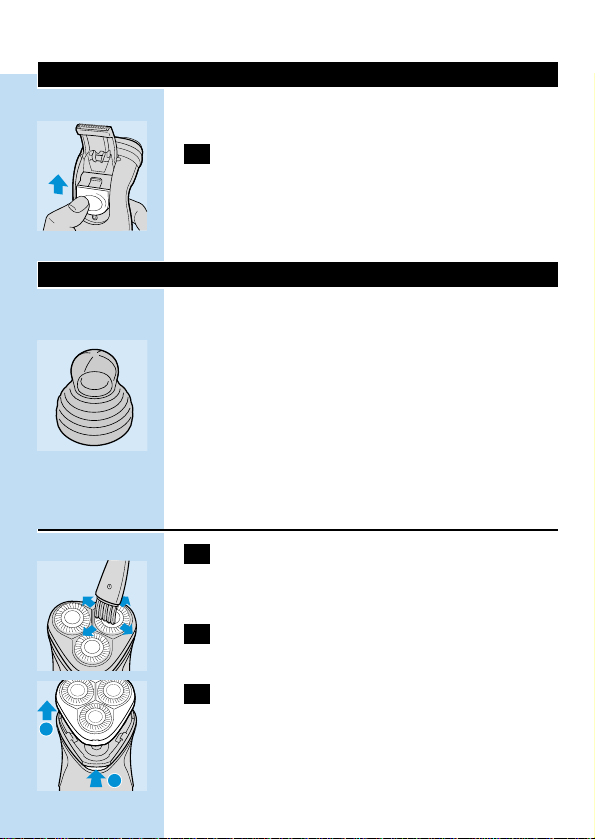
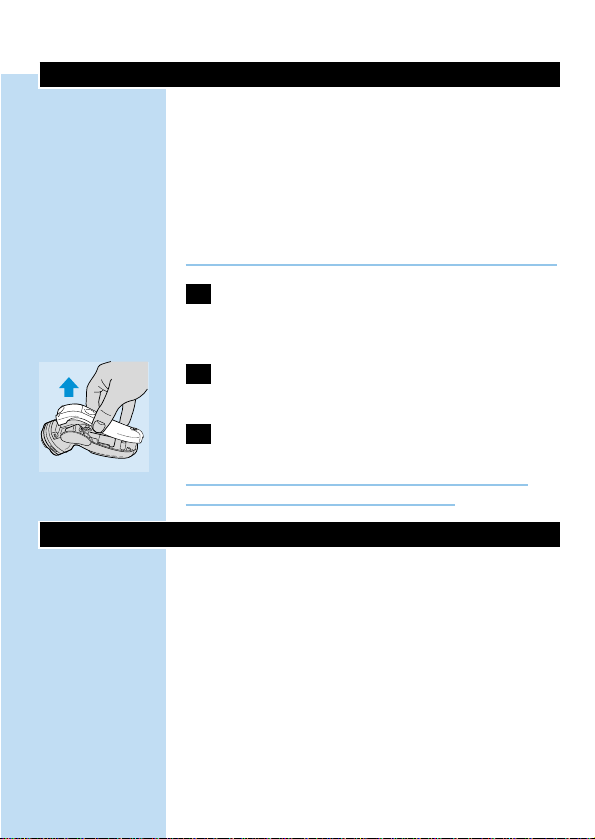
1 Open the trimmer by pushing the slide
upwards.
The trimmer can be activated while the motor is
running.
Cleaning
◗ Regular cleaning guarantees better shaving
performance.
C
◗ For easy and optimal cleaning,the Philishave
Action Clean (shaving head cleaner,type
HQ100) is available.Ask your Philishave dealer
for information.
You can also clean the shaver in the following
way:
Every week:shaving unit
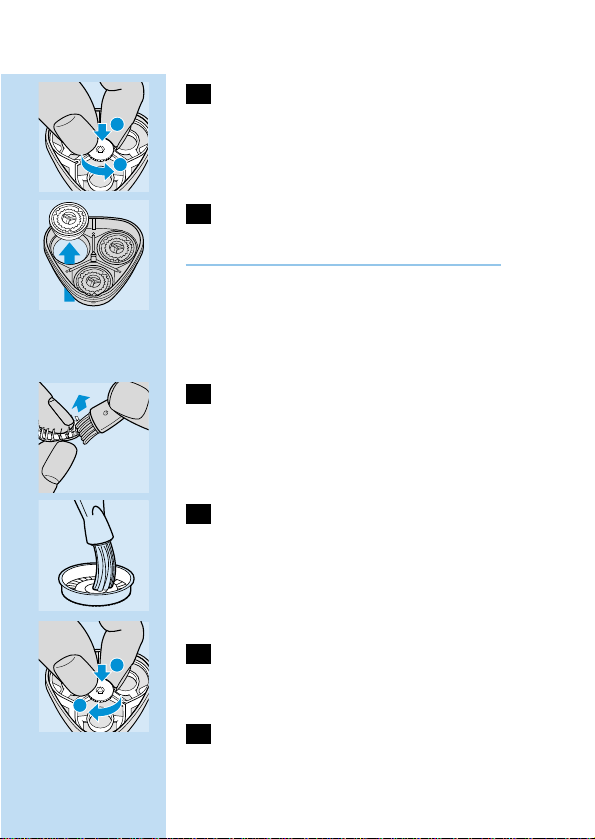
1 Switch the shaver off,remove the
powerplug from the wall socket and pull
the appliance plug out of the shaver.
C
2 Clean the top of the appliance first,using
the brush supplied.
C
3 Press the release button and remove the
shaving unit.
ENGLISH6
2
1
Page 5
C
4 Clean the inside of the shaving unit and the
hair chamber with the brush.
C
5 Put the shaving unit back onto the shaver.
Every two months:shaving heads
1 Switch the shaver off,remove the
powerplug from the wall socket and pull
the appliance plug out of the shaver.
C
2 Press the release button and remove the
shaving unit.
C
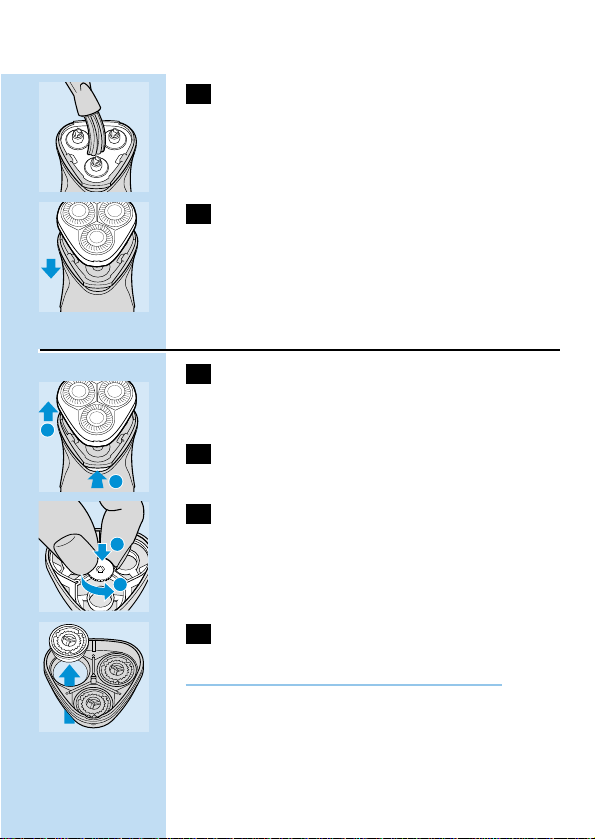
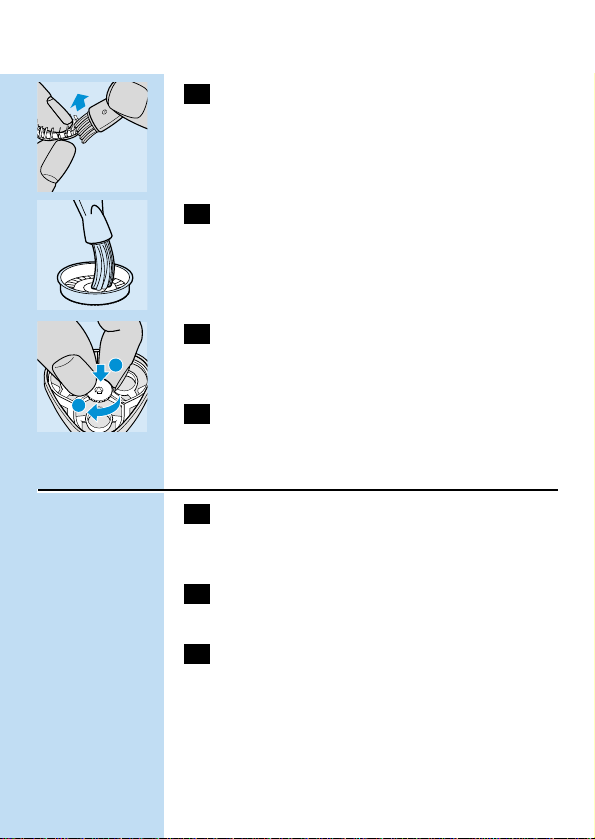
3 Turn the wheel anticlockwise and remove
the retaining frame.
C
4 Remove and clean the shaving heads
(cutters and guards) one by one.
Do not mix up the cutters and the guards.
This is essential since each cutter has been
ground with its corresponding guard for optimal
performance. If you accidentally mix the sets up,it
could take several weeks before optimal shaving
performance is restored.
ENGLISH 7
2
1
1
2
Page 6
C
5 Clean the cutter with the short-bristled
side of the brush.
Brush carefully in the direction of the arrow.
C
6 Brush the guard.
If necessary,you can clean the shaving unit with a
degreasing liquid (e.g. alcohol).Remember to
lubricate the central point of the guards with a
drop of sewing machine oil after cleaning.
C
7 Reassemble the shaving unit by replacing
the retaining frame.Press the wheel and
turn it clockwise.
8 Put the shaving unit back onto the shaver.
Trimmer
1 Switch the shaver off,remove the
powerplug from the wall socket and pull
the appliance plug out of the shaver.
2 Clean the trimmer every time you have
used it.
3 Lubricate the trimmer teeth with a drop
of sewing machine oil every six months.
ENGLISH8
1
2
Page 7
Disposal of the battery
Remove the battery when you discard the
appliance. Do not throw the battery away with
the normal household waste, but hand it in at an
official collection point.You can also take the
battery to a Philips Service Centre,which will
dispose of it in an environmentally safe way.
Only remove the battery if it is completely empty.
1 Remove the powerplug from the wall
socket and pull the appliance plug out of
the shaver.
C
2 Let the shaver run until it stops,undo the
screws and open the shaver.
3 Remove the battery.
Do not connect the shaver to the mains again
after the battery has been removed.
Troubleshooting
◗ Problem:The shaver does not work after the
on/off button has been slided upwards.
B
Solution:Recharge the battery.
If the shaver still does not work,see 'Guarantee &
service'.
ENGLISH 9
Page 8

Guarantee & service
If you need information or if you have a problem,
please visit the Philips Web site at
www.philips.com or contact the Philips Customer
Care Centre in your country (you will find its
phone number in the worldwide guarantee
leaflet).If there is no Customer Care Centre in
your country,turn to your local Philips dealer or
contact the Service Department of Philips
Domestic Appliances and Personal Care BV.
ENGLISH10
Page 9
Important
C
◗ Veillez à ce que l'appareil et le cordon
d'alimentation ne soient pas exposés à
l'humidité.
◗ Utilisez exclusivement le cordon
d'alimentation fourni avec l'appareil.
Indications de charge
C
◗ Charge
Dès que vous commencez à charger le rasoir
vide, le témoin vert s'allume.
A pleine charge, le rasoir possède
approximativement 45 minutes d'autonomie.
Charge
Chargez et maintenez l'appareil à une
température comprise entre 5cC et 35cC.
Ce rasoir fonctionne sur une tension secteur de
100 à 240~volts.
Vous pouvez également vous raser directement
sans charger préalablement l'appareil en
raccordant directement l'appareil à la tension du
réseau.
Pour prolonger la durabilité des accumulateurs
enlevez le chargeur de la prise de courant, et tirez
la fiche hors du rasoir.
C
1 Enfoncez la fiche dans le rasoir.
FRANÇAIS 11
Page 10
2 Mettez le chargeur dans la prise de
courant.
Ne chargez jamais l'appareil dans un étui fermé.
3 Lorsque vous chargez l'appareil pour la
première fois,ou si l'appareil n'a pas été
utilisé pendant une longue période:
chargez-le pendant 12 heures sans
interruption.
Une charge normale dure 8 heures environ.
4 Lorsque le rasoir est complètement
rechargé,retirez d'abord le chargeur de la
prise de courant puis la fiche du rasoir.
Rasage
1 Mettez l'appareil en marche en faisant
glisser le bouton marche/arrêt vers le haut.
C
2 Déplacez rapidement les têtes de rasage
sur la peau en effectuant des mouvements
rectilignes et circulaires.
Les meilleurs résultats de rasage sont obtenus sur
peau sèche.
Votre peau peut avoir besoin de 2-3 semaines
pour s'habituer au système de coupe Philishave.
3 Arrêtez le rasoir.
C
4 Remettez le capot protecteur sur le rasoir
pour éviter tout dommage.
FRANÇAIS12
Page 11
Remplacez les têtes de coupe (type HQ5 Reflex
Action) tous les 2 ans pour obtenir des résultats
de rasage optimaux.
Tondeuse
Pour tailler les favoris et la moustache.
C
1 Dégagez la tondeuse en faisant glisser
l'interrupteur vers le haut.
La tondeuse peut être mise en service pendant
que le moteur fonctionne.
Nettoyage
◗ Nettoyez régulièrement l'appareil pour
obtenir de meilleurs résultats de rasage.
C
◗ Pour un nettoyage facile et rapide des têtes,
vous pouvez utiliser L'Action Clean de
Philishave (type HQ100).Disponible auprès de
votre revendeur ou Centre Service Agréé
Philips.
Vous pouvez également nettoyer le rasoir de la
manière suivante :
Toutes les semaines:unité de coupe
1 Arrêtez l'appareil,enlevez le chargeur de la
prise de courant,et tirez la fiche hors du
rasoir.
FRANÇAIS 13
Page 12

C
2 Nettoyez le dessus de l'appareil avec la
brosse fournie.
C
3 Appuyez sur le bouton de déverrouillage
et enlevez l'unité de coupe.
C
4 Nettoyez l'unité de rasage avec la brosse.
C
5 Replacez l'unité de rasage sur le rasoir.
Tous les deux mois:têtes de coupe
1 Arrêtez l'appareil,enlevez le chargeur de la
prise de courant,et tirez la fiche hors du
rasoir.
C
2 Appuyez sur le bouton de déverrouillage
et enlevez l'unité de coupe.
FRANÇAIS14
2
1
2
1
Page 13
C
3 Faites tourner la molette dans le sens
contraire des aiguilles d'une montre et
enlevez le flasque de retenue.
C
4 Enlevez et nettoyez les têtes de rasage
(couteaux et grilles) une à une.
N'intervertissez pas les lames et les grilles.
Les couteaux et les grilles sont affutés par paire
ce qui leur assure des performances optimales. Si
vous les intervertissez accidentellement, plusieurs
semaines peuvent être nécessaires avant que
l'appareil rase à nouveau de manière optimale.
C
5 Nettoyez les couteaux avec le côté à poils
courts de la brosse.
Brossez avec précaution dans le sens de la flèche.
C
6 Brossez la grille
Si nécessaire, vous pouvez nettoyer l'unité de
coupe avec un liquide dégraissant (p.ex.alcool).
N'oubliez pas de lubrifier le point central des
grilles avec une goutte d'huile pour machine à
coudre après le nettoyage.
C
7 Assemblez à nouveau l'unité de coupe en
pressant la molette et en la tournant dans
le sens des aiguilles d'une montre.
8 Replacez l'unité de rasage sur le rasoir.
FRANÇAIS 15
1
2
1
2
Page 14

Tondeuse
1 Arrêtez l'appareil,enlevez le chargeur de la
prise de courant,et tirez la fiche hors du
rasoir.
2 Nettoyez la tondeuse après chaque
utilisation.
3 Tous les six mois,lubrifiez la tondeuse à
l'aide d'une gouttelette d'huile pour
machine à coudre.
Elimination de accumulateur
Enlevez le accumulateur lorsque vous mettez
l'appareil au rebut.Ne jetez pas le accumulateur
avec les ordures ménagères,mais déposez-les à
un endroit prévu à cet effet par les pouvoirs
publics.Vous pouvez également les déposer dans
un Centre Service Agréé Philips où ils y seront
traités dans le respect de l'environnement.
Eliminez l'accumulateur uniquement lorsque celui
ci est entièrement à plat.
1 Enlevez le chargeur de la prise de courant
et tirez la petite fiche hors de l'appareil.
C
2 Laissez le rasoir fonctionner jusqu'à l'arrêt
complet du moteur,ôtez les vis et ouvrez
l'appareil.
3 Enlevez le accumulateur.
FRANÇAIS16
Page 15

Ne raccordez plus l'appareil à la tension du
réseau une fois que le accumulateur ont été
enlevés.
En cas de problèmes
◗ Problème:Le rasoir ne fonctionne pas après
avoir fait glisser le bouton marche/arrêt vers
le haut.
B
Solution:Rechargez le accumulateur.
Si le rasoir ne fonctionne pas, consultez le
chapitre 'Garantie et service'.
Garantie et service
Pour toute réparation/information,ou en cas de
problème, visitez notre website:www.philips.com.
Ou veuillez contacter le Service Consommateurs
Philips de votre pays (vous trouverez le numéro
de téléphone dans le dépliant sur la garantie
internationale). S'il n'y a aucun Service
Consommateurs Philips dans votre pays,
contactez votre distributeur ou le Service
Department de Philips Domestic Appliances and
Personal Care BV.
FRANÇAIS 17
Page 16

Importante
C
◗ Asegúrese de que el aparato y el cable no se
mojen.
◗ Emplee únicamente el cable que se suministra.
Indicaciones de carga
C
◗ Carga
Tan pronto como empiece a cargar la afeitadora
descargada, la lámpara piloto verde se encenderá.
El tiempo de afeitado sin cable de una afeitadora
completamente cargada es de unos 45 minutos.
Carga
Recargue y guarde el aparato a una temperatura
entre 5cC y 35cC.
El aparato es apto para una gama de voltajes de
red entre 100 y 240 V.
También puede afeitarse sin recargar la afeitadora,
enchufándola a la red eléctrica.
Para alargar la vida útil de la batería, desenchufe la
clavija adaptadora de la red y saque la clavija de la
afeitadora una vez que la batería se haya cargado
completamente.
C
1 Ponga la clavija del aparato en la afeitadora
2 Enchufe la clavija adaptadora a la red.
ESPAÑOL18
Page 17

No recargue la afeitadora dentro de su funda
cerrada.
3 Cuando la cargue por vez primera,o
después de mucho tiempo sin usarla,deje
que la afeitadora se cargue durante
12 horas seguidas.
Una carga normal necesita unas 8 horas.
4 Cuando la batería se haya cargado
completamente,desenchufe la clavija
adaptadora de la red y saque la clavija de la
afeitadora.
Afeitado
1 Ponga en marcha la afeitadora deslizando
el botón de encendido/apagado hacia
arriba.
C
2 Desplace los conjuntos cortantes
rápidamente sobre la piel con
movimientos tanto rectos como circulares.
Los mejores resultados se obtienen afeitando
sobre la piel seca.
Puede que su piel necesite de 2 a 3 semanas para
acostumbrarse al sistema de afeitado Philishave.
3 Apague la afeitadora.
C
4 Coloque la tapa protectora en la
afeitadora para evitar que se deteriore.
ESPAÑOL 19
Page 18

Para unos óptimos resultados en el afeitado,
sustituya cada 2 años los conjuntos cortantes
(HQ5 Reflex Action).
Cortapatillas
Para arreglar las patillas y el bigote.
C
1 Abra el cortapatillas presionando el botón
deslizante hacia arriba.
El cortapatillas se puede activar con la afeitadora
en marcha.
Limpieza
◗ Una limpieza regular garantiza el mejor
resultado en el afeitado.
C
◗ Para una limpieza fácil y óptima está
disponible Philishave Action Clean (limpiador
de conjuntos cortantes,modelo HQ100).Para
más información,consulte con su vendedor o
distribuidor Philips.
También puede limpiar la afeitadora de la
siguiente manera:
Cada semana:unidad de afeitado
1 Apague la afeitadora,desenchufe la clavija
adaptadora de la red y saque la clavija de la
afeitadora.
ESPAÑOL20
Page 19

C
2 Limpie primero la parte superior del
aparato con el cepillo que se suministra.
C
3 Presione el botón de liberación y saque la
unidad afeitadora.
C
4 Limpie el interior de la unidad de afeitado
y la cámara de recogida del pelo con el
cepillo.
C
5 Vuelva a colocar la unidad de afeitado en la
afeitadora.
Cada dos meses:cabezales
1 Apague la afeitadora,desenchufe la clavija
adaptadora de la red y saque la clavija de la
afeitadora.
C
2 Presione el botón de liberación y saque la
unidad afeitadora.
ESPAÑOL 21
2
1
2
1
Page 20

C
3 Gire la ruedecilla en sentido contrario al
de las agujas del reloj y saque el bastidor
de retención.
C
4 Saque y limpie los conjuntos cortantes
(cuchillas y protectores) uno a uno.
No mezcle las cuchillas y protectores entre sí.
Esto es esencial,ya que cada cuchilla ha sido
afilada con su protector correspondiente para
asegurar un resultado óptimo.Si,accidentalmente,
se mezclaran entre sí protectores y cuchillas,
podrían ser necesarias varias semanas hasta que
se volviera a alcanzar de nuevo el nivel óptimo de
afeitado.
C
5 Limpie la cuchilla con el lado de cerdas
cortas del cepillo.
Cepille con cuidado siguiendo la dirección de la
flecha.
C
6 Cepille el protector.
Si es necesario,puede limpiar la unidad de
afeitado con un líquido desengrasante (p.ej.,
alcohol).Recuerde lubricar el punto central de los
protectores con una gota de aceite para
máquinas de coser después de realizar la limpieza.
C
7 Colocando de nuevo el bastidor de
retención,vuelva a montar la unidad
afeitadora.Presione la ruedecita y hágala
girar en el sentido de las agujas del reloj.
ESPAÑOL22
1
2
1
2
Page 21

8 Vuelva a colocar la unidad de afeitado en la
afeitadora.
Cortapatillas
1 Apague la afeitadora,desenchufe la clavija
adaptadora de la red y saque la clavija de la
afeitadora.
2 Limpie el cortapatillas cada vez que lo use.
3 Cada seis meses lubrifique los dientes del
cortapatillas con una gota de aceite de
máquina de coser.
Cómo deshacerse de la batería
Quite la batería cuando vaya a deshacerse del
aparato.No la tire a la basura normal del hogar y
deposítela en un lugar de recogida oficial.También
puede llevarla a un Servicio de Asistencia Técnica
de Philips,donde se desharán de ella de un modo
seguro para el medio ambiente.
Quite la batería sólo cuando esté completamente
descargada.
1 Denchufe la clavija adaptadora de la red y
saque la clavija de la afeitadora.
C
2 Deje que la afeitadora funcione hasta que
se pare.Luego afloje los tornillos y abra la
afeitadora.
ESPAÑOL 23
Page 22

3 Quite la batería.
La afeitadora no puede volver a enchufarse a la
red después de haber quitado la batería.
Solución de problemas
◗ Problema:La afeitadora no funciona después
de haber deslizado el botón de
encendido/apagado hacia arriba.
B
Solución:Recargue la batería
Si la afeitadora sigue sin funcionar, vea la sección
"Garantía y Servicio".
Garantía y Servicio
Si necesita información o tiene algún problema,
visite la página Web de Philips en
www.philips.com,o contacte con el Servicio
Philips de Atención al Cliente de su país (hallará
su número de teléfono en el folleto de la
Garantía Mundial). Si en su país no hay Servicio
Philips de Atención al Cliente,diríjase a su
distribuidor local Philips o contacte con el Service
Department of Philips Domestic Appliances and
Personal Care BV.
ESPAÑOL24
Page 23

Importante
C
◗ Não molhe a máquina nem o cabo de
alimentação.
◗ Utilize apenas o cabo de alimentação
fornecido.
Indicações de carga
C
◗ Carga
Assim que se começa a carregar a máquina vazia,
a luz verde acende-se.
Uma máquina com carga total tem uma
autonomia para cerca de 45 minutos de
funcionamento.
Carga
Carregue e guarde a máquina numa temperatura
entre 5cC e 35cC.
Esta máquina suporta tensões de alimentação
situadas entre 100 e 240 V.
Poderá igualmente barbear-se sem carregar a
máquina,bastando que a ligue à corrente.
Para prolongar a vida da bateria, retire a ficha da
tomada de corrente e puxe a ficha de ligação
para fora da máquina quando a bateria estiver
com carga total.
C
1 Introduza a ficha do aparelho na máquina
de barbear.
PORTUGUÊS 25
Page 24

2 Ligue a ficha à tomada de corrente.
Não recarregue a máquina de barbear dentro da
bolsa fechada.
3 Quando carregar pela primeira vez ou
após um período prolongado de
inactividade:deixe em carga contínua
durante 12 horas.
A carga normal demora cerca de 8 horas.
4 Quando a bateria estiver com carga total,
desligue o cabo de alimentação da
corrente e puxe a ficha de ligação para
fora da máquina.
Utilização da máquina de barbear
1 Ligue a máquina empurrando o interruptor
'on/off' para cima.
C
2 Passe as cabeças de corte rapidamente
sobre a pele,efectuando movimentos
longitudinais e circulares.
Obterá melhores resultados se a pele estiver
seca.
A sua pele poderá demorar entre 2 a 3 semanas
a adaptar-se ao sistema de barbear Philishave.
3 Desligue a máquina.
C
4 Coloque a tampa de protecção na máquina
para evitar danos.
PORTUGUÊS26
Page 25

Para garantir um barbear com óptimos resultados,
substitua as cabeças de corte (tipo HQ5 Reflex
Action) cada 2 anos.
Aparador
Para aparar as patilhas e o bigode.
C
1 Liberte o aparador empurrando o
comutador para cima.
O aparador poderá ser activado com o motor
em funcionamento.
Limpeza
◗ Uma limpeza regular é garantia de melhores
resultados.
C
◗ Para uma limpeza mais simples e eficaz,
adquira o Philishave Action Clean (líquido de
limpeza das cabeças,tipo HQ100).Informe-se
num agente ou num distribuidor Philishave.
Também poderá limpar a máquina de barbear da
seguinte forma:
Todas as semanas:unidade de barbear
1 Desligue a máquina,retire a ficha da
tomada eléctrica e puxe a ficha de ligação
para fora da máquina.
C
2 Limpe a parte superior da máquina com a
ajuda da escova fornecida para o efeito.
PORTUGUÊS 27
Page 26

C
3 Pressione o botão de desengate e abra a
unidade de barbear.
C
4 Limpe a unidade de barbear e a câmara de
recolha dos pêlos com a ajuda da escova.
C
5 Volte a colocar a unidade de corte na
máquina.
A cada dois meses:cabeças de corte
1 Desligue a máquina,retire a ficha da
tomada eléctrica e puxe a ficha de ligação
para fora da máquina.
C
2 Pressione o botão de desengate e abra a
unidade de barbear.
C
3 Rode o anel para a esquerda e retire a
armação de retenção.
PORTUGUÊS28
2
1
2
1
1
2
Page 27

C
4 Retire e limpe as cabeças de corte (lâmina
e guarda),uma a uma.
Não misture as lâminas e as guardas.
Tenha cuidado para que isto não aconteça,
porque as lâminas e as guardas formam um
conjunto que garante um rendimento adequado.
Se misturar acidentalmente os conjuntos, poderá
levar várias semanas até conseguir voltar a obter
um barbear apurado com óptimos resultados.
C
5 Limpe as lâminas utilizando para o efeito
as cerdas mais curtas da escova.
Escove as lâminas cuidadosamente na direcção da
seta.
C
6 Escove a guarda.
Se for necessário,poderá limpar a unidade de
corte com um liquido desengordurante (álcool,
por exemplo).Não se esqueça de lubrificar o
ponto central das guardas com uma gota de óleo
para máquinas de costura depois de terminada a
limpeza.
C
7 Volte a montar a unidade de corte
colocando-lhe a armação.Prima o anel e
rode-o para a direita.
8 Volte a colocar a unidade de corte na
máquina.
PORTUGUÊS 29
1
2
Page 28

Aparador
1 Desligue a máquina,retire a ficha da
tomada eléctrica e puxe a ficha de ligação
para fora da máquina.
2 Limpe o aparador sempre que o utilizar.
3 A cada seis meses,lubrifique os dentes do
aparador com uma gota de óleo para
máquinas de costura.
Remoção da bateria
Retire a bateria quando se desfizer da máquina.
Não deite a bateria para o seu lixo doméstico
normal. Coloque-a nos contentores (ecopontos)
próprios para esse tipo de desperdícios. Se quiser,
leve-a a um Centro de Assistência Philips que se
encarregará de se desfazer da bateria de forma a
respeitar o ambiente.
A bateria só deve ser retirada depois de estar
completamente vazia.
1 Retire o cabo de alimentação da tomada
de corrente e puxe a ligação para fora da
máquina.
C
2 Deixe a máquina funcionar até parar,
desaperte os parafusos e abra-a.
3 Retire a bateria.
PORTUGUÊS30
Page 29

A máquina de barbear não deverá ser ligada
novamente à corrente depois de lhe ser retirada
a bateria.
Resolução de problemas
◗ Problema:A máquina não trabalha quando se
empurra o interruptor 'on/off' para cima.
B
Solução:Recarregue a bateria.
Se a máquina continuar sem trabalhar, consulte a
secção 'Garantia e assistência'.
Informações e assistência
Se necessitar de informações ou se tiver qualquer
problema,por favor visite o site da Philips:
www.philips.com ou contacte o Centro de
Informação ao Consumidor Philips do seu país (o
número de telefone está indicado no folheto da
garantia mundial).Se não existir um Centro de
Informação ao Consumidor Philips no seu país,
dirija-se ao agente Philips local ou contacte o
Departamento de Service da Philips Domestic
Appliances and Personal Care BV.
PORTUGUÊS 31
Page 30

32
äÉjQÉ£ÑdG øe ¢ü∏îàdGäÉjQÉ£ÑdG øe ¢ü∏îàdG
»eôJ ’h .¬æe ¢ü∏îàJ ÉeóæY RÉ¡÷G øe ájQÉ£ÑdG ™∏NEG»eôJ ’h .¬æe ¢ü∏îàJ ÉeóæY RÉ¡÷G øe ájQÉ£ÑdG ™∏NEG
õcôe ‹EG É¡ª∏°S øµdh ájOÉ©dG á«dõæŸG ádÉHõdG ‘ ájQÉ£ÑdGõcôe ‹EG É¡ª∏°S øµdh ájOÉ©dG á«dõæŸG ádÉHõdG ‘ ájQÉ£ÑdG
º«∏°ùJ É°†jCG ∂æµÁh .»ª°SôdG ájhɪ«µdG ádÉHõdG ™«ªŒº«∏°ùJ É°†jCG ∂æµÁh .»ª°SôdG ájhɪ«µdG ádÉHõdG ™«ªŒ
õcôŸG É¡æe ¢ü∏îà«a ¢ùÑ«∏«a áeóN õcôe ¤EG ájQÉ£ÑdGõcôŸG É¡æe ¢ü∏îà«a ¢ùÑ«∏«a áeóN õcôe ¤EG ájQÉ£ÑdG
.áÄ«ÑdG ô°†J ’ á≤jô£H.áÄ«ÑdG ô°†J ’ á≤jô£H
.ÉeÉ“ áZQÉa âfÉc GPEG ’EG RÉ¡÷G øe ájQÉ£ÑdG ™∏îJ ’.ÉeÉ“ áZQÉa âfÉc GPEG ’EG RÉ¡÷G øe ájQÉ£ÑdG ™∏îJ ’
11π°üaEGh ¢ùÑ≤ŸG øe QÉ«àdG ¢ùHÉb ™∏NEGh RÉ¡÷G ∞bhCGπ°üaEGh ¢ùÑ≤ŸG øe QÉ«àdG ¢ùHÉb ™∏NEGh RÉ¡÷G ∞bhCG
.ábÓ◊G ádBG øe RÉ¡÷G ¢ùHÉb.ábÓ◊G ádBG øe RÉ¡÷G ¢ùHÉb
BB
22≈àM π¨à°ûJ ádB’G ∑ôJCGh QÉ«àdG øY RÉ¡÷G π°üaEG≈àM π¨à°ûJ ádB’G ∑ôJCGh QÉ«àdG øY RÉ¡÷G π°üaEG
.ábÓ◊G ádBG íàaEGh ÖdGƒ∏dG ∂µah ∞bƒàJ.ábÓ◊G ádBG íàaEGh ÖdGƒ∏dG ∂µah ∞bƒàJ
33.ájQÉ£ÑdG ™∏NEG.ájQÉ£ÑdG ™∏NEG
ó©H á«fÉK Iôe »FÉHô¡µdG QÉ«àdÉH ábÓ◊G ádBG π«°UƒJ Öéj ’ó©H á«fÉK Iôe »FÉHô¡µdG QÉ«àdÉH ábÓ◊G ádBG π«°UƒJ Öéj ’
.É¡æe äÉjQÉ£ÑdG ™∏N.É¡æe äÉjQÉ£ÑdG ™∏N
á«Hô©dGá«Hô©dG
IQÉjR ∂æe ƒLôf á∏µ°ûe ájCG â¡LGh hCG áeóN ájCG ¤G âéàMG GPGIQÉjR ∂æe ƒLôf á∏µ°ûe ájCG â¡LGh hCG áeóN ájCG ¤G âéàMG GPG
¿GƒæY â– âfÎf’G ≈∏Y ¢ùÑ«∏«a áëØ°U ¿GƒæY â– âfÎf’G ≈∏Y ¢ùÑ«∏«a áëØ°Uwww.philips.comwww.philips.com
∂æµÁ ) ∑ó∏H ‘ øFÉHõdG áeóÿ ¢ùÑ«∏«a õcôà ∫É°üJ’G hCG∂æµÁ ) ∑ó∏H ‘ øFÉHõdG áeóÿ ¢ùÑ«∏«a õcôà ∫É°üJ’G hCG
øµj ⁄ GPG .(»ŸÉ©dG ¿Éª°†dG ≥ë∏e øe ∞JÉ¡dG ºbQ ≈∏Y ∫ƒ°ü◊Gøµj ⁄ GPG .(»ŸÉ©dG ¿Éª°†dG ≥ë∏e øe ∞JÉ¡dG ºbQ ≈∏Y ∫ƒ°ü◊G
π«cƒH π°üJEG ,¬«a ø£≤J …òdG ó∏ÑdG ‘ øFÉHõdG áeóN õcôe ∑Éægπ«cƒH π°üJEG ,¬«a ø£≤J …òdG ó∏ÑdG ‘ øFÉHõdG áeóN õcôe ∑Éæg
б«dхжŸG дGhOCУd ¢щС«∏«a бeуN хcфГ π°ьJEG hCG ¢щС«∏«a дЙйажeб«dхжŸG дGhOCУd ¢щС«∏«a бeуN хcфГ π°ьJEG hCG ¢щС«∏«a дЙйажe
.á«°üî°ûdG ájÉæ©dGh.á«°üî°ûdG ájÉæ©dGh
ááeeóóÿÿGGhh ¿¿Éɪª°°††ddGGááeeóóÿÿGGhh ¿¿Éɪª°°††ddGG
Page 31

BB
55.á°TôØdG øe ô©°ûdG IÒ°ü≤dG á¡÷ÉH ≈°SƒŸG ∞q¶f.á°TôØdG øe ô©°ûdG IÒ°ü≤dG á¡÷ÉH ≈°SƒŸG ∞q¶f
.º¡°SC’G √ÉŒEG ‘ ≥aôH ∞q¶f.º¡°SC’G √ÉŒEG ‘ ≥aôH ∞q¶f
BB
66.á°TôØdÉH »eÉ◊G QÉWE’G ∞q¶f.á°TôØdÉH »eÉ◊G QÉWE’G ∞q¶f
πjõe πFÉ°ùH ábÓ◊G IóMh ∞«¶æJ ∂æµÁ IQhô°†dG óæYπjõe πFÉ°ùH ábÓ◊G IóMh ∞«¶æJ ∂æµÁ IQhô°†dG óæY
øe ájõcôŸG á£≤ædG º«ë°ûJ ≈°ùæJ ’h .(∫ƒëµdG πãe) ºë°û∏døe ájõcôŸG á£≤ædG º«ë°ûJ ≈°ùæJ ’h .(∫ƒëµdG πãe) ºë°û∏d
.∞«¶æàdG ó©H áWÉ«ÿG ádBG âjR øe Iô£≤H »eÉ◊G QÉWE’G.∞«¶æàdG ó©H áWÉ«ÿG ádBG âjR øe Iô£≤H »eÉ◊G QÉWE’G
BB
77‘ É¡JQGOEGh á∏é©dG §¨°†H ábÓ◊G IóMh Ö«côJ óYCG‘ É¡JQGOEGh á∏é©dG §¨°†H ábÓ◊G IóMh Ö«côJ óYCG
.áYÉ°ùdG ÜQÉ≤Y √ÉŒEG.áYÉ°ùdG ÜQÉ≤Y √ÉŒEG
88.ábÓ◊G ádBG ‘ ábÓ◊G IóMh Ö«côJ óYCG.ábÓ◊G ádBG ‘ ábÓ◊G IóMh Ö«côJ óYCG
òÛGòÛG
11¢ùHÉb π°üaEGh ¢ùÑ≤ŸG øe ¢ùHÉ≤dG ™∏NEGh RÉ¡÷G ∞bhCG¢ùHÉb π°üaEGh ¢ùÑ≤ŸG øe ¢ùHÉ≤dG ™∏NEGh RÉ¡÷G ∞bhCG
.ábÓ◊G ádBG øe RÉ¡÷G.ábÓ◊G ádBG øe RÉ¡÷G
22.É¡«a ¬eóîà°ùJ Iôe πc ó©H á°TôØdÉH òÛG ∞q¶f.É¡«a ¬eóîà°ùJ Iôe πc ó©H á°TôØdÉH òÛG ∞q¶f
33πc áWÉ«ÿG ádBG âjR øe Iô£≤H òÛG ¿Éæ°SCG ºqë°Tπc áWÉ«ÿG ádBG âjR øe Iô£≤H òÛG ¿Éæ°SCG ºqë°T
.ô¡°TCG áà°S.ô¡°TCG áà°S
33
á«Hô©dGá«Hô©dG
1
2
Page 32

BB
44.á°TôØdÉH ô©°ûdG IôéMh ábÓ◊G IóMh ∞q¶f.á°TôØdÉH ô©°ûdG IôéMh ábÓ◊G IóMh ∞q¶f
BB
55.ójóL øe ábÓ◊G ádBG ‘ ábÓ◊G IóMh ÖqcQ.ójóL øe ábÓ◊G ádBG ‘ ábÓ◊G IóMh ÖqcQ
ábÓ◊G ¢ShDhQ :øjô¡°T πcábÓ◊G ¢ShDhQ :øjô¡°T πc
11π°üaEGh ¢ùÑ≤ŸG øe QÉ«àdG ¢ùHÉb ™∏NEGh RÉ¡÷G ∞bhCGπ°üaEGh ¢ùÑ≤ŸG øe QÉ«àdG ¢ùHÉb ™∏NEGh RÉ¡÷G ∞bhCG
.ábÓ◊G ádBG øe RÉ¡÷G ¢ùHÉb.ábÓ◊G ádBG øe RÉ¡÷G ¢ùHÉb
BB
22ádBG øe ábÓ◊G IóMh ™aQEGh ¥ÓWE’G QR »∏Y §¨°VEGádBG øe ábÓ◊G IóMh ™aQEGh ¥ÓWE’G QR »∏Y §¨°VEG
.ábÓ◊G.ábÓ◊G
BB
33π°üaEGh áYÉ°ùdG ÜQÉ≤Y ó°V √ÉŒEG ‘ á∏é©dG QOCGπ°üaEGh áYÉ°ùdG ÜQÉ≤Y ó°V √ÉŒEG ‘ á∏é©dG QOCG
.∂°SÉŸG QÉWE’G.∂°SÉŸG QÉWE’G
BB
44≈°SƒŸG) IóM »∏Y IóMGh πc ábÓ◊G ¢ShDhQ ™aQCG≈°SƒŸG) IóM »∏Y IóMGh πc ábÓ◊G ¢ShDhQ ™aQCG
.ɪ¡Ø¶fh (»eÉ◊G QÉWE’G ¬©eh.ɪ¡Ø¶fh (»eÉ◊G QÉWE’G ¬©eh
.¢SGƒeC’Gh á«eÉ◊G äGQÉWE’G §∏îJ ’.¢SGƒeC’Gh á«eÉ◊G äGQÉWE’G §∏îJ ’
á«eÉ◊G äGQÉWE’Gh ¢SGƒeC’G ¿C’ GóL º¡e º¡æ«H §∏ÿG ΩóYá«eÉ◊G äGQÉWE’Gh ¢SGƒeC’G ¿C’ GóL º¡e º¡æ«H §∏ÿG ΩóY
êhR πµd ájOCÉJ π°†aCG »£©J GòHh É¡°†©H ™e âeAÓJêhR πµd ájOCÉJ π°†aCG »£©J GòHh É¡°†©H ™e âeAÓJ
IóŸ QɶàfE’G ‹EG ô£°†J ó≤a GƒØY º¡æ«H §∏N ¿EGh .áYƒªéªcIóŸ QɶàfE’G ‹EG ô£°†J ó≤a GƒØY º¡æ«H §∏N ¿EGh .áYƒªéªc
øe ¬«∏Y âfÉc Ée ‹EG ≈∏ãŸG ájOCÉàdG Oƒ©J ≈àM ™«HÉ°SCG IóYøe ¬«∏Y âfÉc Ée ‹EG ≈∏ãŸG ájOCÉàdG Oƒ©J ≈àM ™«HÉ°SCG IóY
.πÑb.πÑb
34
á«Hô©dGá«Hô©dG
2
1
1
2
Page 33

òÛGòÛG
πÑ°ùdGh ÜQGƒ°ûdG Öjò¡àdπÑ°ùdGh ÜQGƒ°ûdG Öjò¡àd
BB
11.≈∏YCG ¤EG ≥dõæŸG ìÉàØŸG ™aóH òÛG íàaEG.≈∏YCG ¤EG ≥dõæŸG ìÉàØŸG ™aóH òÛG íàaEG
.∑ôÙG ¿GQhO AÉæKCG òÛG 𫨰ûJ øµÁ.∑ôÙG ¿GQhO AÉæKCG òÛG 𫨰ûJ øµÁ
∞¶æàdG∞¶æàdG
●●◗◗ábÓ◊G ádB’ ájOCÉJ π°†aCG º¶àæŸG ∞«¶æàdG øª°†jábÓ◊G ádB’ ájOCÉJ π°†aCG º¶àæŸG ∞«¶æàdG øª°†j..
BB
●●◗◗»∏Y π°üMEÉa º¡∏¡°SCGh ∞«¶æJ π°†aCG ‘ âÑZQ ¿EG»∏Y π°üMEÉa º¡∏¡°SCGh ∞«¶æJ π°†aCG ‘ âÑZQ ¿EG
,ábÓ◊G ¢ShDhôd ∞«¶æàdG IOÉe) Ú∏c ø°ûcCG ∞«°û«∏«a,ábÓ◊G ¢ShDhôd ∞«¶æàdG IOÉe) Ú∏c ø°ûcCG ∞«°û«∏«a
´ƒædG ´ƒædG
100100HQHQ. (. (
.∞«°û«∏«a Iõ¡LCG π«ch øe äÉeƒ∏©ŸG Ö∏WCG.∞«°û«∏«a Iõ¡LCG π«ch øe äÉeƒ∏©ŸG Ö∏WCG
:á«dÉàdG á≤jô£dÉH ábÓ◊G ádCG ∞«¶æJ É°†jCG ∂æµÁh:á«dÉàdG á≤jô£dÉH ábÓ◊G ádCG ∞«¶æJ É°†jCG ∂æµÁh
ábÓ◊G IóMh :´ƒÑ°SCG πcábÓ◊G IóMh :´ƒÑ°SCG πc
11¢ùHÉb π°üaEGh ¢ùÑ≤ŸG øe ¢ùHÉ≤dG ´õfEGh RÉ¡÷G ∞bhCG¢ùHÉb π°üaEGh ¢ùÑ≤ŸG øe ¢ùHÉ≤dG ´õfEGh RÉ¡÷G ∞bhCG
.ábÓ◊G ádBG øe RÉ¡÷G.ábÓ◊G ádBG øe RÉ¡÷G
BB
22.RÉ¡÷G ™e IOQƒŸG á°TôØdÉH RÉ¡÷G ≈∏YCG ∞q¶f.RÉ¡÷G ™e IOQƒŸG á°TôØdÉH RÉ¡÷G ≈∏YCG ∞q¶f
BB
33.ábÓ◊G IóMh ™aQEGh ¥ÓWE’G QR ≈∏Y §¨°VEG.ábÓ◊G IóMh ™aQEGh ¥ÓWE’G QR ≈∏Y §¨°VEG
35
á«Hô©dGá«Hô©dG
2
1
Page 34

BB
11.ábÓ◊G ádBG ‘ RÉ¡÷G ¢ùHÉb ÖcQ.ábÓ◊G ádBG ‘ RÉ¡÷G ¢ùHÉb ÖcQ
22.§FÉ◊G ¢ùÑ≤e ‘ »FÉHô¡µdG QÉ«àdG ¢ùHÉb πNOCG.§FÉ◊G ¢ùÑ≤e ‘ »FÉHô¡µdG QÉ«àdG ¢ùHÉb πNOCG
.≥∏¨e ÜGôL ‘ ≈gh ábÓ◊G ádBG øë°T ó«©J ’.≥∏¨e ÜGôL ‘ ≈gh ábÓ◊G ádBG øë°T ó«©J ’
33.áYÉ°S 8 IóŸ øë°TEG.áYÉ°S 8 IóŸ øë°TEG
44RÉ¡÷G ¢ùHÉb ™∏NEGh RÉ¡÷G ¢ùÑ≤e øe ¢ùHÉ≤dG ™∏NEGRÉ¡÷G ¢ùHÉb ™∏NEGh RÉ¡÷G ¢ùÑ≤e øe ¢ùHÉ≤dG ™∏NEG
áfƒë°ûe äÉjQÉ£ÑdG íÑ°üJ ÉŸÉM ábÓ◊G ádBG øeáfƒë°ûe äÉjQÉ£ÑdG íÑ°üJ ÉŸÉM ábÓ◊G ádBG øe
.ÉeÉ“.ÉeÉ“
ábÓ◊GábÓ◊G
11 .≈∏YCG ¤EG ≥dõæŸG ìÉàØŸG áMõMõH RÉ¡÷G πq¨°T .≈∏YCG ¤EG ≥dõæŸG ìÉàØŸG áMõMõH RÉ¡÷G πq¨°T
BB
22‘ É¡côMh .ó∏÷G ≈∏Y áYô°ùH ábÓ◊G ¢ShDhQ ∑ôM‘ É¡côMh .ó∏÷G ≈∏Y áYô°ùH ábÓ◊G ¢ShDhQ ∑ôM
.ôFGhO ‘h ᪫≤à°ùe •ƒ£N.ôFGhO ‘h ᪫≤à°ùe •ƒ£N
.É¡©ÑàJ á≤jôW ø°ùMCG ≈g ±É÷G ó∏÷G ≈∏Y ábÓ◊G ¿EG.É¡©ÑàJ á≤jôW ø°ùMCG ≈g ±É÷G ó∏÷G ≈∏Y ábÓ◊G ¿EG
Ωɶf ≈∏Y OÉà©«d áKÓK hCG ÚYƒÑ°SCG ¤EG ∑ó∏L êÉàëj óbhΩɶf ≈∏Y OÉà©«d áKÓK hCG ÚYƒÑ°SCG ¤EG ∑ó∏L êÉàëj óbh
.ábÓë∏d ∞«°û«∏«a.ábÓë∏d ∞«°û«∏«a
33.RÉ¡÷G ∞bhCG.RÉ¡÷G ∞bhCG
BB
44.É¡d Qô°†dG ™æªàd ábÓ◊G ádBG ≈∏Y ájɪ◊G AÉ£Z ÖqcQ.É¡d Qô°†dG ™æªàd ábÓ◊G ádBG ≈∏Y ájɪ◊G AÉ£Z ÖqcQ
´ƒædG) ábÓ◊G ¢ShDhQ ∫óÑà°SEG ´ƒædG) ábÓ◊G ¢ShDhQ ∫óÑà°SEG
x Actionx ActionflefleHQ 5 ReHQ 5 Reπc (πc (
.§‰ π°†aCG ≈∏Y ábÓ◊G ádBG ájOCÉJ ¿Éª°†d ÚeÉY.§‰ π°†aCG ≈∏Y ábÓ◊G ádBG ájOCÉJ ¿Éª°†d ÚeÉY
36
á«Hô©dGá«Hô©dG
Page 35

áeÉg äɶMÓeáeÉg äɶMÓe
●●◗◗.∂∏°ùdGh RÉ¡÷G ∫ÓàHEG ΩóY øe ócCÉJ.∂∏°ùdGh RÉ¡÷G ∫ÓàHEG ΩóY øe ócCÉJ
●●◗◗.RÉ¡÷G ™e OQƒŸG ∂∏°ùdG ’EG Ωóîà°ùJ ’.RÉ¡÷G ™e OQƒŸG ∂∏°ùdG ’EG Ωóîà°ùJ ’
øë°ûdG ô°TDƒeøë°ûdG ô°TDƒe
●●◗◗øë°ûdGøë°ûdG
Aƒ°†dG A»°†j áZQÉØdG ábÓ◊G ádBG øë°T ‘ CGóÑJ ÉŸÉMAƒ°†dG A»°†j áZQÉØdG ábÓ◊G ádBG øë°T ‘ CGóÑJ ÉŸÉM
.ô°†NC’G.ô°†NC’G
.∂∏°S ¿hóH á≤«bO 45 IóŸ á«∏c áfƒë°ûŸG ábÓ◊G ádBG π¨à°ûJ.∂∏°S ¿hóH á≤«bO 45 IóŸ á«∏c áfƒë°ûŸG ábÓ◊G ádBG π¨à°ûJ
øë°ûdGøë°ûdG
óæY ájƒÄe áLQO 35 h 5 ÚH IQGôM áLQO ‘ RÉ¡÷ÉH ßØàMEGóæY ájƒÄe áLQO 35 h 5 ÚH IQGôM áLQO ‘ RÉ¡÷ÉH ßØàMEG
.¿õÿGh øë°ûdG.¿õÿGh øë°ûdG
.§dƒa 240h 100 ÚH ìhGÎJ äÉ«£dƒØd Ö°SÉæe RÉ¡÷Gh.§dƒa 240h 100 ÚH ìhGÎJ äÉ«£dƒØd Ö°SÉæe RÉ¡÷Gh
Iô°TÉÑe RÉ¡÷G π«°UƒàH øë°T ¿hóH ábÓ◊G É°†jCG ∂æµÁhIô°TÉÑe RÉ¡÷G π«°UƒàH øë°T ¿hóH ábÓ◊G É°†jCG ∂æµÁh
.»FÉHô¡µdG QÉ«àdÉH.»FÉHô¡µdG QÉ«àdÉH
.ΩGhódG ≈∏Y »FÉHô¡µdG QÉ«àdÉH Ó°Uƒe RÉ¡÷G ∑ÎJ ’.ΩGhódG ≈∏Y »FÉHô¡µdG QÉ«àdÉH Ó°Uƒe RÉ¡÷G ∑ÎJ ’
37
á«Hô©dGá«Hô©dG
Page 36

ÈdÉU! s¶8«bï« ñËœÈdÉU! s¶8«bï« ñËœ
‘uîU8 ÁU~¶<œ të bOzULï ÃñU8 ÁU~¶<œ “« vïUî“ «ñ UN|dÉU!‘uîU8 ÁU~¶<œ të bOzULï ÃñU8 ÁU~¶<œ “« vïUî“ «ñ UN|dÉU!
‰eMî vìuLFî tìU!“ U! Á«dLÙ UN|dÉU! s¶8«bï« ñËœ “« ÆX<«‰eMî vìuLFî tìU!“ U! Á«dLÙ UN|dÉU! s¶8«bï« ñËœ “« ÆX<«
q|u% ʬ Èñˬ lL3 ’uB‹î eëdî t! tJK! ¨ÁœuLï Èñ«œœu8q|u% ʬ Èñˬ lL3 ’uB‹î eëdî t! tJK! ¨ÁœuLï Èñ«œœu8
fáOKOã f|Ëd< eëdî p| t! «ñ UN|dÉU! bOï«u¶Oî sOMâLÙ ÆbOÙœfáOKOã f|Ëd< eëdî p| t! «ñ UN|dÉU! bOï«u¶Oî sOMâLÙ ÆbOÙœ
«bè« Xfi|“ jOæî kH4 s¶ãdÖ dEïñœ U! ʬ «bNï« t! X§fiï U" bOٜ«bè« Xfi|“ jOæî kH4 s¶ãdÖ dEïñœ U! ʬ «bNï« t! X§fiï U" bOÙœ
ÆœœdÖ ÆœœdÖ
ÆbOzULï i|uF" ¨qîUë Êœu! vìU8 †ñu ñœ UNM" «ñ UN|dÉU!ÆbOzULï i|uF" ¨qîUë Êœu! vìU8 †ñu ñœ UNM" «ñ UN|dÉU!
±±ÃñU8 ÁU~¶<œ “« «ñ vÖœUî Ë ¨e|dÄ “« «ñ ‚d! t8UÅËœÃñU8 ÁU~¶<œ “« «ñ vÖœUî Ë ¨e|dÄ “« «ñ ‚d! t8UÅËœ
Æb|“U<Æb|“U<
BB
≤≤sÅËñ ñbIï¬ «ñ ‘«d" g|ñ ¨t¶8U< ÃñU8 «ñ ‚d! rO<sÅËñ ñbIï¬ «ñ ‘«d" g|ñ ¨t¶8U< ÃñU8 «ñ ‚d! rO<
g|ñ Ë ÁœuLï “U! «ñ êOÄ fá< ÆœuÅ nèu¶î U" b|ñ«c~!g|ñ Ë ÁœuLï “U! «ñ êOÄ fá< ÆœuÅ nèu¶î U" b|ñ«c~!
ÆbOMë “U! «ñ ‘«d"ÆbOMë “U! «ñ ‘«d"
≥≥Æb|“U< ÃñU8 «ñ UN|dÉU!Æb|“U< ÃñU8 «ñ UN|dÉU!
ÆœuÅ qË ‚d! t! b|U§ï ‘«d" g|ñ ¨UN|dÉU! s¶Å«œd! †ñu ñœÆœuÅ qË ‚d! t! b|U§ï ‘«d" g|ñ ¨UN|dÉU! s¶Å«œd! †ñu ñœ
38
Page 37

tOìË« XìUæ! ÁU~¶<œ vz«ñUë Ϋœbºî U" bOAë bÙ«u8 ‰uÉ UÙtOìË« XìUæ! ÁU~¶<œ vz«ñUë Ϋœbºî U" bOAë bÙ«u8 ‰uÉ UÙ
ÆœœdÖd! ÆœœdÖd!
BB
˚˚ÆbOMë eO9 ”d! ÁU"uë Ë d!“ ·dÉ U! «ñ tGO"ÆbOMë eO9 ”d! ÁU"uë Ë d!“ ·dÉ U! «ñ tGO"
ÆbOïe! ”d! gKã dOfiî ñœ UIOèœÆbOïe! ”d! gKã dOfiî ñœ UIOèœ
BB
˙˙kãUæî Êœ“ ”d!kãUæî Êœ“ ”d!
»dÇ l|Uî U! «ñ ÁbMMë Õö« XLfiè bOï«u¶Oî ÂËeì †ñu ñœ»dÇ l|Uî U! «ñ ÁbMMë Õö« XLfiè bOï«u¶Oî ÂËeì †ñu ñœ
XLfiè bOÅU! t¶Å«œ dÉU‹! ÆbOMë eO9 ©qJì« bMïUî® È« ÁbMMëXLfiè bOÅU! t¶Å«œ dÉU‹! ÆbOMë eO9 ©qJì« bMïUî® È« ÁbMMë
ŒdÇ säËñ ÁdDè p| U! ¨ÊœuLï eO9 “« fÄ «ñ UNEãUæî ÈeëdîŒdÇ säËñ ÁdDè p| U! ¨ÊœuLï eO9 “« fÄ «ñ UNEãUæî Èeëdî
ÆbOMë »dÇ vÉUO8ÆbOMë »dÇ vÉUO8
BB
∑∑Ë Áœ«œ ñUAã «ñ Ábïœ ŒdÇ ∫b|bM§! «ñ ÁbMMë Õö« XLfièË Áœ«œ ñUAã «ñ Ábïœ ŒdÇ ∫b|bM§! «ñ ÁbMMë Õö« XLfiè
ÆbOïU8dâ! XàU< ÈUÙ t!dIà XN3 ñœ ÆbOïU8dâ! XàU< ÈUÙ t!dIà XN3 ñœ
∏∏ÆbOï«œdÖ“U! ‘«d" g|ñ t! «ñ ÁbMMë Õö« XLfièÆbOï«œdÖ“U! ‘«d" g|ñ t! «ñ ÁbMMë Õö« XLfiè
Ê“ j8 Ê“ j8
±±vÖœUî Ë e|dÄ “« «ñ ‚d! t8UÅËœ ¨ÁœuLï ‘uîU8 «ñ ÁU~¶<œvÖœUî Ë e|dÄ “« «ñ ‚d! t8UÅËœ ¨ÁœuLï ‘uîU8 «ñ ÁU~¶<œ
Æb|“U< ÃñU8 ÁU~¶<œ “« «ñÆb|“U< ÃñU8 ÁU~¶<œ “« «ñ
≤≤ÆbOMë eO9 ”d! U! ¨ÁœUH¶<« ñU! dÙ “« fÄ «ñ Ê“ j8ÆbOMë eO9 ”d! U! ¨ÁœUH¶<« ñU! dÙ “« fÄ «ñ Ê“ j8
≥≥säËñ ÁdDè p| U! ñU§J| ÁUî gÅ dÙ «ñ Ê“ j8 ÈUÙ tï«bïœsäËñ ÁdDè p| U! ñU§J| ÁUî gÅ dÙ «ñ Ê“ j8 ÈUÙ tï«bïœ
ÆbOMë »dÇ vÉUO8 ŒdÇÆbOMë »dÇ vÉUO8 ŒdÇ
39
1
2
Page 38

BB
˘˘”d! U! «ñ uî ÁbMMë lL3 tEHæî Ë ÁbMMë Õö« XLfiè”d! U! «ñ uî ÁbMMë lL3 tEHæî Ë ÁbMMë Õö« XLfiè
ÆbOMë eO9 Á«dLÙÆbOMë eO9 Á«dLÙ
BB
˚˚ ÆbOï«œdÖ“U! ‘«d" g|ñ t! Ϋœbºî «ñ ÁbMMë Õö« XLfiè ÆbOï«œdÖ“U! ‘«d" g|ñ t! Ϋœbºî «ñ ÁbMMë Õö« XLfiè
‘«d" g|ñ d< ∫ÁUî Ëœ dÙ‘«d" g|ñ d< ∫ÁUî Ëœ dÙ
±±Ë ¨e|dÄ “« «ñ ‚d! t8UÅËœ ¨ÁœuLï ‘uîU8 «ñ ÁU~¶<œË ¨e|dÄ “« «ñ ‚d! t8UÅËœ ¨ÁœuLï ‘uîU8 «ñ ÁU~¶<œ
Æb|“U< ÃñU8 ÁU~¶<œ “« «ñ vÖœUî Æb|“U< ÃñU8 ÁU~¶<œ “« «ñ vÖœUî
BB
≤≤‘«d" g|ñ “« «ñ ÁbMMë Õö« XLfiè “U<œ«“¬ tLÖœ ñUAã U!‘«d" g|ñ “« «ñ ÁbMMë Õö« XLfiè “U<œ«“¬ tLÖœ ñUAã U!
Æb|“U< ÃñU8Æb|“U< ÃñU8
BB
≥≥Ë ÁbïU8dÇ XàU< ÈUÙ t!dIà fJà XN3 ñœ «ñ Ábïœ ŒdÇË ÁbïU8dÇ XàU< ÈUÙ t!dIà fJà XN3 ñœ «ñ Ábïœ ŒdÇ
ÆbOMë «b3 «ñ Ábïñ«bÙU~ï »UèÆbOMë «b3 «ñ Ábïñ«bÙU~ï »Uè
BB
˘˘Ë t¶8U< ÃñU8 p" p" «ñ ©kãUæî Ë tGO"® ‘«d" g|ñ d<Ë t¶8U< ÃñU8 p" p" «ñ ©kãUæî Ë tGO"® ‘«d" g|ñ d<
ÆbOMë eO9ÆbOMë eO9
ÆbOïeï rN! «ñ UNEãUæî Ë UÙ tGO" VO"d" ÆbOïeï rN! «ñ UNEãUæî Ë UÙ tGO" VO"d"
UNM" ¨UNEãUæî q8«œ ñœ UÙ tGO" g|U< «d|“ X<« ÈËd{ dî« s|«UNM" ¨UNEãUæî q8«œ ñœ UÙ tGO" g|U< «d|“ X<« ÈËd{ dî« s|«
ÁU~¶<œ vìUà vz«ñUë sîU{ ¨†UFDè `Oæ Èñ«e~|U3 †ñu ñœÁU~¶<œ vìUà vz«ñUë sîU{ ¨†UFDè `Oæ Èñ«e~|U3 †ñu ñœ
t¶HÙ ¨kãUæî Ë tGO" †UFDè VO"d" vèUH"« Êœñu8 rN! U! ÆbÅU§Oît¶HÙ ¨kãUæî Ë tGO" †UFDè VO"d" vèUH"« Êœñu8 rN! U! ÆbÅU§Oî
40
2
1
1
2
Page 39

Ê“ j8 Ê“ j8
ÆqO§< ÊœuLï V"dî Ë Êœ“ j8 È«d!ÆqO§< ÊœuLï V"dî Ë Êœ“ j8 È«d!
BB
±± Ê“ j8 Ê“ j8rrTrimmeTrimmeÆbOMë “U! ôU! t! vzuAë Xëd4 U! «ñÆbOMë “U! ôU! t! vzuAë Xëd4 U! «ñ
ÆbMJOî ñUë ¨X<« sÅËñ ÁU~¶<œ ñu"uî tJOî«œUî jIã Ê“ j8 ÆbMJOî ñUë ¨X<« sÅËñ ÁU~¶<œ ñu"uî tJOî«œUî jIã Ê“ j8
XãUEï XãUEï
●●◗◗ÆbÅU§Oî Õö« d¶N! Z|U¶ï sîU{ ¨ÁU~¶<œ V"dî ÊœuLï eO9ÆbÅU§Oî Õö« d¶N! Z|U¶ï sîU{ ¨ÁU~¶<œ V"dî ÊœuLï eO9
BB
●●◗◗ fáOKOã ‘«d" g|ñ »u8 Ë ÁœU< XãUEï È«d! fáOKOã ‘«d" g|ñ »u8 Ë ÁœU< XãUEï È«d!CleanCleanActionAction¨¨
‰bî ‘«d" g|ñ d< ÁbMMë „UÄ® ‰bî ‘«d" g|ñ d< ÁbMMë „UÄ®HQ 100HQ 100ÆbÅU§Oî ”d¶<œ ñœ ©ÆbÅU§Oî ”d¶<œ ñœ ©
ÆbOzULï ŸöÉ« Vfië fáOKOã vÖbM|ULï “« œñuLM|« ñœÆbOzULï ŸöÉ« Vfië fáOKOã vÖbM|ULï “« œñuLM|« ñœ
∫bOMë eO9 «ñ ‘«d" g|ñ bOï«u¶Oî eOï d|“ o|dD!∫bOMë eO9 «ñ ‘«d" g|ñ bOï«u¶Oî eOï d|“ o|dD!
Õö« XLfiè ∫ t¶HÙ dÙ Õö« XLfiè ∫ t¶HÙ dÙ
±±Ë ¨e|dÄ “« «ñ ‚d! t8UÅËœ ¨ÁœuLï ‘uîU8 «ñ ÁU~¶<œË ¨e|dÄ “« «ñ ‚d! t8UÅËœ ¨ÁœuLï ‘uîU8 «ñ ÁU~¶<œ
Æb|“U< ÃñU8 ÁU~¶<œ “« «ñ vÖœUîÆb|“U< ÃñU8 ÁU~¶<œ “« «ñ vÖœUî
BB≤≤ÆbOMë eO9 Á«dLÙ ”d! U! «ñ ÁU~¶<œ ÈôU! XLfièÆbOMë eO9 Á«dLÙ ”d! U! «ñ ÁU~¶<œ ÈôU! XLfiè
BB
≥≥Æb|“U< ÃñU8 «ñ ÁbMMë Õö« XLfiè “U<œ«“¬ tLÖœ ñUAã U!Æb|“U< ÃñU8 «ñ ÁbMMë Õö« XLfiè “U<œ«“¬ tLÖœ ñUAã U!
41
2
1
Page 40

BB
±±‘«d" g|ñ ñœ ʬ tïUAï j8 U" «ñ ‚d! rO< vÖœUî d<‘«d" g|ñ ñœ ʬ tïUAï j8 U" «ñ ‚d! rO< vÖœUî d<
ÆbOzULï q8«œÆbOzULï q8«œ
≤≤ÆbOzULï qË ‚d! e|dÄ t! «ñ t8UÅËœÆbOzULï qË ‚d! e|dÄ t! «ñ t8UÅËœ
ÆbOzULï Èñ«œœu8 ÁbOÅuÄ XìU4 ñœ ‘«d" g|ñ ÊœuLï ˛ñUÅ “« ÆbOzULï Èñ«œœu8 ÁbOÅuÄ XìU4 ñœ ‘«d" g|ñ ÊœuLï ˛ñUÅ “«
≥≥ ÆbOzULï ˛ñUÅ XàU< ∏ †bL! «ñ ‘«d" g|ñ ÆbOzULï ˛ñUÅ XàU< ∏ †bL! «ñ ‘«d" g|ñ
˘˘Ë ¨e|dÄ “« «ñ ‚d! t8UÅËœ ¨UN|dÉU! qîUë ˛ñUÅ œdºî t!Ë ¨e|dÄ “« «ñ ‚d! t8UÅËœ ¨UN|dÉU! qîUë ˛ñUÅ œdºî t!
Æb|“U< ÃñU8 ‘«d" g|ñ “« «ñ vÖœUîÆb|“U< ÃñU8 ‘«d" g|ñ “« «ñ vÖœUî
ÊbOÅ«d" ÊbOÅ«d"
±±ÆbOzULï sÅËñ «ñ ÁU~¶<œ ôU! ·dD! vzuAë tLÖœ ÊbOAë U!ÆbOzULï sÅËñ «ñ ÁU~¶<œ ôU! ·dD! vzuAë tLÖœ ÊbOAë U!
BB
≤≤Ë rOI¶fiî ◊uD8 †ñuB! Ë Xàdfi! «ñ ‘«d" g|ñ d<Ë rOI¶fiî ◊uD8 †ñuB! Ë Xàdfi! «ñ ‘«d" g|ñ d<
Æb|ñˬñœ Xëdæ! †ñu X<uÄ ÈËñ ñ«Ë Ád|«œ Æb|ñˬñœ Xëdæ! †ñu X<uÄ ÈËñ ñ«Ë Ád|«œ
qU4 X<uÄ Êœu! pA8 XìU4 ñœ †ñu Õö« Z|U¶ï s|d¶N!qU4 X<uÄ Êœu! pA8 XìU4 ñœ †ñu Õö« Z|U¶ï s|d¶N!
t! ULÅ X<uÄ U" bAJ! ‰uÉ t¶HÙ ≥ vì« ≤ œñ«œ ÊUJî« Æœœd~Oît! ULÅ X<uÄ U" bAJ! ‰uÉ t¶HÙ ≥ vì« ≤ œñ«œ ÊUJî« Æœœd~Oî
ÆbMë †œUà ‘«d" g|ñ s|« ñUë r¶fiO<ÆbMë †œUà ‘«d" g|ñ s|« ñUë r¶fiO<
≥≥ÆbOzULï ‘uîU8 «ñ ÁU~¶<œÆbOzULï ‘uîU8 «ñ ÁU~¶<œ
BB
˘˘pÙöë U! «ñ ‘«d" g|ñ d< ¨Êb|œ VO<¬ “« ÈdOÖuK3 È«d!pÙöë U! «ñ ‘«d" g|ñ d< ¨Êb|œ VO<¬ “« ÈdOÖuK3 È«d!
ÆbOïUÅuá! ʬ kãUæîÆbOïUÅuá! ʬ kãUæî
‰U< Ëœ dÙ ¨†ñu Õö« ÂË«bî Ë »u8 XOHOë ‰uB4 È«d!‰U< Ëœ dÙ ¨†ñu Õö« ÂË«bî Ë »u8 XOHOë ‰uB4 È«d!
‰bî® ‘«d" g|ñ d< ñU§J|‰bî® ‘«d" g|ñ d< ñU§J|x Actionx ActionflefleHQ5 ReHQ5 Rei|uF" «ñ ©i|uF" «ñ ©
ÆbOzULï ÆbOzULï
42
Page 41

rNî rNî
BB
●●◗◗ÆbïuAï »uÉdî ʬ rO< Ë ÁU~¶<œ bOMë XèœÆbïuAï »uÉdî ʬ rO< Ë ÁU~¶<œ bOMë Xèœ
●●◗◗ÆbOMë ÁœUH¶<« Á«dLÙ ‚d! rO< “« jIãÆbOMë ÁœUH¶<« Á«dLÙ ‚d! rO< “« jIã
˛ñUÅ Xîöà ˛ñUÅ Xîöà
ll
◗◗
BB
●●◗◗˛ñUÅ˛ñUÅ
Æœœd~Oî sÅËñ ʬ e§< ⁄«dÇ ¨vìU8 ÁU~¶<œ ˛ñUÅ ŸËdÅ œdºL! Æœœd~Oî sÅËñ ʬ e§< ⁄«dÇ ¨vìU8 ÁU~¶<œ ˛ñUÅ ŸËdÅ œdºL!
ñUë rO< v! tIOèœ ˘˚ ¨qîUë ˛ñUÅ †ñu ñœ ‘«d" g|ñ p|ñUë rO< v! tIOèœ ˘˚ ¨qîUë ˛ñUÅ †ñu ñœ ‘«d" g|ñ p|
ÆbMJOîÆbMJOî
ÊœuLï ˛ñUÅ ÊœuLï ˛ñUÅ
≥˚ vì« ˚ sO! v"ñ«d4 t3ñœ ñœ ¨ÁœuLï ˛ñUŠΫœbºî «ñ ÁU~¶<œ≥˚ vì« ˚ sO! v"ñ«d4 t3ñœ ñœ ¨ÁœuLï ˛ñUŠΫœbºî «ñ ÁU~¶<œ
ÆbOzULï Èñ«bÙU~ï œ«d~O¶ïU< t3ñœÆbOzULï Èñ«bÙU~ï œ«d~O¶ïU< t3ñœ
±∞∞ sO! dOG¶î ÈUÙ˛U¶ìË U! ‚d! rO< È«d! ÁU~¶<œ ‚d! t8UÅËœ±∞∞ sO! dOG¶î ÈUÙ˛U¶ìË U! ‚d! rO< È«d! ÁU~¶<œ ‚d! t8UÅËœ
ÆbÅU§Oî V<UMî XìË ≤˘∞ vì« ÆbÅU§Oî V<UMî XìË ≤˘∞ vì«
g|ñ “« ¨‚d! t! ʬ ‰UB"«U! ¨ÁU~¶<œ ˛ñUÅ ÊËb! bOï«u¶Oî sOMâLÙg|ñ “« ¨‚d! t! ʬ ‰UB"«U! ¨ÁU~¶<œ ˛ñUÅ ÊËb! bOï«u¶Oî sOMâLÙ
ÆbOzULï ÁœUH¶<« ‘«d"ÆbOzULï ÁœUH¶<« ‘«d"
Èñ«œœu8 ‚d! t! rz«œ ‰UB"« XìUæ! ‘«d" g|ñ Êœ«œñ«dè “«Èñ«œœu8 ‚d! t! rz«œ ‰UB"« XìUæ! ‘«d" g|ñ Êœ«œñ«dè “«
ÆbOzULïÆbOzULï
43
Page 42

4222 001 88214
 Loading...