

Page 1

ENGLISH 4
13
HQ560
3
Page 2
Warning
Please read these instructions before using the
appliance.
◗ Only use the HQ800 powerplug supplied to
charge the appliance.
◗ The HQ800 powerplug transforms 100-240
volts to a safe voltage lower than 24 volts.
C
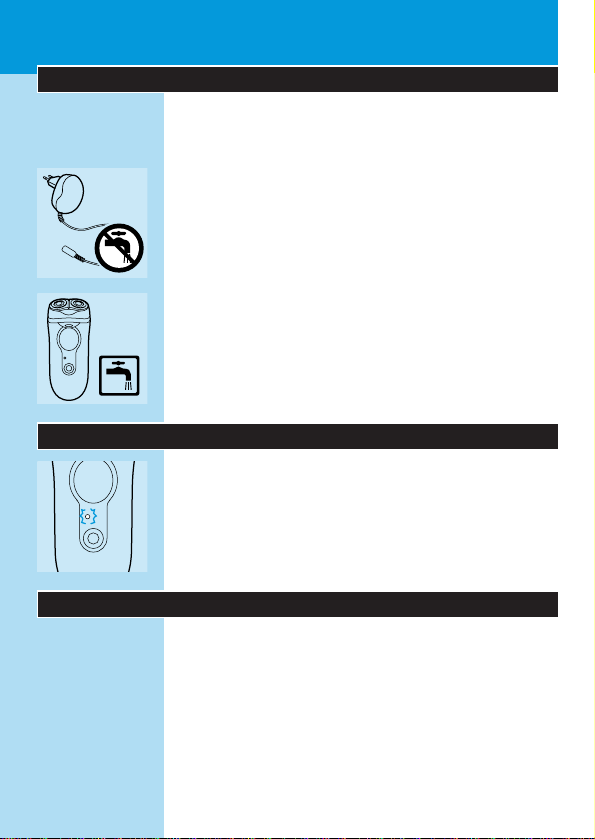
◗ Make sure the HQ800 powerplug and the
cord do not get wet.
C
◗ The shaver runs at a safe low voltage of less
than 24 volts. It is watertight and can be
cleaned under the tap. Do not rinse with
water hotter than 80cC.
Charge indications
C
◗ As soon as you start charging the empty
shaver, the green pilot light will go on.
A fully charged shaver has a cordless shaving time
of up to 30 minutes.
Charging
Recharge, store and use the appliance at a
temperature between 5cC and 35cC.
The powerplug is suitable for mains voltages
ranging from 100 to 240V.
You cannot use the shaver when it is charging,
because the appliance does not work while the
battery is being charged.
ENGLISH4
Page 3

To extend the lifetime of the battery, remove the
powerplug from the wall socket and pull the
appliance plug out of the shaver when the battery
has been fully charged.
C
1 Put the appliance plug in the shaver.
2 Put the powerplug in the wall socket.
Do not recharge the shaver in a closed pouch.
3 When charging for the first time or after a
long period of disuse: leave the shaver to
charge continuously for 12 hours.
Charging normally takes approx. 8 hours.
4 Remove the powerplug from the socket
and pull the appliance plug out of the
shaver when the battery has been fully
charged.
A fully charged shaver has a cordless shaving time
of up to 30 minutes.
Shaving
1 Switch the shaver on by pressing the on/off
button once.
C
2 Move the shaving heads quickly over your
skin, making both straight and circular
movements.
Shaving on a dry face gives the best results.
Your skin may need 2 or 3 weeks to get
accustomed to the Philishave system.
ENGLISH 5
Page 4

3 Switch the shaver off by pressing the on/off
button once.
C
4 Put the protection cap on the shaver every
time you have used it, to prevent damage.
Replace the shaving heads (type HQ53) every
2 years for optimal shaving results.
Trimming
For grooming sideburns and moustache.
C
1 Open the trimmer by pushing the slide
upwards.
The trimmer can be activated while the motor is
running.
Cleaning
The easiest and most hygienic way to clean the
appliance is to rinse the shaving unit and the hair
chamber every day with hot water (60cC-80cC).
Regular cleaning guarantees better shaving
performance.
When you clean the appliance, it is not necessary
to take the shaving heads (cutters and guards)
apart. If you want to take them apart, be sure not
to mix up the cutters and guards, since grinding of
the cutters in the guards only guarantees optimal
performance for each matching set. If you
accidentally mix up the sets, it could take several
weeks before optimal shaving performance is
restored.
ENGLISH6
Page 5
C
◗ For easy and optimal cleaning, the Philishave
Action Clean (shaving head cleaner, type
HQ100) is available.Ask your Philishave dealer
for information.
Every day: Shaving unit
1 Switch the shaver off, remove the
powerplug from the wall socket and pull
the appliance plug out of the shaver.
C
2 Press the release button and open the
shaving unit.
C
3 Rinse the shaving unit and the hair
chamber with hot water (60cC - 80cC).
Do not clean under the tap while charging the
shaver.
C
4 Rinse the outside of the appliance.
Never dry the shaving unit with a towel or tissue
as this may damage the shaving heads.
◗ You can also clean the hair chamber without
water by using the brush supplied.
Every six months:Trimmer
1 Switch the shaver off, remove the
powerplug from the wall socket and pull
the appliance plug out of the shaver.
ENGLISH 7
Page 6

C
2 Brush the trimmer.
C
3 Lubricate the trimmer teeth with a drop
of sewing machine oil every six months.
Replacing the shaving heads
Replace the shaving heads every two years for
optimal shaving results.
1 Switch the shaver off, remove the
powerplug from the socket and pull the
appliance plug out of the shaver.
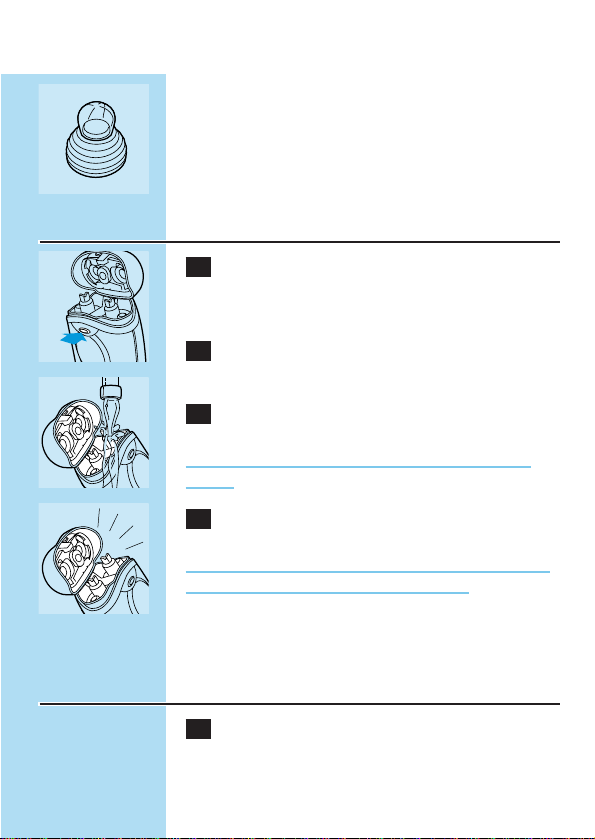
C
2 Press the release button to open the
shaving unit.
C
3 Turn the wheel counter-clockwise and
remove the retaining frame.
C
4 Remove the shaving heads and place the
new ones in the shaving unit.
ENGLISH8
OIL
2
1
Page 7

C
5 Reassemble the shaving unit by replacing
the retaining frame. Press the wheel and
turn it clockwise.
Replace damaged or worn shaving heads with
Philishave HQ53 shaving heads only.
Storing
C
◗ Put the protection cap on the shaver to
prevent damage.
◗ Store the powerplug and the shaver in the
pouch.
Disposal of the battery
The built-in rechargeable battery contains
substances that may pollute the environment.
Remove the battery when you discard the
appliance. Do not throw the battery away with
the normal household waste, but hand it in at an
official collection point.You can also take the
battery to a Philips Ser vice Centre, which will
dispose of it in an environmentally safe way.
Only remove the battery if it is completely empty.
1 Remove the powerplug from the socket
and pull the appliance plug out of the
shaver.
C
2 Let the shaver run until it stops, undo the
screws and open the shaver.
ENGLISH 9
1
2
Page 8

3 Remove the battery.
Do not connect the shaver to the mains again
after the battery has been removed.
Troubleshooting
1 Reduced shaving performance.
B
Cause 1: the shaving heads are dirty.
◗ The shaver has not been rinsed long enough
or the water used was not hot enough.
◗ Clean the shaver thoroughly before you
continue shaving (see 'Cleaning').
B
Cause 2: long hairs are obstructing the shaving
heads.
C
◗ Remove the retaining plate.
C
◗ Clean the cutters and guards.
Do not clean more than one cutter and guard at
a time, since they are all matching sets. If you
accidentally mix up the cutters and guards, it may
take several weeks before optimal shaving
performance is restored.
◗ Remove the hairs with the brush supplied.
◗ Put the retaining plate back onto the shaving
unit.
B
Cause 3: shaving heads are damaged or worn.
ENGLISH10
2
1
Page 9

◗ Remove the retaining plate.
◗ Remove the old shaving heads from the
shaving unit and replace them with new ones.
Damaged or worn shaving heads (cutters and
guards) must only be replaced with the original
Philishave HQ53 shaving heads.
◗ Put the retaining plate back onto the shaving
unit.
2 The shaver does not work when the
ON/OFF button is pressed.
B
Cause: the battery is empty.
B
Cause: the shaver is connected to the mains. This
shaver does not work while the battery is being
charged.
3 In case of other problems:
◗ See 'Information & service'.
Accessories
The following accessories are available:
- Philishave HQ53 shaving heads.
- HQ8000 powerplug.
- HQ100 Philishave Action Clean (shaving head
cleaner).
- HQ101 Philishave Action Clean refill (shaving
head cleaning liquid).
- HQ110 Philishave shaving head cleaner (shaving
head cleaning spray).
ENGLISH 11
Page 10

Information & service
If you need information or if you have a
problem, please visit the Philips Web site at
www.philips.com or contact the Philips Customer
Care Centre in your country (you will find its
phone number in the worldwide guarantee
leaflet). If there is no Customer Care Centre in
your country, turn to your local Philips dealer or
contact the Service Depar tment of Philips
Domestic Appliances and Personal Care BV.
◗ Keep these instructions for use for future
reference.
ENGLISH12
Page 11

13
◗ HQ800
◗ HQ800 100 - 240
24
C
◗ HQ800
C
◗ 24
80
C
◗
30
5-35
100 -240
Page 12

14
C
1
2
3
12
8
4
30
1
C
2
2-3
3 on/off
C
4
HQ53
Page 13

15
C
1
60 80
1
C
2
C
3
Page 14

16
C
4
◗
1
C
2
C
3
1
C
2
OIL
Page 15

17
C
3
C
4
C
5
HQ53
C
◗
◗
2
1
1
2
Page 16

18
1
C
2
3
1
B
◗
◗
B
C
◗
2
1
Page 17

19
C
◗
◗
◗
B
◗
◗
HQ53
◗
2
B
B
3
◗
HQ53
HQ8000
Page 18

20
BV
◗
2002/11
Page 19

21
Page 20

22
4222 002 42252
 Loading...