

Page 1
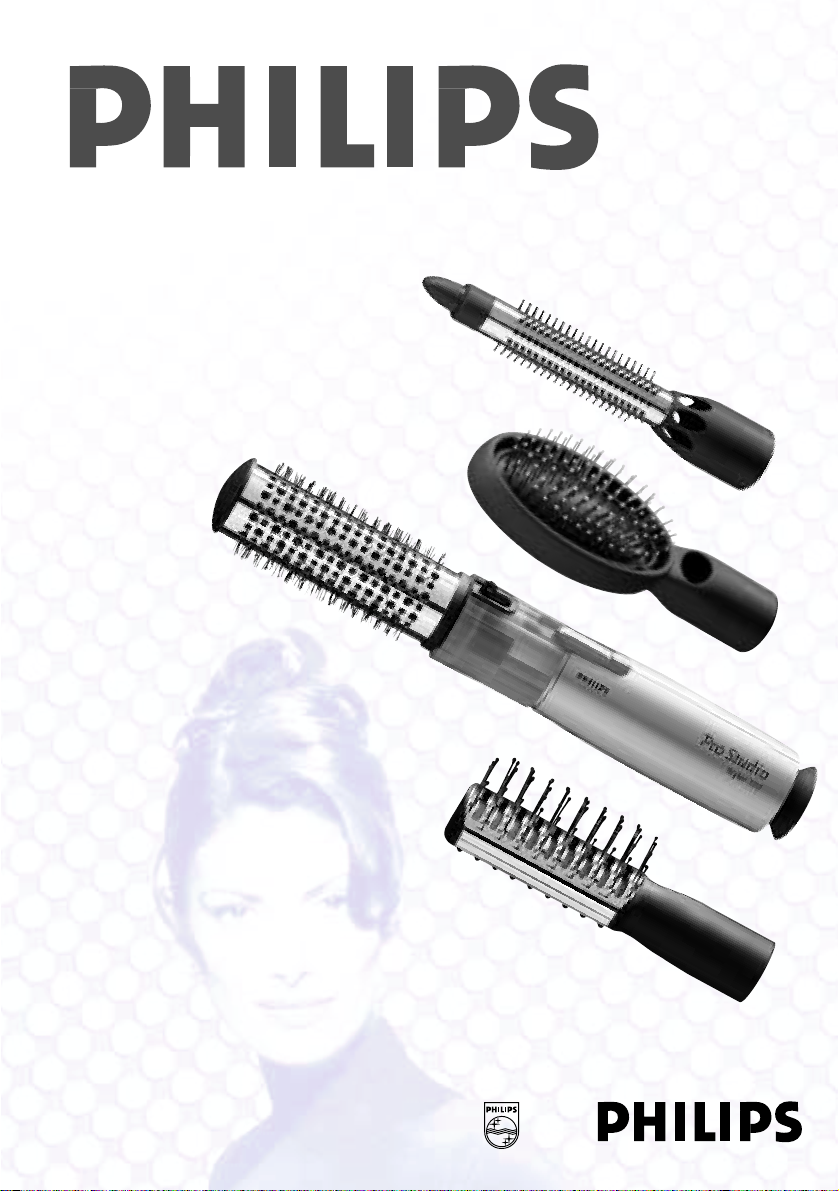
pro studio styler
HP 4670
Page 2
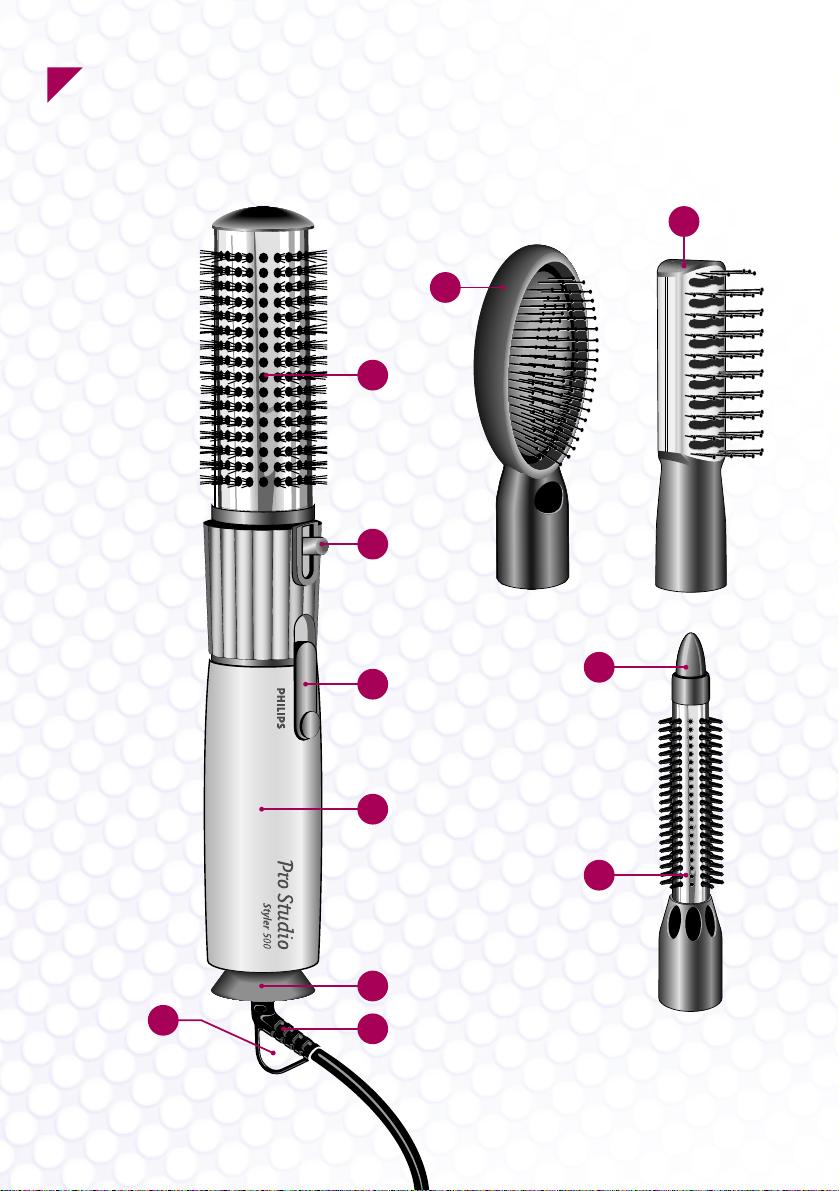
1
A
G
H
K
D
J
C
B
F
I
E
Page 3
Important
• Before connecting the appliance, check that the voltage indicated on the type
plate corresponds to the local mains voltage.
• Do not use this product near water in e.g. baths, washbasins, sinks. If the
product falls into water, unplug it immediately and dispose of it. It must not be used again.
• Always ensure that the attachments are completely dry (on the inside as well as the outside!)
before affixing them to the styler.
• Always switch the appliance off before putting it down, even if it is only for a moment.
• For additional protection, the installation of a residual current device (RCD) with a rated
residual operating current not exceeding 30 mA is advisable in the electric circuit supplying
the bathroom. Ask your electrician for advice.
• Even when the appliance is switched off, the electricity has not been cut off. Always pull out
the mains plug when the appliance is not being used.
• Never obstruct the air inlet grille.
• This product is equipped with an automatic overheating protection device. If the appliance
overheats, it will switch off. Unplug the appliance. After cooling down for a few minutes, the
appliance can be used again. Before switching back on again, check the air inlet grille for
possible blockage by fluff, hair, etc. If in doubt, consult your dealer or an Authorised Philips
Service Centre.
• Check the condition of the mains cord regularly. Do not wind the mains cord around the
appliance.
• The mains cord of this appliance cannot be replaced. If the cord is damaged, the appliance
should be discarded.
• For examination or repairs always return the appliance to an Authorised Philips Service
Centre. Unqualified repair work can be dangerous for the user.
English
Your new Philips Pro Studio Styler has been specially designed to give beautiful styling results. It is quick
and easy to use. We hope you will enjoy using your Pro Studio Styler - the hairstyler with which you can
create any desired hairdo.
In order to get the best results, please read the instructions carefully before use. Also refer to the
illustrations on the fold-out pages.
Page 4

the thickness, length and structure of your hair.
Experimenting with the attachments will allow
you to discover the styling possibilities for your
particular hair type and will help you determine
how to achieve the best results.
• When using the Large Vent Brush, make sure it
does not get tangled in your hair. Don’t rotate
the brush for more than 1.5 turns. Keep the
brush away from the head when you remove it
from the hair to avoid picking up any underlaying
hair.
• You can remove the attachment from the hair as
soon as the hair feels dry. The time needed to
dry the hair depends on the thickness of the hair
and the amount of hair being styled.
• Use position || (maximum position) when you
start styling.
When the hair gets dryer, you can switch back to
position |.
For a longer-lasting result, set the Pro Studio
Styler to the "Cool air" (1) position for a few
seconds before removing the brush from your
hair. The cool air will fix your wave or curl so that
your style will last longer.
• Always switch the appliance off before removing
and/or affixing the attachments.
Attachments
• Shape Total Brush
The Shape Total Brush is suitable for straight and
wavy hair of any length, especially for long hair.
Its special design with vented hollow center
ensures that the warm air is directed directly into
your hairdo. The bobble-tipped pins provide good
grip on the hair. The heated metal plate on the
back and front of the brush ensures optimum
styling and “volume”. For a longer lasting result
you can apply some mousse before styling your
hair.
Volume
- Insert the Shape Total Brush into the hair. Brush
against the direction of the hair growth, touching
the scalp with the brush. Then rotate the
attachment away from the head (fig. 4). The hair
will be lifted and fall lightly back onto the head.
In this manner you add maximum volume and
body to the hair.
• If the hair is still damp you can hold the Shape
Total Brush still for a moment, before you rotate
it away from the head to remove it.
• You can also add volume to long hair by holding
your head down and brushing the hair with the
Pro Studio Styler in this position.
General description (fig. 1)
A Hairstyler
B Shape Total Brush
C Large Oval Cushion Brush
D Retractable Bristle Brush with metal bar
E Large Vent Brush
F Switch
0 =Off
| = Gentle warm air flow for easy styling
|| = Stronger and warmer air flow for fast
styling and drying
•
= Cool air
G Air inlet grille
H Swivel cord
I Release button for detaching attachments
J Bristle retraction knob (to retract or push out
the bristles)
K Hanging loop
To affix an
attachment:
- Align the attachment with
the styler, making sure
the arrows on the
attachment are in line
with the arrows on the
styler. Press to fit (fig. 2).
To remove an
attachment:
- While pressing the
release button, pull
the attachment in the
direction of the arrow
(fig. 3).
How to use
• Remember, a good haircut is the basis for a good
hairstyle.
• The Pro Studio Styler is most effective when the
hair is slightly damp. After washing, dry your hair
in the normal way until it is damp. Then begin
using your styler. When the hair is dry, slightly
dampen it with water.
• Before styling, brush or comb your hair to ensure
that it is untangled.
• Prevent the hair from becoming too dry.
Overdrying may result in frizzy hair ends which
are hard to style.
• The results you can obtain with the Pro Studio
Styler depend upon various factors, for example
2
CLICK
3
1
2
Page 5

Shaping and Styling
Making waves in medium to long hair
- Switch on the appliance. Take the ends of the
hair (fig. 5) and wind the brush around the tress
in the desired direction (fig. 6). The resulting
shape of the wave depends on the thickness of
the lock.
- As soon as the hair is warm to the touch,
remove the hot air brush from the hair by
rotating it away from the head (fig. 7).
- Leave the curls or waves to cool down, before
finishing by combing, brushing or fingercombing
the hair into its final style (fig. 8).
• Large vent brush and retractable bristle
brush
Making curls in short to medium hair
- Divide the hair into tresses (fig. 9), using a
comb. Do not take too much hair in one tress.
- Switch on the appliance. Wind the hair around
the brush in the desired direction (fig. 10). When
using the large vent brush, make sure it does
not get tangled in the hair. Therefore, do not
rotate it in the hair more than 1,5 turn.
Ensure that the hair is wound up so that it is at
right angles to the scalp (fig. 11). This will give
your hair optimum lift and volume.
As soon as the hair is warm to the touch,
remove the brush from the hair.
Making waves in long hair
- Switch on the appliance. Take the ends of the
hair (fig. 12) and wind them around the brush in
the desired direction (fig. 13). The resulting
shape of the wave depends on the thickness of
the lock and the brush used:
the retractable bristle brush makes tighter curls
and the large vent brush makes looser and
bigger waves.
- As soon as the hair is warm to the touch, switch
off the appliance and carefully remove the hot
air brush from the hair.
- Leave the curls or waves to cool down, before
finishing by combing, brushing or fingercombing
the hair into its final style (fig. 14).
To remove the brush from the hair
• Large Vent Brush
- Carefully rotate the styler in the opposite
direction, just far enough to release the hair
without spoiling the curl. Be careful not to pick
up underlying hairs because this could cause
the brush to get stuck in hair.
• Retractable Bristle Brush
- It is not necessary to rotate the brush in the
opposite direction. Simply push and turn the
bristle retraction knob in the direction of the
arrows (fig. 15) and the bristles will retract.
- Slide the metal bar sideways out of the curl.
This will prevent the curl from getting spoilt or
tangled and makes it last longer.
• Large Oval Cushion Brush
- This brush is especially suitable for longer hair
for grooming and shaping. The bobble-tipped
bristles protect the hair; they won’t pull it, won’t
scratch your scapula and they can be used to
very gentle brush the tangles out while blowing
warm air through the hair to smoothen it. The
brush will glide through your (wet) hair,
preventing tugging and helping to remove knots.
Root lift
- To create root lift use the Cushion Brush; insert
the pins in your hair until it touches your
scapula.
- Starting from the front, brush backwards and
forwards across the centre parting (fig. 16).
Soft flowing hair
- To groom the hair and have a straight finish, lift
the hair at the roots on the sides of your head,
and follow down the hair lengths with the styler
(fig. 17). This technique will tame stray ends and
help promote shine and softness (fig. 18).
Cleaning
The brushes can be cleaned with a small brush or
a dry cloth.
Storage
The appliance can be hung
from the hanging loop
(fig. 19).
19
Page 6

4
9
11
12
15
5
6
7
8
Page 7

10
13
1
2
16
17
14 18
Page 8

Page 9

Page 10

;
4222 002 21342
 Loading...