How it Works
Log In / Sign Up
Buy Points
How it Works
FAQ
Contact Us
Questions and Suggestions
Users
Philips
Loading...
H
HD7221/60
HD7221/62
HD7221/80
HD7221E
HD7225/24
2
HD7225/25
2
HD7225/26
HD7252/00
2
HD7252/22
2
HD7252/60
2
HD7252/62
2
HD7252/68
2
HD7252/82
2
HD7253/00
2
HD7253/22
2
HD7253/62
2
HD7255/20
HD7255A
HD7256
HD7256/22
HD7256/62
HD7257/23
HD7257/62
HD7257/82
HD7257A
HD7257E
HD7258/62
HD7259/00
HD7262/62
HD7262E
HD7301/00
3
HD7301/01
HD7301/90
2
HD7303/00
2
HD7304/00
HD7310
2
HD7310/60
HD7311
HD7311/60
3
HD7400
14
HD7400/10
HD7400/17
HD7400/20
2
HD7400/40
2
HD7400/41
2
HD7400/50
HD7400/99
HD7400A
HD7402
5
HD7404
4
HD7406
3
HD7410/22
HD7410/23
HD7410/26
HD7410/46
HD7410/52
HD7410/62
HD7410B
HD7412/26
HD7412/62
HD7414/22
2
HD7418
HD7418A
HD7430
HD7431
3
HD7431/00
HD7431/10
HD7431/20
2
HD7431/30
HD7432
HD7432/20
6
HD7432/30
HD7433
3
HD7433/20
3
HD7434
4
HD7434/20
HD7435
5
HD7435-20
3
HD7436
2
HD7436/00
2
HD7437
HD7437/50
HD7440
5
HD7444
6
HD7444/11
6
HD7444/12
8
HD7444/16
5
HD7444/52
6
HD7446
32
HD7446/00
2
HD7446/20
HD7446/22
HD7446/56
HD7446/57
HD7446/70
2
HD7447
12
HD7447/00
2
HD7447/01
HD7447/20
HD7447/31
Loading...
Loading...
Nothing found
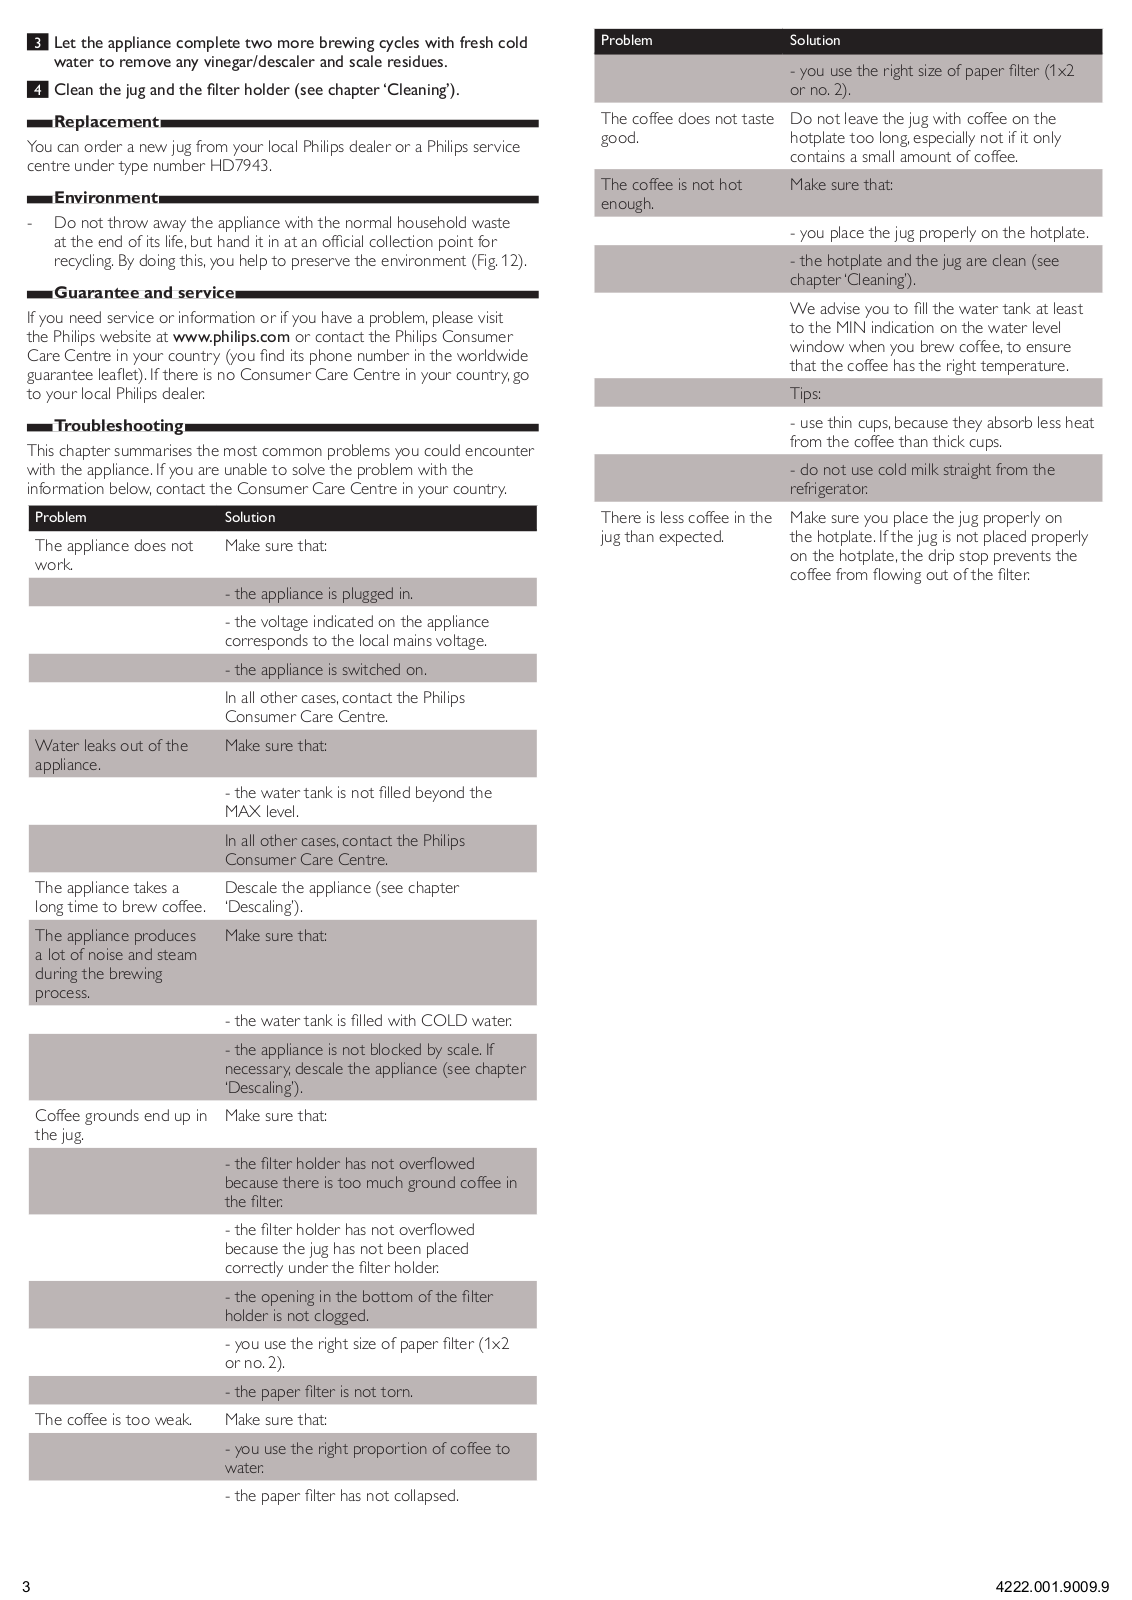
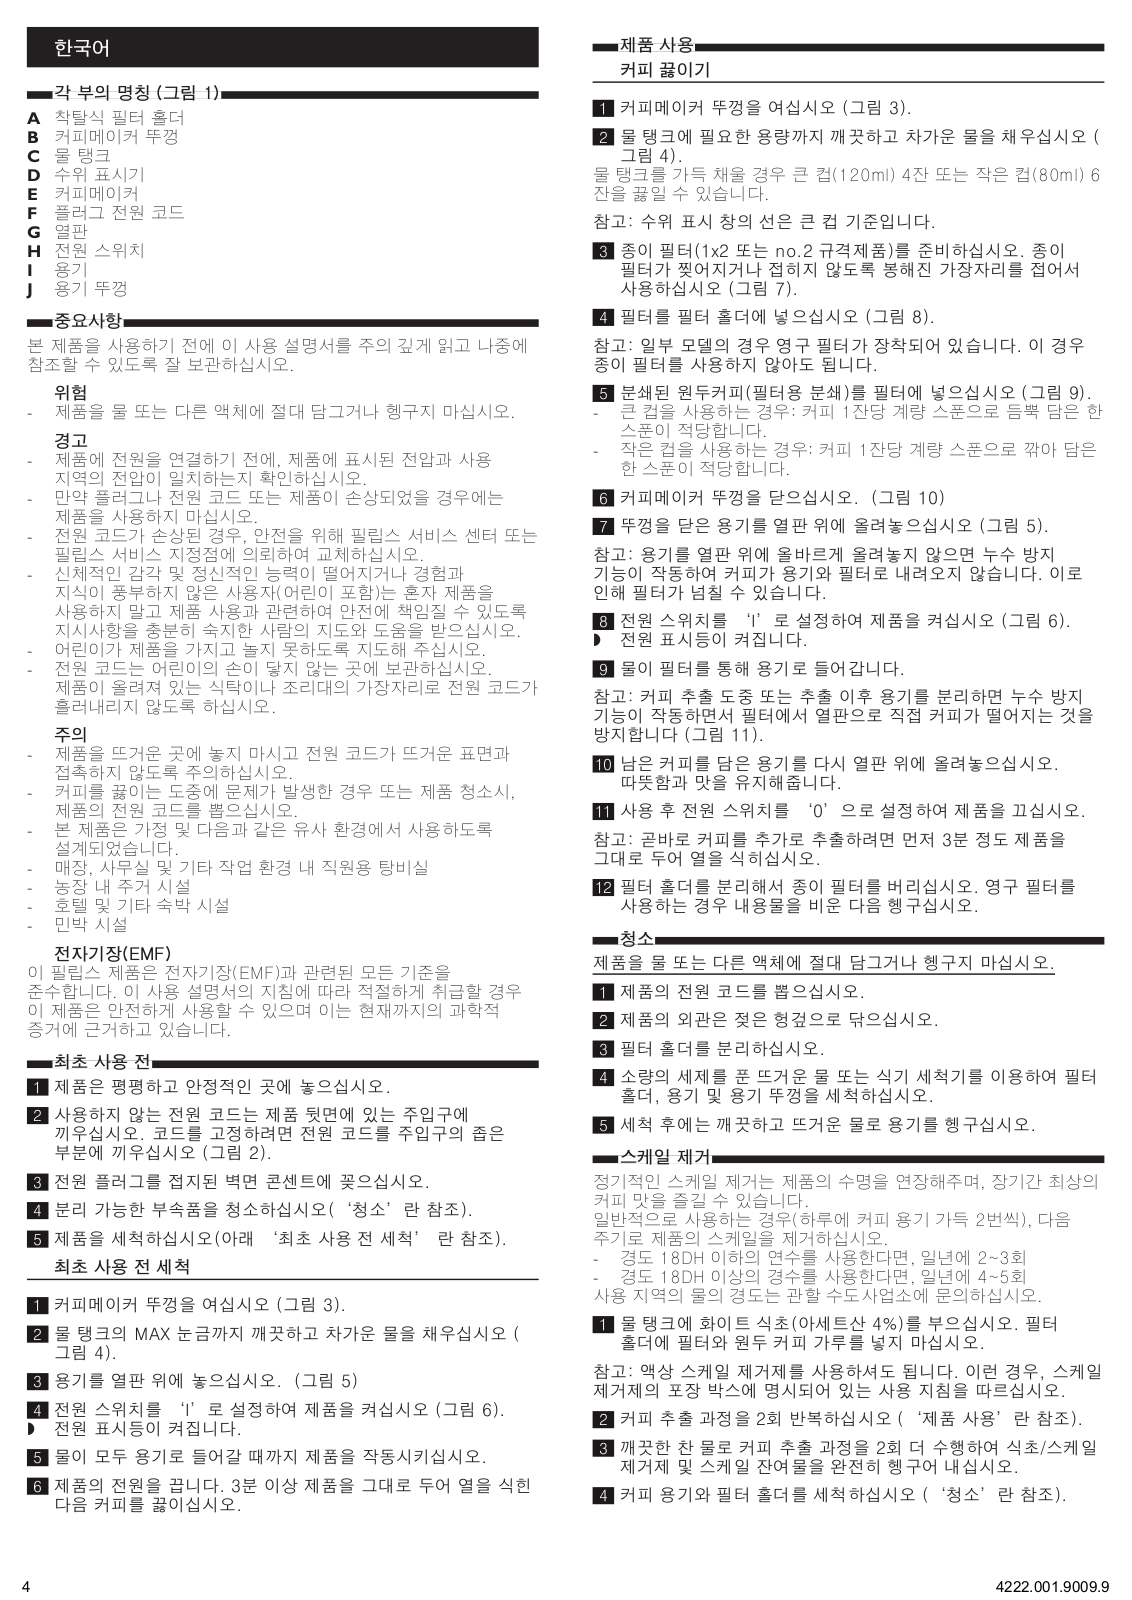
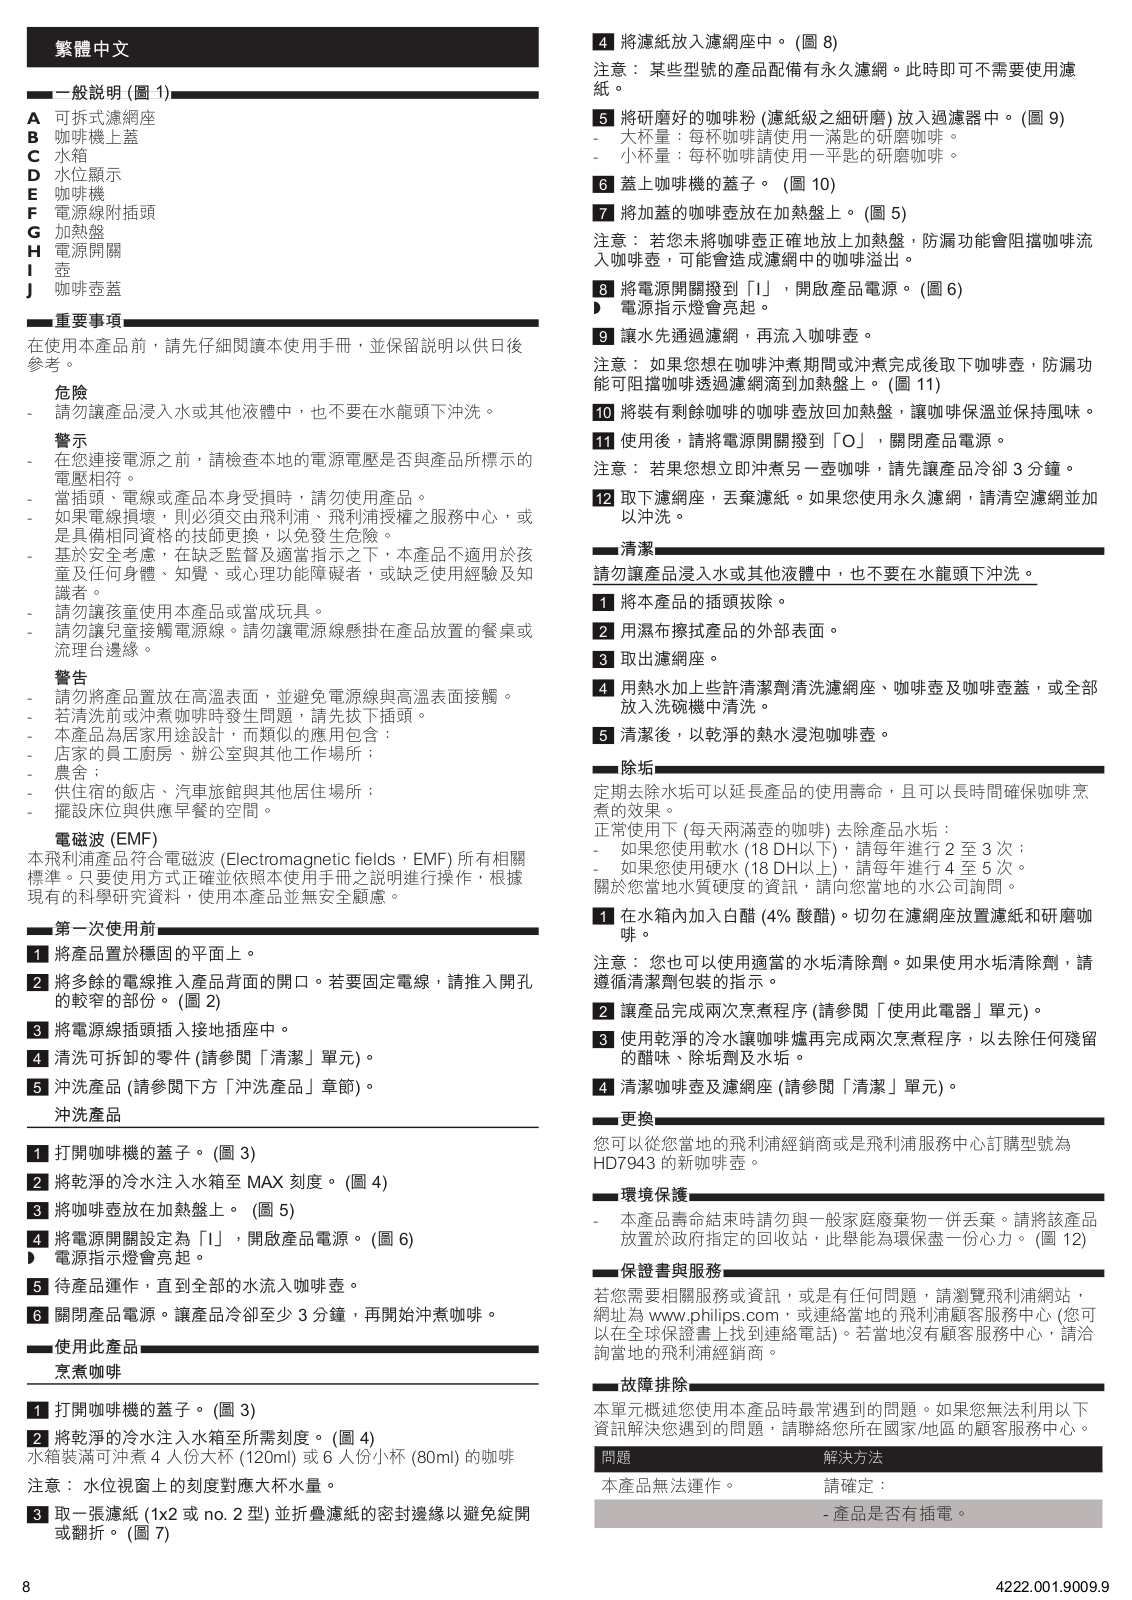
HD7406
User Manual
11 pgs
1.67 Mb
0
User Manual
88 pgs
1.09 Mb
0
User Manual
64 pgs
932.24 Kb
0
Table of contents
Loading...
Philips HD7406, HD7404, HD7402, HD7400 User Manual
...
Philips User Manual
Download
Specifications and Main Features
Frequently Asked Questions
User Manual
Download
Page 1
Page 2
Page 3
Page 4
Page 5
Page 6
Page 7
Page 8
Page 9
Page 10
Page 11
Loading...
+
hidden pages
Unhide
You need points to download manuals.
1 point = 1 manual.
You can buy points or you can get point for every manual you upload.
Buy points
Upload your manuals
 Loading...