

Page 1
Coffee Maker “Café Gourmet”
HD5410/00
Philips Consumer Lifestyle
Service Manual
PRODUCT INFORMATION
- This product meets the requirements regarding
interference suppression on radio and TV.
- After the product has been repaired, it should function
properly and has to meet the safety requirements as
officially laid down at this moment.
TECHNICAL INFORMATION
- Voltage : 220 - 240 V
- Frequency : 50 Hz
- Power consumption : 1250 W + 50 W
(keep warm element)
- Contents jug : 1000 cc
- Color : Aluminum brushed with
Charcoal Grey plastic parts.
- Filter size : 1 x 2
- Thermostat (T1) switch-off temp. : 125 ± 5 °C
- Thermostat (T2) switch-off temp. : 75 - 15 °C
- Fuse cut-off temp : 172 °C
- SAP coding : HD5410
DISASSEMBLY- AND RE-ASSEMBLY ADVISE
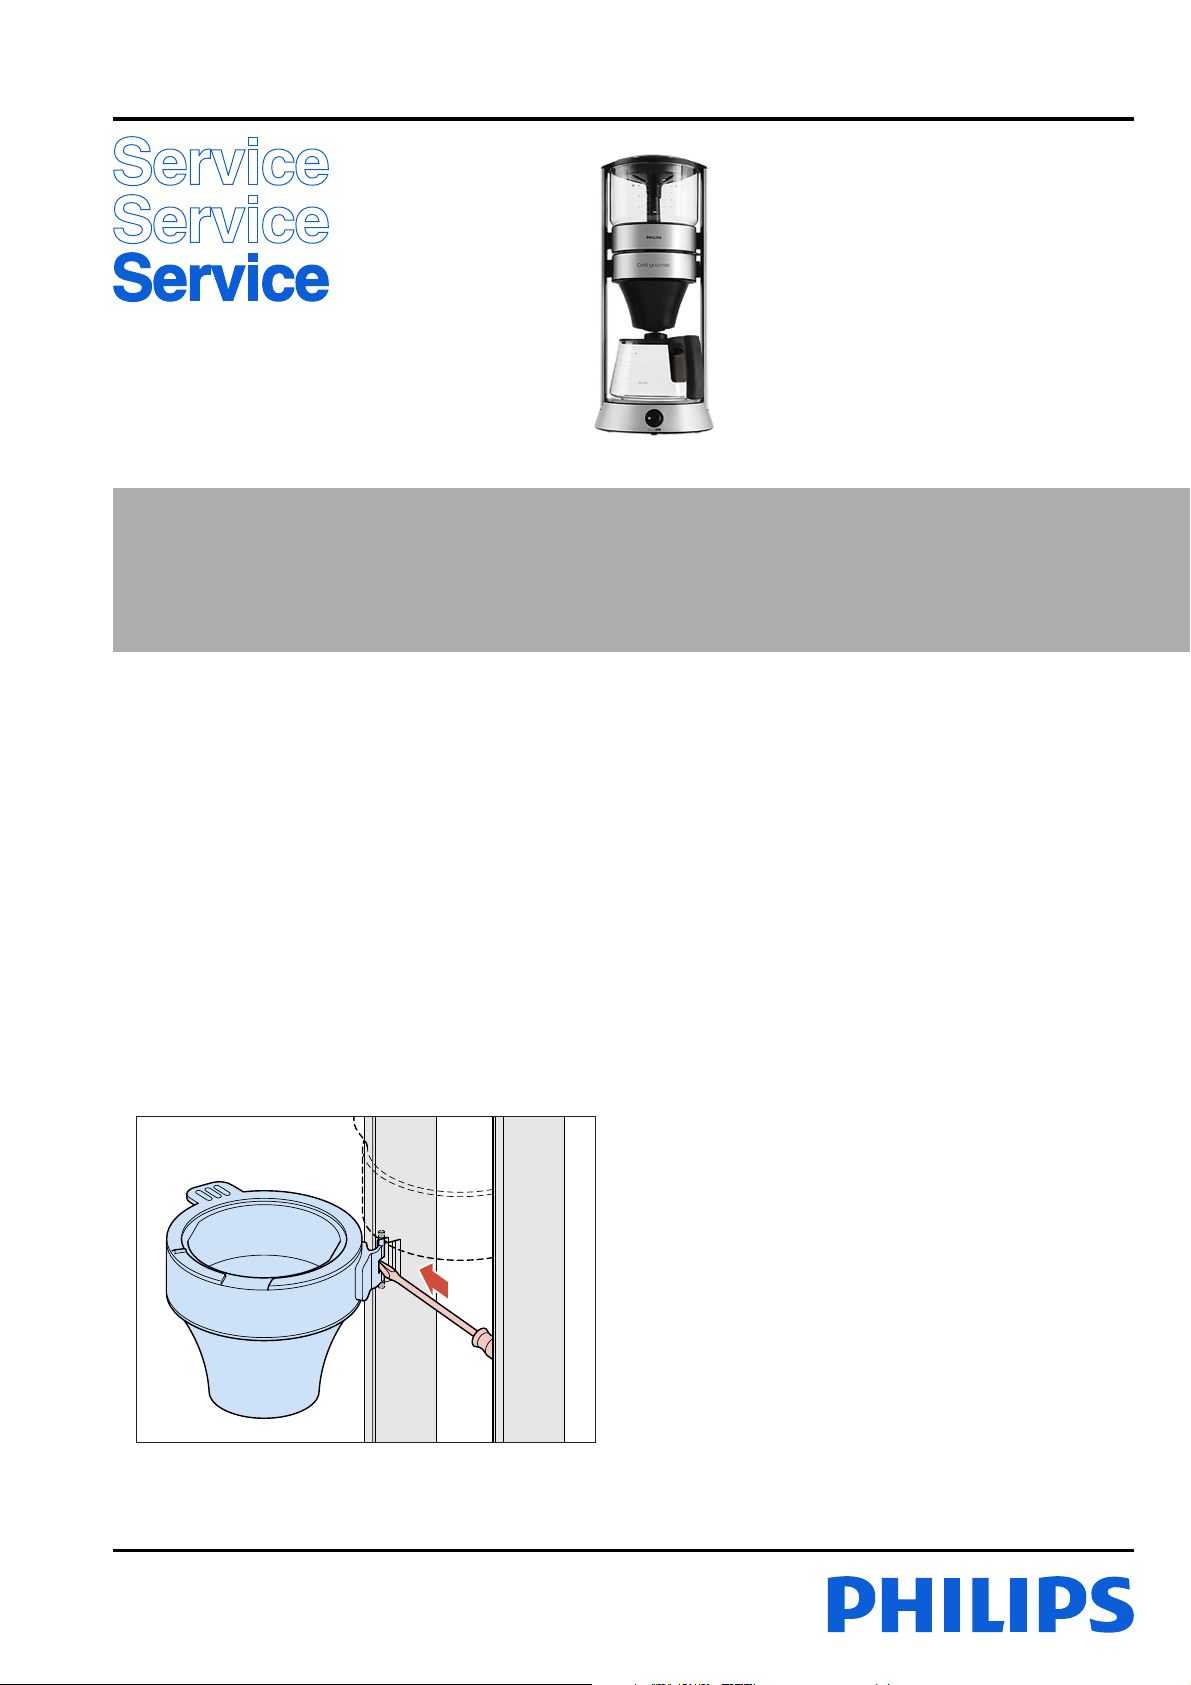
- To remove the swing filter holder proceed as follows:
1. Swing the fi lter holder open.
2. Push with a small screwdriver the plastic cam inside,
see picture for location.
3. While the cam is pushed inside gently lift the fi lter
holder up until the lowest pin of the fi lter holder comes
out of the hinge.
4. Pull downwards the fi lter holder out of alignment till it
comes loose totally.
Published by Philips Consumer Lifestyle Printed in the Netherlands © Copyright reserved Subject to modification
09/02
Page 2
DISASSEMBLY- AND RE-ASSEMBLY ADVISE
- Assembling tank and heater assy.
1. Clean the rubber sealing ring and glass tank and place
the sealing ring on the glass tank.
2. Place the valve -heating assy and glass tank with rubber
ring onto the housing construction of the Coffeemaker.
3. Mind the position of the glass tank so that the printing
on the glass tank is in line with the PHILIPS printing on
the aluminum housing part.
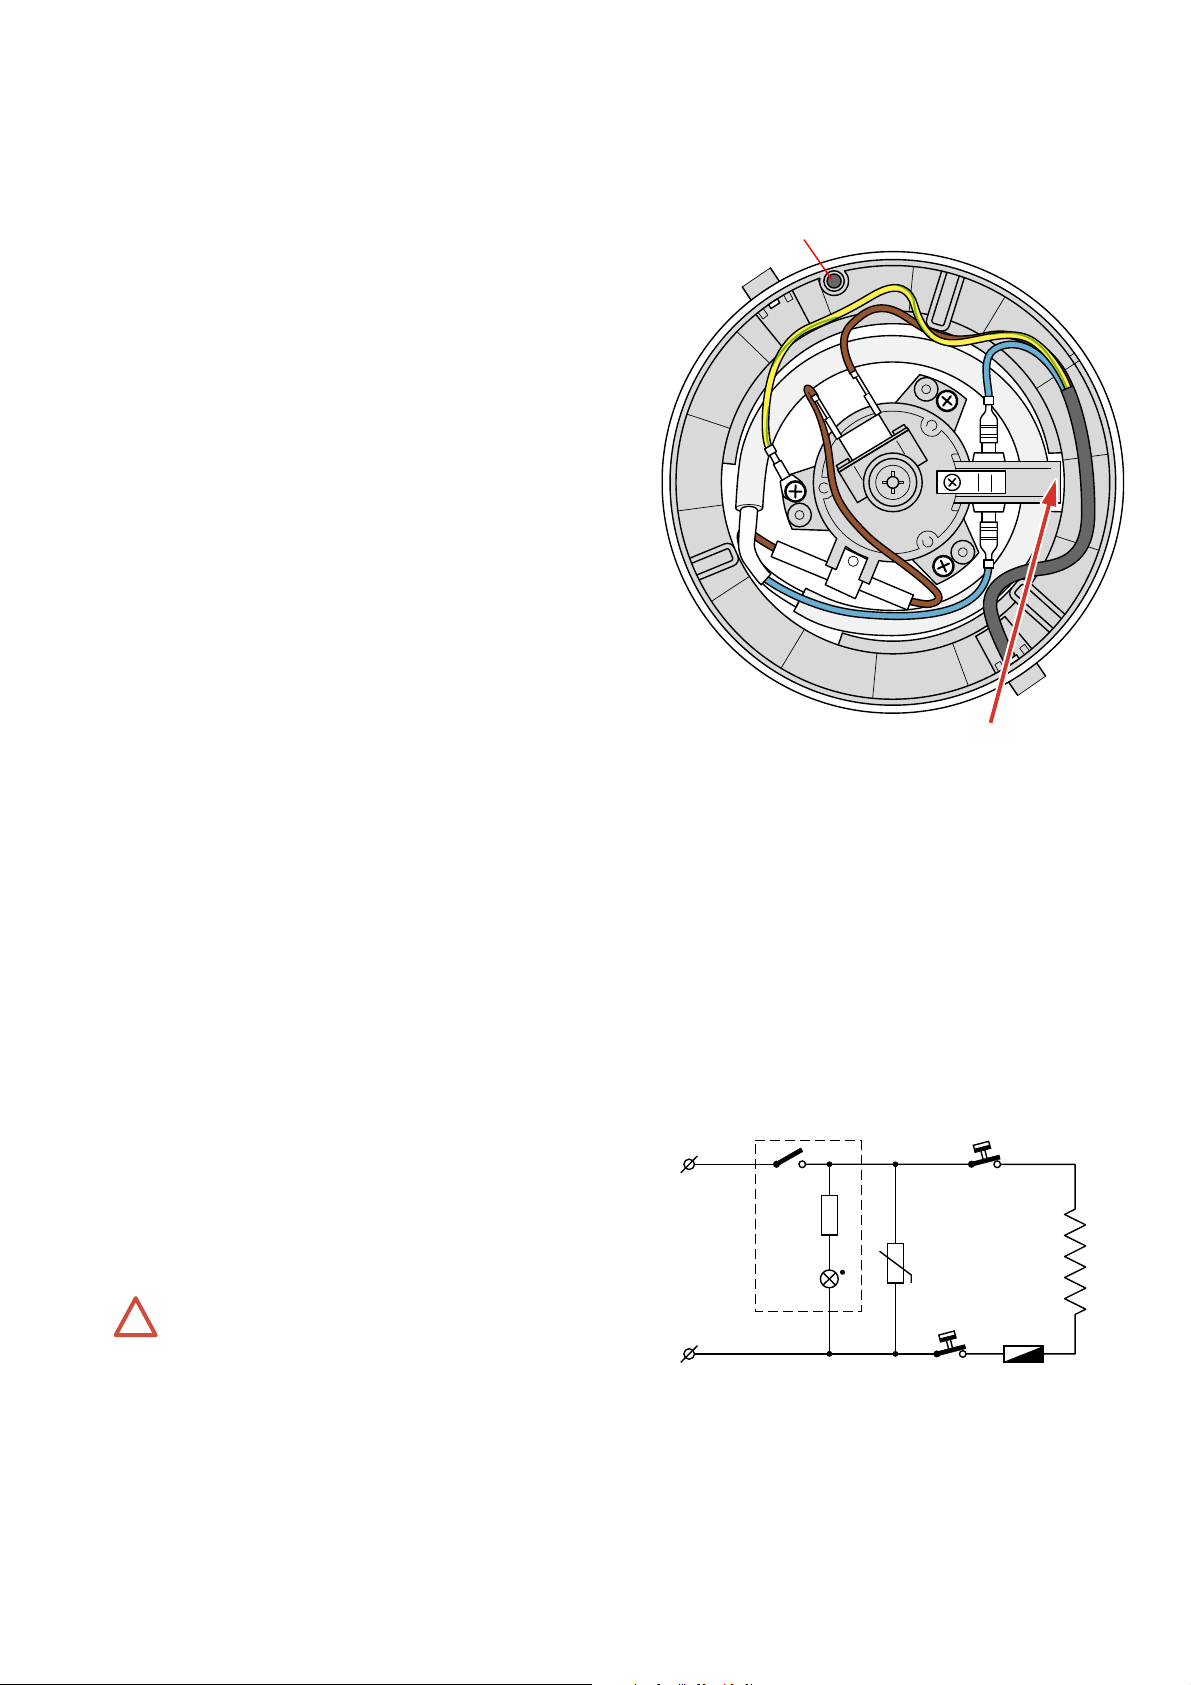
4. Also important is that the heater assy has been aligned
exactly like the picture.
5. Connect the wires to the right positions and make sure
the routing is the same as the picture shows. (Make sure
the wires coming out from the bar do not touch the
heating element surface to prevent the risk that the wires
will melt, which can result in a dangerous situation!
Also make sure the wires are not lead between screw
bosses and U shaped ribs!)
6. Place the spring and pin (fi lter click function) see picture
for position.
7. Place the tank base assy (only one position possible) and
tighten the three screws alternately to make sure the
construction will be fi xed properly.
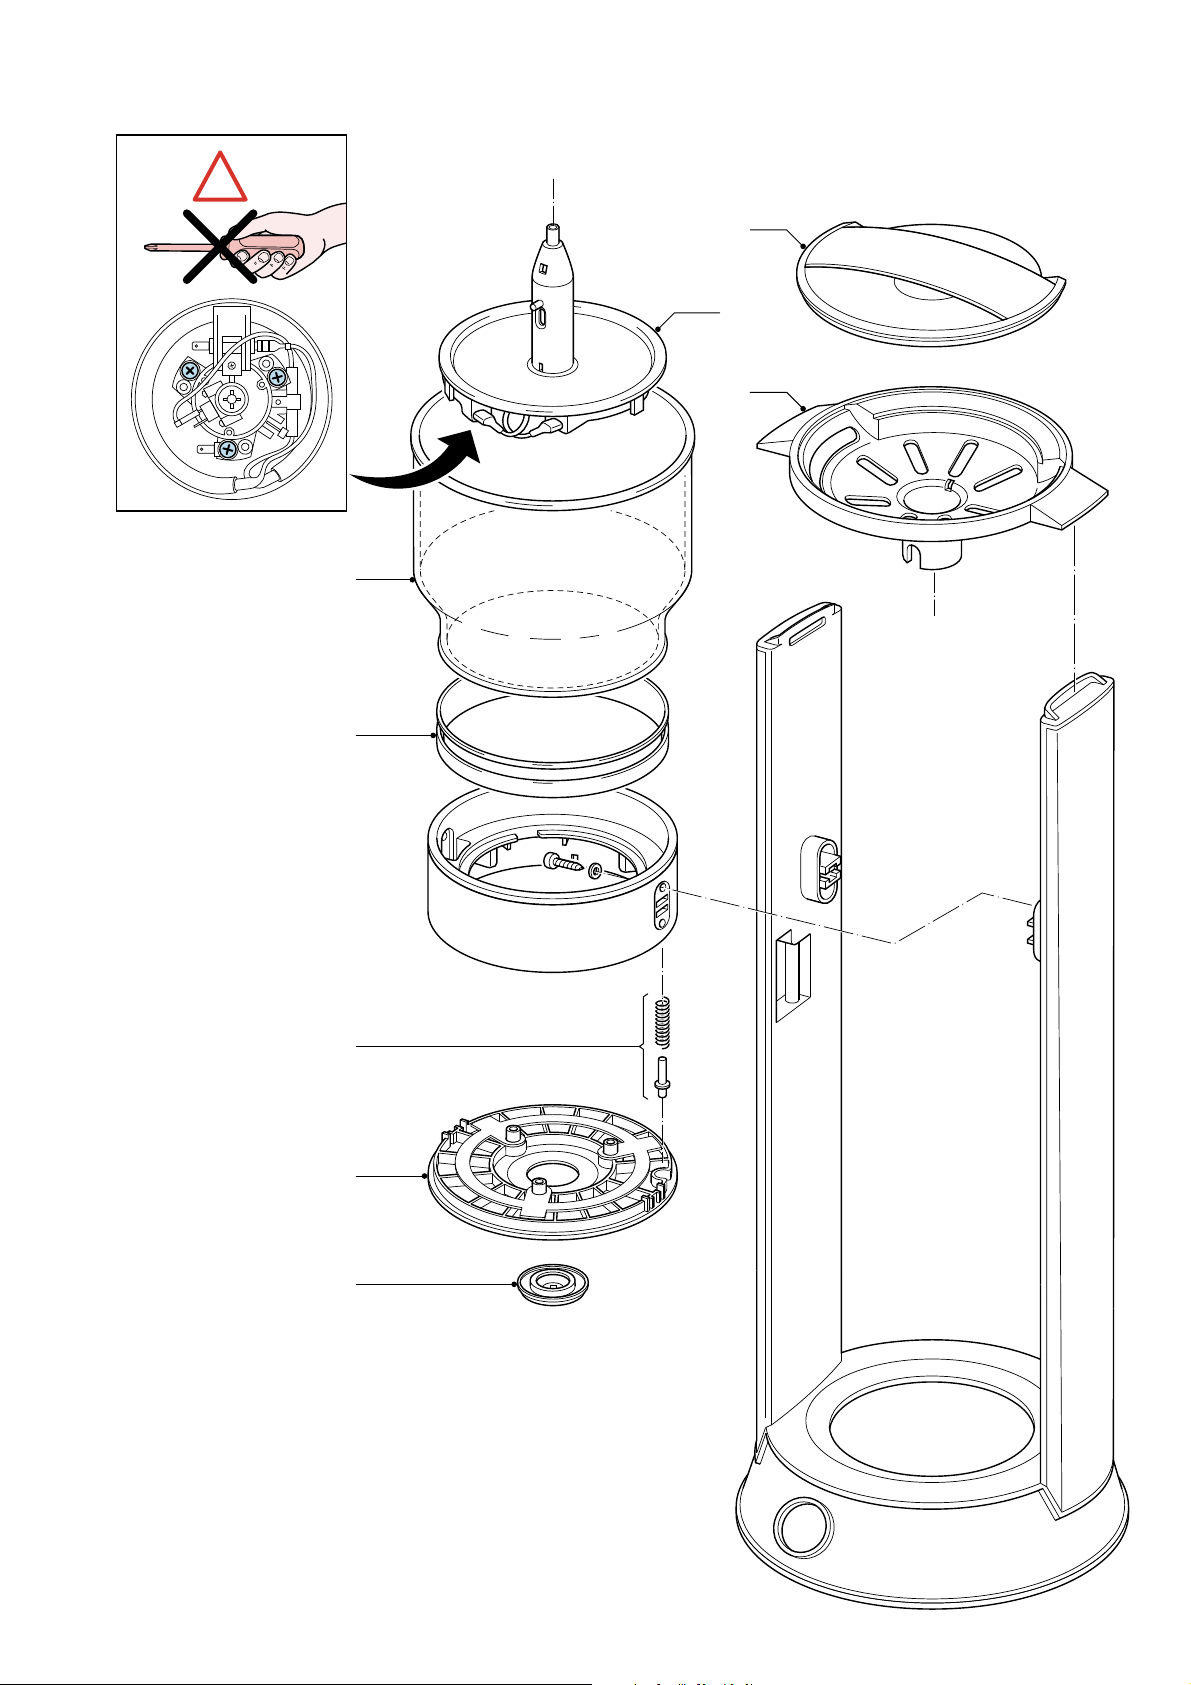
8. Don’t forget to place the rubber seal (position 5 exploded
view) back on the tank base.
9. When the construction has been aligned properly the
tank cover can be placed easily on top of the appliance.
HD5410/00
Spring and Pin
position
Alignment
Important:
Always check the functionality of the valve construction
and check if there is no leakage by operating the
coffeemaker once or twice with water.
If possible let the coffee maker fi lled with water in the
tank overnight to check if the construction doesn’t leak.
REPAIR INSTRUCTION
Electrical circuit
- When the appliance does not work, check the electrical
circuit.
- If the element, thermal fuse, thermostats or valve
construction prove defective, the complete heating assy
(element, fuse, thermostat, valve construction) has to be
replaced.
Warning: It is not allowed to unscrew or screw on the
!
heating assy.
Un-assembly and re-assembly from the heating
assy can end into an unsafe appliance!
ASO switch
S1
PTC
T1
E
T2
2-5
Page 3
REPAIR INSTRUCTION
Working principle
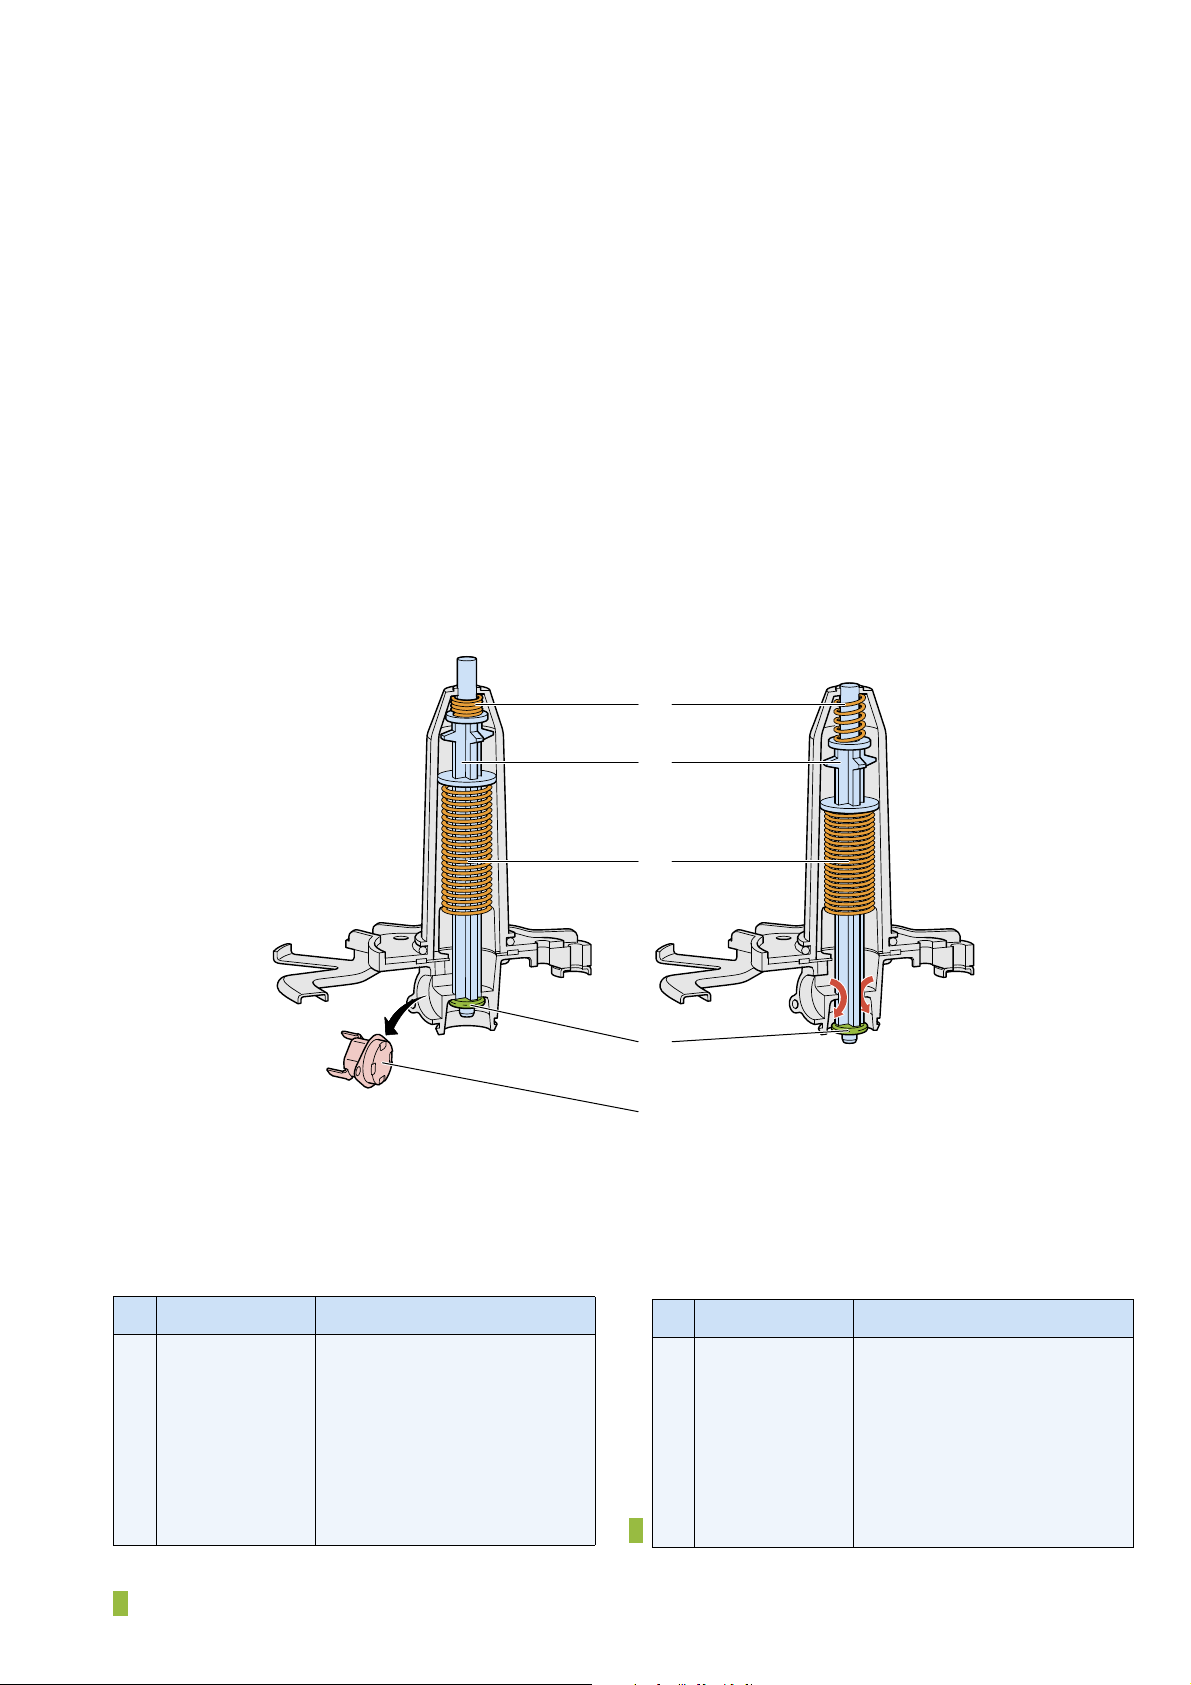
- When the appliance has been switched on, water in the
tank starts to heat up. (Thermostat contacts (T1) and (T2)
are closed, see electrical scheme).
- When the boiling point has been reached, the memory
spring (M1) in the valve construction will expand and
pushes the rod (R2) downwards.
The hot water fl ows along thermostat (T2) and rubber valve
(V3), into the coffee fi lter.
Thermostat contact (T2) will open when the temperature
of 75 °C has reached and switches the heating element off.
The function of thermostat (T1) is only to limit the
temperature of the heating element.
- To start the process again, cold water must be poured via
the tank cover along the memory spring (M1).
The memory spring (M1) will shrink and thermostat
contact (T2) will close again.
The spring (S4) will push the rod (R2) upwards and valve
(V3) will close the water outlet.
HD5410/00
De-scaling
- If the water system is nearly or less clogged by scale then
operate the coffeemaker a few times with vinegar or with a
10-15 % solution of either vinegar-acid, citric acid or tartar
acid, into cold tap water.
- Do not use other de-scaling agents as these may harm the
appliance.
- If this procedure does not restore the function, then switch
off the coffeemaker when the acid has passed through
during approximately. 3 min. Keep the appliance in this
condition overnight and continue/repeat the cleaning
operation. After the de-scaling procedure, operate the
coffeemaker twice with tap water in order to rinse away any
residual substances.
OPTIONAL (accessories)
- Commercial trade number : HD7979
(Jug included lid, Charcoal grey)
PARTS LIST
M1
R2
S4
V3
T2
Pos Service code Description
1
9965 000 32860
2
9965 000 32861
3
9965 000 32862
4
9965 000 32863
5
9965 000 32864
6
9965 000 32865
7
9965 000 32866
8
9965 000 32867
= changed
Glass tank
Sealingring Glasstank
Filter lock assy (spring + pin)
Tank base assy
Rubber seal, waterreduction
Tanklid, ALU
Heatingelement valve assy
Tank cover
Pos Service code Description
9
4222 247 35400
10
9965 000 32868
11
9965 000 32869
12
9965 000 32870
13
9965 000 32871
14
9965 000 32872
15
9965 000 32873
16
4222 459 45690
Coffee spoon
Filter assy
ASO switch
Juglid, charcoal grey
Glass Jug + Juglid
PTC element heater
Base
Filter holder assy
3-5
Page 4
EXPLODED VIEW
!
HD5410/00
6
7
8
1
2
3
4
5
4-5
Page 5
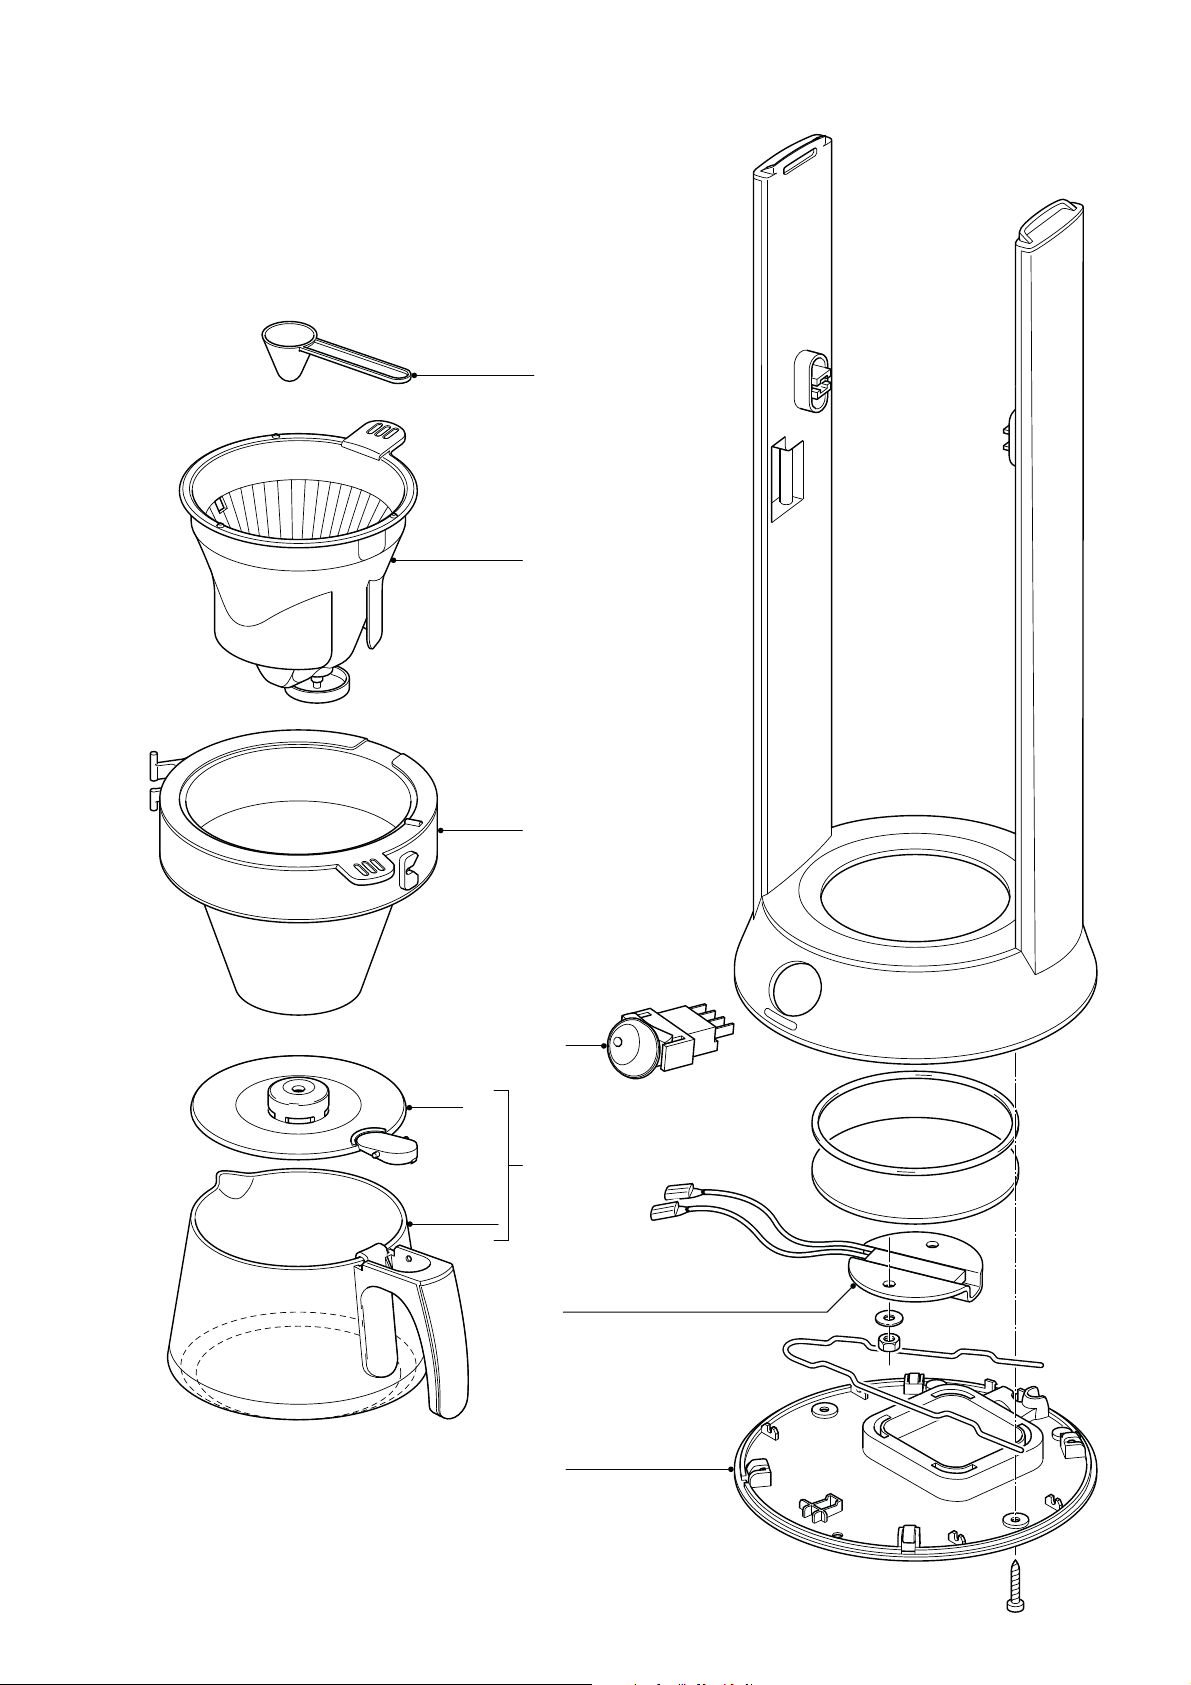
EXPLODED VIEW
HD5410/00
9
10
12
16
11
13
14
15
5-5
 Loading...