

Page 1
Overview
概覽
Preparing for use
準備使用
Using the induction cooker
使用電磁爐
Using the timer
使用定時功能
Cleaning
清潔
Recommended types and sizes of cookware
建議的廚具種類和大小
Specifications are subject to change without notice
© 2016 Koninklijke Philips N.V.
All rights reserved.
HD4992_AUS_UM_v0.5_160517
HD4992
Always there to help you
Register your product and get support at
www.philips.com/welcome
Preset time for delayed cooking
預約時間延時烹飪
English
1 Your induction cooker
Congratulations on your purchase and welcome to
Philips! To fully benet from the support that Philips
oers, register your product at www.philips.com/
welcome.
2 What’s in the box
Induction cooker main unit Warranty card
Important information leaet User manual
Magnet Free carry bag
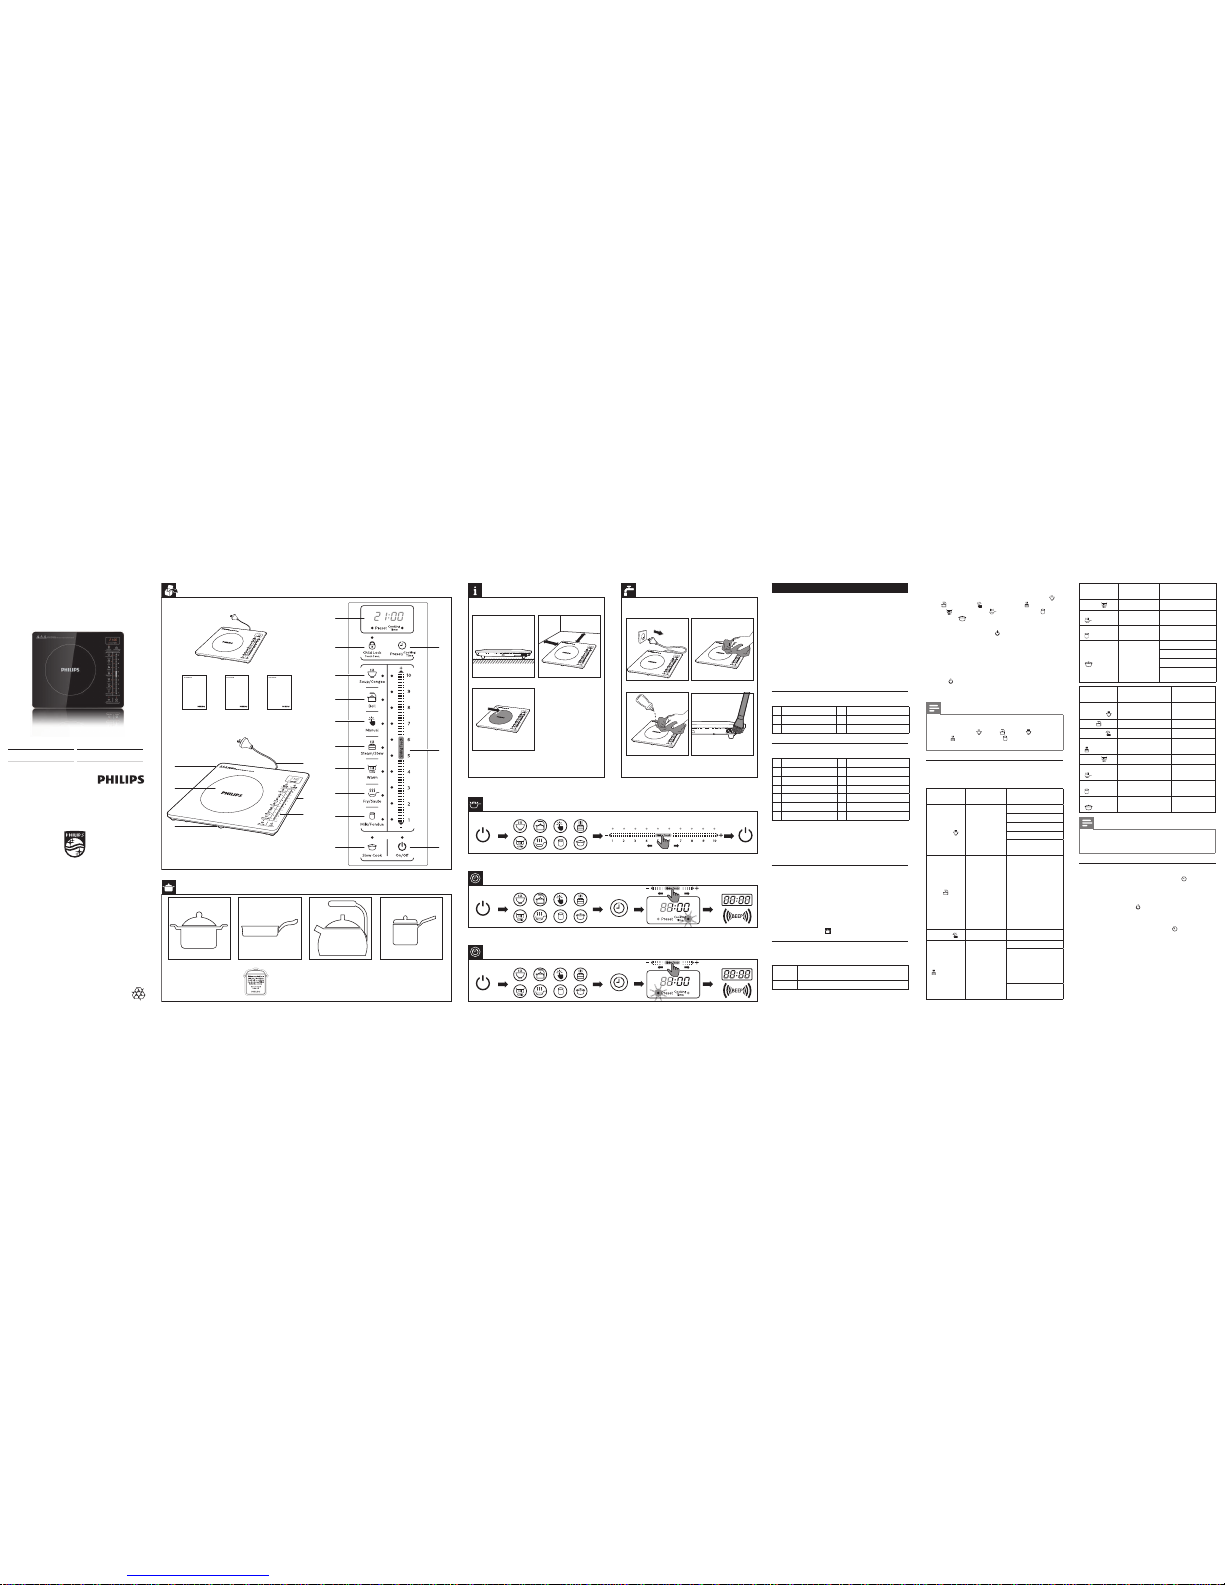
Overview
a
Cooking platedControl panel
b
Cooking zoneeAir outlets
c
Air inlet
f
Power cord
Controls overview
g
Display screennFry/Saute
h
Child LockoMilk/Fondue
i
Soup/CongeepSlow Cook
j
Boil
q
On/O
k
Manual
r
Power Slider
l
Steam/StewsPreset/Cooking Time
m
Warm
3 Before first use
Remove all packaging materials from the induction
cooker.
Preparing for use
1 Place the appliance on a dry, stable and level
surface.
2 Make sure there is at least 10cm free space around
the appliance to prevent overheating.
3 Always place the cookware on the cooking zone
during cooking.
4 Make sure you use cookware of the correct types
and sizes (see Fig ).
Recommended types and sizes of
cookware
Material Cookware with a bottom made of iron or
magnetic stainless steel
Shape Cookware with a at bottom
4 Using the induction cooker
There are eight cooking modes: Soup/Congee ( ),
Boil ( ), Manual ( ), Steam/Stew ( ),
Warm ( ), Fry/Saute ( ), Milk/Fondue ( ) and
Slow Cook ( ).
1 Follow the steps in “Preparing for use”.
2 Touch the On/O icon ( ), the On/O indicator
lights up.
3 Touch the cooking icons to choose the desired
cooking mode. The corresponding indicator lights
up and the induction cooker starts working in the
selected mode.
4 When the cooking is nished, touch the On/O
icon ( ) to switch o the appliance.
5 Unplug the induction cooker after the fan stops
working.
Note
•
During cooking, you can change the power level by
moving your ngers up and down on the power slider.
• In Soup/Congee ( ), Boil ( ), Soup ( ), Steam/
Stew (
), and Milk/Fondue ( ) modes, the cooking
power automatically changes for better cooking result.
Default cooking time and temperature
Refer to below table for the default cooking time and
temperature of dierent cooking modes.
Cooking
mode
Cooking
temperature
Default cooking
power
Soup/
Congee ( )
100°C
1000W (0-3 mins)
1600W (3-15 mins)
1000W (15-20 mins)
400W (20-60 mins)
100W (60 mins
onwards)
Boil (
)
100(±20)°C
Starts with 1800W.
When the water
temperature
reaches 80±20°C,
the power drops to
1000W. After the
preset cooking time
or the timer(if set)
has elapsed,the
appliance turns o
automatically.
Manual (
)
100(±20)°C 1800W
Steam/Stew
(
)
100(±20)°C
1800W (0-5 mins)
1400W (5-15 mins)
When water is
brought to boil,
the power drops to
1000W.
100W (15 mins
onwards)
EN User manual ZH-T 使用手冊
Cooking
mode
Cooking
temperature
Default cooking
power
Warm ( )
160(±20)°C 1000W
Fry/Saute
(
)
200(±20)°C 1200W
Milk/Fondue
(
)
60(±20)°C 800W
Slow Cook
(
)
100(±20)°C
1800W (0-3 mins)
1600W (3-15 mins)
1400W (15-25 mins)
400W (25 mins
onwards)
Cooking
mode
Default cooking
time
Timer
Soup/
Congee (
)
3 hrs 1-120 mins
Boil (
) 20 mins 0-1 hr
Manual (
) 1 hr 4 hrs
Steam/Stew
(
)
1 hr 1-120 mins
Warm (
) 2 hrs 1-120 mins
Fry/Saute
(
)
2 hrs 1-120 mins
Milk/Fondue
(
)
20 mins /
Slow Cook
(
)
6hrs 1-600 mins
Note
•
Depending on the cookware being used or the
ingredients in the cookware, the actual cooking
temperature may be dierent.
Using the timer
You can use the Preset/Cooking Time ( ) icon to
decide how much time you want the appliance to
work at dierent cooking modes.
1 Follow the steps in “Preparing for use”.
2 Touch the On/O ( ) icon, the On/O indicator
lights up.
3 Choose the desired cooking mode.
4 Touch the Preset/Cooking Time ( ) icon twice,
the timer indicator lights up.
5 Move your nger on the power slider upwards to
set minute and downwards to set hour.
6 When the time has elapsed, the induction cooker
turns o automatically.
• If the magnet sticks to your pan / cookware, then it will be suitable
for use on your Philips induction cooker. Please use the magnet in
the box for checking.
• 如果磁性貼可以貼住您的平底鍋
/
炊具,則該平底鍋/炊具適用于您的飛利
浦電磁爐。請使用包裝盒內的磁性貼進行檢測。
Diameter: >12 cm
直徑:大於12釐米
Material: Ferrous/Magnetic
材質:鐵制/磁性
www.philips.com/welcome
User manual
HD4911
www.philips.com/welcome
Safety leaflet
HD4911
www.philips.com/welcome
Warranty
HD4911
10cm
10cm
c
a
b
d
e
f
g
h
i
j
k
l
m
n
o
p
s
r
q
Page 2
Note
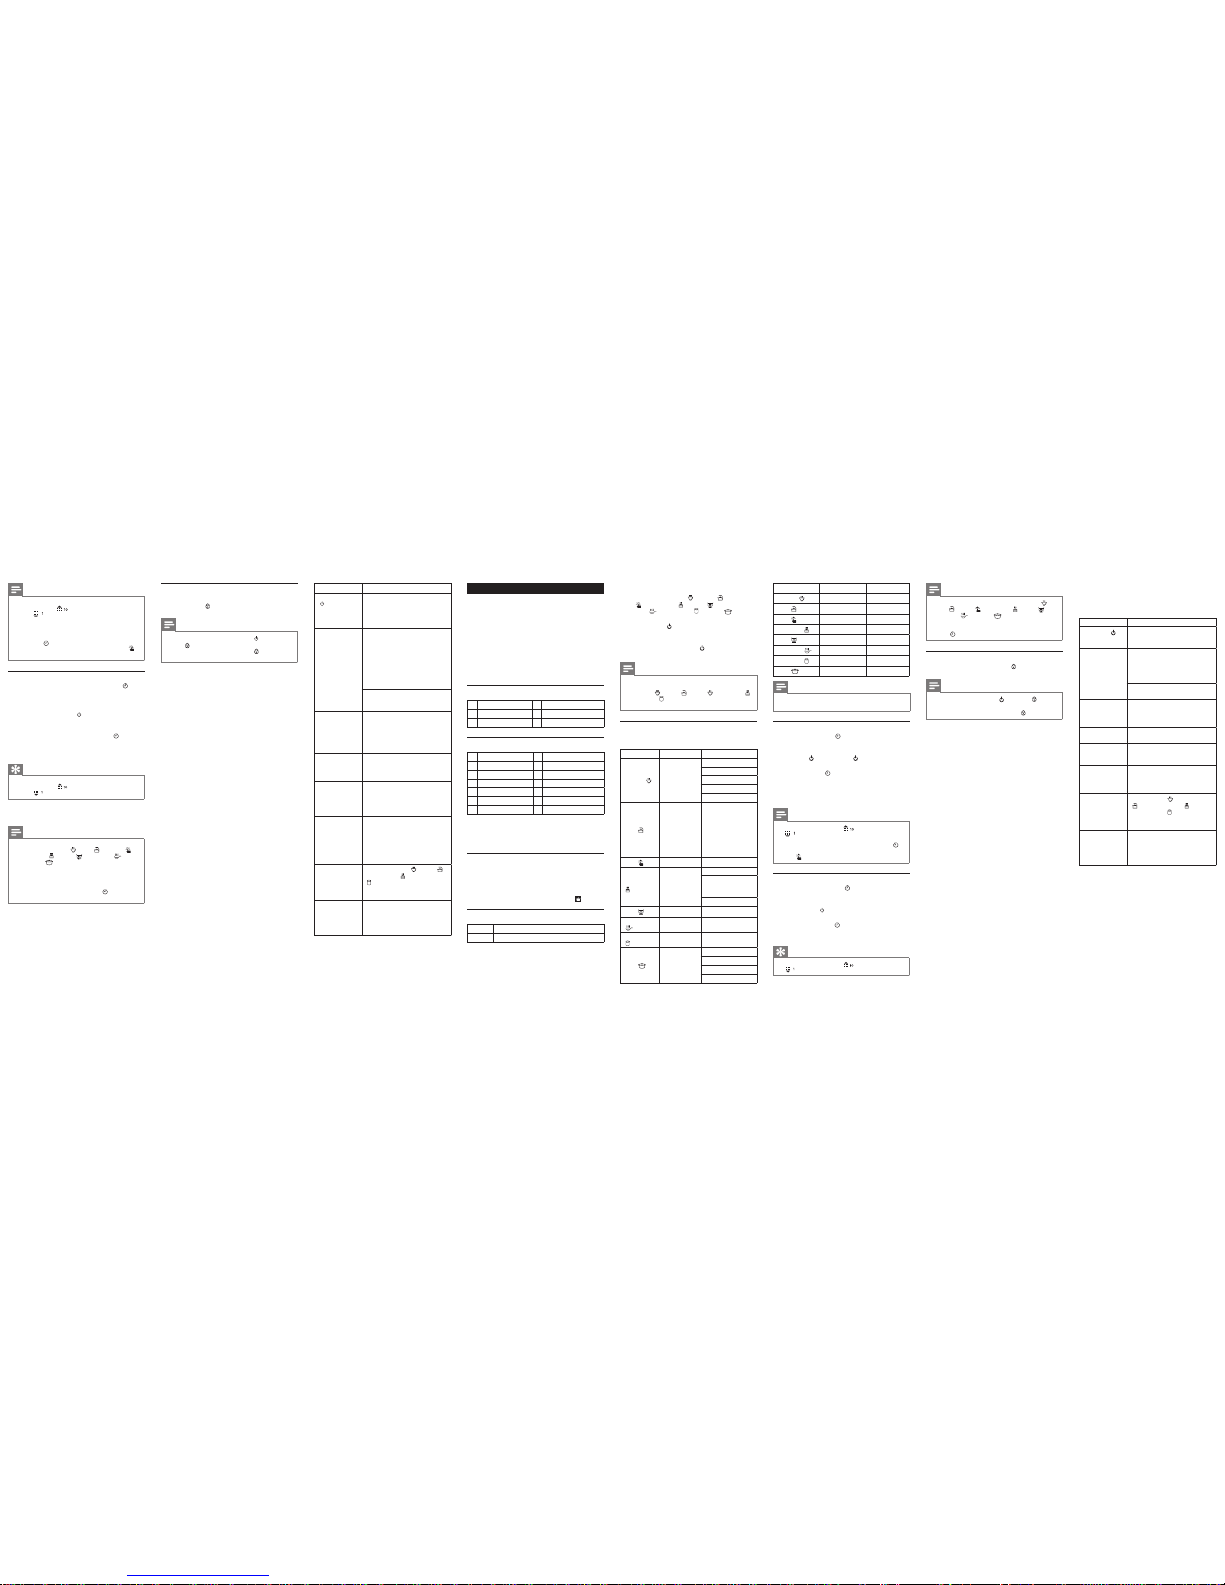
•
You can also set minute/hour by touching the top of
the power slider (
) and the bottom of the power
slider (
).
• After you have selected the cooking time, wait for a
few seconds before the induction cooker automatically
conrms it.
• After the timer is set, you can touch the Preset/Cooking
Time icon (
) again to cancel the timer.
• You cannot use the timer function in the Manual ( )
mode.
Preset time for delayed cooking
You can use the Preset/Cooking Time icon ( ) to
set the time at which you want the appliance to start
cooking. The preset timer is available up to 24 hours.
1 Follow the steps in “Preparing to use”.
2 Touch the On/O icon ( ), the On/O indicator
lights up.
3 Choose the desired cooking mode.
4 Touch the Preset/Cooking Time icon ( ) once,
the preset indicator lights up.
5 Move your nger on the power slider upwards to
set minute and downwards to set hour.
Tip
•
You can also set minute/hour by touching the top of
the power slider (
) and the bottom of the power
slider (
).
6 When the preset time has elapsed, you will hear a
few beeps and the induction cooker starts working
automatically.
Note
•
The preset timer is available in the following cooking
modes: Soup/Congee (
), Boil ( ), Manual ( ),
Steam/Stew (
), Warm ( ), Fry/Saute ( ), and
Slow Cook (
).
• After you have selected the preset time, wait for a few
seconds before the induction cooker automatically
conrms it.
• When the induction cooker is at preset mode, you can
touch the Preset/Cooking Time icon (
) again to
cancel the preset time.
Set the child lock
When the induction cooker is working, touch the
Child Lock icon ( ) for three seconds to enter child
lock mode.
Note
•
At child lock mode, only the On/O ( ) and Child
Lock (
) icons are responsive.
• To unlock, press the Child Lock icon ( ) for three
seconds again.
5 Cleaning
1 Unplug the appliance after the fan stops working
and let it cool down.
2 Clean the appliance with a damp cloth and, if
necessary, with some mild cleaning agent.
6 Recycling
Do not throw away the product with the normal
ousehold waste at the end of its life, but hand it in at
an ocial collection point for recycling. By doing this,
you help to preserve the environment.
7 Guarantee and service
If you need service or information or if you have
a problem, please visit the Philips website at
www. philips.com or contact the Philips Consumer
Care Centre in your country (you will nd its phone
number in the worldwide guarantee leaet). If there
is no Consumer Care Centre in your country, go to
your local Philips dealer.
8 Troubleshooting
If your induction cooker does not function properly
or if the cooking quality is insucient, consult the
table below. If you are unable to solve the problem,
contact a Philips service centre or the Consumer
Care Centre in your country.
Problem Solution
The On/O icon
(
) does not
respond.
There is a connection problem.
Check if the induction cooker is
connected to the mains and if
the plug is inserted rmly into
the wall socket
The appliance
beeps
continuously
and then stops
working.
You may have put unsuitable
cookware on the cooking plate
or you may have removed the
cookware from the cooking plate
during cooking. Make sure the
cookware is made of steel, iron
or aluminum with stainless steel
cladding base and has a base
diameter larger than 12cm.
You may have placed the
cookware outside of the cooking
zone.
The cookware
does not
heat up to
the required
temperature.
The bottom of the cookware
may not be at. Use cookware
with a at bottom. If the problem
still exists, take the appliance to
your Philips dealer or a service
center authorised by Philips.
The appliance
stops working
suddenly.
The temperature of the
cookware might be too high. Let
the cookware cool down for a
while.
The cooking
temperature
of the preset
modes are too
high or too low.
During cooking, you can change
the power level by moving your
ngers on the power slider.
When I press
one of the
cooking mode
icons, the light
of the selected
mode does not
go on.
The light is defective. Take the
appliance to your Philips dealer
or a service centre authorised by
Philips.
The cooking
temperature
automatically
changes in some
preset modes.
In Soup/Congee (
), Boil ( ),
Steam/Stew ( ), Milk/Fondue
( ) the cooking temperature
automatically changes for better
cooking result.
Error codes E1,
E2, E3, E4, E5,
E6, E7, E8 or E9
displays on the
screen.
The induction cooker has
malfunction. Take the appliance
to your Philips dealer or a service
center authorised by Philips.
繁體中文
1
電磁爐
感謝您購買本產品。歡迎來到飛利浦的世界! 請至
www.philips.com/welcome
註冊您的產品,以獲得飛
利浦提供的完整支援。
2
內容物
電磁爐主機體 保固卡
重要資訊手冊 使用手冊
磁性貼
手提袋
概覽
a
加熱面板
d
控制面板
b
烹調區
e
出風口
c
進風口
f
電源線
控制項概覽
g
顯示畫面
n
油炸/煎炒
h
兒童鎖
o
牛奶/火鍋
i
煲湯/粥
p
燜煮
j
煮沸
q
開/關
k
手動
r
火力撥鈕
l
蒸煮/燜燉s預設/定時器
m
保溫
3
第一次使用前
取下電磁爐所有包裝材料。
使用前準備
1 請將本產品放置在乾燥、穩固且水平的表面。
2 確認本裝置周圍至少保留
10
公分的空間,以預防
過熱。
3 烹煮時請務必將鍋具置於烹調區內。
4 請務必使用正確類型與大小的鍋具
(
參閱圖 )。
建議使用的鍋具類型與尺寸
材質 鐵製或具磁性的不銹鋼製鍋底
形狀 平底的鍋具
4
使用電磁爐
有八種烹調模式:煲湯/粥
(
)
、煮沸
( )、
手動
( )
、蒸煮/燜燉
( )
、保溫
( )、
油炸/煎炒
( )
、牛奶/火鍋
( )
及燜煮
( )
。
1 請依照「使用前準備」中的步驟操作。
2 觸控開
/
關圖示
(
),開/
關指示燈隨即亮起。
3 觸控烹調圖示,選擇想要的烹調模式。對應的指示燈
會亮起,電磁爐隨即以所選的模式開始運作。
4 烹調完成後,觸控開
/
關圖示
(
)
,關閉產品電源。
5 請在風扇停止運轉之後拔下電磁爐插頭。
備註
•
烹調時,您可以用手指上下滑動調整火力撥鈕,來變更
火力。
• 在煲湯
/粥 ( )
、煮沸
( )
、熬湯
( )
、蒸煮/燜燉
( )
和牛奶/火鍋
(
)
模式中,烹調火力會自動變更,以呈現更
佳的烹調結果。
預設烹調時間與溫度
請參閱下表,瞭解不同烹調模式的預設烹調時間與
溫度。
烹調模式 烹調溫度 預設烹調火力
煲湯/粥
(
)
100°C
1000W (0-3 分鐘)
1600W (3-15 分鐘)
1000W (15-20 分鐘)
400W (20-60 分鐘)
100W (60
分鐘以上
)
煮沸
(
)
100(±20)°C
開始按
1800W
加熱。當水溫到
80±20°C時,火力
會降至
1000W,
預設烹煮時間結束,
或者定時結束(如有
設置),產品會自動
關閉電源。
手動
(
)
100(±20)°C
1800W
蒸煮/燜燉
(
)
100(±20)°C
1800W (0-5 分鐘)
1400W (5-15 分鐘)
當水煮沸時,火力會
降至
1000W
。
100W (15
分鐘以上
)
保溫
(
)
160(±20)°C
1000W
油炸/煎炒
(
)
200(±20)°C
1200W
牛奶/火鍋
(
)
60(±20)°C
800W
燜煮
(
)
100(±20)°C
1800W (0-3 分鐘)
1600W (3-15 分鐘)
1400W (15-25 分鐘)
400W (25
分鐘以上
)
烹調模式 預設烹煮時間 計時器
煲湯/粥
(
)
3
小時
1-120
分鐘
煮沸
(
)
20 分鐘0-1
小時
手動
(
)
1
小時4 小時
蒸煮/燜燉
(
)
1
小時
1-120
分鐘
保溫
(
)
2
小時
1-120
分鐘
油炸/煎炒
(
)
2
小時
1-120
分鐘
牛奶/火鍋
(
)
20 分鐘/
燜煮
(
)
6
小時
1-600
分鐘
備註
•
視您所使用的鍋具或鍋具中的食材而定,實際的烹調溫度可
能會有所不同。
使用定時功能
您可以使用預設/定時器
( )
圖示,決定您希望本產品
在不同烹調模式下的運作時間長短。
1 請依照「使用前準備」中的步驟操作。
2 觸控開
/關 ( )
圖示,開/關
( )
指示燈隨即亮起。
3 選擇想要的烹調模式。
4 觸控預設
/
定時器
(
)
圖示兩次,定時器指示燈會亮
起。
5 用手指向上調整火力撥鈕可設定分鐘,向下移動則可
設定小時。
6 所設定的時間結束時,電磁爐會自動關閉。
備註
•
您也可以觸控火力撥鈕頂端
( )
與火力撥鈕的底部
(
)
來設定分鐘/小時。
• 選擇烹調時間後,請等待數秒讓電磁爐自動確認時間。
• 設定好定時器後,您可以再次觸控預設
/
定時器圖示
( )
來取消定時器。
• 手動
( )
烹調模式不可使用定時功能。
延遲烹煮預設時間
您可以使用預設/定時器圖示
( )
來設定您希望本產品開
始烹調的時間。預設定時器最多可為
24
小時。
1 請依照「使用前準備」中的步驟操作。
2 觸控開
/
關圖示
(
),開/
關指示燈隨即亮起。
3 選擇想要的烹調模式。
4 觸控預設
/
定時器圖示
( )
一次,預設指示燈會亮起。
5 用手指向上滑動調整火力撥鈕可設定分鐘,向下滑動
則可設定小時。
秘訣
•
您也可以觸控火力撥鈕頂端
( )
與火力撥鈕的底部
(
)
來設定分鐘/小時。
6 當預設時間結束時,您會聽見幾聲嗶聲,電磁爐隨即
自動開始運作。
備註
•
您可以在下列烹調模式使用預設定時器:煲湯/粥
( )、
煮沸
(
)
、手動
( )
、蒸煮/燜燉
( )
、保溫
( )、
油炸/煎炒
(
)
、及燜煮
( )
。
• 選擇預設時間後,請等待數秒讓電磁爐自動確認時間。
• 當電磁爐在預設模式時,您可以再次觸控預設
/
定時器
圖示
(
)
來取消預設時間。
設定兒童鎖
當電磁爐運作時,觸控兒童鎖圖示
(
)
三秒鐘,即可進
入兒童鎖模式。
備註
•
在兒童鎖模式中,只有開/關
(
)
和兒童鎖
( )
圖示會
有反應。
• 若要解除鎖定,請再次按下兒童鎖圖示
( )
三秒。
5
清潔
1 請在風扇停止運作之後,拔下本產品插頭,然後讓
產品冷卻。
2 用濕布清潔本產品,若有必要可使用少許溫和的
清潔劑。
6 回收
本產品使用壽命結束時,請勿與一般家庭廢棄物一併丟
棄。請將該產品送至政府指定的回收點進行回收。此舉
能為環保盡一份心力。
7
保固與服務
若您需要相關服務或資訊,或是有任何問題,請造訪飛
利浦網站:
www. philips.com
,或聯絡您所在國家/地區
的飛利浦客戶服務中心 (您可以在全球保證書上找到電話
號碼)。若當地沒有客戶服務中心,請洽詢當地的飛利浦
經銷商。
8
疑難排解
如果電磁爐無法正常運作,或未達到預期烹調品質,請
參閱下表。如果您無法解決所遇到的問題,請聯絡您所
在國家/地區的飛利浦服務中心或客戶服務中心。
問題 解決方法
開/關圖示
(
)
沒有回應。
電源連接有問題。請檢查電磁爐是
否連接電源,插頭是否確實插入電
源插座中。
產品持續發出
嗶聲,接著停止
運作。
您可能在加熱面板上放了不適用的
鍋具,或是您可能在烹調時將鍋具
移開加熱面板。請確定鍋具是由
鋼、鐵或鋁合金製成,鍋底以不銹
鋼電鍍而成,且直徑大於
12
公分。
您可能誤將鍋具擺放在烹調區
之外。
鍋具並未自動
加熱至所需的
溫度。
鍋具可能不是平底。請使用平底的
鍋具。如果問題持續發生,請將本
產品送至飛利浦經銷商或飛利浦授
權的服務中心。
產品突然停止
運轉。
鍋具的溫度可能太高。請讓鍋具
冷卻一下。
預設模式的
烹調溫度太高或
太低。
烹調時,您可以用手指調整火力
撥鈕,來變更火力。
按下其中一個烹
調模式圖示時,
所選模式指示燈
不會亮。
指示燈故障。請將產品送至飛利浦
經銷商或飛利浦授權的服務中心。
在部分預設模式
下,烹調溫度會
自動變更。
在「煲湯/粥」
(
)
、「煮沸」
( )
、「蒸煮/燜燉」
( )、
「牛奶/火鍋」
( )
模式下,
烹調溫度會自動變更,以呈現
更佳的烹調結果。
螢幕上顯示錯誤
代碼
E1、E2、
E3、E4、E5、
E6、E7、E8 或
E9
。
電磁爐故障。請將本產品送至飛
利浦經銷商或飛利浦授權的服務
中心。
 Loading...