

Page 1
www.philips.com/welcome
User manual
HD4911
www.philips.com/welcome
Safety leaflet
HD4911
www.philips.com/welcome
Warranty
HD4911
10cm
10cm
c
a
b
d
e
f
g h i m n oj k l
p r tq s
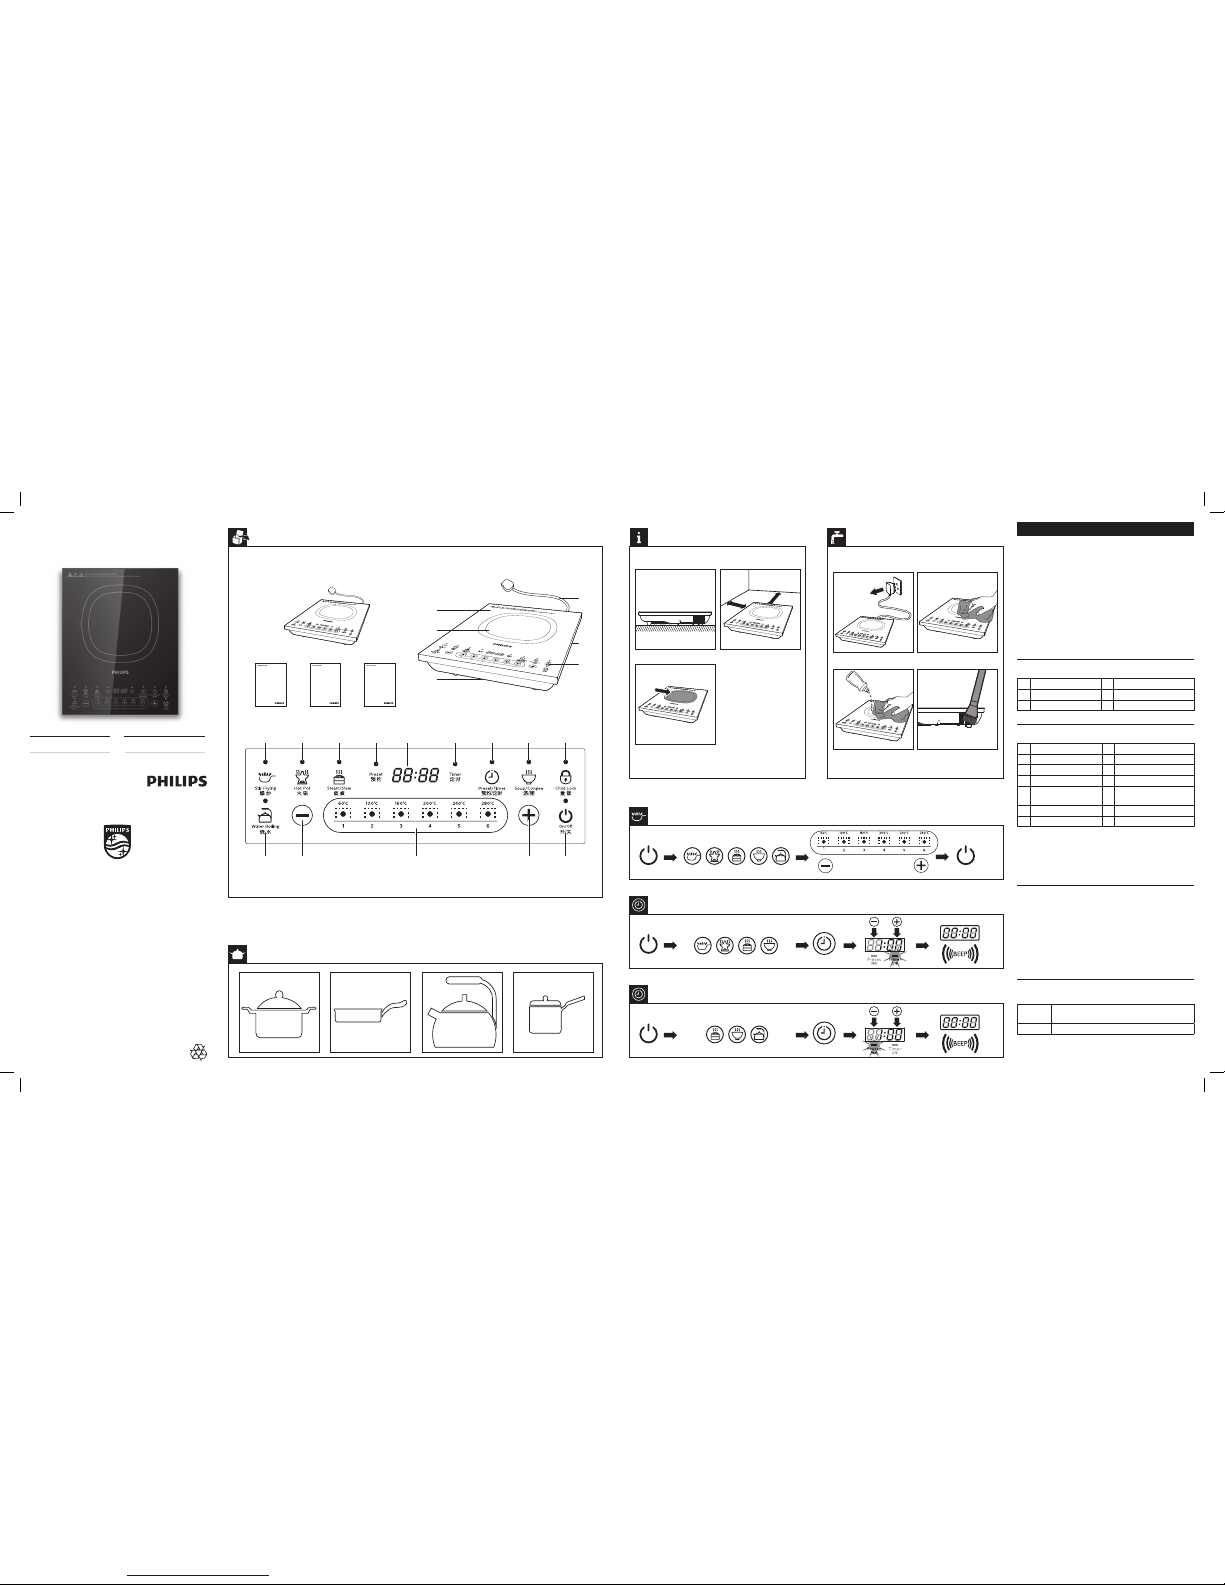
Overview
概览
Preparing for use
准备使用
Using the induction cooker
使用电磁炉
Using the timer
使用定时功能
Cleaning
清洁
Recommended types and sizes of cookware
建议的厨具种类和大小
Specifications are subject to change without notice
© 2016 Koninklijke Philips N.V.
All rights reserved.
HD4931_Malay_UM_V1.0
HD4931
Always there to help you
Register your product and get support at
www.philips.com/welcome
Preset time for delayed cooking
预约时间延迟烹饪
English
1 Your induction cooker
Congratulations on your purchase and welcome to
Philips! To fully benet from the support that Philips
oers, register your product at www.philips.com/
welcome.
2 What’s in the box
Induction cooker main unit Warranty card
Important information leaet User manual
Overview
a
Cooking platedControl panel
b
Cooking zoneeAir outlets
c
Air inlet
f
Power cord
Controls overview
g
Stir Frying buttonnSoup/Congee button
h
Hot Pot buttonoChild Lock button
i
Steam/Stew buttonpWater Boiling button
j
Preset indicatorqDecrease button
k
Display screenrCooking power level
and temperature
l
Timer indicatorsIncrease button
m
Preset/Timer buttontOn/O button
3 Before first use
Remove all packaging materials from the induction
cooker.
Preparing for use
1 Place the appliance on a dry, stable and level
surface.
2 Make sure there is at least 10cm free space around
the appliance to prevent overheating.
3 Always place the cookware on the cooking zone
during cooking.
4 Make sure you use cookware of the correct types
and sizes (see the table below).
Recommended types and sizes of
cookware
Material Cookware with a bottom made of iron or
magnetic stainless steel
Shape Cookware with a at bottom
EN User manual ZH-S 用户手册
Page 2
4 Using the induction cooker
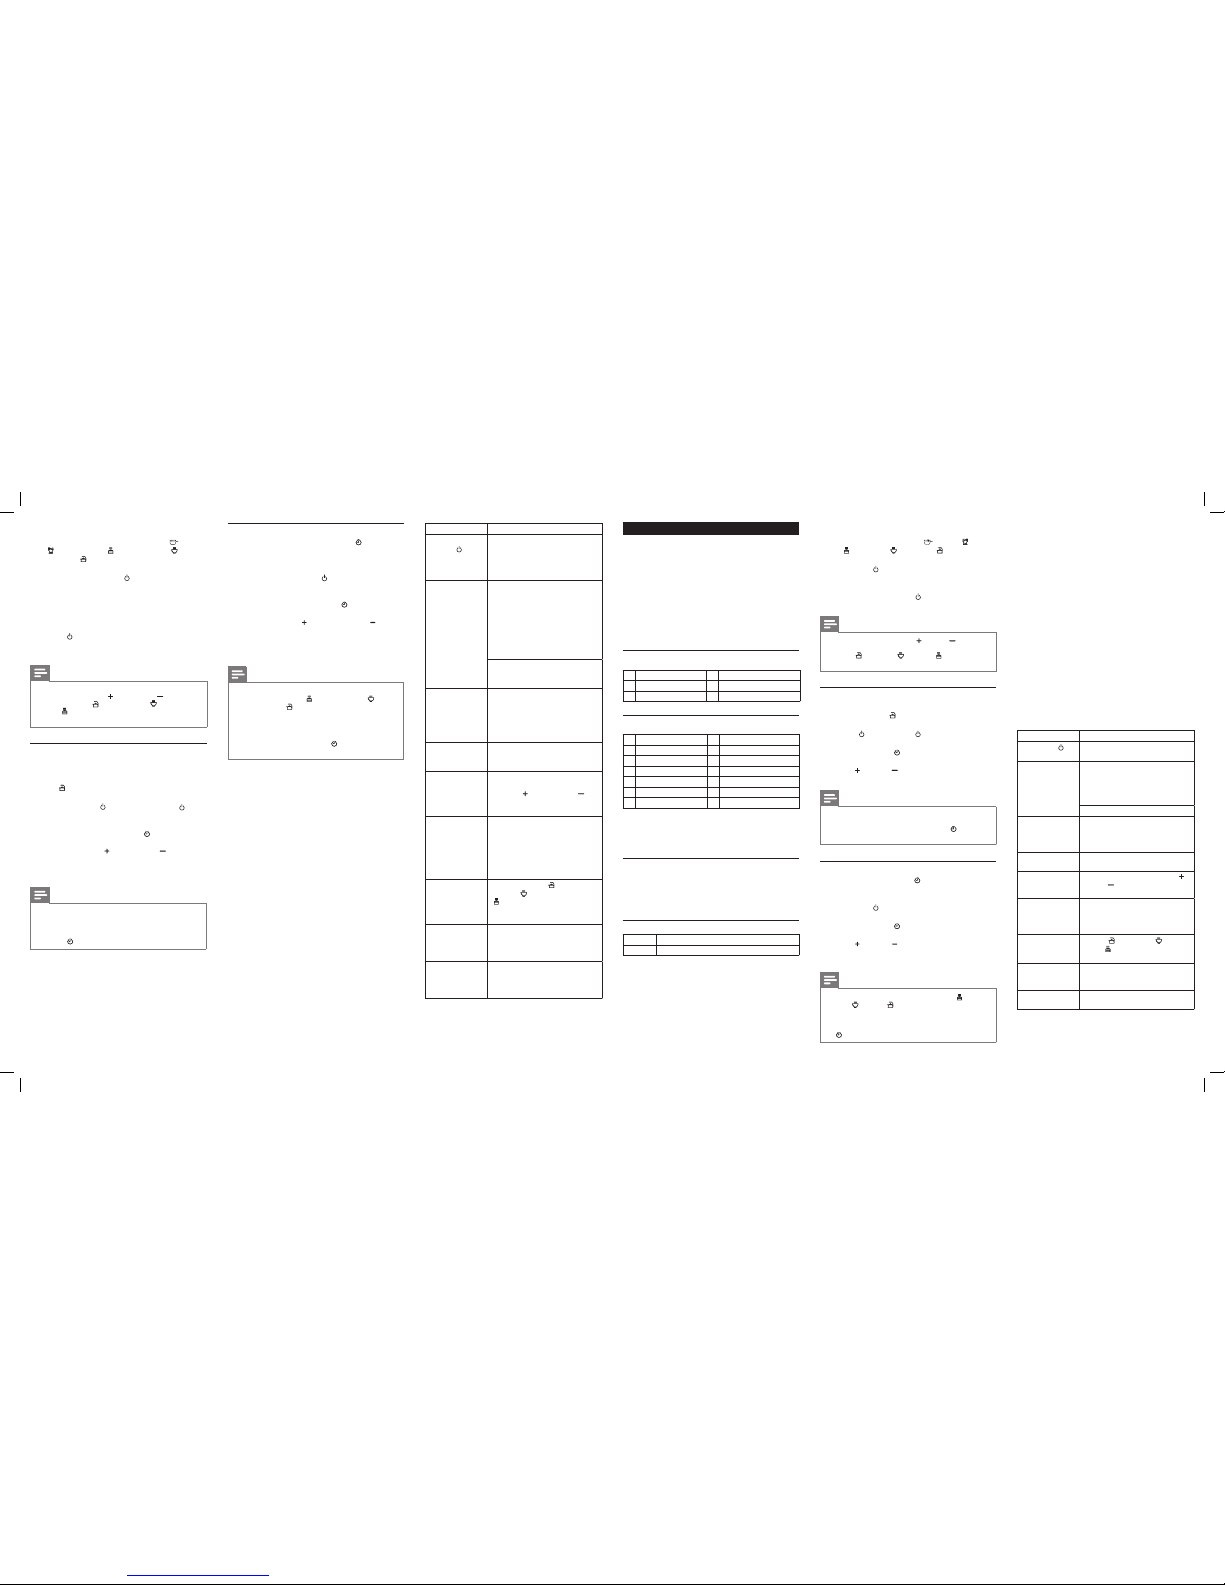
There are ve cooking modes: Stir Frying ( ), Hot
Pot ( ), Steam/Stew ( ), Soup/Congee( ), and
Water Boiling ( ).
1 Follow the steps in “Preparing for use”.
2 Press the On/O button ( ), the On/O indicator
lights up.
3 Press the desired cooking button. The
corresponding indicator lights up and the
induction cooker starts working in the selected
mode.
4 When the cooking is nished, press the On/O
button (
) to switch o the appliance.
5 Unplug the induction cooker after the fan stops
working.
Note
•
During cooking, you can change the power level by
pressing the Increase (
) or Decrease ( ) button.
• In Water Boiling ( ), Soup/Congee ( ), and Steam/
Stew (
) modes, the cooking power automatically
changes for better cooking result.
Using the timer
You can use the Preset/Timer button to decide
how much time you want the appliance to work at
dierent cooking modes (not applicable in Water/
Boiling ( ) mode).
1 Follow the steps in “Preparing for use”.
2 Press the On/O ( ) button, the On/O ( )
indicator lights up.
3 Choose the desired cooking mode.
4 Press the Preset/Timer button ( ) once or more
times until the timer indicator lights up.
5 Press the Increase ( ) or Decrease ( ) button to
adjust the time.
6 When the time has elapsed, the induction cooker
turns o automatically.
Note
•
After you have selected the cooking time, wait for a
few seconds before the induction cooker automatically
conrms it.
• After the timer is set, you can press the Preset/Timer
button (
) again to cancel the timer.
Preset time for delayed cooking
You can use the Preset/Timer button ( ) to set
the time at which you want the appliance to start
cooking. The preset timer is available up to 24 hours.
1 Follow the steps in “Preparing to use”.
2 Press the On/O button ( ), the On/O indicator
lights up.
3 Choose the desired cooking mode.
4 Press the Preset/Timer button ( ) once or more
times until the preset indicator lights up.
5 Press the Increase ( ) or the Decrease ( ) button
to choose the desired preset time.
6 When the preset time has elapsed, you will hear a
few beeps and the induction cooker starts working
automatically.
Note
•
The preset timer is available in the following cooking
modes:
Steam/Stew ( ), Soup/Congee ( ) and
Water Boiling (
).
• After you have selected the preset time, wait for a few
seconds before the induction cooker automatically
conrms it.
• When the induction cooker is at preset mode, you can
press the Preset/Timer button (
) again to cancel the
preset time.
5 Cleaning
1 Unplug the appliance after the fan stops working
and let it cool down.
2 Clean the appliance with a damp cloth and, if
necessary, with some mild cleaning agent.
6 Recycling
Do not throw away the product with the normal
ousehold waste at the end of its life, but hand it in at
an ocial collection point for recycling. By doing this,
you help to preserve the environment.
7 Guarantee and service
If you need service or information or if you have
a problem, please visit the Philips website at
www. philips.com or contact the Philips Consumer
Care Centre in your country (you will nd its phone
number in the worldwide guarantee leaet). If there
is no Consumer Care Centre in your country, go to
your local Philips dealer.
8 Troubleshooting
If your induction cooker does not function properly
or if the cooking quality is insucient, consult the
table below. If you are unable to solve the problem,
contact a Philips service centre or the Consumer
Care Centre in your country.
Problem Solution
The On/O
button (
) does
not respond.
There is a connection problem.
Check if the induction cooker is
connected to the mains and if
the plug is inserted rmly into the
wall socket
The appliance
beeps
continuously
and then stops
working.
You may have put unsuitable
cookware on the cooking plate
or you may have removed the
cookware from the cooking plate
during cooking. Make sure the
cookware is made of steel, iron
or aluminum with stainless steel
cladding base and has a base
diameter larger than 12cm.
You may have placed the
cookware outside of the cooking
zone.
The cookware
does not heat up
to the required
temperature.
The bottom of the cookware may
not be at. Use cookware with a
at bottom. If the problem still
exists, take the appliance to your
Philips dealer or a service center
authorised by Philips.
The appliance
stops working
suddenly.
The temperature of the cookware
might be too high. Let the
cookware cool down for a while.
The cooking
temperature
of the preset
modes are too
high or too low.
During cooking, you can change
the power level by pressing the
Increase (
) or Decrease ( )
button.
When I press
one of the
cooking mode
buttons, the light
of the selected
mode does not
go on.
The light is defective. Take the
appliance to your Philips dealer
or a service centre authorised by
Philips.
The cooking
temperature
automatically
changes in some
preset modes.
In Water/Boiling (
), Soup/
Congee ( ), and Steam/Stew
( ) modes, the cooking
temperature automatically
changes for better cooking result.
Error code E1,
E2, E3, E4, or E7
is displayed on
the screen.
The induction cooker has
malfunction. Take the appliance
to your Philips dealer or a service
center authorised by Philips.
Error code E5 or
E6 is displayed
on the screen.
The voltage is either too high
or too low. Check if the voltage
in your home is suitable for the
induction cooker.
简体中文
1
您的电磁炉
恭喜您购买了您的产品,欢迎您来到 Philips 大家庭!为
了您能充分享受飞利浦提供的支持,请在
www.philips.com/welcome 上注册您的产品。
2
包装盒内物品
电磁炉主装置 保修卡
重要信息单页 用户手册
总体说明
a
炉面
d
控制面板
b
烹饪区
e
出风口
c
进风口
f
电源线
控件概述
g
炒菜按钮
n
煲汤/粥按钮
h
火锅按钮
o
儿童锁按钮
i
蒸/焖按钮
p
烧水按钮
j
预设指示灯
q
减小按钮
k
显示屏幕
r
烹饪功率和温度
l
定时器指示灯
s
增大按钮
m
预设/计时器按钮
t
开/关按钮
3
首次使用之前
拆掉电磁炉上的所有包装材料。
使用准备
1 将产品放在一个干燥、平稳的表面上。
2 应确保电磁炉周围至少有
10
厘米的空间以防过热。
3 在烹饪过程中炊具始终放置在烹饪区上面。
4 确保使用的炊具类型和尺寸正确(请参见下表)。
建议的炊具类型和尺寸
材料 底部是由铁或磁性不锈钢制成的炊具
外形 平底炊具
4
使用电磁炉
有五种烹饪模式可供选择:炒菜
(
)
、火锅
( )
、
蒸/焖
( )
、煲汤/粥
( )
以及烧水
( )
。
1 按照“准备使用”中的步骤操作。
2 按开
/
关按钮
(
),开/
关指示灯亮起。
3 按所需的烹饪按钮。对应的指示灯亮起,电磁炉按照
所选模式开始工作。
4 烹饪完成后,按开/关按钮
( )
关闭产品。
5 风扇停止工作后,拔掉电磁炉的电源线
。
注意
•
烹饪期间,您可以通过按增大
( )
或减小
( )
按钮来更改
功率大小。
• 在烧水
( )
、煲汤/粥
( ) 和蒸/焖 ( )
模式下,烹饪功
率将自动更改以获得更好的烹饪效果。
使用计时器
您可以使用预设/计时器按钮确定产品在不同烹饪模式下
工作的时间(在烧水
( )
模式下不适用)。
1 按照“准备使用”中的步骤操作。
2 按开/关
(
)
按钮,开/关
( )
指示灯亮起。
3 选择所需的烹饪模式。
4 按预设/计时器按钮
( )
一次或多次,直到计时器指
示灯亮起。
5 按增大
(
)
或减小
( )
按钮调整时间。
6 到达时间时,电磁炉将自动关闭。
注意
•
选择烹饪时间之后,请等待几秒钟,然后电磁炉将自动确
认时间。
• 计时器设定好后,再次按预设
/
计时器按钮
( )
可以取消
计时器。
延长烹饪的预设时间
您可以使用预设/计时器按钮
(
)
设置想要产品开始烹
饪的时间。预设计时器最长可达 24 小时。
1 按照“准备使用”中的步骤操作。
2 按开/关按钮
( )
,开/关指示灯亮起。
3 选择所需的烹饪模式。
4 按预设
/
计时器按钮
(
)
一次或多次,直到预设指示
灯亮起。
5 按增大
(
)
或减小
( )
按钮选择所需的预设时间。
6 到达预设时间时,您将听到几声蜂鸣音,电磁炉将自
动开始工作。
注意
•
以下烹饪模式下可以使用预设计时器:蒸/焖
(
)
、煲
汤/粥
(
)
和烧水
( )
。
• 选择预设时间之后,请等待几秒钟,然后电磁炉将自动确
认时间。
• 当电磁炉处于预设模式时,再次按预设/计时器按钮
(
)
可以取消预设时间。
5
清洁
1 风扇停止工作后,拔掉产品的电源插头,待其冷却。
2 用湿布清洁电磁炉,必要时使用一些中性清洁剂。
6 回收
弃置产品时,请不要将它与一般生活垃圾一同丢弃,应
将其交给官方指定的回收中心。这样做有利于环保。
7
保修与服务
如果您需要服务或信息或有任何问题,请浏览飞利浦网
站,地址为 www.philips.com。您也可以与您所在国家/
地区的飞利浦客户服务中心联系(您可以从全球保修卡
中找到电话号码)。如果您所在的国家/地区没有飞利浦
客户服务中心,请向当地的飞利浦经销商求助。
8
故障排除
如果电磁炉工作不正常,或烹饪质量有缺陷,请查询下
表。如果无法解决问题,则请联系您所在国家/地区的飞
利浦服务中心或客户服务中心。
问题 解决方法
开/关按钮
(
)
不响应。
接触不良。检查电磁炉是否与电源
连接,插头是否插牢。
产品持续发出蜂
鸣音,然后停止
工作。
烹饪期间炉面上放置了不合适的炊
具,或者您从炉面上取下了炊具。
确保炊具为钢、铁制品或不锈钢底
的铝制品,并且底面直径大于
12 厘米。
炊具可能放置在烹饪区外。
炊具没有加热到
所需温度。
炊具底部不平。请使用平底炊具。
如果问题仍然存在,请将本产品送
往当地的飞利浦经销商,或经飞利
浦授权的客户服务中心。
产品突然停止
工作。
炊具温度过高。让炊具冷却
一会儿。
预设模式的
烹饪温度过高或
过低。
烹饪期间,您可以通过按增大
(
)
或减小
( )
按钮来更改功率大小。
按下某个烹饪模
式按钮时,所选
模式的指示灯
不亮。
指示灯有故障。请将本产品送往当
地的飞利浦经销商,或经飞利浦授
权的客户服务中心。
在某些预设模式
下,烹饪温度会
自动更改。
在烧水
(
)
、煲汤/粥
( ) 和
蒸/焖
( )
模式下,烹饪温度会自
动更改,以获得更好的烹饪效果。
屏幕上显示错误
代码 E1、E2、
E3、E4 或 E7。
电磁炉发生故障。请将本产品送往
当地的飞利浦经销商,或经飞利浦
授权的客户服务中心。
屏幕上显示错误
代码 E5 或 E6。
电压过高或过低。检查家中的电压
是否适合电磁炉。
 Loading...