

Philips HADCO WAMT14 Installation Instructions Manual
100 Craftway, P.O. Box 128
Littlestown, Pennsylvania 17340-0128
Phone: 800-331-4185 Fax: 717-359-9672
INSTALLATION INSTRUCTIONS:
WAMT14 FLOODLIGHT
®
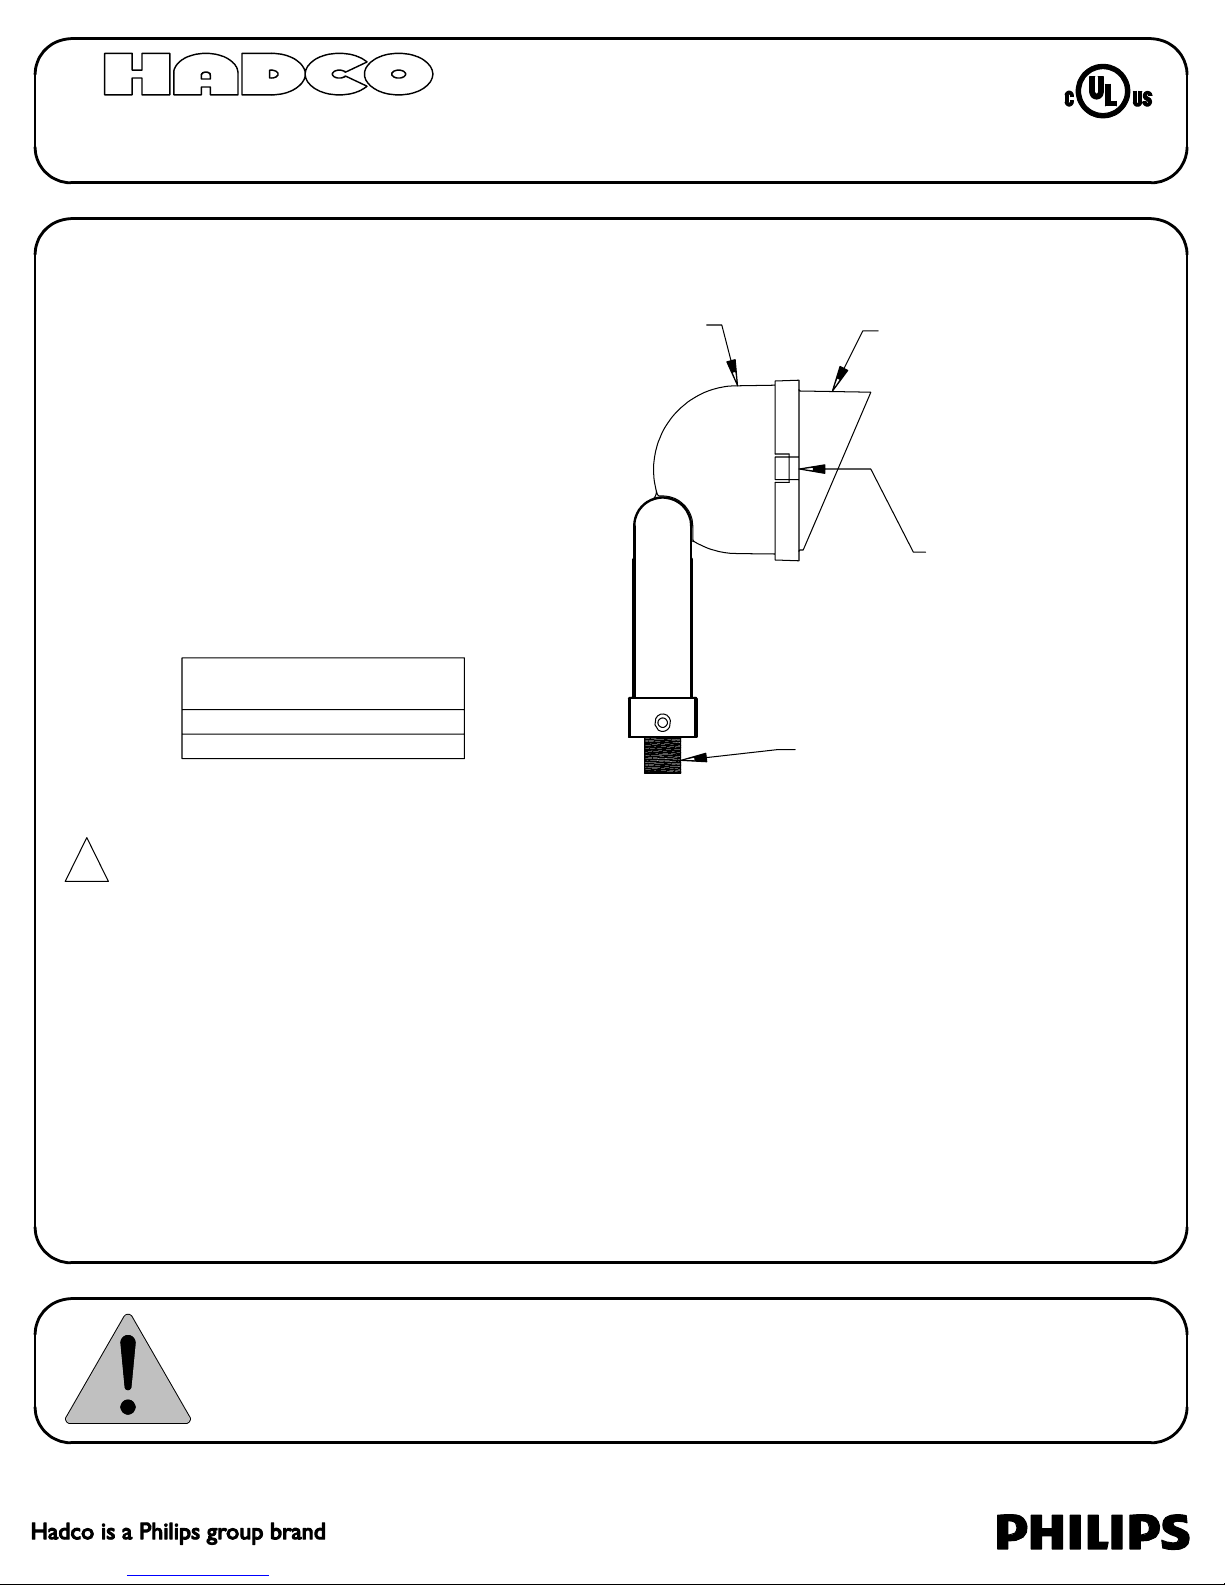
LISTED
HOUSING
The following lamps may
be used in this fixture:
50W GY6.35 T-4 Bi-pin
35W GY6.35 T-4 Bi-pin
1/2" N.P.S. FITTER
! SAFETY WARNING:
ALWAYS TURN FIXTURE OFF/DISCONNECT POWER AND ALLOW TO COOL BEFORE
PERFORMING ANY MAINTENANCE, INCLUDING RELAMPING AND CLEANING!
SHROUD
SHROUD SCREW
This fixture can become very HOT! The fixture housing and lens, especially if it is glass, can become hot enough
to blister hands. Attention should be paid to where the fixture is mounted, particularly if it can be touched by
children or pets. To help prevent premature failure, decreased performance, overheating and risk of fire, keep
fixture and lens clean and free of leaves, mulch, debris and mineral deposits from water. The fixture and lens
can be cleaned using a soft cloth and a solution of mild liquid soap and warm water. Wipe clean and dry with a
soft, lint-free dry cloth. Avoid polishing fixture or lens.
FOR USE ONLY WITH LINE VOLTAGE LANDSCAPE LIGHTING POWER UNITS THAT ARE RATED
MAXIMUM 120 VOLTS PER CIRCUIT.
Do not install fixture within 10 feet (3.05 meters) of a pool, spa or fountain.
This fixture is intended for installation in accordance with the National Electrical Code and local code
specifications. Failure to adhere to these codes and instructions may result in serious injury and/or damage
to the ballast and void the warranty. These instructions do not purport to cover all details or variations in
equipment, nor to provide for every possible contingency related to installation, operation, maintenance,
or mounting situation. Should specific problems occur that are not addressed by these instructions, contact
your Sales Representative or distributor for assistance. Retain these instructions for future reference.
32001330, revision B
page 1 of 2

INSTALLATION INSTRUCTIONS
1. Make sure power is turned OFF before installing or servicing this fixture.
2. This fixture must be mounted to a junction box or mounting stake that is UL Listed for line voltage.
Mounting stakes S3, M0028A, or junction box TM2H, TMC2H, BI1, BI2, BI3, BI4 may be used.
3. Insert wires through 1/2-14 NPS hole of mounting device and screw fixture onto junction box lid/stake cap.
4. Wire the fixture as follows, using wire nuts to make the splices inside the junction box.
-Connect white (positive) supply wire to white fixture wire.
-Connect black (negative) supply wire to black fixture wire.
-Connect green (ground) supply wire to green fixture wire.
5. Secure the junction box lid/stake cap back onto the junction box/mounting stake.
6. Loosen shroud screws and remove shroud by pulling off of housing.
7. Install specified lamp (not included).
8. Push shroud completely back into housing and tighten shroud screws to secure shroud in place.
9. Loosen screw in arm, aim fixture as desired and tighten screw.
10. Turn power ON.
INSTRUCTIONS PERTAINING TO A RISK OF FIRE OR INJURY TO PERSONS
IMPORTANT SAFETY INSTRUCTIONS - SAVE THESE INSTRUCTIONS!
WARNING - Lamp gets HOT quickly! To reduce the risk of FIRE OR INJURY TO PERSONS:
Do not operate fixture with a missing or damaged lens/lens assembly.
Contact only switch or plug when turning fixture on or off. Do NOT touch hot lens or housing.
Turn off or unplug fixture and allow to cool before relamping. Keep lamp away from combustibles.
Do NOT touch lamp with bare hands at any time; use a soft cloth as oil from skin may damage lamp.
32001330, revision B
page 2 of 2
 Loading...