

Page 1
Question?
Contact
Philips
Question?
Contact
Philips
Always there to help you
Register your product and get support at
www.philips.com/welcome
GC4880 series
2
User manual
Specifications are subject to change without notice
© 2015 Koninklijke Philips N.V.
All rights reserved.
4239 000 99981
Page 2
3 4
1
f
e
a
g
h
i
j
k
l
c
b
a
b
d
c
m
n
o
Page 3
ENGLISH 6
POLSKI 12
ČEŠTINA 19
ROMÂNĂ 25
MAGYAR 31
GC4880 series
Page 4
6 ENGLISH
Introduction
Congratulations on your purchase and welcome to Philips!
To fully benefit from the support that Philips oers,
register your product at www.philips.com/welcome.
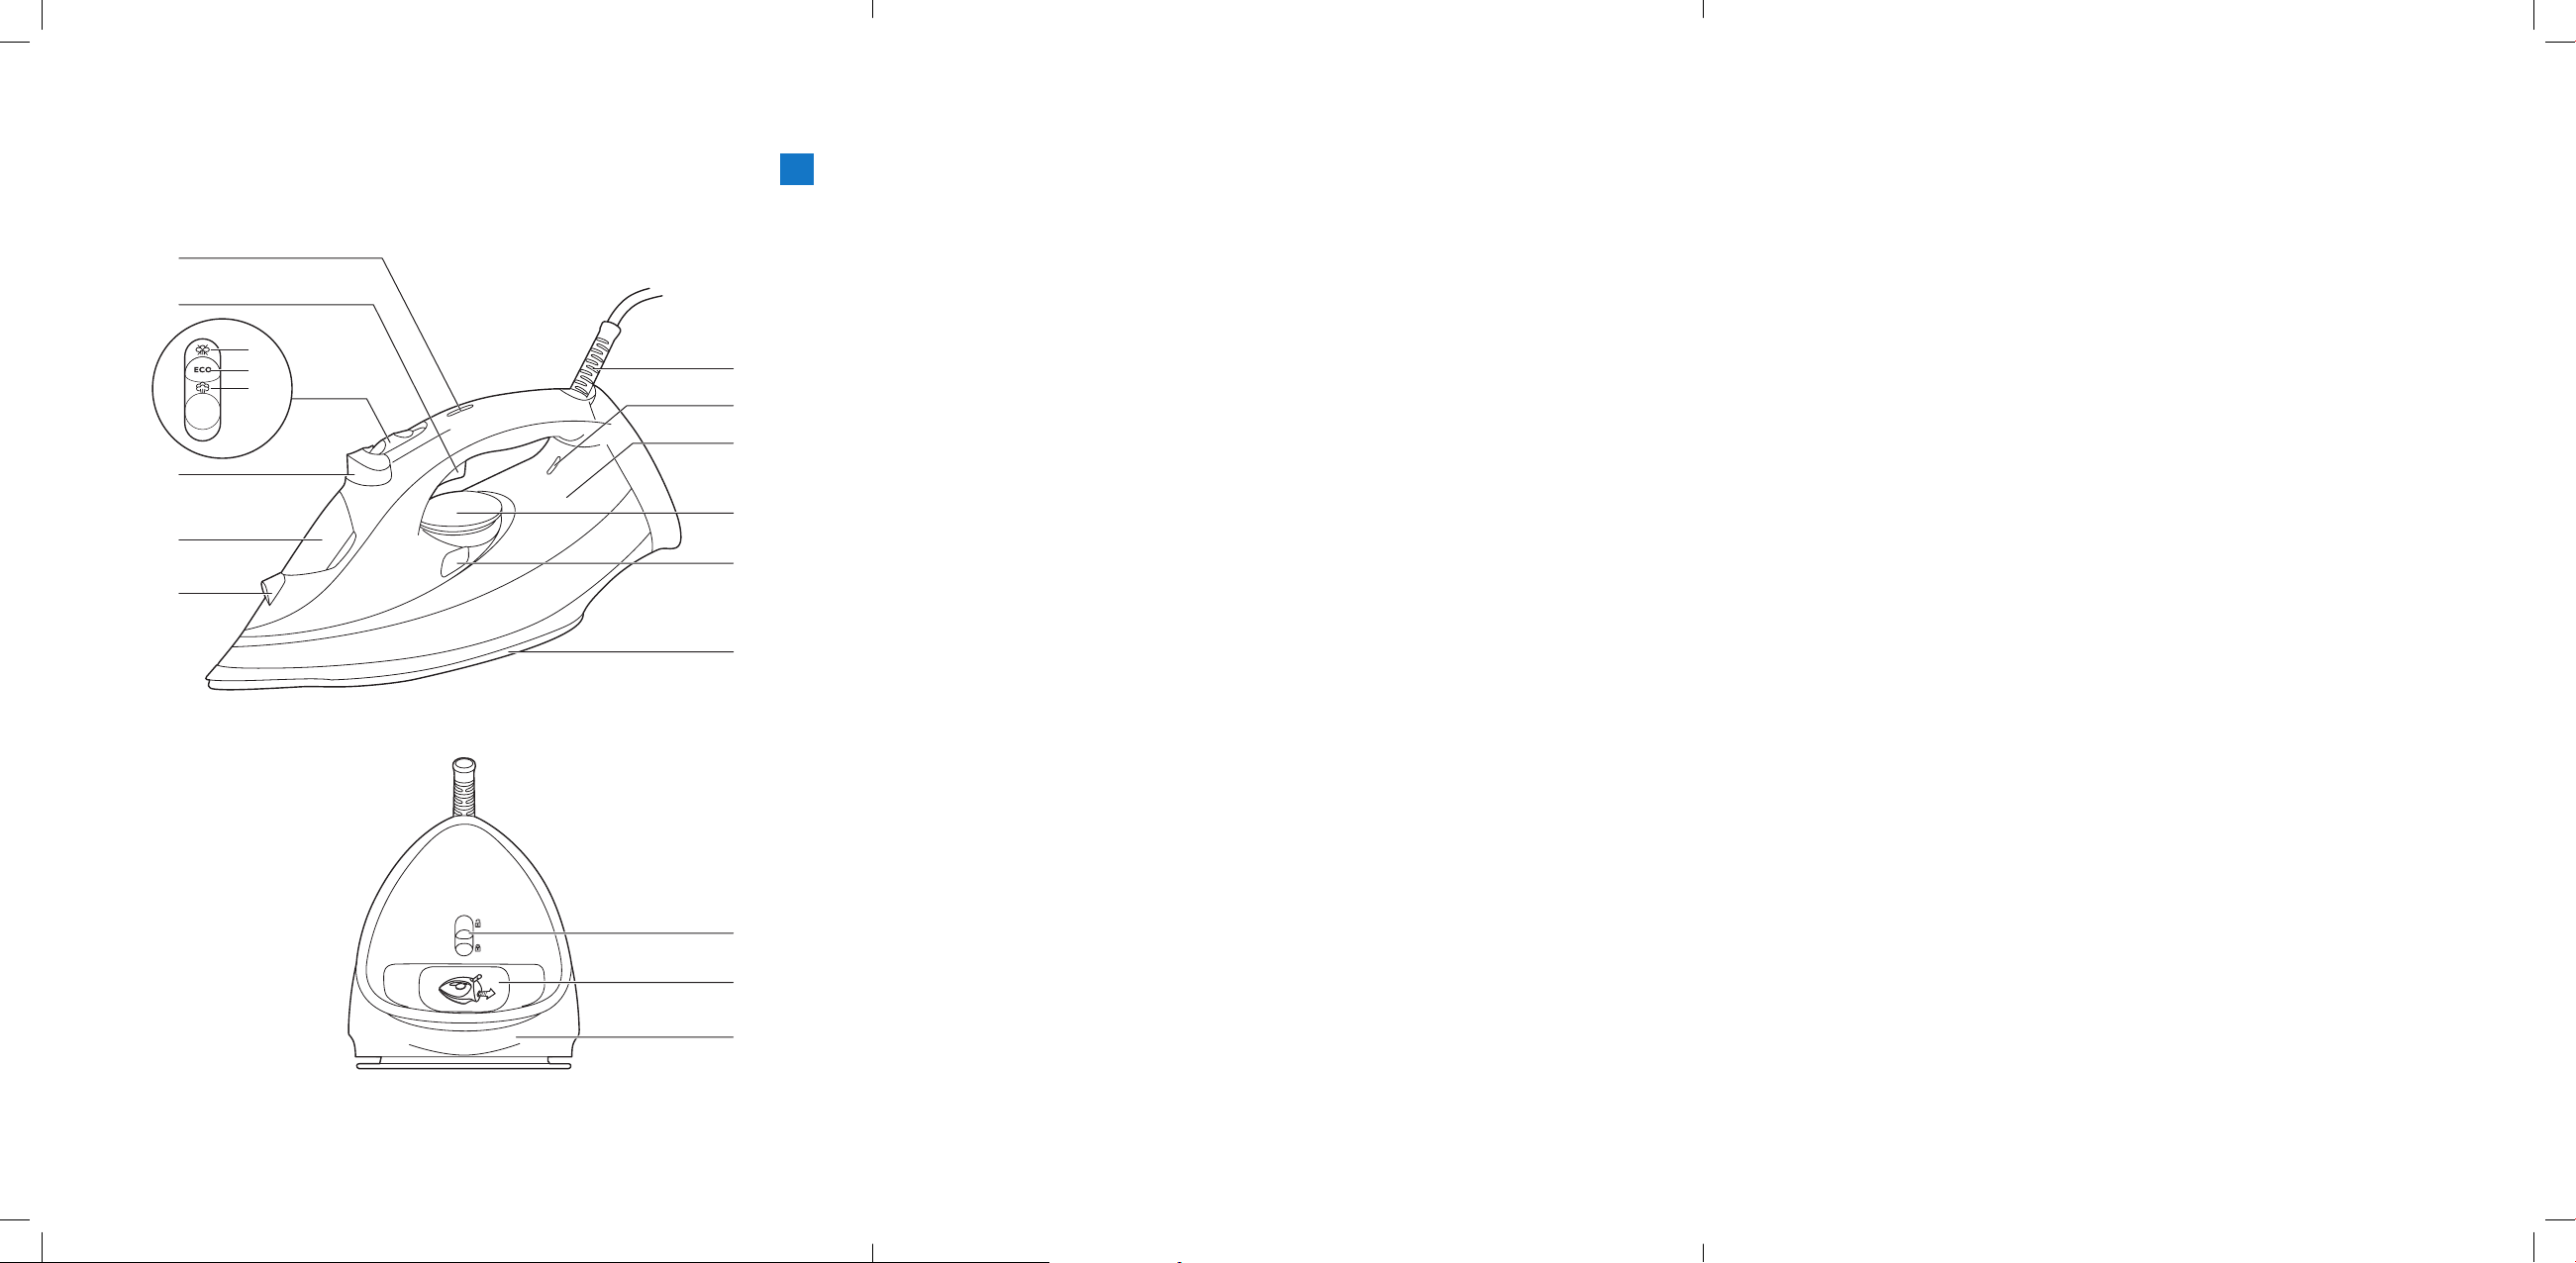
Product overview (Fig. 1)
1 Spray nozzle
2 Water filling door
3 Spray button
4 Steam slider
a. Dry setting ( )
b. ECO setting (
c. MAX setting ( )
5 Steam boost trigger
6 Safety auto-o light (specific types only)
7 Mains cord
8 Temperature indicator light
9 Water tank
10 Temperature dial
11 Calc clean button
12 Soleplate
13 Quick Calc Release lock
14 Quick Calc Release tray
15 Typeplate
ECO
)
Important
Read the separate important information leaet and this user
manual carefully before you use the appliance. Keep both
documents for future reference.
Using the appliance
Filling the water tank
Note: Your appliance has been designed to be used with
tap water. If you live in an area with hard water, fast scale
build-up may occur. Therefore, it is recommended to use
100% distilled or demineralized water to prolong the lifetime
of your appliance.
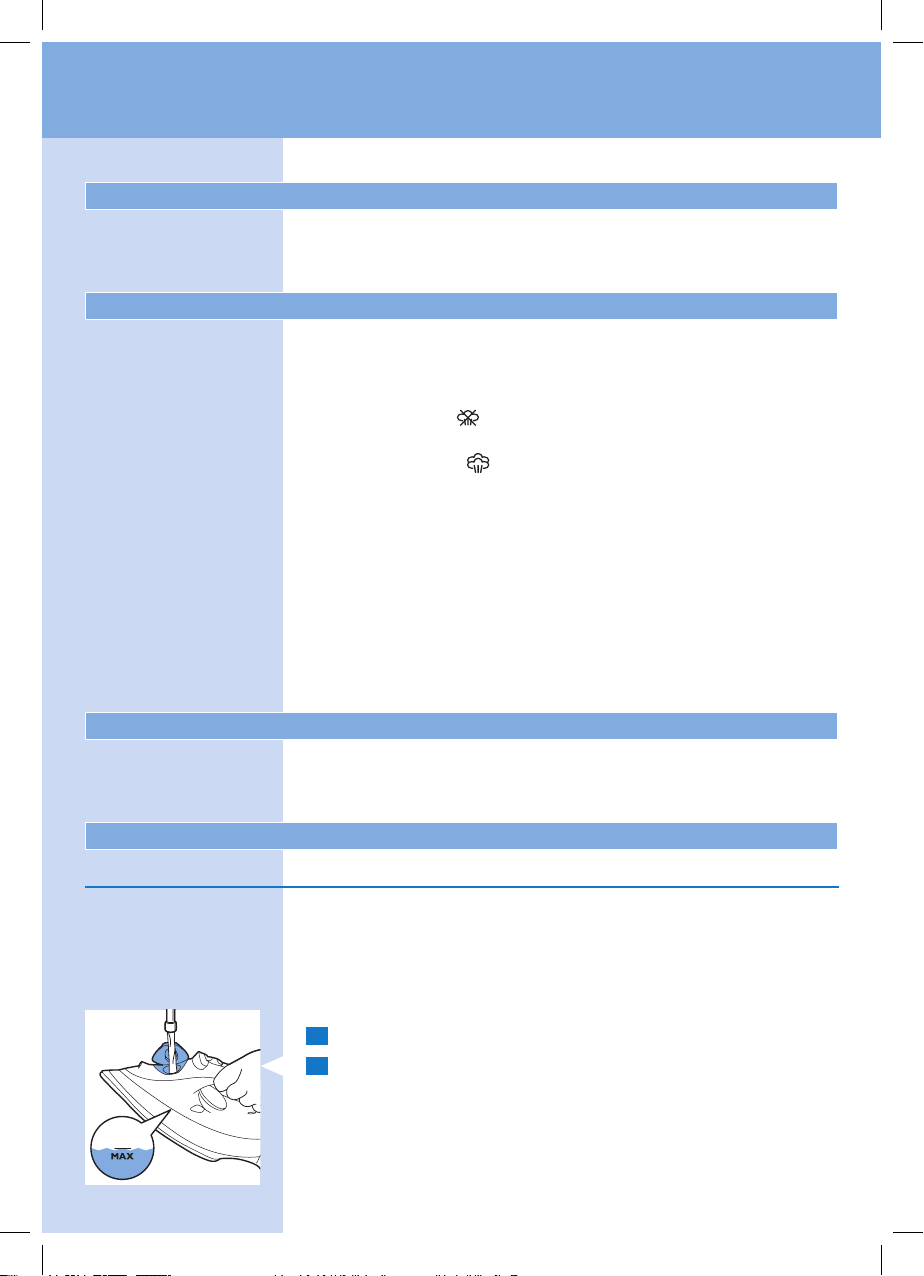
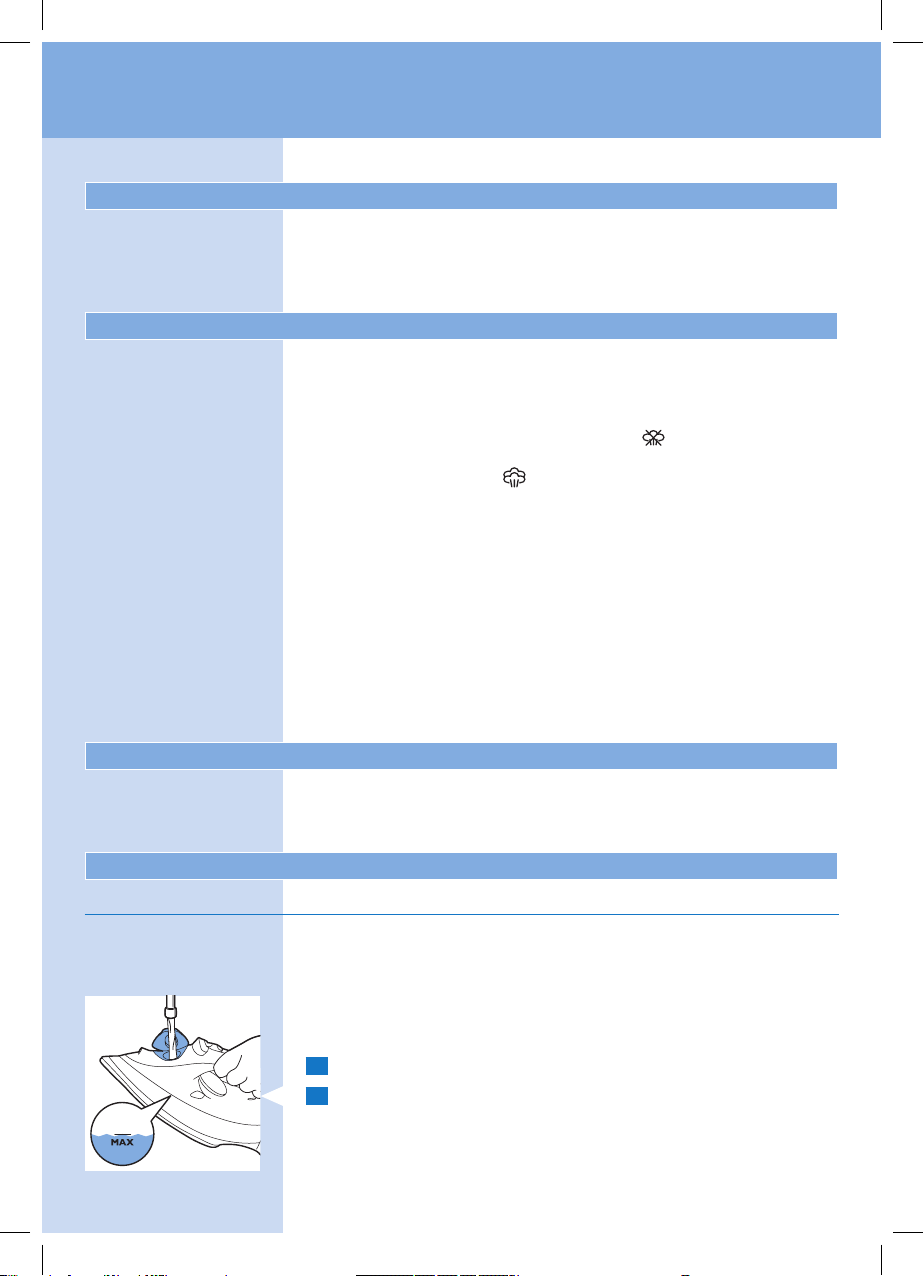
1 Open the water lling door.
2 Tilt the iron backwards and ll the water tank with tap
water up to the maximum level.
Note: Do not fill the water tank beyond the MAX indication.
Page 5
ENGLISH 7
Do not put perfume, vinegar, starch, descaling agents, ironing
aids or other chemicals in the water tank.
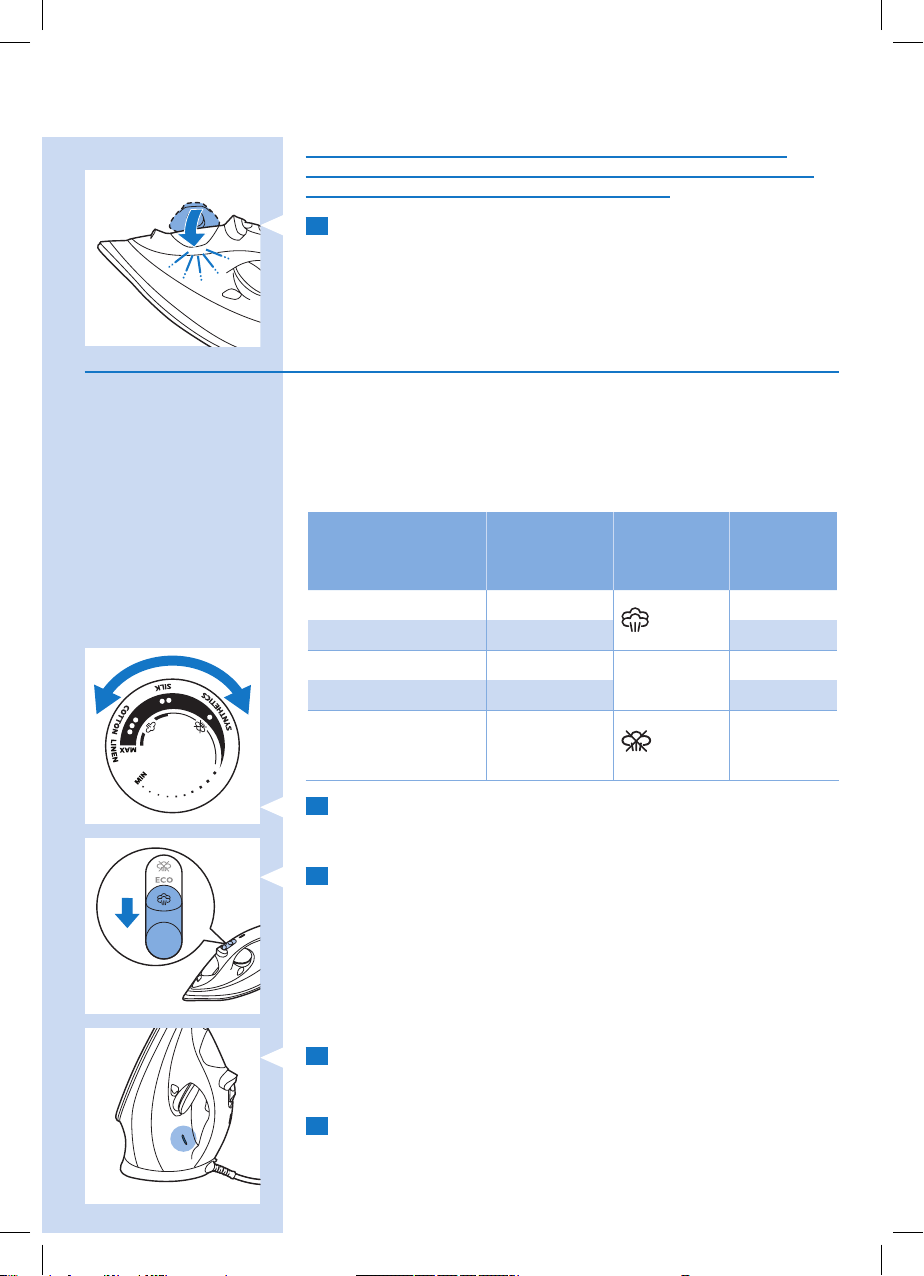
3 Close the water lling door ( ‘click’).
Temperature and steam setting
Table 1:
Warning: Do not use steam or steam boost at low
temperature, as indicated in the below table. Otherwise,
hot water may leak from the iron.
Fabric type Temperature
setting
Linen MAX
Cotton ●●● Yes
Wool ●●
Silk ●● No
Synthetic
fabric (e.g.
acrylic, nylon,
polyamide,
polyester)
1 Refer to Table 1 to set the temperature dial to the
appropriate setting for your garment.
2 Refer to Table 1 to set the appropriate steam setting for
your garment.
Note: Make sure that the steam setting you select is suitable
for the set ironing temperature.
3 Put the iron on its heel and plug it in. The temperature
light goes on to indicate that the iron is heating up.
4 When the temperature light goes out, the iron has reached
the correct temperature and you could start ironing.
● No
Steam
setting
/ ECO
ECO
Steam
boost
Yes
No
Page 6
ENGLISH8
Features
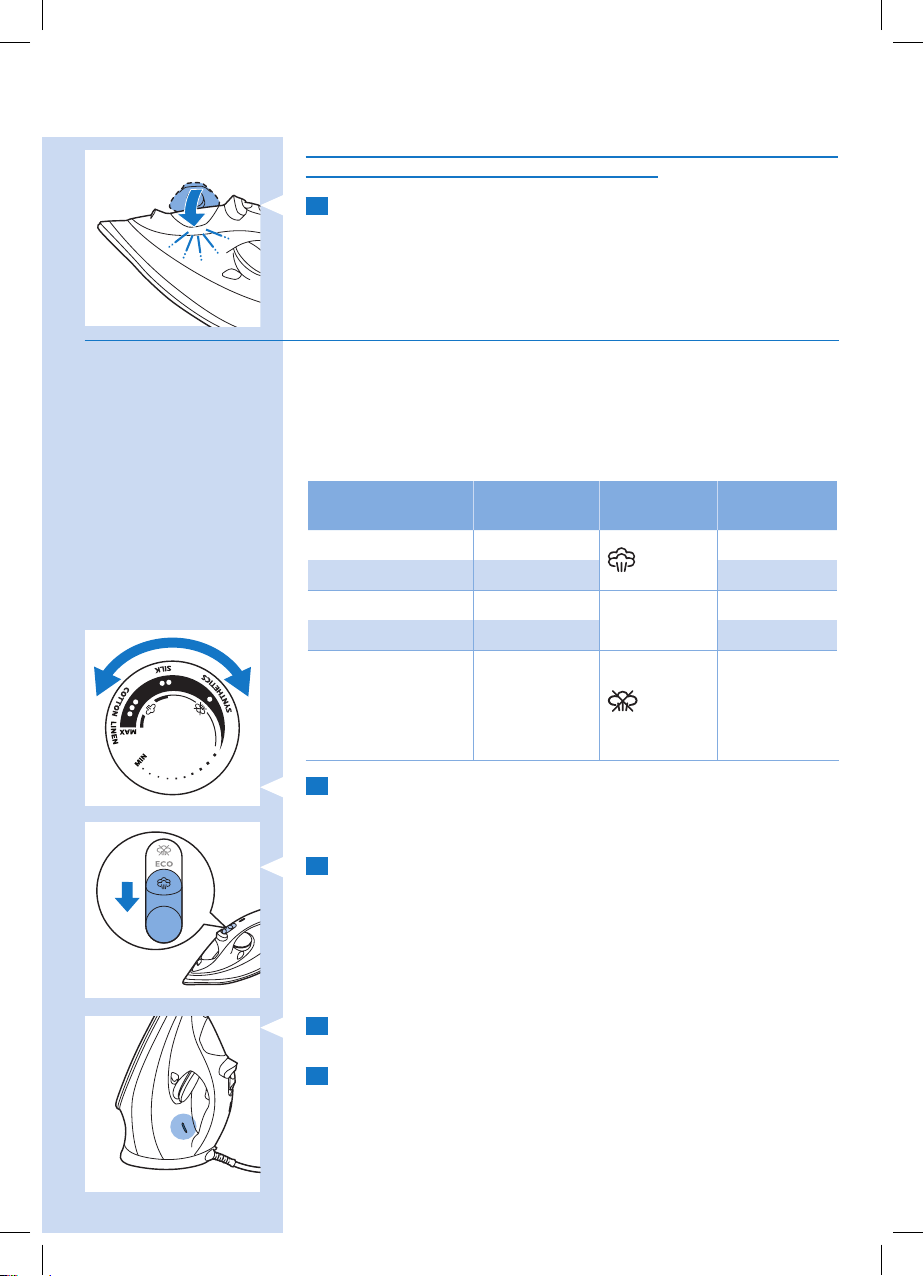
Spray function
- Press the spray button to moisten the article to be ironed.
This helps to remove stubborn creases.
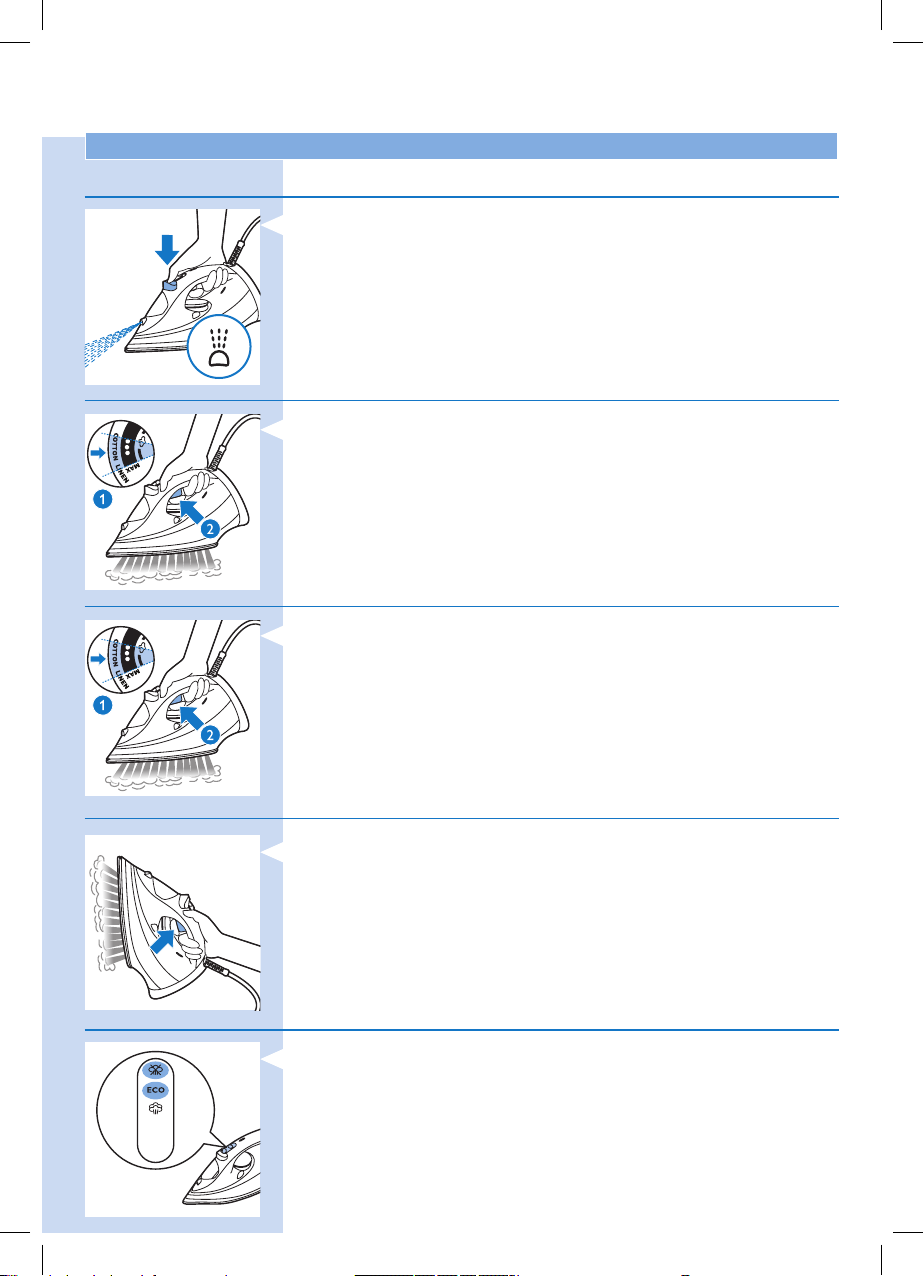
Steam boost function
- Use steam boost function at a temperature dial setting
between ●●● to MAX.
- Press and release the steam boost trigger for a powerful
boost of steam to remove stubborn creases.
Ironing with extra steam
- For extra steam during ironing, press and hold the steam
boost trigger.
Vertical steam
- You can use the steam boost function when you hold the
iron in vertical position for removing creases from hanging
clothes, curtains etc.
ECO steam setting / Dry ironing
- You could choose ECO setting in the steam slider to save
energy, yet to achieve satisfactory ironing results.
- To iron without steam, select dry setting in the steam slider.
Page 7
ENGLISH 9
Safety auto-o (specic types only)
The safety auto-o function automatically switches o the iron
if it has not been used for 30 seconds resting on its soleplate
or 8 minutes resting on its backplate. The auto-o light will
light up.
- To let the iron heat up again, pick up the iron or move it
slightly. The auto-o light goes out.
Cleaning and maintenance
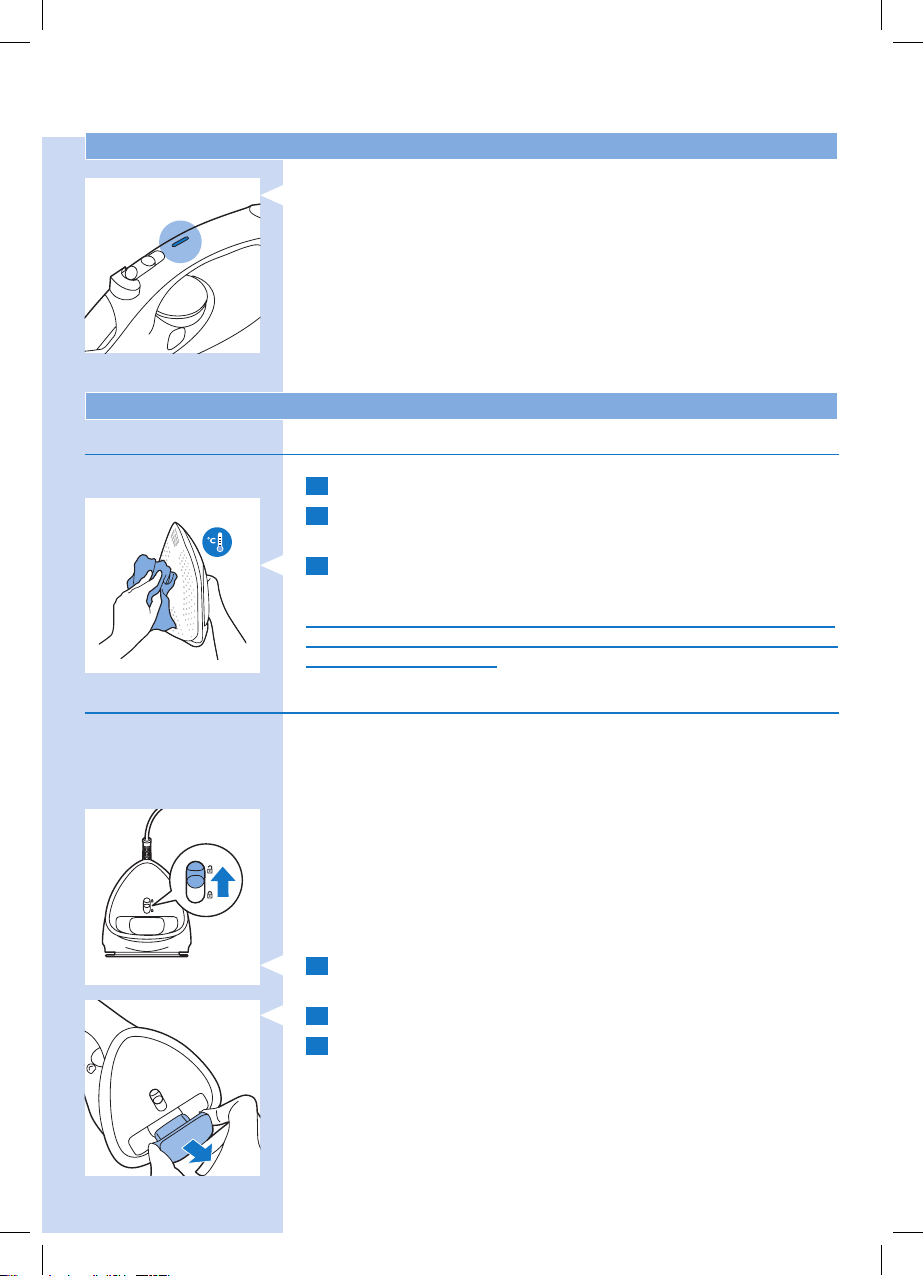
Cleaning
1 Unplug the iron and let it cool down.
2 Pour any remaining water out of the water tank from the
water lling door.
3 Wipe akes and any other deposit o the soleplate with a
damp cloth and a non-abrasive (liquid) cleaning agent.
To keep the soleplate smooth, avoid hard contact with metal
objects. Never use a scouring pad, vinegar or other chemicals
to clean the soleplate.
Quick Calc Release
IMPORTANT: To prolong the life time of your appliance and
to maintain good steaming performance, use Quick Calc
Release function once every 1 month.
If water in your area is very hard, use this function more
frequently.
Note: Make sure that the iron has been unplugged for at
least 1 hour and has completely cooled down, before you use
Quick Calc Release.
1 Put the iron on a levelled surface and push up the Quick
Calc Release lock at the back of the iron.
2 Take out the Quick Calc Release tray.
3 Pour out scales in the tray into a sink or dustbin. Clean the
tray using tap water. Remove any excess water from the
tray.
Page 8
ENGLISH10
Do not pour water, vinegar, descaling agents or other chemicals
into the iron from the opening of the Quick Calc Release.
Do not use vinegar, descaling agents or other chemicals to
wash the tray.
4 Wipe o the scales in the opening of the Quick Calc
Release tray with a damp cloth.
5 Insert the tray back into the iron.
6 Push down the Quick Calc Release lock.
Do not use the iron when the Quick Calc Release tray is not locked.
If you break or lose the tray, contact a consumer care center
in your country (see the worldwide guarantee leaet for
contact details).
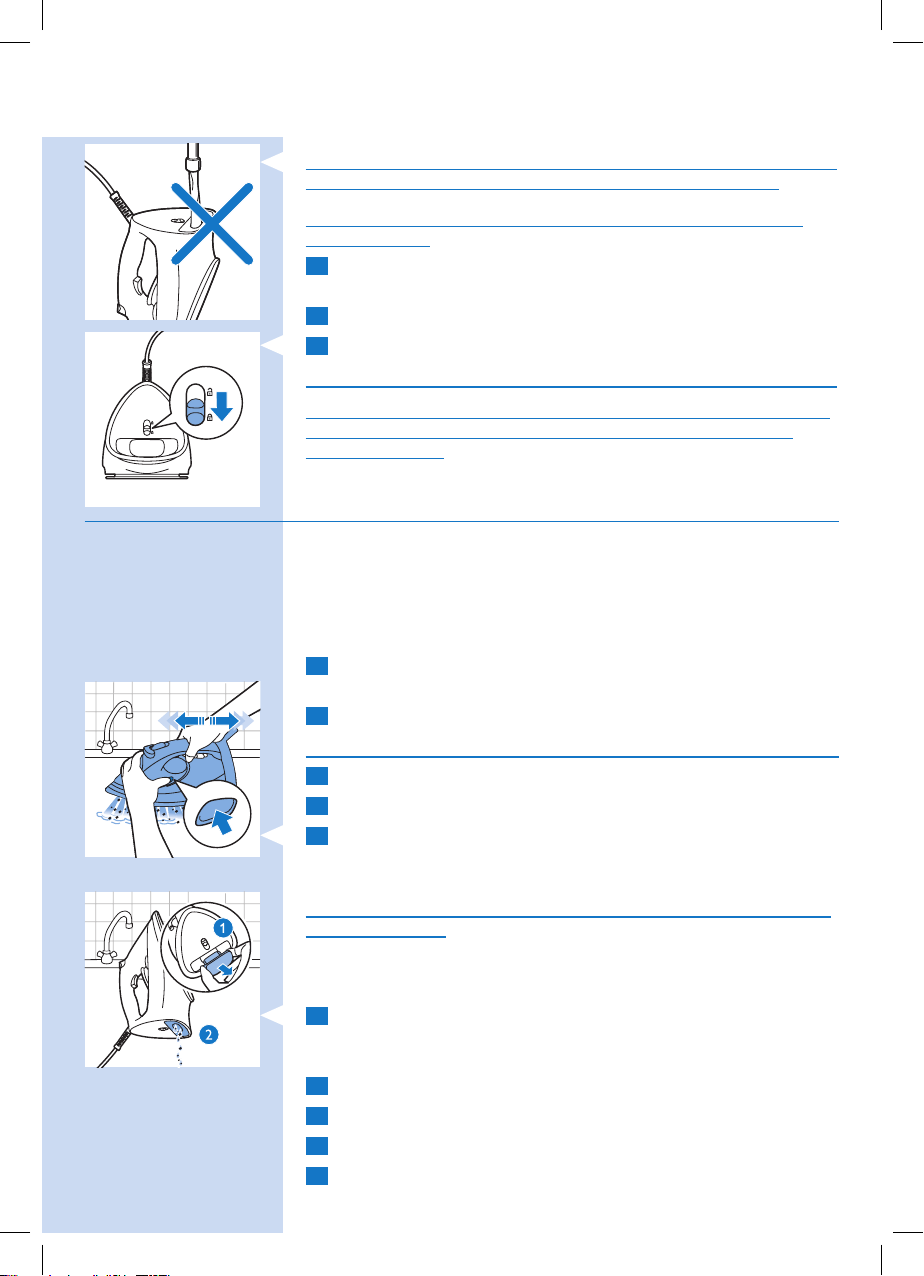
Calc-clean function
IMPORTANT: Besides Quick Calc Release function, you
should also perform calc-clean once every 1 month to
prolong the life of your iron. If water in your area is very
hard, or you see scales coming out from the soleplate during
ironing, use this function more frequently.
1 Make sure the iron is unplugged and the steam slider is set
to dry setting.
2 Fill the water tank to the MAX indication.
Do not pour vinegar or other descaling agents into the water tank.
3 Plug in the iron and set the temperature dial to MAX.
4 Unplug the iron when the temperature light goes out.
5 Hold the iron over the sink. Keep pushing the calc clean
button and gently shake the iron forth and back until all
water in the water tank has been used up.
Scales is ushed out, steam and boiling water also come out
of the soleplate.
Note: Repeat steps 2 to 5 if the water that comes out of the
iron still contains scale particles.
6 Take out the Quick Calc Release tray, empty the water in
the tray. Hold the iron vertically to allow small amount of
water to ow out.
7 Insert the tray back to the iron and lock it.
8 Plug in the iron and let the iron heat up to dry the soleplate.
9 Unplug the iron when the temperature indicator light goes out.
10 Move the iron gently over a piece of cloth to remove any
water stains on the soleplate.
Page 9
Storage
1 Unplug the iron and empty the water tank. Let it cool
down in a safe place.
2 Wind the mains cord around the backplate of the iron and
store it on its heel.
Troubleshooting
This chapter summarises the most common problems you
could encounter with the appliance. If you are unable to solve
the problem with the information below, visit www.philips.com/
support for a list of frequently asked questions or contact the
Consumer Care Centre in your country (see the worldwide
guarantee leaet for contact details).
Problem Possible cause Solution
ENGLISH 11
The steam boost
function does
not work properly
(water leaks out of
the soleplate).
Flakes and
impurities
come out of the
soleplate during
ironing.
Water leaks from
the water filling
door.
Water or steam
leaks from the
back part of the
iron.
You have used
the steam boost
function too often
within a very short
period.
You have used
the steam boost
function at a too low
temperature.
Scales are formed
inside the soleplate.
You have overfilled
the water tank.
You have not
locked the Quick
Calc release tray
properly.
The Quick Calc
release tray is
damaged.
Wait for a few seconds before you use the
steam boost function again.
Set an ironing temperature at which the
steam boost function can be used (●●● to
MAX).
Use the Calc-clean function (see chapter
‘Cleaning and maintenance’, section ‘Calcclean function’).
Do not fill the water tank beyond the MAX
indication. Pour excess water out of the
water tank.
Take out the Quick Calc Release tray and
clean it using tap water. Use a piece of
cloth to wipe o scales in the opening of
the back part of the iron. Put back the tray
and lock it. (See chapter ‘Cleaning and
maintenance’, section ‘Quick calc release
function’).
Contact a consumer care center in your
country (see the world wide guarantee
leaet for contact details).
Page 10
12 POLSKI
Wprowadzenie
Gratulujemy zakupu i witamy w gronie użytkowników
produktów Philips! Aby w pełni skorzystać z oferowanej
przez firmę Philips pomocy, zarejestruj swój produkt na
stronie www.philips.com/welcome.
Opis produktu (rys. 1)
1 Dysza spryskiwacza
2 Drzwiczki otworu wlewowego wody
3 Przycisk spryskiwacza
4 Przełącznik pary
a. Ustawienie prasowania na sucho ( )
b. Ustawienie ECO (ECO)
c. Ustawienie MAX ( )
5 Przycisk silnego uderzenia pary
6 Wskaźnik automatycznego wyłączenia (tylko wybrane
modele)
7. Przewód sieciowy
8 Wskaźnik temperatury
9 Zbiornik wody
10 Pokrętło regulatora temperatury
11 Przycisk funkcji Calc-Clean
12 Stopa
13 Blokada funkcji Quick Calc Release
14 Tacka funkcji Quick Calc Release
15 Tabliczka znamionowa
Ważne
Przed pierwszym użyciem urządzenia zapoznaj się dokładnie
z ulotką informacyjną oraz instrukcją obsługi. Zachowaj oba
dokumenty na przyszłość.
Zasady używania urządzenia
Napełnianie zbiornika wody
Uwaga: urządzenie jest przystosowane do wody z kranu.
Jeśli w Twojej okolicy woda jest twarda, w urządzeniu może
szybko osadzić się kamień. Dlatego w celu przedłużenia
okresu eksploatacji urządzenia zaleca się używanie wody
destylowanej 100% lub zdemineralizowanej.
1 Otwórz drzwiczki otworu wlewowego wody.
2 Przechyl żelazko do tyłu i napełnij zbiornik wodą z kranu
do maksymalnego poziomu.
Uwaga: nie nalewaj wody powyżej oznaczenia „MAX”.
Page 11
POLSKI 13
Nie wlewaj do zbiornika wody perfum, octu, krochmalu,
środków do usuwania kamienia, ułatwiających prasowanie
ani żadnych innych środków chemicznych.
3 Zamknij drzwiczki otworu wlewowego wody (usłyszysz
„kliknięcie”).
Ustawianie temperatury i pary
Tabela 1:
Ostrzeżenie: nie używaj funkcji pary ani silnego uderzenia
pary w przypadku wybrania niskiej temperatury, zgodnie z
informacjami podanymi w poniższej tabeli. W przeciwnym
razie z żelazka może wyciekać gorąca woda.
13
Rodzaj materiału Ustawienie
temperatury
Linen MAX
Bawełna ●●● TAK
Wełna ●●
Jedwab ●● Nie
Tkaniny sztuczne
(np. akryl, nylon,
poliamid, poliester)
1 Skorzystaj z tabeli 1, aby ustawić pokrętło regulatora
temperatury
w pozycji odpowiedniej dla danego typu ubrania.
2 Skorzystaj z tabeli 1, aby wybrać odpowiednie ustawienie
pary dla danego typu ubrania.
Uwaga: sprawdź, czy wybrane ustawienie pary jest
odpowiednie dla wybranej temperatury prasowania.
3 Ustaw żelazko w pozycji pionowej i podłącz je do
gniazdka elektrycznego. Wskaźnik temperatury włączy się,
wskazując, że żelazko się nagrzewa.
4 Wyłączenie się wskaźnika temperatury oznacza, że
żelazko nagrzało się do odpowiedniej temperatury i
można rozpocząć prasowanie.
● Nie
Ustawienie
pary
/ ECO
ECO
Silne
uderzenie
pary
TAK
Nie
Page 12

14
POLSKI14
Właściwości
Funkcja spryskiwacza
- Aby zwilżyć prasowaną tkaninę, naciśnij przycisk
spryskiwacza. Pomoże to rozprasować oporne zagniecenia.
Funkcja silnego uderzenia pary
- Używaj funkcji silnego uderzenia pary, gdy pokrętło
regulatora temperatury jest ustawione na wartość między
●●● a MAX.
- Naciśnij i zwolnij przycisk silnego uderzenia pary,
aby uzyskać uderzenie pary umożliwiające usunięcie
najbardziej uporczywych zagnieceń.
Prasowanie z dodatkowym strumieniem pary
- Aby uzyskać dodatkowy strumień pary podczas
prasowania, naciśnij i przytrzymaj przycisk silnego
uderzenia pary.
Prasowanie w pionie
- Funkcji silnego uderzenia pary można również używać, gdy
żelazko znajduje się w pozycji pionowej. Umożliwia ona
usunięcie zagnieceń na wiszących ubraniach, zasłonach itd.
Ustawienie pary ECO / prasowanie na sucho
- Można wybrać ustawienie ECO na przełączniku pary, aby
zaoszczędzić energię, nie rezygnując z zadowalających
efektów prasowania.
- Aby prasować bez użycia pary, wybierz ustawienie
prasowania na sucho na przełączniku pary.
Page 13

POLSKI 15
15
Automatyczne wyłączanie (tylko wybrane modele)
Funkcja automatycznego wyłączania samoczynnie wyłącza żelazko,
jeśli nie było ono używane przez 30 sekund po umieszczeniu na
stopie lub przez 8 minut po umieszczeniu na płycie tylnej. Wskaźnik
automatycznego wyłączenia zacznie świecić.
- Podnieś żelazko lub lekko nim poruszaj, aby ponownie się
rozgrzało. Wskaźnik automatycznego wyłączenia zgaśnie.
Czyszczenie i konserwacja
Czyszczenie
1 Wyjmij wtyczkę żelazka z gniazdka elektrycznego i
poczekaj, aż ostygnie.
2 Wylej ze zbiornika pozostałą wodę przez otwór wlewowy
wody.
3 Zetrzyj ze stopy żelazka płytki kamienia i inne osady
za pomocą wilgotnej szmatki i (płynnego) środka
czyszczącego niezawierającego środków ściernych.
Aby powierzchnia stopy pozostała niezarysowana,
należy chronić żelazko przed kontaktem z metalowymi
przedmiotami. Do czyszczenia stopy nie wolno używać
czyścików, octu ani innych środków chemicznych.
Funkcja Quick Calc Release
WAŻNE: aby przedłużyć okres eksploatacji urządzenia i
zapewnić optymalne działanie pary, korzystaj z funkcji
Quick Calc Release raz w miesiącu.
Jeśli woda w Twojej okolicy jest bardzo twarda, korzystaj z
tej funkcji częściej.
Uwaga: przed użyciem funkcji Quick Calc Release upewnij
się, że żelazko zostało odłączone od sieci elektrycznej co
najmniej godzinę wcześniej i całkowicie ostygło.
1 Umieść żelazko na płaskiej powierzchni i przesuń w górę
blokadę funkcji Quick Calc Release z tyłu żelazka.
2 Wyjmij tackę funkcji Quick Calc Release.
3 Usuń kamień z tacki do zlewu lub kosza na śmieci.
Wyczyść tackę pod bieżącą wodą. Usuń nadmiar wody z
tacki.
Page 14

16
POLSKI16
Nie wlewaj do żelazka wody, octu, środków do usuwania
kamienia ani żadnych innych środków chemicznych przez
otwór funkcji Quick Calc Release.
Nie używaj octu, środków do usuwania kamienia ani żadnych
innych środków chemicznych do mycia tacki.
4 Zetrzyj kamień z otworu tacki funkcji Quick Calc Release
za pomocą wilgotnej szmatki.
5 Włóż tackę z powrotem do żelazka.
6 Przesuń w dół blokadę funkcji Quick Calc Release.
Nie używaj żelazka, kiedy tacka funkcji Quick Calc Release
nie jest zablokowana.
W przypadku uszkodzenia lub zgubienia tacki skontaktuj
się z Centrum Obsługi Klienta w swoim kraju (informacje
kontaktowe znajdują się w ulotce gwarancyjnej).
Funkcja Calc-Clean
WAŻNE: oprócz użycia funkcji Quick Calc Release, co miesiąc
należy korzystać z funkcji Calc-Clean, aby przedłużyć okres
eksploatacji żelazka. Jeśli woda w Twojej okolicy jest bardzo
twarda lub podczas prasowania ze stopy żelazka spadają
płytki kamienia, korzystaj z tej funkcji częściej.
1 Upewnij się, że urządzenie jest odłączone od sieci
elektrycznej, a przełącznik pary znajduje się w pozycji
prasowania na sucho.
2 Napełnij zbiornik wodą do poziomu oznaczonego
symbolem „MAX”.
Nie wlewaj do zbiornika wody octu ani innych środków do
usuwania kamienia.
3 Podłącz żelazko do gniazdka elektrycznego i ustaw
pokrętło regulatora temperatury w pozycji oznaczonej
symbolem „MAX”.
4 Gdy zgaśnie wskaźnik temperatury, wyjmij wtyczkę
żelazka z gniazdka elektrycznego.
5 Przytrzymaj żelazko nad zlewem. Przytrzymując przycisk
Calc-Clean, delikatnie potrząsaj żelazkiem do przodu i do
tyłu aż do zużycia całej wody w zbiorniku.
Podczas wypłukiwania kamienia ze stopy żelazka będzie
wydostawać się również para i gorąca woda.
Uwaga: powtórz czynności od 2 do 5, jeśli woda wydostająca
się z żelazka nadal zawiera cząstki kamienia.
6 Wyjmij tackę funkcji Quick Calc Release i wylej z niej
wodę. Przytrzymaj żelazko pionowo, aby umożliwić
wypłynięcie niewielkiej ilości wody.
Page 15

POLSKI 17
7 Włóż tackę z powrotem do żelazka i zablokuj ją.
8 Podłącz żelazko do gniazdka elektrycznego i poczekaj na
rozgrzanie żelazka, aby wysuszyć stopę.
9 Gdy zgaśnie wskaźnik temperatury, wyjmij wtyczkę żelazka
z gniazdka elektrycznego.
10 Aby usunąć zacieki wodne, jakie mogły powstać na stopie
żelazka, delikatnie przeciągnij żelazko po kawałku tkaniny.
17
Przechowywanie
1 Wyjmij wtyczkę żelazka z gniazdka elektrycznego i
opróżnij zbiornik wody. Odstaw żelazko w bezpieczne
miejsce i poczekaj, aż ostygnie.
2 Owiń przewód sieciowy wokół tylnej płyty żelazka i
przechowuj żelazko w pozycji pionowej.
Rozwiązywanie problemów
W tym rozdziale opisano najczęstsze problemy, z którymi
można się zetknąć, korzystając z urządzenia. Jeśli poniższe
wskazówki okażą się niewystarczające do rozwiązania
problemu, odwiedź stronę
www.philips.com/support, na której znajduje się lista często
zadawanych pytań, lub skontaktuj się z Centrum Obsługi
Klienta w swoim kraju (informacje kontaktowe znajdują się w
ulotce gwarancyjnej).
Problem
Funkcja silnego
uderzenia pary nie działa
prawidłowo (woda
wycieka ze stopy).
Podczas prasowania ze
stopy żelazka wydostają
się zanieczyszczenia.
Prawdopodobna
przyczyna Rozwiązanie
Funkcja silnego uderzenia
pary była używana zbyt
często w bardzo krótkim
czasie.
Funkcja silnego uderzenia
pary była używana przy
zbyt niskiej temperaturze
prasowania.
Wewnątrz stopy tworzy się
kamień.
Odczekaj kilka sekund, zanim
ponownie użyjesz funkcji
silnego uderzenia pary.
Ustaw temperaturę
prasowania, przy której
można używać funkcji silnego
uderzenia pary (od ●●● do
„MAX”).
Użyj funkcji Calc-Clean
(patrz rozdział „Czyszczenie i
konserwacja”, część „Funkcja
Calc-Clean”).
Page 16

18 POLSKI18
Problem
Prawdopodobna
przyczyna Rozwiązanie
Woda wycieka z otworu
wlewowego.
Woda lub para wycieka z
tylnej części żelazka.
Zbiornik wody jest
przepełniony.
Nie zablokowano
prawidłowo tacki funkcji
Quick Calc Release.
Tacka funkcji Quick Calc
Release jest uszkodzona.
Nie nalewaj wody powyżej
oznaczenia „MAX”. Wylej
nadmiar wody ze zbiornika.
Wyjmij tackę funkcji Quick
Calc Release i wyczyść ją pod
bieżącą wodą. Za pomocą
szmatki zetrzyj kamień z
otworu w tylnej części żelazka.
Załóż tackę i zablokuj ją.
(Patrz rozdział „Czyszczenie i
konserwacja”, część „Funkcja
Calc-Clean”).
Skontaktuj się z Centrum
Obsługi Klienta w swoim
kraju (informacje kontaktowe
znajdują się w ulotce
gwarancyjnej).
Page 17

ČEŠTINA 19
19
Úvod
Společnost Philips Vám gratuluje ke koupi a vítá Vás! Chcete-li
využívat všech výhod podpory nabízené společností Philips,
zaregistrujte svůj výrobek na stránkách www.philips.com/welcome.
Přehled o výrobku (obr. 1)
1 Tryska rozprašovače
2 Plnicí dvířka na vodu
3 Tlačítko rozprašovače
4 Posuvník páry
a. Nastavení suchého žehlení ( )
b. Nastavení ECO (ECO)
c. Nastavení MAX ( )
5 Spoušť parního rázu
6 Bezpečnostní kontrolka automatického vypnutí (pouze
některé typy)
7 Napájecí kabel
8 Kontrolka teploty
9 Nádržka na vodu
10 Volič teploty
11 Tlačítko Calc Clean
12 Žehlicí plocha
13 Zámek funkce Quick Calc Release
14 Zásobník funkce Quick Calc Release
15 Typový štítek
Důležité
Před použitím si pečlivě přečtěte uživatelskou příručku a
samostatný letáček s důležitými informacemi. Uložte si oba
dokumenty pro budoucí použití. Uložte si oba dokumenty pro
budoucí použití.
Použití přístroje
Naplnění nádržky na vodu
Poznámka: Přístroj je určen pro použití s vodou z vodovodního
kohoutku. Pokud žijete v oblasti s velmi tvrdou vodou, může
docházet k rychlé tvorbě vodního kamene. Doporučujeme
proto používat 100% destilovanou nebo demineralizovanou
vodu, aby se prodloužila životnost přístroje.
1 Otevřete plnicí dvířka na vodu.
2 Nakloňte žehličku dozadu a nádržku na vodu naplňte
vodou z kohoutku po značku maximálního množství.
Poznámka: Neplňte nádržku na vodu nad úroveň značky
MAX.
Page 18

20
ČEŠTINA20
Do nádržky na vodu nelijte parfém, ocet, škrob, odvápňovací
prostředky, změkčovadla či jiné chemické látky.
3 Zavřete plnicí dvířka na vodu (uslyšíte klapnutí).
Nastavení teploty a páry
Tabulka 1:
Varování: Nepoužívejte páru nebo parní ráz při nízkých
teplotách, jak je uvedeno v tabulce níže. Jinak se může stát,
že z žehličky unikne horká voda.
Typ tkaniny Nastavení
teploty
Len MAX
Bavlna ●●● Ano
Vlna ●●
Hedvábí ●● Ne
Syntetický
materiál (např.
akryl, nylon,
polyamid nebo
polyester).
1 Nastavte volič teploty podle údajů v tabulce 1, aby
nastavení odpovídalo žehlenému oděvu.
2 Upravte nastavení páry podle pokynů v tabulce 1, aby
odpovídalo žehlenému oděvu.
Poznámka: Přesvědčte se, že vybrané nastavení páry je
vhodné pro nastavenou teplotu žehlení.
3 Položte žehličku na zadní stěnu a zapojte ji. Rozsvítí se
kontrolka teploty na znamení, že se žehlička ohřívá.
4 Když kontrolka teploty zhasne, žehlička dosáhla správné
teploty a můžete začít žehlit.
● Ne
Nastavení
páry
/ ECO
ECO
Parní ráz
Ano
Ne
Page 19

ČEŠTINA 21
Funkce
Funkce rozstřikování
- Stisknutím tlačítka rozprašovače navlhčete žehlený oděv. To
pomáhá odstranit nepoddajné záhyby.
Funkce parního rázu
- Použijte funkci parního rázu s nastavením voliče teploty
mezi hodnotami ●●● a MAX.
- Stisknutím a uvolněním spouště parního rázu získáte silný
parní ráz pro odstranění nepoddajných záhybů.
Žehlení s velkým množstvím páry
- Chcete-li během žehlení získat velké množství páry,
stiskněte a podržte spoušť parního rázu.
21
Vertikální napařování
- Funkci parního rázu lze také použít, držíte-li žehličku
ve svislé poloze. To je užitečné při odstraňování záhybů
u zavěšených oděvů, záclon apod.
Nastavení páry ECO / suché žehlení
- Na posuvníku páry můžete zvolit nastavení ECO, čímž
ušetříte energii a zároveň dosáhnete uspokojivých
výsledků.
- Chcete-li žehlit bez páry, zvolte na posuvníku páry suché
žehlení.
Page 20

22
ČEŠTINA22
Bezpečnostní automatické vypnutí (pouze některé typy)
Funkce bezpečnostního automatického vypnutí žehličku
automaticky vypne, pokud je 30 minut na žehlicí ploše a
nepoužívá se a nebo 8 minut stojí na zadní straně. Rozsvítí se
kontrolka automatického vypnutí.
- Chcete-li žehličku znovu zahřát, zdvihněte ji nebo s ní lehce
pohněte. Kontrolka automatického vypnutí zhasne.
Čištění a údržba
Čištění
1 Žehličku odpojte z napájení a nechte ji vychladnout.
2 Zbývající vodu vylijte z nádržky plnicími dvířky.
3 Ze žehlicí plochy otřete všechny nečistoty vlhkým
hadříkem, případně můžete použít neabrazivní (tekutý)
čisticí prostředek.
Aby zůstala žehlicí plocha hladká, chraňte ji před přímým
kontaktem s kovovými předměty. K čištění žehlicí plochy
nikdy nepoužívejte kovovou žínku, ocet nebo jiné chemikálie.
Quick Calc Release
DŮLEŽITÉ: Chcete-li prodloužit životnost přístroje a zachovat
kvalitní parní výkon, používejte funkci Quick Calc Release
jednou za měsíc.
Pokud je voda ve vaší oblasti nadměrně tvrdá, používejte
tuto funkci častěji.
Poznámka: Žehlička musí být před použitím funkce Quick
Calc Release alespoň 1 hodinu odpojena od napájení a musí
zcela vychladnout.
1 Položte žehličku na rovný povrch a stlačte zámek Quick
Calc Release na zadní straně.
2 Vyjměte zásobník Quick Calc Release.
3 Vylijte vodní kámen zachycený v zásobníku do dřezu nebo
do koše. Zásobník omyjte vodou z kohoutku. Odstraňte ze
zásobníku přebytečnou vodu.
Page 21

ČEŠTINA 23
Nelijte do žehličky otvorem funkce Quick Calc Release vodu,
ocet a odvápňovací přípravky.
Nepoužívejte ocet, odvápňovací přípravky nebo jiné
chemikálie k umytí zásobníku.
4 Hadříkem otřete z otvoru zásobníku Quick Calc Release
vodní kámen.
5 Vložte zásobník zpátky do žehličky.
6 Stlačte zámek Quick Calc Release.
Pokud zásobník Quick Calc Release není uzamčen, žehličku
nepoužívejte.
Pokud zásobník rozbijete nebo ztratíte, obraťte se na středisko
péče o zákazníky společnosti Philips ve své zemi (kontaktní
informace naleznete na záručním listu s celosvětovou platností).
Funkce Calc-clean pro odstranění vodního kamene
DŮLEŽITÉ: Chcete-li prodloužit životnost žehličky, měli byste
kromě funkce Quick Calc Release vždy jednou za měsíc
použít i funkci Calc Clean. Pokud je voda ve vaší oblasti
nadměrně tvrdá nebo si během žehlení všimnete, že z žehlící
plochy uniká vodní kámen, používejte tuto funkci častěji.
23
1 Zajistěte, aby byla žehlička odpojená, a aby byl regulátor
páry nastaven na suché žehlení.
2 Nádržku na vodu naplňte vodou až po označení MAX.
Nenalévejte do nádržky na vodu ocet nebo jiné přípravky
k odstranění vodního kamene.
3 Zapojte žehličku a nastavte volič teploty do polohy MAX.
4 Po zhasnutí kontrolky teploty odpojte žehličku ze zásuvky.
5 Podržte žehličku nad dřezem. Opakovaně tiskněte tlačítko
Calc Clean a jemně žehličkou zatřeste ze strany na stranu,
dokud se nespotřebuje veškerá voda z nádržky.
Během vyplavování vodního kamene vychází z žehlicí plochy
také pára a vroucí voda.
Poznámka: Pokud voda vycházející z žehličky stále obsahuje
usazeniny, opakujte kroky 2 až 5.
6 Vyjměte zásobník Quick Calc Release a odstraňte z něj
vodu. Podržte žehličku ve vodorovné poloze, aby mohlo
vytéct malé množství vody.
7 Vložte zásobník zpět do žehličky a uzamkněte jej.
8 Zapojte žehličku a nechte ji zahřát, aby žehlicí plocha oschla.
9 Po zhasnutí kontrolky teploty odpojte žehličku ze zásuvky.
Page 22

24 ČEŠTINA24
10 Lehce přežehlete kousek látky, aby se odstranily všechny
vodní skvrny z žehlicí plochy.
Uskladnění
1 Žehličku vypněte a vyprázdněte nádržku na vodu. Nechte ji
na bezpečném místě vychladnout.
2 Obtočte napájecí kabel kolem zadní strany žehličky a
uchovávejte ji ve svislé poloze.
Odstraňování problémů
V této kapitole jsou shrnuty nejběžnější problémy, se kterými
se můžete u přístroje setkat. Pokud se vám nepodaří problém
vyřešit podle následujících informací, navštivte adresu
www.philips.com/support, kde jsou uvedeny odpovědi na
nejčastější dotazy, nebo kontaktujte Středisko péče o zákazníky
ve své zemi (kontaktní informace naleznete na záručním listu
s celosvětovou platností).
Problém Možná příčina Řešení
Funkce parního rázu
nepracuje správně
(z žehlicí plochy uniká
voda).
Ze žehlicí plochy se
při žehlení odlupují
šupinky a jiné nečistoty.
Z plnicích dvířek na
vodu uniká voda.
Ze zadní části žehličky
uniká voda nebo pára.
Funkci parního rázu
jste používali příliš
často během krátké
doby.
Použili jste funkci
parního rázu při příliš
nízké teplotě.
Uvnitř žehlící plochy
se vytváří vodní
kámen.
Přeplnili jste nádržku
na vodu.
Zásobník Quick Calc
Release není pořádně
uzamčen.
Zásobník Quick Calc
Release je poškozen.
Než znovu použijete funkci parního
rázu, několik sekund počkejte.
Nastavte takovou teplotu žehlení,
při níž lze použít funkci parního
rázu (od ●●● do MAX).
Použijte funkci Calc-Clean
(viz kapitola „Čištění a údržba“,
část „Funkce Calc-Clean“).
Neplňte vodní zásobník nad úroveň
značky MAX. Přebytečnou vodu
vylijte z nádržky.
Vyjměte zásobník Quick Calc Release
a omyjte jej vodou z vodovodního
kohoutku. Hadříkem z otvoru zadní
části žehličky otřete vodní kámen.
Zásobník vložte zpět a uzamkněte jej.
(viz kapitola „Čištění a údržba“, část
„Funkce Quick Calc Release“).
Obraťte se na Středisko péče
o zákazníky ve vaší zemi (kontaktní
informace naleznete na záručním
listu s celosvětovou platností).
Page 23

ROMÂNĂ 25
Introducere
Felicitări pentru achiziţie şi bun venit la Philips!
Pentru a beneficia pe deplin de asistenţa oferită de Philips,
înregistrează-ţi produsul la www.philips.com/welcome.
Prezentare generală a produsului (Fig. 1)
1 Duză pulverizare
2 Uşă de umplere cu apă
3 Buton pulverizator
4 Glisor pentru abur
a. Setarea pentru călcat uscat ( )
b. Setarea ECO (ECO)
c. Setarea MAX ( )
5 Declanşator pentru jet de abur
6 Led pentru oprire automată de siguranţă (doar la anumite tipuri)
7 Cablu de alimentare
8 Indicator de temperatură
9 Rezervor de apă
10 Selector de temperatură
11 Buton de detartrare
12 Talpă
13 Buton de blocare pentru detartrare rapidă
14 Tavă pentru funcţia de detartrare rapidă
15 Plăcuţă cu date tehnice
25
Important!
Citeşte broşura separată cu informaţii importante şi acest
manual de utilizare cu atenţie înainte de a utiliza aparatul.
Păstrează ambele documente pentru consultare ulterioară.
Utilizarea aparatului
Umplerea rezervorului de apă
Notă: Aparatul a fost conceput pentru a fi folosit cu apă
de la robinet. Dacă locuieşti într-o zonă cu apă dură, pot
apărea rapid depuneri de calcar. Prin urmare, se recomandă
utilizarea apei distilate sau a apei demineralizate 100%
pentru a prelungi durata de viaţă a aparatului tău.
1 Deschide uşa de umplere cu apă.
2 Înclină erul de călcat spre spate şi umple rezervorul de
apă cu apă de la robinet până la nivelul maxim.
Notă: Nu umpleţi rezervorul peste gradaţia MAX.
Page 24

26
ROMÂNĂ26
Nu turnaţi parfum, oţet, amidon, agenţi de detartrare, aditivi
de călcare sau alte substanţe chimice în rezervorul de apă.
3 Închide uşa de umplere cu apă („clic”).
Setarea temperaturii şi a aburului
Tabelul 1:
Avertisment: Nu utilizaţi abur sau jet de abur la temperaturi
scăzute, după cum este indicat în tabelul de mai jos. În caz
contrar, este posibil ca apa fierbinte să curgă din fierul de călcat.
Tipul de material Reglaj de
temperatură
In MAX
Bumbac ●●● Da
Lână ●●
Mătase ●● Nu
Material sintetic
(de ex. bre
acrilice, nailon,
poliamidă,
poliester)
1 Consultă Tabelul 1 pentru a programa selectorul de
temperatură la setarea corespunzătoare pentru articolul
vestimentar.
2 Consultă Tabelul 1 pentru a efectua setarea
corespunzătoare pentru abur pentru articolul tău
vestimentar.
Notă: Ai grijă ca setarea de abur selectată să se potrivească
temperaturii de călcare setate.
3 Pune erul de călcat în poziţie verticală şi conectează-l
la priză. Indicatorul de temperatură se aprinde pentru a
indica faptul că erul de călcat se încălzeşte.
4 Când ledul de temperatură se stinge, erul de călcat a
atins temperatura corectă şi poţi începe să calci.
● Nu
Reglaj de
abur
/ ECO
ECO
Jet de abur
Da
Nu
Page 25

ROMÂNĂ 27
Caracteristici
Funcţie spray
- Apasă butonul pulverizatorului pentru a umezi articolul
pe care doreşti să îl calci. Acest lucru ajută la îndepărtarea
cutelor persistente.
Funcţia de jet de abur
- Utilizează funcţia de amplificare a aburului la o setare a
selectorului de temperatură între ●●● şi MAX.
- Apasă şi eliberează butonul de declanşare jet de abur
pentru un jet puternic de abur pentru a îndepărta cutele
persistente.
Călcarea cu abur suplimentar
- Pentru abur suplimentar în timpul călcării, apăsaţi continuu
declanşatorul pentru jet de abur.
27
Jet de abur vertical
- Poţi utiliza funcţia jet de abur atunci când ţii fierul în
poziţie verticală pentru îndepărtarea cutelor de pe haine
suspendate, draperii etc.
Setarea abur ECO/Călcat uscat
- Poţi alege setarea ECO din glisorul pentru abur pentru a
economisi energie şi a obţine rezultate satisfăcătoare de
călcare.
- Pentru a călca fără abur, selectează setarea de călcat uscat
cu ajutorul glisorului pentru abur.
Page 26

28
ROMÂNĂ28
Oprire automată de siguranţă (doar la anumite tipuri)
Funcţia de oprire automată de siguranţă opreşte automat fierul
de călcat dacă nu este utilizat timp de 30 de secunde, când
este aşezat pe talpă, sau timp de 8 minute când este aşezat în
poziţie verticală. Se va aprinde ledul de oprire automată.
- Pentru a permite încălzirea fierului din nou, ridică-l sau
mişcă-l uşor. Ledul de oprire automată se stinge.
Curăţare şi întreţinere
Curăţarea
1 Deconectează erul de la priză şi lasă-l să se răcească.
2 Scurge apa rămasă în rezervorul de apă, prin uşa de
umplere cu apă.
3 Şterge impurităţile şi alte depuneri de pe talpă cu o lavetă
umedă şi cu un agent de curăţare (lichid) non-abraziv.
Pentru a păstra talpa netedă, evită contactul dur cu obiecte
metalice. Nu utilizaţi niciodată burete de sârmă, oţet sau alte
chimicale pentru a curăţa talpa.
Detartrare rapidă
IMPORTANT: Pentru a prelungi durata de viaţă a aparatului
şi a menţine performanţe bune de generare a aburului,
utilizează funcţia de detartrare rapidă o dată la 1 lună.
Dacă apa din zona dvs. este foarte dură, utilizaţi această
funcţie mai des.
Notă: Asigură-te că fierul de călcat a fost scos din priză cu
cel puţin 1 oră înainte şi că s-a răcit complet, înainte de a
folosi funcţia de detartrare rapidă.
1 Pune erul pe o suprafaţă plată şi apasă butonul de
blocare pentru detartrare rapidă de pe spatele erului de
călcat.
2 Scoate tava pentru funcţia de detartrare rapidă.
3 Scurge depunerile de calcar din tavă într-o chiuvetă sau
un coş de gunoi. Curăţă tava cu apă de la robinet. Şterge
apa rămasă în tavă.
Page 27

ROMÂNĂ 29
Nu turna apă, oţet, agenţi de detartrare sau alte substanţe
chimice în er prin oriciul pentru funcţia de detartrare rapidă.
Nu utiliza oţet, agenţi de detartrare sau alte substanţe chimice
pentru a spăla tava.
4 Şterge depunerile de calcar din oriciul pentru funcţia de
detartrare rapidă cu o lavetă umedă.
5 Introdu tava înapoi în erul de călcat.
6 Apasă butonul de blocare pentru detartrare rapidă.
Nu utiliza erul când tava pentru funcţia de detartrare rapidă
nu este blocată.
Dacă spargi sau pierzi tava, contactează un centru de
asistenţă pentru clienţi din ţara ta (consultă broşura de
garanţie internaţională pentru detalii de contact).
Funcţia de detartrare
IMPORTANT: Pe lângă funcţia de detartrare rapidă, trebuie
să mai efectuezi detartrarea o dată pe lună, pentru a prelungi
durata de viaţă a fierului tău de călcat. Dacă apa din zona dvs.
este foarte dură sau dacă, în timpul călcării, apar depuneri de
pe talpa fierului de călcat, utilizaţi această funcţie mai des.
1 Asigură-te că erul de călcat este scos din priză şi că
glisorul pentru abur este la setarea uscat.
2 Umple rezervorul de apă până la indicaţia MAX.
Nu turnaţi oţet sau alţi agenţi pentru îndepărtarea calcarului
în rezervorul de apă.
3 Introdu erul în priză şi setează selectorul de temperatură
la MAX.
4 Scoate erul în priză când ledul de temperatură se stinge.
5 Ţine erul de călcat deasupra chiuvetei. Ţine apăsat
butonul de detartrare şi scutură uşor erul înainte şi înapoi
până când toată apa din rezervorul de apă se consumă.
Depunerile sunt eliminate, aburul şi apa aată în erbere ies,
de asemenea, prin talpă.
Notă: Repetă paşii 2 - 5 dacă apa care iese din fierul de
călcat conţine în continuare particule de calcar.
6 Scoate tava pentru funcţia de detartrare rapidă, elimină
apa din tavă. Ţine erul vertical pentru a permite ieşirea
unei mici cantităţi de apă.
7 Introdu tava înapoi în er şi blocheaz-o.
8 Introdu erul în priză şi lasă-l să se încălzească pentru a
permite uscarea tălpii.
9 Scoate erul în priză când indicatorul de temperatură se stinge.
29
Page 28

30 ROMÂNĂ30
10 Mişcă uşor erul de călcat peste o bucată de material
pentru a îndepărta petele de apă care s-au format pe talpă.
Depozitarea
1 Scoate erul de călcat din priză şi goleşte rezervorul de
apă. Lasă erul de călcat să se răcească într-un loc sigur.
2 Înfăşoară cablul de alimentare în jurul plăcii din spate a
erului de călcat şi depozitează-l în poziţie verticală.
Depanare
Acest capitol prezintă cele mai frecvente probleme care pot
surveni la utilizarea aparatului. Dacă nu poţi rezolva o problemă
cu ajutorul informaţiilor de mai jos, accesează www.philips.com/
support pentru o listă de întrebări frecvente sau contactează
centrul de asistenţă pentru clienţi din ţara ta (consultă broşura de
garanţie internaţională pentru detalii de contact).
Problemă Cauză posibilă Soluţie
Funcţia pentru
jet de abur nu
funcţionează
corect (se scurge
apă din talpa
fierului de călcat).
În timpul călcării, din
talpă ies bucăţi de
calcar şi impurităţii.
Se scurge apă din
uşa de umplere
cu apă.
Se scurge apă
sau aburi din
partea din spate a
fierului de călcat.
aţi folosit prea des
funcţia pentru jet de
abur într-un interval
de timp foarte scurt.
Aţi folosit funcţia
pentru jet de abur la
o temperatură prea
scăzută.
Se formează
depuneri în
interiorul tălpii.
Ai umplut excesiv
rezervorul de apă.
Nu aţi blocat corect
tava pentru funcţia
de detartrare rapidă.
Tava pentru funcţia
de detartrare rapidă
este deteriorată.
Aşteptaţi timp de câteva secunde înainte de
a utiliza din nou funcţia pentru jet de abur.
Setează temperatura de călcare la care
poate fi utilizată funcţia jet de abur (de la
●●● la MAX).
Utilizează funcţia de detartrare (consultă
capitolul „Curăţare şi întreţinere”, secţiunea
„Funcţia de detartrare”).
Nu umple rezervorul peste indicaţia MAX
MAX. Vărsaţi apa în exces din rezervorul de
apă.
Scoateţi tava pentru funcţia de detartrare
rapidă şi curăţaţi-o cu apă de la robinet.
Ştergeţi cu o bucată de pânză depunerile
din orificiul din partea din spate a fierului
de călcat. Aşezaţi la loc tava şi blocaţi-o.
(Consultă capitolul „Curăţare şi întreţinere”,
secţiunea „Funcţia de detartrare rapidă”).
Contactaţi un centru de asistenţă pentru
clienţi din ţara dvs. (pentru detalii de contact,
consultaţi certificatul de garanţie universal).
Page 29

MAGYAR 31
31
Bevezetés
Köszönjük, hogy Philips terméket vásárolt, és üdvözöljük a Philips
világában! A Philips által biztosított teljes körű támogatáshoz
regisztrálja termékét a www.philips.com/welcome oldalon.
Termék áttekintése (Ábra 1)
1 Vízpermetező orr
2 Vízbetöltő nyílás
3 Vízpermetező gomb
4 Gőzbeállító csúszka
a. Száraz beállítás ( )
b. ECO beállítás (ECO)
c. MAX beállítás ( )
5 Gőzlövet gomb
6 Biztonsági automatikus kikapcsolás jelzőfénye
(csak bizonyos típusoknál)
7 Hálózati kábel
8 Hőmérsékletjelző fény
9 Víztartály
10 Hőfokszabályozó
11 Vízkőmentesítő gomb
12 Vasalótalp
13 Quick Calc Release zár
14 Quick Calc Release tálca
15 Típustábla
Fontos
Kérjük, körültekintően olvassa el a „Fontos tudnivalók” c.
ismertetőt és ezt a felhasználói kézikönyvet, mielőtt használni
kezdené a készüléket. Őrizze meg mindkét dokumentumot
későbbi használatra.
A készülék használata
A víztartály feltöltése
Megjegyzés: A készüléket csapvízzel való használatra
tervezték. Ha olyan helyen él, ahol kemény a víz, a
készülékben hamar felhalmozódhat a vízkő. Ezért javasolt
100%-ban desztillált vagy demineralizált víz használata a
készülék élettartamának megnövelése érdekében.
1 Nyissa ki a vízbetöltő nyílást.
2 Döntse a vasalót hátra, és töltse meg a víztartályt a
maximális jelzésig csapvízzel.
Megjegyzés: Ne töltse a víztartályt a MAX jelzés fölé.
Page 30

32
MAGYAR32
Ne töltsön parfümöt, ecetet, keményítőt, vízkőmentesítő
szert, vasalási segédanyagokat vagy egyéb vegyszert a
víztartályba.
3 Zárja be a vízbetöltő nyílást (kattanásig).
A hőmérséklet és a gőz beállítása
1.táblázat:
Figyelmeztetés: Ne alkalmazzon gőzt, vagy
gőzlövetetalacsony hőmérsékleten, az alábbi táblázatban
jelzetteknek megfelelően. Ellenkező esetben forró víz
távozhat a vasalóból.
A textília típusa Hőfokbeállítás Gőzfokozat Gőzlövet
Linen MAX
Pamut ●●● Igen
Gyapjú ●●
Silk ●● Nem
Műszálas
anyagok (pl.
akril, nejlon,
poliamid,
poliészter)
● Nem
/ ECO
ECO
Igen
Nem
1 Az 1. táblázat alapján állítsa be a hőfokszabályzót a
vasalandó ruhának megfelelően.
2 Az 1. táblázat alapján állítsa be a megfelelő gőzbeállítást a
vasalandó ruhához.
Megjegyzés: ügyeljen arra, hogy a kiválasztott gőzbeállítás
feleljen meg a beállított vasalási hőmérsékletnek.
3 Állítsa a vasalót függőleges helyzetbe, és csatlakoztassa
a fali aljzatba. A hőmérsékletjelző fény bekapcsolása
mutatja, hogy a vasaló melegszik.
4 Amikor a hőmérsékletjelző fény elalszik, a vasaló elérte a
megfelelő hőmérsékletet, ön pedig elkezdheti a vasalást.
Page 31

MAGYAR 33
Jellemzők
Spriccelés funkció
- A vízpermetező gombot megnyomva nedvesítse be
a vasalandó ruhát. Ez segít a makacs gyűrődések
eltávolításában.
Gőzlövet funkció
- Használja a gőzlövet funkciót ●●● és MAX közötti
hőfokbeállításon.
- A gőzlövet gombot nyomja le, majd engedje fel az erőteljes
gőzlövetért, mellyel eltávolíthatja a makacs gyűrődéseket.
Vasalás extra gőzlövettel
- A vasalás közben alkalmazott extra gőzlövethez nyomja le
és tartsa lenyomva a gőzlövet gombot.
33
Függőleges gőz
- A gőzlövet funkció függőleges helyzetű vasalóval is
használható. Így a felfüggesztett textíliák, függönyök stb.
gyűrődéseinek kisimítására is alkalmas.
ECO gőzbeállítás / száraz vasalás
- Ha az ECO beállítást választja a gőzbeállító csúszkán, energiát
takaríthat meg és a vasalási eredmény is megfelelő lesz.
- A gőz nélküli vasaláshoz válassza ki a száraz beállítást a
gőzbeállító csúszkán.
Page 32

34
MAGYAR34
Biztonsági automatikus kikapcsolás funkció (csak bizonyos típusoknál)
A biztonsági automatikus kikapcsolás funkció automatikusan
kikapcsolja a vasalót, ha a talpára állított helyzetben 30
másodpercig nem használják, illetve ha a sarkára állított
helyzetben 8 percig nem használják. Az automatikus
kikapcsolás jelzőfénye világítani kezd.
- A vasaló újbóli felmelegítéséhez emelje fel vagy kicsit
mozdítsa meg a vasalót. Az automatikus kikapcsolás
jelzőfénye kialszik.
Tisztítás és karbantartás
Tisztítás
1 Húzza ki a vasaló hálózati csatlakozó dugóját a fali
aljzatból, és hagyja lehűlni.
2 Öntse ki a maradék vizet a víztartályból a vízbetöltő
nyíláson át.
3 Törölje le a vasalótalpról a vízkődarabkákat és az egyéb
lerakódásokat nedves ruhával, nem karcoló (folyékony)
tisztítószerrel.
A vasalótalp épségének megóvása érdekében kerülje
fémtárggyal való érintkezését. A vasalótalp tisztításához ne
használjon súrolószivacsot, ecetet vagy egyéb vegyszereket.
A Quick Calc Release funkció
FONTOS: A készülék élettartamának megnövelése, és a
megfelelő gőzölési teljesítmény érdekében használja a Quick
Calc Release funkciót havonta.
Ha lakóhelyén a víz nagyon kemény, használja gyakrabban
ezt a funkciót.
Megjegyzés: Ügyeljen arra, hogy a Quick Calc Release
használatának megkezdése előtt legalább 1 órával húzza
ki a vasaló csatlakozóját a fali aljzatból, és a vasaló legyen
teljesen lehűlt állapotban.
1 Helyezze vízszintes felületre a vasalót, és a vasaló hátulján
nyomja felfelé a Quick Calc Release zárat.
2 Vegye ki a Quick Calc Release tálcát.
3 A tálcáról öntse ki a vízkövet a mosogatóba vagy a
szemetesbe. Csapvízzel öblítse le a tálcát. Távolítsa el a
felesleges vizet a tálcáról.
Page 33

MAGYAR 35
A Quick Calc Release nyíláson keresztül ne töltsön vizet,
ecetet, vízkőmentesítő szert vagy egyéb vegyszert a vasalóba.
A tálca tisztításához ne használjon ecetet, vízkőmentesítő
szert, vagy egyéb vegyszert.
4 Nedves ruhával törölje le a Quick Calc Release tálca
nyílásánál lévő vízkövet.
5 Helyezze vissza a tálcát a vasalóba.
6 Nyomja le a Quick Calc Release zárat.
Ne használja a vasalót, ha a Quick Calc Release tálca nincs
lezárva.
Ha a tálca eltörik vagy elvész, forduljon a helyi vevőszolgálat
munkatársaihoz. (A részletekért tekintse meg a világszerte
érvényes garancialevelet).
Vízkőmentesítő funkció
FONTOS: a Quick Calc Release funkció mellett is érdemes
havonta egyszer vízkőmentesítést végezni a vasaló
élettartamának meghosszabbítása érdekében. Ha lakóhelyén
nagyon kemény a víz, vagy vasalás közben vízkő távozik a
vasalótalpból, használja gyakrabban ezt a funkciót.
1 Ügyeljen rá, hogy a vasaló hálózati csatlakozódugója ki
legyen húzva a fali aljzatból, és a gőzbeállító csúszka
száraz vasalás fokozatra legyen állítva.
2 Töltse fel a tartályt MAX szintjelzésig.
Ne töltsön a víztartályba ecetet vagy egyéb vízkőmentesítő szert.
3 Csatlakoztassa a vasalót a konnektorba és a
hőfokszabályzót állítsa MAX pozícióba.
4 Amikor a hőmérsékletjelző fény elalszik, húzza ki a hálózati
dugót a fali konnektorból.
5 Tartsa a vasalót a mosogató fölé. Tartsa nyomva a
vízkőmentesítő gombot, és óvatosan rázogassa a vasalót
előre és hátra, amíg a tartályból az összes víz el nem fogy.
A vízkő, gőz és forrásban lévő víz is távozik a vasalótalpból.
Megjegyzés: Ha a vasalóból távozó víz még mindig tartalmaz
vízkőlerakódásokat, ismételje meg a 2-5. lépést.
6 Vegye ki a Quick Calc Release tálcát, öntse ki a vizet a
tálcáról. Tartsa a vasalót függőleges helyzetben, hogy egy
kis víz kifolyhasson belőle.
7 Helyezze vissza a tálcát a vasalóba, és zárja le.
8 Csatlakoztassa a vasalót a fali aljzatba, és hagyja
felmelegedni, hogy a talp megszáradhasson.
9 Amikor a hőmérsékletjelző fény elalszik, húzza ki a vasaló
hálózati dugóját a fali aljzatból.
10 Mozgassa könnyedén a vasalót egy textildarabon, hogy a
vasalótalpon lévő vízfoltokat eltávolítsa.
35
Page 34

36 MAGYAR36
Tárolás
1 Húzza ki a vasaló hálózati csatlakozódugóját a fali
aljzatból, és ürítse ki a víztartályt. Hagyja lehűlni egy
biztonságos helyen.
2 Tekerje a hálózati kábelt a vasaló sarkára, és a sarkára
állítva tárolja a vasalót.
Hibaelhárítás
Ez a fejezet összefoglalja a készülékkel kapcsolatban leggyakrabban
felmerülő problémákat. Ha a hibát az alábbi útmutató segítségével
nem tudja elhárítani, látogasson el a www.philips.com/support
weboldalra a gyakran felmerülő kérdések listájáért, vagy forduljon
az országában illetékes ügyfélszolgálathoz (a részletek érdekében
tekintse meg a világszerte érvényes garancialevelet).
Probléma Lehetséges ok Megoldás
A gőzlövet funkció
nem működik
megfelelően
(víz szivárog a
vasalótalpból).
Vasalás közben
vízkőlerakódások
és szennyeződések
jönnek ki a
vasalótalpból.
Víz szivárog a
vízbetöltő ajtón
keresztül.
Víz vagy gőz
szivárog a vasaló
hátsó részéből.
A gőzlövet funkciót
nagyon rövid idő alatt túl
gyakran használta.
Túl alacsony
hőmérsékleten használta
a gőzlövet funkciót.
Vízkő rakódott le a
vasalótalpon belül.
A víztartályba túl sok
vizet töltött.
Nem zárta le
megfelelően a Quick
Calc Release tálcát.
A Quick Calc Release
tálca megsérült.
Várjon pár percet a gőzlövet funkció
újabb használata előtt.
Állítson be a gőzlövet funkcióhoz
megfelelő hőfokot (●●● és MAX
közé).
Alkalmazza a vízkőmentesítő funkciót
(lásd a „Tisztítás és karbantartás”
fejezet „Vízkőmentesítő funkció” c.
részét).
Ne töltse a víztartályt a MAX jelzés
fölé. A felesleges vizet öntse ki a
víztartályból.
Vegye ki a Quick Calc Release tálcát
és csapvízzel tisztítsa meg. Egy
ruhadarabbal törölje le a vízkőt a
vasaló hátsó részének nyílásáról.
Tegye vissza a tálcát és zárja le. (Lásd
a „Tisztítás és karbantartás” c. fejezet
„Quick Calc Release funkció” c. részét).
Vegye fel a kapcsolatot az országában
található vevőszolgálattal (az
elérhetőségeket megtalálja a
világszerte érvényes garancialevélen).
 Loading...