How it Works
Log In / Sign Up
Buy Points
How it Works
FAQ
Contact Us
Questions and Suggestions
Users
PHILIPS
Loading...
G
GA-214
GA-408
GAGGIA CAREZZA SILVER
Garbo
3
Garbo LC6231
Garbo Matchline
Garbo Matchline LC7181
Garbo Series
GBD307PDQ
GB SC TC
gb telephone
GC 012
9
GC 130
4
GC 136
GC 137
4
GC 141
2
GC 1436/20
3
GC 146
5
GC 1480
3
GC 160
GC 1710
24
GC 2010
5
GC 2015
5
GC 2088
2
GC 2088/30
3
GC 2145/20
4
GC 220
GC 2310
4
GC 2560
35
GC 2640
34
GC 2652
10
GC 2671/50
2
GC 2675/85
3
GC 2810
25
GC 2830
26
GC 2840
25
GC 2905
2
GC 2906
2
GC 2907
2
GC 2986
2
GC 2994
GC 2997/40
3
GC 2998/80
3
GC 3109
8
GC 3126
6
GC 3220
32
GC 3240
29
GC 3330
32
GC 3332
13
GC 3340
33
GC 3531
2
GC 3541
3
GC 3551
2
GC 3569
5
GC 3588
2
GC 3593/35
2
GC 3620
28
GC 3620/02
3
GC 3630/02
2
GC 3640
25
GC 3640/02
2
GC 3660/02
2
GC 3720
2
GC 3802/20
3
GC 3803/37
2
GC 4005
4
GC 4015
3
GC 4033
3
GC 4218
20
GC 4330
25
GC 4340
14
GC 4410
39
GC 4411
14
GC 4420
33
GC 4430
36
GC 4440
24
GC 4506
3
GC 4521/20
3
GC 4621
17
GC 4621/02
2
GC 4630
26
GC 4640
28
GC 4640/02
2
GC 4640i
5
GC 4641
19
GC 4721
2
GC 4730
19
GC 4850
19
GC 4887-30
2
GC 6000
2
GC 6002
2
GC 6004
2
GC 6005
2
GC 6006
4
GC 6007
3
GC 6010
3
GC 6012
4
GC 6014
3
GC 6019
GC 6020
Loading...
Loading...
Nothing found
GC 3531
BROCHURE
2 pgs
757.32 Kb
0
User Manual
10 pgs
5.17 Mb
0
Table of contents
Loading...
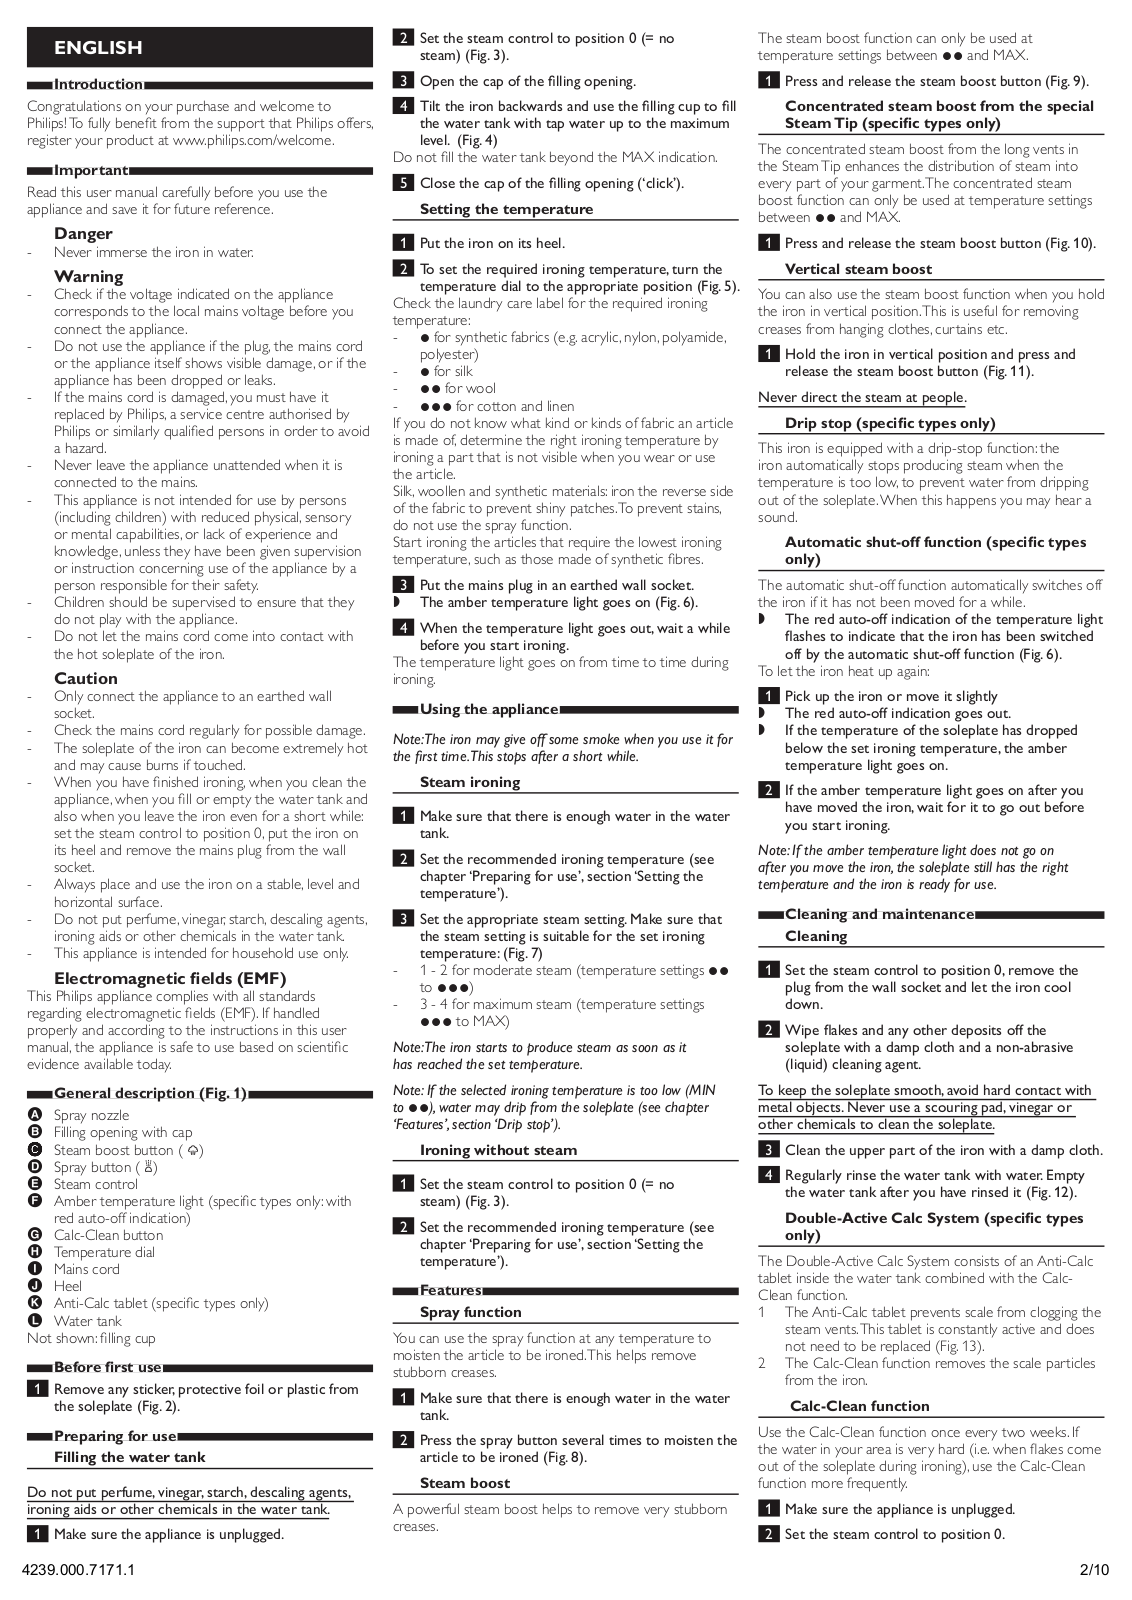
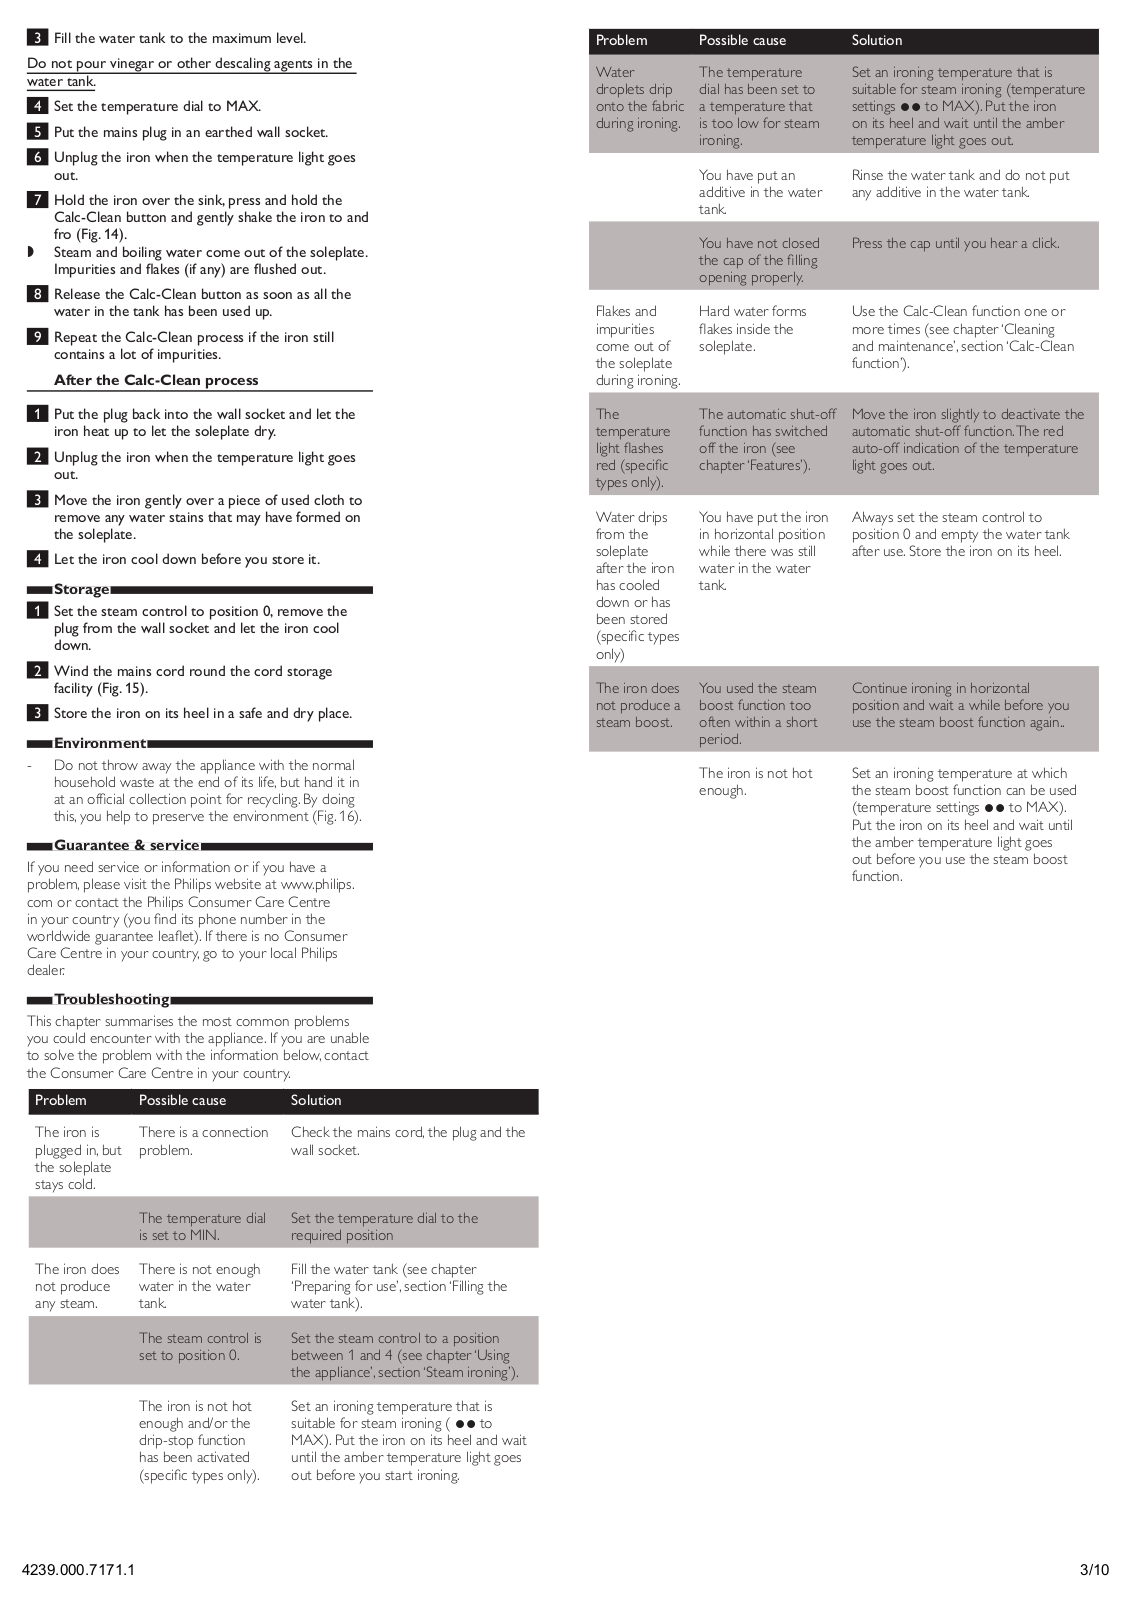
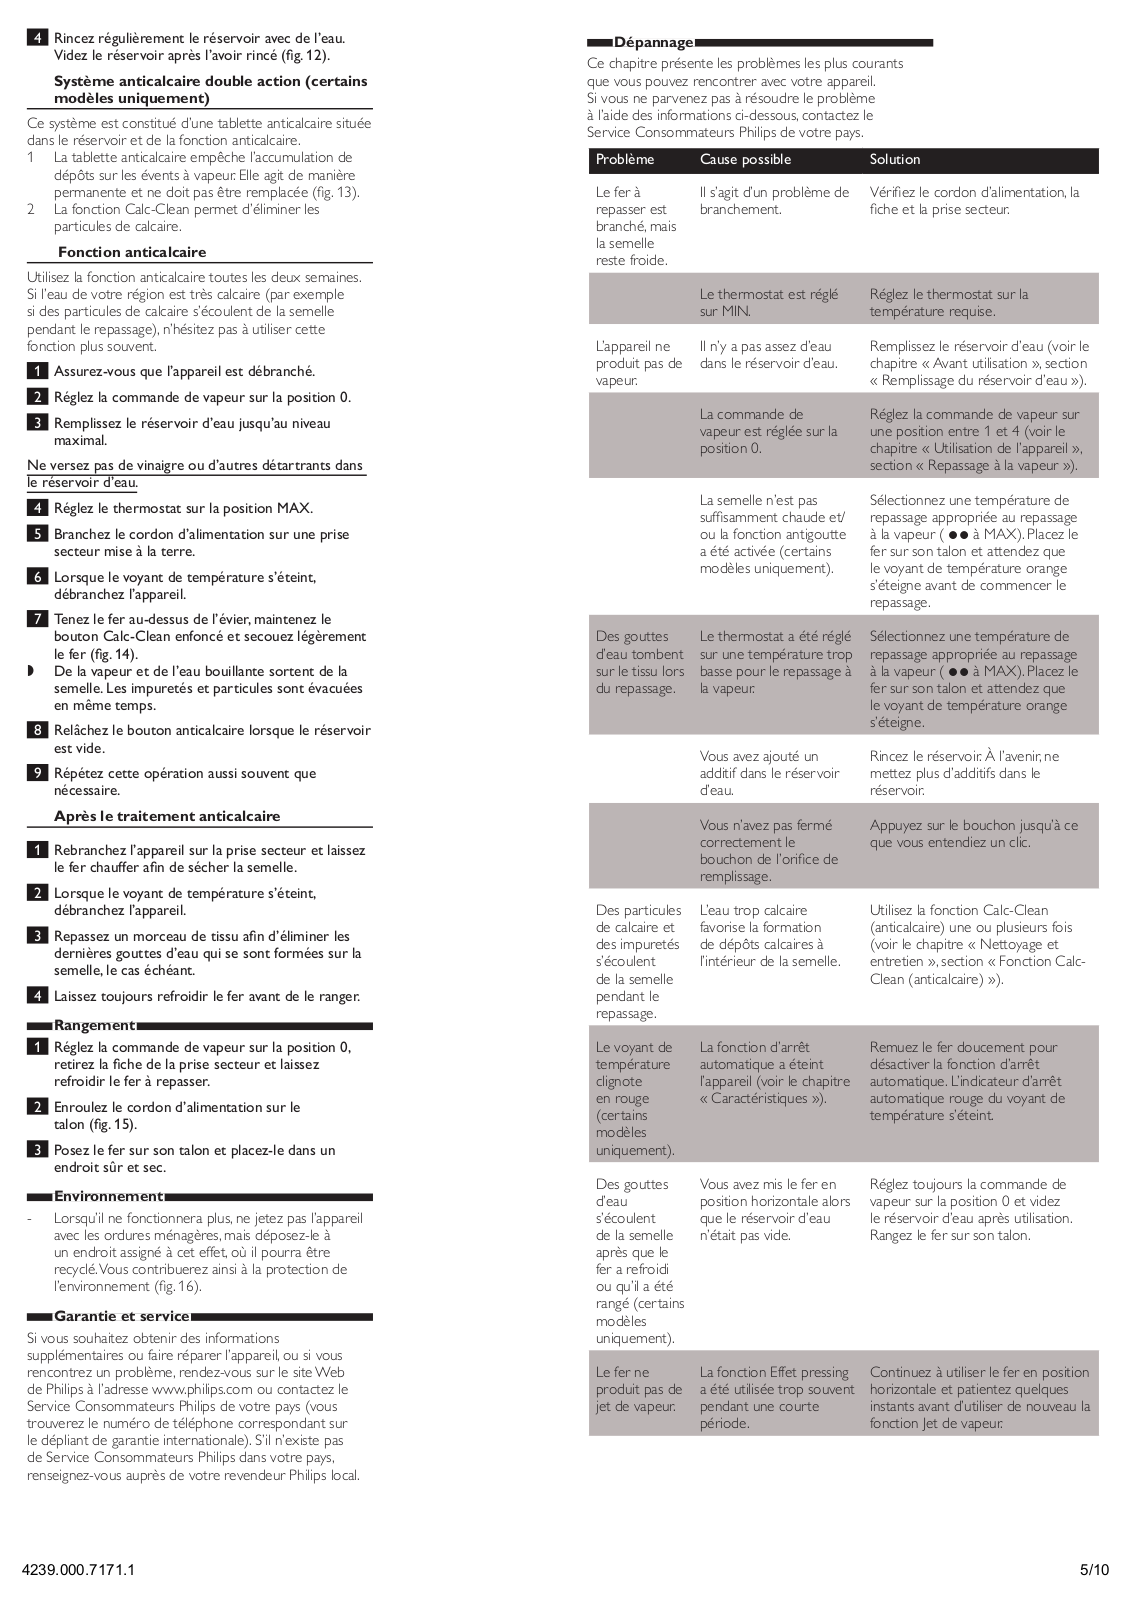
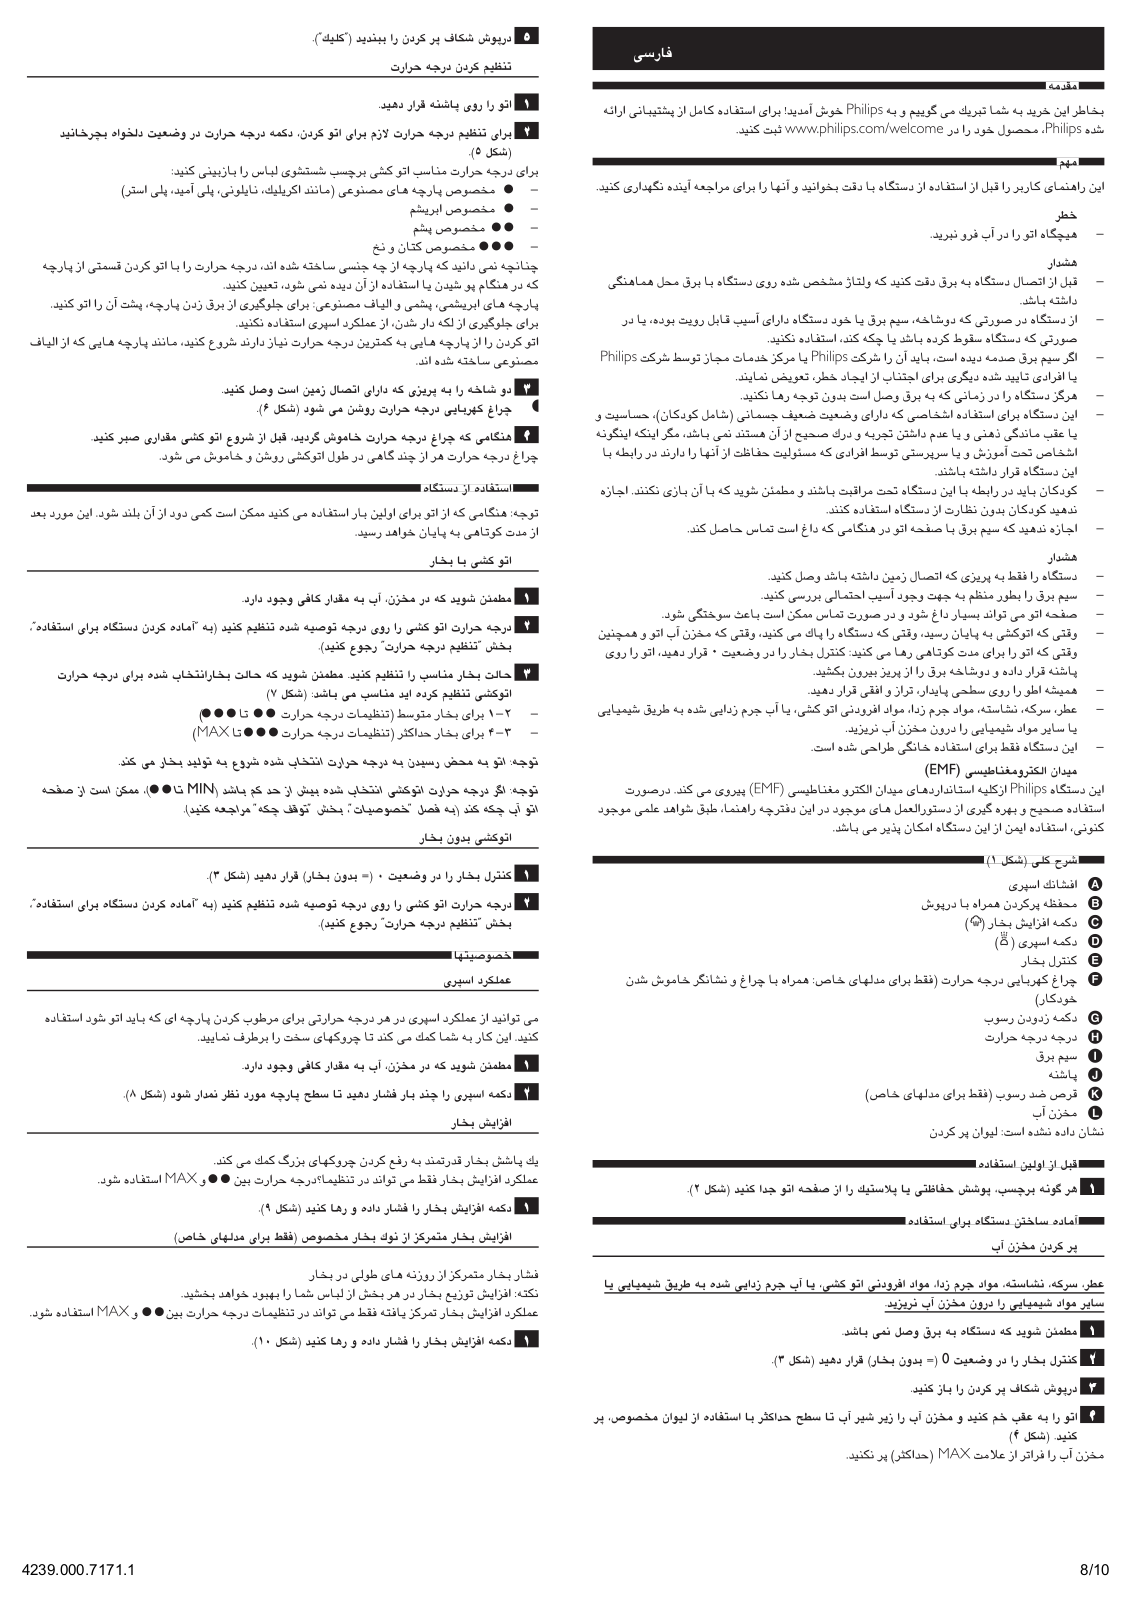
PHILIPS GC3531 User Manual
...
PHILIPS User Manual
Download
Specifications and Main Features
Frequently Asked Questions
User Manual
Download
Page 1
Page 2
Page 3
Page 4
Page 5
Page 6
Page 7
Page 8
Page 9
Page 10
Loading...
+
hidden pages
Unhide
You need points to download manuals.
1 point = 1 manual.
You can buy points or you can get point for every manual you upload.
Buy points
Upload your manuals
 Loading...