

Philips FWR8R37 User Manual [en, es, fr]

FW-I
rf
-.ii
—
■.
.i-
1—
■
: - u I •. liii T i-t' fun' til 'ti itBto
■ I
^.0-'
gM
—■
<M
Toll Free Help Line
Ligni* d‘as‘'ist«inr<- «-11 si-rvirr lihre
LitK .1 dt‘ .lyuda ickTonk.i sin c
800-531-0039
Ldh mah b&H&i
Vi-
f
PHILIPS

Return your Warranty Registration card today to
ensure you receive all the benefits you’re entitled to.
Once your Philips purchase is registered, you’re eligible to
receive all the privileges of owning a Philips product.
^Warranty
Verification
Registering your product within 10 days
confirms your right to maximum
protection under the terms and
conditions of your Philips warranty.
^ Owner
Confirmation
Your completed Warranty Registration
Card serves as verificntion of ownership
in the event of product theft or loss.
PHILIPS
Congratulations on your purchase,
and welcome to the "family!**
So complete and return the Warranty Registration Card
enclosed with your purchase at once. And take advantage
of these important benefits.
Model
• - - -
Registration
Returning your Warranry Registration
Card right away guarantees you’ll
receive all the information and special
offers which you qualify for as the
owner of your model.
Know these
symbols
RIS K OF ELE CTR IC SHOC K
A A
CAUTION: TO REDUCE THE RISK OF ELECTRIC SHOCK, DO NOT
REMOVE COVER (OR BACK}. №0 USER-SERVICEABLE PARTS
INSIDE. REFER SERVICING TO QUALIFIED SERVICE PERSONNEL.
DO NOT OPE N
Dear Philips product owner:
Thank you for your confidence in Philips.You’ve selected one of the best-built,
best-backed products available today. And we’ll do everything in our power to
keep you happy with your purchase for many years to come.
As a member of the Philips “family,” you’re entitled to protection by one of the
most comprehensive warranties and outstanding service networks in the industry.
What’s more, your purchase guarantees you’ll receive all the information and
special offers for which you qualify, plus easy access to accessories from our
convenient home shopping network.
And most importantly you can count on our uncompromising commitment to
your total satisfaction.
All of this is our way of saying welcome-and thanks for investing in a Philips product.
Sincerely,
Robert Minkhorst
President and Chief Executive Officer
P.S. Remember, to get the most from your Philips product, you must
return your Warranty Registration Card within 10 days. So please
mail it to us right now!
This “bolt of lightning” indicates
uninsulated material within your unit
A
the safety of everyone in your household,
please do not remove product covering.
A
prevent operating and maintenance problems.
may cause an electrical shock. For
The “exclamation point” calls attention!
to features for which you should read ;
the enclosed literature closely to
WARNING: to prevent fire or
SHOCK HAZARD, DO NOT EXPOSE THIS
EQUIPMENT TO RAIN OR MOISTURE.
CAUTION: To prevent electric shock,
match wide blade of plug to wide slot, and
fully insert.
For Customer Use
Enter below the Serial No. which is located
on the rear of the cabinet. Retain this
information for future reference.
Model No.
______________________
________
Serial No.________________________________
PHILIPS Visit our World Wide Web Site at http://www.philipsusa.com
шш
■4 ' ’"’v
г

Canada
English: This digital apparatus does not exceed the Class B
limits for radio noise emissions from digital apparatus as set
out in the Radio Interference Regulations of the Canadian
Department of Communications.
English
52
"5»
Français : Cet appareil numérique n'émet pas de bruits
radioélectriques dépassant les limites applicables aux
appareils numériques de Classe B prescrites dans le
Français.................................................................32
Règlement sur le Brouillage Radioélectrique édicté par le
Ministère des Communications du Canada.
This warning lable is located on the rearside and inside this laser product.
rAIITinN invisible
bHUIIUm-laser RADIATION
WHEN OPEN. DO NOT STARE INTO BEAM.
nAMOCD-INVISlBLE LASER RADIATION WHEN OPEN.
ÜMniUcn avoid DIRECT EXPOSURE TO BEAM.
UARHI avahaessa ja suojalukitus ohitettaessa olet
VMRU. ALnilNANAKYMATTOMAALLE LASERSATEILYLLE. ALA
katso SATEESEEN.
UARMIMßl OSYNLIG LASERSTRÄLNING NÄR DENNA DELÄR QPPNAO.
VHnrinitU. Q0H SPARREN AR URKOPPLAD. 6ETRAKTA EJ STRÄLEN.
or
DANGER - Invisible laser radiation when open.
AVOID DIRECT EXPOSURE TO BEAM.
Español
IMPORTANT SAFETY INSTRUCTIONS - Read before operating equipment
This product was designed and manufactured to meet strict
quality and safety standards. There are, however, some
installation and operation precautions which you should be
particularly aware of.
1. Read these instructions - All the safety and operating
instructions should be read before the appliance is
operated.
2. Keep these instructions - The safety and operating
instructions should be retained for future reference.
3. Heed all warnings - All warnings on the appliance
and in the operating instructions should be adhered to.
4. Follow all instructions - All operating and use
instructions should be followed.
5. Do not use this apparatus near water - for example,
near a bathtub, washbowl, kitchen sink, laundry tub, in a
wet basement or near a swimming pool, etc.
6. Clean only with a damp cloth. The appliance should
be cleaned only as recommended by the manufacturer.
7. Install in accordance with the manufacturers
instructions. Do not block any of the ventilation
openings. For example, the appliance should not be
situated on a bed, sofa, rug, or similar surface or placed in a
built-in installation, such as a bookcase or cabinet that may
impede the flow of air through the ventilation openings.
8. Do not install near any heat sources such as
radiators, heat registers, stoves, or other apparatus
(including amplifiers) that produce heat.
9. Do not defeat the safety
purpose of the polarized or
grounding-type plug. A polarized ^ j ac Polarized
plug has two blades with one Plug
wider than the other. A grounding type plug has two
blades and a third grounding prong. The wide blade or
the third prong are provided for your safety. When the
provided plug does not fit into your outlet, consult an
electrician for replacement of the obsolete outlet.
10. Protect the power cord from being walked on or
pinched particulary at plugs, convenience receptacles,
and the point where they exit from the apparatus.
11. Only use attachments/accessories specified by the
manufacturer.
Use only with a cart, stand, tripod, bracket,
or table specified by the manufacturer, or sold
with the apparatus. When a cart is used, use
caution when moving the cart/apparatus
combination to avoid injury from tip-over.
13. Unplug this apparatus during lightning storms or
when unused for long periods of time.
14. Refer all servicing to qualified service personnel.
Servicing is required when the apparatus has been
damaged in any way, such as power-supply cord or plug is
damaged, liquid has been spilled or objects have fallen into
the apparatus, the apparatus has been exposed to rain or
moisture, does not operate normally, or has been dropped.
.62
EL 4562-E004:99/3
'(5
(B
a.
CO

>6»
•i»ewí.-.»»:.'^'.«*;«^.-v:A.
í'sJí-.-Zt.s .caz
' '-"ri
- /. - • •«-•: .*л ••' .
•■ü!-.tf.y- Л'У.’Уг"
Í-5A-.ÍR
GENERAL INFORMATION
Safety instructions ■ General information
Accessories supplied.........................................................................................................................4
Setup infornnation.............................................................................................................................4
Maintenance.........................................................................................................................................4
Environmental information............................................................................................................4
Discs for recording
Discs for playback...............................................................................................................................5
'CD(RW) handling.................................................................................................................................5
Controls and connections li :
Installation
Power........................................................................................................................................................8
Speaker connections.........................................................................................................................8
Antenna connections........................................................................................................................8
Analog audio connections..............................................................................................................9
Digital audio connections...............................................................................................................9
Connecting a subwoofer.................................................................................................................9
Remote control
Remote control buttons................................................................................................................10
Remote control batteries..............................................................................................................10
Display ...........................................................................................................
Basic functions
Switching on, switching to standby.........................................................................................12
Loading the CD changer, CD recorder...................................................................................12
Playing a CDIRW)
Sound control....................................................................................................................................13
Demo mode........................................................................................................................................13
Selecting a disc on the CD changer.........................................................................................14
Selecting a track and searching.................................................................................................14
SHUFFLE and REPEAT.....................................................................................................................14
CD text................................................................................................................................................ 14
Microphone mixing.........................................................................................................................14
Program
Programming track numbers
Erasing a track from the program............................................................................................15
Clearing the program.................................................................................................................... 15
Making a program for recording
About recording
Basic information.............................................................................................................................16
Direct Lino Recording (DLR)...................................................................................................... 16
Auto Level Control (ALC)...............................................................................................................16
REC LEVEL key................................................................................................................................. 16
Internal recording
Recording modes.............................................................................................................................17
High speed recording and automatic finalizing
High speed recording.................................................................................................................. 18
Normal recording and listening................................................................................................18
Manual recording........................................................................................................................... 19
External recording
Analog or digital recording?.......................................................................................................20
Recording with automatic start.................................................................................................20
Manual recording............................................................................................................................21
Automatic track increment......................................................................................................... 22
(Unifinalizing, erasing
Finalizing CDRIW) discs.................................................................................................................22
Unfinalizing CDRW discs...............................................................................................................23
Erasing from a CDRW disc...........................................................................................................23
Features
EDIT TEXT Ion CO recorder only).......................................................................................24-25
Track editing (on CD changer only)....................................................................................... 25
............
................................................................................................................5
.................
............................................................................................................12
.................
,.....................................................................................15
............................................................................................
................................................................
15
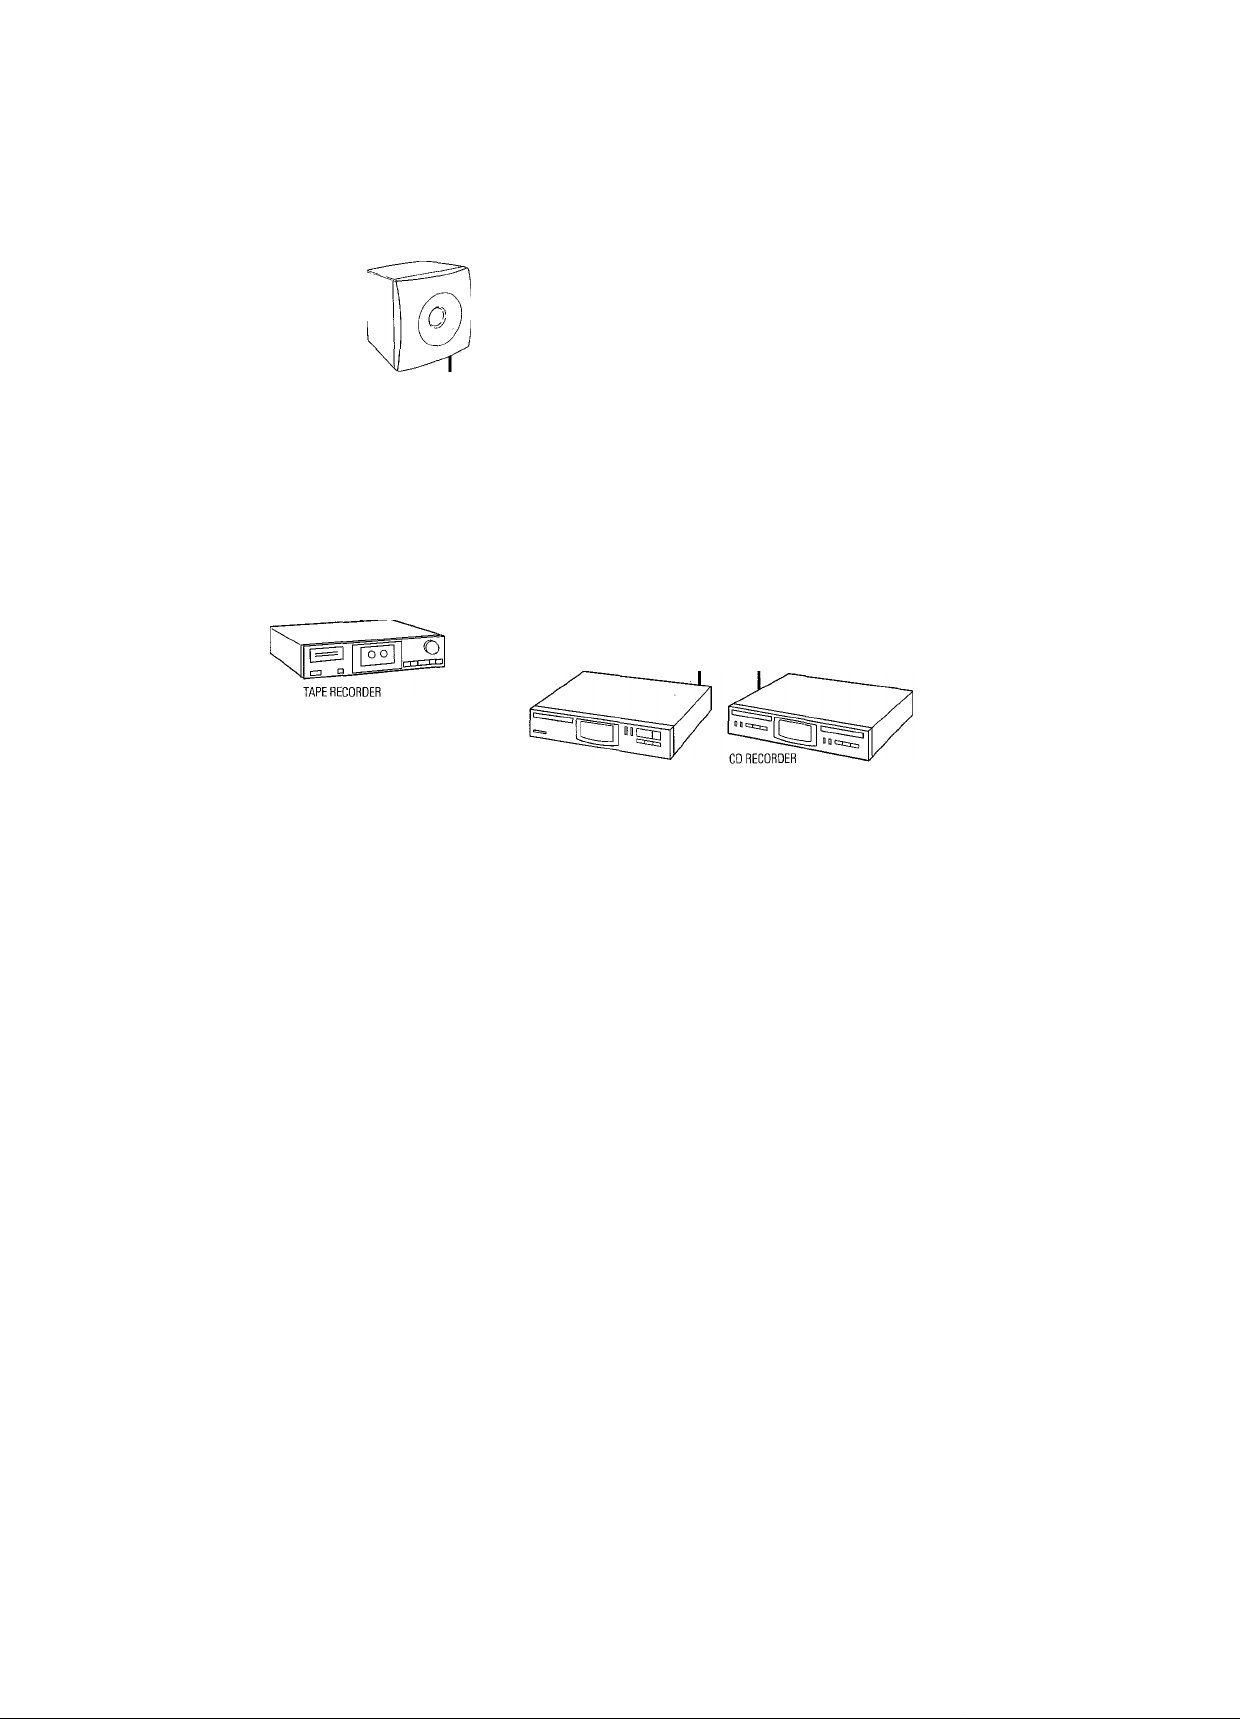
Accessories supplied
- 2 speakers including 2 speaker cables
- Remote control
- 2 batteries for the remote control, size AA
- AM loop antenna
- FM wire antenna
- Power cable
iSetup information
Place the unit on a flat, hard and stable surface. Make sure
there is sufficient space around the unit to prevent
overheating.
Active mobile phones close to the CDR Mini Hi-Fi system may
cause malfunctions.
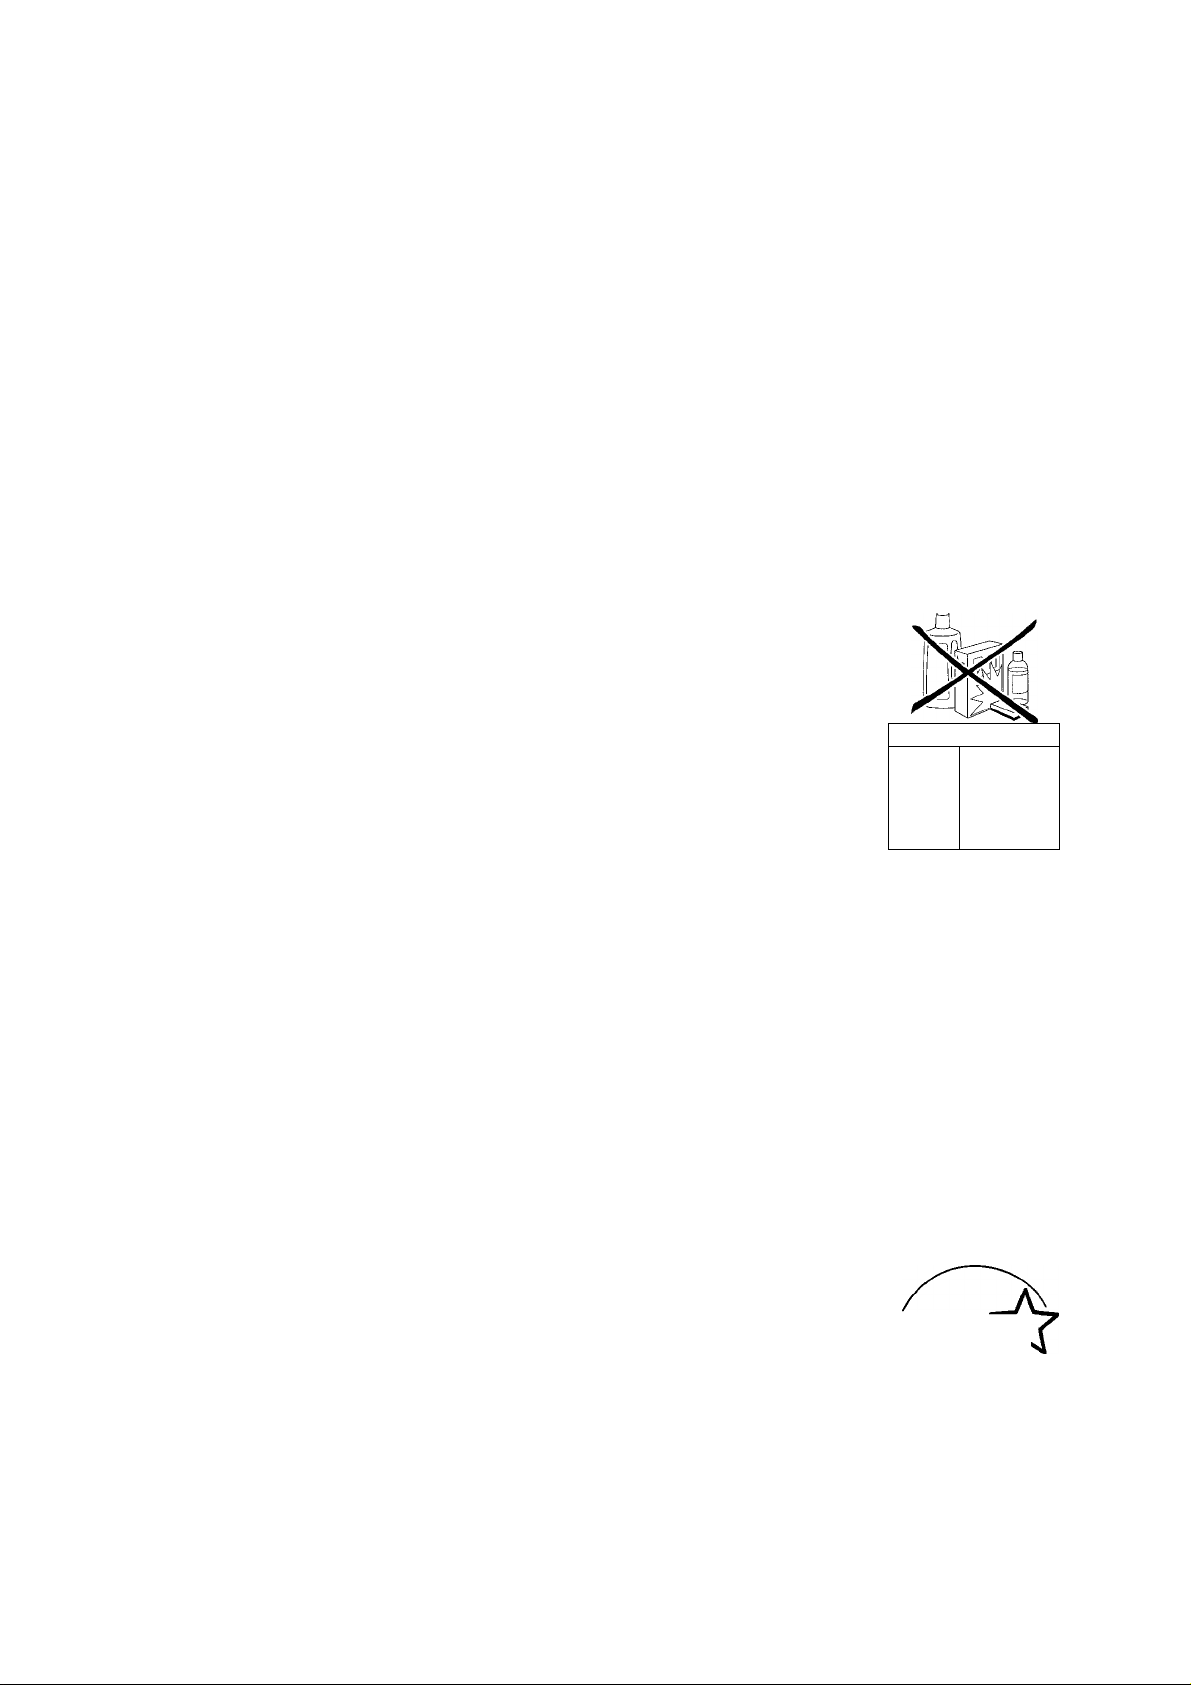
Maintenance
Clean the unit with a soft,
slightly dampened, lint-free cloth. Do
not use any cleaning agents as they
may have a corrosive effect.
Do not expose the unit, batteries
or discs to humidity, rain, sand or
excessive heat (caused by heating
equipment or direct sunlight).
Environmental information
All redundant packing material has been omitted. We have
17
tried to make the packaging easy to separate into three mono
materials: cardboard (box), polystyrene foam (buffer) and
polyethylene (bags, protective foam sheet).
Your unit consists of materials which can be recycled if
disassembled by a specialized company. Please observe the
local regulations regarding the disposal of packing materials,
dead batteries and old equipment.
Tuning to radio stations................................................................................................................26
Storing radio stations.....................................................................................................................26
Tuning to preset stations............................................................................................................. 26
Clock/Timer
Clock setting..................................................................................................................................... 27
Alarm timer
................................
Record timer.......................................................................................................................................28
Switching the alarm and record timei on/off......................................................................28
Sleep timer..........................................................................................................................................28
Technical data
Troubleshooting 3'.
Limited wnrranty 3:
,..........................................................................................................28
As an ENERGY STAR® partner,
Philips has determined that this
product meets the ENERGY STAR®
guidelines for energy efficiency.
i

• • *«v« :
¿Ö-Ä-?;•«*: vr>
‘.ÍFf.iik-------------

GENERAL INFORMATION
Discs for recording
For recording, make sure to use special audio discs only.
These discs are marked "Digital Audio" and with the logos
shown below.
Two different types of audio discs are usable on this
CD recorder:
CD-Audio Recordable (CDR) discs
These discs can be recorded once and
will play on all standard CD players and
CD recorders, when finalized.
DIGITAL AUDIO
Recordable
CD-Audio Rewritable (CDRW) discs
These discs can be recorded, erased and
rerecorded many times and will play on
CDRW-compatibie CD players and
CD recorders, when finalized.
All Philips CD players and CD recorders with
this sticker are CDRW compatible.
To ensure proper working of the unit, we recommend the use
of Philips audio CDR and audio CDRW discs only.
A/ofe; Do not use a computer CDR or CDRW as recording will
not work properly!
DIGITAL AUDIO
[Rewritable I
CD(RW) handling
If the CDR Mini Fli-Fi system fails to read discs correctly, use
a commonly available cleaning-CD to clean the lenses before
submitting the unit to repair. Other cleaning methods may
destroy the lenses. Always keep the trays closed to avoid
dust on the lenses.
The lenses may cloud over when the unit is suddenly moved
from cold to warm surroundings. Playing a CD(RW) is not
possible then. Leave the unit in a warm environment until the
moisture evaporates.
To take a CD(RW) out of its box
easily, press the center spindle while
lifting the CD(RW). Always pick up a
CD(RW) by the edge and put it back in
its box after use. Never write on a CD
or attach a sticker to it. Write only on
the printed side of a CDR or CDRW,
and only with a soft, felt-tipped pen.
To clean a CD(RW), wipe it in a
straight line from the center toward the
edge using a soft, lint-free cloth. A
cleaning agent may damage the disc!
w
"3s
e
UJ
Recording is permissable insofar as copyright or other
rights of third parties are not infringed upon.
fn some countries, the use of the Phifips CDR Mini
Hi-Fi system as shown or suggested in this user
manual may require the authorization of copyright
holders.
[Piscs for playback ^
For playback on this CD changer and CD recorder you can use
the following audio discs:
- All pre-recorded audio CDs
- All audio CDR and audio CDRW discs
Notes: - Do not try to play a CD-ROM, CD-I or CDV!
- CDR(Wj discs, which are recorded on a computer,
can only be used when they are correctly treated
according to the audio standard (IEC958: Consumer
part). Single session only!
CAUTION
Use of controls or adjustments or performance of
procedures other than herein may result in hazardous
radiation exposure or other unsafe operation.

V.Ä-.'- .T •■•; ’*■
”-*=• ! f-"“.
гг-55;—
г.

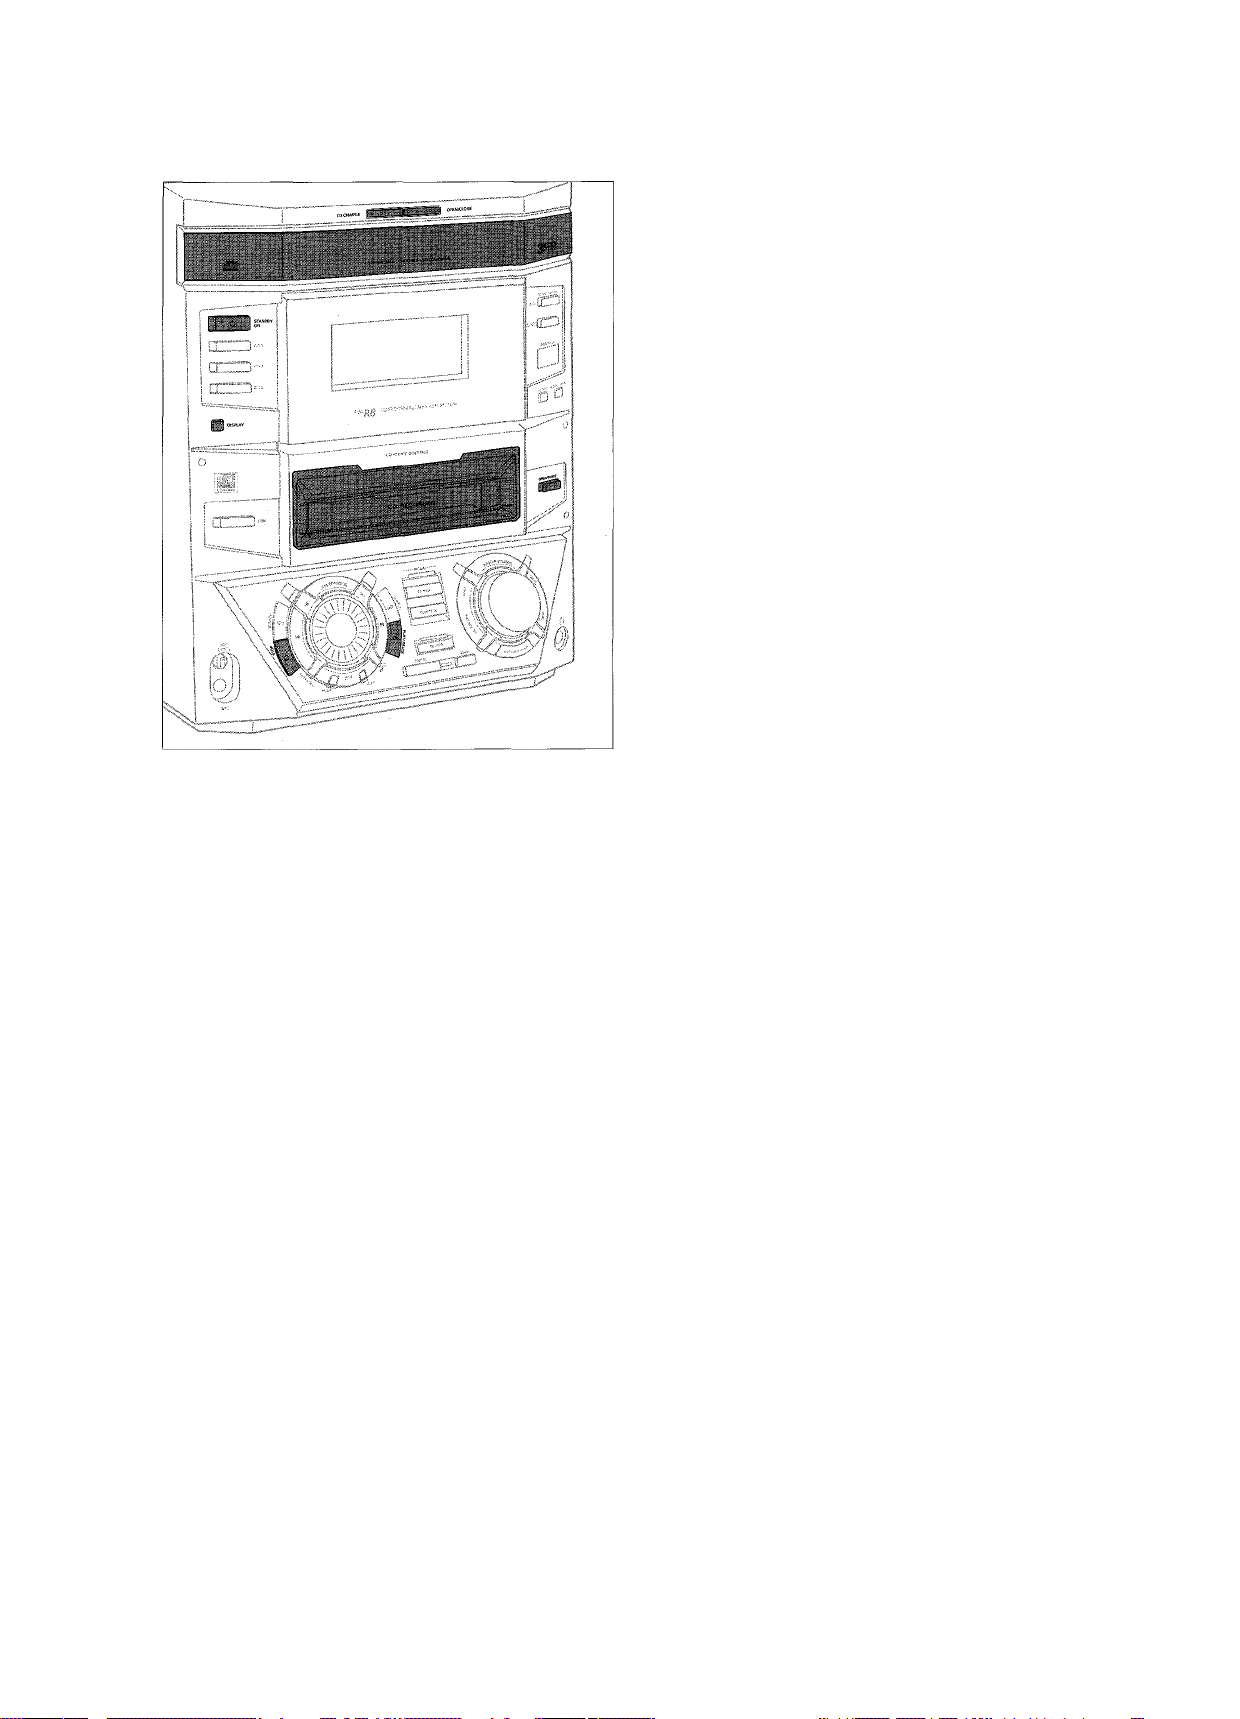
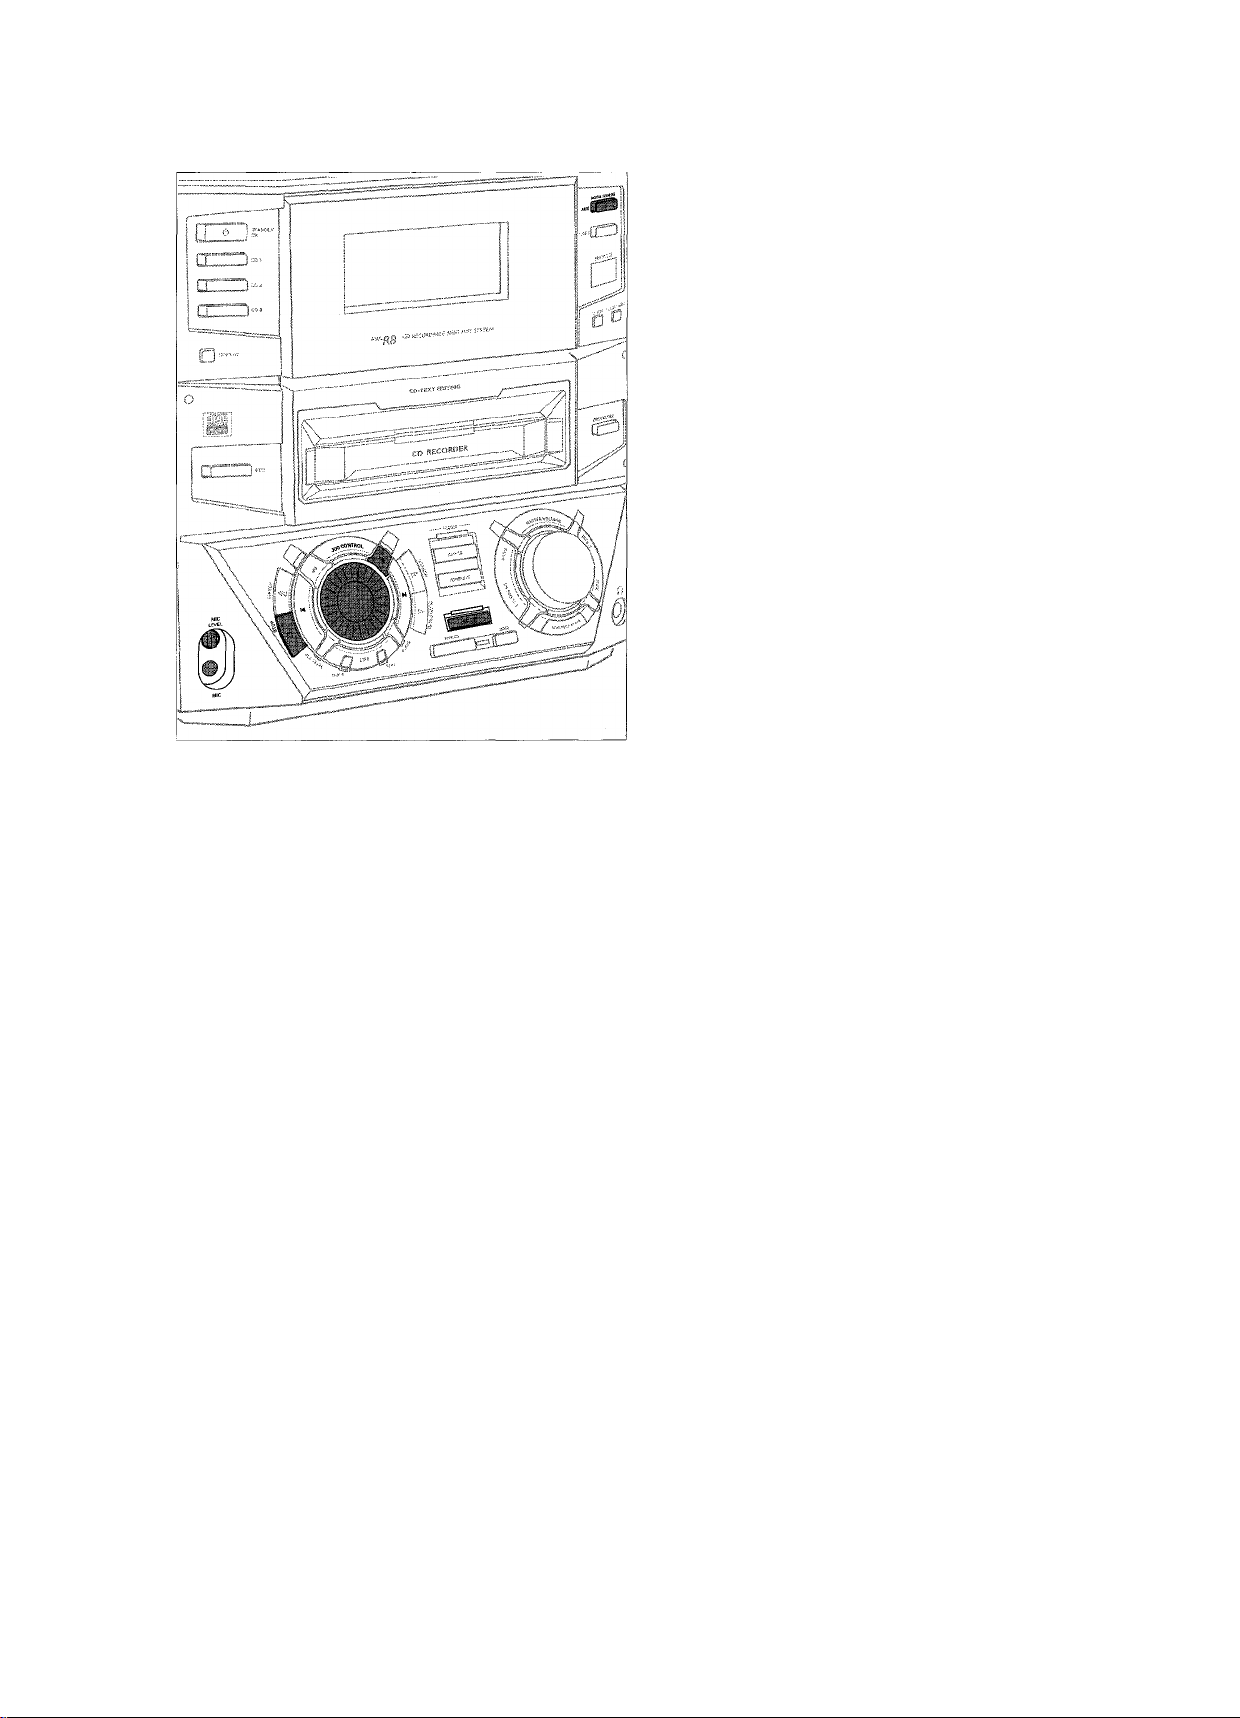
CONTROLS AND CONNECTIONS
On the back
Q] AC MAINS ~
0 DIGITAL IN
[3] DIGITAL OUT
0 SPEAKERS 6 QL/R.
0 SUBWOOFER OUT
........................
...........
After all other
connections have been
made, connect the power
cord to the power outlet.
For optimal performance
use only the original
power cable.
....connect to the coaxial output
of a digital appliance
....connect to the coaxial input
of a digital appliance
....connect to the supplied
speakers
....connect to the input of a
subwoofer
0 AM AERIAL
0 FM AERIAL 300 Q.
0 AUX IN L/R...............................connect to the analog audio
[9] LINE OUT L/R
...............................
.......................
...............................
connect the supplied loop
antenna here
connect the supplied wire
antenna here
output of an additional
appliance
connect to the analog audio
input of an additional
appliance

к

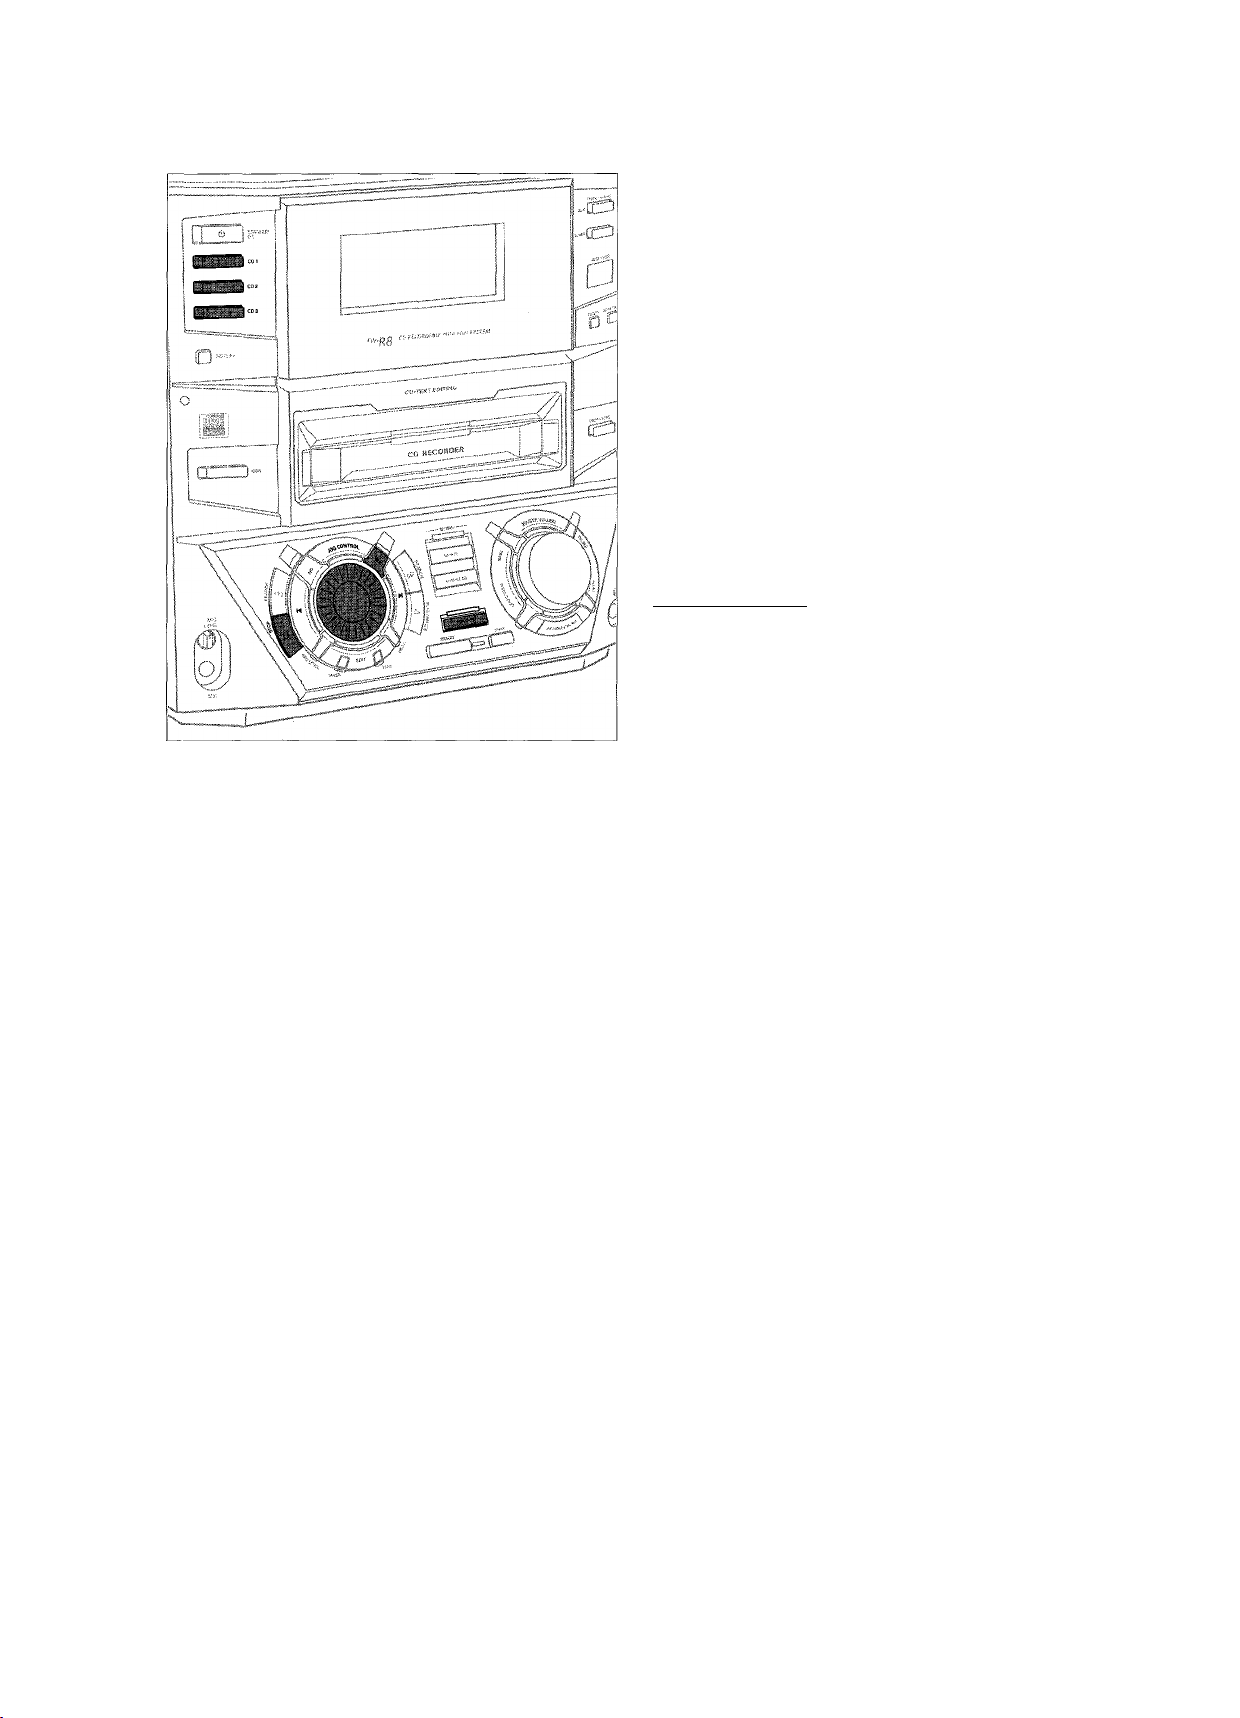
CONTROLS AND CONNECTIONS
On the front
[i^ Source selection
CD 1, CD 2, CD 3...........................selects the CD changer,
CDR
....................................................
TUNER...............................................selects the tuner
DIGITAL / ANALOG AUX....selects the input for an
[ii] ...............................................................CD changer tray
[i| OPEN/CLOSE.....................................opens and closes the
[i| CD CHANGE
M ................................................................display
[j5| CD RECORDER................................CD recorder tray
Qe] c!) STANDBY ON
DISPLAY
[jH MIC LEVEL
[i9| MIC......................................................microphone jack
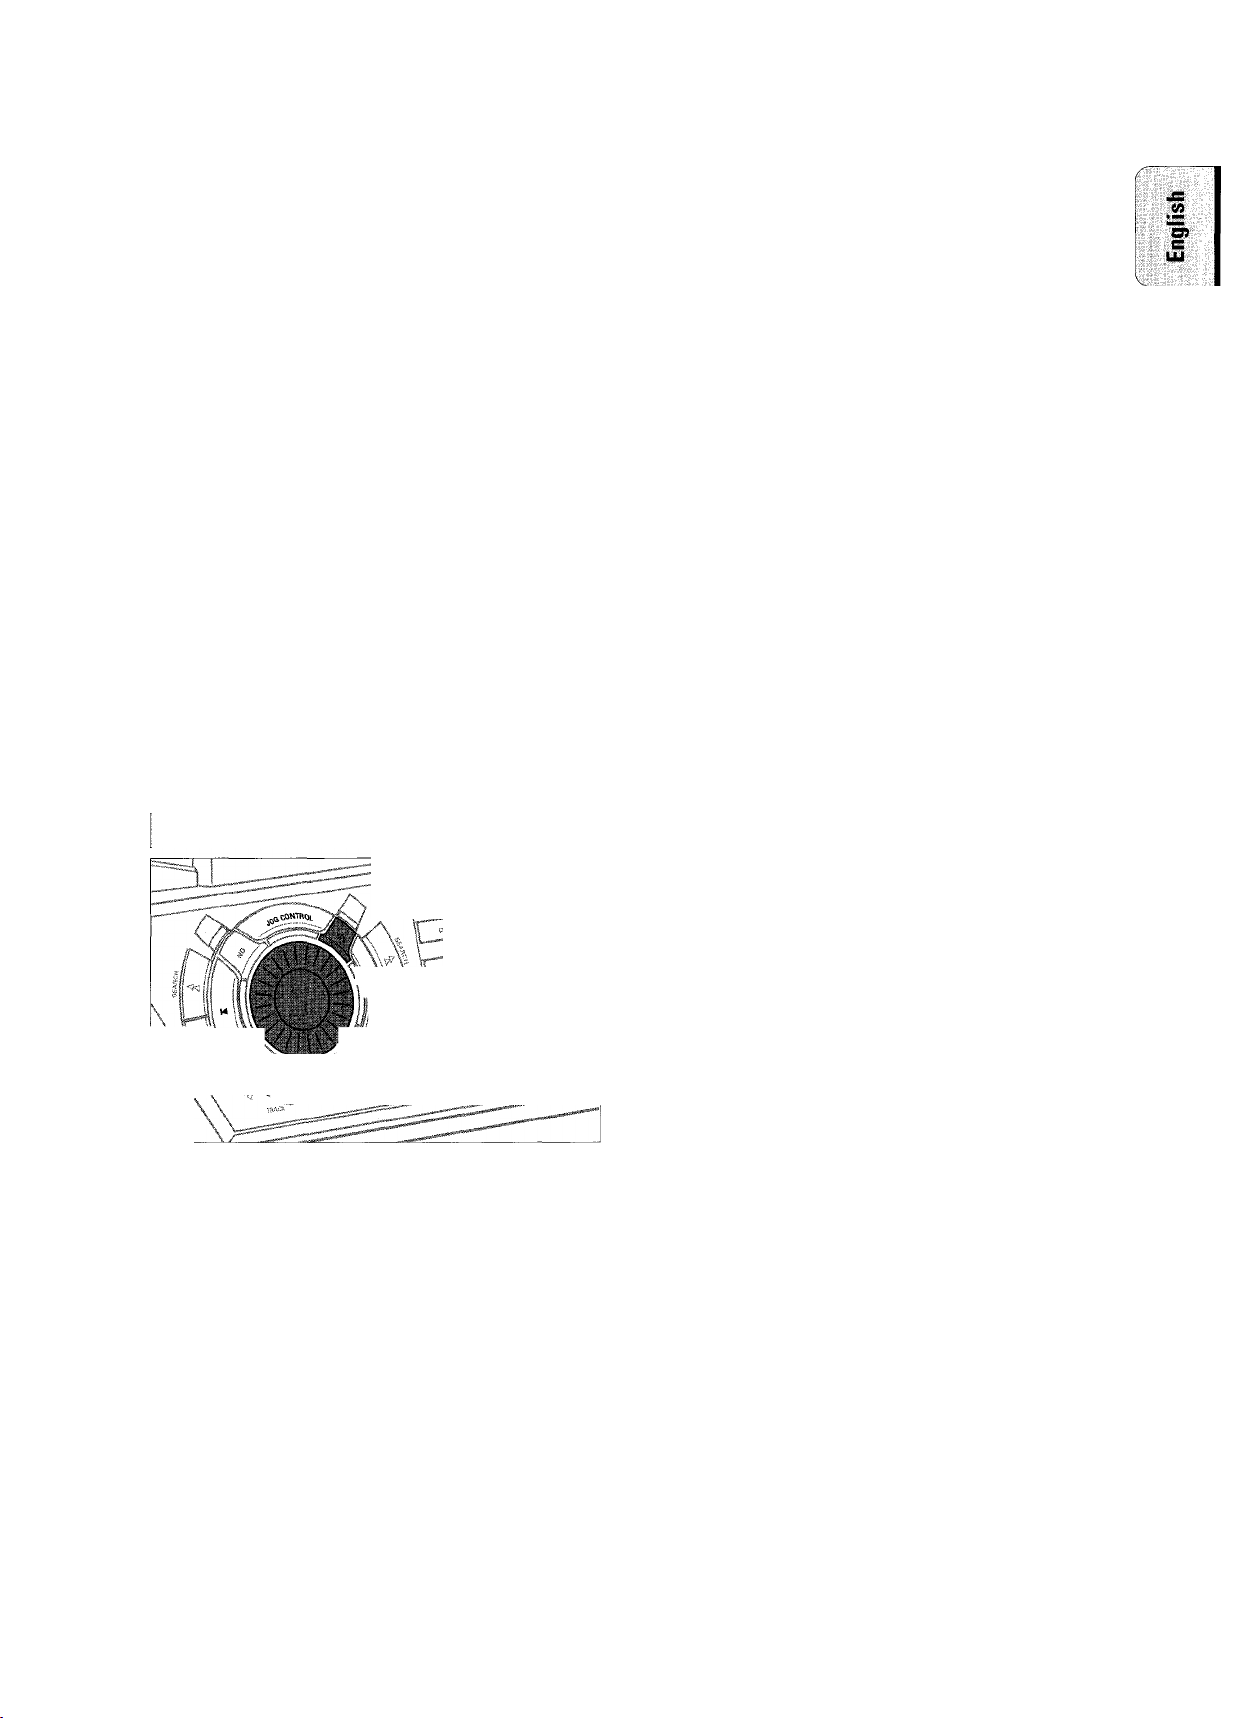
Multiple function control
Rotary control:
N JOG CONTROL ►!
Keys to press:
YES......................................................confirms a selection
►► SEARCH
► PLAY/PAUSE
PROG................................................opens/closes the program
EDIT TEXT.........................................enters/exits the text edit
EDIT TRACK
REC LEVEL.......................................enables the rotary control to
■ STOP
◄◄ SEARCH..................................CDC, CDR: searches
NO
.....................................................
________________________________
switches to CD 1, CD 2 or
CD3
selects the CD recorder
additional appliance
CD changer tray
......................................
..........................
........................................
..................
...................................
............................
...................................
................................
selects the next disc tray
switches the unit on and to
standby
................
selects display
information/text
adjusts the microphone
volume
CDC, CDR: selects the
previous/next track
TUNER: selects the
previous/next preset tuner
station
CDC, CDR: searches forward,
reviews the tracks in a
program, controls the cursor
in different menus
TUNER: tunes to a higher
radio frequency
starts and interrupts
playback/recording
menu
menu
enters/exits the track edit
menu
adjust the level for
recordings
...........
stops CD play/record, closes
program memory
backward, reviews the tracks
in a program, controls the
cursor in different menus
TUNER: tunes to a lower
radio frequency
cancels a selection
FINALIZE........................................finalizes and unfinalizes
recordings
^ REC TYPE...........................................enters/exits the recording
menu
^ RECORD
CD—CD...........................................selects high speed recording
and automatic finalizing of
current CD
COMPILE CD................................selects high speed recording
and automatic finalizing of
current program
1^ ERASE
...............................................
erases recordings
Sound control
MASTER VOLUME
TREBLE
............................................
...................
adjusts the volume
sets the treble level
PURE.................................................switches bass and treble
settings on/off
INCREDIBLE SURR
LOUDNESS
BASS
.................................................
[g if.
............................................................
Note: Connecting the headphones will switch off the
speakers.
1^ OPEN/CLOSE
@ CD TEXT
[2^ CLOCK/TIMER
g iR SENSOR
Note: You will recognize that various keys will be illuminated
...........................................
........................................
on the unit depending on the different modes or
programs you are in. This is for your guidance in order
to facilitate the finding of the relevant keys for
selection.
...................
...................................
................................
............................
creates an incredibly wide
stereo effect
boosts treble and bass
sets the bass level
3.5 mm headphone jack
opens and closes the
CD recorder tray
switches through CD text
information
selects the clock function,
activates and deactivates the
timer
sensor for the infrared
remote control
M
oi
B
INSTALLATION
Power
The type plate is located on the rear of the unit.
(/)
1 Check whether the power voltage as shown on the type
plate corresponds to your local power voltage. If it does
not, consult your dealer or service organization.
2 Make sure all connections have been made before
switching on the power supply.
3 Connect the supplied power cable to AC MAINS ~ and to
the power outlet. This switches on the power supply.
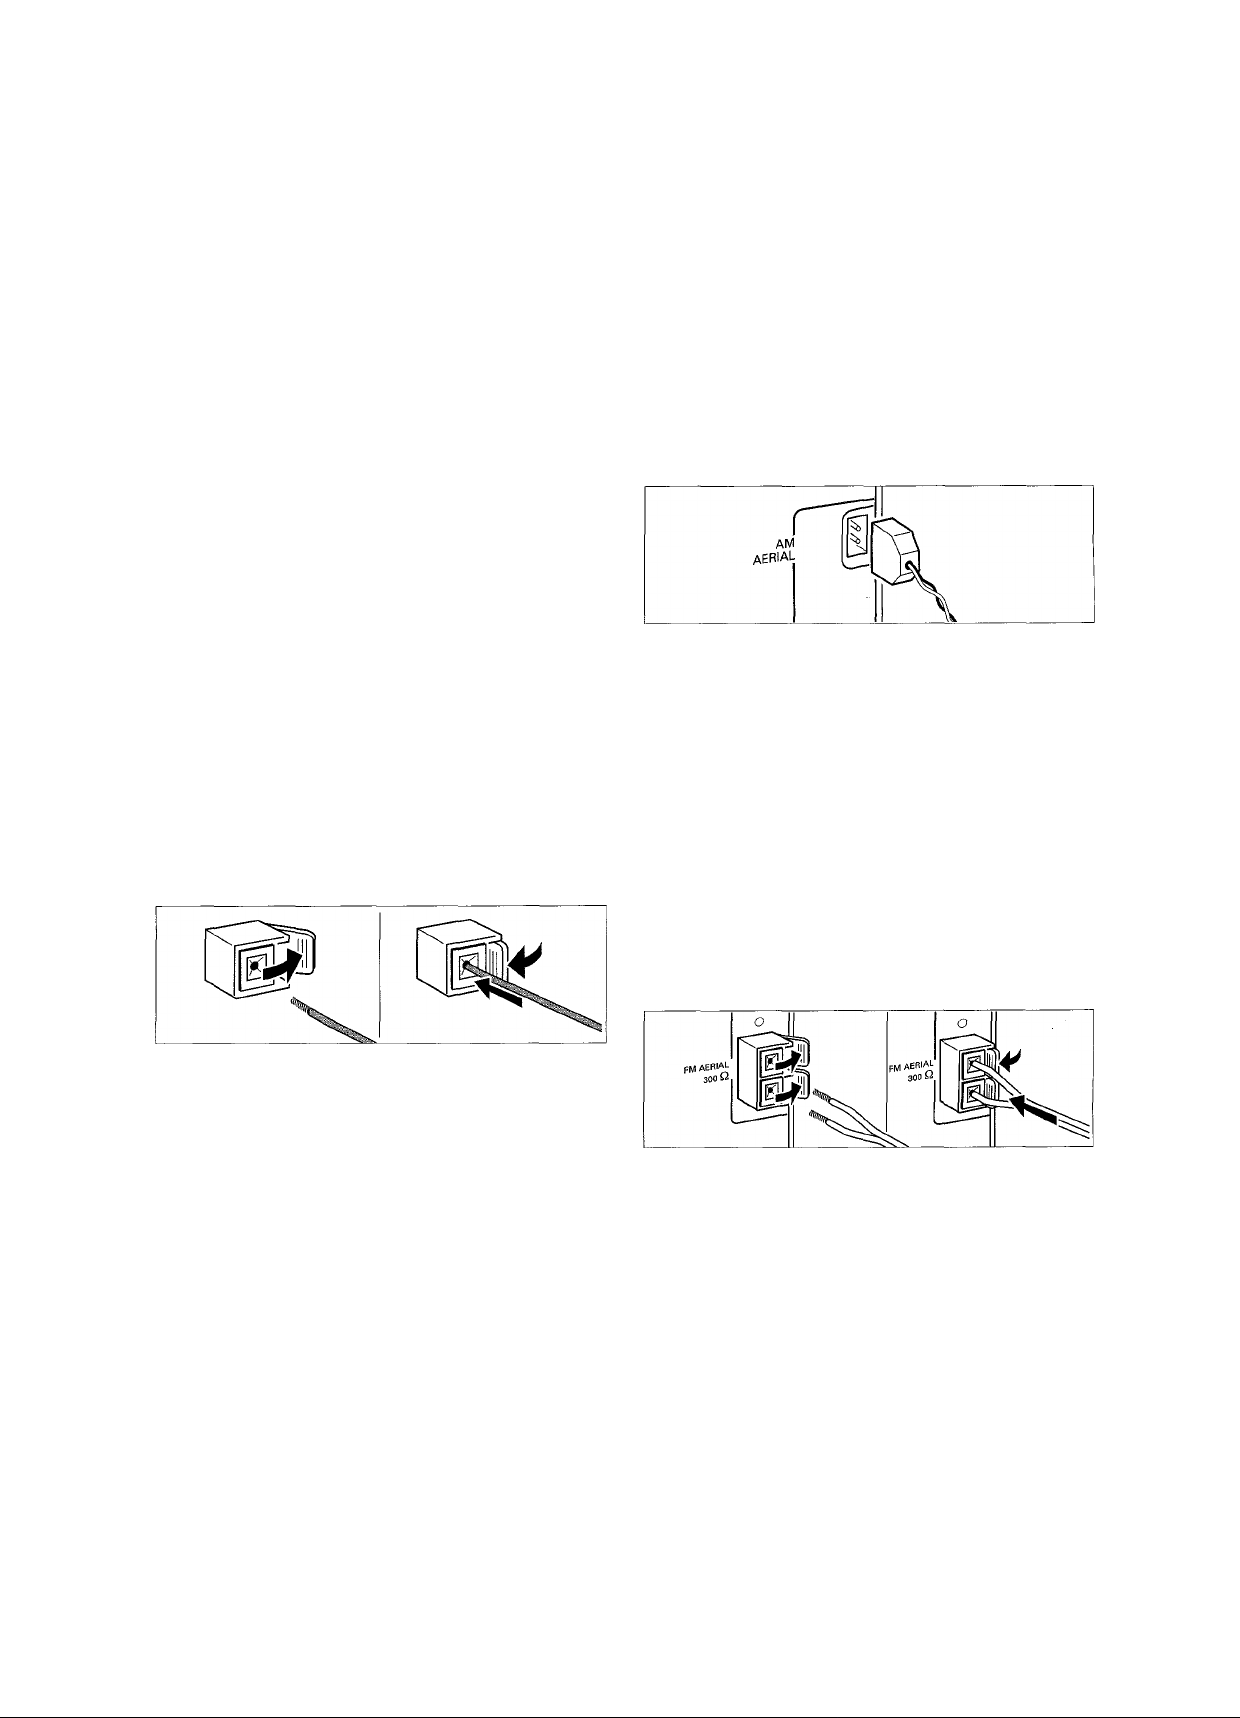
Antenna connections
AM antenna
The supplied loop antenna is for indoor use only.
1 Fit the plug of the loop antenna to AM AERIAL as shown
below.
2 Position the antenna as far as possible from a TV, VCR or
other radiation sources.
3 Turn the antenna for optimum reception.
For optimal performance use only the original power
cable.
When the unit is switched to standby, it is still consuming
some power. To disconnect the unit from the power
completely, remove the power cable from the power outlet.
FM antenna
To avoid overheating of the unit, a safety circuit has
been built in. Therefore, your unit may disconnect
under extreme conditions. If this happens, switch the
The supplied wire antenna can only be used to receive nearby
stations. For better reception we recommend using a cable
antenna system or an outdoor antenna.
unit offend let it cool down before reusing it.
1 Open the FM AERIAL 300 il click-fits by pushing the lever
Speaker connections
The speaker connections are click-fit connectors. Use them as
shown below.
down as shown below.
2 Insert each wire of the antenna into one hole.
3 Close the click-fits using the lever.
1 Connect the colored (or marked) wire to the red terminal
and the black (or unmarked) wire to the black terminal.
2 Connect:
- Left speaker to L (red and black)
- Right speaker to R (red and black)
4 Move the antenna in different positions for optimum
reception.
The unit complies with the FCC-Rules, Part 15 and with
21CFR 1040.10. Operation is subject to the following
two conditions:
1. This device may not cause harmful interference, and
2. This device must accept any interference received,
including interference that may cause undesired
operation.
INSTALLATION
.2
"en
SUBWOOFER
I
3
CD PLAYER
Analog audio connections
AUX IN L/R
It is possible to use an additional appliance, e.g. tape
recorder, TV or VCR, with the unit.
1 Insert the red plug of a cinch cable to the red jack AUX IN R
and insert the white plug to the white jack AUX IN L.
2 Connect the other end of the cinch cable to the audio
outputs of the additional appliance.
3 Press DIGITAL / ANALOG AUX repeatedly to select the
analog input for the appliance.
-►flux Analog is displayed.
ODD
o
Digital audio connections
DIGITALIN
You can use this coaxial input for recordings from any digital
audio equipment with a digital coaxial output e.g. CD player
or DVD player.
1 Use a coaxial cable to connect the coaxial output of the
additional appliance with DIGITAL IN on the unit.
2 Press DIGITAL / ANALOG AUX repeatedly to select the
digital input for the appliance.
-►flUX Digital is displayed.
3 Operate your appliance as usual.
4 Operate your appliance as usual and adjust volume and
sound with the unit.
Note: It is not possible to connect a turntable directly to
AUX IN L/R. If you wish to use a turntable with the
unit, you have to connect an amplifier to AUX IN L/R on
the unit. Then connect the turntable to the amplifier.
LINE OUT L/R
You can use these outputs for playback or recording on any
analog audio equipment e.g. amplifier or tape recorder.
• Use a cinch cable to connect the analog audio inputs of the
additional appliance with LINE OUT L/R on the unit and
operate your appliance as usual.
DIGITAL DUT
You can use this coaxial output for recordings on any digital
audio equipment with a digital coaxial input e.g. CD recorder.
• Use a coaxial cable to connect the coaxial input of the
additional appliance with DIGITAL OUT on the unit and
operate your appliance as usual.
I
Connecting a subwoofer
A subwoofer can be used to enhance the bass performance of
your unit dramatically.
1 Use a cinch cable to connect the input of the subwoofer
with SUBWOOFER OUT at the unit.
2 Follow the instructions supplied with the subwoofer.

REMOTE CONTROL
Remote control buttons
0
.......................................
CDR, TUNER, CD1,
CD2, CD3, AUX
Number/alphabet keys
1-0
...........................
ABC - XYZ
SPACE
....................
EDIT TEXT
— VOLUME................decreases the volume
+ VOLUME
►
N
N
■
►>
◄◄
II......................................interrupts playback/recording
YES
N0
PROGRAM
SHUFFLE
REPEAT
TRACK INCR.................selects automatic or manual increment of
TIMER ON/OFF
SLEEP
MUTE
BRIGHTNESS
L BALANCE
R BALANCE
LOUDNESS...................boosts treble and bass
INCREDIBLE
SURROUND
PURE
.....................
.................
...................................
....................................
.....................................
....................................
..................................
.................................
..................................
...................................
...................
.......................
..........................
.............................
.............................
..................
..................
.................
...............................
switches the unit to standby
...........
selects the sources
keys in numbers for tracks or stations
.............
keys in letters for text
keys in a space within the text
enters the text edit menu
increases the volume
starts playback/recording
CDC, CDR: selects the previous track
TUNER: selects the previous preset tuner
station
CDC, CDR: selects the next track
TUNER: selects the next preset tuner
station
stops CD play/recording, closes program
memory
CDC, CDR: searches forward, reviews the
tracks in a program, controls the cursor in
different menus
TUNER: tunes to a higher radio frequency
CDC, CDR: searches backward, reviews
the tracks in a program, controls the
cursor in different menus
TUNER: tunes to a lower radio frequency
selects a selection
cancels a selection
opens/closes the program menu
plays tracks in fandom order
repeats a track, the entire CD(RW) or the
program
a track
...........
activates and deactivates the timer
activates the sleep timer
mutes the sound
...............
controls the brightness of the display
adjusts the volume balance to the left
speaker
adjusts the volume balance to the right
speaker
creates an incredibly wide stereo effect
switches bass and treble settings on/off
_____________________________
j
TUNER CD1 CD2 CDS
PROGRAM SHUFFLE REPEAT TRACK INCR.
TIMER ON/OFF SLEEP MUTE
BRIGHTNESS BAUNCE
Remote control batteries
Open the battery compartment
of the remote control and insert
2 alkaline batteries, type AA
(R06, UM-3).
Do not use old and new or
different types of batteries in
combination.
Ô €)
о о о о
ABC DEF GHI
© © ©
JKL MN OPQ
© © ©
RST UVW XYZ
@ ® ©
О О О О
ООО
LOUDNESS INCREDIBLE PURE
SPACE TEXT
PHILIPS
Note: Always press the source key of the source you wish to
control (e.g. CD1 / before selecting the desired function
keyle.g. SHUFFLE).
10
Remove batteries if they are dead or if the remote control is
not to be used for a long time.
Batteries contain chemical substances, so they should
be disposed of properly.
DISPLAY
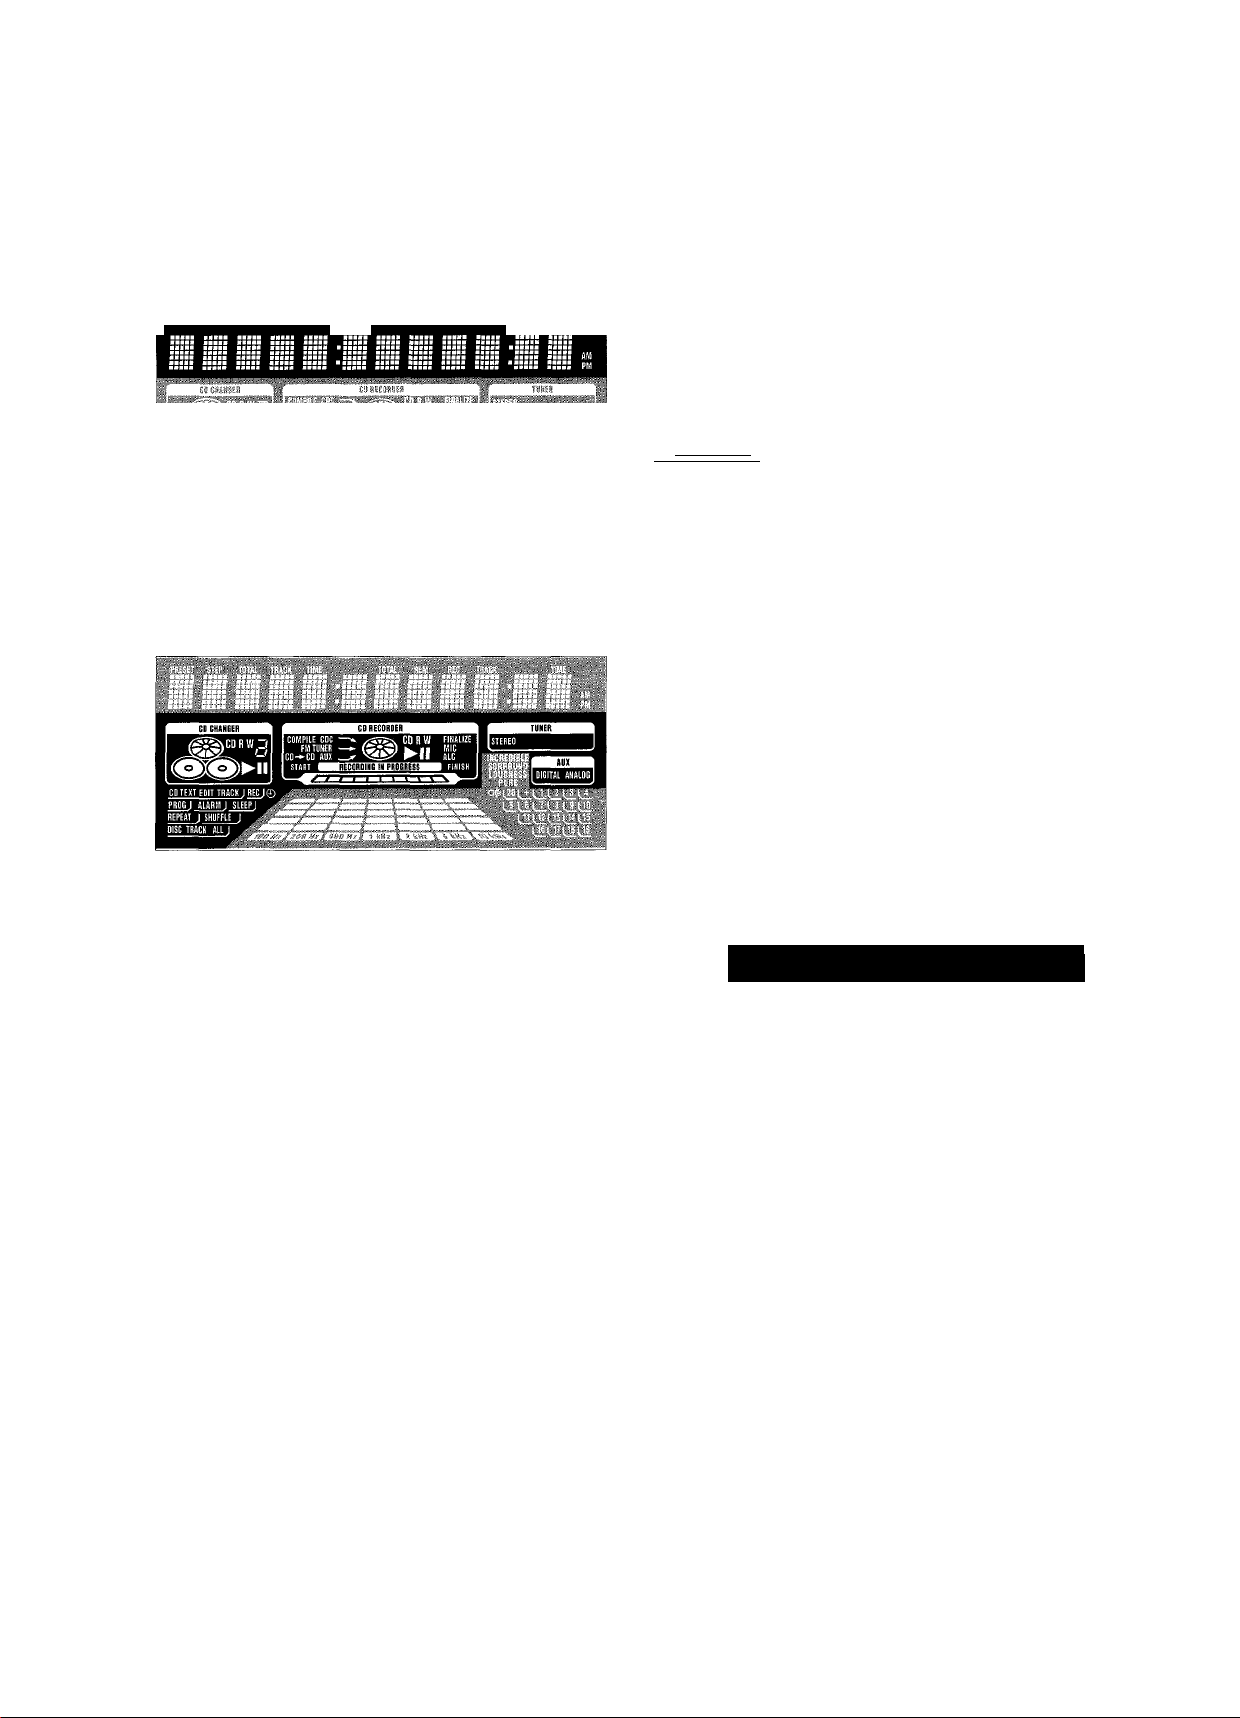
Display
The display of the unit is divided into 3 sections, which show
you the following:
Information area
Pfl£S£T
Slip TOTAl
TflflCK TIME TOTil flEM fiEC TH/ICK
This area is used for feedback of the CD changer, CD recorder,
tuner frequencies, menu options, values and scrolling text
messages.
Status lights and flags
CD Recorder
COMPILE CDC
........................
current program is being recorded with
high speed dubbing and auto finalize
FM TUNER ..............................FM station is being recorded
CD-^CD
.........................................
current disc is being recorded with
high speed dubbing and auto finalize
Aux ..........................................material from an external source is
being recorded
® ►.......................................playback is activated
® II
........................................
RECORDING IN PROGRESS..recording in progress
”fip—a,
CD............................................pre-recorded CD, finalized CDR or
----
¿mS" status of recording progress is shown
playback is interrupted
CDRW inserted
CD R
........................................
CD RW.....................................unfinalized CDRW inserted
FINALIZE..................................(un)finalizing will start
MIC..........................................microphone input is being used
ALC
..........................................
unfinalized CDR inserted
auto level control is active
Tuner
STEREO
....................................
FM station is being received in stereo
AUX
DIGITAL
...................................
ANALOG
..................................
digital input in use for external source
analog input in use for external source
.S2
"5)
Flags
CD TEXT
...............................
CD text is available
CD TEXT EDIT.....................text edit menu is active
EDIT TRACK.........................track edit menu is active
REC ©
.....................
.............record timer is selected
PROG.....................................program menu is active
0..............................................clock is selected
ALARM 0..............................alarm timer is selected
SLEEP.....................................sleep timer is selected
REPEAT DISC
REPEAT TRACK
REPEAT ALL
......................
..................
........................
selected disc is played repeatedly
Current track is played repeatedly
all dIscs In the CD changer (or the
program) are (is) played repeatedly
SHUFFLE...............................either all tracks of the program or of
the loaded disc(s) in the CD changer or
CD recorder are played in random
order
CD Changer
..............................
number of disc trays loaded
<S> ►.................................playback is activated
II....................................playback is interrupted
CD l,D,3...............................disc tray 1,2 or 3 is selected and
loaded with a pre-recorded CD,
finalized CDR or CDRW
CD R I, 3
CD RW l,E,3
...............................
...................
disc tray 1, 2 or 3 is selected and
loaded with an unfinalized CDR
disc tray 1, 2 or 3 is selected and
loaded with an unfinalized CDRW
Music calendar, sound lights and remote control
HI
INCREDIBLE SURROUND....Incredible Surround is active
LOUDNESS..............................Loudness is active
PURE
.......................................
bass and treble settings are switched
PURE
o({<i^U.L1LÌQQ.
LlU-U-LiaUl
off
o((<
.......................................
command from remote control Is being
received
Music calendar
1-20
.................................
CDC, CDR: actual track number played,
number of tracks on a disc/program
TUNER: preset number of tuned
station
-I-
........................................
CDC, CDR: disc or program contains
more than 20 tracks
TUNER: more than 20 radio stations
are stored
.......spectrum analyzer
11
(a_
c7)‘
BASIC FUNCTIONS
3 CD changer:
Press OPEN/CLOSE on the unit again to close the tray.
-►The tray is closed and Reading is displayed.
-►If an unfinalized disc is inserted, Initializing will
be displayed.
-►CD, the disc tray number, the total number of tracks and
the total playing time of the disc in the last selected disc
tray are displayed. The track numbers light up in the music
calendar.
CD recorder:
Press OPEN/CLOSE on the unit again to close the tray.
-►The tray is closed and Reading is displayed.
-►If an unfinalized disc is inserted. Initializing will
be displayed.
-►CDR, the total number of tracks and the total playing time
of the disc are displayed. The track numbers light up in the
music calendar.
[switching on, switching to standby j
• To switch the unit on press (!) STANDBY ON on the unit.
• To switch the unit to standby press (!) STANDBY ON
again on the unit (0 on the remote control).
Loading the CD changer, CD recorder |
Important!
V This system is designed for reguiar CD(RW)s.
Therefore, do not use any accessories such as disc
stabiiizer rings or CD treatment sheets, etc. as offered
on the market, because they may cause jamming of
the changer mechanism.
2) Do not toad more than one disc into one disc tray.
1 CD changer:
Press OPEN/CLOSE on the unit to open the CD changer tray.
-►Open CDC is displayed and the tray is opened.
CD recorder:
Press OPEN/CLOSE on the unit to open the CD recorder tray.
-►Open CDR is displayed and the tray is opened.
2 CD changer:
You can toad up to three discs in the CD changer for
continuous ptayback without interruption. Insert an
audio disc (printed side up) in the right disc tray.
• You can load another disc in the left disc tray.
• To insert a third audio disc, press CD CHANGE on the unit.
-►The CD carousel will rotate until the empty disc tray
is at the right hand side.
CD recorder:
Insert an audio disc (printed side up) in the tray.
Playing a CD(RW)
* •
1 Press ► PLAY/PAUSE ( ► on the remote control) to start
playback.
CD changer:
-►CD, the disc tray number, the current track number and
elapsed playing time are displayed. The current track
number is also blinking in the music calendar,
CD recorder:
-►CDR, the current track number and elapsed playing time
are displayed. The current track number is also blinking
in the music calendar.
• To switch through the following information, repeatedly
press DISPLAY on the unit;
-►Track number, remaining playing time of current track
-►Track number, remaining playing time of disc
-►Track number, actual playing time of current track
2 Press ■ STOP (■ on the remote control) to stop playback.
CD changer:
-►CD, the disc tray number, the total number of tracks and
the total playing time of the disc are displayed.
CD recorder:
-►CDR, the total number of tracks and the total playing
time of the disc are displayed.
• To switch through the following information, repeatedly
press DISPLAY on the unit;
-►Total number of tracks, total playing time of disc
-►CD text is displayed.
• You can interrupt playback by pressing ► PLAY/PAUSE
(II on the remote control).
-►The time where playback was interrupted is blinking.
• To resume playback press
remote control) again.
► PLAY/PAUSE ( ► on the
12

Sound control
Volume adjustment
• Adjust the volume by using MASTER VOLUME
(— VOLUME/ + on the remote control).
-►The volume level in dB (decibel) is displayed.
BASIC FUNCTIONS
LOUDNESS
• Press LOUDNESS to switch loudness either on or off.
-►LOUDNESS is shown and Loudness is displayed if
loudness is on.
MUTE
This feature allows you to temporarily switch off the sound
without switching off the unit.
1 Press MUTE on the remote control to switch off the sound.
-►Mute is displayed and playback/recording will be
continued without sound.
2 Press MUTE on the remote control again to switch on the
sound again.
Speaker balance
It is possible to adjust the relative volume balance between
the connected front speakers.
Incredible Surround
Stereo sound is determined by the distance between the front
speakers. Incredible Surround enables you to enjoy an incredibly
wide stereo effect, regardless of the speakers' distance.
• Press INCREDIBLE SURR. (INCREDIBLE SURROUND on the
remote control) to switch the surround sound effect either
on or off.
-►INCREDIBLE SURROUND is shown and Incredible
Surround is displayed if the surround sound effect is on.
/Vote: The effect of Incredible Surround may vary with different
types of music.
Treble and Bass level adjustment
1 Press TREBLE or BASS on the unit.
-►The volume rotary is activated to select the treble/bass
settings.
2 Turn the volume rotary to adjust the treble or bass.
-►Treble or B.ass and the actual value (between -5
and +5) is displayed briefly.
Note: If the volume rotary Is not turned for 5 seconds, it will
switch back to volume.
• Press L BALANCE or R BALANCE on the remote control to
adjust the relative volume of the left or right front speaker.
-►B.al.ance L (or R) and the actual volume of the left
(or right) front speaker are displayed.
-►When the volume of both speakers is balanced,
BaLance L=R is displayed.
Demo mode
The demo mode displays various features of the unit and will
start automatically.
• If any source key is pressed:
-►The unit switches to the selected source.
If&STANDBY ON is pressed:
-►The unit switches to standby. After a few seconds, the
demonstration will start again.
•
Cancelling tbe demo mode
• Keep ■ STOP on the unit pressed for at least 3 seconds to
cancel the demo mode.
-►The demo mode is cancelled permanently. The unit
switches to standby. A few seconds later the unit
switches to an economy power save mode.
PURE
• Press PURE repeatedly to switch bass and treble settings
either on or off.
-►PURE is shown and Pure is displayed if bass and treble
settings are switched off.
-►iDp t i m.a 1 is displayed if preset bass and treble
settings are switched on.
-►Personal is displayed if personal preset bass and
treble settings are switched on.
13

BASIC FUNCTIONS
[Selecting a disc on the CD changer
• Press either CD 1, CD 2 or CD 3 to select a particular disc.
Selecting a track and searching
Selecting a track during playback
• Rotate N JOG CONTROL N (press M or N on the remote
control) to skip to the beginning of the previous or next track
on the selected disc.
-►Playback continues with the selected track.
Selecting a track when playback is stopped
1 Rotate M JOG CONTROL ►! (press N or M on the
remote control) to skip to the required track number.
2 Press ► PLAY/PAUSE ( ► on the remote control) to start
playback.
-►Playback starts with the selected track.
Note: Instead of using N or M on the remote control, you can
also directly key in the required track number by using the
numerical keys. For 2-digit numbers, press the keys in
rapid succession.
Searching for a passage during playback
1 Keep ◄◄ SEARCH or ►► SEARCH (◄◄ or ►► on the remote
control) pressed to find a particular passage in a backward
or forward direction.
-►Searching is started and playback continues at a low
volume. After 3 seconds, the search speeds up with
volume muted.
2 Release the key at the desired passage.
-►Normal playback continues.
Note: During SHUEELE, while repeating a track or while playing
a program, searching is only possible within the current
track.
SHUFFLE and REPEAT
Repeating a track, the disc or the program
1 Repeatedly press REPEAT on the remote control during
playback to select either:
-►REPEAT track: The current track is played repeatedly.
-►REPEAT disc: The entire selected disc is played repeatedly.
-►REPEAT ALL All discs in the CD changer (or the program)
are (is) played repeatedly.
Playing tracks in random order
1 Press SHUEELE on the remote control during playback.
-►SHUFFLE is shown and either all tracks of the program or
of the loaded disc(s) in the CD changer or CD recorder
are played in random order.
2 To return to normal playback, press SHUEELE again.
CD text
This feature allows the display of information such as album
title or track title contained on a specially encoded CD.
• Make sure to insert a CD with CD text.
-►CD TEXT is shown and the album title is scrolled once.
CD text when playback is stopped
• Press CD TEXT on the unit to see the following information,
which will be scrolled once (if available):
- Album title
- Artist's name on album
CD text during playback
• Press CD TEXT on the unit to see the following information,
which will be scrolled once (if available):
- Artist's name on track (on CD recorder only)
- Track title
Microphone mixing
1 Set MIC LEVEL to the minimum level to prevent acoustic
feedback (e.g. a loud howling sound) before you connect the
microphone.
2 Connect a microphone to MIC.
3 Press CD 1, CD 2, CD 3, CDR, TUNER or
DIGITAL / ANALOG AUX to select the source with which
you wish to mix the microphone.
4 Play the selected source.
5 Adjust the volume using MASTER VOLUME.
I
2 Playback starts in the chosen mode.
3 To return to normal playback, press REPEAT on the remote
control until the display indication disappears.
Note: REPEAT disc is not possible during SHUEELE or while
playing a program.
14
6 Adjust the desired mixing level between the source and the
microphone by turning MIC LEVEL.
7 Start singing or talking through the microphone.
Note: Keep the microphone away from the speakers to
prevent a howling sound.

PROGRAM
' \
\
¡Programming track numbers |
You can select tracks and store them either in the CD changer
or CD recorder memory. If you use the program for playback
you can choose one of the two memories, else if you like to
specify tracks for recording, use the CD changer memory only!
You can store any track more than once.
1 Load the desired disc(s) in the disc tray(s).
2 Press either CD 1, CD 2, CD 3, or CDR to select the disc.
3 Press PROG on the unit (PROGRAM on the remote control).
-►PROG starts blinking and Program is displayed.
¡Erasing a track from the program
T If necessary, press ■ STOP on the unit (■ on the remote
control) to stop playback,
2 Press either CD 1, CD 2, CD 3, or CDR to select the desired
memory.
3 Press PROG (PROGRAM on the remote control), followed by
◄◄ SEARCH or ►► SEARCH (◄◄ or ►► on the remote
control) to move through the program steps.
-►The track number at the selected step and the total
program time are displayed.
4 Press NO to remove the track from the program.
-►Cleared is displayed briefly.
-►The next programmed track number will move up to this
position and is displayed together with the step number
and the remaining total program time.
[Clearing the program
1 If necessary, press ■ STOP on the unit (
control) to stop playback.
2 Press NO.
-►Clear Prog? is displayed.
_____
_
on the remote
c/i
:|S
:
4 If either CD 1, CD 2 or CD 3 is selected:
Rotate N JOG CONTROL M to select either:
-►GDI (or 2, 3) fill: All tracks of CD 1 (or 2, 3) will be
programmed.
-►GDI (or 2, 3) and track number: The track number of
CD 1 (or 2, 3) will be programmed.
If CDR is selected:
Rotate N JOG CONTROL N (press the numerical keys on
the remote control; for 2-digit numbers, press the keys in
rapid succession) to select a track number.
5 Press YES to store your selection in the memory.
-►The number of programmed tracks (step). Prog and the
total program time are displayed. The track number
blinks in the music calendar.
6 Select and store all desired tracks in this way.
7 Press PROG on the unit (PROGRAM on the remote control)
to end programming.
-►PROG stays shown and the program is currently
available.
Note: If the maximum number of programmable tracks is
reached, the display shows Program fu 11.
3 Press YES to clear the program.
-►Prog Cleared will be displayed and PROG goes off.
Note: When you open the CD recorder tray or the CD changer
tray the respective program will be cleared.
Making a program for recording 1
1 Select and store all desired tracks in the CD changer
memory (see "Programming track numbers").
2 Enter the recording menu (see "Internal recording").
• If the total time of the program is of larger size than the
remaining recording time of the CDR(W):
-►Hot f i tting! will be displayed briefly, followed by
the remaining recording time and Record Prog?
If you nevertheless start recording, only those tracks of the
program that fit onto the CDR(W) will be recorded in
entirety.
•To change the program, press NO.
-►Edit Program will be displayed briefly, prog and
the time of the program start blinking. Now you can
change the program (see "Programming track numbers",
"Erasing a track from the program" and "Clearing the
program").
•
15

ABOUT RECORDING
Basic information
S'
The CD recorder deck offers you 3 main functions:
- Recording from the internal CD changer and tuner or
from a selected external source
- Finalizing your CDR(W) discs and unfinalizing your
CDRW discs
Direct Line Recording (DLR)
The CD recorder is equipped with the high-performance Direct
Line Recording technique. It ensures a perfect recording of
the source material, meaning a true "bit for bit" recording.
DLR will always become active when you make normal
recordings in listen mode.
- Erasing a CDRW disc
Auto Level Control (ALC)
The recording procedure is the same for CDR and CDRW
discs. Make sure the CDR(W) is absolutely free of
scratches and dust particles.
For recordings, the minimum track length is 4 seconds. You can
record up to a maximum of 99 tracks on a disc. The minimum
of recording time left on the disc is 7 seconds. Otherwise
Does not fit is displayed and you cannot enter the
record standby mode.
DO NOT FORGET TO FINALIZE!
Finalizing a CDR(W) disc is a simple procedure, necessary to:
- play a recorded CDR on a standard CD player or
- play a recorded CDRW on a CDRW compatible CD player
and CD recorder.
Copyright protection
The Serial Copy Management System (SCMS) prevents the
making of a digital copy from a digital copy. The system allows
making a digital recording from the original, however in some
countries this may require the authorization of copyright holders.
Auto Level Control ensures that the tracks on the recorded
disc have a similar volume level. At all times the already
recorded tracks of the CDR(W) disc will be taken as reference
for the volume level of the following recordings. ALC is active
when ALC is shown.
Auto level control becomes active when;
- COMPILE CD is being used,
- a disc, a track or a track edit is being high speed recorded
and the CDR(W) has recordings on it,
- a program (consisting from more than one disc) from the
CD changer is being high speed recorded, or
- CD-^CD is being used and the CDR(W) has recordings on it.
Auto level control will not become active when;
- CD-*CD is being used and the CDR(W) has no recordings
on it,
- making recordings from the FM tuner,
- making recordings from an external source, or
- making normal recordings in listen mode.
REC LEVEL key
When you try to record copy protected material from an external
source. Copy Protect will be displayed. No further digital
recording is possible then.
You can adjust the reference record level. This is also possible
when ALC is active. This feature can be used for fading your
recordings in or out.
When you try to record copy protected material from the
internal CD changer, no digital recording is possible, however
the CD recorder will automatically switch to analog recording.
Recording CD text
If the original CD has CD Text, this text will be recorded
automatically, provided that the CD text is not copy protected.
In that case, recording of CD text will not be possible and
Test Protect will be displayed.
1 Keep REC LEVEL on tbe unit pressed to enable tbe rotary
control to adjust the record level.
2 Turn the rotary control to the left to adjust the desired
record level.
-►The actual record level (in dB) will be displayed.
• The record level is reset after the unit has been switched to
standby.
16

INTERNAL RECORDING
Recording modes
For internal recordings you can record from the internal
CD changer or tuner. You can choose from the following
recording modes:
- High speed recording and automatic finalizing:
Fast and easy! Record and finalize your CDR(W) in one
quick step while the sound is muted. You can record the
current CD or a program from the CD changer.
- High speed recording;
Record your CDR(W) fast while the sound is muted. You can
record an entire CD, a track, a program or a track edit from
the CD changer.
- Normal recording and listening;
Listen to the recording while you are making it. You can
record an entire CD, a track, a program or a track edit
from the CD changer.
- Manual recording:
Start and stop your recording manually while listening to
it. You can do either microphone recordings or radio
recordings from the FM tuner.
High speed recording and automatic finalizing
High speed recording and automatic finalizing
(optional) of the current program
1 Make sure the CDR(W) is absolutely free of scratches and
dust particles.
2 Press COMPILE CD on the unit to enter the record mode.
-►Both decks will be selected in the display, the arrow
starts blinking. The remaining recording time of the
CDR(W), the total playing time of the source CD and
Record Prog? are displayed.
3 Press either:
YES to confirm,
or
NO to change the program.
-►PROG starts blinking. Now you can change the program
(see "Program") and return to the record mode by
pressing COMPILE CD.
4 fluLo Fin? is displayed.
Press either:
YES, if the CDR(W) is to be finalized after recording,
or
NO, if the CDR(W) is not to be finalized after recording.
V)
en
c=
IiW
m\
1 V
High speed recording and automatic finalizing of the
current disc
1 Make sure the CDR(W) is absolutely free of scratches and
dust particles.
2 Press CD-^CD on the unit to enter the recording mode.
-►Both decks will be selected in the display, the arrow starts
blinking. The remaining recording time of the CDR(W), the
total playing time of the source CD and Record CDl
(or 2, 3)? are displayed.
3 Press YES to start recording and finalizing.
-►The arrow lights, recording in progress is shown, high
speed recording and finalizing start, and the actual
recording time remaining starts to count down.
-►The arrow lights, recording in progress is shown, high
speed recording and finalizing (if selected) start and the
actual recording time remaining starts to count down.
Note: If no program is available and you press COMPILE CD,
you enter immediately into the program menu. Start
your programming and return to the record mode by
press/ng PROGRAM or COMPILE CD.
DO NOT FORGET TO FINALIZE!
Finalizing a CDH(W) disc is a simple procedure, necessary to:
- play a recorded CDR on a standard CD player or
- play a recorded CDRW on a CDRW compatible CD player
and CD recorder.
A/ote: If a program was already available before pressing
CD-^CD, this will be ignored, prog goes off and the
current disc will be recorded. After finishing the recording,
PROG is shown and the program is available again.
17
(B
3
M
INTERNAL RECORDING
5 Press YES to confirm your selection.
-►Both decks will be selected in the display, the arrow
starts blinking. The remaining recording time of the
CDR(W), the total recording time of the CDR(W) and
either Record CD 1 (or 2, 3)?, Record Prog? or
Record fi-B? is displayed.
Note: When the CDR(Wj already contains a recording, ALC
will also become active and alc will be shown.
6 Press YES to start high speed recording.
-►The arrow lights, recording in progress is shown, high
speed recording starts and the actual recording time
remaining starts to count down,
• To stop recording, press ■ STOP on the unit.
|Normal recording and listening
Normal recording and listening of an entire disc, a
track, a program or a track edit
1 Make sure the CDR(W) is absolutely free of scratches and
dust particles.
High speed recording
* •
High speed recording of an entire disc, a track, a
program or a track edit
1 Make sure the CDR(W) is absolutely free of scratches and
dust particles.
2 Press either CD 1, CD 2 or CD 3 to select the disc from
which you wish to record.
3 Press REC TYPE on the unit to enter into the recording menu.
4 Rotate N JOG CONTROL N to select one of the
following high speed recording modes:
/fa disc from the CD changer is selected:
-►CD F.ast.?: for high speed recording of an entire disc
• Continue with step 5.
-►Tr.ack F.ast?; for high speed recording of a track
• Press YES to confirm.
• Rotate N JOG CONTROL N to select the track.
-►F'ec Tr and the track number is displayed.
• Continue with step 6.
If CD changer program mode is available:
-►Prog Fast?; for high speed recording of the selected
disc or of the program
2 Follow steps 2 and 3 of "High speed recording".
3 Rotate M JOG CONTROL ►! to select one of the
following normal record options:
If CD changer is selected:
-►CD Listen?: for listening to the entire disc during
normal recording
-►Tr.3ckListen?: for listening to the track during
normal recording
• Press YES to confirm,
• Rotate N JOG CONTROL N to select the desired
track.
-►Rec Tr and the track number is displayed.
• Continue with step 6 of "High speed recording".
If CD changer program mode is available:
-►Prog Listen?: for listening to the program during
normal recording
If CD changer track edit mode is available:
-►fl-B Listen?: for listening to the A-B track during
normal recording
4 Follow steps 5 and 6 of "High speed recording".
• To stop recording, press ■ STOP on the unit.
If CD changer track edit mode is available:
-►H-B Fast?: for high speed recording of the A-B track
18
DO NOT FORGET TO FINALIZE!
Finalizing a CDH(Wj disc is a simple procedure, necessary to:
- play a recorded CDR on a standard CD player or
- play a recorded CDRW on a CDRW compatible CD player
and CD recorder.

INTERNAL RECORDING
4 Press CD 1, CD 2 or CD 3 to select the disc with which you
wish to mix the microphone.
5 Press REC TYPE on the unit to enter the recording menu.
6 Rotate M JOG CONTROL ►! to select the manual recording
mode for the microphone:
-►CD Mix Mic is displayed.
7 Press YES to confirm.
-►UJ.ai t and Record? are displayed.
8 Press YES to start recording.
9 Rotate !◄ JOG CONTROL ►! to select the desired track.
-►The disc tray number, the current track number and
playing time of the track are displayed.
10 Press ► PLAY/PAUSE to start playback.
-►The selected source is mixed with the microphone.
.52
Manual recording
Manual recording from the FM tuner
1 Make sure the CDR(W) is absolutely free of scratches and
dust particles.
2 Press TUNER repeatedly to select the FM tuner. Then select
the desired radio station (see "Tuning to radio stations").
3 Press REC TYPE on the unit to enter the recording menu.
-►FM Tuner? is displayed.
4 Press YES to confirm.
-►W-ai t and Record? are displayed.
5 Press YES to start recording.
-►The arrow lights, recording in progress is shown,
manual recording starts and the actual recording time
remaining starts to count down.
6 Press ■ STOP to stop recording.
11 Press ■ STOP to stop recording.
• To perform microphone recording only, see "Manual
recording" in chapter "External recording".
DO NOT FORGET TO FINALIZE!
Finalizing a CDR(W) disc is a simple procedure, necessary to:
- play a recorded CDR on a standard CD player or
- play a recorded CDRW on a CDRW compatible CD player
and CD recorder.
Manual microphone recording
1 Make sure the CDR(W) is absolutely free of scratches and
dust particles.
2 Set MIC LEVEL to the minimum level to prevent acoustic
feedback (e.g. a loud howling sound) before you connect
the microphone.
3 Connect a microphone to MIC.
19
EXTERNAL RECORDING
6
Start playback on the selected source.
-►The CD recorder starts to record simultaneously and
Ja'
RECORDING IN PROGRESS is shown. The remaining
recording time on the CDR(W) is displayed.
Note: If you start playback on the selected source within a
track, recording starts at the beginning of the next track
or after 2.7 seconds of silence in analog recordings.
1 If a digital source is selected:
After the recording process, the CD recorder stops
automatically.
Note: Recordings from DAT or DCC will automatically stop
after 20 seconds of silence.
If an analog source is selected:
At the end of the recording process, the CD recorder stops
after a silence of 20 seconds on the source material.
Analog or digital recording?
When making recordings from an externai source, we
recommend to do anaiog recording only if digital recording is
not possible. Digital recording will usually result in better
sound quality.
Recording with automatic start
Recording of an entire disc or a track with automatic
start
1 Make sure tbe CDR(W) is absolutely free of scratches and
dust particles.
2 Repeatedly press DIGITAL / ANALOG AUX to select the
input for the external source from which you want to record.
Digital is displayed if the digital input is
selected.
-►flUIT Analog is displayed if the analog input is selected.
3 Press REC TYPE on the unit to enter the recording menu.
• To stop recording manually, press I
-►RECORDING IN PROGRESS goeS Off.
STOP on the unit.
DO NOT FORGET TO FINALIZE!
Finalizing a CDR(Wj disc is a simple procedure, necessary to:
- play a recorded CDR on a standard CD player or
- play a recorded CDRW on a CDRW compatible CD player
and CD recorder.
4 Rotate N JOG CONTROL N to select either:
-►AUX CD?: for recording with synchronized start of an
entire disc
-►AUX Track?: for recording with synchronized start of
a track
5 Press YES to confirm your selection.
-►Start Source, AUX and the remaining recording
time of the CDR(W) are displayed.
20

EXTERNAL RECORDING
Manual recording
Manual recording from an external source
1 Make sure the CDR(W) is absolutely free of scratches and
dust particles.
2 Repeatedly press DIGITAL / ANALOG AUX to select the
input for the external source from which you want to record.
-►flUH Digital is displayed if the digital Input is
selected.
-►flux Analog is displayed if the analog input is selected.
3 Press REC TYPE on the unit to enter the recording menu.
4 Rotate N JOG CONTROL N to select the type of recording.
-►flUX Manual?: for manual start of recording
5 Press YES to confirm your selection.
-►Wait is displayed.
-►Recor d ?, flux and the remaining recording time of
the CDR(W) are displayed.
6 Start playback on the external source in order to set the
optimal recording level on the CD recorder (see
"REC LEVEL key").
7 Stop playback on the external source.
8 Go to the beginning of the desired track.
9 Press YES on the unit and simultaneously start playback on
the external source.
-►The CD recorder starts to record and recording in
PROGRESS is shown. The remaining recording time of the
CDR(W) is displayed.
Note: /f Check Input is flashing, check the digital
connection.
10 Press ■ STOP on the unit to stop recording.
-►Update is displayed and recording in progress goes off.
4 Repeatedly press DIGITAL / ANALOG AUX to select the
input for the external source with which you wish to mix
the microphone.
-►flux Digi tal is displayed if the digital input is
selected.
-►flux Analog is displayed if the analog input is selected.
5 Press REC TYPE on the unit to enter the recording menu.
6 Rotate M JOG CONTROL N to select the type of recording:
-►flux Mi.-i Mic: the microphone is mixed with the
external source.
-►Mic Only: only the microphone is recorded.
7 Press YES to confirm your selection.
-►Wait is displayed.
-►Record?, flux and the remaining recording time of
the CDR(W) are displayed.
8 Set the optimal recording level on the CD recorder (see
"REC LEVEL key").
• In addition, you can also set the optimal recording level
of the microphone by turning MIC LEVEL.
9/7flux Mix \]ic is selected:
Press YES on the unit and simultaneously start playback on
the external source.
-►The CD recorder starts to record and recording in
PROGRESS is shown. The remaining recording time of the
CDR(W) is displayed.
Ifn i c On 1 y is selected:
Press YES on the unit to start recording.
-►The CD recorder starts to record and recording in
PROGRESS is shown. The remaining recording time of the
CDR(W) is displayed.
10 Press ■ STOP on the unit to stop recording.
-►Update is displayed and recording in progress goes off.
M
"bj
Manual microphone recording
1 Make sure the CDR(W) is absolutely free of scratches and
dust particles.
2 Set MIC LEVEL to the minimum level to prevent acoustic
feedback (e.g. a loud howling sound) before you connect
the microphone.
3 Connect a microphone to MIC.
DO NOT FORGET TO FINALIZE!
Finalizing a CDR(WI disc is a simple procedure, necessary to:
- play a recorded COB on a standard CD player or
- play a recorded CDRW on a CDRW compatible CD player
and CD reborder.
21

35'
EXTERNAL RECORDING
Automatic track increment
In recording mode, tracks will be incremented automatically so
that the track numbers are in the same position as the original.
• To switch the automatic track increment function on, press
as often as necessary TRACK INCR. on the remote control
during stop when CDR is selected.
-►flu to Tr OH is displayed and the function is on. Track
increments are now automatically detected from digital
source material. In analog source material, a silence of
2.7 seconds or more is detected as a track increment.
(UN)FINALIZING, ERASING
J
• To switch the automatic track increment function off, press
as often as necessary TRACK INCR. on the remote control
during stop when CDR is selected.
-►fluto Tr OFF is displayed and the function is off.
Track numbers can now be incremented manually by
pressing TRACK INCR. on the remote control during
recording. The minimum track length is 4 seconds.
Notes: - Track numbers cannot be changed after recording.
- The automatic track increment only works with
consumer sources with a digital output signal
according to the lEC 958 (consumer part) audio
standard. DAT, DVD and DCC do not deliver this
signal.
Finalizing CDR(W) discs |
Finalizing a CDR(W) disc is a simple procedure, necessary to:
- play a recorded CDR on a standard CD player,
- play a recorded CDRW on a CDRW compatible CD player
and CD recorder,
- avoid further unwanted recordings on a disc, or
- avoid erasure of tracks on a CDRW.
Notes: - Finalizing will take about 2-4 minutes.
- After finalization of the CDR(W), cdr(w) changes to
CD on the display.
- During finalization no other operating commands
can be executed.
Auto finalizing
When using either CD—CD or COMPILE CD, your recordings
will be finalized automatically (see "Fligh speed recording and
automatic finalizing").
Manual finalizing when recording is in progress
1 Press FINALIZE on the unit during recording.
-►flu to Fi na 1 ? is displayed.
2 Press YES to confirm.
-►FINALIZE is shown. The finalization will start after recording
and the actual finalizing time left will start to count down.
22
Manual finalizing when recording is stopped
1 Insert the CDR(W) you want to finalize in the CD recorder tray.
2 Press CDR to select the CD recorder.
3 Press FINALIZE on the unit.
-►Final ize? is displayed.
4 Press YES to start finalizing.
-►FINALIZE is shown. Final is displayed and the actual
finalizing time left starts to count down.
(UN)FINALIZING, ERASING
Unfinalizing CDRW discs
If you want to record (or erase) on (from) a finalized CDRW,
you have to unfinalize it first.
Notes: - Unfinalizing will take approximately 2 minutes.
- After unfinalizing of the CDHW, CD changes to cdrw
on the display.
- When unfinalizing a CDRW with CD text on it
available, this text will be transferred to the
CD recorder memory. In case the memory is full, you
have to erase text (see "Erasing from the memory")
or to finalize another disc first in order to obtain
memory space.
1 Insert the CDRW you want to unfinalize in the CD recorder
tray.
2 Press CDR to select the CD recorder.
3 Press FINALIZE on the unit.
-►Unf in-al ize? is displayed.
4 Press YES to start unfinalizing.
-►Unf in.al is displayed and the operation time remaining
starts to count down.
Erasing from a CDRW disc
5 Press YES to confirm your selection.
-►Er.ase?, the total playing time and the total number of
tracks to be erased are displayed. All track numbers will
blink in the music calendar.
6 Press YES to start erasing.
-►Er.ase is displayed and the operation time remaining
starts to count down. The track number of tbe actual
erased track will go off in tbe music calendar.
Erasing one or more tracks
1 Insert the CDRW from which you want to erase tracks in
the CD recorder tray.
2 Press CDR to select the CD recorder.
3 Press ERASE to enter the erasing menu.
4 Rotate !◄ JOG CONTROL N to select the track number(s)
you wish to erase.
-►Erase and the track number (e.g. 10+)? are displayed.
• To select more tracks to be erased, repeat step 4.
Note: When erasing more tracks, the tracks to be erased
must be selected in sequence, starting from the last
recorded track. Example: The CDRW has 5 tracks
recorded on it Now, you can erase tracks 5 and 4. You
can also erase tracks 5, 4 and 3, but you cannot erase
tracks 5 and 3!
'Jrl
m I i
It is possible to erase one or more tracks (starting from the
end of the last track) or the entire CDRW.
Erasing an entire CDRW
1 Insert the CDRW you want to erase in the CD recorder tray.
2 Press CDR to select the CD recorder.
3 Press ERASE to enter the erasing menu.
4 Rotate N JOG CONTROL H to select:
-►Erase Disc?: for erasing the entire disc
-►All track numbers selected for erasing will blink in the
music calendar. The remaining track numbers light up.
5 Press YES to confirm your selection.
-►Erase? is displayed.
6 Press YES to start erasing.
-►Erase is displayed and the operation time remaining
starts to count down. The track number of the currently
erased track will go off in the music calendar.
23

FEATURES
Storing text during recording
You can store and edit text even while recording a single
(Л
EDIT TEXT (on CD recorder only) |
Storing text during stop mode
After you have recorded your CDR(W) you can enter text, e.g.
names to discs and tracks. The text will be displayed during
playback. You can enter up to 60 characters per text field.
Only use an unfinalized CDR or CDRW (finalized CDRW must
be unfinalized first).
1 If necessary, press ■ STOP on the unit (■ on the remote
control) to stop playback.
track or single CD, or when recording from an external source
or tuner. Editing text during finalizing is not possible. Make
sure, when using high speed recording and automatic
finalizing, to enter the text before finalizing starts, otherwise
automatic finalizing will be cancelled.
• Follow steps 3-10 of "Storing text during stop mode".
Note: Editing text is not possibie when a copy protected track
is analog recorded. Editing is stopped, CDText
S.aued is displayed and your text is saved for later
editing.
Auto copied text
When an artist's name has been stored for a track, it will be
copied automatically into the next track.
• Press either:
EDIT TEXT to confirm the copied text,
or
NO to delete the copied text and enter new text.
2 Press CDR to select the CD recorder.
3 Press EDIT TEXT on the unit to enter the text edit menu.
-►CD TEXT EDIT is blinking. Test Edit is displayed.
4 Press YES to confirm.
5 Rotate N JOG CONTROL M to select either:
-►fllburn Artist: for editing the CD artist.
-►A.1 bum Ti 11 e: for editing the CD title.
-►Artist Tr 1 or (2, 3,...): for editing the artist of
track 1 or (2, 3,...).
-►Title Tr 1 or (2, 3,...): for editing the title of track 1
or (2,3,...).
6 Press YES to confirm the selection.
7 Rotate M JOG CONTROL И (press the alphabet keys on
the remote control) to select a character.
8 Press YES to confirm the selection.
-►The cursor moves to the next character space.
9 Repeat steps 7 and 8 for adding further characters.
10 Press EDIT TEXT to save the characters that have been
selected and to exit to the last position in the text editing
menu.
-►Upd-iate is displayed.
Inserting a space
1 Press ◄◄ SEARCEI or ►► SEARCEI (◄◄ or ►► on the remote
control) to move to the position where the space is to be
inserted.
-►The position starts blinking.
2 Press YES to confirm the position of the insert character.
-►A space will be inserted, text will move to the right.
Deleting and substituting a character
1 Press ◄◄ SEARCH or ►► SEARCH (◄◄ or ►► on the remote
control) to move to the character's position to be deleted or
substituted.
-►The character starts blinking.
2 If you want to delete the character:
Press NO.
-►The character is deleted and the text is shifted one
position to the left.
If you want to substitute the character:
Rotate N. JOG CONTROL M (press the alphabet keys on
the remote control) to select a new character.
Press YES to confirm the selection.
• To change another character, press ◄◄ SEARCH or
►► SEARCH (◄◄ or ►► on the remote control).
24
 Loading...