

Page 1

Toll Free Help Line
Ligne d’assistance en service libre
Linea de ayuda telefonica sin cargo
800-531-0039
¿e/i mU
P''"
Page 2
Page 3

Return your Warranty Registration card today to
ensure you receive all the benefits you’re entitled to,
Once your Philips purchase is registered, you’re eligible to
receive all the privileges of owning a Philips product.
^Warranty
Verification
Registering your product within 10 days
confirms your right to maximum
protection under the terms and
conditions of your Philips warranty.
^ Owner
Confirmation
Your completed Warranty Registration
Card serves as verification of ownership
in the event of product theft or loss.
PHILIPS
Congratulations on your purchase,
and welcome to the **family!**
So complete and return the Warranty Registration Card
enclosed with your purchase at once. And take advantage
of these important benefits.
Model
Registration
Returning your Warranty Registration
Card right away guarantees you’ll
receive all the information and special
offers which you qualify for as the
owner of your model.
Know these
symbols
RISK OF ELECTRIC SHOCK
CAUTION: TO REDUCE THE RISK OF ELECTRIC SHOCK, DO NOT
A
REMOVE COVER (OR BACK). NO USERSERVICEABLE PARTS
INSIDE. REFER SERVICING TO QUALIFIED SERVICE PERSONNEL.
DO NOT OPEN
A
Dear Philips product owner:
Thank you for your confidence in Philips.You’ve selected one of the best-built,
best-backed products available today. And we’ll do everything in our power to
keep you happy with your purchase for many years to come.
As a member of the Philips “family,” you’re entitled to protection by one of the
most comprehensive warranties and outstanding service networks in the industry.
What’s more, your purchase guarantees you’ll receive all the information and
special offers for which you qualify, plus easy access to accessories from our
convenient home shopping network.
And most importantly you can count on our uncompromising commitment to
your total satisfaction.
All of this is our way of saying welcome-and thanks for investing in a Philips product.
Sincerely,
Robert Minkhorst
President and Chief Executive Officer
P.S. Remember, to get the most from your Philips product, you must
return your Warranty Registration Card within 10 days. So please
mail it to us right now!
This “bolt of lightning” indicates
uninsulated material within your unit
may cause an electrical shock. For
A
the safety of everyone in your household,
please do not remove product covering.
The “exclamation point” calls attention
to features for which you should read
the enclosed literature closely to
A
prevent operating and maintenance problems.
WARNING: TO PREVENT FIRE OR
SHOCK HAZARD, DO NOT EXPOSE THIS
EQUIPMENT TO RAIN OR MOISTURE.
CAUTION: To prevent electric shock,
match wide blade of plug to wide slot, and
fully insert.
For Customer Use
Enter below the Serial No. which is located
on the rear of the cabinet. Retain this
information for future reference.
Model No. _____________________________
_________
Serial No. _____________________________ ______
PHILIPS V/s/t our World Wide Web Site at http://www.phiiipsusaa
Page 4

Page 5

IMPORTANT SAFETY INSTRUCTIONS - Read before operating equipment
This product was designed and manufactured to meet strict
quality and safety standards. There are, however, some
installation and operation precautions which you should be
particularly aware of.
1. Read these instructions - All the safety and operating
instructions should be read before the appliance is
operated.
2. Keep these instructions - The safety and operating
instructions should be retained for future reference.
3. Heed all warnings - All warnings on the appliance
and in the operating instructions should be adhered to.
4. Follow all instructions - All operating and use
instructions should be followed.
5. Do not use this apparatus near water - for example,
near a bathtub, washbowl, kitchen sink, laundry tub, in a
wet basement or near a swimming pool, etc.
6. Clean only with a damp cloth. The appliance should
be cleaned only as recommended by the manufacturer.
7. Install in accordance with the manufacturers
instructions. Do not block any of the ventilation
openings. For example, the appliance should not be
situated on a bed, sofa, rug, or similar surface or placed in a
built-in installation, such as a bookcase or cabinet that may
impede the flow of air through the ventilation openings.
8. Do not install near any heat sources such as
radiators, heat registers, stoves, or other apparatus
(including amplifiers) that produce heat.
9. Do not defeat the safety
purpose of the polarized or
grounding-type plug. A polarized
plug has two blades with one
wider than the other. A grounding type plug has two
blades and a third grounding prong. The wide blade or
the third prong are provided for your safety. When the
provided plug does not fit into your outlet, consult an
electrician for replacement of the obsolete outlet.
10. Protect the power cord from being walked on or
pinched particulary at plugs, convenience receptacles,
and the point where they exit from the apparatus.
11. Only use attachments/accessories specified by the
manufacturer.
Use only with a cart, stand, tripod, bracket,
or table specified by the manufacturer, or sold
with the apparatus. When a cart is used, use
caution when moving the cart/apparatus
combination to avoid injury from tip-over.
13. Unplug this apparatus during lightning storms or
when unused for long periods of time.
14. Refer all servicing to qualified service personnel.
Servicing is required when the apparatus has been
damaged in any way, such as power-supply cord or plug is
damaged, liquid has been spilled or objects have fallen into
the apparatus, the apparatus has been exposed to rain or
moisture, does not operate normally, or has been dropped.
EL 4562-E004:99/3
Page 6

Page 7

ItillJf
■■■■
IIIIIIm
Page 8

Page 9

English
Français.................................................................32
_ç2
"5>
.2
'c5
o»
c
CB
Español
Canada
_____
___
.60
English: This digital apparatus does not exceed the Class B
limits for radio noise emissions from digital apparatus as set
out in the Radio Interference Regulations of the Canadian
Department of Communications.
Français : Cet appareil numérique n'émet pas de bruits
radioélectriques dépassant les limites applicables aux
appareils numériques de Classe B prescrites dans le
Règlement sur le Brouillage Radioélectrique édicté par le
Ministère des Communications du Canada.
This warning lable is located on the rearside and inside this laser product.
LASER RADIATION
WHEN OPEN. DO NOT STARE INTO BEAM.
n AKir^CD INVISIBLE LASER RADIATION WHEN OPEN.
UANUCK-avOID DIRECT EXPOSURE TO BEAM.
ALHIINANAKYMAnOMAALLE LASERSATEILYLLE. AW
KATSO SATEESEEN.
' OCH SPARREN AR ÜRKOPPLAD. 8ETRAKTA £J STRÂLEN.
CB
a.
DANGER - Invisible laser radiation when open.
AVOID DIRECT EXPOSURE TO BEAM.
Page 10

• *¿ м
i
8 -Ä •
Page 11
GENERAL INFORMATION
(0_
s
m'
Safety instructions
General information
Setup
■■Discs
Controls and connections
Installation
SpBiiiér::GDPieitiemss.vv.i:.i:y};::k.«.;kk:v:-.^^
: k > >inllntfaasdhnèiilens:yi:k:k..k,k.;.ak..k.a:£iy
: ■■ ki kSroitìtì eudiSeerijftittólekyk
k; teitauilffSHeectiMysk.^
.............................................................................
......................................................................
........................
Z-3
'iiì.ÌìMié£MS&:ì''‘T\
.k.;k:k:.i,3S;i.i;k;0e:kk:kk
kkà;Kl;,y;ik;MiSk':k:
'mMr&MSsidmr
::,|:,ki§4iiSkil|;ki;:k:kk
■y;ikKSKylilliikkkk
kM,k3:akki;ki.;itìikikkkk
ky;fkkkp:5kS;|®ki':*
y;;>;Skk.kk.3:ai''i:k;k
:y,kaàk:lkafk^;p:ii
Accessories supplied
- 2 speakers including 2 speaker cables
- Remote control
- 2 batteries for the remote control, size AA
-AM loop antenna
- FM wire antenna
- Power cable
Setup information
Place the unit on a flat, hard and stable surface. Make sure
there is sufficient space around the unit to prevent overheating.
::: : i k : lbonheMieg;i:sui\ytìoierftSlk|k^k
Remote control
.k: ■ k: ikiempte cowreiMttiins::k,j.,k^
:'k ReiTlatócòÉitealterieS;k..';ikiy.)kkk:;:.:..k.:k
"■ ;r :DiS|JÌ8y^v.k.:^,,i.ik.k.k.k.:kkkkk,.kk.,iVi:.y.Ak
Basic functions
: Switching on, switching to standby................................................
■ :kvPlayinga;Cb{RyV);k...k..:;.
kSbund:cHri(rOikii;:^ki.y:k.k..;^;.^;:.k:,;k;u,.k:i.:;:..tk^ .:.:.J;:3,ìa:,:kU3kffi^3kk;k:
- k'kOemoimodeki.l:kv.i£:i?kk..«;U;i.v,kk:.k^^
■ " Selecting a diso ori the?GD:chahger;y:k:k:,k.i:k,k..k.kk.k
' ; k:Selecting!e:fiaBk:ahd:searchiHg;«kiktki;.k^.tv'rikk^
ik^KkkShUfftiaMttteksyMyk
k: ■■■“:;i: C0M::kk;.kikyi3:yita&^^^^^^^
Program
Progfamming track numbers....................................................
Erasing a track from the program
Clearing the program.......................................................................
Making a program for recording
About recording
k: Basic ibforrhationk:;.kk..:..kkki:kkk:kv:kkk.k:.k.kkk
■ birèctiUnè Recbfénftfb№)ik;E.t:syk.;,k
...............................................
..................................................
■ k^utofevel CóhttoÌ(iiitfl)k..:i.,k,:,:,;:;k.k;.k;k^^
k::RECkLEVEL:Ìey....:;;:i.y.i:..k.k^
Internal recording
' : Recordingmbdesk..:;..v,;;:ii...;.;.k:,.;,;.k....kk.;..u
: kHìqh:Speedre(:ordmqàndautóÌbetÌG:finayzin8k.k^^
k ■Higb'SbéadkffiàiÌmpk:£'k;l;k
Normal recording and listening....................................................
k kWànòal redordingkk.k;.;iB;.;i.:k./.i!.k.3:3kki^^
External recording
;k : Analogiordigitai:recQrdinq?:..kkik:yM:i
Recording with automatic start....................................................
,kkk£y.:i:yk;l3ikk'T
..■vC;,;kk;:,kkkw.;3i4k:kkkkk
i;.kk;k^;i.3;;rkv3i.aÀkkk':;:
;;..:::kyk:;.k.kyÌAkf::;;
kky;kkk..kkl,;sil;ikkkk
;.kK,3.kk.:.;ìk.s:.k;i:6;k:k'k
irntòrmimm .
..............................16
.
...........................17
k:i:ikSiS;kkkR»fckk:ì:
..........................
::3k»;a;kyykT|#^;k
...ik::kk.K.y;ka;mikk:;:
.ki,™fci:y.v:;,;.jlii; 'k,:
.;k::k;i;k.;:a:kk:s:fffkk'5
.■k:kkk;:;a.ka;E.;iSkkk:;k;
.kk:..;;:::;kk.,k;.ikkis:kk:k:
.Aa..;.ai;..kklSiyÒ'':t'kk
yi.y:!akyk:i)kkkk=k;
: ■■ :Mehuaikrec0rdihg?.k..kk*.2kSi.ik..:.i::kk.k:3.;:::..kkk
Automatic track increment............................................................
(Un)finalizing, erasing
::SXX.XX.iX2SXX.
17
Active mobile phones close to the CDR Mini Fli-Fi system may
cause malfunctions.
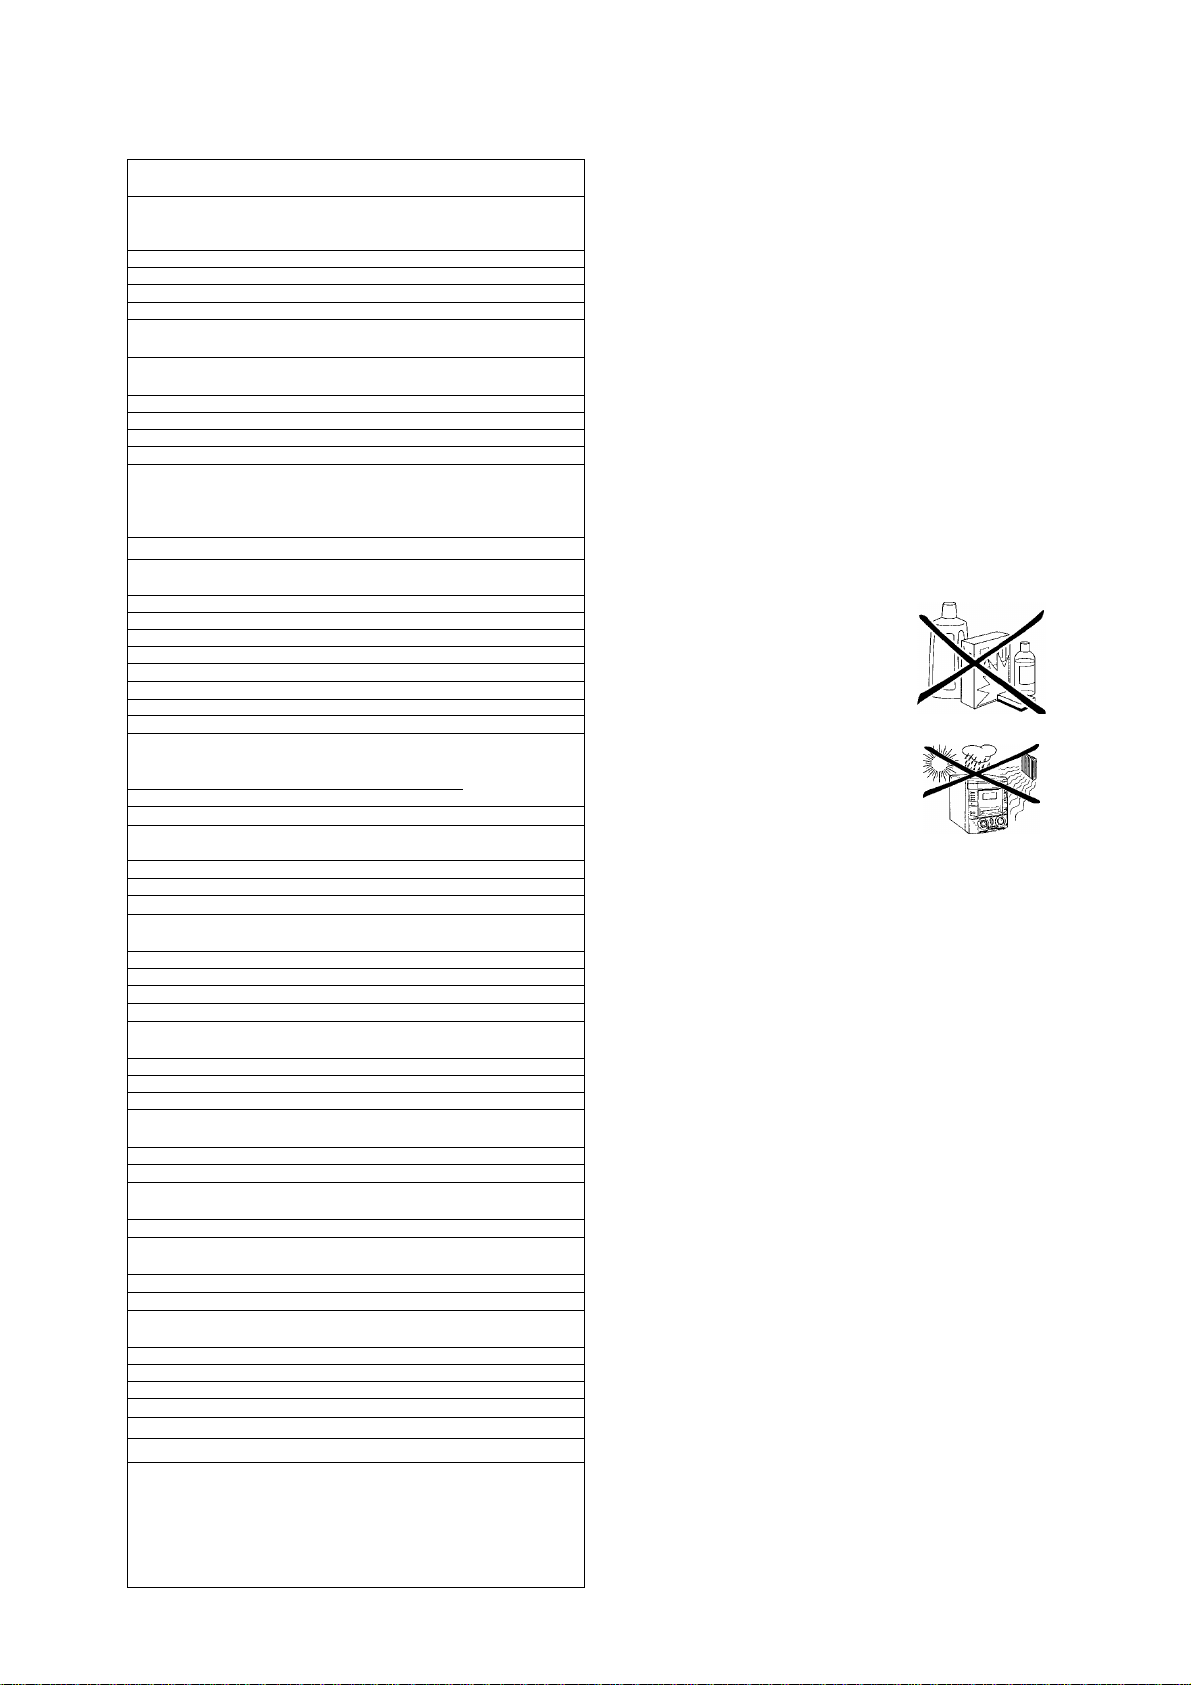
Maintenance
Clean the unit with a soft,
slightly dampened, lint-free cloth. Do
not use any cleaning agents as they
may have a corrosive effect.
Do not expose the unit, batteries
or discs to humidity, rain, sand or
excessive heat (caused by heating
equipment or direct sunlight).
Environmental information
All redundant packing material has been omitted. We have
tried to make the packaging easy to separate into three mono
materials: cardboard (box), polystyrene foam (buffer) and
polyethylene (bags, protective foam sheet).
Your unit consists of materials which can be recycled if
disassembled by a specialized company. Please observe the
local regulations regarding the disposal of packing materials,
dead batteries and old equipment.
i " FinalizingCQRiySffdiSes .:kkk..k:k;,iU..k.k:;.3!,3:kS.ik.,;::i:
: UhfmàlizÌTOCORW;dÌsoS;k.,,yki;.;i..:..;;.;:...;ky
Erasing from a CDRW disc
Features
...................................................
EDIT TEXT jon CD recorder only).......................................
Track editing ion CD changer only)..................................
Tuner
: : ; : k : Tuning toktadlaStetibni :.k:.k.kk.ki3.kk:..:jkk
k k:Storit^^radib.statiQnsk•..k.ík;v..;:.¿i..r,;:,r¿v..k.i..k.k;..k
k i Tuh(hgtdpreset stàtiùns.kkì.:a...k.k.;:,k.:i.k.:.:ki:
Clock/Timer
k i -Clock setting:;';ik,..i:i:,..;kkkk’.v^.?.y;k:k.;.k,;..i;k::y
:.:iXMkxMTx
x:x,x»xj:mx:
As an ENERGY STAR® partner,
Philips has determined that this
product meets the ENERGY STAR®
guideiines for energy efficiency.
i k Sleep timerk,;...i;k;,;u;ki.,kv;k.:.:k.k'.^kk;;;;k,;.;;.;i:.k;A
;. ki k;Alaim:t(mefi..:k.:v.:k kk:T.',,..;k;;k.;;k;,,.wk>.k
■:: : : Record tiimer.:;.;.kv..k:ikc,k;.k:kk.k;;; k;k.kk«^^^^
; ' > Switching thiàlarrn;àhd:feGortì’tirnefkdh/b^
Technical data...........................................................................................
Troubleshooting........................................................................................
Limited warranty......................................................................................
Page 12

•>.“ 1н^:.{?, I <.i': ¡'i* i: •'!" .’к
Page 13

GENERAL INFORMATION
Discs for recording
For recording, make sure to use special audio discs only.
These discs are marked "Digital Audio" and with the logos
shown below.
Two different types of audio discs are usable on this
CD recorder:
CD-Audio Recordable (CDR) discs
These discs can be recorded once and
will play on all standard CD players and
CD recorders, when finalized.
COMPACT
nci
DIGITAL AUDIO
Recordable
CD-Audio Rewritable (CDRW) discs
These discs can be recorded, erased and
rerecorded many times and will play on
CDRW compatible CD players and
CD recorders, when finalized.
All Philips CD players and CD recorders with
this sticker are CDRW compatible.
To ensure proper working of the unit, we recommend the use
of Philips audio CDR and audio CDRW discs only.
Note: Do not use a computer CDR or CDRW as recording will
not work properly!
COMPACT
DIGITAL AUDIO
I Rewritable
CD(RW) handling
If the CDR Mini Fli-Fi system fails to read discs correctly, use
a commonly available cleaning-CD to clean the lenses before
submitting the unit to repair. Other cleaning methods may
destroy the lenses. Always keep the trays closed to avoid
dust on the lenses.
The lenses may cloud over when the unit is suddenly moved
from cold to warm surroundings. Playing a CD(RW) is not
possible then. Leave the unit in a warm environment until the
moisture evaporates.
To take a CD(RW) out of its box
easily, press the center spindle while
lifting the CD(RW). Always pick up a
CD(RW) by the edge and put it back in
its box after use. Never write on a CD
or attach a sticker to it. Write only on
the printed side of a CDR or CDRW,
and only with a soft, felt-tipped pen.
To clean a CD(RW), wipe it in a
straight line from the center toward the
edge using a soft, lint-free cloth. A
cleaning agent may damage the disc!
"S
Recording is permissable insofar as copyright or other
rights of third parties are not infringed upon.
In some countries, the use of the Philips CDR Mini
Hi-Fi system as shown or suggested in this user
manual may require the authorization of copyright
holders.
[Discs for playback _
For playback on this CD changer and CD recorder you can use
the following audio discs:
- All pre-recorded audio CDs
- All audio CDR and audio CDRW discs
Notes: - Do not try to play a CD-ROM, CD-I or CDV!
- CDR(Wj discs, which are recorded on a computer,
can only be used when they are correctly treated
according to the audio standard (IEC958: Consumer
part). Single session only!
CAUTION
Use of controls or adjustments or performance of
procedures other than herein may result in hazardous
radiation exposure or other unsafe operation.
Page 14

V T '.V < - » • . s
iA&iwi'i:
Page 15

m
vygjL: i
CONTROLS AND CONNECTIONS
0 ЩЩ
ШШ Ш
ниш и
On the back
Q] AC MAINS ~
[2] SPEAKERS 6 Q FRONT 17R ...connect to the supplied
U] LINE OUT L/R
S AUXIN17R
...........................
.................................
..............
After all other
connections have been
made, connect the power
cord to the power outlet.
For optimal performance
use only the original
power cable.
speakers
connect to the analog audio
input of an additional
appliance
connect to the analog audio
output of an additional
appliance
[5] SUBWOOFER OUT
® FM AERIAL 300 Q
0 AM AERIAL
0 DIGITAL OUT
0 DIGITAL IN.........................................connect to the coaxial output
.......................... .............
......................
.........................
....................................
connect to the input of a
subwoofer
connect the supplied wire
antenna here
connect the supplied loop
antenna here
connect to the coaxial input
of a digital appliance
of a digital appliance
Page 16

« ¡ =
ПП;
•iÄ'f
_ il
*А..*
»:гт
Ù:
Page 17

CONTROLS AND CONNECTIONS
On the front
Source selection
CD 1, CD 2, CD 3...........................selects the CD changer,
CDR
...................................................
TUNER
DIGITAL/ANALOG AUX... selects the input for an
[]]] ..............................................................CD changer tray
^ OPEN/CLOSE
|i| CD CHANGE
53 ...............................................................display
CD RECORDER..............................CD recorder tray
5^ (!) STANDBY ON
53 DISPLAY
51 Multiple function control
Rotary control:
JOG CONTROL..............................CDC, CDR: selects the
Keys to press:
YES
.....................................................
>t> SEARCH
PLAY/PAUSE >QD
PROG
EDIT TEXT........................................enters/exits the text edit
EDIT TRACK....................................enters/exits the track edit
REC LEVEL.......................................enables the rotary control to
STOP □
<K1 SEARCH
NO.....................................................cancels a selection
_____________
..............................................
....................................
......................................
............................
............................................
..................................
.......................
................................................
.............................................
..................................
I
switches to CD 1, CD 2 or
CD3
selects the CD recorder
selects the tuner
additional appliance
opens and closes the
CD changer tray
selects the next disc tray
switches the unit on and to
standby
selects display
information/text
previous/next track
TUNER; selects the
previous/next preset tuner
station
confirms a selection
CDC, CDR: searches forward,
reviews the tracks in a
program, controls the cursor
in different menus
TUNER; tunes to a higher
radio frequency
starts and interrupts
playback/recording
opens/closes the program
menu
menu
menu
adjust the level for recordings
stops CD play/record, closes
program memory
CDC, CDR: searches
backward, reviews the tracks
in a program, controls the
cursor in different menus
TUNER: tunes to a lower
radio frequency
51 FINALIZE...........................................finalizes and unfinalizes
recordings
m REC TYPE..........................................enters/exits the recording
menu
[H RECORD
CD—CD...........................................selects high speed recording
and automatic finalizing of
current CD
COMPILE CD
m ERASE
Sound control
MASTER VOLUME.....................adjusts the volume
DSC
..............................
INCREDIBLE SURROUND ..creates an incredibly wide
LOUDNESS....................................boosts treble and bass
PURE
[24| ini......................................................3.5 mm headphone jack
Note: Connecting the headphones will switch off the
^ OPEN/CLOSE
CD TEXT..........................................switches through CD text
1^ CLOCK/TIMER
iR SENSOR.....................................sensor for the infrared
Note: You will recognize that various keys will be Illuminated on
the unit depending on the different modes or programs
you are in. This is for your guidance in order to facilitate
the finding of the relevant keys for selection.
................................
................................................
................................................
speakers.
...................................
..............................
selects high speed recording
and automatic finalizing of
current program
erases recordings
DIGITAL SOUND CONTROL
selects sound characteristics
stereo effect
switches DSC settings on/off
opens and closes the
CD recorder tray
information
selects the clock function,
activates and deactivates the
timer
remote control
_j2
Page 18

^ г - д •
г-._,. ? •* ”
,"А*. ’í£.’ .
Í7.~-
‘.-.л .. ..U.VÍ
Í К:
:í:..
, ..-Л!
!• • •
------
■ .г: pii;
Page 19

INSTALLATION
■rn
I
The type plate is located on the rear of the unit.
1 Check whether the power voltage as shown on the type
plate corresponds to your local power voltage. If it does
not, consult your dealer or service organization.
2 Make sure all connections have been made before
switching on the power supply.
3 Connect the supplied power cable to AC MAINS ~ and to
the power outlet. This switches on the power supply.
For optimal performance use only the original power
cable.
When the unit is switched to standby, it is still consuming
some power. To disconnect the unit from the power
completely, remove the power cable from the power outlet.
To avoid overheating of the set, a safety circuit has
been built in. Therefore, your unit may disconnect
under extreme conditions. If this happens, switch the
unit off and let it cool down before reusing it.
Speaker connections
The speaker connections are click-fit connectors. Use them as
shown below.
Antenna connections
AM antenna
The supplied loop antenna is for indoor use only.
1 Fit the plug of the loop antenna to AM AERIAL as shown
below.
2 Position the antenna as far as possible from a TV, VCR or
other radiation sources.
3 Turn the antenna for optimum reception.
FM antenna
The supplied wire antenna can only be used to receive nearby
stations. For better reception we recommend using a cable
antenna system or an outdoor antenna.
1 Open the FM AERIAL 300 Q. click-fits by pushing the lever
down as shown below.
2 Insert each wire of the antenna into one hole.
1 Connect the colored (or marked) wire to the red terminal
and the black (or unmarked) wire to the black terminal.
2 Connect:
- Left speaker to L (red and black)
- Right speaker to R (red and black)
3 Close the click-fits using the lever.
4 Move the antenna in different positions for optimum
reception.
The unit complies with the FCC-Rules, Part 15 and with
21CFR 1040.10. Operation is subject to the following
two conditions:
1. This device may not cause harmful interference, and
2. This device must accept any interference received,
including interference that may cause undesired
operation.
10
Page 20

•J. í?—- . .•
;
----------------------------
7C'Z^ — - \
■ .;\7LSi-;"
•"¡t -
í.k.....;' .'г^.
:л.-1Ч1-
Page 21

INSTALLATION
UJ
Analog audio connections |
AUX IN L7R
It is possible to use an additional appliance, e.g. tape recorder,
TV or VCR, with the unit.
1 Insert the red plug of a cinch cable to the red jack AUX IN R
and insert the white plug to the white jack AUX IN L.
2 Connect the other end of the cinch cable to the audio outputs
of the additional appliance.
3 Press DIGITAL / ANALOG AUX repeatedly to select the analog
input for the appliance.
-►RIJ:«; Rri.alog is displayed.
4 Operate your appliance as usual and adjust volume and
sound with the unit.
Note: It is not possible to connect a turntable directly to
AUX IN L/R. If you wish to use a turntable with the
unit you have to connect an amplifier to AUX IN L/R on
the unit Then connect the turntable to the amplifier.
LINE OUT IVR
You can use these outputs for playback or recording on any
analog audio equipment e.g. amplifier or tape recorder.
Digital audio connections
DIGITAL IN
You can use this coaxial input for recordings from any digital
audio equipment with a digital coaxial output e.g. CD player
or DVD player.
1 Use a coaxial cable to connect the coaxial output of the
additional appliance with DIGITAL IN on the unit.
2 Press DIGITAL / ANALOG AUX repeatedly to select the digital
input for the appliance.
-►RUX Digi tal is displayed.
3 Operate your appliance as usual.
DIGITAL OUT
You can use this coaxial output for recordings on any digital
audio equipment with a digital coaxial input e.g. CD recorder.
• Use a coaxial cable to connect the coaxial input of the
additional appliance with DIGITAL OUT on the unit and
operate your appliance as usual.
¡Connecting a subwoofer
A subwoofer can be used to enhance the bass performance of
your unit dramatically.
• Use a cinch cable to connect the analog audio inputs of the
additional appliance with LINE OUT L/R on the unit and
operate your appliance as usual.
1 Use a cinch cable to connect the input of the subwoofer
with SUBWOOFER OUT at the unit.
2 Follow the instructions supplied with the subwoofer.
11
Page 22

l4*:. ы 's 'si- í. ». О ►. W* /» •
_ ¡>
r I
г-ф ‘ -
Page 23

REMOTE CONTROL
ГТ1
3
и’
Remote control buttons
O
......................................
CDR, TUNER, GDI,
CD2, CD3, AUX
Number/alphabet keys
1-0...........................keys in numbers for tracks or stations
ABC - XYZ
SPACE.....................keys in a space within the text
EDIT TEXT
— VOLUME
+ VOLUME
►.....................................starts playback/recording
N
N
■
►►
◄◄
II
YES...................................selects a selection
NO...................................cancels a selection
PROGRAM....................opens/closes the program menu
SHUFFLE........................plays tracks in random order
REPEAT
TRACK INCR.................selects automatic or manual increment of
TIMER ON/OFF
SLEEP..............................activates the sleep timer
MUTE..............................mutes the sound
BRIGHTNESS
L BALANCE
R BALANCE
LOUDNESS...................boosts treble and bass
INCREDIBLE
SURROUND
PURE...............................switches DSC settings on/off
.....................
............ .....
....................................
.....................................
.....................................
..................................
..................................
......................................
..........................
..................
..................
switches the unit to standby
...........
selects the sources
.............
keys in letters for text
enters the text edit menu
................
decreases the volume
increases the volume
CDC, CDR; selects the previous track
TUNER: selects the previous preset tuner
station
CDC, CDR: selects the next track
TUNER: selects the next preset tuner
station
stops CD play/recording, closes program
memory
CDC, CDR: searches forward, reviews the
tracks in a program, controls the cursor in
different menus
TUNER: tunes to a higher radio frequency
CDC, CDR: searches backward, reviews
the tracks in a program, controls the
cursor in different menus
TUNER: tunes to a lower radio frequency
interrupts playback/recording
repeats a track, the entire CD(RW) or the
program
a track
...........
activates and deactivates the timer
...............
controls the brightness of the display
adjusts the volume balance to the left
speaker
adjusts the volume balance to the right
speaker
.................
creates an incredibly wide stereo effect
Ô (Ê)
TUNER GDI CD2 CD3
О О О О
ABC DEF GHI
© © ©
JKL MN OPQ
© ® ®
RST UVW XYZ
® ® ®
^VOLUME.^^,—^
I® CE)|
PROGRAM SHUFFLE REPEAT TRACK INCR.
О О О О
TIMER ON/OFF SLEEP MUTE
C3 CD CD
BRIGHTNESS BAUNCE
CD CD—CD
LOUDNESS INCREDIBLE PURE
О О О
PHILIPS
Remote control batteries
Open the battery compartment
of the remote control and insert
2 alkaline batteries, type AA
(R06, UM-3).
Do not use old and new or
different types of batteries in
combination.
TEXT
Cül)
Note: Always press the source key of the source you wish to
control (e.g. CD}) before selecting the desired function
keyle.g. SHUFFLE).
12
Remove batteries if they are dead or if the remote control is
not to be used for a long time.
Batteries contain chemical substances, so they should
be disposed of properly.
Page 24

.’ .. .
fb- .\i7z.
•'
•*•••*
•••!:• •
fi
-
1 i V
И'
• :,
r>>^v
■b: ik
>'Vi
1 ’■ ' • ^ 1
1 - 1
1
'.vr-t ■•• ■‘ts
' •
Page 25

DISPLAY
Display
The display of the unit is divided into 3 sections, which show
you the following:
Information area
PRESET STEP TOTAL TRACK TIME
This area is used for feedback of the CD changer, CD recorder,
tuner frequencies, menu options, values and scrolling text
messages.
Status lights and flags
TOTAL REM REC TRACK
CD Recorder
COMPILE CDC
.........................
current program is being recorded with
high speed dubbing and auto finalize
FM TUNER — ^
CD-*-CD
.....................
....................................
FM station is being recorded
current disc is being recorded with
high speed dubbing and auto finalize
Aux ..........................................material from an external source is
being recorded
^ ►
.......................................
playback is activated
^ II.........................................playback is interrupted
RECORDING IN PROGRESS..recording in progress
.....
status of recording progress is shown
CD............................................pre-recorded CD, finalized CDR or
CDRW inserted
CD R
........................................
CD RW
.....................................
FINALIZE
.................................
ALC
..........................................
unfinalized CDR inserted
unfinalized CDRW inserted
(un)finalizing will start
auto level control is active
Tuner
STEREO
....................................
FM station is being received in stereo
AUX
DIGITAL
...................................
ANALOG
..................................
digital input in use for external source
analog input in use for external source
Flags
CD TEXT...............................CD text is available
CD TEXT EDIT.....................text edit menu is active
EDIT TRACK
........................
track edit menu is active
REC ©...................................record timer is selected
PROG
....................................
0
.............................. ..............
ALARM 0
SLEEP
REPEAT DISC
REPEAT TRACK
REPEAT ALL
.............................
....................................
.....................
.................
........................
program menu is active
clock is selected
alarm timer is selected
sleep timer is selected
selected disc is played repeatedly
Current track is played repeatedly
all discs in the CD changer (or the
program) are (is) played repeatedly
SHUFFLE...............................either all tracks of the program or of
the loaded disc(s) in the CD changer or
CD recorder are played in random order
CD Changer
..........................
►
...............................
^ II
.......................................
number of disc trays loaded
playback is activated
playback is interrupted
CD I, E, 3...........................disc tray 1, 2 or 3 is selected and
loaded with a pre-recorded CD,
finalized CDR or CDRW
CD R i, E, 3...........................disc tray 1, 2 or 3 is selected and
loaded with an unfinalized CDR
CD RW I, E,3
....................
disc tray 1, 2 or 3 is selected and
loaded with an unfinalized CDRW
Music calendar, sound lights and remote control
______________________
----
INCREDIBLE SURROUND.
LOUDNESS
PURE
...........................
......................................
-----------------
..Incredible Surround is active
..Loudness is active
..DSC settings are switched off
-----------
------
IJ.LiLLU.LlU»
.command from remote control is being
received
Music calendar
1-20
.CDC, CDR; actual track number played,
number of tracks on a disc/program
TUNER; preset number of tuned station
.CDC, CDR: disc or program contains
more than 20 tracks
TUNER: more than 20 radio stations
are stored
.spectrum analyzer
iiaa
UlUlUlUiUi
U61J71J8lJ9
13
Page 26

fe ï'h.‘
■¿ш
"i
T*. 1л::ч.
г.:
■■
Page 27

s
srWgjjfS::
Tk'
BASIC FUNCTIONS
[switching on, switching to standby
To switch the unit on press (1) STANDBY ON on the unit.
To switch the unit to standby press (!) STANDBY ON
again on the unit (O on the remote control).
3 CD changer:
Press OPEN/CLOSE on the unit again to close the tray.
-►The tray is closed and Reading is displayed.
-►If an unfinalized disc is inserted, Ini tial ising will
be displayed.
-►CD, the disc tray number, the total number of tracks and
the total playing time of the disc in the last selected
disc tray are displayed. The track numbers light up in
the music calendar.
CD recorder:
Press OPEN/CLOSE on the unit again to close the tray.
-►The tray is closed and Reading is displayed.
-►If an unfinalized disc is inserted. Ini tializing will
be displayed.
-►CDR, the total number of tracks and the total playing
time of the disc are displayed. The track numbers light
up in the music calendar.
* •
Playing a CD(RW)
1 Press PLAY/PAUSE
playback.
CD changer:
-►CD, the disc tray number, the current track number and
elapsed playing time are displayed. The current track
number is also blinking in the music calendar.
CD recorder:
-►CDR, the current track number and elapsed playing time
are displayed. The current track number is also blinking
in the music calendar.
O D D (
► on the remote control) to start
Iloading the CD changer, CD recorder
Important!
1) This system is designed for regular CD(RW)s.
Therefore, do not use any accessories such as disc
stabilizer rings or CD treatment sheets, etc. as offered
on the market, because they may cause jamming of
the changer mechanism.
2} Do not load more than one disc into one disc tray.
1 CD changer:
Press OPEN/CLOSE on the unit to open the CD changer tray.
-►Open CDC is displayed and the tray is opened.
CD recorder:
Press OPEN/CLOSE on the unit to open the CD recorder tray.
-►Open CDR is displayed and the tray is opened.
2 CD changer:
You can load up to three discs in the CD changer for
continuous playback without interruption. Insert an
audio disc (printed side up) in the right disc tray.
• You can load another disc in the left disc tray.
• To insert a third audio disc, press CD CHANGE on the unit.
-►The CD carousel will rotate until the empty disc tray
is at the right hand side.
CD recorder:
Insert an audio disc (printed side up) in the tray.
• To switch through the following information, repeatedly
press DISPLAY on the unit:
-►Track number, remaining playing time of current track
-►Track number, remaining playing time of disc
-►Track number, actual playing time of current track
2 Press STOP □ (■ on the remote control) to stop playback.
CD changer:
-►CD, the disc tray number, the total number of tracks and
the total playing time of the disc are displayed.
CD recorder:
-►CDR, the total number of tracks and the total playing
time of the disc are displayed.
• To switch through the following information,' repeatedly
press DISPLAY on the unit:
-►Total number of tracks, total playing time of disc
-►CD text is displayed.
• You can interrupt playback by pressing PLAY/PAUSE
(II on the remote control).
-►The time where playback was interrupted is blinking.
• To resume playback press PLAY/PAUSE
remote control) again.
> D D
( ► on the
> D D
14
Page 28

"V .T-.V' .:';'^‘'....
.1 —
Page 29

Sound control
Volume adjustment
• Adjust the volume by using MASTER VOLUME
( — VOLUME/ + on the remote control).
-►The volume level in dB (decibel) is displayed.
DSC
Digital Sound Control enables you to select different preset
sound settings.
• Press DSC repeatedly to select the desired sound
characteristics.
—►Optimal, Jazz, Classic, Rock, Uocal, Techno.
BASIC FUNCTIONS
MUTE
This feature allows you to temporarily switch off the sound
without switching off the unit.
1 Press MUTE on the remote control to switch off the sound.
-►Mute is displayed and playback/recording will be
continued without sound.
2 Press MUTE on the remote control again to switch on the
sound again.
Speaker balance
It is possible to adjust the relative volume balance between
the connected front speakers.
• Press L BALANCE or R BALANCE on the remote control to
adjust the relative volume of the left or right front speaker.
-►B-a Lance L (or R) and the actual volume of the left
(or right) front speaker are displayed.
-►When the volume of both speakers is balanced,
BaLance L=R is displayed.
|Demo mode
The demo mode displays various features of the unit and will
start automatically.
* •
.¡2
Incredible Surround
Stereo sound is determined by the distance between the front
speakers. Incredible Surround enables you to enjoy an incredibly
wide stereo effect, regardless of the speakers' distance.
• Press INCREDIBLE SURROUND (INCREDIBLE SURROUND on
the remote control) to switch the surround sound effect
either on or off.
-►INCREDIBLE SURROUND is showp and Incredible
Surround is displayed if the surround sound effect is on.
Note: The effect of Incredible Surround may vary with different
types of music.
PURE
• Press PURE repeatedly to switch the DSC settings either on
or off.
-►PURE is shown and Pure is displayed if the DSC settings
are switched off.
LOUDNESS
• Press LOUDNESS to switch loudness either on or off.
-►LOUDNESS is shown and Loudness is displayed if
loudness is on.
• If any source key Is pressed:
-►The unit switches to the selected source.
IfO STANDBY ON Is pressed:
-►The unit switches to standby. After a few seconds, the
demonstration will start again.
Cancelling the demo mode
• Keep STOP □ on the unit pressed for at least 3 seconds to
cancel the demo mode.
-►The demo mode is cancelled permanently. The unit
switches to standby. A few seconds later the unit
switches to an economy power save mode.
15
Page 30

V'.
•¿'Zí.-f^i- •■■
>?:? •-• ■ .*Ä
•?"я-
• * • ••• —
!Ь;.ч • - -
!5^.4--v
"L *ч.ч • ••
Page 31

BASIC FUNCTIONS
m
s
w'
Selecting a disc on the CD changer
Press either CD 1, CD 2 or CD 3 to select a particular disc.
Playing tracks in random order
1 Press SHUFFLE on the remote control during playback.
-►SHUFFLE is shown and either all tracks of the program or
of the loaded disc(s) in the CD changer or CD recorder
are played in random order.
Selecting a track and searching
Selecting a track during playback
• Rotate JOG CONTROL (press N or H on the remote
control) to skip to the beginning of the previous or next
track on the selected disc.
-►Playback continues with the selected track.
Selecting a track when playback is stopped
1 Rotate JOG CONTROL (press !◄ or W on the remote control)
to skip to the required track number.
2 Press PLAY/PAUSE
playback.
-►Playback starts with the selected track.
Note: Instead of using M or ►! on the remote control, you can
also directly key in the required track number by using the
numerical keys. For 2-digit numbers, press the keys in
rapid succession.
Searching for a passage during playback
1 Keep <K] SEARCH or» SEARCH (◄◄ or ►► on the
remote control) pressed to find a particular passage in a
backward or forward direction.
-►Searching is started and playback continues at a low
volume. After 3 seconds, the search speeds up with
volume muted.
> 0 D
( ► on the remote control) to start
2 Release the key at the desired passage.
-►Normal playback continues.
2 To return to normal playback, press SHUFFLE again.
CD text
title or track title contained on a specially encoded CD.
• Make sure to insert a CD with CD text.
-►CD TEXT is shown and the album title is scrolled once.
CD text when playback is stopped
• Press CD TEXT on the unit to see the following information,
which will be scrolled once (if available):
-Album title
- Artist's name on album
CD text during playback
• Press CD TEXT on the unit to see the following information,
which will be scrolled once (if available):
- Artist's name on track (on CD recorder only)
- Track title
Note: During SHUFFLE, while repeating a track or while playing
a program, searching is only possible within the current
track.
SHUFFLE and REPEAT
Repeating a track, the disc or the program
1 Repeatedly press REPEAT on the remote control during
playback to select either:
-►REPEAT track: The current track is played repeatedly.
-►REPEAT Disc: The entire selected disc is played repeatedly.
-►repeat all: All discs in the CD changer (or the program)
are (is) played repeatedly.
2 Playback starts in the chosen mode.
3 To return to normal playback, press REPEAT on the remote
control until the display indication disappears.
Note: repeat disc is not possible during SHUFFLE or while
playing a program.
16
Page 32

V г.”:.-'-«-.' •.!!!;.%;.л
■ ^г^гГ-Г j:':y}.\^
i
^::^ ... ' .fl
•i\ ••'- ■■ ••.••■.%if~-
-X-'
v;4
-:.'i ri ••
■
Page 33

PROGRAM
Programming track numbers
You can select tracks and store them either in the CD changer
or CD recorder memory. If you use the program for playback you
can choose one of the two memories, else if you like to specify
tracks for recording, use the CD changer memory only! You can
store any track more than once.
1 Load the desired disc(s) in the disc tray(s).
2 Press either CD 1, CD 2, CD 3, or CDR to select the disc.
3 Press PROG on the unit (PROGRAM on the remote control).
-►PROG starts blinking and Program is displayed.
Erasing a track from the program
______ _______
1 If necessary, press STOP □ on the unit (■ on the remote
control) to stop playback.
2 Press either CD 1, CD 2, CD 3, or CDR to select the desired
memory.
3 Press PROG (PROGRAM on the remote control), followed by
<M SEARCH or» SEARCH (◄◄ or ►► on the remote
control) to move through the program steps.
-►The track number at the selected step and the total
program time are displayed.
4 Press NO to remove the track from the program.
-►Cleared is displayed briefly.
-►The next programmed track number will move up to this
position and is displayed together with the step number
and the remaining total program time.
Clearing the program
1 If necessary, press STOP □ on the unit (■ on the remote
control) to stop playback.
2 Press NO.
-►Clear Prog? is displayed.
|
"в»:
e ^
4 If either CD /, CD 2 or CD 3 is selected:
Rotate JOG CONTROL to select either:
-►CDl (or 2, 3) All: All tracks of CD 1 (or 2, 3) will be
programmed.
-►CDl (or 2, 3) and track number: The track number of
CD 1 (or 2, 3) will be programmed.
If CDR is selected:
Rotate JOG CONTROL (press the numerical keys on the
remote control; for 2-digit numbers, press the keys in rapid
succession) to select a track number.
5 Press YES to store your selection in the memory.
-►The number of programmed tracks (step). Prog and the
total program time are displayed. The track number
blinks in the music calendar.
6
Select and store all desired tracks in this way.
7 Press PROG on the unit (PROGRAM on the remote control)
to end programming.
-►PROG stays shown and the program is currently available.
Note: If the maximum number of programmable tracks is
reached, the display shows Progr.arn f u 11.
3 Press YES to clear the program.
-►Prog Cleared will be displayed and PROG goes off.
Note: l/Vhen you open the CD recorder tray or the CD changer
tray the respective program will be cleared.
Making a program for recording ________________|
1 Select and store all desired tracks in the CD changer
memory (see "Programming track numbers").
2 Enter the recording menu (see "Internal recording").
• If the total time of the program is of larger size than the
remaining recording time of the CDR(W):
-►Not f i tting! will be displayed briefly, followed by
the remaining recording time and Record Prog?
If you nevertheless start recording, only those tracks of the
program that fit onto the CDR(W) will be recorded in entirety.
•To change the program, press NO.
-►Edit Progr.am will be displayed briefly, prog and the
time of the program start blinking. Now you can change
the program (see "Programming track numbers", "Erasing
a track from the program" and "Clearing the program").
17
Page 34

■■■><: V.'
■ V. —
?• i • • Л ’I'.!. ••X*. • • *
'..'.y. '.'. ..
Г^лЧГ; . ‘
;;Л5л я .. .
Page 35

ABOUT RECORDING
m
(A
Basic information
The CD recorder deck offers you 3 main functions:
- Recording from the internal CD changer and tuner or
from a selected external source
- Finalizing your CDR(W) discs and unfinalizing your
CDRW discs
- Erasing a CDRW disc
Direct Line Recording (DLR)
The CD recorder is equipped with the high-performance Direct
Line Recording technique. It ensures a perfect recording of the
source material, meaning a true "bit for bit" recording. DLR will
always become active when you make normal recordings in
listen mode.
Auto Level Control (ALC)
The recording procedure is the same for CDR and CDRW discs.
Make sure the CDR(W) is absolutely free of scratches
and dust particles.
For recordings, the minimum track length is 4 seconds. You can
record up to a maximum of 99 tracks on a disc. The minimum
of recording time left on the disc is 7 seconds. Otherwise
Does no+.. f i t is displayed and you cannot enter the
record standby mode.
DO NOT FORGET TO FINALIZE!
Finalizing a CDR(W) disc is a simple procedure, necessary tor
- play a recorded CDR on a standard CD player or
- play a recorded CDRW on a CDRW compatible CD player
and CD recorder.
Copyright protection
The Serial Copy Management System (SCMS) prevents the
making of a digital copy from a digital copy. The system allows
making a digital recording from the original, however in some
countries this may require the authorization of copyright holders.
Auto Level Control ensures that the tracks on the recorded disc
have a similar volume level. At all times the already recorded
tracks of the CDR(W) disc will be taken as reference for the
volume level of the following recordings. ALC is active when alc
is shown.
Auto level control becomes active when:
- COMPILE CD is being used,
- a disc, a track or a track edit is being high speed recorded
and the CDR(W) has recordings on it,
- a program (consisting from more than one disc) from the
CD changer is being high speed recorded, or
- CD-»CD is being used and the CDR(W) has recordings
on it.
Auto level control will not become active when;
- CD—CD is being used and the CDR(W) has no recordings
on it,
- making recordings from the FM tuner,
- making recordings from an external source, or
- making normal recordings in listen mode.
When you try to record copy protected material from an external
source. Copy Protect will be displayed. No further digital
recording is possible then.
When you try to record copy protected material from the
internal CD changer, no digital recording is possible, however
the CD recorder will automatically switch to analog recording.
Recording CD text
If the original CD has CD Text, this text will be recorded
automatically, provided that the CD text is not copy protected.
In that case, recording of CD text will not be possible and
Tex t Pro tec t will be displayed.
REC LEVEL key
You can adjust the reference record level. This is also
possible when ALC is active. This feature can be used for
fading your recordings in or out.
1 Keep REC LEVEL on the unit pressed to enable the rotary
control to adjust the record level.
2 Turn the rotary control to the left to adjust the desired
record level.
-►The actual record level (in dB) will be displayed.
• The record level is reset after the unit has been switched to
standby.
18
Page 36

i'
T-г-'?.•: г
• ;>••*?• -~: -.¡г ..............................
Page 37

INTERNAL RECORDING
Recording modes
For internal recordings you can record from the internal
CD changer or tuner. You can choose from the following
recording modes:
- High speed recording and automatic finalizing:
Fast and easy! Record and finalize your CDR(W) in one
quick step while the sound is muted. You can record the
current CD or a program from the CD changer.
- High speed recording:
Record your CDR(W) fast while the sound is muted.
You can record an entire CD, a track, a program or a track
edit from the CD changer.
- Normal recording and listening:
Listen to the recording while you are making it.
You can record an entire CD, a track, a program or a track
edit from the CD changer.
- Manual recording:
Start and stop your recording manually while listening to
it. You can do radio recordings from the FM tuner.
High speed recording and automatic finalizing
High speed recording and automatic finalizing
(optional) of the current program
1 Make sure the CDR(W) is absolutely free of scratches and
dust particles.
2 Press COMPILE CD on the unit to enter the record mode.
-►Both decks will be selected in the display, the arrow
starts blinking. The remaining recording time of the
CDR(W), the total playing time of the source CD and
Record Prog? are displayed.
3 Press either;
YES to confirm,
or
NO to change the program.
-►prog starts blinking. Now you can change the program
(see "Program") and return to the record mode by
pressing COMPILE CD.
4 ñuto Fin? is displayed.
Press either:
YES, if the CDR(W) is to be finalized after recording,
or
NO, if the CDR(W) is not to be finalized after recording.
M
High speed recording and automatic finalizing of the
current disc
1 Make sure the CDR(W) is absolutely free of scratches and
dust particles.
2 Press CD-'CD on the unit to enter the recording mode.
-►Both decks will be selected in the display, the arrow
starts blinking. The remaining recording time of the
CDR(W), the total playing time of the source CD and
Record CDl (or 2,3)? are displayed.
3 Press YES to start recording and finalizing.
-►The arrow lights, recording in progress is shown, high
speed recording and finalizing start, and the actual
recording time remaining starts to count down.
-►The arrow lights, recording in progress is shown, high
speed recording and finalizing (if selected) start and the
actual recording time remaining starts to count down.
Note: If no program is available and you press COMPILE CD,
you enter immediately into the program menu. Start
your programming and return to the record mode by
pressing PPOGPAM or COMPILE CD.
DO NOT FORGET TO FINALIZE!
Finalizing a CDR(W) disc is a simple procedure, necessary to:
- play a recorded CDH on a standard CD player or
-play a recorded CDRWon a CDRW compatible CD player
and CD recorder.
Note.- If a program was alraady available before pressing
CD—CD, this will be ignored, prog goes off and the
current disc will be recorded. After finishing the recording,
prog is shown and the program is available again.
19
Page 38

“'" “1^..
•. .»Л .. . . ••},•
•К9,
ЛГ. —w.
4::OÍi:-
■•:'=::>r¿r-.*-
Page 39

INTERNAL RECORDING
(gj
m
s
w‘
5 Press YES to confirm your selection.
-►Both decks will be selected in the display, the arrow
starts blinking. The remaining recording time of the
CDR(W), the total recording time of the CDR(W) and
either Record CDl (or 2, 3)?, Record Prog? or
Record fl-B? is displayed.
Note: When the CDFI(W) already contains a recording, ALC
will also become active and alc will be shown.
6
Press YES to start high speed recording.
-►The arrow lights, recording in progress is shown, high
speed recording starts and the actual recording time
remaining starts to count down.
• To stop recording, press STOP □ on the unit.
Normal recording and listening
Normal recording and listening of an entire disc, a
track, a program or a track edit
1 Make sure the CDR(W) is absolutely free of scratches and
dust particles.
2 Follow steps 2 and 3 of "High speed recording".
High speed recording
High speed recording of an entire disc, a track, a
program or a track edit
1 Make sure the CDR(W) is absolutely free of scratches and
dust particles.
2 Press either CD 1, CD 2 or CD 3 to select the disc from
which you wish to record.
3 Press REC TYPE on the unit to enter into the recording menu.
4 Rotate JOG CONTROL to select one of the following high
speed recording modes:
If a disc from the CD changer is selected:
-►CD Fast,?: for high speed recording of an entire disc
• Continue with step 5.
-►Track Fast?: for high speed recording of a track
• Press YES to confirm.
• Rotate JOG CONTROL to select the track.
-►Rec Tr and the track number is displayed.
• Continue with step 6.
3 Rotate JOG CONTROL to select one of the following normal
record options:
If CD changer is selected:
-►CD Listen?: for listening to the entire disc during
normal recording
-►Tr-ackListen?: for listening to the track during
normal recording
• Press YES to confirm.
• Rotate JOG CONTROL to select the desired track.
-►Rec Tr and the track number is displayed.
• Continue with step 6 of "High speed recording".
If CD changer program mode is available:
-►Prog Listen?: for listening to the program during
normal recording
If CD changer track edit mode is available:
-►fl-B Listen?: for listening to the A-B track during
normal recording
4 Follow steps 5 and 6 of "High speed recording".
If CD changer program mode is available:
-►Prog Fast?: for high speed recording of the selected
disc or of the program
If CD changer track edit mode is available:
-►fl-B Fast?: for high speed recording of the A-B track
20
• To stop recording, press STOP □ on the unit.
DO NOT FORGET TO FINALIZE!
: Finalizing a CDR(W) disc is a simple procedure, necessary to:
- play a recorded CDR on a standard CD player or
- play a recorded CDRW on a CDRW compatible CD player
and CD recorder.
Page 40

'л •
Ш ¡?i:
/ •*,* 1 * . . I*. .** •
; !«*•=í;ji: •.!>.■»'••''•
Í' ;■
•
..!'' «i-
V
r .!^>. Í.¡;
. M l>f . . i;.-
^ i4
• :¡! .'■■
'ifi. Л
'I:: I ■•
-Л' ,
.'pÍií m;
.<Xt
Page 41

INTERNAL RECORDING
(/)
Manual recording
Manual recording from the FM tuner
1 Make sure the CDR(W) is absolutely free of scratches and
dust particles.
2 Press TUNER repeatedly to select the FM tuner. Then select
the desired radio station (see "Tuning to radio stations").
3 Press REC TYPE on the unit to enter the recording menu.
-►FM Tuner? is displayed.
4 Press YES to confirm.
-►1.1.1.311 and Record? are displayed.
5 Press YES to start recording.
-►The arrow lights, recording in progress is shown,
manual recording starts and the actual recording time
remaining starts to count down.
6
Press STOP □ to stop recording.
DO NOT FORGET TO FINALIZE!
Finalizing a CDH(Wj disc is a simple procedure, necessary to:
- play a recorded CDR on a standard CD player or
- play a recorded CDHW on a CDRW compatible CD player
and CD recorder.
21
Page 42

. .'* *
î*üs?^V1*
Page 43

EXTERNAL RECORDING
7 If a digital source is selected:
After the recording process, the CD recorder stops
automatically.
Note: Recordings from DAT or DCC will automatically stop
after 20 seconds of silence.
If an analog source is selected:
At the end of the recording process, the CD recorder stops
after a silence of 20 seconds on the source material.
ClS-
Й
ij 1 ' j' \
r-i' в» " ^
--'Г
Analog or digital recording?
When making recordings from an external source, we recommend
to do analog recording only if digital recording is not possible.
Digital recording will usually result in better sound quality.
Recording with automatic start
Recording of an entire disc or a track with automatic start
1 Make sure the CDR(W) is absolutely free of scratches and
dust particles.
2 Repeatedly press DIGITAL / ANALOG AUX to select the
input for the external source from which you want to record,
-►flux Digital is displayed if the digital input is selected,
-►flux Analog is displayed if the analog input is selected.
• To stop recording manually, press STOP □ on the unit.
-►RECORDING IN PROGRESS goeS off.
Manual recording
Manual recording from an external source
1 Make sure the CDR(W) is absolutely free of scratches and
dust particles.
2 Repeatedly press DIGITAL / ANALOG AUX to select the
input for the external source from which you want to record,
-►flux Digi ial is displayed if the digital input is selected.
-►flUX Analog is displayed if the analog input is selected.
3 Press REC TYPE on the unit to enter the recording menu.
4 Rotate JOG CONTROL to select the type of recording,
-►flux Manual?: for manual start of recording
5 Press YES to confirm your selection.
-►Wait is displayed.
-►Record?, fliJX and the remaining recording time of
the CDR(W) are displayed.
6
Start playback on the external source in order to set the optimal
recording level on the CD recorder (see "REC LEVEL key").
7 Stop playback on the external source.
8 Go to the beginning of the desired track.
3 Press REC TYPE on the unit to enter the recording menu.
4 Rotate JOG CONTROL to select either;
-►flux CD?: for recording with synchronized start of an
entire disc
-►flux Track?: for recording with synchronized start of
a track
5 Press YES to confirm your selection.
-►Start Source, flUX and the remaining recording
time of the CDR(W) are displayed.
6 Start playback on the selected source.
-►The CD recorder starts to record simultaneously and
RECORDING IN PROGRESS is shown. The remaining
recording time on the CDR(W) is displayed.
Note: If you start playback on the selected source within a
track, recording starts at the beginning of the next track
or after 2.7 seconds of silence in analog recordings.
22
9 Press YES on the unit and simultaneously start playback on
the external source.
-►The CD recorder starts to record and recording in
PROGRESS is shown. The remaining recording time of the
CDR(W) is displayed.
Note: If Check I npu t is flashing, check the digital connection.
10 Press STOP □ on the unit to stop recording.
-►Update is displayed and recording in progress goes off.
DO NOT FORGET TO FINALIZE!
Finalizing a CDH(W) disc is a simple procedure, necessary to:
- play a recorded CDR on a standard CD player or
- play a recorded CDRW on a CDRW compatible CD player
and CD recorder.
Page 44

'ti • “*•
!*.¡. Л'.! .•••/• «'••.
■■‘-ji ' '
rTzx?i'-‘tt /■ '= •*•• ••••
1?. ••.■. - ■
.
....................
j. :." T." ••••••-
...........
Page 45

EXTERNAL RECORDING
(UN)FINALIZING, ERASING
Automatic track increment
In recording mode, tracks will be incremented automatically so
that the track numbers are in the same position as the original.
• To switch the automatic track increment function on, press
as often as necessary TRACK INCR. on the remote control
during stop when CDR is selected.
-►ñuto Tr OH is displayed and the function is on. Track
increments are now automatically detected from digital
source material. In analog source material, a silence of
2.7 seconds or more is detected as a track increment.
• To switch the automatic track increment function off,
press as often as necessary TRACK INCR. on the remote
control during stop when CDR is selected.
-►Ruto Tr OFF is displayed and the function is off.
Track numbers can now be incremented manually by
pressing TRACK INCR. on the remote control during
recording. The minimum track length is 4 seconds.
Notes: - Track numbers cannot be changed after recording.
- The automatic track increment only works with
consumer sources with a digital output signal
according to the lEC 958 (consumer part) audio
standard. DAT, DVD and DCC do not deliver this signal.
Vi
Finalizing CDR(W) discs
Finalizing a CDR(W) disc is a simple procedure, necessary to:
- play a recorded CDR on a standard CD player,
- play a recorded CDRW on a CDRW compatible CD player
and CD recorder,
- avoid further unwanted recordings on a disc, or
- avoid erasure of tracks on a CDRW.
Notes: - Finalizing will take about 2-4 minutes.
-After finalization of the CDR(W), cdr(w) changes to
CD on the display.
- During finalization no other operating commands
can be executed.
Auto finalizing
When using either CD—CD or COMPILE CD, your recordings
will be finalized automatically (see "High speed recording and
automatic finalizing").
Manual finalizing when recording is in progress
1 Press FINALIZE on the unit during recording.
-►ñuto Fin-al? is displayed.
2 Press YES to confirm.
-►FINALIZE is shown. The finalization will start after recording
and the actual finalizing time left will start to count down.
Manual finalizing when recording is stopped
1 Insert the CDR(W) you want to finalize in the CD recorder tray.
2 Press CDR to select the CD recorder.
3 Press FINALIZE on the unit.
-►Fin-al ize? is displayed.
4 Press YES to start finalizing.
-►FINALIZE is shown, Fin.al is displayed and the actual
finalizing time left starts to count down.
23
Page 46

«1 -Y'"'"- •
■íí :•: -••:*
V. ^ •'•- .
■Ш--
j-i-ül.- .Ti
•rY’-.' '-T^sv
Page 47

(UN)FINALIZING, ERASING
m
a
Unfinalizing CDRW discs
If you want to record (or erase) on (from) a finalized CDRW,
you have to unfinalize it first.
Notes: - Unfinalizing will take approximately 2 minutes.
- After unfinalizing of the CDRW, cd changes to cdrw
on the display.
- When unfinalizing a CDRW with CD text on it
available, this text will be transferred to the
CD recorder memory. In case the memory Is full, you
have to erase text (see "Erasing from the memory")
or to finalize another disc first in order to obtain
memory space.
1 Insert the CDRW you want to unfinalize in the CD recorder
tray.
2 Press CDR to select the CD recorder.
3 Press FINALIZE on the unit.
-►Unf in.al ize? is displayed.
4 Press YES to start unfinalizing.
-►iJnf in.3l is displayed and the operation time
remaining starts to count down.
Erasing from a CDRW disc
5 Press YES to confirm your selection.
-►Erase?, the total playing time and the total number of
tracks to be erased are displayed. All track numbers will
blink in the music calendar.
6 Press YES to start erasing.
-►Erase is displayed and the operation time remaining
starts to count down. The track number of the actual
erased track will go off in the music calendar.
Erasing one or more tracks
1 Insert the CDRW from which you want to erase tracks in
the CD recorder tray.
2 Press CDR to select the CD recorder.
3 Press ERASE to enter the erasing menu.
4 Rotate JOG CONTROL to select the track number(s) you
wish to erase.
-►Erase and the track number (e.g. 19+)? are displayed.
• To select more tracks to be erased, repeat step 4.
Note: When erasing more tracks, the tracks to be erased
must be selected in sequence, starting from the last
recorded track. Example: The CDRW has 5 tracks
recorded on it. Now, you can erase tracks 5 and 4. You
can also erase tracks 5, 4 and 3, but you cannot erase
tracks 5 and 3!
It is possible to erase one or more tracks (starting from the
end of the last track) or the entire CDRW.
Erasing an entire CDRW
1 Insert the CDRW you want to erase in the CD recorder tray.
2 Press CDR to select the CD recorder.
3 Press ERASE to enter the erasing menu.
4 Rotate JOG CONTROL to select:
-►Er.3se Disc?: for erasing the entire disc
-►All track numbers selected for erasing will blink in the
music calendar. The remaining track numbers light up.
5 Press YES to confirm your selection.
-►Erase? is displayed.
6 Press YES to start erasing.
-►Erase is displayed and the operation time remaining
starts to count down. The track number of the currently
erased track will go off in the music calendar.
24
Page 48

' Л^;Г::г 'гч- :.-ч
V"- ••
Page 49

EDIT TEXT (on CD recorder only) |
Storing text during stop mode
After you have recorded your CDR(W) you can enter text, e.g.
names to discs and tracks. The text will be displayed during
playback. You can enter up to 60 characters per text field.
Only use an unfinalized CDR or CDRW (finalized CDRW must
be unfinalized first).
1 If necessary, press STOP □ on the unit (■ on the remote
control) to stop playback.
2 Press CDR to select the CD recorder.
3 Press EDIT TEXT on the unit to enter the text edit menu.
-►CD TEXT EDIT is blinking. Text Edi t is displayed.
FEATURES
Storing text during recording
You can store and edit text even while recording a single track
or single CD, or when recording from an external source or tuner.
Editing text during finalizing is not possible. Make sure, when
using high speed recording and automatic finalizing, to enter the
text before finalizing starts, otherwise automatic finalizing will
be cancelled.
• Follow steps 3-10 of "Storing text during stop mode".
A/ofe.’ Editing text is not possible when a copyprotected track
is analog recorded. Editing is stopped. CDTex t Saued
is displayed and your text is saved for later editing.
Auto copied text
When an artist's name has been stored for a track, it will be
copied automatically into the next track.
• Press either:
EDIT TEXT to confirm the copied text,
or
N0 to delete the copied text and enter new text.
Inserting a space
1 Press « SEARCH or» SEARCH (◄◄ or ►► on the
remote control) to move to the position where the space is
to be inserted.
-►The position starts blinking.
4 Press YES to confirm.
5 Rotate JOG CONTROL to select either:
-►Rlburn Rrtist: for editing the CD artist.
-►Rlburn Ti tie: for editing the CD title.
-►Rrtist Tr 1 or (2, 3,...): for editing the artist of
track 1 or (2,3,...).
-►Ti tie Tr 1 or (2, 3,...): for editing the title of track
1 or(2,3,...).
6 Press YES to confirm the selection.
7 Rotate JOG CONTROL (press the alphabet keys on the
remote control) to select a character.
8 Press YES to confirm the selection.
-►The cursor moves to the next character space.
9 Repeat steps 7 and 8 for adding further characters.
10 Press EDIT TEXT to save the characters that have been
selected and to exit to the last position in the text editing
menu.
-►Update is displayed.
2 Press YES to confirm the position of the insert character.
-►A space will be inserted, text will move to the right.
Deleting and substituting a character
1 Press <Kl SEARCH or» SEARCH or ►► on the
remote control) to move to the character's position to be
deleted or substituted.
-►The character starts blinking.
2 If you want to delete the character:
Press N0.
-►The character is deleted and the text is shifted one
position to the left.
If you want to substitute the character:
Rotate JOG CONTROL (press the alphabet keys on the
remote control) to select a new character.
Press YES to confirm the selection.
• To change another character, press «1 SEARCH or
>o SEARCH (◄◄ or ►► on the remote control).
25
Page 50

-iií’ - =‘5г.‘7л X -У.
.,у . ^ ^ ..Ч
'.'.WW i •
•'?•. ..Г".
г.р«
'.г.#. •
Page 51

FEATURES
<g
Erasing text
1 Press EDIT TEXT to enter the text edit menu.
-►CD TEXT EDIT is blinking. Text Edit is displayed.
2 Rotate JOG CONTROL to select the text erase menu.
-►Text Erase is displayed.
3 Press YES to confirm.
4 Rotate JOG CONTROL to select one of the following:
-►fll 1 Text; All text of the selected disc is chosen to
be erased in one step.
-►Fllburn Rrtist: CD artist's name is chosen to be
erased.
-►fllburn Title: CD title is chosen to be erased.
-►Rrtist Tr 1 or (2, 3,...): artist's name of track 1 or
(2,3,...) is chosen to be erased.
-►Title Tr 1 or (2, 3,...): title of track 1 or (2, 3,...)
is chosen to be erased.
5 Press YES to confirm your selection.
-►Erase? or Erase Rll? is displayed.
6
Press YES to start erasing.
-►Update is displayed and the chosen text is erased.
Erasing from the memory
When the text memory of your CD recorder is full, the messages
Memory Ful 1 and Final ize Disc will be displayed. If
you still want to add a new disc to the text memory, you either
have to erase another disc from the memory or you have to
finalize another disc.
1 Press EDIT TEXT to enter the text edit menu.
-►CD TEXT EDIT is blinking, Text Edi t is displayed.
2 Rotate JOG CONTROL to select the memory view menu.
-►Text Memory is displayed.
[Track editing (on CD changer only)
You can create a "track" by marking a passage of music
within one track on the current disc. This new "track" can be
used for recording or playing. The minimum track length is
4 seconds.
1 Press EDIT TRACK on the unit.
-►EDIT TRACK starts blinking, TraoL: and the current track
number ? are displayed. The current track number also
blinks in the music calendar.
2 Rotate JOG CONTROL until the desired track number is
displayed.
3 Press YES to confirm the selected track.
-►The marker position R and the track time will be
displayed. The first 4 seconds of the track will be played
continuously.
4 Press PLAY/PAUSE
start position of your new "track" (The initial position of
marker R is always the start of the chosen track).
• To fast forward to the desired start position, press
«1 SEARCH or» SEARCH on the unit.
• To fine tune the position, first press PLAY/PAUSE
the unit, then rotate JOG CONTROL.
5 Press YES to confirm the position of marker R.
-►The marker position B and the new "track" time will be
displayed. The first 4 seconds before marker position B
until marker position B will be played continuously.
6
Press PLAY/PAUSE
position of your new "track" (the initial position of marker B
is always the position of marker R plus 4 seconds).
> D D
on the unit to play to the desired
> D D
on the unit to play to the stop
_________
> 0 D
on
3 Press YES to confirm.
4 Rotate JOG CONTROL to select the disc you wish to erase
from the text memory.
5.Press YES to confirm.
-►Erase Memory is displayed.
6 Press YES to confirm the text erasure of that particular disc.
Note: If there are no discs stored in the text memory,
Memory Empty will be displayed.
26
7 Press YES to confirm the marked passage.
-►EDIT TRACK is shown, R-E and the track edit time are
displayed.
Note: If you open the CD changer tray, the edit is deleted.
Clearing the track edit
1 Press NO during stop.
-►Cle.ar R-B? is displayed.
2 Press YES to clear the markers.
-►The markers R-B are cleared.
Page 52

JV...4 »-V,^ ™v"'**’"'* ■
-"■- ——
•«>•!-• •-.. •;«!•/.•. ,'. ,T
•«
•:.г:
-
........
;-,w. ”?-t.
...
..................
■’”,•» WA Í*.
Page 53

oz
TUNER
2 Keep PROG (PROGRAM on the remote control) pressed for
more than 2 seconds.
-►flutoprograrn is displayed, prog and the current
preset number in the music calendar start blinking.
-►All available radio stations for the selected waveband
are stored automatically, prog goes off, the preset
number, the waveband and the frequency of the last
preset station are displayed briefly.
O’
• To store radio stations for another waveband, repeat steps
1-2. Make sure to select the next available preset number
first before proceeding, otherwise already programmed
radio stations may be erased.
• To exit the automatic programming, press PROG (PROGRAM
on the remote control).
's)
t
'U
.-A
|Tuning to radio stations
1 Press TUNER to select the tuner.
-►Tuner is scrolled.
2 Press TUNER again to select the desired waveband.
-►The selected waveband is displayed.
3 Keep <Ki SEARCH or t» SEARCH or ►► on the
remote control) pressed for more than a half second.
-►The selected waveband and Searching are
displayed. The radio tunes to a station with sufficient
signal strength.
4 Repeat searching until you find the desired station.
• To tune to a weak station, briefly press <ki SEARCH or
» SEARCH (◄◄ or ►► on the remote control) as often as
necessary for optimum reception.
|Storing radio stations________
It is possible to store up to 40 radio stations. Stations can be
selected and programmed automatically or you can do that
yourself. Programming will overwrite your former presets
starting from the last active preset station. After programming
the last stored preset station will be tuned.
____ ____
____
Note: Strong stations will always automatically be
programmed first, followed by the weak stations.
Manual programming
1 Follow steps 1 and 2 of "Tuning to radio stations".
2 Keep PROG (PROGRAM on the remote control) pressed for
less than 2 seconds.
-►PROG and the current preset number in the music
calendar start flashing.
3 Press <K1 SEARCH or» SEARCH (◄◄ or ►► on the
remote control) to tune to the desired radio station.
• To allocate the radio station to another preset number, rotate
JOG CONTROL (press !◄ or H on the remote control).
4 Press YES to confirm the setting.
-►PROG goes off, the preset number, the waveband and
the frequency of the preset station are displayed.
To exit manual programming, press PROG (PROGRAM on
the remote control).
Tuning to preset stations
Use JOG CONTROL (!◄ or ►! on the remote control) until
the preset number of the desired station is displayed.
Automatic programming
If no preset is tuned, automatic programming starts at preset
number one.
1 Follow steps 1 and 2 of "Tuning to radio stations".
27
Page 54

.' i '•••.V.!'. •••
■ '.Г"'-'' ' - ••••
•-J-
zA,'i.í.^ •“ ’-••'{'■—•'■
-Г":.--
•Î!5ï‘:A*r.'
Page 55

CLOCK/riMER
ffl
3
w'
You can select different timer functions which will be activated
at a chosen time. Make sure the clock is set before using one
of these features.
[sleep timer
You can set a certain period of time before the unit switches off.
1 Press SLEEP on the remote control until the desired sleeper
time is displayed.
-►SLEEP is shown and Sleep 60 minj 45 mirij
30 min, 15 min is displayed or, Sleep OFF is
displayed.
2 As soon as the desired time is displayed, do not press
SLEEP again.
-►After the chosen time has elapsed, the unit switches to
standby.
• To deactivate the sleep timer, press SLEEP on the remote
control until Sleep OFF is displayed.
Alarm timer
Alarm timer setting
Clock setting
Manual clock setting
1 Press (!) STANDBY ON as often as necessary on the unit to
switch the unit to standby.
2 Press CLOCK/TIMER on the unit.
3 Rotate JOG CONTROL to select the clock.
-►Clock is displayed and © starts blinking.
4 Press YES to confirm the selection.
-►The day of the week digit blinks.
5 Rotate JOG CONTROL to set the day.
6 Use « SEARCH or» SEARCH on the unit to move
from day of the week to hour.
7 Rotate JOG CONTROL to set the hour.
8 Repeat steps 6 and 7 to set the minutes.
9 Press YES to confirm the settings.
The unit can be used as an alarm clock, whereby the tuner,
CD recorder or CD changer starts playback automatically at a
preset time.
1 Press (!) STANDBY ON as often as necessary on the unit to
switch the unit to standby.
2 Press CLOCK/TIMER on the unit.
3 Rotate JOG CONTROL to select the alarm timer.
-►RLarm is displayed, alarm is blinking.
4 Press YES to confirm the selection.
-►The hour digit is blinking.
5 Rotate JOG CONTROL to set the hour.
6 Use « SEARCH or» SEARCH on the unit to move
from hour to minutes.
7 Rotate JOG CONTROL to set the minutes.
8 Press YES to confirm the time settings.
9 Rotate JOG CONTROL to select the source you want to be
woken up with.
28
10 Press YES on the unit to confirm the source selection.
• To stop the alarm, press (!) STANDBY ON on the unit.
Page 56

■ ry.j-. *:V/ь'.• ' .
J- I - ' ; ■•..c.iv. -i -.-
• .Г:,;:.™
..........
Page 57

CLOCK/TIMER
TECHNICAL DATA
Record timer
Record timer setting
The unit can do recordings automatically from an external
source or from a preset radio station at a preset time.
1 Follow steps 1 and 2 of "Alarm timer setting".
2 Rotate JOG CONTROL to select the record timer.
-►Rec Timer is displayed, REC is shown and 0 starts
blinking.
3 Press YES on the unit to confirm the selection.
-►The hour digit for the start of recording blinks.
4 Rotate JOG CONTROL to set the hour of start of recording.
5 Use <Kl SEARCH or» SEARCH on the unit to move
from hour to minutes of start of recording.
6 Rotate JOG CONTROL to set the minutes of start of recording.
7 Continue this procedure by using « SEARCH or
» SEARCH to move on to hour and minutes of end of
recording and to the day of the week. After each move,
always rotate JOG CONTROL to do the settings.
8 Press YES to confirm the settings.
9 Rotate JOG CONTROL to select from which you want to
record.
If you have chosen the tuner as source:
Rotate JOG CONTROL again to select a preset radio station
and confirm this selected station by pressing YES.
10 Press YES on the unit to confirm the source selection.
• To stop the recording press STOP □ on the unit.
Switching the alarm and record timer on/off |
• Press TIMER ON/OFF on the remote control repeatedly to
switch the alarm and/or record timer on or off:
-► ALARM is shown and RLarm OH is displayed when the
alarm timer is on.
-► REC is shown and REC T imer ON is displayed when
the record timer is on.
-► AWRM and REC are shown, REC+fllarm OH is
displayed when the alarm and record timer are on.
-► ALARM and REC go off, REC+RlarmOFF is displayed
when the alarm and record timer are off.
•
Subject to modification without notice.
General
AC Power..................................................................................120 V/60 Hz
Power consumption
Active.................................................................................................66 W
Standby..........................................................................................< 22 W
Economy power save mode
Dimensions, w x h x d........................................10.4 x 12.2 x 15.7 in.
Weight (without speakers)................................................................9 kg
Amplifier
Output power
Frequency response......................40-16,000 Hz FTC, +0.5/-1.5 dB
S/N ratio.................................................................................> 80 dBA (lEC)
Input sensitivity
AUXINL/R...............................................................................................800 mV
DIGITAL IN........................................500 mVpp (75 Q)/12-56 kHz
Output
Impedance speakers..................................................................> 6 Q
Impedance headphones
LINE OUT L/R.......................................................................................500 mV
DIGITAL OUT
SUBWOOFER OUT
CD changer
Number of programmable tracks
Frequency range............................................................................20-20,000 Hz
S/N ratio...........................................................................................> 92 dBA
Cross talk...........................................................................< -65 dB (1 kHz)
Total harmonic distortion...........................................< -94 dB (1 kHz)
CD recorder
Number of programmable tracks.........................................................99
CD playback
Frequency range
S/N ratio playback...............................................................> 92 dBA
Cross talk
Total harmonic distortion
Analog recording, digital playback
Frequency range
S/N ratio playback...............................................................> 86 dBA
Cross talk
Total harmonic distortion
Laser (CD recorder)
Type.............................................................Semiconductor laser GaAIAs
Wave length
Output power
Beam divergence..........................................................................................60 degree
Tuner
Wave range
FM..............................................................................87.5-108.0 MHz
AM....................................................................................530-1,700 kHz
Speakers
System..............................................................................3 way bass reflex
Impedance...................................................................................................6 Q
Woofer
Tweeter
Tweeter.............................................................................1x1", Polydome
Dimensions, h x w x d
Weight...........................................................................................4.6 kg/each
.......................
.......................................
.............................................................................
...................................................................
..................................................................
...................................................................
..................................................................
.........................................................
...................................
..................................................................................................1 X 6.5"
.........................................................
..........................................
....................................................
2 X 50 W FTC, 6 Q, 1 kHz, THD 10%
............................................
500 mVpp (75 Q)/44.1 kHz
........................................................
< -65 dB (1 kHz)
..................................
..................................
2.5 mW (Read), 35 mW (Write)
1 x 2.5", Ferro fluid cooled
< -84 dB (1 kHz)
< -65 dB (1 kHz)
< -81 dB (1 kHz)
775-795 nm (at 25° C)
12.2 x 9.4 x 12.7 in.
< 2 W
32 Q-600 Q
20-20,000 Hz
20-20,000 Hz
1 V
40
O)
(=
29
Page 58

- _S ^ - •_ -J * ; i
'i -л:. T., г “ "v * •• • \
-i
?.V. -•
;: тгл7У •
!¿
л
Page 59

TROUBLESHOOTING
m
3
ca_
m'
WARNING
Under no circumstances should you try to repair the
unit yourself as this will invalidate the guarantee. Do
not open the unit as there is a risk of electric shock.
If a fault occurs, first check the points listed, before taking
the unit for repair.
PROBLEM
No sound,
no power
No reaction to
controls
Poor radio reception
Poor bass sound
Bad sound
Remote control does not
function properly
Insert Disc indication
i.i.irong Disc indication,
Use Rudio CD indication
Disc Recouer indication
Disc Error indication
Check Input indication
Does not record
Recorded disc does not
play in another standard
CD player
POSSIBLE CAUSE
Volume is not correctly adjusted.
Headphones are connected.
Speakers are wrongly or not connected.
Power cable is not securely connected.
Electrostatic discharge
Weak radio signal
Antenna is positioned near a radiation source
such as a TV, VCR, computer, etc.
Speakers are not in phase.
Badly matched setting for the given type of
music or sound.
Batteries are inserted incorrectly.
Batteries are flat.
Distance to the unit is too large.
The CD(RW) is scratched badly or dirty.
No CD(RW) inserted or inserted upside down.
The laser lens is steamed up.
No digital audio disc is inserted.
Power loss
Disc Recover was not able
to repair the disc.
Wrong input is chosen.
No correct digital source is detected after
starting recording.
CDR(W) is scratched or dirty.
The inserted disc is not recordable.
Recording process is interrupted (power
loss, mechanical shock).
The inserted CDR(W) is not finalized.
The CDRW is inserted in a non-CDRW
compatible CD player.
If you are unable to solve a problem by following these hints,
consult your dealer or service center.
LASER SAFETY
This unit employs a laser. Only a qualified service
person should remove the cover or attempt to service
this device, due to possible eye injury.
SOLUTION
Adjust the volume.
Disconnect headphones.
Make sure speakers are properly connected.
Connect power cable properly.
Disconnect the unit from power supply, then
reconnect after a few seconds.
Direct the antenna for optimum reception.
Change the position of the interfering unit or
try to switch it off.
Connect the colored (or marked) wires to the
colored terminals and the black (or unmarked)
wires to the black terminals.
Correct the sound settings on the unit.
Insert batteries correctly.
Insert new batteries.
Reduce distance.
Replace or clean the disc.
Insert a CD(RW), with label facing upwards.
Wait until the lens has cleared.
Insert a digital audio disc marked with "Digital
Audio" and the special logo.
Wait a few minutes. The disc is being repaired.
The disc can still be played, but not recorded
or finalized further.
Select the correct input.
Make sure the connection cable is properly
connected.
Make sure the CDR(W) is absolutely free of
scratches and dust particles.
Insert a digital CDR(W) and make sure it is
unfinalized.
Start recording again.
Finalize the CDR(W).
Insert the CDRW in a CDRW compatible
CD player.
30
Page 60

% • '••♦tl*4»¡eV*;.». -.•V»VV»*.* j'y I
Page 61

LIMITED WARRANTY
AUDIO SYSTEM
One Year Free Labor
One Year Free Service on Parts
This product must be carried in for repair.
WHO IS COVERED?
You must have proof of purchase to receive warranty service. A sales
receipt or other document showing that you purchased the product
is considered proof of purchase.
WHAT IS COVERED?
Warranty coverage begins the day you buy your product. For one
year thereafter, all parts will be repaired or replaced, and labor is
free. After one year from the day of purchase, you pay for the
replacement or repair of all parts, and for all labor charges.
All parts, including repaired and replaced parts, are covered only for
the original warranty period. When the warranty on the product
expires, the warranty on all replaced and repaired parts also expires.
WHAT IS EXCLUDED?
Your warranty does not cover:
• labor charges for installation or setup of the product, adjustment
of customer controls on the product, and installation or repair of
antenna systems outside of the product.
• product repair and/or part replacement because of misuse, acci
dent, unauthorized repair or other cause not within the control of
Philips Consumer Electronics Company.
• reception problems caused by signal conditions or cable or anten
na systems outside the unit.
• a product that requires modification or adaptation to enable it to
operate in any country other than the country for which it was
designed, manufactured, approved and/or authorized, or repair of
products damaged by these modifications.
• incidental or consequential damages resulting from the product.
(Some states do not allow the exclusion of incidental or conse
quential damages, so the above exclusion may not apply to you.
This includes, but is not linriited to, prerecorded material, whether
copyrighted or not copyrigjited.)
• a product that is used for ¿ommercial or institutional purposes.
BEFORE REQUESTING SERVICE...
Please check your owner’s manual before requesting service.
Adjustments of the controls discussed there may save you a service
call.
TO GET WARRANTY SERVICE IN U.S.A.,
PUERTO RICO OR U.S. VIRGIN ISLANDS...
Take the product to a Philips factory service center (see enclosed
list) or authorized service center for repair.When the product has
been repaired, you must pick up the unit at the center. Centers may
keep defective parts. (In U.S.A., Puerto Rico and U.S.Virgin Islands, all
implied warranties, including implied warranties of merchantability
and fitness for a particular purpose, are limited in duration to the
duration of this express warranty. But, because some states do not
allow limitations on how long an implied warranty may last, this limi
tation may not apply to you.)
TO GET WARRANTY SERVICE IN CANADA...
Please contact Philips at:
1-800-661-6162 (French Speaking)
1-800-363-7278 (English Speaking)
(In Canada, this warranty is given in lieu of ail other warranties. No
other warranties are expressed or implied, including any implied war
ranties of merchantability or fitness for a particular purpose. Philips is
not liable under any circumstances for any direct, indirect, special,
incidental or consequential damages, howsoever incurred, even if
notified of the possibility of such damages.)
REMEMBER...
Please record the model and serial numbers found on the product
below. Also, please fill out and mail your warranty registration card
promptly. It will be easier for us to notify you if necessary.
WHERE IS SERVICE AVAILABLE?
Warranty service is available in all countries where the product is
officially distributed by Philips Consumer Electronics Company. In
countries where Philips Consumer Electronics Company does not
distribute the product, the local Philips service organization will
attempt to provide service (although there may be a delay if the
appropriate spare parts and technical manual(s) are not readily avail
able).
MAKE SURE YOU KEEP...
Please keep your sales receipt or other document showing proof of
purchase.Attach it to this owner’s manual and keep both nearby.Also
keep the original box and packing material in case you need to return
your product
This warranty gives you specific legal rights You may have other rights which vary from state-province to state!province.
Philips Service Solutions Group, P.O. Box 2976, Longview,Texas 75606, (903) 242-4800
EL4965E005 / MAC 4110/1-97
MODEL#
SERIAL#
Page 62

Page 63

Renvoyez votre carte d’enregistrement de garantie pour vous
assurer de recevoir tous les avantages auxquels vous avez droit.
Dès que rachat de votre appareil Philips est enregistré,
vous avez droit à tous les avantages dont bénéficient les
possesseurs des produits Philips.
^ Vérification I de garantie
Enregistrez votre produit dans les
10 jours pour confirmer votre droit à
une protection maximum selon les
termes et les conditions de votre
garantie Philips.
^ Confirmation i de possession
Votre carte d’enregistrement de
garantie prouve que vous possédez
l’appareil en cas de vol ou de perte
du produit.
Remplissez et renvoyez votre carte d'enregistrement de
garantie jointe à votre appareil sans tarder. Vous
bénéficierez de ces avantages importants.
PHILIPS
Vous félicitant de votre achat,
la « famille » vous souhaite la bienvenue!
Cher possesseur de produit Philips,
Nous vous remercions de la confiance dont vous témoignez à Philips.Vous avez
choisi l’un des produits actuellement sur le marché les mieux construits et
bénéficiant d’un des meilleurs service après-vente. Et nous mettrons tout en
oeuvre pour que vous demeuriez satisfait de votre produit au cours des
nombreuses années à venir.
A présent membre de la « famille » Philips, vous êtes protégé par l’une des
garanties les plus complètes et l’un des réseaux de service les plus
exceptionnels de l’industrie.
De plus, grâce à votre achat vous recevrez toutes les informations, offres et
tous les bonus auxquels vous avez droit ainsi qu’un accès facile à notre réseau
d’achat à domicile très pratique.
Et, plus important encore, vous pouvez compter sur notre dévouement
incomparable à vous apporter une satisfaction totale.
Nous vous souhaitons ainsi la bienvenue tout en vous remerciant d’avoir investi
dans un produit Philips.
Sincèrement,
^ Enregistrement i
du modèle
Renvoyez votre carte d’enregistrement
de garantie dès aujourd’hui pour vous
assurer de recevoir toutes les
informations, les offres et les bonus
auxquels vous avez droit en tant que
possesseur de ce modèle.
Connaissez ces
symboles de è
A
AHENTION: POUR REDUIRE LE RE80UE DE CHOC ELECTRIQUE, NE PAS ENLEVER
LE COUVERCLE (NI LE PANNEAU ARRIERE). CET APPAREIL NE COMPORTE AUCUNE
PIECE POUVANT TRE REPAREE PAR L’imUBATEUR. CONFIER SON ENTRETIEN A
A
sécurité de chacun, nous vous prions de ne pas
retirer le boîtier de ce produit.
A
vous ne lisez pas les informations s’y reportant.
DANGER: ne pas exposer cet
ÉQUIPEMENT A LA PLUIE NI A UNE HUMIDITÉ
EXCESSIVE POUR ÉVITER LES RISQUES
D’INCENDIE ET DE CHOC ÉLECTRIQUE.
ATTENTION: Pour éviter les chocs
électriques, introduire la lame la plus large de
la fiche dans la borne correspondante de la
prise et pousser jusqu’au fond.
RISQUE DE CHOC ELECTRIQUE
Cet « éclair à pointe de flèche »
indique qu’un matériau non isolé,
situé à l’intérieur de l’unité, risque
de provoquer un choc électrique. Pour la
ie « point d’exclamation » attire
votre attention sur des sujets
risquant de provoquer des
problèmes de fonctionnement et d’entretien si
17
NE PAS OUVRIR
UN TECHNICIEN QUALIFIE.
A
Robert Minkhorst
Président Directeur général
P.S. N’oubiiez pas de renvoyer votre carte d’enregistrement de
garantie dans les 10 jours pour obtenir le maximum de votre
produit Philips.Veuillez donc la renvoyer dès maintenant!
L ‘adresse de PHILIPS sur ¡e World Wide Web est: http://www.philipsusa.com
Cet espace vous est réservé
Inscrivez ci-dessous le numéro de série situé à
l’arrière du bloc. Conservez cette information
pour vous y reporter à l’avenir.
№ de modèle
№ de série
_______________________ __________
Page 64

••*••....»
irv ¿ f ^¿ ..••Т/ *:i"/
.Su if'T.* •
*:. .-TA'.
•гг: —
'—ib..
■•fT’«'üVftw7.vj;i
.'¿Jir*.- •
Л**
...
Page 65

CONSIGNES DE SECURITE IMPORTANTES -A lire avant toute utilisation du matériel
Ce produit a été conçu et fabriqué en accord avec des
normes de sécurité et de qualité très strictes. Il existe
toutefois des précautions d'installation et de fonctionnement
qu'il est important de connaître et de respecter.
1. Lisez ces instructions. - Il est impératif de lire toutes
les consignes de sécurité et les instructions de
fonctionnement avant d'utiliser l'appareil.
2. Conservez ces instructions. - Il est recommandé de
conserver ces consignes de sécurité et instructions de
fonctionnement pour référence ultérieure.
3. Respectez les avertissements. - Tous les
avertissements inscrits sur l'appareil lui-même ou
figurant dans les instructions de fonctionnement doivent
être respectés.
4. Suivez toutes les instructions. - Il est impératif de
suivre toutes les instructions de fonctionnement et
d'utilisation.
5. N'utilisez pas cet appareil à proximité d'une
source d'eau - comme par exemple, une baignoire, un
lavabo, un évier de cuisine, un baquet de lingerie, ou
dans une cave humide, près d'une piscine, etc.
6. Nettoyez l'appareil uniquement avec un chiffon
humide. - Cet appareil doit être nettoyé uniquement
selon la procédure recommandée par le fabricant.
7. Installez l'appareil selon les instructions du
fabricant. N'obstruez aucun orifice de ventilation.
- Par exemple, l'appareil ne doit pas être posé sur un
canapé, un lit, un tapis, ou autre surface du même type ;
il ne doit pas non plus être placé dans un meuble intégré
comme un ensemble bibliothèque ou autre où le
système de ventilation de l'appareil serait bloqué.
9. Ne détruisez pas la sécurité
incorporée dans la prise de terre
ou prise polarisée fournie - Une Prise
prise polarisée est dotée de polarisée c.A.
deux lames dont une plus large que l'autre. Une prise de
terre est dotée de deux fiches semblables et d'une
troisième, plus large, qui assure la mise à la terre pour
votre sécurité. Si la prise fournie ne convient pas à la
prise murale dont vous disposez, consultez un électricien
pour remplacer et adapter votre prise murale.
10. Protégez le cordon d'alimentation pour éviter de
marcher dessus ou de le pincer particulièrement aux
endroits des prises, mâles et femelles, et au point de
raccordement sur l'appareil lui-même.
11 Utilisez uniquement des accessoires ou options
recommandés par le fabricant.
Utilisez uniquement un meuble sur
roulettes, un support, un pied, une étagère
ou une table de type recommandé par le
fabricant. Si vous utilisez un meuble sur
roulettes, veillez à le déplacer avec
précaution afin d'éviter tout accident
corporel si l'équipement se renversait.
13. Débranchez l'appareil pendant les orages ou s'il doit
rester inutilisé pendant une période de temps prolongée.
14. Pour toute réparation, faites appel à un personnel
qualifié. Une réparation sera nécessaire si l'appareil a
subi des dommages tels que détérioration du cordon
d'alimentation ou de la prise, liquide renversé sur
l'appareil, ou encore si un objet est tombé dessus, si
l'appareil a été exposé à la pluie ou à l'humidité, s'il ne
fonctionne pas correctement ou s'il a fait une chute.
8. N'installez pas l'appareil près d'une source de
chaleur comme par exemple des radiateurs, bouches de
chaleur, cuisinières, ou autres appareils (même des
amplificateurs) dégageant de la chaleur.
EL 4562-F004:99/3
33
Page 66

Page 67

INFORMATIONS GENERALES
-a-
09
O
S.
S3'
Conseils de sécurité .,32-33
Informations générales
Accessoires fournis.....................................................................................................34
Informations de mise en place................................................................................. 34
Entretien......................................................................................................................34
Informations relatives à l'environnement.......................:
Disques destinés à l'enregistrement.........................................................................35
Disques destinées à la lecture...................................................................................35
Manipulation des CD(RW)........................................................................................35
Commandes et raccordements................................................................................ 38-37
Installation
Raccordement au secteur
Raccordement des haut*parleurs
r--"’;fiaecc|£#tpë|yEi|arvt|d|ls|.;,üïM
Raccordements audio analogiques..................................................;
r p V Raccordements audio numériques......................................................................... 39
Branchement d'un subwoofer............................................................................. ..39
Télécommande
pV'':;îdjich8idedat|léGom|i|||i|jA
:;i’;;iiiéédi1qltéliddn|npidëi;:“ftrtœ:l;.ï
Fonctions de base
j i P : :Misé eri iniféhéi! olis|*ÿp ||^; p
Insertion des disques dans le chargeur de CD et l'enregistreur de CD
Lecture d'un CD(RW|............................................................................................... 42
Commande du son...,,..,,.,,.,,,..,......,..:......,,.,...,..,„„.,......,.,„.43
Mode Démo.................................................................................................................. 43 ^
Sélection d'un disque sur le chargeur de CD
Sélection d'une piste et recherche............................................................................44
¡i: : P:SH№M
Programma
;;P; tiPfdgiwii||idhiisiW#|rasJ^^^
P; i Itfljpdiiié)’dnb |istad||: pidgÿmf éiK
Effacer le programme................................................................................................45
Réaliser un programme pour un enregistrement..................................................,45
A propos de l'enregistrement
Lp:'p{‘iniorrnatidns :|i'BaSlÎ ,1,1^
’ ; ¡p; ;pDirédtilJ|hdf||d0i|ihg}c|i|:iUp
p^i^iAutdPt|véipteiгdlP(IKHfiiÿ.ïïiïP.iPrii..pp;;ppS,i;í&^^
ppp^pppTpucheililiiiljPlfg^
Enregistrement interne
P- .';ycd8|pieHWiiiiidt|ht|||PPSPÿ^
Enregistrement rapide et finalisation automatique
fP;.P ;:p:Ertreg|siritdaht la^telÆïPP&i^
Enregistrement normal et écoute............................................................................ 48
p.: P;InfdgiireiftehWlIiliteliPiBPPiPiiïpplPj^
Enregistrement externe
Enregistrement analogique ou numérique?........................................................... 50
Enregistrement avec démarrage automatique.......................................................50
ppp!;P^finrégistirei#dt.hiidditeiïPS.ftPi.Pv,»îi
P p: ppAjouieptimalgui lepptstlpi:^
(DéHinalisation, effacement
Finaliser les disques CDR{W).................................................................................... 51
Définaliser des disques CDRW................................................................................. 52
pP;P'PpÉWScèf'dUf;q6pi'ïMiRll^ï''>P'”ï-rt^
Fonctions
EDIT TEXT (sur l'enregistreur de CD uniquement)
Edition de pistes (sur le chargeur de CD uniquement).............................................54
Tuner
Recherche de stations de radio
Mise en mémoire des stations de radio.....
Recherche des stations préprogrammées..................................................................55
Horloge/minuterie
pïp?Pié|^agi|dttWto#|Pp|p|îp;:|,®iiî;p;^
:ppP||i:t|itériSpd|Mdew'№ite|pi;^^
pP; i:?|/lîhüt|rfSd'8l|rrh®:fSt||ÆLPfc
P ■ p;Miftutérîàpd|qnreg(fttpdntiài..i.;|
Actîver/désactiver la minuterie d'alarme et d'enregistrement................................57
Caractéristiques techniques............................................................................................ 57
Recherche des pannes.................................................................................................... 58
(iGi8r8éîéTgititfé.l,p;;S.K4:s:fo^^^^
........................................................................................
............................................................................
..............................................................................
..................................................................
..........................................
.........^............
...................
..........................................................
................................................
.............................................
53-54 ^
55
Accessoires fournis
- 2 haut-parleurs et 2 câbles de haut-parleurs
- Télécommande
34
- 2 piles pour la télécommande, taille AA
- Antenne cadre AM
- Fil d'antenne FM
- Câble d'alimentation électrique
38
38
Informations de mise en place
Installez l'appareil sur une surface plane, solide et stable.
39
Assurez-vous qu'il y ait suffisamment de place autour de
l'appareil pour éviter toute surchauffe.
Des téléphones portables en activité près du Mini-système
HIFI CDR sont susceptibles d'en perturber le fonctionnement.
42 :
Entretien
Nettoyez l'appareil à l'aide d'un
chiffon doux, légèrement humide et
44
non pelucheux. N'utilisez pas de
produits de nettoyage, car ils sont
susceptibles d'avoir un effet corrosif.
N'exposez jamais l'appareil, les piles
ou les disques à l'humidité, à la pluie
ou à une chaleur excessive (chauffage
ou lumière directe du soleil).
Informations relatives à l'environnement
47
55 ;
Tous les matériaux d'emballage superflus ont été supprimés.
Nous avons fait tout notre possible pour que l'emballage
puisse être trié en trois matériaux : carton (boîte), mousse de
polystyrène (protections) et polyéthylène (sachets, plaques de
protection en mousse).
Votre appareil est fabriqué dans des matériaux pouvant être
recyclés, s'il est démonté par une société spécialisée. Veuillez
respecter les règlements locaux lorsque vous vous débarrassez
de l'emballage, des piles usagées ou de votre ancien appareil.
P
En tant que partenaire d'ENERGY
STAR®, Philips a déterminé que ce
produit répond aux lignes directrices
d'ENERGY STAR® en matière de
rendement énergétique.
34
Page 68

oÿV«l^«v
•Í
?■ • *гГ»-'^ -^V.* ► Л*
Page 69

INFORMATIONS GENERALES
|Disques destinés à renregistrement
Pour l'enregistrement, veillez à n'utiliser que des disques audio
spéciaux, sur lesquels figurent la mention « Digital Audio » et
les logos repris ci-dessous.
il existe deux types différents de disques audio susceptibles
d'être utilisés avec cet enregistreur de CD :
Les disques CD audio enregistrables
(CDR)
Ces disques peuvent être enregistrés une
seule fois et lus par tous les lecteurs de
CD et enregistreurs de CD classiques,
après avoir été finalisés.
Les disques CD audio réenregistrables (CDRW)
Il est possible d'enregistrer sur ces
disques, de les effacer et de réenregistrer
à plusieurs reprise. Ils peuvent ensuite être
lus sur des lecteurs de CD et des enregistreurs
de CD compatibles CDRW, après avoir été finalisés
Tous les lecteurs de CD et enregistreurs de CD
Philips arborant l'autocollant ci-contre sont
compatibles avec les CDRW.
Pour garantir le bon fonctionnement de votre appareil, nous
vous recommandons de n'utiliser que des disques audio CDR
et CDRW Philips.
_____________
COMPACT
DIGITAL AUDIO
Recordable
COMPACT
DIGITAL AUDIO
[Rewritable J
Manipulation des CD(RW)
Si le Mini-système HIFI CDR Philips ne peut lire les disques,
utilisez correctement un CD de nettoyage courant, afin de
nettoyer les lentilles, et ce, avant de porter l'appareil en
réparation. D'autres méthodes de nettoyage risquent de détruire
les lentilles. Assurez-vous que les tiroirs sont toujours fermés
pour éviter que des poussières ne recouvrent les lentilles.
La lentille peut se couvrir de buée lorsque vous faites passer
brutalement l'appareil du froid à la chaleur. Il n'est alors plus
possible de lire un CD(RW). Laissez l'appareil dans un
environnement chaud jusqu'à ce que la buée s'évapore.
Pour sortir facilement un CD(RW) de
son boîtier, appuyez sur la broche
centrale tout en soulevant le CD(RW).
Prenez toujours un CD(RW) par le bord et
rangez-le après l’avoir utilisé. N'inscrivez
jamais rien sur un CD ou n'y collez
aucune étiquette. N’écrivez que sur le
côté imprimé d'un CDR ou d'un CDRW,
et uniquement avec un stylo feutre.
Pour nettoyer un CDRW, essuyez-le en
ligne droite du centre vers le bord, à
l'aide d'un chiffon doux non pelucheux.
Les produits de nettoyage risquent
d'endommager le disque I
y»
(5
O
e
CD
Remarque : N'utilisez pas un CDR ou un CDRW pour ordinateur,
dans la mesure où l'enregistrement ne fonctionnera
pas correctement!
L'enregistrement est autorisé pour autant que les droits
d'auteurs et les autres droits des tiers soient respectés.
Dans certains pays, l'utilisation du Mini-système HIFI
CDR Philips telle qu'indiquée ou suggérée dans le
présent manuel d'utilisateur peut nécessiter
l'autorisation des titulaires des droits d'auteurs.
iDisques destinés à la lecture
Pour lire des disques à l'aide de ce chargeur de CD et de cet
enregistreur de CD, vous pouvez utiliser les disques audio suivants :
- Tous les CD audio préenregistrés
-Tous les disques audio CDR et CDRW
Remarques : - N'essayez pas de lire un CD-ROM, un CD-I ou
un CDV!
- Les disques CDR(W) qui sont enregistrés sur un
ordinateur ne peuvent être utilisés que s'ils ont
subi un traitement adapté aux normes audio
(IEC958 : Partie consommateur). Session unique
seulement!
AHENTION
L'utilisation de commandes ou de réglages ou
l'exécution de procédures autres que celles décrites
dans le présent manuel risque d'entraîner une exposition
à un rayonnement dangereux ou d'avoir d'autres
conséquences sur la sécurité.
35
Page 70

ФР--..
i -•••• X
■а.Sv? ^ /-'г*г -
•r.vÄ»^..;v^*
7кШ-:-т-
Page 71

Ю
T
I
Ш
Mit
c/>
COMMANDES ET RACCORDEMENTS
A l'arrière
|T] AC MAINS ~
[2] SPEAKERS6FRONT lyR
Й LINE OUT lyR
0AUXINL/R
...........................
.........................
............................
36
Après que toutes les
autres connexions ont été
effectuées, raccordez le
câble d'alimentation à la
prise électrique.
Pour un résultat optimal,
n'utilisez que le câble
d'alimentation d'origine.
.branchement aux haut-
parleurs fournis
.raccordement à l'entrée audio
analogique d'un autre appareil
.raccordement à la sortie
audio analogique d'un autre
appareil
SUBWOOFER OUT......................raccordement à l'entrée d'un
subwoofer
[б] FM AERIAL 300 Q
0AM AERIAL
U] DIGITAL OUT
[9] DIGITAL IN
...........................
........................
.............raccordement à l'antenne
..................................
.....................................
raccordement au fil
d'antenne fourni
cadre fournie
raccordement à l'entrée
coaxiale d'un appareil
numérique
raccordement à la sortie
coaxiale d'un appareil
numérique
Page 72

'J \ » ♦. / ** ^ V* * I
> '• ^y« • •
.... ... ..... ........ ........ ..... ... ..... ... .
" 1д:>л^С-h""'
• .'jfe*'v ¡-“■••••'■
-«4Ь*'--1Л- ..... . ...
Л ш* т *
Page 73

COMMANDES ET RACCORDEMENTS
A l'avant
[ï^ Choix de la source
j]]]
..............................................................
[i| CD CHANGE......................................sélectionne le porte-disque
[ul ...............................................................affichage
[ï^ DISPLAY
Ql Commande multifonctions
JDG CONTROL
YES......................................................confirme la sélection
STOP □.............................................arrête la lecture/
_____________________________
CD 1, CD 2, CD 3...........................sélectionne le chargeur de
CD, passe au CD 1, au CD 2
ou au CD 3
CDR....................................................sélectionne l'enregistreur de CD
TUNER...............................................sélectionne le tuner
DIGITAL/ANALDG AUX....sélectionne un appareil
supplémentaire en entrée
plateau du chargeur de CD
OPEN/CLOSE......................
CD RECDRDER...............................plateau de l'enregistreur de CD
(!) STANDBY DN............................allume l'appareil et le met en
............................................
Commande rotative :
...............................
Touches à enfoncer :
» SEARCH.........................................CDC, CDR : effectue une
PLAY/PAUSE >DD
PROG................................................ouvre/ferme le menu de
EDIT TEXT
EDIT TRACK
REC LEVEL
« SEARCH
NO.....................................................annule une sélection
.......................................
...................................
......................................
.......................................
..........
........................
ouvre et ferme le plateau du
chargeur de CD
suivant
veille
sélectionne les informations
ou le texte affiché
CDC, CDR : sélectionne la
piste précédente/suivante
TUNER : sélectionne la
station programmée
précédente/suivante
recherche vers l'avant, passe
en revue les pistes d'un
programme, commande le
curseur dans les différents
menus TUNER : passe à une
fréquence radio supérieure.
démarre et interrompt la
lecture/l'enregistrement
programmation
entre/sort dans/du menu
d'édition de texte
entre/sort dans/du menu
d'édition de piste
permet de régler le volume
d'enregistrement à partir de
la commande rotative
l'enregistrement d'un CD, ferme
la mémoire de programmation
CDC, CDR : effectue une
recherche vers l'arrière,
passe en revue les pistes
d'un programme, commande
le curseur dans les différents
menus TUNER : passe à une
fréquence radio inférieure
[ïi FINALIZE...........................................finalise et définalise les
enregistrements
[Ü REC TYPE
[2| RECORD
CD-^CD
COMPILE CD
ERASE
Commande du son
MASTER VOLUME règle le volume
DSC....................................................DIGITAL SOUND CONTROL
INCREDIBLE SURROUND ..crée un effet stéréo
LOUDNESS
PURE
ImI
Remarque : Le fait de brancher un casque désactive les
^ OPEN/CLOSE....................................ouvre et ferme le plateau de
CD TEXT..........................................parcours les informations du
CLOCK/TIMER
H iR SENSOR
Remarque : Vous constaterez que différentes touches seront
.........................................
..........................................
................................
..............................................
....................................
................................................
.....................................................
haut-parleurs.
.............................
........................................
éclairées sur l'appareil en fonction des différents
modes et programmes que vous aurez choisis.
Cela vous servira d'indication pour trouver
facilement les touches qui vous seront utiles.
entre/sort dans/du menu
d'enregistrement
sélectionne un enregistrement
rapide et une finalisation
automatique du CD actuel
sélectionne un enregistrement
rapide et une finalisation
automatique du programme
actuel
efface les enregistrements
sélectionne les
caractéristiques du son
incroyablement large
augmente les aigus et les
graves
active/désactive les réglages
de DSC
prise pour casque de 3,5 mm
l'enregistreur de CD
texte du CD
sélectionne la fonction
d'horloge, active et désactive
la minuterie
capteur pour la
télécommande à infrarouge
Ç2
'15
O'
e
CS
37
Page 74

*./•
.-V^-- ■>.
¡’•St. ■i'í^..
Г'* .......
-"'■ ‘.'.Z.~''\ïî-..
■■■“ V.. :iv.v
"Г... isr
.M. • U, îVvi^:
■■■
Page 75

«O
7
D>
a
B)
m'
INSTALLATION
Raccordement au secteur Raccordement des antennes
La plaquette d'identification se situe a l'arriere de
l'appareil.
1 Vérifiez que la tension d'alimentation indiquée sur la
plaque d'identification du modèle correspond bien à celle
de votre réseau local. Si tel n'est pas le cas, adressez-vous
à votre revendeur ou à votre société de réparation.
2 Assurez-vous que toutes les connexions ont bien été
effectuées avant de brancher l'appareil au secteur.
3 Raccordez le câble d'alimentation fourni à la prise
AC MAINS ~ et à la prise murale, de manière à raccorder
l'appareil au réseau électrique.
Pour un résultat optimal, n'utilisez que le câble
d'alimentation d'origine.
L'appareil consomme toujours de l'électricité lorsqu'il est en
veille. Pour couper complètement l'alimentation de l'appareil,
débrancher la fiche de la prise murale.
Pour éviter toute surchauffe de l'appareil, ce dernier
possède un circuit de sécurité intégré. Il se peut, par
conséquent, que votre appareil s'éteigne dans des
conditions extrêmes. Si cela se produit, débranchez-le
et laissez-le refroidir avant de le réutiliser.
Antenne AM
L'antenne cadre fournie n'est conçue que pour être utilisée
à l'intérieur.
1 Enfoncez la prise de l'antenne cadre à la prise AM AERIAL,
comme indiqué ci-dessous.
2 Placez l'antenne aussi loin que possible d'un téléviseur,
d'un magnétoscope ou d'autres sources de rayonnements.
3 Tournez l'antenne pour obtenir une réception optimale.
Antenne FM
Le fil d'antenne fourni ne peut servir que pour capter des
stations proches. Pour une meilleure réception, nous vous
recommandons d'utiliser un système par câble ou une
antenne extérieure.
1 Ouvrez les connecteurs à enfichage direct FM AERIAL 300 Q
en abaissant le levier comme indiqué ci-dessous.
.Raccordement des haut-parleurs
Le raccordement des haut-parleurs s'effectue grâce à des
connecteurs à enfichage direct. Utilisez-les de la manière
indiquée ci-dessous.
1 Connectez le fil coloré (ou marqué) sur la borne rouge et le
fil noir (ou non-marqué) sur la borne noire.
2 Branchez :
- le haut-parleur gauche sur les bornes L (rouge et noire)
- le haut-parleur droit sur les bornes R (rouge et noire)
2 Placez chacun des fils d'antenne dans un orifice.
3 Fermez les connecteurs à enfichage direct en déplaçant le
levier.
4 Changez la position de l'antenne pour obtenir une réception
optimale.
L'appareil répond aux normes FCC, Part 15 et 21CFR
1040.10. Fonctionnement soumis aux deux conditions
suivantes :
1. Cet appareil ne doit pas provoquer d'interférences
nuisibles, et
2. Cet appareil doit accepter toute interférence reçue, y
compris les interférences susceptibles de provoquer
un fonctionement peu satisfaisant.
38
Page 76

•-Ü ri
'<!
. J
• 1
1 '
::! f;
: •
; 4
i
#1 #
N ^
'Í' '.iiÿ
■ì
Ih :v
1 1
■ 1 i
Oli
'^1
ьши
Щь
: • ilÜ Л •
_ / J
•í:
*i * il
'ii'
t!ÜÍ
il 1,1 !'
Page 77

INSTALLATION
O»
c
2
|Raccordements audio analogiques
AUX IN lyR
Cette chaîne peut être utilisée avec d'autres appareils, à
l'instar d'un enregistreur à cassettes, d'un téléviseur ou d'un
magnétoscope.
1 Insérez la fiche rouge d'un câble cinch dans la prise rouge
AUX IN R et la fiche blanche dans la prise blanche AUX IN L.
2 Raccordez l'autre extrémité du câble cinch aux sorties audio
de l'appareil supplémentaire.
3 Appuyez à plusieurs reprises sur DIGITAL / ANALOG AUX
pour sélectionner l'entrée analogique pour cet appareil.
-►L'indication flux Analog est affichée.
4 Utilisez votre appareil comme d'habitude et réglez le son et
le volume à l'aide de la chaîne.
Remarque : Il n'est pas possible de brancher directement une
platine sur l'entrée AUX IN L/R. Si vous souhaitez
utiliser une platine avec votre chaîne, vous devez
brancher un amplificateur sur l'entrée AUX IN L/R,
puis relier la platine à cet amplificateur.
LINE OUT L7R
Vous pouvez utiliser cette sortie pour la lecture ou
l'enregistrement sur n'importe quel appareil audio analogique,
comme un amplificateur ou un enregistreur à cassettes.
• Utilisez un câble cinch pour relier les entrées analogiques audio
de l'appareil supplémentaire à la prise LINE OUT L/R de la
chaîne, et utilisez votre appareil de façon tout à fait normale.
Raccordements audio numériques
DIGITAL IN
Vous pouvez utiliser cette entrée coaxiale pour enregistrer à
partir de tout appareil audio numérique équipé d'une sortie
numérique coaxiale, par exemple un lecteur de CD ou de DVD.
1 Reliez la sortie coaxiale de l'appareil supplémentaire à la
prise DIGITAL IN de la chaîne à l'aide d'un câble coaxial.
2 Appuyez à plusieurs reprises sur DIGITAL / ANALOG AUX
pour sélectionner l'entrée numérique pour cet appareil.
-►L'indication AUX Digital est affichée.
3 Utilisez votre appareil comme d'habitude.
DIGITAL DUT
Vous pouvez utiliser cette sortie coaxiale pour enregistrer sur
n'importe quel appareil audio numérique équipe d'une entrée
coaxiale numérique, par exemple, un enregistreur de CD.
• Utilisez un câble coaxial pour relier l'entrée coaxiale de
l'appareil supplémentaire à la prise DIGITAL OUT de la
chaîne et utilisez votre appareil comme d'habitude.
Branchement d'un subwoofer
Vous pouvez utiliser un subwoofer pour améliorer
considérablement la restitution des graves par votre chaîne.
1 Utilisez un câble cinch pour relier l'entrée du subwoofer
à la prise SUBWOOFER OUT de la chaîne.
2 Suivez les instructions fournies avec le subwoofer.
39
Page 78

•гг. -ÎJ-i-Vi
•ч-
Page 79

“O
S2.
ô5'
TELECOMMANDE
Touches de la télécommande
0
......................................
CDR, TUNER, CD1,
CD2, CD3, AUX
Touche alphanumériques
1-0...........................numéros destinés aux choix des pistes ou
ABC - XYZ
SPACE
....................
EDIT TEXT
— VOLUME
+ VOLUME
►
N ....................................CDC, CDR : sélection de la piste précédente.
N
■.....................................arrêt de la lecture / de l'enregistrement,
►►
◄◄
Il.......................................interruption de la lecture/de l'enregistrement
YES...................................choix d'une sélection
NO...................................annulation d'une sélection
PROGRAM....................ouverture/fermeture du menu de
SHUFFLE........................lecture aléatoire des pistes
REPEAT
TRACK INCR
TIMER ON/OFF
SLEEP
MUTE
BRIGHTNESS
L BALANCE
R BALANCE
LOUDNESS...................augmentation des aigus et des graves
INCREDIBLE
SURROUND
PURE...............................activation/désactivation des réglages DSC
Hemarque : Appuyez toujours sur la touche correspondant à la
.....................
...................................
.....................................
..................................
..................................
..........................
..............................
.............................
mise en veille de l'appareil
...........
choix de la source
des stations
.............
insertion de lettres dans les textes
insertion d'un espace dans les textes
activation du menu d'édition de texte
...............
diminution du volume
.................
augmentation du volume
démarrage de la lecture/de l'enregistrement
TUNER : sélection de la station programmée
précédente.
CDC, CDR : sélection de la piste suivante.
TUNER : sélection de la station
programmée suivante.
clôture de la mémoire de programme
CDC, CDR : effectue une recherche vers
l'avant, passe en revue les pistes d'un
programme, commande le curseur dans
les différents menus
TUNER : passe à une fréquence radio
supérieure
CDC, CDR : effectue une recherche vers
l'arrière, passe en revue les pistes d'un
programme, commande le curseur dans
les différents menus
TUNER : passe à une fréquence radio
inférieure
programmation
répétition d'une piste, du CD(RW) en
entier ou du programme
................
sélection d'un incrément automatique ou
manuel d'une piste
...........
activation ou désactivation de la minuterie
activation de la minuterie de mise en veille
coupure du son
...............
réglage de la luminosité de l'affichage
...................
..................
.................
réglage du volume de balance du haut-
parleur gauche
réglage du volume de balance du
haut-parleur droit
création d'un effet stéréo incroyablement
large
source que vous souhaitez commander (par
exemple, CD1) avant de choisir la touche de
fonction voulue (par exemple, SHUFFLE],
Piles de la télécommande
Ouvrez le logement des piles de
la télécommande et placez-y
2 piles alcalines de type AA
(R06, UM-3).
N'utilisez pas ensemble des piles
neuves et usagées ou de types
différents.
Retirez les piles lorsqu'elles sont déchargées ou si vous ne devez
pas vous servir de la télécommande pendant un certain temps.
Les piles contiennent des substances chimiques, de
sorte qu'il convient de s'en débarrasser d'une façon
adéquate.
40
Page 80

л
. . _•
■ jÿ-àî;,-.
V>V/.S'>
■tO:
'Й1
■ i i t \
Page 81

pii H ';} tût’ ’> .■ t i ' I , ^.N- -h ) V ;. , .
lii»iiŒ^^fc=EzJ==±E±™£^
Cette zone sert à vous communiquer des informations à propos du
chargeur de CD, de l'enregistreur de CD, des fréquences du tuner,
des options du menu, des valeurs et des messages qui défilent.
Témoins et fanions
m
Fanions
CD TEXT
....................................
CD TEXT EDIT
EDIT TRACK
REC ©
PROG.......................................le menu de programmation est actif
............................
..............................
.....................................
0.............................................l'horloge est sélectionnée
ALARM 0
..................................
SLEEP
.......................................
REPEAT DISC.............................le disque choisi est lu en boucle
REPEAT TRACK.........................la piste actuelle est lue en boucle
REPEAT ALL
SHUFFLE
.............................
...................................
Chargeur de CD
►................................lecture en cours
Il
...................................
I, c?, 3
...........................
R I, c?, 3
RW 1,3,3
..........................
..........................
CD
CD
le texte du CD est disponible
le menu d'édition de texte est actif
le menu d'édition de piste est actif
la minuterie d'enregistrement est
sélectionnée
la minuterie de l'alarme est sélectionnée
la minuterie de mise en veille est
sélectionnée
tous les disques du chargeur de CD (ou le
programme) sont (est) lus (lu) en boucle
toutes les pistes du programme ou du
(des) disque(s) présent(s) dans le
chargeur de CD ou dans le enregistreur
de CD sont lues de façon aléatoire
.nombre de porte-disques chargés
lecture interrompue
le porte-disque 1,2 ou 3 est sélectionné
et contient un CD préenregistré, un CDR
ou un CDRW finalisé
le porte-disque 1,2 ou 3 est sélectionné
et contient un CDR non finalisé
le porte-disque 1,2 ou 3 est sélectionné
et contient un CDRW non finalisé
ECRAN
Enregistreur de CD
COMPILE CDC
FM TUNER — ^
CD-*-CD ....................................Le disque actuel est en cours
AUX
@) Il......................................La lecture est interrompue.
RECORDING IN PROGRESS..Enregistrement en cours.
CD.............................................Un CD préenregistré, un CDR ou un
CD R
CD RW
FINALIZE
ALC
Tuner
STEREO
AUX
DIGITAL
ANALOG....................................Utilisation d'une entrée analogique
Calendrier musical, témoins du volume et télécommande
INCREDIBLE SURROUND....L'option Incredible Surround est activée.
LOUDNESS
PURE.........................................Les réglages DSC sont désactivés.
o(((.........................................Réception d'un signal de la
Calendrier musical
1-20
+.........................................CDC, CDR : le disque ou le programme
...........................
.......................
..........................................
...............................
........................................
.....................................
..................................
..........................................
....................................
....................................
mmmM
^
................................
..................................
.......Vumètre.
Le programme actuel est en cours
d'enregistrement rapide avec
finalisation automatique.
La station FM est en cours
d'enregistrement.
d'enregistrement rapide avec
finalisation automatique.
L'enregistrement est en cours à partir
d'une source extérieure.
La lecture est activée.
.....
Etat d'avancement de l'enregistrement.
CDRW finalisé a été chargé.
Un CDR non finalisé a été chargé.
Un CDRW non finalisé a été chargé.
Début de la (dé)finalisation.
Contrôle automatique du niveau activé.
Une station FM est captée en stéréo.
Utilisation d'une entrée numérique
pour une source extérieure.
pour une source extérieure.
OUND
znjzz
LOUDNESS
PURE
L1U.U.1J.LLU»
L'augmentation des graves et des
aigus est activée.
télécommande.
CDC, CDR : nombre réel de pistes lues,
nombre de pistes d'un disque ou d'un
programme.
TUNER ; numéro programmé de la
station
contient plus de 20 pistes.
TUNER : plus de 20 stations sont
enregistrées.
'rê
CS
(O
41
Page 82

5'—w¿'"'
^
___
Ч-—•*Г'.*ЯГ» .?• ••. .* . .
. . ч*.?!2Я
я::.^ • к?:--.
- i—Ü--
Page 83

FONCTIONS DE BASE
Chargeur de CD :
Appuyez une nouvelle fois sur OPEN/CLOSE pour rentrer le
plateau.
-►Le plateau rentre et Reading est affiché.
-►Si un disque non finalisé est inséré, Ini ti.al izing
sera affiché.
-►CD est affiché, le numéro du porte-disque, le nombre
total de pistes et la durée totale de lecture du disque du
dernier porte-disque choisi. Les numéros des pistes
(A
K, "'M >
f
Mise en marche, mise en veille
• Pour mettre la chaîne en marche, appuyez sur la touche
ô STANDBY ON de l'appareil.
• Pour mettre la chaîne en veille, appuyez une nouvelle
fois sur la touche (!) STANDBY ON de l'appareil ((!) sur la
télécommande).
Insertion des disques dans le chargeur de CD et l'enregistreur de CD
Important!
1} Ce système est conçu pour des CD(RW) classiques. Par
conséquent, n'utilisez pas d'accessoires disponibles sur
le marché tels qu'adaptateurs de disques ou feuilles de
traitement de CD, etc., car ils pourraient bloquer le
mécanisme du chargeur.
2) Ne placez pas plus d'un disque par plateau.
1 Chargeur de CD :
Appuyez sur OPEN/CLOSE pour faire sortir le plateau du
chargeur de CD.
-►Open CDC est affiché et le plateau sort.
Enregistreur de CD :
Appuyez sur OPEN/CLOSE pour faire sortir le plateau de
l'enregistreur de CD.
-►Open CDR est affiché et le plateau sort.
2 Chargeur de CD :
Le chargeur de CD peut accueillir jusqu'à trois disques
pour une lecture continue sans interruption. Placez un disque
audio (face imprimée vers le haut) sur le porte-disque de droite.
• Vous pouvez placer un autre disque sur le porte-disque de
gauche.
• Pour placer un troisième disque audio, appuyez sur CD CHANGE.
-►Le tiroir rotative tournera jusqu'à ce que le porte-disque
vide soit du côté droit.
Enregistreur de CD :
Placez un disque audio (face imprimée vers le haut) sur le plateau.
s'allument sur le calendrier musical.
Enregistreur de CD :
Appuyez une nouvelle fois sur OPEN/CLOSE pour rentrer le
plateau.
-►Le plateau rentre et Reading est affiché.
-►Si un disque non finalisé est inséré, l'écran affichera
Initializi ng.
-►CDR est affiché, le nombre total de pistes et la durée
totale de lecture du disque. Les numéros des pistes
s'allument sur le calendrier musical.
Lecture d'un CD(RW)
1 Appuyez sur PLAY/PAUSE
pour démarrer la lecture.
Chargeur de CD :
-►CD est affiché, le numéro du plateau, le numéro de la
piste jouée et le temps de lecture écoulé. Le numéro de la
piste jouée clignote également sur le calendrier musical.
Enregistreur de CD :
-►CDR est affiché, le numéro de la piste jouée et le temps
de lecture écoulé. Le numéro de la piste jouée clignote
également sur le calendrier musical.
• Pour passer en revue les renseignements suivants, appuyez
à plusieurs reprises sur la touche DISPLAY de la chaîne :
-►Numéro de la piste, temps de lecture restant de la piste
jouée
-►Numéro de la piste, temps de lecture restant du disque
-►Numéro de la piste, temps de lecture réel de la piste
jouée
2 Appuyez sur STOP □ ( ■ sur la télécommande) pour arrêter
la lecture.
Chargeur de CD :
-►CD est affiché, le numéro du plateau, le nombre total de
pistes et la durée totale de lecture du disque.
Enregistreur de CD :
-►CDR est affiché, le nombre total de pistes et la durée
totale de lecture du disque.
• Pour passer en revue les renseignements suivants, appuyez
à plusieurs reprises sur la touche DISPLAY de la chaîne :
-►Nombre total de pistes, durée de lecture totale du disque.
-►Affichage du texte du CD.
• Vous pouvez interrompre la lecture en appuyant sur
PLAY/PAUSE >DD ( Il sur la télécommande).
-►Le temps de lecture écoulé au moment de l'interruption
clignote.
• Pour reprendre la lecture, appuyez une nouvelle fois sur
PLAY/PAUSE >DD ( ► sur la télécommande).
>o a
( ► sur la télécommande)
42
Page 84

Page 85

FONCTIONS DE BASE
MUTE
Cette fonction vous permet de couper provisoirement le son
sans éteindre l'appareil.
1 Appuyez sur MUTE sur la télécommande pour couper le son.
-►Mute est affiché, et la lecture / l'enregistrement se
poursuit sans son.
Commande du son
Réglage du volume
• Réglez le volume à l'aide de MASTER VOLUME
( —VOLUME/+ sur la télécommande).
-►Le niveau du volume est affiché en dB (décibels).
DSC
Le Digital Sound Control vous permet de choisir parmi
différents réglages sonores prédéfinis.
• Appuyez sur DSC à plusieurs reprises pour choisir les
caractéristiques sonores voulues.
* •
—►Optima 1, Jazz, CLassie, Rock, Uocal, Techno.
Incredible Surround
C'est la distance entre les haut-parleurs avant qui détermine
le son stéréo. L'Incredible Surround vous permet de bénéficier
d'un effet stéréo incroyablement large, indépendamment de
la distance entre les haut-parleurs.
• Appuyez sur INCREDIBLE SURROUND (INCREDIBLE
SURROUND sur la télécommande) pour activer ou
désactiver l'effet sonore surround.
-►INCREDIBLE SURROUND apparaît et l'indication
I ncr-ed i b 1 e Surround est affichée si l'effet
sonore surround est activé.
Remarque : Les effets de ¡'Incredible Surround sont susceptibles
de varier en fonction des différents types de
musique.
2 Appuyez une nouvelle fois sur MUTE sur la télécommande
pour réactiver le son.
Balance des haut-parleurs
Il est possible de régler le volume relatif des haut-parleurs
avant reliés à l'appareil.
• Appuyez sur L BALANCE ou sur R BALANCE sur la
télécommande pour régler le volume relatif du haut-parleur
gauche ou droit.
-►Balance L (ou R) suivi du volume réel du
haut-parleur avant gauche (ou droit) est affiché.
-►Lorsque le volume des deux haut-parleurs est le même,
l'écran affiche Balance L=R.
iMode Démo ,
Le mode démo affiche diverses fonctions de l'appareil et
démarre automatiquement.
• Si vous appuyez sur une touche correspondant à une source :
-►L'appareil passe à la source choisie.
SI vous appuyez surô STANDBY ON .■
-►L'appareil se met en veille. La démonstration reprend
après quelques secondes.
Annulation du mode démo
• Appuyez sur STOP □ pendant 3 secondes au minimum pour
annuler le mode démo.
-►Le mode démo est annulé définitivement et l'appareil se
place en veille. Quelques secondes plus tard, l'appareil
passe en mode l'économie d'énergie.
<Q
rm,
T'fiSh /'
CO
PURE
• Appuyez sur PURE à plusieurs reprises pour activer ou
désactiver les réglages DSC.
-►PURE apparaît et Pure est affichée si les réglages DSC
sont désactivés.
LOUDNESS
• Appuyez sur LOUDNESS pour activer ou désactiver
l'augmentation des aigus et des graves.
-►LOUDNESS apparaît et l'indication Loudness est affichée
si l'augmentation des aigus et des graves est activée.
43
Page 86

yv у??.! I ¿ 1‘.^ « -i
:xf:}^:;..iv;:r: ... -
-í.jK'. íí.,í,:-
Seï".- -:?:•*••-•
_ k::^.i--‘
f-'r. . .:t-z-
Page 87

FONCTIONS DE BASE
•O
Q>
»
Crt"
Sélection d'un disque sur le chargeur de CD
Appuyez sur CD 1, CD 2 ou CD 3 pour sélectionner le disque
correspondant.
Sélection d'une piste et recherche
Sélection d'une piste en cours de lecture
• Faites tourner JOG CONTROL (appuyez sur N ou N sur la
télécommande) pour passer au début de la piste précédente
ou suivante sur le disque choisi.
-►La lecture se poursuit avec la piste choisie.
Sélection d'une piste lorsque la lecture est arrêtée
1 Faitestourner JOG CONTROL (appuyez sur N ou N sur la
télécommande) pour passer à la piste voulue.
2 Appuyez sur PLAY/PAUSE
pour lancer la lecture.
H^La lecture commence à la piste sélectionnée.
Remarque : Plutôt que d’utiliser W ou N sur la télécommande,
vous pouvez également entrer directement le
numéro de piste souhaité à l'aide des touches
numériques. Pour les numéros à 2 chiffres, appuyez
rapidement sur les deux touches successivement.
Recherche d'un passage en cours de lecture
> D D
( ► sur la télécommande)
1 Appuyez sur <M SEARCH ou » SEARCH (◄◄ ou ►► sur
la télécommande) sans relâcher afin de trouver un passage
particulier vers l'avant ou vers l'arrière.
-►La recherche débute et la lecture se poursuit avec un
volume réduit. La recherche s'accélère après trois
secondes et le volume est coupé.
2 Relâchez la touche sur le passage souhaité.
-►La lecture reprend normalement.
Remarque : Lorsque la fonction SHUFFLE est activée, que
l'appareil rejoue une piste ou qu'il suit un
programme, la recherche n'est possible que sur la
piste en cours de lecture.
Lecture aléatoire des pistes
1 Appuyez sur SHUFFLE sur la télécommande en cour de
lecture.
-►SHUFFLE apparaît et toutes les pistes du programme ou
du (des) disque(s) présent(s) dans le chargeur de CD ou
l'enregistreur de CD sont lues de façon aléatoire.
2 Pour revenir à une lecture normale, appuyez une nouvelle
fois sur SHUFFLE.
Texte du CD
titre de l'album ou du morceau choisi, informations reprises
sur un CD spécialement encodé.
• Veillez à introduire un CD avec le texte du CD.
-►CD text apparaît et le titre de l'album défile une fois.
Texte du CD lorsque la lecture est à l'arrêt
• Appuyez sur CD TEXT sur l'appareil pour voir les
informations suivantes, qui défileront une seule fois (si
elles sont disponibles) :
- Titre de l'album
- Nom de l'artiste de l'album
Texte du CD en cours de lecture
• Appuyez sur CD TEXT sur l'appareil pour voir les
informations suivantes, qui défileront une seule fois (si
elles sont disponibles) :
- Nom de l'artiste du morceau (sur l'enregistreur de CD
uniquement)
- Titre du morceau
SHUFFLE et REPEAT
Répétition d'une piste, du disque ou du programme
1 En cours de lecture, appuyez à plusieurs reprises sur
REPEAT sur la télécommande, pour choisir ;
-►REPEAT TRACK : La piste actuelle est lue en boucle.
-►REPEAT DISC : L'ensemble du disque sélectionné est lu en
boucle.
-►REPEAT ALL : Tous les disques du chargeur de CD (ou le
programme) sont (est) lu(s) en boucle.
2 La lecture débute dans le mode choisi.
3 Pour revenir à une lecture normale, appuyez sur REPEAT sur
la télécommande jusqu'à ce que l'indication disparaisse de
l'écran.
Remarque : L’option rep eat disc n'est pas disponible en mode
SHUFFLE ou pendant la lecture d'un programme.
44
Page 88

I .f » • :íf •] w\
Page 89

Programmation des numéros de piste
Vous pouvez sélectionner des pistes et enregistrer leur numéro
dans la mémoire soit du chargeur de CD soit de l'enregistreur de
CD. Si vous utilisez ce programme pour la lecture, vous pouvez
opter pour l'une de ces deux mémoires. En revanche, si vous
voulez vous en servir pour un enregistrement, n'utilisez que la
mémoire du chargeur de CD ! N'importe quelle piste peut être
enregistrée plus d'une fois.
1 Chargez le(s) disque(s) voulu(s) sur le(s) plateau(x).
2 Appuyez sur CD 1, CD 2, CD 3 ou CDR pour choisir le disque.
3 Appuyez sur PROG sur l'appareil (PROGRAM sur la
télécommande).
-►PROG se met à clignoter et l'indication Progr arn est
affichée.
PROGRAMME
Supprimer une piste d'un programme
1 Si nécessaire, appuyez sur STOP □ sur l'appareil ( ■ sur la
télécommande) pour arrêter la lecture.
2 Appuyez sur CD 1, CD 2, CD 3 ou CDR pour choisir la
mémoire souhaitée.
3 Appuyez sur PROG (PROGRAM sur la télécommande), puis
sur « SEARCFI ou l» SEARCH (◄◄ ou ►► sur la
télécommande) pour parcourir les différentes étapes du
programme.
-►Le numéro de la piste correspondant à l'étape choisie et
la durée totale du programme sont affichés.
4 Appuyez sur NO pour supprimer la piste du programme.
-►Cle.3red apparaît brièvement.
-►Le numéro de piste programmé suivant passe à cette
position et est affiché en même temps que le numéro
de l'étape et la durée totale restante du programme.
Effacer le programme
1 Si nécessaire, appuyez sur STOP □ sur l'appareil ( ■ sur la
télécommande) pour arrêter la lecture.
2 Appuyez sur NO.
-►Clear Prog? est affiché.
3 Appuyez sur YES pour effacer le programme.
-►Prog Cleared est affiché et pro g disparaît.
¡2
'râ
c
4 Si le CD 1, le CD 2 ou le CD 3 est choisi :
Faites tourner JOG CONTROL pour choisir :
-►CDl (ou 2, 3) fill: Toutes les pistes du CD 1 (ou 2, 3)
seront programmées.
-►CDl (ou 2, 3) et numéro de piste : Le numéro de la
piste du CD 1 (ou 2, 3) sera programmé.
CDR est choisi :
Faites tourner JOG CONTROL (appuyez sur les touches
numériques de la télécommande; pour les numéros à
2 chiffres, appuyez rapidement sur les deux touches
successivement) pour choisir le numéro de piste.
5 Appuyez sur YES pour placer votre sélection en mémoire.
-►Le nombre de pistes programmées (step). Prog et la
durée totale du programme sont affichés. Le numéro
des pistes clignote sur le calendrier musical.
6 Sélectionnez et enregistrez de cette manière toutes les
pistes souhaitées.
7 Appuyez sur PROG sur l'appareil (PROGRAM sur la
télécommande) pour arrêter la programmation.
-►PROG apparaît toujours et le programme est désormais
disponible.
Remarque : Si le nombre maximal de pistes programmables
est atteint, l'écran affiche Program f u 11.
Remarque : Si vous ouvrez l'enregistreur de CD ou faites
sortir le porte-CD du chargeur, leurs programmes
respectifs seront effacés.
Réaliser un programme pour un enregistrement |
1 Sélectionnez et enregistrez toutes les pistes souhaitées
dans la mémoire du chargeur de CD (voir « Programmation
des numéros de piste »).
2 Lancez le menu d'enregistrement (voir « Enregistrement
interne »).
• Si la durée totale du programme est supérieure à la durée
d'enregistrement restante sur le CDR(W) :
-►L'indication No t f i 11 i ng ! apparaît brièvement, suivie
du temps d'enregistrement restant et de Record Prog ?
Si vous démarrez l'enregistrement, seules les pistes
complètes du programme qui peuvent l'être seront
enregistrées sur le CDR(W).
• Pour modifier le programme, appuyez sur N0.
-►Edi t Progr.3rri est affiché brièvement, prog et la
durée du programme se mettent à clignoter. Vous pouvez
désormais modifier le programme (voir « Programmation
des numéros de piste », « Supprimer une piste d'un
programme » et « Effacer le programme »).
45
Page 90

.•л *> -V.--;.*- -T Vi ”. • •. • •-> . - •
''xi¿'■
j' r*T.T. *■•'• •
ГЛГ
..г:
~!лОа-Ч'>
"¿•i í.r** • ¡ r^; •;.. ..
••-••■ - т'У...
...........
... r..^wT..v
■ • •
Page 91

A PROPOS DE L'ENREGISTREMENT
"П
Ш
Informations de base
L'enregistreur de CD vous offre 3 fonctions principales :
- Enregistrement à partir du chargeur de CD et du tuner
internes ou au départ d'une source externe
- Finalisation de vos CDR(W) et définalisation de vos
CDRW
- Effacement de vos CDRW
La procédure d'enregistrement est la même pour les CDR et les
CDRW. Veillez à ce que le CDR(W) ne présente
absolument aucune rayure ou aucune trace de poussière.
Pour les enregistrements, la longueur minimale de la piste est
de 4 secondes. Vous pouvez enregistrer jusqu'à 99 pistes au
maximum sur un disque. La durée minimale d'enregistrement
restant sur le disque est de 7 secondes. Si tel n'est pas le
cas, l'indication Does not fi f. est affichée et vous ne
pouvez passer au mode de veille d'enregistrement.
N'OUBLIEZ PAS LA FINALISATION!
La finalisation d'un CDR(W) est une procédure simple,
nécessaire pour :
- lire un CDR enregistré sur un lecteur de CD standard
- lire un CDRW enregistré sur un lecteur de CD
compatible CDRW et sur un enregistreur de CD
Direct Line Recording (DLR)
L'enregistreur de CD est équipé de la technique très performante
du Direct Line Recording, qui garantit un enregistrement parfait
du disque de source, ce qui signifie un véritable enregistrement
« bit par bit ». Le DLR est toujours activé lorsque vous effectuez
des enregistrements normaux en mode d'écoute.
¡Auto Level Control (ALC)
L'Auto Level Control (commande automatique du niveau) fait
en sorte que les pistes enregistrés sur le disque aient un
niveau de volume semblable. Les pistes déjà enregistrées sur
le disque CDR(W) servent toujours de référence pour le
niveau de volume des enregistrements ultérieurs. L'ALC est
actif lorsque alc est affiché.
La commande automatique du niveau est activée lorsque :
- l'option COMPILE CD est utilisée,
- un disque, une piste ou une édition de piste est
enregistrée rapidement et que quelque chose est déjà
enregistré sur le CDR(W),
- un programme (composé à partir de plus d'un disque) du
chargeur de CD est enregistré rapidement ou,
- l'option CD—CD est utilisé et que quelque chose est déjà
enregistré sur le CDR(W).
Protection des droits d'auteurs
Le Serial Copy Management System (SCMS) empêche de
réaliser une copie numérique à partir d'une autre copie
numérique. Ce système permet d'effectuer un enregistrement
numérique à partir d'un original, bien que dans certains pays,
cela puisse nécessiter l'autorisation des titulaires des droits
d'auteurs.
Si vous essayez d'enregistrer un disque protégé à partir d'une
source externe, l'indication Copy Protect est affichée. Il
n'est alors plus possible d'effectuer d'enregistrement
numérique.
Si vous essayez d'enregistrer un disque protégé à partir du
chargeur de CD interne, vous ne pourrez pas effectuer
d'enregistrement numérique. Cependant, l'enregistreur de CD
passe automatiquement à un enregistrement analogique.
Enregistrer le texte du CD
Si le CD original dispose d'un texte de CD, celui-ci sera
enregistré automatiquement, pour autant que le texte de CD
ne soit pas protégé contre les copies. Si tel est le cas,
l'enregistrement du texte du CD ne sera pas possible et
l'indication Te>:t. Protect sera affichée.
La commande automatique de niveau n'est pas activée
lorsque :
- l'option CD-"CD est utilisée et que rien n'est encore
enregistré sur le CDR(W),
- vous effectuez un enregistrement depuis une station de
radio FM,
-vous effectuez un enregistrement depuis une source
externe, ou
- vous effectuez un enregistrement normal en mode d'écoute.
Touche REC LEVEL
Vous pouvez régler le niveau de référence de
l'enregistrement. Cette fonction est également disponible lors
que l'ALC est actif. Elle peut servir à réaliser un
enchaînement à la fin ou début de l'enregistrement.
1 Maintenez REC LEVEL enfoncée sur l'appareil pour que la
molette de commande serve au réglage du niveau
d'enregistrement.
2 Faites tourner la molette de commande vers la gauche pour
définir le niveau d'enregistrement voulu.
-►Le niveau d'enregistrement réel est affiché (en dB).
46
• Le niveau d'enregistrement est remis à zéro après chaque
mise en veille de l'appareil.
Page 92

Zé'm T ^ . • Л • •» Ä T'*
‘.AiiiViiv-' ‘T!”;.~'■
:sv«rV* 's<- •* ••■• ■ “ü
-•• • ■ ••. :t
Й^-= :• -Sï^':.-
-..-.T
Page 93

ENREGISTREMENT INTERNE
Modes d'enregistrement
Les enregistrements internes vous permettent d'enregistrer
à partir du chargeur de CD ou du tuner interne. Vous avez le
choix parmi les modes d'enregistrement suivants :
- Enregistrement rapide et finalisation automatique :
Rapide et facile ! Enregistrez et finalisez votre CDR(W)
en une seule étape rapide, alors que le son est coupé.
Vous pouvez enregistrer le CD actuel ou un programme du
chargeur de CD.
- Enregistrement rapide :
Enregistrez rapidement votre CDR(W) alors que le son est
coupé. Vous pouvez enregistrer un CD entier, une piste, un
programme ou une édition de piste à partir du chargeur de CD.
- Enregistrement normal et écoute :
Ecoutez l'enregistrement en même temps que vous le réalisez.
Vous pouvez enregistrer un CD entier, une piste, un
programme ou une édition de piste à partir du chargeur de CD.
- Enregistrement manuel :
Démarrez et coupez manuellement votre enregistrement
et écoutez-le. Vous pouvez réaliser des enregistrements
de la radio à partir du tuner FM.
Enregistrement rapide et finalisation automatique
Enregistrement rapide et finalisation automatique (en
option) du programme actuel
1 Assurez-vous que le CDR(W) ne présente absolument
aucune rayure ni aucune trace de poussière.
2 Appuyez sur COMPILE CD sur l'appareil pour passer au
mode d'enregistrement.
-►L'écran laisse apparaître les deux platines et la flèche
se met à clignoter. La durée d'enregistrement restante
du CDR(W), la durée totale de lecture du CD source et
l'indication Record Prog? sont affichées.
3 Appuyez soit ;
sur YES pour confirmer,
soit
sur N0 pour modifier le programme.
-►PROG commence à clignoter. Vous pouvez désormais
modifier le programme (voir « Programme ») et revenir au
mode d'enregistrement en appuyant sur COMPILE CD.
4 ñuto Fin? est affiché.
Appuyez soit :
sur YES, pour finaliser le CDR(W) après l'enregistrement,
soit
sur N0, pour ne pas finaliser le CDR(W) après
l'enregistrement.
'râ
(A
O
c
CO
Enregistrement rapide et finalisation automatique du
disque actuel
1 Assurez-vous que le CDR(W) ne présente absolument
aucune rayure ni aucune trace de poussière.
2 Appuyez sur CD-^CD sur l'appareil pour passer au mode
d'enregistrement.
-►L'écran laisse apparaître les deux platines et la flèche
se met à clignoter. La durée d'enregistrement restante
du CDR(W), la durée totale de lecture du CD source et
l'indication Record CDl (ou 2, 3)? sont affichées.
3 Appuyez sur YES pour lancer l'enregistrement et la finalisation.
-►La flèche s'allume, recording in progress est affiché,
l'enregistrement rapide et la finalisation débutent et le
temps d'enregistrement réel restant est affiché.
-►La flèche s'allume, recording in progress est affiché,
l'enregistrement rapide et la finalisation (si elle a été
sélectionnée) débutent et (e temps d'enregistrement
réel restant est affiché.
Remarque : Si aucun programme n'est disponible lorsque
vous appuyez sur COMPILE CD, vous passez
directement au menu de programmation. Réalisez
votre programmation, puis revenez en mode
d'enregistrement en appuyant sur PROGRAM ou
sur COMPILE CD.
N'OUBUEZ PAS LA FINALiSATION!
La finalisation d'un CDR(W) est une procédure simple,
nécessaire pour :
■ lire un CDR enregistré sur un lecteur de CD standard
- lire un CDRW enregistré sur un lecteur de CD
compatible CDRW et sur un enregistreur de CD
Remarque : Si un programme était déjà disponible avant que vous
appuyiez sur CD~»CD, celui-ci ne sera pas pris en
considération, pro g s'éteint et le disque actuel est
enregistré. Lorsque l'enregistrement est terminé, pro g
réapparaît et le programme est à nouveau disponible.
47
Page 94

Page 95

ENREGISTREMENT INTERNE
5 Appuyez sur YES pour confirmer votre sélection.
-►L'écran laisse apparaître les deux platines et la flèche
se met à clignoter. La durée d'enregistrement restante
du CDR(W), la durée totale d'enregistrement du CDR(W)
et l'indication
Record CDl (ou 2, 3)?, Record
Prog? ou Record R-B? sont affichées.
Remarque : Lorsque le CDR(W) contient déjà un enregistrement,
l'ALC se met également en fonction et l'indication
ALC apparaît
6 Appuyez sur YES pour lancer l'enregistrement rapide.
-►La flèche s'allume, recording in progress est affiché,
l'enregistrement rapide démarre et le temps
d'enregistrement réel restant est affiché.
• Pour arrêter l'enregistrement, appuyez sur STOP □ sur l'appareil.
Enregistrement normal et écoute
Enregistrement normal et écoute d'un disque entier,
d'une piste, d'un programme ou d'une édition de piste
1 Assurez-vous que le CDR(W) ne présente absolument
aucune rayure ni aucune trace de poussière.
Enregistrement rapide
Enregistrement rapide d'un disque entier, d'une piste,
d'un programme ou d'une édition de piste
1 Assurez-vous que le CDR(W) ne présente absolument
aucune rayure ni aucune trace de poussière.
2 Appuyez sur CD 1, CD 2 ou CD 3 pour sélectionner le disque
à partir duquel vous désirez enregistrer.
3 Appuyez sur REC TYPE sur l'appareil pour activer le menu
d'enregistrement.
4 Faites tourner JOG CONTROL pour choisir l'un des modes
d'enregistrement rapide suivants :
Si vous avez choisi un disque du chargeur de CD :
-►CD F.3st? : pour l'enregistrement rapide d'un disque
entier
• Passez au point 5.
-►Tr.acl< Fast? : pour l'enregistrement rapide d'une piste
• Appuyez sur YES pour confirmer.
• Faites tourner JOG CONTROL pour sélectionner la piste.
-►Rec Tr et le numéro de la piste sont affichés.
• Passez au point 6.
Si le mode de programmation du chargeur de CD est
disponible :
-►Prog Fast? : pour l'enregistrement rapide du disque
ou du programme sélectionné
Si le mode d'édition de piste du chargeur de CD est
disponible :
-►R-B Fast? : pour l'enregistrement rapide de la piste
A-B
2 Suivez les étapes 2 et 3 dans « Enregistrement rapide ».
3 Faites tourner JOG CONTROL pour choisir l'un des modes
d'enregistrement rapide suivants :
Si vous avez choisi un disque du chargeur de CD :
-►CD Listen? : pour écouter le disque en entier
pendant un enregistrement normal
-►TrackListen? : pour écouter la piste pendant un
enregistrement normal
• Appuyez sur YES pour confirmer.
• Faites tourner JOG CONTROL pour sélectionner la piste.
-►Rec Tr et le numéro de la piste sont affichés.
• Passez au point 6 dans « Enregistrement rapide ».
Si le mode de programmation du chargeur de CD est
disponible ;
-►Prog Listen? : pour écouter le programme pendant
un enregistrement normal
Si le mode d'édition de piste du chargeur de CD est
disponible :
-►R-B Listen? : pour écouter la piste A-B pendant un
enregistrement normal
4 Suivez les étapes 5 et 6 dans « Enregistrement rapide ».
• Pour arrêter l'enregistrement, appuyez sur STOP □ sur l'appareil.
NVUBLIEZ PAS IA FINALISATION!
La finalisation d'un CDR(W) est une procédure simple,
nécessaire pour :
- lire un CDR enregistré sur un lecteur de CD standard
- lire un CDRW enregistré sur un lecteur de CD
compatible CDRW et sur un enregistreur de CD
48
Page 96

■>,' '•,‘,'. •/, ". :•.-*-гт
I ’ ’-• C. ■'•'•' ' ‘^¿:'’~'ii^'''
■• Vs.-.-.» '-' - W--'-l
■-*
....................
"Í r'.s,:t-.:
Й- -Ч:
Page 97

ENREGISTREMENT INTERNE
VÌ
'(5
c
(Q
Enregistrement manuel
Enregistrement manuel à partir du tuner FM
1 Assurez-vous que le CDR(W) ne présente absolument
aucune rayure ni aucune trace de poussière.
2 Appuyez à plusieurs reprises sur TUNER pour sélectionner
le tuner FM. Choisissez ensuite la station de radio voulue
(voir « Recherches de stations de radio »).
3 Appuyez sur REC TYPE sur l'appareil pour activer le menu
d'enregistrement.
-►FM Tuner? est affiché.
4 Appuyez sur YES pour confirmer.
-►i.i.i.ai t et Record? sont affichés.
5 Appuyez sur YES pour lancer l'enregistrement.
-►La flèche s'allume, recording in progress est affiché,
l'enregistrement manuel démarre et le temps
d'enregistrement réel restant est affiché.
6 Appuyez sur STOP □ pour arrêter l'enregistrement.
N'OUBUEZ PAS LA FINALISATION!
La finalisation d'un CDR(Wj est une procédure simple,
necessaire pour :
- lire un CDR enregistré sur un lecteur de CD standard
lire un CDRW enregistré sur un lecteur de CD
compatible CDRW et sur un enregistreur de CD
49
Page 98

• .*ч • *
л.
Page 99

Ю
ENREGISTREMENT EXTERNE
Remarque : Si la lecture à partir de la source sélectionnée débute
au miiieu d'une piste, l'enregistrement commencera
au début de la piste suivante, ou après 2,1 secondes
de blanc pour des enregistrements analogiques.
7 Si une source numérique est sélectionnée :
L'enregistreur de CD s'arrête automatique à l'issue du
ai
S
ш
Й'
Enregistrement analogique ou numérique ?
^our réaliser des enregistrements à partir d'une source externe,
nous vous recommandons de n'utiliser l'enregistrement analogique
que si l'enregistrement numérique n'est pas disponible. En général,
les enregistrements numériques présentent une meilleure qualité
sonore.
Enregistrement avec démarrage automatique |
Enregistrement d'un disque complet ou d'une piste
avec démarrage automatique
1 Assurez-vous que le CDR(W) ne présente absolument
aucune rayure ni aucune trace de poussière.
2 Appuyez à plusieurs reprises sur DIGITAL / ANALOG AUX
pour sélectionner l'entrée qui sera utilisée pour la source
externe à partir de laquelle vous souhaitez enregistrer,
-►flux Digital est affiché si l'entrée numérique est
sélectionnée.
-►flUK Analog est affiché si l'entrée analogique est
sélectionnée.
3 Appuyez sur REC TYPE sur l'appareil pour activer le menu
d'enregistrement.
4 Faites tourner JOG CONTROL pour sélectionner :
-►AUX CD? : pour l'enregistrement avec démarrage
synchronisé d'un disque entier
-►AUX Track? : pour l'enregistrement avec démarrage
synchronisé d'une piste
5 Appuyez sur YES pour confirmer votre sélection.
-►Start Source, AUX et le temps d'enregistrement
restant sur le CDR(W) sont affichés.
6 Lancez la lecture à la source sélectionnée.
-►L'enregistreur de CD lance l'enregistrement
simultanément et recording in progress est affiché. Le
temps d'enregistrement restant sur le CDR(W) est affiché.
processus d'enregistrement.
Remarque : L'enregistrement à partir du DAT ou DCC s'arrête
automatiquement après 20 secondes de blanc.
Si une source analogique est sélectionnée :
Au terme du processus d'enregistrement, l'enregistreur de CD
s'arrête après un blanc de 20 secondes sur le support source.
• Pour arrêter manuellement l'enregistrement, appuyez sur
STOP □ sur l'appareil.
-►RECORDING IN PROGRESS S'éteint.
Enregistrement manuel
Enregistrement manuel à partir d'une source externe
1 Assurez-vous que le CDR(W) ne présente absolument
aucune rayure ni aucune trace de poussière.
2 Appuyez à plusieurs reprises sur DIGITAL / ANALOG AUX
pour sélectionner l'entrée qui sera utilisée pour la source
externe à partir de laquelle vous souhaitez enregistrer.
-►AUX Digi t.al est affiché si l'entrée numérique est
sélectionnée.
-►AUX An.3log est affiché si l'entrée analogique est
sélectionnée.
3 Appuyez sur REC TYPE sur l'appareil pour activer le menu
d'enregistrement.
4 Faites tourner JOG CONTROL pour sélectionner le type
d'enregistrement.
-►AUX М.эпи.эГ? : pour un démarrage manuel de
l'enregistrement
5 Appuyez sur YES pour confirmer votre sélection.
-►Ui.3i t est affiché.
-►Record?, AUX et le temps d'enregistrement restant
sur le CDR(W) sont affichés.
6 Commencez la lecture à partir de la source externe, de
manière à déterminer le niveau d'enregistrement optimal
sur l'enregistreur de CD (voir « Touche REC LEVEL »).
7 Arrêtez la lecture à la source externe.
8 Placez-vous au début de la piste voulue.
9 Appuyez sur YES sur l'appareil en même temps que vous
lancez la lecture à la source externe.
-►L'enregistreur de CD lance l'enregistrement et recording
IN PROGRESS est affiché. Le temps d'enregistrement
restant sur le CDR(W) est affiché.
Remarque : Si Check I при t clignote, il convient de
vérifier la connexion numérique.
10 Appuyez sur STOP □ sur l'appareil pour arrêter l'enregistrement.
-►Lipd-ate est affiché et recording in progress s'efface.
N'OUBUEZ PAS LA FINALISATION!
La finalisation d'un CDR(W) est une procédure simple,
nécessaire pour :
~ lire un CDR enregistré sur un lecteur de CD standard
- lire un CDRW enregistré sur un lecteur de CD
compatible CDRW et sur un enregistreur de CD
50
Page 100

' I Гф'’. ' i ‘ • J .
Я.-
' v¿ V. 'Г 'V • '
¿;}¿-*r/ vp -^^5-
•b •!••••- ■'..■:l-:
 Loading...