

Philips DVDR880/001, DVDR880/021, DVDR890/051, DVDR880/051, DVDR890/001 Service Manual
...
Published by GH 0266 Service PaCE Printed in the Netherlands Subject to modification EN 3122 785 12200
©
Copyright 2002 Philips Consumer Electronics B.V. Eindhoven, The Netherlands.
All rights reserved. No part of this publication may be reproduced, stored in a
retrieval system or transmitted, in any form or by any means, electronic,
mechanical, photocopying, or otherwise without the prior permission of Philips.
DVD-Video Recorder DVDR880 & DVDR890
/001 /021 /051
Contents Page Contents Page
1 Technical Specifications and
Connection Facilities 4
2 Safety Information, General Notes 6
3 Directions for Use 8
4 Mechanical Instructions 45
5 Diagnostic Software 51
6 Block Diagrams, Waveforms, Wiring Diagram 81
Wiring Diagram 83
Waveforms 84
7 Electrical Diagrams And Print-Layouts 93
Display Panel (Diagram 1) 93
Front Connector Panel (FC) (Diagram 2) 97
Key Panel (KEY) (Diagram 3) 99
Record Key Panel (REC) (Diagram 4) 100
Analog Board:Fronted Video (FV) (Diagram 1) 101
Analog Board: In / Out Video (IOV)(Diagram 2) 102
Analog Board: In / Out Audio (IOA)(Diagram 3) 103
Analog Board: Power Supply (PS) (Diagram 4) 104
Analog Board: Multi Sound Processing (MSP)
(Diagram 5) 105
Analog Board: VPS (VPS) (Diagram 6) 106
Analog Board: Follow Me (FOME)(Diagram 7) 106
Analog Board: Digital In / Out (DIGIO)
(Diagram 8) 107
Analog Board: Audio Converter (DAC_ADC)
(Diagram 9) 108
UPC 12 Sub PCB: Centra Controler (CECO)
(Diagram 10) 114
UPC 12 Sub PCB: Fan Control (FACO)
(Diagram 11) 115
DVIO Front Board (Diagram 1) 118
DVIO Board: 1394 Interface (Diagram 2) 119
DVIO Board: Microprocessor (Diagram 3) 120
DVIO Board: FIFO & Control (D iagram 4) 121
DVIO Board: DVCODEC (Diagram 5) 122
DVIO Board: A & V Output (Diagram 6) 123
Digital Board: VSM Buffer Memmory and Bit
Engine Interface (Diagram 1) 128
Digital Board: AV Dec. STI5508 (Diagram 2) 129
Digital Board: AV Decoder Mem. (Diagram 3) 130
Digital Board: Video Enc. Empress(Diagram 4) 131
Digital Board: VIP CVBS Y/C Video Input
(Diagram 5) 132
Digital Board: Analog Board Cons. Video In/Out
(Diagram 6) 133
Digital Board: Progressive Scan (Diagram 7)
134
Digital Board: Progressive Scan (Diagram 8) 135
Digital Board: Power, Clock and Reset Audio
Clock (Diagram 9) 136
8 Alignments 145
9 Circuit-, IC Descriptions and List
of Abbreviations 148
10 Spare Part List 210

Technical Specifications and Connection Facilities
EN 4 DVDR880-890 /0X11.
1. Technical Specifications and Connection Facilities
1.1 General:
Mains voltage : 198V-276V
Mains frequency : 43 Hz - 63Hz
Power consumption mains : 28 W
Power consumption standby : < 7 W
Power consumption low power
stand-by : < 3 W
1.2 RF Tuner
Test equipment:Fluke 54200 TV Signal generator
Test streams:PAL BG Philips Standard test pattern
1.2.1 System:
PAL B/G, PAL D/K, SECAM L /L’, PA L I
1.2.2 RF - Loop Through:
Frequency range : 45 MHz - 860 MHz
Gain: (ANT IN - ANT OUT) : -6 dB to 0dB
1.2.3 Radio Interference:
input voltage /3 tone method (+40
dB min) : no limit
1.2.4 Receiver:
PLL tuning with AFC for optimum reception
Frequency range: : 45.25 MHz - 857 MHz
Sensitivity at 40 dB S/N :
≥ 60dBµV at 75Ω
(video unweighted )
1.2.5 Video Performance:
Channel 25 / 503,25 MHz,
Test pattern: PAL BG PHILIPS standard test pattern,
RF Level 74 dBV
Measured on SCART 1
Frequency response: : 0 - 4.00 MHz +0-4dB
Group delay ( 0.1 MHz - 4.4 MHz ) : 0 nsec
± 150nsec
1.2.6 Audio Performance:
Audio Performance Analogue - HiF i:
Frequency response at SCART 1
(L+R) output: : 100 Hz - 12 kHz / 0
±
3dB
S/N according to DIN 45405, 7, 1967 :
and PHILIPS standard test pattern
video signal: : FM:
≥ 50dB; AM ≥
45dB, unweighted
Harmonic distortion ( 1 kHz,
± 25
kHz deviation ): : FM
≤ 1.5%; AM ≤ 2%
Audio Performance NICAM:
Frequency response at SCART
1(L+R) output: : 40 Hz - 15 kHz 0
±
3dB
S/N according to DIN 45405, 7, 1967 :
and PHILIPS standard test pattern
video signal: :
≥ 60 dB unweighted
Harmonic distortion (1 kHz): :
≤ 0.5 %
1.2.7 Tuning
Automatic Search Tuning
scanning time without antenna : typ. 3 min. PAL
stop level (vision carrier) :
≥ 37dBµV
Maximum tuning error of a recalled
program :
± 62.5 kHz
Maximum tuning error during
operation :
± 100 kHz
Tuning Principle
automatic B,G, I, DK and L/L’detection
manual selection in "STORE" mode
1.3 Analogue Inputs
1.3.1 SCART 1 (Connected to TV)
Pin Signals:
1 - Audio R 1. 8V RMS
2 - Audio R
3 - Audio L 1.8V RMS
4 - Audio GND
5 - Blue/Chroma
GND
6 - Audio L
7 - Blue out/
Chroma in 0.7Vpp
± 0.1V into 75 Ohm (*)
8 - Function
switch <2V = TV
>4.5V / <7V = asp. ratio 16:9 DVD
>9.5V / <12V = asp. ratio 4:3 DVD
9 - Green GND
10 - P50 control
11 - Green 0.7Vpp
± 0.1V into 75 Ohm (*)
12 - Nc
13 - Red/Chroma
GND
14 - fast switch
GND
15 - Red out/
Chroma out 0.7Vpp
± 0.1V into 75 Ohm (*)
± 3dB 0.3Vpp Chroma (burst)
16 - fast switch
RGB/ CVBS or Y <0.4V into 75 Ohm = CVBS
>1V / <3V into 75 Ohm = RGB
17 - Y/CVBS GND
OUT
18 - Y/CVBS GND
IN
19 - CVBS/Y 1Vpp
± 0.1V into 75 Ohm (*)
20 - CVBS/Y
21 - Shield
1.3.2 SCART 2 (Connected to AUX)
Pin Signals:
1 -Audio R 1.8V RMS
2 -Audio R
3 -Audio L 1.8V RMS
4 -Audio GND
5 -Blue/Chroma
GND
6 -Audio L
7 -Blue in/
Chroma out
± 3dB 0.3Vpp Chroma (burst)
8 -Function
switch
9 -Green GND
10 - P50 control

Technical Specifications and Connection Facilities
EN 5DVDR880-890 /0X1 1.
11 -Green
12 -Nc
13 -Red/Chroma
GND
14 -fast switch
GND
15 -Red in/
Chroma in
16 -fast switch
RGB/ CVBS or
Y
17 -CVBS GND
OUT
18 -CVBS GND
IN
19 -CVBS/Y/RGB
sync 1Vpp
± 0.1V into 75 Ohm (*)
20 -CVBS/Y
21 -Shield
(*) for 100% white
1.3.3 Audio/Video Front Input Connectors
Audio
Input voltage : 2 Vrms
Input impedance : >10k
Ω
Video - Cinch
Input voltage : 1 Vpp
± 3dB
Input impedance : 75
Ω
Video - YC (Hosiden)
Input voltage Y : 1Vpp
± 3dB
Input impedance Y : 75
Ω
Input voltage C : burst 300 mVpp ± 3
dB
Input impedance C : 75
Ω
1.4 Video Performance
All outputs loaded with 75 Ohm
SNR measurements over full bandwidth without weighting.
1.4.1 SCART (RGB)
SNR : > -65 dB on all output
Bandwidth : 4.8 MHz
± 2dB
1.5 Audio Perform an c e CD
1.5.1 Cinch Output Rear
Output voltage 2 channel mode : 2Vrms
± 2dB
Channel unbalance (1kHz) : <1dB
Crosstalk 1kHz : >95dB
Crosstalk 20Hz-20kHz : >85dB
Frequency response 20Hz- 20kHz :
±0.2dB max
Signal to noise ratio : >95 dB
Dynamic range 1kHz : >85dB
Dynamic range 20Hz-20kHz : >80dB
Distortion and noise 1kHz : >85dB
Distortion and noise 20Hz-20kHz : >75dB
Intermodulation distortion : >77dB
Mute : >95dB
Outband attenuation: : >40dB above 30kHz
1.5.2 Scart Audio
Output voltage 2 channel mode : 1.6Vrms
± 2dB
Channel unbalance (1kHz) : <1dB
Crosstalk 1kHz : >85dB
Crosstalk 20Hz-20kHz : >70dB
Frequency response 20Hz- 20kHz :
± 0.2dB max
Signal to noise ratio : >85 dB
Dynamic range 1kHz : >75dB
Dynamic range 20Hz-20kHz : >70dB
Distortion and noise 1kHz : >75dB
Distortion and noise 20Hz-20kHz : >65dB
Intermodulation distortion : >70dB
Mute (spin-up, pause, access) : >85dB
Outband attenuation: : >40dB above 25kHz
1.6 Digital Output
1.6.1 Coaxial
CDDA/ LPCM (incl MPEG1) : according IEC958
MPEG2, AC3 audio : according IEC1937
DTS : according IEC1937,
amendment 1
1.7 Digital Video Input (IEEE 1394)
1.7.1 Applicable Standards
Implementation according:
IEEE Std 1394-1995
IEC 61883 - Part 1
IEC 61883 - Part 2 SD-DVCR (02-01-1997)
Specification of consumer use digital VCR’s using 6.3 mm
magnetic tape - dec.1994
Mechanical connection according:
Annex A of 61883-1
1.8 P50 System Control
Via SCART pin nr 10
1.9 Dimensions and Weight
Height of feet : 10mm
Apparatus tray closed : WxDxH :435 x 324.5 x
88cm
Apparatus tray open : WxDxH :435 x 366 x
88cm
Weight without packaging : app. 4 kg
± 0.5 kg
Weight in packaging : app. 6.5 kg
1.10 Laser Output Power & Wavelength
1.10.1 DVD
Output power during reading : 0.8mW
Output power during writing : 20mW
Wavelength : 660nm
1.10.2 CD
Output power : 0.3mW
Wavelength : 780nm
Safety Information, General Notes
EN 6 DVDR880-890 /0X12.
2. Safety Information, General Notes
2.1 Safety Instructions
2.1.1 General Safety
Safety regulations require that during a repair:
• Connect the unit to the mains via an isolation transformer.
• Replace safety components, indicated by the symbol ,
only by components identical to the original ones. Any
other component substitution (other than original type) may
increase risk of fire or electrical shock hazard.
Safety regulations require that after a repair, you must return
the unit in its original condition. Pay, in particular, attention to
the following points:
• Route the wires/cables correctly, and fix them with the
mounted cable clamps.
• Check the insulation of the mains lead for external
damage.
• Check the electrical DC resistance between the mains plug
and the secondary side:
1. Unplug the mains cord, and connect a wire between
the two pins of the mains plug.
2. Set the mains switch to the 'on' position (keep the
mains cord unplugged!).
3. Measure the resistance value between the mains plug
and the front panel, controls, and chassis bottom.
4. Repair or correct unit when the resistance
measurement is less than 1 M
Ω.
5. Verify this, before you return the unit to the customer/
user (ref. UL-standard no. 1492).
6. Switch the unit ‘off’, and remove the wire between the
two pins of the mains plug.
2.1.2 Laser Safety
This unit employs a laser. Only qualified service personnel may
remove the cover, or attempt to service this device (due to
possible eye injury).
Laser Device Unit
Type : Semiconductor laser
GaAlAs
Wavelength : 650 nm (DVD)
: 780 nm (VCD/CD)
Output Power : 20 mW
(DVD+RW writing)
:0.8 mW
(DVD reading)
:0.3 mW
(VCD/CD reading)
Beam divergence : 60 degree
Figure 2-1
Note: Use of controls or adjustments or performance of
procedure other than those specified herein, may result in
hazardous radiation exposure. Avoid direct exposure to beam.
2.2 Warnings
2.2.1 General
• All ICs and many other semiconductors are susceptible to
electrostatic discharges (ESD, ). Careless handling
during repair can reduce life drastically. Make sure that,
during repair, you are at the same potential as the mass of
the set by a wristband with resistance. Keep components
and tools at this same potential.
Available ESD protection equipment:
– Complete kit ESD3 (small tablemat, wristband,
connection box, extension cable and earth cable) 4822
310 10671.
– Wristband tester 4822 344 13999.
• Be careful during measurements in the live voltage section.
The primary side of the power supply (pos. 1005), including
the heatsink, carries live mains voltage when you connect
the player to the mains (even when the player is 'off'!). It is
possible to touch copper tracks and/or components in this
unshielded primary area, when you service the player.
Service personnel must take precautions to prevent
touching this area or components in this area. A 'lightning
stroke' and a stripe-marked printing on the printed wiring
board, indicate the primary side of the power supply.
• Never replace modules, or components, while the unit is
‘on’.
2.2.2 Laser
• The use of optical instruments with this product, will
increase eye hazard.
• Only qualified service personnel may remove the cover or
attempt to service this device, due to possible eye injury.
• Repair handling should take place as much as possible
with a disc loaded inside the player.
• Text below is placed inside the unit, on the laser cover
shield:
Figure 2-2
2.2.3 Notes
Dolby
Manufactered under licence from Dolby Laboratories. “Dolby”,
“Pro Logic” and the double-D symbol are trademarks of Dolby
Laboratories. Confidential Unpublished Works.
©1992-1997 Dolby Laboratories, Inc. All rights reserved.
Figure 2-3
Trusurround
TRUSURROUND, SRS and symbol (fig 2-4) are trademarks of
SRS Labs, Inc. TRUSURROUND technology is manufactured
under licence frm SRS labs, Inc.
Figure 2-4
CAUTION VISIBLE AND INVISIBLE LASER RADIATION WHEN OPEN AVOID EXPOSURE TO BEAM
ADVARSEL SYNLIG OG USYNLIG LASERSTRÅLING VED ÅBNING UNDGÅ UDSÆTTELSE FOR STRÅLING
ADVARSEL SYNLIG OG USYNLIG LASERSTRÅLING NÅR DEKSEL ÅPNES UNNGÅ EKSPONERING FOR STRÅLEN
VARNING SYNLIG OCH OSYNLIG LASERSTRÅLNING NÄR DENNA DEL ÄR ÖPPNAD BETRAKTA EJ STRÅLEN
VARO! AVATTAESSA OLET ALTTIINA NÄKYVÄLLE JA NÄKYMÄTTÖMÄLLE LASER SÄTEILYLLE ÄLÄ KATSO SÄTEESEEN
VORSICHT SICHTBARE UND UNSICHTBARE LASERSTRAHLUNG WENN ABDECKUNG GEÖFFNET NICHT DEM STRAHL AUSSETSEN
DANGER VISIBLE AND INVISIBLE LASER RADIATION WHEN OPEN AVOID DIRECT EXPOSURE TO BEAM
ATTENTION RAYONNEMENT LASER VISIBLE ET INVISIBLE EN CAS D'OUVERTURE EXPOSITION DANGEREUSE AU FAISCEAU
!

Safety Information, General Notes
EN 7DVDR880-890 /0X1 2.
Video Plus
“Video Plus+” and “PlusCode” are registered trademarks of the
Gemstar Development Corporation. The “Video Plus+” system
is manufactored under licence from the Gemstar Development
Corporation.
Figure 2-5
Macrovision
This product incorporates copyright protection technology that
is protected by method claims of certain U.S. patents and other
intellectual property rights owned by Macrovision Corporation
and other rights owners.
Use of this copyright protection technology must be autorized
by Macrovision Corporation, and is intended for home and
other limited viewing uses only unless otherwise authorized by
Macrovision Corporation. Reverse engineering or disassembly
is prohibited.
Directions For Use
EN 8 DVDR880-890 /0X13.
3. Directions For Use
N Select previous title/search backwards:
Briefly press the button during playback: Previous chapter/filmor
previous title
Hold down the button: Search backwards
Hold down the button during the still picture: slow motion backwards
O Select next title/search forwards:
Briefly press the button during playback: Next chapter/film or next title
Hold down the button: Search forwards
Hold down the button during the still picture: slow motion forward
STOP h Stop: Stop playback / recording, except with programmed recordings
(TIMER)
Hold down the button to open and close the disc tray.
REC/OTR n Record: Record the current TV channel
EDIT EDIT: For displaying the edit menu for DVD+(RW) discs, for setting
chapter markers
TIMER TIMER: To program a recording with ShowView
®
/ without
ShowView
®
or to alter/clear programmed recordings
Additional TV functions
TV VOLUME q TV volume: Increase TV volume
TV VOLUME r TV volume: Reduce TV volume
For the following functions you need to hold down the button DVD/TV at the side and then
select the function you need with the appropriate button.
0..9 Number buttons:0-9
CHANNEL q TV programmenumber: To select a higher programme number
CHANNEL r TV programmenumber: To select a lower programme number
Front of the device
STANDBY/ON Switch on or off: To switch off or on, interrupt a function, interrupt a
programmed recording (TIMER)
CHANNEL r Select: Lower programme number
CHANNEL q Select: Higher programme number
REC MODE Record type (quality): To select the maximum possible record time
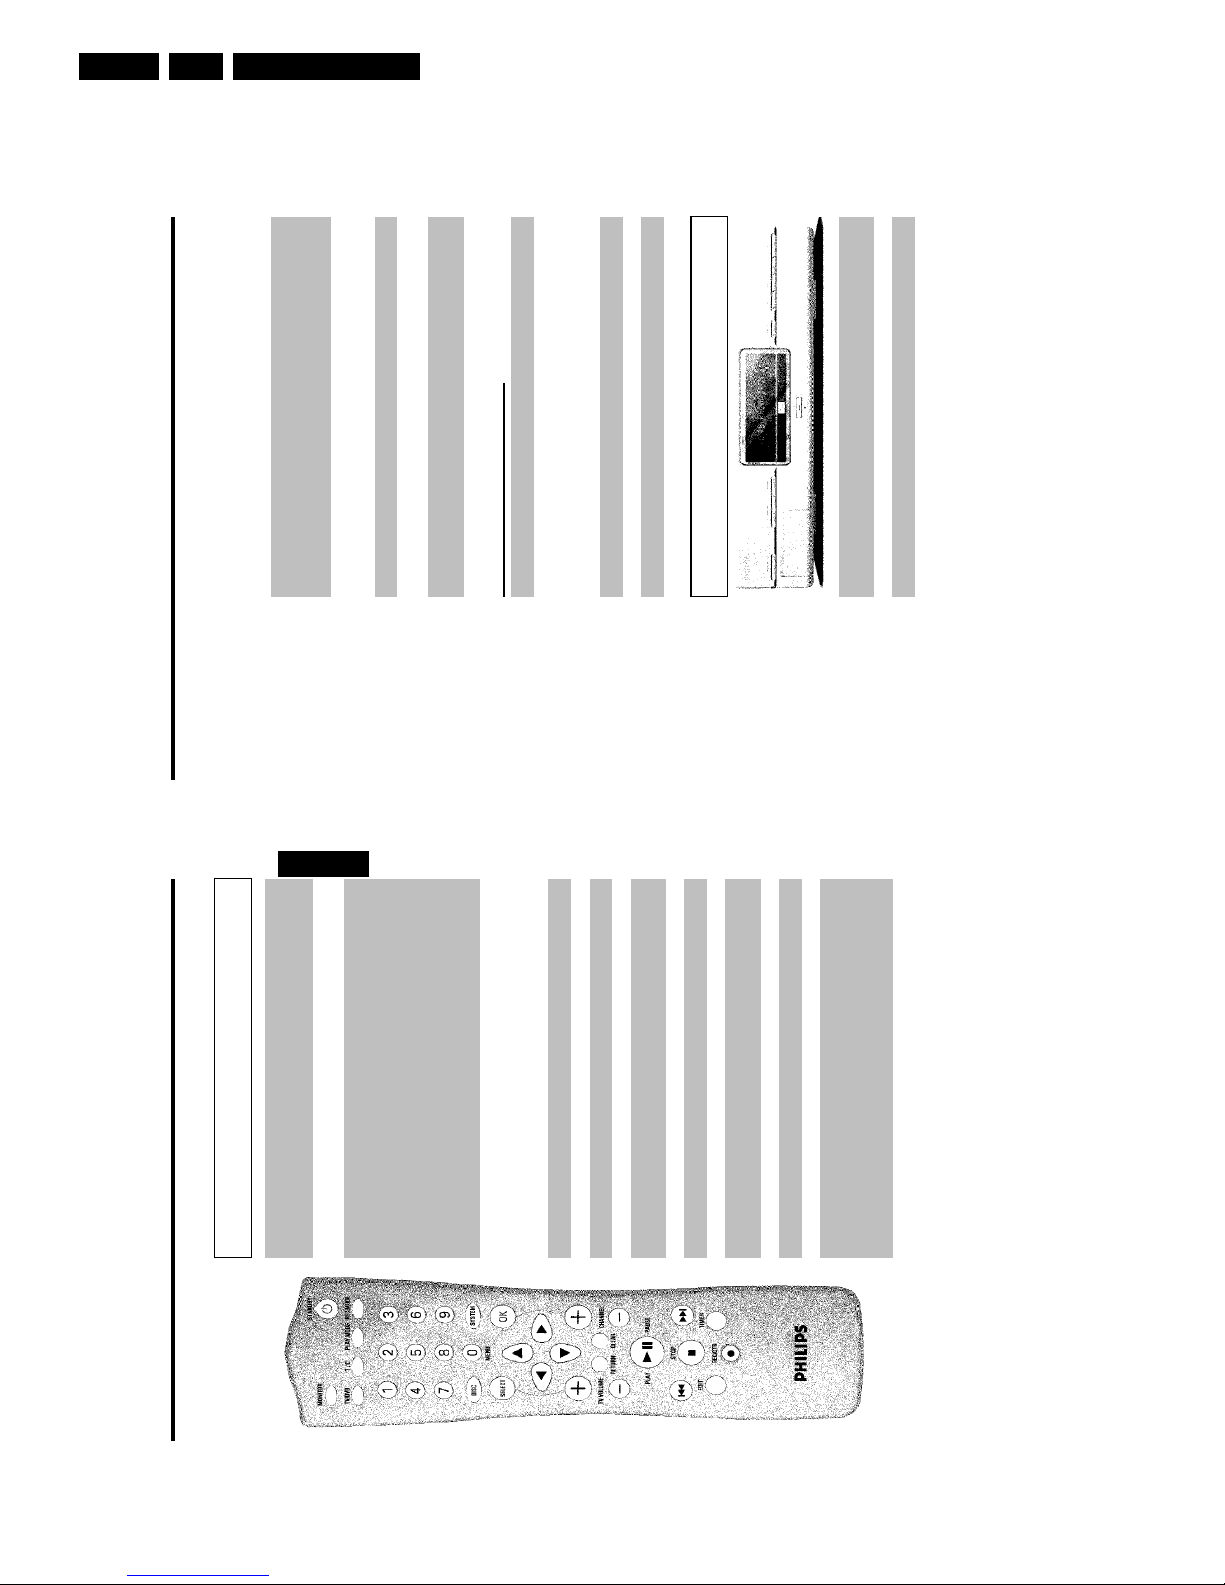
The remote control
MONITOR Monitor: This button lets you switch between the (internal) TV tuner
in the DVD recorder (TV picture on the TV set) and playback on the
DVD recorder
STANDBY m Switch on or off: To switch set on or off, interrupt menu function,
interrupt a programmed recording (TIMER)
TV/DVD TV/DVD switch: Switches the scart socket EXT 2 AUX I/O directly
to the TV set. This lets you watch the picture from any unit connected
to this scart socket (set-top box', video recorder or satellite receiver)
and at the same time record from another source.
If you have not connected a device to scart socket EXT 2 AUX
I/O you can use this button to switch between TV reception and DVD
recorder.
This, however, functions only if you have connected your TV set to the
DVD recorder using a scart cable (socket EXT 1 TO TV-I/O ) and
your TV set reacts to the switching.
T/C Title/Chapter: Choose the '
B
'(Title)/
C
'(Chapter) directly from the
menu bar
If 'INFO' appears in the display, the index menu from a recorded disc or
an introductoryfilm will be shown. In this case, this function is not
available.
PLAY MODE Playback type: Choose between repeat, shuffle play and intro-scan
REC. MODE Record type (quality): To select the maximum possible record time
0..9 Number buttons:0-9
DISC-MENU Disc menu: To show the DVD menu or the index screen
SYSTEM-MENU System menu: Call up/cancel the main menu (menu bar at the top of
the screen)
SELECT Select: Select function/value
OK Store/confirm: To store or confirm entry
DCAB Cursor keys: Left, right, up, down
RETURN Back: Return to previous menu on a video CD (VCD). This function
works also on some DVD's.
CLEAR Delete: To delete last entry or clear programmed recording (TIMER)
CHANNEL q Plus: Next programme number
CHANNEL r Minus: Previous programme number
PLAY/PAUSE G9 Playback/pause: Play back a disc.
If this button is pressed during playback, the DVD recorder switches to
pause. You will see a still picture.
If this button is pressed during recording, the DVD recorder will also
switch to pause.
ENGLISH
Directions For Use
EN 9DVDR880-890 /0X1 3.
EXT 1 TO TV-I/O Scart socket 1: Connection of a TV set. RGB- output
OUT S-VIDEO (Y/C) SVideo output: Connection of an S-Video compatible TV set
OUT VIDEO
(CVBS)
Video output (yellow socket): Connection of a TV set with a video
input (CVBS, Composite Video)
OUT L AUDIO R Analogue audiooutput (white/redsocket): Connection of a TV
set with audio input sockets or connection of an additional device
DIGITAL AUDIO
OUT
Digital audio output: Connection of a digital audio device
(amplifier/receiver)
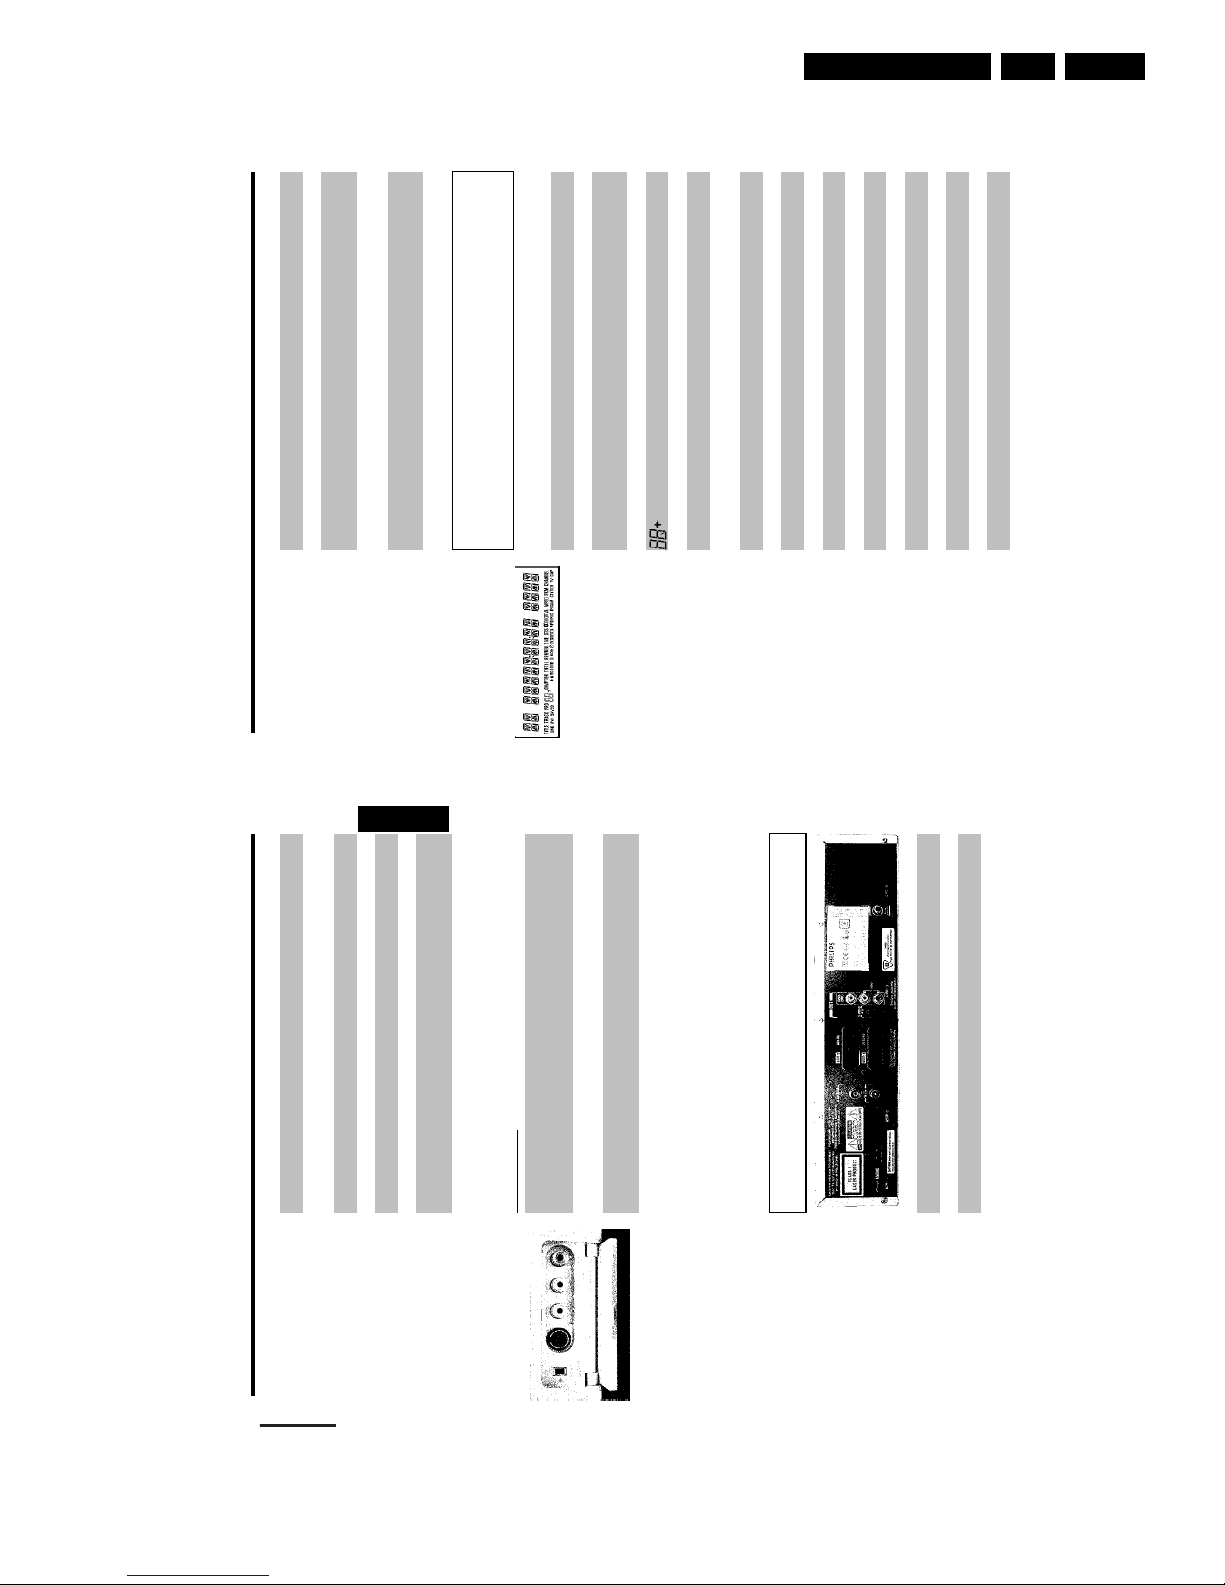
The symbols on your DVD recorder
display
These symbols can light up on your DVD recorder display:
TITLE
Displays the title number selected/played (DVD)
TRACK
Displays the track selected/played (VCD/CD)
DVD+RW
Displays the inserted DVD disc: DVD /DVD+R / DVD+RW. Disc types
'DVD-R/DVD-RW ' are shown as DVD.
S-VCD
Displays the CD-disc inserted: S VCD/VCD/CD
Displays recording type (Quality)/Playback type'HQ, SP+, EP, EP+'.
CHAPTER
Displays the chapter selected/played
TOTAL TIME
Total playback time
REMAIN
TIME
Time remaining
TIME
Time used
DTS
A DTS audio signal is available on the digital audio output
DD DIGITAL
A Dolby digital audio signal is available on the digital audio output
MPEG
An MPEG audio signal is available on the digital audio output
PCM
A PCM audio signal is available on the digital audio output
CHANNEL
Channel/programme numberGPlayback in progress9Playback/record interrupted (Pause)
RECORD
Recording in progressxA satellite recording has been programmed.
o((
A remote control signal has been receivedkA recording (timer) has been programmed
DECODER
A decoder has been assigned to the current TV channel (programme)
RECORD Record: Record the current TV channel
RECORD LED Recording in progress: Red light on the RECORD button to
indicate recording in progress
OPEN/CLOSE Open/close disc tray: Open/close disc tray
N Select previous title/search backwards
O Select next title/search forwards
hSTOP Stop: Interrupt playback/recording
GPLAY/PAUSE Playback/pause: Play back recorded disc, interrupt playback, still
picture
Behind the flap at the lefthand corner on
the front
DV iLink / DV socket (digital video input, IEEE 1394, FireWire):
Connecting a digital camcorder or other suitable device (programme
number 'CAM2').
S-VIDEO SVideo socket: Connection of SVHS/Hi8 camcorders or SVHS/Hi8
video recorders (programme number CAM1')
Yellow socket
VIDEO
Video input socket: Connection of camcordersor video recorders
(programme number 'CAM1')
White/red socket
left AUDIO right
Audio input socket left/right: Connection of camcorders or video
recorders (programme number 'CAM1')
Switching between sockets IN S-VIDEO (Y/C) and IN VIDEO (CVBS) is done automatically.
In case both sockets are used, the signal received at socket IN S-VIDEO (Y/C) is treated with
priority.
Back of the unit
4MAINS Mains socket: Connection to the mains supply (230V/50Hz)
ANTENNA Aerial input: Connection of the aerial
TV Aerial output: Connection of the TV set
EXT 2 AUX I/O Scart socket 2: Connection of an additional device (satellite receiver,
set-top box, video recorder, camcorder, etc.)
ENGLISH

Directions For Use
EN 10 DVDR880-890 /0X13.
EMPTYDISC The disc inserted is either new or has been completely erased (no
recordings).
PROTECTED The disc is protected against recording.
MAX TITLE The maximum number of titles per disc has been reached. The
maximum number of titles per disc is 48.
MAX CHAP The maximum number of chapters per title/disc has been reached. The
maximum number of chapters per title is 99, and 124 per disc.
DISC FULL The disc is full. There is no space for new recordings
PAL DISC A disc with PAL recordings has been inserted. The machine is trying to
record an NTSC signal. Insert a new disc or one that contains NTSC
recordings.
NTSC DISC A disc with NTSC recordings has been inserted. The machine is trying
to record a PAL signal. Insert a new disc or one that contains PAL
recordings.
RECORDING An illegal action (e.g. OPEN/CLOSE button) was attempted during
recording.
FREETITLE Playback was started for an empty title or the following title is empty
DISC LOCK An attempt has been made to record during playback of a protected
disc. This message appears if an attempt is made to insert a chapter
marker ( EDIT button).
DISC ERR An error occurred when the title was being written. If this error keeps
occurring, please clean the disc or use a new one.
You will find information on how to clean the disc in the next chapter in
the section 'Cleaning the discs'.
DISC WARN An error occurred when writing the title. Recording was continued; the
error was skipped
SETUP After the automatic channel search, the menu for time/date settings
appears on the screen.
WAIT 01 During the automatic channel search, the TV channels found will be
count
BLOCKED It is not possible to close/open the disc tray.
SAFE RECO The new recording will be made at the end of all the other recordings
(SAFE RECORD).
EASYLINK The 'EasyLink' function is currently transferring information from the TV
set.
VPS/PDC
Video programming system / programme delivery control: A VPS or
PDC code will be transmitted for the selected TV program
NICAM
The DVD recorder has detected a Nicam audio signal.
STEREO
During playback a HiFi/2 channel tone was detected or a HiFi/2 channel
tone was received
Multi-function display/Text line
•) Clock
•) Disc/title playing time
•) OTR switch-off time
•) Title name
•) Display of programme number of TV channel/position/channel
name/function.
•) Display of informations, warnings.
Messages in the DVD recorder display
READING
The following messages may appear in your DVD recorder display
TV ON The DVD recorder is currently in the initial installation mode. Switch on
your TV set and read section Installing your DVD recorder' in chapter
'Initial Installation'.
NO SIGNAL No input signal available (signal inadequate or unstable)
MENU The menu on the screen is active
OPENING Disc tray opening
TRAY OPEN Disc tray open
CLOSING Disc tray closing
READING Disc being read
MENU UPDT Once recording has been successfully completed the table of contents is
created.
INIT MENU The menu structure is created after the first recording has been made
on a new disc
COPY PROT You have tried to copy a copy-protected DVD/video cassette.
WAIT Please wait until this message disappears.The DVD recorder is busy
performing a task.
NO DISC No disc has been inserted for recording. If a disc has been inserted,
perhaps it cannot be read.
INFO
Information on the inserted DVD is displayed on the screen
BUSY The DVD recorder is processing the changes to make them DVD
compatible
ERASING The entire disc is erased
ENGLISH
Directions For Use
EN 11DVDR880-890 /0X1 3.
12
When you install your DVD recorder for the first time, select one of the following options:
'Connecting with a scart cable and Easy Link'
If your TV set is equipped with Easy Link, Cinema Link, NexTView Link, Q-Link, Smart Link,
Megalogic, Datalogic, ...' and you wish to use a scart cable.
What is Easy Link?
If your TV set is equipped with functions such as Easy Link, Cinema Link,
NexTView Link, Q-Link, Smart Link, Megalogic or Datalogic, which are fully
compat ble with one another (TV set, DVD recorder, etc.), your DVD
recorder can exchange information with your TV set. Please see your TV's
operating instructions.
?
'Connecting with a scart cable without EasyLink'
If your TV set is not equipped with Easy Link, Cinema Link, NexTView Link, Q-Link, Smart Link,,
Megalogic, Datalogic, ...' and you wish to use a scart cable.
'Connecting with an SVideo (Y/C) cable'
If your TV set is equipped with an S-Video (SVHS) socket.
What is an 'SVideo (Y/C) cable'?
This connecting cable, also known as the SVHS cable, is used to transmit the
brightness signal (Y signal) and colour signal (C signal) separately. This mini
DIN socket/plug is also called a Hosiden socket/plug.
?
'Connecting with video (CVBS) cable'
If your TV set is equipped only with a video (CVBS) socket.
What is 'Video (CVBS)'?
This socket, usually referred to as the Cinch socket, is used for transmitting
the composite video signal (FBAS, CVBS). In this method of transmission the
colour signal and the brightness signal are transmitted on the same cable. In
certain circumstances, this can lead to problems with the picture, such as
'Moiré' patterns.
?
Connecting the DVD recorder
11
B
Connecting the DVD recorder
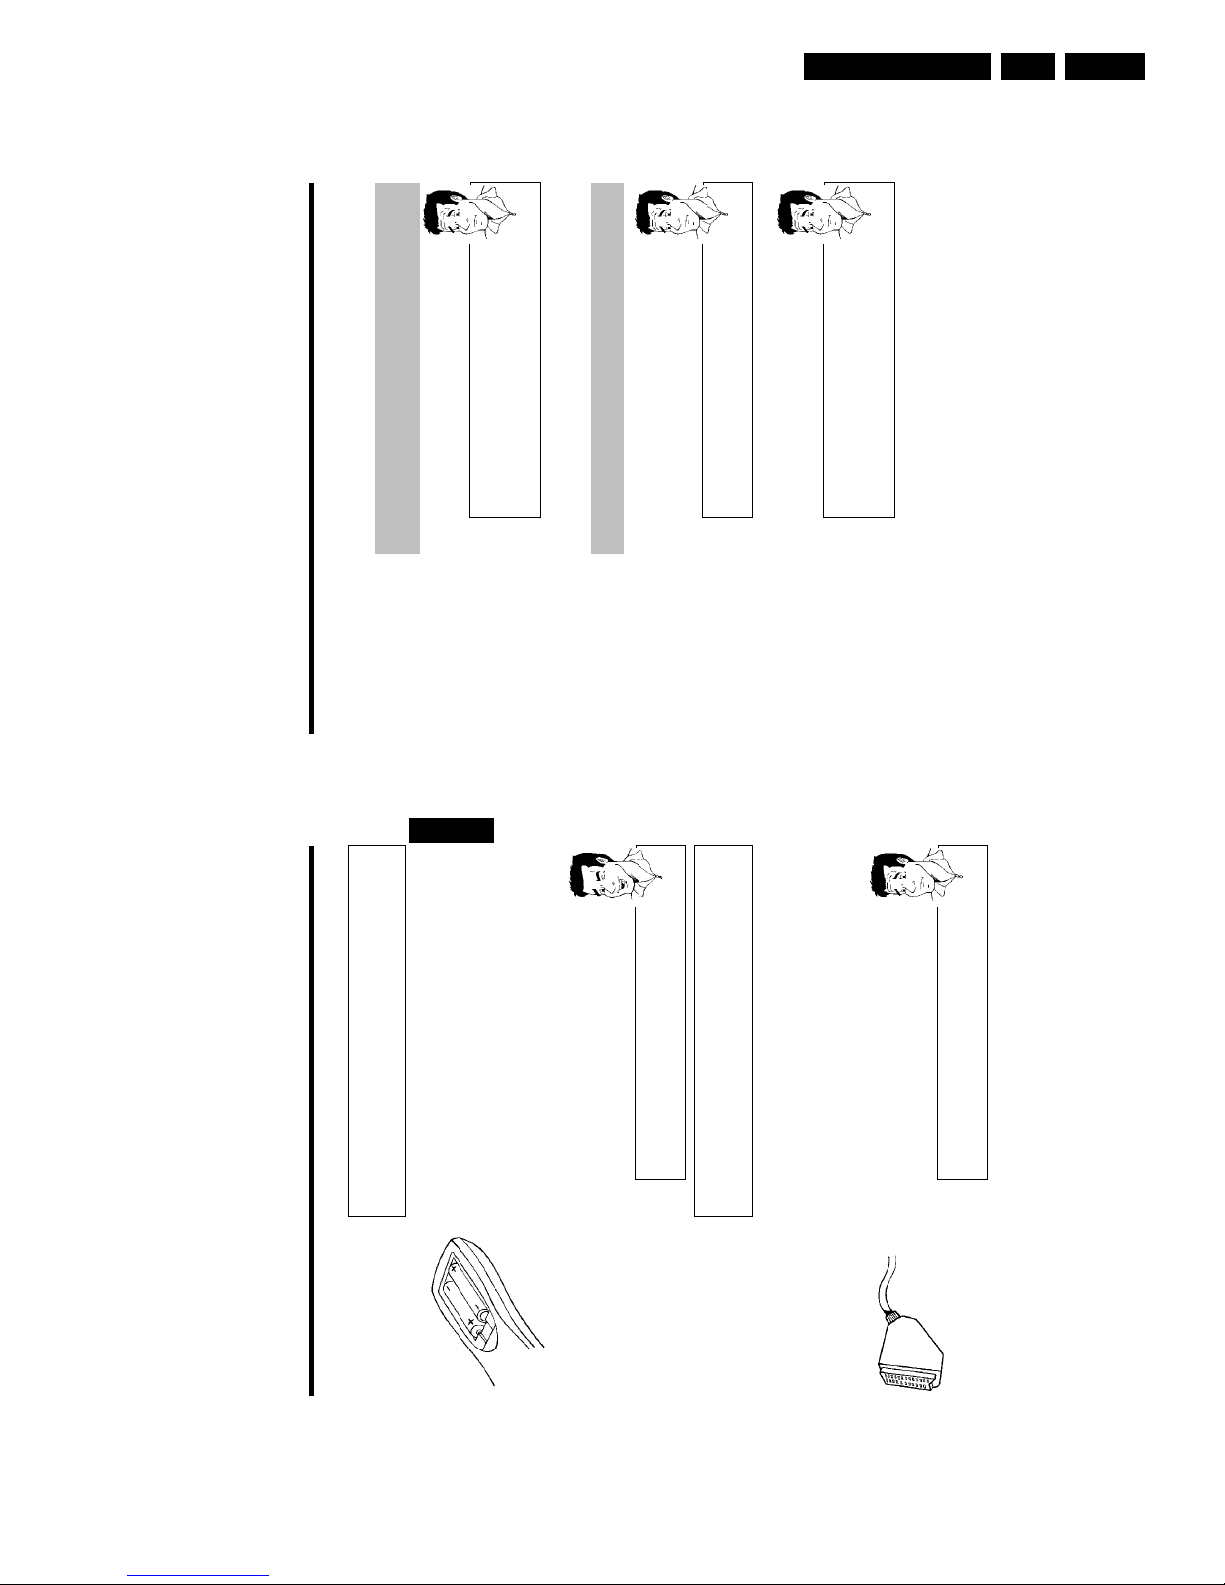
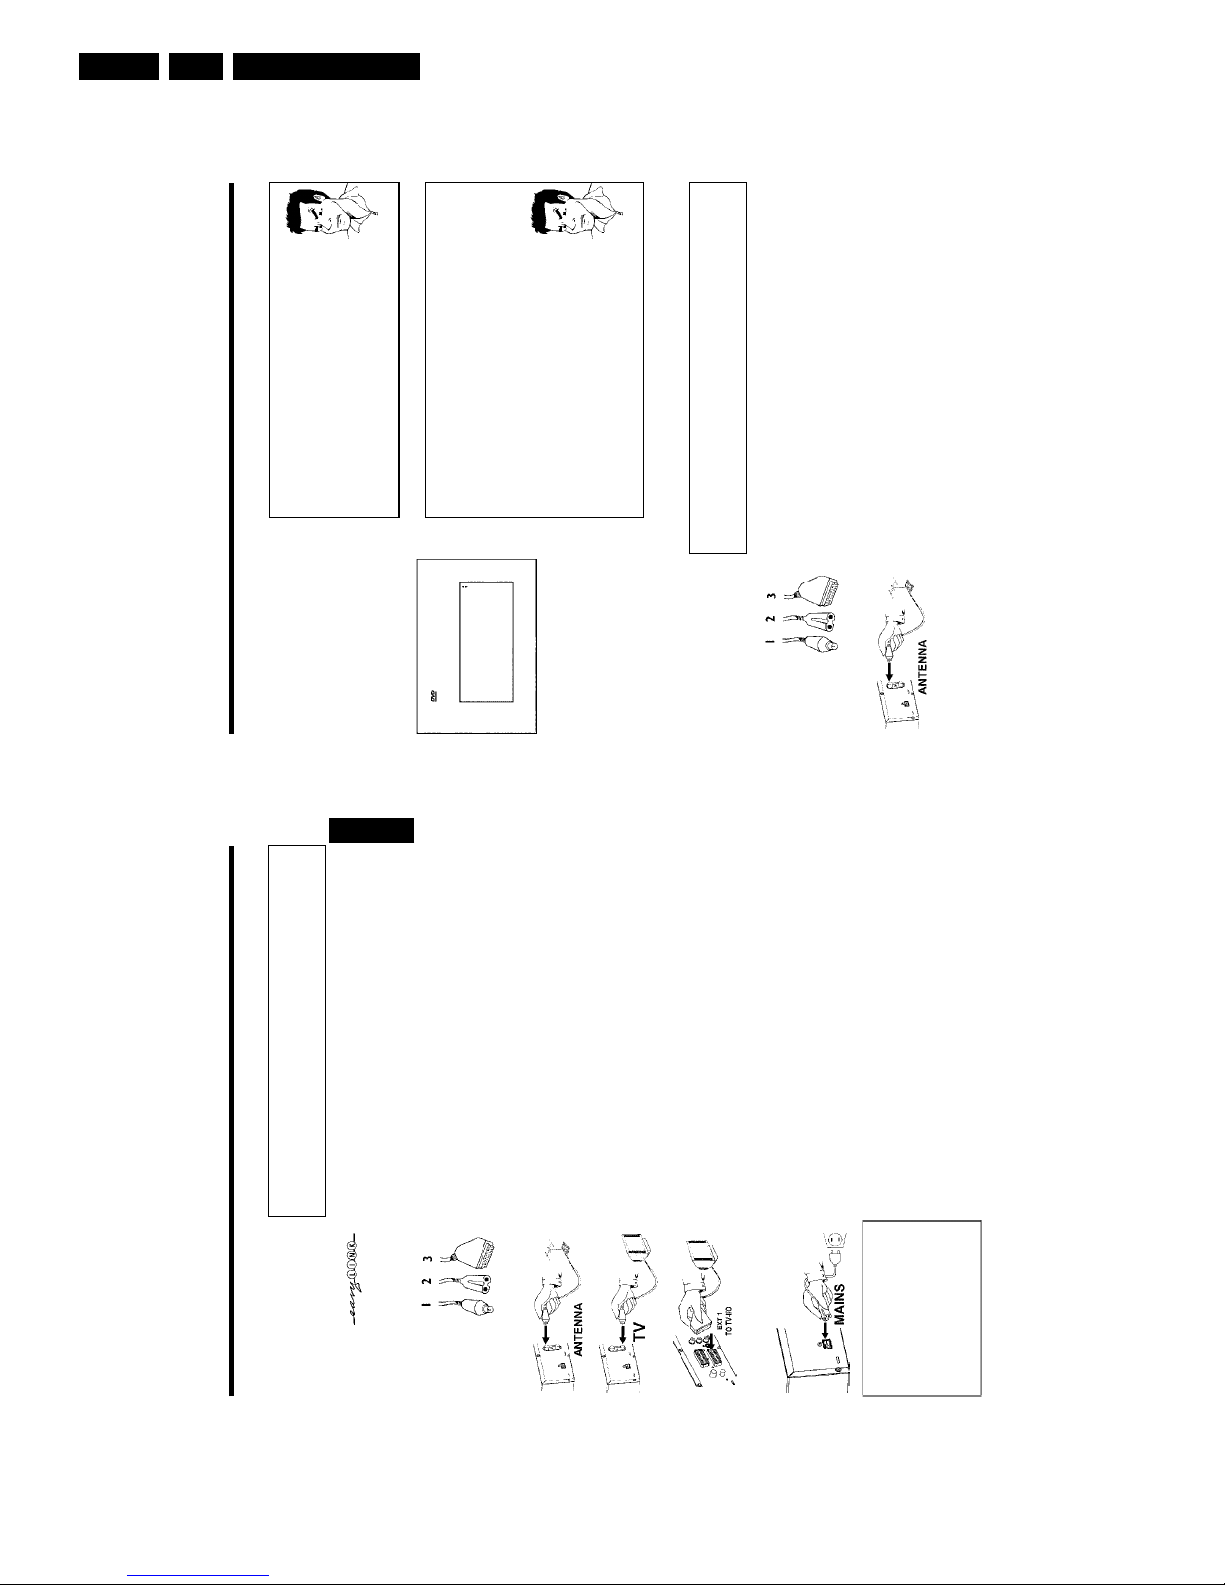
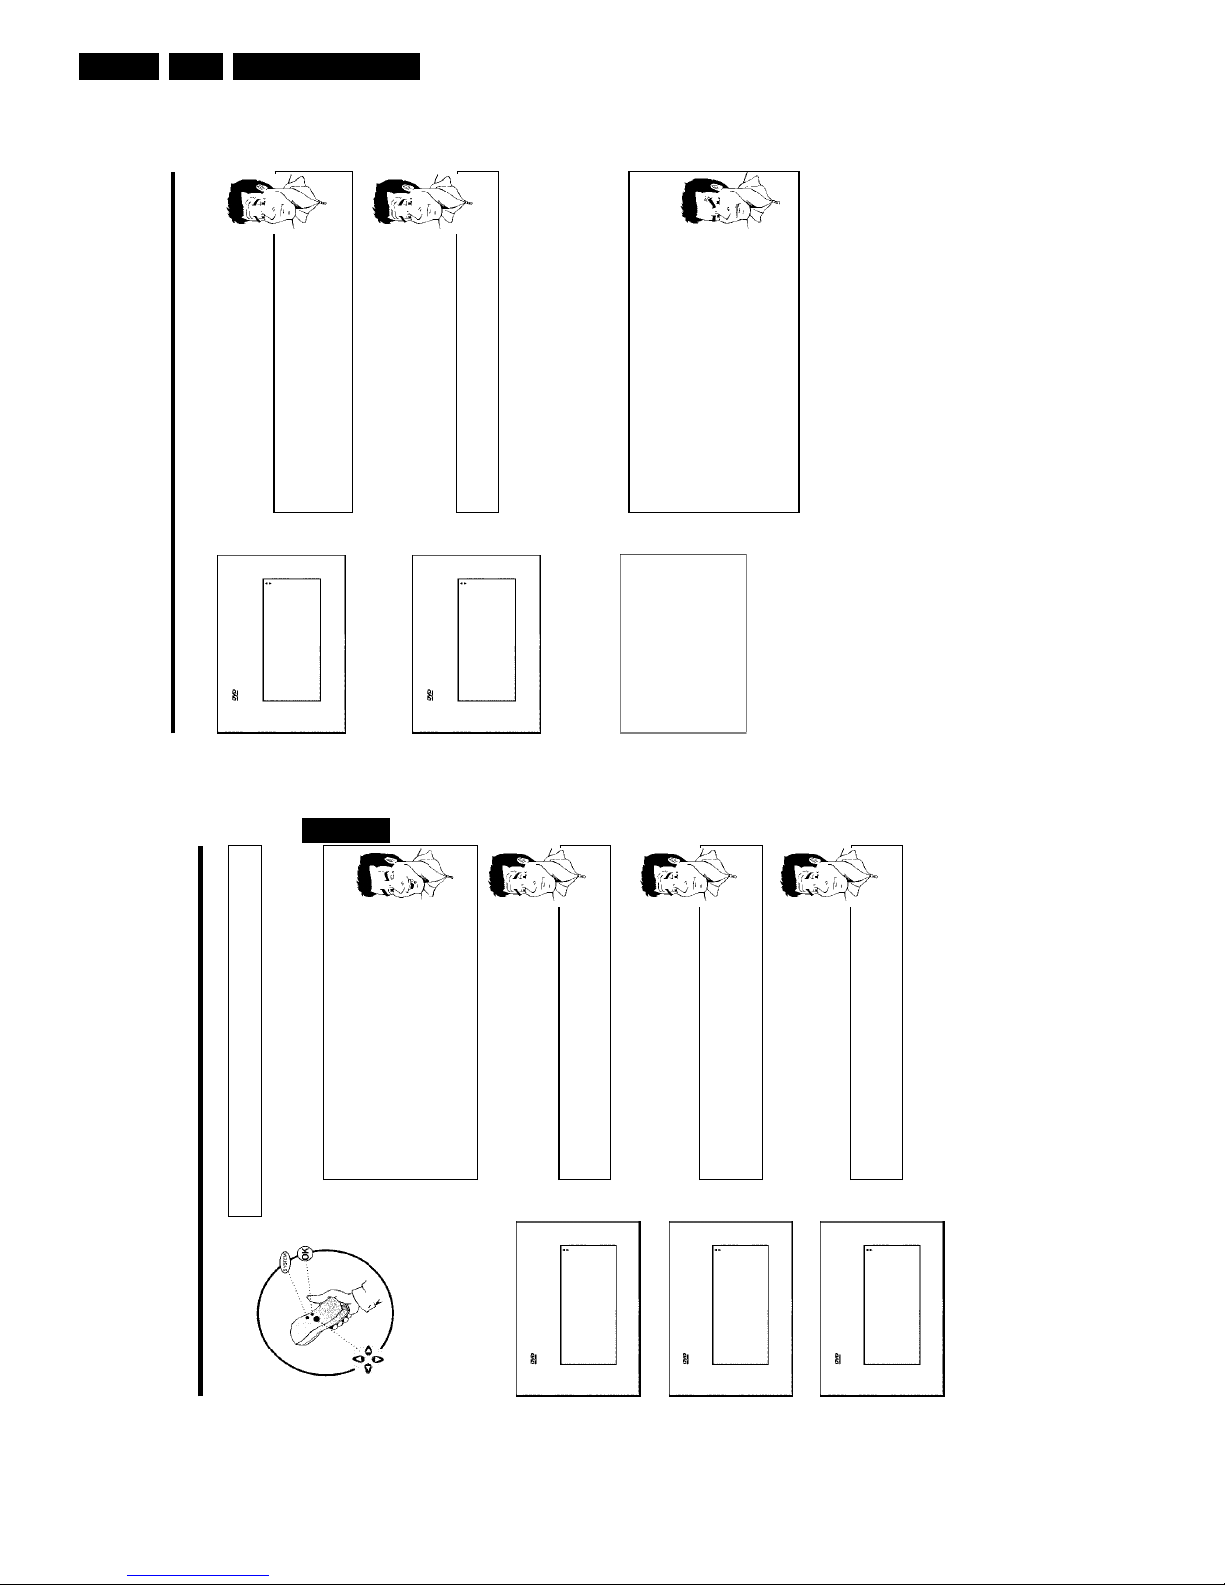
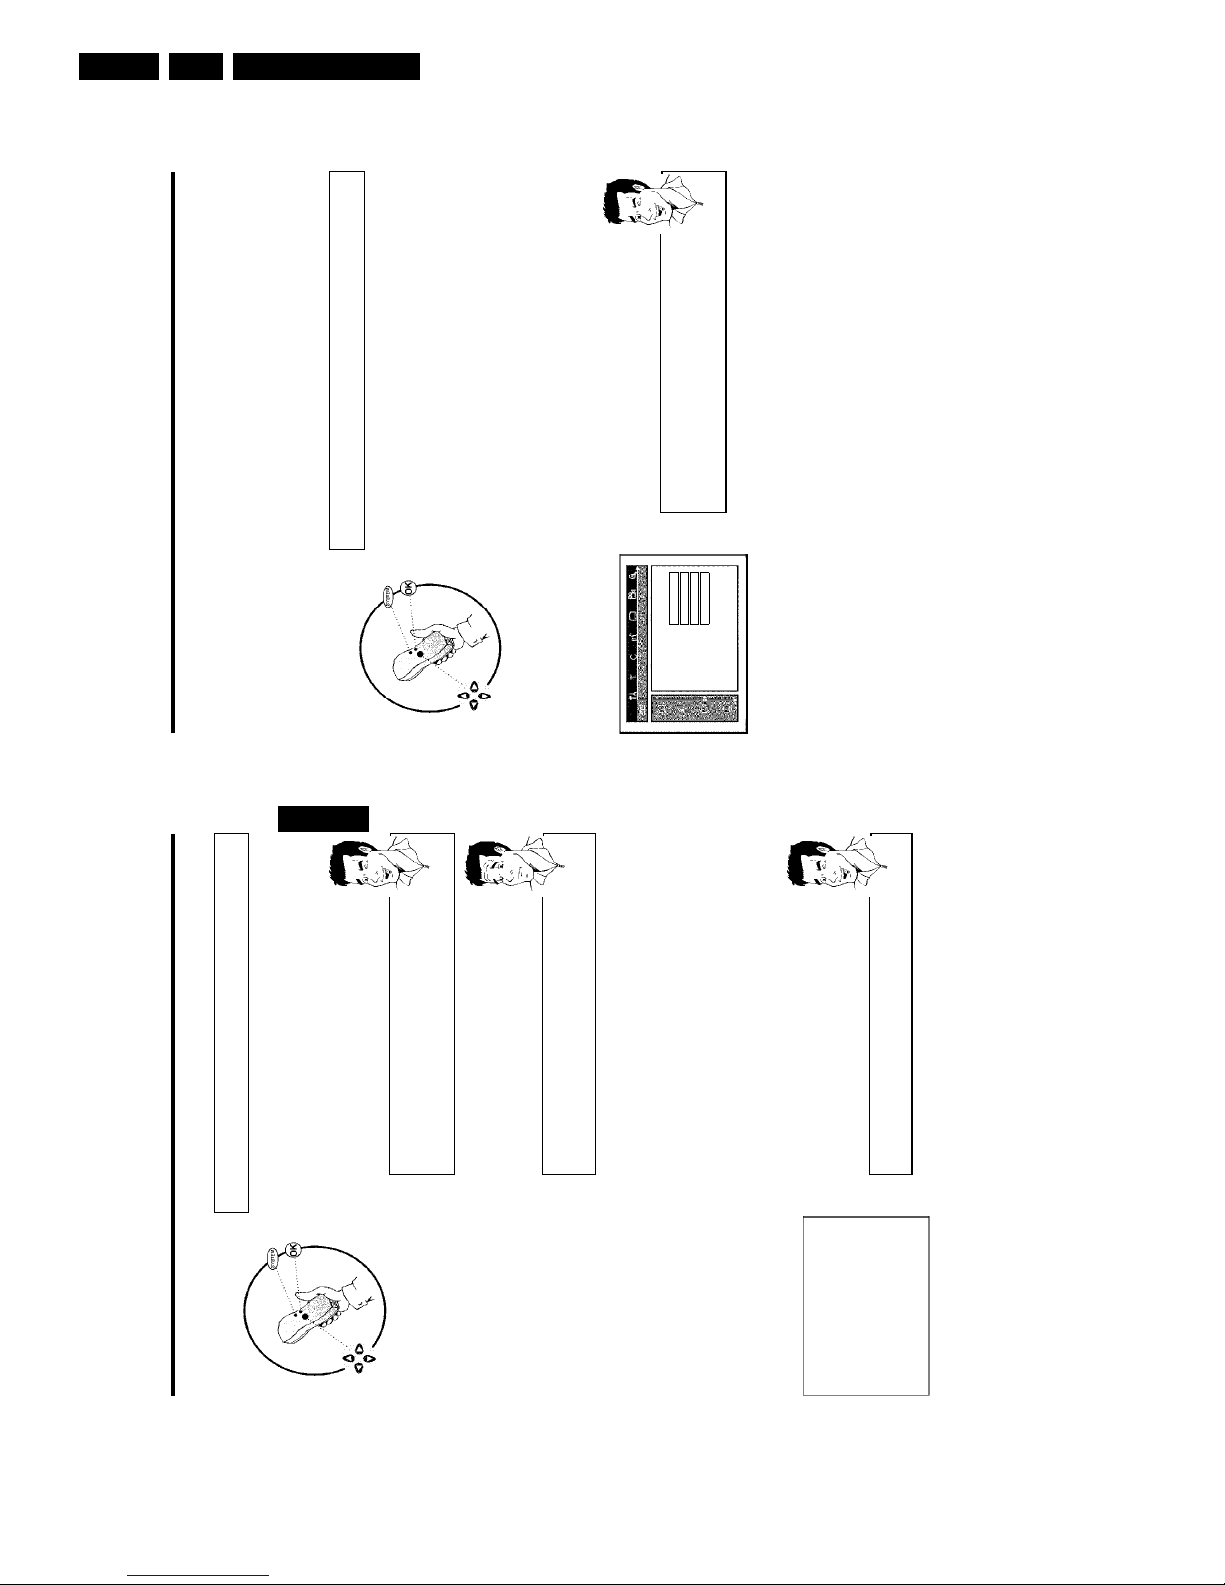
Preparing the remote control for
operation
The remote control and its batteries are packed separately in the original DVD recorder
packaging. You must install the batteries in the remote control before use - described in the
following section.
1 Take the remote control of the DVD recorder and the enclosed
batteries (2 batteries).
2 Open the battery compartment, insert the batteries as shown and
then close the battery compartment.
The remote control is now ready to use.
Its range is approximately 5 to 10 meters.
'Aim' correctly
In the following sections, you will need the remote control for the first time.
Always point the front of the remote control at the DVD recorder and not at
the TV set.
Tip
Connecting your DVD recorder to the TV
set
The necessary cable connections must be made before you can record or playback TV
programmes using your DVD recorder.
Connect the DVD recorder directly to your TV set. If there is a video recorder in between
the picture quality may be poor because of the copy protection system built into the DVD
recorder.
We recommend that you use a scart cable to connect your TV set and DVD recorder.
What is a scart cable?
The scart or Euro AV cable serves as the universal connector for picture,
sound and control signals. With this type of connection, there is practically no
loss of quality in picture or sound transmission.
?
ENGLISH
Connecting the DVD recorder
Directions For Use
EN 12 DVDR880-890 /0X13.
14
a'Time', 'Year', 'Month', 'Date' appears on my TV screen for
confirmation
Normally, the date and time are transferred from the data of the TV
channel that is stored under programme P01. If the aerial signal is too weak
or disrupted, you must manually set the time and date:
1
Check if the time in line 'Time' is correct.2If required, change the time with the number buttons 0..9 on your
remote control.3Select the next line with A or B .4Check the displayed settings for: Year', 'Month' and 'Date'.5When all information is correct, save by pressing OK .
Problem
Virgin mode
Audio Language
English
Español
Français
Português
Italiano
Press OK to continue
aI can see more installation menus on my TV set
Not all the necessary data has been transferred. Please enter the settings
by hand as follows. For more information on the various functions see
'Initial installation' in 'Installing your DVD recorder'.
1
Select the desired audio language using B or A and confirm with OK .2Select the desired subtitle language with B or A and confirm with
OK .
3
Select the desired picture format using B or A .
'4:3 letterbox' For a 4:3 TV set;cinema format (black bars above and
below the picture)
'4:3 panscan' For a 4:3 TV set; full height format with the sides cut
off
'16:9' For a 16:9 TV set4Confirm with OK .5Select your country with B or A .
If your country does not appear, select 'Other'.6Confirm with OK .
Problem
Initial installation is now complete.
Connecting with a scart cable without
'Easy Link'
Have the following cables ready:
an aerial cable (1, supplied), a mains cable (2, supplied), a scart cable (3).
1 Remove the aerial cable plug from your TV set. Insert it into the
ANTENNA socket at the back of the DVD recorder.
Connecting the DVD recorder
13
Connecting with a scart cable and 'Easy
Link'
Your DVD recorder can exchange information with your TV set using 'Easy Link'. Your TV
channels can also be transferred in the same order from your TV set to your DVD recorder
using 'Easy Link'.
Have the following cables ready:
an aerial cable (1, supplied), a mains cable (2, supplied), a special scart cable (3, suitable for
Easylink).
1 Switch off your TV set.
2 Remove the aerial cable plug from your TV set. Insert it into the
ANTENNA socket at the back of the DVD recorder.
3 Insert one end of the supplied aerial cable into the TV socket at the
back of the DVD recorder and the other end into the aerial input
socket at the back of the TV set.
4 Plug a special scart cable (for Easylink) into the scart socket EXT 1
TO TV-I/O at the back of the DVD recorder and the corresponding
scart socket at the back of the TV set (see TV set operating
instructions).
5 Switch on the TV set.
6 Insert one end of the supplied mains cable into the mains socket
4MAINS at the back of the DVD recorder and the other end into
the wall socket.
EasyLink
loading data from TV;
please wait
7 A message appears on the screen announcing that the transfer has
started. 'EASYLINK' appears on the display during transfer.
The TV set transfers all stored TV channels, in the same order, to the
DVD recorder.
This may take several minutes.
ENGLISH
Connecting the DVD recorder
Directions For Use
EN 13DVDR880-890 /0X1 3.
16
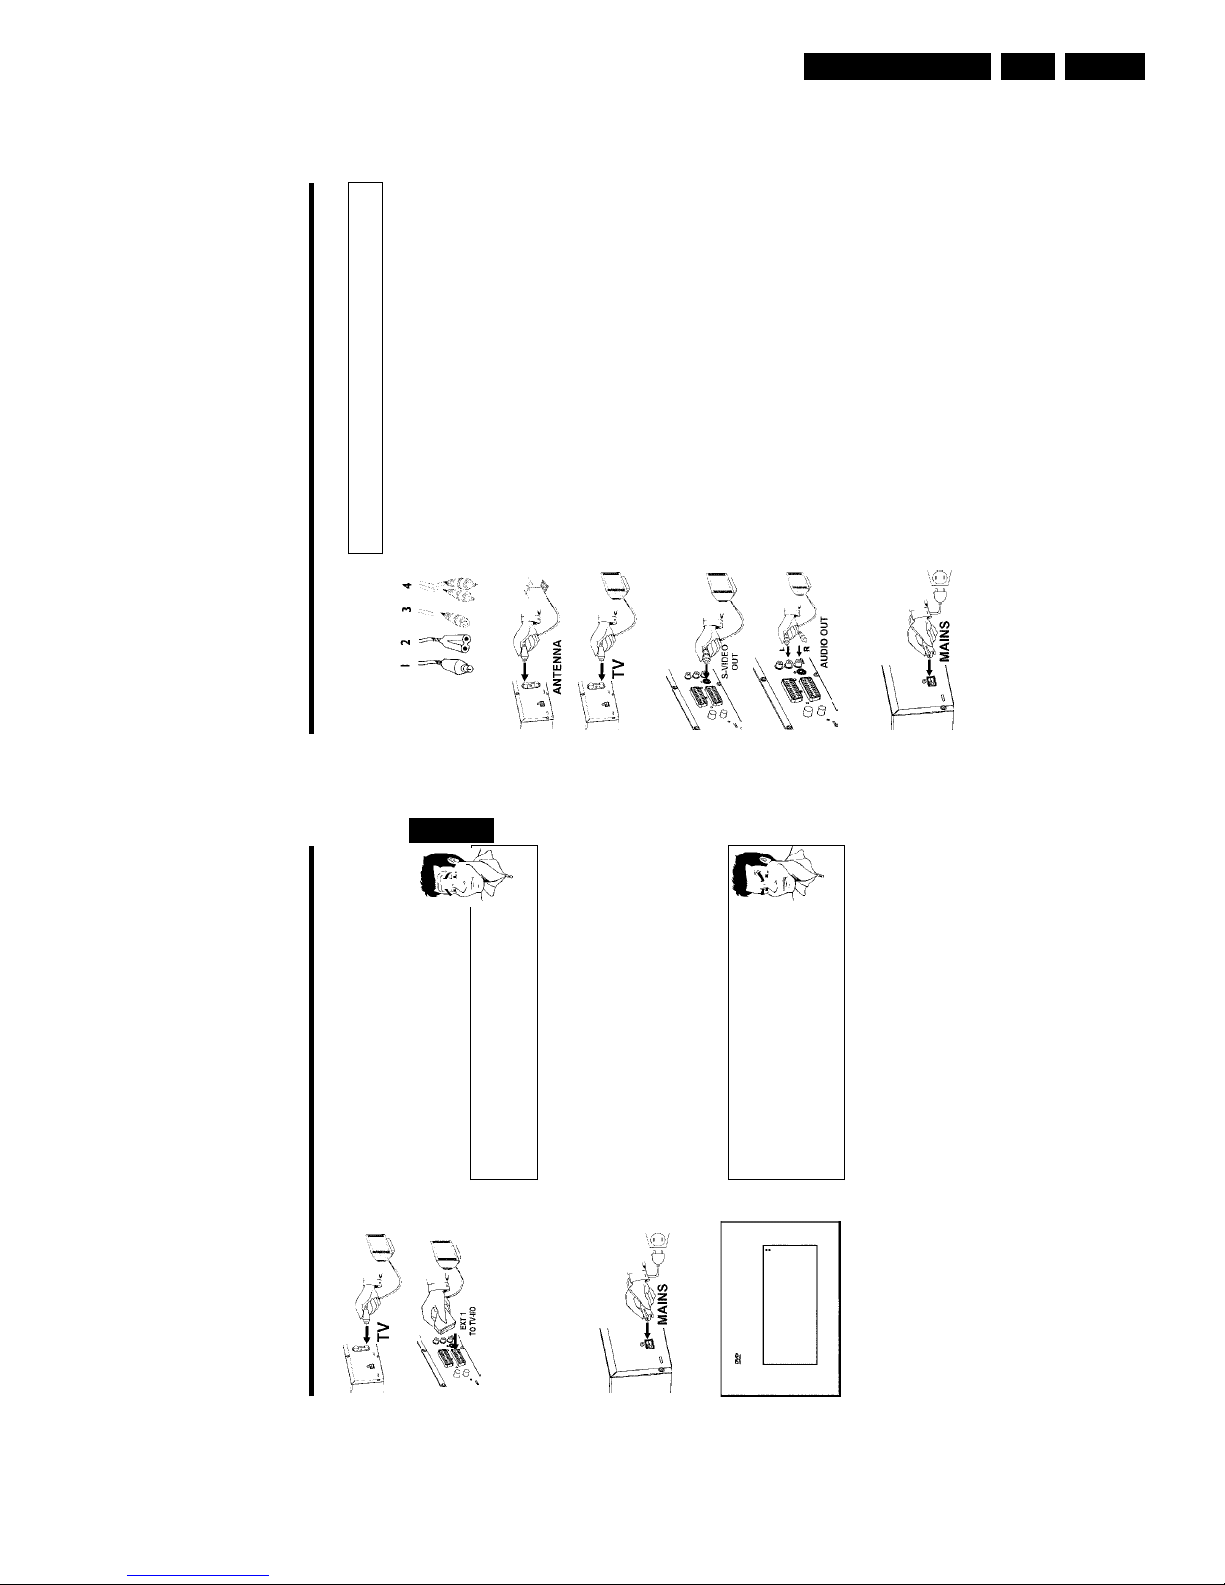
Connecting with an SVideo(Y/C)cable
Have the following cables ready:
an aerial cable (1, supplied), a mains cable (2, supplied), an S-Video (SVHS) cable (3), an audio
cable (4, supplied, red/white plug).
1 Remove the aerial cable plug from your TV set. Insert it into the
ANTENNA socket at the back of the DVD recorder.
2 Insert one end of the supplied aerial cable into the TV socket at the
back of the DVD recorder and the other end into the aerial input
socket at the back of the TV set.
3 Insert one end of a S-Video (SVHS) cable into the OUT S-VIDEO
(Y/C) socket at the back of the DVD recorder and the other end into
the S-Video (SVHS) input socket on the TV set (usually labelled
'S-Video in' or 'SVHS in'. See TV operating instructions).
4 Insert one end of the supplied audio (Cinch) cable into the red/white
Cinch socket OUT L AUDIO R at the back of the DVD recorder
and the other end into the audio input socket (usually red/white) on
the TV set (usually labelled 'Audio in' or 'AV in'. See TV operating
instructions).
5 Switch on the TV set. Switch the TV set over to this input socket or
select the relevant channel number. Please see your TV's operating
instructions for the channel number you need.
6 Insert one end of the supplied mains cable into the mains socket
4MAINS at the back of the DVD recorder and the other end into
the wall socket. 'TV ON ' will appear on the display.
Then, read the paragraph on 'Initial installation' in 'Installing your DVD recorder'.
Connecting the DVD recorder
15
2 Insert one end of the supplied aerial cable into the TV socket at the
back of the DVD recorder and the other end into the aerial input
socket at the back of the TV set.
3 Plug a scart cable into the scart socket EXT 1 TO TV-I/O at the
back of the DVD recorder and the scart socket for the DVD
recorder at the back of the TV set (see TV set operating instructions).
My TV set has several scart sockets. Which one should I use?
Select the scart socket that is suitable for both video output and for video
input.
My TV set shows me a selection menu for the scart socket
Select 'VCR' as the source for this scart socket.
?
4 Switch on the TV set.
5 Insert one end of the supplied mains cable into the mains socket
4MAINS at the back of the DVD recorder and the other end into
the wall socket. 'TV ON ' will appear on the display.
6 If the connection was properly made and your TV was automatically
switched to the programme number for the scart socket, e.g. 'EXT',
'0', 'AV', you will see the following picture:
Virgin mode
Menu Language
English
Español
Français
Italiano
Deutsch
Press OK to continue
aMy screen is empty.
b Many TV sets are switched by the DVD recorder to the programme
number for the scart socket by way of a control signal sent through the
scart cable.
b If the TV set does not automatically switch to the scart socket programme
number, manually change to the corresponding programme number on your
TV set (see your TV's operating instructions).
b Check that the scart cable is connected from the TV set to the EXT 1
TO TV-I/O socket on the DVD recorder. The EXT 2 AUX I/O socket is
intended only for additional devices.
Problem
Then, read the paragraph on 'Initial installation' in 'Installing your DVD recorder'.
ENGLISH
Connecting the DVD recorder
Directions For Use
EN 14 DVDR880-890 /0X13.
18
Connecting additional devices to the
second scart socket
You can connect additional devices such as decoders, satellite receivers, camcorders, etc. to the
EXT 2 AUX I/O socket. When playback is started on this additional device the DVD recorder
automatically connects the EXT 2 AUX I/O scart socket with the EXT 1 TO TV-I/O scart
socket. You will then see the picture from the additional device on your TV set, even if the
DVD recorder is switched off.
The TV/DVD button on the remote control allows you to switch between playback through the
EXT 2 AUX I/O scart socket and playback from the DVD recorder.
Connecting additional video recorders
You can connect a video recorder to the EXT 2 AUX I/O socket. If you have an SVHS video
recorder you can additionally use the OUT S-VIDEO (Y/C) socket and the OUT L AUDIO
R sockets.
Please note:
Most pre-recorded video cassettes and DVDs are copy-protected. If you try to copy them you
will see the message 'COPY PROT' on the DVD recorder's display.
aWhen copying video cassettes the display on the DVD recorder
shows 'NO S GNAL'.
b Check that the scart cable is plugged in firmly.
b The DVD recorder may not be able to recognise the video input signal if
this signal is poor or does not comply with relevant standards.
aWhen I copy DVD video discs or prerecorded video cassettes the
picture is fuzzy and the brightness varies
b This happens if you try to copy DVDs or video cassettes that have been
copy-protected. Even though the picture on the TV is fine the recording on
a DVD+R(W) is faulty. This nterference is unavoidable with copy-protected
DVDs or video cassettes.
Problem
Connecting the DVD recorder
17
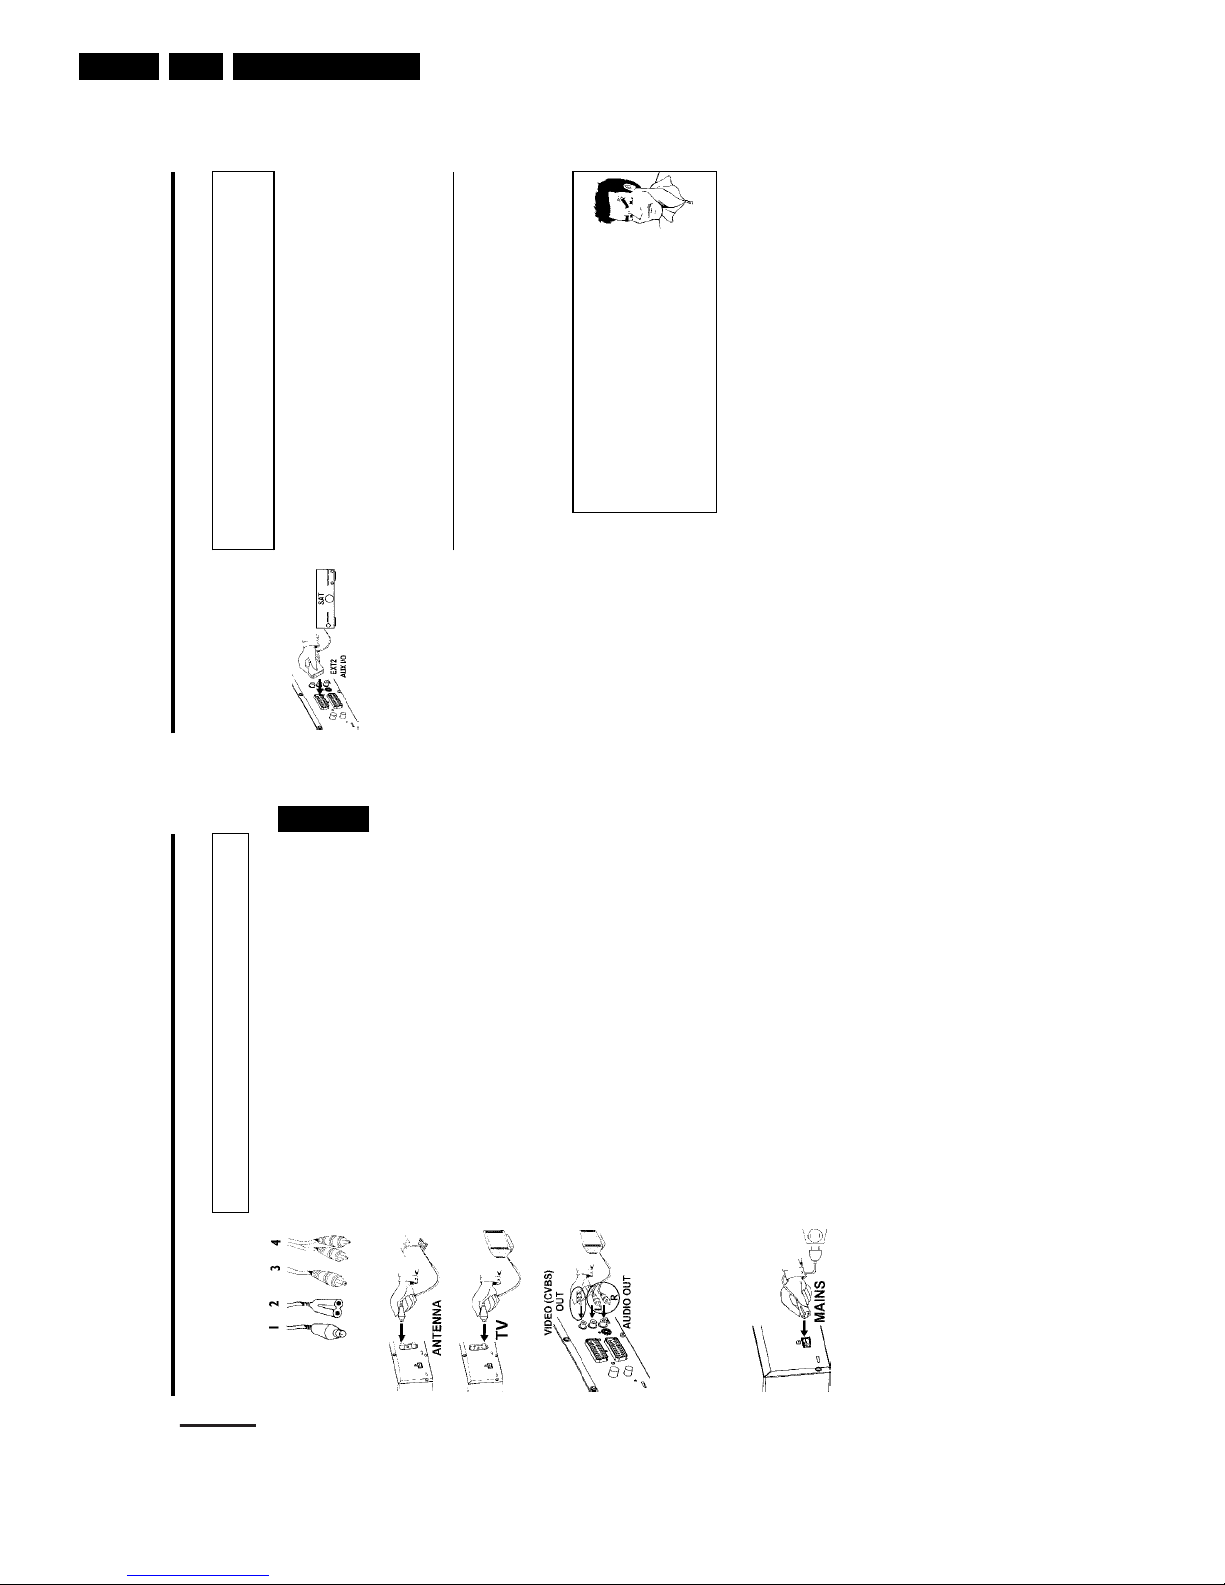
Connecting with video(CVBS) cable
Have the following cables ready:
an aerial cable (1, supplied), a mains cable (2, supplied), a video (CVBS) cable (3, supplied, yellow
plug), an audio cable (4, supplied, red/white plug).
1 Remove the aerial cable plug from your TV set. Insert it into the
ANTENNA socket at the back of the DVD recorder.
2 Insert one end of the supplied aerial cable into the TV socket at the
back of the DVD recorder and the other end into the aerial input
socket at the back of the TV set.
3 Insert one end of the supplied video (CVBS) cable into the yellow
Cinch socket OUT VIDEO (CVBS) at the back of the DVD
recorder and the other end into the video input socket (usually
yellow) on the TV set (usually labelled 'Video in' or 'AV in'. See TV
operating instructions).
4 Insert one end of the supplied audio (Cinch) cable into the red/white
Cinch socket OUT L AUDIO R at the back of the DVD recorder
and the other end into the audio input socket (usually red/white) on
the TV set (usually labelled 'Audio in' or 'AV in'. See TV operating
instructions).
5 Switch on the TV set. Switch the TV set over to the Video/Audio
input socket or select the relevant programme number. Please see
your TV's operating instructions for the programme number you need.
6 Insert one end of the supplied mains cable into the mains socket
4MAINS at the back of the DVD recorder and the other end into
the wall socket. 'TV ON ' will appear on the display.
Then, read the paragraph on 'Initial installation' in 'Installing your DVD recorder'.
ENGLISH
Connecting the DVD recorder
Directions For Use
EN 15DVDR880-890 /0X1 3.
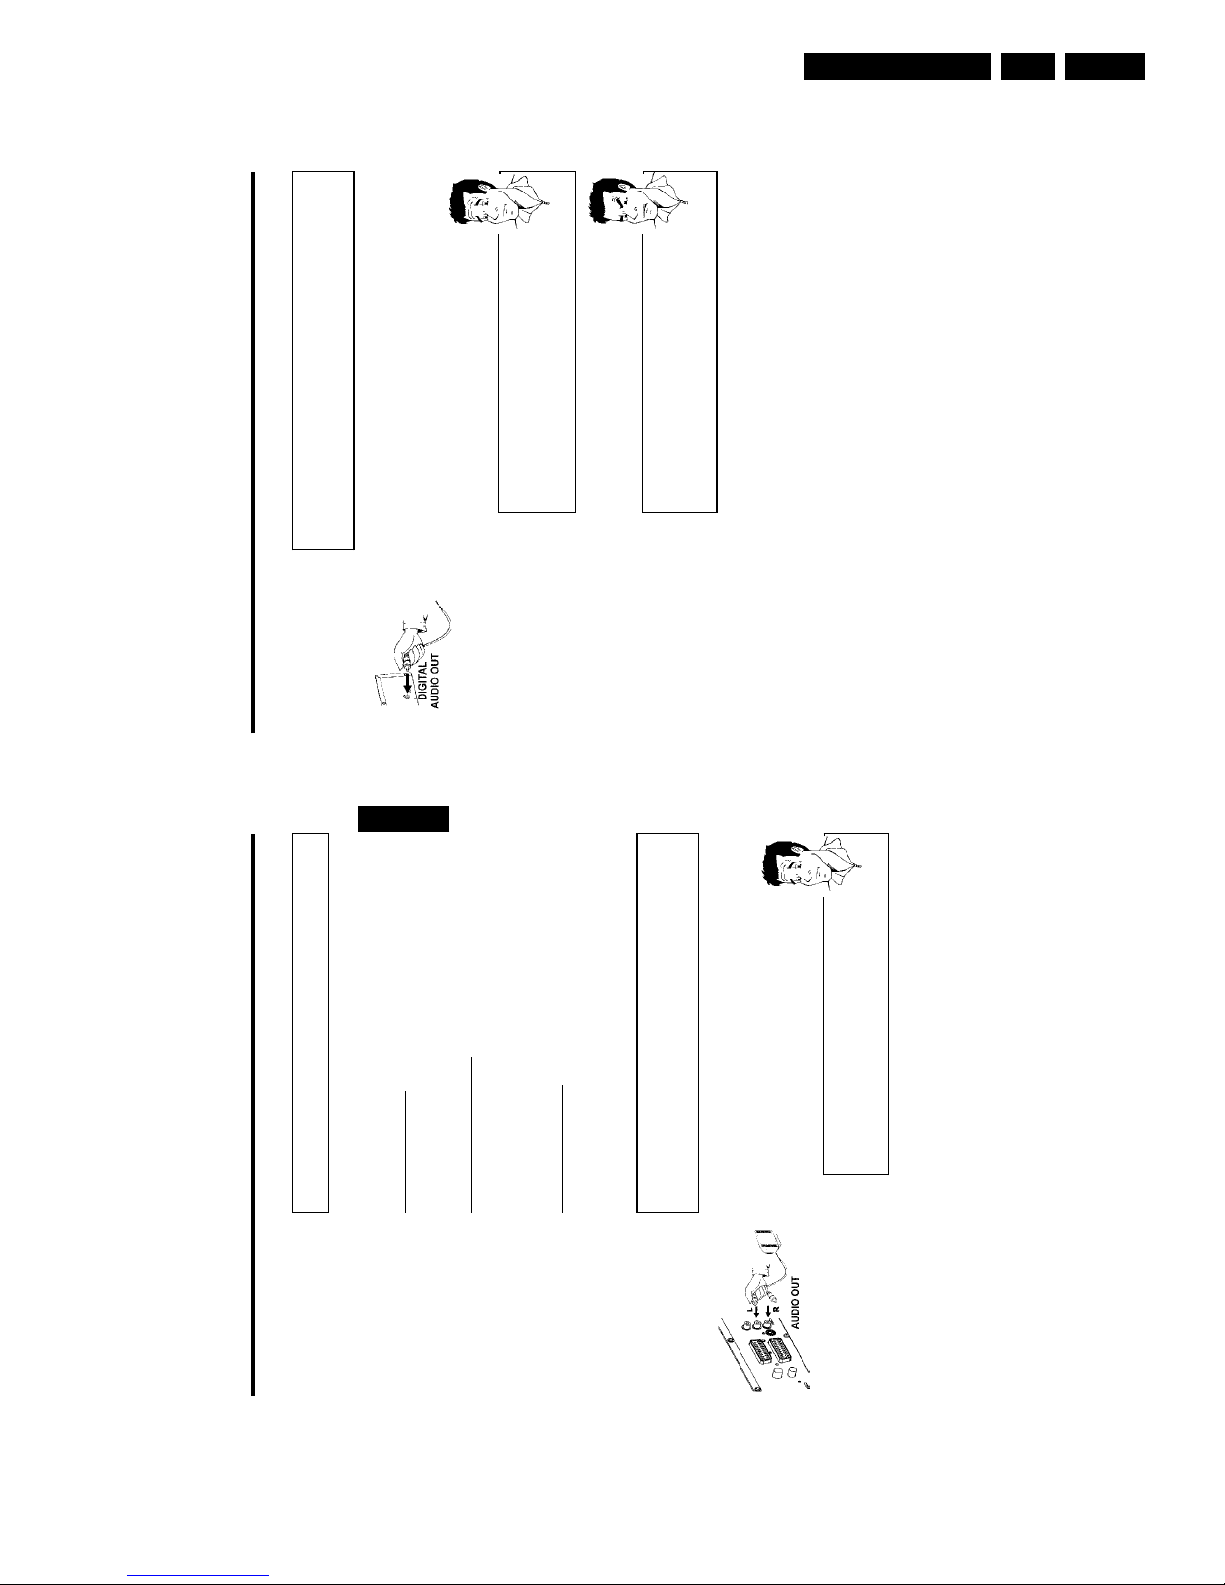
20
Connecting audio devices to the digital
audio socket
At the back of the DVD recorder there is a digital audio output socket DIGITAL AUDIO
OUT for an coaxial cable.
These can be used to connect the following:
•) an A/V receiver or an A/V amplifier with a digital multichannel sound decoder
•) a receiver with twochannel digital stereo (PCM)
Digital multichannel sound ?
Digital multi-channel sound offers the best possible sound quality. You will
need a multi-channel A/V receiver or amplifier that supports at least one of
the audio formats of the DVD recorder (MPEG2, Dolby Digital and DTS).
Consult the operating instructions for your receiver to find out which audio
formats it supports.
?
aAll I can hear from my loudspeakers is a loud distorted noise
b The receiver is not compatible with the digital audio format of the DVD
recorder. The audio format of the DVD disc is displayed in the status
window when you switch to another language. Playback in six-channel
digital surround sound is only possible if the receiver has a digital
multi-channel sound decoder.
Problem
Connecting the DVD recorder
19
Connect camcorder to the front sockets
To copy camcorder recordings, you can use the front sockets. These sockets are located behind
the flap on the left hand side.
Best Picture Quality
If you have a DV or Digital 8 camcorder, connect the DV input of the DVD recorder to the
appropriate DV output on the camcorder.
Very good Picture Quality
If you have a Hi8 or S-VHS(C) camcorder, connect the S-VIDEO input of the DVD recorder to
the appropriate S-VHS output on the camcorder.
You must also connect the audio input left AUDIO right on the DVD recorder to the audio
output on the camcorder.
Good Picture Quality
If you have a camcorder that only has a single video output (Composite Video, CVBS), connect
the VIDEO input on the DVD recorder to the appropriate output on the camcorder.
You must also connect the audio input left AUDIO right on the DVD recorder to the audio
output on the camcorder.
Connecting audio devices to the analogue
audio sockets
Two analogue audio sockets OUT L AUDIO R (audio signal output left/right) are located at the
back of the DVD recorder.
These can be used to connect the following:
•) a receiver with DolbyProLogic
•) a receiver with twochannel analogue stereo
Can I use the 'Phono' input on my amplifier?
This socket (input) on the amplifier is designed only for record players
without preamplifiers. Do not use this input for connecting the DVD
recorder.
The DVD recorder or the amplifier may be damaged as a result.
?
ENGLISH
Connecting the DVD recorder
Directions For Use
EN 16 DVDR880-890 /0X13.
22
Virgin mode
TV Shape
4 3 letterbox
4 3 panscan
16:9
Press OK to continue
7 Select the desired screen format position using B or A . These
settings will only be used if you insert a DVD that contains this
information.
Which screen formats can I select?
'4:3 letterbox' for wide-screen (cinema format)with black borders at the
top and bottom of the screen.
4:3 panscan' for a full-height picture with cropped edges.
16:9' for a wide-screen TV set (screen edge ratio 16:9)
?
8 Confirm with OK .
Virgin mode
Country
Austria
Belgium
Denmark
Finland
France
Press OK to continue
9 Select your country with B or A .
If your country does not appear, select 'Other'.
Why do I have to set the country?
To call up the specific settings for the respective country, you must first install
the country.
?
0 Confirm with OK .
A After you connect the aerial (or cable TV, satellite receiver, etc.) to
the DVD recorder, press OK .
The automatic TV channel search starts. 'WAIT' will appear on the
display.
Installation
Autom. search
Searching for TV channels
00 Channels found
Bitte warten
aThe DVD recorder cannot find any TV stations
b Select channel 1 on the TV set. Can you see the stored TV channel on the
TV set?
If not, check the cable connection from the aerial (aerial socket) to the
DVD recorder and to the TV set.
b Please have patience.
The DVD recorder searches the entire frequency range in order to find
and store the largest possible number of TV channels. It is possible that the
TV channels in your country are broadcast in a higher frequency range. As
soon as this range is reached during the search, the DVD recorder will find
the TV channels.
b If no aerial is connected, complete the basic settings and then, if desired,
start the automatic channel search (see section 'Automatic TV channel
search').
Problem
B When the automatic TV channel search is complete, 'Autom. search
complete' will appear on the TV screen.
'Time', 'Year', 'Month', 'Date' will appear on the TV screen.
Installing your DVD recorder
21
C
Installing your DVD recorder
Initial installation
After successfully connecting your DVD recorder to the TV set and other additional devices as
described in the previous chapter, this chapter will show you how to start the initial installation.
The DVD recorder automatically seeks out and stores all available TV channels.
Aim correctly with the remote control
In the following sections, you will need the remote control for the first time.
Aim the remote control at the DVD recorder and not at the TV set.
Connecting additional devices
If you have connected additional devices such as a satellite receiver to the
aerial cable, switch them on. The automatic channel search will recognise it
and save it.
No aerial connected
Even if you only want to use the DVD recorder to play back or have only
connected a satellite receiver, you must still complete the initial installation.
This is necessary so that the basic settings are stored correctly. Once initial
installation is complete you can use the DVD recorder as normal.
Tip
Virgin mode
Menu Language
English
Español
Français
Italiano
Deutsch
Press OK to continue
1 Select the desired language for the on-screen menu by pressing B or
A .
What is an onscreen menu?
The multi-language on-screen menu takes the mystery out of using your new
DVD recorder. All settings and/or functions are displayed on your TV screen
in the relevant language.
?
2 Confirm with OK .
Virgin mode
Audio Language
English
Español
Français
Português
Italiano
Press OK to continue
3 Select the desired audio language using B or A .
What is an audio language?
The DVD will play the sound in the language you select, provided this
language is available on the disc. If it is not available on the disc the fist
language on the DVD will be used instead. The DVD Video D sc menu, if
available, will also be displayed in the language you select.
?
4 Confirm with OK .
Virgin mode
Subtitle Language
English
Español
Français
Português
Italiano
Press OK to continue
5 Select the desired language for the subtitles by pressing B or A .
What is the subtitle language?
The subtitles w ll be displayed in the language you select, provided this
language is available on the disc. If it is not available on the disc the fist
language on the DVD will be used instead.
?
6 Confirm with OK .
ENGLISH
Installing your DVD recorder
Directions For Use
EN 17DVDR880-890 /0X1 3.
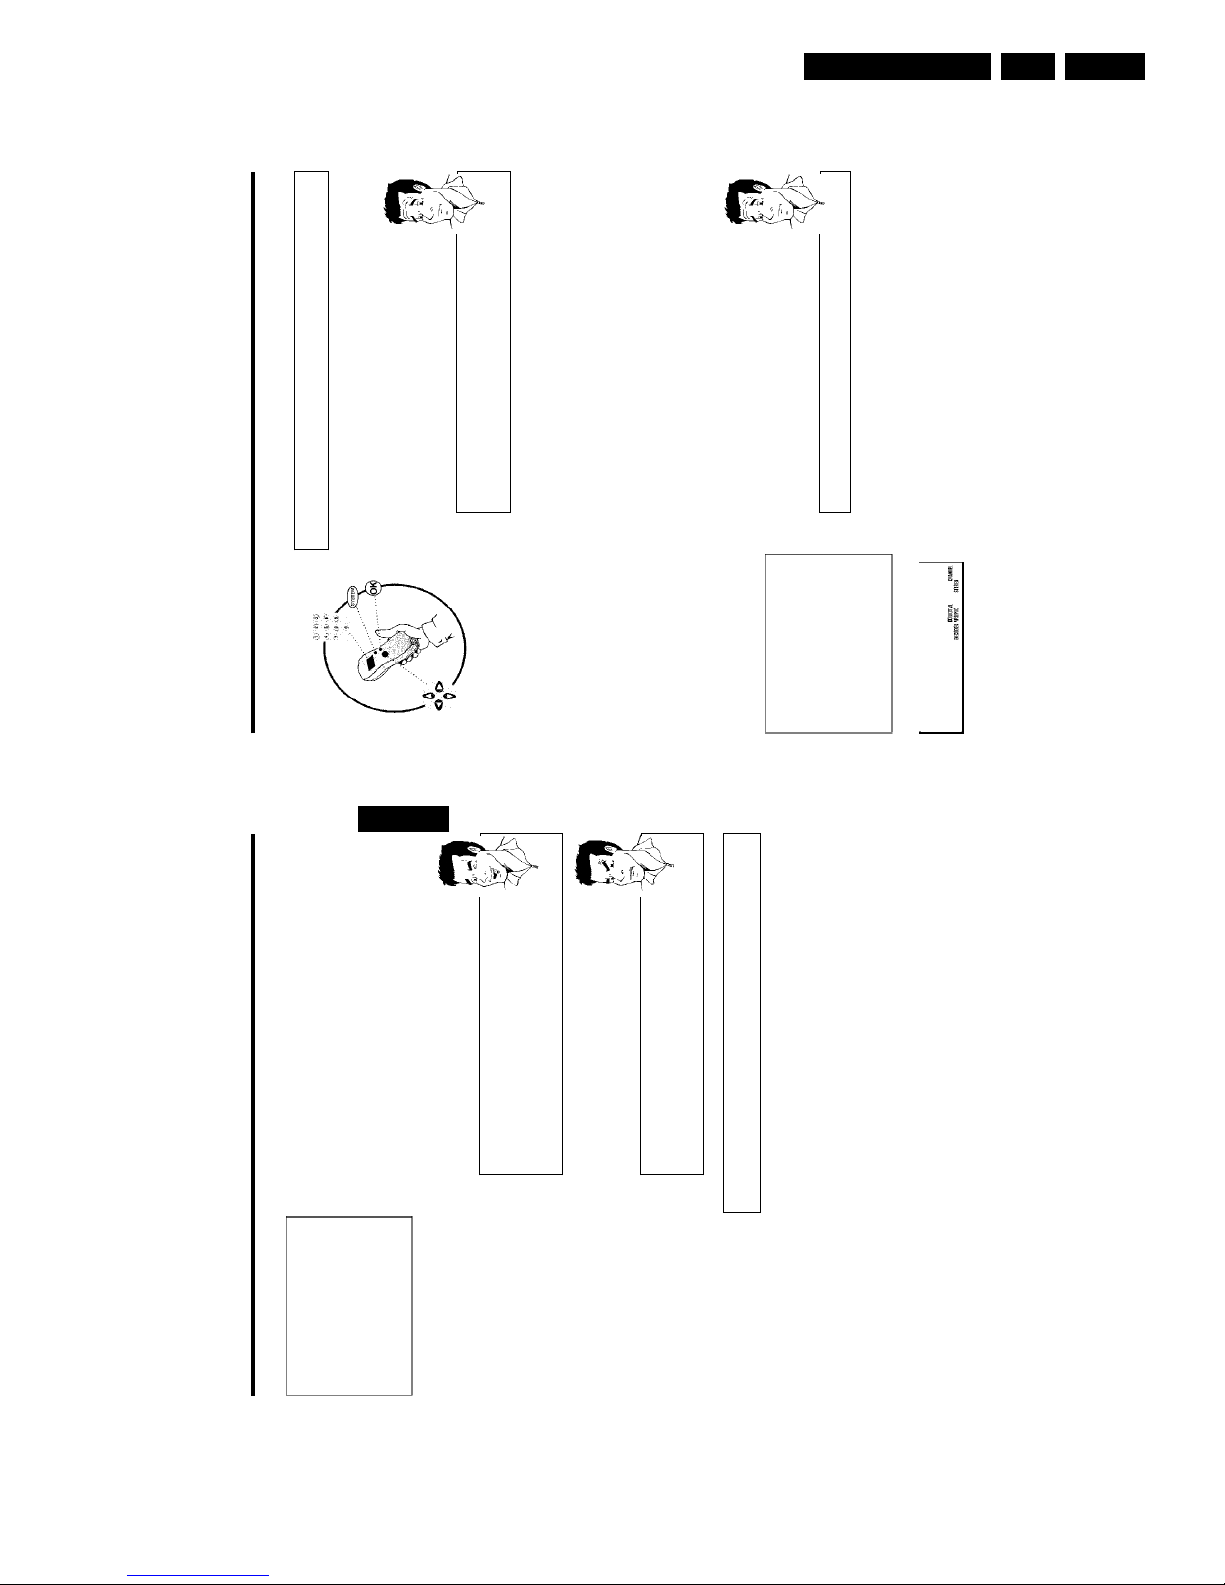
24
Allocating a decoder
Some TV channels send coded TV signals that can only be viewed properly with a purchased or
rented decoder. You can connect such a decoder (descrambler) to your DVD recorder. The
following function automatically activates the connected decoder for the TV channel you want to
watch.
How do I allocate the decoder for Easy Link?
If your TC=V set supports 'Easy Link' the decoder must be assigned to the
relevant TV channel on the TV set (see the operating instructions for your TV
set). Settings cannot then be made in this menu.
?
1 Switch on the TV set. If required, select the programme number for
the DVD recorder.
2 Switch on the DVD recorder using STANDBY/ON .
3 Use the CHANNEL q and CHANNEL r buttons on the DVD
recorder or the number buttons 0..9 on the remote control to select
the TV channel for which you want to use the decoder. If necessary,
use the MONITOR button to switch to the internal tuner.
4 Press the SYSTEM-MENU button on the remote control. The menu
bar will appear at the top of the screen.
5 Select '
A
' using D or C .
6 Select line 'Installation' using B or A and confirm with C .
7 Select line 'Manual search' using B or A and confirm with C .
Installation
Manual search
Channel/freq. CH
Entry/search 01
Programme number 01
TV channel name BBC1
Decoder Off
TV system PAL-BG
NICAM On
Fine tuning 0
To store
Press OK
8 Select line 'Decoder' using B or A .
9 Select function 'On' with D or C .
How can I switch the decoder off again?
Select 'Off' (decoder off) on the TV screen in the line 'Decoder' using C .
?
0 Confirm with OK .
A To end, press SYSTEM-MENU .
MTV
Your decoder has now been allocated to this TV channel.
When this TV channel is selected, the 'DECODER' symbol will appear in the DVD recorder
display.
Installing your DVD recorder
23
Auto. Prog.Suchl.
Autom. search complete
00 Channels found
Time 20:01
Year 2002
Month 01
Date 01
To continue
Press OK
C Check if the time in 'Time' is correct.
À If required, change the time with the number buttons 0..9 on your
remote control.
Á Select the next line with A or B .
 Check if the displayed settings for: Year', 'Month' and 'Date' are
correct.
à When all information is correct, save by pressing OK .
The initial installation is now complete.
Satellite receiver
If you are connecting a satellite receiver, please read the section on 'Using a
satellite receiver'.
Decoder
If you are connecting a decoder, you must install it as described in the next
section.
Tip
aSound may be distorted on some TV channels.
b If the sound is distorted on any of the stored TV channels or if there is no
sound at all, the wrong TV system may have been stored for the TV
channel. Read 'Manual TV channel search' for information on how to
change the TV system.
Problem
Using a satellite receiver
TV channels from a satellite receiver (connected to scart socket EXT 2 AUX I/O ) are received
on the DVD recorder on programme number 'EXT2'
If necessary, use the MONITOR button to switch to the internal tuner.
Then select programme number 'EXT1' with 0 on the remote control and programme number
'EXT2' with CHANNEL r .
You should select the TV channels to be received by the satellite receiver directly on the
receiver itself.
ENGLISH
Installing your DVD recorder
Directions For Use
EN 18 DVDR880-890 /0X13.
26
9 Using D or C in 'Programme number', select the programme
number you want to use for the TV channel, e.g. '01'.
How can I change the displayed symbol of a TV channel?
1 In 'TV channel name', press C .
2 Select the desired symbol position using D or C .
3 Change the symbol at the symbol position with B or A .
4 Select the next symbol position in the same way.
5 Keep pressing C until the cursor disappears.
Tip
How can I change the TV system of the TV channel?
In 'TV system', use D or C to select the TV system that produces the
least distortion of picture and sound.
What is NICAM?
NICAM is a digital sound transmission system. Using NICAM, you can
transmit either 1 stereo channel or 2 separate mono channels. However, if
reception is poor and the sound distorted you can turn off NICAM.
In 'NICAM', select 'Off' using D or C .
How can I improve the automatic process for storing channels?
To change the automatic process for storing channels (fine tuning), select
'Fine tuning'.
Using D or C you can try to fine-tune the TV channel manually.
Experts
0 Press OK to store the TV channel.
A To search for other TV channels, begin again at
8 .
B To end, press SYSTEM-MENU .
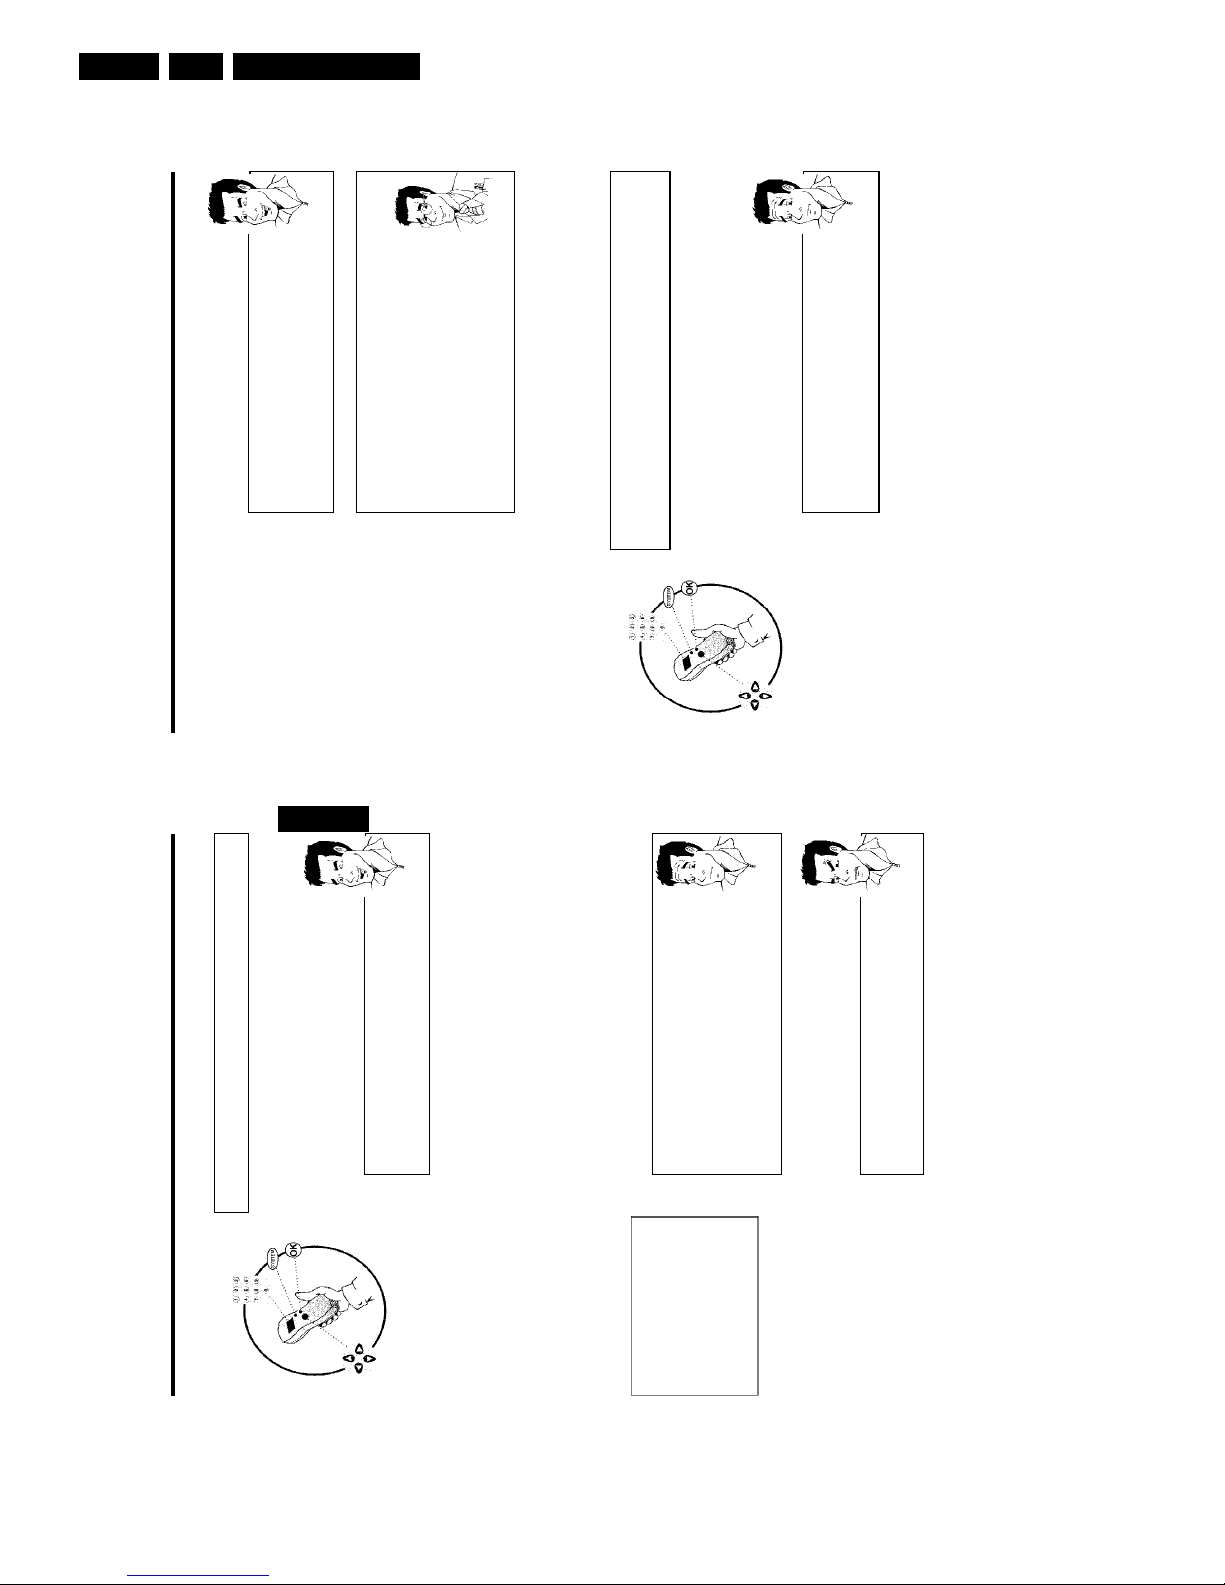
Sorting TV channels automatically (Follow
TV)
When the automatic channel search function is activated, the TV channels are stored in a specific
order. This may differ from the order in which the TV channels appear on your TV set.
This function changes the order of the TV channels stored in your DVD recorder to match the
order on the TV set.
This only works if the DVD recorder ( EXT 1 TO TV-I/O socket) and the TV set are
connected with a scart cable.
What does EASYLINK do?
If your TV set supports 'Easylink,..', TV channels will be stored during initial
installation in the same order as they appear on the TV set. To store the TV
channels in a different order, you'll need to change the order on the TV set.
When you start the Follow TV function the information is transferred again
from the TV set.
?
1 Switch on the TV set. If required, select the programme number for
the DVD recorder.
Installing your DVD recorder
25
Manual TV channel search
In some cases, not all of the available TV channels may have been found and stored during initial
installation. In this case, you will need to search for and store the missing or coded TV channels
manually.
Manual search with EasyLink
With 'Easy Link', the DVD recorder will automatically download the TV
channels stored on the TV set. This is why some l nes have no function. To
store new TV channels, they must first be stored on the TV set. The
information will then be transferred to the DVD recorder automatically.
Tip
1 Switch on the TV set. If required, select the programme number for
the DVD recorder.
2 Switch on the DVD recorder using STANDBY/ON .
3 Press SYSTEM-MENU on the remote control. The menu bar
appears.
4 Select '
A
' using D or C .
5 Select 'Installation' using B or A and confirm with C .
6 Select 'Manual search' using B or A and confirm with C .
Installation
Manual search
Channel/freq. CH
Entry/search 01
Programme number 01
TV channel name BBC1
Decoder Off
TV system PAL-BG
NICAM On
Fine tuning 0
To store
Press OK
7 In 'Channel/freq.', select the desired display using C
What is hidden behind the settings?
'Freq.': Display/entry of frequencies
'CH': Display/entry of channels
'S-CH': Display/entry of special channels
What is a special channel?
TV signals are transmitted in certain pre-defined frequency ranges. These
ranges are divided into channels. A specific frequency/channel is assigned to
each TV station. Certain frequency ranges are specified as special channels
(hyperband channels).
?
8 In 'Entry/search', enter the frequency or channel of the TV station
using the number buttons 0..9 .
aI don't know the channel for my TV station
b In this case, press C to start the automatic search. A changing channel
number/frequency number will appear on the TV screen.
Continue the automatic search until you have found the TV channel you
are looking for.
Problem
ENGLISH
Installing your DVD recorder
Directions For Use
EN 19DVDR880-890 /0X1 3.
28
Automatic TV channel search
During installation, all available TV channels are searched for and stored. If the channel
assignments of your cable or satellite TV provider change or if you are reinstalling the DVD
recorder, e.g. after moving house, you can start this procedure again. This will replace the stored
TV channels with the new ones.
What does Easy Link do?
With Easylink, you can search for and store TV channels only on the TV set.
These settings are accepted by the DVD recorder. Use this function to start
the transfer of TV channels from the TV set.
?
1 Switch on the TV set. If required, select the programme number for
the DVD recorder.
2 Switch on the DVD recorder using STANDBY/ON .
3 Press SYSTEM-MENU on the remote control. The menu bar will
appear at the top of the screen.
4 Select '
A
' using D or C .
5 Select line 'Installation' using B or A and confirm with C .
6 Select line 'Autom. search' using B or A .
7 Press C .
Installation
Autom. search
Searching for TV channels
00 Channels found
Bitte warten
8 The automatic TV channel search starts. This allows the DVD
recorder to save all available TV channels. This procedure may take
several minutes.
9 When the automatic search is completed, 'Autom. search
complete' will appear on the TV screen.
0 To end, press SYSTEM-MENU .
You can read about how to search for a TV channel manually in section 'Adding and clearing TV
channels manually'.
Installing your DVD recorder
27
2 Switch on the DVD recorder using STANDBY/ON .
3 Press the SYSTEM-MENU button on the remote control. The menu
bar appears.
4 Select '
A
' using D or C .
5 Select 'Installation' using B or A and confirm with C .
6 Select 'Follow TV' using B or A and confirm with C .
7 Confirm the message on the screen with OK . TV 01' will appear in
the DVD recorder display.
TV 01
8 Select programme number '1' on the TV set.
aI cannot switch my TV set to programme number '1'
b If you have connected additional devices to the EXT 2 AUX I/O socket,
please disconnect these devices. Other connected devices may have
switched the TV set to the programme number of the scart socket.
Problem
9 Confirm with OK on the DVD recorder remote control.
'WAIT' will appear on the display. The DVD recorder compares the
TV channels on the TV set and the DVD recorder.
If the DVD recorder finds the same TV channel as on the TV set it
stores it at 'P01'.
a'NOTV' will appear in the display. The DVD recorder is not
receiving a video signal from the TV set.
b Check the connectors at both ends of the scart cable.
b Check your TV's operating instructions to see which scart socket is used
for video signals.
b If the problem persists, you won't be able to use this feature.
Please read 'Sorting and clearing TV channels manually'.
Problem
0 Wait until for example 'TV 02' appears in the display.
TV 02
A Select the next programme number on the TV set, e.g. '2'.
B Confirm with OK on the DVD recorder remote control.
Deleting sorting
You can delete incorrect TV channel sorting by pressing D .
Tip
C Repeat steps 0 to B until you have assigned all the TV channels.
À To end, press SYSTEM-MENU .
ENGLISH
Installing your DVD recorder
Directions For Use
EN 20 DVDR880-890 /0X13.
30
8 Using B or A , shift the TV channel to the desired position and
press the D button. The DVD recorder will insert the TV channel.
9 Repeat steps
6 to 8until you have resorted/deleted all desired TV
channels.
0 To save, press OK .
A To end, press SYSTEM-MENU .
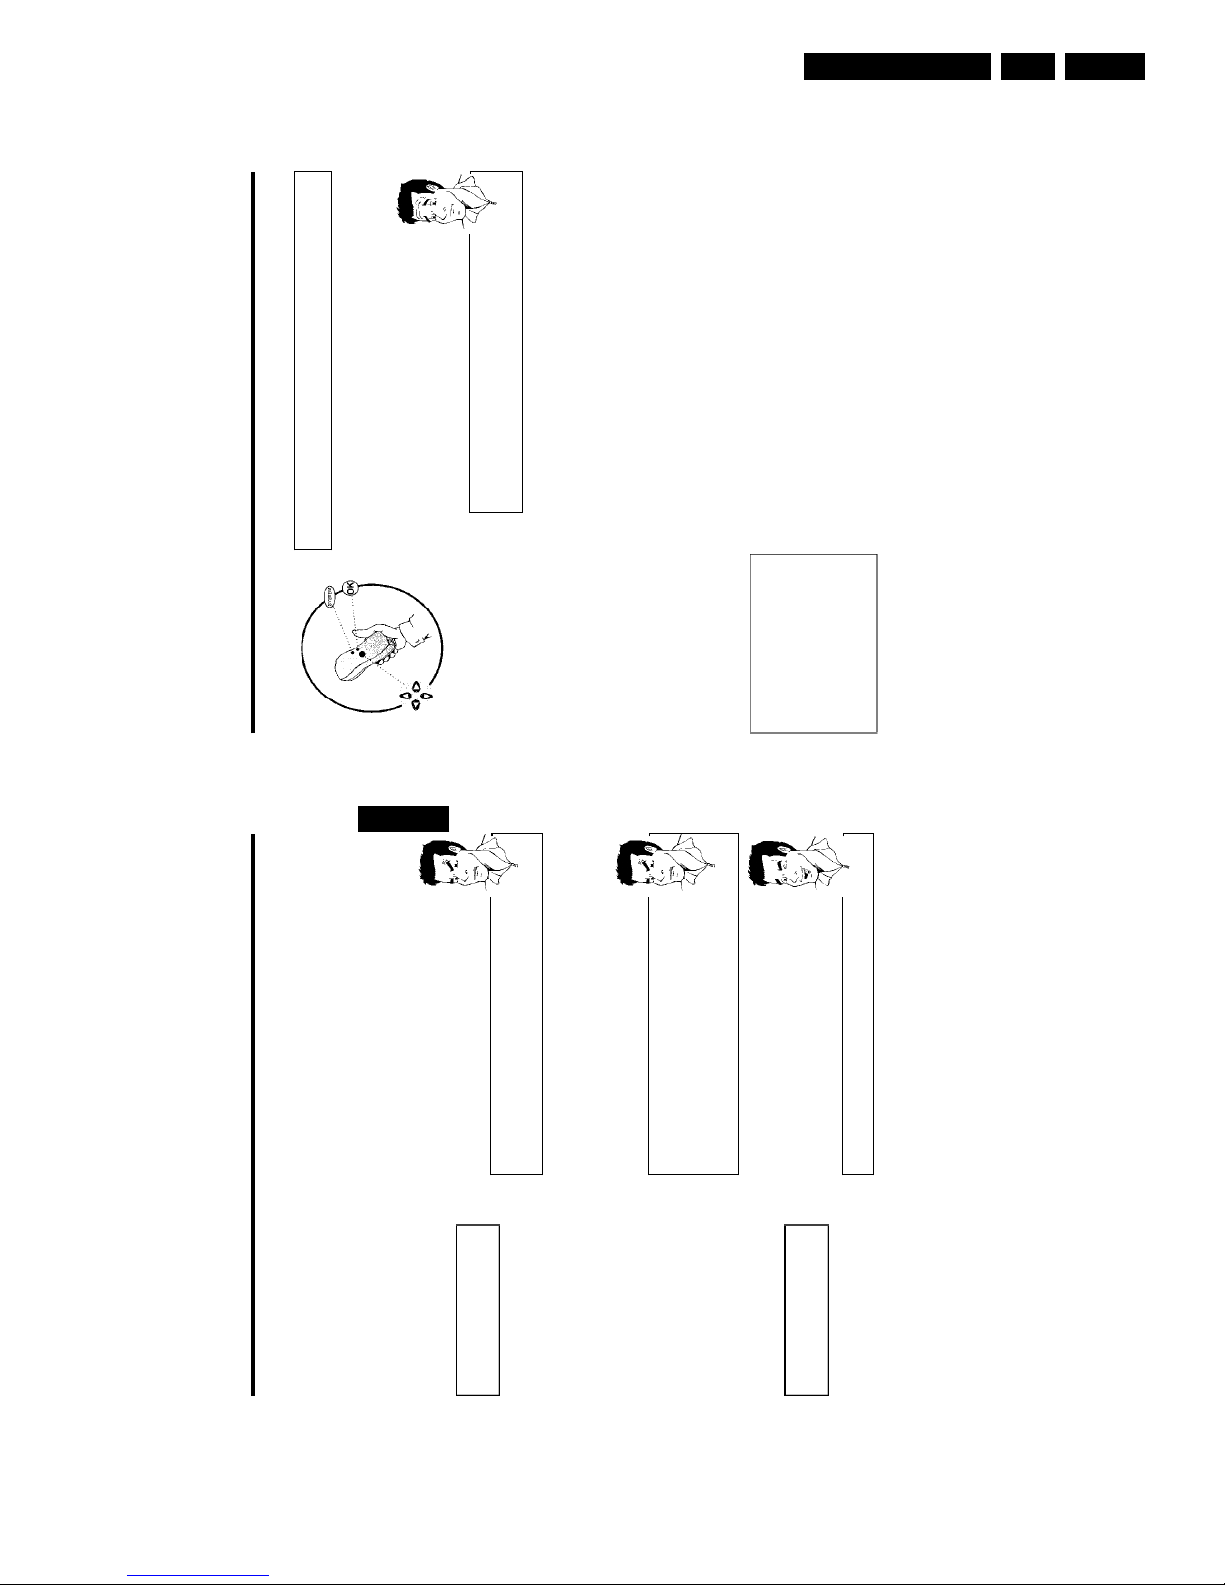
Setting the language/country
You can select the country and the subtitle language as well as the audio language for DVD
playback. Please observe that with some DVDs, you can change the audio language and/or
subtitle language only via the DVD disc menu.
Moreover, you can set one of the displayed languages for the on-screen menu (OSD). However,
the DVD recorder display will only display English text regardless of this setting.
1 Switch on the TV set. If required, select the programme number for
the DVD recorder.
2 Switch on the DVD recorder using STANDBY/ON .
3 Press SYSTEM-MENU on the remote control. The menu bar
appears.
4 Select the '
A
' icon using D or C .
5 Select 'Language' using B or A and confirm with C .
Language
Audio Language English
Subtitle English
Menu English
Country Other
6 Select the appropriate line and confirm with C .
Which settings can I choose?
Audio Language: Playback language (audio language)
Subtitle: Subtitle language
Menu: Language of the OSD menu
Country: Location (country)
Tip
7 Select the appropriate setting using B or A and confirm with OK .
8 To end, press SYSTEM-MENU .
Installing your DVD recorder
29
Sorting and clearing TV channels manually
After you have performed the automatic channel search you may not agree with the sequence in
which the individual TV channels have been allocated to the programme positions (programme
numbers). You can use this function to rearrange the TV channels already stored or to delete
TV channels you don't want or those with poor reception.
The teletext clock resets automatically
If you store a TV channel which transmits TXT/PDC on programme number
'P01', the date and time w ll automatically be transmitted and constantly
updated. As a result, the changes from summer time to w nter time and back
again will be made automatically.
Tip
What does Easy Link do?
With Easylink, TV channels can only be searched for and saved on the TV set.
These settings are then accepted by the DVD recorder.
That is why you cannot select this function manually.
?
1 Switch on the TV set. If required, select the programme number for
the DVD recorder.
2 Turn on the DVD recorder. Press the SYSTEM-MENU button on
the remote control. The menu bar will appear at the top of the
screen.
3 Select '
A
' using D or C .
4 Select line 'Installation' using B or A and confirm with C .
5 Select line 'Sort TV channels' using B or A and confirm with
C .
Installation
Sort TV channels
...
• P01 BBC1
P02 BBC2
P03 ITV
P04
P05
P06
...
To sort
Press ›
To exit press
SYSTEM MENU
6 Select the TV channel that you want to delete or whose order you
want to change using B or A .
7 Confirm with C .
Deleting TV channels
Unwanted channels or those with poor reception can be deleted using
CLEAR . After that you can continue at step 6 .
Tip
ENGLISH
Installing your DVD recorder

Directions For Use
EN 21DVDR880-890 /0X1 3.
32
D
Information on the TV screen
You can check and change many of the features and settings on your DVD recorder using the
system menu. The menu bar cannot be displayed during recording.
Icons in the menu bar
Use the SYSTEM-MENU button to call up and close the menu bar (main menu). You can
select the appropriate feature using D and C . You confirm a feature using B . This takes you
to a submenu or executes the feature immediately.
Depending on the current disc, some features may not be available.
Menu bar 1
A
User preferencesBTitle/TrackCChapter/Index
D
Audio languageESubtitle languageFCamera angleGZoom
Menu bar 2
To display menu bar 2, press C while menu bar 1 is displayed.
H
SoundIFramebyframe playbackJSlow motionKFast motionLSearch by time
Information on the TV screen
31
Setting the time and date
If the display shows an incorrect time or '--:--', the time and date must be reset manually.
If a TV channel which transmits TXT/PDC (teletext/PDC) is stored under programme number
'P01', the time and date will automatically be taken from the TXT/PDC information.
1 Press SYSTEM-MENU on the remote control. The menu bar
appears.
2 Select the '
A
' icon using D or C .
3 Select 'Installation' using B or A and confirm with C .
4 Select 'Time/Date' using B or A and confirm with C .
Installation
Time/Date
Time 20:00
Year 2002
Month 01
Date 01
To exit press
SYSTEM MENU
5 Check if the time in 'Time' is correct. If required, change the time
with the number buttons 0..9 on your remote control.
6 Check 'Year', 'Month' and 'Date' in the same way. To move between
the fields, use B or A .
7 Check the displayed settings and confirm with OK .
'Stored' will appear briefly on the screen.
8 To end, press SYSTEM-MENU .
ENGLISH
Installing your DVD recorder

Directions For Use
EN 22 DVDR880-890 /0X13.
34
Operating mode icons
R
RecordSStopTPlayUPause playVRecord pauseXSearch forwards (8x speed)YSearch backwards (8x speed)ZSlow motion
Tuner info box
This box appears in the lower left-hand corner of the screen. The aerial signal, the TV channel
and name of the TV channel are shown.
a
Current channel/selected input socketbNo signal
TV channel is not available/additional device is not connected or is
switched offcCopyprotected signal
Timer information box
This box appears above the tuner information box. When a timer recording is set, it shows the
timer icon and the start time or date of the first programme to be recorded.
If no timer recording is scheduled, the current time is displayed.
This box disappears during playback of a disc or after a recording starts.
f
Timer starts on the day showngOTR recordingruns untilthe stop time displayedhCurrent time
No timer event programmed
Information on the TV screen
33
Temporary feedback icons
Temporary feedback icons appear in the top left hand corner of the menu bar with information
on the different operating modes. This information appears briefly when certain disc features are
activated :
Shuffle: Shuffle playScanRepeat entire discRepeat titleRepeat trackRepeat chapterRepeat from A to endRepeat from A to BCamera angleChild lock activeAuto resumeAction not allowed
Status box
The status box displays the current operating mode (status) of the DVD recorder and the
current disc type. This display can be switched off.
Disc type icons
M
DVD+RWWDVD+RNDVD videoOVideo CDPNo discQError
ENGLISH
Information on the TV screen
Directions For Use
EN 23DVDR880-890 /0X1 3.
36
During the playback of a DVD+RW, the index screen overview appears. Choose the title you want
to play back using B , A , N , O .
Confirm with OK .
For further information, read chapter 'Playing a DVD+RW/+R disc'.
If the playback does not start automatically, press PLAY/PAUSE G9 .
For further information, read chapter 'Playing an audio CD'.
If the 'h' symbol appears in the display, start playback by pressing PLAY/PAUSE G9 . If a menu
appears on the screen, use the remote control buttons indicated on the screen to select the menu
option you want (PREV= N , NEXT= O ) or with the number buttons 0..9 .
For further information see ' Playing a (Super) Video CD'.
Playing a DVD video disc
a'P N' will appear on the display
b The ch ld lock was activated for the inserted disc. Read section 'Access
control' and 'Authorising a disc' and in chapter 'Access control (child lock)'.
aThe menu on the screen is showing an 'X'
b Some DVD discs can be manufactured so that certain steps are required
before the disc can be played, or so that only limited operation is possible
during playback. When an X' appears on the screen the selected feature is
not possible.
aThe screen is showing regional code information
b Since DVD films are not normally released in all parts of the world at the
same time, all DVD players have a specific regional code. Discs can be given
a regional code. If the regional codes differ between the player and the
disc, playback is not possible.
b The regional code is shown on the label on the back of the machine.
b The regional code does not apply to recordable DVD discs.
aThe screen is prompting me to choose an option from the menu.
b Select the option you want using A , B , D , C or the number keys
0..9 .
In some cases you need to confirm with OK .
You can also access the menu using DISC-MENU on the remote control.
Problem
How can I access hidden information?
1 Press the DISC-MENU button on the remote control. A menu will
appear on the screen. For some feature films this may appear after an
introductory sequence.
2 Select the option you want using A , B , D , C or the number keys
0..9 .
Confirm with OK .
Tip
Playback
35
E
Playback
Playback hints
This DVD recorder will play the following systems:
•) DVD video
•) (Super)Video-CD disc
•) DVD+RW disc
•) DVD+R Disc
•) DVD-RW (videomode, finalised)
•) DVD-R
•) CD-R
•) CD-RW
•) Audio CD
•) MP3-CD
You can operate the DVD recorder using the remote control or the buttons on the front of the
DVD recorder.
Inserting a disc
OPENING 001
1 Press the OPEN/CLOSE button on the front. The disc tray opens.
The dialog box shows 'OPENING' and then 'TRAY OPEN'.
2 Insert the disc carefully into the tray, with the label uppermost and
press PLAY/PAUSE G9 or OPEN/CLOSE . The dialog box
shows 'CLOSING' and then 'READING'. The information on the disc is
read.
How do I insert a doublesided DVD?
Double-sided d scs are not printed on either side. The labelling is in the
centre on each side of the disc. The labelling of the side you wish to play
must be uppermost.?Opening/closing the tray using the remote control
You can open and close the disc tray using the remote control.
Press and hold the STOP h button on the remote control until the dialog
box shows 'OPEN NG'or CLOS NG'.
Tip
3 Playback begins automatically.
A menu may appear during playback of a DVD. In case titles and chapters are numbered, press a
number button on the remote control. You can also select a menu item using D , C , A ,
B and confirm with OK .
For further information, read chapter 'Playing a DVD video disc'.
ENGLISH
Playback

Directions For Use
EN 24 DVDR880-890 /0X13.
38
Playing an audio CD
You can use your DVD recorder to play audio CDs
1 Insert an audio CD. Playback starts automatically.
Audio CD display'
If the TV is on, the audio CD screen appears automatically
During play, the current track number and its elapsed playing time will show
on the TV screen and on the recorder display.
Tip
2 Stop playback using STOP h . The number of tracks and the total
time are displayed.
Playing an MP3 CD
MP3 (MPEG1 Audio Layer-3) files are highly compressed music files. Using this technology the
data volume can be compressed by a factor of 10. This means it is possible to record 10 hours
of music in CD quality on a single CD-ROM.
When creating MP3 CDs please note the following:
Supported file system: ISO9660, Joliet
Supported formats: *.mp3
File names: maximum 64 ASCII characters (Joliet)
Maximum of 99 albums, 999 tracks
Supported sampling frequencies: 44.1kHz, 48kHz. Files with lesser than 44.1kHZ will be skipped.
Supported bit rate: 32, 64, 96, 128, 192, 256 (kbps)
ID3 Tag: Version 1, 1.1. If the version is higher, the directory name is used for the album and
the filename for the track.
Important notes for playback:
In agreement with SDMI the digital audio output will not work during MP3 playback.
Only the first session of a multi-session CD will play back.
1 Insert an MP3 CD. Playback starts automatically.
MP3 CD display
If the TV is on, the MP3 CD screen appears automatically
During playback, the current track number and its elapsed playing time will
show on the TV screen and on the recorder display.
During interrupted playback ( STOP h ), the current track number will show
on the TV screen and on the recorder display.
If available in the so-called ID tag, more information will be displayed on:
album, track, and artist.
Tip
2 Stop playback using STOP h . The number of albums will be shown
in the display.
Playback
37
1 1 204
1 If playback does not start automatically, press PLAY/PAUSE G9 .
The display shows:
title, chapter, time elapsed.
2 To stop the disc, press STOP h on the remote control or
hSTOP on the DVD recorder.
3 To eject the disc, press OPEN/CLOSE on the front of the DVD
recorder.
Playing a DVD+RW/+R disc
1 If the disc is write-protected or a finalised DVD+R disc, playback
starts automatically.
2CHARLES 001
2 If playback does not start automatically, select the title you want to
watch from the Index Picture Screen using B or A .
You can also use the N or O buttons on the front of the set.
3 Press PLAY/PAUSE G9 .
The display shows:
title number, recording quality.
aI see the message 'EMPTYD SC' in the display
b There are no recordings on this disc.
Problem
4 To stop the disc, press STOP h on the remote control or
hSTOP on the DVD recorder.
5 To eject the disc, press OPEN/CLOSE on the front of the DVD
recorder.
What should I note when playing back different recording types
(qualities)?
The correct recording quality 'HQ(HQ), SP+(SP+), EP(EP), EP+(EP+)' will
automatically be selected during playback.
For more information, please read section 'Selecting the recording type
(Quality)' in chapter 'Manual recording'.
?
ENGLISH
Playback
Directions For Use
EN 25DVDR880-890 /0X1 3.
40
F
Additional playback features
Changing to another title/chapter
If there is more than one title or chapter on the disc, follow the instructions to change to
another title or chapter. If there are several chapters within the title, these will be shown. It is
possible to select these titles using the menu bar.
1 During playback use the O button to move to the next
title/chapter. Pressing N takes you to the start of the current title
or chapter. Pressing N twice takes you to the start of the previous
title or chapter.
Using T/C (title/chapter)
1
Press T/C (title/chapter) and select the appropriate title using A or
B .
Ensure that the 'T'(Title) icon is selected in the menu bar.
2
Using T/C you can select chapters within the title. Press T/C and select
the 'C' (Chapter) icon using C .
Select the appropriate chapter using A or B .
Tip
Searching a disc
You can search the disc for a recording at 4x or 32x playback speed. Additional playback speeds
are available via menu bar (
K
).
1 During playback, press and hold N (reverse) or O (forwards) to
switch to the search feature. You can switch between the playback
speeds using N / O .
2 To continue playback press PLAY/PAUSE G9 twice at your
chosen location.
aNo sound
b The sound is switched off in search mode. This is not a fault in your
machine.
Problem
Search function via menu bar
1
During playback press SYSTEM-MENU on the remote control. The
menu bar will appear at the top of the screen.2Select the '
K
' icon using C or D and confirm with B .
3
Using D or C you can now select different speeds forwards or
backwards.
4
If necessary hide the menu bar using SYSTEM-MENU .5To continue playback, press PLAY/PAUSE G9 .
Tip
Additional playback features
39
Additional playback features
Select the previous or next title with N or O .
Choose the previous or the next album using A or B .
Choose the previous or next title with D or C .
You can also use the number buttons 0..9 on the remote control to enter
the number of the album/track.
You can also use T/C to select titles and albums.
1 Press T/C and then select symbol 'T' for album or 'C' for title with
C or D .
2 Select the number of the album/title with B , A or with the number
buttons 0..9 on the remote control.
You can also use repeat functions (Button PLAY MODE ).
Tip
Playing a (Super) Video CD
(Super) Video CDs may be equipped with PBC (Play Back Control). This means that special
playback functions (menus) can be directly selected. The Video CD must be PBC-compatible (see
CD packaging).
'PBC' is turned on by default.
1 Insert a (Super) Video CD and press PLAY/PAUSE G9 .
If the 'h' symbol appears in the display, start playback by pressing
PLAY/PAUSE G9 .
2 If a menu appears on the screen, use the remote control buttons
indicated on the screen to select the menu option you want
(PREV= N , NEXT= O ) or with the number buttons 0..9 .
If the PBC menu contains a title list, the desired title can be chosen
directly.
3 The RETURN button will take you back to the previous menu.
4 Stop playback using STOP h .
ENGLISH
Playback
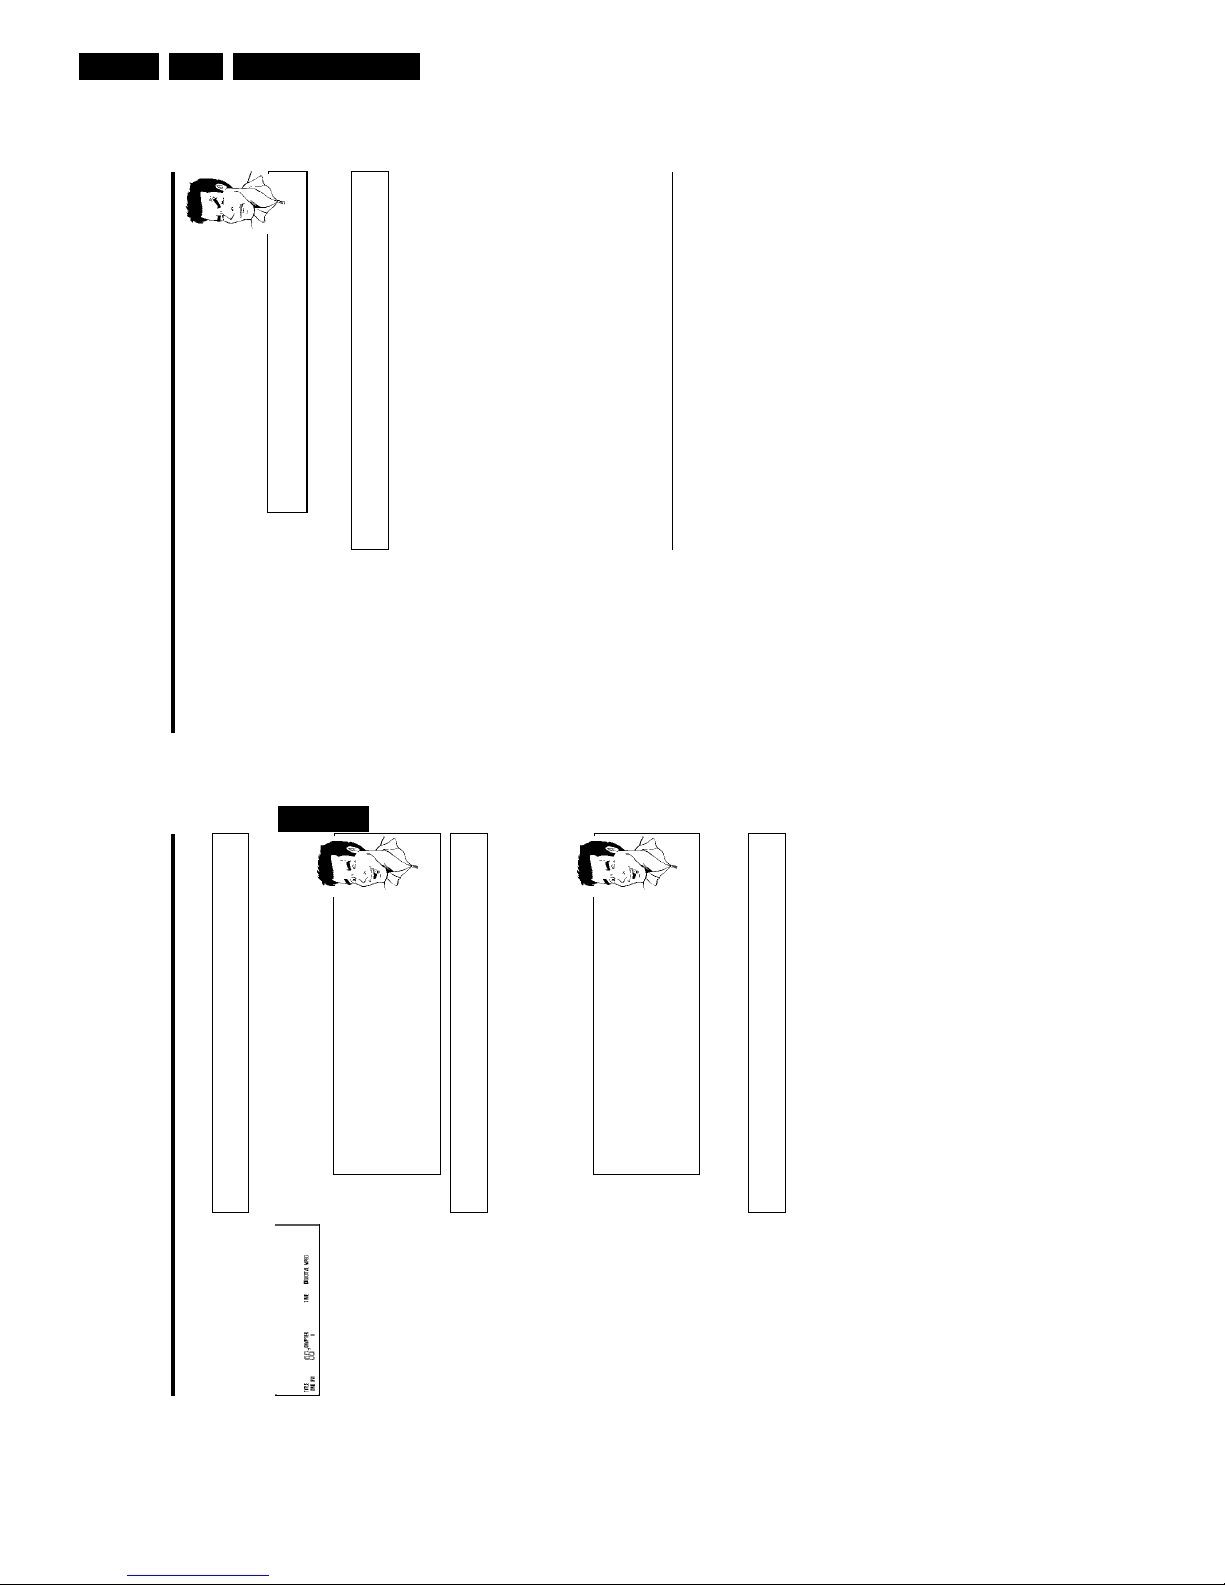
Directions For Use
EN 26 DVDR880-890 /0X13.
42
4 Confirm with OK .
aThe time entered will flash
b The selected title is shorter than the time entered. Enter a new time or
end the function using SYSTEM-MENU .
Problem
5 Playback starts before the time entered.
Repeat/Shuffle play
You can mark entire sections or the whole disc for endless playback. Depending on the type of
disc (DVD video, DVD+RW, video CD) you can select a chapter, title or the entire disc.
1 Select the desired chapter, title or the entire disc and start playback.
2 During playback, press PLAY MODE . By pressing PLAY
MODE again you can chose from the following options:
•)'
': repeat chapter – DVD only
•)'
': repeat title/track
•)'
': repeat entire disc (Video CD, Audio CD only)
•)'
': Shuffle play
•) display disappears: no repeat
3 To switch off the repeat, press STOP h .
You can also press PLAY MODE repeatedly until the icons
disappear.
Repeat sequence (AB)
You can repeat a certain sequence within a title/chapter. You have to mark the start and end of
the desired sequence.
1 During playback press at the start of the sequence
PLAY/PAUSE G9 .
You see a still picture.
2 Press PLAY MODE until the '
' icon appears on the screen.
This marks the start point.
Press PLAY/PAUSE G9 to start playback.
3 At the desired end point, press OK .'
' appears on the TV
screen. The disc will only play between the selected points.
4 To switch off the repeat, press STOP h .
You can also press PLAY MODE repeatedly until the icons
disappear.
Additional playback features
41
Still picture
1 1 204
1 During playback, press PLAY/PAUSE G9 to stop the disc and
display a still picture.
Framebyframe playback via menu bar
1 During the still picture press SYSTEM-MENU on the remote control.
The menu bar will appear at the top of the screen.
2 Select the '
I
' icon using C or D and confirm with B button.
3 Using D or C you can now scroll back or forwards one frame at a
time.
4 If necessary hide the menu bar using SYSTEM-MENU .
5 To continue playback, press PLAY/PAUSE G9.
Tip
Slow motion
1 During playback, press PLAY/PAUSE G9 on the remote control.
Then hold down N or O to switch to slow motion.
2 You can choose between the various speeds using N or O .
Slow motion over the menu bar
1 During playback, press PLAY/PAUSE G9 on the remote control and
then press SYSTEM-MENU The menu bar will appear at the top of the
screen.
2 Select the '
J
' symbol using C or D and confirm with B .
3 Using D or C you can now select various slow motion speeds
backwards or forwards.
4 If necessary hide the menu bar using SYSTEM-MENU .
Tip
3 To continue playback, press PLAY/PAUSE G9 twice.
Search by time
Using this feature you can select where playback should start (select elapsed time).
1 During playback press SYSTEM-MENU on the remote control. The
menu bar will appear at the top of the screen.
2 Select the
L
' symbol using C or D and confirm with B . Playback
is stopped and a box appears on the screen showing the elapsed time.
3 Enter the start time with the digit keys 0..9 from where playback
should start.
ENGLISH
Additional playback features

Directions For Use
EN 27DVDR880-890 /0X1 3.
44
3 Select the required camera angle using B or A . You can also enter
the number directly using the number buttons 0..9 .
4 After a short delay, playback changes to the new camera angle. The
'
F
' icon remains displayed until multiple angles are no longer
available.
Changing the audio language
Pre-recorded DVD videos often come with multiple audio languages. Playback uses the language
you selected during initial installation. You can change the audio language of the current disc at
any time.
You can change the audio language either using the menu of the inserted disc
( DISC-MENUbutton) or the menu bar ( SYSTEM-MENU button). The audio languages for
DVD playback in the two menus may be different.
1 During playback press SYSTEM-MENU and select the '
D
' icon
using C .
2 Select the required audio language using B or A . You can also
enter the number directly using the number buttons 0..9 .
3 Play continues in the new audio language.
Subtitles
Pre-recorded DVD videos often come with subtitles in several languages. Playback uses the
language you selected during initial installation. You can change the subtitle language of the
current disc at any time.
You can change the subtitle language either using the menu of the inserted disc
( DISC-MENUbutton) or the menu bar ( SYSTEM-MENU button). The subtitle languages in
the menus may differ.
1 During playback press SYSTEM-MENU and select the '
E
' icon
using C .
2 Select the required subtitle language using B or A . You can also
enter the number directly using the number buttons 0..9 .
You can switch off subtitles again with 0 or by pressing 'off'.
3 Playback continues in the new subtitle language.
Additional playback features
43
Scan feature
This feature plays back the first 10 seconds of each chapter (DVD) or track (CD).
1 During playback, press PLAY MODE . Select '
' using PLAY
MODE .
2 After 10 seconds the DVD recorder switches to the next
chapter/index. To start playback at the corresponding chapter/index,
press STOP h and then PLAY/PAUSE G9 .
Zoom feature
The Zoom feature allows you to enlarge the video image and pan through the enlarged image.
1 During playback, press PLAY/PAUSE G9 . The DVD recorder
switches to 'PAUSE'. You will see a still picture.
2 Press SYSTEM-MENU and select the '
G
' icon using C .
3 Select the required zoom factor using B or A .
4 When 'press OK to pan' appears on the screen, the zoom process
is complete.
5 Press OK . Using A , B , C , D select the part of the image you
wish to view.
6 Confirm with OK .
7 To stop the feature, press PLAY/PAUSE G9 and
then SYSTEM-MENU.
Camera angle
If a DVD video contains sequences recorded from different camera angles you can change the
camera angle for playback.
1 During playback, press PLAY/PAUSE G9 . You will see a still
picture.
2 Press SYSTEM-MENU and select the '
F
' icon using C .
aThe '
F
' icon is not visible
b The selected scene was not recorded from different camera angles. That is
why you cannot select this feature. For more information please read the
'cover text' on your DVD video d sc.
Problem
ENGLISH
Additional playback features
Directions For Use
EN 28 DVDR880-890 /0X13.
46
Recording without automatic switchoff
1 Switch on the TV set. If required, select the programme number for
the DVD recorder.
2 Insert a disc to be used for the recording. The system and content of
the disc will be checked. READING' will appear on the display.
aIndex display
b A DVD+RW disc was inserted that already contains recordings. Use
A and B to select a location where the recording should be started.
a'EMPTYD SC' appears in the display
b The inserted DVD disc is empty.
aA dialog box appears asking if the contents should be erased or
the disc should be ejected
b The inserted disc is a DVD+RW d sc whose contents are not compatible
with DVD Video (e.g. a data disc). This disc cannot be used for recordings
until the entire disc is erased using the REC/OTR n button.
a'Too many titles' appears on the screen when a recording is
attempted
b A disc can only contain a max. of 48 titles (including the empty titles).
Erase the titles or change the disc.
Problem
3 If necessary, switch to the internal tuner on the DVD recorder using
the MONITOR button on the remote control.
4 Select the programme number (station name) you wish to record
using CHANNEL q or CHANNEL r . The following will appear on
the display:
1 FREETITLE001
Station name
If a TV station transmits a station name it will be shown in the display.
Programme number of the external inputs:
'EXT1' Scart socket at the back EXT 1 TO TV-I/O
'EXT2' Scart socket at the back EXT 2 AUX I/O
'CAM1' SVHS-/Audio front sockets S-VIDEO / left AUDIO right
'CAM1' Video/audio front sockets A/V VIDEO / left AUDIO right
Switching between sockets S-VIDEO and VIDEO is done
automatically. In case both sockets are used, the signal received at
socket S-VIDEO is treated with priority.
'CAM2' Digital Video (i Link) front socket DV
Tip
Manual recording
45
G
Manual recording
General information
Which discs can I use for recording?
With ths DVD recorder, you can record on two types of DVD:
DVD+RW
This disc can be written to and then the contents deleted.
DVD+R
This type of d sc can only be recorded once.
If you want to play this DVD in a DVD player it must be finalized using the
'Finalise disc' function. It is not possible to make further recordings using
this disc.
If this disc is to be played n a DVD recorder it must not be final sed.
Recordings can be added and deleted. The disc space (playback time) from the
deleted recording cannot be recovered for further recordings
?
Use the 'Manual recording' feature to spontaneously start recording (e.g. to record a TV show
already in progress).
In the 'Index Picture screen' select the title to be overwritten or 'Empty title' using B and
A .
If you want to record between existing recordings, check the length of the old recording and the
length of the new recording. If the new recording is too long, the following recording
(title/chapter) will be overwritten.
Insert new recordings at the end of all existing recordings (Safe
Record)
To add a new recording at the end of the last recording on the disc, hold
down the REC/OTR n button until the message SAFE RECO' appears on the
d splay.
For DVD+R discs each new recording is always added at the end of all
previous recordings as existing recordings cannot be overwritten.
Tip
If you want to start and stop a recording manually, read 'Recording without automatic
switchoff'.
If you want to start a recording manually but stop it automatically, read 'Recording with
automatic switchoff'. (e.g. not to record to the end of the disc)
Read 'Automatic recordingfrom a satellite receiver', if you want a recording to be
controlled automatically by a satellite receiver.
Read 'Direct record' if you want to record a programme currently being shown.
ENGLISH
Manual recording
Directions For Use
EN 29DVDR880-890 /0X1 3.
48
Recording with automatic switchoff (OTR
– One Touch Recording)
1 Insert a disc.
2 Use CHANNEL q or CHANNEL r to select the programme
number (channel name) you want to record.
3 Press REC/OTR n on the remote control.
4 Each time you press REC/OTR n you will add 30 minutes to the
recording time.
How can I cancel the recording time I have just set?
To cancel the entry, press the CLEAR button while the recording time is
displayed.
?
Protecting the disc against accidental
recording
To prevent an important recording from being accidentally erased, you can protect the entire
disc. You can only protect the disc as a whole. It is not possible to protect an individual
recording.
What happens with DVD+R discs?
As long as these discs are not finalised, they can be protected aga nst
accidental erasure in the same way as DVD+RW discs.
?
1 Insert the disc you wish to protect.
2 Press DISC-MENU . The Index Picture Screen appears.
3 While the Index Picture Screen is displayed, press the
STOP h button on the remote control. The first title is marked.
4 Press A . This takes you to the disc info screen.
5 Press the C button.
Select 'Protection'.
Confirm with C .
6 Select 'Protected' using B and confirm with OK .
7 Quit using D and then DISC-MENU .
Manual recording
47
5 To start recording, press REC/OTR n on the remote control or
RECORD on the DVD recorder. If you want to start the recording
at the end of the existing recordings, hold down the
REC/OTR n button until the message 'SAFE RECO' appears on the
display.
For DVD+R discs each new recording is always added at the end of
all previous recordings as existing recordings cannot be overwritten.
On the display will appear e.g.:
5 1 11651 001
Inserting chapter markers
During recording it is possible to mark scenes that you want to see or hide
later.
During recording press EDIT at the relevant location. The screen displays
'Inserting marker'. The 'CHAPTER' number is increased by one in the
display box.
For more information on titles and chapters please see the section 'Changing
to another title/chapter' in the chapter 'Playback'.
Tip
6 You can stop recording by pressing STOP h on the remote control
or hSTOP on the recorder. MENU UPDT' will appear on the display.
The DVD player is preparing the list of contents. Wait until this
message disappears in the display, then the recording is completed.
aThe display will read 'D SC ERR'
b The recording could not be completed correctly because of a disc error.
Check and, if necessary, clean the inserted disc.
Problem
Making recordings on DVD+R discs compatible
If you want to play back the recording on a DVD player, you need to finalise
the disc in the DVD recorder. You can prepare your DVD for use in a DVD
player using the 'Finalising' feature. See the section Finalising DVD+R discs'
in chapter 'Managing the disc contents'.
Tip
Interrupt recording (Pause)
1 During recording press PLAY/PAUSE G9 , for example to avoid
recording the commercials.
2 To continue recording, press REC/OTR n .
End recording
To end the recording, press the STOP h button. Wait until 'MENU UPDT'
disappears from the display.
Tip
ENGLISH
Manual recording
Directions For Use
EN 30 DVDR880-890 /0X13.
50
Selecting the recording mode (quality)
By selecting a recording mode, you define the picture quality of recordings and the maximum
recording time for a disc.
You can check the quality by switching to a recording mode and then watch the picture via the
built-in tuner ( MONITOR button).
For playback, the correct picture quality will automatically be selected.
1 Switch on the TV set. If required, select the programme number for
the DVD recorder.
2 On the front of the DVD recorder select the recording quality using
REC MODE .
You can also use the button REC. MODE on the remote control.
Which recording types can I choose?
'HQ/HQ': HighQuality offers the best picture quality and a record ng time of
60 minutes.
'SP+/SP+': StandardPlay (pre-recorded DVD quality) offers excellent picture
quality with a recording time of 150 minutes.
'EP/EP': ExtendedPlay (better than VHS quality). Recording time 240
minutes.
'EP+EP+': 6 hours (VHS picture quality). Recording time 360
minutes.
Can I select the recording type via a menu as well?
1 Press the SYSTEM-MENU button.
2 Select '
A
' symbol with D or C .
3 Select 'Record settings' using D or C and confirm with C .
4 In the line 'Rec Mode' select the recording type with B or A .
5 Confirm using OK and SYSTEM-MENU .
6 If you have selected the record ng type 'EP/EP'or'EP+/EP+', you can
select the settings 'Stndrd' (Standard) or 'Sport' (fast movements) in
the 'Filter mode' line.
Tip
Automatic recording from a satellite
receiver (Sat Recording)
You can use this feature if you own a satellite receiver that can control other devices via a scart
cable and a programming feature (Timer). For more information, please see the operating
instructions for the satellite receiver.
1 Switch on the TV set. If required, select the programme number for
the DVD recorder.
2 Press SYSTEM-MENU on the remote control. The menu bar
appears.
Manual recording
49
The entire disc is now protected. If you try to record onto this disc the message 'DISC LOCK'
will appear in the display and 'Disc locked' on the screen.
Lining up recordings within a title
(assemble cut)
You can add further recordings to a title already contained on a DVD+RW disc. This recording
will be added to the title as a so-called 'chapter'. Existing information will be overwritten from
this location onward. Depending on the length of the recording, this will also overwrite titles
that follow the current title. The recording mode (quality) is automatically transferred from the
current title.
To play back this recording, press SYSTEM-MENU and select 'C' (chapter) using C . You can
also use T/C .
For more information, read section 'Changing to a different title/chapter' in chapter 'Playback'.
What happens with DVD+R discs?
New recordings on 'DVD+R' discs can only be added after existing recordings.
It is not possible to overwrite existing recordings on 'DVD+R' discs.
?
1 Find the title in the Index Picture Screen where you want to insert
the new recording.
2 Look at the last minute of the old recording (playback)
3 Press PLAY/PAUSE G9 on the remote control at the position
where the new recording is to go. '9' will appear on the display.
4 To monitor the recording you can switch to the internal tuner using
MONITOR .
5 Now start recording as usual by pressing REC/OTR n on the
remote control.
The new recording will be inserted.
6 Stop recording with STOP h .
ENGLISH
Manual recording
Directions For Use
EN 31DVDR880-890 /0X1 3.
52
a'WA T' will appear on the display.
b The DVD recorder is comparing its stored TV channels with those on the
TV set. Please do not change the TV channel on the TV set while 'WA T'is
displayed.
a'NOTV' appears in the display
b This TV channel could not be found in the DVD recorder's memory.
Check that all the TV channels stored on the TV set are available on the
DVD recorder. If necessary, store any missing channels. Please read
paragraph 'Manual TV channel search' in the chapter 'Installing your DVD
Recorder'.
b Check the connectors at both ends of the scart cable.
b Check your TV's operating instructions to see which scart socket is used
for video signals.
b If the problem persists, you won't be able to use this feature.
Problem
3 Stop recording with STOP h .
Switching 'Direct Record' on or off
1 Switch on the TV set. If required, select the programme number for
the DVD recorder.
2 Press SYSTEM-MENU on the remote control. The menu bar
appears.
3 Select '
A
' using D or C .
4 Select 'Record settings' using B or A and confirm with C .
5 Select 'Direct Record' using B or A .
6 Select 'On' (Direct Record on) or 'Off' (Direct Record off) using
D or C .
7 Confirm with OK .
8 Quit using SYSTEM-MENU .
9 Switch off with STANDBY m .
Manual recording
51
3 Select '
A
' using D or C .
4 Select line 'Record settings' using B or A and confirm with C .
5 Select 'Sat record' using B or A .
6 Select 'EXT2' with D or C .
Switching off 'Sat Recording'
To switch off the feature, select 'Off' using C or D .
Tip
7 Confirm with OK .
8 Use a scart cable to connect the scart socket EXT 2 AUX I/O on
the DVD recorder to the corresponding scart socket on the satellite
receiver.
9 Quit using SYSTEM-MENU .
0 Insert a disc that you want to use for recording.
A Programme the satellite receiver with the required information
(programme number of the TV channel, start time, end time).
If necessary, please see the operating instructions for your satellite
receiver.
B Switch off the DVD recorder with STANDBY m .'x' appears in the
display to show the activated feature.
The DVD recorder is now ready to record. The beginning and end of the recording is
controlled via the scart socket EXT 2 AUX I/O .
'Direct Record'
Can I instantly record the TV channel I want, even though the DVD recorder is switched off?
No problem. If recording is started manually, the DVD recorder, when it is switched off , is set
to the current TV channel on the TV set using the scart cable.
You will find more information on how to switch 'Direct record' on or off in the next section
'Direct Record'.
How does Direct Record work?
The DVD recorder uses the scart cable to compare the TV channel selected
on the TV set with its stored TV channels. If the same TV channel is found,
the DVD recorder switches to the corresponding programme number and
starts recording.
During this search please do not change the TV channel on the TV. This may
affect the tuning of the DVD recorder.
?
1 On the TV set, select the programme number you want make the
recording from.
2 Press REC/OTR n with the DVD recorder switched off.
ENGLISH
Manual recording
Directions For Use
EN 32 DVDR880-890 /0X13.
54
Editing recording titles (name)
Some TV stations transmit the title (name) of a programme. In this case, the name will be
included automatically (e.g. 'ROCKY'). Otherwise, the channel number and time of the recording
are stored as the name. The name of the recording can only be changed after the recording has
been completed.
1 Press the STOP h button or during playback press DISC-MENU .
Settings for title Charly 1
Name Charly 1
Play fu l ti le
Erase this title
2 Using A or B select the title whose name you want to edit and
confirm with C . The menu for editing names appears.
3 Select 'Name' using A or B and confirm with C .
4 Using C or D select the position where the letter/number/icon is to
be changed/re-entered.
5 Change the icon using A or B . You can switch between upper and
lowercase using SELECT . You can delete the character using
CLEAR .
6 Repeat
4 and 5 until you have made the changes you want.
7 Save the new name with OK .'Storing name' appears on the TV
screen for confirmation.
8 To end, press D .
Playing back titles
If you have hidden certain chapters of a title, with this setting you can view the entire title
including the hidden chapters. Proceed as follows:
1 Press the STOP h button or during playback press DISC-MENU .
Settings for title Charly 1
Name Charly 1
Play fu l ti le Press OK
Erase this title
2 Using A or B select the title that you want to play back and
confirm with C . The menu for editing titles appears.
3 Select 'Play full title' using A or B and confirm with OK .
4 Playback begins automatically. The full title – including the hidden
chapters - is played back.
Managing the disc contents
53
H
Managing the disc contents
Charly 1
00:29:59 • HQ
Fri15/02/2002
Empty title
01:30:01
General Information
When a recording is made to disc, the following additional information is also stored at the
beginning of the recording:
•) Name of the recording
If the TV station does not transmit a name, only the
channel number and time will be stored as the name
•) Length of the recording
•) Record type (Quality)
•) Date of the recording
•) Index picture of the recording
A marker will be set every 5-6 minutes if the 'Auto chapters' function is activated in the
'Record settings' menu. This marker is known as a 'chapter'.
These markers can be changed when the recording has finished.
Can markers be set on a DVD+R disc?
Markers can be set on these discs if they have not been finalised.
?
It is also possible to add 'chapters' later. This means that scenes you do not want to see during
playback, such as commercials, can be hidden or skipped. During playback you can watch your
recording as a continuous sequence without the hidden chapters.
Read section 'Disc settings', to change general settings of the disc.
Read 'Editing recordingtitles (name)'to find out how to change a name.
Read 'Playing back titles'to find out how to play back the entire recording including the
hidden chapters
Read 'Erasing a recording/title'to find how to erase titles and the accompanying recording.
Read 'Favourite scene selection'to find out how to split the title into chapters and how to
manage the chapters.
ENGLISH
Managing the disc contents
 Loading...