

Page 1
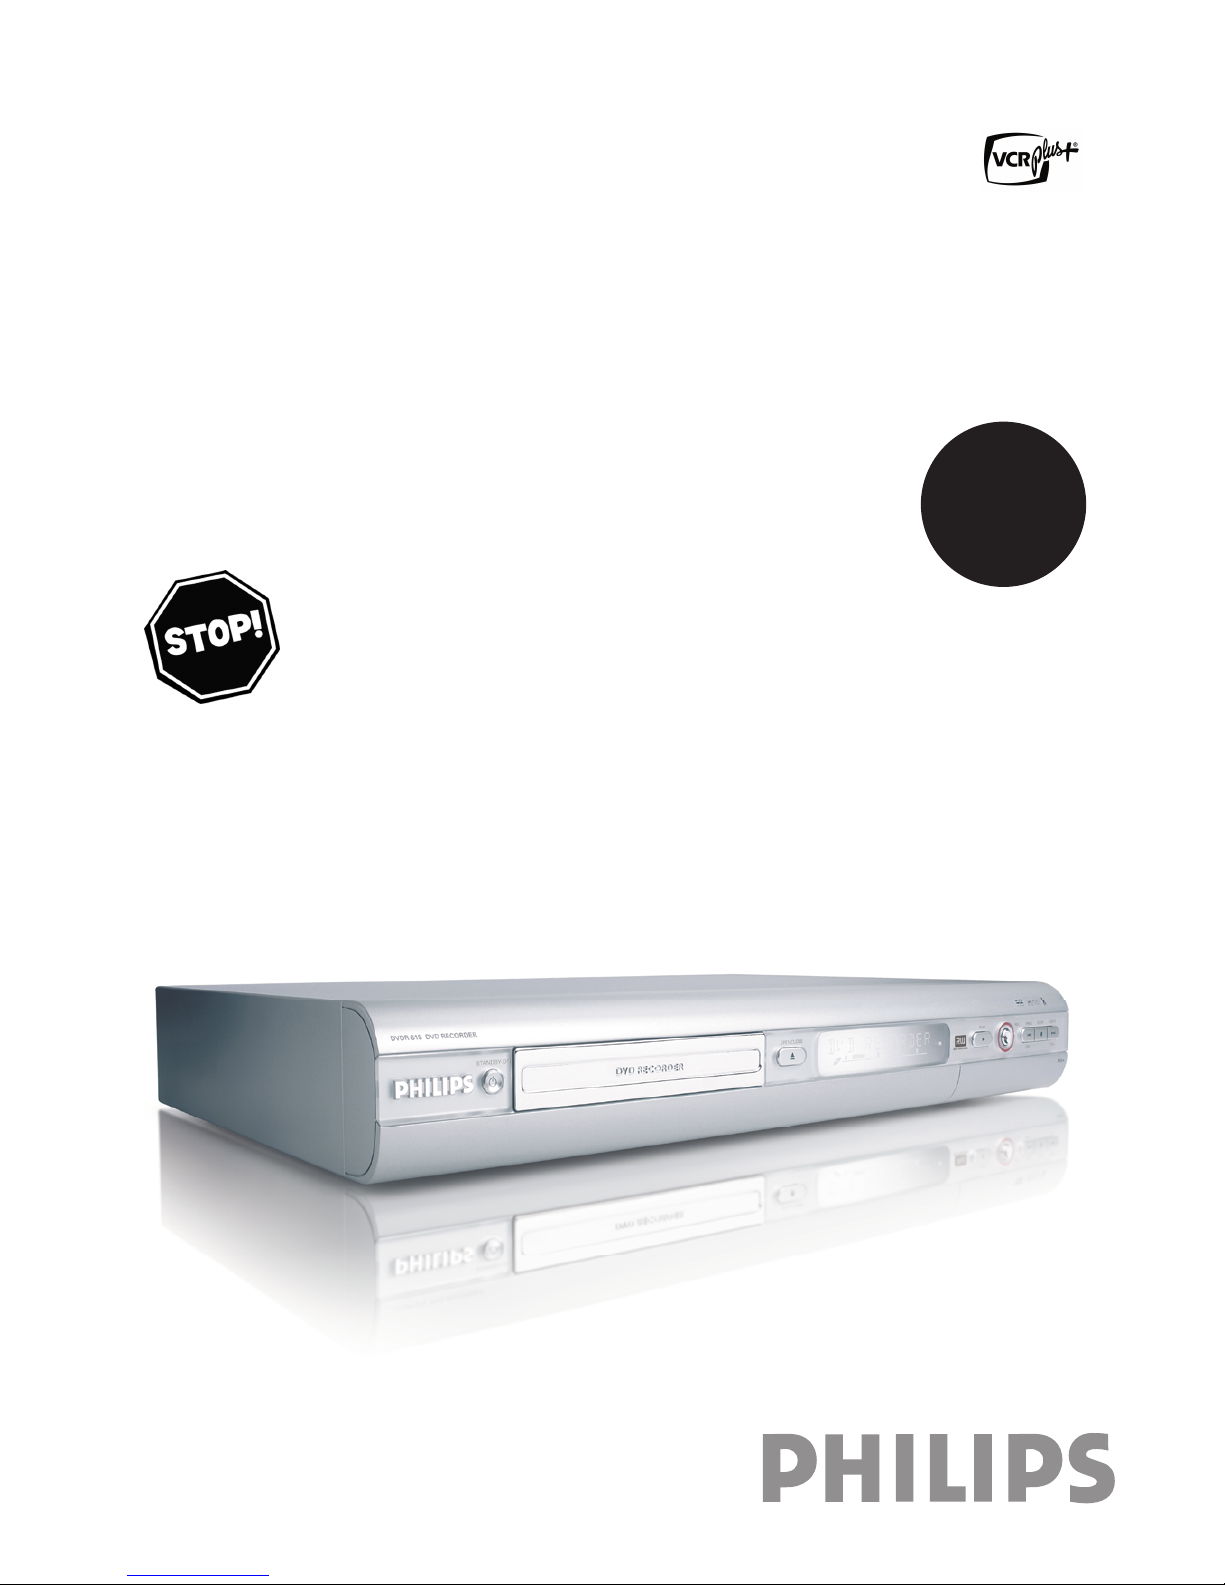
User manual
Important!
Return your
Warranty
Registration Card
within 10 days.
See why inside.
NEED HELP? CALL US!
PHILIPS REPRESENTATIVES ARE READY TO HELP YOU WITH ANY QUESTIONS ABOUT YOUR NEW
PRODUCT. WE CAN GUIDE YOU TROUGH CONNECTIONS, FIRST-TIME SETUP, AND ANY OF THE
FEATURES. WE WANT YOU TO START ENJOYING YOUR NEW PRODUCT RIGHT AWAY.
CALL US BEFORE YOU CONSIDER
RETURNING THE PRODUCT
1-800-531-0039
OR VISIT US ON THE WEB AT WWW.PHILIPS.COM
DVD Recorder
DVDR 615/17
Page 2
Visit our World Wide Web Site at http://www.philips.com
Return your Warranty Registration card today to ensure you
receive all the benefits you're entitled to.
Once your PHILIPS purchase is registered, you're eligible to receive all the privileges of owning a PHILIPS So complete
and return the Warranty Registration Card enclosed with your purchase at once. And take advantage of these important
benefits.
Warranty
Verification
Registering your product within 10 days
confirms your right to maximum
protection under the terms and
conditions of your PHILIPS warranty.
Owner
Confirmation
Your completed Warranty Registration
Card serves as verification of ownership
in the event of product theft or loss.
Model
Registration
Returning your Warranty Registration
Card right away guarantees you'll receive
all the information and special offers
which you qualify for as the owner of
your model.
Congratulations on your purchase,
and welcome to the "family!"
Dear PHILIPS product owner:
Thank you for your confidence in PHILIPS. You've selected one
of the best-built, best-backed products available today. We'll
do everything in our power to keep you happy with your
purchase for many years to come.
As a member of the PHILIPS "family," you're entitled to
protection by one of the most comprehensive warranties and
outstanding service networks in the industry. What's more,
your purchase guarantees you'll receive all the information and
special offers for which you qualify, plus easy access to
accessories from our convenient home shopping network.
Most importantly, you can count on our uncompromising
commitment to your total satisfaction. All of this is our way of
saying welcome - and thanks for investing in a PHILIPS
product.
Sincerely,
Lawrence J. Blanford
President and Chief Executive Officer
P.S.Remember, to get the most from your PHILIPS
product, you must return your Warranty
Registration Card within 10 days. So please mail
it to us right now!
Know these
safetysymbols
This "bolt of lightning" indicates
uninsulated material within your
unit may cause an electrical
shock. For the safety of everyone in your
house-hold, please do not remove product
covering.
The "exclamation point" calls
attention to features for which you
should read the enclosed
literature closely to prevent operating and
maintenance problems.
WARNING: TO PREVENT FIRE OR
SHOCK HAZARD, DO NOT EXPOSE
THIS EQUIPMENT TO RAIN OR
MOISTURE.
CAUTION: To prevent electric shock,
match wide blade of plug to wide slot, fully
insert.
ATTENTION: Pour éviter les choc
électriques, introduire la lame la plus large
de la fiche dans la borne correspondante de
la prise et pousser jusqu'au fond.
For Customer Use
Enter below the Serial No. which
is located on the rear of the
cabinet.Retain this information
for future reference.
Model No.: DVDR615/17
Serial No. _________________
Page 3

Safety Information
Safety Precautions
Warning: To prevent fire or shock hazard, do not expose this equipment to rain or moisture.
Federal Communications Commission (FCC) Warning: Any unauthorized changes or modifications to this equipment void the user’s
authority to operate it.
Laser Safety
This unit employs a laser. Only a qualified service person should remove the cover or attempt to service this device, due to possible
eye injury.
CAUTION: Use of controls or adjustments or performance of procedures other than those specified herein may result in hazardous
radiation exposure. The set complies with the FCC-Rules, Part 15 and with 21 CFR 1040.10.
CAUTION: Visible and invisible laser radiation when open and interlock defeated. Do not stare into the beam. The beam is located
inside, near the deck mechanism.
Special Information for Canadian Users
This digital apparatus does not exceed the Class B limits for radio noise emissions from digital apparatus as set out in the Radio
Interference Regulations of the Canadian Department of Communications.
Radio/TV Interference
This equipment has been tested and found to comply with the limits for a Class B digital device, pursuant to Part 15 of the FCC
Rules. These limits are designed to provide reasonable protection against harmful interference in a residential installation. This
equipment generates, uses, and can radiate radio frequency energy and, if not installed and used in accordance with the instructions,
may cause harmful interference to radio communications. However, there is no guarantee that interference will not occur in a
particular installation. If this equipment does cause harmful interference to radio or television reception, which can be determined by
turning the equipment off and on, the user is encouraged to try to correct the interference by one or more of the following
measures:
1) Reorient or relocate the receiving antenna.
2) Increase the separation between the equipment and the receiver.
3) Connect the equipment into an outlet on a circuit different from that to which the receiver is connected.
4) Consult the dealer or an experienced radio/TV technician for help.
Note to Cable TV system installer:
This reminder is provided to call the Cable TV(CATV) system installer 's attention to Article 820-40 of the NEC (National Electrical
Code) that provides guidelines for proper grounding and, in particular, specifies that the cableground shall be connected to the
grounding system of the building, as close to the point of cable entry as practical.
Copyright Protection
Unauthorized copying, broadcasting, public performance and lending of Discs are prohibited. This product incorporates copyright
protection technology that is protected by method claims of certain U.S. patents and other intellectual property rights owned by
Macrovision Corporation and other rights owners. Use of this copyright protection technology must be authorized by Macrovision
Corporation and is intended for home and other limited viewing uses only unless otherwise authorized by Macrovision Corporation.
Reverse engineering or disassembly is prohibited.
Declaration of Conformity
Model Number: DVDR615/17
Trade Name: PHILIPS
Responsible Party: Philips Consumer Electronics N.A.
P.O. Box 14810, Knoxville, TN 37914-1810 1-800-531-0039
Page 4
IMPORTANT SAFETY INSTRUCTIONS
1. Read these instructions.
2. Keep these instructions.
3. Heed all warnings.
4. Follow all instructions.
5. Do not use this apparatus near water.
6. Clean only with dry cloth.
7. Do not block any of the ventilation openings. Install
in accordance with the manufacturer’s instructions.
8. Do not install near any heat sources such as radiators,
heat registers, stoves, or other apparatus (including
amplifiers) that produce heat.
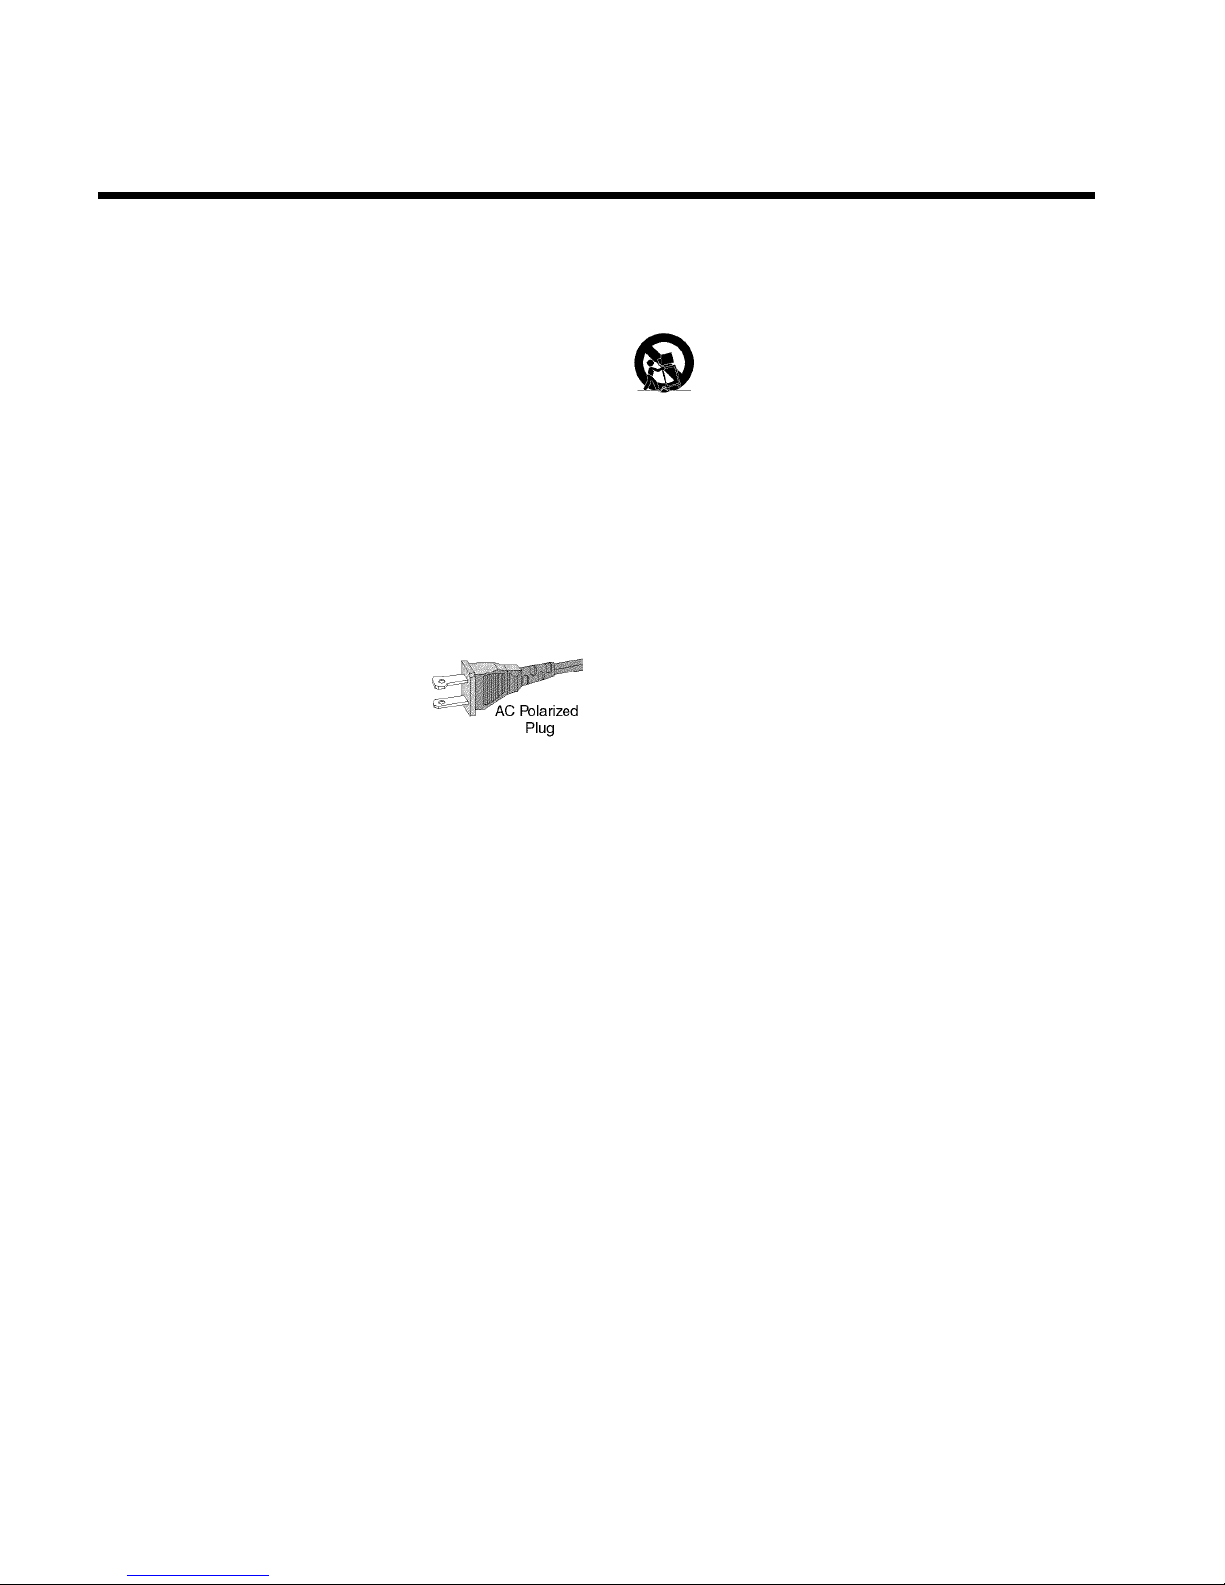
9. Do not defeat the safety purpose
of the polarized or grounding-type
plug. A polarized plug has two blades
with one wider than the other.
A grounding type plug has two blades and a third grounding
prong. The wide blade or the third prong are provided for
your safety. If the provided plug does not fit into your
outlet, consult an electrician for replacement of the obsolete
outlet.
10.Protect the power cord from being walked on or
pinched, particularly at plugs, convenience receptacles, and
the point where they exit from the apparatus.
11.Only use attachments/accessories specified by the
manufacturer.
12. Use only with a cart, stand, tripod, bracket, or
table specified by the manufacturer or sold with the
apparatus. When a cart is used, use caution when
moving the cart/apparatus combination to avoid
injury from tip-over.
13.Unplug this apparatus during lightning storms or when
unused for long periods of time.
14.Refer all servicing to qualified service personnel.
Servicing is required when the apparatus has been damaged
in any way, such as power-supply cord or plug is damaged,
liquid has been spilled or objects have fallen into the
apparatus, the apparatus has been exposed to rain or
moisture, does not operate normally, or has been dropped.
15.Battery usage CAUTION - To prevent battery
leakage which may result in bodily injury, property damage,
or damage to the unit:
• Install all batteries correctly, + and as marked on the
unit.
• Do not mix batteries (old and new or carbon and
alkaline, etc.).
• Remove batteries when the unit is not used for a
longtime.
EL 6474E004:02/8
Page 5
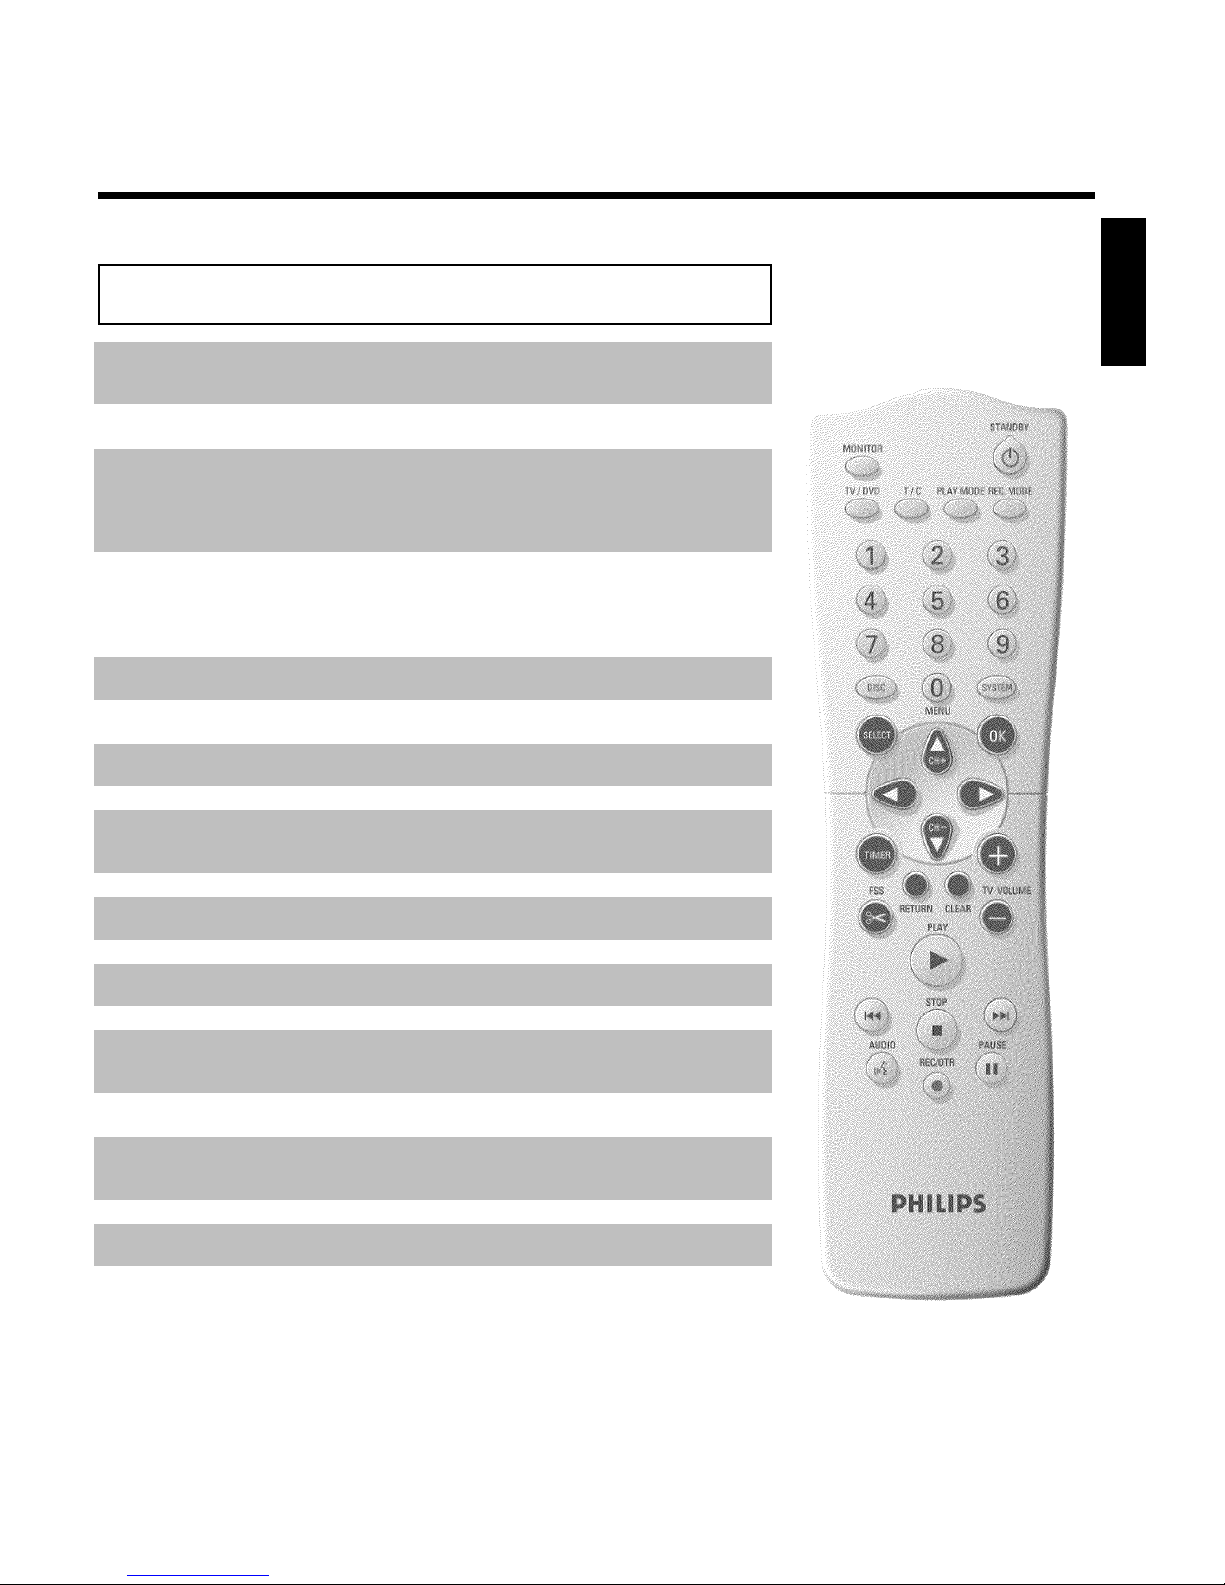
The remote control
MONITOR Monitor: To switch between the internal tuner of the DVD Recorder
(TV reception) and playback of the DVD Recorder
STANDBY m Switch on or off: To switch set on or off, interrupt menu function,
interrupt a programmed recording (TIMER)
TV/DVD TV/DVD: To connect the antenna signal directly to the TV. This button
lets you switch between the DVD Recorder and the antenna signal. This
function operates when the DVD Recorder is connected to the TV with
only an antenna cable.
T/C Title/Chapter: To directly select a '
B
'(title)/'C'(chapter) in the menu
bar using CH- B , CH+ A .
If 'INFO' appears in the display, the index menu of the loaded disc will
appear or an introduction will play. In this case, this function will not be
available.
PLAY MODE Playback mode: To select Repeat, Shuffle, and Intro Scan
REC MODE Recording mode (quality): To select the maximum possible
recording duration
0..9 Number buttons:0-9
DISC-MENU Disc Menu: To display the DVD menu or index screen
SYSTEM-MENU System Menu: To display/hide the main menu (menu bar at top of
screen)
SELECT Select: To select a function
OK Store/Confirm: To store or confirm an entry
DC Cursor buttons : To move left, right
CH+ A Cursor buttons/Plus : Cursor up / Next channel
CH- B Cursor buttons/Minus : Cursor down / Previous channel
TIMER TIMER: To make a TIMER programming with VCR Plus+
®
system /
without VCR Plus+
®
system or to alter or clear a programmed TIMER
FSS FSS: To display the edit menu for DVD+R(W) discs, to set chapter
marker
RETURN Back: To return to the previous menu step on a video CD (VCD). This
also functions with some DVDs.
CLEAR Delete: To delete last entry or clear programmed recording (TIMER)
PLAY G Playback: To play a recorded disc.
N Previous Chapter Track/Reverse search:
Pressing this button twice during playback will return to the previous
chapter track/ title
If this button is held down during playback, it will search backward.
If this button is held down during a still picture, it will search backward
in slow motion.
ENGLISH
Page 6

O Next title/Chapter/Track/Forward search:
Pressing this button once during playback will jump to the next
chapter/track.
If this button is held down during playback, it will search forward.
If button is held down during a still picture function, it will search
forward in slow motion.
STOP h Stop: To stop playback/recording, except with programmed recordings
(TIMER)
Holding down the button will open and close the disc tray.
AUDIO Audio: To select the audio language. For SAP recording
REC/OTR n Record: Record the current TV channel
PAUSE 9 Pause(still picture): If this button is pressed during playback, the
DVD Recorder switches to pause. You will see a still picture.
If this button is pressed during recording, the DVD Recorder will also
switch to pause.
Additional TV functions
This will only work with TVs with the same remote control code (RC5) (e.g. Philips TVs)
TV VOLUME q TV volume: Increase TV volume
TV VOLUME r TV volume: Reduce TV volume
For the following functions, you must hold down the side button DVD/TV while pressing the
other button.
STANDBY m Switching the TV off:
0..9 Number buttons:0-9
CH+ A TV Channel: To select the next highest TV channel.
CH- B TV Channel: To select the next lower TV channel.
Page 7
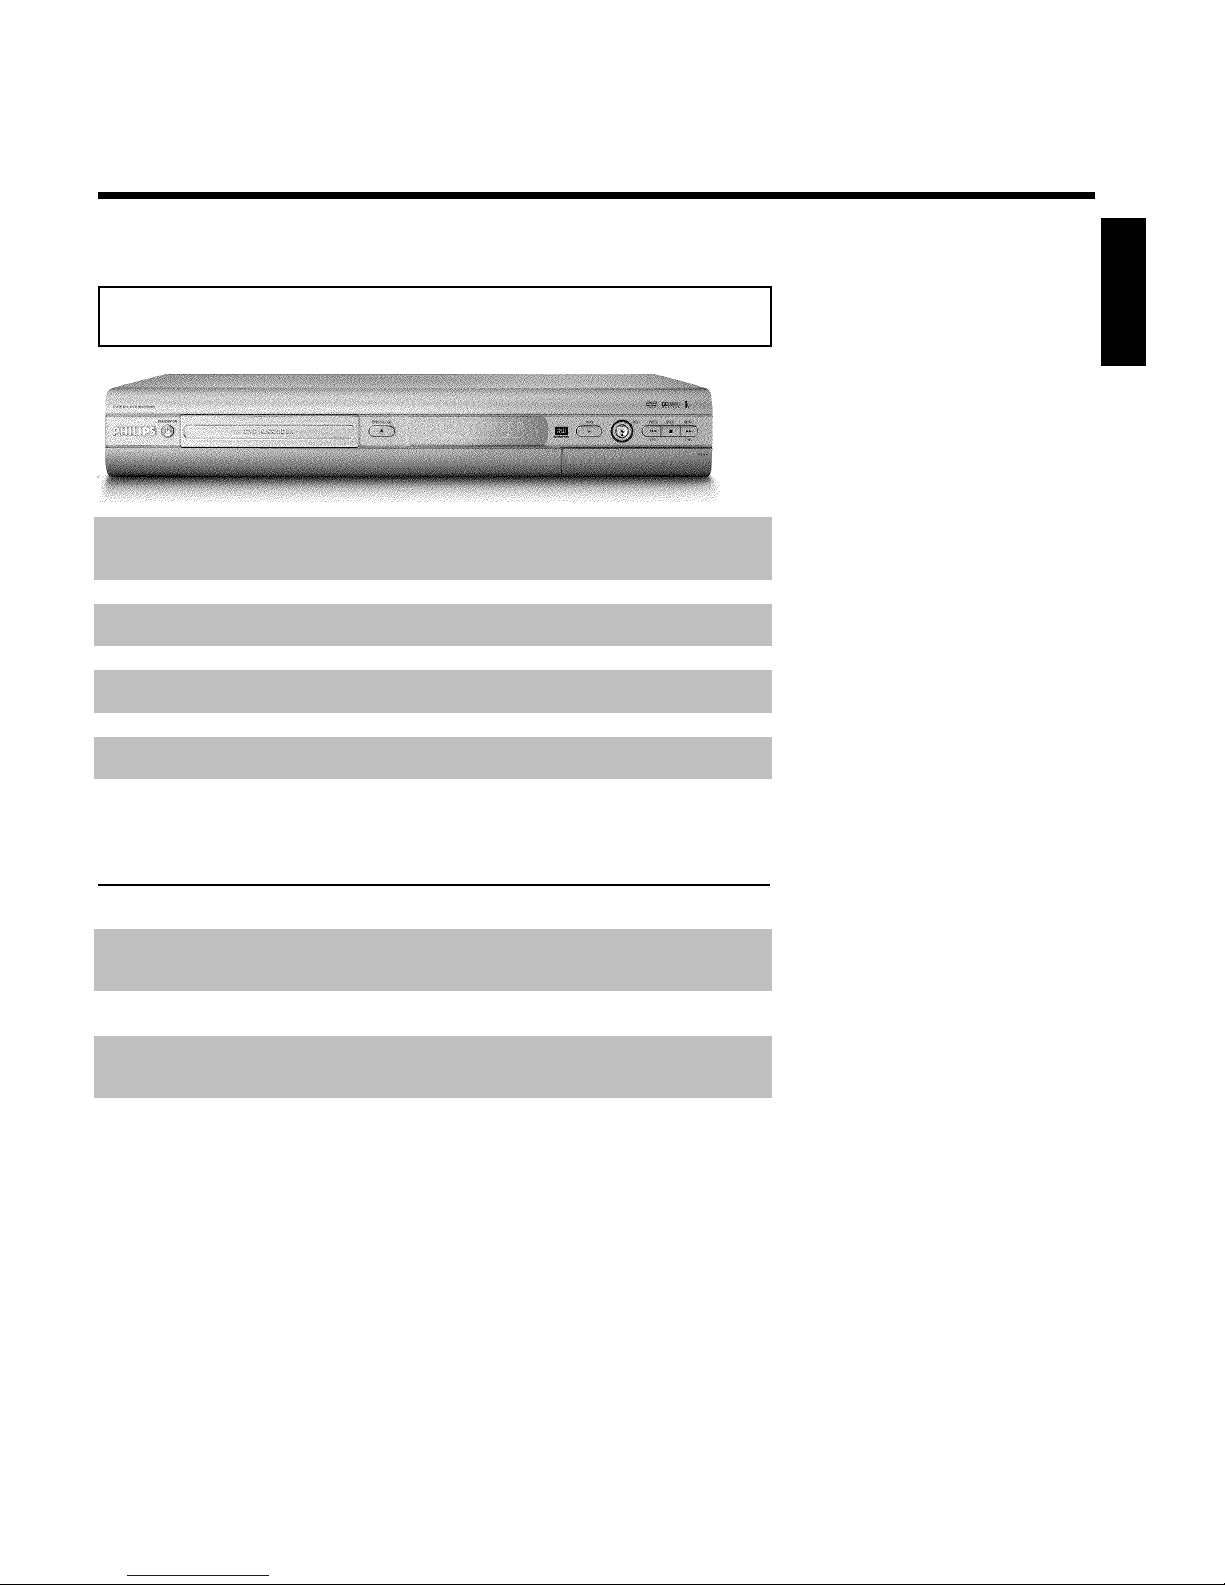
Front of the Recorder
STANDBY-ON m Switch on or off: To switch the DVD Recorder off or on, interrupt a
function, or interrupt a programmed recording (TIMER)
OPEN/CLOSE J Open/close disc tray: Open/close disc tray
PLAY G Playback: To play a recorded disc.
REC n Record: Record the current TV channel
PREV/CH- N previous chapter track/reverse search/ previous channel
STOP h Stop: Pause playback/recording
NEXT/CH+ O next chapter track/forward search/next channel
Behind the door at the lower right front
corner
Switching between jack S-VIDEO and VIDEO is done automatically.
S-VIDEO SVideo jack : Input for SVHS/Hi8 camcorders or SVHS/Hi8 video
recorders (channel number 'CAM1')
Yellow jack
VIDEO
Video input jack: Input for camcorders or video recorders (channel
number 'CAM1')
White/Red jack
AUDIO left/right
Audio input jack left/right : Input for camcorders or video recorders
(Channel number 'CAM1')
DV IN i.Link / DV jack (digital video input, IEEE 1394, Firewire): Input
for digital Camcorders or other suitable devices using this connector
(channel number 'CAM2').
ENGLISH
Page 8
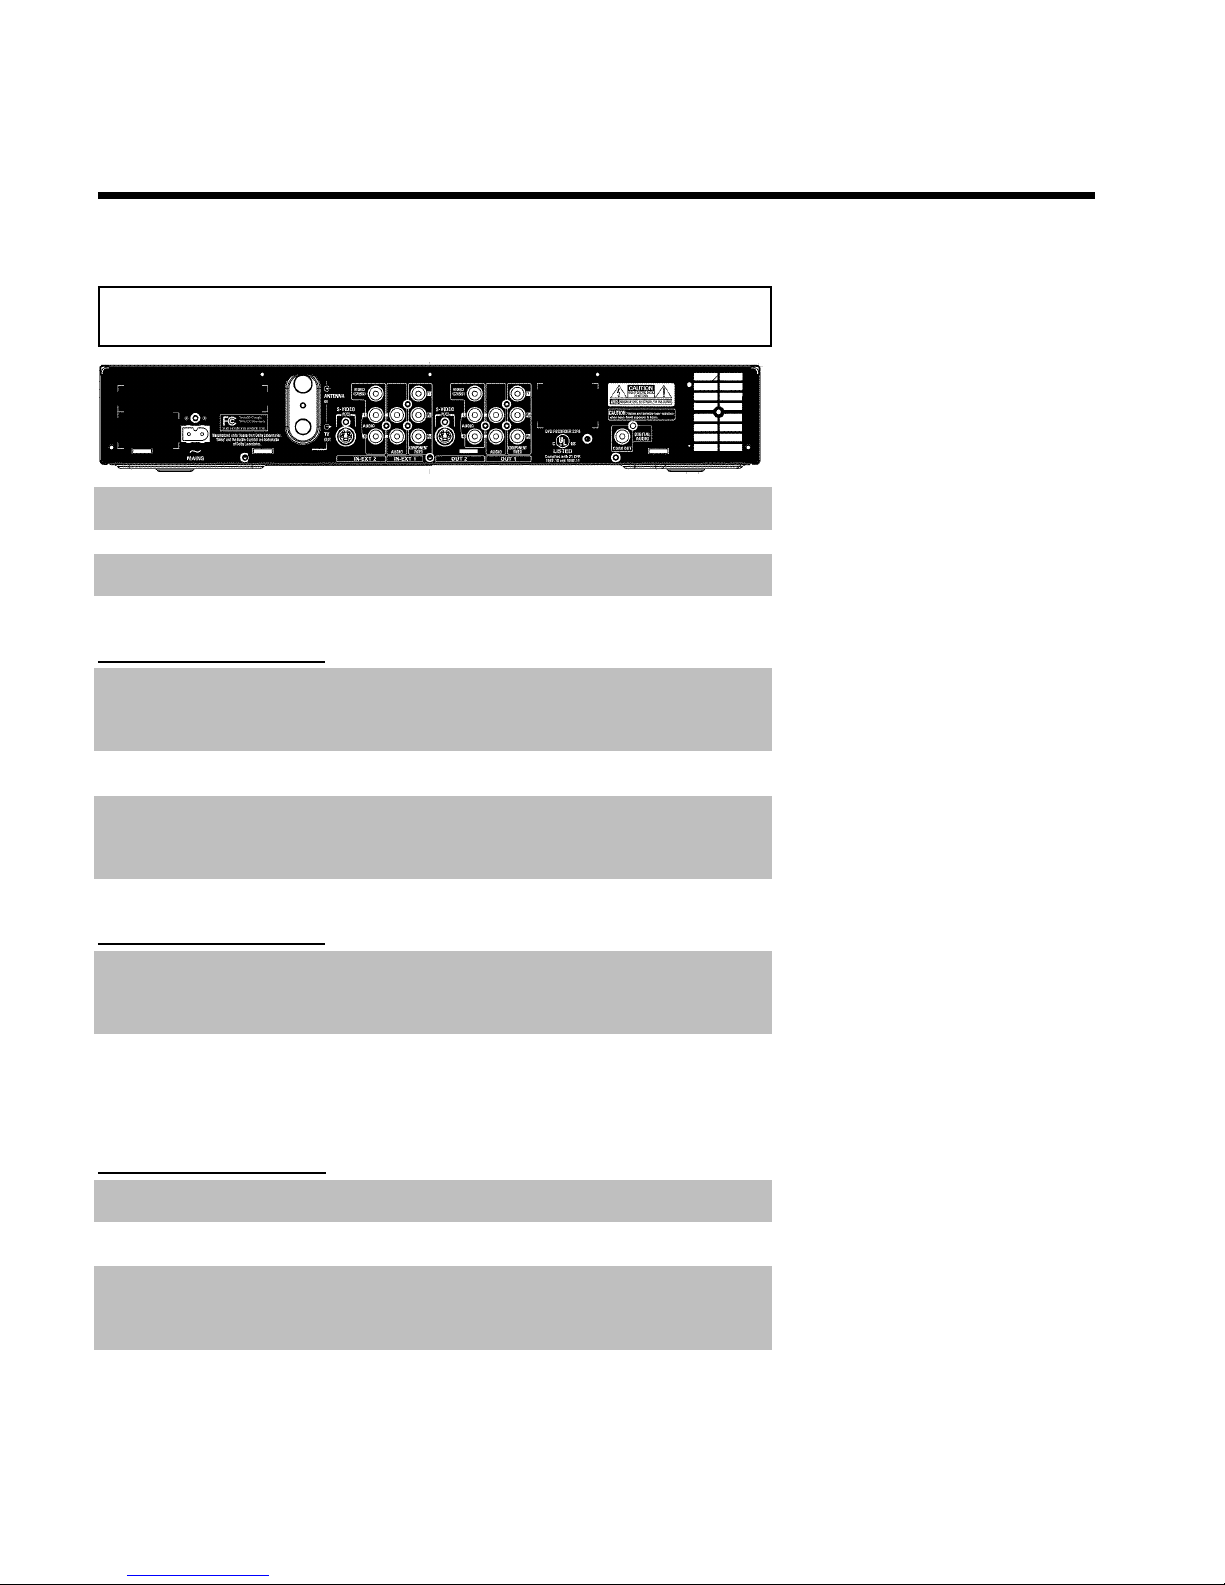
Back of the Recorder
4MAINS Power plug: Connection to the power outlet (110V/60Hz)
ANTENNA IN Antenna input: Connect your antenna or Cable TV signal here
TV OUT Antenna output: Connection to the TV
Input jacks (INEXT2)
S-VIDEO (Y/C) SVideo input: Connection for an additional device (channel number
'EXT2'). Switching between jack S-VIDEO (Y/C) and VIDEO
(CVBS) is done automatically.
VIDEO (CVBS) Video input (yellow jack): Connection for an additional device
(channel number 'EXT2')
L AUDIO R Analog audio input (red/white jack) underneath jack VIDEO
(CVBS) . Audio for jack VIDEO (CVBS) : Connection for an
additional device (channel number 'EXT2')
Input jacks (INEXT1)
AUDIO Analog audio input (red/white jack) next to jack COMPONENT
VIDEO Y PB PR : Connection for an additional device. Audio input for
component video (channel number 'EXT1')
COMPONENT
VIDEO Y PB PR
Component video input (red/blue/green jack): Connection for an
additional device with component video output (channel number
'EXT1')
Output jacks (OUT2)
S-VIDEO (Y/C) OUT SVideo output: Connection for a S-video-compatible TV
VIDEO (CVBS)
OUT
Video output (yellow jack): Connection to a TV with video input
(CVBS, Composite Video)
L AUDIO R OUT Analog audio output (red/white jack) underneath jack VIDEO
(CVBS) . Audio for jack VIDEO (CVBS) OUT : Connection for an
additional device
Page 9
Output jacks (OUT1 480p/480i)
AUDIO OUT Analog audio output (red/white jack): Connection for an additional
device. Audio output for component video/progressive scan
COMPONENT
VIDEO Y PB PR
OUT
Component video output (red/blue/green jack): Connection for
an additional device with component video/progressive scan output
Output jack (DIGITAL AUDIO OUT)
DIGITAL AUDIO
OUT
Digital audio output: Connection for a digital audio device
(amplifier/receiver)
The symbols on your DVD Recorder
display
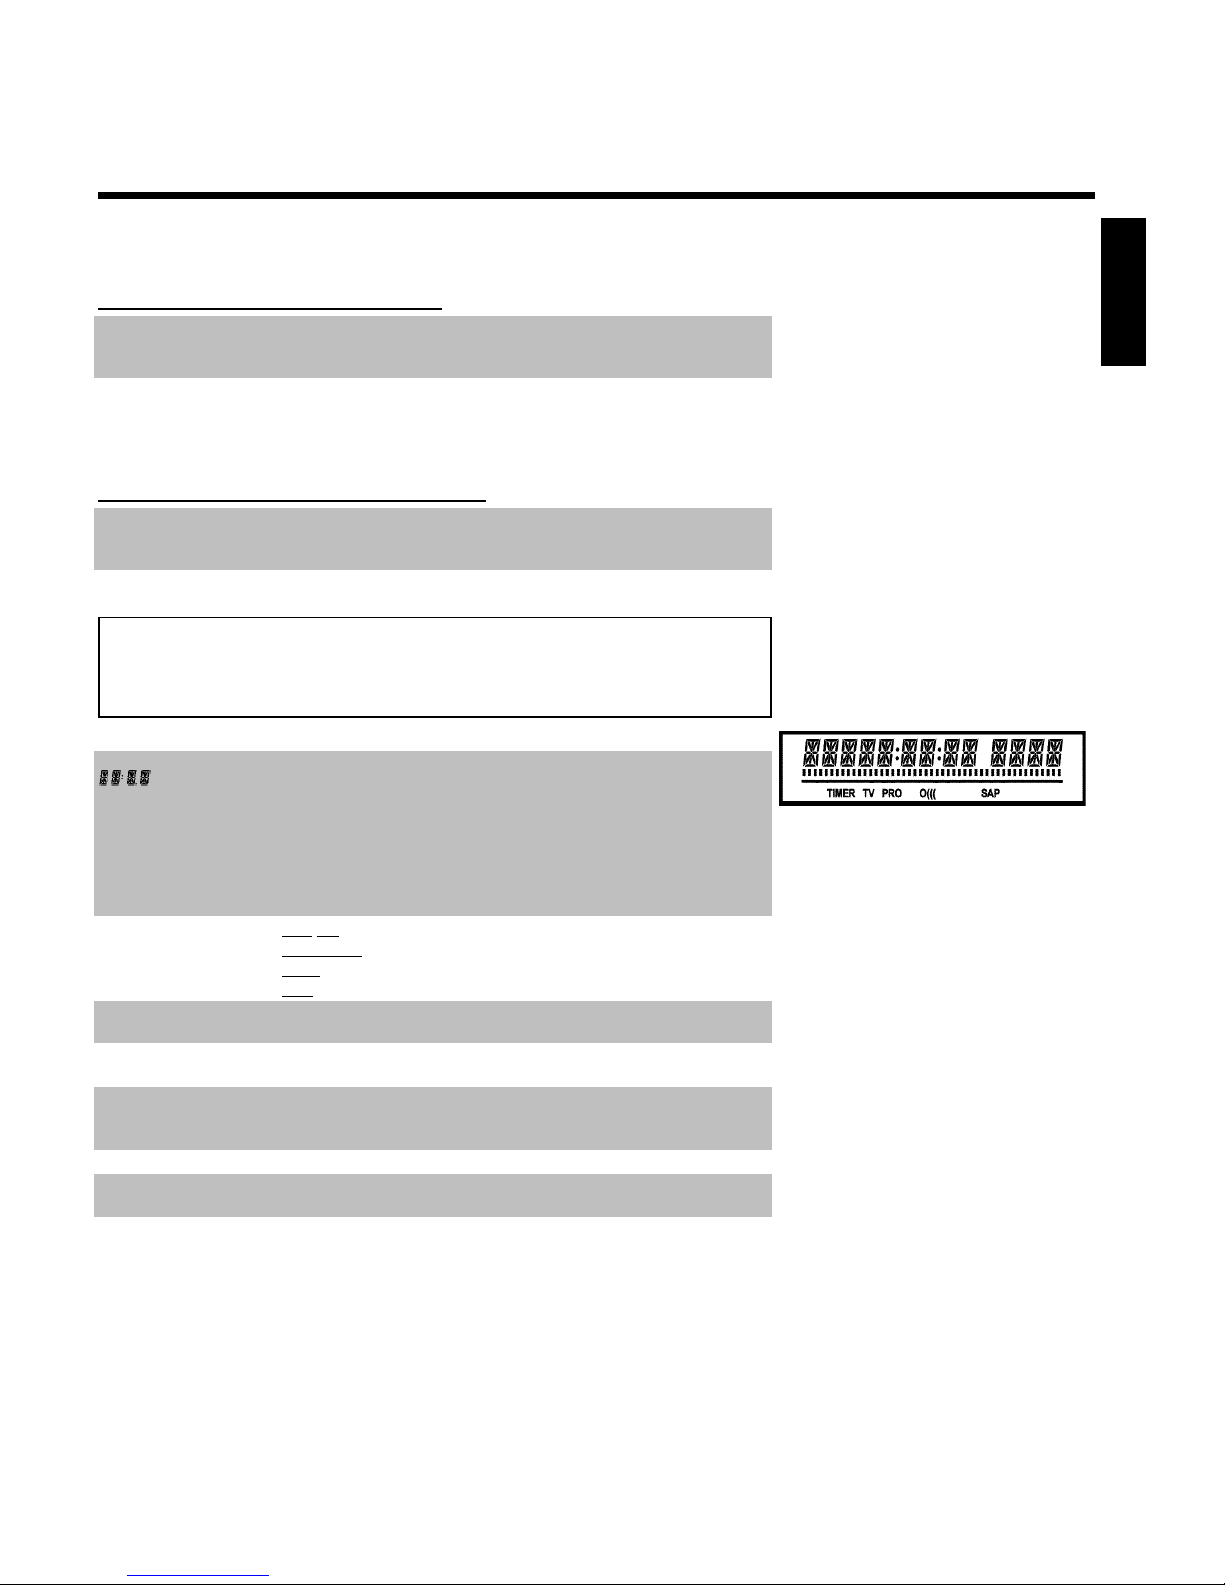
The following symbols may appear on your DVD Recorder display:
Multifunction display/text line
•) Clock
•) Disc/Title play time
•) OTR time
•) Title name
•) Display of the TV channel number / playing time / function.
•) Display of information, warnings
IIIIIIIIIIIIIII Disc bar: Displays the current position on the disc (disc pointer).
Play/Record: single flashing segment at the current position.
Pause: flashing segment on both sides of the current position.
Stop: flashing segment at the current position.
TIMER A recording (Timer) has been programmed
TV Modulator is switched off . The antenna signal (RF signal) is only
connected to the TV when the modulator is switched off.
PRO Component Video output set to 'Progressive Scan.' If this is not
displayed, the Component Video output is set to 'Interlaced.'
o((( Remote control command has been sent
SAP Secondary audio program from the tuner is selected
ENGLISH
Page 10
Messages on your DVD Recorder display
READING
The following messages may appear on your DVD Recorder display. If you name a disc, the disc
name will appear on the display panel as well.
IS TV ON? The DVD Recorder is currently in the initial installation mode. Switch
on your TV and read section 'Initial installation' in chapter 'Installing
your DVD recorder.'
NO SIGNAL No signal or poor signal strength
MENU The on-screen menu display is on.
OPENING Disc tray is opening.
TRAY OPEN Disc tray is open.
CLOSING Disc tray is closing.
READING Disc is being read.
MENU UPDT After a successful recording, the list of disc contents is updated.
INIT MENU After the first recording has been successfully completed on a new disc,
the menu structure is created.
COPY PROT The DVD/video cassette you are trying to copy is copy protected.
WAIT Please wait until this message disappears. The DVD Recorder is busy
processing another operation.
NO DISC No disc has been inserted. If a disc has been inserted, then it is possible
that the disc cannot be read.
INFO Information on the inserted DVD is displayed on the screen.
BUSY The DVD Recorder is busy making changes DVD-compatible.
ERASING Entire disc is being erased.
EMPTYDISC Inserted disc is new or has been completely erased (no recordings
present).
PROTECTED Disc cannot be recorded on.
MAX TITLE The maximum number of titles has been reached for the disc. Each disc
can have a maximum of 48 titles.
MAX CHAP The maximum number of chapters per title/disc has been reached. The
maximum number of chapters per title is 99, and 124 per disc.
DISC FULL Disc is full. There is no room for new recordings.
PAL DISC A disc with PAL recordings has been inserted and an attempt was made
to record an NTSC signal. Insert a new disc or use a disc containing
NTSC recordings.
NTSC DISC A disc with NTSC recordings has been inserted and an attempt was
made to record a PAL signal. Insert a new disc or use a disc containing
PAL recordings.
Page 11

RECORDING An unauthorized action was attempted during recording (e.g. pressing
the OPEN/CLOSE J button).
FREETITLE An empty tile was selected.
DISC LOCK An attempt was made to record on a protected disc during playback.
This message will also appear when an attempt is made to insert a
chapter marker( FSS button).
DISC ERR An error occurred when writing the title. If this happens often, please
clean the disc or use a new one.
Read section 'Cleaning discs' in the next chapter on how to clean the
disc.
DISC WARN An error occurred when writing the title. The recording will continue,
but the error will be skipped.
SETUP After the automatic channel search, the menu for setting the time/date
appears on the screen.
WAIT 01 During automatic channel search, the detected TV channels are
counted.
BLOCKED It is not possible to close/open the disc tray.
SAFE REC The new recording will be added to the end of all recordings (SAFE
RECORD).
POST-FORMAT After the creation of the menu structure the disc is prepared
PHILIPS The DVD-Recorder has been switched on
STANDBY The DVD-Recorder has been switched off
ENGLISH
Page 12

Page 13

Table of contents
AIntroduction 3....................................
Dear Philips customer 3.....................................................................................
Compatible discs 5..............................................................................................
Region codes 6.....................................................................................................
Technical data 6...................................................................................................
Accessories 6........................................................................................................
Important notes regarding operation 7..........................................................
Cleaning discs 8....................................................................................................
Special functions of your new DVD Recorder 9.........................................
BConnecting the DVD Recorder 11...
Preparing the remote control for operation 11...........................................
Connecting your DVD Recorder to the TV 11............................................
Connecting with a Component Video (Y PB PR) cable 12........................
Connecting with a S-Video (Y/C) cable 14....................................................
Connecting with Video (CVBS) cable 15........................................................
Connecting only with the antenna cable 16...................................................
CConnecting additional devices 18....
Connecting an additional video recorder, DVD player 18.........................
Connecting the satellite receiver using a cinch or an S-video cable 19...
Connecting additional devices only via aerial cable 19................................
Connecting a camcorder to the front jacks 20.............................................
Connecting audio devices to analog audio jacks 20.....................................
Connecting audio devices to the digital audio jack 21.................................
DInstalling your DVD recorder 22......
Initial installation 22.............................................................................................
Automatic TV channel search 24.....................................................................
Adding and deleting TV channels manually 25...............................................
Setting the language 26.......................................................................................
Switching audio recording (Stereo, SAP) 27..................................................
Assigning the VCR Plus+
®
Guide channel numbers 28................................
Setting the time/date automatically 29............................................................
Manually setting the time & date 30................................................................
EInformation on the TV screen 31....
Menu bar icons 31...............................................................................................
Menu bar 1 31.......................................................................................................
Menu bar 2 31.......................................................................................................
Field for temporary messages 32.....................................................................
Status box 32........................................................................................................
Disc type icons 32................................................................................................
Disc status icons 33.............................................................................................
Tuner info box 33................................................................................................
Timer info box 33................................................................................................
FPlayback 34........................................
General information regarding playback 34...................................................
Inserting a disc 34................................................................................................
Playing a DVD video disc 35..............................................................................
Playing a DVD+RW or DVD+R 36.................................................................
Playing audio CDs 36..........................................................................................
Playing MP3 CDs 37............................................................................................
Playback of a (Super) Video CD 38.................................................................
GOther playback functions 39.............
Changing to a different chapter track/title 39...............................................
Disc search 39......................................................................................................
Still picture 40.......................................................................................................
Slow motion 41....................................................................................................
Search with time entry 41..................................................................................
Repeating/Shuffle 42............................................................................................
Repeat a specific segment A-B 42....................................................................
Scan function 43...................................................................................................
Camera angle 43...................................................................................................
Zoom function 44................................................................................................
Changing audio language 44...............................................................................
Subtitles 45............................................................................................................
HRecording 46......................................
General information 46......................................................................................
Recording without automatic switch-off 47...................................................
Pausing recording 49...........................................................................................
Recording with automatic switch-off (OTR one-touch-recording) 49....
Preventing accidental erasing of discs 50........................................................
Lining up recordings within a title (assemble cut) 51..................................
Selecting the recording mode (picture quality) 52.......................................
IManaging disc content 53.................
General 53.............................................................................................................
Favorite Scene Selection 54...............................................................................
Inserting chapter marker 54..............................................................................
Hiding chapters 54...............................................................................................
Deleting chapter markers 56.............................................................................
Changing the index picture 56..........................................................................
Changing the menu background 57.................................................................
Splitting titles 57...................................................................................................
Editing recording titles (name) 58....................................................................
Playing the entire title 58...................................................................................
Deleting recordings/titles 59.............................................................................
Disc settings 60....................................................................................................
Changing disc name 60.......................................................................................
Finalize editing 61.................................................................................................
Finalizing DVD+R discs 61.................................................................................
Erasing DVD+RWs 62........................................................................................
Table of contents
Page 14

JProgramming a recording
(TIMER) 63..............................................
General 63.............................................................................................................
Programming a recording with the 'VCR Plus+
®
system' 63......................
Programming a recording without the VCR Plus+
®
system 66.................
How to change or delete a programmed recording (TIMER) 67.............
Problem solving for programmed recordings 68..........................................
KUser preferences 69..........................
Picture settings 70................................................................................................
Sound settings 71.................................................................................................
Language settings 72............................................................................................
Additional settings 72..........................................................................................
Remote control settings 73...............................................................................
Disc feature menu 74..........................................................................................
LAccess control (Child lock) 75.........
Child lock (DVD and VCD) 75.........................................................................
Activating/Deactivating the child lock 75........................................................
Authorizing discs 76............................................................................................
Locking authorized discs 76...............................................................................
Parental control (DVD video only) 76............................................................
Activating/Deactivating the parental control 77............................................
Changing the country 78....................................................................................
Changing the PIN 79...........................................................................................
MBefore you call technical support 80
Table of contents
Page 15
3
AIntroduction
Dear Philips customer
Instruction manuals are usually very dry since they are technically-oriented and often poorly
translated. I have been employed by Philips for this reason.
Allow me to introduce myself.
My name is Phil. I will be guiding you through the instruction manual and try to be of help in
operating your new device. At appropriate points along the way, I will be providing you with the
following information:
(Question)?
Here I will be explaining
seemingly unimportant things.
Tip
Here I will be giving you
instructions on functions that
help make it easier to use your
DVD Recorder.
Problem
Here I will help you find the
cause of problems and their
solutions.
I hope you have lots of fun with your new DVD Recorder.
Phil
P.S.: If you have questions or if problems come up during operation, please see the helpful
information in the chapter 'Before you call technical support'. If this doesn't help you resolve the
problem, please call the customer support service for your country.
The corresponding telephone numbers and e-mail addresses can be found on the last page of
this instruction manual.
You can also visit the website 'http://www.p4c.philips.com' .
ENGLISH
Introduction
Page 16
4
Welcome to the large family of PHILIPS DVD owners.
Thank you for buying a DVDR615/17 .
Please take the time to read this owner's manual before using your DVD Recorder. It contains
important information and notes regarding operation.
The DVD Recorder should not be turned on immediately after transportation from a
cold to a hot area or vice versa, or in conditions of extreme humidity.
Wait at least three hours after transporting the device. The DVD Recorder needs this to
acclimate to its new environment (temperature, air humidity, etc.).
Your Philips team hopes you will enjoy
using your new DVD Recorder.
What is a DVD?
DVDs (Digital Versatile Discs) are the new storage medium that
combines the convenience of the Compact Disc with the latest advanced
digital video technology. DVD Video uses state-of-the-art MPEG2 data
compression technology that allows an entire film to be put on a single
5-inch disc.
How high is the resolution compared to VHS?
The crystal-clear digital pictures have a resolution of over 500 lines, with
720 pixels (picture elements) per line. This resolution is more than
double that of VHS and is superior to Laser Discs. The quality can be
compared to digital masters made in recording studios.
What is DVD+RW?
DVD+ReWritable (DVD+RW) uses phase-change media, the same
technology that formed the basis for CD-ReWritable. A high-power laser
is used to change the reflectivity of the recording layer. This process
means the disc can be recorded on more than a thousand times.
What is DVD+R?
DVD+R (recordable DVD). In contrast to DVD+RW, this disc can only
be recorded once. If a disc has not been finalized after recording, it can
continue to be recorded upon in the DVD Recorder. Old recordings can
be later deleted, but they cannot be overwritten. The deleted titles are
marked as 'Deleted title.'
For this disc to be played in a DVD player, it must be 'finalized' in the
DVD Recorder. After this has been completed, no further recordings
can be added.
What can my DVD Recorder do?
Your Philips DVD Recorder is a Recorder and Player for digital video
discs, with a two-way compatibility to the universal DVD Video standard.
This means that:
•)existing pre-recorded DVDs can be played.
•)recordings made on your DVD Recorder can play on existing DVD
Video players and DVD-ROM drives. In some cases, the discs may have
to be finalized before they will play on other DVD players.
?
Introduction
Page 17
5
Compatible discs
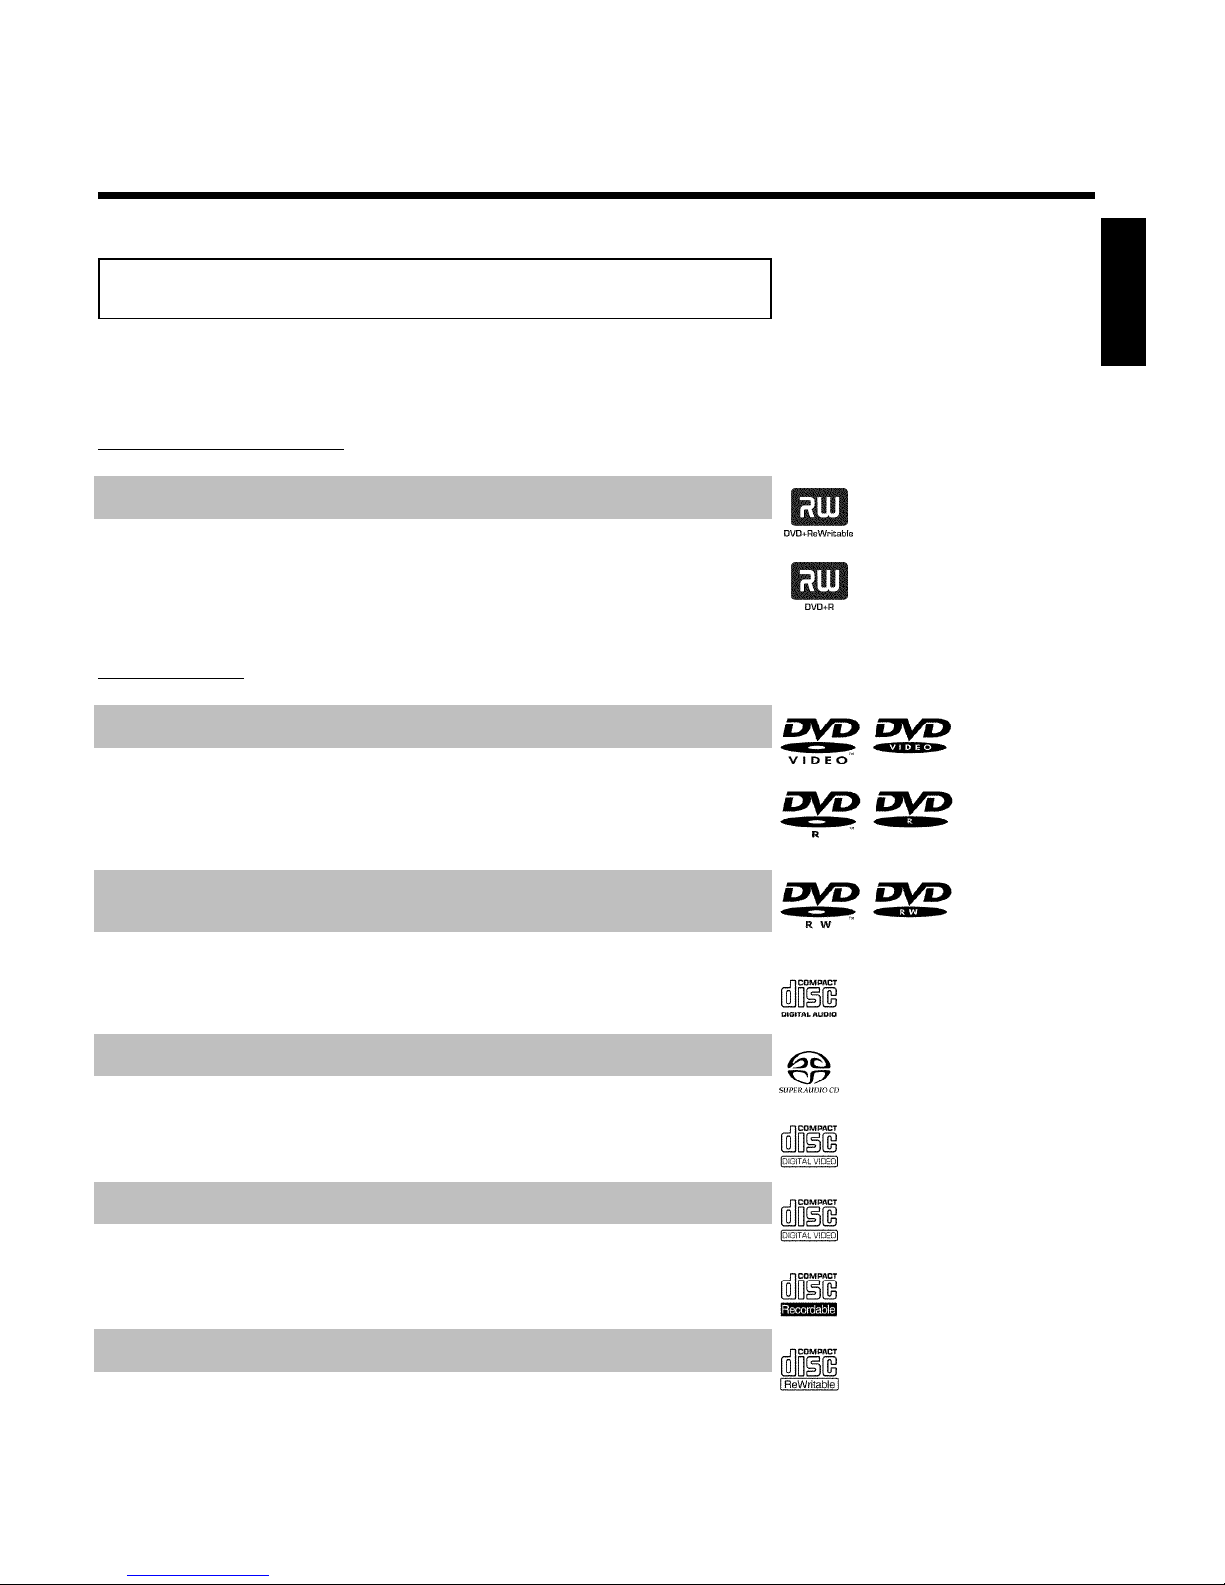
Using this DVD Recorder, you can play and record on the following discs:
Recording and Playback
DVD+RW (Digital Versatile Disc + Rewritable); can be recorded on over and over.
DVD+R (Digital Versatile Disc + recordable); can be recorded on once.
Playback only:
DVD Video (Digital Versatile Disc)
DVD-R (DVD-Recordable) Can only be played back when the recording was made in 'video mode'
and the recording was finalized.
DVD-RW (DVD-Rewritable) Can only be played back when the recording was made in 'video
mode' and the recording was finalized.
Audio CD (Compact Disc Digital Audio)
Super Audio CD (only plays the CD layer of a hybrid SACD disc)
Video CD (Formats 1.0, 1.1, 2.0)
Super Video CD
CD-R (CD-Recordable) Audio/MP3 contents
CD-RW (CD-Rewritable) Audio/MP3 contents
ENGLISH
Introduction
Page 18
6
Region codes
Because DVD films are usually not released at the same time in all regions of the world, all DVD
players are keyed to a specific region code. Discs can be assigned an optional region code. If the
region codes of the player and disc do not coincide, playback is not possible.
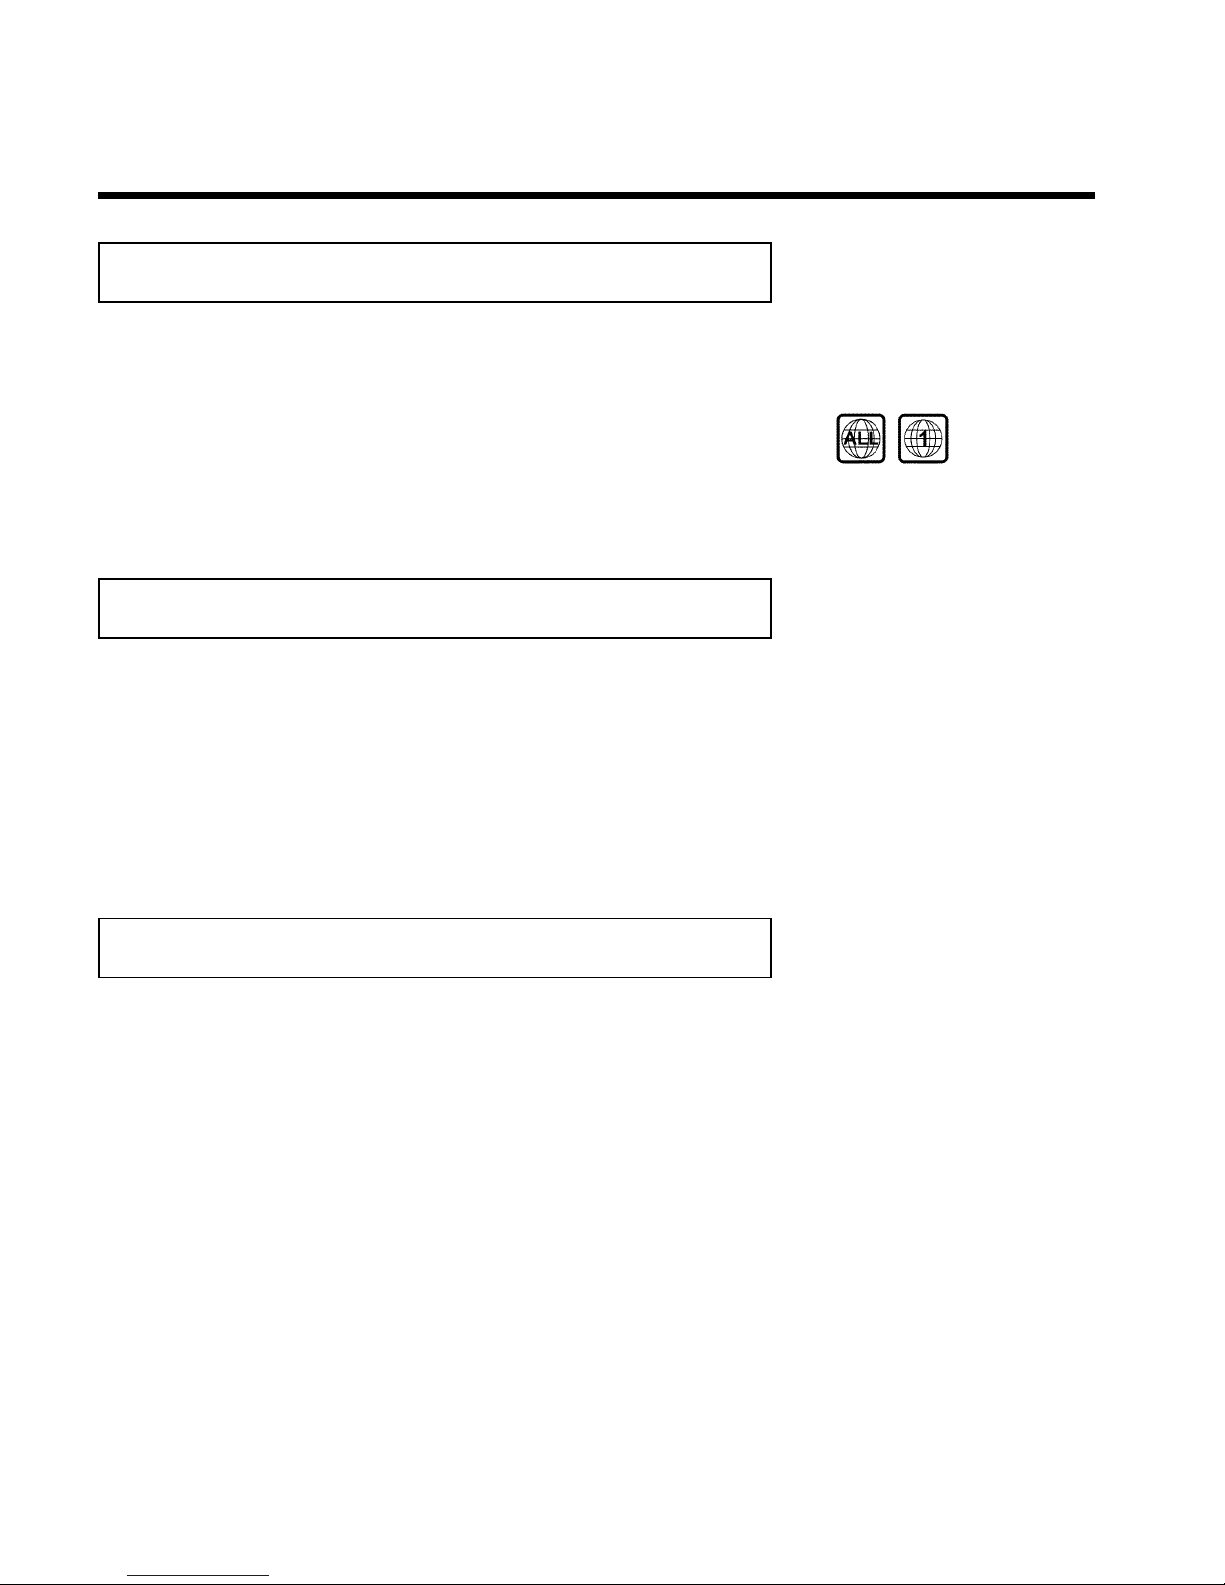
This device will only play Region 1 DVDs or DVDs manufactured to be played in all regions ('ALL').
DVDs from other regions cannot be played in this DVD Recorder.
The number within the globe represents the region of the world.
Region 1 represents:
U.S, Canada, upper regions of North America, Bermuda, U.S. Virgin Islands and smaller regions near
Australia.
Technical data
Voltage : 120V/60Hz
Power consumption : 27W
Power consumption (Standby): Less than 3W (clock display off)
Measurements in inches (W/H/D): 17.12/2.78/13.58 (disc tray closed), 18.90 (disc tray open)
Weight without packaging approx.: 9.26 lb
Power failure/no power supply: Channel and timer data will remain stored for approx. 1 year,
the clock data for approx. 12 hours.
Operating position: max. inclination of 10 degrees in any direction
Ambient temperature: 59 °F - 95 °F
Humidity: 25% - 75%
Accessories
Owner's manual
Warranty booklet
Quick install guide
Remote control and batteries
Antenna cable
Power cable
Audio cable (with red/white plugs)
Video cable (yellow plugs)
Introduction
Page 19
7
Important notes regarding operation
Caution!
Visible and invisible laser radiation. When open avoid exposure to beam.
Because of the danger of eye injury, only qualified service personnel should remove the cover or
attempt to service this device.
LASER
Type: Semiconductor laser InGaAlP (DVD), AlGaAs (CD)
Wavelength: 660nm (DVD), 780nm (CD)
Output power (out of objective): 20mW (DVD+RW writing), 0.8mW (DVD reading), 0.3mW (CD
reading).
Beam divergence: 82 degrees (DVD), 54 degrees (CD)
Danger: High voltage! Do not open!
There is a risk of an electrical shock!
The machine does not contain any components that can be repaired by the customer. Please leave
all maintenance work to qualified personnel.
As soon as the DVD Recorder is connected to the power supply, there are some components
that are in constant operation. To switch off the DVD Recorder completely you must disconnect
it from the power supply.
If you disconnect the DVD Recorder from the power supply, pull out the power cord's plug from
the wall outlet, not only the plug from the jack 4MAINS at the rear of the set. Children playing
near the device could suffer injuries at the free end of the cable.
These Owner's manual have been printed on non-polluting paper.
Deposit old batteries at the appropriate collection points.
Please make use of the facilities available in your country for disposing of the packaging in a way
that helps protect the environment.
This electronic device contains many materials that can be recycled. Please enquire about the
possibilities for recycling your old device.
ENGLISH
Introduction
Page 20
8
In a cabinet, allow about 2.5 cm (1 inch) of free space around the Recorder for adequate
ventilation.
Make sure that air can circulate freely through the ventilation slots on the machine. Do not place
the device on an unsteady base.
Make sure that no objects or liquids enter the Recorder. Do not place vases or similar objects
on the DVD Recorder. If liquid spills into it, immediately disconnect the Recorder from the
power supply and call Philips for advice.
Keep the DVD Recorder away from domestic heating equipment and other sources of heat, as well
as direct sunlight.
Do not place any combustible objects on the device (candles, etc.).
Make sure children do not place any foreign objects into the openings or the disc tray.
Cleaning discs
Some problems occur because the disc inside the Recorder is dirty (frozen picture, sound
disruptions, picture distortions). To avoid these problems, discs should be cleaned on a regular
basis.
1
When a disc is dirty, clean it with a soft cloth. Wipe the disc
from the center to the edge in a straight line.
2
Do not use solvents such as benzine, thinner, commercially
available cleaners, or anti-static sprays intended for analog discs.
Can I use a cleaning disc intended for DVD players?
Since the optical unit (laser) of the DVD Recorder operates at a higher
power than regular DVD or CD players, these kinds of cleaning CDs
may damage the optical unit (laser).
Therefore, refrain from using a cleaning CD!
?
Introduction
Page 21
9
Special functions of your new DVD
Recorder
Your PHILIPSDVD Recorder has special functions that will make day-to-day use of your new
DVD Recorder easier for you.
This connection is also known as 'FireWire' and 'IEEE 1394.' This connection is used for the
transfer of high bandwidth digital signals as used by digital video (DV) camcorders. Its cable is
used to transmit audio and video signals. Along with DV and Hi8 camcorders, some personal
computers with digital video outputs can also be connected to this digital input.
This screen provides an overview of the disc. Each index picture represents a recording. At the
right-hand side of the screen, a disc pointer graphically displays the duration and position on the
disc of the selected recording.
This function can be used to delete commercial interruptions during a film as well as other
scenes. The corresponding scenes are marked, then skipped as desired. This is saved on the
DVD so any DVD player will also skip these scenes. You must make edits compatible.
MP3 files are highly compressed pieces of music. The amount of data of the original audio material
is reduced by 1/10 of the original size using a special process. This enables you to fit up to 10 hours
of music on a single CD.
These music CDs can be played using this Recorder.
As a rule, a recording is made at the current position. This is similar to a video tape, e.g. in the
middle of the tape. By holding down the REC/OTR n button, the recording will be made at the
end of all other recordings. This helps avoid overwriting previous recordings.
New recordings on a DVD+R disc will always be added after the end of all recordings.
The Philips DVD Recorder can play DVDs and CDs. DVDs made using this DVD Recorder can be
played in most current (and future) DVD players.
ENGLISH
Introduction
Page 22
10
This is a standard from Dolby Laboratories for the transmission of 5.1 channel sound. This
acoustical playback system is used to transmit five full channels. In addition, one channel is used
exclusively for low frequencies (effects). Speakers are positioned at front left, center, and front
right, as well as rear left and right. This is currently the most common system, also used in
movie theaters.
This DVD Recorder records each sound in two-channel Dolby Digital on a DVD+RW.
Manufactured under license from Dolby Laboratories. Dolby and the double-D symbol are
trademarks of Dolby Laboratories.
This product incorporates copyright protection technology that is protected by US patent numbers
4631603, 4577216, 4819098, and 4907093, as well as other intellectual property rights. Use of this
copyright protection technology must be authorized by Macrovision Corporation, and is only
intended for home use and other pay-per-view applications. Macrovision must provide written
authorization for any other use. Changes to the device, reverse engineering, or disassembly is
prohibited.
Simple programming system for DVD recorders. Simply enter the number code associated with
your television program. This number is located in your television listings magazine.
VCR Plus+ and PlusCode are registered trademarks of Gemstar Development Corporation. The
VCR Plus+ system is manufactured under license from Gemstar Development Corporation. US
patent Nr.: 6,466,734; 6,430,359; 6,091,882; 6,049,652; 5,335,079; 5,307,173
In order to identify your machine for service questions or in the event of theft, enter the serial
number here. The serial number (PROD. NO.) is printed on the type plate fixed at the rear of
the recorder:
MODEL NO. DVDR615/17
PROD. NO. ..................
Introduction
Page 23
11
BConnecting the DVD Recorder
Preparing the remote control for
operation
The remote control and its batteries are packed separately in the original DVD Recorder
packaging. You must install the batteries in the remote control - as described in the paragraph
below - before use.
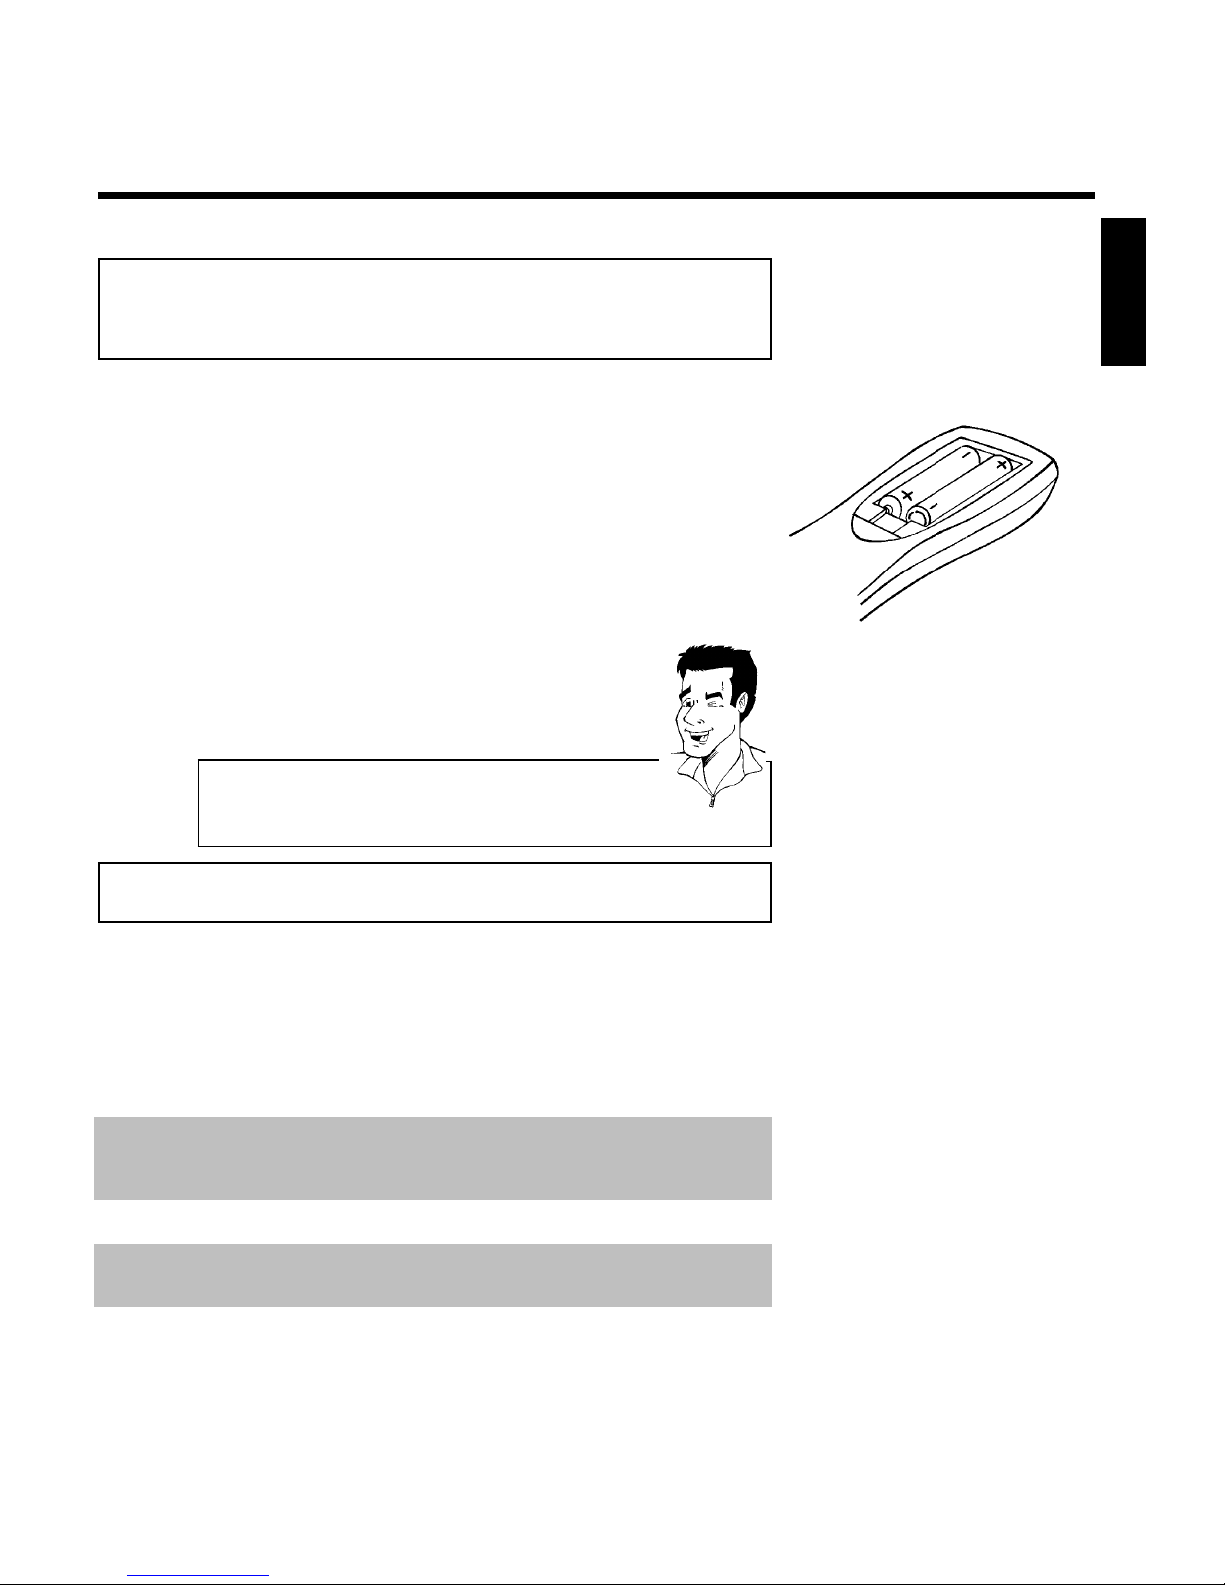
1
Take the remote control and the enclosed batteries (2 AA
batteries).
2
Remove the battery compartment lid, insert the batteries as
shown, then replace the battery compartment lid. Always install
the +/- ends of the batteries as indicated inside the battery
compartment.
The remote control is now ready to use.
Its range is approximately 16-32 feet (5 to 10 meters).
'Correct aiming' of the remote control
In the following sections, you require the remote control for the first
time. When using the remote control, always aim the front part of it at
the DVD recorder, not the TV.
Tip
Connecting your DVD Recorder to the TV
The necessary cable connections must be made before you can record or playback TV programs
using your DVD recorder.
Connect the DVD Recorder directly to the TV. Connecting a video cassette Recorder between
the DVD Recorder and the TV could result in poor picture quality.
When you install your DVD Recorder for the first time, select one of the following options:
'Connecting with Component Video (Y PB PR, YUV) / Progressive Scan (Y PB PR)
If your TV is equipped with Component Video (Y PB PR, YUV) / Progressive Scan (Y PB PR)
input
'Connecting with SVideo (Y/C)'
If your TV is equipped with a S-Video (SVHS) jack.
'Connecting with a Video (CVBS) cable'
If your TV is equipped with a Video (CVBS) jack.
'Connecting only with the antenna cable'
If your TV has only an Antenna-In jack (no other audio and video in jacks) or you do not wish to
use any other cable. The TV's Antenna In jack may be labeled ANT IN, RF IN, 75 ohm, etc. Check
your TV instructions for details.
ENGLISH
Connecting the DVD Recorder
Page 24

12
Connecting with a Component Video
(Y PB PR) cable
Component Video is the highest quality a system for transmitting video by splitting the video
signal into the Y (brightness), U and V (red minus brightness, blue minus brightness) components.
The signals are sent over separate lines. The plus for these cables and the corresponding jacks
are usually red, green, and blue.
In addition, the signal can be 'interlaced' or use 'progressive scan.'
Interlaced
The regular video/TV signal is interlaced, i.e. the even and odd lines are formed as half pictures
in an alternate fashion.
Progressive scan
With progressive scan, each picture is structured (approx. 50/60 times per second depending on
the TV system) as a complete picture, i.e. the even and odd lines are formed together.
Disruptive picture flickering is avoided as is the case with 100 Hz TV devices.
Have the following cables ready:
an antenna cable (1, supplied), a power cable (2, supplied), a Component Video (Y PB PR) cable
(3, red, green, blue jack) or a corresponding video-compatible cinch cable, an audio cable (4,
red/white jack).
1
Remove the antenna cable plug from your TV. Insert it into the
ANTENNA IN jack at the back of the DVD recorder.
2
Insert one end of the supplied antenna cable into the TV
OUT jack at the back of the DVD Recorder and the other end
into the antenna input jack at the back of the TV.
3
Use the Component Video (Y PB PR) cable and connect one end
to the red, blue, green COMPONENT VIDEO Y PB PR
OUT jacks at the back of the DVD Recorder and the other end
to the Component Video In jacks of the TV.
4
If your TV set is equipped with a 'progressive scan' jack, please
use this jack. (Usually called 'Video In Y Cb Cr'. Please see your
TV's instruction manual).
Please note the color order
The colors of the jacks on the DVD Recorder must match those on the
TV (red-red/blue-blue/green-green). If they are not matched properly,
this could cause the color of the picture to be reversed or there could
be no picture at all.
Tip
Connecting the DVD Recorder
Page 25
13
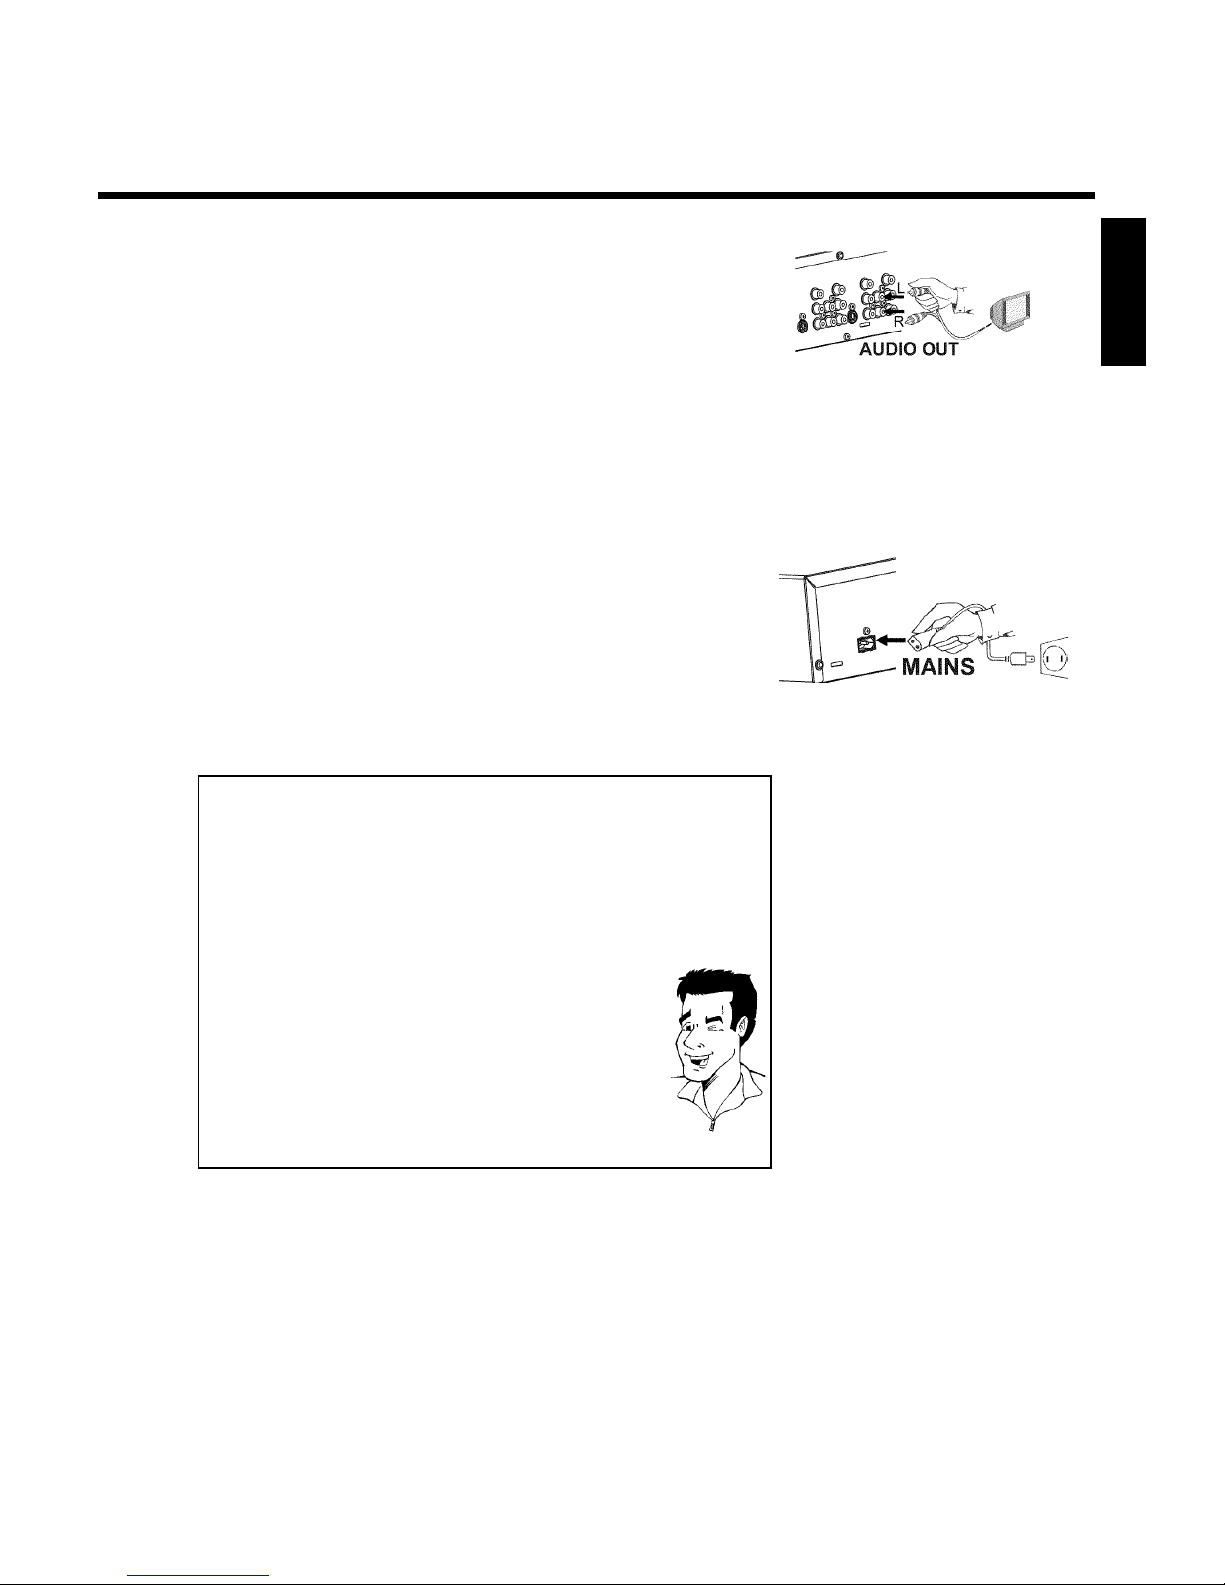
5
Use an audio cable and plug one end into the AUDIO OUT jack
at the back of the DVD Recorder (next to COMPONENT
VIDEO Y PB PR OUT ) and the other into the red/white Audio
In jacks of the TV (usually called Audio in', 'AV in'. Please see
your TV's instruction manual).
6
Switch on the TV.
If necessary, set the TV to the Component Video channel.
If necessary, see the operating instructions for your TV. Or, go
to channel zero on your TV, then keep changing channels down
until you see the DVD Recorder screens (when the Recorder is
on). This is not channel 3 or 4 as it would be if you used only
the cable/antenna connection.
7
Connect the mains jack 4MAINS at the back of the DVD
Recorder with the power supply using the supplied power cable.
The most important features of the DVD Recorder will appear
on the display.
After the initial installation is completed, this function will be
switched off. How you switch on this function again, read in the
chapter 'User preferences' in the section 'Standby'.
8
Press STANDBY-ON m on the recorder. 'IS TV ON?' will
appear on the display.
Switching TV and DVD Recorder to 'Progressive scan'
The factory settings of the DVD Recorder are set to 'Interlaced'. If you
selected the 'Progressive scan' connection during installation, you must
switch the 'Component Video output' of the DVD Recorder and, if
necessary, the 'Component Video input' of the TV to 'Progressive scan.'
Switching the TV
Please select 'Progressive scan' for the Component Video input on the
TV. If necessary, see your TV instruction manual.
If your TV is equipped with separate input jacks for Interlaced and
Progressive, connect the DVD Recorder to the jack that supports
'Progressive scan.'
Switching the DVD Recorder
1 Disconnect the recorder's power cord.
2 Hold down N on the DVD Recorder while reconnecting the
power cord. 'PRO' (progressive scan) will appear on the display.
3 If you want to switch back, repeat steps 1 and 2 . 'PRO'
(progressive scan) will disappear from the display. The DVD
Recorder is switched to 'Interlaced.'
Tip
Then, read the paragraph 'Initial installation' in the chapter 'Installing your DVD recorder'.
ENGLISH
Connecting the DVD Recorder
Page 26
14
Connecting with a SVideo (Y/C) cable
This connecting cable, also known as the SVHS cable, is used to transmit the brightness signal (Y
signal) and color signal (C signal) separately. This mini DIN jack/plug is also called a Hosiden
jack/plug.
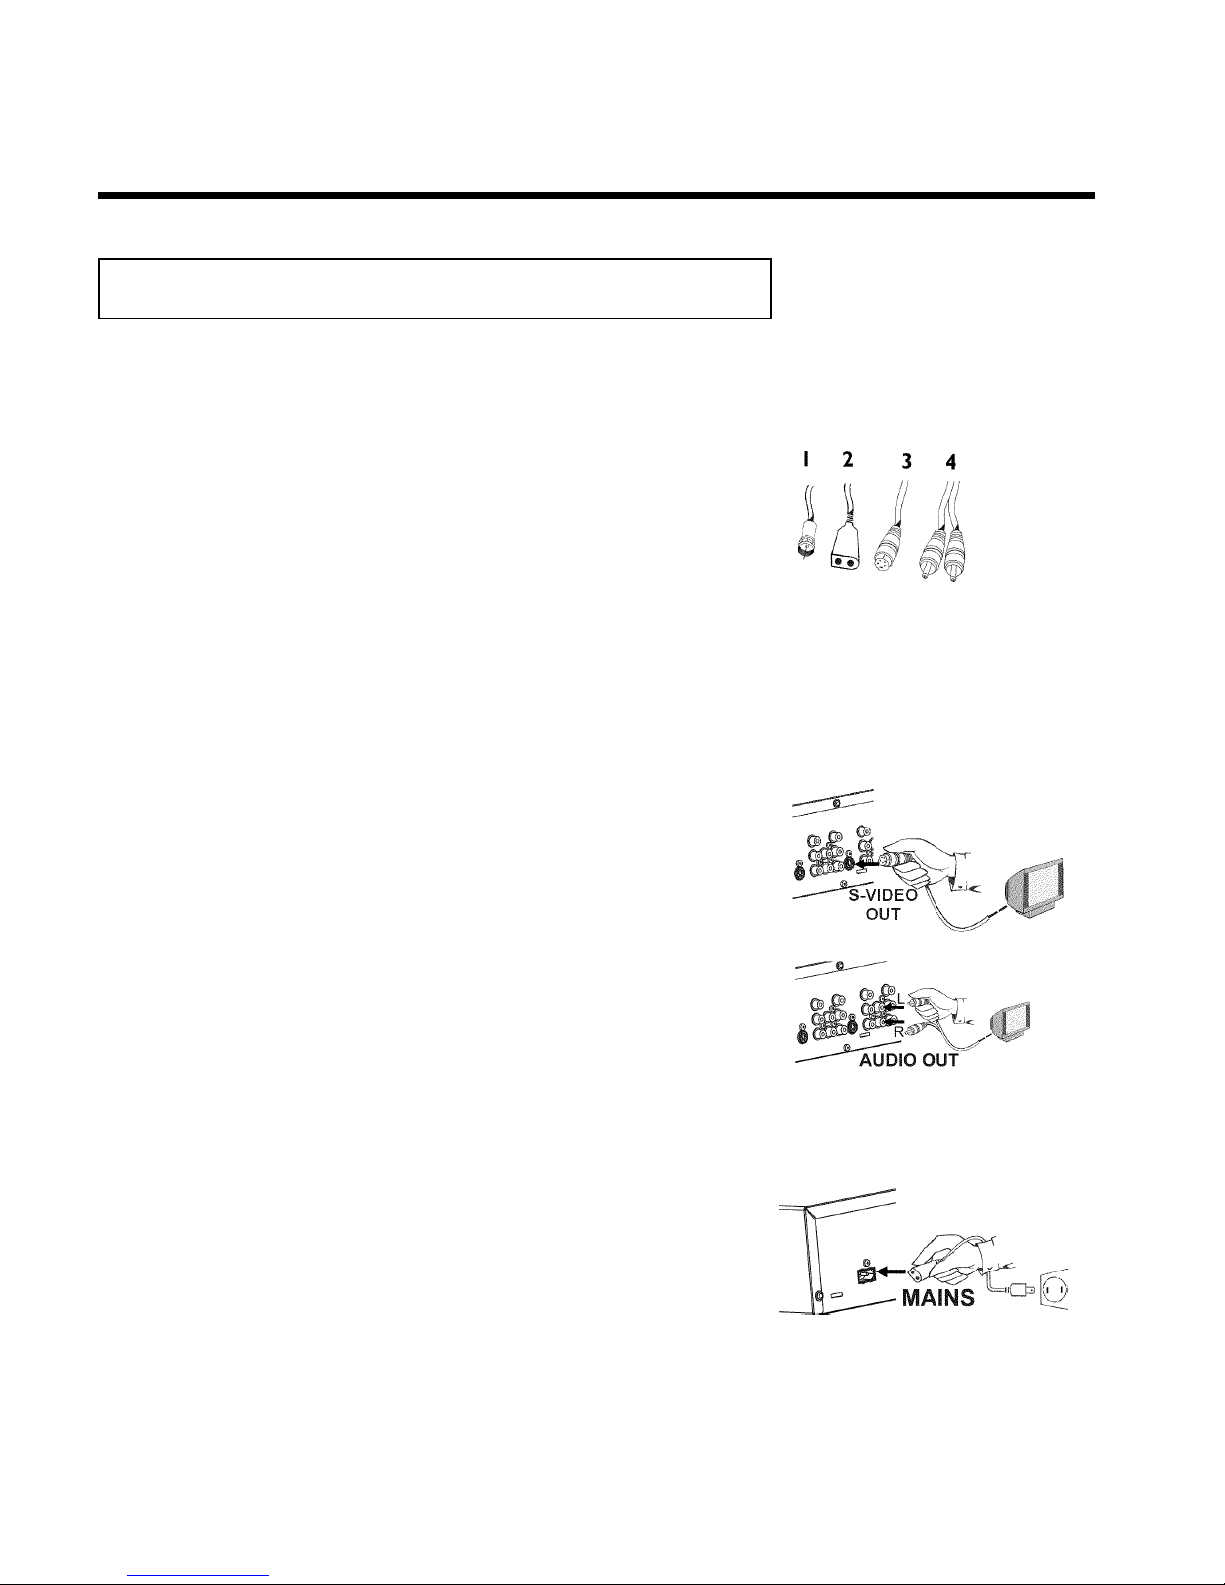
Have the following cables ready:
an antenna cable (1, supplied), a power cable (2, supplied), a S-video (SVHS) cable (3), an audio
cable (4, with red/white ends).
1
Remove the antenna cable plug from your TV. Insert it into the
ANTENNA IN jack at the back of the DVD recorder.
2
Insert one end of the supplied antenna cable into the TV
OUT jack at the back of the DVD Recorder and the other end
into the antenna input jack at the back of the TV.
3
Use a S-Video (SVHS) cable and plug one end into the S-VIDEO
(Y/C) OUT jack at the back of the DVD Recorder and the other
end into the S-Video (SVHS) In jack of the TV (usually called
S-Video in or SVHS in. See your TV's instruction manual).
4
Use an audio (cinch) cable and plug one end into the red/white
cinch jack AUDIO L/R OUT at the back of the DVD Recorder
(next to S-VIDEO (Y/C) OUT ) and the other into the
corresponding red/white audio input jack of the TV (usually called
Audio in', 'AV in'. See your TV's instruction manual).
5
Switch on the TV. Then switch the set to the SVHS input jack or
select the corresponding channel number. For the channel
number, please see your TV's instruction manual.
6
Connect the mains jack 4MAINS at the back of the DVD
Recorder with the power supply using the supplied power cable.
The most important features of the DVD Recorder will appear
on the display.
After the initial installation is completed, this function will be
switched off. How you switch on this function again, read in the
chapter 'User preferences' in the section 'Standby'.
7
Press STANDBY-ON m on the recorder. 'IS TV ON?' will
appear on the display.
Then, read the paragraph 'Initial installation' in the chapter 'Installing your DVD recorder'.
Connecting the DVD Recorder
Page 27
15
Connecting with Video (CVBS) cable
This cable, usually featuring yellow cinch plugs, is used for transmitting the Composite Video
signal (FBAS, CVBS). In this method of transmission the color signal and the brightness signal are
transmitted on the same cable. Under certain circumstances, this may lead to problems with the
picture, such as 'Moiré' patterns.
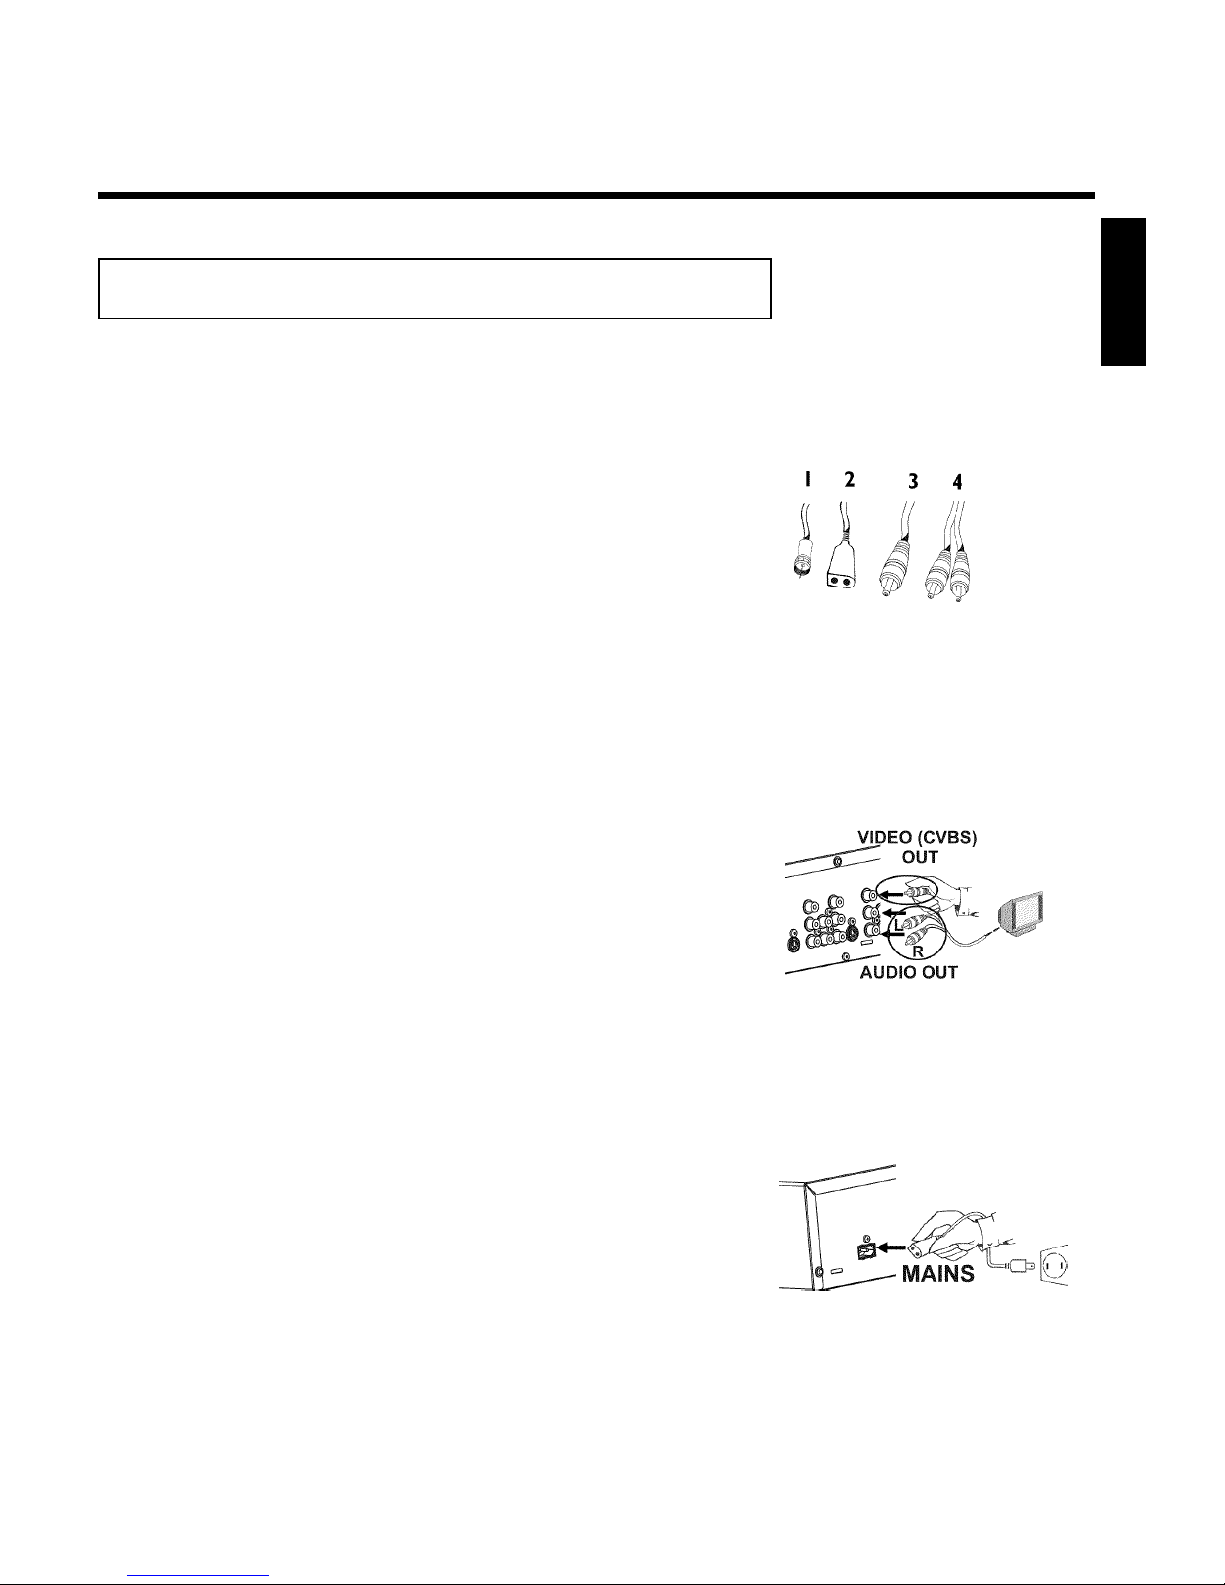
Have the following cables ready:
an antenna cable (1, supplied), a power cable (2, supplied), a video (CVBS) cable (3, with yellow
ends), and an audio cable (4 with red/white ends).
1
Remove the antenna or cable TV signal from your TV. Connect it
to the ANTENNA IN jack at the back of the DVD recorder.
2
Insert one end of the supplied antenna cable into the TV
OUT jack at the back of the DVD Recorder and the other end
into the antenna input jack at the back of the TV.
3
Use a video (CVBS) cable and plug one end into the yellow jack
VIDEO (CVBS) OUT at the back of the DVD Recorder and the
other end into the Video In jack (usually yellow) of the TV
(usually called Video in or AV in. See your TV's instruction
manual).
4
Use an audio (cinch) cable and plug one end into the red/white
cinch jack L AUDIO R OUT at the back of the DVD Recorder
(under to VIDEO (CVBS) ) and the other into the
corresponding red/white audio input jack of the TV (usually called
Audio in', 'AV in'. See your TV's instruction manual).
5
Switch on the TV. Then switch the TV to the Video/Audio input
jack or select the corresponding channel number. For the channel
number, please see your TV's instruction manual.
6
Connect the mains jack 4MAINS at the back of the DVD
Recorder with the power supply using the supplied power cable.
The most important features of the DVD Recorder will appear
on the display.
After the initial installation is completed, this function will be
switched off. How you switch on this function again, read in the
chapter 'User preferences' in the section 'Standby'.
7
Press STANDBY-ON m on the recorder. 'IS TV ON?' will
appear on the display.
Then, read the paragraph 'Initial installation' in the chapter 'Installing your DVD recorder'.
ENGLISH
Connecting the DVD Recorder
Page 28
16
Connecting only with the antenna cable
USE THIS CONNECTIONN IF YOUR TV ONLY HAS A SINGLE ANTENNA IN JACK AND
DOES NOT HAVE ANY AUDIO/VIDEO JACKS. Please observe that you must adjust the TV to
the DVD-Recorder (channel 3 or 4).
Have the following cables ready:
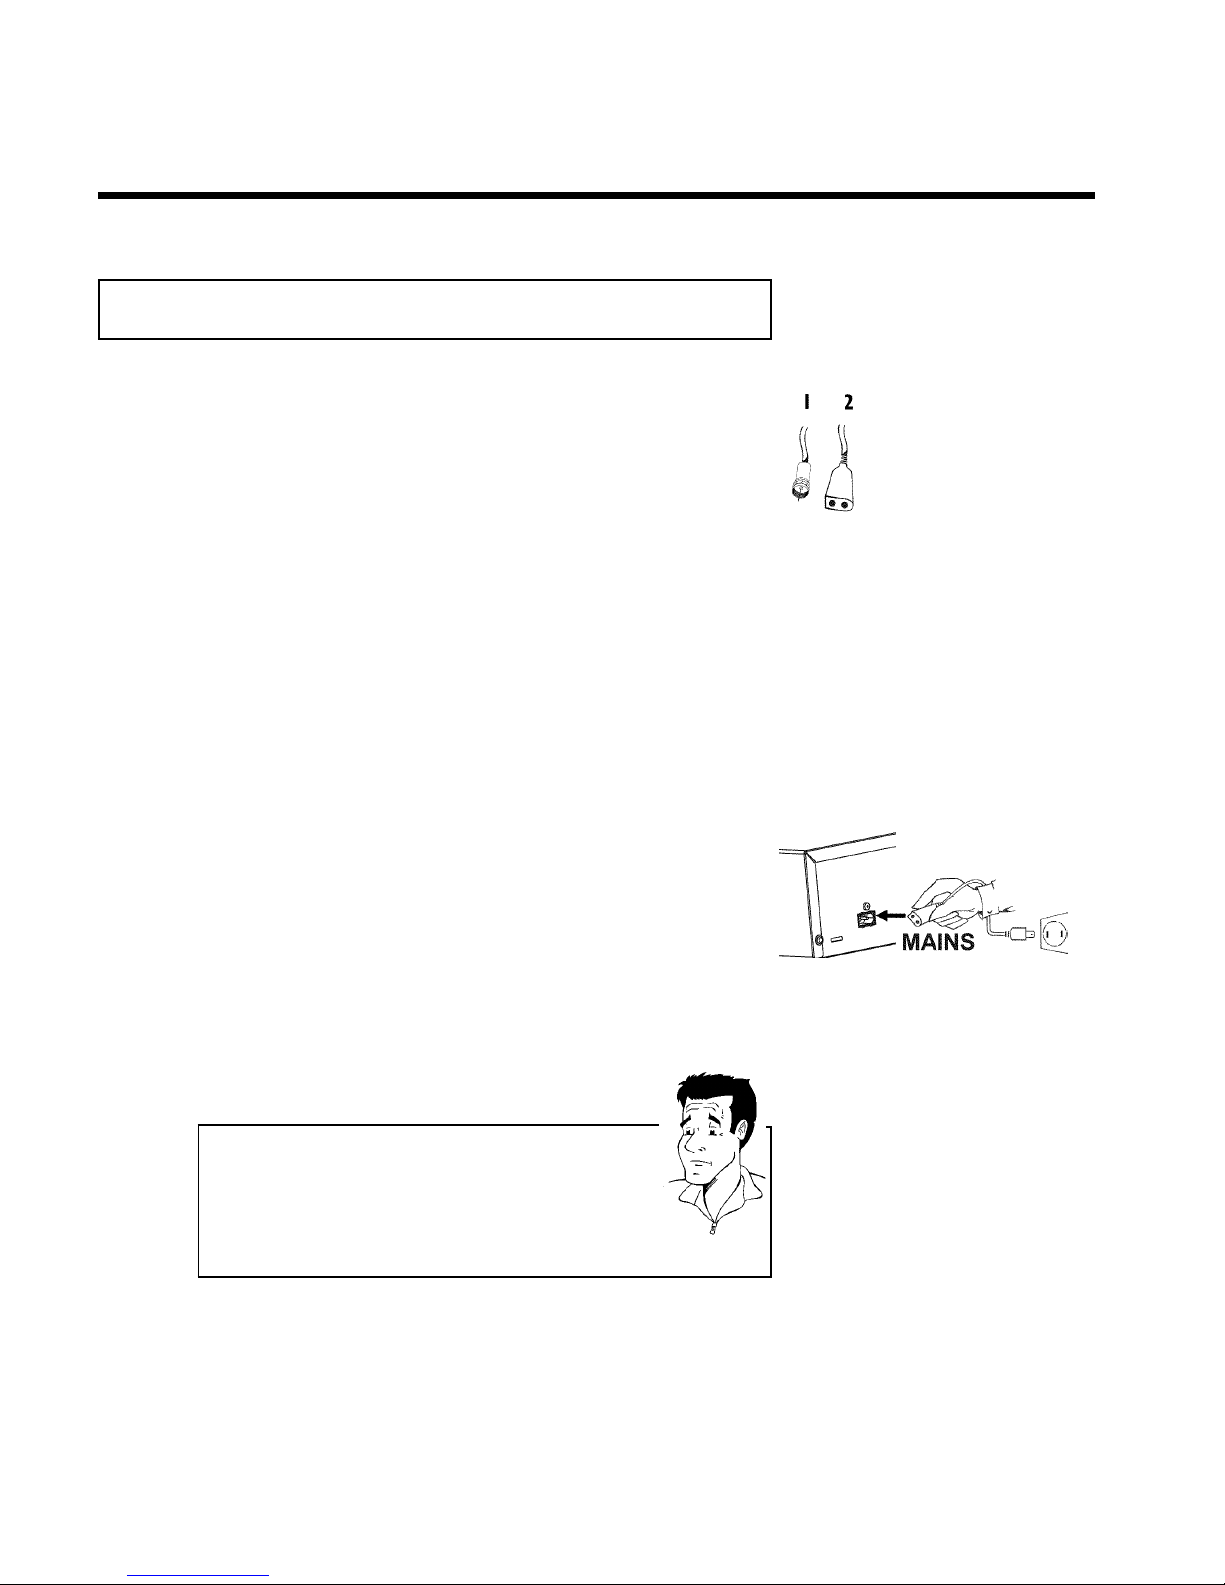
an antenna cable (1, supplied), and a power cable (2, supplied).
1
Switch off your TV.
2
Remove the antenna or Cable TV signal from the antenna input
jack of the TV. Insert it into the ANTENNA IN jack at the back
of the DVD recorder.
3
Insert one end of the supplied antenna cable into the TV
OUT jack at the back of the DVD Recorder and the other end
into the antenna input jack at the back of the TV.
4
Connect the mains jack 4MAINS at the back of the DVD
Recorder with the power supply using the supplied power cable.
The most important features of the DVD Recorder will appear
on the display.
After the initial installation is completed, this function will be
switched off. How you switch on this function again, read in the
chapter 'User preferences' in the section 'Standby'.
5
Press STANDBY-ON m on the recorder. 'IS TV ON?' will
appear on the display.
6
Switch on your TV and select the channel used for DVD/VCR
playback on your TV. Choose between channel 3 or 4.
How do I switch the Recorder between channel 3 and 4?
The factory setting is for channel 3. However, if you would like to
switch to channel 4, proceed as follows:
1 Hold 4 on the remote control while 'IS TV ON?' is displayed.
2 'C04' (channel 4) will appear on the display.
3 If you want to switch back to channel 3, hold 3 .'C03' (channel 3)
will appear on the display.
?
7
Switch your TV to the selected channel (channel 3 or 4). Use
therefor your TV remote control.
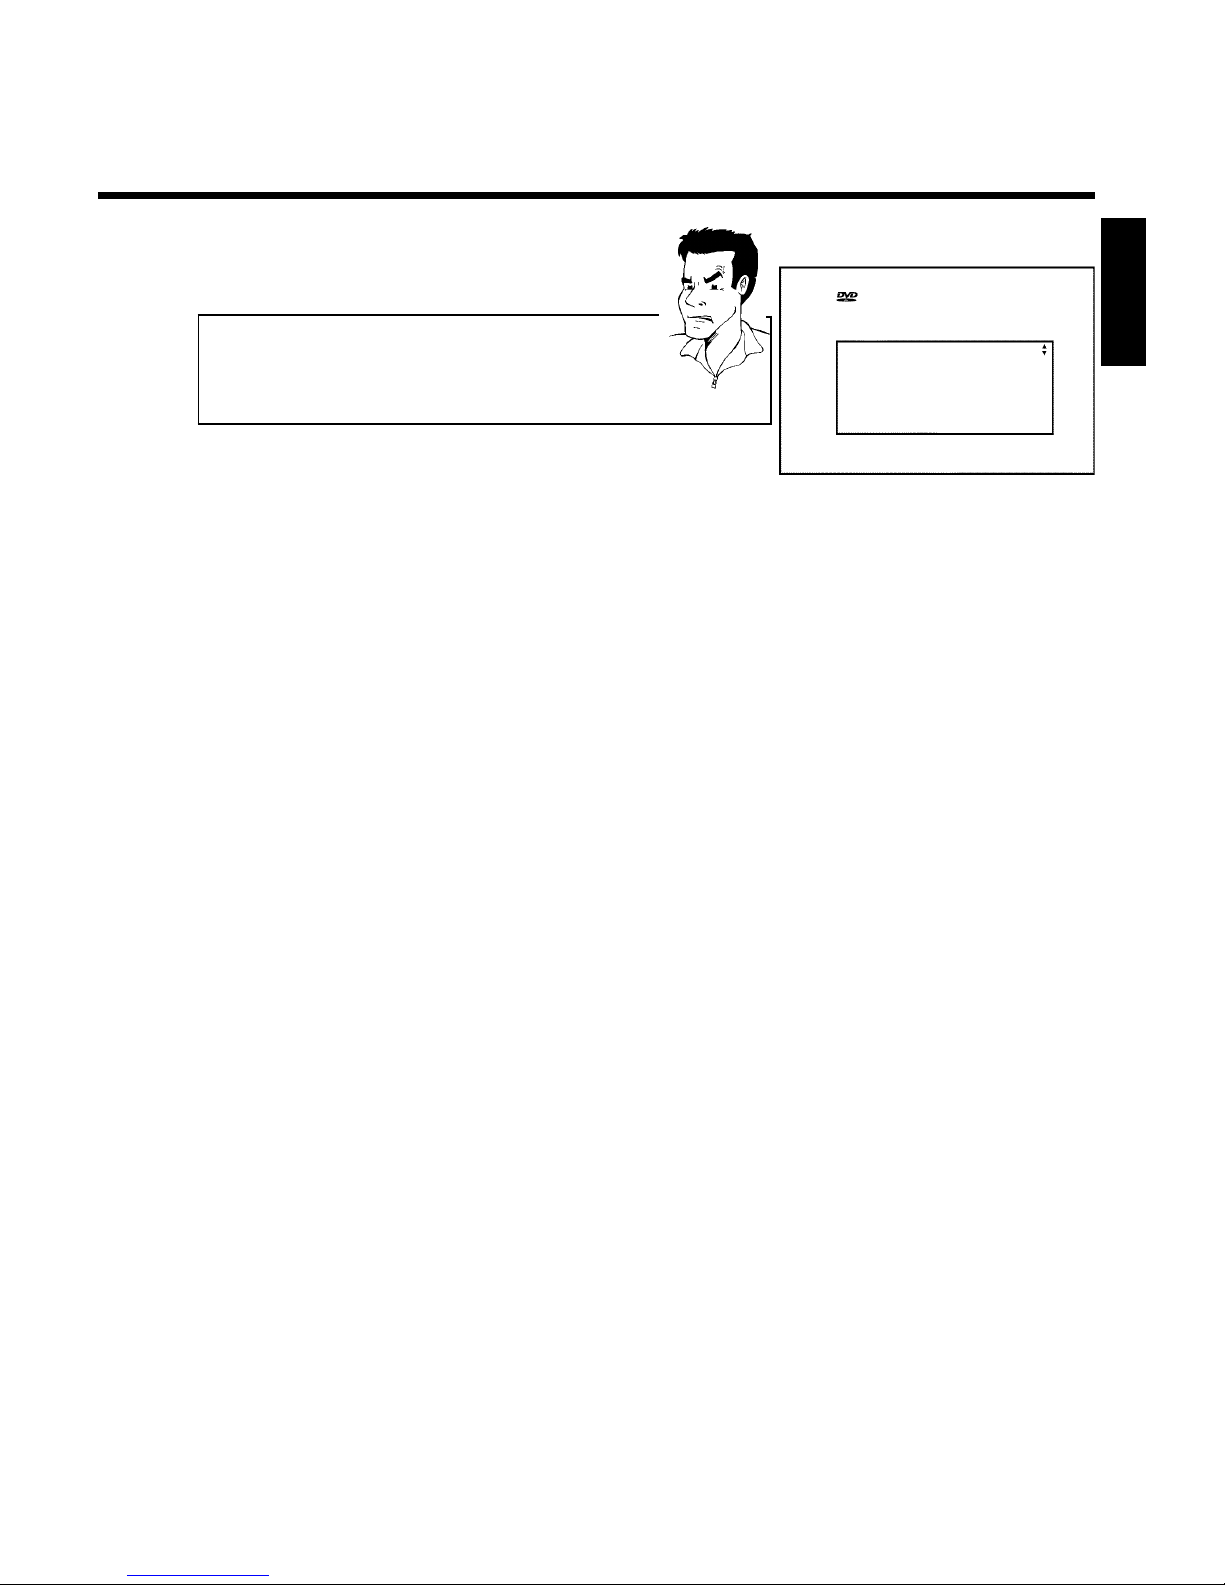
The menu for language selection will appear on the screen.
Connecting the DVD Recorder
Page 29
17
Initial Setup
Menu Language
English
Español
Français
Press OK to continue
a I don't see a menu for language selection
b Check the cable connections.
b Is 'DVDR' (DVD Recorder operation) lit up in the display?
If not, press the TV/DVD button until 'DVDR' is lit.
b Change between channel 3 and 4 on the TV.
Problem
8
This TV channel number must be used in the future for DVD
recorder playback.
Then, read the paragraph 'Initial installation' in the chapter 'Installing your DVD recorder'.
ENGLISH
Connecting the DVD Recorder
Page 30
18
CConnecting additional devices
You can connect additional devices such as decoders, satellite receivers, camcorders, etc. to the
S-VIDEO (Y/C) , VIDEO (CVBS) , COMPONENT VIDEO Y PB PR and the L AUDIO R ,
AUDIO jacks on the recorder. Switching between jack S-VIDEO (Y/C) and VIDEO (CVBS) is
done automatically.
The DVD recorder must be connected directly to the TV set ( S-VIDEO (Y/C) OUT ,
VIDEO (CVBS) OUT ,or COMPONENT VIDEO Y PB PR OUT socket directly to the TV
set). If there is a video recorder in between the picture quality may be poor because of the copy
protection system built into the DVD recorder.
Can I also connect other devices with 'Progressive scan'?
The COMPONENT VIDEO Y PB PR jacks are only used for
'interlaced' signals. Signals using progressive scan cannot be processed by
the DVD recorder.
?
Connecting an additional video recorder,
DVD player
You can also connect a video recorder or a DVD player to the input jacks. Please use the
S-VIDEO (Y/C) jack and the L AUDIO R jacks for SVHS video recorders.
Please be aware
Most pre-recorded video cassettes and DVDs are copy protected. When you attempt to copy
them, the 'COPY PROT' message will appear in the DVD Recorder display.
a When copying video cassettes 'NO SIGNAL' appears in the
DVD Recorder display
b Check whether the cable plugs fit correctly.
b If the recording is made from a video recorder, adjust the "tracking"
on the video recorder.
b In case of bad, non-standard video input signals, the DVD Recorder
may not be able to detect the signal.
a When copying from DVDs or precopied video cassettes, the
picture is grainy and the brightness fluctuates.
b This occurs when you attempt to copy copy-protected DVDs or
video cassettes. Although the picture on the TV is OK, the recording
is distorted on a DVD+R(W). Copy-protected DVDs and video
cassettes cannot be copied without these disruptions.
Problem
Connecting additional devices
Page 31

19
Connecting the satellite receiver using a
cinch or an Svideo cable
You can connect additional devices such as decoders, satellite receivers, camcorders, and the like
to the S-VIDEO (Y/C) or VIDEO (CVBS) input sockets and the L AUDIO R audio sockets.
Switching between sockets S-VIDEO (Y/C) and VIDEO (CVBS) is done automatically.
The aerial cable must be connected to the satellite receiver and the DVD recorder.
Connect the DVD recorder directly to the TV set (cable from the S-VIDEO (Y/C) OUT ,
VIDEO (CVBS) OUT output sockets is directly connected to the TV set). If there is a video
recorder or an additional device in between, the picture quality may be poor because of the
copy protection system built into the DVD recorder.
Connecting additional devices only via
aerial cable
If you want to connect additional devices (e.g. satellite receiver...) only via aerial cable, please
observe the following:
The DVD-Recorder must be connected directly to the TV set. If there is a video recorder or an
additional device in between, the picture quality may be poor because of the copy protection
system built into the DVD-Recorder.
The additional device (satellite receiver) must be connected before the DVD recorder (additional
device - DVD recorder - TV set). Only the TV set must be connected to the TV OUT jack.
•) If there is interference in the picture when the satellite receiver is switched on, a TV
broadcaster may be transmitting on the same channel or a channel very close to that of the
satellite receiver. (e.g.: TV broadcaster on channel 3, satellite receiver also on channel 3). In this
case, change the channel of the satellite receiver. Consult the instruction manual of the satellite
receiver.
You must also store this channel on the DVD recorder to be able to record TV programmes
from the satellite receiver.
•) Switch on the additional device during the installation of the DVD recorder. During the
automatic channel search, the channel on which the additional device is transmitting will be
stored as a TV channel.
ENGLISH
Connecting additional devices
Page 32
20
Connecting a camcorder to the front jacks
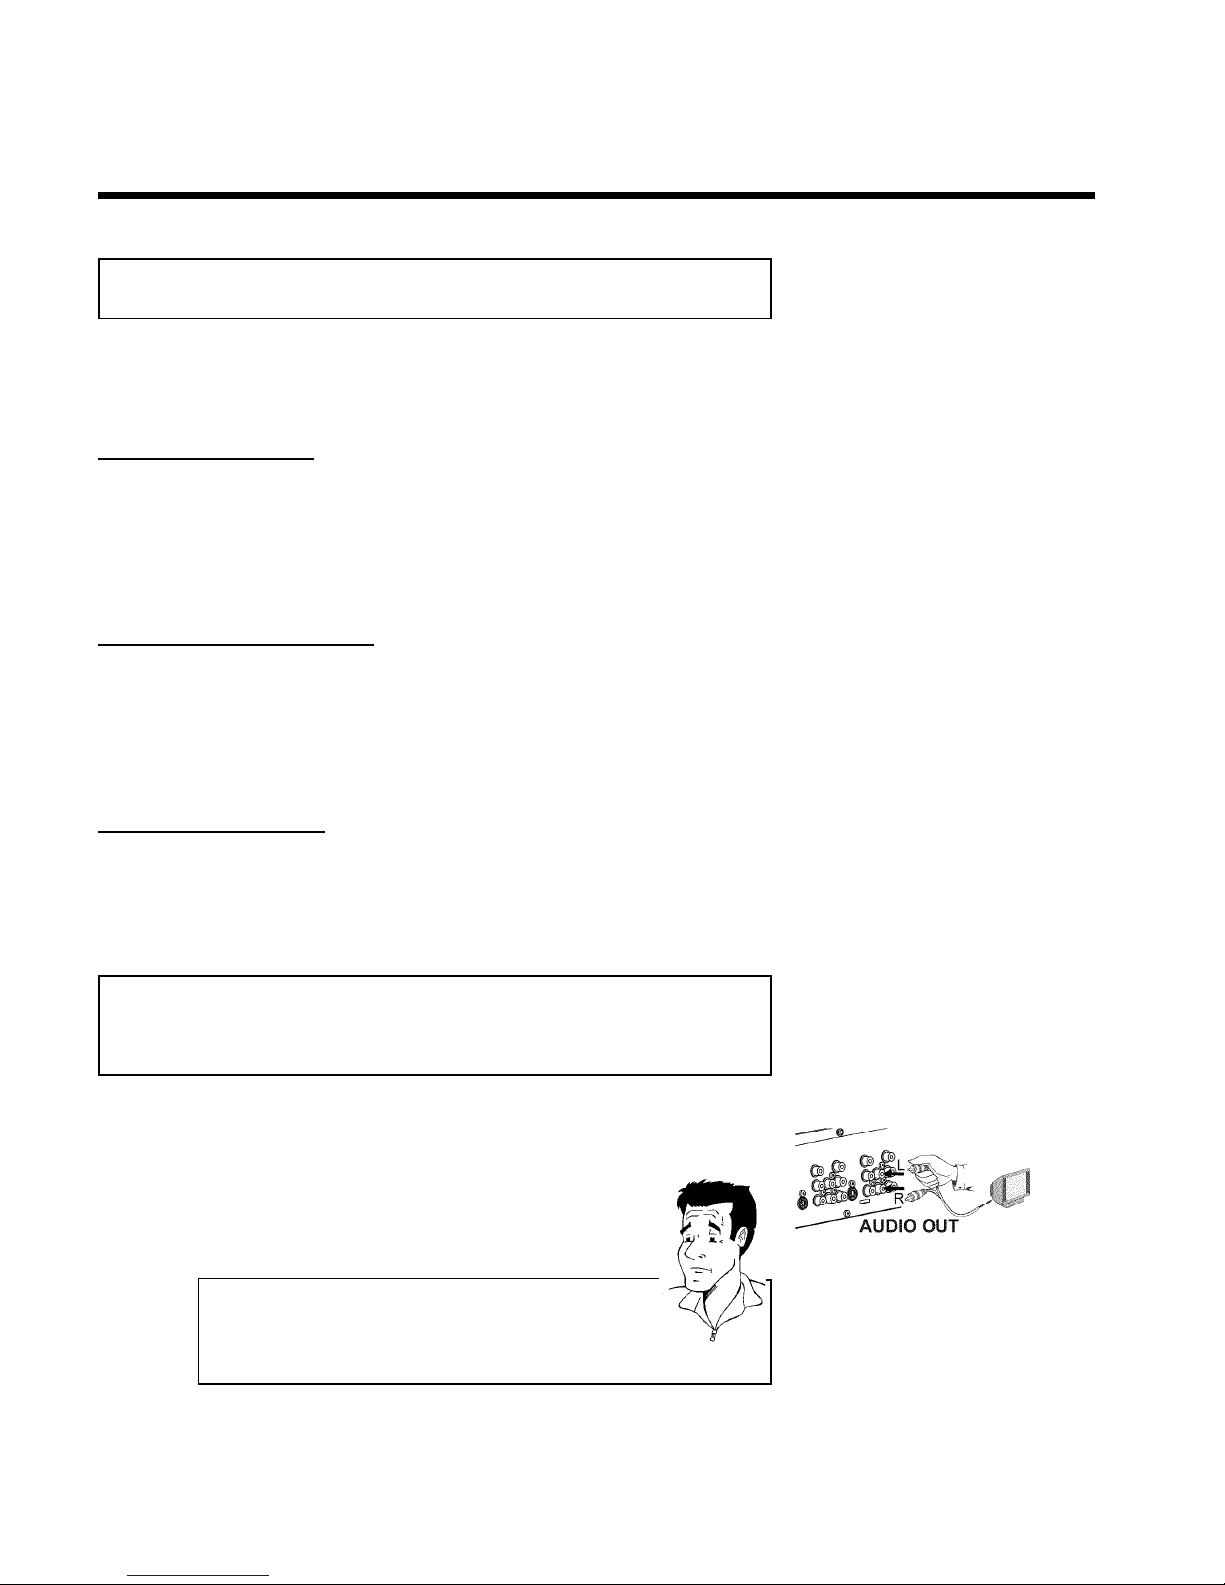
The front video and audio jacks can be used to easily connect a camcorder to the DVD
recorder. These jacks are behind the door in the lower right corner of the front panel.
Best Picture Quality
If you are using a Digital Video or Digital 8 camcorder, connect the DV IN IN jack of the DVD
Recorder to the corresponding DV OUT jack on the camcorder.
When films are transferred, the original recording date and time are stored as DVD subtitles.
During playback, you can display this data on the TV screen by using the '
E
' function (Subtitle).
Choose 'CAM2' as a programme number for this input jack.
Very good Picture Quality
If you are using a Hi8 or S-VHS(C) camcorder, connect the S-VIDEO in jack of the DVD
Recorder to the corresponding S-video out jack on the camcorder.
You must also connect the AUDIO left/right in jacks of the DVD Recorder to the audio out
jacks on the camcorder.
Choose 'CAM1' as a programme number for this input jack.
Good Picture Quality
If your camcorder only uses a video output (Composite Video or CVBS), connect the
VIDEO input of the DVD Recorder to the corresponding output jack on the camcorder.
You must also connect the AUDIO left/right in jacks of the DVD Recorder to the audio out
jacks on the camcorder.
Choose 'CAM1' as a programme number for this input jack.
Connecting audio devices to analog
audio jacks
There two analog audio output jacks L AUDIO R OUT (audio signal output left/right) and two
audio input jacks L AUDIO R (audio input left/right) on the back of the DVD Recorder.
These can be used to connect the following devices:
•) A receiver with Dolby Surround Pro Logic
•) A receiver with twochannel analog stereo
Can I use the 'Phono input' of my amplifier?
This amplifier jack (input) should only be used for record players without
a pre-amplifier. Do not use this input jack to connect the DVD
recorder.
This could damage the DVD Recorder or the amplifier.
?
Connecting additional devices
Page 33
21
Connecting audio devices to the digital
audio jack
The rear of the DVD Recorder features a digital DIGITAL AUDIO OUT out jack for a coaxial
cable.
It can be used to connect the following devices:
•) an Audio/Video receiver or an Audio/Video amplifier with a digital multichannel
sound decoder
•) a receiver with twochannel digital stereo (PCM)
Digital multichannel sound
Digital multi-channel sound provides maximum sound quality.
Consult the instruction manual of your receiver to find out which audio
formats it supports.
?
a A loud distorted sound is coming from my speakers
b The receiver does not support the digital audio format of the DVD
recorder. The audio format of the inserted DVD is displayed in the
display panel when another language is switched on. Playback using
6-channel digital surround sound is only possible when the receiver
has a digital multi-channel sound decoder.
Problem
ENGLISH
Connecting additional devices
Page 34
22
DInstalling your DVD recorder
Initial installation
After you have successfully connected the DVD Recorder and other devices to your TV (as
described in the previous chapter), this chapter will help you start the initial installation. The
DVD Recorder automatically seeks and stores all available TV channels.
Connecting additional devices
If you have connected additional devices (satellite receiver,...) via the
antenna cable, switch them on now. The automatic channel search will
recognize them and save them.
No antenna connected
If you are only using the DVD Recorder as a playback device or you
only have a satellite receiver connected, you still need to perform the
initial installation. This is necessary so the basic settings can be saved
correctly. After the initial installation is completed once, you can use the
DVD Recorder normally.
Tip
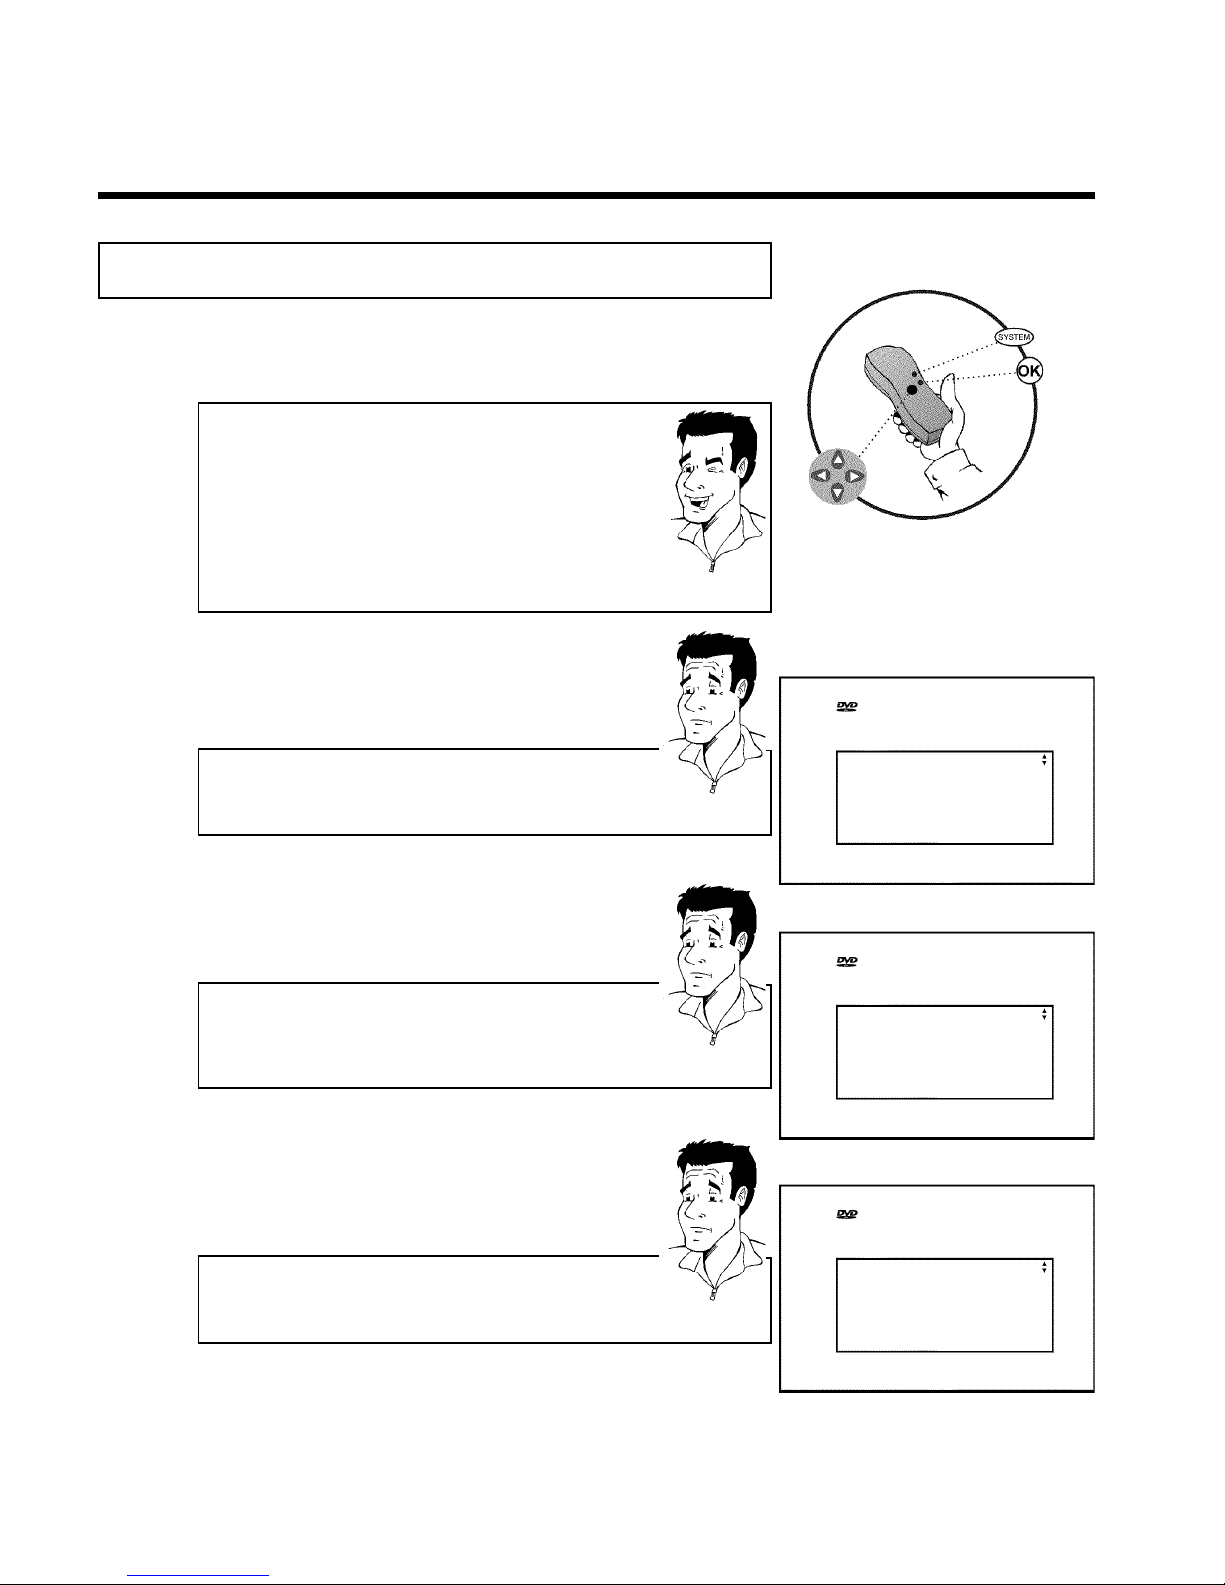
Initial Setup
Menu Language
English
Español
Français
Press OK to continue
1
Select the desired language for the on-screen menu by pressing
CH- B or CH+ A .
What is an onscreen menu?
The multi-language on-screen menu takes the mystery out of using your
new DVD recorder. All settings and/or functions are displayed on your
TV screen in one of the available languages (English, French, or Spanish).
?
2
Confirm with OK .
Initial Setup
Audio Language
English
Español
Français
Português
Italiano
Press OK to continue
3
Select the desired audio language using CH- B or CH+ A .
What is the audio language?
The DVD audio will play in the selected language if it is available. If this
language is not available on the DVD, the audio will play in the first
language on the DVD. The DVD disc menu will appear in the selected
language if it is available on the disc.
?
4
Confirm with OK .
Initial Setup
Subtitle Language
English
Español
Français
Português
Italiano
Press OK to continue
5
Select the desired language for the subtitles by pressing
CH- B or CH+ A .
What is the language of the subtitles?
DVD subtitles will be in the selected language if it is available. If this
language is not available, subtitles will be in the first language on the
DVD.
?
6
Confirm with OK .
Installing your DVD recorder
Page 35
23
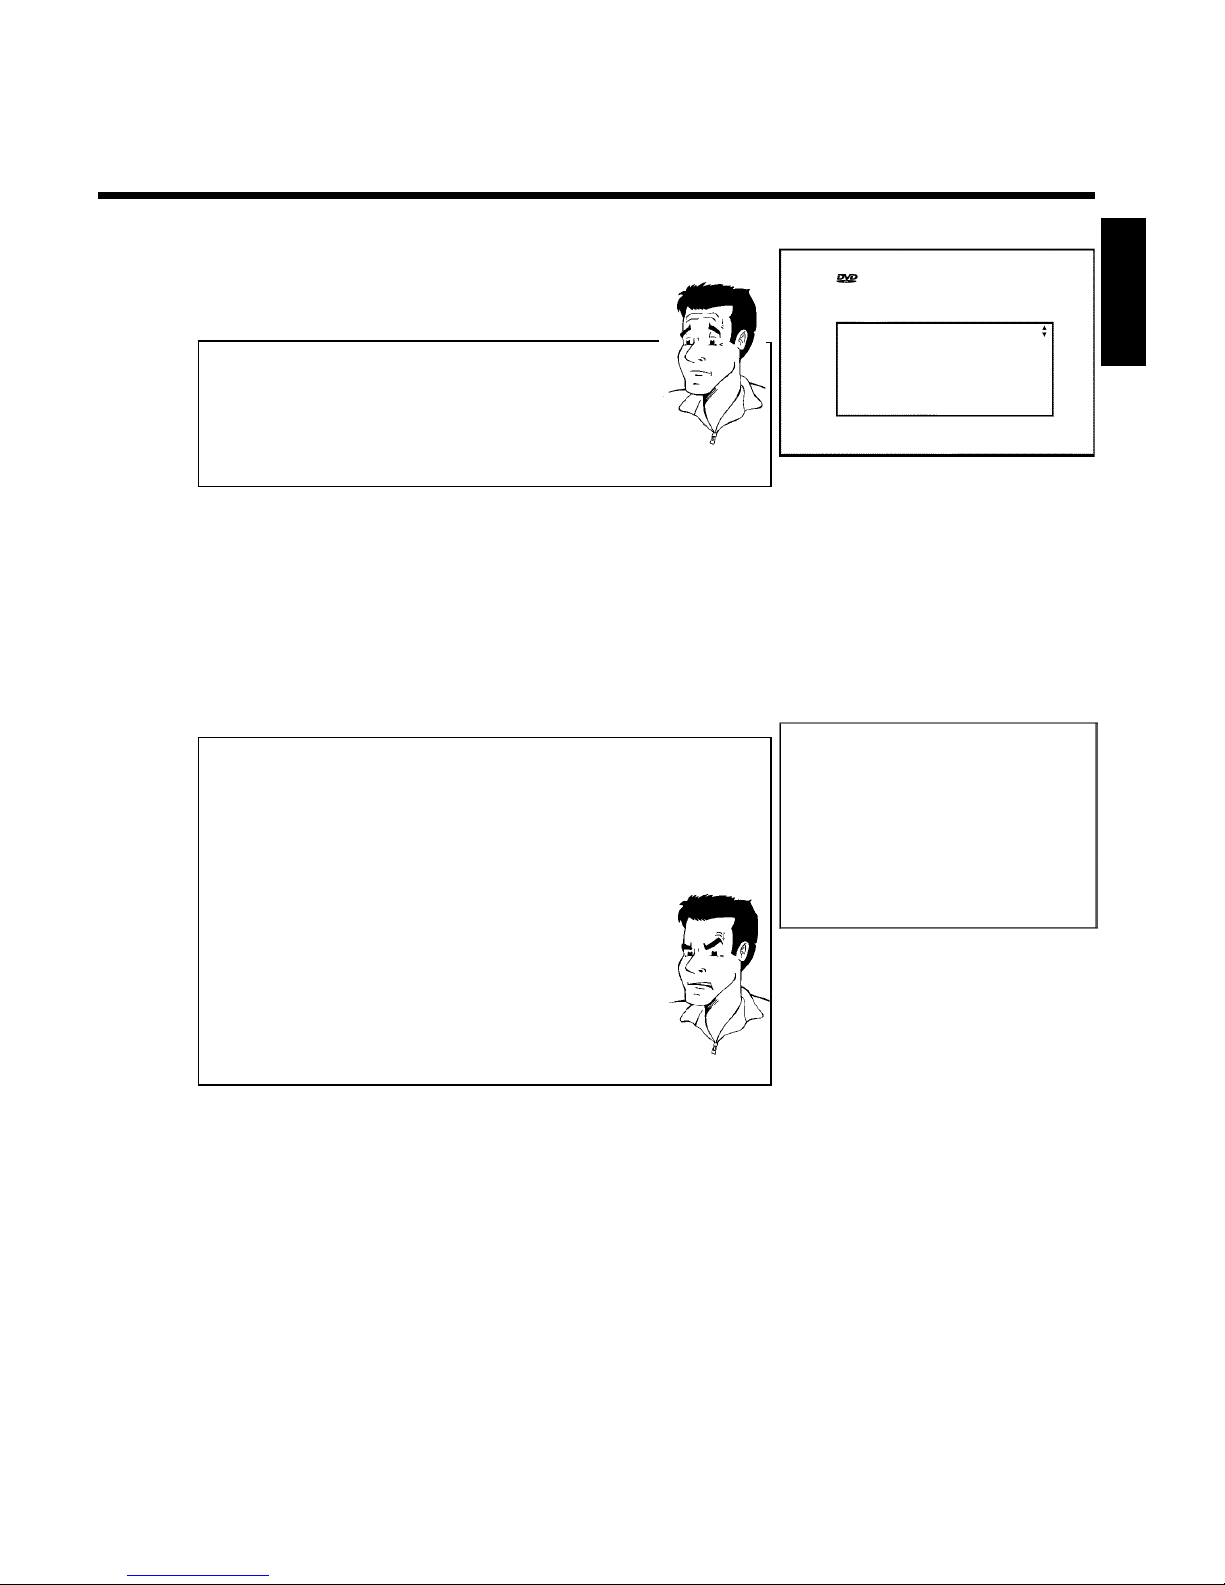
Initial Setup
TV Shape
4:3 letterbox
4:3 panscan
16:9
Press OK to continue
7
Select the desired screen format with CH- B or CH+ A . This
setting only functions if you have inserted a DVD recorded in this
format.
Which screen formats can I choose?
'4:3 letterbox' for a wide-screen display (theatrical format) with black
bars at the top and bottom of the picture.
'4:3 panscan' for a full-height picture with the sides trimmed to fill you
TV screen.
'16:9' for wide-screen TV (16:9) aspect ratio
?
8
Confirm with OK .
9
After you connect the antenna (or cable TV, satellite receiver,
etc.) to the DVD recorder, press OK .
Make sure the cable TV signal is connected securely to the
Antenna jack on the rear of the DVD Recorder.
The automatic TV channel search starts. 'WAIT' will appear on the
display.
Installation
Auto Ch. Programming
Searching for TV channels
000 Channels found
h______________
Please wait
a During the channel search, if the DVD Recorder does not
find any TV channels:
b Select another channel on the TV. Do you see that channel on the TV
screen?
If not, check the cable connection of the antenna (antenna jack)
between the DVD Recorder and TV.
b Please have patience.
The DVD Recorder searches the entire frequency range in order to
find and save the largest possible number of TV channels.
b If no antenna is connected, complete the basic settings and then, if
desired, start the automatic channel search (see section 'Automatic TV
channel search').
a The DVD Recorder finds very few/no channels during the
search.
b It is possible that the automatic switching between antenna/cable does
not properly detect your TV signal. Read the section about how to
switch manually.
Problem
10
Wait until all available TV channels have been found. This can
take several minutes.
11
As soon as the automatic TV channel search is completed, 'Auto
ch. search complete' will appear on the TV screen along with
the number of channels found.
12
To remove the menus, press the SYSTEM-MENU button on
the Recorder's remote control.
The initial installation is now complete.
ENGLISH
Installing your DVD recorder
Page 36
24
Automatic TV channel search
During installation, all available TV channels are searched for and saved. If the channel
assignments of your cable or satellite TV provider change or if you are reinstalling the DVD
recorder, e.g. after moving, you can start this procedure again. This will replace the TV channels
already saved with the new ones.
1
Turn on your TV. Select the channel number for the DVD
Recorder (channel 3 or 4 or the Audio/Video In channel).
2
Turn on the DVD Recorder by pressing STANDBY-ON m .
3
Press SYSTEM-MENU on the remote control. The menu bar
will appear at the top of the TV screen.
4
Select 'A' using D or C .
5
Press CH- B continuously to select the line 'Installation'. (It is
on the second screen of menus.) Confirm with C .
6
Select line 'Auto Ch. Programming' using CH- B or
CH+ A .
7
Press C . The automatic TV channel search starts. This allows
the DVD Recorder to save all available TV channels. This
procedure may take several minutes.
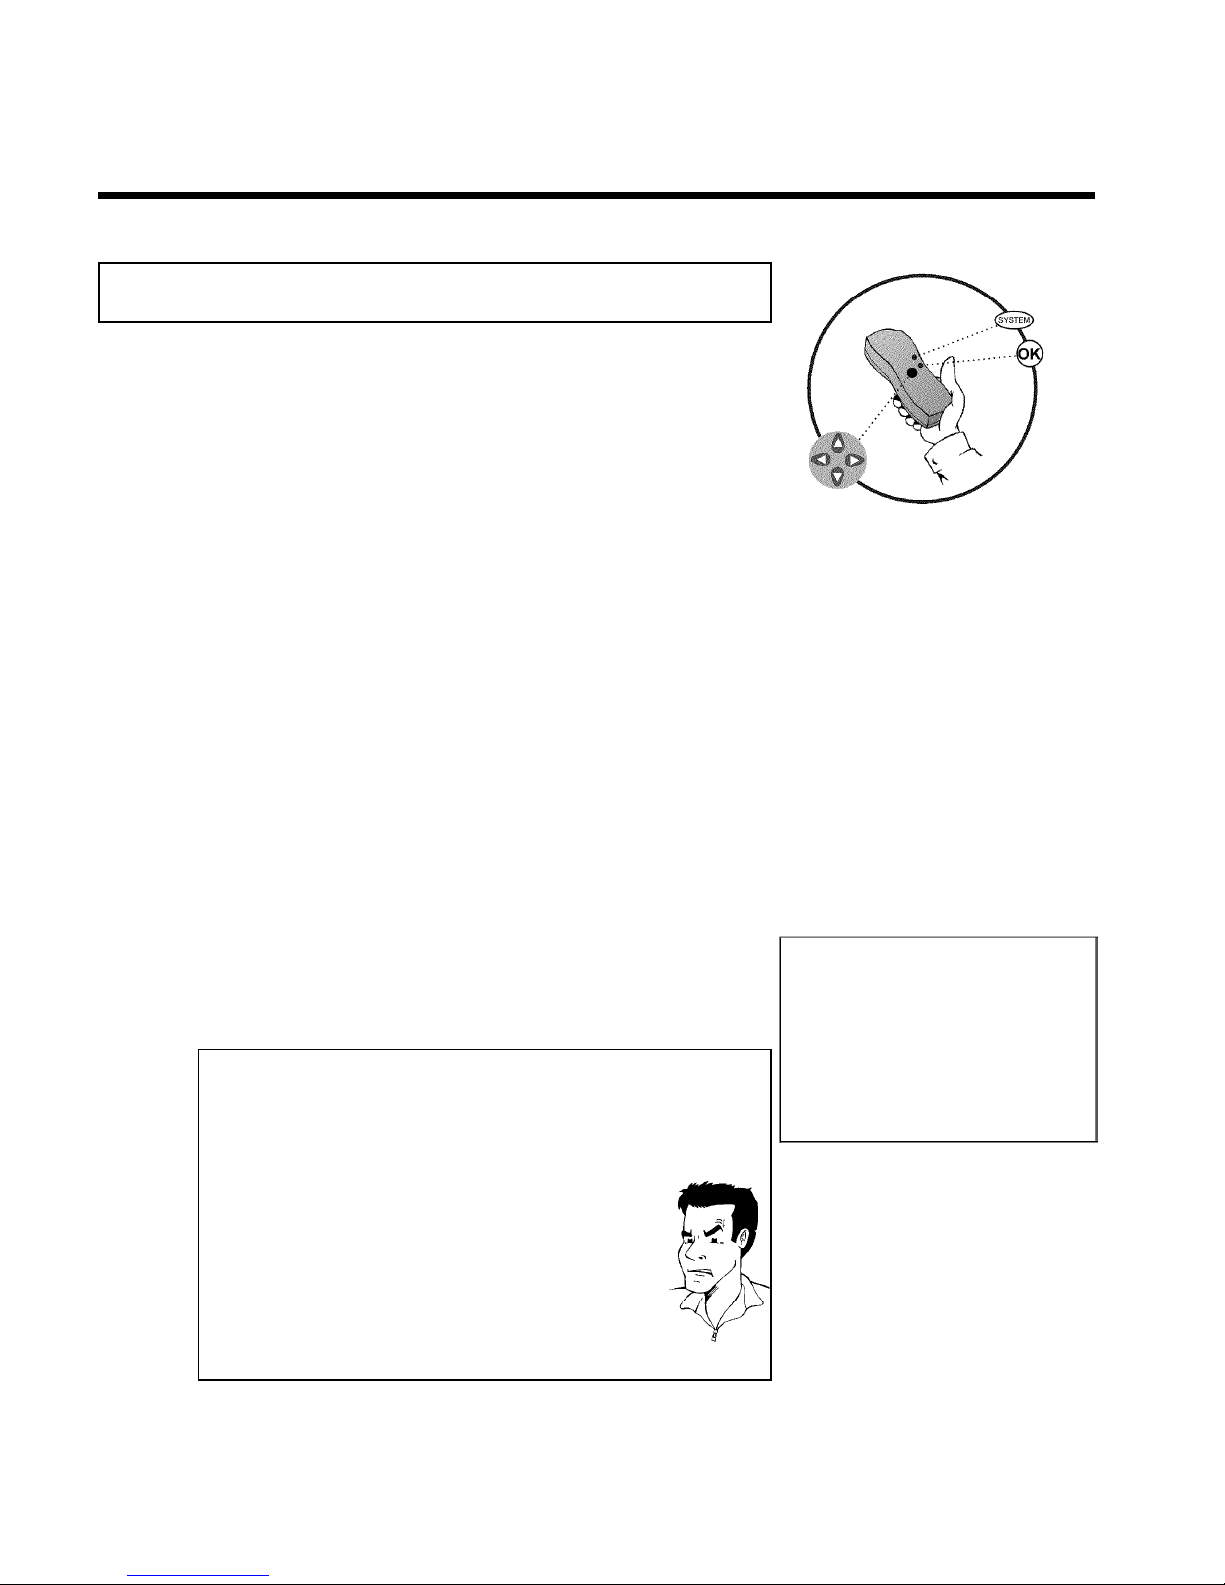
Installation
Auto Ch. Programming
Searching for TV channels
000 Channels found
h______________
Please wait
8
When the channel search is completed, 'Auto ch. search
complete' will appear on the TV screen.
9
Press SYSTEM-MENU repeatedly to remove all the menus
from the screen.
a Very few TV channels were found
b During 'Automatic channel search' the DVD Recorder detects
whether an antenna or a cable TV signal is connected. If you have
connected a cable TV signal but found very few TV channels, you
must search the channels manually.
1 To do so, select 'Cable/Antenna' instead of line 'Auto Ch.
Programming' in step 6 and confirm with C .
2 If you select 'Cable', channels 1-125 will be available.
If you select 'Anten.', channels 2-69 will be available.
Select your type of connection by pressing C repeatedly:
'Anten.', 'Cable'or'Auto.' automatically detects which one you
have.
3 Confirm the setting with OK .
4 Press SYSTEM-MENU to go to the next menu. Press OK to
start channel search as prompted by the on-screen message. When
the channel search is complete, press SYSTEM-MENU repeatedly
to remove all the menus.
Problem
You can read about how to search for a TV channel manually in the following section 'Adding
and clearing TV channels manually'.
Installing your DVD recorder
Page 37
25
Adding and deleting TV channels manually
With this function you can delete/switch off TV channels on which reception is not possible.
They will be skipped when the CH+ A and CH- B buttons are selected.
1
Turn on your TV. If required, select the TV's Audio/Video In (or
channel 3 or 4).
2
Press STANDBY m to turn on the DVD recorder. Press the
SYSTEM-MENU button on the remote control. The menu bar
will appear at the top of the screen.
3
Select 'A' using D or C .
4
Press CH- B repeatedly to select 'Installation' and then press
C .
5
Select line 'Add/Delete Channels' using CH- B or
CH+ A the press C .
Installation
Add/Delete Channels
...
• Channel 001 Add
Channel 002 Add
Channel 003 Delete
Channel 004 Delete
Channel 005 Delete
Channel 006 Delete
...
To exit press
SYSTEM MENU
6
Using CH- B or CH+ A select the TV channel that you want
to delete or add.
7
Press C or D to choose 'Add'or'Delete'.
8
Repeat steps 6 to 7 until you have added/deleted all the TV
channels you want.
9
To save your channel selections, press OK .
10
To remove the menus, press SYSTEM-MENU repeatedly.
ENGLISH
Installing your DVD recorder
Page 38
26
Setting the language
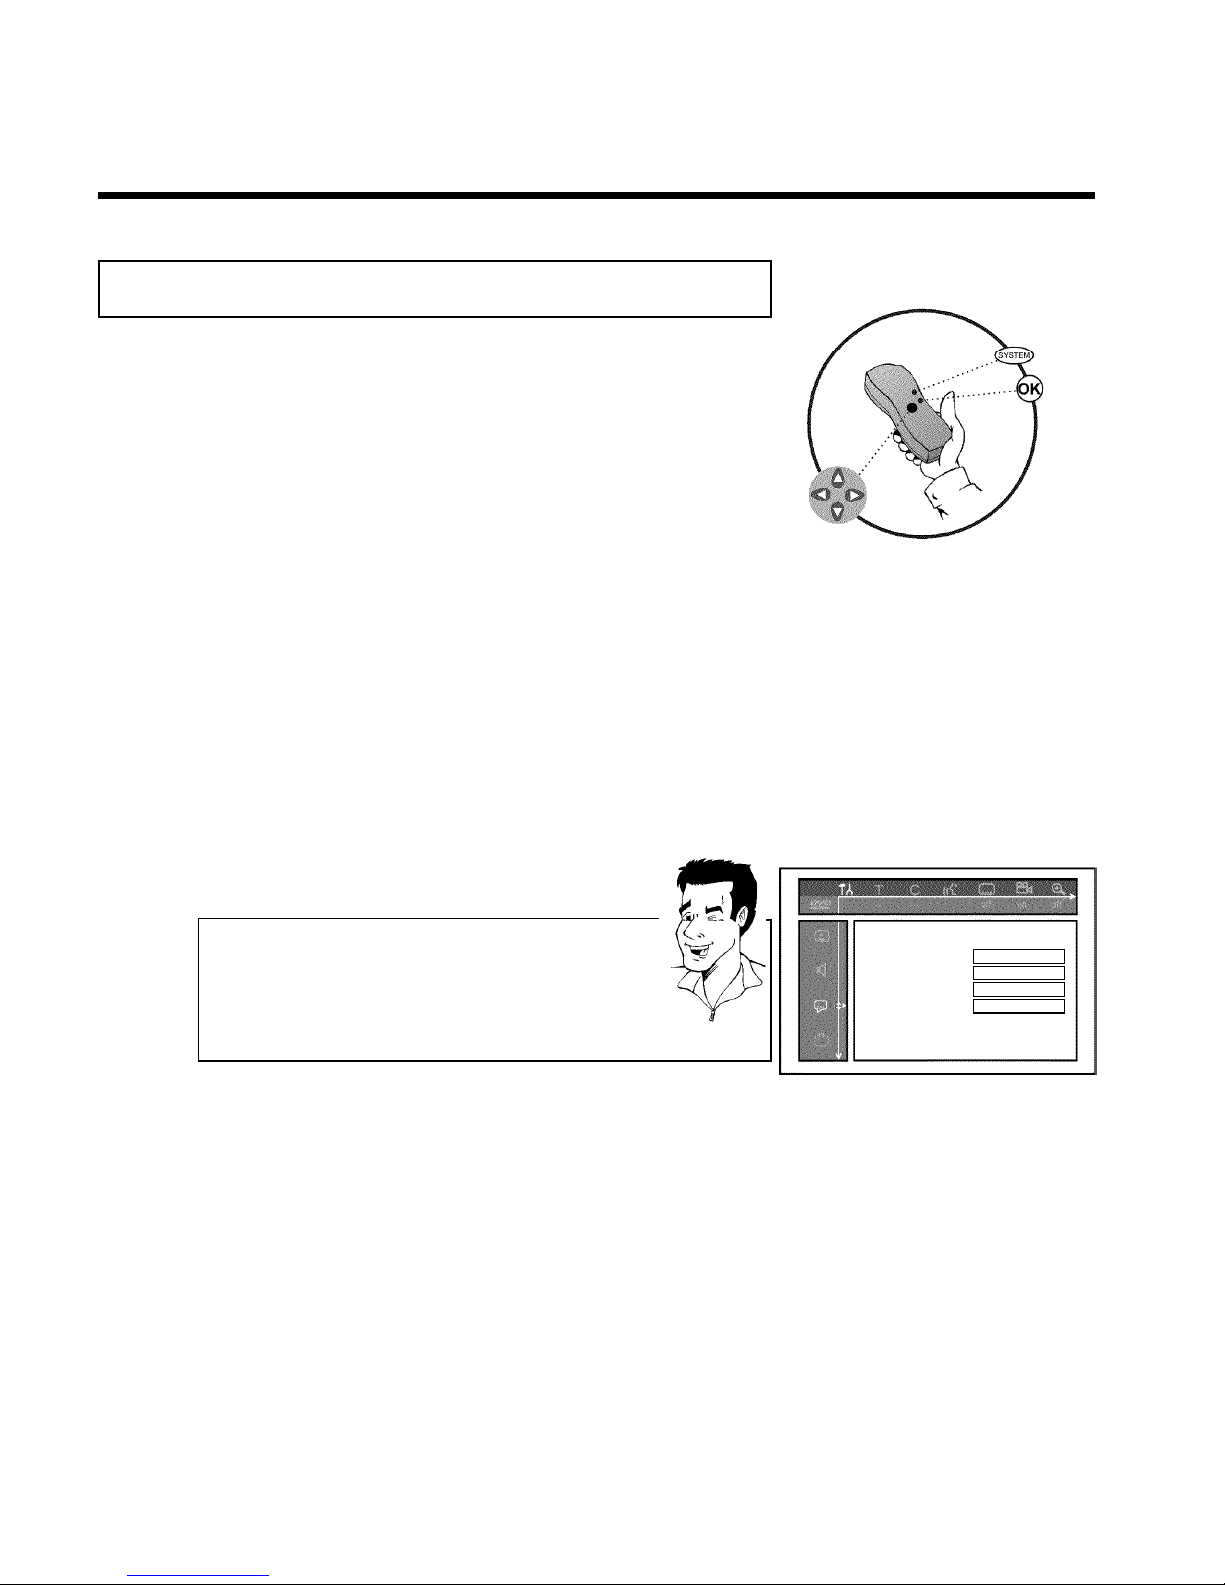
You can select the language for subtitles and audio for DVD playback. Please observe that with
some DVDs, you can change the audio language and/or subtitle language only via the DVD disc
menu.
Moreover, when recording the sound of a TV channel, you can switch between stereo and an
additional language (SAP - Secondary Audio Program). See the following section on 'Switching
audio recording (stereo, SAP)'.
Plus, you have the option of setting one of the displayed languages for the recorder's on-screen
menu. However, the DVD Recorder will only display text in English, regardless of this setting.
1
Turn on your TV. If required, select the channel number for the
DVD Recorder (channel 3 or 4).
2
Turn on the DVD Recorder by pressing STANDBY-ON m .
3
Press SYSTEM-MENU on the remote control. The menu bar
will appear.
4
Select 'A' using D or C .
5
Select the line 'Language' using CH- B or CH+ A and
confirm with C .
Language
Playback audio English
Recording audio Stereo
Subtitle English
Menu English
6
Select the corresponding line and confirm with C .
Which settings can I choose?
'Playback audio' : The DVD will play back in the language you have
chosen.
'Recording audio' : Type of audio recording 'Stereo'or'SAP'
'Subtitle' : Subtitle language
'Menu': Language of the OSD menu
Tip
7
Select the corresponding setting with CH- B or CH+ A and
confirm with OK .
8
To end, press SYSTEM-MENU .
Installing your DVD recorder
Page 39
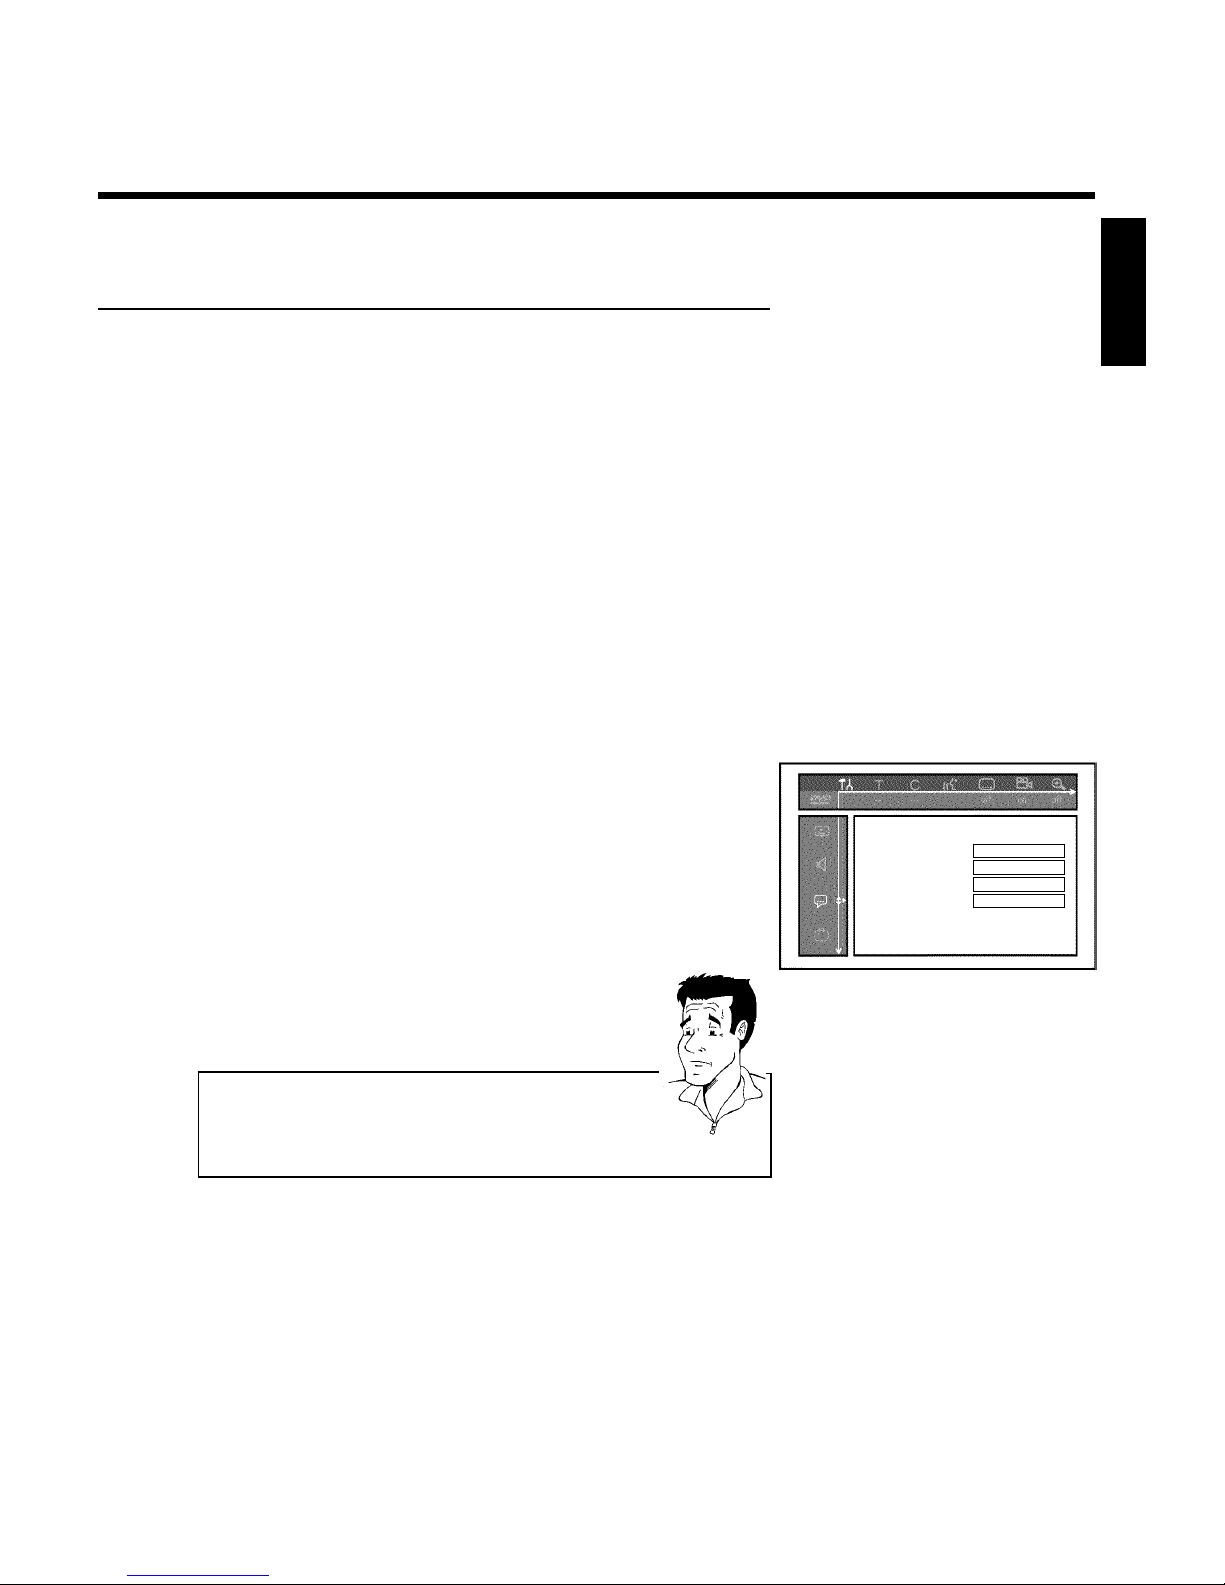
27
Switching audio recording (Stereo, SAP)
Some TV programs broadcast additional audio (SAP - Secondary Audio Program). In most cases
this means an additional language is available. For example, if a program is available in English and
Spanish, Spanish can be broadcast as the additional audio program (SAP).
To record TV programs in stereo or SAP, you can select Stereo or SAP as the default setting.
This setting does not become active until the sound of a TV program is transmitted in Stereo or
SAP.
When you playback the recording, you can playback the sound only in the setting you selected
for recording (a recording in SAP can be played back only in SAP).
1
Switch on the TV. If required, select the channel number for the
DVD Recorder (channel 3 or 4).
2
Turn on the DVD Recorder by pressing STANDBY-ON m .
3
Press SYSTEM-MENU on the remote control. The menu bar
will appear.
4
Select 'A' using D or C .
Language
Playback audio English
Recording audio Stereo
Subtitle English
Menu English
5
Select the line 'Language' using CH- B or CH+ A and
confirm with C .
6
Select line 'Recording audio' and confirm with C .
7
Select 'Stereo'or'SAP' using CH- B or CH+ A and confirm
with OK .
A TV program is only available in 'Stereo' but my setting is
'SAP'?
If the setting for 'Recording audio'is'SAP' but the TV channel
broadcasts only in stereo during recording, the recording will be done in
stereo.
?
8
To end, press SYSTEM-MENU .
ENGLISH
Installing your DVD recorder
Page 40
28
Assigning the VCR Plus+®Guide channel
numbers
If you intend to use the VCR Plus+®programming system, you must first assign Guide channel
numbers to the TV channels.
1
Press SYSTEM-MENU on the remote control. The menu bar
will appear.
2
Select 'A' using D or C .
3
Select line 'Installation' using CH- B or CH+ A and confirm
with C .
4
Select the line 'VCR Plus+ Ch.' using CH- B or CH+ A and
confirm with C .
Installation
VCR Plus+ Ch.
VCR Plus+ Ch. Channel
...
001 --002 --003 --004 --005 ---
...
To exit press
SYSTEM MENU
5
Use CH- B or CH+ A to select the Guide channel number
you want to assign to a TV channel.
6
Use D or C , or use the number buttons 0..9 to select the TV
channel corresponding to this Guide channel number. An
overview of guide numbers/TV channels can be found in your
daily newspaper or in your TV listings.
7
Confirm the allocation with OK .
8
To end, press SYSTEM-MENU .
Installing your DVD recorder
Page 41
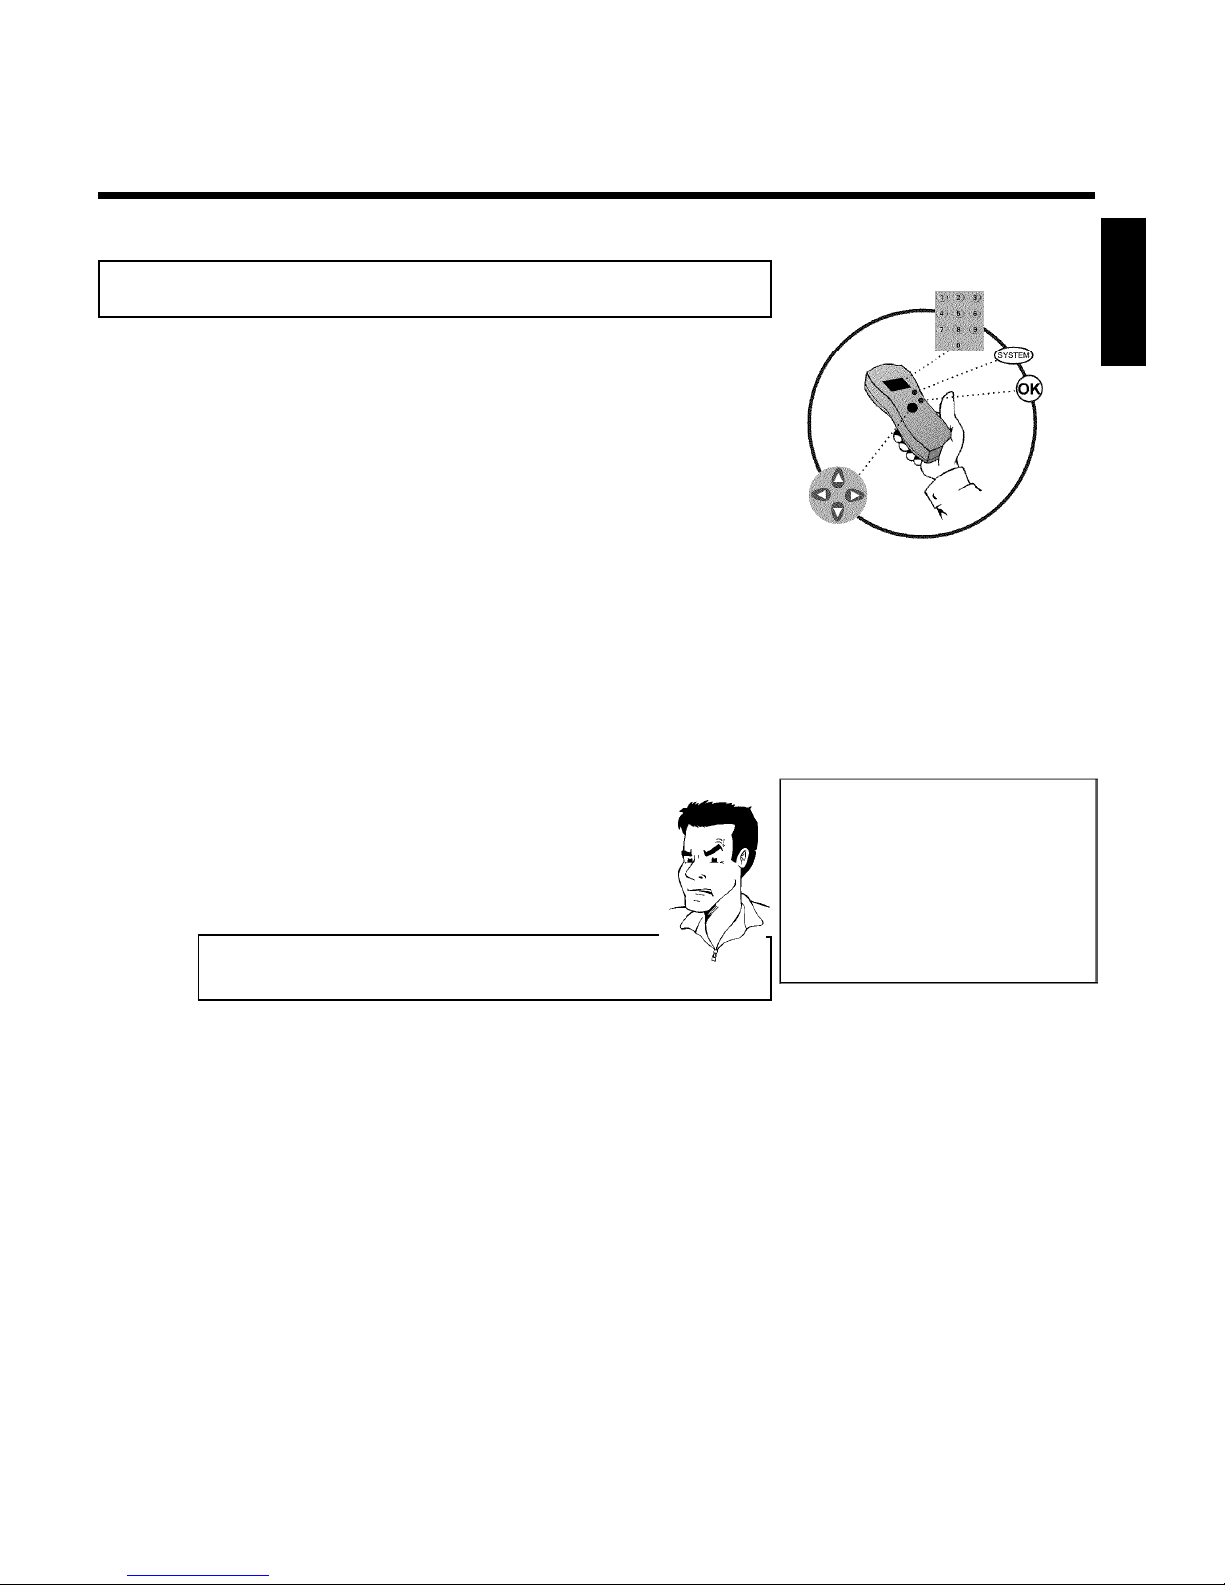
29
Setting the time/date automatically
This function uses the information sent via the local PBS channel to automatically set the
time/date. For this reason, you must enter the PBS channel that sends this additional information.
When the DVD Recorder chooses a wrong PBS channel or the displayed time/date is wrong,
you must manually set the date/time (see section 'Manually setting the time & date').
1
Press SYSTEM-MENU on the remote control. The menu bar
will appear.
2
Select 'A' using D or C .
3
Select line 'Installation' using CH- B or CH+ A and confirm
with C .
4
Select line 'Time/Date' using CH- B or CH+ A and confirm
with C .
5
Select 'Automatic' with CH- B or CH+ A and confirm with
C .
Time/Date
Automatic
PBS Channel Auto.
Daylight Saving Off
Time Zone Auto.
To exit press
SYSTEM MENU
6
Select the corresponding line with CH- B or CH+ A .
7
Select the channel which sends the time/date information in the
line 'PBS Channel' and confirm with OK . The DVD Recorder
will check whether or not the information transfer is possible.
a 'Clock not set, check channel' will appear on the TV screen
b No time/date data can be received from this TV channel.
Select a different channel or 'Auto.' in line 'PBS Channel'.
Problem
8
Select one of the following settings in line 'Daylight Saving':
'On': The time set corresponds to summer time (summer time
activated)
'Off': The time set corresponds to the winter time (summer time
is off)
9
In the line 'Time Zone', select your time zone if the PBS channel
entered was for a different time zone. This is the only way to set
the time correctly, or, if necessary, to correct it.
If you want to use the time zone of the PBS channel, select
'Auto.'.
10
Confirm the changes with OK .
11
To end, press SYSTEM-MENU .
The time and date are automatically transferred from the selected 'PBS channel' after the
Recorder is shut off.
ENGLISH
Installing your DVD recorder
Page 42
30
Manually setting the time & date
If the time is incorrect, this could be due to a weak or disrupted TV signal. If this is the case,
switch off the automatic function.
1
Press SYSTEM-MENU on the remote control. The menu bar
will appear.
2
Select 'A' using D or C .
3
Select line 'Installation' using CH- B or CH+ A and confirm
with C .
4
Select line 'Time/Date' using CH- B or CH+ A and confirm
with C .
5
Select 'Manual' with CH- B or CH+ A .
6
Confirm with OK .
Time/Date
Manual
Time 09:02
AM/PM AM
Year 2003
Month 01
Date 01
Daylight Saving Off
To exit press
SYSTEM MENU
7
Change the time in line 'Time' using the number buttons 0..9 on
your remote control.
8
Check 'AM/PM', 'Year', 'Month', and 'Date' in the same way.
To select between the fields, use CH- B or CH+ A .
Change the information with D , C or the number buttons
0..9 .
9
Select one of the following settings in line 'Daylight Saving':
'On': The time set corresponds to the summer time (summer
time is on)
'Off': The time set corresponds to the winter time (summer time
is off)
10
When all settings are correct, confirm with OK .
11
To end, press SYSTEM-MENU .
If the setting has been confirmed with OK the automatic system is disabled.
Installing your DVD recorder
Page 43
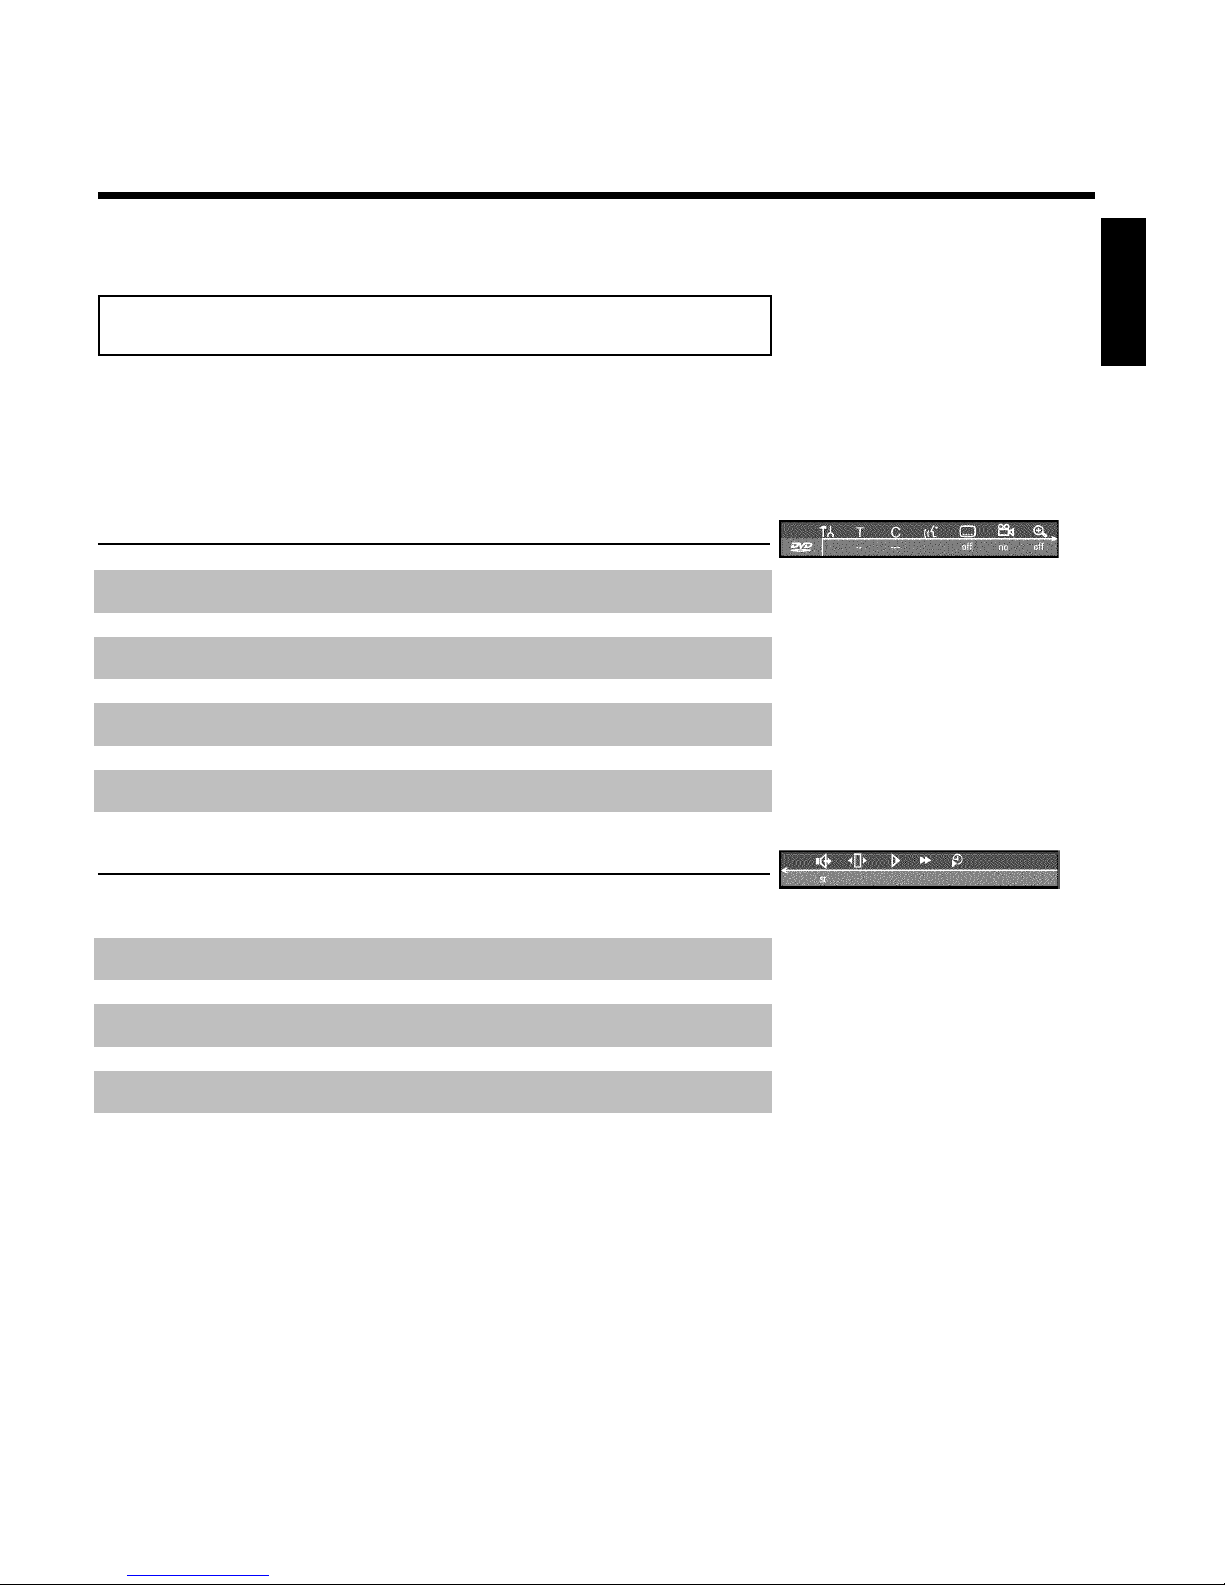
31
EInformation on the TV screen
You can check/change many functions and settings of your DVD Recorder via the system menu
bar. The menu bar cannot be displayed during recording.
Menu bar icons
The SYSTEM-MENU button is used to call up the menu bar (main menu) and to close it. The
D and C buttons are used to select the corresponding function. The CH- B button confirms
the function and either leads you to an additional menu or executes the function.
Depending on the disc inserted, some functions may not be available.
Menu bar 1
A
User preferences
B
Current Title/Track
C
Current Chapter/Index
D
Audio Language
E
Subtitle Language
F
Camera Angle
G
Zoom
Menu bar 2
While menu bar 1 is being displayed, you can press C repeatedly to display menu bar 2.
H
Sound
I
Picture by Picture
J
Slow motion
K
Fast motion
L
Search with time entry
ENGLISH
Information on the TV screen
Page 44
32
Field for temporary messages
There is a field in the top left corner of the menu bar which displays temporary information
regarding different operating functions. This information appears briefly on the screen when
certain disc functions are activated.
Shuffle: Shuffle tracks
Scan: Play introduction to each track
Repeat entire disc
Repeat current title
Repeat current track
Repeat current chapter
Repeat A until end
Repeat A to B
Camera Angle
Child lock on
Resume
Action prohibited
Status box
The status box displays the current status of the DVD Recorder and the type of disc inserted.
This display can be turned off.
.
Disc type icons
M
DVD+RW
W
DVD+R
N
DVDVideo
O
VideoCD
P
No disc
Q
Disc error
Information on the TV screen
Page 45
33
Disc status icons
R
Recording
S
Stop
T
Playing
U
Pause play
V
Pause record
X
Fast forward (x8)
Y
Fast reverse (x8)
Z
Slow motion
Tuner info box
This box appears in the bottom left corner of the TV screen. It displays the current antenna
signal, the TV channel, and the channel name of the program you just selected.
a
Current channel / selected device
b
No Signal
TV channel is not available or reception to too weak / Device is not
connected or is turned off
c
Copyprotected signal
Timer info box
This box is located above the tuner info box. When a recording is programmed (timer), it shows
the time symbol and the start time or the date of the first programmed recording.
When no timer is programmed, the current time will be displayed.
This box is not displayed during disc playback or recording. However, you can access it duriong
an OTR recording by pressing SYSTEM-MENU .
f
Timer set for day shown or time shown (if set for today).
g
OTR recording will run until displayed stop time
h
Current time
No recording (timer) programmed
ENGLISH
Information on the TV screen
Page 46
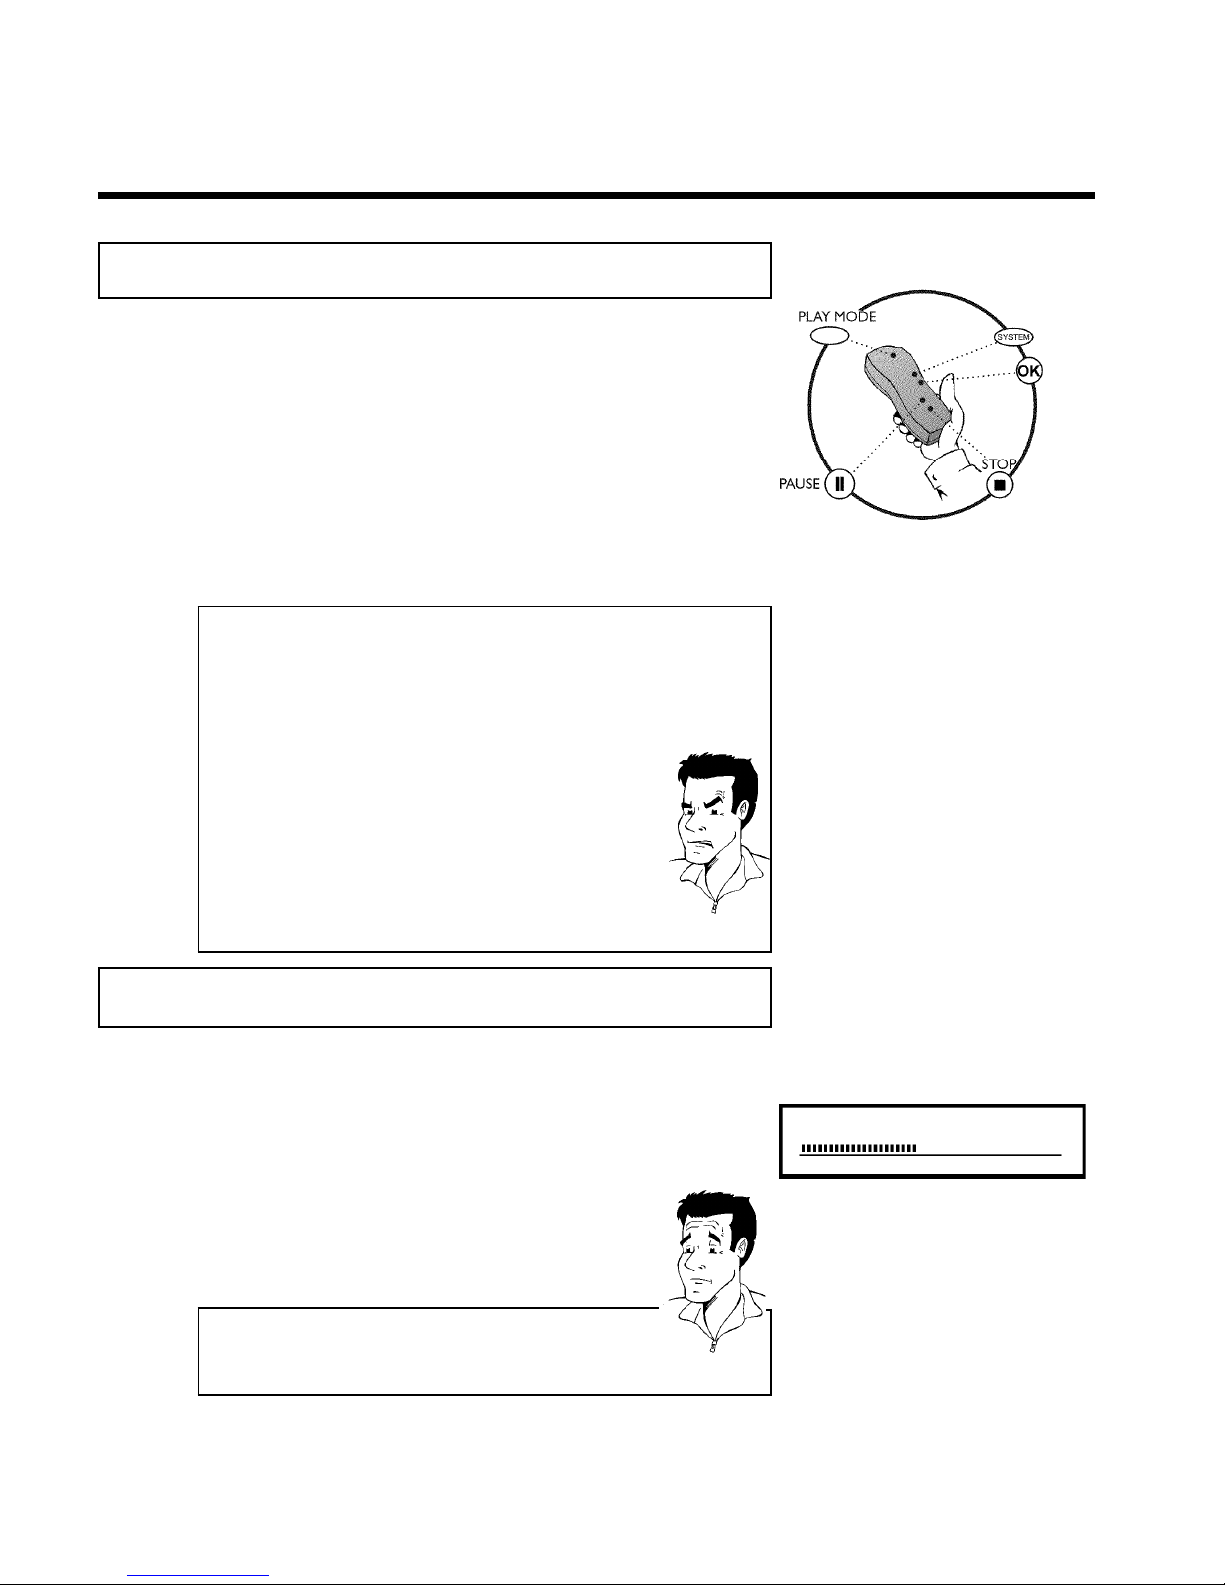
34
FPlayback
General information regarding playback
The DVD Recorder can be used with the following systems:
•) DVD Video
•) Video CD or Super Video CD
•) DVD+RW
•) DVD+R
•) DVD-RW (video mode, finalized)
•) DVD-R
•) CD-R
•) CD-RW
•) Audio CD
•) MP3-CD
You can operate the video Recorder using the remote control or the buttons on the front of
the DVD recorder.
a 'PIN' appears on the display.
b The child lock was activated for the inserted disc. Read 'Child lock'
and 'Authorizing discs' in the 'Child lock' chapter.
a I see an 'X' in the menu bar on the screen.
b DVDs can be manufactured in such a way that certain operations are
required or only specific functions are possible during playback. When
the 'X' symbol appears on the screen, the selected function is not
available.
a I see region code information on the screen.
b Because DVD films are usually not released at the same time in all
regions of the world, all DVD players are keyed to a specific region
code. Discs can be assigned an optional region code. If the region
codes of the player and disc do not coincide, playback is not possible.
b The region code for a DVD player can be found on a label at the
back of the device.
b There are no region codes for DVD+Rs.
Problem
Inserting a disc
OPENING P01
1
Press the OPEN/CLOSE J button on the front of the
Recorder. The disc tray will open. 'OPENING' will appear in the
display, then 'TRAY OPEN' when the disc tray has already been
opened.
2
Carefully place the disc into the tray with the label facing up, then
press PLAY G or OPEN/CLOSE J .'CLOSING' then
'READING' will appear on the display. This indicates that the disc
is being read.
How do I insert doublesided DVDs?
Double-sided DVDs do not have labels on either side. The label for each
side is placed in the middle (on the inner ring). To play a specific side,
the label on the side you want to play must be on top.
?
Playback
Page 47
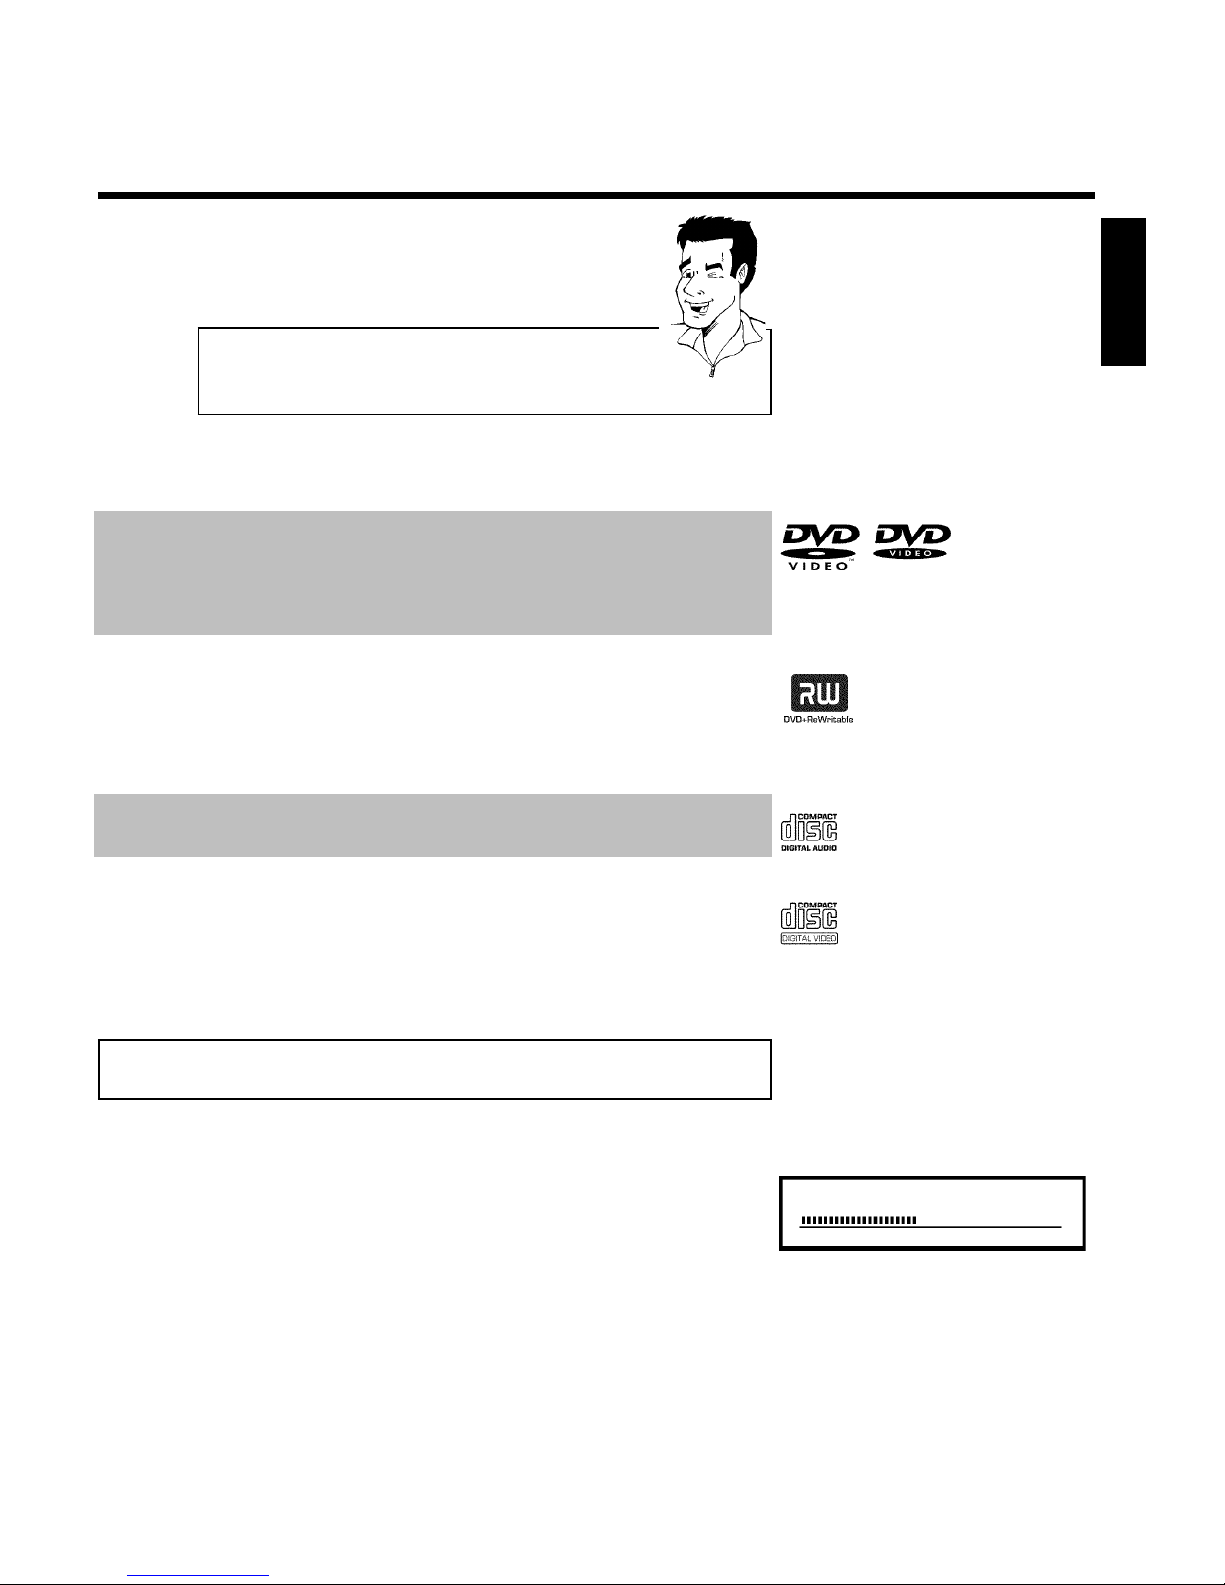
35
Opening/Closing the tray using the remote control
You can also use the remote control to open and close the disc tray.
To do this, hold down the STOP h button on the remote control until
'OPENING' (opens) or 'CLOSING' (closes) appears in the display.
Tip
3
Playback starts automatically.
A menu may appear during playback of a DVD. If the titles and chapters are numbered, press a
number button on the remote control. You can also select a menu item with D , C ,
CH+ A , CH- B , or with the number buttons 0..9 and confirm with OK .
You can also call up the menu any time by pressing DISC-MENU on the remote control.
For more information, read section 'Playing a DVD video disc'.
When playing a DVD+RW, the Index Picture screen appears. Choose the title you want to play
with CH- B , CH+ A or N , O .
Confirm with OK .
For more information, read section 'Playing a DVD+RW or DVD+R'.
If playback does not start automatically, press PLAY G .
For more information, read section 'Playing Audio CDs'.
If 'h' lights up in the display, begin replay with PLAY G .
If a menu appears on the screen, select the corresponding menu item with the buttons of the
remote control indicated on the screen (PREV= N , NEXT= O ) or with the remote control
buttons 0..9 .
For more information, read section 'Playback of a (Super) Video CD'.
Playing a DVD video disc
C01 2:04
1
If playback does not start automatically, press PLAY G .
The following will appear on the display:
chapter, elapsed time.
2
To stop playback, press STOP h on the remote control or
STOP h on the DVD recorder.
3
To eject the disc, press OPEN/CLOSE J on the front of the
DVD recorder.
ENGLISH
Playback
Page 48
36
Playing a DVD+RW or DVD+R
1
If the inserted disc has been write-protected or it is a finalized
DVD+R, playback starts automatically.
C01 ANNA P01
2
If playback does not start automatically, select the title you want
to play from the index screen using CH- B or CH+ A .
You can also use the N or O buttons on the front of the
recorder.
3
Press the PLAY G button.
The following will appear on the display:
title/chapter number, elapsed time.
a I see the message 'EMPTYDISC' on the display
b There are no recordings on this disc.
Problem
4
To stop playback, press STOP h on the remote control or
STOP h on the DVD recorder.
5
To eject the disc, press OPEN/CLOSE J on the front of the
DVD recorder.
What do I must pay attention to with regard to recordings that
have been recorded in different recording modes?
During playback, the device will automatically switch to the proper mode
'M1, M2, M2x, M3, M4, M6, M8'.
For more information, please read the section 'Selecting the recording
mode (picture quality)' in the chapter 'Manual recording'.
?
Playing audio CDs
You can also use the DVD Recorder to play audio CDs
1
Insert an audio CD. Playback starts automatically.
Audio CD display
If the TV is turned on, the Audio CD display will appear on the screen.
During playback, the number of the current track will be shown on the
screen and display.
Tip
2
Stop playback with STOP h . Track number and total play time
are displayed.
Playback
Page 49
37
Playing MP3 CDs
MP3 (MPEG1 Audio Layer-3) files are highly compressed pieces of music. Using this technology
the data volume can be compressed by a factor of 10. This enables you to fit up to 10 hours of
CD quality music on a single CD-ROM.
When creating MP3 CDs, keep the following in mind:
Data system supported: ISO9660
Directory structure: maximum of 8 levels
Formats: *.mp3
File names: maximum of 12 characters (8+3)
Maximum of 32 albums, 999 titles
Sampling frequency supported: 32, 44.1, 48 (kHz). Music pieces with different frequencies will be
skipped.
Bit rate supported: 32, 64, 96, 128, 192, 256 (kbit/s)
ID3 Tag: Version 1, 1.1. In the case of later versions, the directory name will appear as the
album and the file name as the title.
Important information regarding playback:
Only the first session of a multisession CD is played back.
1
Insert an MP3 CD. Playback starts automatically.
MP3 CD display
If the TV is turned on, the MP3 CD display will appear on the TV
screen.
During playback, the number of the current track will be shown on the
screen and display.
During interrupted playback (using STOP h ), the album numbers will
be shown on the TV and on the display.
If available on the CD in a so-called ID tag, more information on album,
track, and artist will appear on the display.
Tip
2
Stop playback with STOP h . The number of albums appears on
the display.
Other playback functions
Select the previous or next track with N or O .
You can also use T/C to select tracks and albums.
1 Press T/C and then select symbol 'T' for album or 'C' for track
with C or D .
2 Select the number of the album/track with CH- B , CH+ A or
the number buttons 0..9 on the remote control.
You can also use repeat functions ( PLAY MODE ).
Tip
ENGLISH
Playback
Page 50

38
Playback of a (Super) Video CD
(Super) Video CDs may feature 'PBC' (Play Back Control). This allows the direct selection of
special playback functions (menus). The Video CD must be PBC-compatible (see CD packaging).
'PBC' is turned on by default.
1
Insert a (Super) Video CD.
If the 'h' appears on the display, begin playback with PLAY G .
2
If a menu appears on the screen, select the corresponding menu
item with the buttons of the remote control indicated on the
screen (PREV= N , NEXT= O ) or with the remote control
buttons 0..9 .
If the PBC menu contains a title list, the desired title can be
chosen directly.
3
The RETURN button will take you back to the previous menu.
4
Stop playback with STOP h .
Playback
Page 51
39
GOther playback functions
Changing to a different chapter track/title
When a disc contains more than one track, title, or chapter, you can change to a different track,
title or chapter as follows. However, if a title contains several chapters, these are selected. Title
selection is then possible via the menu bar only.
1
During playback, you can go to the next title/chapter/track using
the O button. Using the N button, you can reach the start
of the current title/chapter/track. By pressing the N button
twice, you can return to the start or the previous
title/chapter/track.
Using the T/C (title/chapter) button
1 Press the T/C (title/chapter) button and select the corresponding
title with CH+ A or CH- B .
Make sure that the 'T' (title) icon is selected in the menu bar.
2 You can also select a chapter within a title using the T/C button.
Press T/C and select 'C' (chapter) using C .
Then select the corresponding chapter with CH+ A or CH- B .
Tip
Disc search
You can fast forward a disc at four or thirty two times normal playback speed. You can select
other speeds only via the menu bar (
K
).
1
During playback, hold down N (reverse) or O (forward) to
switch to the search function. You can switch between different
speed modes using the N / O buttons.
2
To continue playback, press PLAY G twice at the desired
position.
a No sound
b During search the sound is turned off. This is not a defect of your
DVD recorder.
Problem
ENGLISH
Other playback functions
Page 52
40
Search function via menu bar
1 During playback, press the SYSTEM-MENU button on the remote
control. The menu bar will appear at the top of the screen.
2 Select the '
K
' symbol on the second menu bar using C or
D and confirm with CH- B .
3 Now you can select different search speeds forwards or backwards
using D or C .
4 If necessary, turn off the menu line with the
SYSTEM-MENU button.
5 To continue playback, press PLAY G twice.
Tip
Still picture
C01 2:04
1
During playback, press PAUSE 9 to stop playback and display a
still picture.
Still picture features via the menu bar
1 While playback is paused, press the SYSTEM-MENU button on
the remote control. The menu bar will appear at the top of the
screen.
2 Select '
I
' in the second menu bar with C or D then press
CH- B .
3 You can now move the still picture forward or backward using
D or C .
4 If necessary, turn off the menu line with the
SYSTEM-MENU button.
Tip
2
To continue playback, press PLAY G .
Other playback functions
Page 53
41
Slow motion
1
Press PAUSE 9 on the remote control during playback. Then
hold down N or O to switch to slow motion.
2
You can switch between the different speeds with N or O .
Slow motion via menu bar
1 During playback, press the PAUSE 9 button and then the
SYSTEM-MENU button on the remote control. The menu bar
will appear at the top of the screen.
2 Select '
J
' with C or D and confirm with CH- B .
3 You can now move forwards or backwards at different speeds using
D or C .
4 If necessary, turn off the menu line with the
SYSTEM-MENU button.
Tip
3
To continue playback, press PLAY G twice.
Search with time entry
Using this function, you can select where playback should start (elapsed time).
1
During playback, press the SYSTEM-MENU button on the
remote control. The menu bar will appear at the top of the
screen.
2
Select 'L' with C or D and confirm with CH- B . The
playback is stopped and the screen displays how much play time
has already elapsed.
3
Enter the desired start time for the playback using the number
buttons 0..9 .
4
Confirm with OK .
a The time that I entered is blinking on the screen
b The selected title is shorter than the time entered. Enter a new time
or cancel the function with SYSTEM-MENU .
Problem
5
Playback will now start at the time you entered.
ENGLISH
Other playback functions
Page 54

42
Repeating/Shuffle
You can select an entire section or the entire disc for repeat playback. Depending on the disc
type (DVD-Video, DVD+RW, Video-CDs), you can select chapters, titles or the entire disc.
1
Select the desired chapter, title or disc and start playback.
2
During playback, press PLAY MODE . By pressing PLAY
MODE again, you can select from the following options:
•) '
': Repeat chapter (DVD only)
•) '
':Repeat track/title
•) '
':Repeat entire disc (video CD, audio CD only)
•) '
':Shuffle
•) No display:no repeat
3
To cancel the repeat, press STOP h .
You can also keep pressing PLAY MODE until the displays
disappear.
Repeat a specific segment AB
You can repeat a specific segment within a title/chapter/track. To do this, you must mark the
start and end of the desired segment.
1
During playback, press the PAUSE 9 at the desired starting
position.
You will see a still picture.
2
Keep pressing PLAY MODE until the '
' symbol appears
on the TV screen. This will store the start point.
Start playback with PLAY G .
3
At the desired stop point, press the OK button. '
' appears
on the TV screen. Playback will now resume repeating the
selected segment.
4
To cancel the repeat, press STOP h .
You can also keep pressing PLAY MODE until the displays
disappear.
Other playback functions
Page 55
43
Scan function
Using this function, you can play the first 10 seconds of each chapter (DVD) or track (CD or
VCD) on the disc.
1
During playback, press PLAY MODE repeatedly until '
'
appears on the screen.
2
After 10 seconds, the DVD Recorder will switch to the next
chapter/track. To resume the playback at the corresponding
chapter/track, press STOP h and then PLAY G .
Camera angle
If a disc contains video sequences that were recorded with different camera angles, you can
select different angles for playback.
1
During playback, press PAUSE 9 . You will see a still picture.
2
Press the SYSTEM-MENU button and select 'F' using C .
a The 'F' icon cannot be selected.
b The selected scene was only recorded with one camera angle. This
function is, therefore, not available. For more information, please read
the label of your DVD disc.
Problem
3
Select the desired angle with CH- B or CH+ A . You can also
directly enter the number with the number buttons 0..9 .
4
After a short pause, playback will resume from the new angle.
The '
F
' icon will remain visible until a section starts that only
has one camera angle.
ENGLISH
Other playback functions
Page 56
44
Zoom function
Using this function, you can enlarge the video image and pan through the enlarged image.
1
During playback, press PAUSE 9 . The DVD Recorder switches
to 'PAUSE'. You will see a still picture.
2
Press the SYSTEM-MENU button and select 'G' using C .
3
Use CH- B or CH+ A to select the desired zoom factor.
4
As soon as 'press OK to pan' appears, the zoom process is
complete.
5
Press OK . Use CH+ A , CH- B , C , and D to select an
area of the image that you want to look at more closely.
6
Confirm with OK .
7
To stop zooming, press PLAY G and then SYSTEM-MENU .
Changing audio language
Pre-recorded DVDs often come in different languages. The language used for playback is the one
that you selected during the initial installation of the Recorder or the default language of the
DVD. However, you can change the audio language of a disc at any time.
Please note that the audio language can be changed via the menu ( DISC-MENU button) of the
inserted disc as well as with the AUDIO button. The audio languages for DVD playback in the
two menus may be different. Some DVD's only allow you to change the language in the DVD
menu.
1
Press AUDIO during playback.
2
Use CH- B or CH+ A to select the desired audio language.
You can also directly enter the number with the number buttons
0..9 .
3
Playback will now resume with the new audio language.
Other playback functions
Page 57

45
Subtitles
Pre-recorded DVDs sometimes come with different subtitle languages. The language used for
playback is the one that you selected during the initial installation or the default of the DVD.
However, you can change the subtitle language of a disc at any time.
Please note that the subtitle language can be changed via the menu ( DISC-MENU button) of the
inserted disc as well as via the recorder's menu bar ( SYSTEM-MENU button). It is possible for
the subtitle languages of the two menus to be different.
1
Press the SYSTEM-MENU button during playback and select
'
E
' using C .
2
Use CH- B or CH+ A to select the desired subtitle language.
You can also directly enter the number with the number buttons
0..9 .
You can shut the subtitles off with number buttons 0 or by
selecting 'off'.
3
Playback will now resume with the new subtitle language.
ENGLISH
Other playback functions
Page 58
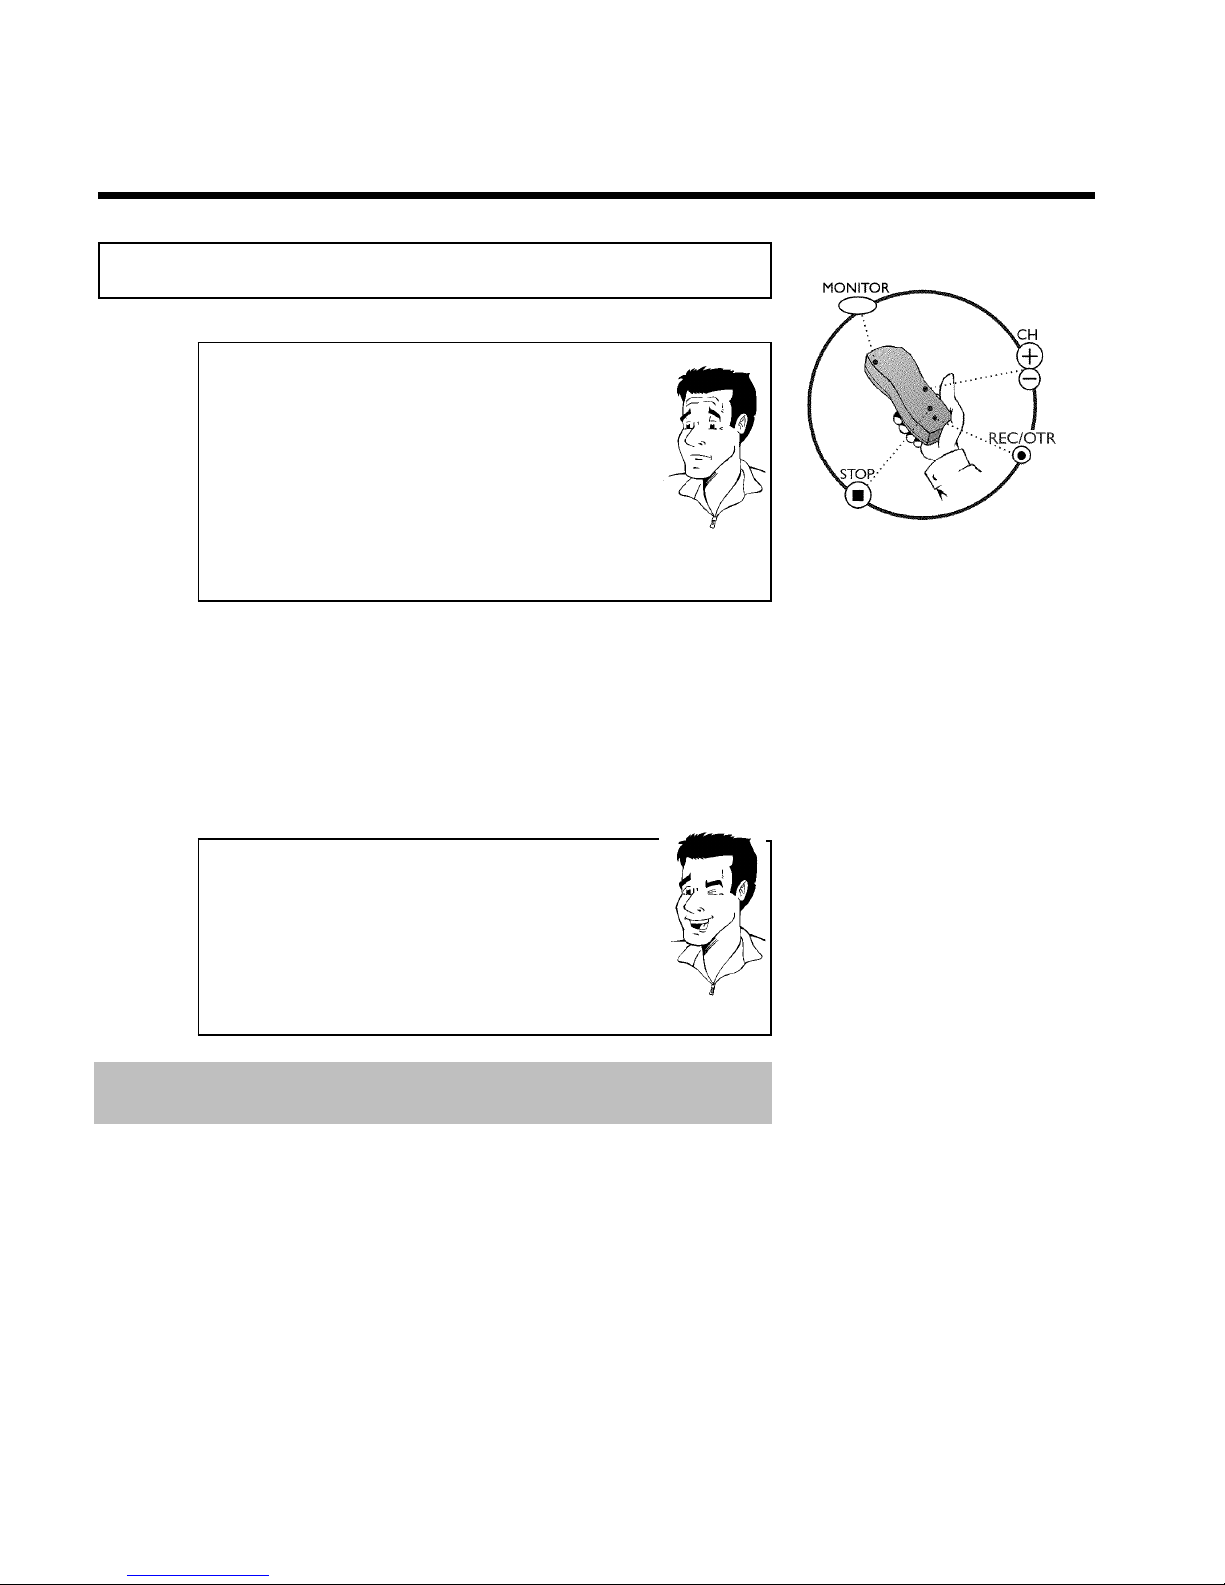
46
HRecording
General information
What kind of discs can be used for recording?
You can used two different types of DVDs with this DVD recorder:
DVD+RW
This disc can be recorded on and then erased.
DVD+R
This disc can only be recorded on once.
For this DVD to be played in a DVD player, it must be finalized with
'Finalize disc'. After this is done, no more recordings can be added to
this disc.
If this disc is only to be played in the DVD recorder, then it does not
have to be finalized. Recordings can be added and then deleted.
However, the location (playing time) of the deleted recording (title) will
no longer be available.
?
With the 'Manual recording' function you can make a spontaneous recording (for example, a
program currently being shown).
To do this, select the title to be overwritten or choose an 'Empty title' in the 'index screen'
with the CH- B , CH+ A buttons.
If the recording is to be inserted between existing recordings, please note the length of the old
and new recording. If the new recording is too long, the recording (title/chapter) following it will
be overwritten.
Adding new recordings after the end of all recordings (Safe
Record)
To add a new recording after the last recording on a disc, press and
hold the REC/OTR n button until 'SAFE REC' appears in the display.
For DVD+R, each new recording is always placed after all previous
recordings since previous recordings cannot be overwritten.
End of disc is reached
If the end of a disc is reached during recording, recording will stop and
the Recorder will turn itself off automatically.
Tip
If you want to start and stop a recording manually, read the section 'Recording without
automatic switchoff'.
Please refer to 'Recording with automatic switchoff', if you want to start a recording manually
and conclude it within a specific amount of time. This permits accidentally recording to the end of
the disc.
Recording
Page 59
47
Recording without automatic switchoff
1
Switch on the TV and, if required, select the channel number for
the DVD Recorder (channel 3 or 4 or Audio In channel).
2
Insert a disc to be used for the recording. The system and
content of the disc will be checked. 'READING' will appear on the
display.
a Index display
b A DVD+RW was inserted that already contains recordings. Use
CH+ A and CH- B to select a location where the recording should
be started.
a 'EMPTYDISC' appears in the display.
b The inserted DVD is empty.
a A dialog box appears asking if the contents should be erased
or the disc should be ejected.
b The inserted disc is a DVD+RW whose contents are not compatible
with DVD Video (e.g. a data disc). This disc cannot be used for
recordings until the entire disc is erased using the
REC/OTR n button.
a 'Title limit' appears on the screen when a recording is
attempted.
b A disc can only contain a max. of 48 titles (including the empty titles).
Erase the titles or change the disc.
Problem
3
If necessary, switch to TV programming by pressing the
MONITOR button on the remote.
4
Use CH+ A or CH- B to select the channel you want to
record. The following will appear on the display:
1 FREETITLE P01
Channel number of the external inputs:
'EXT2' SVHS jack (Y/C) S-VIDEO (Y/C) Video jack (CVBS) VIDEO
(CVBS) , Audio jack L AUDIO R for SVHS-jack and Video
jack.
Switching between jack S-VIDEO (Y/C) and VIDEO
(CVBS) is done automatically.
'EXT1' Component Video jacks on the back COMPONENT VIDEO Y
PB PR , Audio jacks AUDIO for Component Video
'CAM1' SVHS-/Audio front jacks S-VIDEO / AUDIO left/right
'CAM1' Video/Audio front jacks A/V VIDEO / AUDIO left/right
Switching between jack S-VIDEO and VIDEO is done
automatically.
'CAM2' Digital video (i.Link) front jack DV IN
Tip
ENGLISH
Recording
Page 60
48
5
To start recording, press REC/OTR n on the remote control
or REC n on the DVD recorder.
To start the recording after all other recordings on the disc,
press and hold the REC/OTR n button until 'SAFE REC' appears
in the display.
For DVD+Rs, each recording is always started after all previous
recordings since previous recordings cannot be overwritten.
The display panel will appear similar to the example shown
below.
C01 1:16:51 P01
Inserting chapter markers
During recording, scenes can be marked so they can be found or hidden
later.
During recording, press FSS at the start of the desired location.
'Inserting marker' appears on the TV screen. In the display, the
number of 'CHAPTERS' is increased by one.
For more information about title/chapter, please read the section
'Changing to a different chapter track/title' in the chapter 'Other
playback functions'.
Tip
6
You can stop recording by pressing STOP h on the remote or
STOP h on the recorder. 'MENU UPDT' will appear on the
display. The DVD Recorder is preparing the list of contents. Wait
until this message disappears in the display, then the recording is
completed.
a If display reads 'DISC ERR'
b The recording could not be completed correctly because of a disc
error. Check and clean the inserted disc if necessary.
Problem
Making recordings on DVD+R discs compatible
If you want to playback recordings on a DVD player, you must first
finalize the disc in the DVD recorder. You can use the 'Finalizing'
function on the DVD so that it can be read by the DVD player without
problem. Please read paragraph 'Finalizing DVD+R discs' in the chapter
'Managing disc content'.
Tip
Recording
Page 61
49
Pausing recording
1
During recording press PAUSE 9 , for example to avoid
recording the commercials.
2
To continue recording, press REC/OTR n .
Ending recording
To stop recording, press the STOP h button. Wait until 'MENU UPDT'
disappears from the display before you try another feature.
Tip
Recording with automatic switchoff
(OTR onetouchrecording)
1
Insert a disc.
2
If necessary, switch to TV programming by pressing the
MONITOR button on the remote.
3
Use CH+ A or CH- B to select the channel you want to
record.
4
Press REC/OTR n on the remote control.
5
Each time you press REC/OTR n you will add 30 minutes to
the recording time.
How can I delete the recording time I just entered?
To delete an entry, press CLEAR while the display shows the recording
time.
How can I check the remaining recording time?
Press SYSTEM-MENU while an OTR is in progress. The time at which
the recording will end will appear on the TV screen in the timer info
box.
?
ENGLISH
Recording
Page 62
50
Preventing accidental erasing of discs
You can lock the entire disc to prevent important recordings from being erased by accident. You
can only lock the entire disc. It is not possible to lock individual recordings.
What happens with DVD+R discs?
As long as these discs have not been finalized, you can protect them
against being overwritten just like DVD+RW.
?
1
Put the disc to be locked into the recorder.
2
While the Index Picture Screen is displayed, press STOP h on
the remote control. The first title is selected.
3
Press CH+ A . The disc information screen is displayed.
4
Press the C button.
Select the 'Protection' line.
Confirm with C .
5
Select 'Protected' using CH- B and confirm with OK .
6
Press D , then press DISC-MENU to play the disc.
The entire disc is now protected. If you attempt a recording,
'DISC LOCK' will appear on the display and 'Disc locked' will
appear on the TV screen.
If you later decide to record on the disc, follow these steps but select
'Unprotected' at step 5 .
Tip
Recording
Page 63
51
Lining up recordings within a title
(assemble cut)
You can add further recordings to a title already contained on a DVD+RW. The new recording
will be added to the title as a chapter. Previous information will be overwritten from this
location onward. Depending on the length of the recording, this will also overwrite titles that
follow the current title. The recording mode (quality) is automatically transferred from the
current title.
To play back this recording, press SYSTEM-MENU and select 'C' (chapter) using C . You can
also use T/C .
For more information, read section 'Changing to a different chapter track/title' in chapter 'Other
playback functions'.
What happens with DVD+Rs?
New recordings on DVD+R can only be made on existing space. You
cannot overwrite existing recordings on 'DVD+R' discs.
?
1
In the index display, find the title to which the new recording is
to be added.
2
Look at the last minute of the old recording.
3
Press PAUSE 9 on the remote control at the location where
the new recording is to start. '9' will appear on the screen.
4
If you want to monitor the recording, you can switch to the
internal tuner using the MONITOR button.
5
Now start recording as usual by pressing REC/OTR n on the
remote control.
The new recording is added.
6
Stop recording with STOP h .
ENGLISH
Recording
Page 64
52
Selecting the recording mode
(picture quality)
By selecting a recording mode, you define the picture quality of recordings and the maximum
recording time for a disc.
To check the quality of a recording mode you can make a 'test recording' with the desired
recording mode. Check during playback the quality of this 'test recording'.
For playback, the correct picture quality will automatically be selected.
1
Switch on the TV. If required, select the channel number for the
DVD recorder (channel 3 or 4 or the Audio/Video In channel).
Select the record mode with the button REC MODE on the
remote control.
Which recording modes can I choose?
Please observe, that you can not switch the recording type
during recording. You have to interrupt the recording with the
STOP h button.
'M1': High Quality offers the best picture quality with a total recording
time of 1 hour.
'M2': Standard Play (pre-recorded DVD quality) offers excellent picture
quality with a total recording time of 2 hours.
'M2x': Standard Play plus (better than S-VHS picture quality) offers
excellent picture quality with a total recording time of 2.5 hours.
'M3': Long Play (S-VHS picture quality). Total recording time of 3 hours.
'M4': Extended Play (better than VHS picture quality). Total recording
time of 4 hours.
'M6': Super Long Play (VHS picture quality). Total recording time of 6
hours.
'M8': Super Extended Play (VHS picture quality). Total recording time of
8 hours.
Can I also change the recording mode via a menu?
1 Press the SYSTEM-MENU button.
2 Select '
A
' using D or C .
3 Select line 'Record settings' using CH- B or CH+ A and
confirm with C .
4 At 'Rec Mode,' select the recording mode using D or C .
5 Confirm with OK and end with SYSTEM-MENU .
6 If you select the 'M3', 'M4', 'M6'or'M8' recording modes, you can
select the 'Stndrd' (standard) or 'Sport' (for quick movements)
settings in the 'Filter mode' line.
Tip
Recording
Page 65
53
IManaging disc content
Charly 1
00:29:59 • M1
Fr15/02/2003
Empty title
01:30:01
General
When a recording is made on a disc, the following information is saved at the start of each
recording:
•) Name of the recording
If no name is sent by the broadcaster, then
the channel number (channel name) and time the recording started is saved as the name
•) Length of recording
•) Recording mode (quality)
•) Date of the recording
•) Recording index screen
If 'Auto chapters' is turned on in the 'Record settings' menu, a marking will be made every
5-6 minutes. These markers are called chapter markers.
These markers can be changed after the recording is complete.
Can markings also be made on DVD+Rs?
Markings can be made on these discs as long as they have not been
finalized.
?
It is also possible to create additional chapter markings. This allows you to hide or skip things
you don't want to see (e.g. commercials). During playback you would then see your recording
without the hidden chapter as a complete sequence.
Select from the following chapters:
Read 'Favorite scene selection'to learn how to divide titles into chapters and how to manage
chapters.
Read 'Editing recording titles (name)'to learn how to change recording names.
Read 'Playing the entire title'to learn how to play the entire title, including hidden chapters.
Read 'Deleting recordings/titles'to learn how to erase the title.
Read 'Disc settings'to change general settings of the disc.
ENGLISH
Managing disc content
Page 66
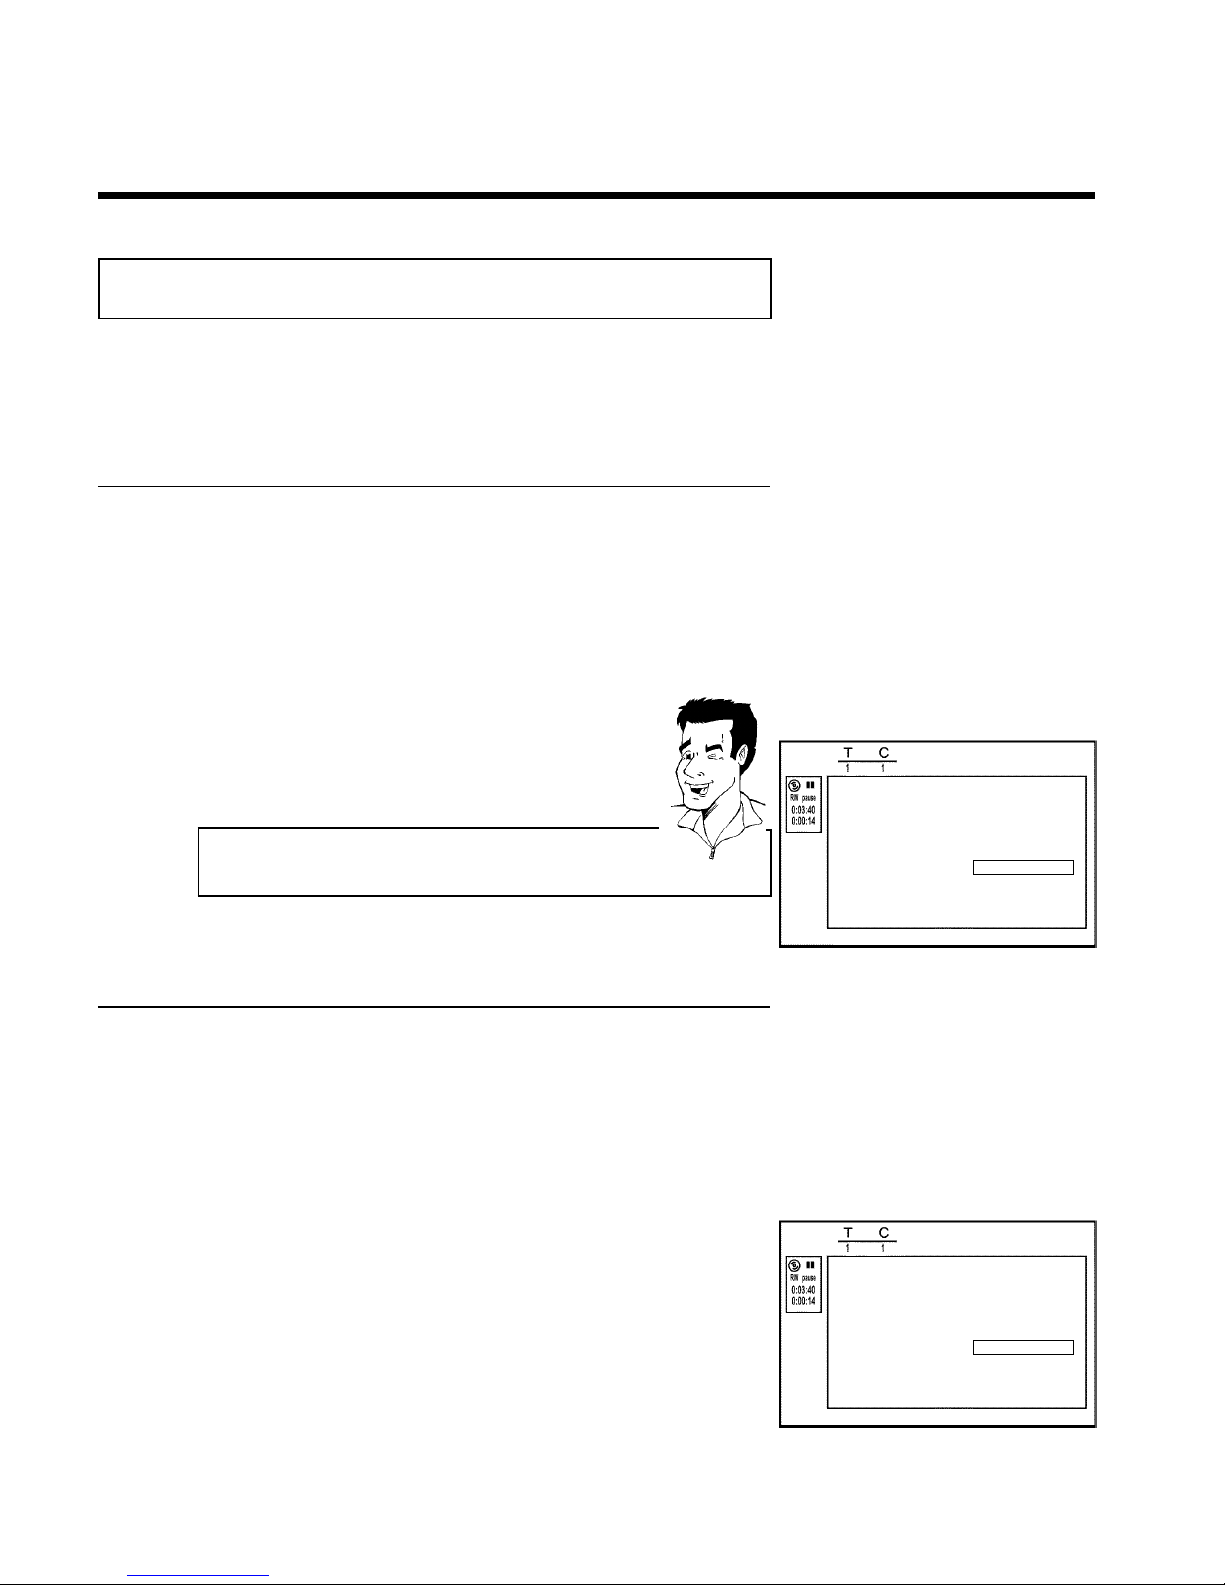
54
Favorite Scene Selection
In this menu, you can adjust a title to your personal preferences.
You can insert/delete chapter markers, hide chapters, select a new index screen, or split the
title. Press FSS on the remote control during recording to open this menu.
Inserting chapter marker
During playback, you can set and delete chapter markers within a title.
Each disc can have a maximum of 124 chapters, and an individual Title can have up to 99
chapters. When one of these values is reached, the following appears on the screen: 'Chapter
limit'. Some markers will need to be deleted in order to create new ones or to make
recordings.
1
During playback, press FSS on the remote control at the
appropriate point. The 'Edit menu' menu will appear on the
screen.
Edit menu
Insert chapter marker PressOK
Delete chapter marker
Delete all markers
Current chapter Visible
Press SELECT to toggle
Press FSS to exit
2
Press CH+ A or CH- B to select 'Insert chapter marker'
then press OK .'Inserting marker' appears on the TV screen.
'X' appears on the TV screen.
This DVD is protected or a finalized DVD-R was inserted. You cannot
make any changes to it.
Tip
3
To remove the menu, press FSS .
Hiding chapters
Initially all chapters are visible. You can hide chapters for playback (e.g. commercial skipping) or
make them visible again. In editing mode, hidden chapters are displayed in dimmed mode. .
A chapter always consists of a start marker and an end marker.
To hide a certain scene, proceed as follows:
1
Search the beginning of the scene you want to hide. Press
PAUSE 9 .
Edit menu
Insert chapter marker PressOK
Delete chapter marker
Delete all markers
Current chapter Visible
Press SELECT to toggle
Press FSS to exit
2
Press FSS on the remote control to call the 'Edit menu'
editing menu.
3
Set the start marker using OK .
The number of chapters ('C') in the menu line will increase by
one.
Managing disc content
Page 67
55
4
Search for the end of the scene. You can also use O or
N to search faster for the end of the scene.
Make sure that you do not jump into the next title (title number
'T' must not change). Only chapters within a title can be hidden.
5
Press PAUSE 9 at the corresponding position.
6
Set the end marker with OK . This will also be the start marker
of the next chapter.
The number of chapters ('C') in the menu line increases by one.
a The number of chapters ('C') has increased by two or more
numbers
b This is the case when you want to hide a chapter that, due to
automatic chapter numbering (if switched on), stretches over two or
more chapters. In this case, you must delete the start of the
automatically generated chapter:
1 Press T/C twice while the editing menu is displayed to change the
chapter number.
2 Select the chapter between the new markers using CH- B or
CH+ A . Press PAUSE 9 .
3 Select 'Delete chapter marker' with CH- B to delete the
current chapter marker. Confirm with OK . The current chapter
number decreases by one.
Problem
7
Press T/C twice to change the chapter number 'C'.
8
Select the previous chapter with CH- B , since you are already
in the next chapter (end of the chapter is also the beginning of
the next chapter).
9
Wait until the chapter has been played and press PAUSE 9 to
stop playback.
10
Select 'Current chapter' using CH- B or CH+ A .
11
Using C select 'hidden'. The picture is shown darker.
Switching quickly
You can switch between show chapters ('Visible') and hide chapters
('hidden') quickly and easily using SELECT .
This function is independent from the selected line.
Tip
12
To end, press FSS .
During playback this chapter will be skipped.
If the chapter is not visible, select 'Visible' in step
3 with C .
ENGLISH
Managing disc content
Page 68
56
Deleting chapter markers
Within a title, you can either delete individual chapter markers or all markers.
Edit menu
Insert chapter marker PressOK
Delete chapter marker
Delete all markers
Current chapter Visible
Press SELECT to toggle
Press FSS to exit
1
During playback of the corresponding chapter, press FSS on the
remote control. The 'Edit menu' menu will appear on the
screen.
How can I select other chapters?
1 Press T/C on the remote control. Titles and chapters will be
displayed at the top of the screen.
2 Select the title (T) or chapter (C) with C or D .
3 Select the title/chapter you want to edit with CH+ A or CH- B .
Tip
2
Using CH- B , select either 'Delete chapter marker' for this
chapter or 'Delete all markers' for all chapters of the selected
title.
3
Confirm with OK . (You will be prompted to press OK again to
make sure you really want to delete all markers. If you do not
want to, press the D button.)
4
To remove the menu, press FSS .
Changing the index picture
Normally, the first frame of a recording is shown as the title's index picture. You can, however,
use any picture as an index picture.
1
During playback, find the location that you want to use as the
new index picture. Press the PAUSE 9 button to pause play.
Edit menu
New index picture Press OK
New background
Divide title
Press FSS to exit
2
Press the FSS button. The 'Edit menu' menu will appear on
the screen.
3
Select the line 'New index picture' and confirm with OK .
4
Start the action with OK .'Updating menu' appears on the TV
screen.
When successfully completed, the DVD Recorder automatically brings you back to the index
picture screen.
Managing disc content
Page 69
57
Changing the menu background
You can, however, use any picture as the menu background. This setting is stored on the
inserted DVD. Please note that after the modification the 'original background' will be lost.
If you erase the complete disc (close the disc tray with CLEAR and make a recording) the
'original background' will be restored.
1
During playback, find the location that you want to use as the
new menu background. Press the PAUSE 9 button to pause
play.
Edit menu
New index picture Press OK
New background
Divide title
Press FSS to exit
2
Press the FSS button. The 'Edit menu' menu will appear on
the screen.
3
Select the line 'New background' and confirm with OK .
4
Start the change with OK .'Updating menu' appears on the
TV screen.
When successfully completed, the DVD Recorder automatically brings you back to the index
picture screen.
Splitting titles
A title can be split into several parts (titles) no matter how large. Each of these parts (titles) is
characterized by its own index picture.
Warning! Once a title is split, it cannot be reversed.
Can I also divide titles on DVD+Rs?
Because recordings on DVD+Rs cannot be overwritten, it is not possible
to divide titles.
?
Edit menu
New index picture Press OK
New background
Divide title
Press FSS to exit
1
Press FSS on the remote control during playback of the
corresponding title. The 'Edit menu' menu will appear on the
screen.
2
Select 'Divide title' and confirm with the OK button.
3
If you are certain, start the process with OK .'Dividing title'
will appear on the screen.
4
Wait until the new title is displayed with an index picture in the
index picture overview.
The process of splitting the title is now complete.
ENGLISH
Managing disc content
Page 70
58
Editing recording titles (name)
The channel number and time of the recording are stored as the name. The name of the
recording can only be changed after the recording has been completed.
1
Press STOP h to stop playback if necessary.
Settings for title Charly1
Name Charly 1
Play full title
Erase this title
2
Using CH+ A or CH- B , select the title you want to edit and
confirm with C . The menu for editing names will appear.
3
Select 'Name' using CH+ A or CH- B and confirm with C .
4
Using C or D , select the character position where the
letter/number/symbol is to be changed or reentered.
5
Change the desired character using CH+ A or CH- B . You
can switch between uppercase and lowercase letters with the
SELECT button. You can re-delete a character with the
CLEAR button.
6
Repeat steps 4 and 5 until you have made the desired changes.
7
Save the new name with OK .'Storing name' appears on the
TV screen for confirmation.
8
To end, press D .
Playing the entire title
If you have hidden certain chapters of a title, with this setting you can view the entire title
including the hidden chapters. Proceed as follows:
1
Press the STOP h button, or during playback press
DISC-MENU .
Settings for title Charly1
Name Charly 1
Play full title Press OK
Erase this title
2
Using CH+ A or CH- B select the title that you want to play
back and confirm with C . The title editing menu will appear.
3
Select 'Play full title' using CH+ A or CH- B and confirm
with OK .
4
Playback starts automatically. The full title - including the hidden
chapters - is played.
Managing disc content
Page 71
59
Deleting recordings/titles
You can delete specific recordings from a disc. Proceed as follows:
1
Press the STOP h button, or during playback press
DISC-MENU .
Settings for title Charly1
Name Charly 1
Play full title
Erase this title Press OK
2
Use CH+ A or CH- B to select the title to be deleted and
confirm with C . The title editing menu will appear.
3
Select 'Erase this title' using CH+ A or CH- B and confirm
with OK .'This will completely erase this title'. 'Press OK
to confirm' will appear on the screen.
4
If you want to delete this title, confirm with OK . Otherwise,
end by pressing D .
5
'Erasing title' will appear on the screen.
6
An 'Empty title' box will now appear at this location in the
index picture screen. New recordings can now be added at this
location.
If the deleted title was too short (less than one minute), no
'Empty title' will appear at this point.
Can titles also be deleted on DVD+Rs?
Titles on DVD+R are only marked as deleted. 'Deleted title' appears on
the TV screen instead of 'Empty title.' During playback, the deleted title
will be skipped. The location on the disc used for this title cannot be
reused since the title has not been physically deleted. After a disc has
been finalized, no further changes can be made.
?
ENGLISH
Managing disc content
Page 72
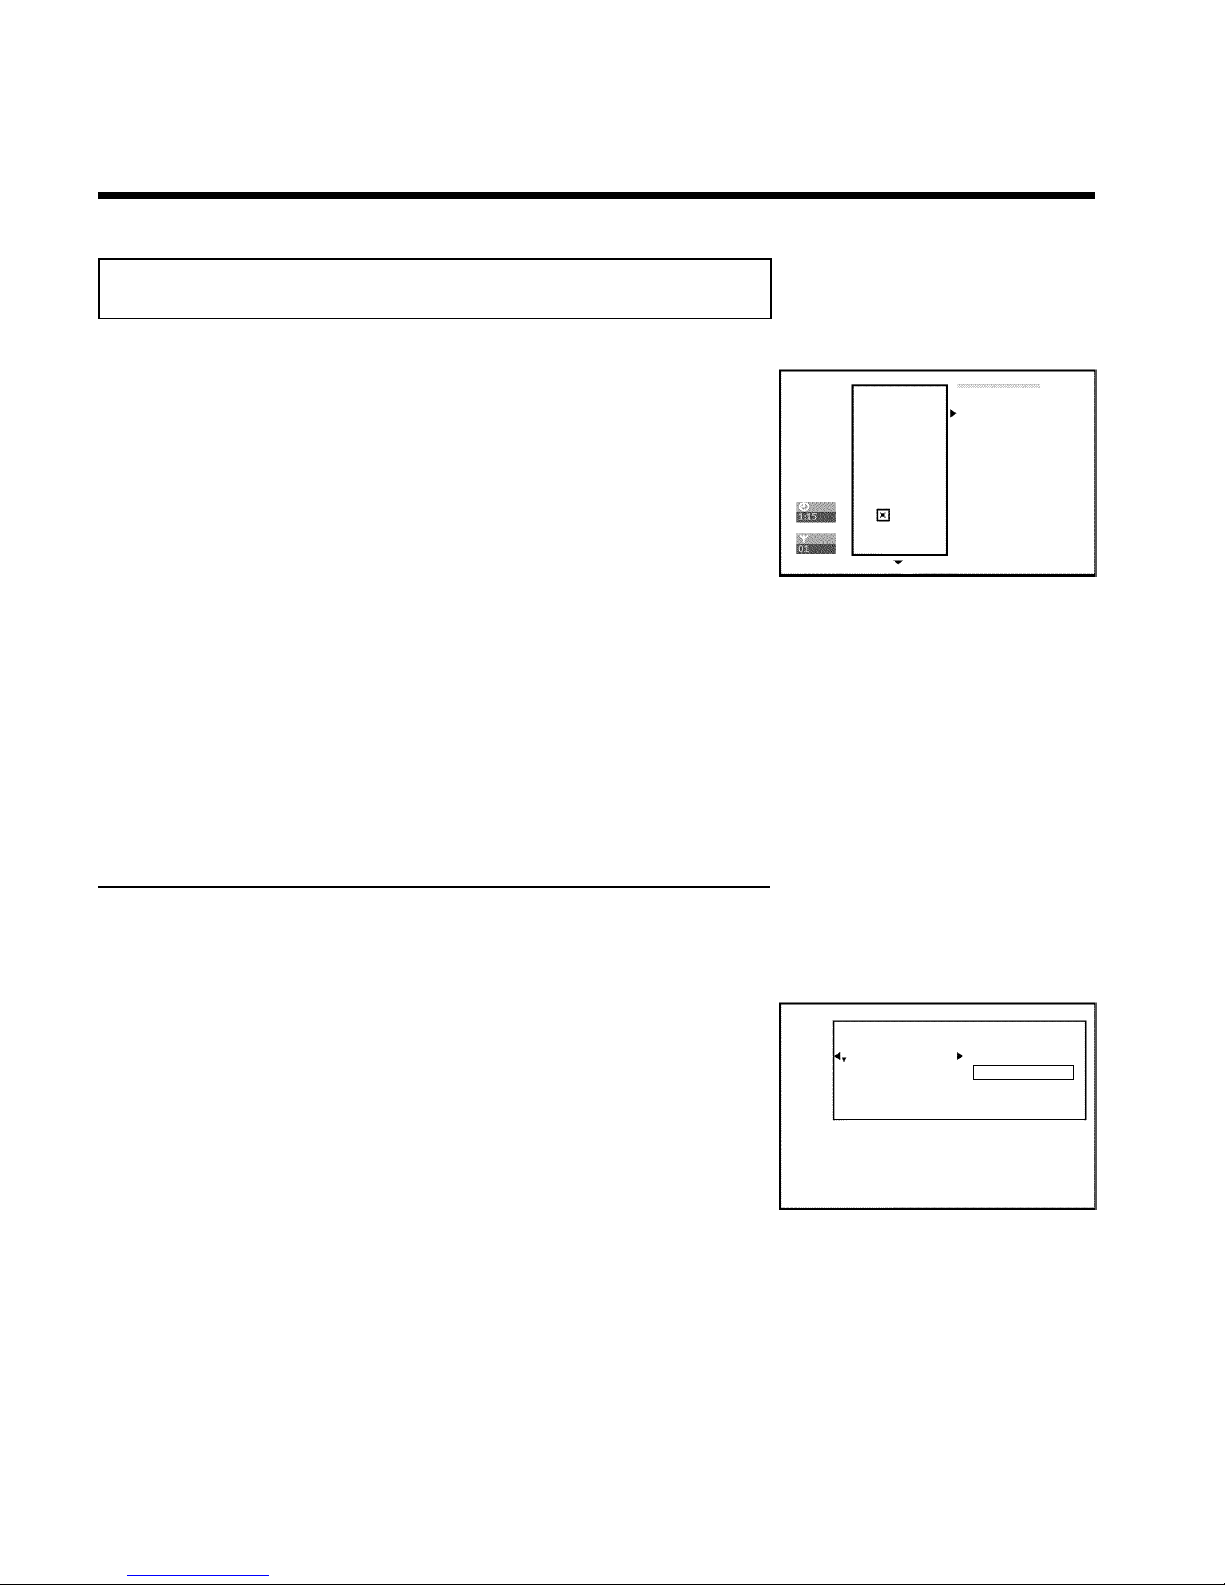
60
Disc settings
Philips1
00:35:59 used
Fr15/02/2003
Unlocked
NTSC
DVD playback
Edits
This display is located before the first title and contains general information about the inserted
disc.
You can:
•) change the disc name
•) protect or unprotect a disc
•) finalize editing (make DVD compatible)
•) finalizing DVD+Rs
•) Erase DVD+RWs
To show this display, proceed as follows:
1
Press the STOP h button, or during playback press
DISC-MENU .
2
Select the first title with CH+ A or press STOP h .
3
Press the CH+ A button. The disc information screen will
appear.
Changing disc name
1
Press C in the 'Disc info display'. The 'Settings for' menu will
appear on the screen.
Settings for Philips1
Disc name Philips1
Protection Unprotected
Erase disc
2
Select the 'Disc name' line using CH+ A or CH- B and
confirm with C .
3
Using C or D select the position where the
letter/number/symbol is to be changed/re-entered.
4
Change the desired character using CH+ A or CH- B . You
can switch between uppercase and lowercase letters with the
SELECT button. You can re-delete a character with the
CLEAR button.
5
Repeat step 3 and step 4 until you have made the desired
changes.
6
Save the new title with OK .'Storing name' appears on the TV
screen for confirmation.
7
To end, press D .
Managing disc content
Page 73
61
Finalize editing
If one or more titles have been edited, it is possible that another DVD Player will display the
original titles. You can prepare your disc so that a DVD player can play the edited version.
1
Press C in the 'Disc info display'. The 'Settings for' menu will
appear on the screen.
2
Select the line 'Make edits compatible' using CH+ A or
CH- B and confirm with OK .
a The line 'Make edits compatible' does not appear
b Your disc is already compatible. It does not need to be converted.
To end, press SYSTEM-MENU .
Problem
3
'This will take...' will appear on the screen to show how long
this process will last.
4
To confirm, press OK .'Working...' will appear on the screen. A
bar moving from left to right will show the progress of the
conversion.
Finalizing DVD+R discs
This function is necessary so that a DVD+R can be played in a DVD player. When this function
is completed, no further recordings or changes can be made to the disc.
1
Press C in the 'Disc info display'. The 'Settings for' menu will
appear on the screen.
2
Select 'Finalize disc' using CH+ A or CH- B and confirm
with OK .
a 'Finalize disc' does not appear in the display.
b Either no DVD+R was inserted or the disc has already been finalized.
To end, press SYSTEM-MENU .
a The 'Settings for' menu does not appear
b If the disc was made on another DVD recorder, it is possible that this
menu cannot be opened. In this case, use the 'Finalize disc' function
in the 'A' menu, submenu 'Features'.
Problem
3
'This will take...' will appear on the screen to show how long
this process will last.
4
To confirm, press OK .'Working...' will appear on the screen. A
bar moving from left to right will show the progress of the
editing process.
ENGLISH
Managing disc content
Page 74
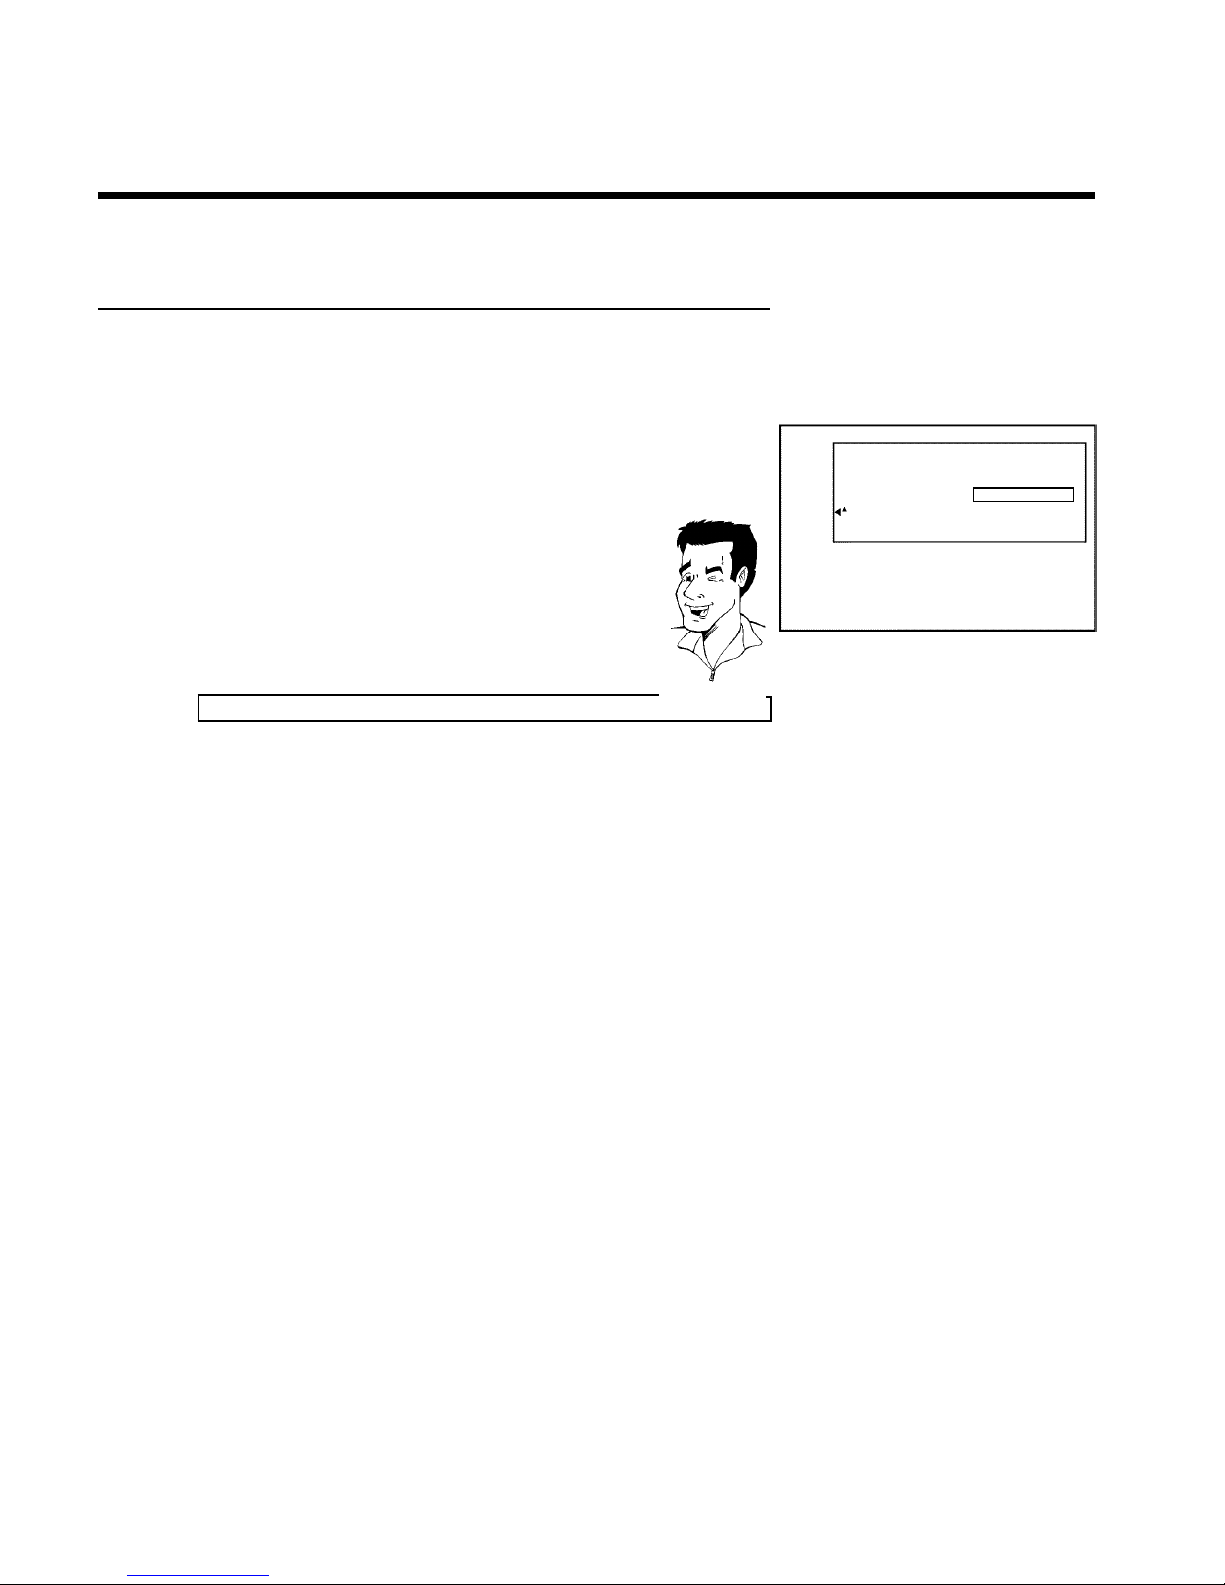
62
Erasing DVD+RWs
1
Press C in the 'Disc info display'. The 'Settings for' menu will
appear on the screen.
Settings for Philips1
Disc name Philips1
Protection Unprotected
Erase disc Press OK
2
Select 'Erase disc' using CH+ A or CH- B and confirm with
OK .'This will erase all titles' Press OK to confirm'
appears on the screen.
3
If you want to delete all titles, confirm with OK . Otherwise, end
by pressing D .
4
'Erasing disc' will appear on the TV screen.
5
After the disc has been successfully erased, the index picture
screen will be empty.
If the disc is empty already, you cannot select 'Erase disc'.
Tip
Managing disc content
Page 75
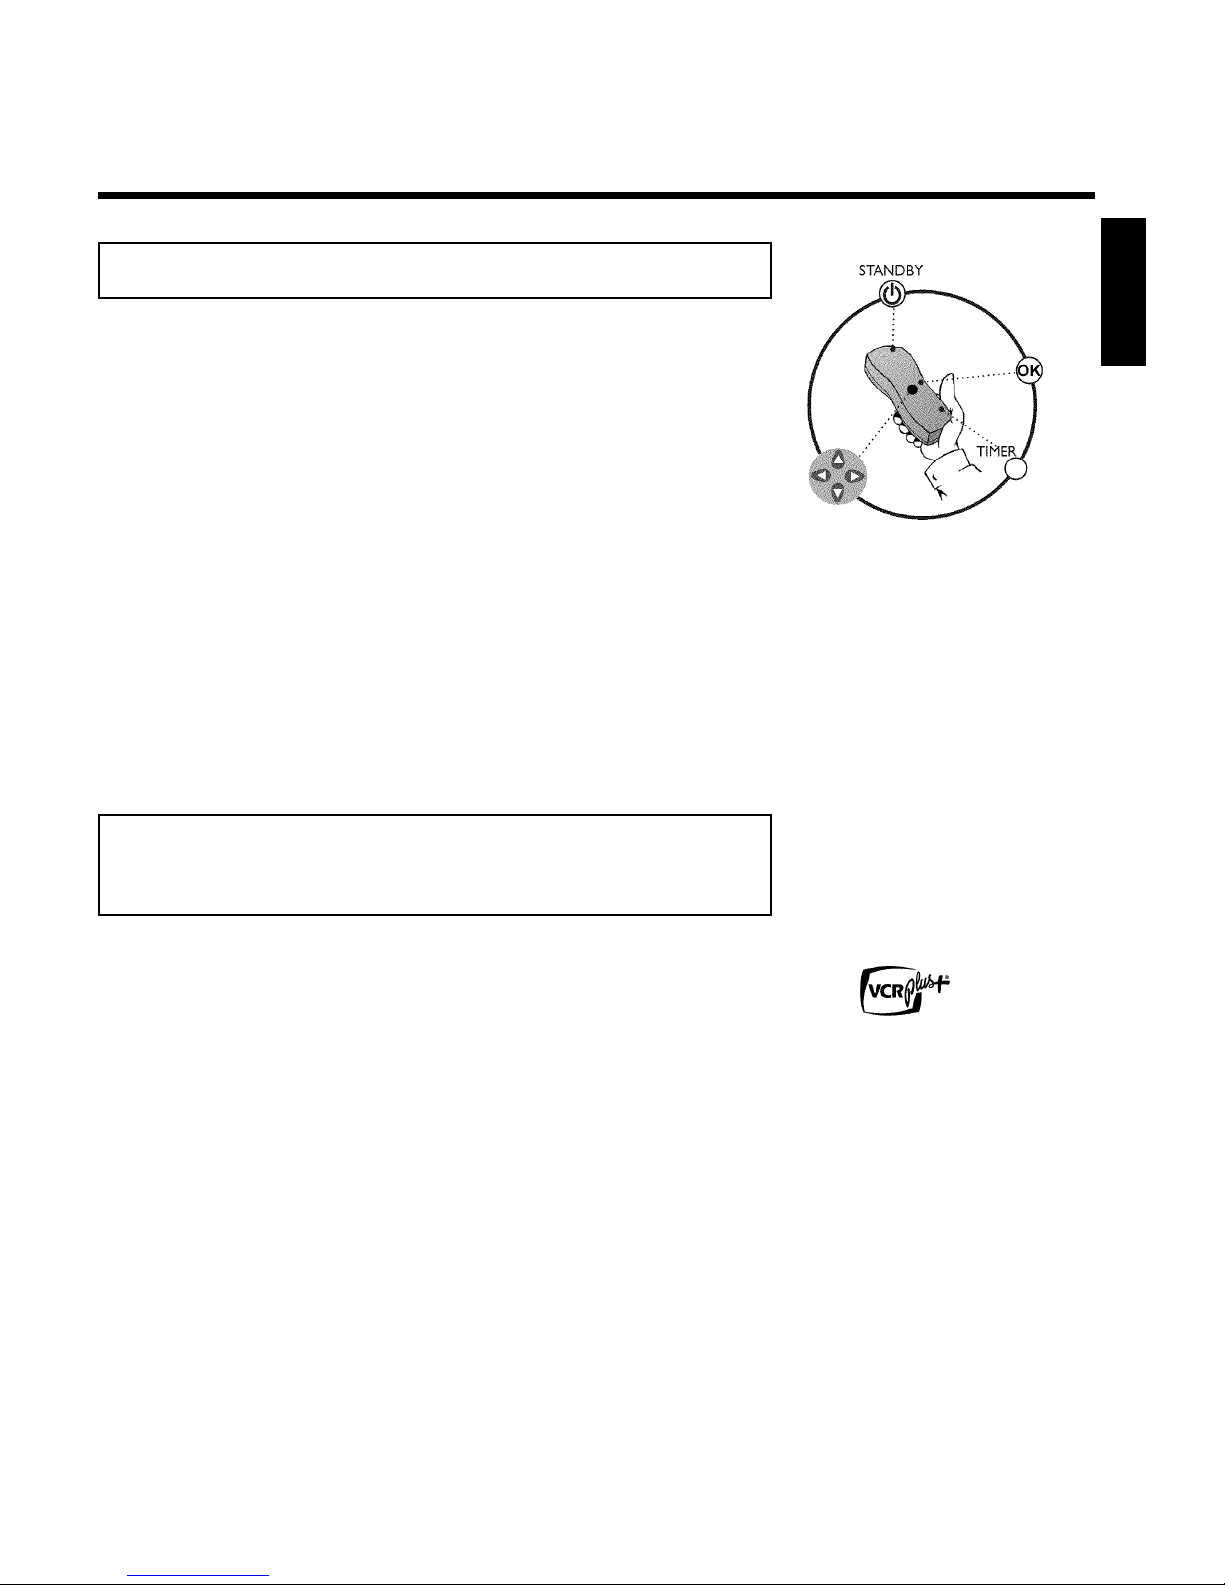
63
JProgramming a recording (TIMER)
General
Use programmed recording (TIMER) to automatically start and stop a recording at a later date.
The DVD Recorder will switch to the right channel and begin recording at the correct time.
With this DVD recorder, you can pre-program up to 6 recordings within a period of one year.
To make a programmed recording, your DVD Recorder needs to know:
* the date of the recording
* the channel number of the TV channel
* the start and stop time of the recording
* the recording mode ('M1/M2/M2x/M3/M4/M6/M8')
This information is saved in a TIMER block.
Before you begin, make sure the clock is set. If the clock is not set, the 'Time/Date' menu will
appear when you press the TIMER button.
Programming a recording with the 'VCR
Plus+
®
system'
Thanks to this programming system, you no longer need to tediously enter the date, TV channel,
start and end times. All the information needed for programming is contained in the PlusCode
programming number. This 8-digit PlusCode number is found in most TV listings for magazines.
1
Switch on the TV. Select the channel number for the DVD
Recorder (channel 3 or 4 or the Audio/Video In channel).
2
With the Recorder on, press TIMER on the remote control.
The programming method selected last is marked.
3
Select line 'VCR Plus+ system' using CH- B or CH+ A and
confirm with C .
4
Enter the entire PlusCode number. This number is up to 9 digits
long and can be found next to the start time of the TV program
in your TV listings magazine.
e.g.: 5-234-89 or 5 234 89
Enter 523489 for the PlusCode number.
If you make a mistake, you can clear the entry with CLEAR .
ENGLISH
Programming a recording (TIMER)
Page 76
64
Timer
VCR Plus+ system
PlusCode number
---------
Mo-Fr/Weekly
Press SELECT
To store
Press OK
Selecting daily/weekly recordings
Using SELECT , select from the following options:
'Mo-Fr': Repeated daily recordings from Monday to Friday.
'Weekly': Repeated weekly recordings (every week on the same day).
Tip
5
Confirm with OK .
a The following message appears on the screen: 'Please enter
channel number'
b The channel number of the TV channel has not yet been assigned to
the PlusCode number. Using C , D or the number buttons 0..9 on
the remote control, select the corresponding channel number (name)
of the TV channel and confirm with OK .
a The following message appears on the screen: 'PlusCode
number wrong'
b The entered PlusCode number is incorrect. Repeat your entry or
cancel using the SYSTEM-MENU button.
b Check the time/date (see 'Setting the time & date' in 'Installing your
DVD recorder').
a The following message appears on the screen: 'Date does not
match Mon-Fri'
b A daily recording was entered for the wrong day. Daily programming
can only be used for recordings to be made from Monday to Friday.
Problem
Timer
VCR Plus+ system
Date
01/22
Ch.
001
Start
08:30AM
End
10:30AM
Rec
Mode
M1
To store
Press OK
AM/PM
Press SELECT
6
The decoded data appears after confirmation. You can go back
and change the data. Select the appropriate input field with C or
D . Change the information with CH+ A , CH- B or the
number buttons 0..9 .
Change 'AM/PM'
Use the SELECT button to select 'AM'or'PM' in the input fields
'Start' and 'End'.
Changing the recording mode
Select 'RecMode' using C .
Using CH- B , select the recording mode 'M1, M2, M2x, M3, M4, M6',
M8'.
Tip
7
If all information is correct, press the OK button. The
information is stored in a TIMER block.
Programming a recording (TIMER)
Page 77

65
8
To end, press TIMER .
9
Insert a recordable disc in the Recorder.
The disc is checked.
10
Locate on the disc the position where you want to start the
recording.
11
Switch the Recorder off with STANDBY m .
The programmed recording will only function properly when the
DVD Recorder has been switched off using the
STANDBY m button.
If any of the TIMER blocks are in use, 'TIMER' will light up on the display.
ENGLISH
Programming a recording (TIMER)
Page 78
66
Programming a recording without the
VCR Plus+
®
system
1
Switch on the TV. Select the channel number for the DVD
Recorder (channel 3 or 4 or the Audio/Video In channel).
2
With the Recorder on, press TIMER on the remote control.
The programming method selected last is marked.
Timer
Timer Programming
Date
01/22
Ch.01Start
08:30AM
End
10:30AM
Rec
Mode
M1
Mo-Fr/Weekly
Press SELECT
To store
Press OK
3
Select line 'Timer Programming' using CH- B or CH+ A and
confirm with C .
The information will be displayed.
4
Select the entry field with D or C .
5
Enter information with CH- B , CH+ A or the number buttons
0..9 .
In the entry field 'Date', you first enter the month and then the
date.
Selecting daily/weekly recordings
In 'Date' use SELECT to select from the following options:
'Mo-Fr': Repeated daily recordings from Monday to Friday
'Mo': Repeated weekly recordings (every week on the same day, e.g.
Monday).
Change 'AM/PM'
Use the SELECT button to select 'AM'or'PM' in the input fields
'Start' and 'End'.
Changing the recording quality
Select the 'RecMode' input field using C .
Use CH- B , CH+ A to select the recording mode.
Tip
6
If all information is correct, press the OK button. The
information is stored in a TIMER block.
7
To end, press TIMER .
The disk you have inserted will be checked.
8
Search the position on the disc where the recording should begin.
9
Switch off with STANDBY m .
The programmed recording will only function properly when the
DVD Recorder has been switched off using the
STANDBY m button.
If any of the TIMER blocks are in use, 'TIMER' will light up on the display.
Programming a recording (TIMER)
Page 79
67
How to change or delete a programmed
recording (TIMER)
1
Switch on the TV. If required, select the channel number for the
DVD Recorder (channel 3 or 4).
2
With the Recorder on, press TIMER on the remote control.
The programming method selected last is marked.
3
Select 'Timer List' using CH- B or CH+ A and confirm with
C .
Timer
Timer List
Date
01/22
--/--
Ch.
01
-----
Start
04:25PM
--:--
End
06:05PM
--:--
Rec
Mode
M2
---
Total record time: 01:40
To change
Press ›
To exit
Press TIMER
4
Select the programmed recording (TIMER) you want to check,
change, or delete with CH- B or CH+ A .
Delete programmed recording
1 Press the CLEAR button.
2 Confirm with OK .'Timer Cleared' will briefly appear on the TV
screen.
'--' appears rather than the displayed values
3 To end, press TIMER .
Tip
5
Press C .
Select the entry field with D or C .
If required, change the information with CH+ A , CH- B or
the number buttons 0..9 .
6
In 'Date', you first enter the month and then the date.
7
Confirm with OK .
8
To end, press TIMER .
9
Switch off with STANDBY m .
ENGLISH
Programming a recording (TIMER)
Page 80
68
Problem solving for programmed
recordings
PROBLEM SOLUTION
DVD Recorder does not
respond
bWhile a programmed recording is being made, you cannot operate your DVD Recorder
manually. If you want to cancel the programmed recording, press STANDBY m .
'Switch off, timer recording'
flashes on the TV screen.
bThe DVD Recorder was switched on a few minutes before the start of a programmed
recording.
Turn off the DVD Recorder by pressing STANDBY m . A programmed recording (timer)
will only function if the DVD Recorder is switched off (button STANDBY m ).
Error message: 'Insert
recordable disc'
bEither no disc was inserted or a disc was inserted that cannot be used for recordings. Insert a
disc that can be recorded upon.
Locate on the disc the right position for the recording.
Turn off the DVD Recorder by pressing STANDBY m .
The error message 'Disc
locked' appears briefly on
the screen.
bA protected disc was inserted. Undo the erase protection (chapter 'Manual recording', section
'Preventing accidental erasing of discs '), or insert a different disc.
Error message: 'Memory
full'
bIf this error message appears after pressing TIMER , then all TIMER blocks are already
programmed. No more recordings can be programmed. Press the C button. Select the
programmed recording (TIMER block) you want to check or clear using CH+ A or CH- B .
The 'Data error' message
appears on the screen.
bThe data for the recording could not be transferred. Please check date, start time, and end
time of the programmed recording.
The message 'Collision'
appears on the screen.
bThe timer recording overlaps with another timer recording.
bIf you ignore this warning, the programmed recording with the early start time will start first.
The second recording will then lack the beginning.
bChange the information for one of the two recordings.
bDelete one of the two recordings.
Programming a recording (TIMER)
Page 81

69
KUser preferences
This section explains how to customize the DVD Recorder to your preferences. These icons
indicate the following:
-
Picture settings
.
Sound settings
/
Language settings
0
Additional settings
1
Remote control settings
Control the DVD Recorder using the remote control of your Philips TV
set
2
Disc settings
3
Recording settings
4
Installation
1
Switch on the TV. If required, select the channel number for the
DVD Recorder (channel 3 or 4 or Audio/Video In channel).
2
Press SYSTEM-MENU on the remote control. The menu bar
will appear at the top of the TV screen.
3
Select 'A' with D or C and confirm with CH- B .
4
Select the corresponding function with CH- B or CH+ A and
confirm with C .
5
Select the corresponding line with CH- B or CH+ A and
confirm with the C button. Choose an item you want to adjust,
using the instructions provided on the following pages.
6
Select the corresponding function with CH- B or CH+ A ,or
select the setting with D or C . Choose an item you want to
adjust, using the instructions provided on the following pages.
7
Confirm the new setting by pressing OK .
8
To close the menu item, press D .
ENGLISH
User preferences
Page 82
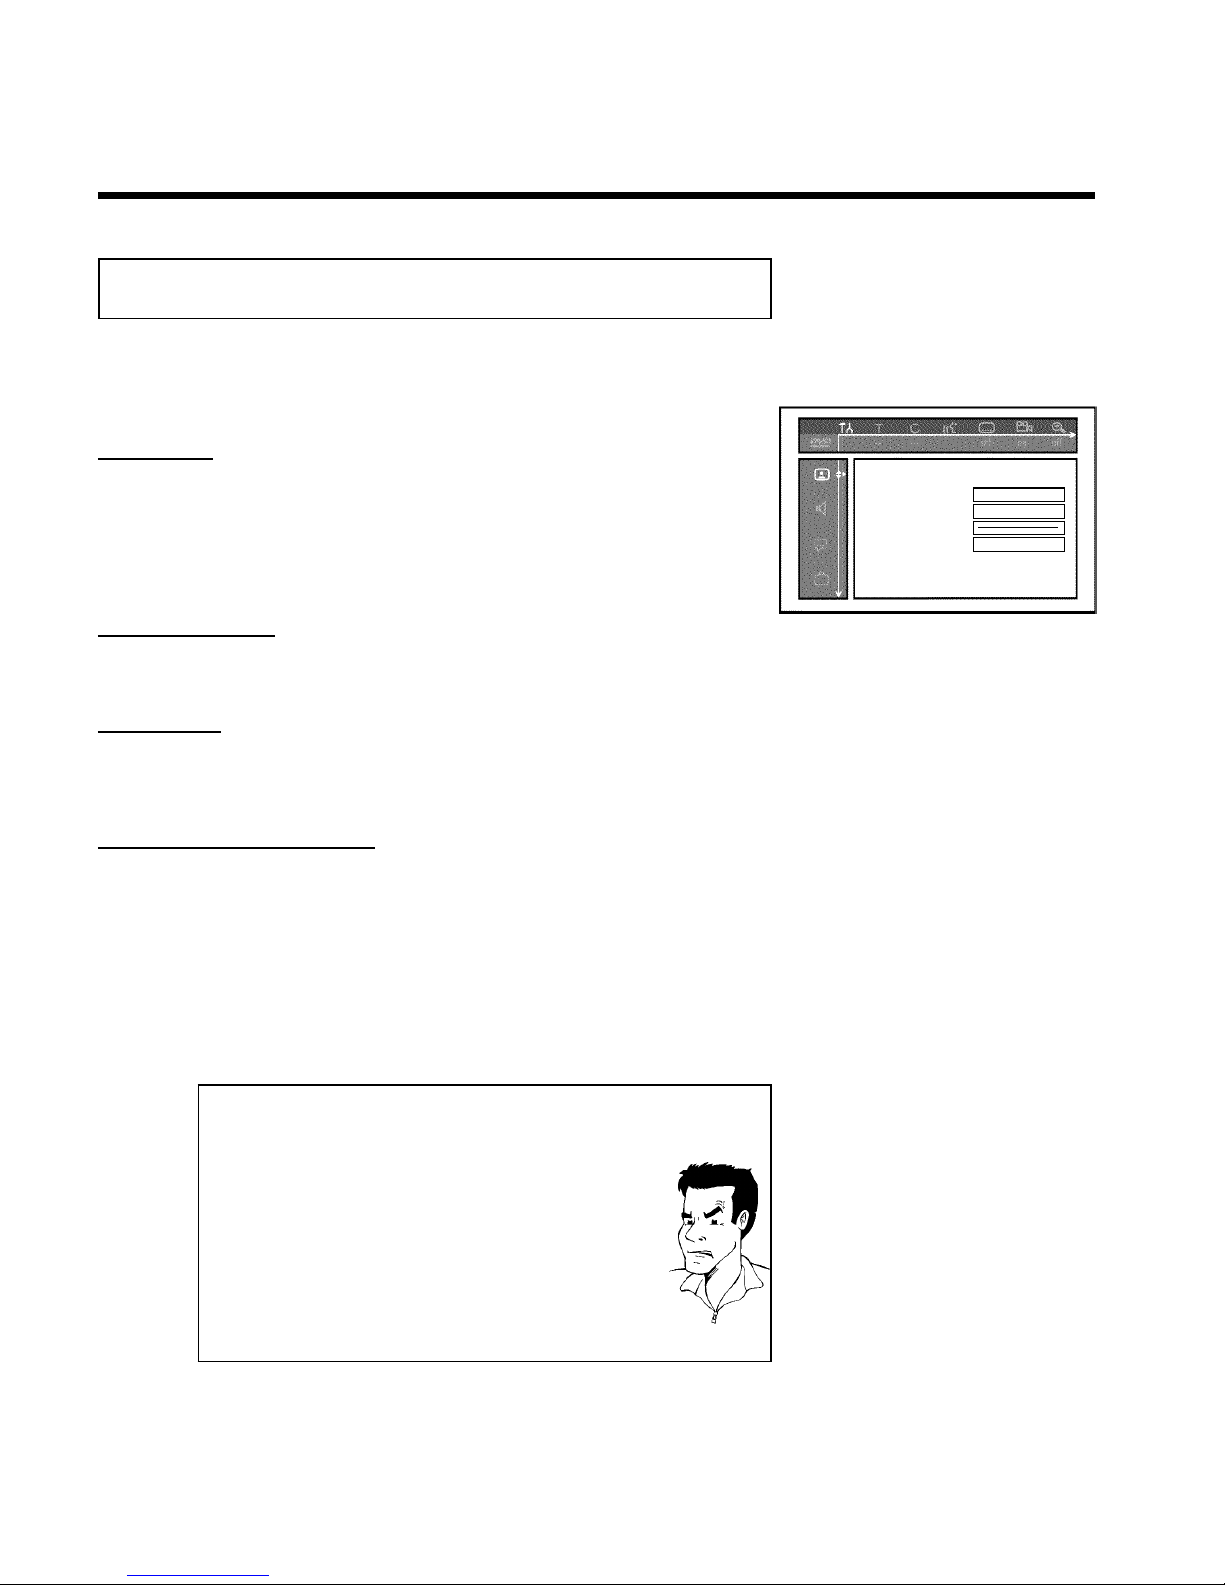
70
Picture settings
You can select the following functions in this menu:
Picture
TV shape 16:9
Black level shift Off
Video shift ï
Component video output Interlaced
'TV shape'
The picture signal can be adjusted to fit your TV:
'4:3 letterbox': for a 'wide-screen' display with black bars on the top and bottom
'4:3 panscan': for a full-height picture with the sides trimmed
'16:9' : for wide-screen TV (frame ratio 16:9)
'Black level shift'
Adapts the color dynamic for NTSC playback when set to 'On'.
'Video shift'
This allows you to move the picture left or right using the D , C buttons in order to adjust
the picture to your TV screen.
'Component video output'
This allows you to switch the Component Video signal between 'Interlaced' and 'Progressive
Scan.'
Warning If your TV has separate connections for 'Interlaced' and 'Progressive Scan' or it does
not switch automatically between the two, it is possible that no picture will appear on the TV
after it is switched from one to the other.
1
Select the setting you need with SELECT . Choose Progressive
Scan only if your TV has Progressive Scan.
2
Confirm with OK .
a No picture appears on the TV after switching
Check the display of your DVD recorder.
'PRO': 'Progressive Scan' is on
No display: 'Interlaced' is on. Switch your TV to the corresponding
input jack or select the corresponding connection. You can also
switch the Component video output signal as follows:
1 Disconnect the recorder's power cord.
2 Hold down N on the DVD Recorder while reconnecting the
power cord. 'PRO' (progressive scan) appears on the display.
3 If you want to switch back, repeat steps 1 and 2 . 'PRO' disappears
from the display. The DVD Recorder is switched to 'Interlaced.'
Problem
User preferences
Page 83
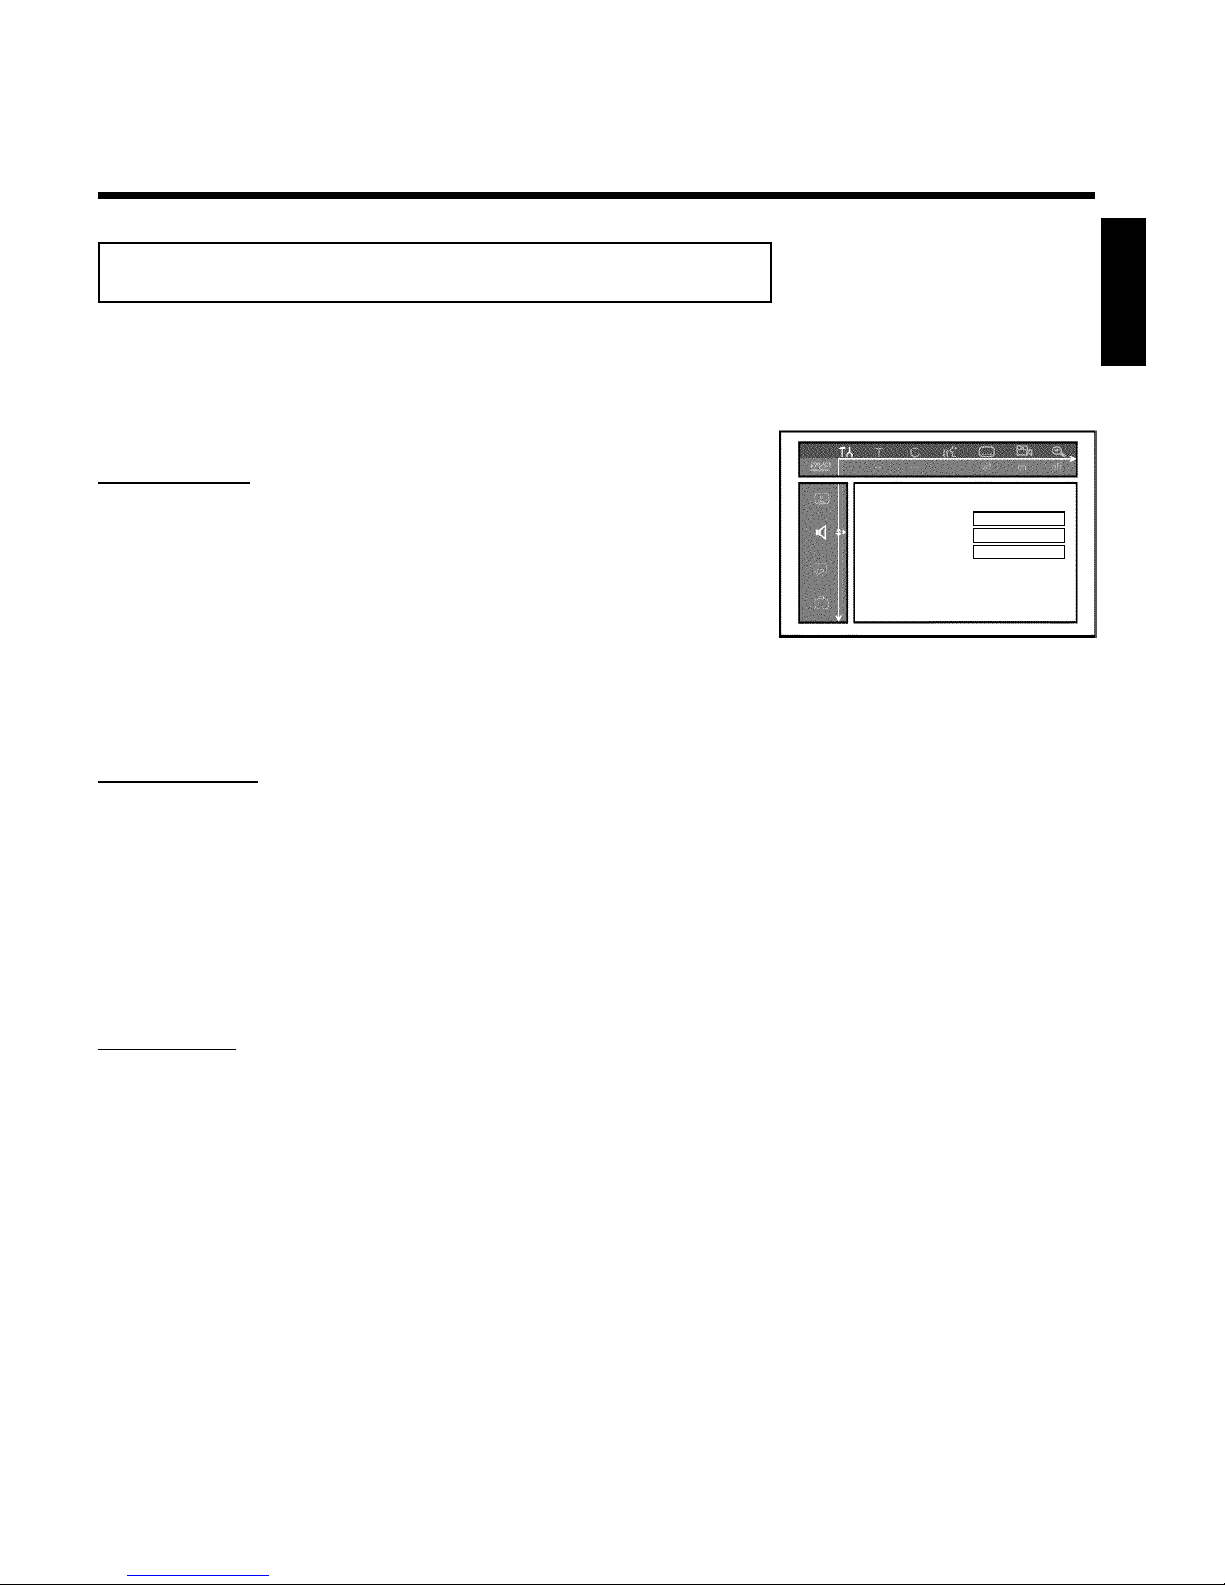
71
Sound settings
Depending on the audio outputs being used, this menu provides you with a selection of settings.
If you are only using the analog audio outputs (red and white L AUDIO R OUT , AUDIO
OUT jacks), select 'Off' in the 'Digital output' menu.
Sound
Digital output All
Analog output Stereo
Night mode Off
'Digital output'
You can select one of the following settings for devices that are connected to the DIGITAL
AUDIO OUT jack:
'All' : Dolby Digital and DTS signals are going out unchanged to the digital output. MPEG-2
multi-channel signals are converted to PCM (Pulse Code Modulation).
Use receivers/amplifiers with a digital multichannel sound decoder.
'PCM only' : Dolby Digital and MPEG-2 multi-channel signals are converted to PCM (Pulse Code
Modulation).
For receivers/amplifiers without a digital multichannel sound decoder.
'Off' : digital output is off.
For devices with an analog audio input.
'Analog output'
You can select from the following settings for devices connected to the analog outputs ( L
AUDIO R OUT , AUDIO OUT ).
'Stereo' : For devices that use neither DolbySurround nor TruSurround. Only use this setting
when the DVD Recorder is connected to a stereo TV.
'Surround' : Dolby Digital and MPEG-2 multi-channel are mixed to a Dolby Surround-compatible
two-channel output signal.
For devices with a Dolby Surround / Pro Logic decoder .
'Night mode'
Night mode optimizes the sound dynamics at low volume. This causes less disturbance in quiet
environments. This setting only functions with Dolby Digital Audio on DVDs.
ENGLISH
User preferences
Page 84
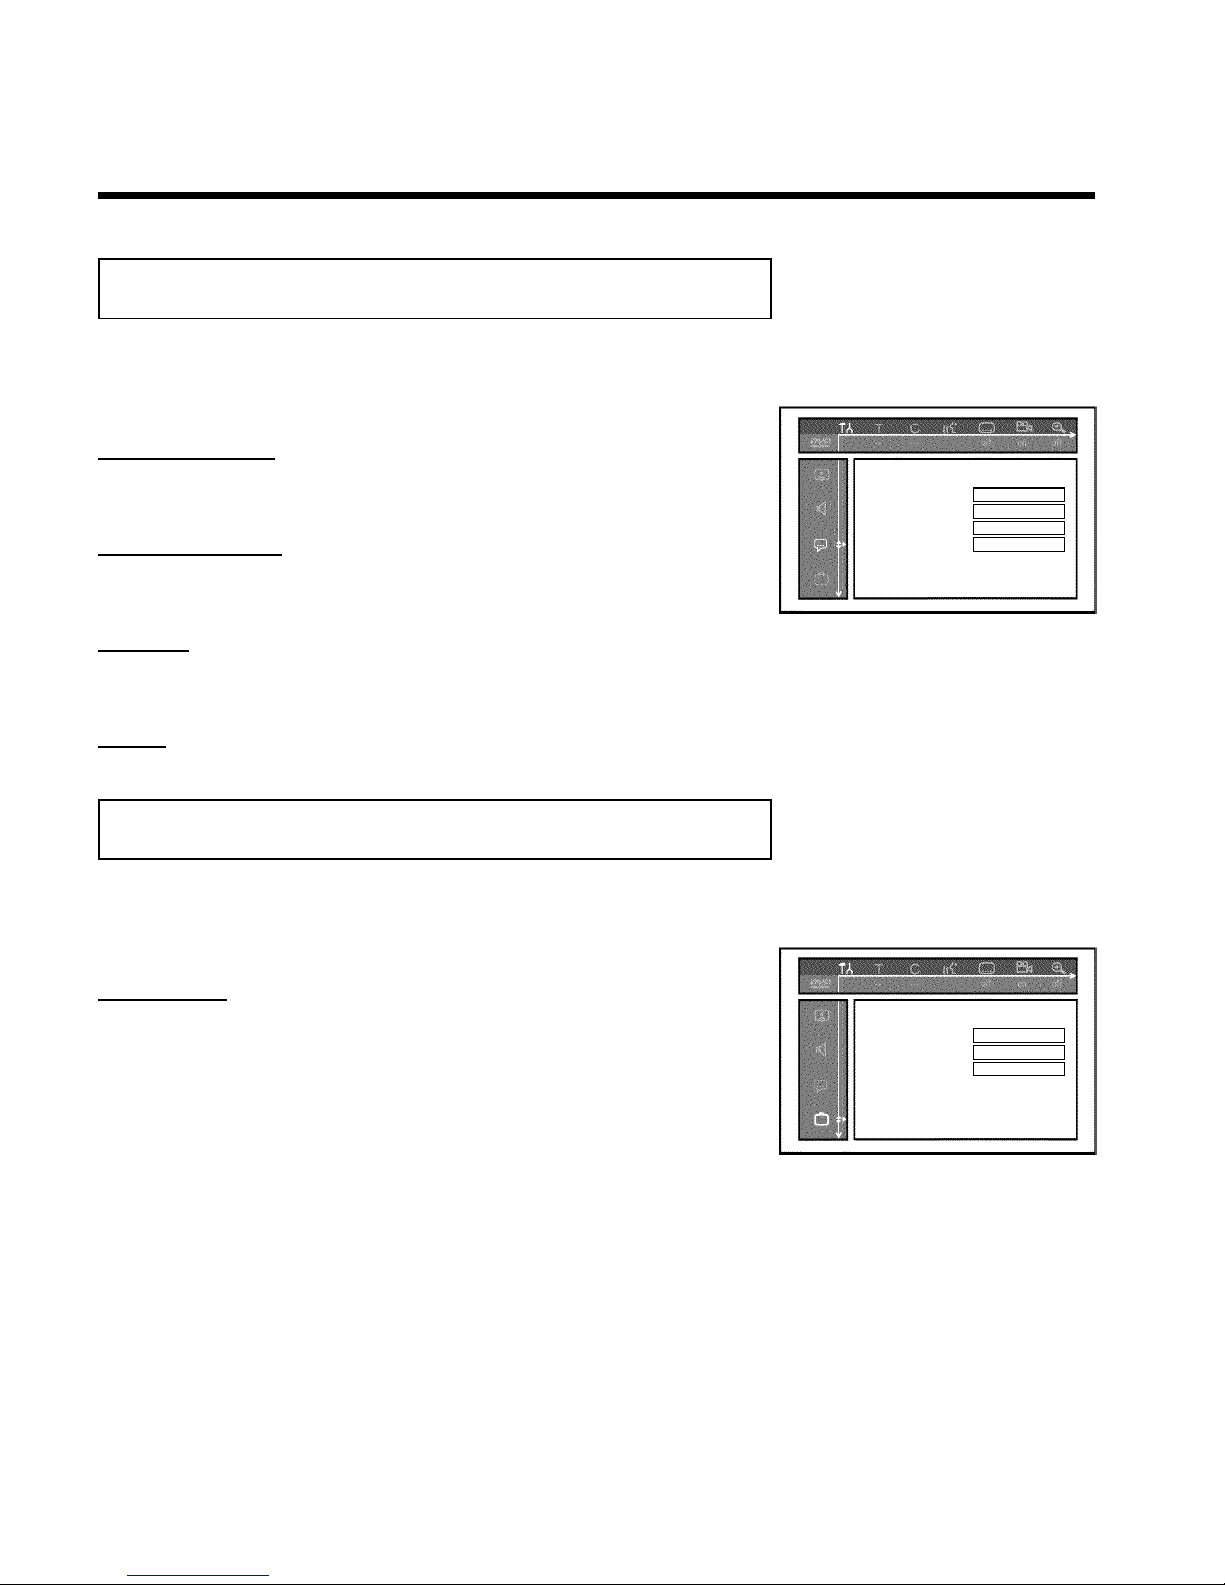
72
Language settings
You can select the following settings in this menu:
Language
Playback audio English
Recording audio Stereo
Subtitle English
Menu English
'Playback audio'
Audio language of DVDs
'Recording audio'
Audio recording
'Subtitle'
Subtitle language
'Menu'
Screen menu language
Additional settings
You can select the following functions in this menu:
Features
Status box On
Standby Normal
Display Bright
'Status box'
Along with the on screen menu, the OSD (On Screen Display) also displays the current
operating status on the TV screen (counter, playback, recording, TV channel,...).
You can switch off the information about the operating status so as to avoid recording this
information when making recordings.
'On': The OSD information appears with every selected mode for a few seconds, then disappears
again.
'Off': The OSD information is switched off. It can no longer be displayed on the screen.
User preferences
Page 85
73
'Standby'
To save energy, you can switch off the clock display on the DVD recorder. Programmed
(TIMER) recordings will still take place.
Moreover, you can present the most important features of the DVD Recorder in scrolling text
in the display (demo).
'Low power': If the DVD Recorder is switched off using STANDBY m , the clock display is not
visible.
'Normal': If the DVD Recorder is switched off using STANDBY m , the clock display is visible.
'Demo mode': If the DVD Recorder is switched off with the STANDBY m button, a list of the
most important features is shown in the display.
'Display'
You can change the brightness of the display on the DVD recorder. This setting only affects the
DVD Recorder when it is switched on.
'Bright': The display appears with normal brightness.
'Dimmed': The display appears less bright.
'Off': The display is switched off.
Remote control settings
In this menu you can set the remote control type to which your DVD Recorder should respond:
'DVD player': The DVD Recorder also responds to a DVD player remote control (remote
control code RC-6).
Choose this setting if your Philips TV remote supports DVD functions.
'DVD recorder': The DVD Recorder only responds to the supplied remote control.
ENGLISH
User preferences
Page 86
74
Disc feature menu
In this menu you can make changes that relate to the disc:
Access control Enter code…
Auto resume On
'Access control'
Please read the next chapter on 'Access control (child lock)'.
'Auto resume'
If playback of a pre-recorded DVD or VCD is interrupted ( STOP h or OPEN/CLOSE J ),
playback will be restarted at the exact location when the disc is reinserted. This function does
not only apply to the current disc but also to the last 20 discs you played.
If desired, this function can be turned off.
'PBC'
This line only appears when a VCD has been inserted.
This function is used to activate or deactivate the PBC menu (playback control) of Video CDs.
For more information, please see the chapter on 'Playback', 'Playback of a (Super) Video CD'.
'Finalize disc'
This feature allows you to finalize DVD+R discs. If the disc has already been finalized this line
will appear darker.
'Adapt disc format'
If a DVD+RW has been recorded in a computer drive or in another DVD recorder, the index
screen may not be displayed correctly.
This feature allows you to change the format of the disc.
This function is therefore only visible if the disc format is different.
User preferences
Page 87
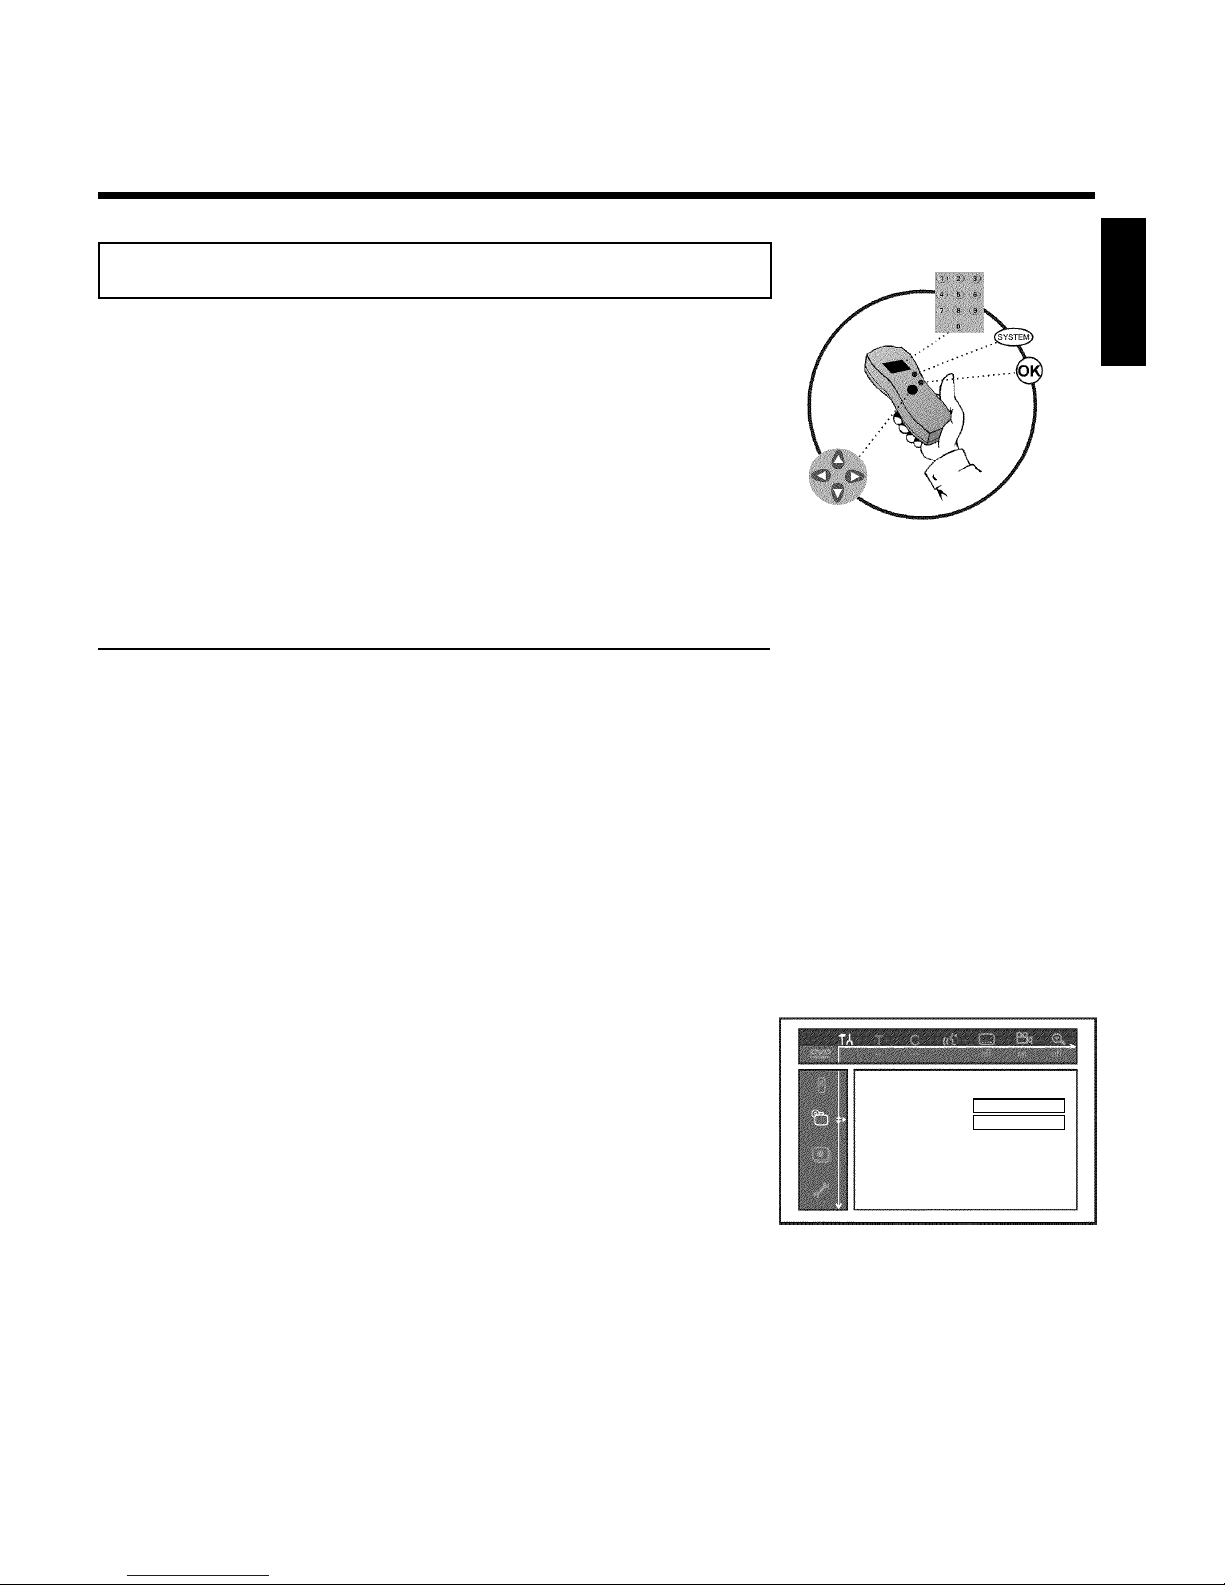
75
LAccess control (Child lock)
Child lock (DVD and VCD)
This function can prevent children from viewing discs.
When in use, a four-digit code (PIN) must be entered in order to play a disc.
In addition, you can set a disc to be played 'always' or 'once' despite the child lock.
•)'Play always':
This disc has been placed in a list that fits 50 such 'child safe discs'. When more than 50 discs
have been added to the list, the oldest disc is removed to make room for the new one. 'Child
safe' will appear on the screen at the start of playback.
•)'Play once':
This disc can be played only once. The PIN must be reentered the next time you try to play the
disc.
Activating/Deactivating the child lock
1
Switch on the TV. If required, select the channel number for the
DVD Recorder (channel 3 or 4 or the Audio/Video In channel).
2
Turn on the DVD Recorder by pressing STANDBY-ON m .
3
Press SYSTEM-MENU . The menu bar will appear at the top of
the screen.
4
Select 'A' using D or C .
5
Select line '2(Disc features)' using CH- B or CH+ A and
confirm with C .
Access control Enter code…
Auto resume On
6
'Access control' will bne selected. Press C .
7
Press the number buttons to enter a four-digit code of your
choice. If this is you first time entering your code, you must
enter this code a second time to confirm it.
8
Select 'Child lock' using CH+ A or CH- B and press C .
9
Select '5' using CH- B or CH+ A .
10
Confirm with OK .
11
To end, press D and SYSTEM-MENU .
If you activated Child Lock, you will need to enter the four-digit PIN in order to play locked
discs. To deactivate the child lock, select the '
6
' icon in 9 .
ENGLISH
Access control (Child lock)
Page 88
76
Authorizing discs
1
Insert the disc. After a short check, the access control menu will
appear on the screen.
2
Using CH+ A or CH- B , select 'Play once'or'Play
always.'
3
Use the number buttons 0..9 to enter your PIN.
Double-sided DVDs can have a unique ID number for each side. To completely authorize these
discs, you must authorize each side separately. 'Multi-volume' VCDs can also have a unique ID
number for each volume. To authorize the complete set, each volume must be authorized
separately.
Locking authorized discs
Proceed as follows to lock an authorized disc.
1
Insert the disc. Playback starts automatically. If playback does not
start automatically, press PLAY G .
2
Press STOP h while the icon '
7
' is being displayed. The
icon will change to '
'. This disc is now locked for further
use.
Parental control (DVD video only)
Movies on DVDs may contain scenes which are not suitable for children. DVDs sometimes come
with rating information for the entire DVD or only for certain scenes.
Affected scenes are rated from 1 to 8. If a scene with such a rating is recognized during
playback, the DVD Recorder compares the Parental control rating with that of the DVD scene.
If the scene rating exceeds the Parental control rating, an alternative scene will be played back (if
available).
Most DVDs apply the rating to an entire DVD. Therefore, if certain scenes exceed the rating
you select, the entire disc will be blocked from viewing.
Access control (Child lock)
Page 89
77
Activating/Deactivating the parental
control
1
Switch on the TV. If required, select the channel number for the
DVD Recorder (channel 3 or 4 or the Audio/Video In channel).
2
Turn on the DVD Recorder by pressing STANDBY-ON m .
3
Press SYSTEM-MENU . The menu bar will appear on the top
of the TV screen.
4
Select 'A' using D or C .
5
Select line '2(Disc features)' using CH- B or CH+ A and
confirm with C .
Access control Enter code…
Auto resume On
6
Confirm the line 'Access control' by pressing C .
7
Enter a four-digit code of your choice. If you are entering the
code for the first time, you must enter it again to confirm.
8
Select 'Parental level' with CH+ A or CH- B and confirm
with C . A bar appears for selecting the parental control level.
9
Select the corresponding parental level using CH- B ,
CH+ A or the number buttons 0..9 .
What do the parental levels mean?
Rating 0 (displayed as '--') parental control is not active.
Rating 1 (childsafe)
Rating 8 (for adults only)
What happens when a DVD scene with a higher rating than
authorized is played?
If the Recorder cannot find a suitable alternative, playback is stopped
until the four-digit code is entered.
Tip
10
Confirm with OK . To end, press repeatedly D and then
SYSTEM-MENU .
ENGLISH
Access control (Child lock)
Page 90
78
Changing the country
The Parental control levels depend on the country in which the DVD was manufactured.
Therefore, it is necessary that you enter the country for which these filter values apply.
1
Switch on the TV. If required, select the channel number for the
DVD Recorder (channel 3 or 4 or the Audio/Video In channel).
2
Turn on the DVD Recorder by pressing STANDBY-ON m .
3
Press SYSTEM-MENU . The menu bar will appear.
4
Select 'A' using D or C .
5
Select line '2(Disc features)' using CH- B or CH+ A and
confirm with C .
Access control Enter code…
Auto resume On
6
Confirm the line 'Access control' by pressing C .
7
Press the number buttons to enter a four-digit code of your
choice. If this is you first time entering your code, you must
enter this code a second time to confirm it.
8
Select 'Change country' using CH+ A or CH- B and confirm
with C .
9
Select your country or that of the DVD using CH+ A or
CH- B and confirm with OK .
10
To end, press D and then SYSTEM-MENU .
Access control (Child lock)
Page 91
79
Changing the PIN
1
Switch on the TV. If required, select the channel number for the
DVD Recorder (channel 3 or 4 or the Audio/Video In channel).
2
Turn on the DVD Recorder by pressing STANDBY-ON m .
3
Press SYSTEM-MENU . The menu bar will appear.
4
Select 'A' using D or C .
5
Select line '2(Disc features)' using CH- B or CH+ A and
confirm with C .
Access control Enter code…
Auto resume On
6
Confirm the line 'Access control' by pressing C .
7
Press the number buttons to enter your four-digit code. If this is
you first time entering your code, you must enter this code a
second time to confirm it.
8
Select the line 'Change code' using CH+ A or CH- B and
confirm with C .
9
Enter the new code with the number buttons 0..9 . Re-enter the
code for confirmation.
10
To end, press D and SYSTEM-MENU .
I forgot my code.
When it asks for the code (step 7 ), press the STOP h button four
times and then press OK . The code entry is now deactivated. You can
now enter a new code as described above.
Tip
ENGLISH
Access control (Child lock)
Page 92

80
MBefore you call technical support
If you have any problems using this DVD recorder, it may be caused by one of the following
reasons. You can also call the customer service center in your country.
The telephone numbers can be found in the back of this instruction manual.
You can also visit our web page 'http://www.p4c.philips.com' .
Have the model number (MODEL NO) and the production number (PROD.NO) ready.
The serial number (PROD. NO.) is printed on the type plate fixed at the rear of the set.
PROBLEM SOLUTION
Your DVD Recorder does
not respond to any button
being pressed, and 'IS TV
ON?' appears in the display:
bDevice is in initial installation mode: Switch on the TV, switch over to the DVD Recorder jack
or, if you have only connected the DVD Recorder to an antenna cable, select channel 3 or 4
on the TV.
Now the menu for language selection should appear. Read paragraph 'Initial Installation' in
'Installing your DVD Recorder'.
The device does not react
to the touch of a button,
the remote control is
working:
b'Dealer Mode' is on: All buttons at the front of the DVD Recorder are locked.
To switch off this function:
1 Disconnect the DVD Recorder from the power outlet.
2 Press and hold down STOP h and OPEN/CLOSE J and re-connect the
Recorder to the power supply.
3 As soon as the time or '--:--' appears in the display (6 - 10 seconds), release
STOP h and OPEN/CLOSE J .
Your DVD Recorder does
not respond to any button
being pressed.
bThere is no power. Check the power supply.
bA programmed recording (TIMER) is currently being made: If desired, cancel the programmed
recording (Timer) with STANDBY m .
bThere is a technical problem: Disconnect from the power outlet for 30 seconds, then connect
again.
If this doesn't help, reset your DVD Recorder to the default factory settings.
Resetting the DVD
Recorder to default factory
settings
bWarning:
All the information stored in the memory (programs, time, TIMER) will be reset (deleted).
1 Disconnect the DVD Recorder from the power outlet.
2 Press and hold down the STANDBY-ON m button on the front of the Recorder
while reconnecting to the power outlet.
3 Release STANDBY-ON m when 'IS TV ON?' appears in the display. All the
information stored in the memory (programs, time, TIMER) will be reset (cleared).
Read paragraph 'Initial Installation' in 'Installing your DVD Recorder'.
Remote control does not
work:
bRemote control is not pointing at the device: Point the remote control at the DVD recorder.
See if the 'o(((' appears on the display briefly each time you press a remote control button. If
it does, the Recorder is receiving information from the remote correctly.
bThere is a technical problem: Take out the batteries, wait for 10 seconds, and then re-insert
them.
bBatteries are weak: Replace the batteries.
Before you call technical support
Page 93
81
PROBLEM SOLUTION
No playback on DVD
recorder:
bThere is no recording on the disc: Change disc.
bYou inserted the wrong disc type: Your Recorder can play the following disc types: DVD
Video, (Super)Video-CD, DVD+R(W), Audio-CD, , MP3-CDs
bYou inserted the disc the wrong way: Insert the disc with the label facing up.
bThe disc is dirty. Clean the disc.
bWrong region code: The region code of the DVD and the DVD Recorder must match.
bThe child lock is on. Read chapter 'Access Control (Child Lock)'
bYou have selected or set the wrong channel number on the TV for the DVD recorder: Select
the correct channel number on the TV (channel 3 or 4).
bThe cable connecting the TV and the DVD Recorder may be loose. Check the cable.
I cannot playback (Super)
Video CDs
bIt is possible that this (Super) Video CD contains a menu and the 'PBC' is switched off. You
can see this in status field 'PBC OFF'. To activate this function, proceed as follows:
1 Press SYSTEM-MENU while the (Super) Video-CD is inserted.
2 Select '
A
' using D or C .
3 Select line 'Features' using CH- B or CH+ A and confirm with C .
4 Select 'On' in line 'PBC' using CH- B or CH+ A .
5 Confirm with OK and end with SYSTEM-MENU .
Poor playback on DVD
Recorder (distorted
picture/distorted sound)
bYour TV is not properly adjusted.
bThe disc is dirty: Clean the disc.
bSometimes the picture may be temporarily distorted. This is not a defect of your DVD
recorder.
No recording possible. bThe TV channel you want to record is not stored or you selected the wrong program
number: Check TV channels stored.
bDisc is write-protected (cannot be recorded on): Remove write-protection or change the disc.
For more information, please see 'Preventing accidental erasing of discs' on the 'Manual
Recording'.
bA finalized DVD+R has been inserted. Change disc.
Programmed recording
does not work:
bYou have set the wrong time or date: Check time/date.
bYou have not set the TIMER properly: Check the programmed recordings (TIMER block).
bA locked disc was inserted: Remove disc lock.
bA finalized DVD+R has been inserted. Change disc.
The wrong TV channel was
decoded (recorded) after
you programmed a
recording using the VCR
Plus+ system.
1 Enter the PlusCode programming number of the desired TV channel.
2 Confirm with OK .
3 Check the channel number in the 'Ch.' input field
4 If this does not correspond to the desired TV channel, select this entry field and
change the channel number.
5 Confirm with OK .
There is picture or sound
interference with the TV
reception.
bBefore recording, select the recording mode as described in chapter 'Manual Recording',
section 'Selecting the recording mode (quality)'.
bChange the modulator channel. During standby hold on the remote the button 3 pressed to
switch to channel 3. With button 4 you switch to channel 4.
bHave your antenna or cable TV signal checked.
Distorted sound coming
from a connected hifi
amplifier
bThe DVD Recorder is connected to the 'Phono-input' of your amplifier: This input jack is
provided only for record players without a preamplifier. Connect to a different audio input.
ENGLISH
Before you call technical support
Page 94
82
PROBLEM SOLUTION
The picture is distorted or
blackandwhite during
playback.
bThe TV system of the disc does not match that of your TV (PAL/NTSC).
bThe recording can be made in color only when the TV channels or the connected additional
device sends a color signal. Black-and-white signals without color information (color
subcarriers) cannot be recorded in color.
No sound signal at the
digital output
bCheck whether the sound settings match the selected inputs and the connected additional
devices.
A DVD+RW cannot be
played on certain DVD
players
bIf a recording is too short, it is possible that a DVD player cannot detect it: Please observe
the following 'Minimum recording times':
Recording mode 'M1': 5 minutes, 'M2': 10 minutes, 'M2x': 13 minutes, 'M3': 15 minutes, 'M4':
20 minutes 'M6': 30 minutes 'M8': 30 minutes
bSome DVD players cannot playback DVD+RW recordings. You can solve this problem by
using a special function:
1 Open the disc tray with OPEN/CLOSE J . Insert the disc but do not close the
tray.
2 Hold down the number button 2 on the remote control until the tray closes. The
disc is modified.
3 If this fails to produce the desired result, repeat the procedure using the number
button 3 on the remote control.
4 You can restore the disc to its original condition by pressing and holding 1 .
Warning!
There is a risk that you can no longer play the disc on other DVD players after this
procedure. Therefore, apply this function with particular care.
Other disc errors bIf it is impossible to play a disc, you can try and repair it for new recordings using the
following function. The disc will only be prepared for deletion. It will be deleted only after the
next recording has taken place.
1 Clean the disc.
2 Open the disc tray with OPEN/CLOSE J . Insert the disc but do not close the
tray.
3 Hold down CLEAR on the remote control until the tray closes. The disc is
prepared for deletion.
4 Start recording as with an empty disc.
Other disc errors (DVD+R),
'Disc contains unknown
data'
bThis message may appear if you insert a disc that was not finalised. DVD+R's that have not
been finalised are very sensitive to fingerprints, dust, or dirt. This may cause problems during
recording.
To use the disc again, follow the next steps
1 Make sure that the surface of the disc is clean.
2 Open the disc tray with OPEN/CLOSE J . Insert the defect DVD+R but do not
close the tray.
3 Hold down 5 on the remote control until the tray closes. The disc will be read
('READING' appears on the display) and the DVD recorder will start the repair
process. This may take up to four times as much time as the recording, in which the
error occurred.
4 If the disc is recovered, the index screen will appear.
Please observe the following:
Error during recording: The title may be missing.
Error while changing the title/index picture: The original title/index picture may be visible.
Error while finalizing: The disc appears not to have been finalized.
Before you call technical support
Page 95
83
PROBLEM SOLUTION
The index screen flickers
when a DVD+R is inserted
bYou can finalise the disc using the following function:
1 Open the disc tray with OPEN/CLOSE J . Insert the defect DVD+R but do not
close the tray.
2 Hold down 4 on the remote control until the tray closes.
'FINALIZE' appears in the display. Finalising begins. This may take up to three
minutes.
3 If finalising has been successful, the index screen will appear.
ENGLISH
Page 96

RENEWED
90 DAY
LIMITED WARRANTY
Page 97
Visite nuestro sitio web a http://www.philips.com
Devuelva hoy su tarjeta de Registro de garantía, para asegurarse
que recibirá todos los beneficios a los que tiene derecho.
Una vez que haya registrado su compra PHILIPS, usted queda calificado para recibir todos los privilegios inherentes a la
posesión de un producto PHILIPS. De modo que complete y devuelva de inmediato la Tarjeta de registro de garantía
incluida en su compra. Y aproveche estos importantes beneficios.
Verificación
de garantía
El registro de su producto dentro de un
plazo de 10 días confirma su derecho a
una máxima protección según los
términos y condiciones de su garantía
PHILIPS.
Confirmación
del propietario
Su Tarjeta de registrode garantía
completada sirve como verificación de
propiedad en caso de robo o pérdida del
producto.
Registro
del modelo
La inmediata devolución de su Tarjeta de
registro de garantía le garantiza que
recibirá toda la información y ofertas
especiales a que tiene derecho como
propietario de su modelo.
¡Felicitaciones por su compra
y bienvenido a la "familia"!
Estimado propietario de un producto PHILIPS:
Gracias por su confianza en PHILIPS. Usted ha escogido uno
de los productos mejor construidos y con mejor respaldo
disponibles hoy en día. Y haremos todo lo que esté a nuestro
alcance por mantenerle satisfecho con su compra durante
muchos años venideros.
Como miembro de la "familia" PHILIPS, usted tiene derecho a
estar protegido por una de las garantías más completas y redes
de servicio más sobresalientes de la industria.
Lo que es más, su compra le garantiza que recibirá toda la
información y ofertas especiales a las que tiene derecho,
además de un fácil acceso a los accesorios desde nuestra
cómoda red de compra desde el hogar. Y lo que es más
importante, usted puede confiar en nuestro irrestricto
compromiso con su satisfacción total. Todo esto es nuestra
manera de decirle bienvenido y gracias por invertir en un
producto PHILIPS.
Sinceramente,
Lawrence J. Blanford
Presidente y Gerente General
P.S.Recuerde que para aprovechar al máximo su
producto PHILIPS, debe devolver su Tarjeta de
registro de la garantía dentro de 10 días.
Envíela ahora mismo!
Conozca estos
símbolos de seguridad
Este "relámpago" indica material no
aislado dentro de su unidad que
puede causar una descarga
eléctrica. Para la seguridad de todos en su
hogar, por favor no retire la cubierta del
producto.
El "signo de exclamación" llama la
atención hacia funciones de las que
debería lee con atención
la literatura adjunta para evitar problemas
operativos y de mantenimiento.
ADVERTENCIA: PARA EVITAR
RIESGOS DE INCENDIO O DESCARGAS
ELÉCTRICAS, NO EXPONGA ESTE
EQUIPO A LA LLUVIA O A LA
HUMEDAD.
PRECAUCIÓN: Para evitar descargas
eléctricas, haga coincidir la paleta ancha del
enchufe con la ranura ancha e introdúzcala
hasta el fondo.
ATTENTION: Pour éviter les choc
électriques, introduire la lame la plus large
de la fiche dans la borne correspondante de
la prise et pousser jusqu'au fond.
Page 98

Información de seguridad
Precauciones de seguridad
Advertencia: Para evitar cualquier riesgo de incendio o choque, no debe exponer este equipo a la lluvia ni a la humedad. Advertencia
de la Comisión Federal de Comunicaciones (FCC): Todo cambio o modificación no autorizado en este equipo invalidará la autoridad
del usuario para operarlo.
Seguridad láser
Esta unidad emplea un rayo láser. Únicamente el personal calificado de servicio puede retirar la cubierta o intentar dar servicio a este
dispositivo, debido a la posibilidad de lesiones en los ojos.
PRECAUCIÓN: Uso de controles o ajustes, o procedimientos distintos a los aquí especificados, pueden ocasionar una exposición
peligrosa a la radiación. Esta unidad cumple con los Reglamentos FCC, Parte 15 y 21 CFR 1040.10.
PRECAUCIÓN: Cuando la unidad se abre y se anula el seguro, hay radiación láser visible e invisible. No mire el rayo. El rayo se ubica
dentro, cerca del mecanismo de la unidad.
Información especial para usuarios Canadienses
Este aparato digital no excede los límites de Clase B para emisiones de ruidos de radiofrecuencia de aparatos digitales, tal como se
establece en los Reglamentos de interferencia de radio del Departamento Canadiense de Comunicaciones.
Interferencia para radio / televisión
Se ha probado este equipo y se encuentra que cumple con los límites para un dispositivo digital Clase B, de conformidad con la Parte
15 de los Reglamentos FCC. Dichos límites están diseñados para proporcionar protección razonable contra interferencia dañina en
instalaciones residenciales. Este equipo genera, utiliza y puede radiar energía de radiofrecuencia y, si no se instala y utiliza de acuerdo
con las instrucciones, puede ocasionar una interferencia dañina a las radiocomunicaciones. Sin embargo, no existe garantía que no
habrá interferencia en una instalación en particular. Si este equipo causa interferencia dañina a la recepción de radio o televisión, lo
que se puede determinar encendiendo y apagando el equipo, se alienta al usuario a intentar corregir la interferencia llevando a cabo
una o más de las siguientes medidas:
1) Reorientar o reubicar la antena receptora.
2) Incrementar la separación entre el equipo y el receptor.
3) Conectar el equipo a un enchufe que pertenezca a un circuito distinto al cual está conectado el receptor.
4) Consultar al proveedor o a un técnico experimentado en radio / televisión para obtener ayuda.
Nota para el técnico de instalación del sistema de televisión por cable:
Este recordatorio es para señalarle al técnico de instalación del sistema de televisión por cable (CATV) el Artículo 820-40 del Código
NEC (Código Nacional Eléctrico) que proporciona los lineamientos para una conexión adecuada a tierra y, en particular, especifica
que el cable aterrizado debe conectarse al sistema de tierra del edificio, tan cerca del punto de la entrada del cable como resulte
práctico.
Protección de derechos de autor
Se prohíbe la copia, transmisión, presentación pública y renta de discos no autorizados. Este producto incluye tecnología de
protección de los derechos de autor que está protegido con los derechos de los métodos de ciertas patentes en Estados Unidos y
otros derechos de propiedad intelectual de Macrovision Corporation y otros propietarios de derechos de autor. El uso de esta
tecnología de protección de derechos de autor debe estar autorizado por Macrovision Corporation y está diseñado para usos
domésticos ilimitados, a menos que así lo autorice Macrovision Corporation. Se prohíbe la ingeniería inversa y el desensamble.
Declaración de conformidad
Número de modelo: DVDR615/17
Nombre comercial: PHILIPS
Parte responsable: Philips Consumer Electronics N.A.
P.O. Box 14810, Knoxville, TN 37914-1810 1-800-531-0039
Page 99
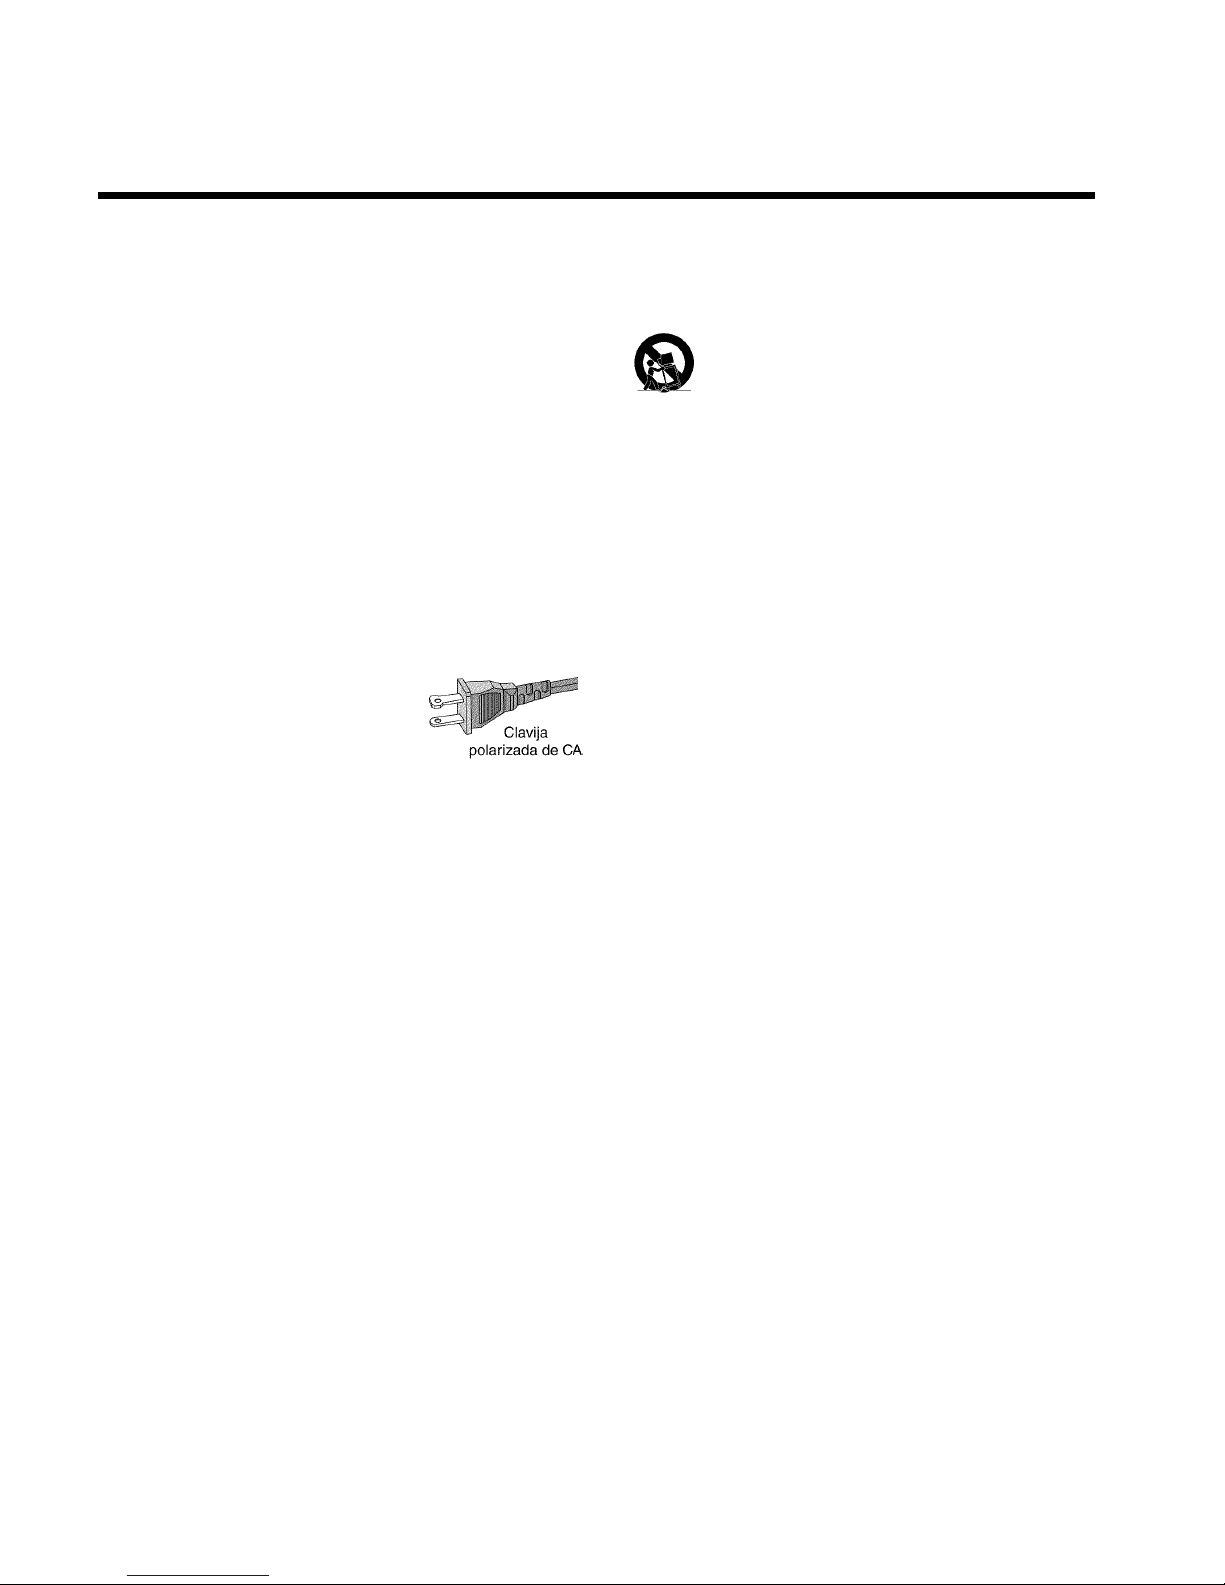
INSTRUCCIONES IMPORTANTES DE SEGURIDAD
1. Lea estas instrucciones.
2. Conserve estas instrucciones.
3. Lea todos los avisos.
4. Siga todas las instrucciones.
5. No utilice este aparato cerca dei agua.
6. Para limpiar el aparato utilice sólo un trapo seco.
7. No tape las aperturas de ventilación. Proceda a
instalación de acuerdo con las instrucciones dei
fabricante.
8. No instale el equipo cerca de fuentes de calor Como
radiadores, calentadorcs, estufas o cualquer otro aparato
(incluyendo los amplificadores) generador de calor.
9. No anule la seguridad de la clavija
de corriente (ya sea de tipo
polarizado o con toma de tierra Las
clavijas polarizadas tienen dos patillas,
una más ancha que la otra.
Las que disponen de toma de tierra tienen dos patiltas y una
tercera que es la de conexión a tierra. Tanto la patilla más
ancha como la toma de tierra han sido incorporadas a la
clavija para su seguridad personal. Si la clavija suministrada
con el equipo no es compatible con su toma de corriente,
consulte a un electricista para sustituir la toma de corriente
obsoleta.
10.Proteja debidamente el cable impidiendo que pueda
pisarse o incluso perforarse, especialmente en la parte más
próxima a la clavija y en el punto de salida del equipo.
11.Utilice exclusivamente aquellos
dispositivos/accesorios recomendados por el fabricante.
12. Coloque el equipo exclusivamente sobre
aquellos carros, bases, tripodes, soportes o mesas
especificados por el comerciante o vendidos con el
equipo. Cuando utilice un carro, tenga cuidado al
desplazar el conjunto carro/equipo para evitar
posibles daños por vuelco.
13.Desenchufe el aparato durante tormentas eléctricas o
cuando no vaya a ser utilizado durante largo tiempo.
14.Confie ei mantenimiento y las reparaciones a
personal técnico especializado. El equipo deberá repararse
siempre que haya resultado dañado de alguna manera, como
por ejemplo por daños en el cable o en la clavija, por
derrame de liquido sobre el equipo, por objetos que
hubieran podido introducirse en su interior, por exposición
del equipo a la lluvia o a ambientes húmedos, cuando el
equipo no funcione con normalidad o cuando hubiera
sufrido algún tipo de caida.
15.Uso de las pilas PRECAUCIÓN - Para prevenir
escapes en las pilas, que pueden ocasionar lesiones fisicas o
daños en la unidad:
• lnstale todas las pilas correctamente, + y como está
marcado en la unidad.
• No mezcle las pilas (viejas con nuevas o de carbono y
alcalinas , etc),
• Extraiga las pilas cuando no vaya a usar la unidad durante
largo tiempo.
EL 6474E004:02/8
Page 100
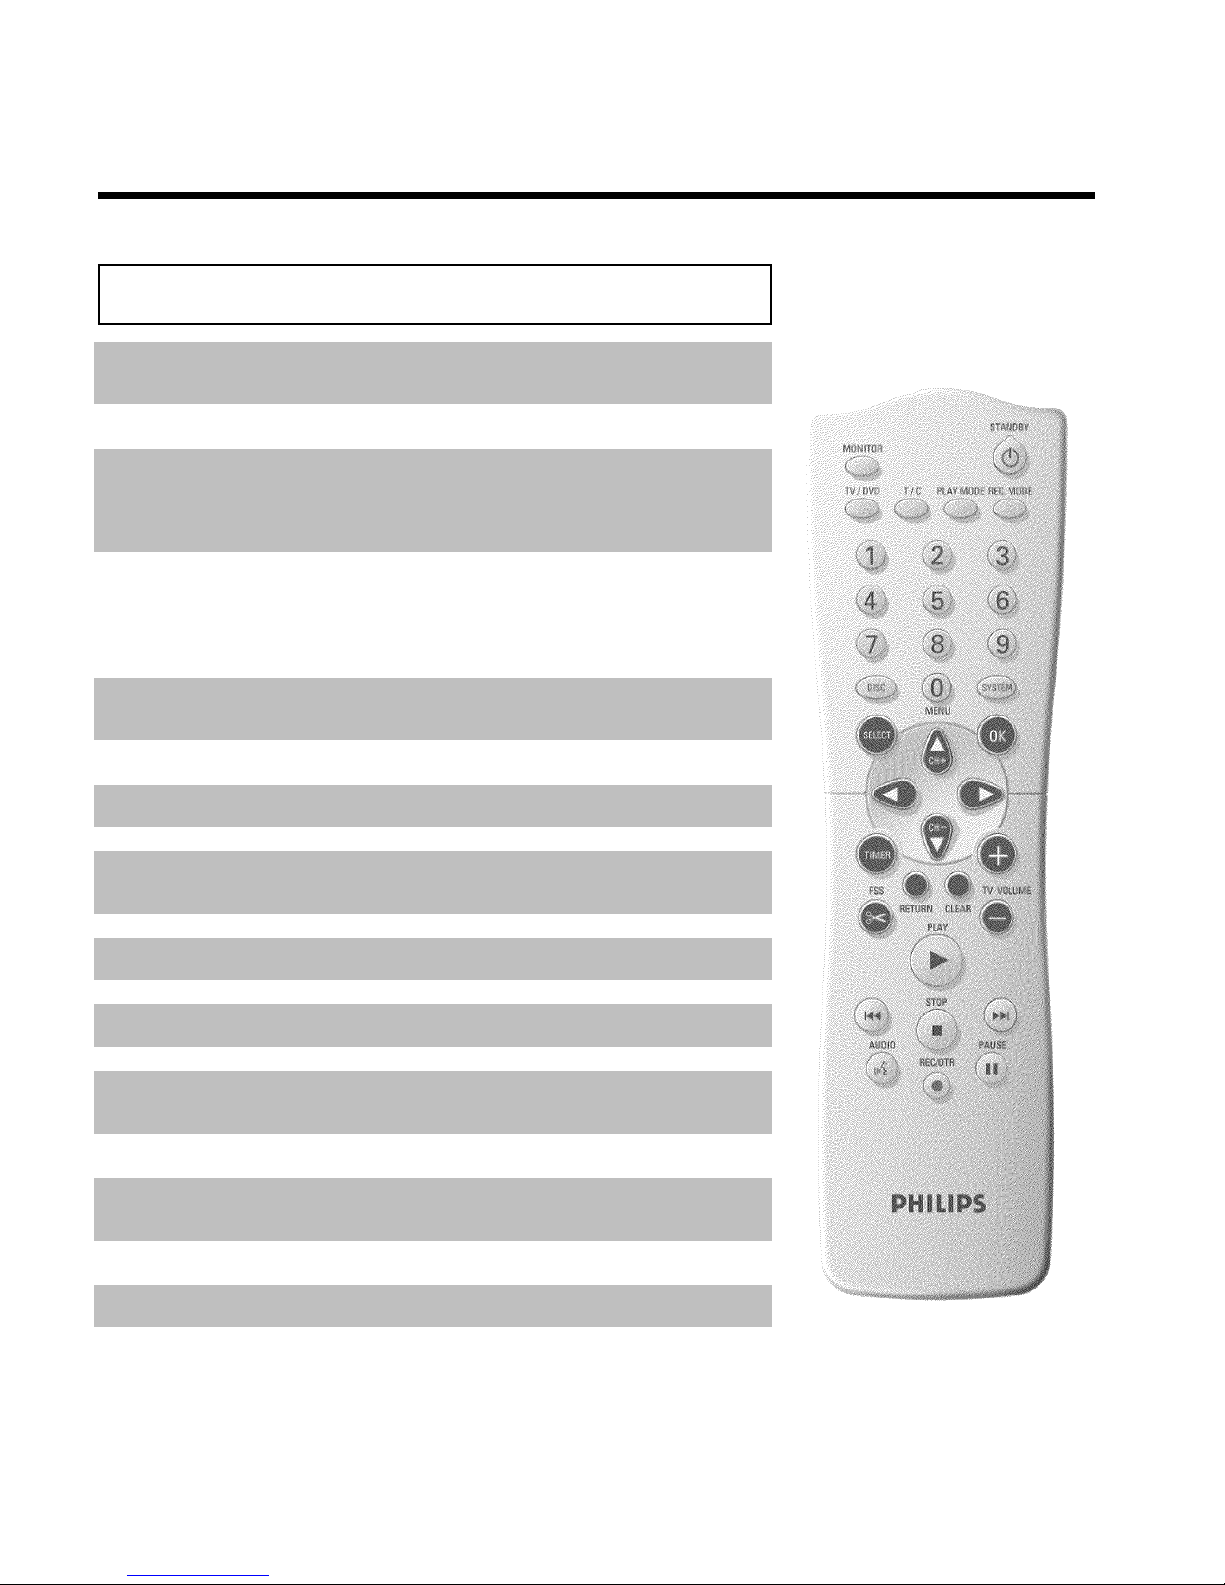
El mando a distancia
MONITOR Monitor: Con esta tecla puede conmutar entre la reproducción de un
disco o la imagen del sintonizador interno (canal de TV).
STANDBY m Apagar / encender: apagar/encender el aparato, interrumpir cualquier
función, interrumpir una grabación programada (TIMER)
TV/DVD Conmutador TV / DVD: conmuta la señal de la antena directamente
al televisor. Con esta tecla se puede conmutar entre el grabador de
DVD y la señal de la antena si el grabador de DVD se ha conectado al
televisor con un sólo cable de antena.
T/C Título / Capítulo: Selección directa de '
B
' (título)/'C' (capítulo) en la
barra de menús para seleccionar títulos o capítulos con CH- B ,
CH+ A .
Si en la pantalla aparece 'INFO', se ve el menú de Índice de un disco
grabado o bien reproduce una secuencia introductoria. En ese caso, esta
función no está disponible.
PLAY MODE Modo de reproducción: seleccionar entre Repetir, Reproducción
aleatoria (Shuffle) e Intro-scan
REC MODE Tipo de grabación (calidad de la imagen): seleccionar la duración
máxima de grabación permitida
0..9 Teclas numéricas:0-9
DISC-MENU Menú Disco: visualizar el menú del DVD o la imagen del Índice
SYSTEM-MENU Menú Sistema: acceder al menú principal / salir del menú principal
(barra de menús en el borde superior de la pantalla)
SELECT Seleccionar: seleccionar funciones / valores
OK Memorizar y confirmar: memorizar / confirmar la entrada
DC Teclas de cursor : hacia la izquierda, la derecha
CH+ A Teclas de cursor / más : cursor hacia arriba / siguiente canal
CH- B Teclas de cursor / menos : cursor hacia abajo / canal anterior
TIMER TIMER: programar grabaciones con / sin sistema VCR Plus+
®
o bien
modificar/borrar una grabación programada
FSS FSS: Visualizar el menú de edición para discos de DVD+R(W),
establecer las marcas de los capítulos
RETURN Atrás: regresar al paso anterior del menú dentro de un CD vídeo
(VCD). Esto también funciona en determinados DVD.
CLEAR Borrar: borrar la última entrada / borrar una grabación programada
(TIMER)
PLAY G Reproducción: Reproducir un disco grabado.
N Seleccionar título anterior / Búsqueda hacia atrás:
Pulsar dos veces la tecla durante la reproducción: capítulo anterior /
pieza o título anterior
Mantener pulsada la tecla: búsqueda hacia atrás
Mantener pulsada la tecla durante la imagen fija: cámara lenta hacia atrás
 Loading...