

Page 1
Register your product and get support at
www.philips.com/welcome
DVDR3506/37
STOP
ARRÊT
ALTO
EN DIGITAL VIDEO DISC RECORDER WITH DIGITAL TUNER
Recording Playback EditingIntroduction Connections Basic Setup Function Setup Others
E7H42UD_DVDR3506-37_EN.indd 1E7H42UD_DVDR3506-37_EN.indd 1 2007/12/28 10:52:382007/12/28 10:52:38
Page 2

PRECAUTIONS
Return your Product Registration Card or register online at
www.philips.com/welcome today to get the very most from your purchase.
Registering your model with PHILIPS makes you eligible for all of the valuable benefits listed below,
so don't miss out. Complete and return your Product Registration Card at once, or register online at
www.philips.com/welcome to ensure:
*Proof of
Purchase
Returning the enclosed card guarantees that your date of purchase
will be on file, so no additional
paperwork will be required from
you to obtain warranty service.
*Product Safety
Notification
By registering your product, you'll
receive notification - directly from
the manufacturer - in the rare
case of a product recall or safety
defect.
Congratulations on your purchase,
and welcome to the “family!”
Dear PHILIPS product owner:
Thank you for your confidence in PHILIPS.
You’ve selected one of the best-built, bestbacked products available today. We’ll do
everything in our power to keep you happy
with your purchase for many years to come.
As a member of the PHILIPS “family,” you’re
entitled to protection by one of the most
comprehensive warranties and outstanding
service networks in the industry. What’s more,
your purchase guarantees you’ll receive all
the information and special offers for which
you qualify, plus easy access to accessories
from our convenient home shopping
network.
Most importantly, you can count on our
uncompromising commitment to your total
satisfaction.
All of this is our way of saying welcome - and
thanks for investing in a PHILIPS product.
P.S. To get the most from your PHILIPS
purchase, be sure to complete and
return your Product Registration Card
at once, or register online at:
www.philips.com/welcome
*Additional
Benefits
Registering your product guarantees that you'll receive all of
the privileges to which you're
entitled, including special moneysaving offers.
Know these
safety symbols
CAUTION
RISK OF ELECTRIC SHOCK
DO NOT OPEN
CAUTION:
SHOCK, DO NOT REMOVE COVER (OR BACK). NO
USER-SERVICEABLE PARTS INSIDE. REFER SERVICING
TO QUALIFIED SERVICE PERSONNEL.
WARNING: To reduce the risk of fire or electric
shock, this apparatus should not be exposed to rain or
moisture, and objects filled with liquids, such as vases,
should not be placed on this apparatus.
CAUTION: To prevent electric shock, match wide blade of
plug to wide slot, fully insert.
ATTENTION: Pour éviter les chocs électriques, introduire la
lame la plus large de la fiche dans la borne correspondante de
la prise et pousser jusqu’au fond.
Enter below the Serial No. which is located on the rear of
the cabinet. Retain this information for future
reference.
Model No. _______________________________________
Serial No. _______________________________________
TO REDUCE THE RISK OF ELECTRIC
This “bolt of lightning” indicates uninsulated material
within your unit may cause an electrical shock. For
the safety of everyone in your household, please do
not remove product covering.
The “exclamation point” calls attention to features
for which you should read the enclosed literature
closely to prevent operating and maintenance
problems.
For Customer Use
Visit our World Wide Web Site at http://www.philips.com/welcome
2EN2EN
E7H42UD_DVDR3506-37_EN.indd 2E7H42UD_DVDR3506-37_EN.indd 2 2007/12/28 10:52:412007/12/28 10:52:41
Page 3

PRECAUTIONS
d
g
IMPORTANT SAFETY INSTRUCTIONS
Read before operating equipment
Introduction
1. Read these instructions.
2. Keep these instructions.
3. Heed all warnings.
4. Follow all instructions.
5. Do not use this apparatus near water.
6. Clean only with a dry cloth.
7. Do not block any of the ventilation openings. Install in accordance
with the manufacturers instructions.
8. Do not install near any heat sources such as radiators, heat registers,
stoves, or other apparatus (including amplifiers) that produce heat.
9. Do not defeat the safety purpose of the polarized or grounding type
plug. A polarized plug has two blades with one wider than the other.
A grounding type plug has two blades and third
grounding prong. The wide blade or third prong
are provided for your safety. When the provided
plug does not fit into your outlet, consult an electrician for replacement of the obsolete outlet.
10. Protect the power cord from being walked on or pinched particularly
at plugs, convenience receptacles, and the point where they exit from
the apparatus.
11. Only use attachments/accessories specified by the manufacturer.
12.
13. Unplug this apparatus during lightning storms or when unused for
14. Refer all servicing to qualified service personnel. Servicing is required
15. This product may contain lead and mercury. Disposal of these materi-
16. Damage Requiring Service - The appliance should be serviced by
17. Tilt/Stability - All televisions must comply with recommended inter-
Use only with a cart, stand, tripod, bracket, or table specified
by the manufacturer, or sold with the apparatus. When a cart
is used, use caution when moving the cart/apparatus combination to avoid injury from tip-over.
long periods of time.
when the apparatus has been damaged in any way, such as powersupply cord or plug is damaged, liquid has been spilled or objects
have fallen into apparatus, the apparatus has been exposed to rain or
moisture, does not operate normally, or has been dropped.
als may be regulated due to environmental considerations. For disposal or recycling information, please contact your local authorities or
the Electronic Industries Alliance: www.eiae.org
qualified service personnel when:
A. The power supply cord or the plug has been damaged; or
B. Objects have fallen, or liquid has been spilled into the appliance; or
C. The appliance has been exposed to rain; or
D. The appliance does not appear to operate normally or exhibits a
marked change in performance; or
E. The appliance has been dropped, or the enclosure damaged.
national global safety standards for tilt and stability properties of its
cabinet design.
AC Polarize
Plu
●
Do not compromise these design standards by applying excessive
pull force to the front, or top, of the cabinet which could ultimately
overturn the product.
●
Also, do not endanger yourself, or children, by placing electronic
equipment/toys on the top of the cabinet. Such items could unsuspectingly fall from the top of the set and cause product damage
and/or personal injury.
18. Wall or Ceiling Mounting - The appliance should be mounted to a
wall or ceiling only as recommended by the manufacturer.
19. Power Lines - An outdoor antenna should be located away from
power lines.
20. Outdoor Antenna Grounding - If an outside antenna is connected to
the receiver, be sure the antenna system is grounded so as to provide
some protection against voltage surges and built up static charges.
Section 810 of the National Electric Code, ANSI/NFPA No. 70- 1984,
provides information with respect to proper grounding of the mast
and supporting structure, grounding of the lead-in wire to an antenna
discharge unit, size of grounding connectors, location of antenna-discharge unit, connection to grounding electrodes, and requirements
for the grounding electrode. See Figure below.
21. Object and Liquid Entry - Care should be taken so that objects do not
fall and liquids are not spilled into the enclosure through openings.
a) Warning: To reduce the risk of fire or electric shock, this apparatus
should not be exposed to rain or moisture and objects filled with
liquids, such as vases, should not be placed on this apparatus.
22. Battery Usage CAUTION - To prevent battery leakage that may result
in bodily injury, property damage, or damage to the unit:
●
Install all batteries correctly, with + and - aligned as marked on the
unit.
●
Do not mix batteries (old and new or carbon and alkaline, etc.).
●
Remove batteries when the unit is not used for a long time.
23. Overloading - Do not overload wall outlets, extension cords, or
integral convenience receptacles as this can result in a risk of fire or
electric shock.
24. Object and Liquid Entry - Never push objects of any kind into this
product through openings as they may touch dangerous voltage
points or short-out parts that could result in a fire or electric shock.
Never spill liquid of any kind on the product.
25. Replacement Parts - When replacement parts are required, be sure
the service technician has used replacement parts specified by the
manufacturer or have the same characteristics as the original part.
Unauthorized substitutions may result in fire, electric shock, or other
hazards.
26. Safety Check - Upon completion of any service or repairs to this product, ask the service technician to perform safety checks to determine
that the product is in proper operating condition.
Connections Basic Setup Function Setup Others
Recording Playback Editing
Note to the CATV system installer: This reminder is provided to call the CATV system installer's attention to Article 820-40 of the
NEC that provides guidelines for proper grounding and, in particular, species that the cable ground shall be connected to the
grounding system of the building, as close to the point of cable entry as practical.
Example of Antenna Grounding
as per NEC - National Electric Code
GROUND CLAMP
ELECTRIC SERVICE EQUIPMENT
E7H42UD_DVDR3506-37_EN.indd 3E7H42UD_DVDR3506-37_EN.indd 3 2007/12/28 10:52:412007/12/28 10:52:41
ANTENNA LEAD IN WIRE
ANTENNA DISCHARGE UNIT
GROUNDING CONDUCTORS
GROUND CLAMPS
POWER SERVICE GROUNDING ELECTRODE SYSTEM (NEC ART 250, PART H)
(NEC SECTION 810-20)
(NEC SECTION 810-21)
3EN
3EN
Page 4

PRECAUTIONS
Welcome!
Congratulations on your purchase, and welcome to Philips!
To fully benefit from the support that Philips offers, register your product at
www.philip.com/welcome.
This product lets you record on DVD and playback DVD/CD of various kinds.
Read this user manual carefully to learn how to use the features described in this manual.
Safety Precautions
Warning: To prevent fire or shock hazard, do not expose this device to rain or moisture.
Federal Communications Commission (FCC) Warning: Any unauthorized changes or modifications to this device
void the user’s authority to operate it.
• Do not stand the unit up vertically. Install the unit in a horizontal and stable position.
• Be sure to remove the disc and unplug the AC power cord from the outlet before carrying the unit.
Department of Health and Human Services (DHHS) Certification: Complies with 21 Center for Radiation (CFR)
chapter 1 subchapter J applicable at time of manufacture.
Laser Safety: This unit employs a laser. Only a qualified service person should remove the cover or attempt to
service this device, due to possible eye injury.
CAUTION: USE OF CONTROLS OR ADJUSTMENTS OR PERFORMANCE OF PROCEDURES OTHER THAN THOSE SPECIFIED
HEREIN MAY RESULT IN HAZARDOUS RADIATION EXPOSURE.
CAUTION: VISIBLE AND INVISIBLE LASER RADIATION WHEN OPEN AND INTERLOCK DEFEATED. DO NOT STARE INTO
BEAM. THE BEAM IS LOCATED INSIDE, NEAR THE DECK MECHANISM.
Special Information for Canadian Users: This Class B digital apparatus complies with Canadian ICES-003.
Cet appareil numérique de la classe B est conforme à la norme NMB- 003 du Canada.
Radio/TV Interference: This device has been tested and found to comply with the limits for a Class B digital
device, pursuant to Part 15 of the FCC Rules. These limits are designed to provide reasonable protection against
harmful interference in a residential installation. This device generates, uses, and can radiate radio frequency energy
and, if not installed and used in accordance with the instructions, may cause harmful interference to radio
communications.
However, there is no guarantee that interference will not occur in a particular installation. If this device does cause
harmful interference to radio or television reception, which can be determined by turning the device off and on, the
user is encouraged to try to correct the interference by one or more of the following measures:
1) Reorient or relocate the receiving antenna.
2) Increase the separation between the device and the receiver.
3) Connect the device into an outlet on a circuit different from that to which the receiver is connected.
4) Consult the dealer or an experienced radio/TV technician for help.
Copyright Notice: The making of unauthorized copies of copy-protected material, including computer programs,
files, broadcasts and sound recordings, may be an infringement of copyrights and constitute a criminal offence. This
device should not be used for such purposes.
Copyright Protection: Unauthorized copying, broadcasting, public performance, and lending of Discs are
prohibited.
This product incorporates copyright protection technology that is protected by U.S. patents and other intellectual
property rights. Use of this copyright protection technology must be authorized by Macrovision, and is intended for
home and other limited viewing uses only unless otherwise authorized by Macrovision. Reverse engineering or
disassembly is prohibited.
Notice for Progressive Scan Use: Consumers should note that not all high definition television sets are fully
compatible with this product and may cause artifacts to be displayed in the picture. In case of picture problems with
525 (480) progressive scan output, it is recommended that the user switch the connection to the ‘standard definition’
output. If there are questions regarding your TV set compatibility with this 525p (480p) DVD player, please contact our
customer service center.
Declaration of Conformity
Model Number: DVDR3506/37
Trade Name: Philips
Responsible Party: PHILIPS CONSUMER ELECTRONICS
1-888-PHILIPS (744-5477)
A Division of Philips Electronics North America Corp
P.O. Box 671539 Marietta, GA30006 0026
Copyright 2007 Philips. All rights reserved.
4EN4EN
E7H42UD_DVDR3506-37_EN.indd 4E7H42UD_DVDR3506-37_EN.indd 4 2007/12/28 10:52:432007/12/28 10:52:43
Page 5

PRECAUTIONS
Supplied Accessories
remote control
with batteries
(AAAx2)
user manual quick start guide
User Manual
RF coaxial cable RCA audio/video
cables
Maintenance
Servicing
• Please refer to relevant topics on “TROUBLESHOOTING”
on pages 99-103 before returning the product.
• If you need to call a customer service representative,
please know the model number and serial number of
your product before you call. This information is
displayed on the back of the product. Also, please take
a moment to identify the problem you are having, and
be prepared to explain this to the representative. If you
believe the representative will need to help you with
operations, please stay near the product. Our
representatives will be happy to assist you. For online
reference, please visit our web site at http://www.
philips.com/welcome
Cleaning the cabinet
• Wipe the front panel and other exterior surfaces of the
unit with a soft, slightly damp cloth.
• Never use a solvent, thinner, benzene or alcohol to
clean the unit. Do not spray insecticide liquid near the
unit. Such chemicals may discolor the surface or
damage the unit.
Cleaning discs
• When a disc becomes dirty, clean it with a cleaning
cloth. Wipe the disc from the center to out. Do not
wipe in a circular motion.
• Do not use solvents such as benzine, thinner,
commercially available cleaners, detergent, abrasive
cleaning agents or antistatic spray intended for analog
records.
Cleaning the disc lens
• If this unit still does not perform properly although you
refer to the relevant sections and to
“TROUBLESHOOTING” in this user manual, the laser
optical pickup unit may be dirty. Consult your dealer or
an Authorized Service Center for inspection and
cleaning of the laser optical pickup unit.
Disc handling
• Handle the discs so that fingerprints and dust do not
adhere to the surfaces of the discs.
• Always store the disc in its protective case when it is
not used.
Installation Location
For safety and optimum performance of this unit:
• Install the unit in a horizontal and stable position. Do
not place anything directly on top of the unit. Do not
place the unit directly on top of the TV.
• Shield it from direct sunlight and keep it away from
devices of intense heat. Avoid dusty or humid places.
Avoid places with insufficient ventilation for proper
heat dissipation. Do not block the ventilation holes on
the sides of the unit. Avoid locations subject to strong
vibration or strong magnetic fields.
Moisture Condensation Warning
Moisture condensation may occur inside the unit when it
is moved from a cold place to a warm place or after
heating a cold room or under conditions of high
humidity. Do not use this unit at least for 2 hours until its
inside gets dry.
IR Signal Check
If the remote control does not work properly, you can test if
the remote control sends out the infrared signal with AM
radio or a digital camera (including built-in camera of cellular
phone). It will help to define the cause of malfunction.
• With an AM radio:
Tune an AM radio to a station with no
broadcasting. Press a button on remote
control toward the radio. Sound will be
fluttering when you press any key and the
radio receives the signal. This means the
remote control is working.
• With a digital camera (including built-in camera of
cellular phone):
Direct a digital camera to remote control,
press and hold a button on remote control. If
infrared light appears through digital camera,
the remote control is working.
Manufactured under license from
Dolby Laboratories. “Dolby” and the
double-D symbol are trademarks of
Dolby Laboratories.
HDMI, the HDMI logo and HighDefinition Multimedia Interface
are trademarks or registered
trademarks of HDMI Licensing
LLC.
Dolby Digital Recording
“Dolby® Digital Recording enables consumers to record
high-quality video with stereo sound on recordable DVD
discs. The technology, when utilized instead of PCM
recording, also saves recordable disc space, allowing for
higher video resolution or extended recording time on
each DVD. DVDs created using Dolby Digital Recording
will play back on all DVD-video players.”
Note: This is true when the players are compatible with
actual recordable DVD discs.
Introduction
Connections Basic Setup Function Setup Others
Recording Playback Editing
5EN
5EN
E7H42UD_DVDR3506-37_EN.indd 5E7H42UD_DVDR3506-37_EN.indd 5 2007/12/28 10:52:432007/12/28 10:52:43
Page 6

CONTENTS
Introduction
PRECAUTIONS . . . . . . . . . . . . . . . . . . . . . . . . . . . . . . . . . . . 2
FEATURES . . . . . . . . . . . . . . . . . . . . . . . . . . . . . . . . . . . . . . . 8
Symbols Used in this User Manual . . . . . . . . . . . . . . . . . . .8
FUNCTIONAL OVERVIEW . . . . . . . . . . . . . . . . . . . . . . . . . 9
Front Panel . . . . . . . . . . . . . . . . . . . . . . . . . . . . . . . . . . . . . . . . .9
Rear Panel . . . . . . . . . . . . . . . . . . . . . . . . . . . . . . . . . . . . . . . . . .9
Remote Control . . . . . . . . . . . . . . . . . . . . . . . . . . . . . . . . . . . 10
Front Panel Display. . . . . . . . . . . . . . . . . . . . . . . . . . . . . . . . 12
Connections
ANTENNA CABLE CONNECTION . . . . . . . . . . . . . . . . . . 13
RF MODULATOR CONNECTION. . . . . . . . . . . . . . . . . . . 14
CONNECTION TO A CABLE / SATELLITE BOX. . . . . . . 15
CONNECTION TO A TV . . . . . . . . . . . . . . . . . . . . . . . . . . . 16
CONNECTION TO A TV WITH
AN HDMI COMPATIBLE PORT . . . . . . . . . . . . . . . . . . . . 17
CONNECTION TO AN AUDIO SYSTEM . . . . . . . . . . . . . 19
Basic Setup
GUIDE TO ON-SCREEN DISPLAYS AND MENUS . . . . 20
On-Screen Display / Menu . . . . . . . . . . . . . . . . . . . . . . . . . 20
Main Menu. . . . . . . . . . . . . . . . . . . . . . . . . . . . . . . . . . . . . . . . 22
INITIAL SETTING . . . . . . . . . . . . . . . . . . . . . . . . . . . . . . . . 23
CHANNEL SETTING . . . . . . . . . . . . . . . . . . . . . . . . . . . . . . 24
Auto Channel Scan . . . . . . . . . . . . . . . . . . . . . . . . . . . . . . . . 24
Adding / Deleting Channels . . . . . . . . . . . . . . . . . . . . . . . 25
SETTING THE CLOCK . . . . . . . . . . . . . . . . . . . . . . . . . . . . 27
Auto Clock Setting . . . . . . . . . . . . . . . . . . . . . . . . . . . . . . . . 27
Manual Clock Setting. . . . . . . . . . . . . . . . . . . . . . . . . . . . . . 28
Daylight Saving Time. . . . . . . . . . . . . . . . . . . . . . . . . . . . . . 28
TUNER SETTINGS . . . . . . . . . . . . . . . . . . . . . . . . . . . . . . . 29
Switching Analog Mode / Digital Mode . . . . . . . . . . . . 29
Channel Selection. . . . . . . . . . . . . . . . . . . . . . . . . . . . . . . . . 29
Selecting TV Audio . . . . . . . . . . . . . . . . . . . . . . . . . . . . . . . . 30
DTV Closed Caption . . . . . . . . . . . . . . . . . . . . . . . . . . . . . . . 32
Closed Caption Style . . . . . . . . . . . . . . . . . . . . . . . . . . . . . . 33
Recording
INFORMATION ON DVD RECORDING . . . . . . . . . . . . . 35
BEFORE RECORDING . . . . . . . . . . . . . . . . . . . . . . . . . . . . 36
Make Recording Compatible . . . . . . . . . . . . . . . . . . . . . . 36
Setting for Auto Chapter . . . . . . . . . . . . . . . . . . . . . . . . . . 36
BASIC RECORDING &
ONE-TOUCH TIMER RECORDING . . . . . . . . . . . . . . . . . 37
TIMER RECORDING . . . . . . . . . . . . . . . . . . . . . . . . . . . . . . 39
Hints for Timer Recording . . . . . . . . . . . . . . . . . . . . . . . . . 42
OVERWRITING UNNECESSARY TITLE . . . . . . . . . . . . . 43
Overwriting from the Beginning of the Title. . . . . . . . 43
Overwriting in the Middle of the Title . . . . . . . . . . . . . . 43
Hints for Overwriting . . . . . . . . . . . . . . . . . . . . . . . . . . . . . . 44
SETTINGS FOR AN EXTERNAL DEVICE . . . . . . . . . . . . 45
Connection to an External Device. . . . . . . . . . . . . . . . . . 45
Recording from an External Device . . . . . . . . . . . . . . . . 46
DV DUBBING . . . . . . . . . . . . . . . . . . . . . . . . . . . . . . . . . . . 47
Guide to DV and On-Screen Display . . . . . . . . . . . . . . . 47
DVC to DVD Dubbing . . . . . . . . . . . . . . . . . . . . . . . . . . . . . 48
SETTING A DISC TO PROTECT . . . . . . . . . . . . . . . . . . . . 50
PLAYING THE DISCS IN OTHER DVD PLAYERS . . . . . 51
Finalizing a Disc . . . . . . . . . . . . . . . . . . . . . . . . . . . . . . . . . . . 51
Auto Finalizing . . . . . . . . . . . . . . . . . . . . . . . . . . . . . . . . . . . . 52
6EN6EN
E7H42UD_DVDR3506-37_EN.indd 6E7H42UD_DVDR3506-37_EN.indd 6 2007/12/28 10:52:442007/12/28 10:52:44
Page 7

CONTENTS
Introduction
Playback
INFORMATION ON PLAYBACK . . . . . . . . . . . . . . . . . . . 53
BASIC PLAYBACK . . . . . . . . . . . . . . . . . . . . . . . . . . . . . . . 55
Direct Playback . . . . . . . . . . . . . . . . . . . . . . . . . . . . . . . . . . . 55
Playback from the Title List . . . . . . . . . . . . . . . . . . . . . . . . 56
Playing Back an Audio CD and a CD-RW/-R
with MP3/Windows Media™ Audio/JPEG Files. . . . . . 58
Playing Back a DivX® . . . . . . . . . . . . . . . . . . . . . . . . . . . . . . 59
Using the Title / Disc Menu . . . . . . . . . . . . . . . . . . . . . . . . 61
Pause . . . . . . . . . . . . . . . . . . . . . . . . . . . . . . . . . . . . . . . . . . . . . 61
SPECIAL PLAYBACK . . . . . . . . . . . . . . . . . . . . . . . . . . . . . 62
Resume Playback . . . . . . . . . . . . . . . . . . . . . . . . . . . . . . . . . 62
Fast Forward / Fast Reverse Playback . . . . . . . . . . . . . . 62
Skipping TV Commercials During Playback. . . . . . . . . 62
Rapid Playback. . . . . . . . . . . . . . . . . . . . . . . . . . . . . . . . . . . . 63
Step by Step Playback . . . . . . . . . . . . . . . . . . . . . . . . . . . . . 63
Slow Forward / Slow Reverse Playback. . . . . . . . . . . . . 63
Zoom . . . . . . . . . . . . . . . . . . . . . . . . . . . . . . . . . . . . . . . . . . . . . 64
Marker Setting . . . . . . . . . . . . . . . . . . . . . . . . . . . . . . . . . . . . 64
SEARCH . . . . . . . . . . . . . . . . . . . . . . . . . . . . . . . . . . . . . . . . 65
Title / Chapter Search . . . . . . . . . . . . . . . . . . . . . . . . . . . . . 65
Track Search . . . . . . . . . . . . . . . . . . . . . . . . . . . . . . . . . . . . . . 65
Time Search. . . . . . . . . . . . . . . . . . . . . . . . . . . . . . . . . . . . . . . 66
REPEAT / RANDOM / PROGRAM PLAYBACK /
SLIDE SHOW . . . . . . . . . . . . . . . . . . . . . . . . . . . . . . . . . . . . 67
Repeat Playback . . . . . . . . . . . . . . . . . . . . . . . . . . . . . . . . . . 67
Random Playback . . . . . . . . . . . . . . . . . . . . . . . . . . . . . . . . . 67
Program Playback . . . . . . . . . . . . . . . . . . . . . . . . . . . . . . . . . 68
Slide Show . . . . . . . . . . . . . . . . . . . . . . . . . . . . . . . . . . . . . . . . 68
SELECTING THE FORMAT OF AUDIO AND VIDEO . . 69
Switching Subtitles. . . . . . . . . . . . . . . . . . . . . . . . . . . . . . . . 69
Switching Audio Soundtrack . . . . . . . . . . . . . . . . . . . . . . 69
Switching Virtual Surround System . . . . . . . . . . . . . . . . 70
Switching Camera Angles . . . . . . . . . . . . . . . . . . . . . . . . . 70
Reducing Block Noise . . . . . . . . . . . . . . . . . . . . . . . . . . . . . 70
Editing
INFORMATION ON DISC EDITING . . . . . . . . . . . . . . . . . 71
Guide to a Title List. . . . . . . . . . . . . . . . . . . . . . . . . . . . . . . . 71
Editing Discs . . . . . . . . . . . . . . . . . . . . . . . . . . . . . . . . . . . . . . 71
EDITING DISCS. . . . . . . . . . . . . . . . . . . . . . . . . . . . . . . . . . 72
Deleting Titles . . . . . . . . . . . . . . . . . . . . . . . . . . . . . . . . . . . . 72
Putting Names on Titles . . . . . . . . . . . . . . . . . . . . . . . . . . . 73
Setting Chapter Marks. . . . . . . . . . . . . . . . . . . . . . . . . . . . . 74
Clearing Chapter Marks . . . . . . . . . . . . . . . . . . . . . . . . . . . 75
Hiding Chapters. . . . . . . . . . . . . . . . . . . . . . . . . . . . . . . . . . . 77
Setting Pictures for Thumbnails. . . . . . . . . . . . . . . . . . . . 78
Dividing a Title . . . . . . . . . . . . . . . . . . . . . . . . . . . . . . . . . . . . 79
Putting Name on Disc . . . . . . . . . . . . . . . . . . . . . . . . . . . . . 80
Setting or Releasing Disc Protect . . . . . . . . . . . . . . . . . . 81
Erasing Disc . . . . . . . . . . . . . . . . . . . . . . . . . . . . . . . . . . . . . . . 82
Making Edits Compatible . . . . . . . . . . . . . . . . . . . . . . . . . . 83
Function Setup
LIST OF SETTINGS . . . . . . . . . . . . . . . . . . . . . . . . . . . . . . . 84
SETUPS. . . . . . . . . . . . . . . . . . . . . . . . . . . . . . . . . . . . . . . . . 87
Playback . . . . . . . . . . . . . . . . . . . . . . . . . . . . . . . . . . . . . . . . . . 87
Display . . . . . . . . . . . . . . . . . . . . . . . . . . . . . . . . . . . . . . . . . . . 91
Video . . . . . . . . . . . . . . . . . . . . . . . . . . . . . . . . . . . . . . . . . . . . . 93
DivX® . . . . . . . . . . . . . . . . . . . . . . . . . . . . . . . . . . . . . . . . . . . . . 95
HDMI . . . . . . . . . . . . . . . . . . . . . . . . . . . . . . . . . . . . . . . . . . . . . 96
Reset All . . . . . . . . . . . . . . . . . . . . . . . . . . . . . . . . . . . . . . . . . . 98
Others
TROUBLESHOOTING . . . . . . . . . . . . . . . . . . . . . . . . . . . . 99
Frequently Asked Questions . . . . . . . . . . . . . . . . . . . . . . 103
LANGUAGE CODE . . . . . . . . . . . . . . . . . . . . . . . . . . . . . . 104
GLOSSARY . . . . . . . . . . . . . . . . . . . . . . . . . . . . . . . . . . . . 105
SPECIFICATIONS . . . . . . . . . . . . . . . . . . . . . . . . . . . . . . . 106
LIMITED WARRANTY . . . . . . . . . . . . . . . . . . . . . . . . . . . 107
Connections Basic Setup Function Setup Others
Recording Playback Editing
7EN
7EN
E7H42UD_DVDR3506-37_EN.indd 7E7H42UD_DVDR3506-37_EN.indd 7 2007/12/28 10:52:452007/12/28 10:52:45
Page 8

FEATURES
This unit not only plays back DVD and CD but also offers features for you to record on DVD and edit them after that.
The following features are offered with this unit.
Recording
This unit is compatible with DVD+RW/DVD-RW, which is
rewritable repeatedly and DVD+R/DVD-R, which is available for recording once. You can choose either one for your
convenience. Even if you choose DVD-RW/-R, these discs will
automatically be recorded in the DVD+VR mode.
Up to 12 program recording:
You can program the unit to record up to 12 programs within
a one-month period. Daily or weekly program recordings are
also available.
One-touch timer recording (OTR):
You can easily set a recording time as you prefer. Every
time [RECORD] or [REC I] is pressed during recording, the
recording time will be increased by 30 minutes up to 6 hours.
The recording automatically stops when the recording time
you set is reached or the disc is full.
DV dubbing:
This function helps you to easily dub the contents of the DVC
(digital video camcorder) to DVD.
Automatic chapter mark setting:
Chapter marks will be put on recordings as you set before
attempting to record.
Automatic title list making:
The unit makes a title list with the index automatically.
Left channel stereo recording:
This unit can record the sound of the left channel monaural
input as left and right channels automatically (the input from
the E2 only).
Playback
Theater surround sound in your home:
When connecting the unit to an amplifier or a decoder which
is compatible with Dolby Digital, you can experience the theater surround sound from discs with surround sound system.
Quick search for what you want to watch:
You can easily find the part you want to watch using the
search function. Search for a desired point on a disc by title,
chapter or time.
Virtual surround system:
You can enjoy stereophonic space through your existing 2
channel stereo system.
Playing back MP3/Windows Media™ Audio/JPEG/DivX®
files:
You can enjoy MP3/Windows Media™ Audio/JPEG/DivX® files
which are recorded on CD-RW/-R.
DivX® files can also be recorded on DVD+RW/+R or DVD-RW/-R.
Editing
Deleting titles:
You can delete titles which you do not need anymore.
Putting names on titles:
You can put your favorite names on titles.
Setting / clearing chapter marks:
You can set / clear chapter marks on titles.
Hiding chapters:
To keep others from playing back some chapters without
permission, you can hide chapters.
Setting pictures for thumbnails:
You can change pictures for thumbnails.
Dividing titles:
You can divide a title into 2 or more.
Putting name on disc:
You can put your favorite disc name.
Compatibility
Available for playing back discs on a regular DVD player:
Recorded discs can be played back on regular DVD players,
including computer DVD drives compatible with DVD-video
playback. Although DVD+R are playable on other units
without finalization in most cases, it is recommended to
finalize in order to stabilize the performance. For DVD-RW/-R,
you need to finalize the recorded discs to play on other DVD
players.
Others
Progressive scan system
Unlike conventional interlace scanning, the progressive scan
system provides less flickering and images in higher
resolution than that of traditional television signals.
HDMI (High-Definition Multimedia Interface)
You can enjoy clearer audio/video output when connecting
this unit to a display device with an HDMI-compatible port.
Symbols Used in this User Manual
To specify for what disc type each function is, we put the
following symbols at the beginning of each item to operate.
* DVD-RW/-R recorded in VR mode or non compatible
recording format are not playable.
* DVD-RW recorded in the mode other than +VR is not
recordable on this unit unless you erase all contents in the
disc (refer to page 82).
* DVD-R recorded in the mode other than +VR is not
recordable on this unit.
Symbol
For Recording, Playing Back, and Editing
For Playback only
If you do not nd any of the symbols listed above under the
function heading, the operation is applicable to all media.
Description
Description refers to DVD+RW
Description refers to DVD+R
Description refers to DVD-RW
Description refers to DVD-R
Description refers to DVD+R DL
Description refers to DVD-video
Description refers to audio CD
Description refers to video CD with PBC function
Description refers to video CD without PBC
function
Description refers to CD-RW/-R with MP3 les
Description refers to CD-RW/-R with Windows
Media™ Audio les
Description refers to CD-RW/-R with JPEG les
Description refers to DVD+RW/+R, DVD-RW/-R and
CD-RW/-R with DivX® les
8EN8EN
E7H42UD_DVDR3506-37_EN.indd 8E7H42UD_DVDR3506-37_EN.indd 8 2007/12/28 10:52:452007/12/28 10:52:45
Page 9
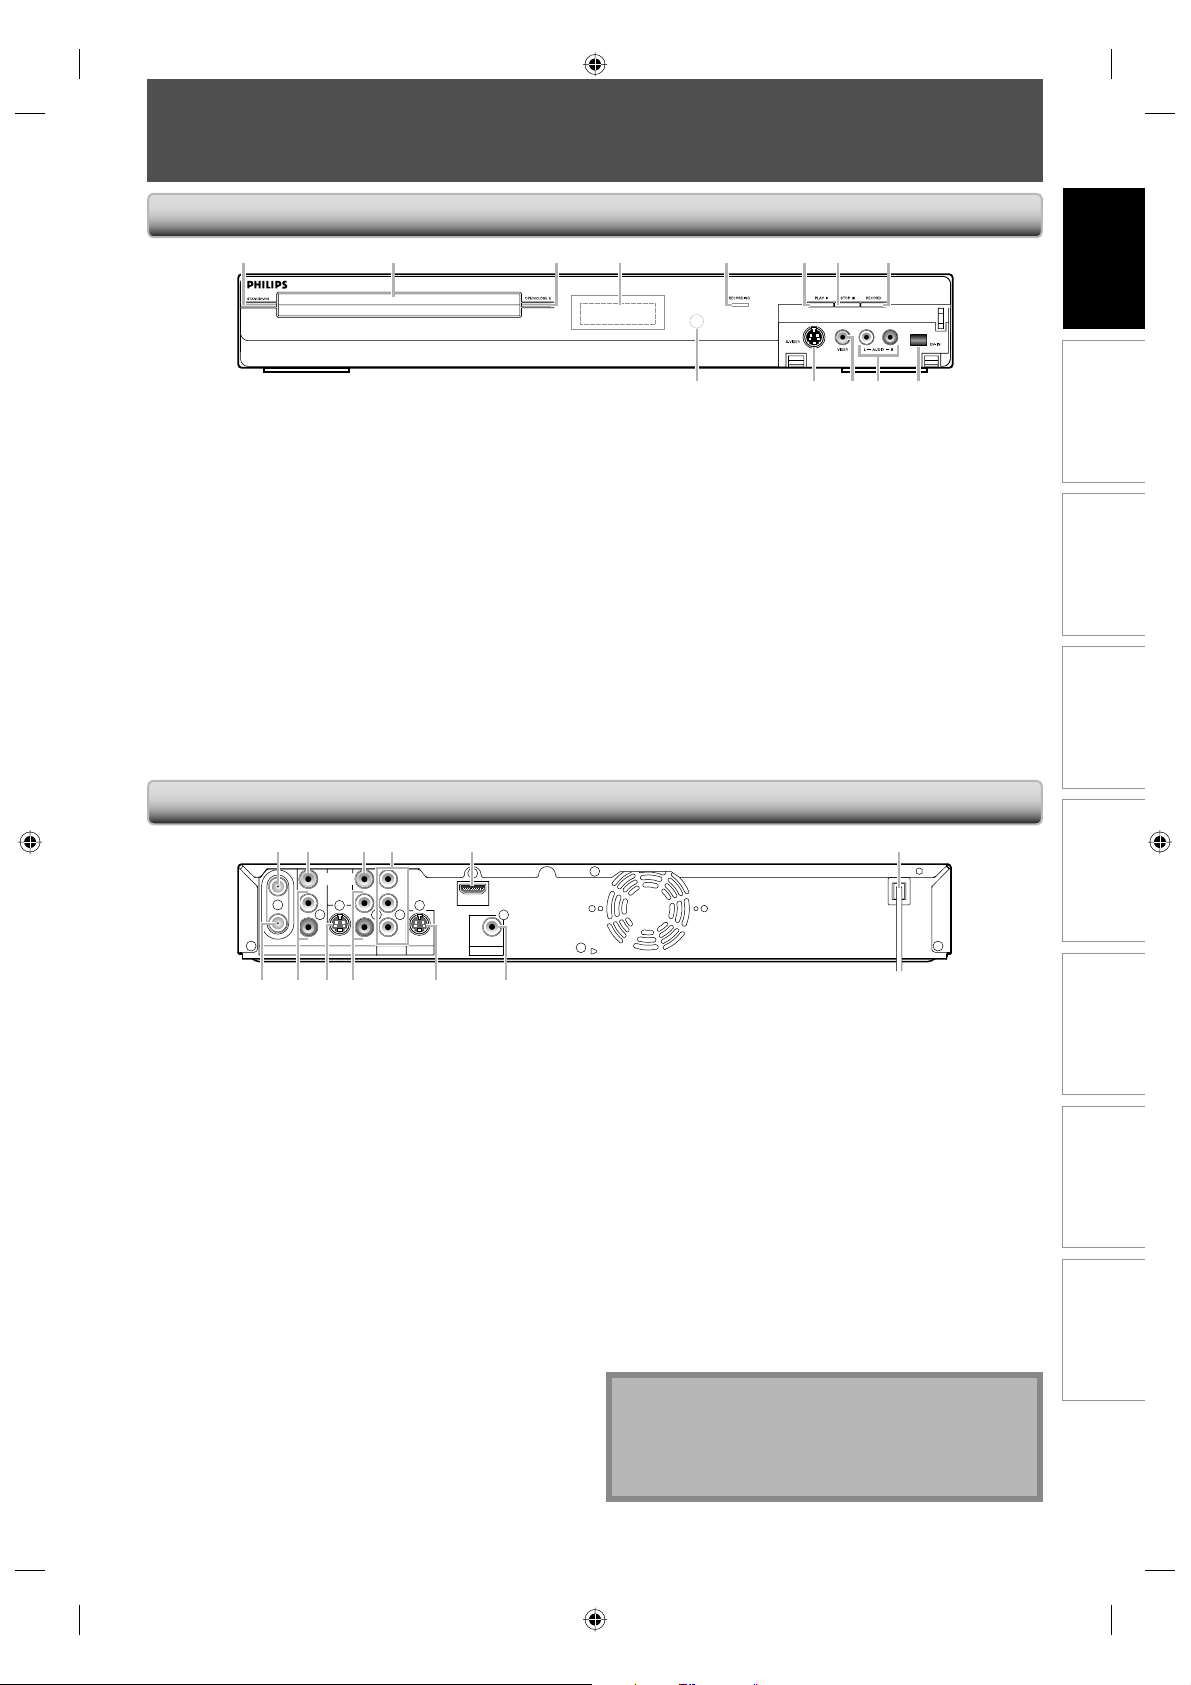
Front Panel
FUNCTIONAL OVERVIEW
Introduction
1 2 3* 5 6* 7 8
(*) The unit can also be turned on by pressing these buttons.
1. STANDBY-ON button
Press to turn the unit on and off.
If timer programmings have been set, press to set the
unit in timer-standby mode.
2. Disc tray
Place a disc when opening the disc tray.
3. OPEN/CLOSE A button*
Press to open or close the disc tray.
4. Display
Refer to “Front Panel Display” on page 12.
5. RECORDING indicator
Lights up when recording function works.
6. PLAY B button*
Press to start or resume playback.
7. STOP C button
Press to stop playback or recording.
Rear Panel
4
910111213
8. RECORD button
Press once to start a recording. Press repeatedly to
start one-touch timer recording.
9. DV-IN jack (E3)
Use to connect the DV output of external device with
a DV cable.
10. AUDIO input jacks (E2)
Use to connect external device with a RCA audio
cable.
11. VIDEO input jack (E2)
Use to connect external device with a RCA video
cable.
12. S-VIDEO input jack (E2)
Use to connect the S-video output of external device
with an S-video cable.
13. Infrared sensor window
Receive signals from your remote control so that you
can control the unit from a distance.
Connections Basic Setup Function Setup Others
Recording Playback Editing
1 2 43 65
IN
VIDEO
VIDEO
IN
L
R
IN
OUT
ANTENNA
AV IN
S-VIDEO S-VIDEO
10 8
1. ANTENNA IN jack
Use to connect an antenna.
2. VIDEO IN jack (E1)
Use to connect external device with a RCA video
cable.
3. VIDEO OUT jack
Use to connect a TV monitor, AV receiver or other
device with a RCA video cable.
4. COMPONENT VIDEO OUTPUT jacks
Use to connect a TV monitor with component video
inputs with a component video cable.
5. HDMI OUT jack
Use an HDMI cable to connect to a display with an
HDMI compatible port.
6. AC Power Cord
Connect to a standard AC outlet to supply power to
this unit.
7. COAXIAL DIGITAL AUDIO OUTPUT jack
Use to connect an AV receiver, Dolby Digital decoder
or other device with a digital audio coaxial input jack
with a digital audio coaxial cable.
8. S-VIDEO OUT jack
Use to connect the S-video input of a TV monitor, AV
receiver or other device with an S-video cable.
Y
OUT
PB/CB
AV OUT
L
R
COMPONENT
VIDEO OUTPUT
PR/CR
HDMI OUT
OUT
COAXIAL
DIGITAL AUDIO OUTPUT
PCM / BITSTREAM
712 11 9
9. AV OUT jacks
Use to connect a TV monitor, AV receiver or other
device with a RCA audio cable.
10. S-VIDEO IN jack (E1)
Use to connect the S-video output of external device
with an S-video cable.
11. AV IN jacks (E1)
Use to connect external device with a RCA audio
cable.
12. ANTENNA OUT jack
Use to connect an RF coaxial cable to pass the signal
from the ANTENNA IN to your TV.
Note
• Do not touch the inner pins of the jacks on the rear
panel. Electrostatic discharge may cause permanent
damage to the unit.
• This unit does not have the RF modulator.
9EN
9EN
E7H42UD_DVDR3506-37_EN.indd 9E7H42UD_DVDR3506-37_EN.indd 9 2007/12/28 10:52:452007/12/28 10:52:45
Page 10

0
Remote Control
FUNCTIONAL OVERVIEW
Installing the Batteries in the Remote Control
Install the batteries (AAAx2) matching the polarity
indicated inside battery compartment of the remote
control.
Open the cover.
1
Insert batteries.
2
Make sure to match + and - on the batteries to
the marks indicated in the battery compartment.
Using a Remote Control
Keep in mind the following when using the remote
control:
• Make sure that there are no obstacles between the remote
control and the infrared sensor window on the unit.
• Remote operation may become unreliable if strong
sunlight or fluorescent light is shining on the infrared
sensor window of the unit.
• Remote control for different devices can interfere with
each other. Avoid using remote control for other device
located close to the unit.
• Replace the batteries when you notice a fall off in the
operating range of the remote control.
• The maximum operable ranges from the unit are as
follows.
- Line of sight: approx. 23 feet (7m)
- Either side of the center:
approx. 16 feet (5m) within 30°
- Above: approx. 16 feet (5m) within 15°
- Below: approx. 10 feet (3m) within 30°
16feet (5m)
30˚
23feet (7m)
16feet (5m)
30˚
Close the cover.
3
Note
Incorrect use of batteries can result in hazards such as
leakage and bursting. Please observe the following:
• Do not mix new and old batteries together.
• Do not use different kinds of batteries together.
Although they may look similar, different batteries
may have different voltages.
• Make sure that the + and - ends of each battery
match the indications in the battery compartment.
• Remove batteries from battery compartment that is
not going to be used for a month or more.
• When disposing of used batteries, please comply
with governmental regulations or environmental
public instruction’s rules that apply in your country
or area.
• Do not recharge, short-circuit, heat, burn or
disassemble batteries.
11
1
2
3
4
5
6
7
8*
9
10
12
13
14
15
16
17
18
19
20
22*
24
25
26
28
29
31
32
33
21
23
27
3
10 EN10 EN
E7H42UD_DVDR3506-37_EN.indd 10E7H42UD_DVDR3506-37_EN.indd 10 2007/12/28 10:52:462007/12/28 10:52:46
Page 11
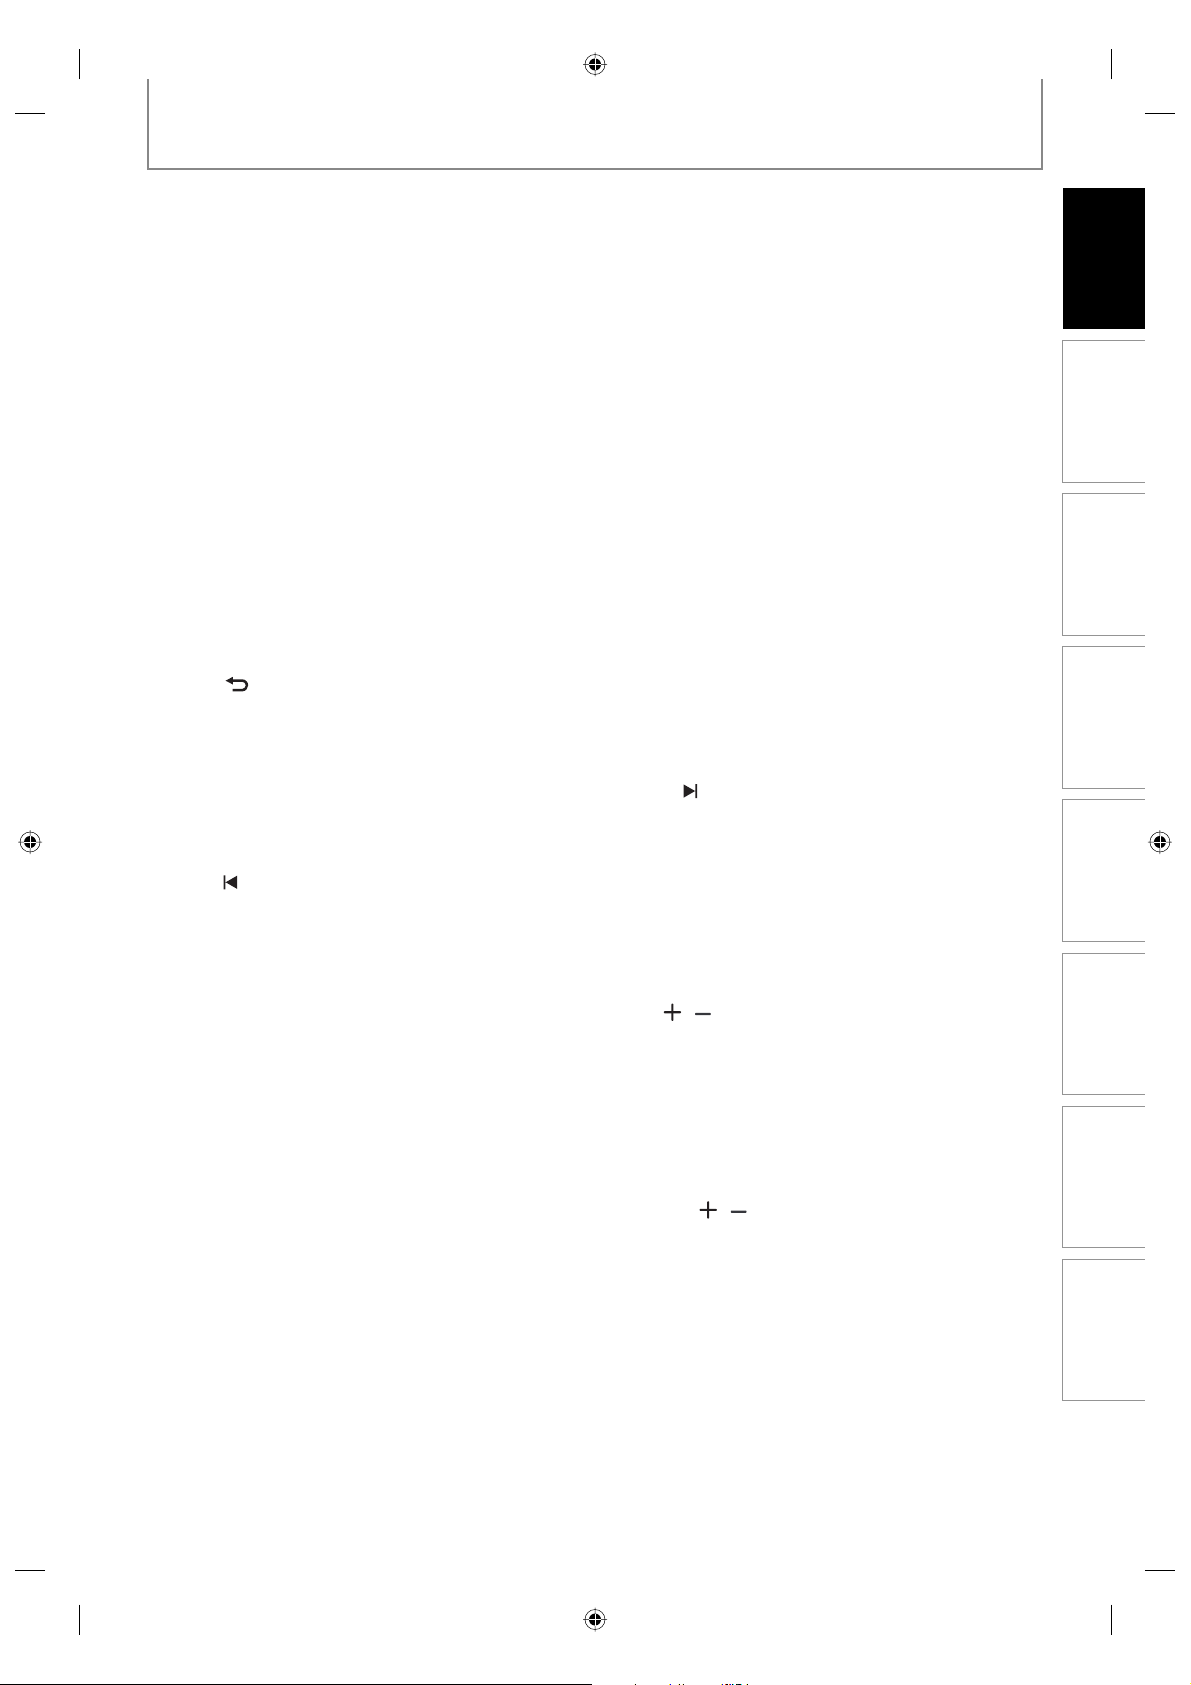
FUNCTIONAL OVERVIEW
y
(*) The unit can also be turned on by pressing these buttons.
1. STANDBY-ON
Press to turn the unit on and off. If timer program-
mings have been set, press to set the unit in timerstandby mode.
2. ZOOM button
During playback, press to enlarge the picture on the
TV screen.
3. SOURCE button
Press to select the appropriate input.
4. REC MODE button
Press to switch the recording mode.
5. DISC MENU button
Press to display the disc menu.
6. AUDIO button
• Press to switch the audio language for digital TV.
• Press to display the audio menu during playback.
7. Cursor K / L / { / B buttons
Press to select items or settings.
8. PLAY B button*
Press to start playback or resume playback.
9. BACK
Press to return to the previously displayed menu
10. REW E button
• During playback, press to fast reverse playback.
• When playback is in pause, press to slow reverse
11. PAUSE F button
Press to pause playback or recording.
12. PREV
• During playback, press to return to the beginning of
• When playback is in pause, press repeatedly to
13. REC I button
• Press once to start a recording.
• Press repeatedly to start the one-touch timer
14. SKIP button
During playback, press to skip 30 seconds.
15. RAPID PLAY button
During playback, press to play back in a slightly
16. Number/Character buttons
• Press to select channel numbers.
• Press to select a title/chapter/track/file on display.
• Press to enter values for the settings in the main
• Press to enter title names.
17. CLEAR button
Press to clear the password once entered or to can-
18. REPEAT button
Press to display the repeat menu.
19. MUTE button
button
screen.
playback.
the current chapter, track or file.
reverse the playback step by step.
recording.
faster/slower mode with keeping the audio quality.
menu.
cel the programming for CD or to clear the selected
marker number, etc.
y button
button
Limited to the Philips brand TV products, you can
mute the TV volume with these buttons.
20. HDMI button
Press to set the HDMI connector’s video signal out-
put mode .
21. DTV/TV button
Press to switch between digital TV (DTV) mode and
analog TV (TV) mode.
22. OPEN/CLOSE A button*
Press to open or close the disc tray.
23. TITLE button
Press to display the title list.
24. SETUP button
• Press to display the main menu.
• During DVD playback, press and hold for more than
3 seconds to switch the progressive scanning mode
to the interlace mode.
25. OK button
Press to confirm or select menu items.
26. INFO button
Press to display the display menu on or off.
27. FFW D button
• During playback, press to fast forward playback.
• When playback is in pause, press to slow forward
playback.
28. NEXT
• During playback, press to skip to the next chapter,
• When playback is in pause, press repeatedly to for-
29. STOP C button
• Press to stop playback or recording.
• Press to exit from the title list.
30. TIMER button
Press to display the timer programming list.
31. CH
Press to change the channel up and down.
32. Confirm ( • ) button
Analog mode:
Digital mode:
33. TV VOL
Limited to the Philips brand TV products, you can
button
track or file.
ward the playback step by step.
/ buttons
Press to confirm the channel selection made by
[the Number buttons].
Press to confirm the major / minor channel
selection made by [the Number buttons].
/ button
adjust the TV volume with these buttons.
Introduction
Connections Basic Setup Function Setup Others
Recording Playback Editing
11EN
11EN
E7H42UD_DVDR3506-37_EN.indd 11E7H42UD_DVDR3506-37_EN.indd 11 2007/12/28 10:52:472007/12/28 10:52:47
Page 12

E
E
P
Front Panel Display
FUNCTIONAL OVERVIEW
2 3
DTV
1
PM
5
4
1.
: Appears in the afternoon
with the clock display.
2. DTV
: Appears when the channel
is in DTV mode.
3. Title / track / file and chapter mark
: Appears when indicating a
title / track / file number.
: Appears when indicating a
chapter number.
Display Message
4. Current status of the unit
: Appears when playback is
paused.
: Appears when playing back
a disc.
: Appears when the timer
programming or OTR has
been set and is proceeding.
: Flashes when all timer
recordings have been
finished.
: Appears during recording
process.
: Flashes when a recording
pauses.
: Appears when a disc is in
this unit.
5. Displays the following
• Elapsed playback time
• Current title / chapter / track /
file number
• Recording time / remaining time
• Clock
• Channel number
• Remaining time for one-touch
timer recording
• Selected HDMI OUTPUT mode
Appears when the disc tray is
opening.
Appears when the disc tray is
closing.
Appears when a disc is loaded
on the disc tray.
Appears when data is being
written on a disc.
Appears when HDMI output
mode (480p) is selected.
Appears when HDMI output
mode (720p) is selected.
Appears when HDMI output
mode (1080i) is selected.
Appears when HDMI output
mode (1080p) is selected.
O
Y
PB/CB
PR/CR
IN OUT
COMPON
S-VIDEO
VIDEO OUT
Appears when the PBC function
is activated. (Video CD playback
only. Refer to page 54.)
12 EN12 EN
E7H42UD_DVDR3506-37_EN.indd 12E7H42UD_DVDR3506-37_EN.indd 12 2007/12/28 10:52:482007/12/28 10:52:48
Page 13
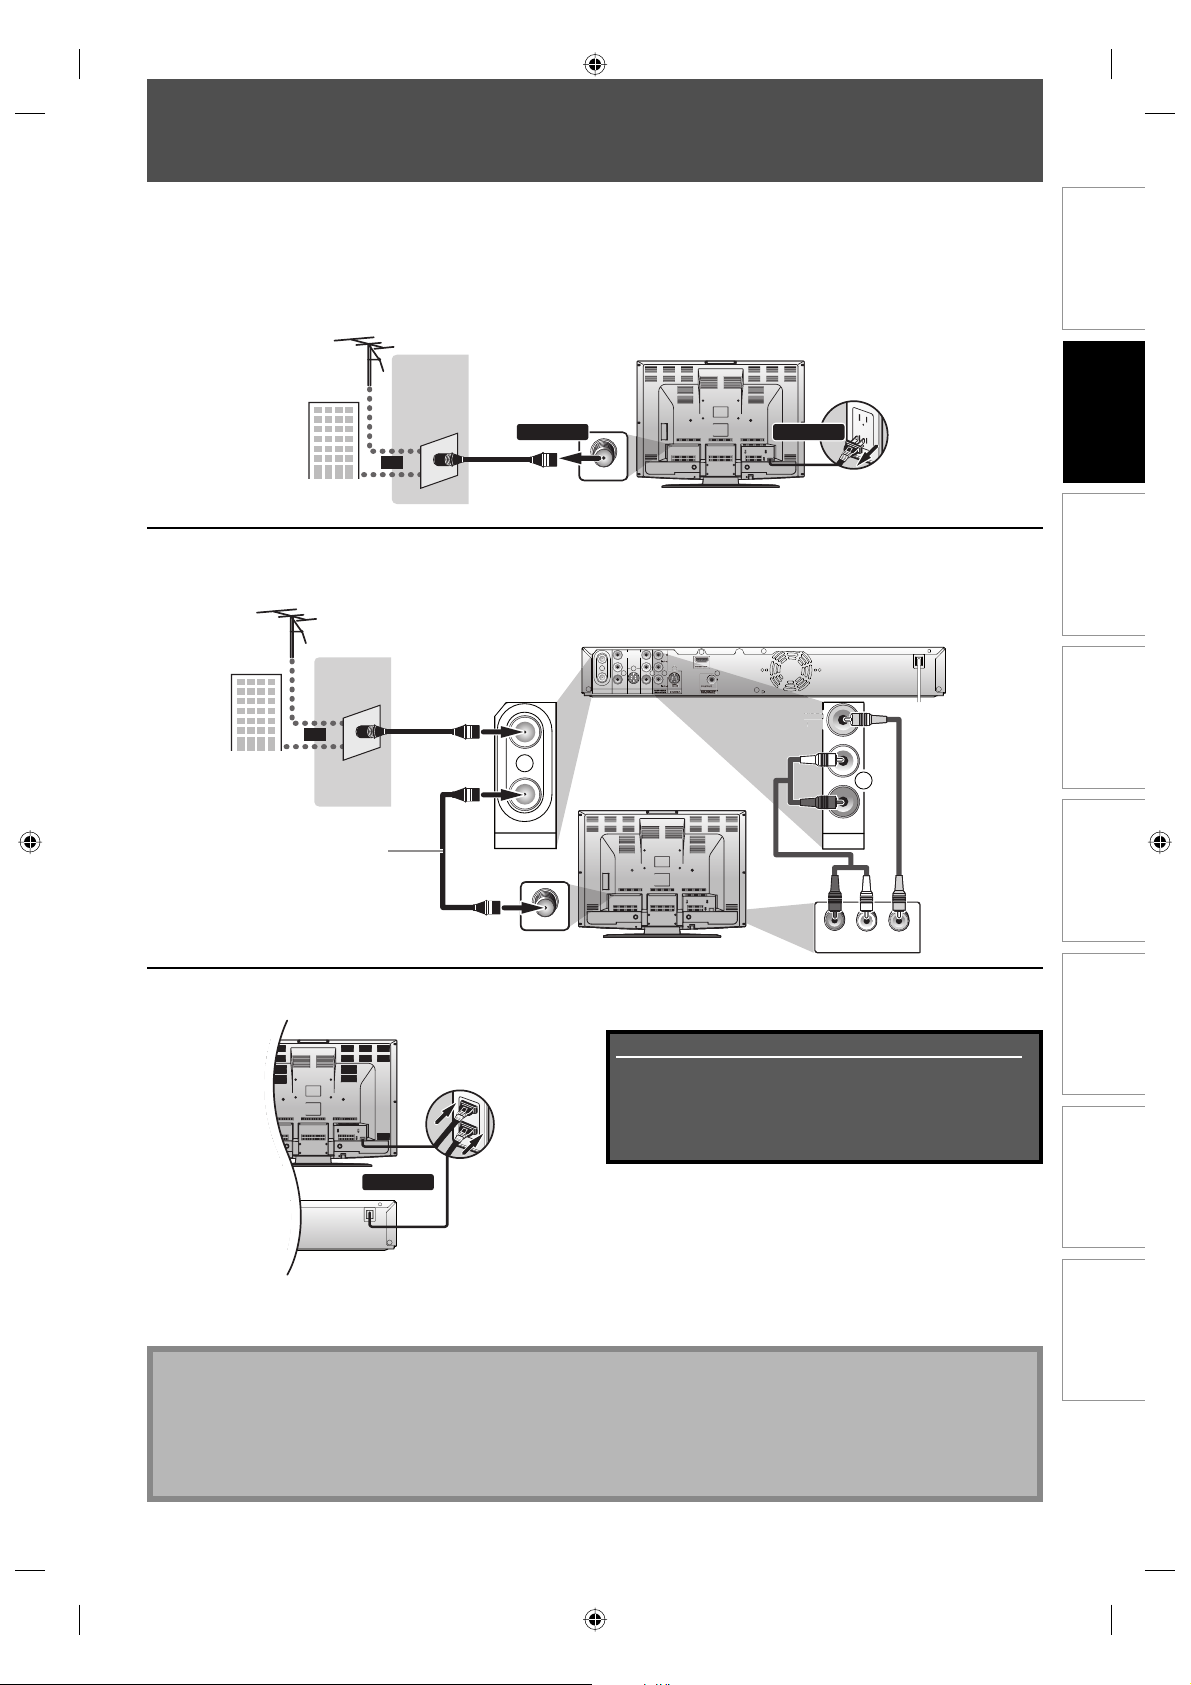
ANTENNA CABLE CONNECTION
V
O
This section describes how to connect your unit to an antenna, cable box, etc.
Disconnect the power cord of your TV from the AC outlet.
1
Disconnect RF coaxial cable from antenna input jack of your TV.
2
VHF / UHF
antenna
or
cable TV
company
Connect cables to the unit.
Make the basic connection as illustrated below.
3
RF coaxial cable
ANT. IN
rear of your TV
Connections
1112
disconnectdisconnect
Basic Setup Function Setup Others
VIDEO
IDE
OUT
AV O UT
cable
AUDIO INLRVIDEO IN
rear of this unit
L
RCA video
cable
R
Recording Playback EditingIntroduction
VHF / UHF
antenna
cable TV
company
This connection is for
TV loop through only
IN
VIDEO
VIDEO
OUT
IN
P
B
L
L
R
P
R
R
IN
OUT
COMPONENT
ANTENNA
AV OUT
AV IN
S-VIDEO
VIDEO OUTPUT
RF coaxial cable
IN
or
rear of your TV
OUT
ANTENNA
RF coaxial cable
ANT. IN
RCA audio
Plug in the power cord of this unit and your TV to the AC outlet.
4
O
VIDEO
Y
OUT
L
PB/CB
R
PR/CR
COAXIAL
IN OUT
DIGITAL AUDIO OUTPUT
COMPONENT
S-VIDEO
AUDIO OUT
VIDEO OUTPUT
PCM / BITSTREAM
HDMI OUT
rear of your TV
connect
rear of this unit
Supplied cables used in this connection are as follows:
• RF coaxial cable x 1
• RCA audio cable (L/R) x 1
• RCA video cable x 1
Please purchase the rest of the necessary cables at your
local store.
* Once connections are completed, turn on the TV and
begin initial setting.
Channel scanning is necessary for the unit to memorize
all available channels in your area.
(Refer to “INITIAL SETTING” on page 23.)
Note
• For your safety and to avoid damage to the device, please unplug the RF coaxial cable from the ANTENNA IN jack
before moving the unit.
• If you use an antenna to receive analog TV, it should also work for DTV reception. Outdoor or attic antennas will be
more effective than set-top versions.
• Antenna out is for tuner pass through only. DVD playback through the RF is not possible.
13EN
13EN
E7H42UD_DVDR3506-37_EN.indd 13E7H42UD_DVDR3506-37_EN.indd 13 2007/12/28 10:52:502007/12/28 10:52:50
Page 14
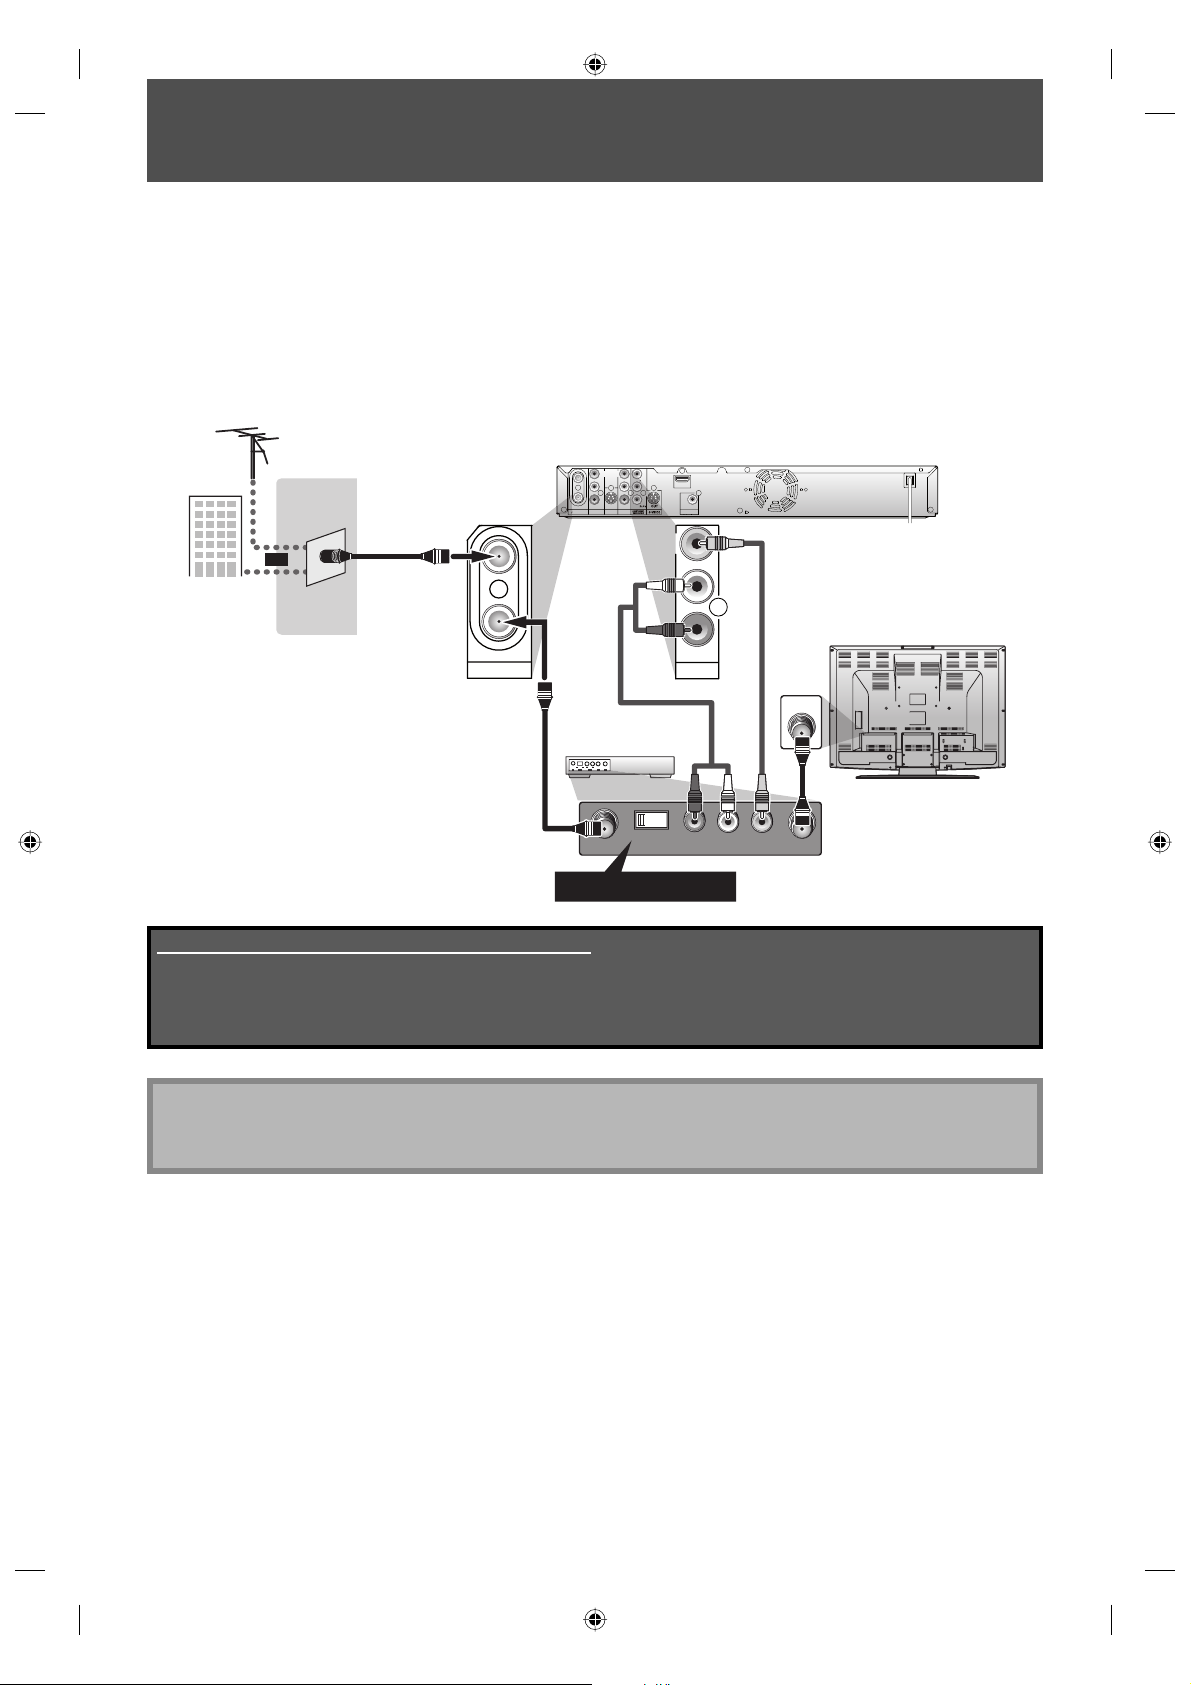
RF MODULATOR CONNECTION
If your TV has antenna in jack only, it is still possible to connect this unit to your TV by using a commercially available
stereo audio/video RF modulator. In this case, follow the instructions below.
1) Disconnect the power cords of the devices from the AC outlet.
2) Make the connection as illustrated below.
3) Set your RF modulator’s channel 3/4 switch to either 3 or 4, whichever the TV channel is least used in your area.
If your RF modulator has a modulator/antenna switch, set it according to the manual supplied with the RF
modulator.
4) Plug in the power cords of the devices to the AC outlet.
5) Turn on your TV and choose the same channel as you set the RF modulator’s channel 3/4 switch to.
For more details, follow the manual supplied with the RF modulator.
VHF / UHF
antenna
RF coaxial cable
IN
ANTENNA
IN
OUT
AV IN
VIDEO
VIDEO
OUT
IN
L
L
R
R
IN
COMPONENT
AV OUT
S-VIDEO S-VIDEO
VIDEO OUTPUT
PB/C
PR/C
or
cable TV
company
OUT
ANTENNA
RCA audio cable
rear of your RF modulator
(not supplied)
RF coaxial cable
Set channel 3 or 4
Supplied cables used in this connection are as follows:
• RF coaxial cable x 1
• RCA audio cable (L/R) x 1
• RCA video cable x 1
Please purchase the rest of the necessary cables at your local store.
Y
B
HDMI OUT
R
OUT
COAXIAL
DIGITAL AUDIO OUTPUT
PCM / BITSTREAM
VIDEO
OUT
AV OUT
L
RCA video
cable
R
ANT. IN
rear of this unit
rear of your TV
RF coaxial cable
43
AUDIO IN TO TVANT. INLRCHANNEL
VIDEO IN
Note
• RF modulator is not supplied with this unit. You need to purchase it at your local store.
• The quality of picture may become poor if this unit is connected to an RF modulator.
14 EN14 EN
E7H42UD_DVDR3506-37_EN.indd 14E7H42UD_DVDR3506-37_EN.indd 14 2007/12/28 10:52:512007/12/28 10:52:51
Page 15

CONNECTION TO A CABLE / SATELLITE BOX
1) Disconnect the power cords of the devices from the AC outlet.
2) Make the connection as illustrated below.
3) Plug in the power cords of the devices to the AC outlet.
e.g.)
satellite
dish
This connection is for
TV loop through only
or
rear of your TV
VIDEO IN
AUDI O IN
Connections
LR
cable TV
ANT. IN
company
RF coaxial cable
RF coaxial cable
RF OUTANT. IN
rear of this unit
IN
ANTENNA
IN
VIDEO
L
R
OUT
AV IN
VIDEO
OUT
IN
IN
S-VIDEO S-VIDEO
cable/satellite
box
VIDEO
AUDIO OUT
LR
OUT
or
S-VIDEO
OUT
OUT
ANTENNA
RCA video cable
RCA audio cable
Supplied cables used in this connection are as follows:
• RF coaxial cable x 1
• RCA audio cable (L/R) x 1
• RCA video cable x 1
Please purchase the rest of the necessary cables at your local store.
Y
PB/CB
L
PR/CR
R
COMPONENT
AV OUT
VIDEO OUTPUT
HDMI OUT
OUT
COAXIAL
DIGITAL AUDIO OUTPUT
PCM / BITSTREAM
VIDEO
VIDEO
IN
IN
L
L
R
R
AV I N
AV I N
S-video cable
RCA video
cable
VIDEO
VIDEO
OUT
OUT
L
L
R
AV O UT
AV O UT
R
IN
IN
S-VIDEO S-VIDEO
S-VIDEO
PB/C
PR/C
COMPONENT
VIDEO OUTPUT
Y
B
R
OUT
RCA audio
cable
Basic Setup Function Setup Others
Recording Playback EditingIntroduction
Note
• Required cables and connecting methods differ depending on the cable/satellite box.
For more information, please contact your cable/satellite provider.
• Instead of using video out jack of this unit, you can also use S-video out jack, component video output jack, or
HDMI out jack (no audio out jack connection required) for connecting to your TV.
With this setup:
• You can record any unscrambled channel by selecting the channel on the cable/satellite box. Be sure that the
cable/satellite box is turned on.
• You cannot record one channel while watching another channel.
15EN
15EN
E7H42UD_DVDR3506-37_EN.indd 15E7H42UD_DVDR3506-37_EN.indd 15 2007/12/28 10:52:522007/12/28 10:52:52
Page 16

CONNECTION TO A TV
Make one of the following connections, depending on the capabilities of your existing device.
Method 1
TV
analog audio
AUDIO IN
LR
standard picture
VIDEO
IN
RCA
video cable
VIDEO
OUT
L
R
AV O UT
VIDEO OUT
this unit
IN
VIDEO
IN
L
R
IN
OUT
ANTENNA
AV IN
S-VIDEO
RCA
audio cable
VIDEO
OUT
VIDEO
Y
OUT
PB/CB
L
HDMI OUT
R
AV OUT
COAXIAL
DIGITAL AUDIO OUTPUT
PCM / BITSTREAM
and or or
L
R
AV OUT
AV OUT
Supplied cables used in this connection are as follows:
• RCA audio cable (L/R) x 1
• RCA video cable x 1
Please purchase the rest of the necessary cables at your local store.
Method 2 Method 3
good picture better picture
S-VIDEO IN
S-video
COMPONENT
VIDEO IN
Y
PB/CB
PR/CR
(Green)
(Blue)
(Red)
cable
component
video cable
(Green)
Y
PB/CB
PR/CR
COMPONENT
VIDEO OUTPUT
(Blue)
(Red)
OUT
S-VIDEO
S-VIDEO OUT COMPONENT
VIDEO OUTPUT
After you have completed the connections
• Switch the input selector on your TV to an appropriate external input channel. Press a button on the TV’s original
remote control that selects an external input channel until the DVD recorder’s opening picture appears. Check your
TV owner’s manual for details.
Note
• Connect this unit directly to the TV. If the RCA audio/video cables are connected to a VCR, pictures may be
distorted due to the copy protection system.
To set progressive scan mode, refer to page 94
• This unit is compatible with the progressive scan system. The feature provides you with the higher quality images than the
traditional output system does. To utilize this feature, you must set “Progressive Scan” to “ON”.
16 EN16 EN
E7H42UD_DVDR3506-37_EN.indd 16E7H42UD_DVDR3506-37_EN.indd 16 2007/12/28 10:52:522007/12/28 10:52:52
Page 17
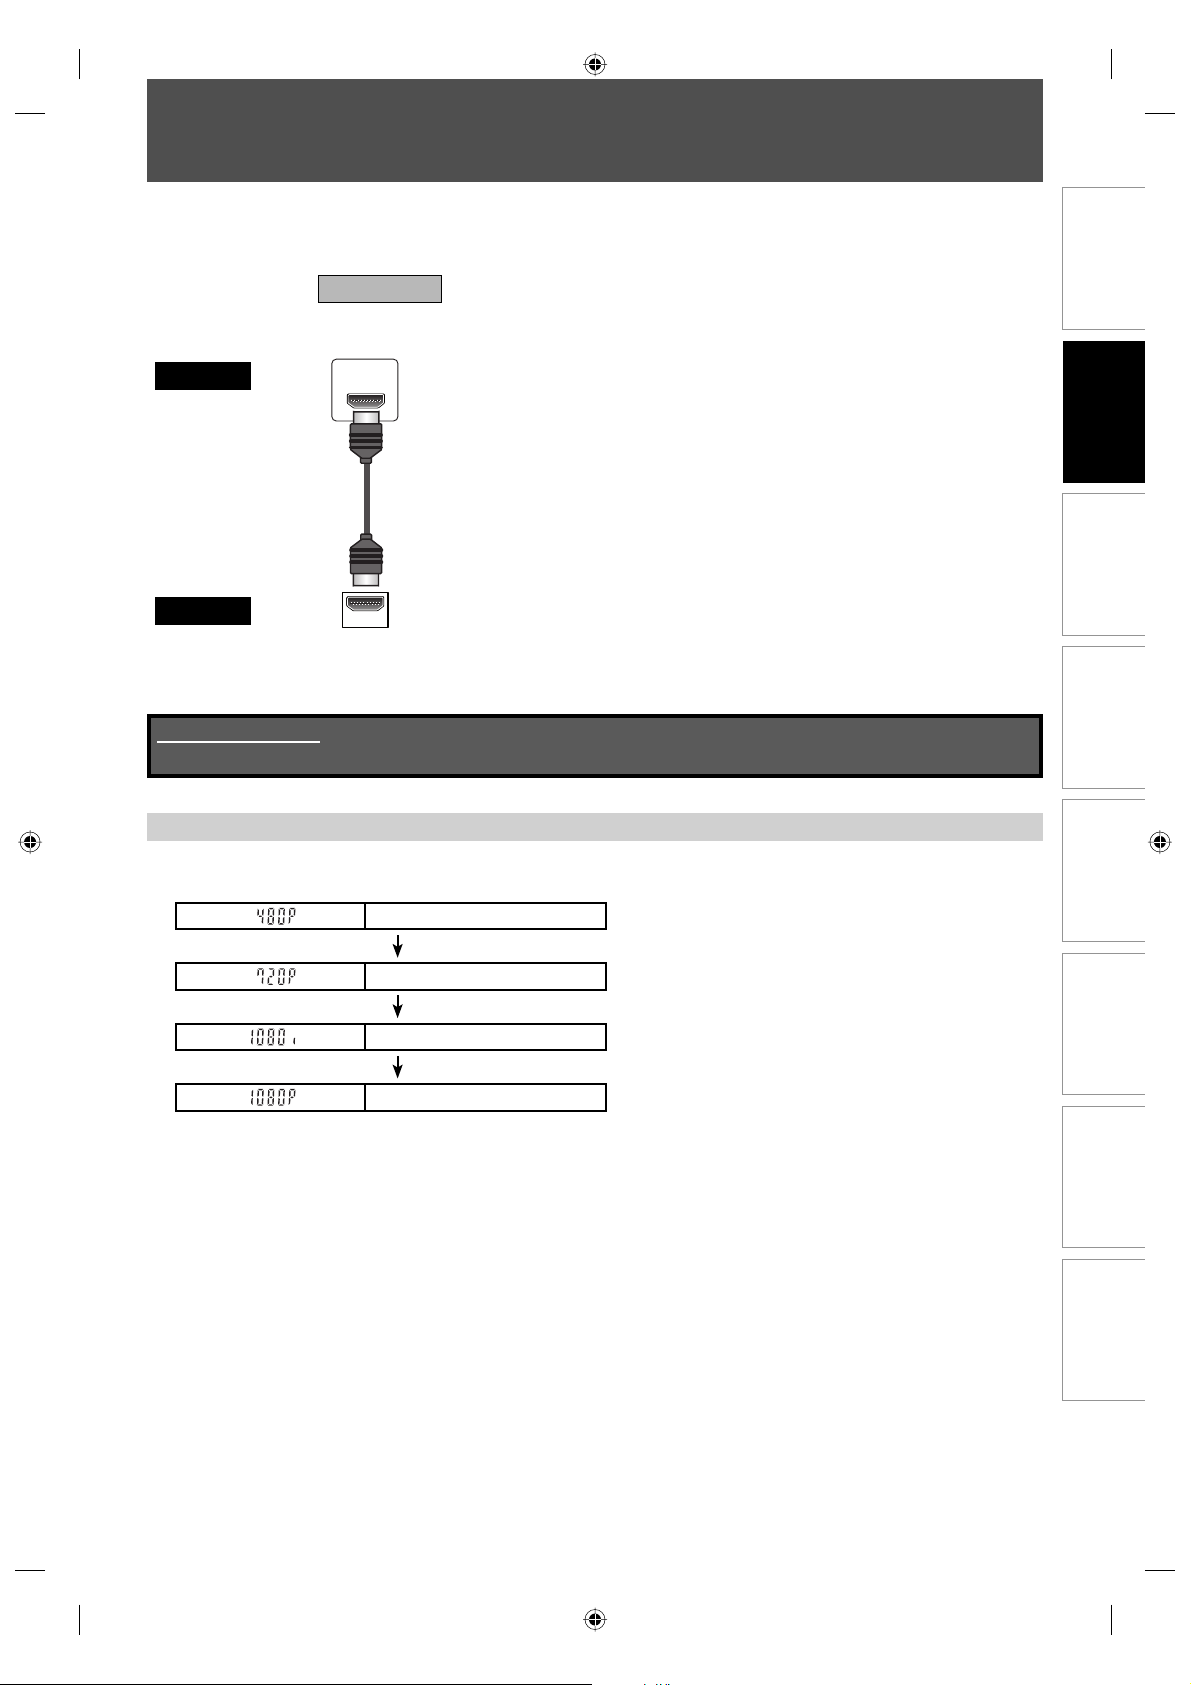
CONNECTION TO A TV WITH AN HDMI COMPATIBLE PORT
A simple 1-cable connection with a device having an HDMI (high-definition multimedia interface) connector allows
digital transfer of the digital images of DVD-video and other devices.
Method 4
best picture
Connections
TV
HDMI IN
HDMI cable
this unit
When connecting with an HDMI cable, the audio signal will be output as the digital audio signal simultaneously, so
you do not need the analog audio connection described on page 16.
Cables not included.
Please purchase the necessary cables at your local store.
HDMI OUT
HDMI Mode and Actual Output Signals
Press [HDMI] to select the HDMI output mode. The output mode changes as follows every time [HDMI] is pressed.
Front Panel Display Video Output Signal
480 Progressive
Press [HDMI]
720 Progressive
Press [HDMI]
1080 interlaced
Press [HDMI]
1080 Progressive
Press [HDMI]
• The HDMI mode that is not supported by display device will be skipped.
Basic Setup Function Setup Others
Recording Playback EditingIntroduction
17EN
17EN
E7H42UD_DVDR3506-37_EN.indd 17E7H42UD_DVDR3506-37_EN.indd 17 2007/12/28 10:52:532007/12/28 10:52:53
Page 18

CONNECTION TO A TV WITH AN HDMI COMPATIBLE PORT
Actual Output Modes by Media
Audio recording format of the disc Dolby Digital setting of this unit Actual output
Dolby Digital
DVD-video
LPCM
Dolby Digital
DivX®
MP3 / MP2
For audio CD, video CD, and MP3 / Windows Media™ Audio files, 2 channel PCM will be output regardless of the
“Dolby Digital” setting.
*1 If the connected device is not compatible with HDMI BITSTREAM, audio will be output as PCM even if you select
“Stream” in “Dolby Digital” setting.
Refer to pages 96-97 for “HDMI” setting.
Copyright protection system
To play back the digital video images of a DVD via an HDMI connection, it is necessary that both the player and the
display device (or an AV amplifier) support a copyright protection system called HDCP (high-bandwidth digital
content protection system). HDCP is copy protection technology that comprises data encryption and authentication
of the connected AV device. This unit supports HDCP. Please read the operating instructions of your display device
(or AV amplifier) for more information.
*HDMI: High Definition Multimedia Interface
PCM 2channel PCM
Stream Dolby Digital
PCM
Stream
PCM 2channel PCM
Stream Dolby Digital
PCM
Stream
2channel PCM
2channel PCM
Note
• When using HDCP-incompatible display device, the image will not be viewed properly.
• Among the devices that support HDMI, some devices can control other devices via the HDMI connector; however,
this unit cannot be controlled by another device vice the HDMI connector.
• The audio signals from the HDMI connector (including the sampling frequency, the number of channels and bit
length) maybe limited by the device that is connected.
• Among the monitors that support HDMI, some do not support audio output (for example, projectors). In
connections with device such as this unit, audio signals are not output from the HDMI output connector.
• When this unit’s HDMI connector is connected to a DVI-D compatible monitor (HDCP compatible) with an HDMIDVI converter cable, the signals are output in digital RGB.
18 EN18 EN
E7H42UD_DVDR3506-37_EN.indd 18E7H42UD_DVDR3506-37_EN.indd 18 2007/12/28 10:52:532007/12/28 10:52:53
Page 19
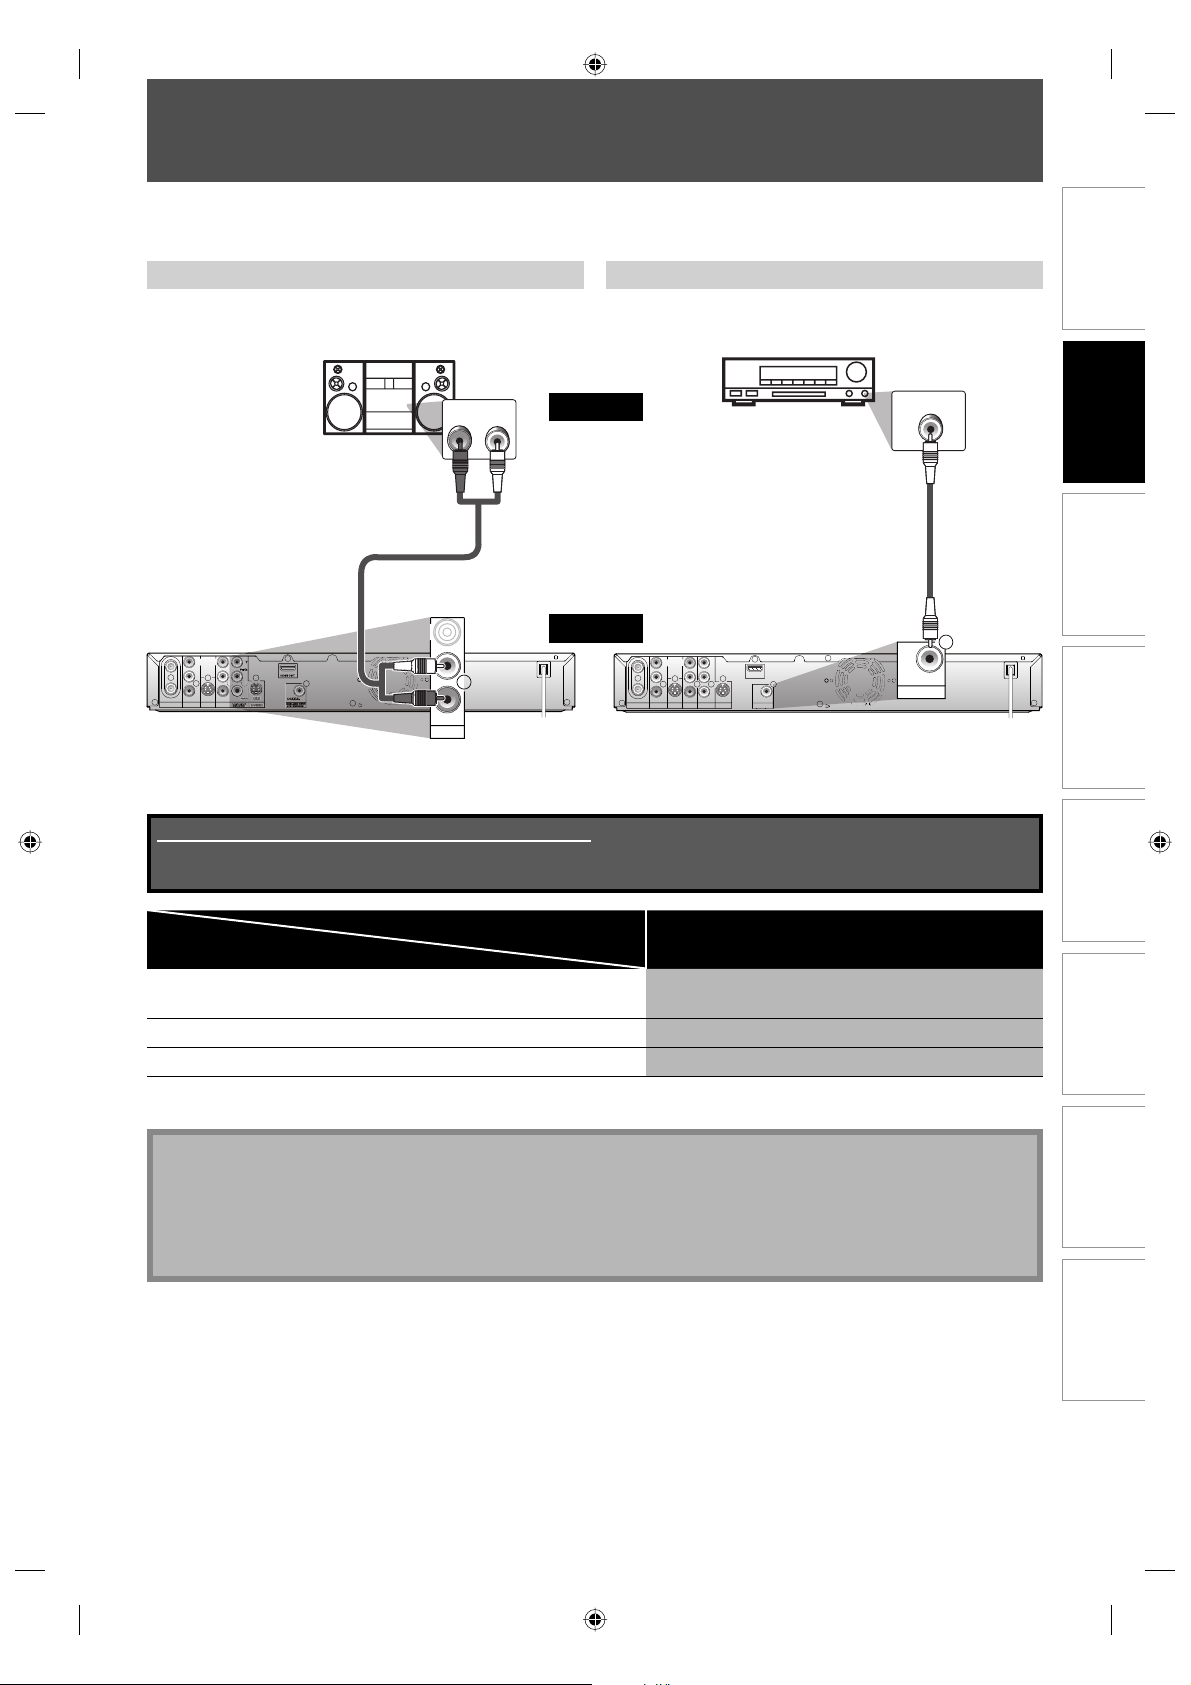
CONNECTION TO AN AUDIO SYSTEM
• When you change the connections, all devices should be turned off.
• Refer to the manual accompanying external devices for more information.
2 Channel Analog Audio Connection Digital Audio Connection
stereo system
AUDIO IN
LR
audio
analog audio
input jacks
RCA audio cable
ANTENNA
VIDEO
OUT
AV OUT
L
R
IN
VIDEO
VIDEO
Y
OUT
IN
PB/CB
L
L
R
IN
OUT
AV OUT
AV IN
S-VIDEO
HDMI OUT
R
COAXIAL
DIGITAL AUDIO OUTPUT
PCM / BITSTREAM
this unit
ANTENNA
AV OUT
Supplied cables used in this connection are as follows:
• RCA audio cable (L/R) x 1
Please purchase the rest of the necessary cables at your local store.
IN
VIDEO
L
R
OUT
AV IN
Dolby Digital decoder,
MD deck or DAT deck
coaxial input jack
digital audio coaxial cable
VIDEO
Y
OUT
IN
PB/CB
L
HDMI OUT
PR/CR
R
OUT
COMPONENT
VIDEO OUTPUT
COAXIAL
DIGITAL AUDIO OUTPUT
PCM / BITSTREAM
IN
AV OUT
S-VIDEO S-VIDEO
DIGITAL AUDIO OUTPUT
digital audio
COAXIAL
DIGITAL AUDIO OUTPUT
PCM / BITSTREAM
Connections
COAXIAL
Basic Setup Function Setup Others
Recording Playback EditingIntroduction
Setting
Connection
If output is Dolby Digital encoded audio, connect to a Dolby
Digital decoder.
Setup >General Setting >Playback >Disc Audio >
Dolby Digital
Stream
Connecting to an MD deck or DAT deck. PCM
If not connected to any external devices. PCM
* To complete these settings, refer to page 89.
Note
• The audio source on a disc in a Dolby Digital multi channel surround format cannot be recorded as digital sound
by an MD or DAT deck.
• By connecting this unit to a Dolby Digital decoder, you can enjoy high-quality Dolby Digital multi channel
surround sound as heard in the movie theaters.
• Playing back a DVD using incorrect settings may generate noise distortion and may also damage the speakers.
19EN
19EN
E7H42UD_DVDR3506-37_EN.indd 19E7H42UD_DVDR3506-37_EN.indd 19 2007/12/28 10:52:532007/12/28 10:52:53
Page 20

GUIDE TO ON-SCREEN DISPLAYS AND MENUS
This unit uses the following on-screen displays and menus to guide you to the easy operations.
The on-screen displays give you the information on the loaded disc, the disc/file in playback, or the HDMI status, etc.
The menus allow you to change the various kinds of settings for playing back, recording, or editing to suite your preference.
On-Screen Display / Menu
The on-screen display changes in the following order
as you press [INFO].
OFF
DTV Program Guide (only in DTV mode)
Disc Information/Menu
Title Name Information
(only when DVD+RW/DVD+R/DVD-RW/DVD-R
is in playback)
or
File Name Information
(only when a CD with MP3/Windows Media™ Audio/
JPEG/DivX® files is in playback)
Windows Media™ Audio Tag Information
(only when a Windows Media™ Audio file is in playback)
HDMI Information
(only for the images output through the HDMI output)
DTV Program Guide
1 5
KABC
A Day of Memories
52
English 1/2
53
A quarter-century ago, which may now
qualify as the good old days of
newspapering, run-of-paper sales
accounted for 80 percent of the
54
industry's advertising revenues.
1. Broadcast station
2. Program title (max. 2 lines displayed)
3. Audio language (“Other” is displayed when the
audio language cannot be acquired, or the acquired
languages are other than English, Spanish or French.)
4. Program guide (max. 6 lines displayed)
5. Channel number
DTV 6.1
Disc Information / Menu
6
1/ 5 1/ 5
0:01:00 / 1:23:45
DVD
Video
CH 10
5 15122
SP(2Hr) 1:53
4
3
* This is an example screen only for explanation.
1. Indicates a disc type and format mode.
2. Indicates a channel number or selected external input
position.
3. Indicates a recording mode and possible recording
time left.
4. Indicates an operation status.
5. Each icon means:
: Search
: Audio
: Subtitle
: Angle
: Repeat
: Marker
: Noise Reduction
: Zoom
: Surround
6. Indicates the current title number/total number of
titles, the current chapter number/total number of
chapters, and time lapse of the current title playback/
total duration of the title.
Note
• This is an example screen only for explanation.
Displayed items are depending on the disc you
inserted.
Note
• When the program guide is displayed in more than 7
lines, use [K / L] to scroll.
• “No description provided” is displayed when the
program guide is not provided.
20 EN20 EN
E7H42UD_DVDR3506-37_EN.indd 20E7H42UD_DVDR3506-37_EN.indd 20 2007/12/28 10:52:542007/12/28 10:52:54
Page 21
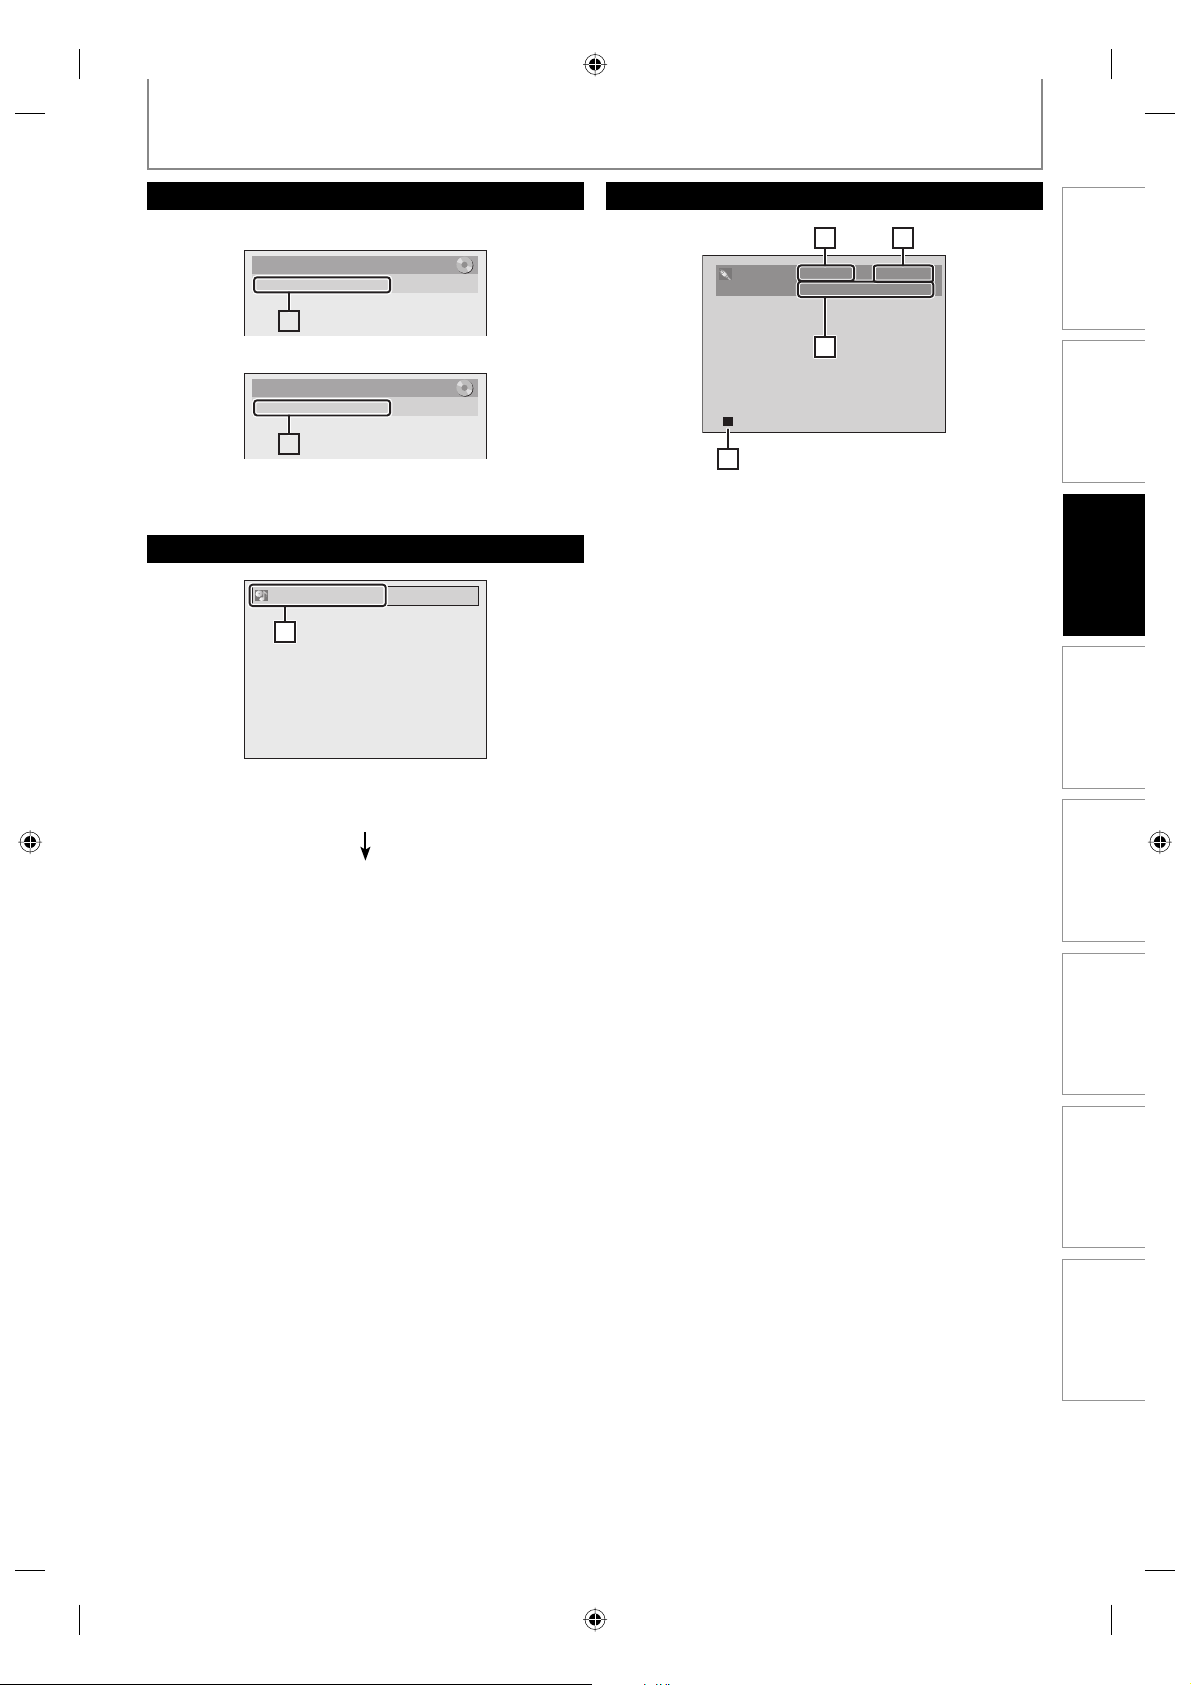
GUIDE TO ON-SCREEN DISPLAYS AND MENUS
Title/File Name Information
Title Name Information
Title Name
My Title
1
File Name Information
File Name
My File
1
1. Displays title/file name.
Windows Media™ Audio Tag Information
Artist Name
11
HDMI Information
21
Video Info. : 480p YCbCr
Audio Info. : Bitstream
343
* This is an example screen only for explanation.
1. Indicates the resolution of the HDMI output image.
2. Indicates the HDMI video format.
3. Indicates the HDMI audio format.
4. Indicates an operation status.
Basic Setup
Recording Playback EditingIntroduction Connections
1. Indicates artist/title information (only when available)
• First, artist name will be displayed.
• If you press [INFO] one more time, title name will be
displayed.
Function Setup Others
21EN
21EN
E7H42UD_DVDR3506-37_EN.indd 21E7H42UD_DVDR3506-37_EN.indd 21 2007/12/28 10:52:542007/12/28 10:52:54
Page 22

GUIDE TO ON-SCREEN DISPLAYS AND MENUS
Main Menu
Press [SETUP] to display the main menu. Then use
[K / L] to select a menu and press [OK] to display the
menu. These menus provide entries to all main functions
of the unit.
Setup
General Setting
1
1
Timer Programming
2
2
Title List
3
3
Disc Edit
4
4
CD Playback Mode
5
5
General Setting Menu
General Setting
1
1
2
2
Playback
Display
3
3
Video
4
4
Recording
Clock
5
5
Channel
6
2
DivX
HDMI
7
3
Reset All
8
4
9
5
1. General Setting:
To go to general setting menu.
2. Timer Programming:
To program a timer recording.
3. Title List:
To call up the title list.
4. Disc Edit:
To set up the DVD disc setting.
5. CD Playback Mode:
To set up the CD playback setting.
• “CD Playback Mode” is available only when an audio
CD, a video CD, a CD-RW/-R with MP3 / Windows
Media™ Audio / JPEG files is inserted into the unit.
1. Playback:
To set up the unit to play back discs as you prefer.
2. Display:
To set up the OSD screen as you prefer.
3. Video:
To set up the video setting.
4. Recording:
To set up the unit to record to discs as you prefer.
5. Clock:
To set up the clock of the unit as you need.
6. Channel:
To adjust the channel setting of the unit as you prefer.
7. DivX:
To set up the setting for the DivX® playback.
8. HDMI:
To set up the HDMI connection setting.
9. Reset All:
To reset the setting to the factory default.
1
1
2
2
3
3
4
4
1
1
2
2
3
3
4
4
1
1
3
2
4
3
1
5
6
2
7
3
8
4
22 EN22 EN
Disc Edit / CD Playback Mode
<Disc Edit menu (DVD+RW)>
Disc Edit
Edit Disc Name
Erase Disc
Make Edits Compatible
Disc Protect OFF ON
<Disc Edit menu (DVD-RW)>
Disc Edit
Edit Disc Name
Erase Disc
Finalize
Disc Protect OFF ON
<Disc Edit menu (DVD+R/DVD-R)>
Disc Edit
Edit Disc Name
Finalize
Disc Protect OFF ON
<CD Playback Mode menu>
CD Playback Mode
Random Play
Program Play
PBC (Video CD only)
Slide Show
1. Edit Disc Name:
Allows you to rename the disc.
2. Erase Disc: (DVD+RW/DVD-RW only)
Allows you to erase all contents in the disc and format it.
3. Make Edits Compatible: (DVD+RW only)
Allows you to memorize the editing status on the disc if
you have added or deleted chapters, or made chapters
hidden on this unit, and to effect it when playing back
on the other unit.
Finalize: (DVD+R/DVD-RW/-R only)
Allows you to finalize a disc containing recorded titles.
4. Disc Protect :
Allows you to protect a disc from accidental editing or
recording.
5. Random Play:
Allows you to activate the random playback feature.
6. Program Play: (audio CD/video CD only)
Allows you to activate the program playback feature.
7. PBC (Video CD only):
Allows you to select images or information on the menu
screen by activating PBC (playback control) function.
8. Slide Show: (JPEG files only)
Allows you to select the display time of the slide show
mode.
E7H42UD_DVDR3506-37_EN.indd 22E7H42UD_DVDR3506-37_EN.indd 22 2007/12/28 10:52:552007/12/28 10:52:55
Page 23
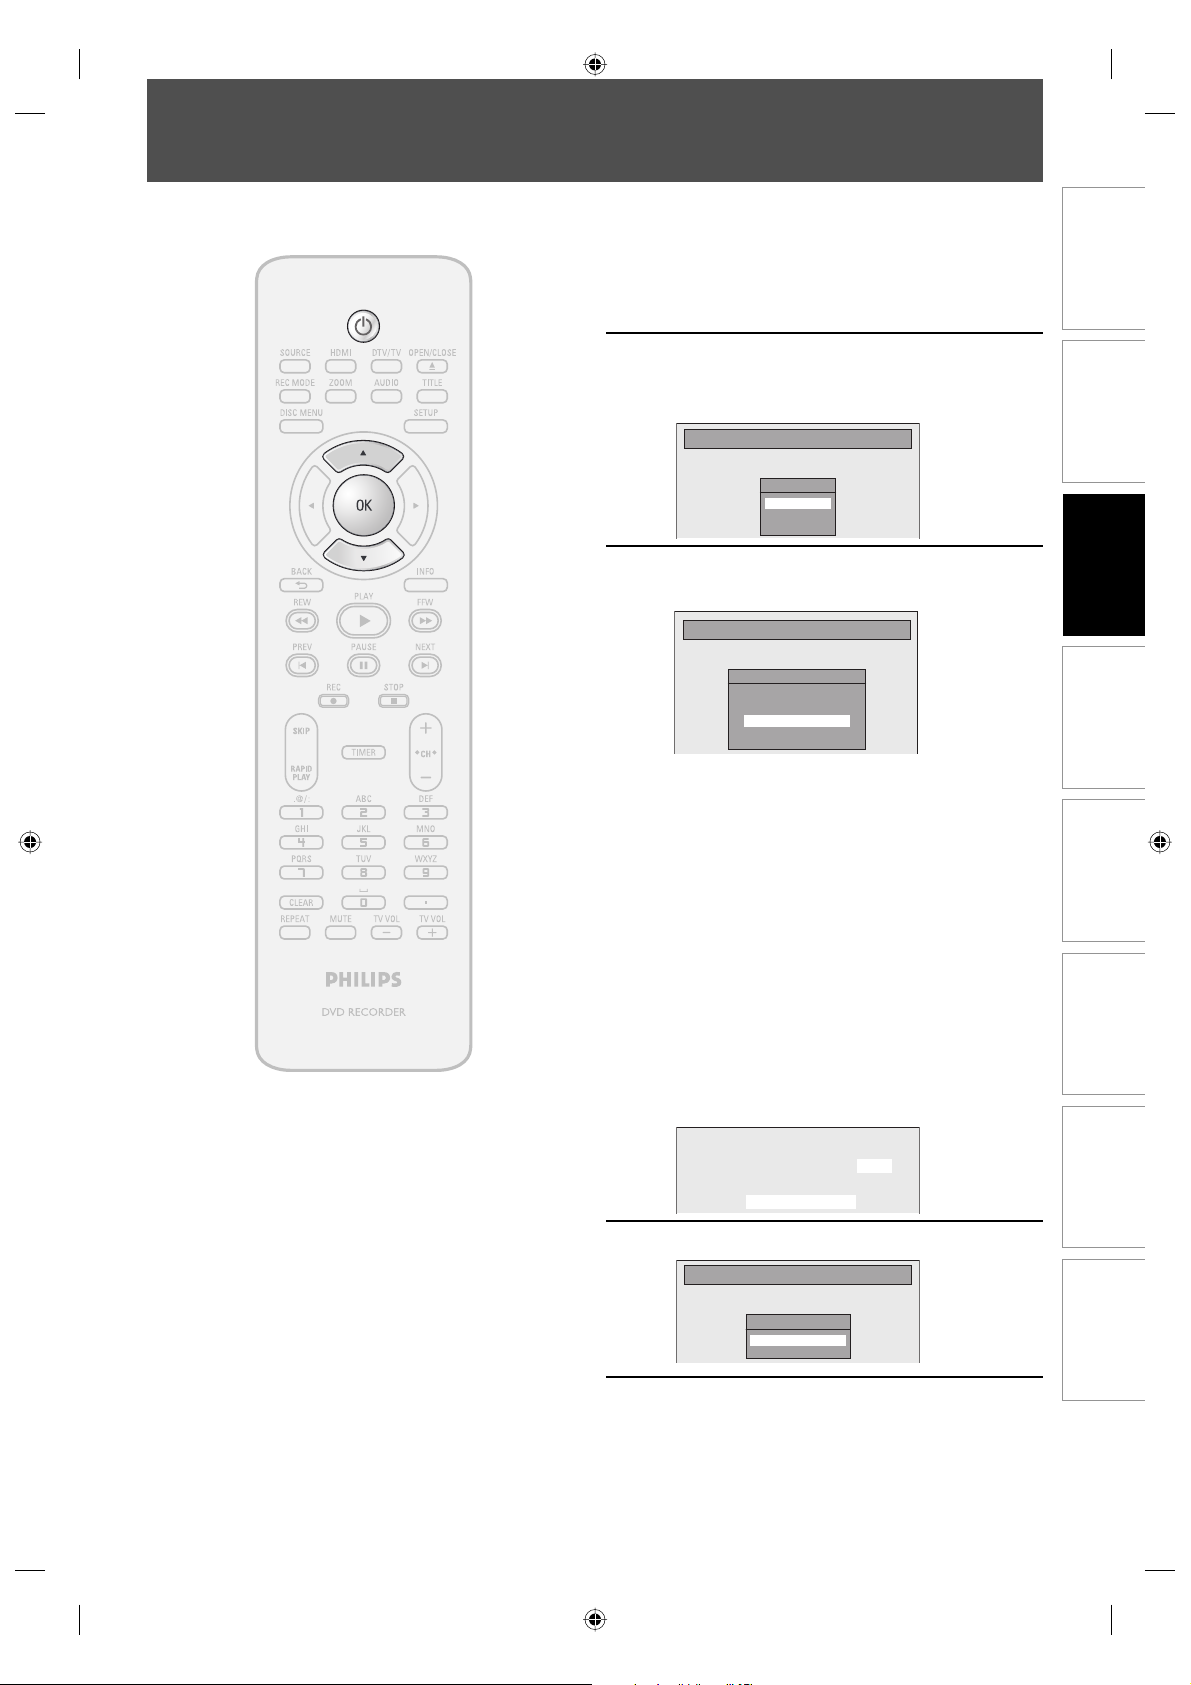
INITIAL SETTING
You need to follow these steps when you turn on this unit for the first time.
Press [STANDBY-ON yy].
1
2
3
Turn the TV on. Select the input to
which the unit is connected.
Use [K / L] to select your desired
language, then press [OK] to set
language.
Initial Setup
OSD Language
English
Français
Español
Use [K / L] to select the type of
broadcasting signal, then press [OK].
Initial Setup
Channel Preset
Make sure the antenna is
connected to “ANTENNA IN” jack.
Antenna
Cable (Analog)
Cable (Analog / Digital)
The unit will start getting channels available in
your area.
Antenna:
(When using antenna)
The channels broadcasted in analog TV and
digital TV are automatically scanned and
memorized. Only the receivable channels in the
area will be memorized.
Cable (Analog):
(When using basic cable)
The channels broadcasted in analog CATV are
automatically scanned and memorized.
Cable (Analog / Digital):
(When using basic cable)
The channels broadcasted in analog CATV and
digital CATV are automatically scanned and
memorized.
Basic Setup
Recording Playback EditingIntroduction Connections
Function Setup Others
CH 1
Auto Presetting Now
Press [OK] to activate “Clock Setting”.
Initial Setup
4
Clock Setting
- - - / - - / - - - - ( - - - )
- - : - - - -
Proceed to step 5 in “Manual Clock
Setting” on page 28.
5
E7H42UD_DVDR3506-37_EN.indd 23E7H42UD_DVDR3506-37_EN.indd 23 2007/12/28 10:52:562007/12/28 10:52:56
• If a PBS (public broadcasting station) is
available in your area, follow “Auto Clock
Setting” on page 27.
23EN
23EN
Page 24
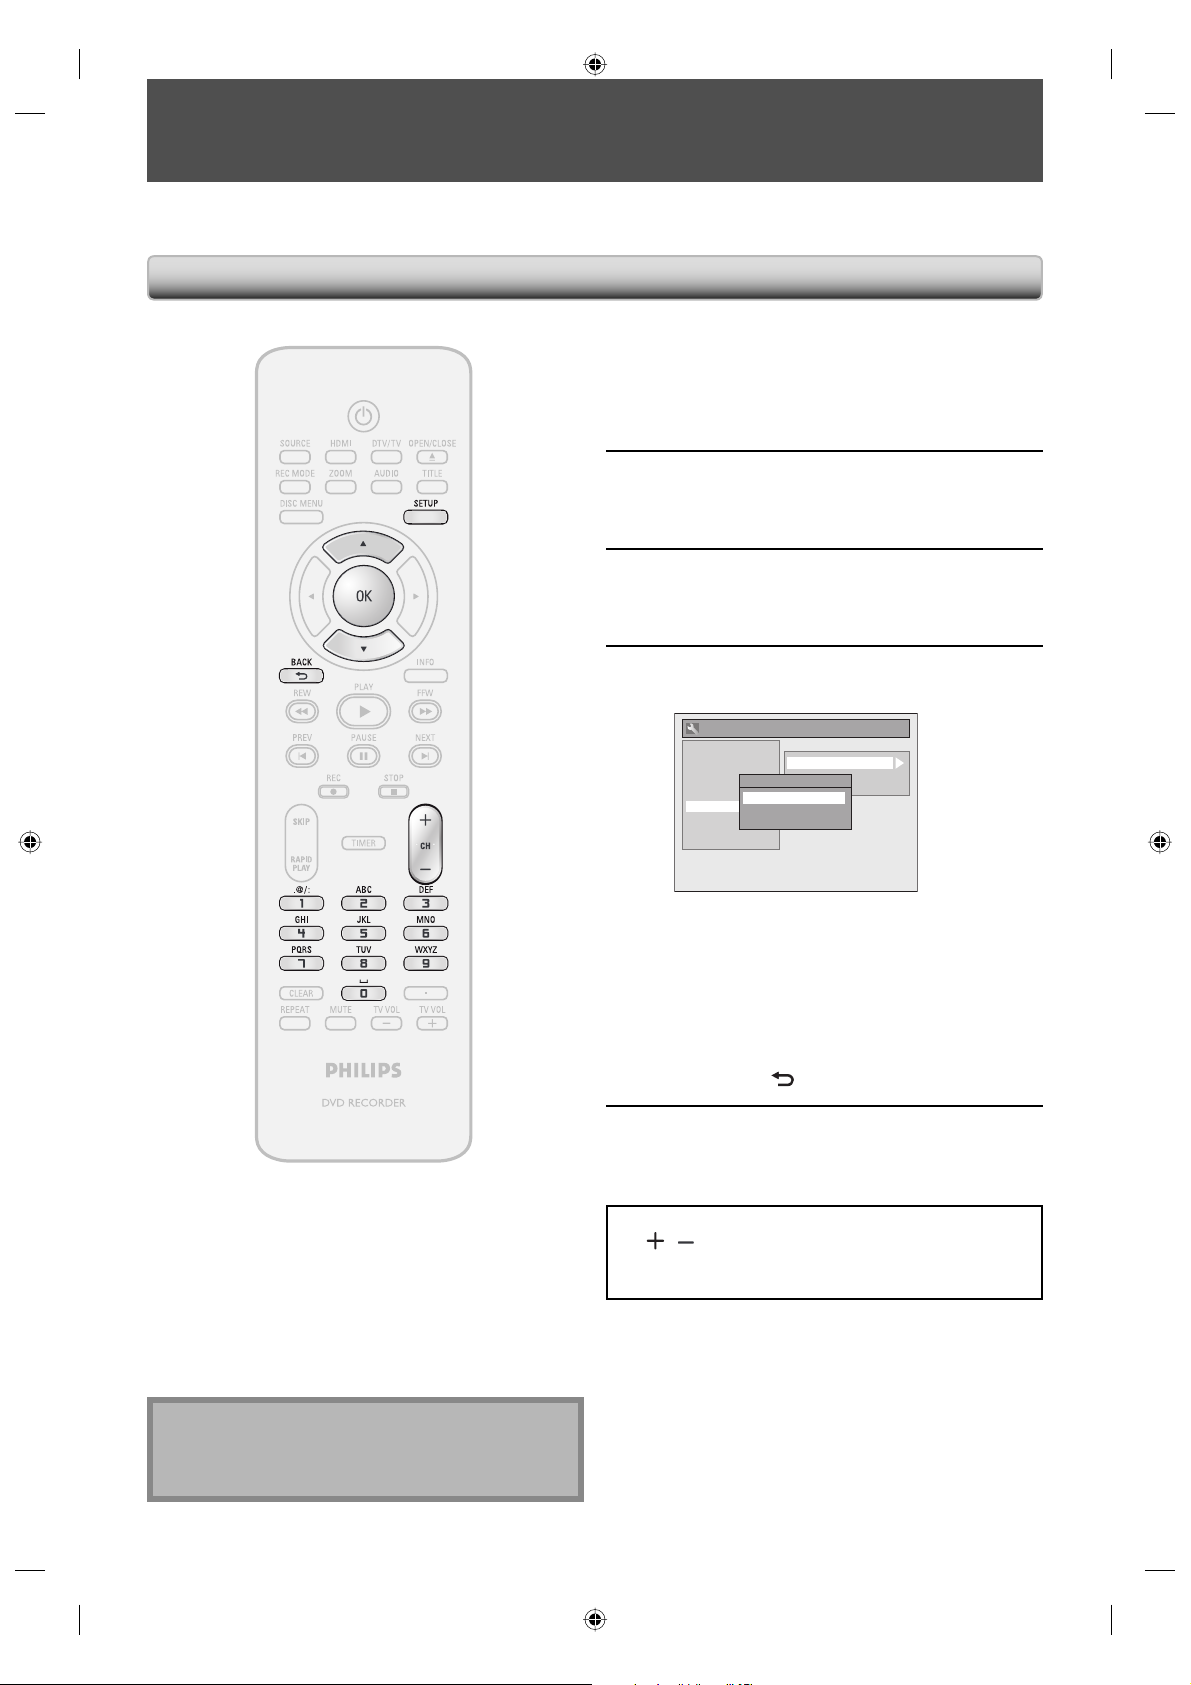
CHANNEL SETTING
If you have changed antenna connection, we recommend that you program available channels in your area with the
following procedures.
Auto Channel Scan
Press [SETUP] and use [K / L] to
select “General Setting”, then press
1
2
[OK].
“General Setting” menu will appear.
Use [K / L] to select “Channel”, then
press [OK].
“Channel” menu will appear.
Use [K / L] to select “Auto Channel
Preset”, then press [OK].
3
Use [K / L] to select the type of
broadcasting signal, then press [OK].
4
General Setting
Playback
Display
Video
Recording
Clock
Channel
DivX
HDMI
Reset All
Auto Channel Preset
Manual Channel Preset
Auto Channel Preset
TV Audio Select
Antenna
Cable (Analog)
Cable (Analog / Digital)
Note
• If the auto channel preset is canceled during
presetting, some channels not yet preset may not be
received.
The unit will start getting channels available in
your area.
• When aerial antenna is connected, select
“Antenna”.
• When connected to CATV, select “Cable
(Analog)” or “Cable (Analog/Digital)”.
To cancel the auto channel preset during
scanning:
Press [BACK
When scanning is over, press [SETUP]
to exit.
] or [SETUP] to cancel.
5
To cycle through only the memorized channels, use
[CH
/ ].
To select a channel directly (including the ones not
memorized), use [the Number buttons].
24 EN24 EN
E7H42UD_DVDR3506-37_EN.indd 24E7H42UD_DVDR3506-37_EN.indd 24 2007/12/28 10:52:582007/12/28 10:52:58
Page 25

Adding / Deleting Channels
CHANNEL SETTING
You may want to add or delete TV channels if your
channel lineup changes or if you no longer watch some
channels.
Adding channel is only available for the analog TV
channels.
Make sure
• You perform “Auto Channel Scan” before adding or
deleting the channels.
Press [DTV/TV] to select the mode
(DTV or TV) to/from which you want
1
2
3
4
to add/delete channels.
Press [SETUP] and use [K / L] to
select “General Setting”, then press
[OK].
“General Setting” menu will appear.
Use [K / L] to select “Channel”, then
press [OK].
“Channel” menu will appear.
Use [K / L] to select “Manual Channel
Preset”, then press [OK].
General Setting
Playback
Display
Video
Recording
Clock
Channel
DivX
HDMI
Reset All
• If you are adding or deleting analog TV/CATV
channels, go to
• If you are deleting digital TV/CATV channels, go
to
DIGITAL
Auto Channel Preset
Manual Channel Preset
TV Audio Select
ANALOG
to continue.
to continue.
Basic Setup
Recording Playback EditingIntroduction Connections
Function Setup Others
Instructions continue on the next page.
25EN
25EN
E7H42UD_DVDR3506-37_EN.indd 25E7H42UD_DVDR3506-37_EN.indd 25 2007/12/28 10:52:592007/12/28 10:52:59
Page 26

CHANNEL SETTING
ANALOG
Select the channel number to add or
delete.
5
6
• Use [CH / ] to cycle through only the
memorized channels.
• Use [{ / B] to cycle through all the channels
including the ones not memorized.
• Use [the Number buttons] to select a channel
directly.
• When a memorized channel is selected, “Add”
is checked and highlighted as a default.
• When an unmemorized channel is selected
“Delete” is checked and highlighted as a
default.
Use [K / L] to select “Add” or
“Delete”, then press [OK].
Manual Channel Preset
CH 2
Add
Delete
Your setting will be activated and it will
automatically switch to the next channel so that
you can continue adding or deleting channels.
DIGITAL
Select the channel number to delete.
• Only the major channel is displayed in “Manual
5
6
Channel Preset” menu. (The channel number
displayed in the parenthesis is a virtual channel
number)
• Use [CH
memorized channels.
• You cannot use [{ / B] for the digital TV
channel selection.
• Use [the Number buttons] to select a channel
directly.
• When a memorized channel is selected, “Add”
is checked and highlighted as a default.
• When an unmemorized channel is selected
“Delete” is checked and highlighted as a
default.
Use [K / L] to select “Delete”, then
press [OK]. Then select the next
channel to delete.
• If the setting is complete, press [BACK ] to
activate “Manual Channel Preset”.
/ ] to cycle through only the
Manual Channel Preset
DTV 2 (CH - - - )
Add
Delete
Press [SETUP] to exit.
7
Your setting will be activated.
WARNING:
• For the digital TV channels, you cannot recover the
deleted channels once they are deleted unless you
perform the auto channel preset again.
Press [SETUP] to exit.
7
26 EN26 EN
E7H42UD_DVDR3506-37_EN.indd 26E7H42UD_DVDR3506-37_EN.indd 26 2007/12/28 10:53:002007/12/28 10:53:00
Page 27
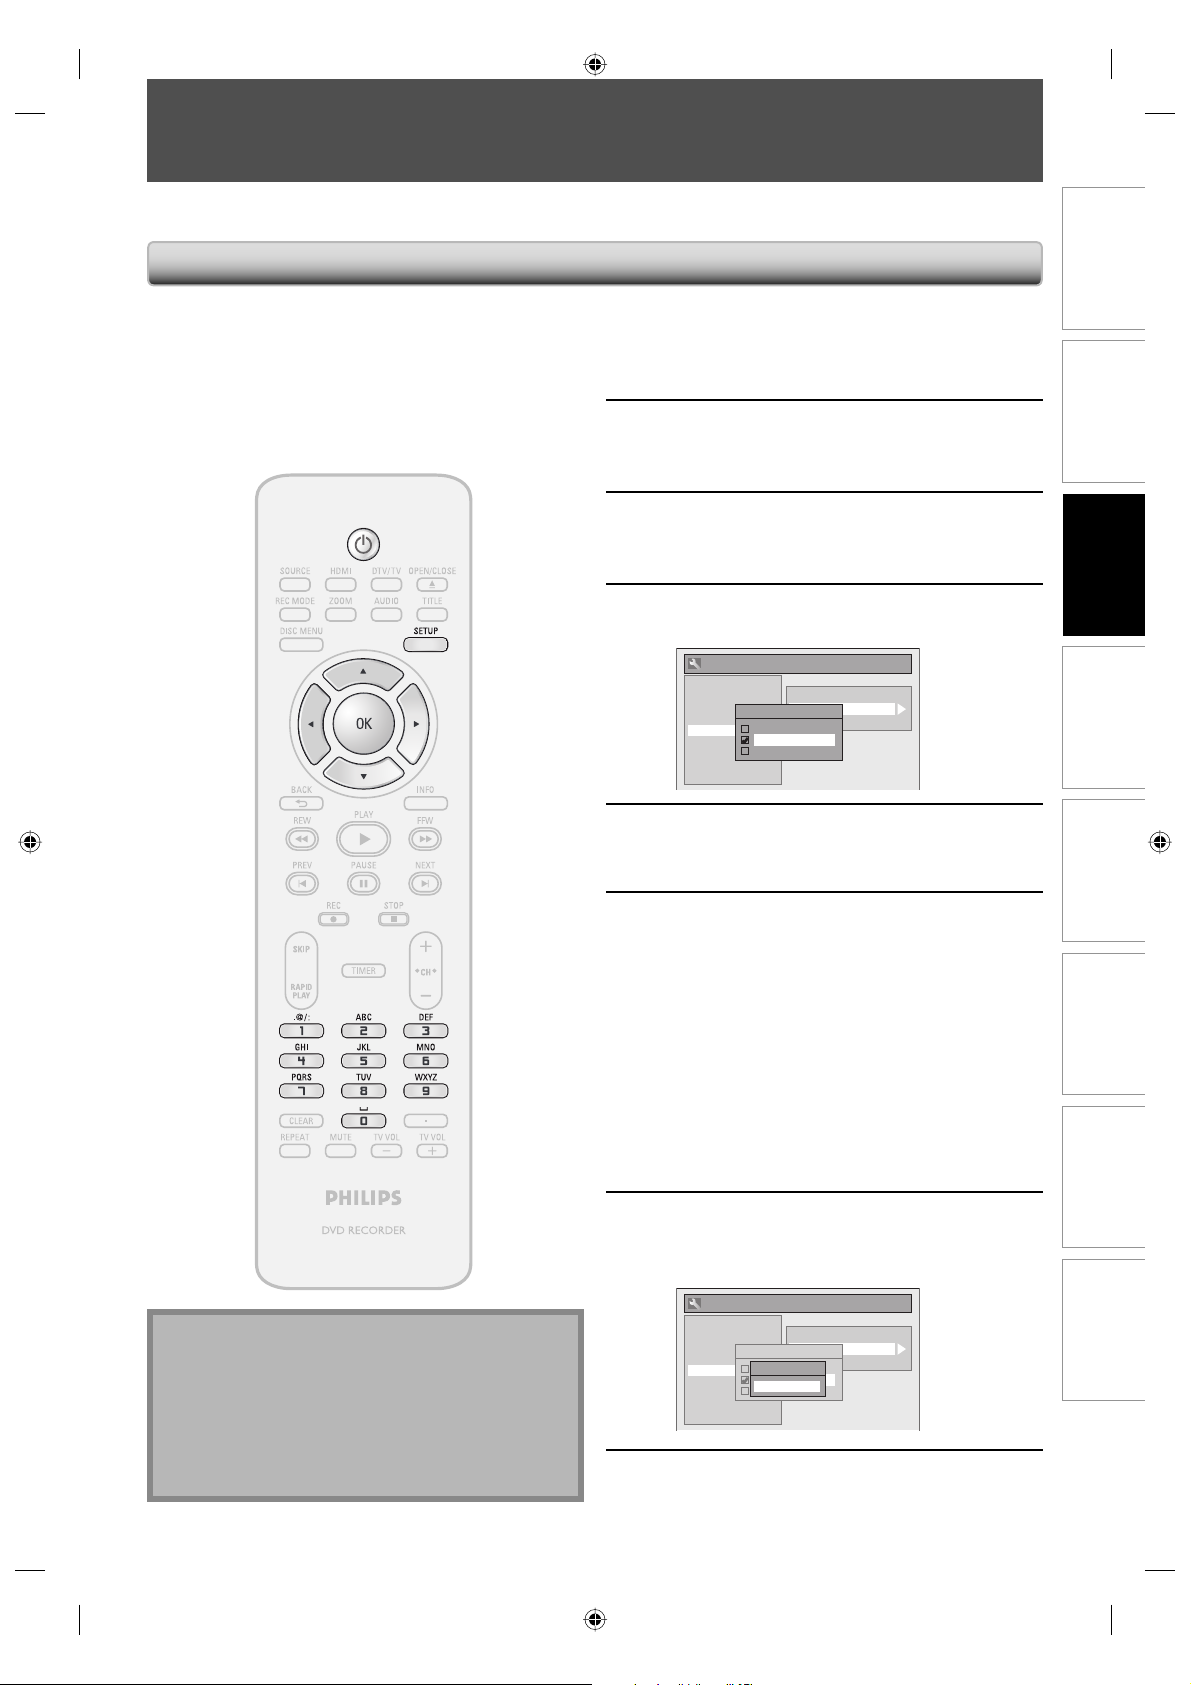
SETTING THE CLOCK
Set the clock before you try the timer programming. If a PBS (public broadcasting station) is available in your area,
follow “Auto Clock Setting” below. If not, follow “Manual Clock Setting” on page 28.
Auto Clock Setting
This unit can set the time and date automatically by
referring to a PBS station.
Make sure
• The antenna/cable TV connections are correct.
• Channels are set. (Refer to page 24.)
• If this unit is connected to a cable/satellite box,
select the local PBS station on them to set the clock
automatically.
Press [SETUP] and use [K / L] to
select “General Setting”, then press
1
2
[OK].
“General Setting” menu will appear.
Use [K / L] to select “Clock”, then
press [OK].
“Clock” menu will appear.
Use [K / L] to select “Auto Clock
Setting”, then press [OK].
3
Use [K / L] to select “Auto”, then
press [OK].
4
General Setting
Playback
Display
Video
Recording
Clock
Channel
DivX
HDMI
Reset All
Press [SETUP] to exit.
Clock Setting
Auto Clock Setting
Auto Clock Setting
Daylight Saving Time
OFF
Auto
Manual
5
Basic Setup
Recording Playback EditingIntroduction Connections
Note
• The clock may set itself automatically after you
connect the antenna/cable signal and plug in the
power cord.
• Only the analog PBS channel signal is effective for
auto clock setting.
• The unit receives the clock data at 12:00 a.m. / p.m.
from the PBS channel when the power is off.
Press [STANDBY-ON yy] to turn off
the unit.
6
If the unit chooses an incorrect PBS channel, set the PBS
channel manually by following the steps below.
This unit will search for the time only when the
power is off. Leave it off for several minutes to
give this unit time to set the clock.
Select “Manual” at step 4, then press
[OK].
1
Use [the Number buttons] or [K / L]
to enter your PBS channel number,
2
then press [OK].
General Setting
Playback
Display
Video
Recording
Clock
Channel
DivX
HDMI
Reset All
Press [SETUP] and turn off the unit.
Clock Setting
Auto Clock Setting
Auto Clock Setting
Daylight Saving Time
Set Channel No.
OFF
Auto
CH 1
Manual
Function Setup Others
3
27EN
27EN
E7H42UD_DVDR3506-37_EN.indd 27E7H42UD_DVDR3506-37_EN.indd 27 2007/12/28 10:53:012007/12/28 10:53:01
Page 28
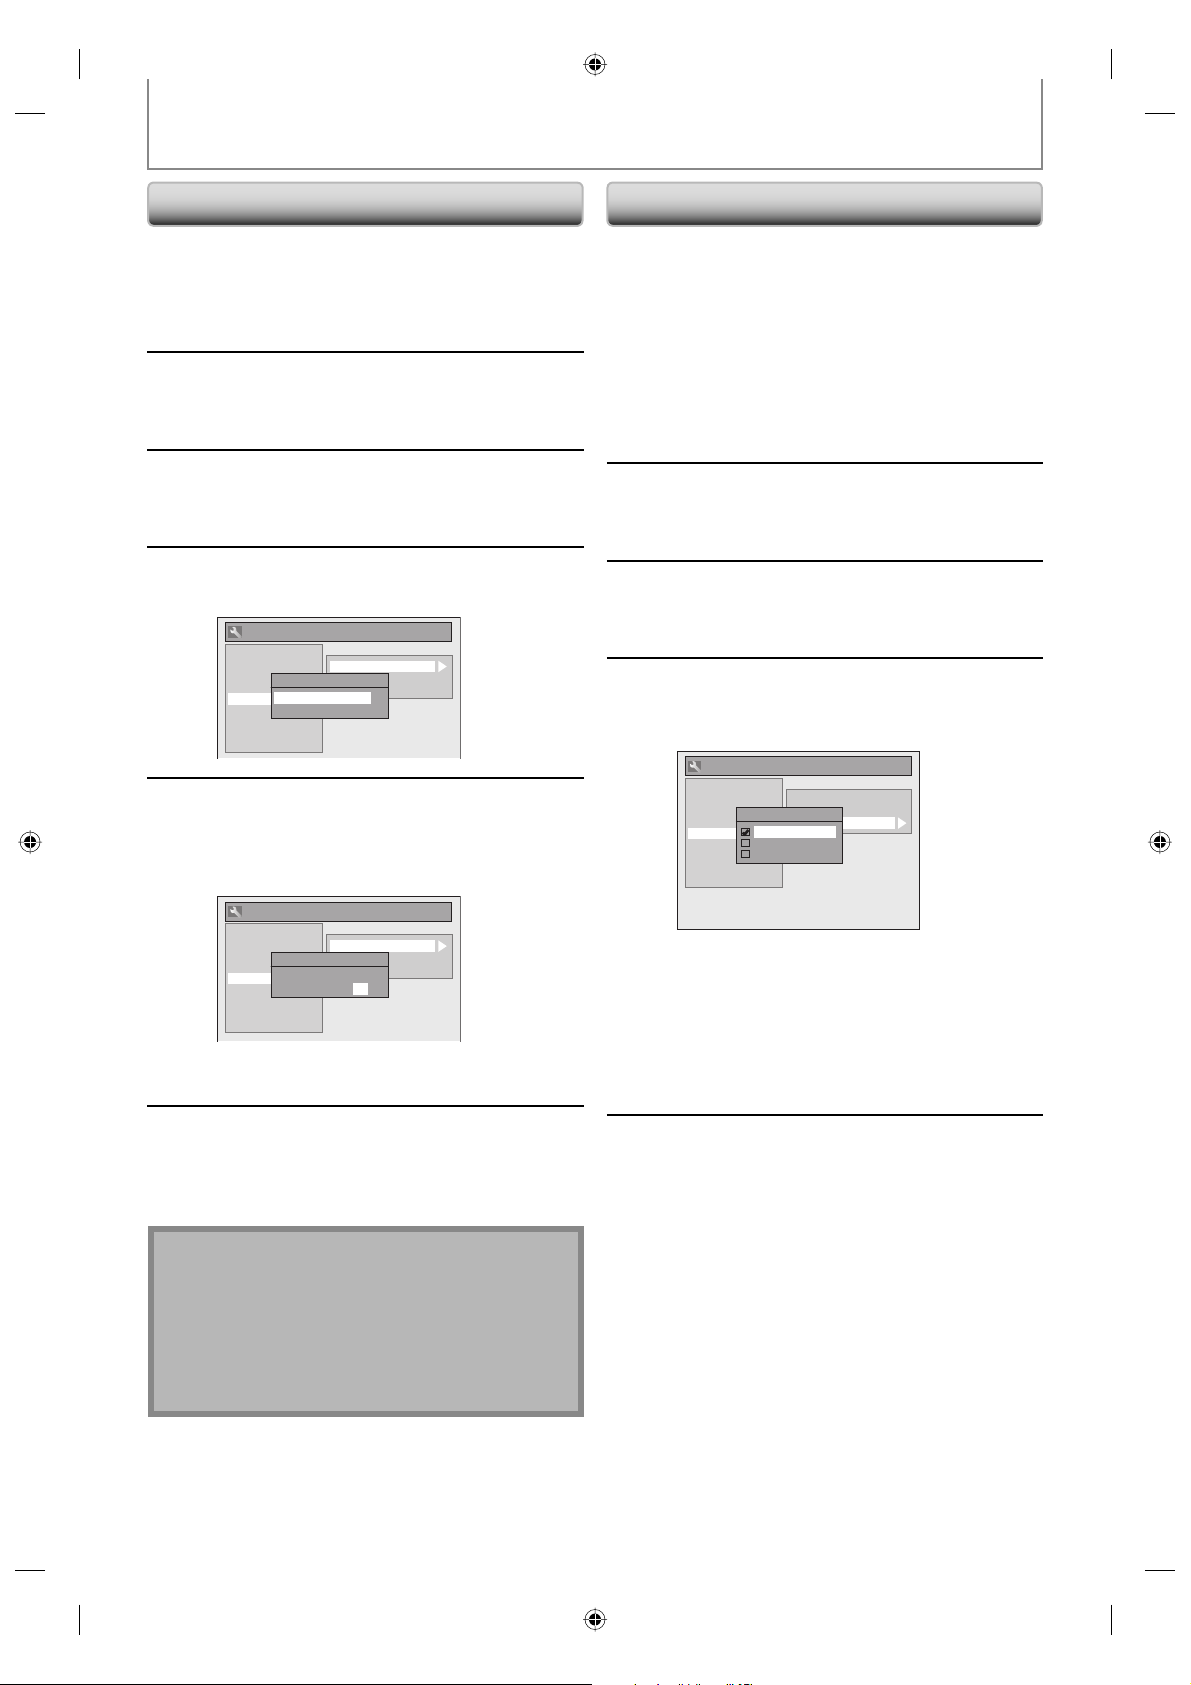
SETTING THE CLOCK
Manual Clock Setting
Press [SETUP] and use [K / L] to
select “General Setting”, then press
1
2
[OK].
“General Setting” menu will appear.
Use [K / L] to select “Clock”, then
press [OK].
“Clock” menu will appear.
Use [K / L] to select “Clock Setting”,
then press [OK].
3
Use [K / L] to select calendar or time,
then press [OK].
4
5
General Setting
Playback
Display
Video
Recording
Clock
Channel
DivX
HDMI
Reset All
Use [{ / B] to select an item to set,
and use [K / L] to select the contents
to suit your preference, then press
[OK].
General Setting
Playback
Display
Video
Recording
Clock
Channel
DivX
HDMI
Reset All
Your setting will be activated.
The clock start counting when you press [OK].
Clock Setting
Auto Clock Setting
Clock Setting
Daylight Saving Time
JAN / 01 / 2007 ( MON )
12 : 00 AM
Clock Setting
Auto Clock Setting
Clock Setting
Daylight Saving Time
JAN / 01 / 2007 ( MON )
12 : 00 AM
Daylight Saving Time
When “Daylight Saving Time” is “ON”, the unit clock will
automatically adjust the time in order to fit the daylight
saving time.
“ON (MAR - NOV)” has been selected as the default.
Press [SETUP] and use [K / L] to
select “General Setting”, then press
1
2
[OK].
“General Setting” menu will appear.
Use [K / L] to select “Clock”, then
press [OK].
“Clock” menu will appear.
Use [K / L] to select “Daylight Saving
Time”, then press [OK].
3
Use [K / L] to select “ON (MAR -
NOV)”, “ON (APR - OCT)” or “OFF”,
4
then press [OK].
General Setting
Playback
Display
Video
Recording
Clock
Channel
DivX
HDMI
Reset All
ON (MAR - NOV):
Move forward one hour on the second Sunday in
March and move back one hour on the first
Sunday in November.
ON (APR - OCT):
Move forward one hour on the first Sunday in
April and move back one hour on the last
Sunday in October.
Clock Setting
Auto Clock Setting
Daylight Saving Time
Daylight Saving Time
ON (MAR - NOV)
ON (APR - OCT)
OFF
Press [SETUP] to exit.
6
Note
• Your clock setting will be lost if either there is a power
failure or this unit has been unplugged for more than
30 seconds when you set the clock manually.
• For setting the day, year, hour, and minute,
[the Number buttons] can also be used.
• You can set the built-in calendar from the year 2007
up to 2056.
Press [SETUP] to exit.
5
28 EN28 EN
E7H42UD_DVDR3506-37_EN.indd 28E7H42UD_DVDR3506-37_EN.indd 28 2007/12/28 10:53:022007/12/28 10:53:02
Page 29
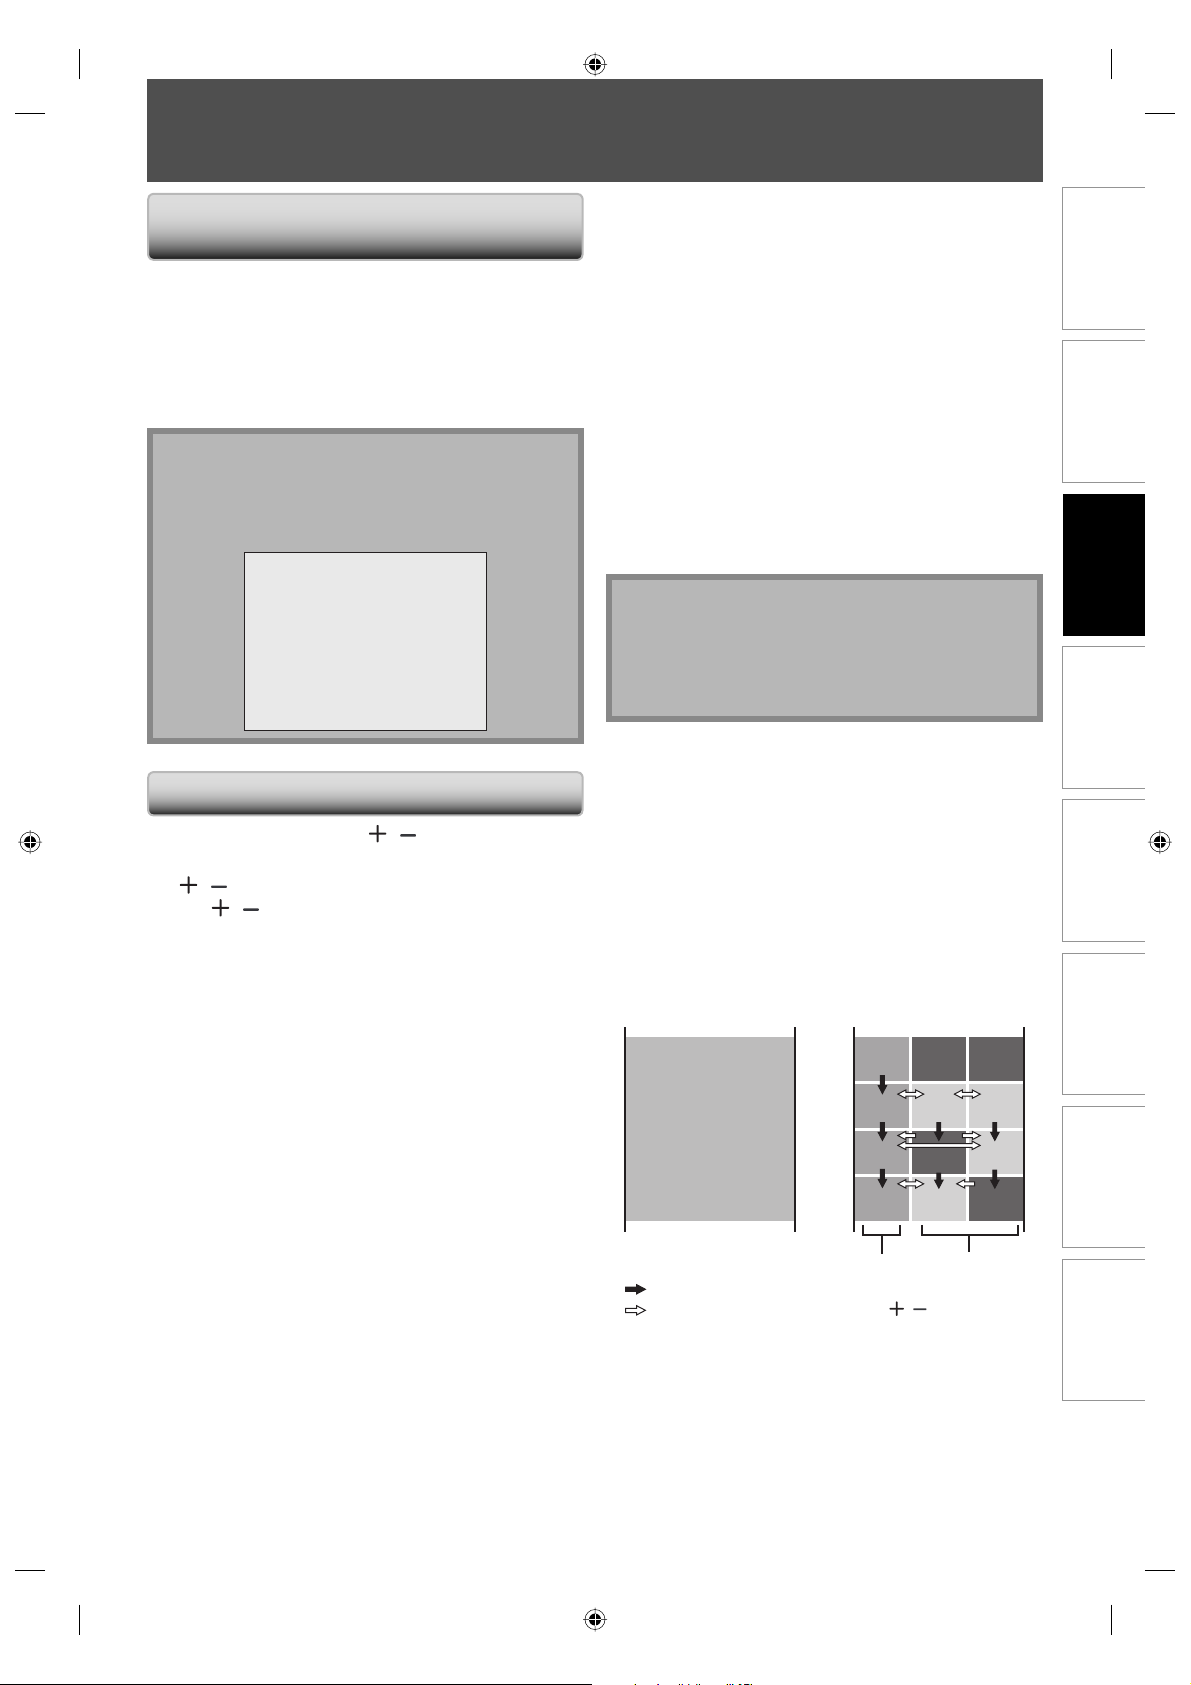
TUNER SETTINGS
Switching Analog Mode /
Digital Mode
You can easily switch the analog TV (NTSC) and digital TV
(ATSC) with the remote control and enjoy viewing the
HDTV (high definition TV) programs as well as the SDTV
(standard definition TV) programs.
Press [DTV/TV] on the remote control.
• The analog mode and digital mode switch alternately.
Note
• When you switch the analog mode to the digital
mode, it may take about 10 seconds until the digital
channel selection is completed. The following screen
is displayed while switching the mode.
DTV 125. 1
Now Scanning
Channel Selection
Select channels by using [CH / ] or [the Number
buttons] found on remote control.
[CH
/ ]
Use [CH
[the Number buttons]
Press the channel number with [the Number buttons] to
select a channel you want to watch.
<Analog TV Channels>
Enter the channel number with [the Number buttons] to
select a channel you want to watch.
For 1-digit number
e.g.) 2 ch: [0] + [2], [2] + [•] or
For 2-digit number
e.g.) 12ch: [1] + [2]
/ ] to change the channel.
[2] + leave it for 2 seconds.
<Digital TV Channels>
Enter the major and minor channel number with [the
Number buttons] to select a channel you want to watch.
For 1-digit number
e.g.) 2-2 ch:
major channel [0] + [2] or [2] + [•]
minor channel [0] + [2], [2] + [•] or
[2] + leave it for 2 seconds.
For 2-digit number
e.g.) 35-16ch:
major channel [3] + [5]
minor channel [1] + [6]
• If you enter 1 digit for major channel and leave it for 2
seconds, the number will be taken as the major channel
and lowest minor channel of the major channel will be
displayed.
• If there is no minor channel input, lowest minor channel
of the major channel will be displayed.
Note
• It may take up to 5 to 7 seconds to switch the digital
TV channels.
• In digital TV broadcasting, 2 or more channels, called
minor channels, are simultaneously broadcast on one
main channel, called major channel.
About digital TV broadcasting:
With its high definition broadcast, digital broadcasting far
surpasses analog broadcasting in both its picture and
sound quality.
What is the minor channel?
By using high compression technology, digital
broadcasting offers a service that enables multiple signals
to send simultaneously.
Therefore, you can select more than one program per
major channel since digital broadcasting technology
distinguishes between multiple channels broadcast by a
signal network.
CH4
[Air Time]
18:00
18:30
19:00
19:30
20:00
ATSC (digital mode)NTSC (analog mode)
CH4-1
CH4-1
CH4-1
smallestCHsmallest
CH4-2
smallest
CH4-2CH4-1
CH
CH
CH4-3
CH4-3
smallest
CH
Basic Setup
Recording Playback EditingIntroduction Connections
Function Setup Others
major channel
minor channel
: change automatically
: change manually by using [CH / ]
29EN
29EN
E7H42UD_DVDR3506-37_EN.indd 29E7H42UD_DVDR3506-37_EN.indd 29 2007/12/28 10:53:032007/12/28 10:53:03
Page 30

TUNER SETTINGS
This section describes how to switch the TV audio. When you record a TV program, only the audio selected here will be
recorded.
Selecting TV Audio
Digital TV
Press [AUDIO] to cycle through
available audio languages.
1
• When you press [AUDIO], selected language
will be displayed on the TV screen.
• Every time you press [AUDIO], the language
will be switched.
e.g.) English 1/3 ➔ Spanish 2/3 ➔ Other 3/3
• Available languages differ depending on the
broadcast.
• The language information display will
automatically disappear.
• When you record digital TV broadcasting, the
audio language you have selected will be
recorded.
English 1/2
Note
• The timer recording for digital TV cannot record any
audio language other than English.
• Pressing [AUDIO] does not control external device
audio.
• When there is only one audio channel on the
broadcast, pressing [AUDIO] does not display
anything.
30 EN30 EN
E7H42UD_DVDR3506-37_EN.indd 30E7H42UD_DVDR3506-37_EN.indd 30 2007/12/28 10:53:042007/12/28 10:53:04
Page 31
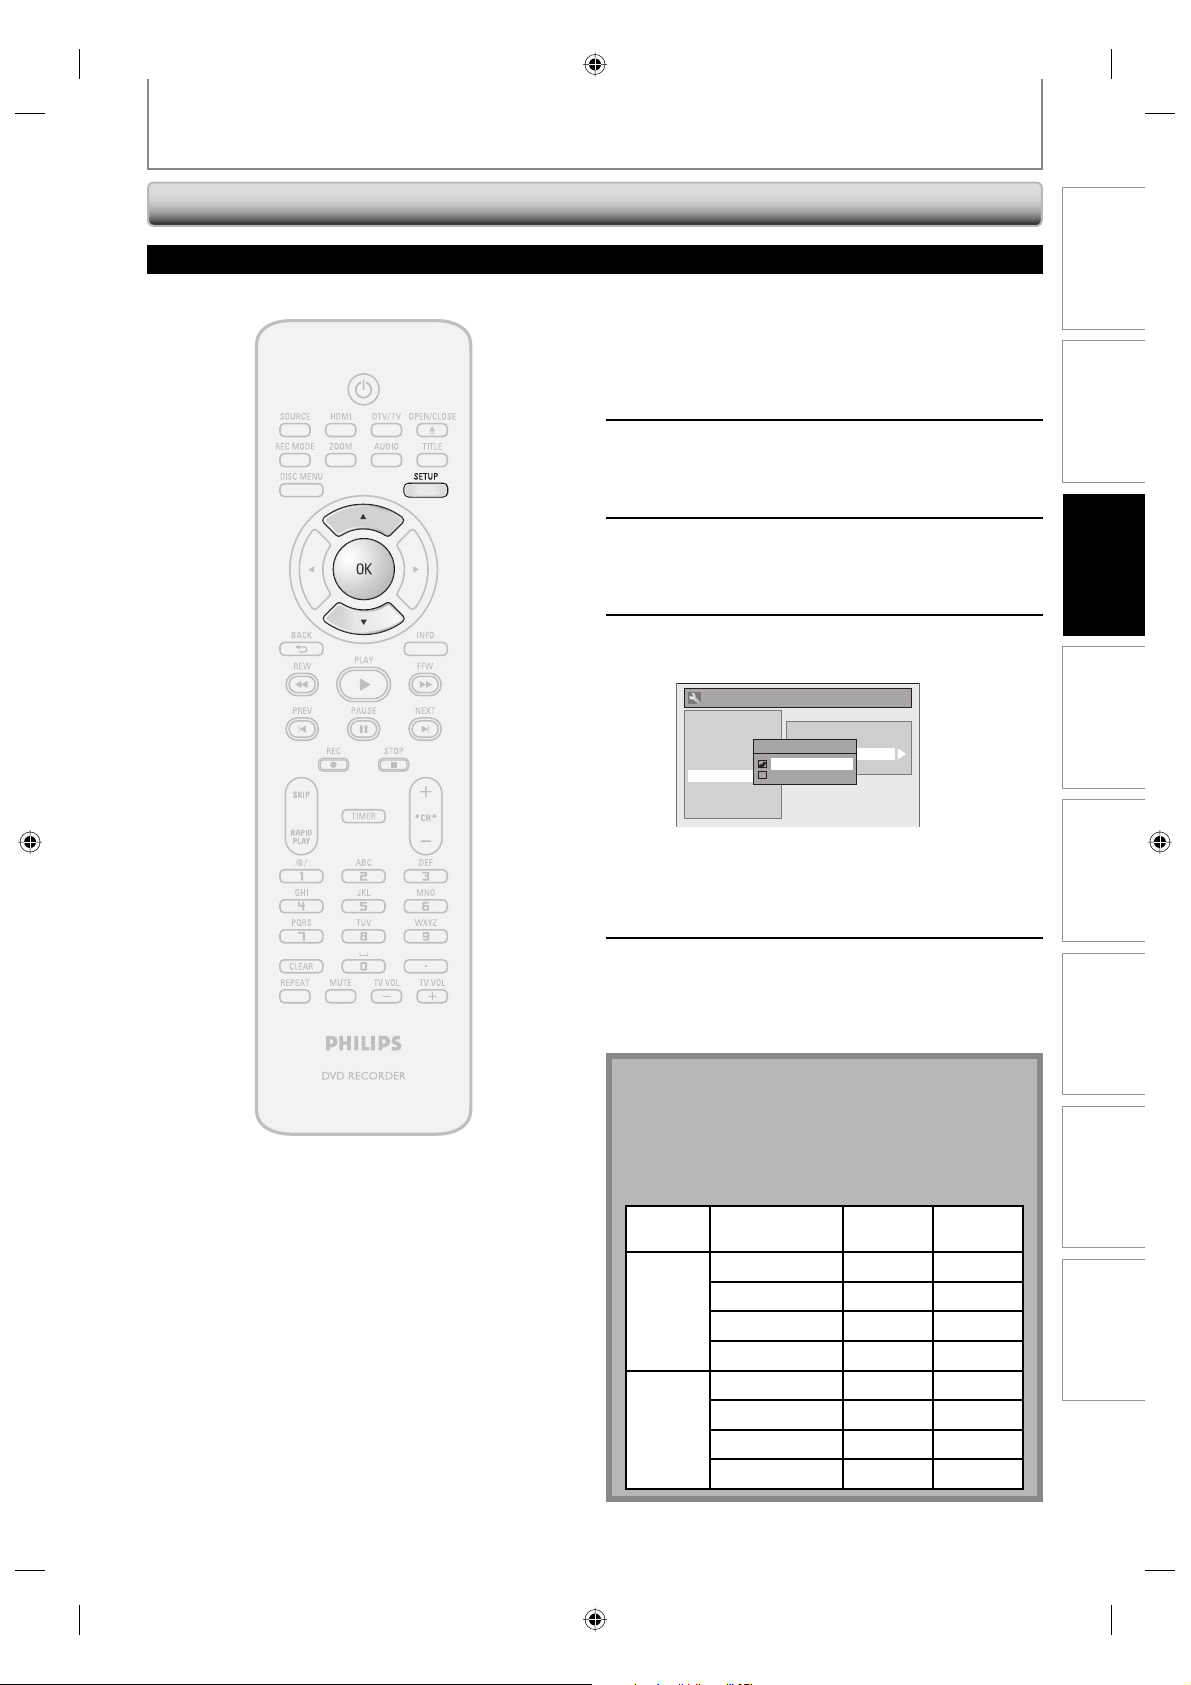
Selecting TV Audio (cont’d)
TUNER SETTINGS
Analog TV
Press [SETUP] and use [K / L] to
select “General Setting”, then press
1
2
[OK].
“General Setting” menu will appear.
Use [K / L] to select “Channel”, then
press [OK].
“Channel” menu will appear.
Use [K / L] to select “TV Audio
Select”, then press [OK].
3
Use [K / L] to select “Stereo” or
“SAP”, then press [OK].
4
General Setting
Playback
Display
Video
Recording
Clock
Channel
DivX
HDMI
Reset All
Auto Channel Preset
Manual Preset
TV Audio Select
TV Audio Select
Stereo
Guide Channel Setting
SAP
Basic Setup
Recording Playback EditingIntroduction Connections
Stereo:
Outputs main-audio.
SAP (secondary audio program):
Outputs sub-audio.
Press [SETUP] to exit.
5
Note on recording analog TV audio
• When you record an analog TV program available in
second audio or stereo, you have to select either
“Stereo” or “SAP” in “General Setting” menu
beforehand. Refer to the following table to check an
appropriate setting.
Selected
audio
Stereo STEREO+SAP STEREO STEREO
SAP STEREO+SAP SAP SAP
Broadcast
audio
STEREO STEREO STEREO
MONO+SAP MONO MONO
MONO MONO MONO
STEREO STEREO STEREO
MONO+SAP SAP SAP
MONO MONO MONO
Disc
recording
Audio
output
Function Setup Others
31EN
31EN
E7H42UD_DVDR3506-37_EN.indd 31E7H42UD_DVDR3506-37_EN.indd 31 2007/12/28 10:53:042007/12/28 10:53:04
Page 32
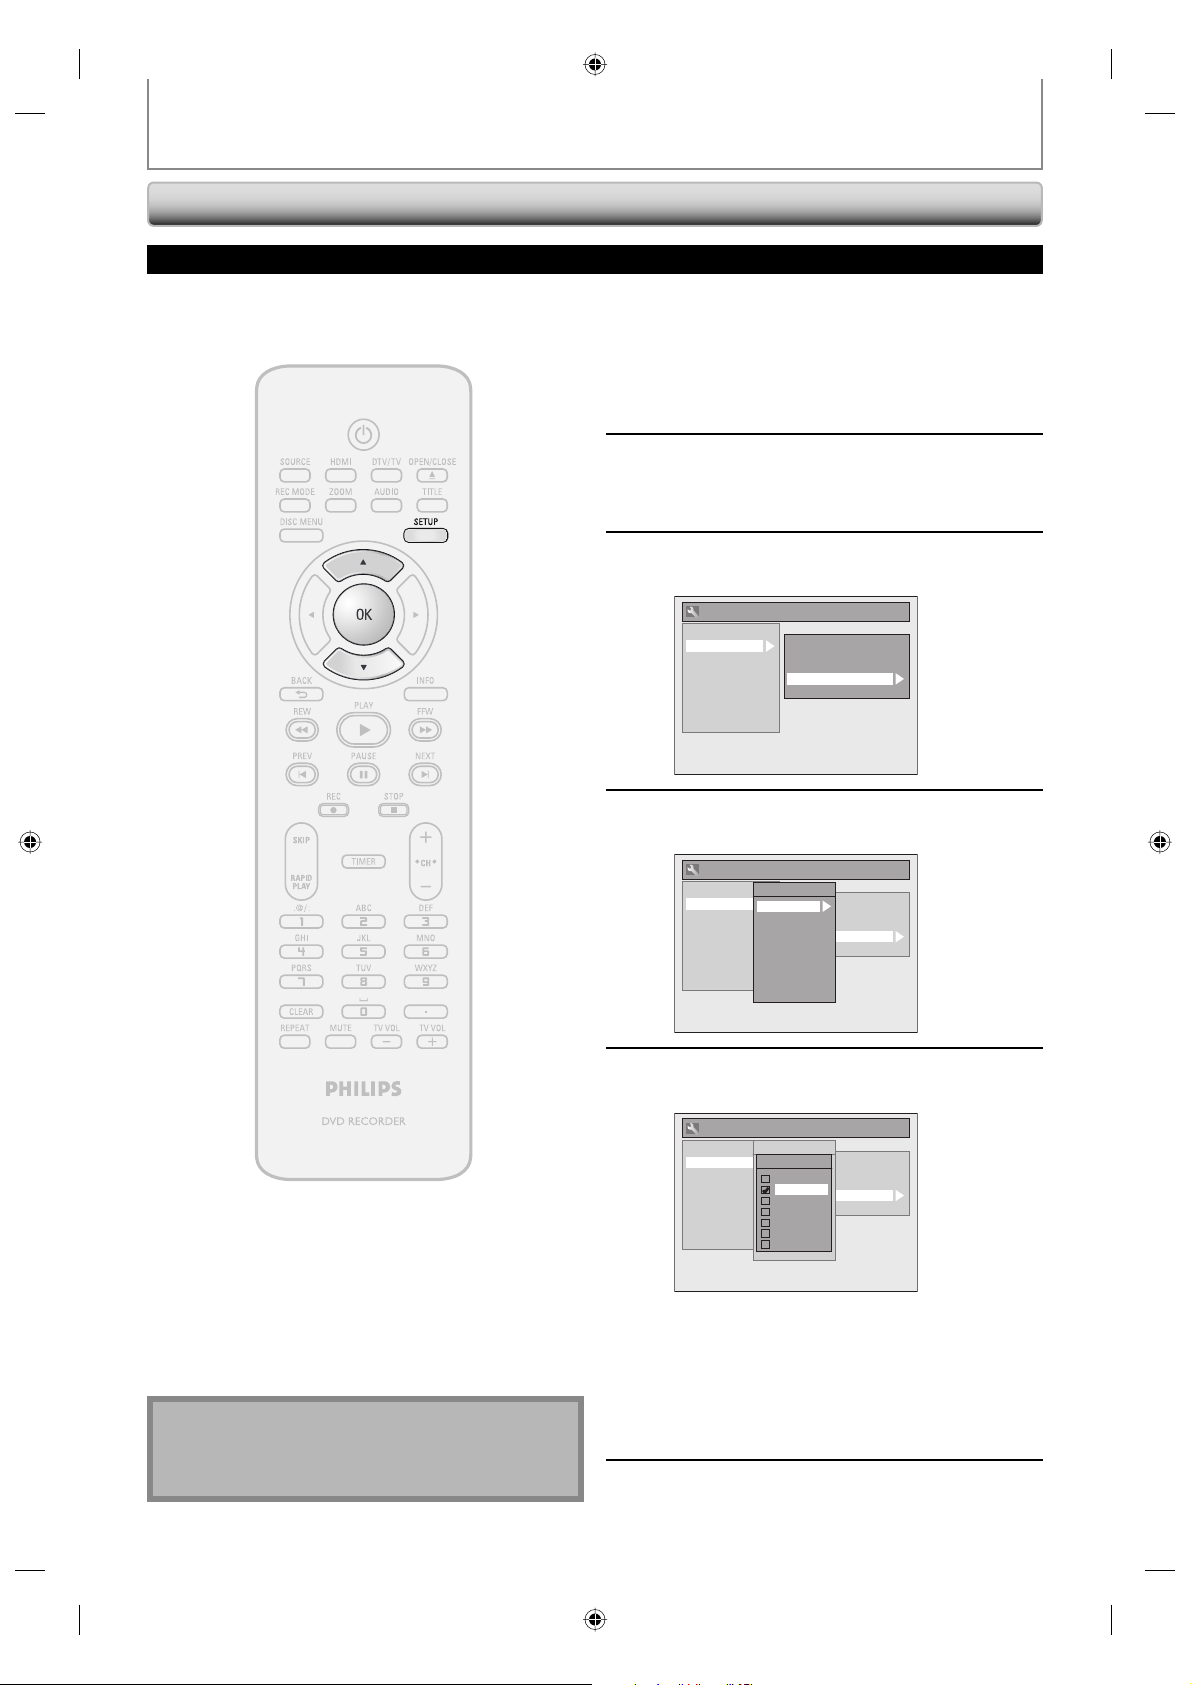
TUNER SETTINGS
DTV Closed Caption
Digital TV
Digital TV has its own closed captions called DTV CC. Use this menu to change the settings for DTV CC.
Press [SETUP] and use [K / L] to
select “General Setting”, then press
1
[OK].
“General Setting” menu will appear.
Use [K / L] to select “Display”, then
press [OK].
2
Use [K / L] to select “CC Style”, then
press [OK].
3
General Setting
Playback
Display
Video
Recording
Clock
Channel
DivX
HDMI
Reset All
OSD Language
Screen Saver
FL Dimmer
CC Style
V-Chip
Note
• Even if you set “DTV CC” to anything other than
“OFF”, its effect will temporarily be canceled while
recording.
Use [K / L] to select “DTV CC”, then
press [OK].
4
General Setting
Playback
Display
Video
Recording
Clock
Channel
DivX
HDMI
Reset All
CC Style
OSD Language
DTV CC
Screen Saver
User Setting
FL Dimmer
Font Size
CC Style
Font Style
V-Chip
Edge Type
Font Opacity
Font Color
Back Opacity
Back Color
Use [K / L] to the desired DTV closed
caption, then press [OK].
5
General Setting
Playback
Display
Video
Recording
Clock
Channel
DivX
HDMI
Reset All
CC Style
OSD Language
DTV CC
DTV CC
Screen Saver
User Setting
OFF
FL Dimmer
Font Size
Service1
CC Style
Font Style
Service2
V-Chip
Edge Type
Service3
Font Opacity
Service4
Font Color
Service5
Back Opacity
Service6
Back Color
OFF:
Select if you do not want DTV CC. This is the
default.
Service 1 to Service 6:
Select one of these before changing any other
item in the closed caption menu. Choose
“Service 1” under normal circumstances.
Press [SETUP] to exit.
32 EN32 EN
E7H42UD_DVDR3506-37_EN.indd 32E7H42UD_DVDR3506-37_EN.indd 32 2007/12/28 10:53:052007/12/28 10:53:05
6
Page 33
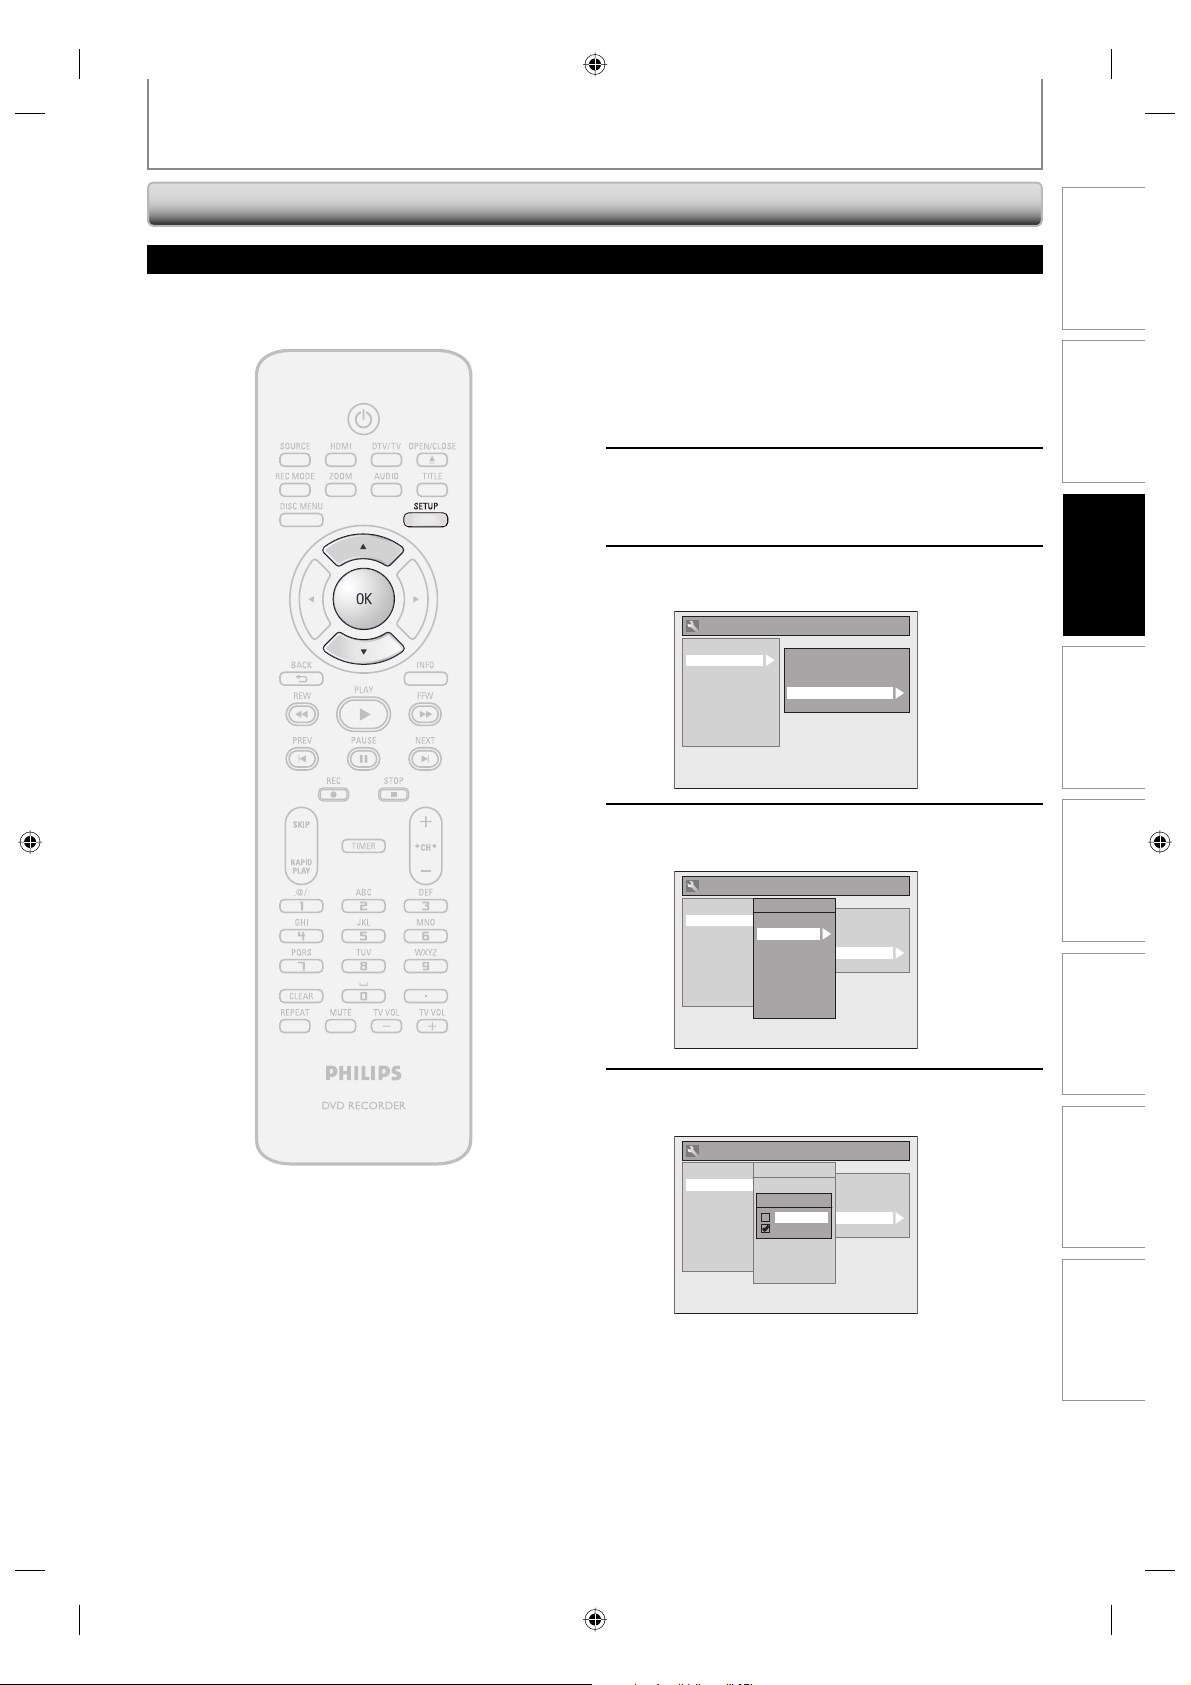
TUNER SETTINGS
Closed Caption Style
Digital TV
Digital TV can also change the style of its closed caption such as font, color or size, etc.
Press [SETUP] and use [K / L] to
select “General Setting”, then press
1
[OK].
“General Setting” menu will appear.
Use [K / L] to select “Display”, then
press [OK].
2
Use [K / L] to select “CC Style”, then
press [OK].
3
General Setting
Playback
Display
Video
Recording
Clock
Channel
DivX
HDMI
Reset All
OSD Language
Screen Saver
FL Dimmer
CC Style
V-Chip
Basic Setup
Recording Playback EditingIntroduction Connections
Use [K / L] to select “User Setting”,
then press [OK].
4
General Setting
Playback
Display
Video
Recording
Clock
Channel
DivX
HDMI
Reset All
CC Style
OSD Language
DTV CC
Screen Saver
User Setting
FL Dimmer
Font Size
CC Style
Font Style
V-Chip
Edge Type
Font Opacity
Font Color
Back Opacity
Back Color
Use [K / L] to select “ON”, then press
[OK].
5
General Setting
Playback
Display
Video
Recording
Clock
Channel
DivX
HDMI
Reset All
CC Style
OSD Language
DTV CC
Screen Saver
User Setting
User Setting
FL Dimmer
Font Size
ON
CC Style
Font Style
OFF
V-Chip
Edge Type
Font Opacity
Font Color
Back Opacity
Back Color
Function Setup Others
Instructions continue on the next page.
33EN
33EN
E7H42UD_DVDR3506-37_EN.indd 33E7H42UD_DVDR3506-37_EN.indd 33 2007/12/28 10:53:062007/12/28 10:53:06
Page 34
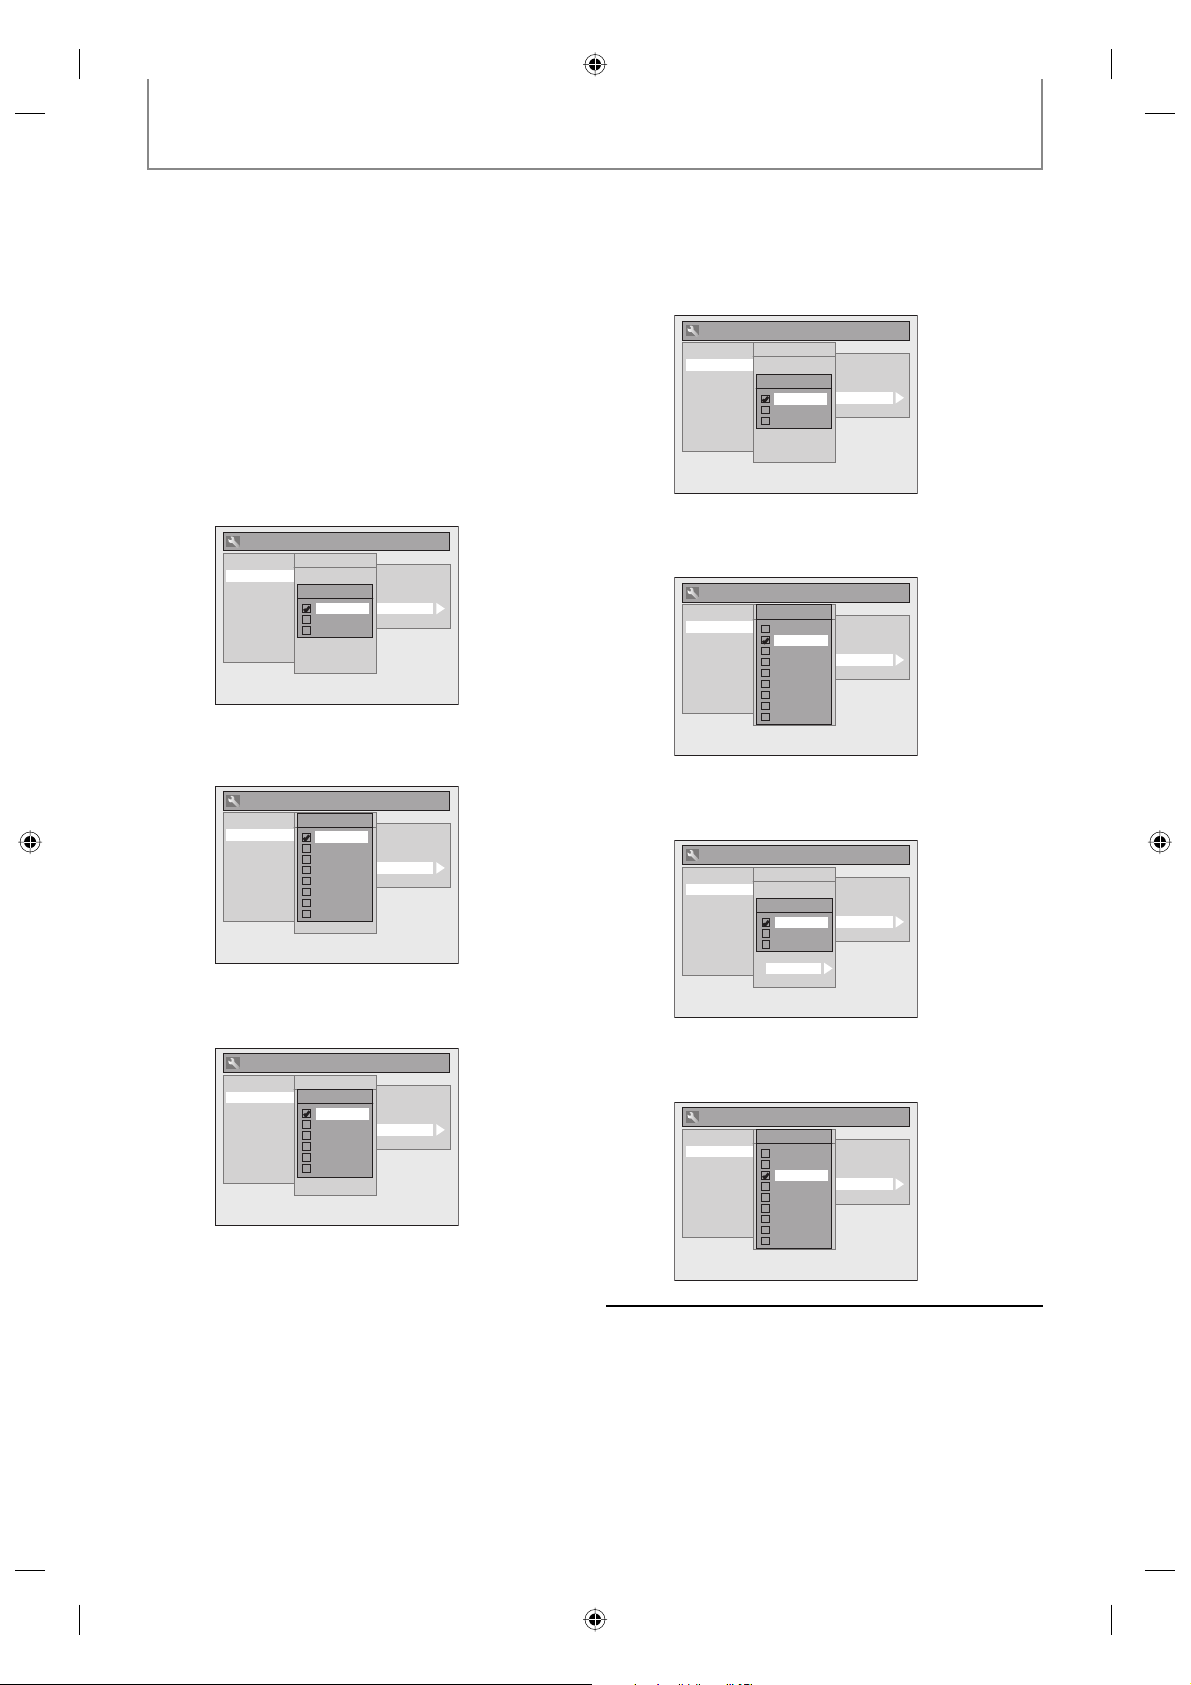
TUNER SETTINGS
Use [K / L] to select the item and
switch the setting for each item you
6
want to set, then press [OK].
• When “User Setting” is set to “ON”, you can set
the following items. CC style set by “User
Setting” will be displayed.
• The setting description for each item is shown
below.
<Font Size>
Font size of the displayed caption can be
switched as below.
General Setting
General Setting
General Setting
CC Style
OSD Language
DTV CC
Screen Saver
User Setting
Font Size
FL Dimmer
Font Size
CC Style
Middle
Font Style
V-Chip
Large
Edge Type
Small
Font Opacity
Font Color
Back Opacity
Back Color
CC Style
Font Style
OSD Language
DTV CC
Style1
Screen Saver
User Setting
Style2
FL Dimmer
Font Size
Style3
CC Style
Font Style
Style4
V-Chip
Edge Type
Style5
Font Opacity
Style6
Font Color
Style7
Back Opacity
Style8
Back Color
CC Style
Edge Type
OSD Language
DTV CC
Screen Saver
User Setting
None
FL Dimmer
Font Size
Raised
CC Style
Font Style
Depressed
V-Chip
Edge Type
Uniform
Font Opacity
L.Shadow
Font Color
R.Shadow
Back Opacity
Back Color
Playback
Display
Video
Recording
Clock
Channel
DivX
HDMI
Reset All
<Font Style>
Font style of the displayed caption can be
switched as below.
Playback
Display
Video
Recording
Clock
Channel
DivX
HDMI
Reset All
<Edge Type>
Edge type of the displayed caption can be
switched as below.
Playback
Display
Video
Recording
Clock
Channel
DivX
HDMI
Reset All
<Font Opacity>
Font opacity of the displayed caption can be
switched as below.
General Setting
Playback
Display
Video
Recording
Clock
Channel
DivX
HDMI
Reset All
CC Style
OSD Language
DTV CC
Screen Saver
User Setting
Font Opacity
FL Dimmer
Font Size
CC Style
Solid
Font Style
V-Chip
Translucent
Edge Type
Flash
Font Opacity
Font Color
Back Opacity
Back Color
<Font Color>
Font color of the displayed caption can be
switched as below.
General Setting
Font Color
Playback
Display
Video
Recording
Clock
Channel
DivX
HDMI
Reset All
CC Style
OSD Language
Transparent
DTV CC
Screen Saver
White
User Setting
FL Dimmer
Black
Font Size
CC Style
Red
Font Style
V-Chip
Green
Edge Type
Blue
Font Opacity
Yellow
Font Color
Magenta
Back Opacity
Cyan
Back Color
<Back Opacity>
Background opacity of the displayed caption can
be switched as below.
General Setting
Playback
Display
Video
Recording
Clock
Channel
DivX
HDMI
Reset All
CC Style
OSD Language
DTV CC
Screen Saver
User Setting
Back Opacity
FL Dimmer
Font Size
CC Style
Solid
Font Style
V-Chip
Translucent
Edge Type
Flash
Font Opacity
Font Color
Back Opacity
Back Color
<Back Color>
Background color of the displayed caption can
be switched as below.
General Setting
Back Color
Playback
Display
Video
Recording
Clock
Channel
DivX
HDMI
Reset All
CC Style
OSD Language
Transparent
DTV CC
Screen Saver
White
User Setting
FL Dimmer
Black
Font Size
CC Style
Red
Font Style
V-Chip
Green
Edge Type
Blue
Font Opacity
Yellow
Font Color
Magenta
Back Opacity
Cyan
Back Color
Press [SETUP] to exit.
7
34 EN34 EN
E7H42UD_DVDR3506-37_EN.indd 34E7H42UD_DVDR3506-37_EN.indd 34 2007/12/28 10:53:082007/12/28 10:53:08
Page 35
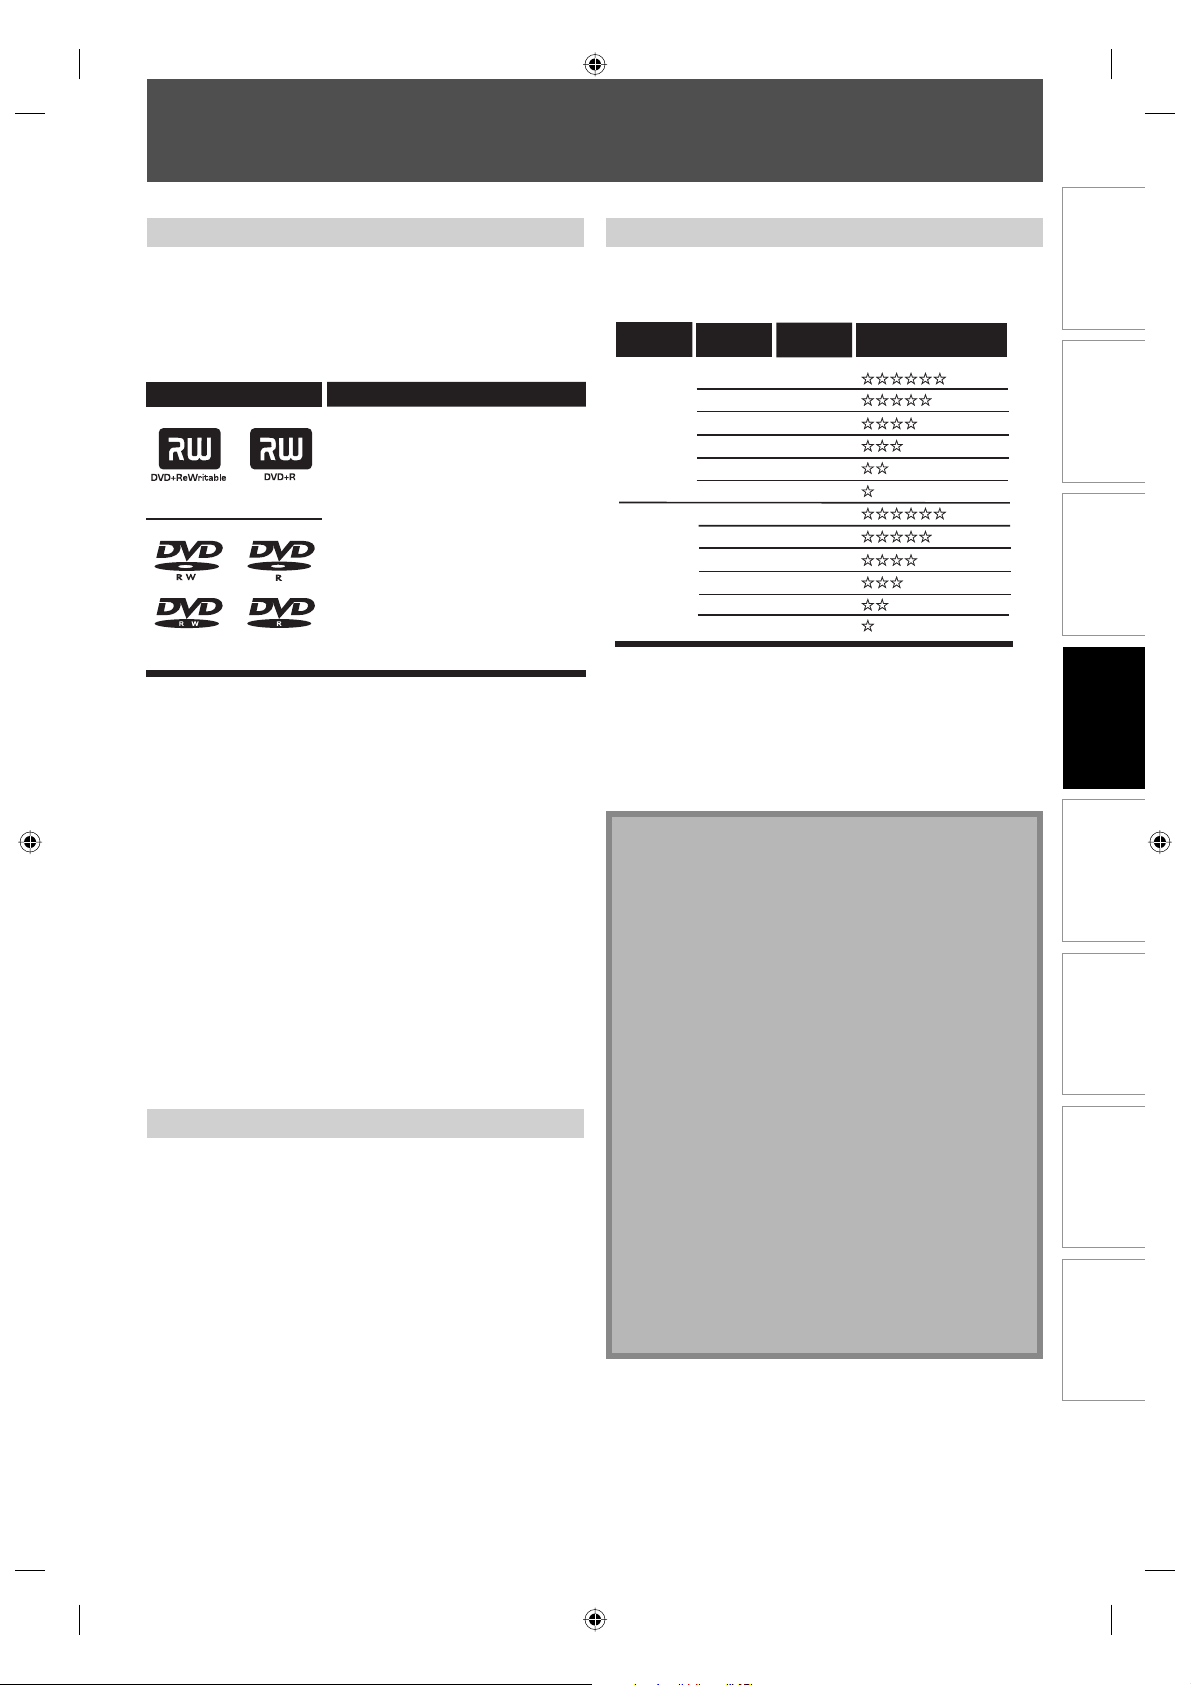
INFORMATION ON DVD RECORDING
Before you make a recording, read the following information.
Recordable Discs
This unit can record to DVD+RW, DVD+R, DVD-RW and
DVD-R.
DVD+R/DVD-R can only be recorded to once. DVD+RW/
DVD-RW can be recorded to and erased many times.
DVD-RW/-R will be recorded in the DVD+VR mode
automatically in this unit.
Logo
Attributes
8cm/12cm, single-sided,
DVD+RW DVD+R
single layer disc
Approx. max. recording time
(SLP mode):
360 minutes (4.7GB) (for 12cm)
108 minutes (1.4GB) (for 8cm)
DVD-RW
DVD-R
• Following discs are recommended for good recording
quality and are proven to be compatible with this unit.
However, depending on the media condition the unit
may not read the disc properly.
Verbatim DVD+R 8x, DVD+RW 4x,
DVD-R 8x, DVD-RW 2x
JVC DVD-RW 4x
Maxell DVD+R 4x/8x/16x, DVD-R 8x/16x
SONY DVD+R 4x/8x/16x, DVD+RW 4x
TDK DVD+R 4x/8x/16x
Performance of any other discs are not guaranteed.
• You can play back DVD+RW on most DVD players
without finalizing. However, if you have added or
deleted chapters, or made chapters hidden, you
must perform “Make Edits Compatible” before being
able to see those effects on other units. (Refer to
page 83 for more details.) To play back discs other
than DVD+RW on other DVD players, you will need
to finalize.
Unrecordable Discs
• DVD-RW recorded in the mode other than +VR is not
recordable on this unit unless you erase all contents in
the disc (refer to page 82).
• DVD-R recorded in the mode other than +VR is not
recordable on this unit.
Recording Mode
You can select a recording mode among 6 options, and
the recording time will depend on the recording mode
you select as follows.
Disc size
8cm Disc
12cm Disc
Recording
mode
HQ
SP (2Hr)
SPP
LP (3Hr)
EP (4Hr)
SLP (6Hr)
HQ
SP (2Hr)
SPP
LP (3Hr)
EP (4Hr)
SLP (6Hr)
(1Hr)
(2.5Hr)
(1Hr)
(2.5Hr)
Recording
time
18 min
36 min
45 min
54 min
72 min
108 min
60 min
120 min
150 min
180 min
240 min
360 min
Video/sound
quality
• The recording time is only an estimate. The actual
recording time may differ.
• The audio and video quality gets poorer as the recording
time becomes longer.
• Each time [REC MODE] is pressed, recording mode and
its allowed recording time will be displayed.
Note
• This unit cannot record to CD-RW or CD-R.
• All high definition pictures will be down converted to
the standard definition pictures when they are
recorded on this unit.
• DVD+RW/+R, DVD-RW/-R and CD-RW/-R recorded on
a personal computer or a DVD or CD recorder may
not be played back if the disc is damaged or dirty or
if there is condensation on the player’s lens.
• If you record a disc using a personal computer, even
if it is recorded in a compatible format it may not be
played back because of the settings of the
application software used to create the disc. (Check
with the software publisher for more detailed
information.)
• Since the recording is made by the VBR (variable bit
rate) method, depending on the picture you are
recording, the actual remaining time for recording
may be a little shorter than the remaining time
displayed on the TV screen.
• You cannot record copy-protected program using
this unit. (Copy-protected signal is included in DVDvideo or some satellite broadcasts.)
• You cannot record “copy-once only” program on
DVD.
(good)
(poor)
(good)
(poor)
Recording
Playback EditingIntroduction Connections Basic Setup Function Setup Others
35EN
35EN
E7H42UD_DVDR3506-37_EN.indd 35E7H42UD_DVDR3506-37_EN.indd 35 2007/12/28 10:53:092007/12/28 10:53:09
Page 36
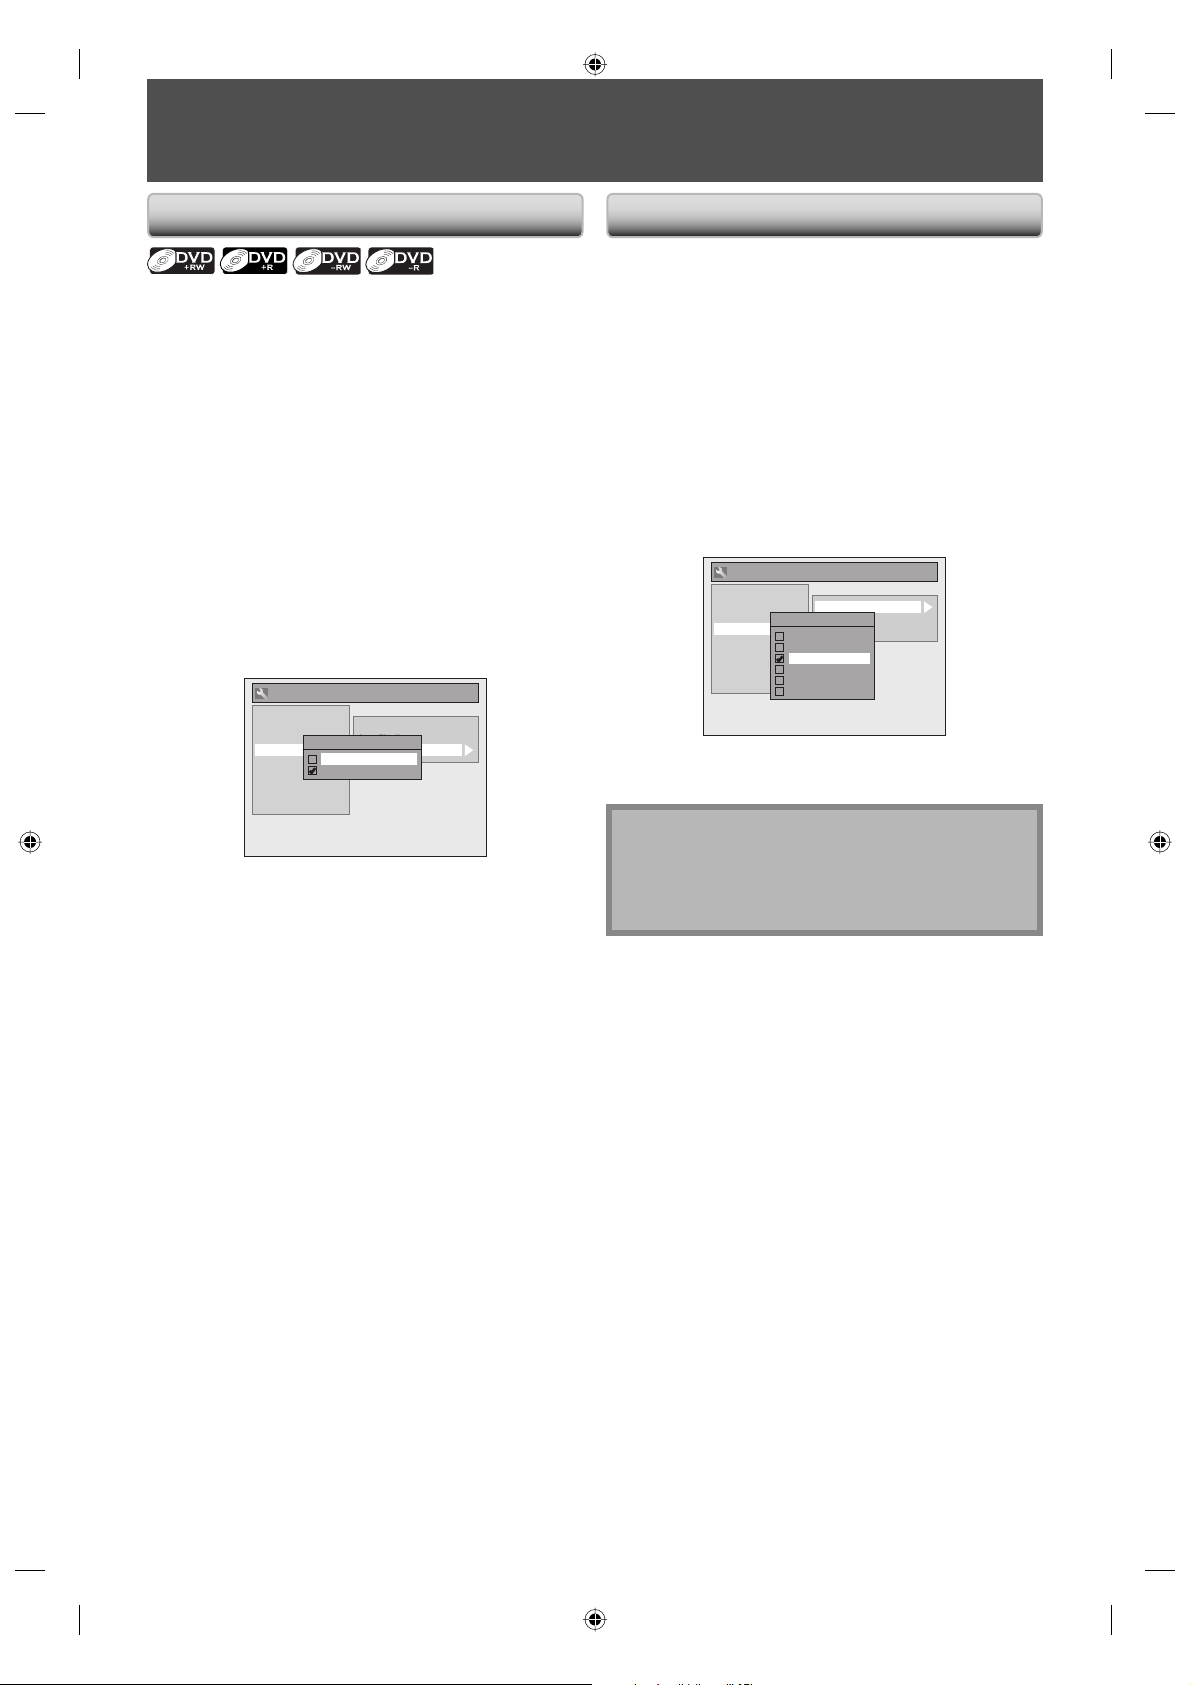
BEFORE RECORDING
Make Recording Compatible Setting for Auto Chapter
Use this feature to make the unfinalized +VR mode discs
recorded on other unit recordable on this unit. When you
make an additional recording on this unit with “Make
Recording Compatible” set to “ON”, the title list is
automatically converted to our style.
1) Press [SETUP] and use [K / L] to select “General
Setting”, then press [OK].
“General Setting” menu will appear.
2) Use [K / L] to select “Recording”, then press [OK].
“Recording” menu will appear.
3) Use [K / L] to select “Make Recording Compatible”,
then press [OK].
4) Use [K / L] to select “ON” or “OFF”, then press [OK].
General Setting
Playback
Display
Video
Recording
Clock
Channel
DivX
HDMI
Reset All
ON: Title list will be replaced when you make
additional recordings to the discs recorded by
other units.
OFF: Prohibiting additional record to the disc that
has a title list created by other units.
Auto Chapter
Auto Finalize
Make Recording Compatible
Make Recording Compatible
ON
OFF
You can set a specified time for chapter marks.
1) Press [SETUP] and use [K / L] to select “General
Setting”, then press [OK].
“General Setting” menu will appear.
2) Use [K / L] to select “Recording”, then press [OK].
“Recording” menu will appear.
3) Use [K / L] to select “Auto Chapter”, then press [OK].
4) Use [K / L] to select a desired time option, then
press [OK].
General Setting
Playback
Display
Video
Recording
Clock
Channel
DivX
HDMI
Reset All
Auto Chapter
Auto Finalize
Auto Chapter
Make Recording Compatible
OFF
5 minutes
10 minutes
15 minutes
30 minutes
60 minutes
5) Press [SETUP] to exit.
Note
• The interval for auto chapter marks may slightly
differ.
• A blank chapter may be created depending on the
remaining time of the disc.
5) Press [SETUP] to exit.
36 EN36 EN
E7H42UD_DVDR3506-37_EN.indd 36E7H42UD_DVDR3506-37_EN.indd 36 2007/12/28 10:53:092007/12/28 10:53:09
Page 37
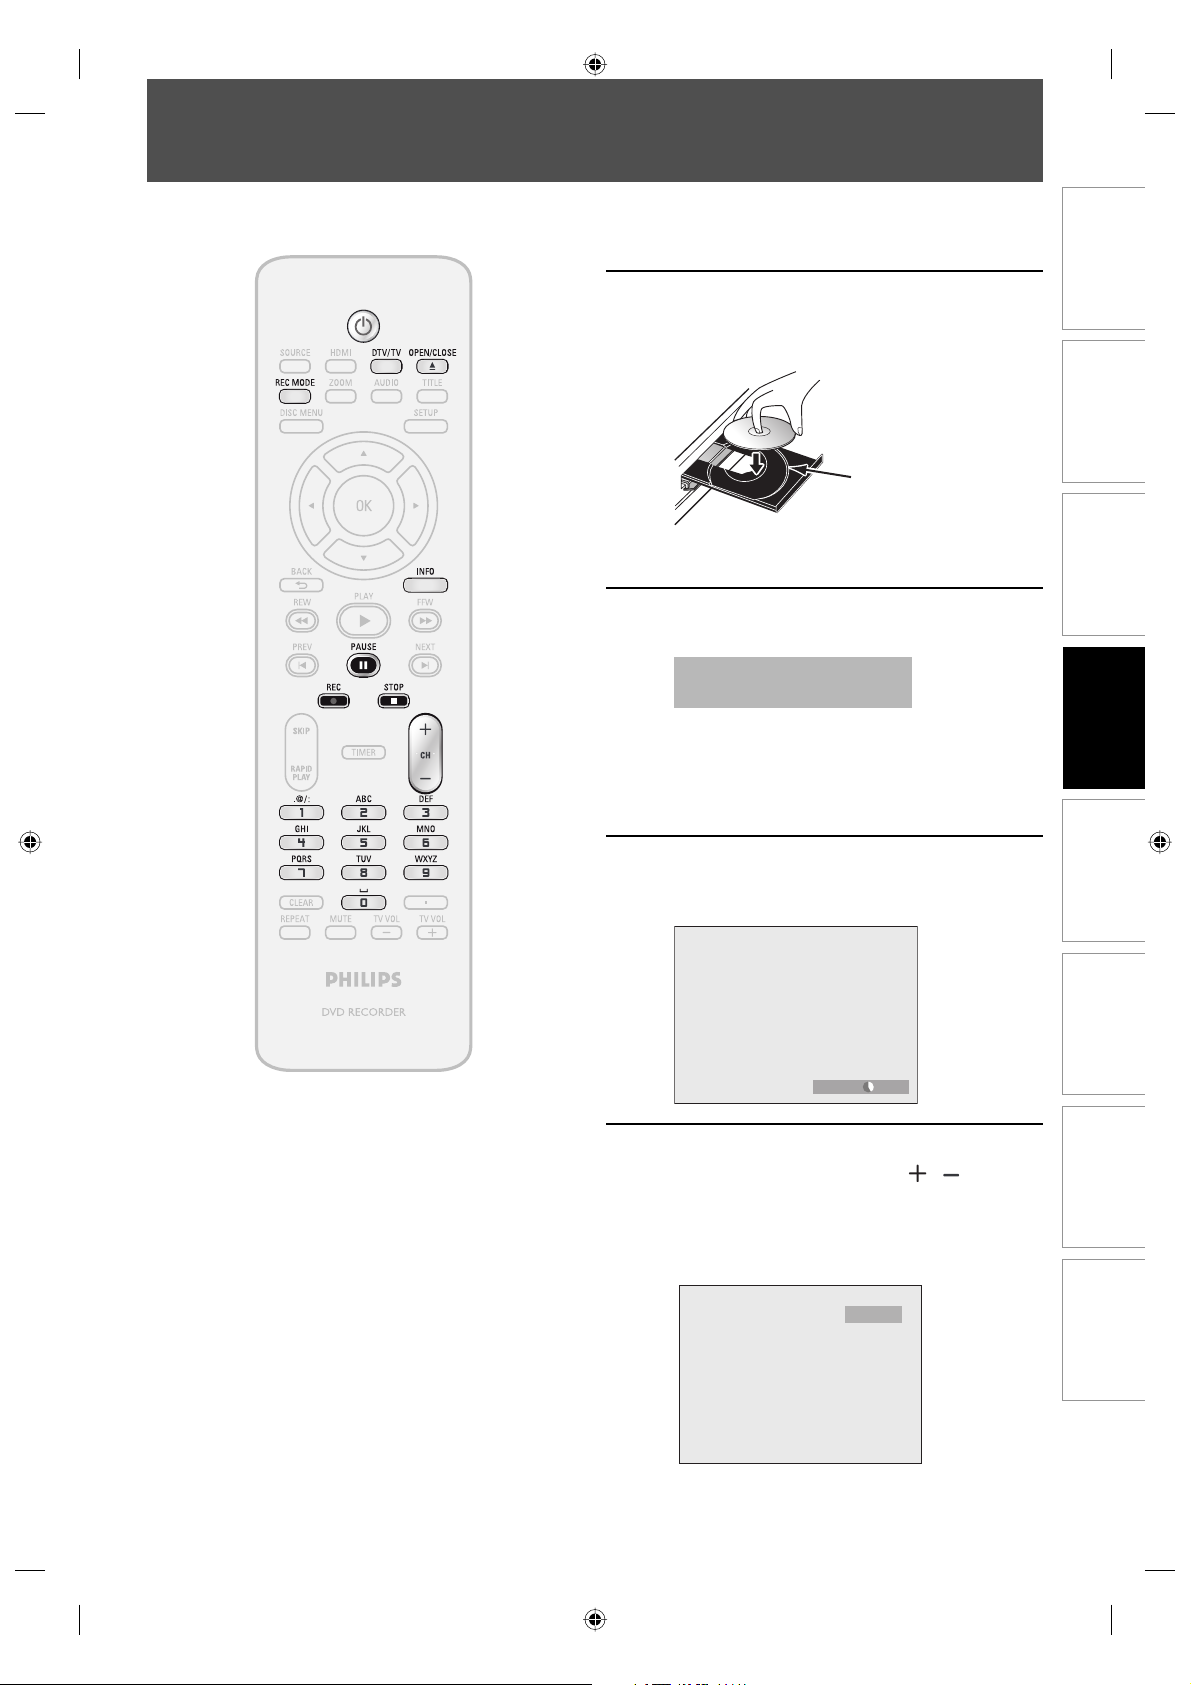
BASIC RECORDING & ONE-TOUCH TIMER RECORDING
Follow the steps to record TV programs.
Press [STANDBY-ON yy].
Turn on the TV and be sure to select the input to
1
2
3
4
which the unit is connected.
Press [OPEN/CLOSE A] to open the
disc tray and insert your disc with its
label facing up.
Align the disc to
the disc tray guide.
* Make sure the disc is compatible with this unit.
(Refer to page 35 for the list of compatible discs.)
Press [OPEN/CLOSE A] to close the
disc tray.
It may take a while to load
the disc completely.
• When inserting a brand-new DVD+RW/DVDRW, the unit automatically starts to format.
• If titles have been recorded on the disc, the
title list is displayed. Press [STOP C] to exit the
title list.
Press [REC MODE] to select a
recording mode.
Refer to “Recording Mode” on page 35.
Recording
Playback EditingIntroduction Connections Basic Setup Function Setup Others
SP(2Hr) 0:58
Press [DTV/TV] to select analog TV or
digital TV, then use [CH
5
E7H42UD_DVDR3506-37_EN.indd 37E7H42UD_DVDR3506-37_EN.indd 37 2007/12/28 10:53:102007/12/28 10:53:10
Number buttons] to select a desired
channel to record.
Refer to “Switching Analog Mode/Digital Mode”
and “Channel Selection“ on page 29.
CH 12
Instructions continue on the next page.
/ ] or [the
37EN
37EN
Page 38
BASIC RECORDING & ONE-TOUCH TIMER RECORDING
y
Press [REC I] to start recording.
“I” will be displayed for 5 seconds.
6
I
Press [PAUSE F] to pause recording.
Press [PAUSE F]] or [REC I] again to restart
recording.
To set one-touch timer recording (OTR)...
This is a simple way to set the recording time in blocks
of 30 minutes.
Press [REC I] repeatedly until the desired recording
time (30 minutes to 6 hours) appears on the TV screen.
One-touch timer recording will start.
I
0:30
0:30
(normal recording)
1:00
Press [STOP C] to stop recording.
The recorded title will appear in the title list.
7
(Refer to “Guide to a Title List” on page 71.)
e.g.) DVD+R
Finalize the recordings so that the disc
can be played on regular DVD players.
Writing to Disc
1 SP(2Hr)
NOV/21/07 11:00AM
NOV/21/07 0:20:44
2
EMPTY TITLE
1:41:17
• Press [STOP C] to exit the title list.
CH12 SP
SP(2Hr)
90%
6:00 5:30
• To cancel one-touch timer recording within the
specified time, press [STOP C].
Note
• When you press [REC I], recording starts immediately and continues until the disc is full or you stop recording.
• This unit cannot record images as aspect ratio of 16:9. The 16:9 images will be recorded as 4:3.
• When the unit clock has not been set, the space for a date and time of title names will be blank.
• When you record a TV program, you have to select the TV channel audio beforehand. Only the selected channel
audio will be recorded. Refer to “Selecting TV Audio” on pages 30-31 for more details.
• This unit cannot record in both stereo and SAP (secondary audio program) at the same time.
• You cannot change the recording mode during the recording pause mode.
• You can change a channel to be recorded during the recording pause mode.
Note for one-touch timer recording
• The remaining recording time will be displayed on the front panel display during one-touch timer recording. Press
[INFO] to see it on the TV screen.
• Unlike the timer recording, you can perform the following operations during one-touch timer recording.
- Turning off the power to stop one-touch timer recording.
- Using [REC I] or [STOP C] on the remote control.
• You cannot use the pause function during one-touch timer recording.
• When one-touch timer recording is finished and the power is turned off, the unit will switch to the timer-standby
mode automatically if a timer recording has been programmed. Press [STANDBY-ON
standby mode to use the unit continuously.
y] to cancel the timer-
38 EN38 EN
E7H42UD_DVDR3506-37_EN.indd 38E7H42UD_DVDR3506-37_EN.indd 38 2007/12/28 10:53:132007/12/28 10:53:13
Page 39
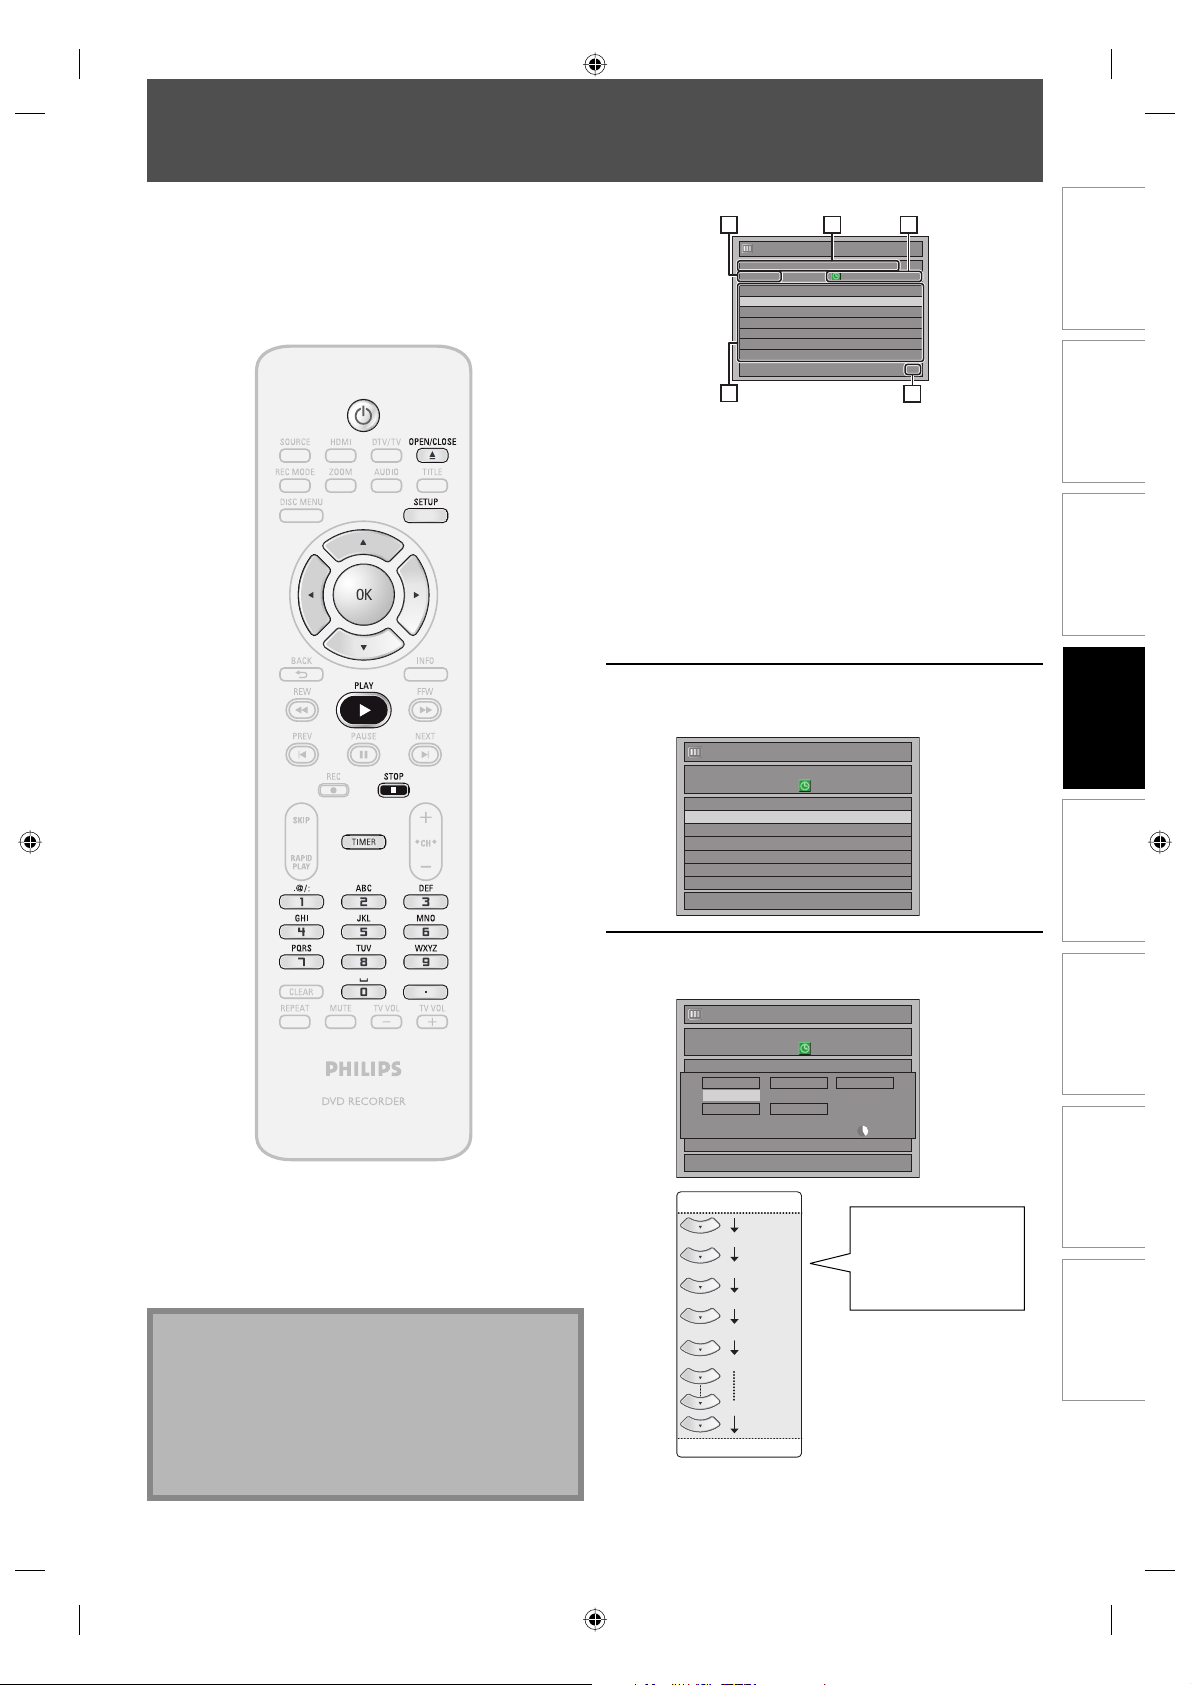
TIMER RECORDING
You can program the unit to record up to 12 programs
within a month in advance. Daily or weekly program
recordings are also available.
Before recording, make sure
• Set the clock before setting a timer programming.
• Insert a recordable disc with enough recordable space.
Guide to Timer Programming Display
3
Timer Programming
JAN/ 2/07 12:00 AM 125.1 SP
Date Start End CH
JAN/02 12:00AM 1:00AM DTV125. 1
New Program
4
1 Title of a timer program (Contains date, time, channel,
recording mode of the program)
2 Current date and time
3 Recording mode, and length of the recording
4 Timer program list
5 Total number of pages and current page (2 pages
maximum)
1
MON JAN/01 11:00AMSP (1:00)
2
1/1
5
Press [TIMER].
1
Use [K / L] to select “New Program”,
then press [OK].
2
Timer Programming
Date Star t End CH
New Program
MON JAN/01 11:00AM
Recording
Playback EditingIntroduction Connections Basic Setup Function Setup Others
Note
• If you have not set the clock yet:
“Clock Setting” menu will appear instead of the timer
programming list at step 1. Continue with the step 4
in “Manual Clock Setting” on page 28 before setting
a timer programming.
• Use [s / B] to move the cursor to the left and the
right in “Timer Programming” menu.
Use [K / L] to enter the date, then
press [B].
3
Timer Programming
Date Star t End CH
New Program
Date
JAN/02
CH
DTV125. 1
JAN/01
Daily
MON-SAT
MON-FRI
SAT
FRI
SUN
JAN/31
Instructions continue on the next page.
MON JAN/01 11:00AM
Start
- - : - Mode
SP
End
- - : - -
SP 2 : 00
When pressing [L] at
the current date, the
date will change as
follows.
e.g.) January 1st
1/1
1/1
39EN
39EN
E7H42UD_DVDR3506-37_EN.indd 39E7H42UD_DVDR3506-37_EN.indd 39 2007/12/28 10:53:132007/12/28 10:53:13
Page 40
TIMER RECORDING
Use [K / L] or [the Number buttons]
to enter the start and end time, then
4
press [B].
New Program
Date
JAN/02
CH
DTV125. 1
Start
12 : 00AM
Mode
SP
End
- - : - -
SP 2 : 00
1/1
Use [K / L / s / B] to select analog
(“- - -”) / digital (“DTV”) mode or
5
external input (E1 / E2), then press
[B].
e.g.) external input mode
New Program
Date
JAN/02
CH
E1
To record from external input (e.g., cable/
satellite box), select E1 or E2.
Use [K / L] to select the channel number to
record.
For digital mode, select both major and minor
channels. Refer to “How to select a channel
number for the timer recording” on page 41
for more details.
e.g.) analog mode
New Program
Date
JAN/02
CH
10
e.g.) digital mode
New Program
Date
JAN/02
CH
DTV125. 1
Start
12 : 00AM
Mode
SP
Start
12 : 00AM
Mode
SP
Start
12 : 00AM
Mode
SP
End
1 : 00AM
SP 1 : 00
End
1 : 00AM
SP 1 : 00
End
1 : 00AM
SP 1 : 00
1/1
1/1
1/1
Use [K / L] to select a recording
mode.
6
Date
JAN/02
CH
DTV125. 1
Start
12 : 00AM
Mode
SP
End
1 : 00AM
SP 1 : 00
1/1
New Program
Refer to “Recording Mode” on page 35.
• You can check the remaining recordable space
of the disc when you select the recording mode.
Date
JAN/02
CH
DTV125. 1
Start
12 : 00AM
Mode
SP
End
1 : 00AM
SP 1 : 00
Auto recording mode select...
When “Auto” is selected as a recording mode, the unit
calculates how much time is available on the disc and
determines the appropriate recording mode to
complete recording the program.
New Program
Date
JAN/02
CH
DTV125. 1
Start
12 : 00AM
Mode
Auto
End
1 : 00AM
Auto 0 : 00
1/1
• “Auto” is only available for one program in the timer
program list.
• The recording may be cut short when the available
recording space of the disc is too limited.
Press [OK] when all items are
entered.
7
After displaying a warning message for a few
seconds, timer program list will appear.
Press STANDBY-ON to Timer Standby mode.
Timer Programming
JAN/ 2/07 12:00 AM 125.1 SP
Date Star t End CH
JAN/02 12:00AM 1:00AM DTV125. 1
MON JAN/01 11:00AMSP (1:00)
Your program setting is now stored.
• To set another program, repeat steps 2 to 7.
• To exit, press [TIMER] or [SETUP].
• When 2 or more programs are overlapped,
“Timer program overlapped” appears, and the
overlapped program will be displayed in blue.
• To correct the timer program refer to
“Checking, canceling, or correcting the timer
programming information” on page 41.
Press [STANDBY-ON yy] to set a timer
programming.
8
• Press [STOP C] to stop recording.
40 EN40 EN
E7H42UD_DVDR3506-37_EN.indd 40E7H42UD_DVDR3506-37_EN.indd 40 2007/12/28 10:53:162007/12/28 10:53:16
Page 41
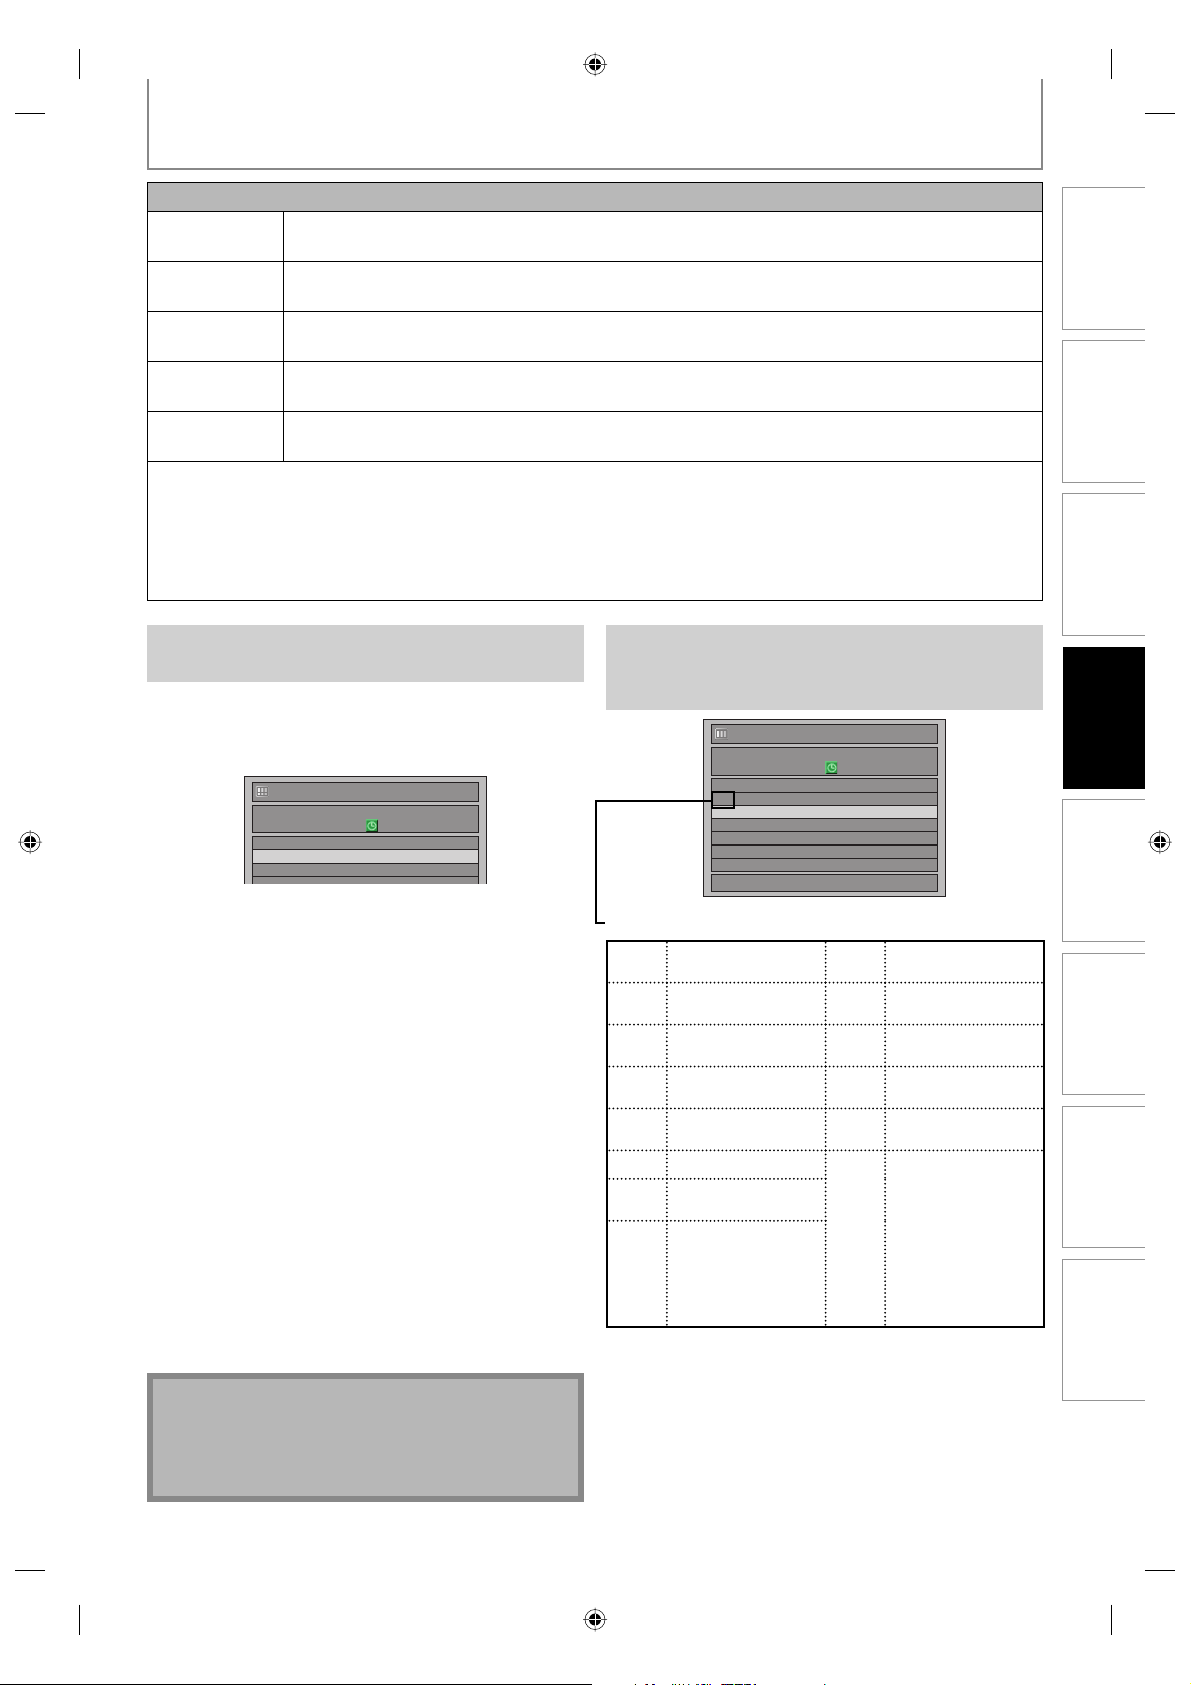
TIMER RECORDING
y
y
How to select a channel number for the timer recording
Analog TV
Analog CATV
Digital TV
Digital CATV
minor channels
<Hint>
• You can decide the 1-digit channel number by pressing 0 first , then enter desired 1-digit channel number.
e.g.) “5”: [0]+[5]
• For selecting the channels with [K / L] you need to press [B] or [ • ] to decide the channel number.
• For selecting the minor channels with [K / L], please make sure the minor channel your are selecting is existed.
[K / L] does not skip the non-existed minor channels.
For channel number 2-6 press, press [B] or [ • ] to decide the channels. For other channels (7-69),
the channel will be decided as soon as you enter the channel number.
For channel number 1-12 press, press [B] or [ • ] to decide the channels. For other channels (13-
125), the channel will be decided as soon as you enter the channel number.
For channel number 1-9 press, press [B] or [ • ] to decide the channels. For other channels (10-99),
the channel will be decided as soon as you enter the channel number.
For channel number 1-13 press, press [B] or [ • ] to decide the channels. For other channels (14-
135), the channel will be decided as soon as you enter the channel number.
For channel number 1-9 press, press [B] or [ • ] to decide the channels. For other channels (10-99),
the channel will be decided as soon as you enter the channel number.
Checking, canceling, or correcting the timer
programming information
1) Press [STANDBY-ON
2) Press [TIMER].
3) Check the information on the list you will need.
JAN/ 2/07 12:00 AM 125.1 SP
Date Star t End CH
JAN/02 12:00AM 1:00AM DTV125. 1
New Program
4-A) To delete the timer program:
1 Use [K / L] to select the program you want to
delete, then press [OK].
2 Use [K / L] to select “Delete”, then press [OK].
Confirmation window will appear.
3 Use [K / L] to select “Yes”, then press [OK].
4-B) To correct the timer program:
1 Use [K / L] to select the program you want to
correct, then press [OK].
2 Use [K / L] to select “Program Change”, then
press [OK].
3 Correct the timer program by using
[K / L / { / B], then press [OK].
5) Press [TIMER] to exit.
6) Press [STANDBY-ON
standby mode.
y].
Timer Programming
MON JAN/01 11:00AMSP (1:00)
y] to return to the timer
Note
• Press [TIMER] to check the timer recording in progress.
When the timer recording is proceeding, that
program will be highlighted with red. In this case,
you cannot select any other program.
If the timer program did not complete correctly,
the error number appears in the timer programming list.
Timer Programming
Date Star t End CH
E41 JAN/02 12:00AM 1:00AM DTV125. 1
New Program
Each error number means:
E1-22
Recording error other
E37-39
than below
E24 Unrecordable disc E42 No disc when
E25-26 Copy prohibited
program
E29 Disc protected E44 Already 254 chapters
E30 Disc full E45 Copy prohibited
E35 PCA full *1 E46 It is impossible to
E36 Already finalized
video format disc
E40 Some portion has
not been recorded
because of program
overlapping.
Recording did not
start at the start time.
• E23, E27, E28, E31, E32, E33 and E34 are not displayed.
• A program with the error number is grayed in the timer
programming list.
• Once the timer programming list with error line(s) is
displayed, or after canceling and setting again the timer
standby mode, the program line(s) with error will be
cleared.
*1 PCA is a disc's space reserved for recording test.
TUE JAN/02 11:00AM
1/1
E41 Power failed
recording
E43 Already 49 titles
recorded
recorded
program
record additionally
on a disc recorded
by other units
when setting “
Make Recording
Compatible” to “OFF”.
Recording
Playback EditingIntroduction Connections Basic Setup Function Setup Others
41EN
41EN
E7H42UD_DVDR3506-37_EN.indd 41E7H42UD_DVDR3506-37_EN.indd 41 2007/12/28 10:53:172007/12/28 10:53:17
Page 42
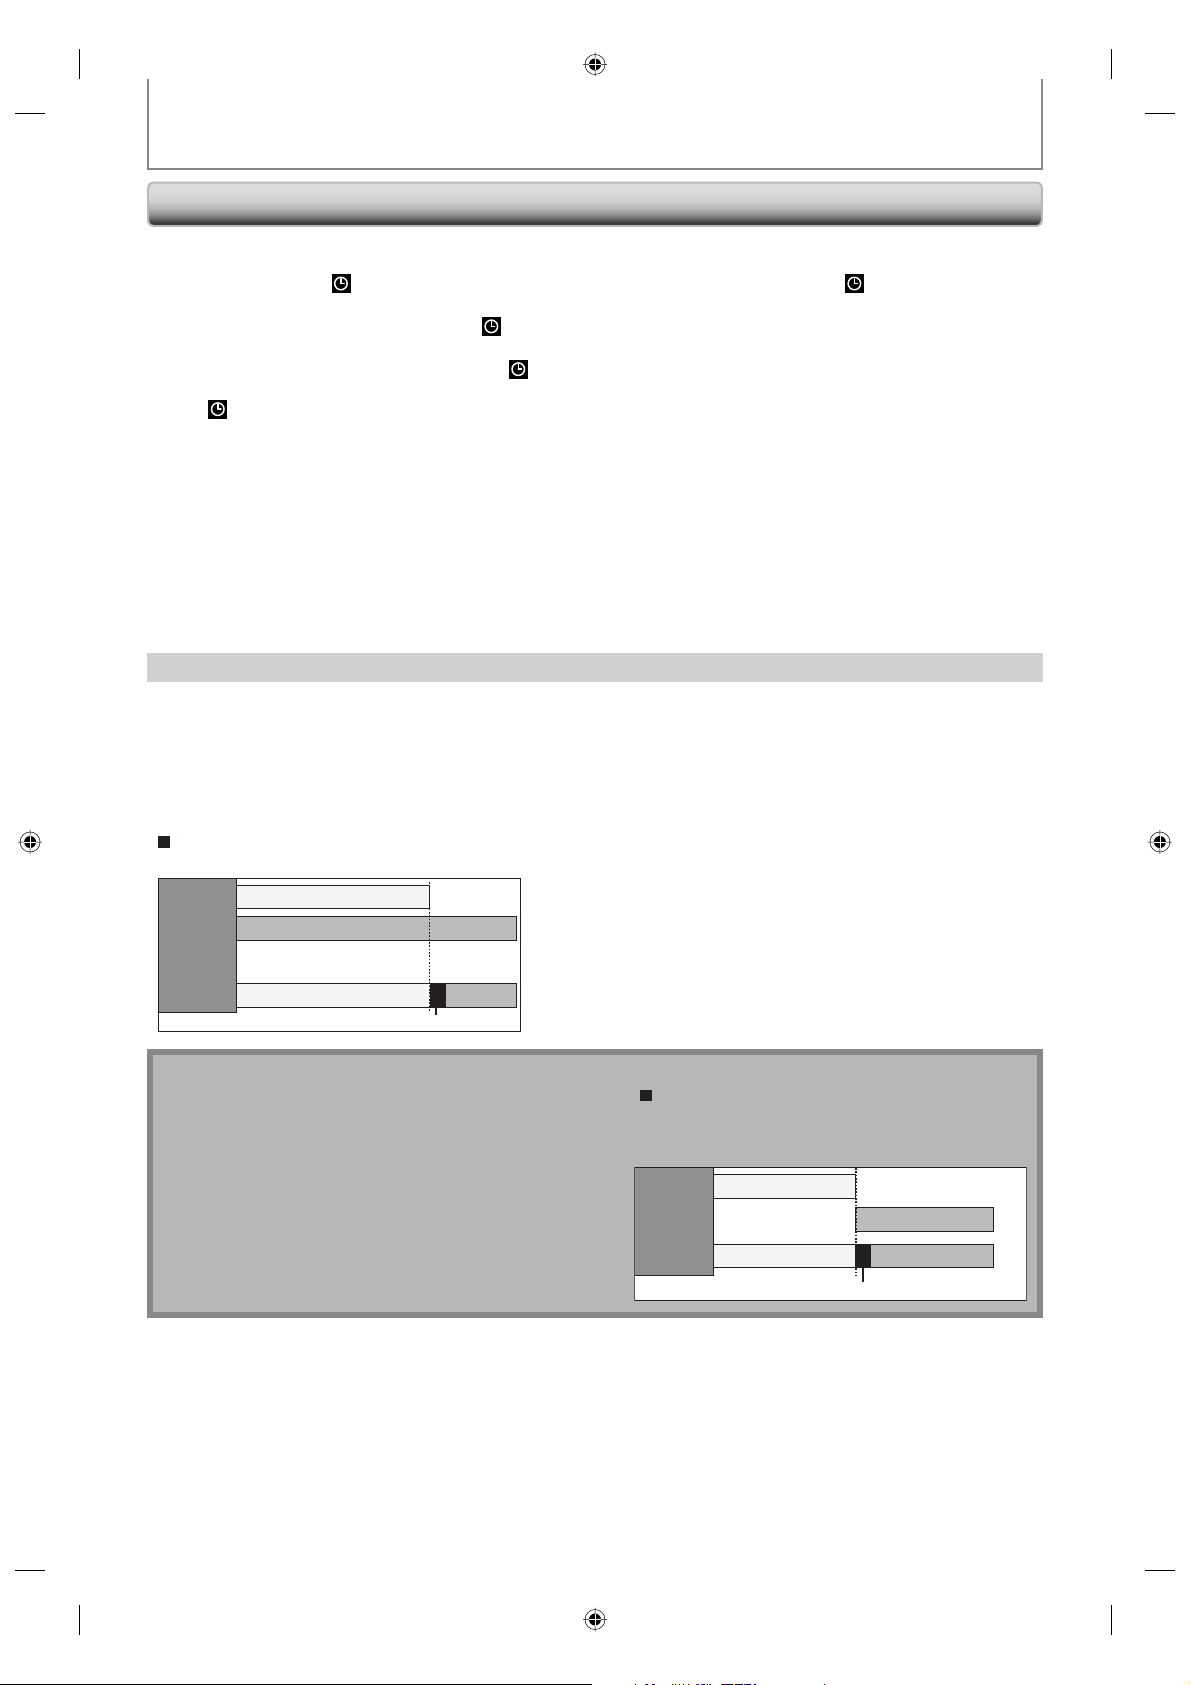
TIMER RECORDING
y
y
y
Hints for Timer Recording
• If there is a power failure or this unit has been unplugged for more than 30 seconds, the clock setting and all timer
programming will be lost.
• If a disc is not inserted,
momentarily around the start point as the unit attempts to record. Please insert a recordable disc.
• When all the timer recording is completed,
[STANDBY-ON
y] first, then select the recorded title and press [PLAY B], or [OPEN/CLOSE A] to remove the disc.
• During timer recording or timer standby mode (
these operations available, press [STOP C] to cancel the timer recording or [STANDBY-ON
mode (
• To cancel the timer standby mode, press [STANDBY-ON
will disappear).
• When the starting and the ending time are the same, the length of the recording will be set for 24 hours. When the
disc becomes full during the recording, the unit turns itself off.
• When the programmed starting and ending time are earlier than the current time, the setting will not be accepted
and be cleared for redoing.
• If the starting time is earlier and the ending time is later than the current time, the recording will start right after you
turn the power off.
• The timer recording for digital TV cannot record any audio language other than English.
• ”Press STANDBY-ON for timer recording” will appear if a timer recording is programmed to start in 5 minutes but the
unit is not in standby mode.
The Priority of Overlapped Settings
• Timer program which has the earlier start time will be placed first in the timer program list, and be given priority over
the programs with the later start time when timer programs overlap.
• When timer programs overlap, the first 2 minutes (at the longest) of the later recording will be cut off.
• When two or more timer programs have the same start time, the program set first will be given priority.
• A timer recording of lower priority will be canceled or start from the middle.
• Check the overlapped timer programmings and change the priority if necessary.
When the starting time is the same:
A program set previously (PROG. A) has priority.
flashes and timer recording cannot be performed. In some cases, will appear
flashes. To play back or eject the recorded disc, press
will appear), any operations on the unit will not be available. To make
y] to release timer standby
y].
PROG. A
PROG. B
actual
recording
The rst 2 minutes (at the longest) will be cut o.
PROG. A
PROG. A
PROG. B
Note for DVD recording
• When the recording time of 2 programs are overlapped, or
the end time of a program and the start time of another
program is the same, the first 2 minutes (at the longest) of
the subsequent program will be cut off.
• If the cut-off portion comes up to 3 minute or more, this
program will be displayed with error number E40 in the
timer programming list.
When the end time of the programming
currently being recorded and the start time
of the subsequent program are same:
The beginning of the PROG. B may be cut o.
PROG. A
PROG. B
actual
recording
The rst 2 minutes (at the longest) will be cut o.
PROG. BPROG. A
42 EN42 EN
E7H42UD_DVDR3506-37_EN.indd 42E7H42UD_DVDR3506-37_EN.indd 42 2007/12/28 10:53:172007/12/28 10:53:17
Page 43
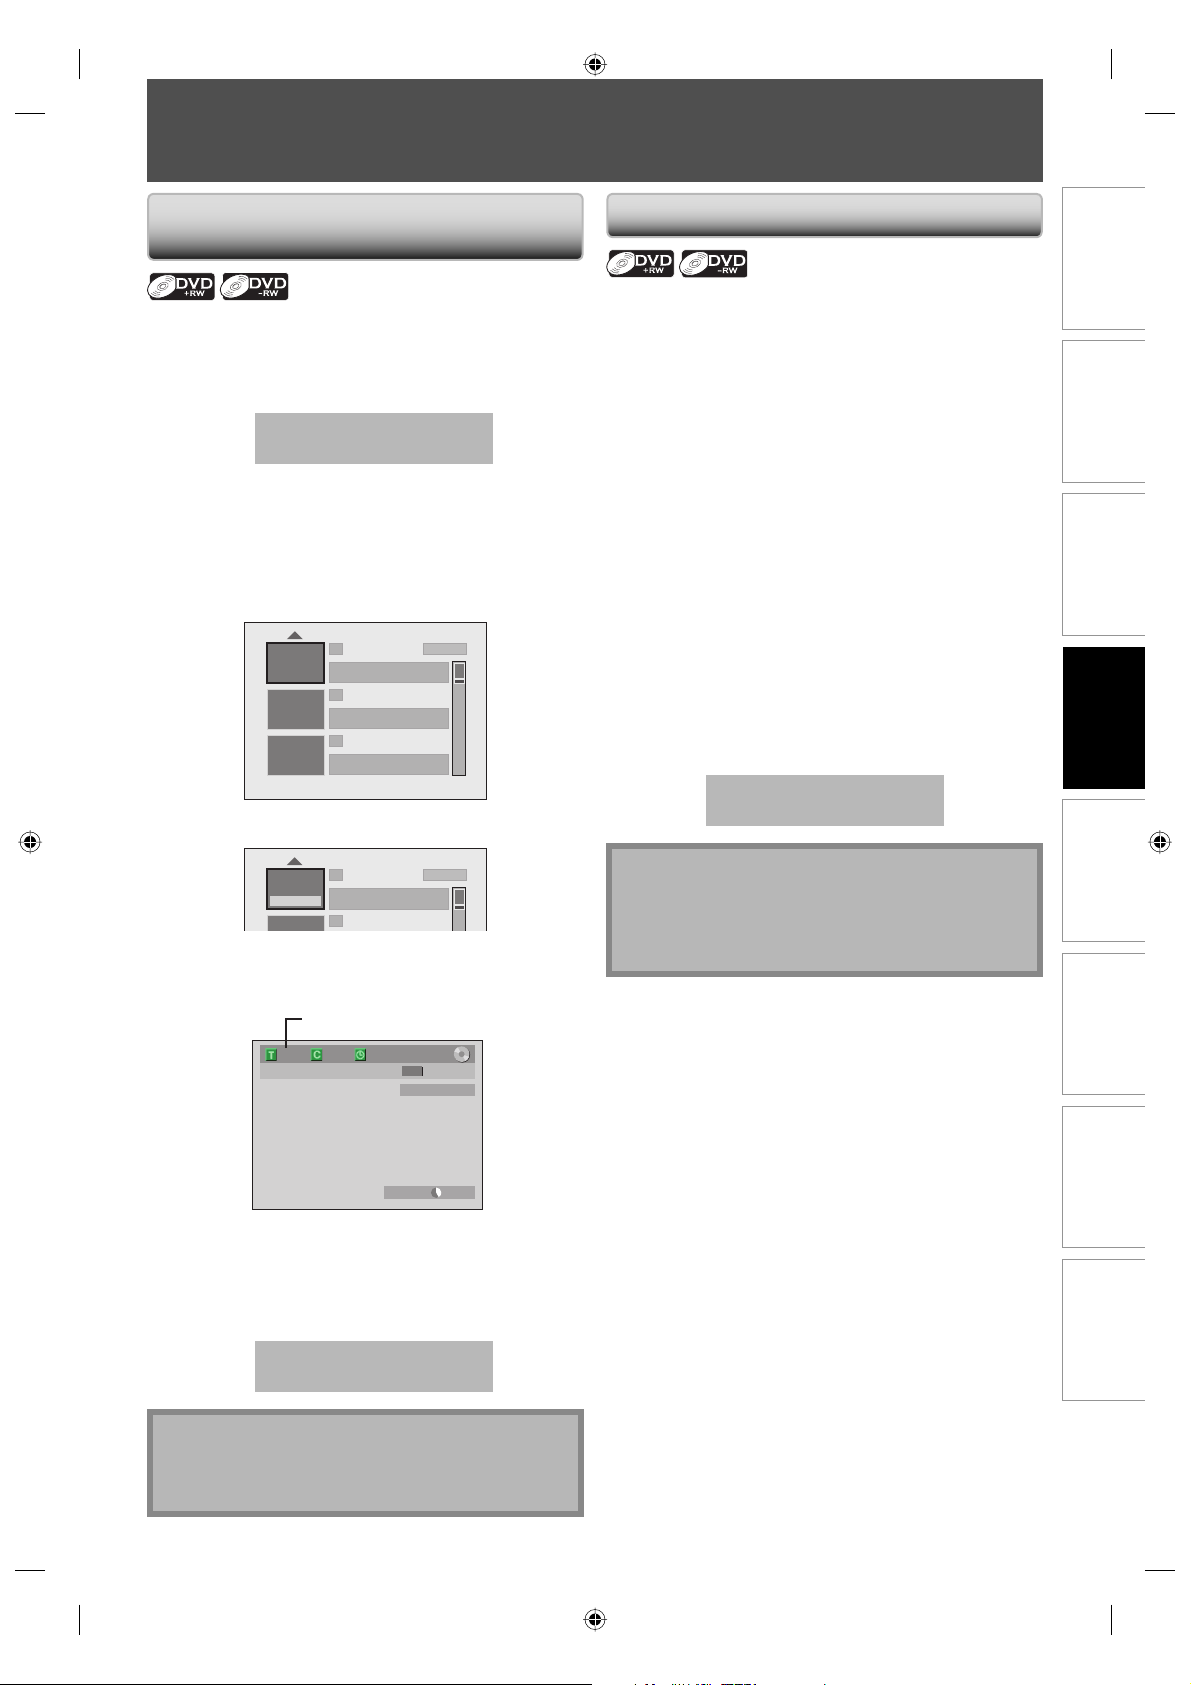
OVERWRITING UNNECESSARY TITLE
y
Overwriting from the Beginning of
the Title
You can overwrite the existing title from the beginning.
1) Press [STANDBY-ON
Make sure that the TV input is set on the unit.
2) Load the disc that includes a title to be overwritten.
Title list will appear.
If the title list does not appear, press [TITLE].
3) Press [REC MODE] to select a recording mode.
Refer to “Recording Mode” on page 35.
4) Use [K / L] to select a title to be overwritten, then
press [OK].
5) Use [K / L] to select “Overwrite”, then press [OK].
y].
It takes a while to display
the title list.
1 SP (2Hr)
NOV/21/07 11:00AM
NOV/21/07 0:20:44
2
NOV/22/07 11:35
NOV/22/07 0:10:33
3
EMPTY TITLE
1:37:52 SP(2Hr)
CH12 SP
AM CH13 EP
Overwriting in the Middle of the Title
You can overwrite the existing title from the selected
position.
1) Follow the steps 1, 2 and 4 on the left.
2) Use [K / L] to select “Play”, then press [OK].
Playback will start.
3) Press [PAUSE F] at the point from which you want
to start overwriting.
4) Press [REC I].
“F I”, display menu, channel, and the time lapse will
be displayed as illustrated on the left.
5) Select the channel you want to record.
(Refer to page 29 on how to select a channel.)
6) Press [REC I] again.
Overwriting recording starts.
7) Press [STOP C] to stop recording.
This operation may take a
while to be completed.
Recording
Playback EditingIntroduction Connections Basic Setup Function Setup Others
1 SP (2Hr)
Play
Edit
Overwrite
NOV/21/07 11:00AM
NOV/21/07 0:20:44
2
CH12 SP
6) Select the channel you want to record.
(Refer to page 29 on how to select a channel.)
e.g.) DVD+RW
selected title number
to be overwritten
F I
11
0:01:00
+RW
CH 12
SP(2Hr) 2:00
7) Press [REC I].
Overwriting recording starts.
The elapsed-time counter starts running.
8) Press [STOP C] to stop recording.
Title name is also overwritten.
This operation may take a
while to be completed.
Note
• The remaining recording time is displayed on the
bottom right corner of the TV screen during
overwriting.
Note
• Recording mode of the overwriting title is the same
as that of the original (overwritten) title when
overwriting in the middle of the title.
• Title name will not be overwritten.
43EN
43EN
E7H42UD_DVDR3506-37_EN.indd 43E7H42UD_DVDR3506-37_EN.indd 43 2007/12/28 10:53:182007/12/28 10:53:18
Page 44
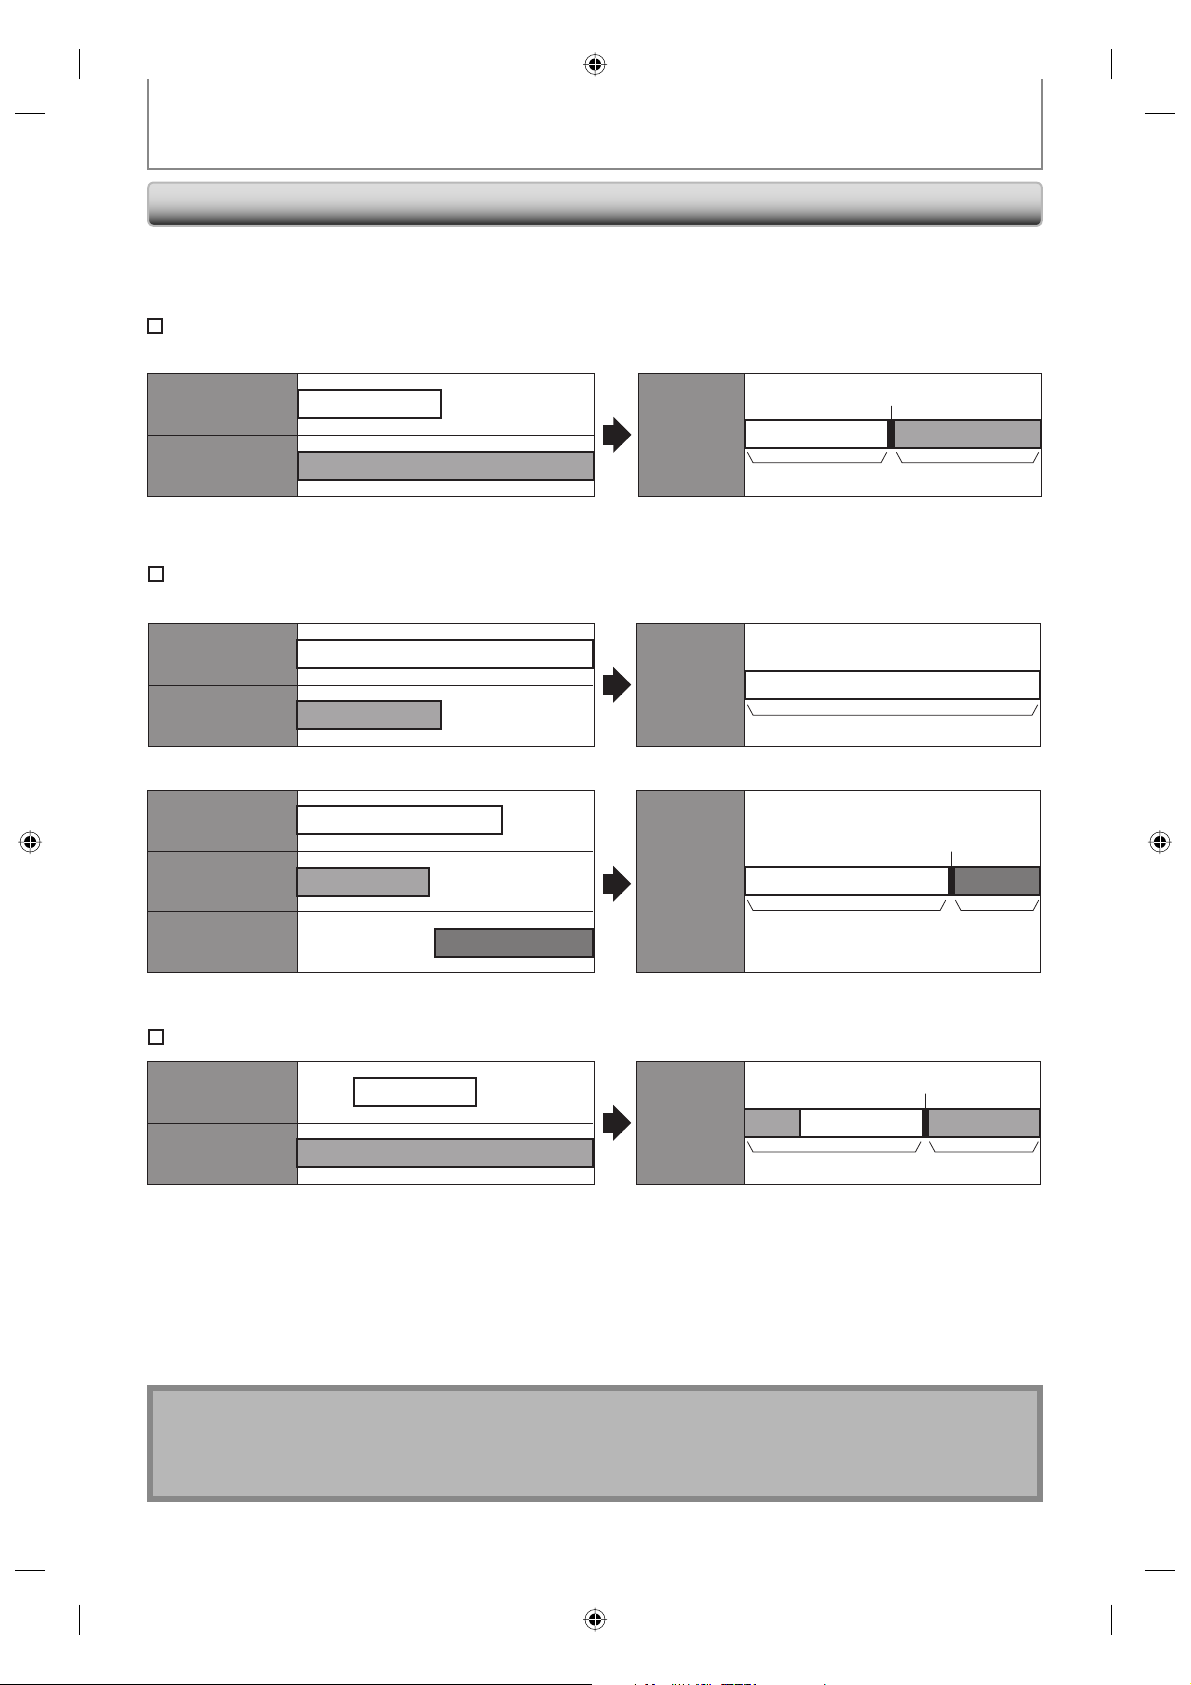
OVERWRITING UNNECESSARY TITLE
Hints for Overwriting
When you overwrite on the unnecessary title, there were various circumstances such as follows. Please note that
following cases only describe the overwriting without any recording mode discrepancy. To avoid accidental deletion
please check if there is no important title after the overwriting point.
When overwriting title is shorter than the existing title:
(overwriting from the beginning of the title)
overwrite
recording : A
existing title : B
When overwriting title is longer than the existing title:
(overwriting from the beginning of the title)
overwrite
recording : A
existing title : B
overwrite
recording : A
existing title : B
existing title : C
after
overwriting
after
overwriting
after
overwriting
30 - 180 seconds will be cut o.
title name : A
title name : A
30 - 180 seconds will be cut o.
title name : A
title name : B
title name : C
When overwriting in the middle of the title:
overwrite
recording : A
existing title : B
after
overwriting
30 - 180 seconds will be cut o.
title name : B*
Overwritten section and the rest of the sections will
*
have the same title name as the original existing
title (B).
title name : B
Note
• When a title name is overwritten, its thumbnail is also overwritten.
• “Auto Chapter” interval time is reset at the overwriting start point.
• A chapter mark is put the beginning of the overwrite title when overwriting in the middle of the title.
44 EN44 EN
E7H42UD_DVDR3506-37_EN.indd 44E7H42UD_DVDR3506-37_EN.indd 44 2007/12/28 10:53:192007/12/28 10:53:19
Page 45
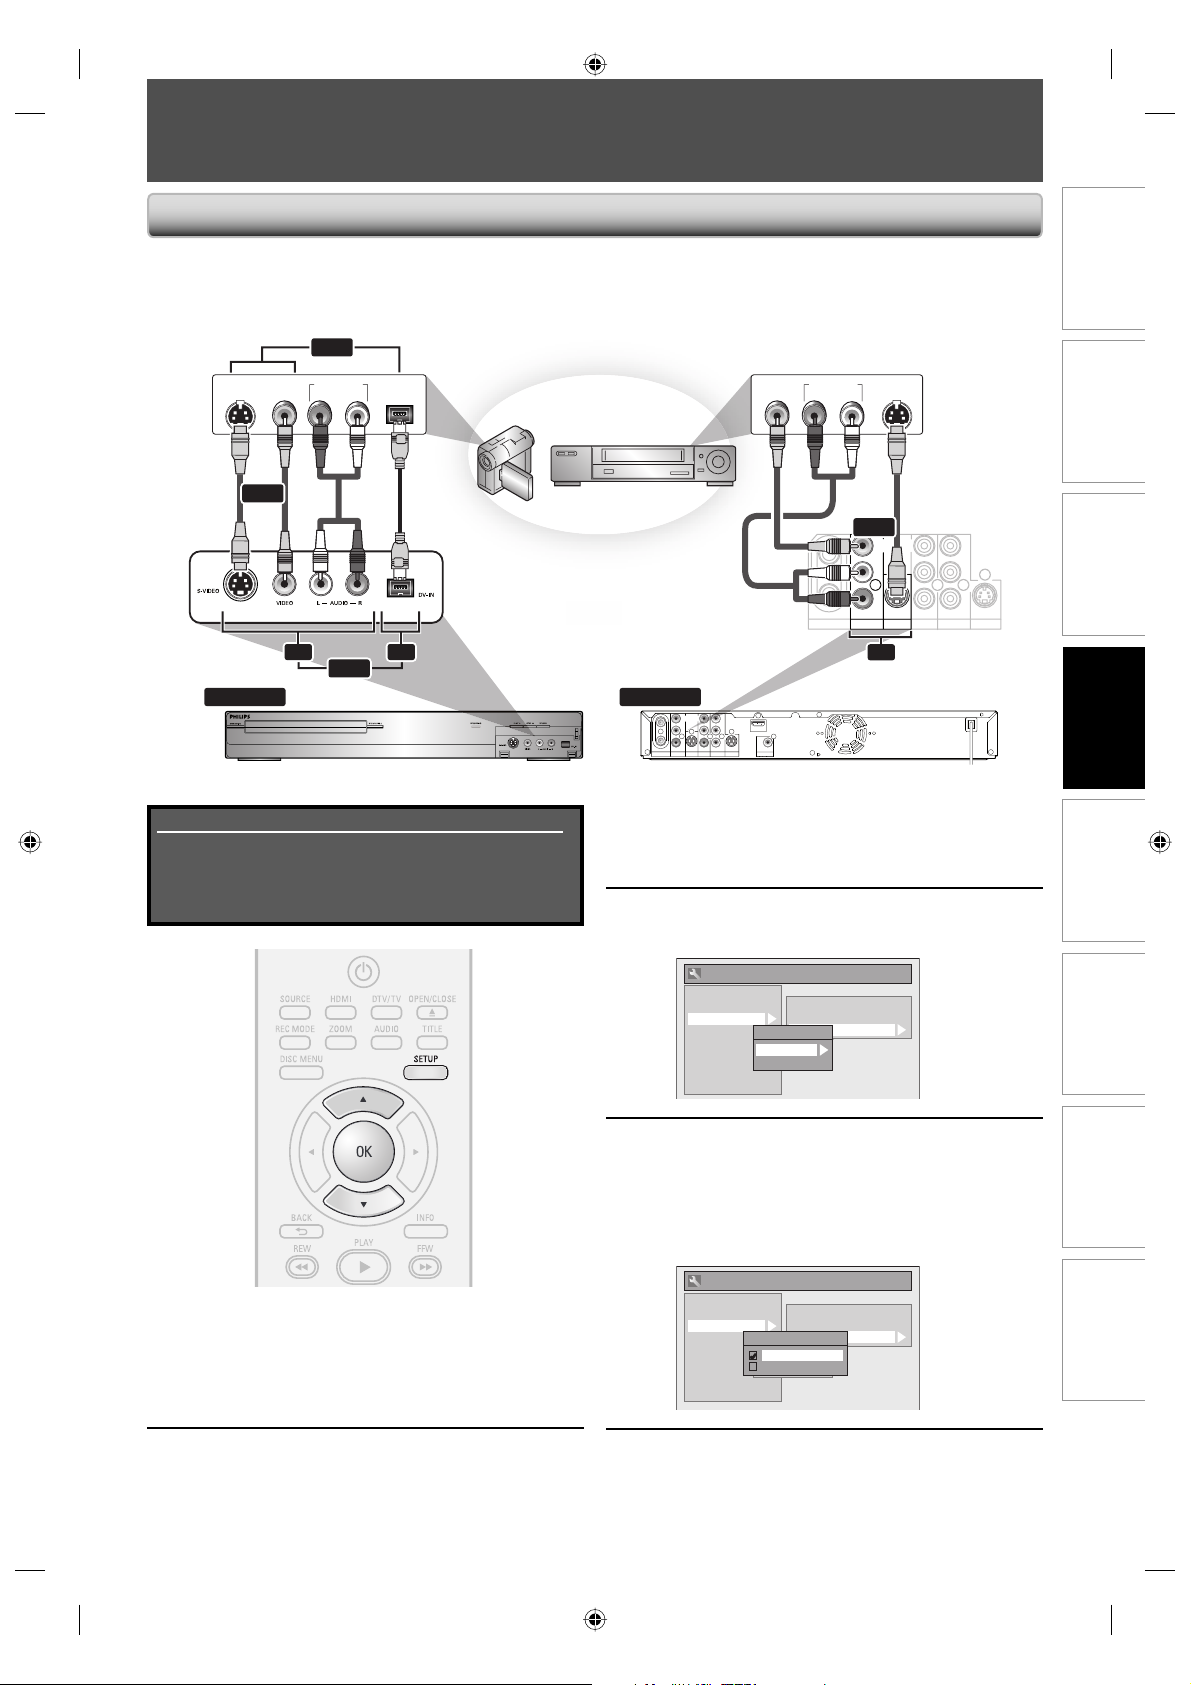
SETTINGS FOR AN EXTERNAL DEVICE
Connection to an External Device
Connect the external device properly to the unit by using input jacks either E2 and E3 (Front) or E1 (Rear).
When connecting an external device of monaural output to this unit, use AUDIO L jack of E2 (Front).
Use S-video or the RCA audio/video cables for this connection.
When connecting a DV-camcorder, use DV-IN jack of E3 (Front) instead of S-VIDEO IN or VIDEO IN jack
or
AUDIO OUT DV-OUT
VIDEO
S-VIDEO
OUT
OUT
LR
external device
(camcorder, VCR etc.)
VIDEO
OUT
AUDIO OUT
.
S-VIDEO
OUT
LR
S-video
cable
or
RCA
video
cable
E2
RCA
audio
cable
or
DV cable
(4-pin)
E3
to E2 & E3 IN
front of this unit rear of this unit
Supplied cables used in this connection are as follows:
• RCA audio cable (L/R) x 1
• RCA video cable x 1
Please purchase the rest of the necessary cables at your
local store.
or
RCA
video
cable
ANTENNA
RCA
audio
cable
OUT
S-video
cable
or
IN
VIDEO
VIDEO
VIDEO
OUT
IN
IN
L
L
R
R
IN
IN
AV IN
AV IN
S-VIDEO S-VIDEO
S-VIDEO
E1
to E1 IN
IN
VIDEO
VIDEO
Y
OUT
IN
PB/CB
L
HDMI OUT
PR/CR
R
OUT
COAXIAL
DIGITAL AUDIO OUTPUT
COMPONENT
AV OUT
PCM / BITSTREAM
VIDEO OUTPUT
ANTENNA
OUT
AV IN
L
R
IN
S-VIDEO S-VIDEO
Use [K / L] to select “Video Input”,
then press [OK].
3
Use [K / L] to select desired external
input position, then press [OK].
4
General Setting
Playback
Display
Video
Recording
Clock
Channel
DivX
HDMI
Reset All
Progressive Scan
TV Aspect
Video Input
Video Input
E1 (Rear)
E2 (Front)
AV OU T
L
R
PB/CB
PR/CR
COMPONENT
VIDEO OUTPUT
Y
OUT
Recording
Playback EditingIntroduction Connections Basic Setup Function Setup Others
Use [K / L] to select the input jack
type to connect, then press [OK].
If you want to use VIDEO IN jack, select “Video
In”.
If you want to use S-VIDEO IN jack, select
“S-Video In”.
General Setting
Playback
Display
Video
Recording
Clock
Channel
DivX
HDMI
Reset All
E1 (Rear)
Video Input
Video In
E1 (Rear)
S-Video In
E2 (Front)
Progressive Scan
TV Aspect
Video Input
Press [SETUP] to exit.
Press [SETUP] and use [K / L] to
select “General Setting”, then press
1
[OK].
“General Setting” menu will appear.
Use [K / L] to select “Video”, then
5
press [OK].
2
E7H42UD_DVDR3506-37_EN.indd 45E7H42UD_DVDR3506-37_EN.indd 45 2007/12/28 10:53:202007/12/28 10:53:20
Submenu will appear.
6
45EN
45EN
Page 46
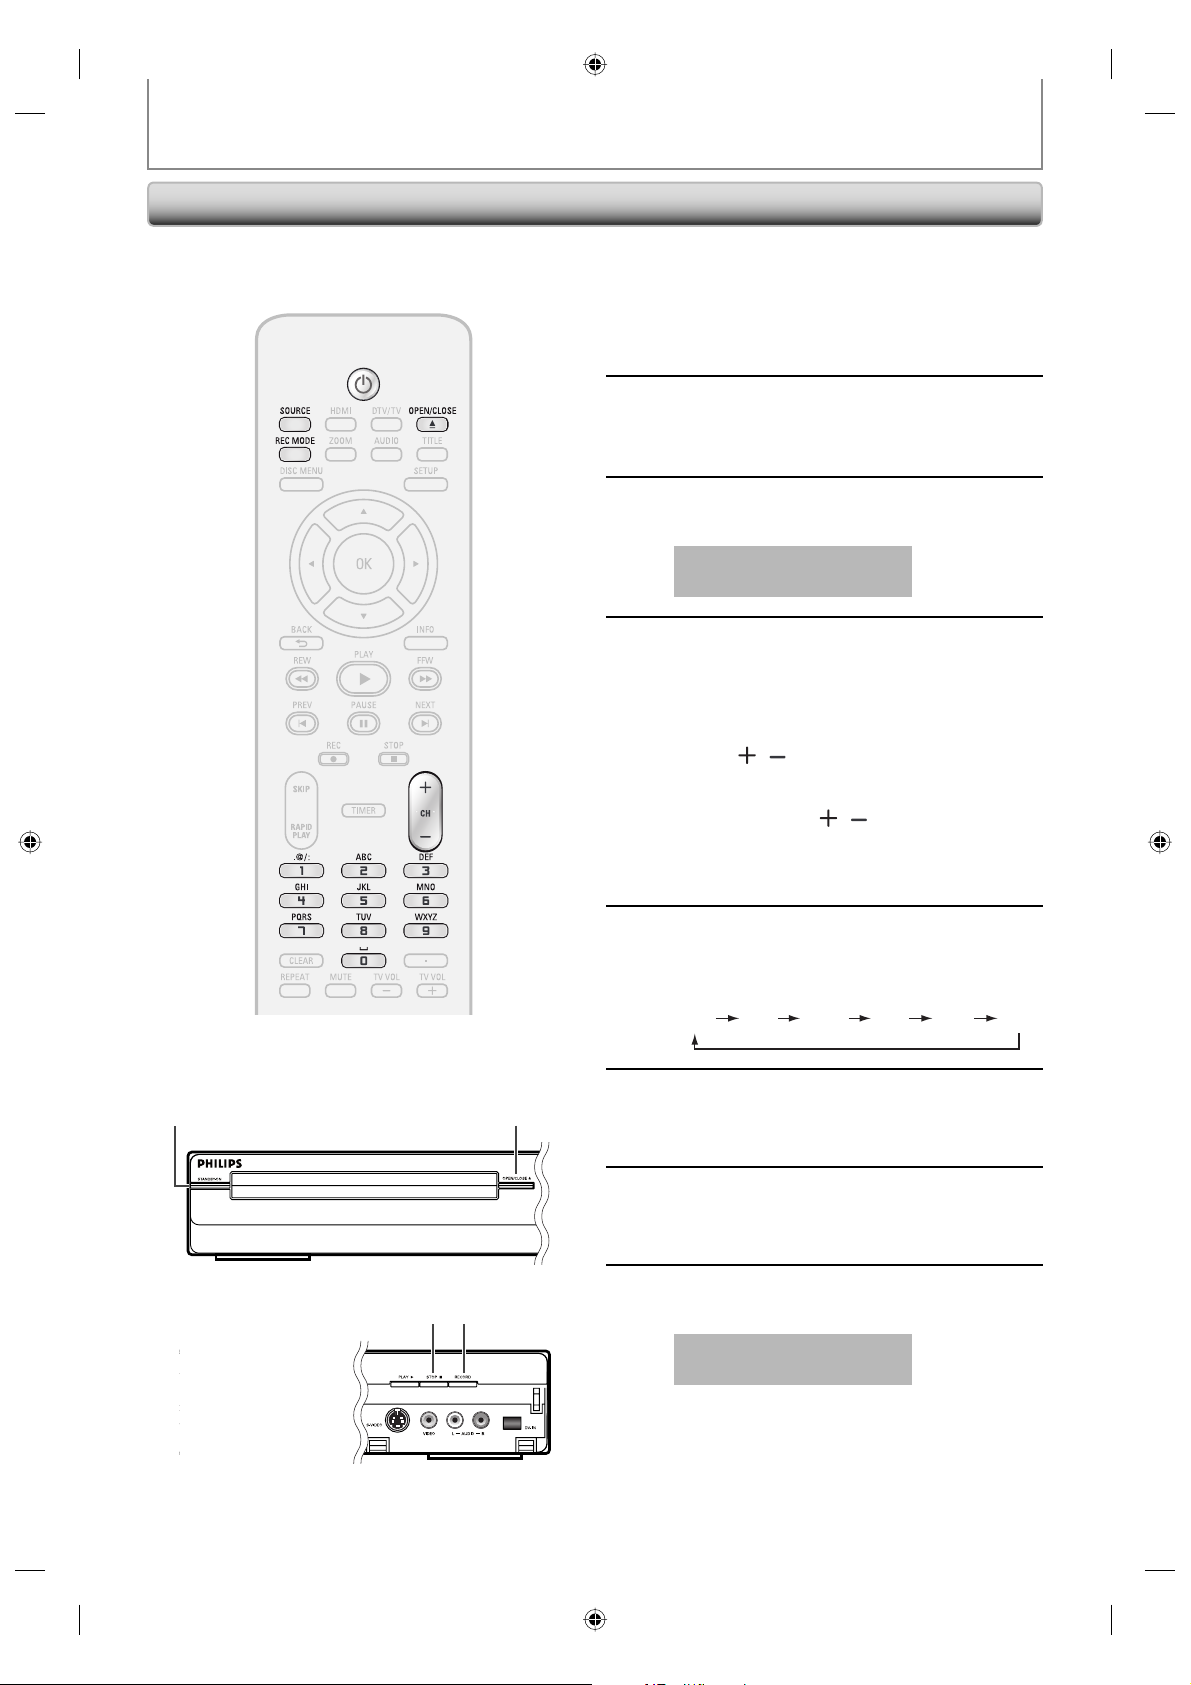
SETTINGS FOR AN EXTERNAL DEVICE
y
Recording from an External Device
Before recording from an external device, refer to the
instructions for the connection on page 45.
Turn on the TV and press
[STANDBY-ON
1
2
3
4
select the input of the TV to which
the unit is connected.
Press [OPEN/CLOSE A] to open the
disc tray. Place the disc to record
properly.
Press [OPEN/CLOSE A] to close the
disc tray.
It takes a while to load
the disc.
Select the input of the unit which the
external device is connected. (E2, E3
or E1)
• To use the input jacks on the rear of this unit;
Select “E1 (Rear)” position by using [SOURCE]
or [CH
• To use the input jacks on the front of this unit;
Select “E2 or E3 (Front)” position by using
[SOURCE] or [CH
• As for E2 and E1, you can also select external
input position by using [the Number buttons].
e.g.) For E1, press [0], [0], [1].
/ ].
y], and be sure to
/ ].
1 2 3
8
6
Press [REC MODE] to select a
recording mode.
5
Refer to “Recording Mode” on page 35.
HQ
(1Hr)SP(2Hr)
Press [RECORD] on the unit to start
recording.
SPP
(2.5Hr)LP(3Hr)EP(4Hr)
6
Start playback on the external device
to record from.
7
Press [STOP C] on the unit to stop
recording.
8
This operation may take a
while to be completed.
SLP
(6Hr)
46 EN46 EN
E7H42UD_DVDR3506-37_EN.indd 46E7H42UD_DVDR3506-37_EN.indd 46 2007/12/28 10:53:212007/12/28 10:53:21
Page 47
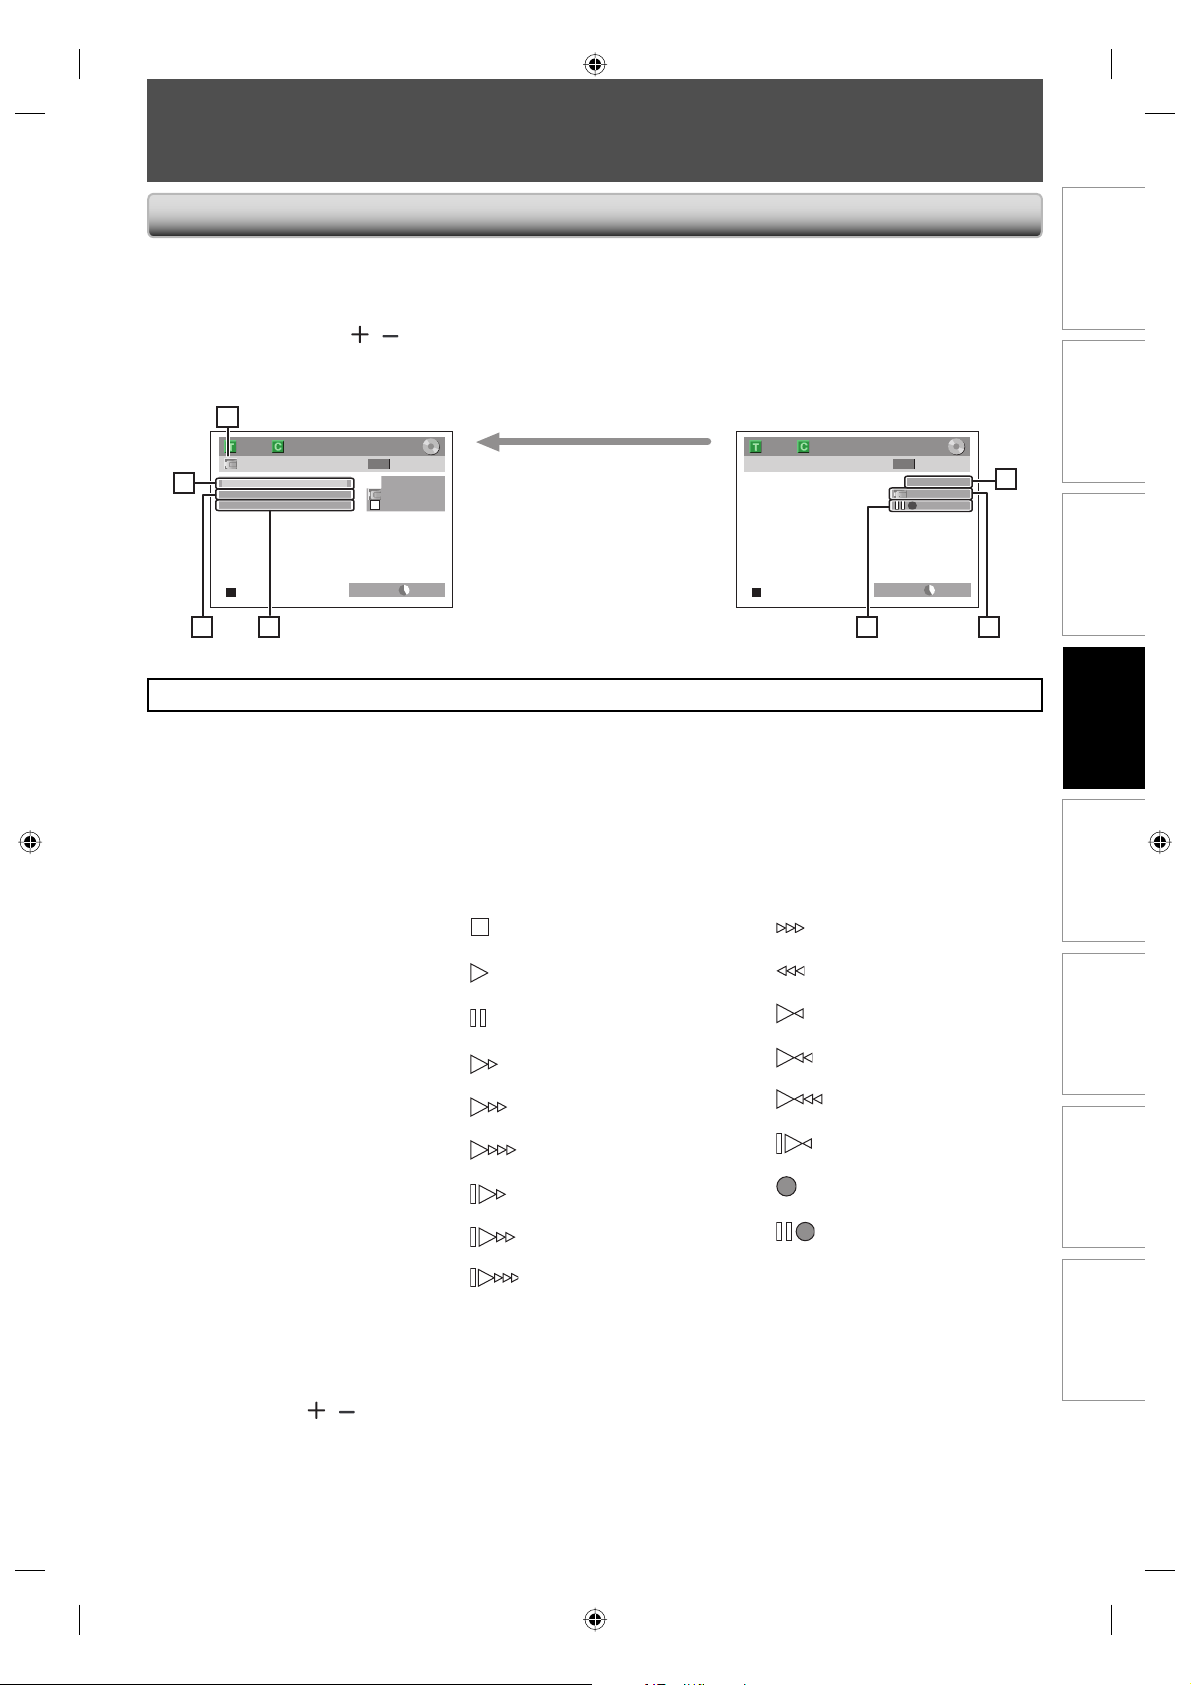
DV DUBBING
Guide to DV and On-Screen Display
This function helps you to easily dub the contents of the DVC (digital video camcorder) to DVD.
You can control basic operations of the DVC from the remote control of this unit such as playback, fast forward or
reverse and stop all operations if the DVC is in video mode. Use the DV cable that has 4-pin input jack and is
compliance with the IEEE1394 standards. When you connect to DV-IN jack on the front of this unit, select “E3” position
by using [SOURCE] or [CH
operating your DVC.
/ ] on the remote control and press [INFO] to show the DV dubbing information for the
When the DVC is in
1
Control DVD
2
DV Audio Stereo1
Start Rec
3 7
video mode...
1/ 1 1/ 1
4
+
RW
E3 (DV-IN)
AB-1234
0:12:34
SP(2Hr) 2:00
The menu changes according to
what mode of DVC.
Switch the mode on the DVC
to video mode for the dubbing
information.
When the DVC is in camera
mode...
1/ 1 1/ 1
The following instructions are described with the operations using the remote control of this unit.
1. DV icon
2. Indicator of active device
• When the “Control” is
highlighted, press [OK] to display
the item selection. Use [K / L] to
select the device you wish to
operate, then press [OK] to
activate.
• Select “DVD” to control this unit.
• Select “DV Input” to control your
DVC.
3. Recording audio mode
• Other than the DV camcorder is in
stop mode, the “DV Audio” can be
selected. Press [OK] to display the
item selection and then use
[K / L] to select the audio you
wish to output. Press [OK] again
to activate.
• Select “Stereo1” to dub the stereo
sound.
• Select “Stereo2” to dub the sound
with after recording sound.
• Select “Mix” to dub the stereo1
and stereo2.
4. Indicator of dubbing function
• When the unit is ready for
dubbing, “Start Rec” will appear.
6. Product name of your DVC
• If the unit cannot recognize the
input signal from the DVC or the
unknown product, “No Device” or
“****” will appear instead.
7. Status of the current operation
and the time counter
Each icon means (Available icons
may vary depending on the DVC):
DVC is in stop mode.
DVC is in playback mode.
DVC is in pause mode.
DVC is fast forwarding.
(standard speed)
DVC is fast forwarding.
(faster than above)
DVC is fast forwarding.
(faster than above)
DVC is slow forwarding.
(standard speed)
DVC is slow forwarding.
(faster than above)
DVC is slow forwarding.
(faster than above)
DVC is fast forwarding.
(in stop mode)
DVC is fast reversing.
(in stop mode)
DVC is fast reversing.
(standard speed)
DVC is fast reversing.
(faster than above)
DVC is fast reversing.
(faster than above)
DVC is in slow reverse
playback.
DVC is in recording.
DVC is in recording pause
mode.
• When the unit is in dubbing,
“Pause Rec” will appear.
5. Channel position
• When you select “E3” by using
[SOURCE] or [CH
/ ], “E3 (DV-
IN)” will appear.
+
RW
E3 (DV-IN)
AB-1234
0:12:34
SP(2Hr) 2:00
5
6
Recording
Playback EditingIntroduction Connections Basic Setup Function Setup Others
47EN
47EN
E7H42UD_DVDR3506-37_EN.indd 47E7H42UD_DVDR3506-37_EN.indd 47 2007/12/28 10:53:222007/12/28 10:53:22
Page 48
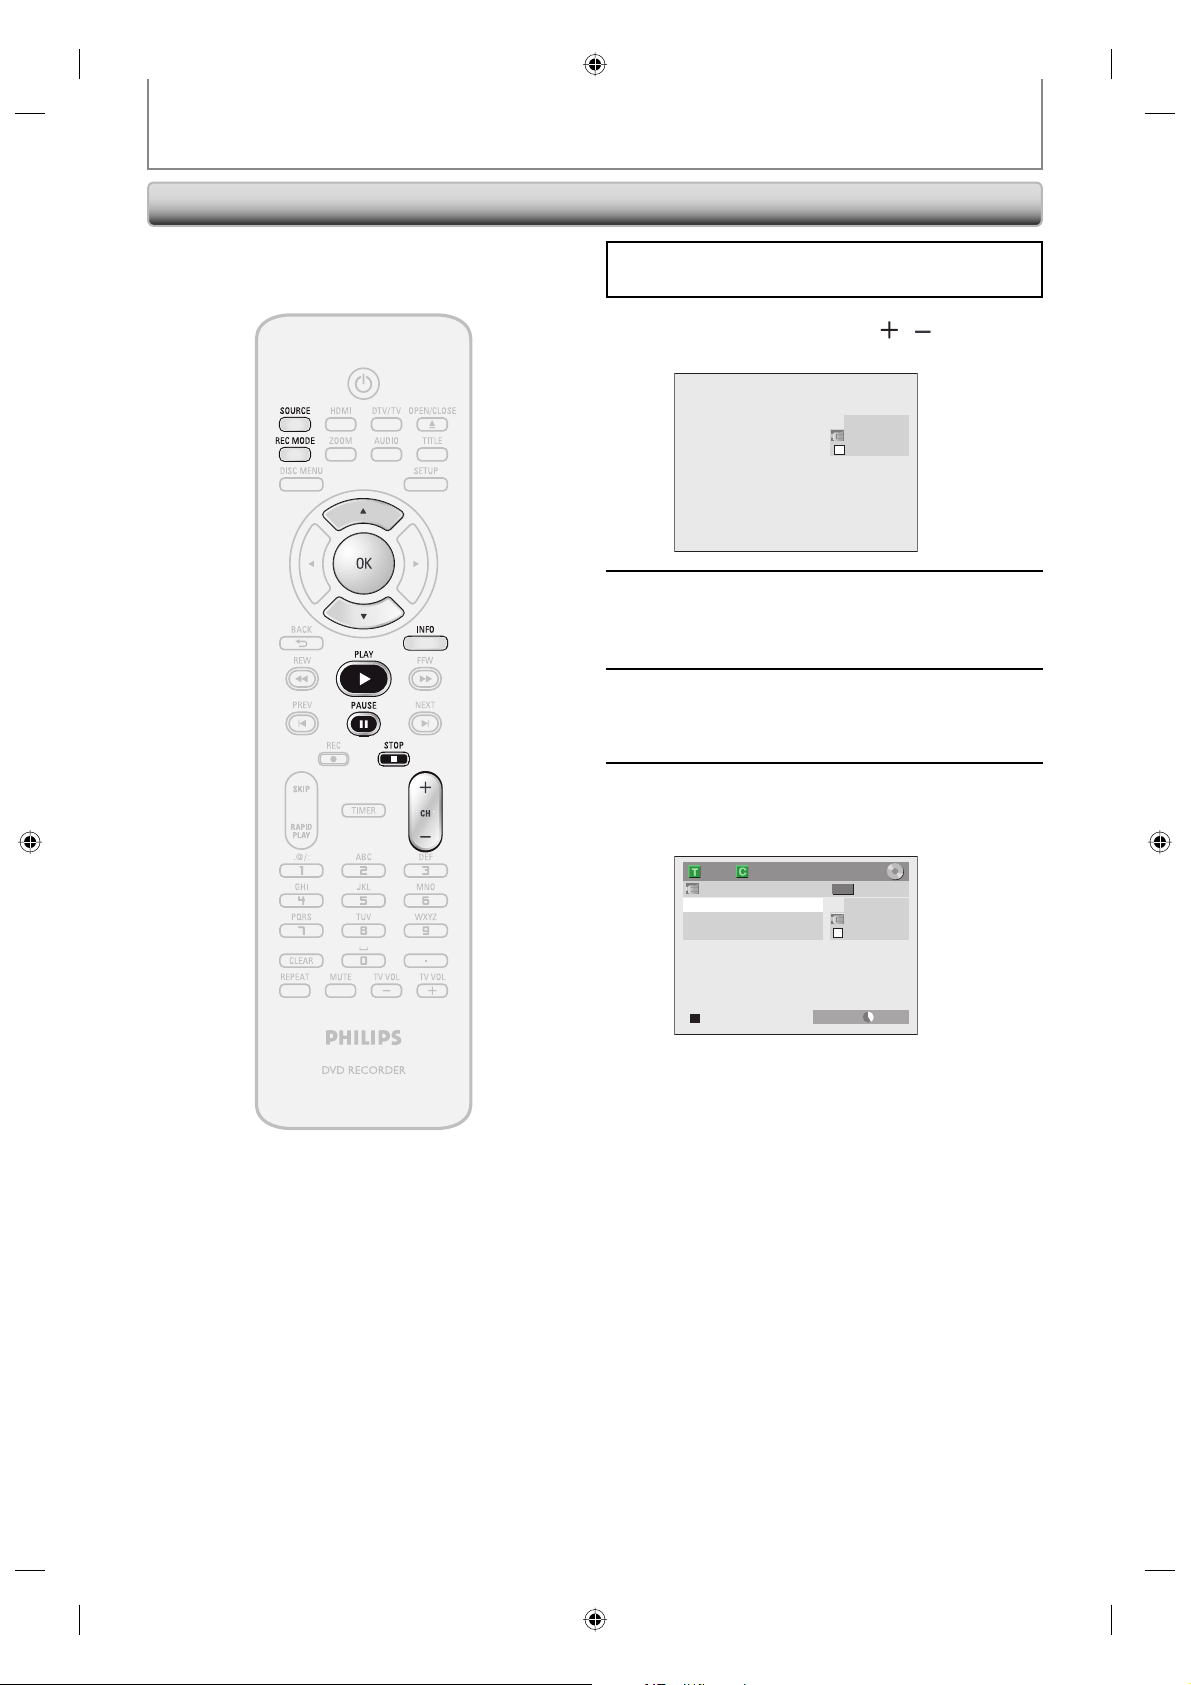
DVC to DVD Dubbing
DV DUBBING
Before recording from DVC, refer to page 45 for
connection instructions.
Insert a recordable media and make sure your DV
camcorder is in video mode.
Use [SOURCE] or [CH / ] to select
“E3 (DV-IN)”.
1
E3 (DV-IN)
AB-1234
0:00:00
Press [REC MODE] to select a
recording mode.
2
(Refer to page 35.)
Press [INFO].
3
Press [OK] to display the item
selection. Use [K / L] to select “DV
4
Input”, then press [OK].
1/ 1 1/ 1
Control DVD
DV Audio Stereo1
Start Rec
+
RW
E3 (DV-IN)
AB-1234
0:00:00
48 EN48 EN
SP(2Hr) 2:00
E7H42UD_DVDR3506-37_EN.indd 48E7H42UD_DVDR3506-37_EN.indd 48 2007/12/28 10:53:252007/12/28 10:53:25
Page 49
DV DUBBING
Press [PLAY B] to find the point
where you wish to start dubbing.
5
6
7
Then, press [STOP C] where you wish
to start dubbing.
Use [K / L] to select “Start Rec”, then
press [OK].
The dubbing will start.
To stop dubbing;
Use [K / L] to select “Control”, then
press [OK].
Use [K / L] to select “DVD”, then
press [OK].
Then press [STOP C].
Note for DV dubbing
• If you press [PAUSE F] at step 5, the tape will rewind to the point a few seconds preceding the paused point
when you press [OK] at step 6, then, it will start dubbing when it comes to the paused point.
• The unit does not send out the output signal to DVC.
• For the proper operation, connect DVC to the unit directly. Do not connect this unit and DVC via any other unit.
• Do not connect more than 1 DVC.
• The unit can only accept DVC. Other DV device such as cable/satellite box or D-VHS VCR cannot be recognized.
• If no video signal is detected from the DVC during DVC to DVD dubbing, the recording will be paused and “I” will
flash on the TV screen. The recording will resume when the unit detects the video signal again.
• When the DVC is in camera mode, refer to “Guide to DV and On-Screen Display” on page 47.
• You cannot dub from DVC during timer standby mode.
• Date / time and cassette memory data will not be recorded.
• Pictures with a copy-guard signal cannot be recorded.
• A DV terminal is a terminal that can use the transmission mode conforming to the IEEE 1394 standards called “Fire
Wire”. It enables digital dubbing between DV devices with little degradation.
Recording
Playback EditingIntroduction Connections Basic Setup Function Setup Others
49EN
49EN
E7H42UD_DVDR3506-37_EN.indd 49E7H42UD_DVDR3506-37_EN.indd 49 2007/12/28 10:53:262007/12/28 10:53:26
Page 50
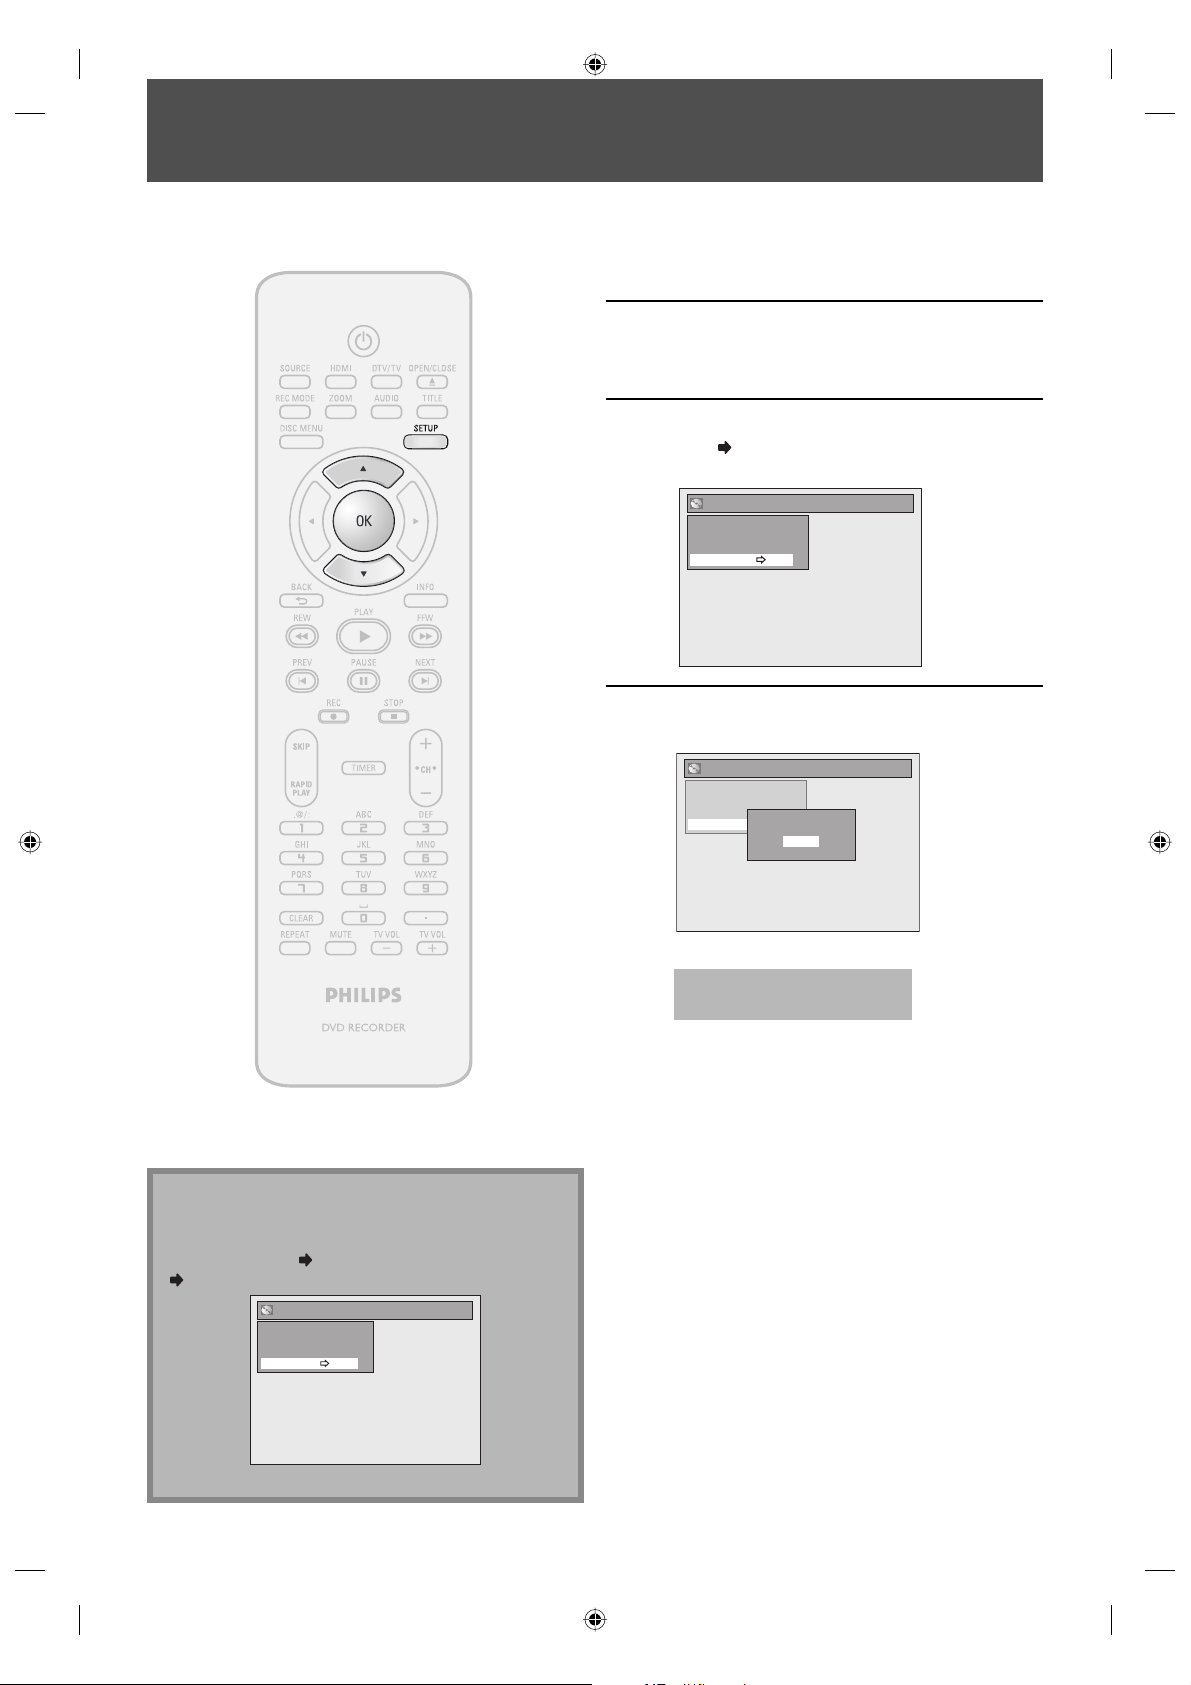
SETTING A DISC TO PROTECT
To prevent accidental recording, editing or erasing the
titles, you can protect them from “Disc Edit” menu.
Press [SETUP].
1
Use [K / L] to select “Disc Edit”, then
press [OK].
2
Use [K / L] to select “Disc Protect
OFF
ON”, then press [OK].
3
4
e.g.) DVD+RW
Disc Edit
Edit Disc Name
Erase Disc
Make Edits Compatible
Disc Protect OFF ON
Use [K / L] to select “Yes”, then press
[OK].
Disc Edit
Edit Disc Name
Erase Disc
Make Edits Compatible
Disc Protect OFF ON
Protect this disc?
Yes
No
Note
To cancel the disc protect:
• When you insert a disc protected with this unit,
“Disc Protect ON
ON” at step 3.
To release the protect for the disc, select “Yes” at step 4.
OFF” will appear instead of “OFF
Disc Edit
Edit Disc Name
Erase Disc
Make Edits Compatible
Disc Protect ON OFF
A disc will be protected.
This operation may take a
while to be completed.
50 EN50 EN
E7H42UD_DVDR3506-37_EN.indd 50E7H42UD_DVDR3506-37_EN.indd 50 2007/12/28 10:53:262007/12/28 10:53:26
Page 51
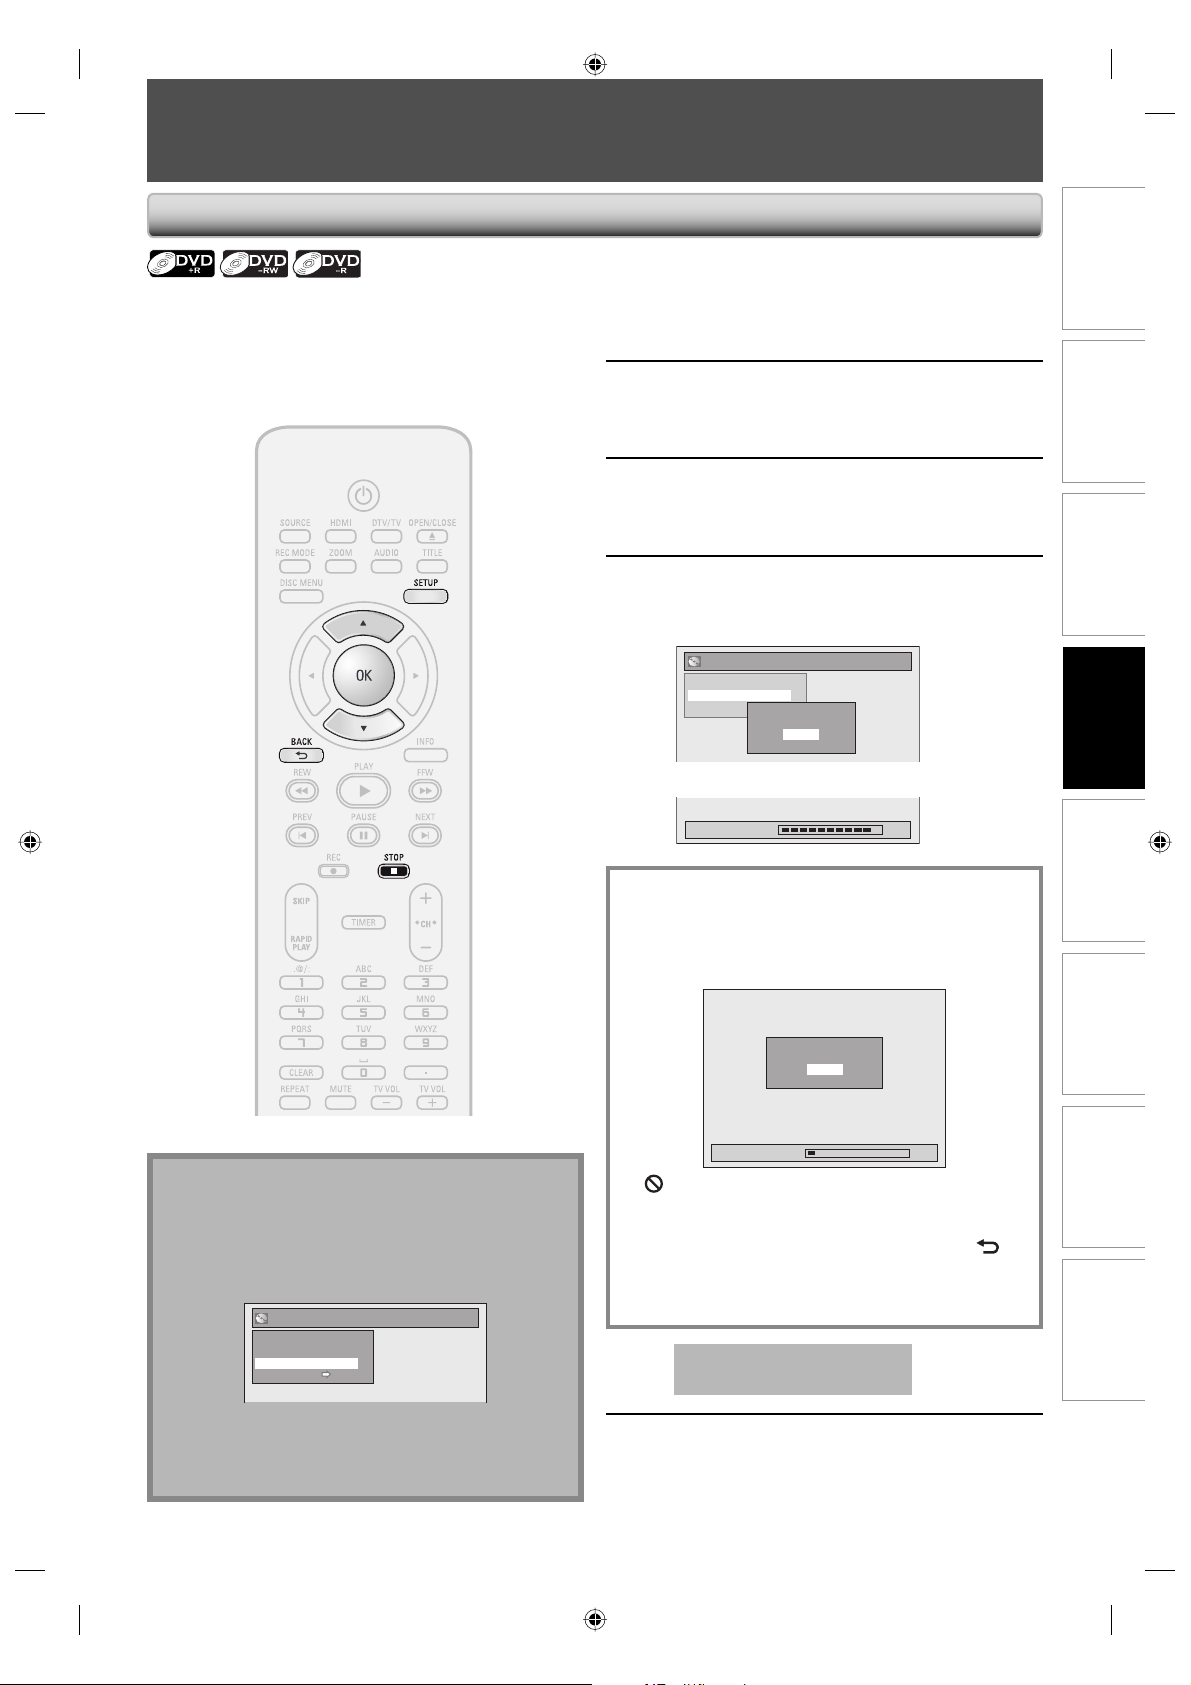
PLAYING THE DISCS ON OTHER DVD PLAYERS
Finalizing a Disc
You will need to finalize DVD+R, DVD-RW or DVD-R to
play them back on other DVD players.
Finalizing may take several minutes up to an hour.
A shorter recording period on the disc will require a
longer time period for finalization. Do not unplug the
power cord during finalization.
Press [SETUP].
If you are in the title list, you need to exit from
1
2
the list by pressing [STOP C] before you are able
to access the main menu.
Use [K / L] to select “Disc Edit”, then
press [OK].
“Disc Edit” menu will appear.
Use [K / L] to select “Finalize”, then
press [OK].
3
Use [K / L] to select “Yes”, then press
[OK].
4
e.g.) DVD+R, DVD-R
Disc Edit
Edit Disc Name
Finalize
Disc Protect OFF ON
Finalizing will start.
Finalizing 90%
Finalize disc?
Yes
No
Recording
Playback EditingIntroduction Connections Basic Setup Function Setup Others
Note
• Once you have finalized a DVD+R/DVD-R, you cannot
edit or record anything on that disc.
• There is no need to finalize DVD+RW.
• When you insert a DVD-RW finalized with this unit,
“Undo Finalize” will appear instead of “Finalize”.
Disc Edit
Edit Disc Name
Erase Disc
Undo Finalize
Disc Protect ON OFF
To release the finalizing for the disc, select “Undo
Finalize” at step 3.
* DO NOT power off during finalization, this will result
in malfunction.
To cancel finalizing...
(DVD-RW only)
• To cancel finalizing at step 4, press [STOP C], select
“Yes” with [K / L], then press [OK]. Finalizing is
canceled and the unit will be in stop mode.
Do you want to cancel ?
Yes
No
Finalizing 5%
• If appears when pressing [STOP C], you cannot
cancel finalizing because the finalizing has been in
certain progress.
• When selecting “No” and press [OK] or [BACK
finalizing will be continued.
• You cannot cancel finalizing the DVD+R/DVD-R once
it has started.
This operation may take a
while to be completed.
Finalizing is completed.
5
] ,
51EN
51EN
E7H42UD_DVDR3506-37_EN.indd 51E7H42UD_DVDR3506-37_EN.indd 51 2007/12/28 10:53:272007/12/28 10:53:27
Page 52
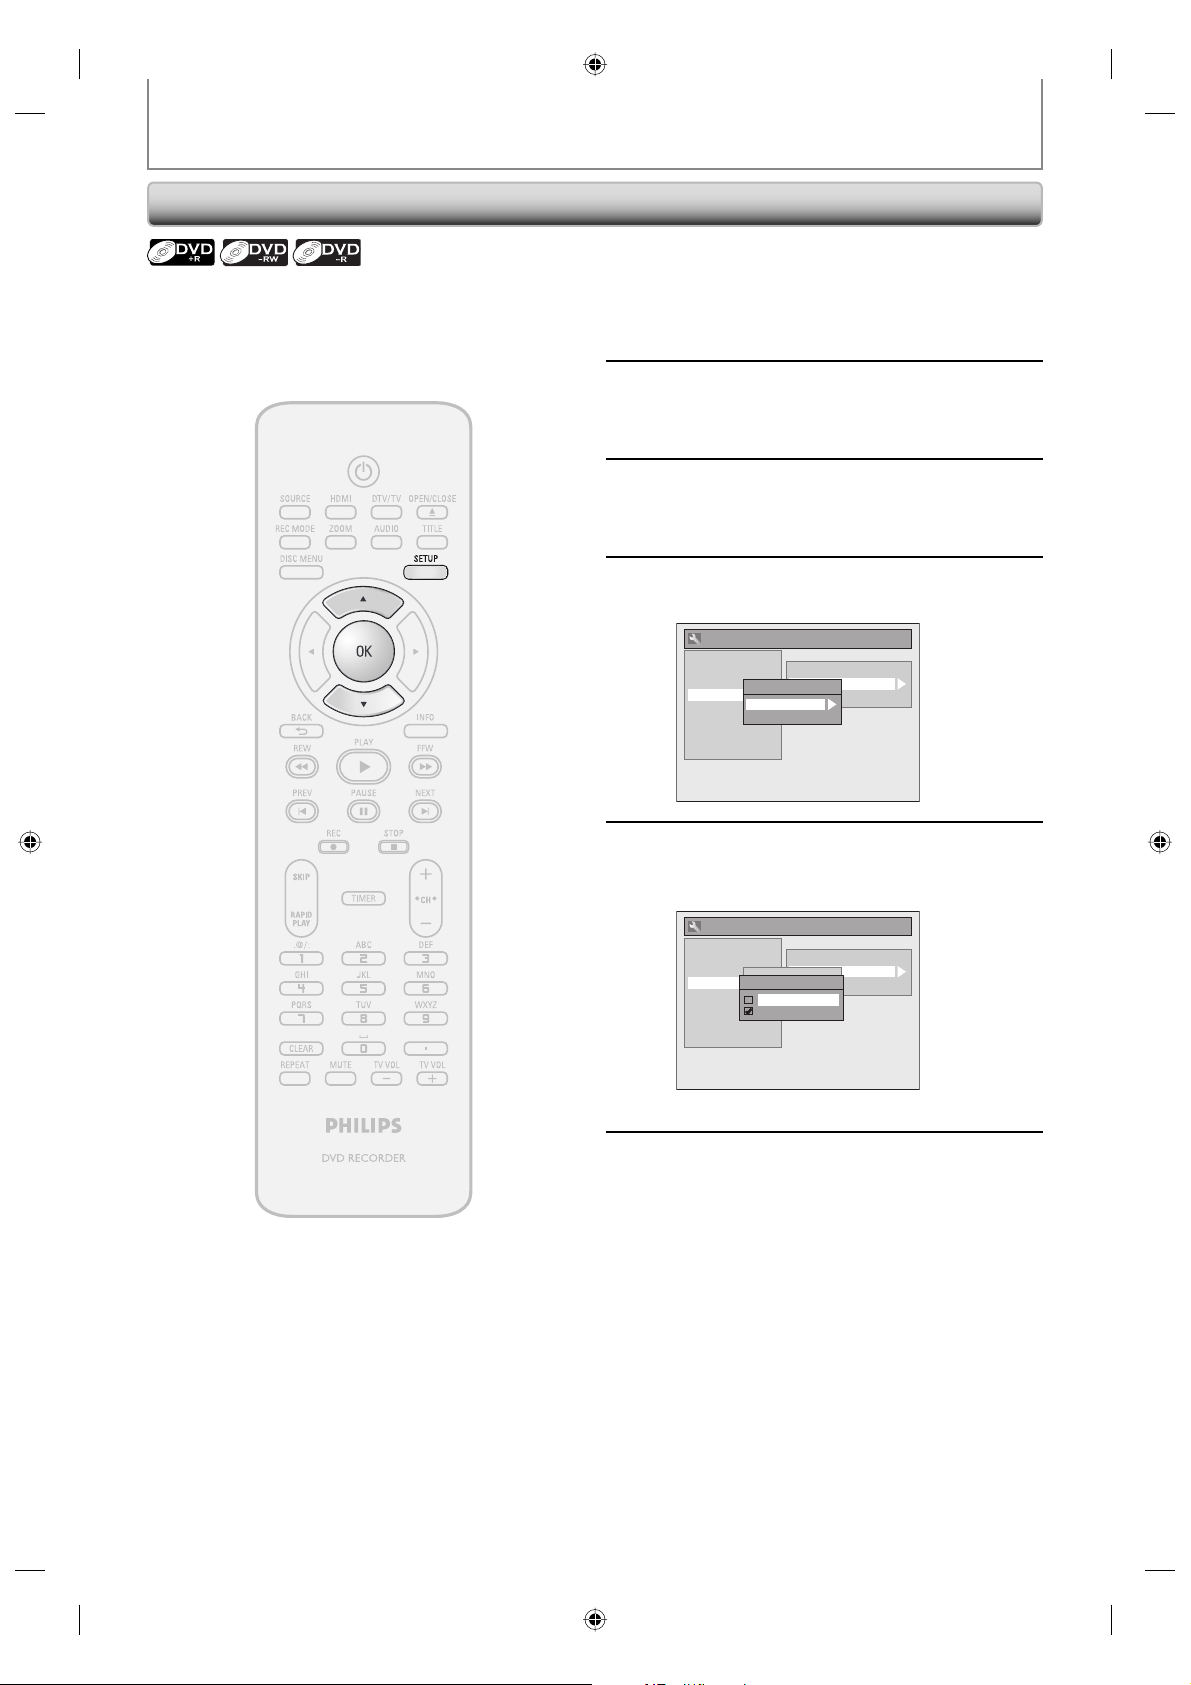
PLAYING THE DISCS IN OTHER DVD PLAYERS
Auto Finalizing
You can finalize discs automatically using this function.
You can use this function to finalize discs after finishing
all timer recordings and at the end of the disc space.
Press [SETUP] and use [K / L] to
select “General Setting”, then press
1
[OK].
“General Setting” menu will appear.
Use [K / L] to select “Recording”,
then press [OK].
2
“Recording” menu will appear.
Use [K / L] to select “Auto Finalize”,
then press [OK].
3
Use [K / L] to select “Disc Full” or
“End of Timer Rec”, then press [OK].
4
General Setting
Playback
Display
Video
Recording
Clock
Channel
DivX
HDMI
Reset All
Auto Chapter
Auto Finalize
Auto Finalize
Make Recording Compatible
Disc Full
End of Timer Rec
Use [K / L] to select “ON”, then press
[OK].
5
e.g.) “Disc Full”
General Setting
Playback
Display
Video
Recording
Clock
Channel
DivX
HDMI
Reset All
Your setting will be activated.
Auto Chapter
Auto Finalize
Auto Finalize
Make Recording Compatible
Disc Full
Disc Full
ON
End of Timer Rec
OFF
Press [SETUP] to exit.
6
52 EN52 EN
E7H42UD_DVDR3506-37_EN.indd 52E7H42UD_DVDR3506-37_EN.indd 52 2007/12/28 10:53:292007/12/28 10:53:29
Page 53
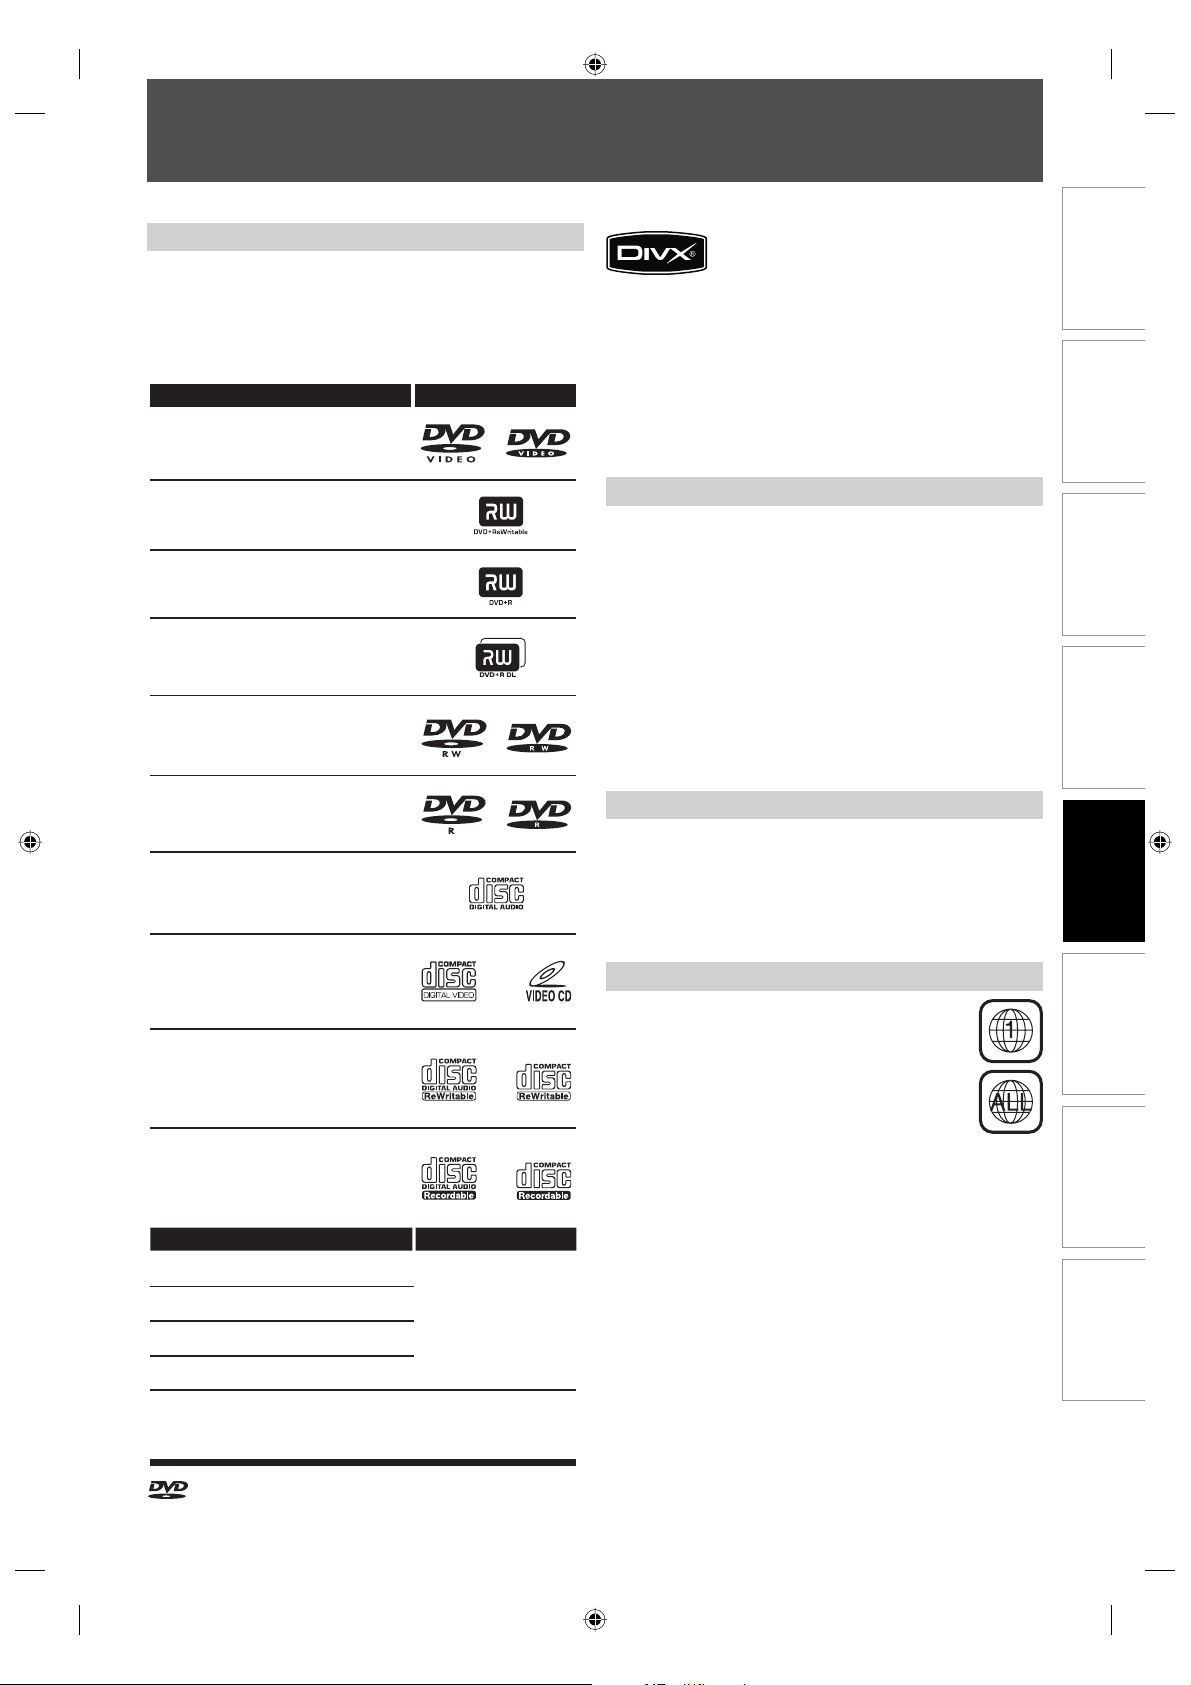
INFORMATION ON PLAYBACK
Before you play back DVD, read the following information.
Playable Discs and Files
This unit is compatible to play back the following discs.
To play back a DVD, make sure that it meets the
requirements for region codes and color systems as
described below. You can play back discs that have the
following logos will play back on the unit. Other disc
types are not guaranteed to play back.
LogosPlayable discs
DVD-video
DVD+RW
DVD+R
DVD+R Double Layer
DVD-RW
(Finalized video mode discs only)
DivX, DivX Certified, and associated logos
are trademarks of DivX, Inc. and are used
under license.
• Official DivX® Certified product; Plays DivX® 6.0, DivX® 5,
DivX® 4, DivX® 3, and DivX®VOD video content (in
compliance with DivX Certified™ technical requirements).
• Discs containing the DivX® files with the DivX® GMC (Global
Motion Compensation) playback feature, which is DivX®
supplemental function, cannot be played back on this unit.
* This unit cannot play back the disc contents protected
by Windows Media Digital Rights Management (DRM).
Unplayable Discs
The following discs will not play back on this unit.
• CD-ROM • Compact Disc-Interactive (CD-I)
• DVD-RAM • Video Single Disc (VSD)
• DVD-ROM • DVD-audio
• Unfinalized disc
• DVD contains MP3/Windows Media™ Audio/JPEG files
• DVD-R or DVD-RW recorded in VR mode or non
compatible recording format
On the following disc, the sound may not be heard.
• Super audio CD - Only the sound on the CD layer can be
heard. The sound on the high-density super audio CD
layer cannot be heard.
Recording
DVD-R
(Finalized video mode discs only)
CD-DA (audio CD)
video CD
CD-RW
CD-R
CD-DA
MP3
Windows Media™ Audio
JPEG
DivX®
MediaPlayable les
CD-RW/-R
CD-RW/-R
DVD+RW/+R
DVD-RW/-R
Color Systems
DVD is recorded in different color systems throughout
the world. The most common color system is NTSC
(which is used primarily in the United States and Canada).
This unit uses NTSC, so DVD you play back must be
recorded in the NTSC system. You cannot play back DVD
recorded in other color systems.
Region Codes
This unit has been designed to play back DVD
with region 1. DVD must be labeled for ALL
regions or for region 1 in order to play back on
the unit. You cannot play back DVD that are
labeled for other regions. Look for the symbols
on the right on your DVD. If these region
symbols do not appear on your DVD, you cannot
play back the DVD in this unit.
The number inside the globe refers to region of the
world.
A DVD labeled for a specific region can only play back on
the unit with the same region code.
Playback
EditingIntroduction Connections Basic Setup Function Setup Others
is a trademark of DVD Format/Logo Licensing Corporation.
53EN
53EN
E7H42UD_DVDR3506-37_EN.indd 53E7H42UD_DVDR3506-37_EN.indd 53 2007/12/28 10:53:312007/12/28 10:53:31
Page 54
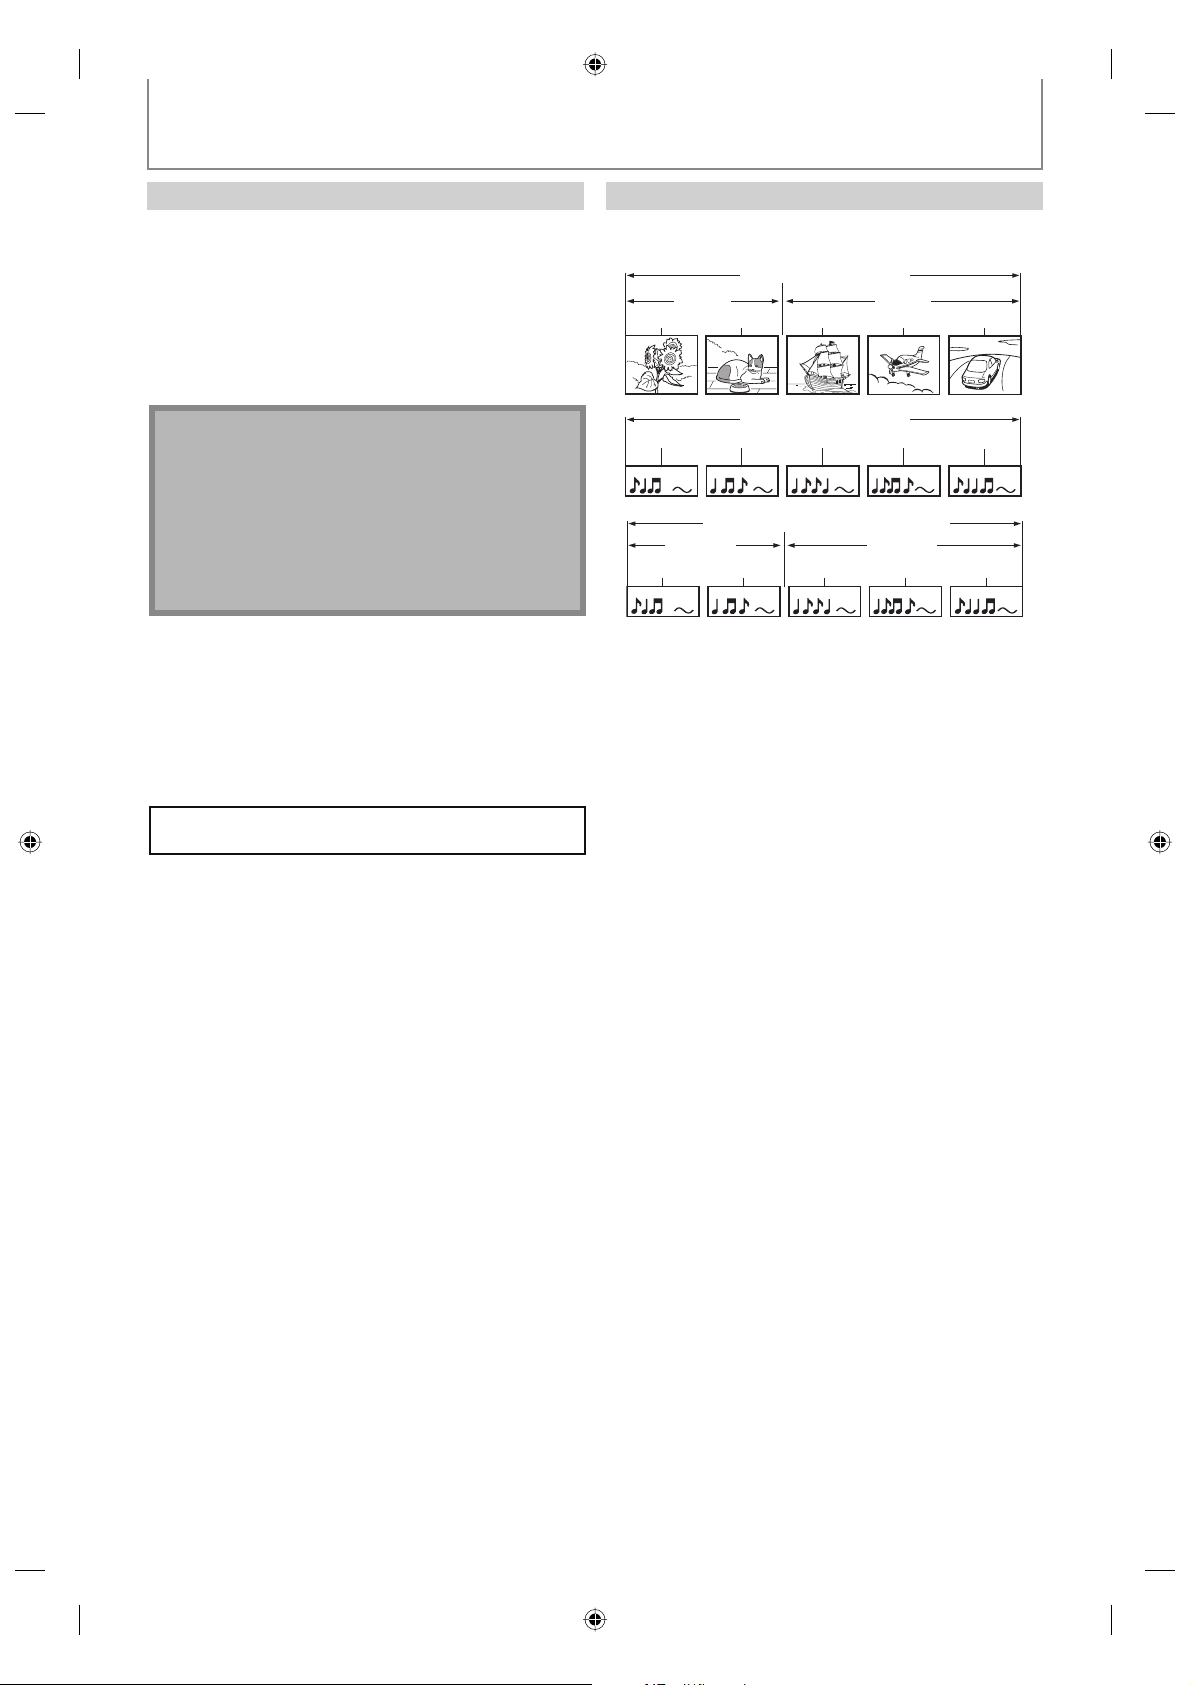
INFORMATION ON PLAYBACK
PBC (playback control) for Video CD
You can select images or information on the menu
screen by activating the PBC (playback control) function
of the video CD.
This unit conforms to ver.1.1 and ver. 2.0 of video CD
standard with PBC function.
Ver.1.1 (without PBC function): You can enjoy playback
picture as well as music CD.
Ver.2.0 (with PBC function): While using a video CD with
PBC function, “PBC” appears on the TV screen.
Note
• PBC setting turns to “ON” when loading video CD
with PBC function, thus, even after setting PBC to
“OFF” and ejecting the video CD then reloading the
video CD, this setting turns to “ON” automatically.
• Some operations cannot be performed while PBC
function is on. Cancel PBC function temporarily to
perform those operations by following the
instruction below.
1) Press [SETUP].
2) Use [K / L] to select “CD Playback Mode”, then
press [OK].
“CD Playback Mode” menu will appear.
3) Use [K / L] to select “PBC (Video CD only)”, then
press [OK].
4) Use [K / L] to select “ON” or “OFF”, then press [OK].
Your setting will be activated.
You can play back interactive software using menu
screens. Refer to instructions in the video CD.
Hint for DVD Playback
The contents of DVD are generally divided into titles.
Titles may be further subdivided into chapters.
DVD-video
title 1 title 2
chapter 1 chapter 2 chapter 1 chapter 2 chapter 3
audio CD, video CD
track 1 track 2 track 3 track 4 track 5
MP3, Windows Media™ Audio, JPEG
folder 1 folder 2
file 1 file 2 file 3 file 4 file 5
54 EN54 EN
E7H42UD_DVDR3506-37_EN.indd 54E7H42UD_DVDR3506-37_EN.indd 54 2007/12/28 10:53:322007/12/28 10:53:32
Page 55
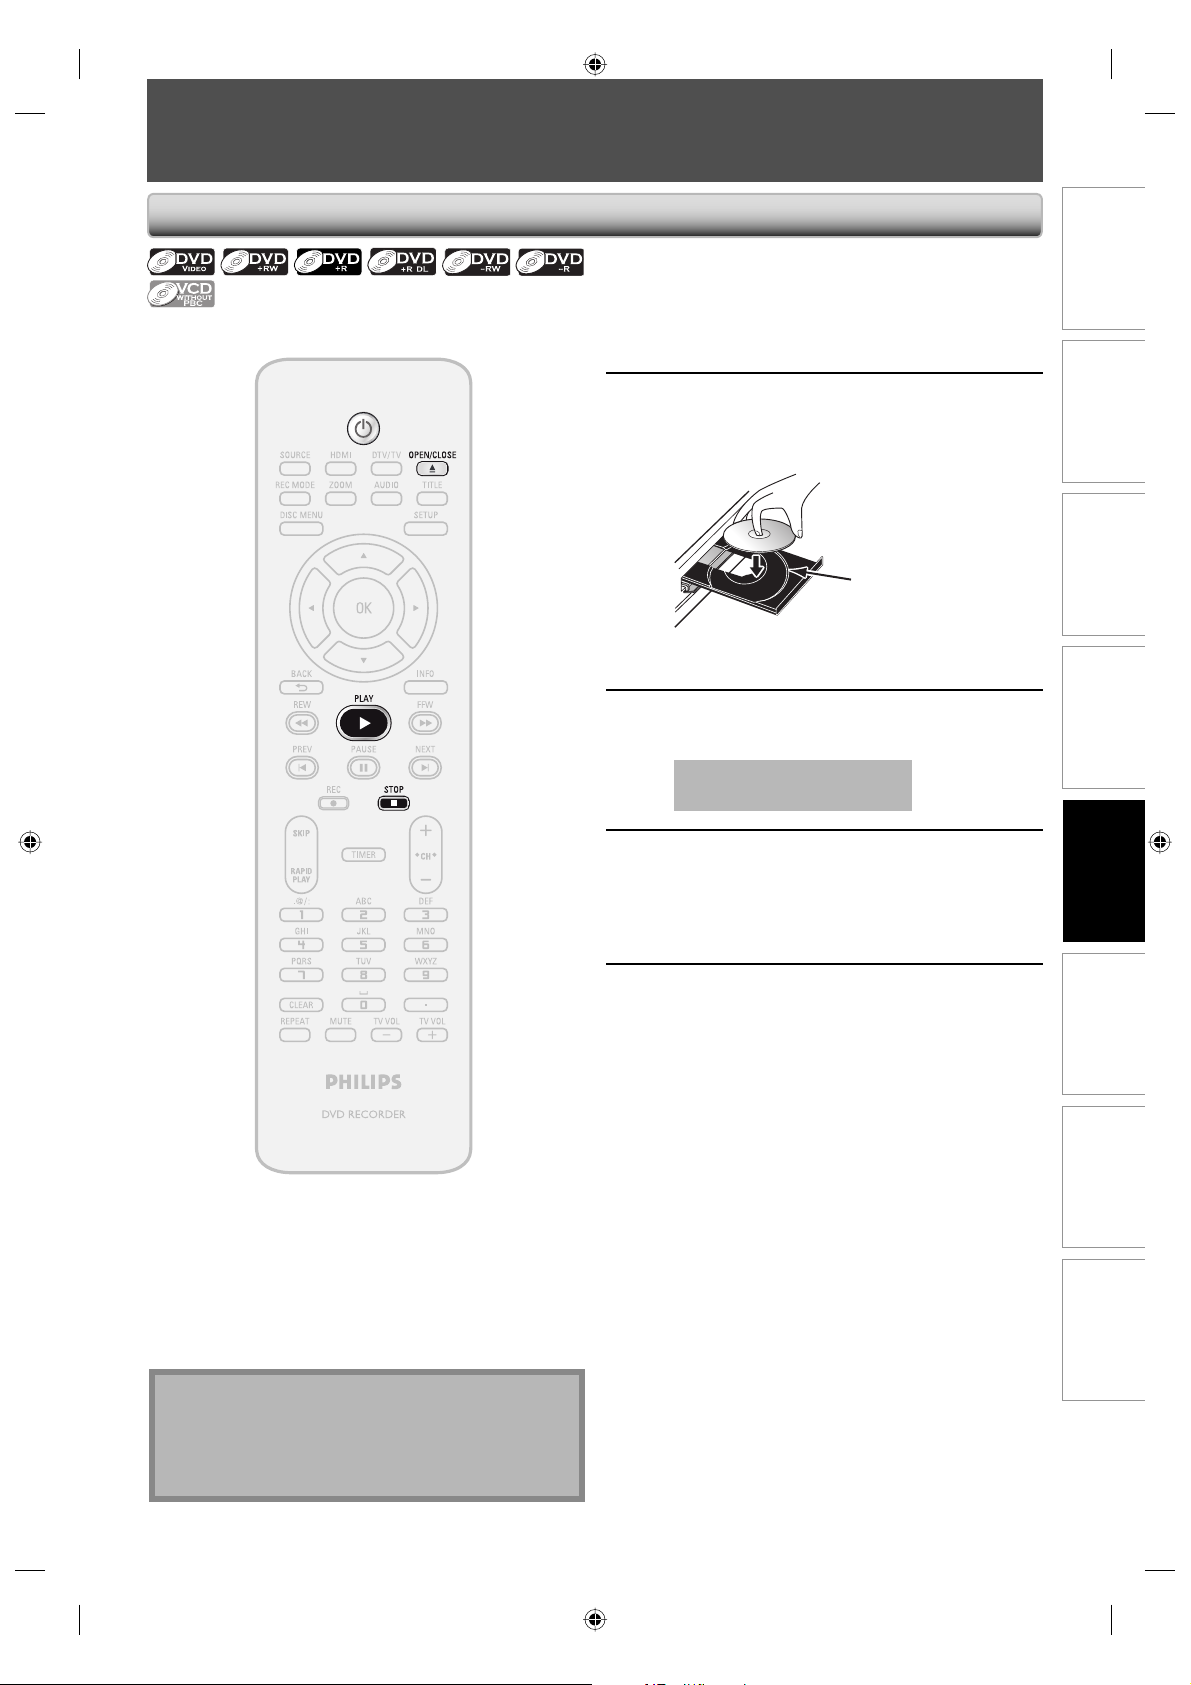
BASIC PLAYBACK
Direct Playback
Press [STANDBY-ON yy].
Turn on the TV and be sure to select the input to
1
2
3
4
which the unit is connected.
Press [OPEN/CLOSE A] to open the
disc tray and insert your disc with its
label facing up.
Align the disc to
the disc tray guide.
* Make sure the disc is compatible with this unit.
(Refer to page 53 for the list of compatible discs.)
Press [OPEN/CLOSE A] to close the
disc tray.
It may take a while to load
the disc completely.
Press [PLAY B] to start playback.
If you are playing back a DVD-video or video CD
with PBC function, a menu may appear.
Refer to “Using the Title / Disc Menu” on page
61.
Recording
Playback
Note
• Some discs may start playback automatically.
• You can select images or information on the menu
screen by activating PBC (playback control) function
(page 54).
Press [STOP C] once to stop playback
temporarily.
5
• Refer to “Resume Playback” on page 62.
EditingIntroduction Connections Basic Setup Function Setup Others
55EN
55EN
E7H42UD_DVDR3506-37_EN.indd 55E7H42UD_DVDR3506-37_EN.indd 55 2007/12/28 10:53:332007/12/28 10:53:33
Page 56
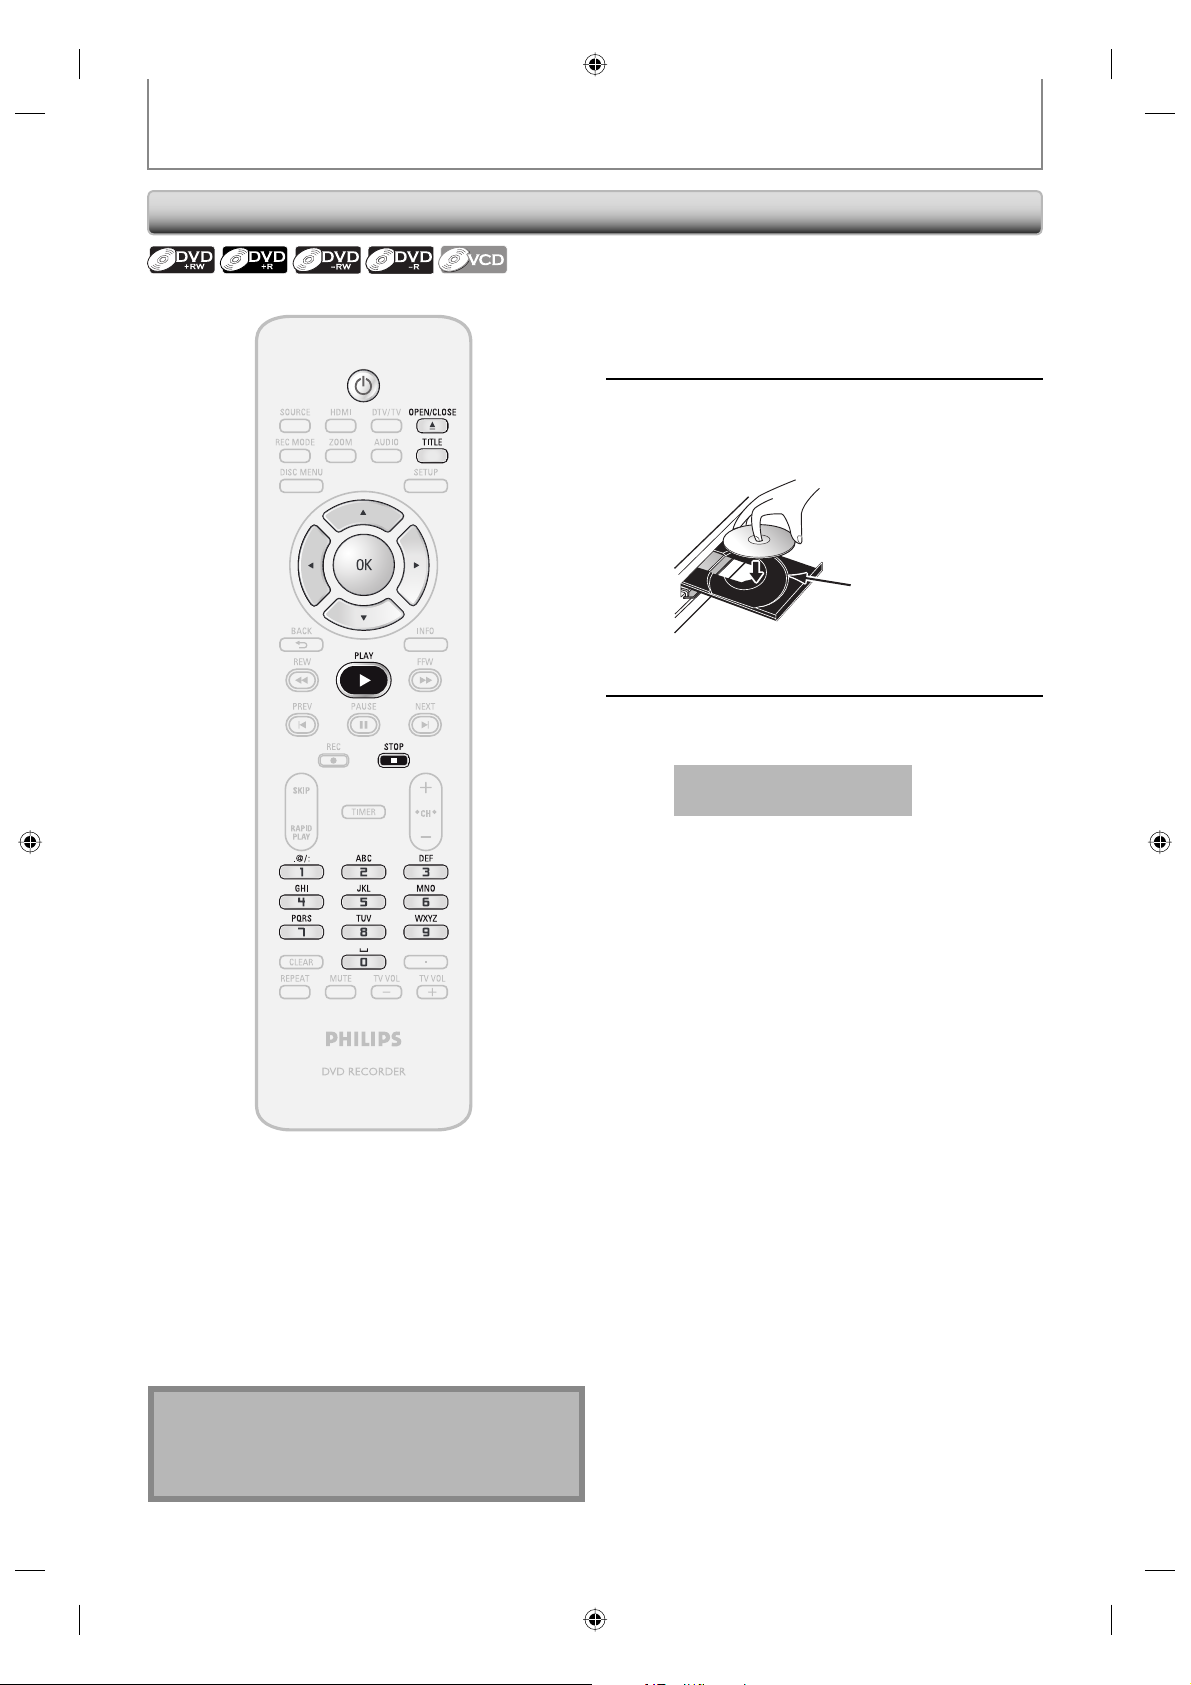
Playback from the Title List
BASIC PLAYBACK
Press [STANDBY-ON yy].
Turn on the TV and be sure to select the input to
1
2
3
which the unit is connected.
Press [OPEN/CLOSE A] to open the
disc tray and insert your disc with its
label facing up.
* Make sure the disc is compatible with this unit.
(Refer to page 53 for the list of compatible discs.)
Press [OPEN/CLOSE A] to close the
disc tray.
It may take a while to load
the disc completely.
• To exit the title list, press [STOP C].
• To resume the title list, press [TITLE].
Align the disc to
the disc tray guide.
Note
• Some discs may start playback automatically.
• You can also start playback by pressing [PLAY B]
instead of [OK] at step 4.
56 EN56 EN
E7H42UD_DVDR3506-37_EN.indd 56E7H42UD_DVDR3506-37_EN.indd 56 2007/12/28 10:53:352007/12/28 10:53:35
Page 57
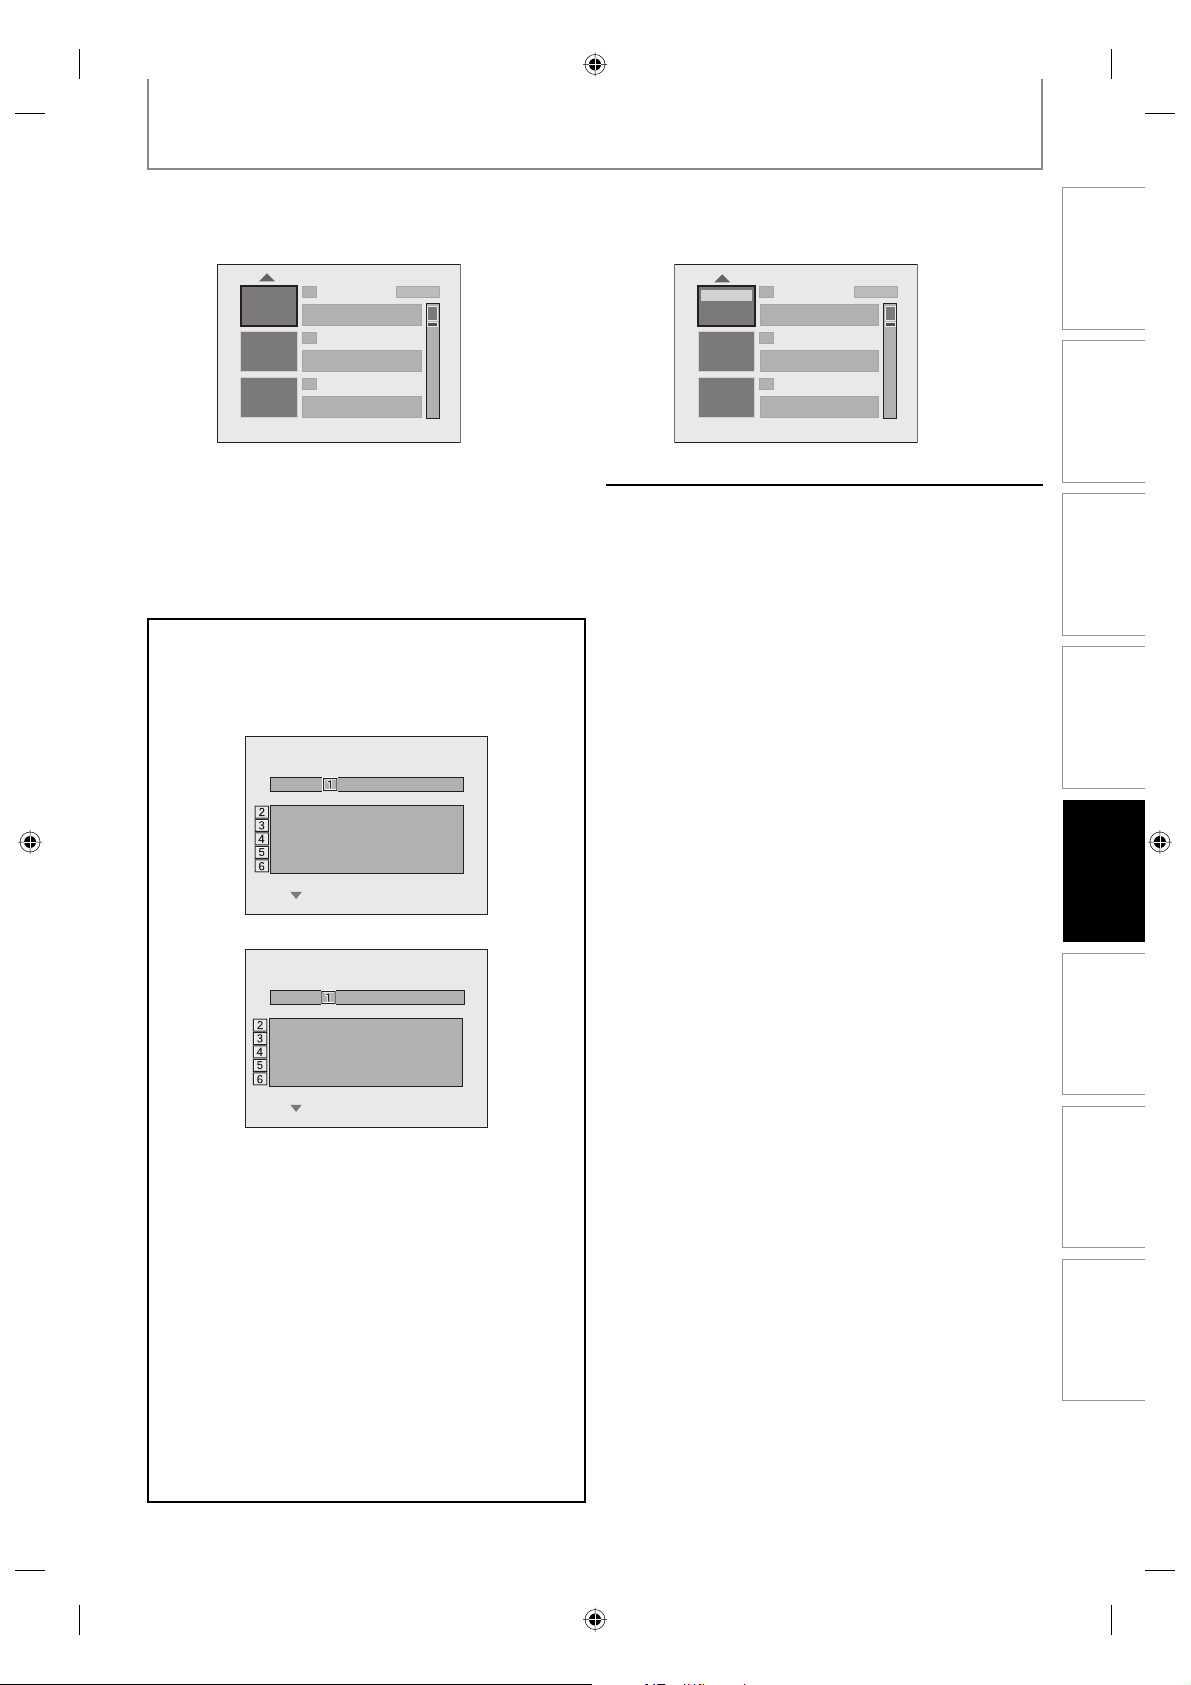
BASIC PLAYBACK
Use [K / L] to select a desired title,
then press [OK].
4
• For Video CD, when “PBC (Video CD only)” in
“CD playback Mode” menu is set to “ON”, the
video CD main menu will appear when
inserting a disc. In such case, select a numbered
menu with [the Number buttons].
• Press [B] to display the next page, and press
[{] to display the previous page.
If you want to see disc information, press [{ ] when the
first page of the title list is displayed or press [ K ] when
the first title is selected but not when “Play”, “Edit” or
“Overwrite” is highlighted.
e.g.) DVD+RW
1 SP (2Hr)
NOV/21/07 11:00AM
NOV/21/07 0:20:44
2
NOV/22/07 11:35
NOV/22/07 0:10:33
3
EMPTY TITLE
1:37:52 SP(2Hr)
Disc DVD+RW
Total Titles 3
Disc Space Used 0:30:48
Disc Protect OFF
Make Edits Compatible Needed
CH12 SP
AM CH13 EP
No Disc Name
Use [K / L] to select “Play”, then
press [OK].
5
Playback will start.
Play
Edit
Overwrite
1 SP (2Hr)
NOV/21/07 11:00AM
NOV/21/07 0:20:44
2
NOV/22/07 11:35
NOV/22/07 0:10:33
3
EMPTY TITLE
1:37:52 SP(2Hr)
CH12 SP
AM CH13 EP
Press [STOP C] once to stop playback
temporarily.
6
• Refer to “Resume Playback” on page 62.
To eject the disc, press [OPEN/CLOSE A] to
open the disc tray, then remove the disc before
turning off the unit.
Recording
Playback
e.g.) DVD+R
No Disc Name
Disc DVD+R
Total Titles 5
Disc Space Used 1:30:48
Disc Protect OFF
Finalize Finalized
1. Disc name
(Default “No Disc Name”)
2. Disc type
(DVD+RW/DVD+R/ DVD-RW/DVD-R)
3. Total number of title
(include “EMPTY TITLE”)
4. Total time of recorded disc space
5. Status of disc protection
(“ON” is protected disc.)
6. Making edits compatible/finalize
• When DVD+RW is inserted:
If the disc needs to be set “Make Edits Compatible”,
“Needed” is displayed. Otherwise, “Not Needed” is
displayed. (Refer to page 83.)
• When DVD+R, DVD-RW or DVD-R is inserted:
If “Finalize” is done, “Finalized” is displayed.
Otherwise, “Unfinalized” is displayed.
EditingIntroduction Connections Basic Setup Function Setup Others
57EN
57EN
E7H42UD_DVDR3506-37_EN.indd 57E7H42UD_DVDR3506-37_EN.indd 57 2007/12/28 10:53:372007/12/28 10:53:37
Page 58
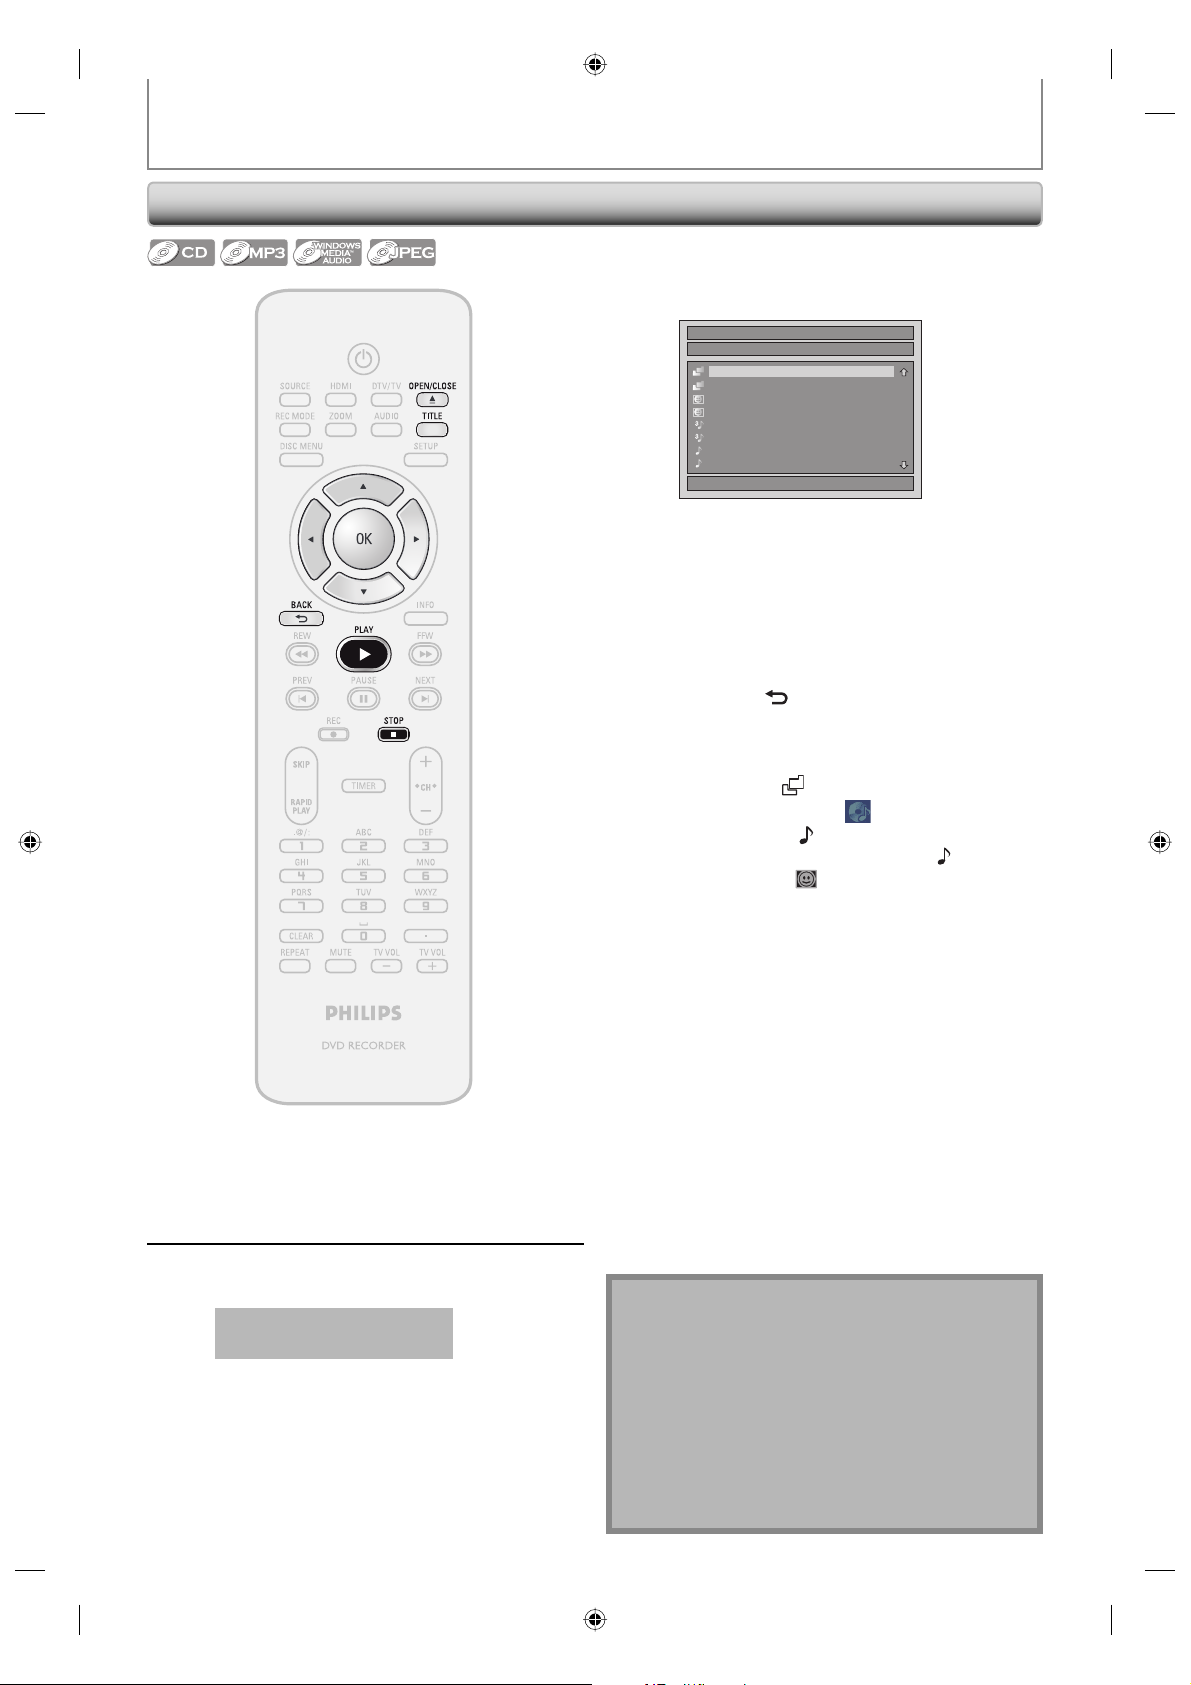
BASIC PLAYBACK
Playing Back an Audio CD and a CD-RW/-R with MP3/Windows Media™ Audio/JPEG Files
Follow steps 1 to 2 in “Direct
Playback” on page 55.
1
Press [OPEN/CLOSE A] to close the
disc tray.
2
When an audio CD is inserted, track list will
appear.
When a CD-RW/-R with MP3/Windows Media™
Audio/JPEG files is inserted, file list will appear.
• To exit the track/file list, press [STOP C].
• To resume the track/file list, press [TITLE].
58 EN58 EN
It may take a while to load
the disc completely.
Use [K / L] to select a desired folder
or track/file, then press [OK].
3
When selecting track/file:
Playback will start.
When selecting the folder (Not available for audio CD):
The files in the folder will appear.
Use [K / L] to select the file or folder you want to play
back, then press [OK].
• Press [PLAY B], [OK] or [B] to move to any lower
• Press [s] or [BACK
Hints for audio CD tracks and MP3 / Windows Media™
Audio / JPEG files:
• Folders are shown by
• Audio CD tracks are shown by
• MP3 files are shown by
• Windows Media™ Audio files are shown by
• JPEG files are shown by
• The system can recognize up to 255 folders, up to 99
• Letters of a file/folder name overflowing the given space
• If there are no files in the folder, “No Files” will be displayed.
It is recommended that files to be played back in this
unit are recorded under the following specifications:
<MP3 / Windows Media™ Audio>
• Sampling frequency : 44.1 kHz or 48 kHz.
• Constant bit rate : 112 kbps - 320 kbps (MP3),
<JPEG>
• Upper limit : 6,300 x 5,100 dots.
• Lower limit : 32 x 32 dots.
• File size of image maximum : 12 MB.
e.g.) File list
File List
DISC NAME
A
B
1 JPEG file1
2 JPEG file2
3 MP3 file1
4 MP3 file2
5 WMA file1
6 WMA file2
hierarchies.
hierarchy.
tracks/999 files.
will be displayed as “...”. Unrecognizable characters will
be replaced with asterisks.
] to move back to the previous
.
3
.
.
1/ 2
.
.
48 kbps - 192 kbps
(Windows Media™ Audio).
Note
• The audio source of MP3 files cannot be recorded as
digital sound by an MD or DAT deck.
• Files whose extension is other than “.mp3(MP3)”
“.wma(Windows Media™ Audio)” or “.jpg / .jpeg(JPEG)”
will not be listed.
• Some unplayable folders or files may be listed due to
the recording status.
• High-resolution JPEG files take longer to be displayed.
• Progressive JPEG files (JPEG files saved in progressive
format) cannot be played back on this unit.
E7H42UD_DVDR3506-37_EN.indd 58E7H42UD_DVDR3506-37_EN.indd 58 2007/12/28 10:53:392007/12/28 10:53:39
Page 59
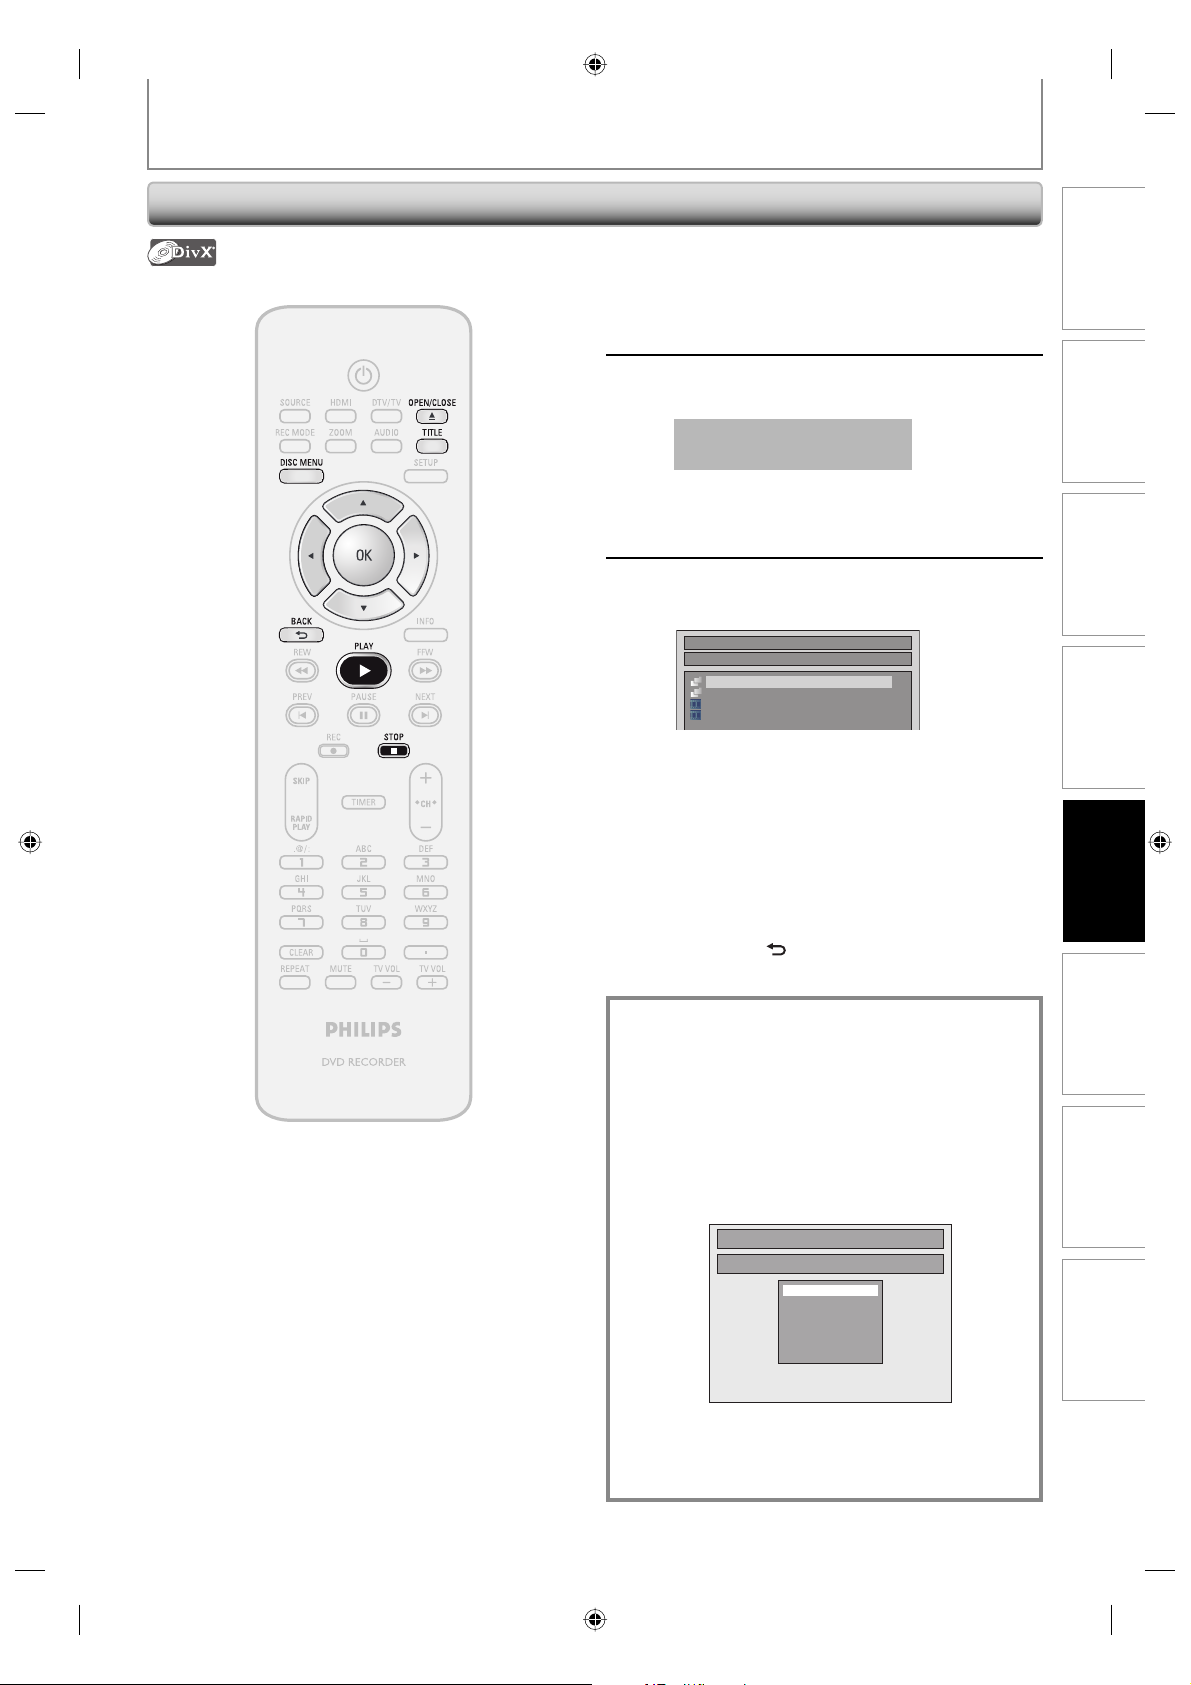
Playing Back a DivX®
BASIC PLAYBACK
Follow steps 1 to 2 in “Direct
Playback” on page 55.
1
Press [OPEN/CLOSE A] to close the
disc tray.
2
3
It may take a while to load
the disc completely.
File list will appear automatically.
• To exit the file list, press [STOP C].
• To resume the file list, press [TITLE].
Use [K / L] to select the desired
folder or file, then press [OK].
File List
DISC NAME
Folder1
Folder2
1 DivX File1
2 DivX File2
Recording
When selecting file:
Playback will start.
When selecting folder:
The files in the folder will appear.
Use [K / L] to select the file you want to play back, then
press [OK].
• Press [PLAY B], [OK] or [B] to move to any lower
hierarchy.
• Press [s] or [BACK
above.
] to move back to the folder
To play back the DivX® subtitle created by
the user...
The subtitle created by the user can be displayed
during DivX® playback.
1) After selecting the DivX® file, the “Subtitle List”
will appear when “DivX Subtitle” is set to
anything other than “OFF”. (Refer to page 95.)
2) Use [K / L] to select the desired extension you
want to display, then press [OK].
Subtitle List
DivX File1
OFF
SMI
SRT
SUB
ASS
SSA
TXT
Playback
EditingIntroduction Connections Basic Setup Function Setup Others
DivX® with the subtitle starts playback. The subtitle
cannot be displayed when the setting is “OFF”.
• If there is more than one extension, the extension
selection appears in the subtitle list.
59EN
59EN
E7H42UD_DVDR3506-37_EN.indd 59E7H42UD_DVDR3506-37_EN.indd 59 2007/12/28 10:53:412007/12/28 10:53:41
Page 60
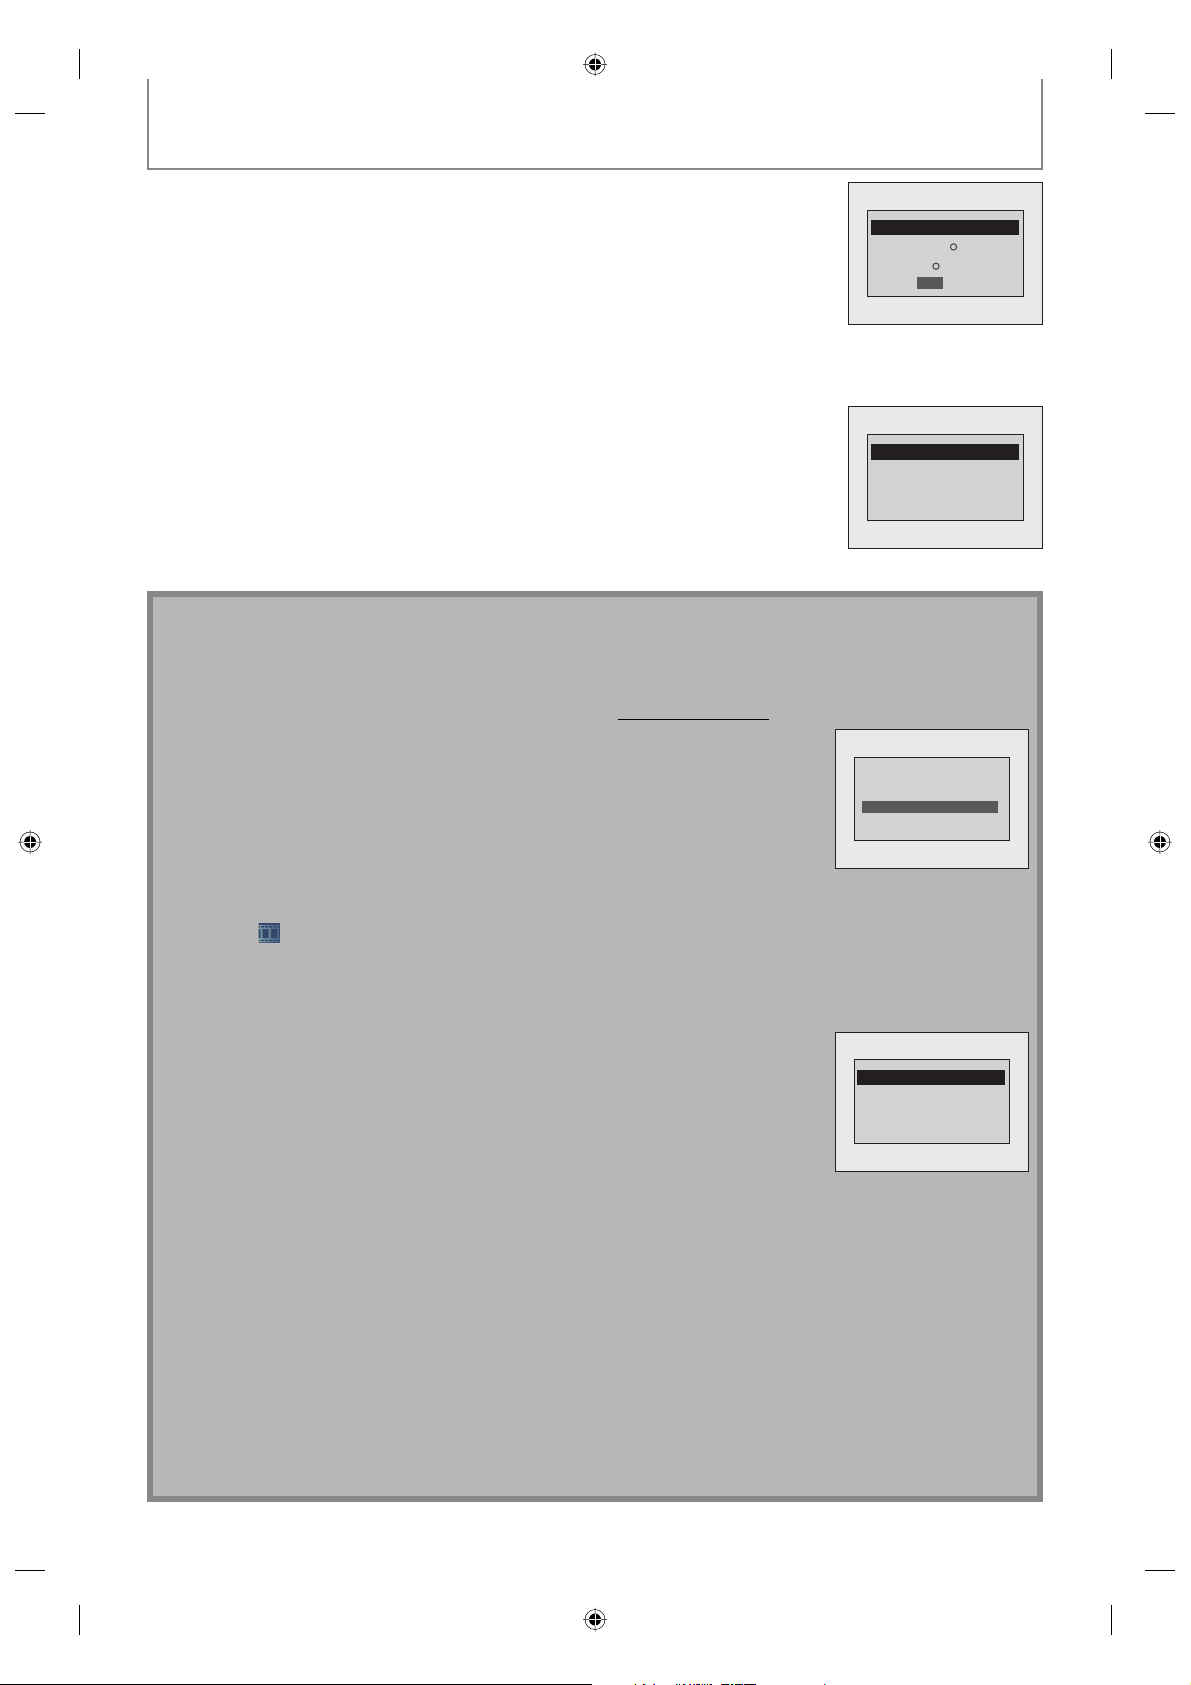
BASIC PLAYBACK
It is recommended that files to be played back in this
unit are recorded under the following specifications:
Official DivX® Certified product
• Playable codec of AVI files : DivX®3.x, DivX®4.x, DivX®5.x
• Maximum size of image : 720 x 480 @30 fps
720 x 576 @25 fps
• Sampling frequency of audio : 8 kHz - 48 kHz
• Audio type : MPEG1 audio layer 3(MP3),
MPEG1 audio layer 2,
Dolby Digital
Hint for the purchased or rental official DivX®
Certified product
• When you purchased or rental a DivX® file through the
official site of DivX® video which is called DivX® VideoOn-Demand (VOD) services, a registration code is
required every time you get the new file from the DivX®
VOD services. Refer to “DivX® VOD” on page 95.
Note for DivX®
• DivX® is a codec (compression/decompression) that can
compress images to a very small amount of data. The
software can compress video data from almost any
devices to the size that can be sent on the Internet
without compromising visual quality of the images.
• A file with an extension of “.avi” and “.divx” is called an
DivX® file. All files with the “.avi” extension are recognized
as MPEG4.
• Files whose extension other than “.avi” and “.divx” will not
be listed on the DivX® menu. However, unplayable folders
and files may be displayed, depending on the recording
conditions.
• Even if the file has an extension of either “.avi” and “.divx”,
this unit cannot play it back if it is recorded in the format
other than DivX®.
• A symbol of
• A maximum of 255 folders or 999 files may be recognized
in a disc.
• Up to 8 hierarchies can be recognized in a folder. Files in
the 9th or deeper hierarchies cannot be played back.
• When there are 9 or more files, a down arrow “L” appears,
indicating that the user can view another part on the
previous page. The current page number and the number
of total pages are shown below the down arrow “L”.
• Letters of a file/folder name overflowing the given space
will be displayed as “...”. Unrecognizable characters will be
replaced with asterisks.
• You can play back the disc recorded in multi-session.
• It may take a while for audio and images to be output
after you inserted a disc and pressed [PLAY B].
• When playing back the files recorded in high bit rates, the
images can be interrupted in some occasions.
• Although DivX® logo has been obtained for this unit, it
may not be able to play back some data, depending on
the characteristics, bit rates, or audio format settings, etc.
• A DivX® file whose file size exceeds 2 GB cannot be played
back.
• If a large-sized DivX® file is selected, it may take a while to
start the playback (over 20 seconds sometimes).
• If you try to playback the DivX® file that has the screen
resolution which this unit does not support, the playback
will be stopped and error message will appear.
is shown on the top of the file name.
• Some DivX® VOD files are
restricted with the limited
playable times (you cannot
play them back beyond the
limit). If your DivX® VOD file
has such limit, the playback
DivX® VOD Rental
This rental has views left.
Do you want to use one
of your views now?
No
Yes
confirmation screen will
appear.
Use [s / B] to select “Yes” if you want to play back the
file, or to select “No” if you do not wish to play it back.
Then, press [OK] to confirm the selection.
• You cannot play back the
DivX® VOD files, of which
rental period has been
expired. In such case, press
[TITLE] and select other files
Rental Expired
This rental is expired.
Please push 'TITLE'.
that can be played back.
• If DivX® files written on a CD-RW/-R cannot be played
back, rewrite them on a DVD+RW/+R or DVD-RW/-R and
try to play back.
• For more information for DivX®, please visit
http://www.divx.com.
• If you insert a CD-RW/-R with
DivX® files that are mixed
with MP3/Windows Media™
Audio/JPEG files, the
playback media selection
screen will be displayed.
Please select the media
to play back.
Video
Audio & Picture
Please select “Video” and
proceed to next step.
• Press [DISC MENU] to call up the playback media
selection screen in stop mode.
• If you select “Audio & Picture”, instead of “Video” on the
playback media selection screen, this unit can play back
MP3/Windows Media™ Audio/JPEG files.
• Some DivX® files cannot be played back on this unit due
to the configuration and characteristics of the disc, or due
to the condition of recording
and authoring software.
• You cannot play back the
DivX® VOD files obtained
with different registration
codes on this unit. Press
Authorization Error
This player is not authorized to
play this video.
Please push 'TITLE'.
[TITLE] and select other files
that can be played back.
Note for DivX® Subtitle
• To utilize this function, the following conditions must
meet.
– “DivX Subtitle” must be activated in “DivX” menu. (Refer
to “DivX Subtitle” on page 95.)
– Playback file and the subtitle file must have the same
name.
– Playback file and the subtitle file must locate in the same
folder.
– Only the subtitle files with the following extensions are
supported; .smi (.SMI), .srt (.SRT), .sub (.SUB), .ass (.ASS), .
ssa (.SSA), .txt (.TXT).
(.sub (.SUB) and .txt (.TXT) files may not be recognized.)
– The subtitles that exceeds the playback time of the DivX®
file will not be displayed.
60 EN60 EN
E7H42UD_DVDR3506-37_EN.indd 60E7H42UD_DVDR3506-37_EN.indd 60 2007/12/28 10:53:432007/12/28 10:53:43
Page 61
BASIC PLAYBACK
Using the Title / Disc Menu
DVD or video CD with PBC function may contain a title
list, which describes the contents of the disc, or a disc
menu, which guides you through the available functions
in the disc.
1) Press [TITLE] or [DISC MENU] to call up the title list
or disc menu.
2) Use [K / L / { / B] to make a selection, and then
press [OK] to enable your selection.
3) Press [STOP C] to exit.
Note
• You can select a numbered menu with [the Number
buttons] also.
• Menus vary among discs. Refer to the information
accompanying the disc for details.
• [TITLE] or [DISC MENU] will not always be active
with all DVD.
• For video CD, when “PBC (Video CD only)” in “CD
Playback Mode” menu is “ON”, the video CD main
menu will appear when inserting a disc.
Pause
1) During playback, press [PAUSE F].
Playback will be paused and sound will be muted.
F
2) Press [PLAY B] to return to the normal playback.
Note
• On DVD, set “Still Mode” to “Field” in “Playback”
menu if pictures in the pause mode are blurred.
(Refer to page 90.)
Recording
Playback
EditingIntroduction Connections Basic Setup Function Setup Others
61EN
61EN
E7H42UD_DVDR3506-37_EN.indd 61E7H42UD_DVDR3506-37_EN.indd 61 2007/12/28 10:53:442007/12/28 10:53:44
Page 62
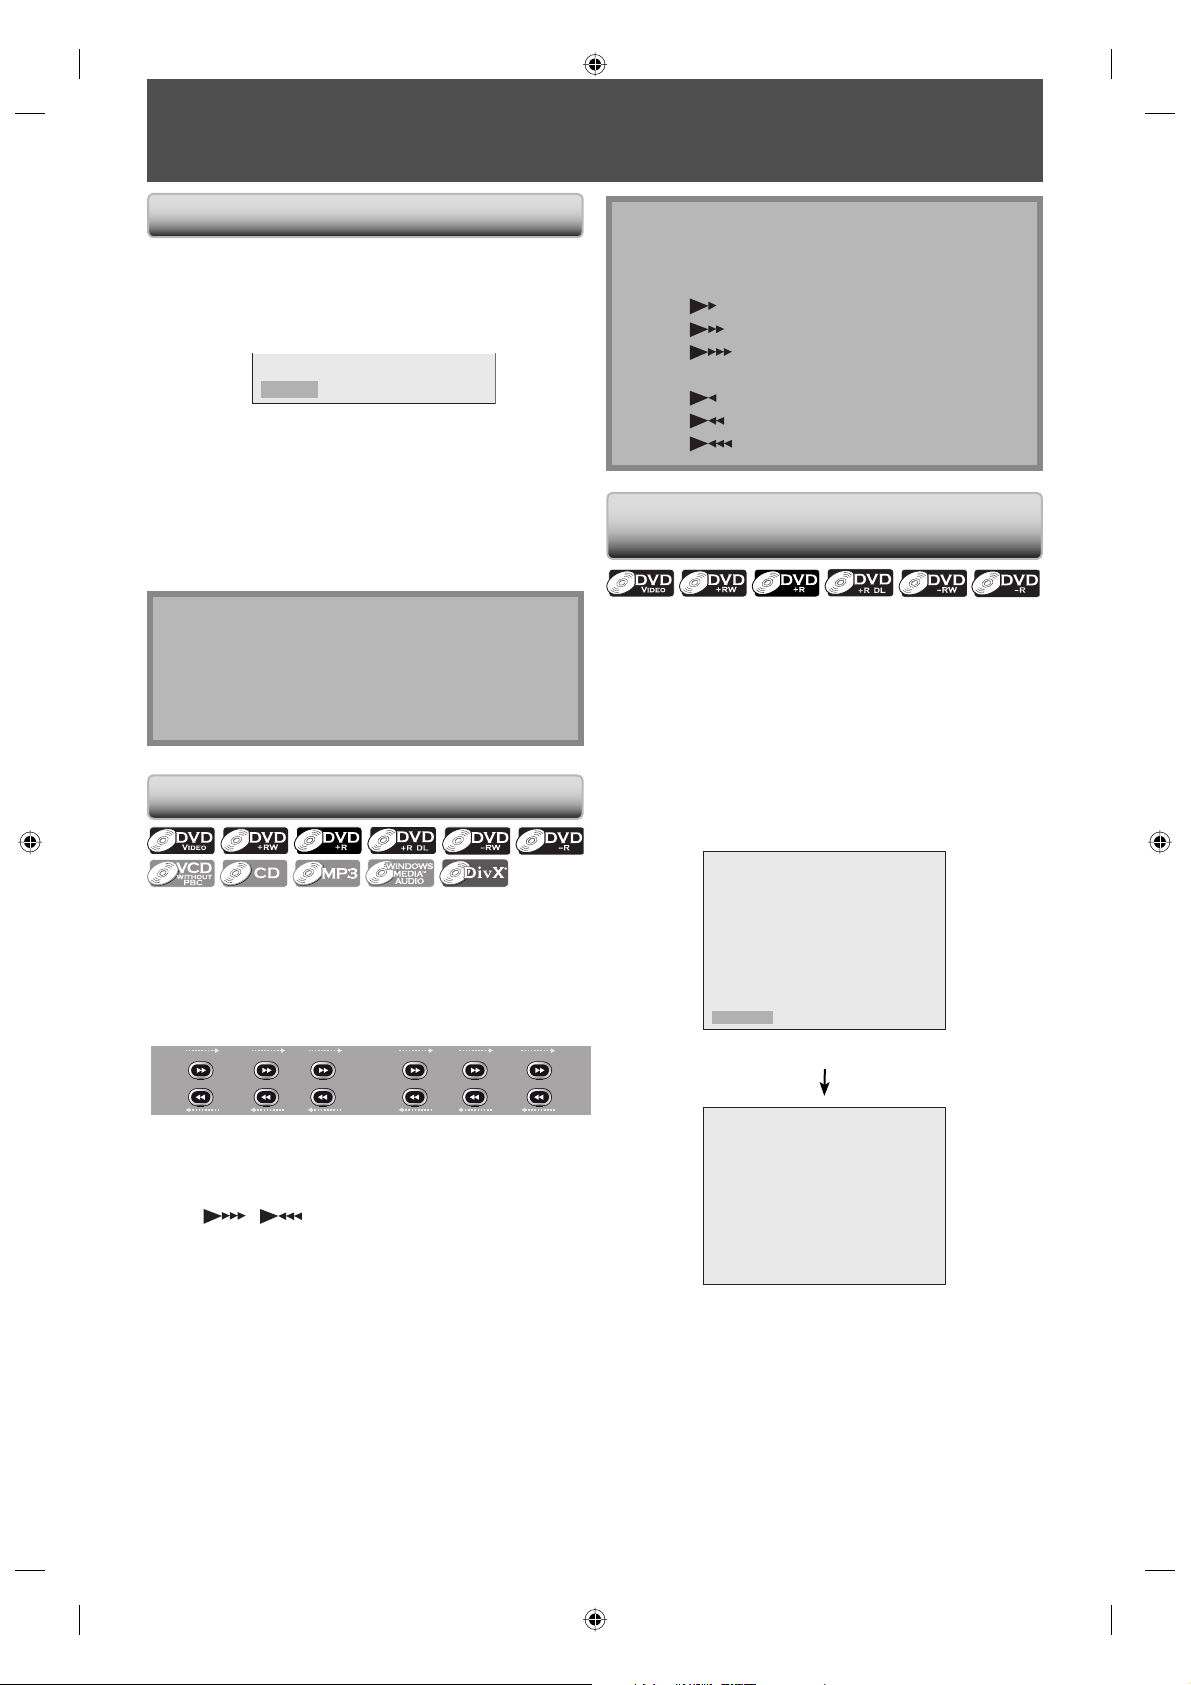
SPECIAL PLAYBACK
Resume Playback
You can play back from where you stopped playing back
the disc last.
1) During playback, press [STOP C].
The resume message will appear.
Resume ON
2) Press [PLAY B].
In a few seconds, playback will resume from the point
at which it stopped last. You can resume playback at
the same point even if you turn off the unit.
To cancel the resume playback and start playing back
the disc from the beginning, press [STOP C] again
while the playback is stopped.
Note
• For MP3/Windows Media™ Audio/JPEG files, playback
will resume from the beginning of the file at which
playback was stopped.
• Some video CD with the PBC function resume
playback from the beginning of the track.
Fast Forward / Fast Reverse Playback
Note
• Forward/reverse speed will be indicated with icons
as follows.
forward (approx. speed)
2x:
20x:
40x:
reverse (approx. speed)
5x:
20x:
40x:
Skipping TV Commercials During
Playback
You can skip TV commercials to enjoy the recorded
programs without interrupting.
During playback, press [SKIP].
Normal playback will start at 30 seconds ahead from the
point you press [SKIP].
Every time you press [SKIP], the searching point will be
extended by 30 seconds ahead.
You can press [SKIP] up to 6 times (180 seconds).
1) During playback, press [FFW D] or [REW E].
Every time you press [FFW D] or [REW E],
approximate speed will be changed as follows.
Fast forward or fast reverse playback across titles (for
DVD) or files (for MP3 / Windows Media™ Audio files) is
not possible.
normal
20x
For video CD, approximate forward/reverse speeds are
2x, 8x, 16x.
For audio CD, MP3/Windows Media™ Audio files,
approximate speed is fixed at 8x with sound (indicated
with / ).
Picture quality of DivX® files in fast reverse is lower
than that in fast forward.
For some DivX® files, fast forward/fast reverse may not
function.
2) Press [PLAY B] to return to the normal playback.
speed
playback
2x 20x5x 40x40x
e.g.) Press [SKIP] once.
Skip 30 sec.
(forwarding 30 seconds)
B
Playback will return to the normal playback.
62 EN62 EN
E7H42UD_DVDR3506-37_EN.indd 62E7H42UD_DVDR3506-37_EN.indd 62 2007/12/28 10:53:452007/12/28 10:53:45
Page 63
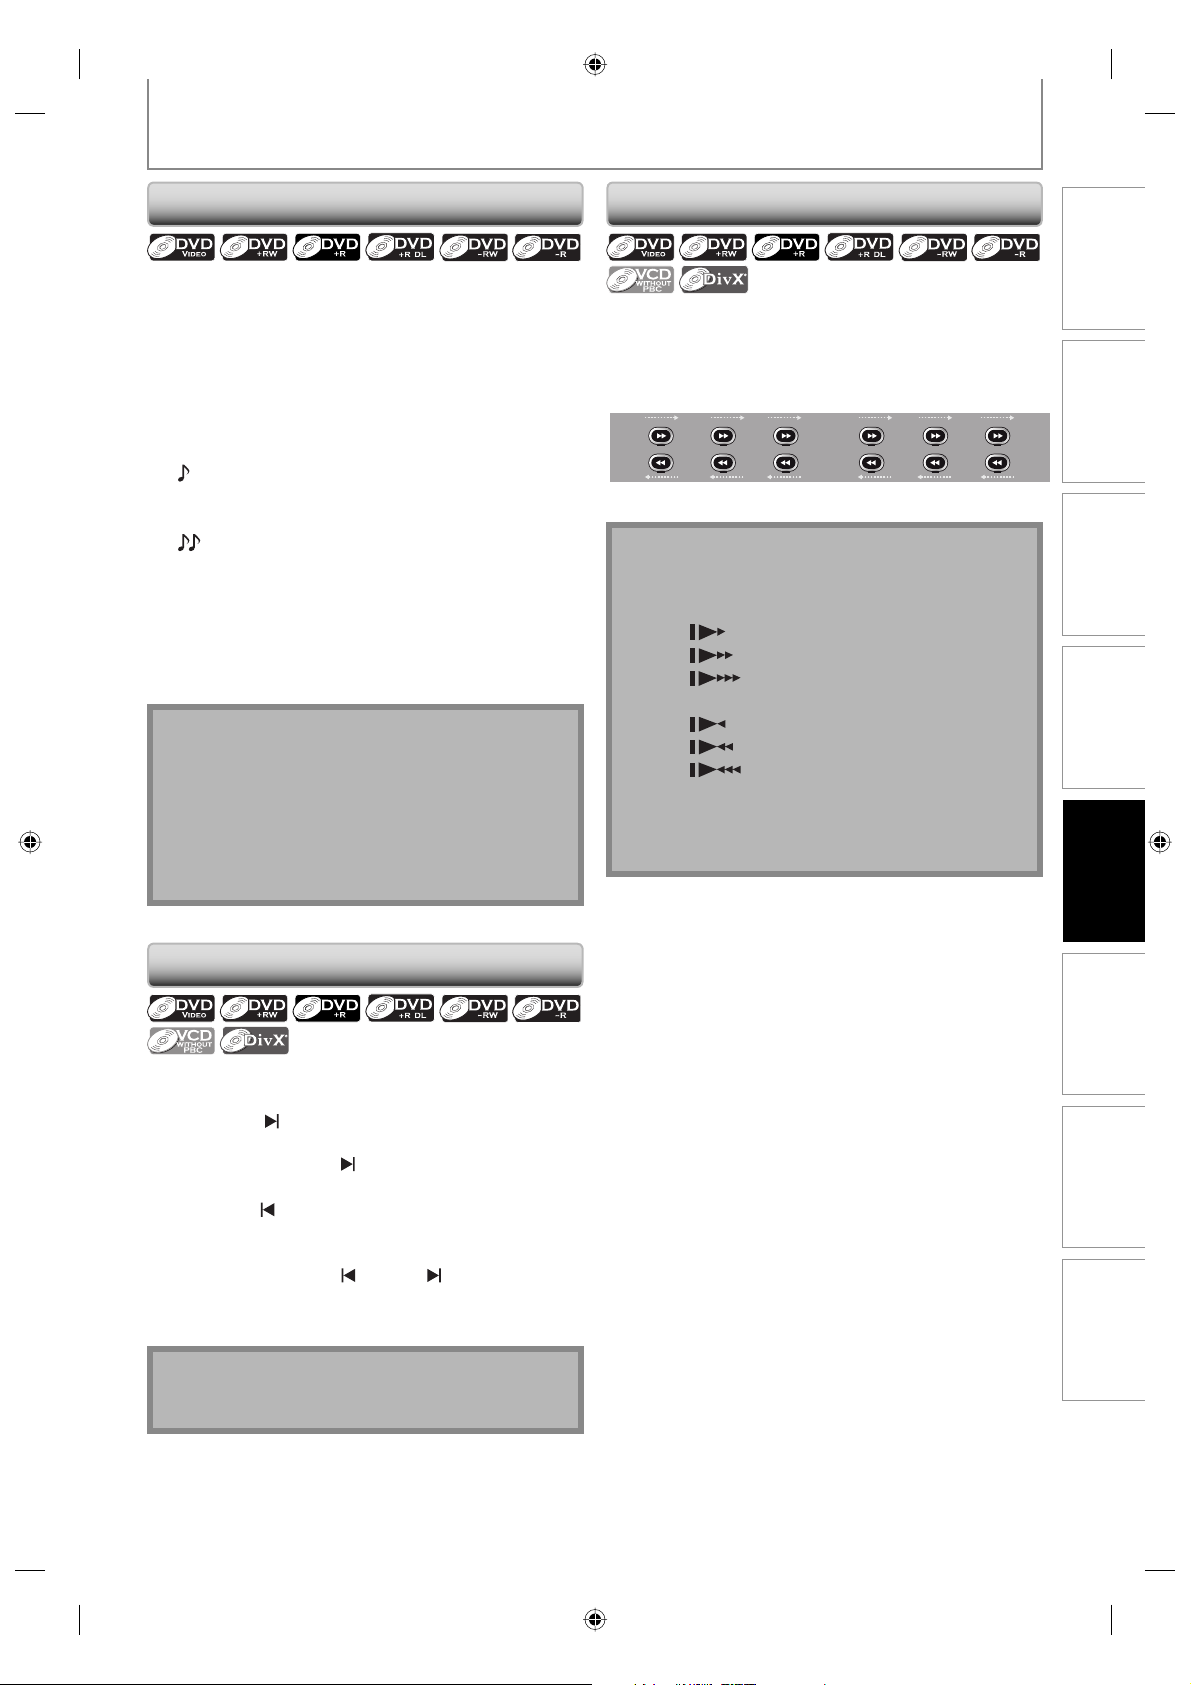
SPECIAL PLAYBACK
Rapid Playback
Rapid playback function is available only during
playback.
This function is available only on discs recorded in the
Dolby Digital format, and plays back in a slightly faster/
slower speed while keeping the sound quality just as
normal playback.
1) During playback, press [RAPID PLAY].
B
B
B :
2) Press [PLAY B] to continue the normal playback.
Note
• Audio (language) setting cannot be changed while
• This feature may not work at some point in a disc.
• Audio is PCM during rapid playback mode except
• When using digital audio connection (COAXIAL or
Press [RAPID PLAY] once during playback.
:
Plays back approximately at 0.8 times of normal
playback.
Press [RAPID PLAY] twice during playback.
:
Plays back approximately at 1.3 times of normal
playback.
Press [RAPID PLAY] 3 times to play back in
normal speed.
No effects.
using this mode.
when using digital audio connection.
HDMI), the LPCM sound (2 channel) will be output.
Slow Forward / Slow Reverse Playback
1) During playback, press [PAUSE F]. Then press
[FFW D] or [REW E].
Every time you press [FFW D] or [REW E],
approximate speed will be changed as follows. (The
sound will remain muted.)
1/8x
To return to the normal playback, press [PLAY B].
Note
• Forward/reverse speed will be indicated with icons
as follows.
forward (approx. speed)
1/16x:
1/8x:
1/3x:
reverse (approx. speed)
1/16x:
1/8x:
1/4x:
• For some DivX® files, slow forward/slow reverse may
not function.
• Only slow forward is available when playing back
video CD and DivX® files.
pause
1/16x 1/8x1/16x 1/3x1/4x
Recording
Playback
Step by Step Playback
1) During playback, press [PAUSE F].
Playback will be paused and sound will be muted.
2) Press [NEXT
Playback will advance one frame (or step) at a time
when you press [NEXT
To play back step by step backward:
Press [PREV
Every time you press the button, the playback will go
backward by one frame.
• Press and hold [PREV
advance continuously.
3) Press [PLAY B] to continue the normal playback.
Note
• Only step by step forward playback is available for
playing back video CD and DivX® files.
] repeatedly.
] with the sound muted.
] repeatedly.
] / [NEXT ] to reverse/
EditingIntroduction Connections Basic Setup Function Setup Others
63EN
63EN
E7H42UD_DVDR3506-37_EN.indd 63E7H42UD_DVDR3506-37_EN.indd 63 2007/12/28 10:53:482007/12/28 10:53:48
Page 64
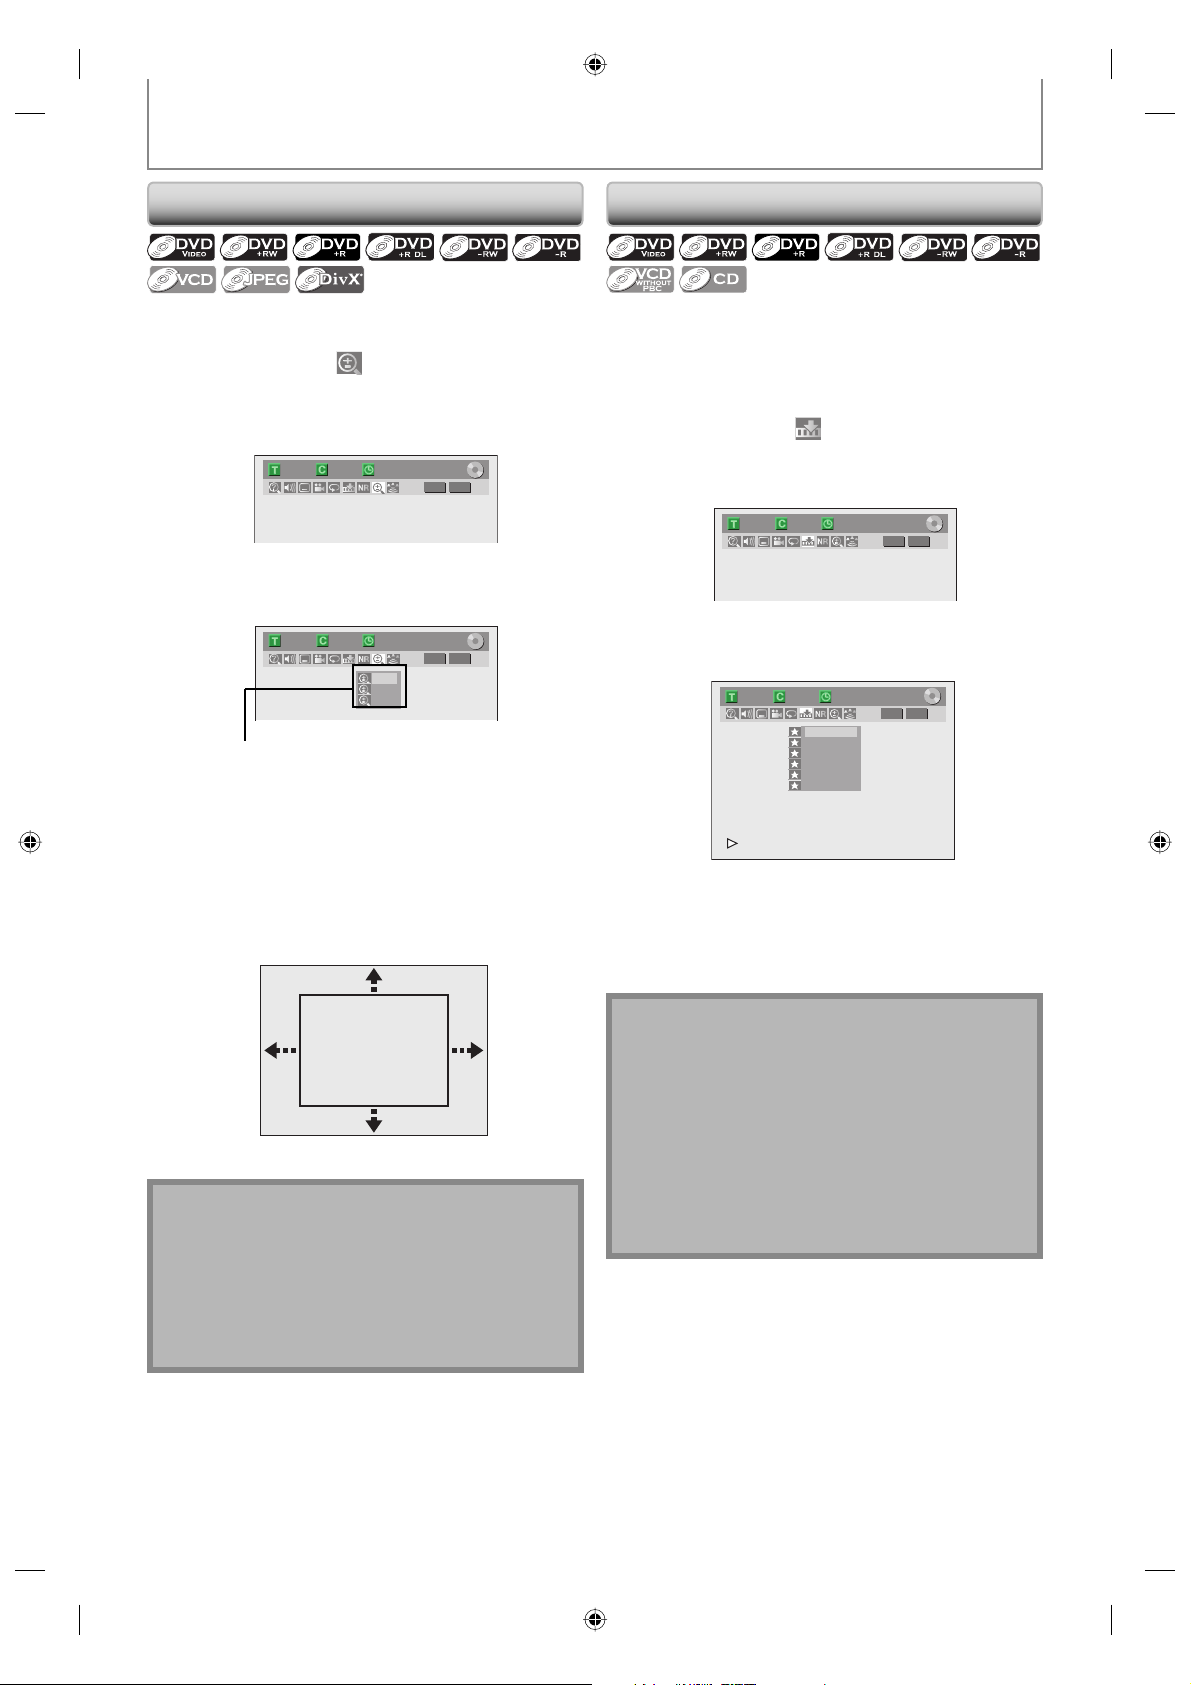
SPECIAL PLAYBACK
Zoom
1) During playback, press [INFO] or [ZOOM].
2) Use [{ / B] to select
second or wait for 1 second to display the selection
menu.
e.g.) DVD-video
1/ 5 1/ 5
3) Use [K / L] to select a desired zoom factor to zoom,
then press [OK].
1/ 5 1/ 5
Zoom menu will appear.
There are four options
(x1.0, x1.2, x1.5 and x2.0), these are displayed
excluding the current zoom rate.
, then press [OK] within 1
0:01:00 / 1:23:45
DVD
Video
0:01:00 / 1:23:45
DVD
× 1.2
× 1.5
× 2.0
Video
Marker Setting
This feature allows you to assign a specific point on a disc
to be called back later.
1) During playback, press [INFO].
2) Use [{ / B] to select
second or wait for 1 second to display the marker
list.
e.g.) DVD-video
1/ 5 1/ 5
3) Use [K / L] to select a desired marker number.
When it reaches the desired point, press [OK].
1/ 5 1/ 5
, then press [OK] within 1
0:01:00 / 1:23:45
DVD
Video
0:01:00 / 1:23:45
DVD
1
---
2
---
3
---
4
---
5
---
6
---
Video
Zoom area will be displayed.
4) Use [K / L / { / B] to select a desired zoom
position, then press [OK].
Zoom playback will start.
Note
• When selecting a smaller factor than the current one,
the zoom area will not be displayed.
• To exit the zoom menu, press [INFO] again at step 1.
• To cancel the zoom function, select “x1.0” using
[K / L], then press [OK].
• You cannot slide the zoomed picture on some JPEG
files.
The title (track) number and the time will be displayed.
4) To return to the marker later:
Use [K / L] to select the desired marker number,
then press [OK].
Note
• To clear a marker, select the marker number to be
cleared, then press [CLEAR].
• All markers will be erased when you operate these
operations listed below.
– Opening the disc tray
– Turning off the power
– Record on a recordable disc
• You can mark up to 6 points.
• Marker setting is not available when you play back
the video CD with PBC function.
64 EN64 EN
E7H42UD_DVDR3506-37_EN.indd 64E7H42UD_DVDR3506-37_EN.indd 64 2007/12/28 10:53:512007/12/28 10:53:51
Page 65
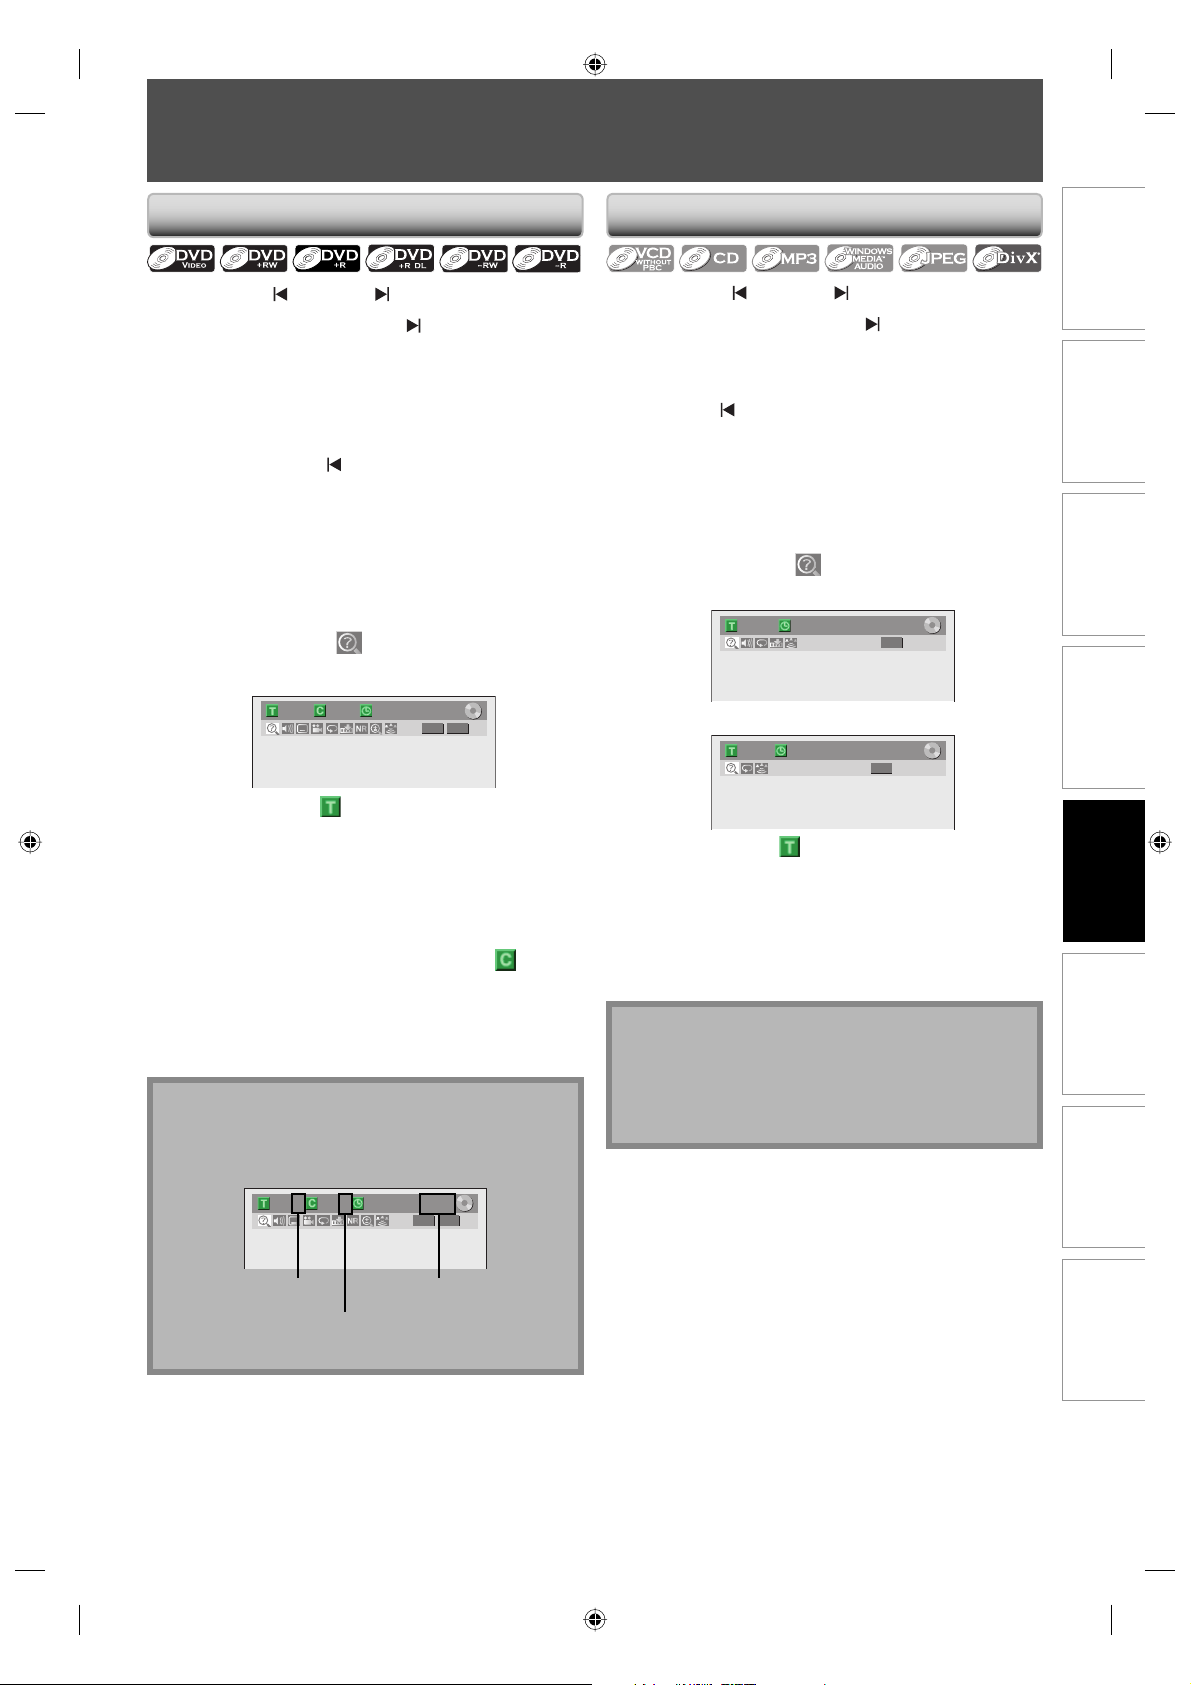
SEARCH
Title / Chapter Search
Using [PREV ] / [NEXT ]
1) During playback, press [NEXT ] to skip the current
title or chapter and move to the next.
The title or chapter will move forward by one at a time.
• If there is no chapter in one title, the current title will
be skipped.
To go back to the beginning of the current title or
chapter, press [PREV
Press it repeatedly to go to the previous title or
chapter. The title or chapter will move backward one
at a time.
Using [INFO]
1) During playback, press [INFO].
2) Use [{ / B] to select
e.g.) DVD-video
].
1/ 5 1/ 5
, then press [OK].
0:01:00 / 1:23:45
DVD
Video
Track Search
Using [PREV ] / [NEXT ]
1) During playback, press [NEXT ] to skip the current
track/file and move to the next.
The track/file will move forward one at a time.
To go back to the beginning of the current track/file,
press [PREV
Press it repeatedly to go to the previous track/file. The
track/file will move backward one at a time.
Using [INFO]
1) During playback, press [INFO].
2) Use [{ / B] to select
e.g.) audio CD
e.g.) MP3 files
].
, then press [OK].
1/ 5CD0:00:15 / 0:05:00
1/ 5 0:00:15
MP3
Recording
The number next to will be highlighted.
3) Title:
Use [K / L] or [the Number buttons] to enter a
desired title number to search, then press [OK].
Title search will start.
Chapter:
Press [B] to move to the number next to
for
chapter.
Use [K / L] or [the Number buttons] to enter a
desired chapter number to search, then press [OK].
After the search, playback will start automatically.
Note
• In search mode display, total numbers of each search
contents (title/chapter/time) are shown as a
denominator.
1/ 5 1/ 5 0:01:00 / 1:23:45
total number
of titles
total number
of chapters
DVD
Video
total time
of the title
Playback
The number next to will be highlighted.
3) Use [K / L] or [the Number buttons] to enter a
desired track/file number to search, then press
[OK].
After the search, playback will start automatically.
EditingIntroduction Connections Basic Setup Function Setup Others
Note
• During CD playback you can enter a track number
directly using [the Number buttons] for track search
without displaying the menu.
• Track search is not available when you play back the
video CD with PBC function.
65EN
65EN
E7H42UD_DVDR3506-37_EN.indd 65E7H42UD_DVDR3506-37_EN.indd 65 2007/12/28 10:53:532007/12/28 10:53:53
Page 66
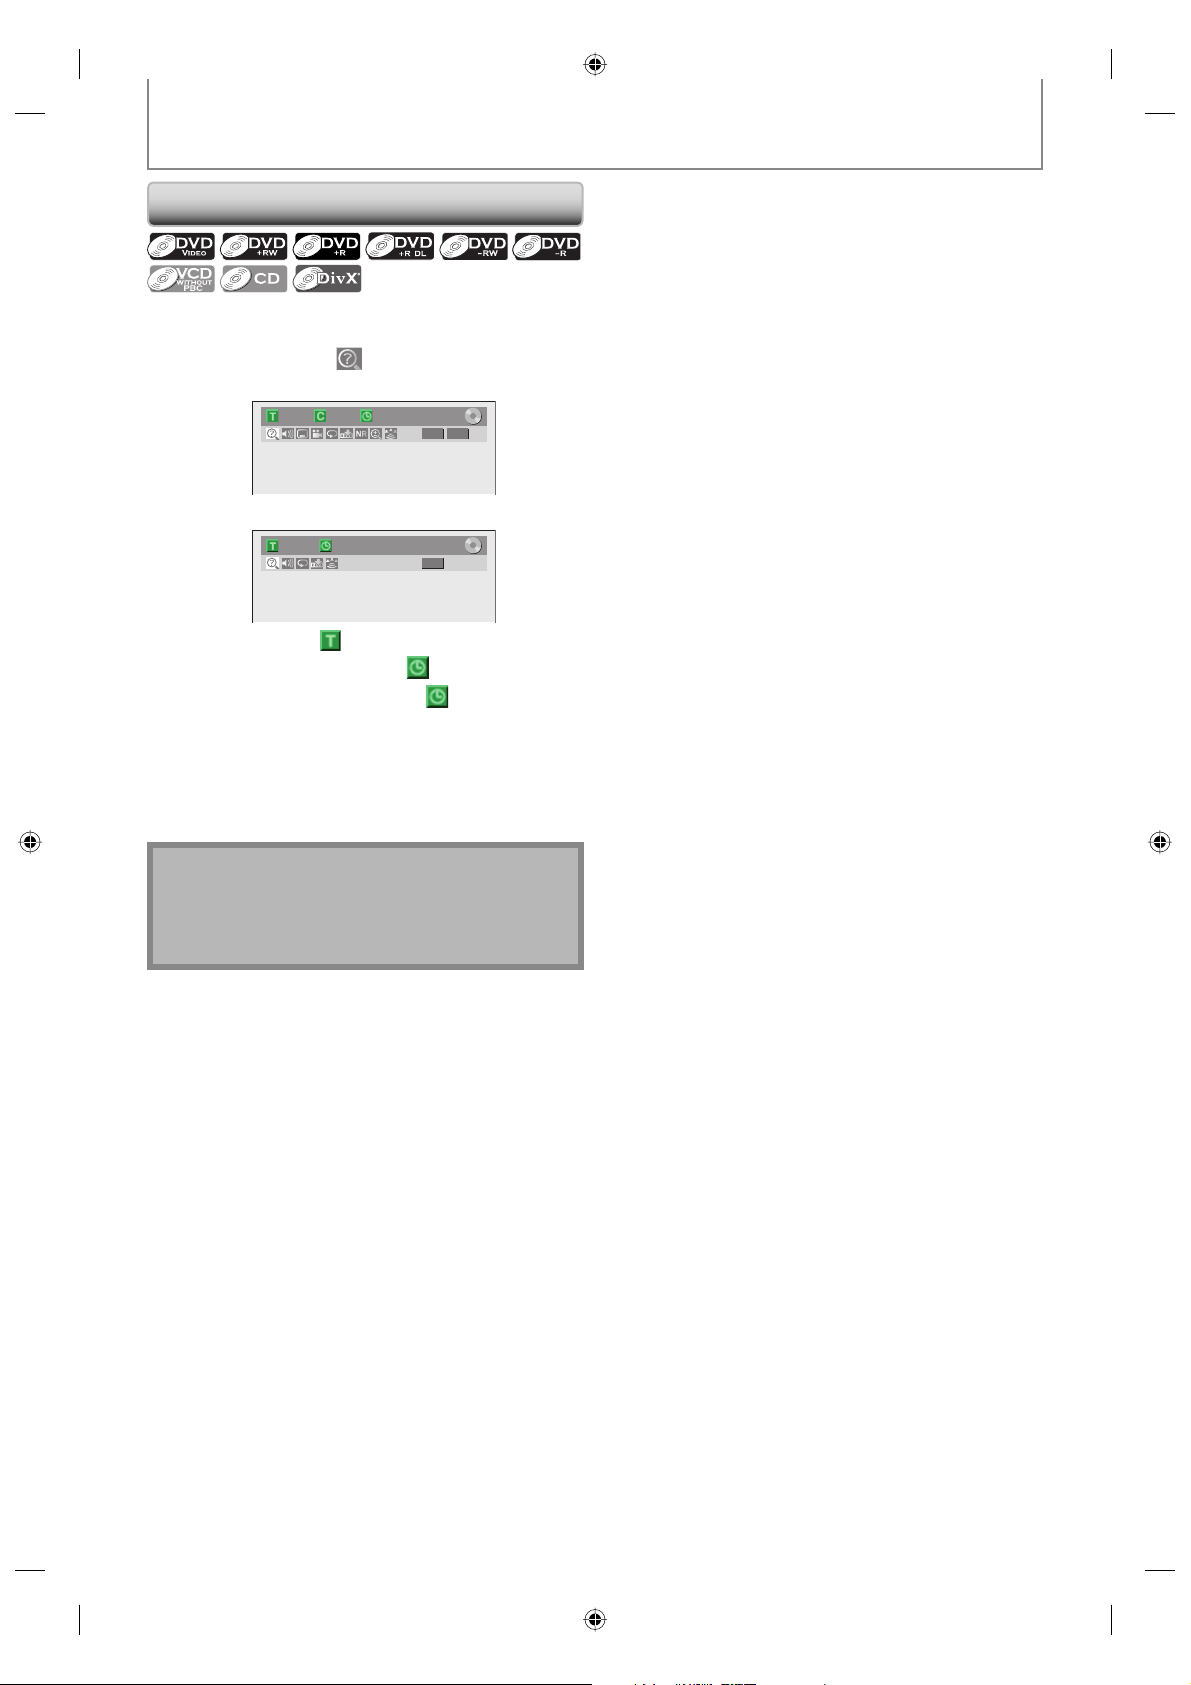
Time Search
1) During playback, press [INFO].
SEARCH
2) Use [{ / B] to select
e.g.) DVD-video
1/ 5 1/ 5 0:01:00 / 1:23:45
e.g.) audio CD
1/ 5CD0:00:15 / 0:05:00
The number next to will be highlighted.
To move to the number next to
When time search is not available,
counter are not displayed.
3) Use [K / L / { / B] or [the Number buttons] to
enter a desired time to search, then press [OK].
After the search, playback will start automatically.
, then press [OK].
DVD
Video
, press [B].
and time
Note
• Time search is available only in the same track, file or
title.
• Time search is not available when you play back the
video CD with PBC function.
66 EN66 EN
E7H42UD_DVDR3506-37_EN.indd 66E7H42UD_DVDR3506-37_EN.indd 66 2007/12/28 10:53:562007/12/28 10:53:56
Page 67
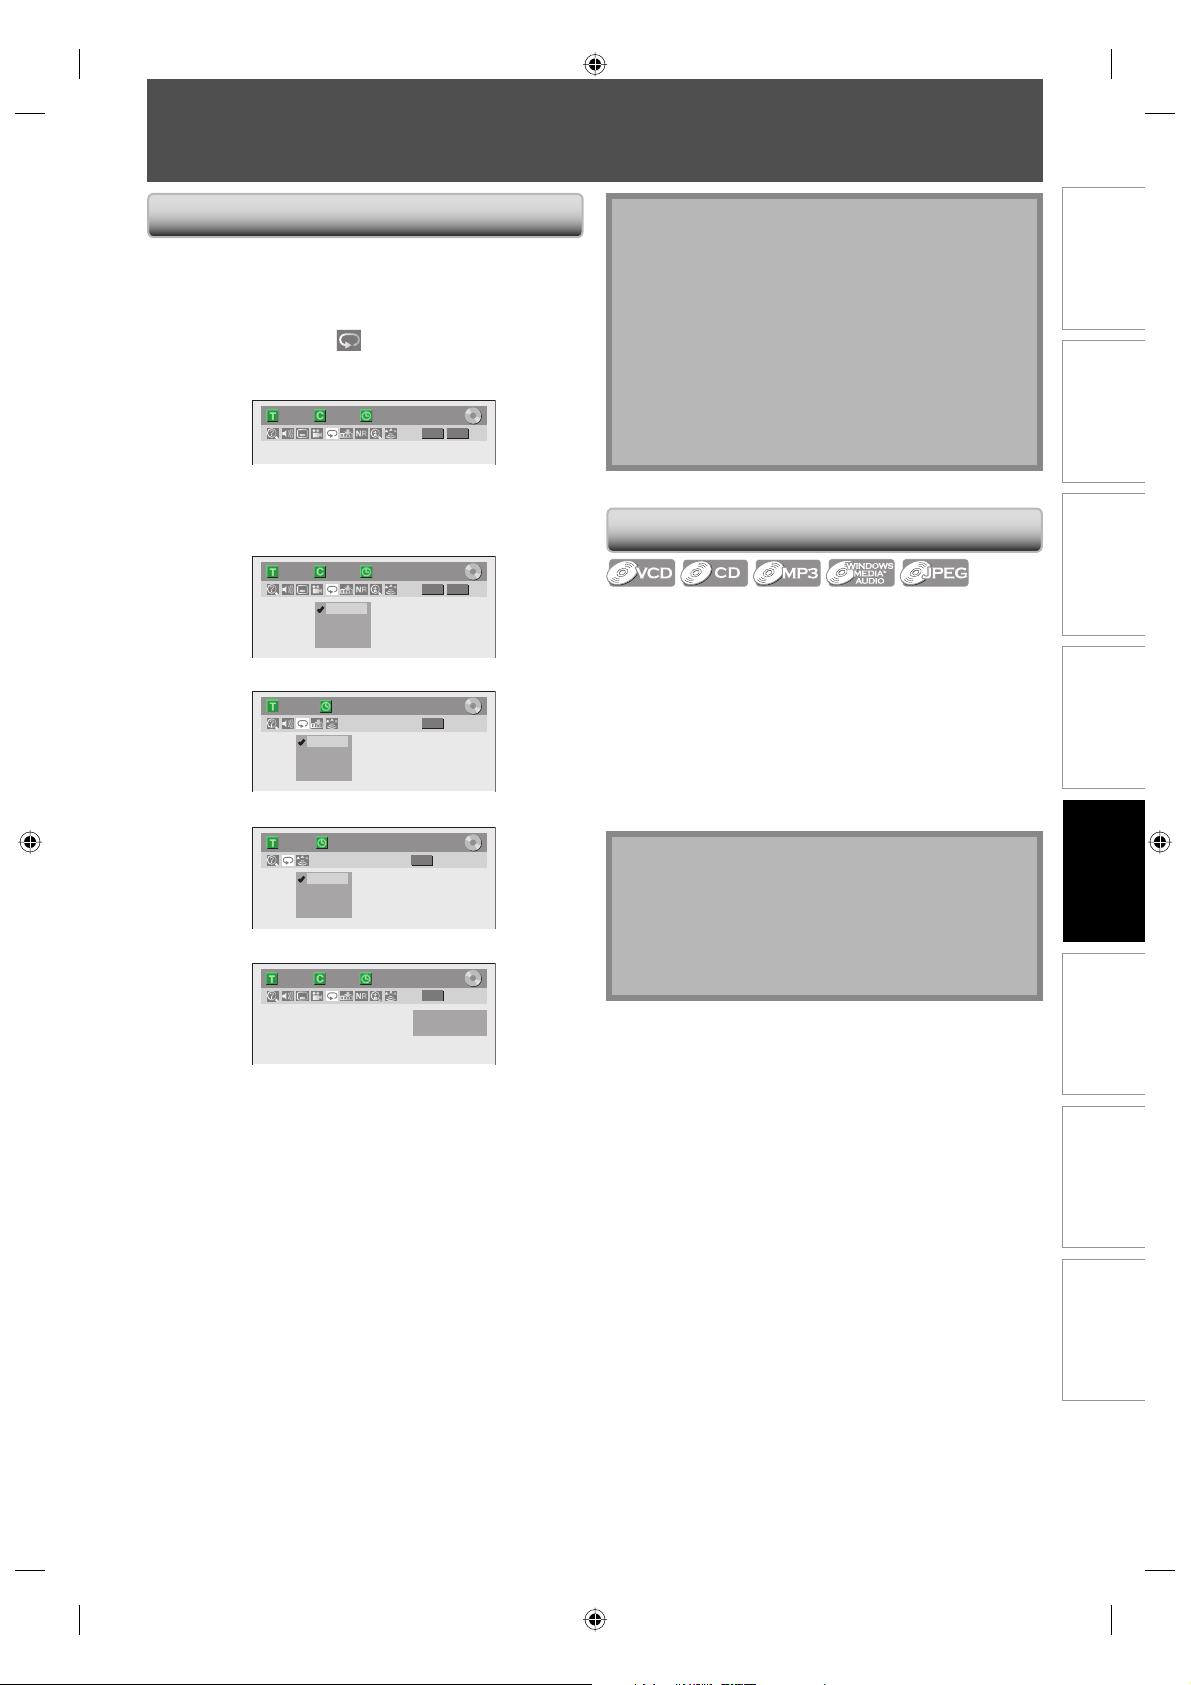
REPEAT / RANDOM / PROGRAM PLAYBACK / SLIDE SHOW
Repeat Playback
Available repeat function may vary depending the discs.
1) During playback press [INFO], then proceed to
step 2), or press [REPEAT] then proceed to step 3).
2) Use [{ / B] to select
second or wait for 1 second to display the selection
menu.
1/ 5 1/ 5
3) Use [K / L] to select a desired option to repeat,
then press [OK].
e.g.) DVD-video
1/ 5 1/ 5
e.g.) audio CD, video CD
1/ 5CD0:00:15 / 0:05:00
e.g.) MP3/Windows Media™ Audio/JPEG files
1/ 5 0:00:15
The selected repeat playback will start.
1/ 5 1/ 5
, then press [OK] within 1
0:01:00 / 1:23:45
DVD
0:01:00 / 1:23:45
DVD
MP3
0:01:00 / 1:23:45
DVD
Repeat
Title
OFF
Track
All
A – B
OFF
Track
All
Group
OFF
Title
Chapter
A – B
Video
Video
Note
• Point B for the repeat A-B playback should be set
within the same title or track as point A.
• To cancel the repeat playback, select “OFF” at step 3.
The repeat setting will also be canceled when you
stop playback.
• You cannot select “Group” during the random
playback of MP3/Windows Media™ Audio/JPEG files.
• For some DivX® files, A-B repeat playback may not
function.
• Repeat playback is not available when you play back
the video CD with PBC function.
Random Playback
You can play back a disc randomly instead of playing
back in the original order.
1) Press [SETUP].
2) Use [K / L] to select “CD Playback Mode”, then press
[OK].
“CD Playback Mode” menu will appear.
3) Use [K / L] to select “Random Play”, then press
[OK].
Random playback will start.
Note
• To cancel random playback, press [STOP C] twice
during random playback. “OFF” appears on the TV
screen.
• For video CD with PBC function, the PBC setting will
be switched to off automatically when you start
random playback.
Recording
Playback
EditingIntroduction Connections Basic Setup Function Setup Others
Title:
The current title will be played back repeatedly.
Chapter:
The current chapter will be played back repeatedly.
All:
The current disc will be played back repeatedly.
A-B:
Desired section can be played back repeatedly.
1) Use [K / L] to select “A-B”, then press [OK].
2) Press [OK] at the desired starting point A.
3) Press [OK] at the desired ending point B.
Track:
The current track or file will be played back repeatedly.
Group:
The current folder will be played back repeatedly.
67EN
67EN
E7H42UD_DVDR3506-37_EN.indd 67E7H42UD_DVDR3506-37_EN.indd 67 2007/12/28 10:53:582007/12/28 10:53:58
Page 68
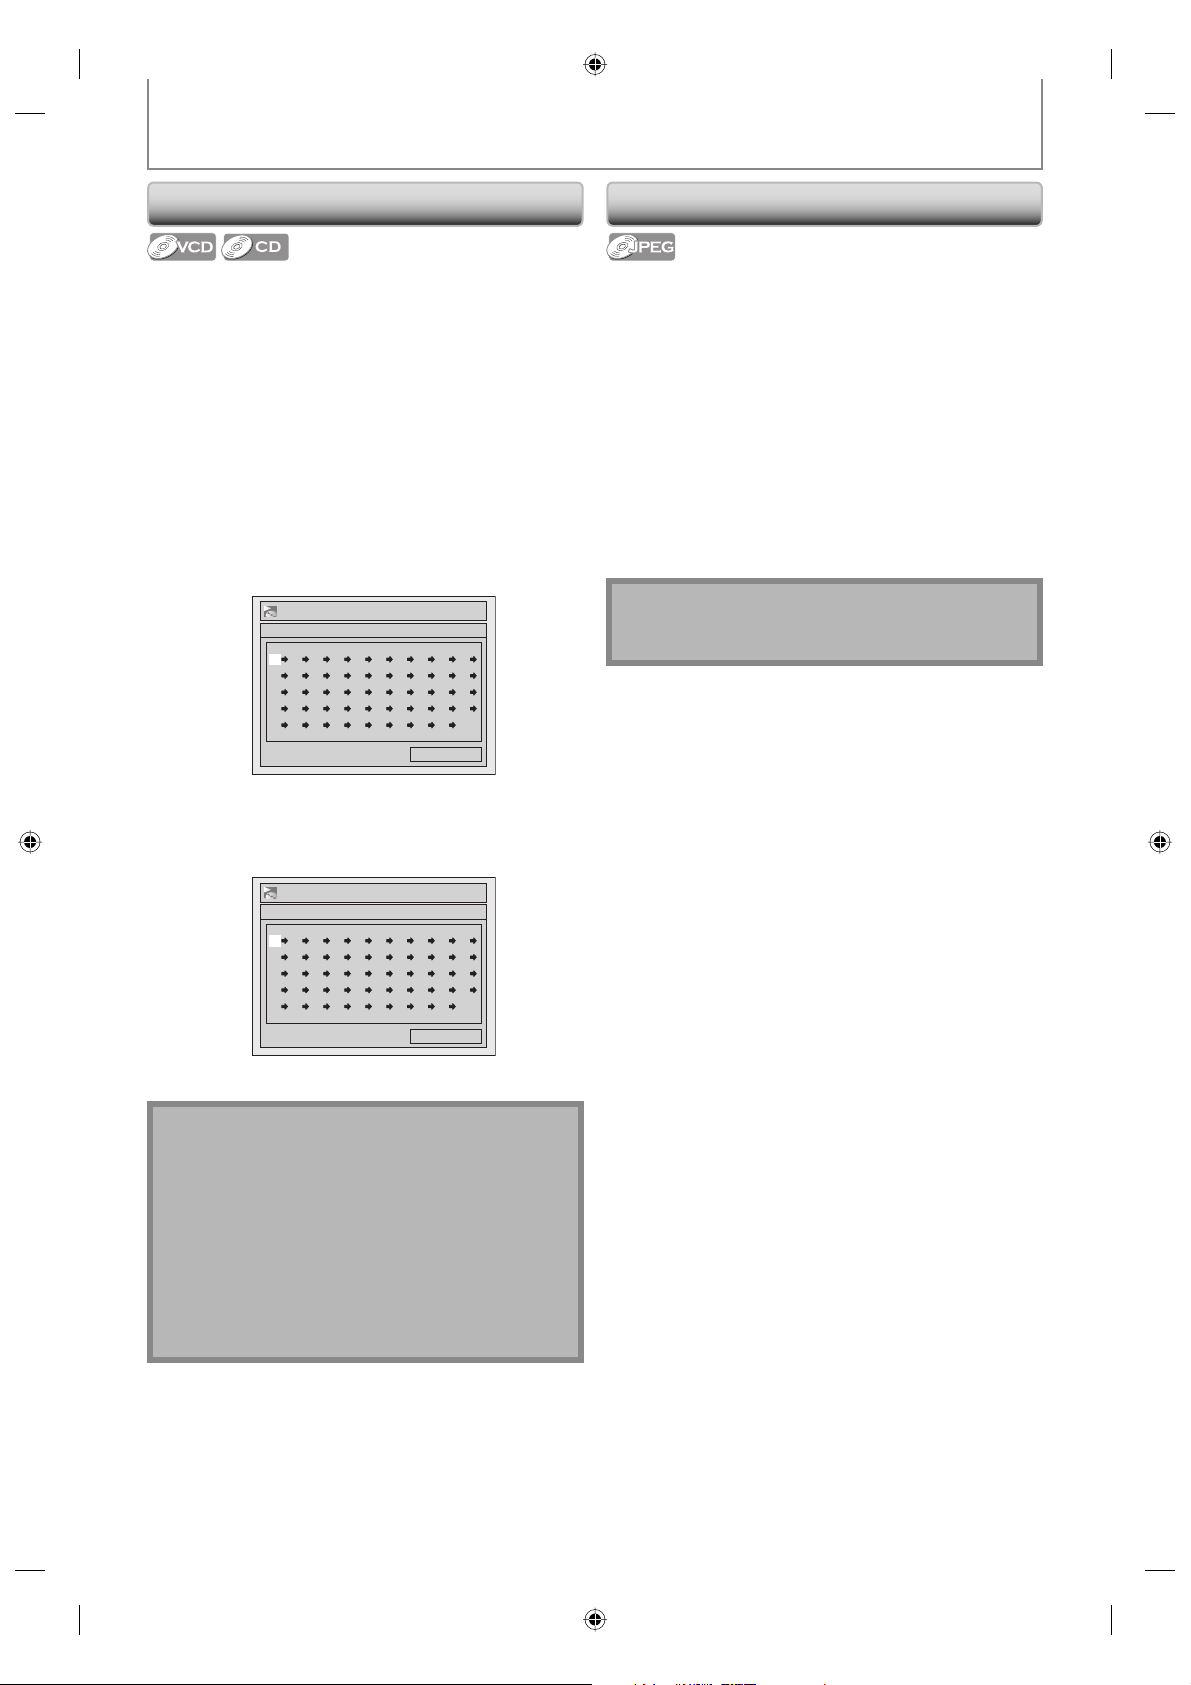
REPEAT / RANDOM / PROGRAM PLAYBACK / SLIDE SHOW
Program Playback
You can program the disc to play back in your desired
order.
1) Press [SETUP].
2) Use [K / L] to select “CD Playback Mode”, then press
[OK].
“CD Playback Mode” menu will appear.
3) Use [K / L] to select “Program Play”, then press
[OK].
4) Use [K / L] to select a desired track, then press [OK]
or [B].
CD Playback Mode
Program Play
--
-- -- -- -- -- -- -- -- --
-- -- -- -- -- -- -- -- -- --
-- -- -- -- -- -- -- -- -- --
-- -- -- -- -- -- -- -- -- --
-- -- -- -- -- -- -- -- -- --
0:00:00Total
Slide Show
You can select the display time between 5 seconds and
10 seconds.
1) Follow steps 1 and 2 in “Random Playback” on page
67.
2) Use [K / L] to select “Slide Show”, then press [OK].
3) Use [K / L] to select the display time, then press
[OK].
4) Press [SETUP] to exit.
Note
• Large-size JPEG files take a few moments to be
displayed.
Repeat this step until you program all the desired
tracks.
5) Press [PLAY B].
CD Playback Mode
Program Play
09
04 10 06 -- -- -- -- -- --
-- -- -- -- -- -- -- -- -- --
-- -- -- -- -- -- -- -- -- --
-- -- -- -- -- -- -- -- -- --
-- -- -- -- -- -- -- -- -- --
0:31:07Total
Program playback will start.
Note
• To erase tracks you selected, press [CLEAR] at step 4.
• You can make program settings up to 50 tracks.
• To cancel program playback, press [STOP C] twice
during program playback. “OFF” appears on the TV
screen.
• You may also select a desired track using [the
Number buttons] at step 4.
• For video CD with PBC function, the PBC setting will
be switched to off automatically when you start
program playback.
68 EN68 EN
E7H42UD_DVDR3506-37_EN.indd 68E7H42UD_DVDR3506-37_EN.indd 68 2007/12/28 10:54:002007/12/28 10:54:00
Page 69
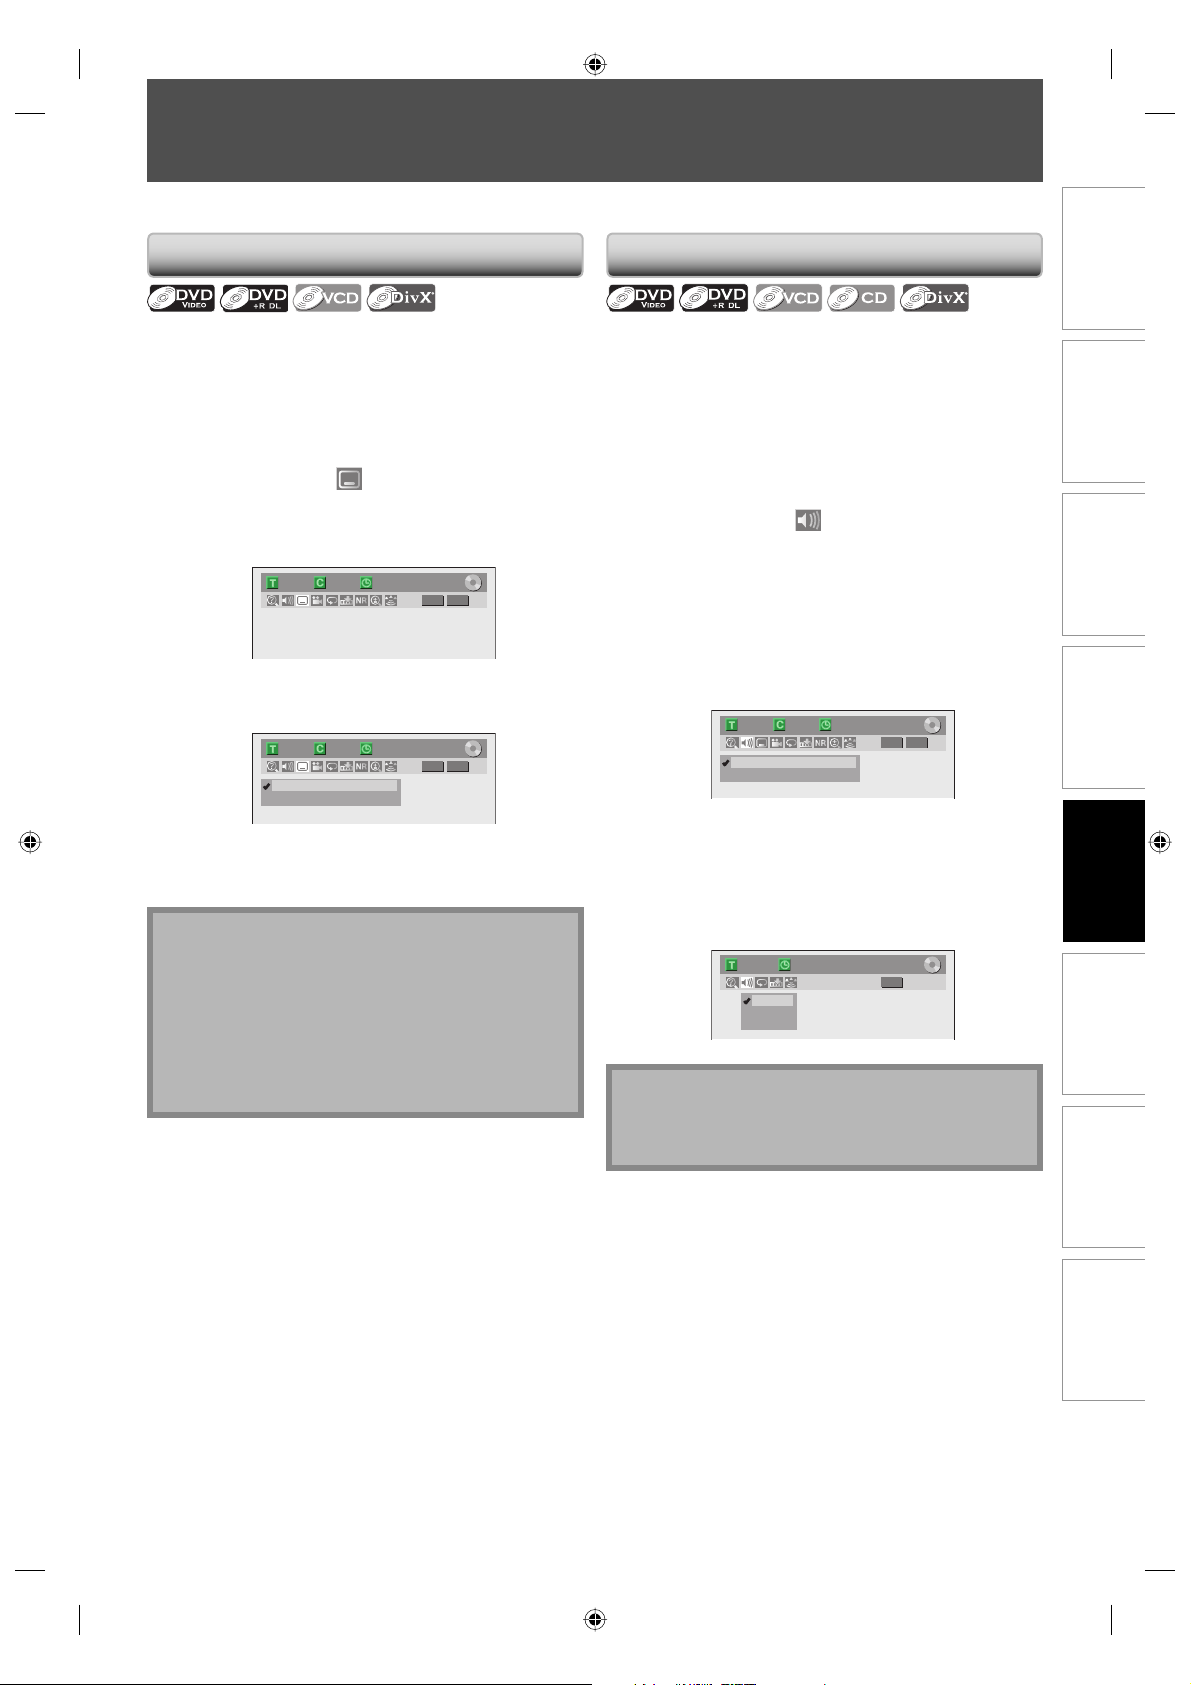
SELECTING THE FORMAT OF AUDIO AND VIDEO
You can select the format of audio and video as you prefer depending on the contents of the disc you are playing back.
Switching Subtitles
DVD-video may have subtitles in 1 or more languages.
Available subtitle languages can be found on the disc
case. You can switch subtitle languages anytime during
playback.
1) During playback, press [INFO].
2) Use [{ / B] to select
second or wait for 1 second to display the selection
menu.
e.g.) DVD-video
1/ 5 1/ 5
3) Use [K / L] to select a desired subtitle language,
then press [OK].
1/ 5 1/ 5
OFF
1.English
Subtitle will be displayed in the selected language.
When selecting “OFF”, subtitle will disappear.
Note
• Some discs will only allow you to change the subtitle
from the disc menu. Press [TITLE] or [DISC MENU] to
display the disc menu.
• If a 4-digit language code appears in the subtitle
menu, refer to the “LANGUAGE CODE” on page 104.
• For disc with DivX® files, the TV screen only displays
the number of subtitle languages and “_ _ _ _“ next
to the numbers.
, then press [OK] within 1
0:01:00 / 1:23:45
DVD
Video
0:01:00 / 1:23:45
DVD
Video
Switching Audio Soundtrack
When playing back a DVD-video recorded with 2 or more
soundtracks (these are often in different languages), you
can switch them during playback.
When playing back video CD, audio CD you can switch
“L/R”(stereo), “L”(left) or “R”(right).
1) During playback press [INFO], then proceed to
step 2), or press [AUDIO] then proceed to step 3).
2) Use [{ / B] to select
second or wait for 1 second to display the selection
menu.
3) Use [K / L] to select a desired audio soundtrack or
audio channel, then press [OK].
For DVD-video, DivX® files
• Audio soundtrack will switch.
e.g.) DVD-video
1/ 5 1/ 5
1.Dolby Digital 5.1ch English
2.Dolby Digital 2ch English
• If the title contains both main and sub audio, you can
further select “L” (main), “R” (sub), or “L/R” (mixed of
main and sub).
For audio CD, video CD
• Audio channel will switch.
e.g.) audio CD
1/ 5CD0:00:15 / 0:05:00
1. L/R
2. L
3. R
Note
• Some discs will only allow you to change the
soundtrack from the disc menu. Press [TITLE] or
[DISC MENU] to display the disc menu.
, then press [OK] within 1
0:01:00 / 1:23:45
DVD
Video
Recording
Playback
EditingIntroduction Connections Basic Setup Function Setup Others
69EN
69EN
E7H42UD_DVDR3506-37_EN.indd 69E7H42UD_DVDR3506-37_EN.indd 69 2007/12/28 10:54:002007/12/28 10:54:00
Page 70
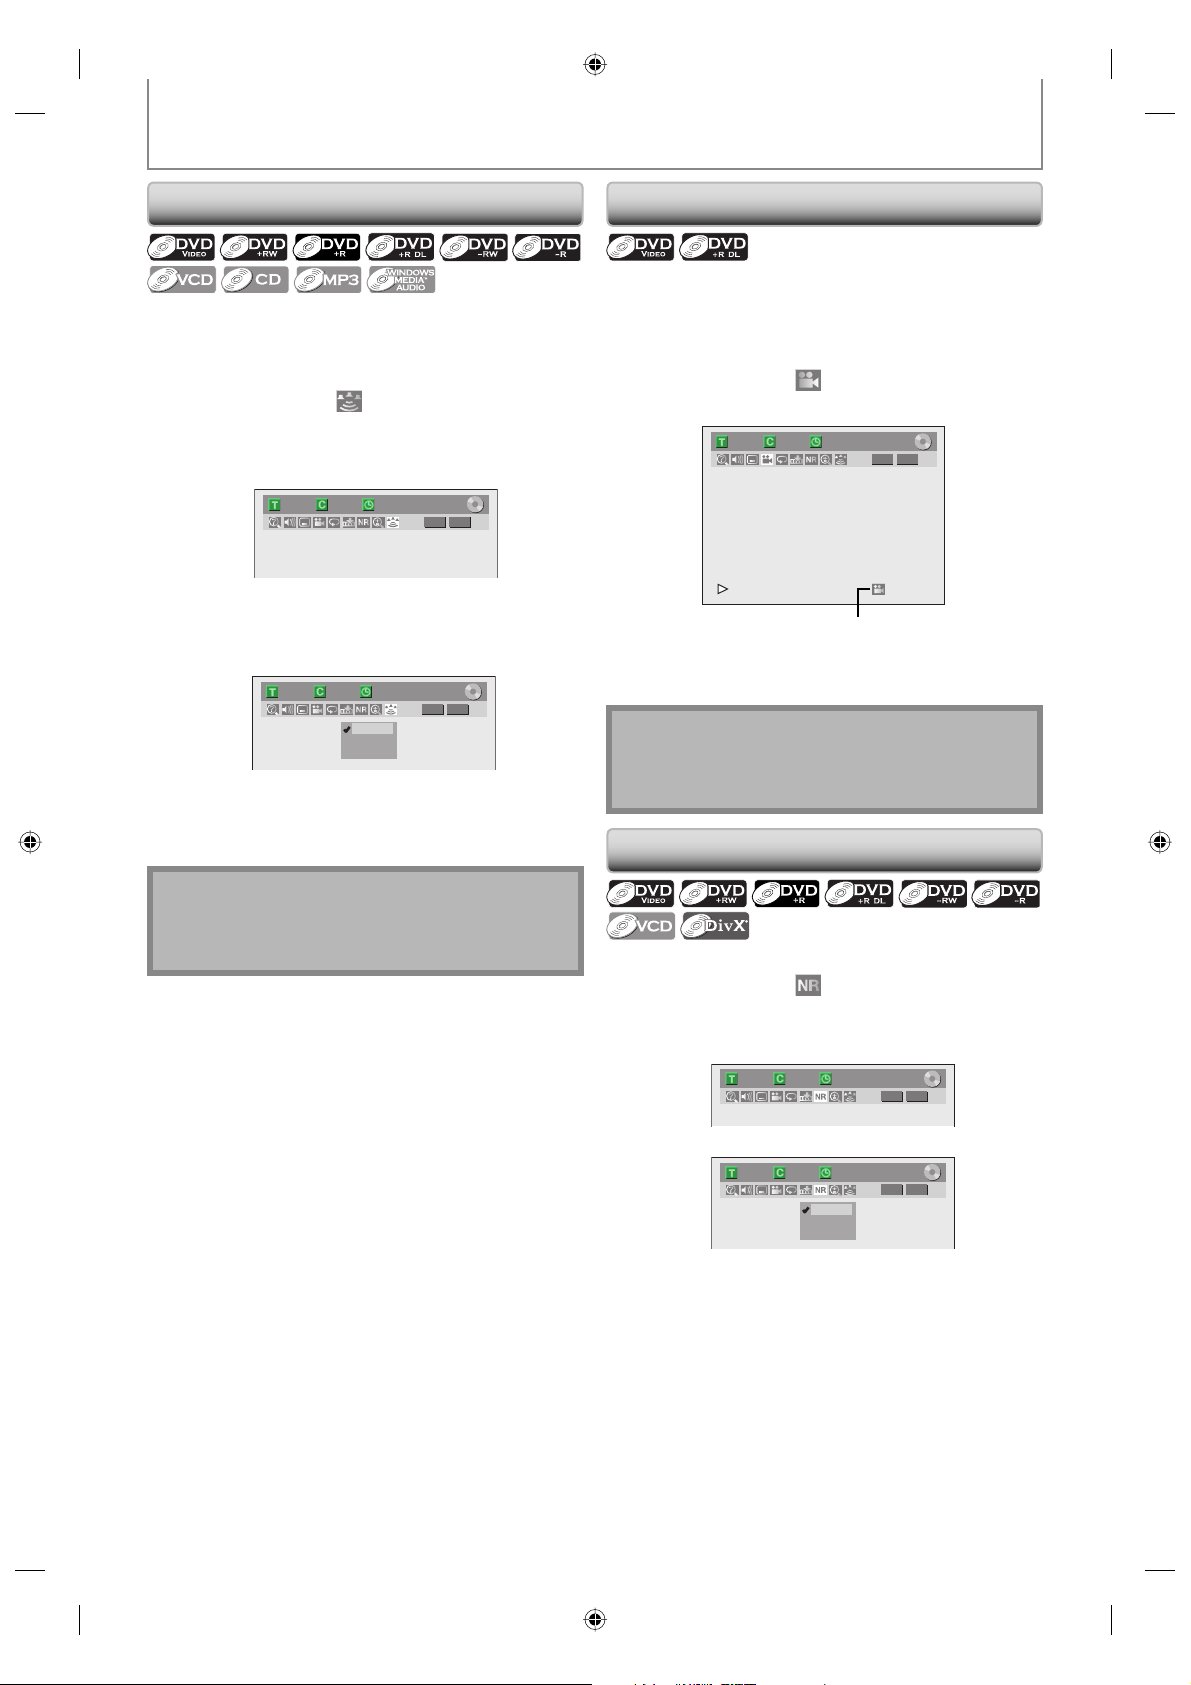
SELECTING THE FORMAT OF AUDIO AND VIDEO
Switching Virtual Surround System
You can enjoy stereophonic virtual space through your
existing 2 channel stereo system.
1) During playback, press [INFO].
2) Use [{ / B] to select
second or wait for 1 second to display the selection
menu.
e.g.) DVD-video
1/ 5 1/ 5
3) Use [K / L] to select “OFF”, “Type 1” or “Type 2”,
then press [OK].
e.g.) DVD-video
1/ 5 1/ 5
OFF : no effect
Type 1 : natural effect
Type 2 : emphasized effect
, then press [OK] within 1
0:01:00 / 1:23:45
DVD
Video
0:01:00 / 1:23:45
DVD
OFF
Type 1
Type 2
Video
Switching Camera Angles
Some DVD-video have scenes shot from 2 or more
angles. Angle information should be on the disc case if
the disc contains multi-angle scenes.
1) During playback, press [INFO].
2) Use [{ / B] to select , then press [OK].
e.g.) DVD-video
1/ 5 1/ 5
0:01:00 / 1:23:45
DVD
Video
Angle icon appears when a switching camera angle is
available.
Angle will switch each time you press [OK].
Note
• Angle icon does not appear on the TV screen in a
case you set “Angle Icon” to “OFF” in “Playback”
menu. Refer to page 90.
Reducing Block Noise
Note
• Select “OFF” in a case sound is distorted.
• The setting will be kept even when the unit is turned
off.
1) During playback, press [INFO].
2) Use [{ / B] to select
second or wait for 1 second to display the selection
menu.
e.g.) DVD-video
1/ 5 1/ 5
3) Use [K / L] to select a desired option, then press
[OK].
1/ 5 1/ 5
Your setting will be activated.
This function reduces noise in the playback picture. If
noises appear on the TV screen during playing back
discs recorded in long time recording mode such as EP
or SLP, select “Type 1” or “Type 2”.
(“Type 2” is more effective.)
When playing back discs with a few noises such as
DVD-video, select “OFF”.
, then press [OK] within 1
0:01:00 / 1:23:45
DVD
Video
0:01:00 / 1:23:45
DVD
OFF
Type 1
Type 2
Video
70 EN70 EN
E7H42UD_DVDR3506-37_EN.indd 70E7H42UD_DVDR3506-37_EN.indd 70 2007/12/28 10:54:022007/12/28 10:54:02
Page 71
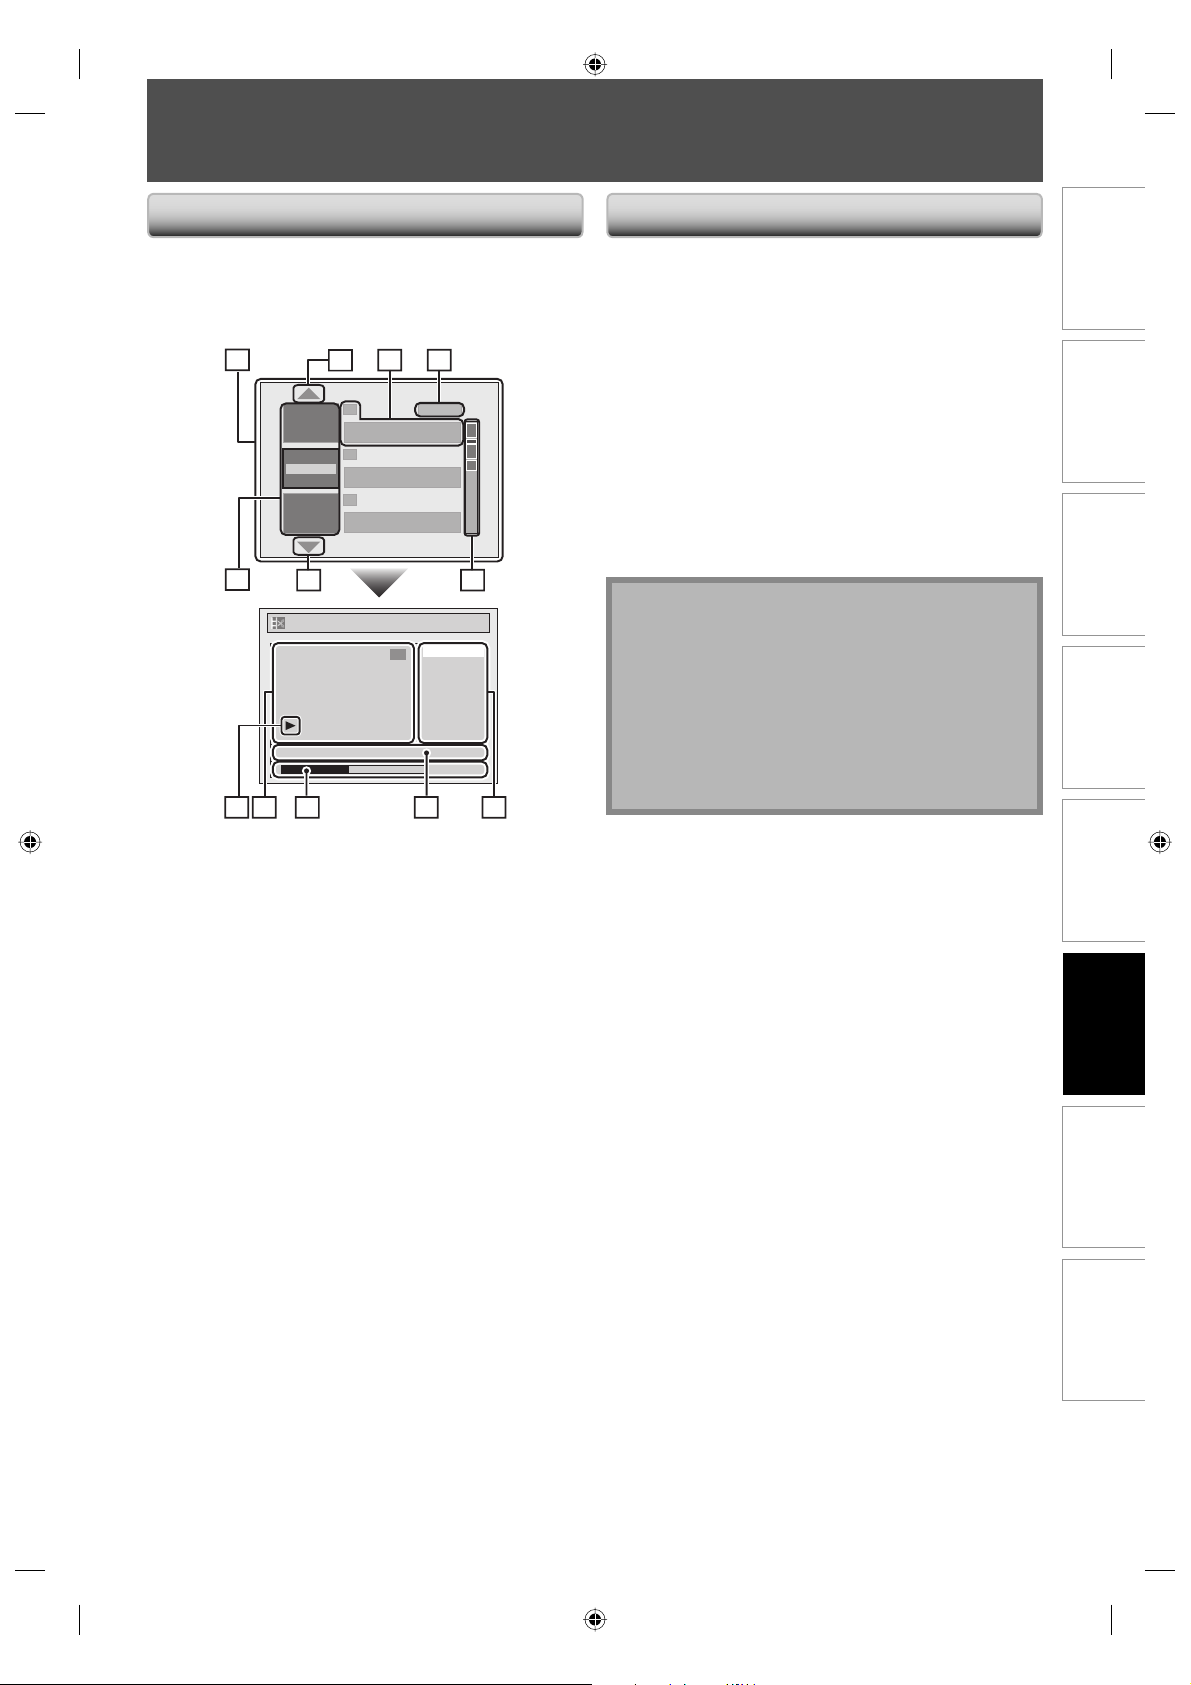
INFORMATION ON DISC EDITING
Guide to a Title List Editing Discs
Introduction Connections Basic Setup Function Setup Others
Title list allows you to check the titles recorded on the
disc easily. You can choose a title to play back from this
list and easily edit the titles as you prefer.
Press [TITLE].
1
6
11
10
2
1
NOV/21/07 11:00AM
NOV/21/07 0:20:44
2
Play
Edit
NOV/22/07 11:35
Overwrite
NOV/22/07 0:10:33
3
EMPTY TITLE
1:37:52 SP(2Hr)
2
Edit
NOV/22/07 11:35AM CH13 EP
AM CH13 EP
2
43
SP (2Hr)
CH12 SP
Title Delete
Edit Title Name
Chapter Mark
Hide Chapter
Index Picture
Title Dividing
0:00:59
5
789
You can edit discs for the following items. Be sure that
once you edit titles, they will not remain as original.
• Deleting Titles (Refer to page 72.)
• Putting Names on Titles (Refer to page 73.)
• Setting Chapter Marks (Refer to page 74.)
• Clearing Chapter Marks (Refer to pages 75-76.)
• Hiding Chapters (Refer to page 77.)
• Setting Pictures for Thumbnails (Refer to page 78.)
• Dividing a Title (DVD+RW/DVD-RW only)
(Refer to page 79.)
• Putting Name on Disc (Refer to page 80.)
• Setting or Releasing Disc Protect (Refer to page 81.)
• Erasing Disc (Refer to page 82.)
• Making Edits Compatible (Refer to page 83.)
Note
• When selecting “Edit” on pop-up menu of the title
list and edit the title, the title list is displayed after
writing the edited contents onto the disc.
• The capacity indicator in the right side of the title list
may not indicate the precise capacity in the disc.
• The capacity indicator may not indicate the capacity
for the titles of which recording time is short.
• Once you have finalized a DVD+R/ DVD-R, you
cannot edit or record anything on that disc.
Recording Playback
1. Title list: List of the titles recorded on the disc, and
their information.
2. Arrow: Indicating there is a previous / next page.
3. Title information: On the first line, title name
(editable) is displayed. On the second line, the length
of the title is displayed.
Empty title: The portion of the disc where there is no
recordings are made. As for the empty title, available
recording time by the selected recording mode is
displayed on the second line.
4. Recording mode: Currently selected recording mode
is displayed here.
5. Capacity indicator: Indicating the position and the
amount of each title in the disc. The portion for the
selected title is highlighted.
6. Thumbnails: A cut from the recorded content is
displayed here.
7. Submenu: Submenus for the selected menu are
displayed here.
8. Title name (editable): If you do not name the title,
the recorded date, time, channel, and the recording
mode are displayed here.
9. Progress bar: Indicating the progress of the
playback.
10. Preview window: Preview of the selected title is
displayed here.
11. Playback status: Indicating the current playback
status of the selected title.
Press [STOP C] to exit the title list.
Editing
71EN
71EN
E7H42UD_DVDR3506-37_EN.indd 71E7H42UD_DVDR3506-37_EN.indd 71 2007/12/28 10:54:052007/12/28 10:54:05
Page 72
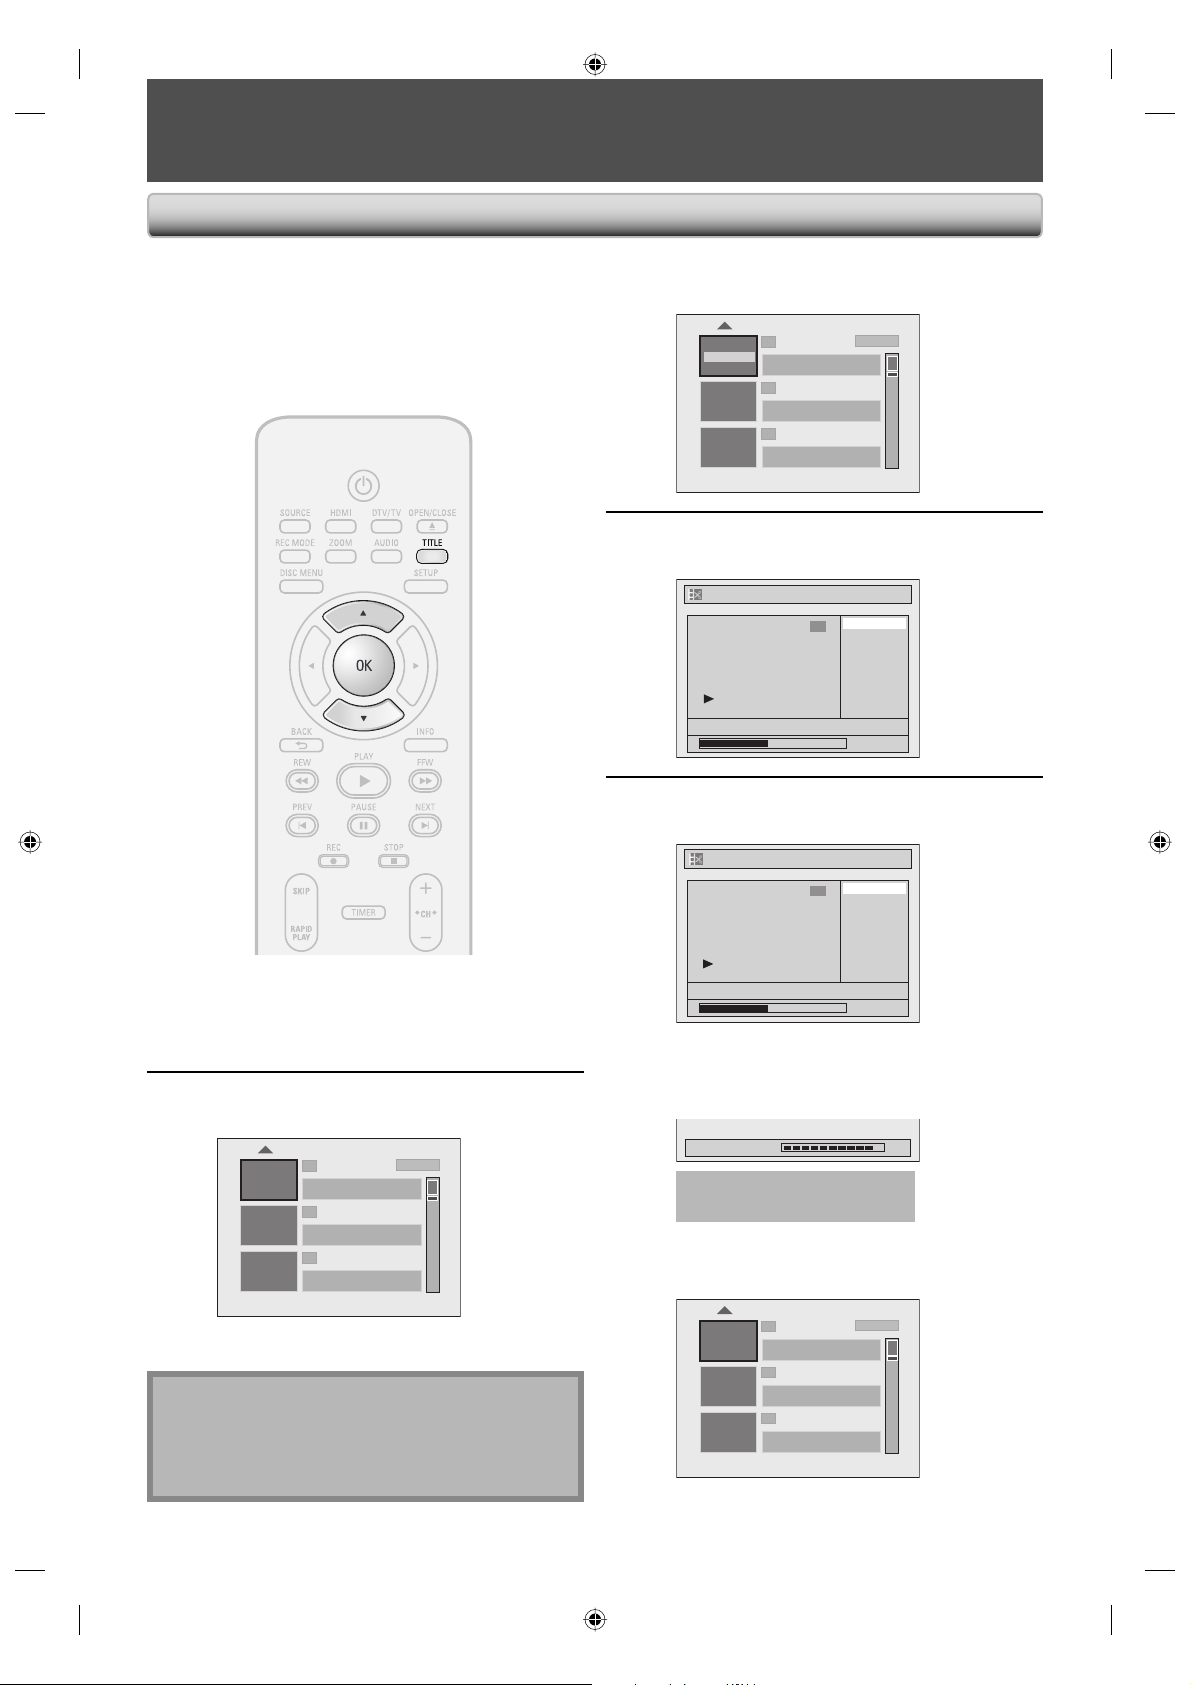
Deleting Titles
EDITING DISCS
You can delete titles which you do not need anymore.
Please be advised that the titles once deleted cannot be
brought back to the disc.
For DVD+RW/DVD-RW, when the last recorded title in the
title list is deleted, the available disc space to record on
will be increased. For DVD+R/DVD-R, the disc space to
record on will not be changed.
Use [K / L] to select “Edit”, then
press [OK].
3
Play
Edit
Overwrite
1
NOV/21/07 11:00AM
NOV/21/07 0:20:44
2
NOV/22/07 11:35
NOV/22/07 0:10:33
3
EMPTY TITLE
1:37:52 SP(2Hr)
SP (2Hr)
CH12 SP
AM CH13 EP
Use [K / L] to select “Title Delete”,
then press [OK].
4
Edit
NOV/21/07 11:00AM CH12 SP
1
Title Delete
Edit Title Name
Chapter Mark
Hide Chapter
Index Picture
Title Dividing
0:00:59
Use [K / L] to select “Yes”, then press
[OK].
5
Edit - Title Delete
Yes
1
No
Press [TITLE].
1
Use [K / L] to select a desired title,
then press [OK].
2
1
NOV/21/07 11:00AM
NOV/21/07 0:20:44
2
NOV/22/07 11:35
NOV/22/07 0:10:33
3
EMPTY TITLE
1:37:52 SP(2Hr)
Note
• Deleted part of the titles in the capacity indicator
changes in color.
• As for DVD+RW/DVD-RW if you delete the title, deleted
title will be displayed as “EMPTY TITLE”.
72 EN72 EN
SP (2Hr)
CH12 SP
AM CH13 EP
NOV/21/07 11:00AM CH12 SP
0:00:59
After that, “Are you sure?” will appear, select
“Yes” and then press [OK].
Title will be deleted.
Data will be written onto the disc momentarily.
Writing to Disc 90%
This operation may take a
while to be completed.
After editing is complete, the title list will appear.
e.g.) DVD+RW/DVD-RW
1
EMPTY TITLE
0:21:14 SP(2Hr)
2
NOV/22/07 11:35
NOV/22/07 0:10:33
3
EMPTY TITLE
1:37:52 SP(2Hr)
SP (2Hr)
AM CH13 EP
E7H42UD_DVDR3506-37_EN.indd 72E7H42UD_DVDR3506-37_EN.indd 72 2007/12/28 10:54:052007/12/28 10:54:05
Page 73
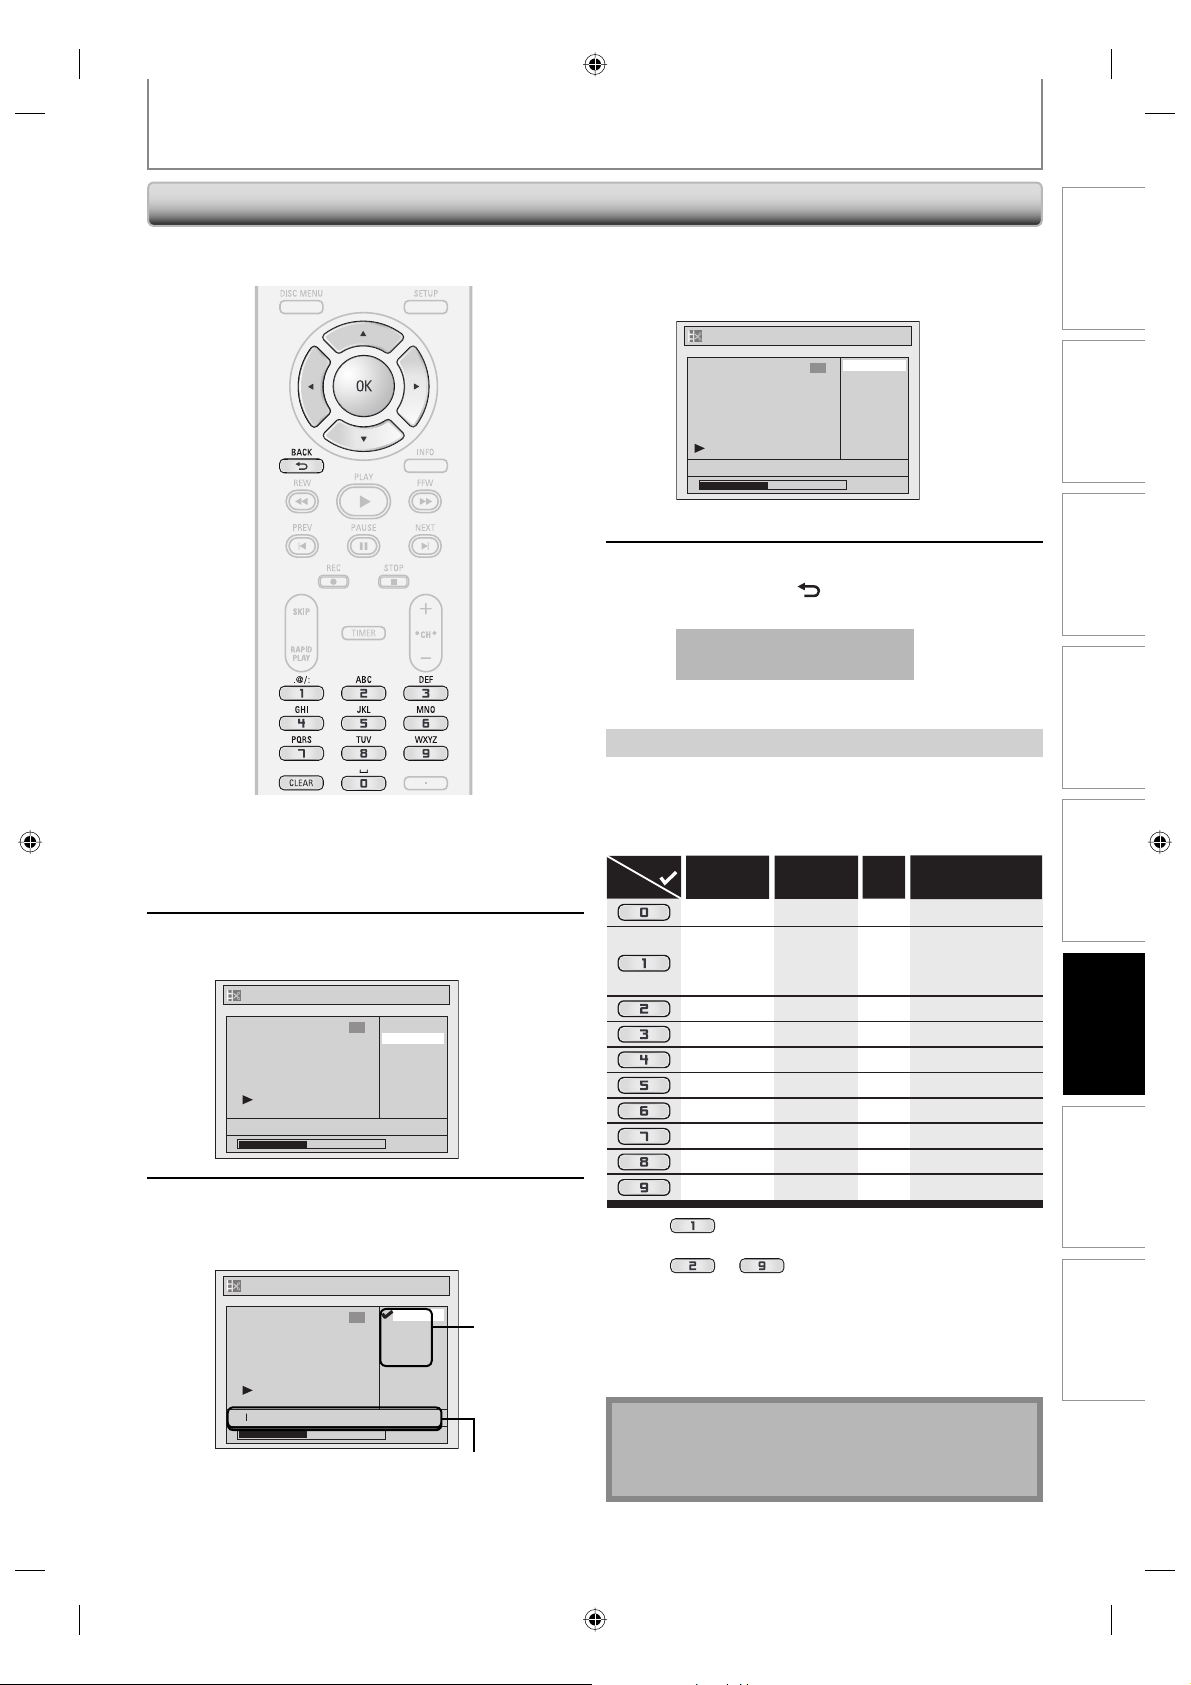
EDITING DISCS
Putting Names on Titles
You can put title names on the titles and change the
names from this menu.
Follow steps 1 to 3 in “Deleting
Titles” on page 72 to display “Edit”
1
2
3
menu.
Use [K / L] to select “Edit Title
Name”, then press [OK].
Edit
Title Delete
1
Edit Title Name
Chapter Mark
Hide Chapter
Index Picture
Title Dividing
NOV/21/07 11:00AM CH12 SP
0:00:59
To enter a title name, follow the
steps of “Guide to Edit Title Name”
on this page.
Edit - Edit Title Name
ABC
1
abc
123
@! ?
character set
Use [K / L] to select “Yes”, then press
[OK].
4
Edit - Edit Title Name
Yes
1
No
MY FAVORITE
The name you entered will be activated for the title.
0:00:59
After this operation is completed,
press [BACK
5
Guide to Edit Title Name
1) Use [K / L] to select a desired character set, then
2) Follow the list below, use [the Number buttons]
Press
*1 Press , character set will be changed to the “ @!? ”
*2 Press
• To delete letters, press [CLEAR] repeatedly.
• Use [s / B] to move the cursor to the left and right.
• You can enter up to 30 letters.
Data will be written onto the disc momentarily.
This operation may take a
while to be completed.
press [OK].
repeatedly until the desired letter appears.
Select
mode automatically.
the previous input mode automatically.
Holding [CLEAR] to delete all letters.
ABC
<space> <space> <space>
(*1) (*1)
ABC
DEF
GHI
JKL
MNO
PQRS
TUV
WXYZ
to , character set will be changed to
] to exit.
abc @ ! ?
abc
def
ghi
jkl
mno
pqrs
tuv
wxyz
123
0
1
2
3
4
5
6
7
8
9
! ” # $ % & ’ ( )
+ , - . / : ; < = >
*
? @ [ ] ^ _ { | }
(*2)
(*2)
(*2)
(*2)
(*2)
(*2)
(*2)
(*2)
Introduction Connections Basic Setup Function Setup Others
Recording Playback
Editing
M
0:00:59
area for entering title names
When you finish entering a title name, press [OK].
E7H42UD_DVDR3506-37_EN.indd 73E7H42UD_DVDR3506-37_EN.indd 73 2007/12/28 10:54:062007/12/28 10:54:06
Note
• Undefined letters in a title name are shown by “*”. If
you delete them, adjoining letters may change to “*”
or other.
73EN
73EN
Page 74
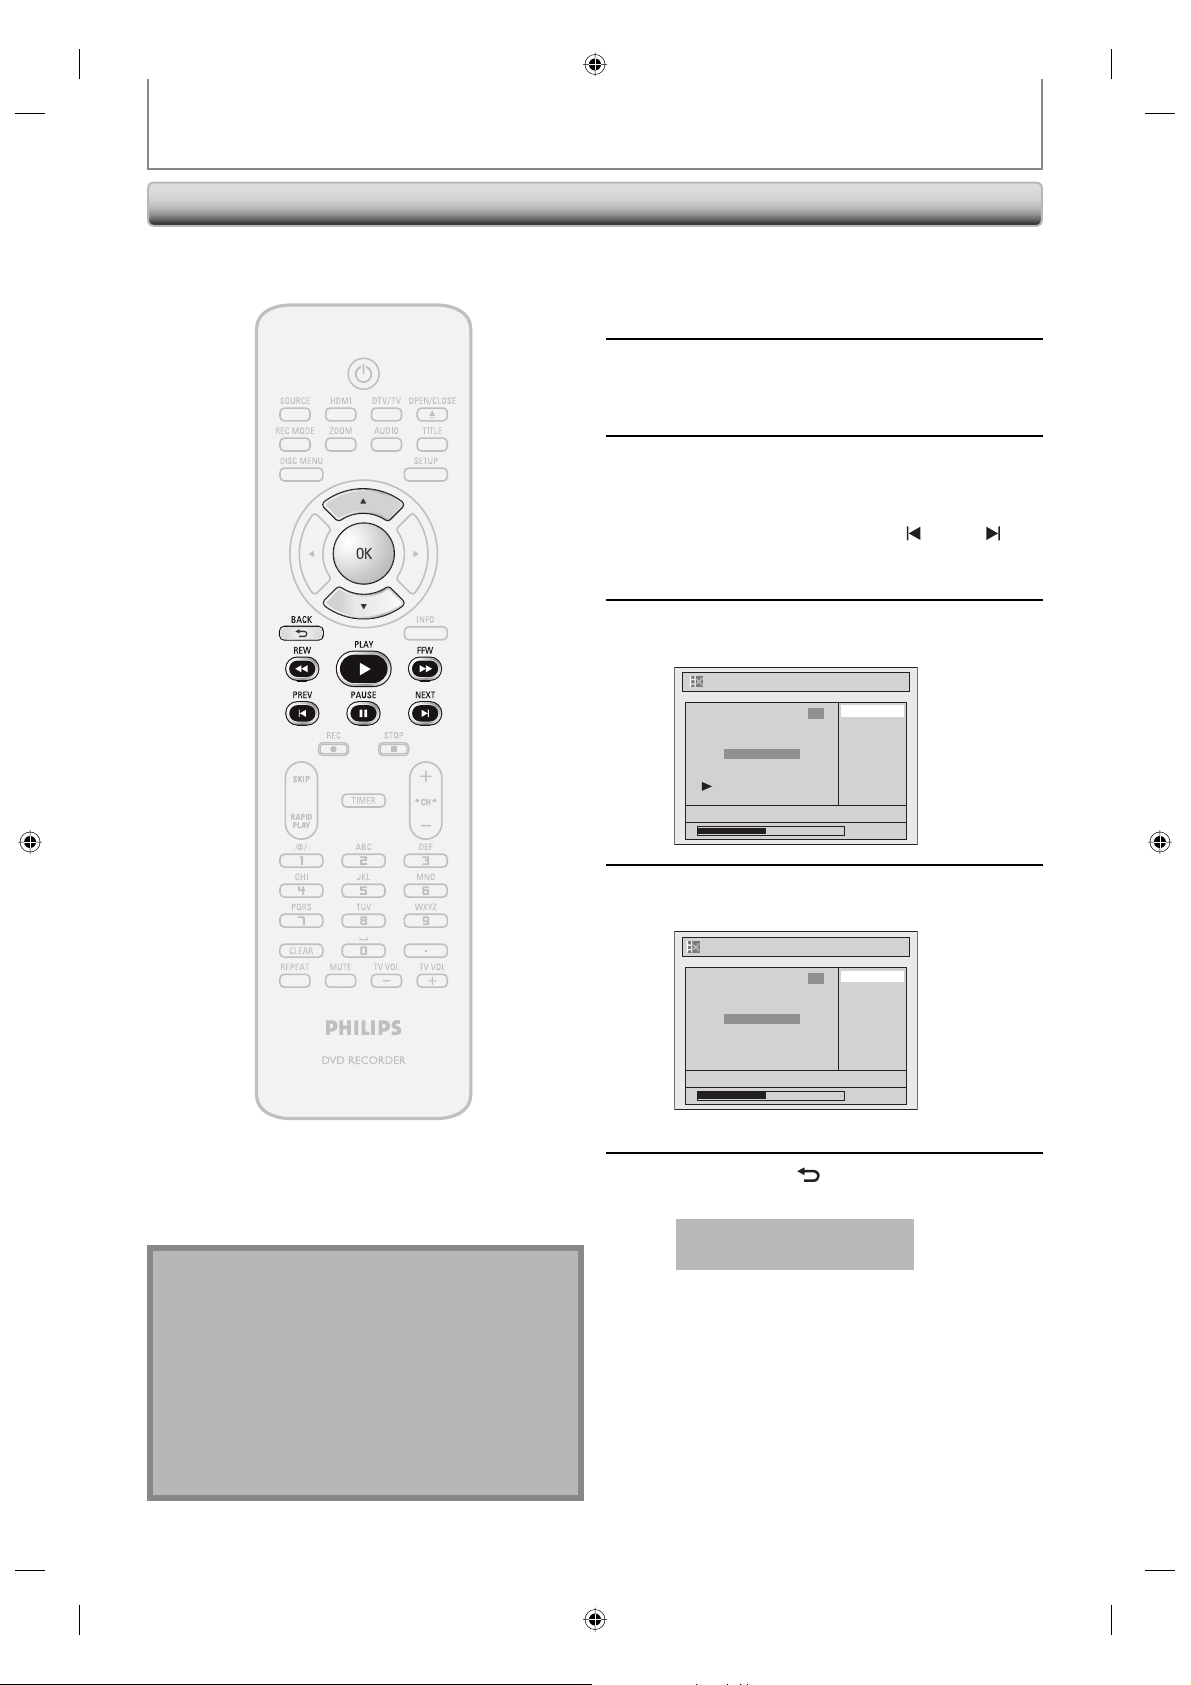
Setting Chapter Marks
EDITING DISCS
You can put chapter marks in each title. Once a chapter is
marked, you can use it for the chapter search feature.
Follow steps 1 to 3 in “Deleting
Titles” on page 72 to display “Edit”
1
2
3
4
menu.
Use [K / L] to select “Chapter Mark”,
then press [OK].
Submenu will appear.
Press [PLAY B] and then [PAUSE F]
to decide the point at which you will
create a new chapter mark.
• It is convenient to use [PREV ], [NEXT ],
[REW E] and [FFW D] for finding the point
to add a new chapter mark.
Use [K / L] to select “Add”, then press
[OK].
Edit - Chapter Mark
Add
1
Delete
Chapter 2/ 2
NOV/21/07 11:00AM CH12 SP
Delete All
0:00:59
Note
• When the number of chapter marks in a title is 99
and the number of chapter marks in a disc is 254,
chapter marks cannot be added.
• Besides the above-mentioned, it is not likely to be
able to add according to recorded time and number
of chapters.
• Remaining time of the disc may decrease when
adding chapter marks or increase when clearing
chapter marks depending on the recording time or
edited contents.
Use [K / L] to select “Yes”, then press
[OK].
5
6
Edit - Chapter Mark - Add
Yes
1
No
Chapter 2/ 2
F
NOV/21/07 11:00AM CH12 SP
A new chapter mark will be added.
Press [BACK ] twice to exit.
Data will be written onto the disc momentarily.
This operation may take a
while to be completed.
0:00:59
74 EN74 EN
E7H42UD_DVDR3506-37_EN.indd 74E7H42UD_DVDR3506-37_EN.indd 74 2007/12/28 10:54:082007/12/28 10:54:08
Page 75
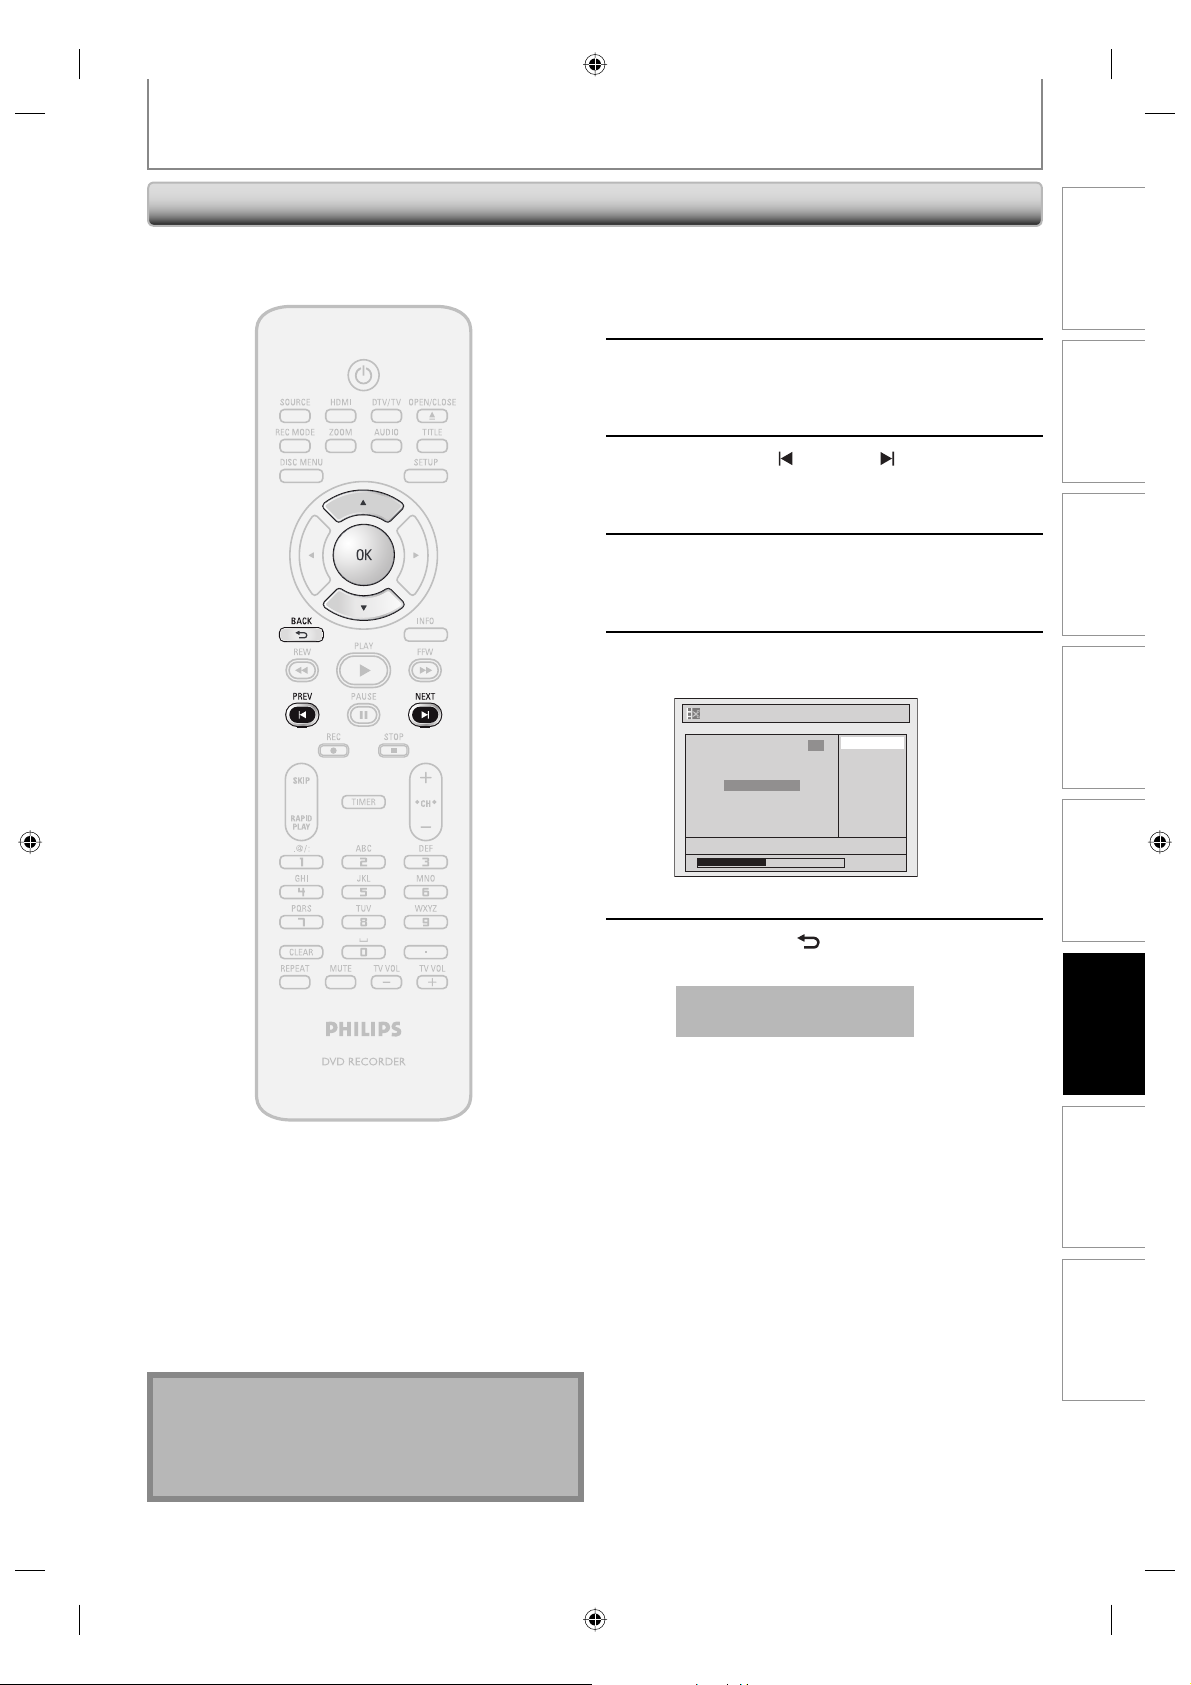
EDITING DISCS
Clearing Chapter Marks
Follow steps 1 to 3 in “Deleting
Titles” on page 72 to display “Edit”
1
2
menu.
Use [K / L] to select “Chapter Mark”,
then press [OK].
Submenu will appear.
Use [PREV ] / [NEXT ] to select a
chapter mark to be deleted.
3
Use [K / L] to select “Delete”, then
press [OK].
4
Use [K / L] to select “Yes”, then press
[OK].
5
Edit - Chapter Mark - Delete
Chapter 2/ 2
F
NOV/21/07 11:00AM CH12 SP
Yes
1
No
0:00:59
Introduction Connections Basic Setup Function Setup Others
Recording Playback
Note
• Remaining time of the disc may decrease when
adding chapter marks or increase when clearing
chapter marks depending on the recording time or
edited contents.
The selected chapter mark will be deleted.
Press [BACK ] twice to exit.
Data will be written onto the disc momentarily.
6
This operation may take a
while to be completed.
Editing
75EN
75EN
E7H42UD_DVDR3506-37_EN.indd 75E7H42UD_DVDR3506-37_EN.indd 75 2007/12/28 10:54:102007/12/28 10:54:10
Page 76
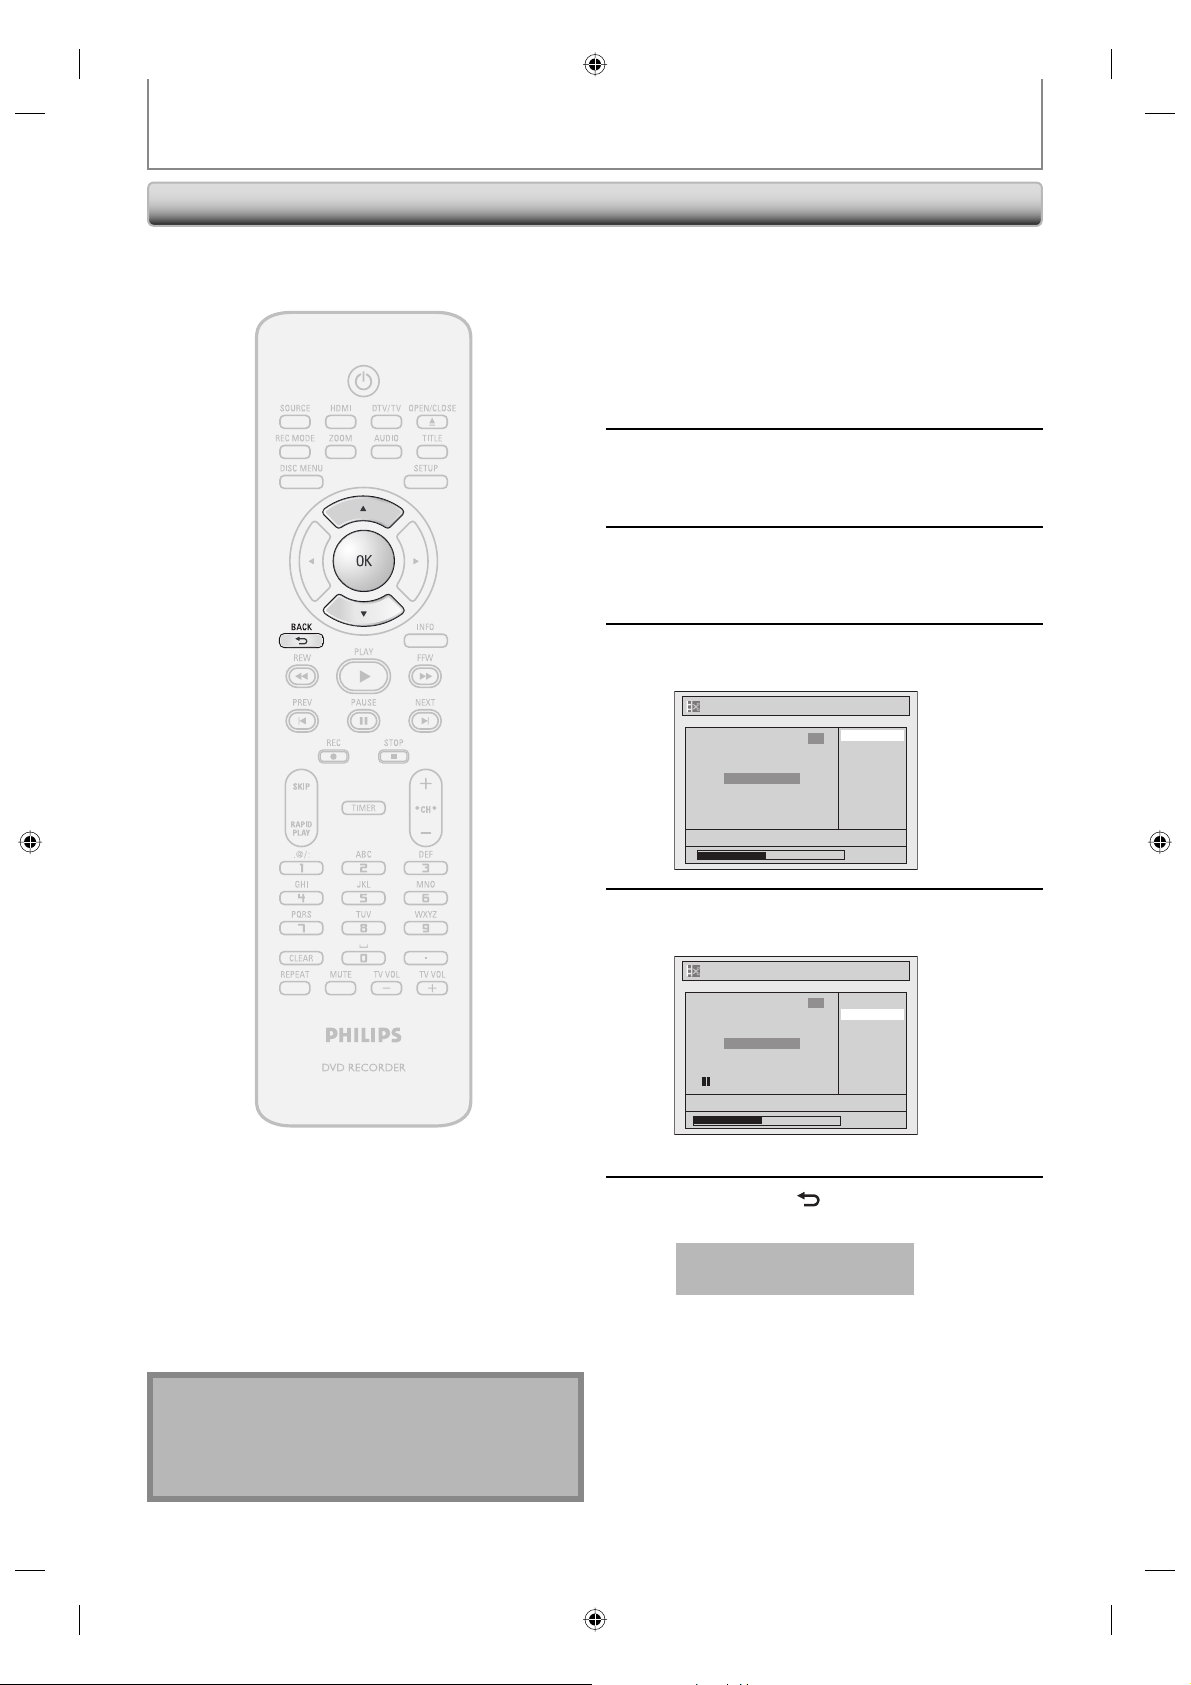
EDITING DISCS
Clearing Chapter Marks (cont’d)
To delete all chapter marks:
Follow steps 1 to 3 in “Deleting
Titles” on page 72 to display “Edit”
1
2
menu.
Use [K / L] to select “Chapter Mark”,
then press [OK].
Submenu will appear.
Use [K / L] to select “Delete All”,
then press [OK].
3
Use [K / L] to select “Yes”, then press
[OK].
4
Edit - Chapter Mark - Delete All
Chapter 2/ 2
F
NOV/21/07 11:00AM CH12 SP
Yes
1
No
0:00:59
Note
• Remaining time of the disc may decrease when
adding chapter marks or increase when clearing
chapter marks depending on the recording time or
edited contents.
Use [K / L] to select “Yes”, then press
[OK].
5
6
Edit - Chapter Mark - Delete All
Are you sure?
1
Yes
Chapter 2/ 2
NOV/21/07 11:00AM CH12 SP
All chapter marks will be deleted.
Press [BACK ] twice to exit.
Data will be written onto the disc momentarily.
This operation may take a
while to be completed.
No
0:00:59
76 EN76 EN
E7H42UD_DVDR3506-37_EN.indd 76E7H42UD_DVDR3506-37_EN.indd 76 2007/12/28 10:54:112007/12/28 10:54:11
Page 77
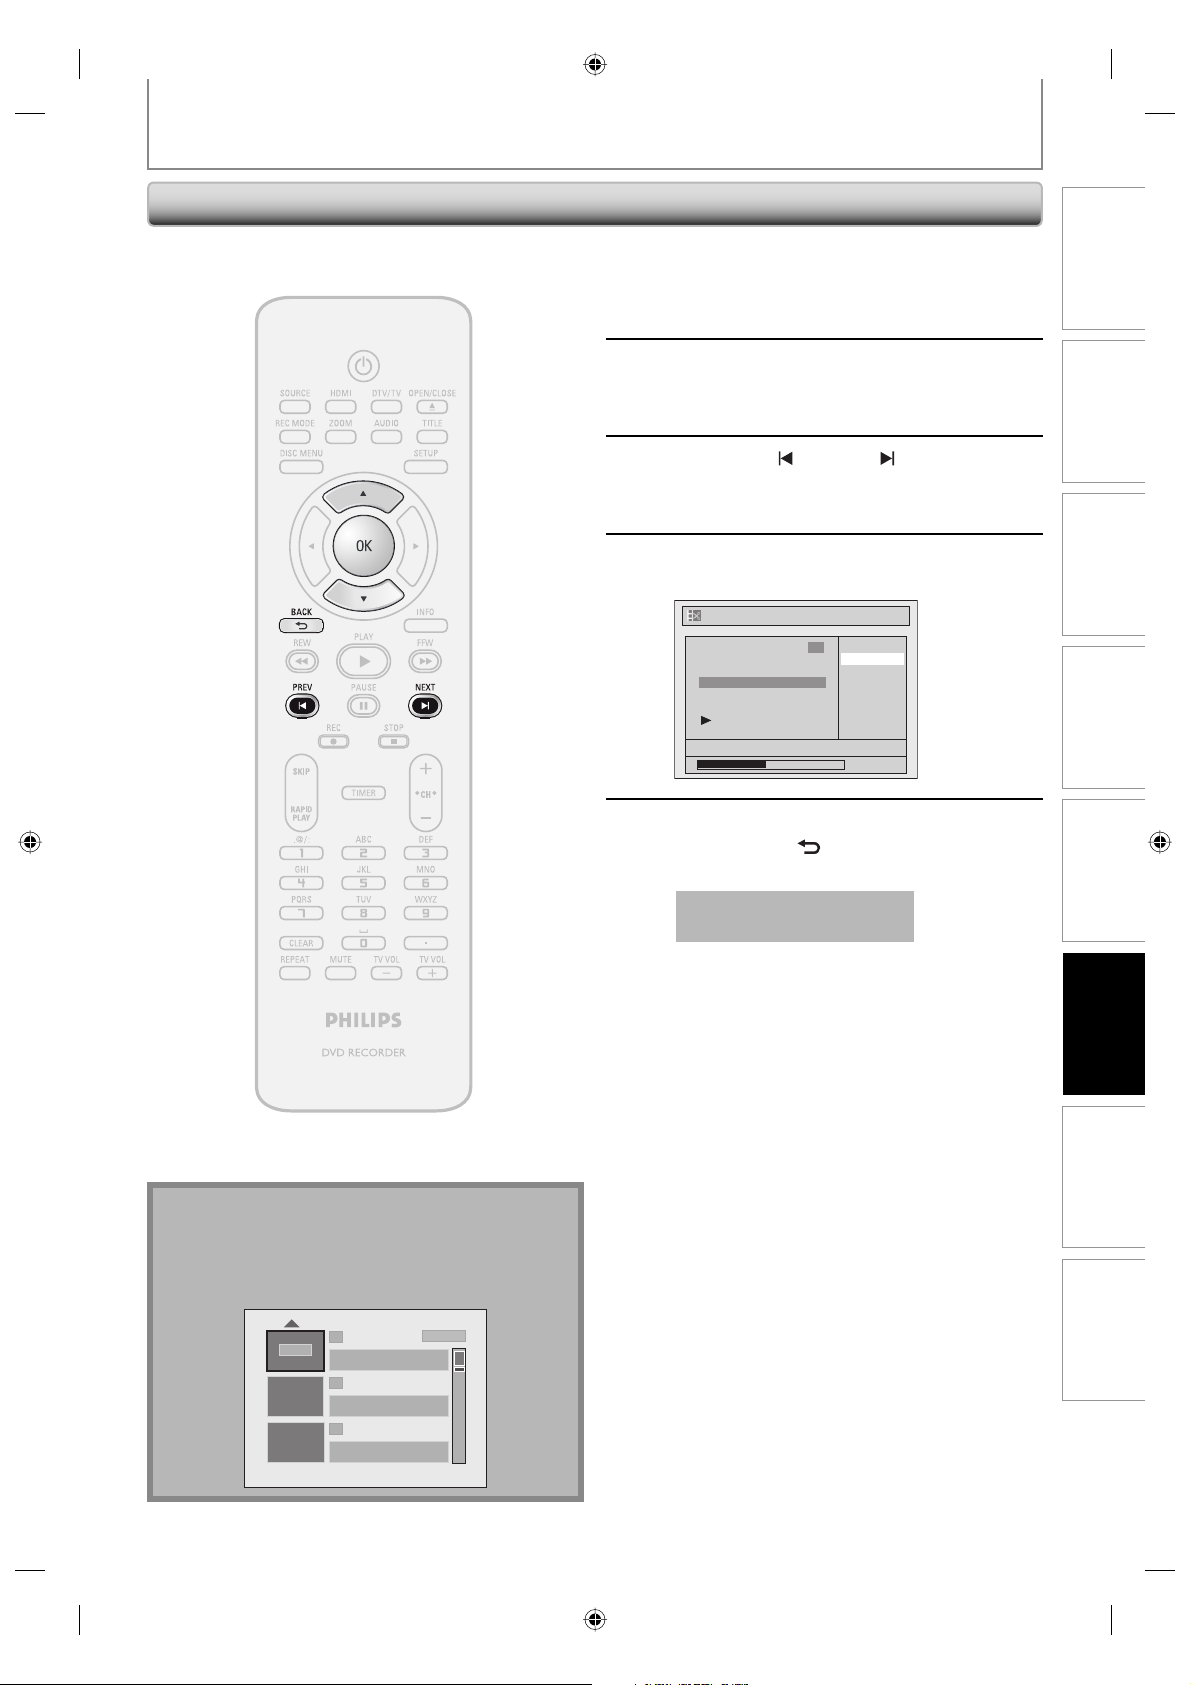
EDITING DISCS
Hiding Chapters
You can hide chapters from the title list.
Hidden chapters are skipped during playback.
Follow steps 1 to 3 in “Deleting
Titles” on page 72 to display “Edit”
1
2
menu.
Use [K / L] to select “Hide Chapter”,
then press [OK].
Submenu will appear.
Use [PREV ] / [NEXT ] to decide the
chapter to be hidden.
3
Use [K / L] to select “Hidden”, then
press [OK].
4
Edit - Hide Chapter
Chapter 2/ 2 Visible
NOV/21/07 11:00AM CH12 SP
Visible
1
Hidden
0:00:59
Introduction Connections Basic Setup Function Setup Others
Recording Playback
Note
• ”Hidden” will be displayed in the preview window
while previewing the hidden chapter.
• When you make all chapters in the title “Hidden”,
“Hidden” is displayed in a thumbnail of the title list.
Hidden
1
NOV/21/07 11:00
NOV/21/07 0:20:44
2
NOV/22/07 11:35AM
NOV/22/07 0:10:33
3
EMPTY TITLE
1:37:52 SP(2Hr)
SP (2Hr)
AM CH12 SP
CH13 EP
After this operation is completed,
5
press [BACK
Data will be written onto the disc momentarily.
This operation may take a
while to be completed.
If you want hidden chapters to be “Visible”,
select the chapter to be shown. Then use
[K / L] to select “Visible” at the step 4 on this
page.
Data will be written onto the disc momentarily.
After that, title list is displayed.
] twice to exit.
Editing
77EN
77EN
E7H42UD_DVDR3506-37_EN.indd 77E7H42UD_DVDR3506-37_EN.indd 77 2007/12/28 10:54:122007/12/28 10:54:12
Page 78
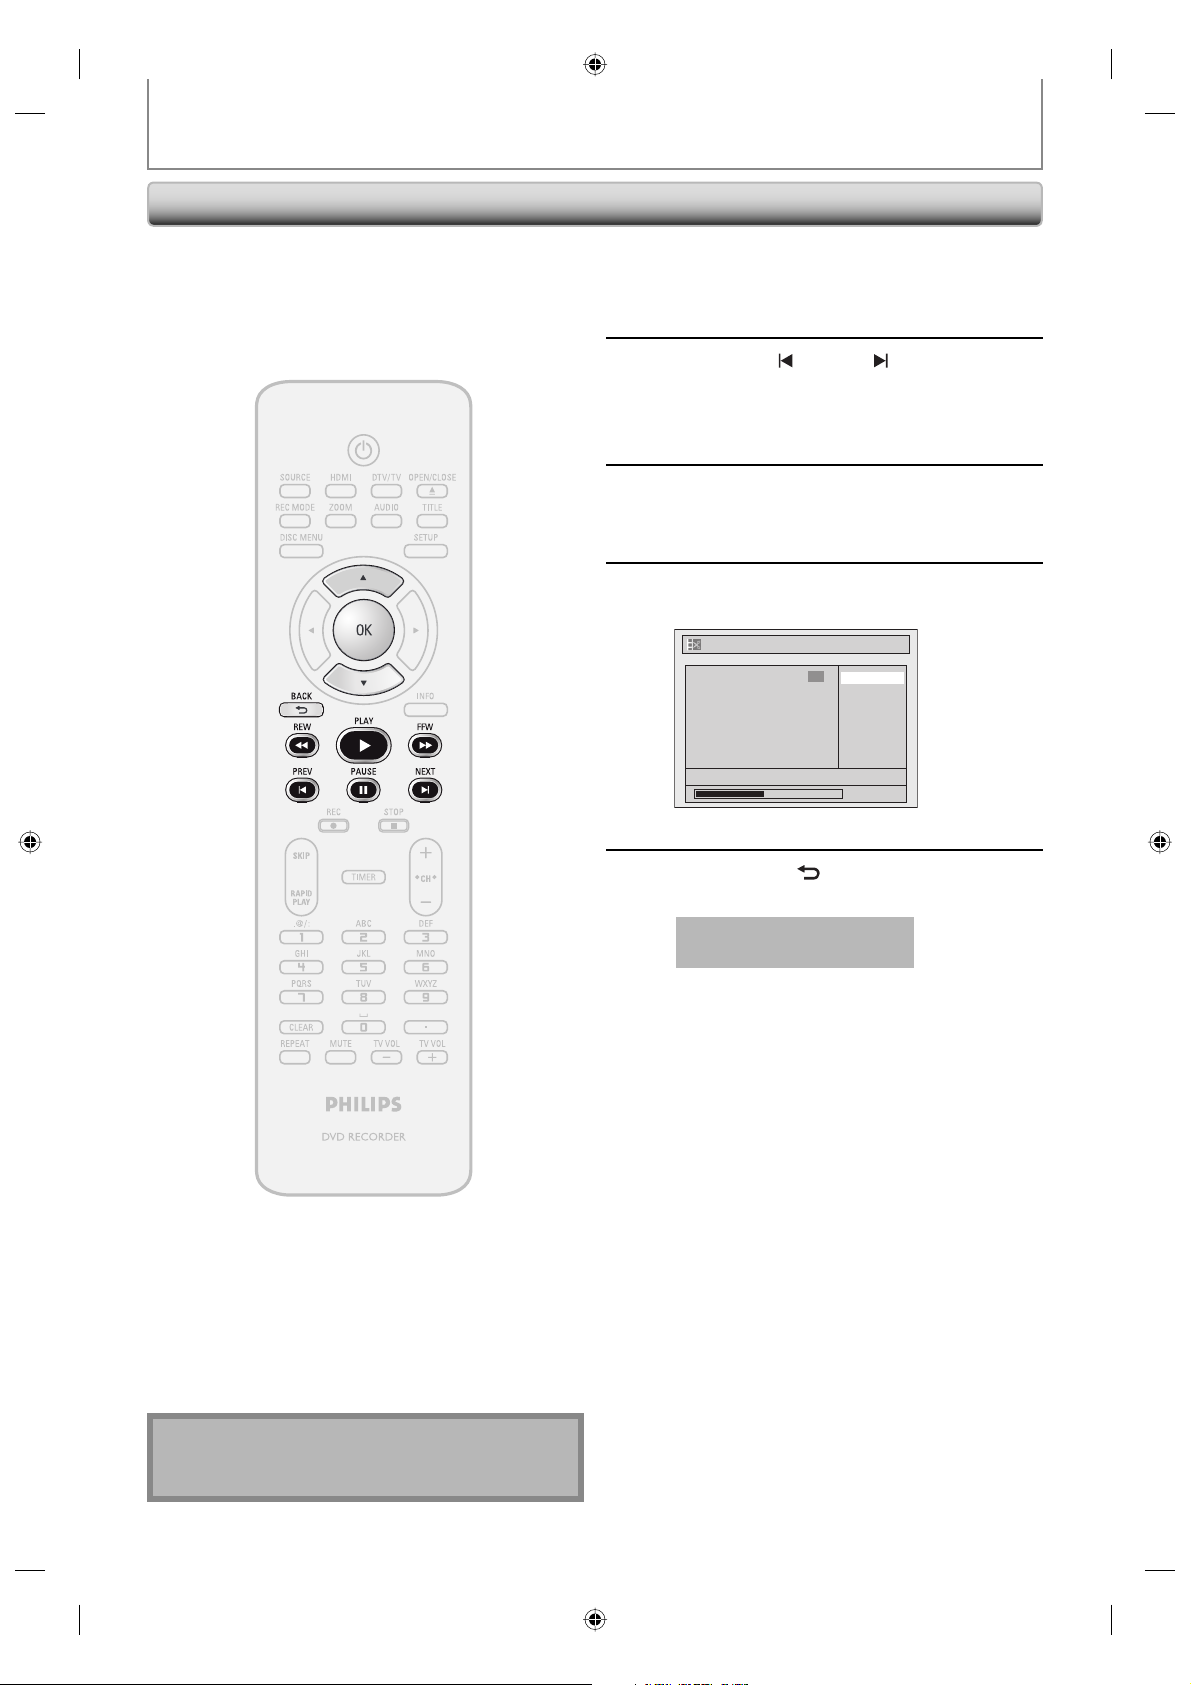
EDITING DISCS
Setting Pictures for Thumbnails
You can set your desired scene as a thumbnail for each
title.
Follow steps 1 to 3 in “Deleting
Titles” on page 72 to display “Edit”
1
2
menu.
Use [PREV ], [NEXT ], [REW E],
[FFW D], [PAUSE F] and [PLAY B]
to decide the picture you want to
select as a thumbnail.
Use [K / L] to select “Index Picture”,
then press [OK].
3
Use [K / L] to select “Yes”, then press
[OK].
4
Edit - Index Picture
1
Yes
No
F
NOV/21/07 11:00AM CH12 SP
A picture for thumbnail will be set.
0:00:59
Note
• If the selected picture for a thumbnail is overwritten,
the index picture is reset to the first scene of the title.
Press [BACK ] to exit.
Data will be written onto the disc momentarily.
5
This operation may take a
while to be completed.
78 EN78 EN
E7H42UD_DVDR3506-37_EN.indd 78E7H42UD_DVDR3506-37_EN.indd 78 2007/12/28 10:54:142007/12/28 10:54:14
Page 79
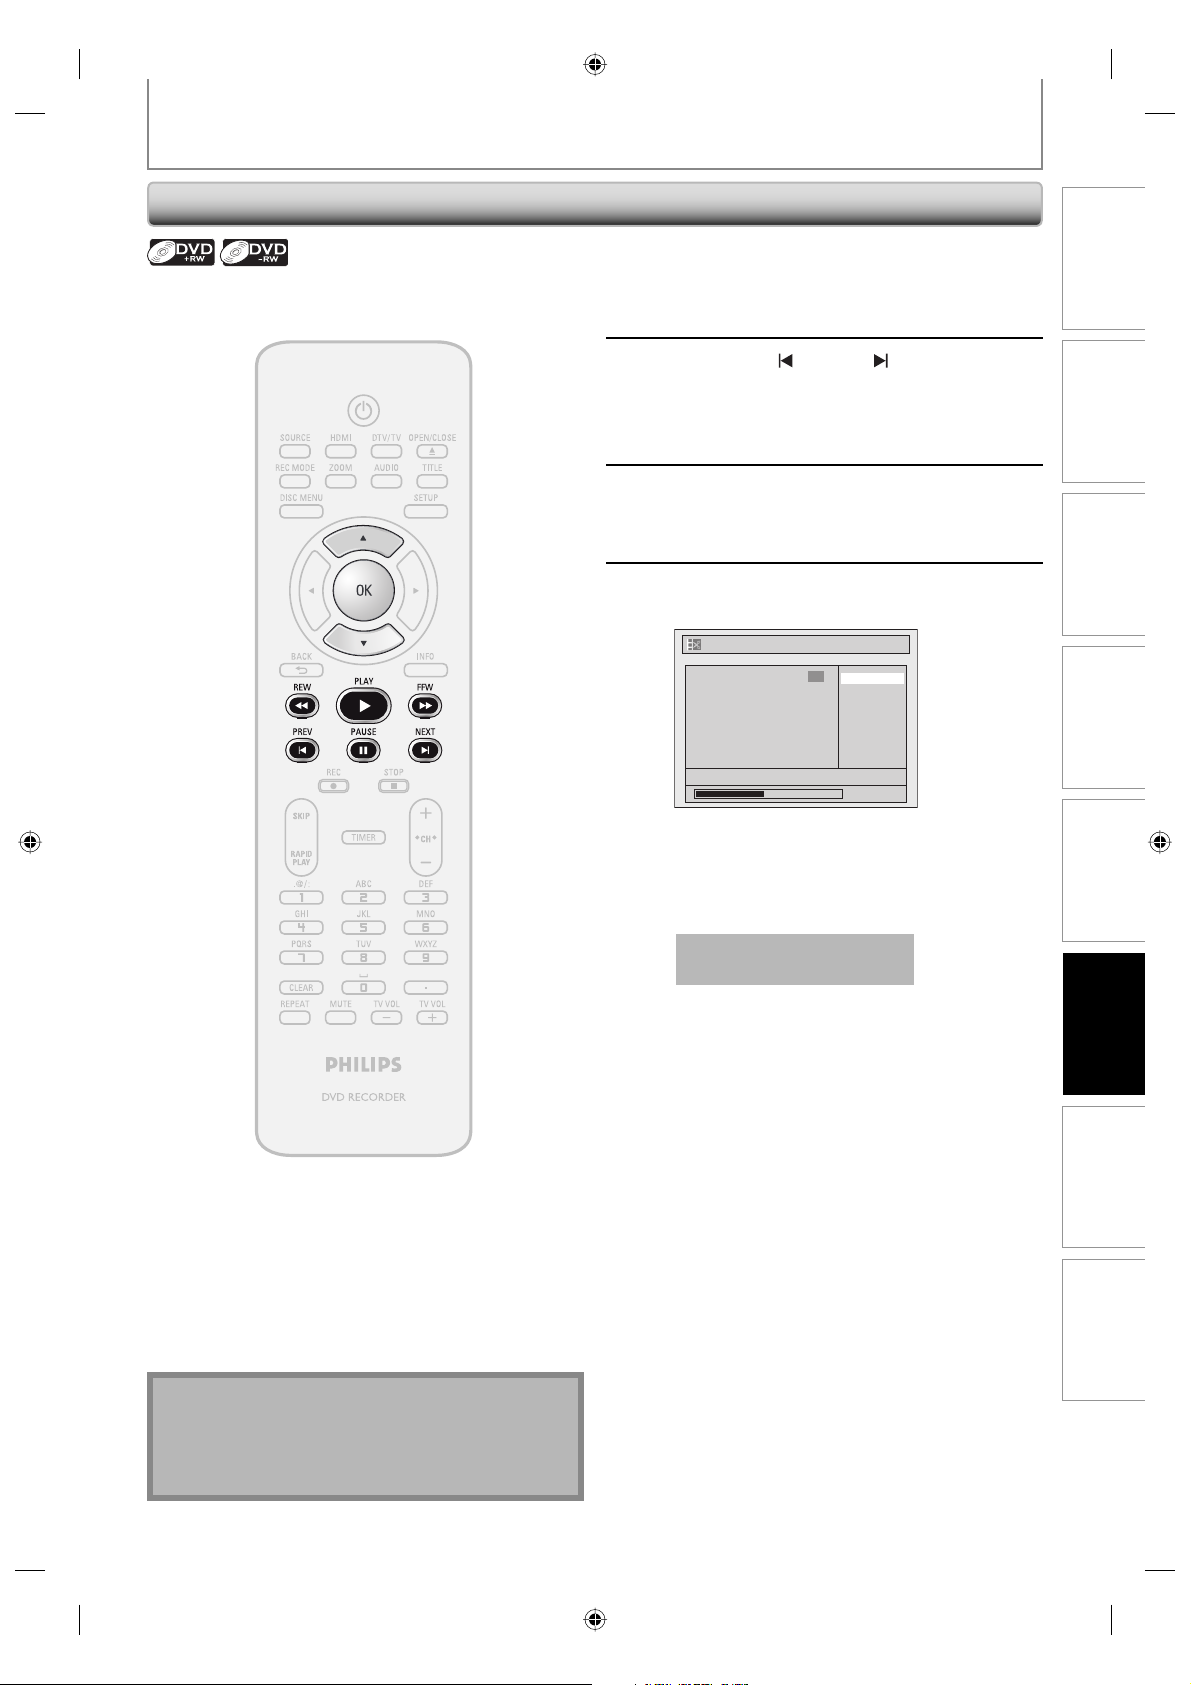
EDITING DISCS
Dividing a Title
You can divide one title into 2 new titles.
Follow steps 1 to 3 in “Deleting
Titles” on page 72 to display “Edit”
1
2
menu.
Use [PREV ], [NEXT ], [REW E],
[FFW D], [PAUSE F] and [PLAY B]
to decide the point at which you will
divide the title.
Use [K / L] to select “Title Dividing”,
then press [OK].
3
Use [K / L] to select “Yes”, then press
[OK].
4
Edit - Title Dividing
1
Yes
No
F
NOV/21/07 11:00AM CH12 SP
The title will be divided into 2 new titles.
Both title names are identical, and index pictures
are reset to the first scene at this point.
0:00:59
Introduction Connections Basic Setup Function Setup Others
Recording Playback
Note
• You cannot divide a title of the disc when the
number of recording titles reaches the maximum of
49, and the number of recording chapters reaches
the maximum of 254.
Data will be written onto the disc momentarily.
This operation may take a
while to be completed.
Editing
79EN
79EN
E7H42UD_DVDR3506-37_EN.indd 79E7H42UD_DVDR3506-37_EN.indd 79 2007/12/28 10:54:152007/12/28 10:54:15
Page 80
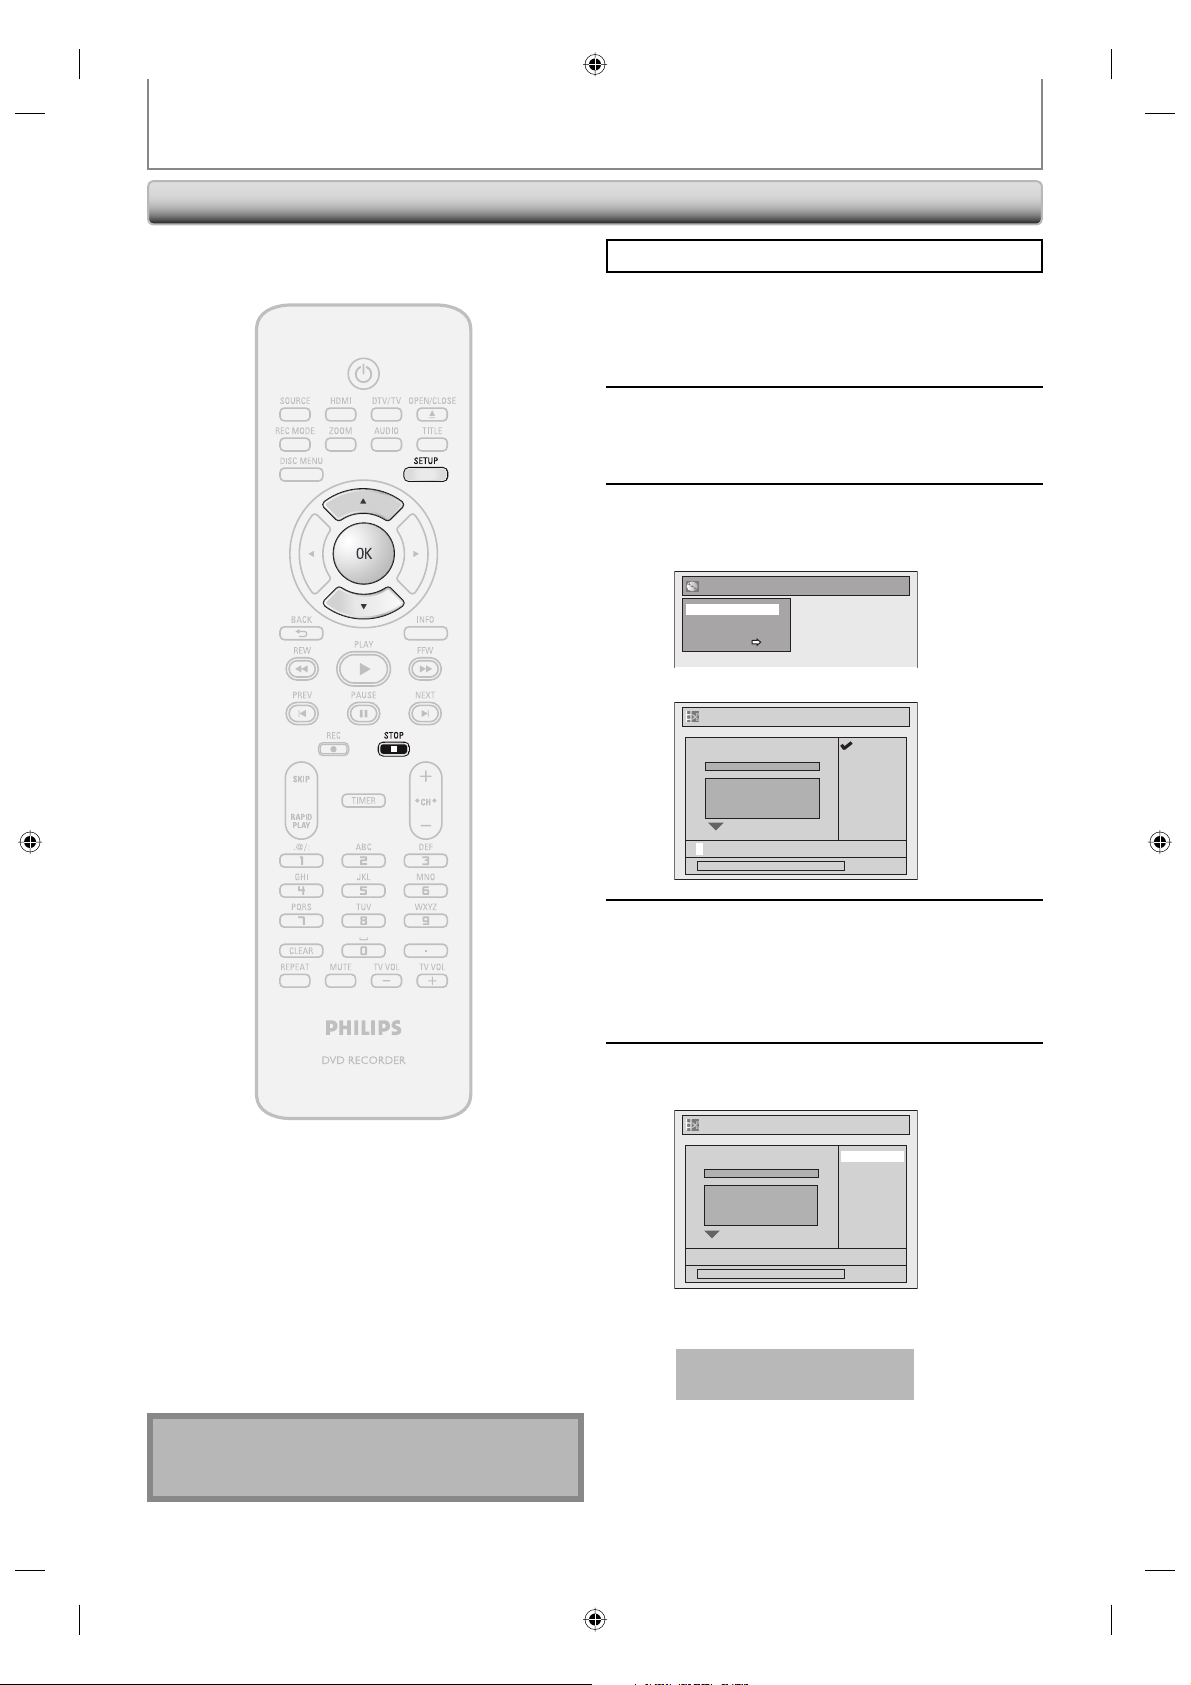
Putting Name on Disc
EDITING DISCS
You can put a name on the disc and change it from this
menu.
Press [STOP C] if you are playing back a disc.
Press [SETUP].
1
Use [K / L] to select “Disc Edit”, then
press [OK].
2
Use [K / L] to select “Edit Disc
Name”, then press [OK].
3
e.g.) DVD+RW
Disc Edit
Edit Disc Name
Erase Disc
Make Edits Compatible
Disc Protect OFF ON
A window for entering a title name will appear.
Edit Disc Name
ABC
No Disc Name
Disc DVD+RW
Total Titles 3
Disc Space Used 0:30:48
Disc Protect OFF
Make Edits Compatible Needed
abc
123
@! ?
Note
• You cannot select “Disc Edit” when finalized DVD+R
or DVD-R is inserted.
0:00:00
To enter a disc name, follow the steps
of “Guide to Edit Title Name” on page
4
73.
When you finish entering a title name, press
[OK].
Use [K / L] to select “Yes”, then press
[OK].
5
Edit Disc Name
Yes
No Disc Name
Disc DVD+RW
Total Titles 3
Disc Space Used 0:30:48
Disc Protect OFF
Make Edits Compatible Needed
MY FAVORITE DISC
The name you entered will be activated for the title.
Data will be written onto the disc momentarily.
This operation may take a
while to be completed.
No
0:00:00
80 EN80 EN
E7H42UD_DVDR3506-37_EN.indd 80E7H42UD_DVDR3506-37_EN.indd 80 2007/12/28 10:54:172007/12/28 10:54:17
Page 81
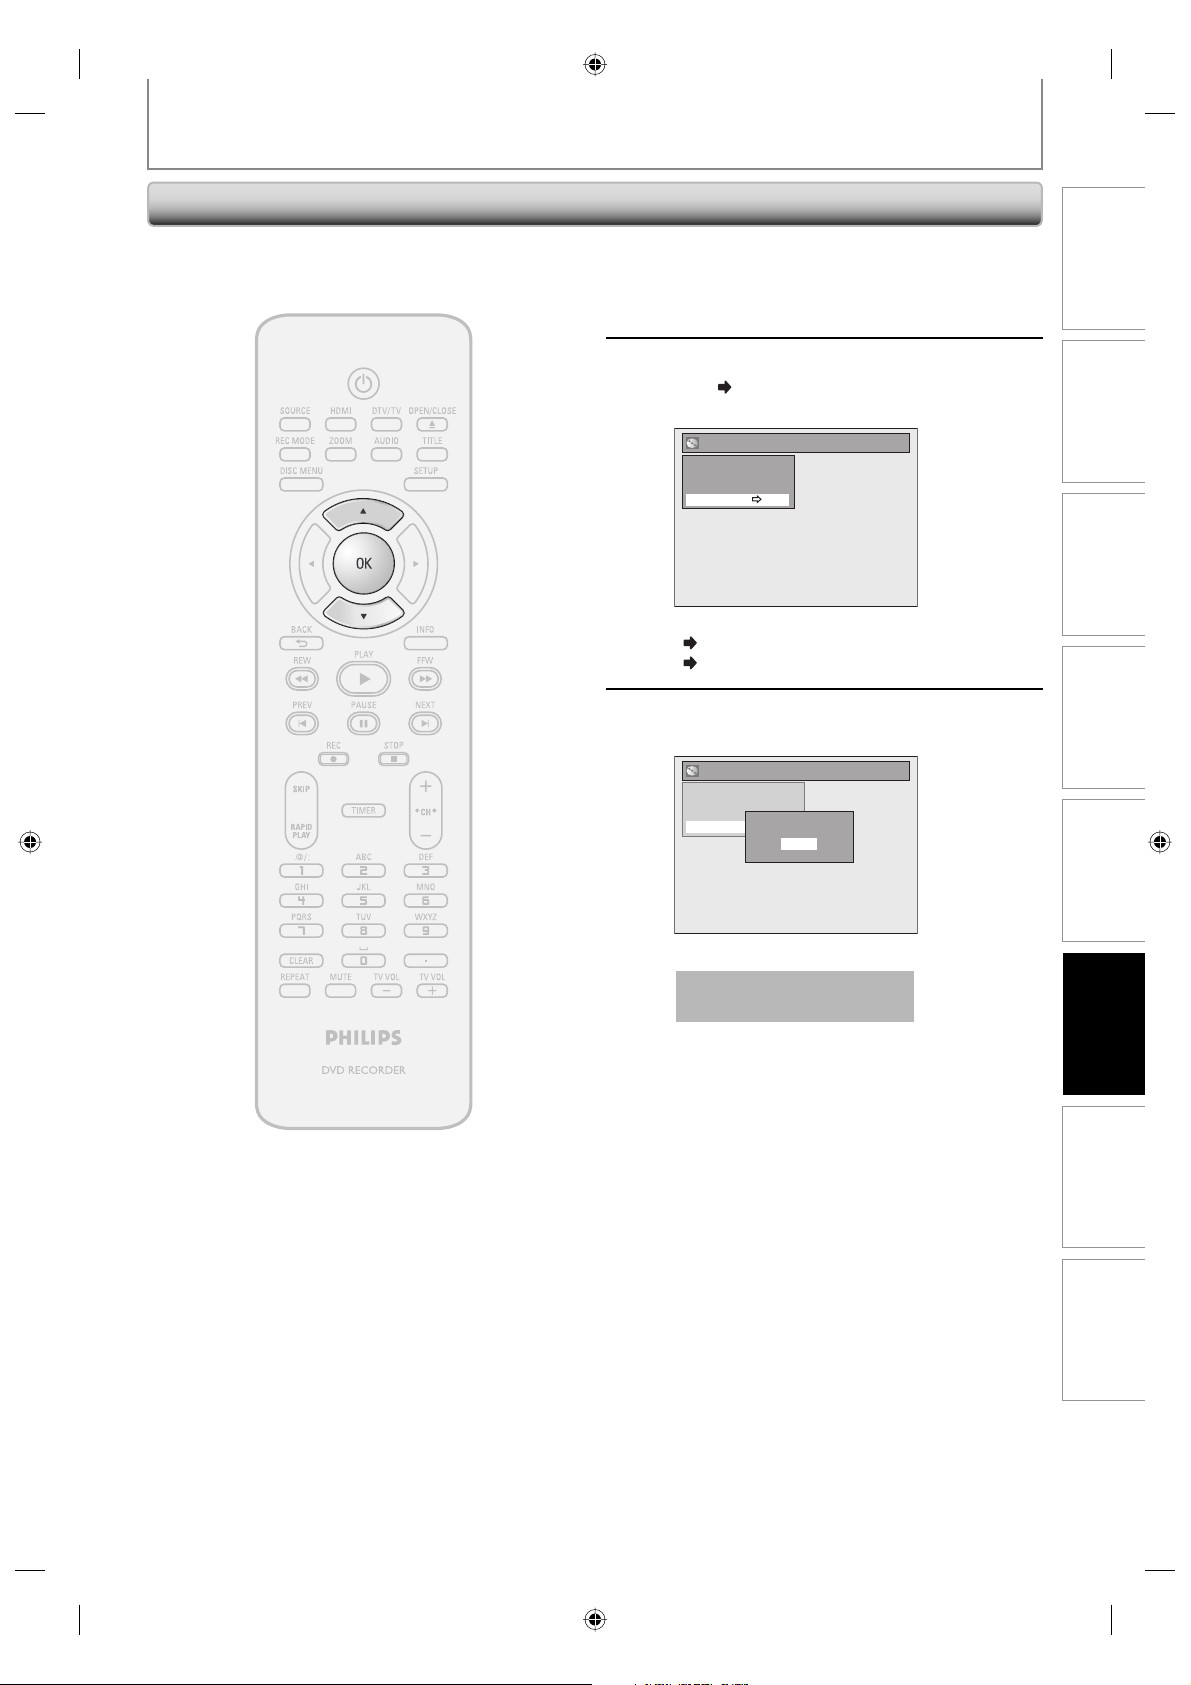
EDITING DISCS
Setting or Releasing Disc Protect
To prevent accidental editing, or erasing the titles, you
can protect them.
Follow steps 1 to 2 in “Putting Name
on Disc” on page 80 to display “Disc
1
2
3
Edit” menu.
Use [K / L] to select “Disc Protect
OFF
ON”, then press [OK].
e.g.) DVD+RW
Disc Edit
Edit Disc Name
Erase Disc
Make Edits Compatible
Disc Protect OFF ON
• If the disc is already protected, “Disc Protect ON
OFF” will appear instead of “Disc Protect OFF
ON”.
Use [K / L] to select “Yes”, then press
[OK].
Disc Edit
Edit Disc Name
Erase Disc
Make Edits Compatible
Disc Protect OFF ON
Protect this disc?
Yes
No
Introduction Connections Basic Setup Function Setup Others
Recording Playback
Data will be written onto the disc momentarily.
This operation may take a
while to be completed.
Editing
81EN
81EN
E7H42UD_DVDR3506-37_EN.indd 81E7H42UD_DVDR3506-37_EN.indd 81 2007/12/28 10:54:182007/12/28 10:54:18
Page 82
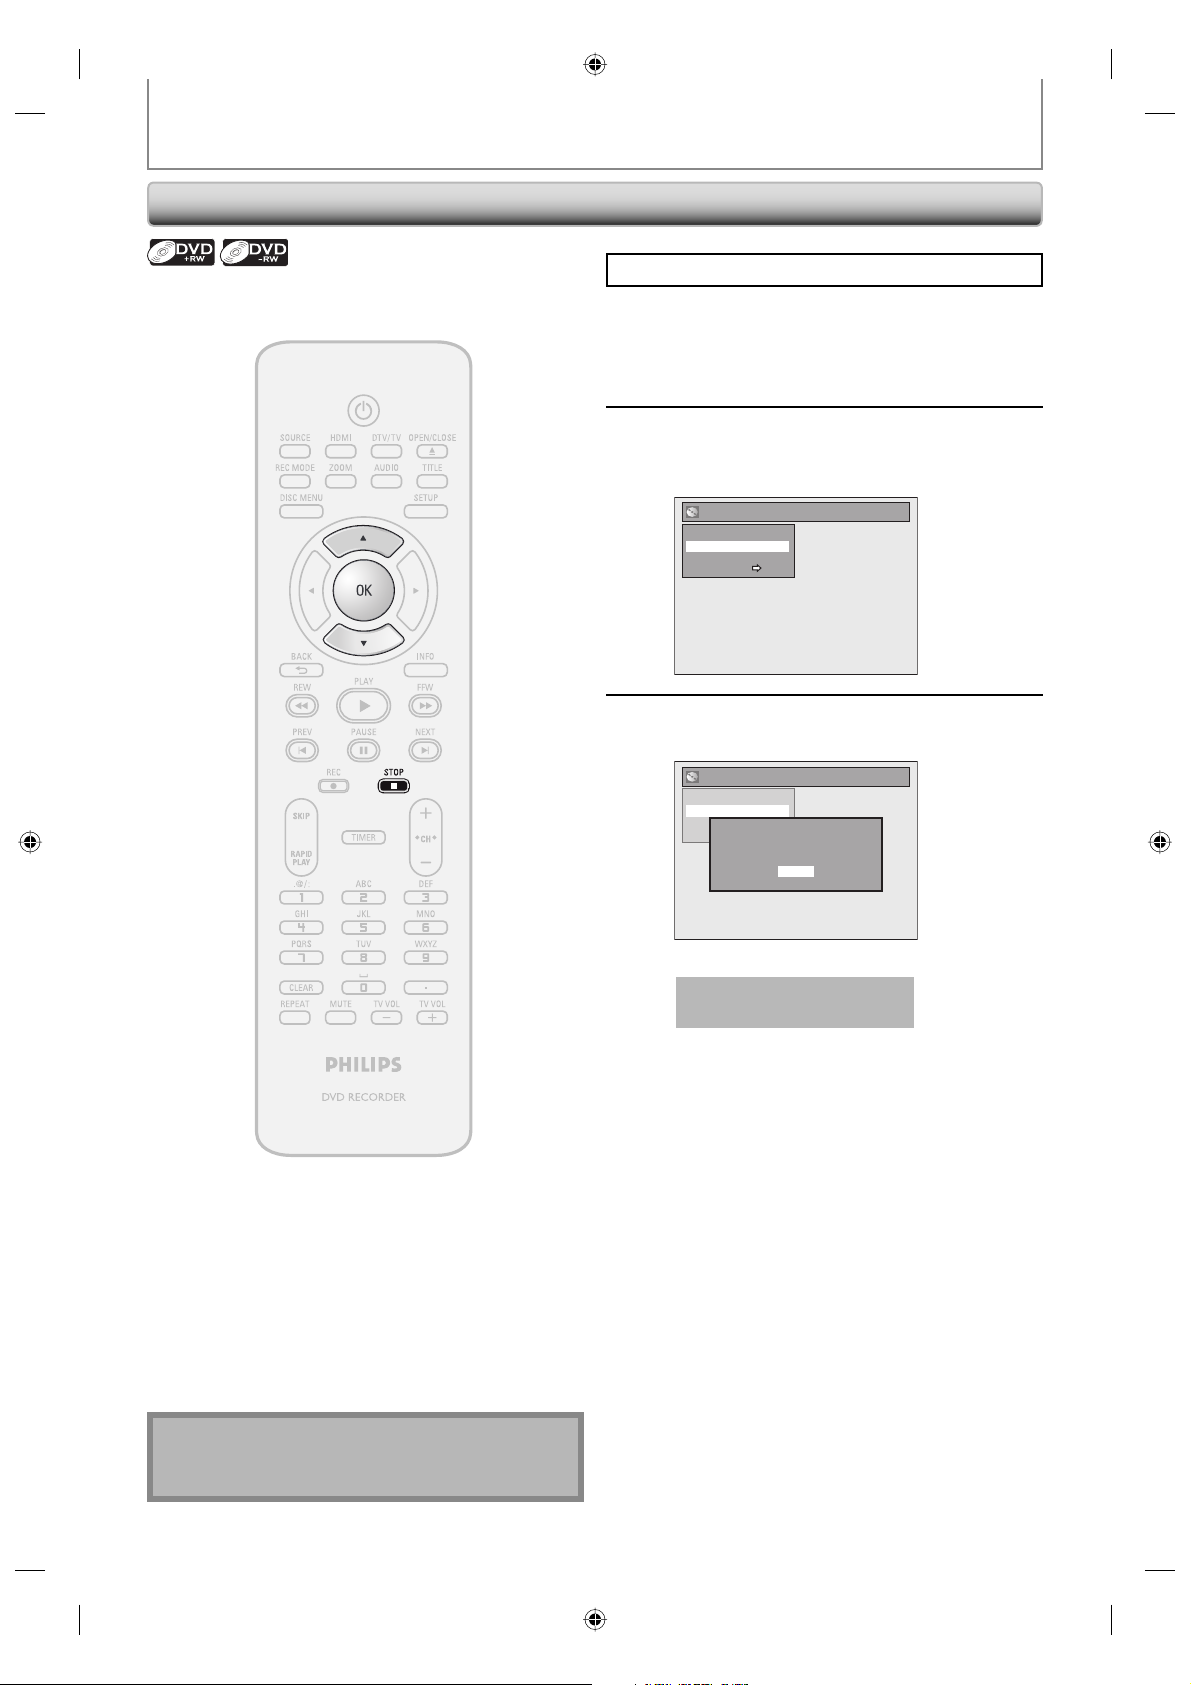
Erasing Disc
EDITING DISCS
You can erase all titles on a disc.
Press [STOP C] if you are playing back a disc.
Follow steps 1 to 2 in “Putting Name
on Disc” on page 80 to display “Disc
1
2
3
Edit” menu.
Use [K / L] to select “Erase Disc”,
then press [OK].
e.g.) DVD+RW
Disc Edit
Edit Disc Name
Erase Disc
Make Edits Compatible
Disc Protect OFF ON
Use [K / L] to select “Yes”, then press
[OK].
Disc Edit
Edit Disc Name
Erase Disc
Make Edits Compatible
When you press “Yes”, all the
Disc Protect OFF ON
contents in the disc will be erased.
Are you sure to erase the disc?
Yes
No
Note
• When you select “Yes” at step 3, all contents of the
disc will be erased.
Data will be written onto the disc momentarily.
This operation may take a
while to be completed.
82 EN82 EN
E7H42UD_DVDR3506-37_EN.indd 82E7H42UD_DVDR3506-37_EN.indd 82 2007/12/28 10:54:192007/12/28 10:54:19
Page 83
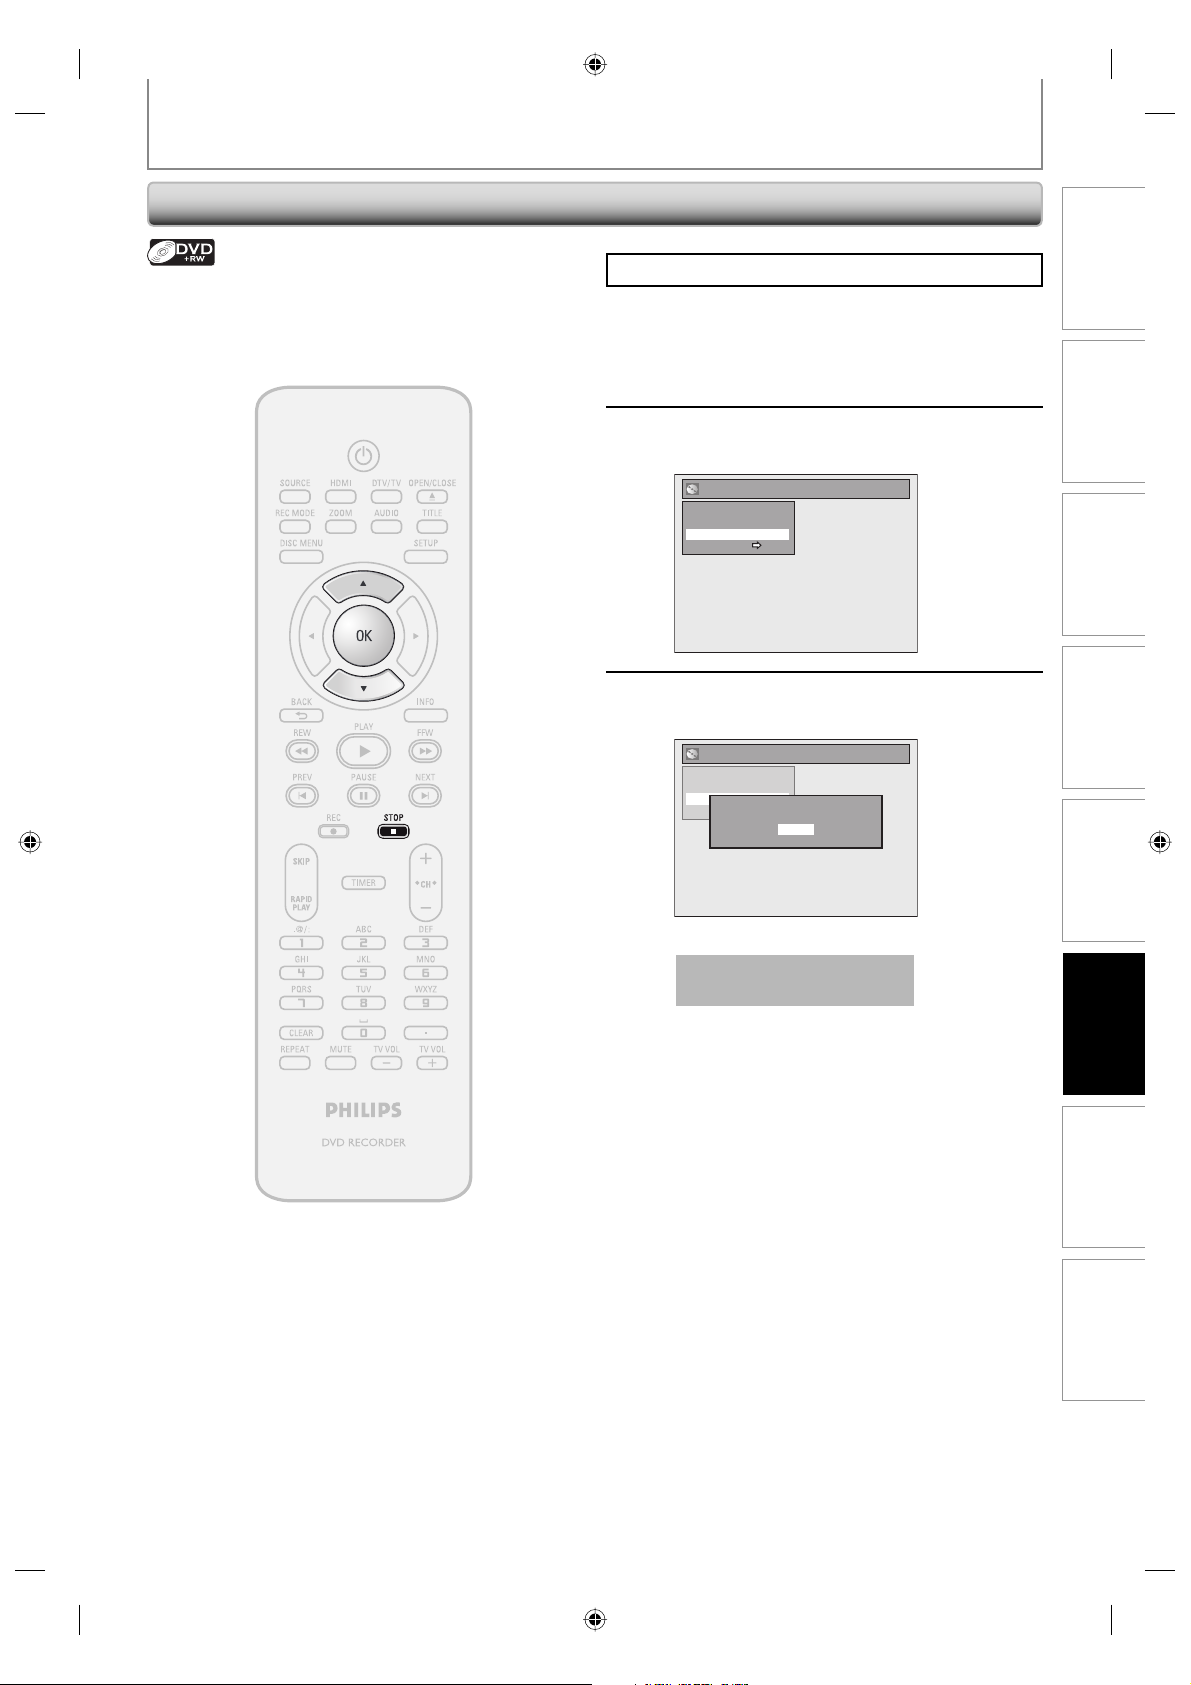
EDITING DISCS
Making Edits Compatible
If you have added or deleted chapters, or made chapters
hidden, you must perform “Make Edits Compatible” to
see those effects on other unit.
Press [STOP C] if you are playing back a disc.
Follow steps 1 to 2 in “Putting Name
on Disc” on page 80 to display “Disc
1
2
3
Edit” menu.
Use [K / L] to select “Make Edits
Compatible”, then press [OK].
Disc Edit
Edit Disc Name
Erase Disc
Make Edits Compatible
Disc Protect OFF ON
Use [K / L] to select “Yes”, then press
[OK].
Disc Edit
Edit Disc Name
Erase Disc
Make Edits Compatible
Activate the Make Edits Compatible?
Disc Protect OFF ON
Yes
No
Introduction Connections Basic Setup Function Setup Others
Recording Playback
Data will be written onto the disc momentarily.
This operation may take a
while to be completed.
Editing
83EN
83EN
E7H42UD_DVDR3506-37_EN.indd 83E7H42UD_DVDR3506-37_EN.indd 83 2007/12/28 10:54:202007/12/28 10:54:20
Page 84
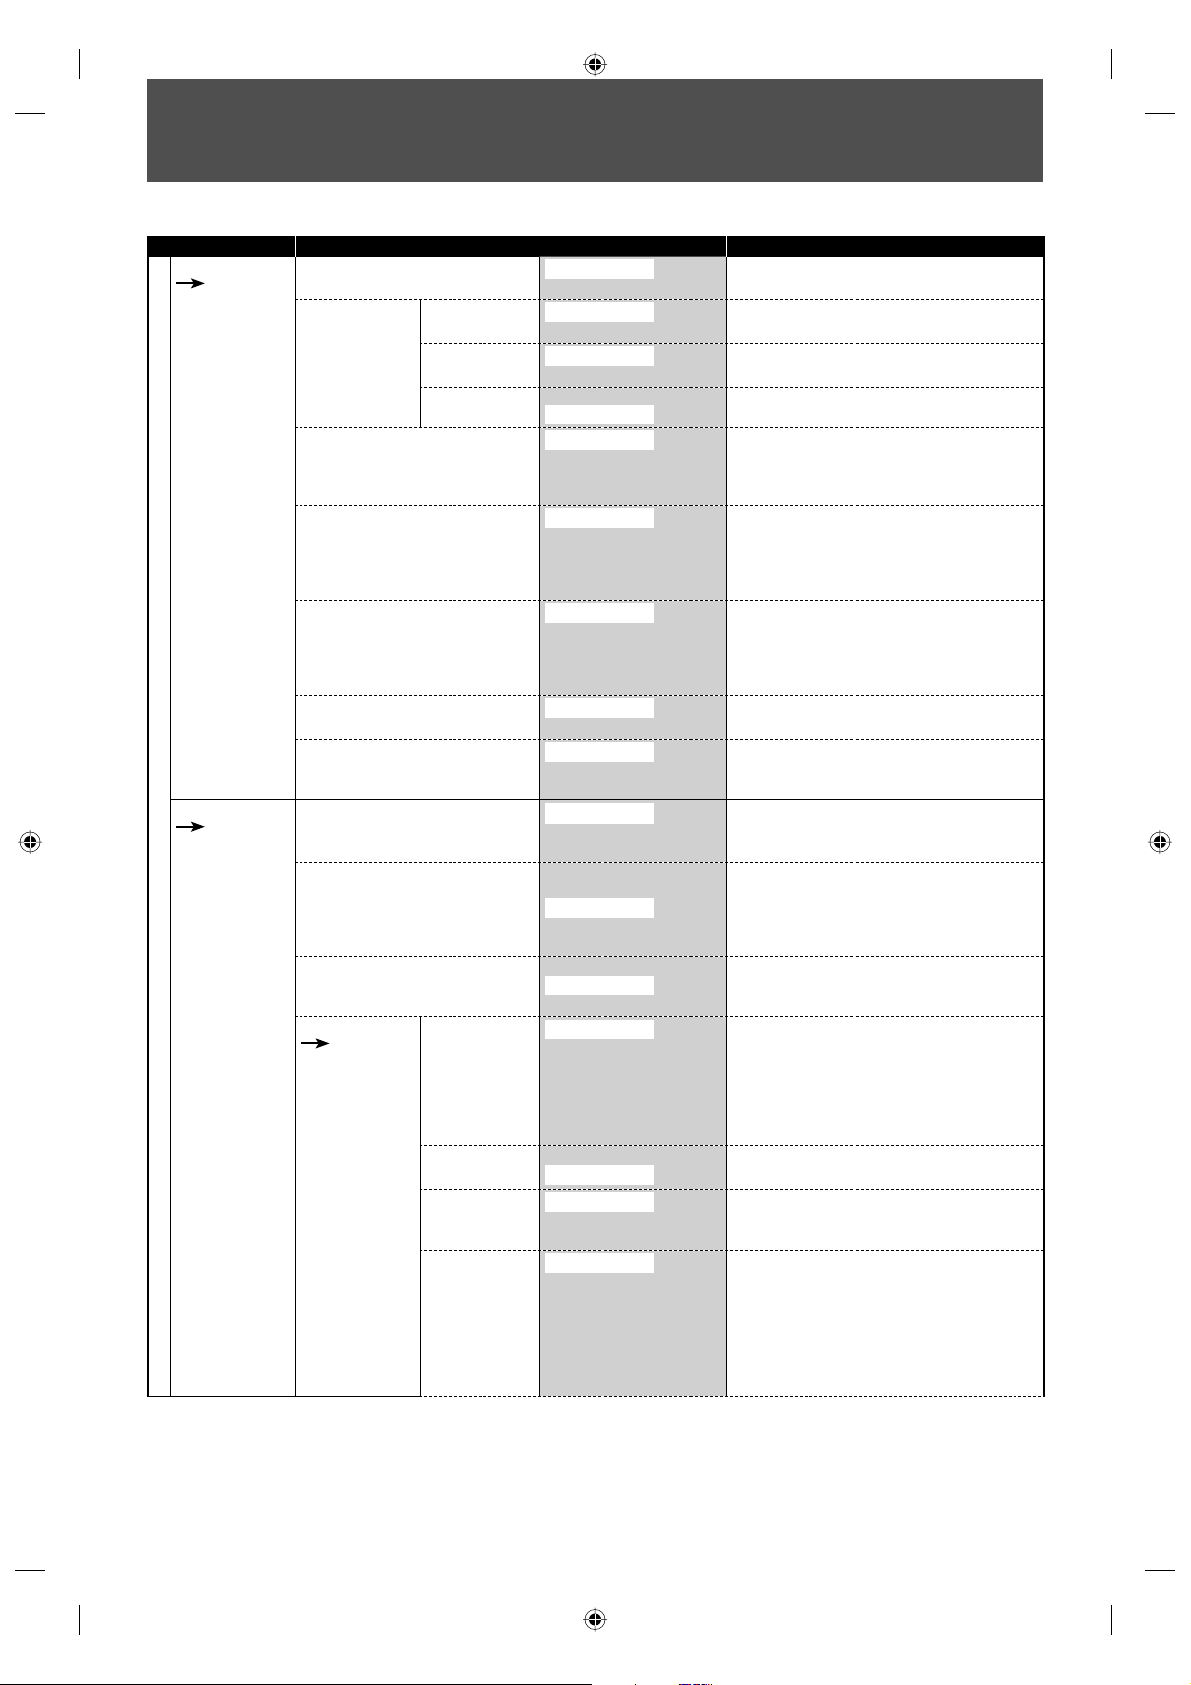
LIST OF SETTINGS
The following table is the contents which you can set and the default setting.
Refer to the following table for useful operation.
Setup Items (highlight is the default) Contents
Playback
Pages 87-90
Display
Pages 91-92
General Setting
Parental Lock
Disc Audio Dynamic Range
Disc Menu Language
Audio Language
Subtitle Language
Angle Icon
Still Mode
OSD Language
Screen Saver OFF
FL Dimmer Auto
CC Style
Pages 32-34
Control
PCM
Dolby Digital PCM
DTV CC
User Setting ON
Font Size
Font Style
OFF
level 8 [Adult] to 1 [Kid Safe]
ON
OFF
48kHz
96kHz
Stream
English
French
Spanish
Other
Original
English
French
Spanish
Other
OFF
English
French
Spanish
Other
ON
OFF
Auto
Field
Frame
English
Français
Español
5minutes
10minutes
15minutes
30miniutes
Bright
Dark
OFF
Service1
Service2
Service3
Service4
Service5
Service6
OFF
Middle
Large
Small
Style1
Style2
Style3
Style4
Style5
Style6
Style7
Style8
Set the parental level for DVD disc playback.
Compressing the range of sound volume.
Set whether the sound recorded in 96kHz will
be down sampled in 48kHz.
Set the type of sound signal which outputs
from the digital audio output jack.
Set the language for disc menu language.
Set the language for audio.
Set the language for subtitles.
Set whether or not to display the angle icon.
Set the type of still image in pausing playback.
Set the language for OSD (on-screen display).
Set the idling time before the screen saver
starts.
Set the brightness of the front panel display.
Set the type of the DTV closed caption.
Set the whether or not CC style setting is
effective.
Set font size of the displayed caption.
Set font style of the displayed caption.
84 EN84 EN
E7H42UD_DVDR3506-37_EN.indd 84E7H42UD_DVDR3506-37_EN.indd 84 2007/12/28 10:54:212007/12/28 10:54:21
Page 85
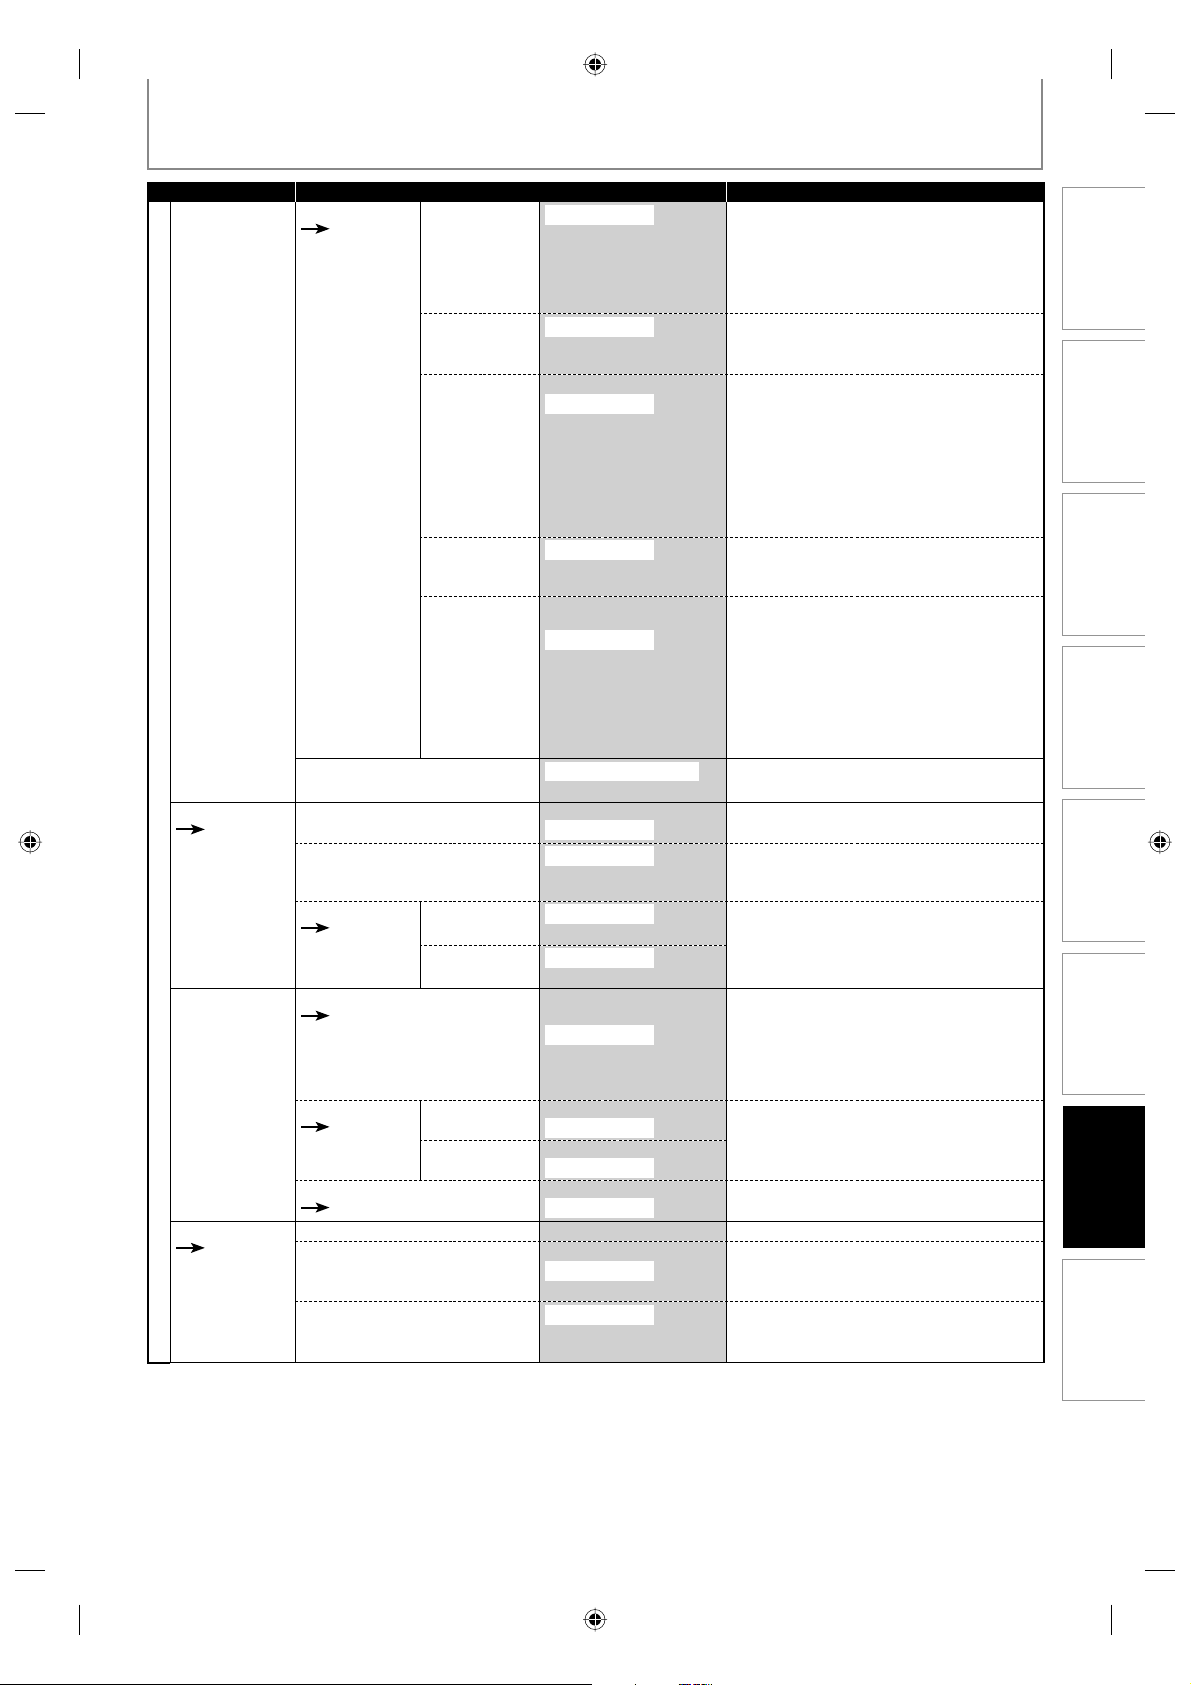
LIST OF SETTINGS
Setup Items (highlight is the default) Contents
Display CC Style
Video
General Setting
Pages 93-94
Recording Auto Chapter
Clock
Pages 27-28
Pages 32-34
V-Chip00
Progressive Scan ON
TV Aspect
Video Input
Page 45
Page 36
Auto Finalize
Page 52
Make Recording Compatible
Page 36
Clock Setting Set the clock.
Auto Clock Setting OFF
Daylight Saving Time
Edge Type
Font Opacity
Font Color Transparent
Back Opacity
Back Color Transparent
E1(Rear)
E2(Front)
Disc Full ON
End of Timer Rec ON
None
Raised
Depressed
Uniform
L.Shadow
R.Shadow
Solid
Translucent
Flash
White
Black
Red
Green
Blue
Yellow
Magenta
Cyan
Solid
Translucent
Flash
White
Black
Red
Green
Blue
Yellow
Magenta
Cyan
Downloadable Rating
Change Password
OFF
4:3 Letter Box
4:3 Pan & Scan
16:9 Wide
Video In
S-Video In
Video In
S-Video In
OFF
5 minutes
10 minutes
15 minutes
30 minutes
60 minutes
OFF
OFF
ON
OFF
Auto
Manual
ON(MAR-NOV)
ON(APR-OCT)
OFF
Set edge type of the displayed caption.
Set the font opacity of the displayed caption.
Set the font color of the displayed caption.
Set back opacity of the displayed caption.
Set back color of the displayed caption.
Set the downloadable rating.
Set to the progressive scan mode (set to "ON")
or to the interlace scan mode(set to "OFF").
Set a picture size according to aspect ratio of
your TV.
Set the video input type for the external input.
Insert chapter marks at even time interval.
Set the unit to finalize the disc automatically.
Set to prohibiting additional recording (OFF)
or to replace the title list after recording (ON).
Set the clock automatically.
Set the clock for the daylight saving time.
Recording Playback EditingIntroduction Connections Basic Setup
Function Setup
Others
85EN
85EN
E7H42UD_DVDR3506-37_EN.indd 85E7H42UD_DVDR3506-37_EN.indd 85 2007/12/28 10:54:212007/12/28 10:54:21
Page 86
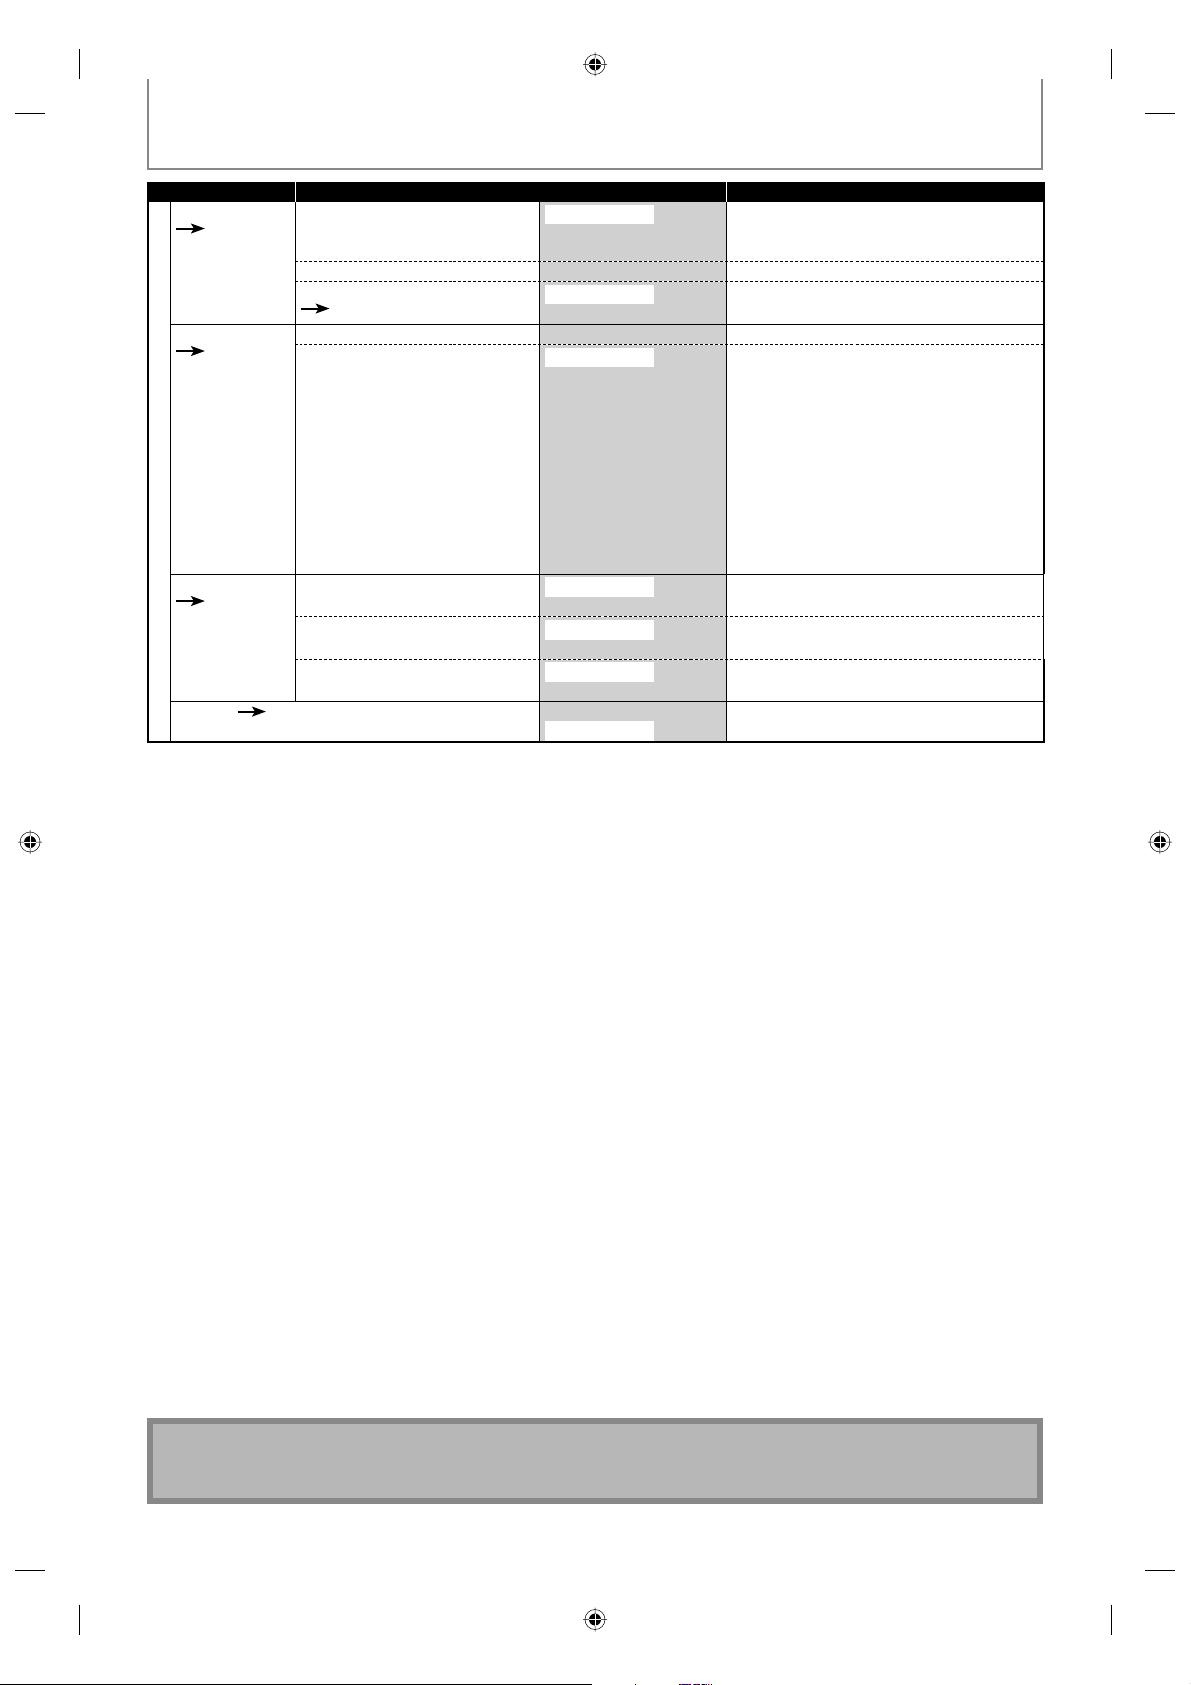
LIST OF SETTINGS
Setup Items (highlight is the default) Contents
Channel
Pages 24-26
DivX
Page 95
General Setting
HDMI
Pages 96-97
Reset All
Auto Channel Preset
Manual Channel Preset Tune the channels manually.
TV Audio Select
Pages 30-31
DivX®VOD Provide DivX®VOD registration code.
DivX Subtitle OFF
Format RGB
HDMI Audio ON
RGB Range Normal
Page 98 Yes
Antenna
Cable (Analog)
Cable (Analog/Digital)
Stereo
SAP
English
French
Spanish
German
Italian
Swedish
Dutch
Russian1
Russian2
Hungarian
Polish
Czech
YCbCr
OFF
Enhanced
No
Tune the channels automatically.
Set the analog TV audio type for output and
recording.
Set the language for DivX® Subtitle.
Set the color space for the HDMI output.
Set whether or not to output the HDMI audio
signal.
Set the black-white contrast level for HDMI
RGB output.
Set to the default setting.
Note
• Your change to each settings stays on even when the power is off.
• An item which is not currently available is grayed in the settings.
86 EN86 EN
E7H42UD_DVDR3506-37_EN.indd 86E7H42UD_DVDR3506-37_EN.indd 86 2007/12/28 10:54:212007/12/28 10:54:21
Page 87
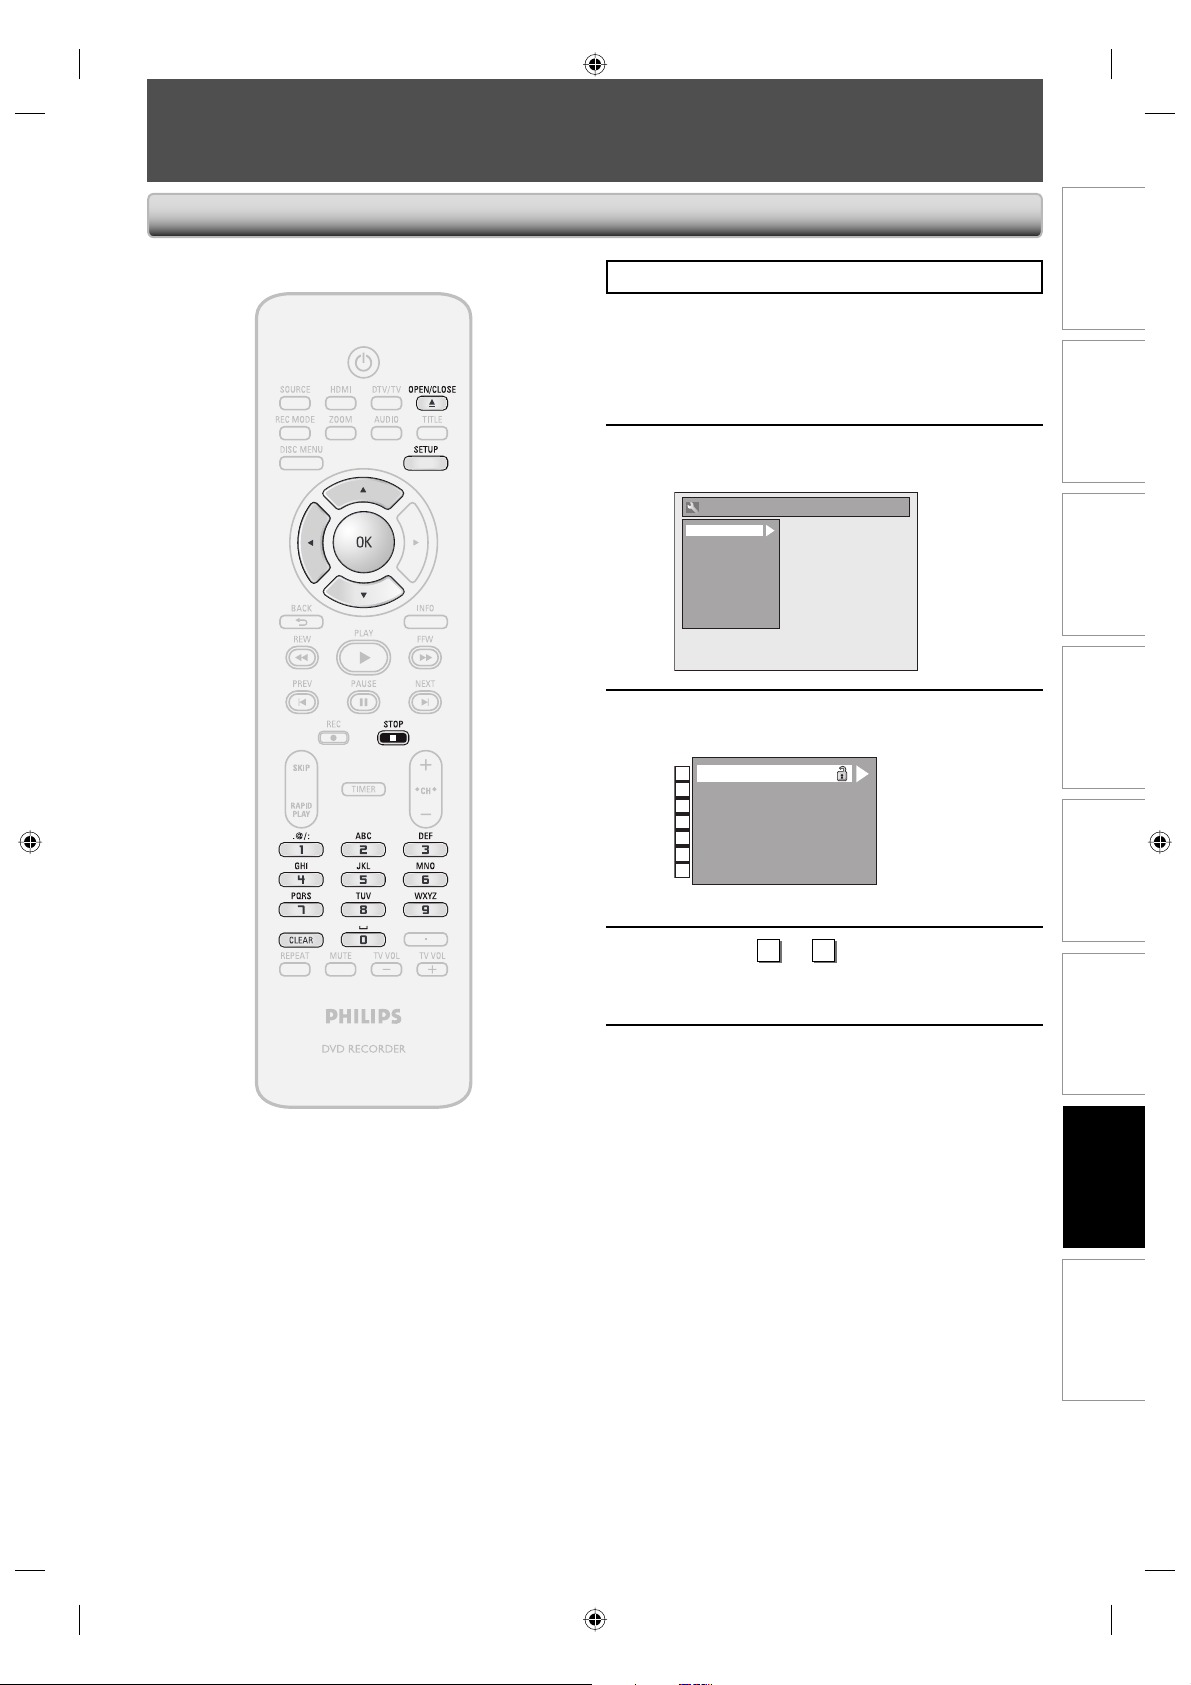
Playback
SETUPS
Press [STOP C] if you are playing back a disc.
Press [SETUP] and use [K / L] to
1
Use [K / L] to select “Playback”, then
2
Use [K / L] to select a desired item,
3
select “General Setting”, then press
[OK].
“General Setting” menu will appear.
press [OK].
General Setting
Playback
Display
Video
Recording
Clock
Channel
DivX
HDMI
Reset All
then press [OK].
Parental Lock
1
Disc Audio
2
Disc Menu Language
3
Audio Language
4
Subtitle Language
5
Angle Icon
6
Still Mode
7
Submenu will appear.
Recording Playback EditingIntroduction Connections Basic Setup
Refer to 1 to 7 on pages 88-90 and
set the selected item.
4
When you finish with setting, press
[SETUP] to exit.
5
Function Setup
Others
87EN
87EN
E7H42UD_DVDR3506-37_EN.indd 87E7H42UD_DVDR3506-37_EN.indd 87 2007/12/28 10:54:212007/12/28 10:54:21
Page 88
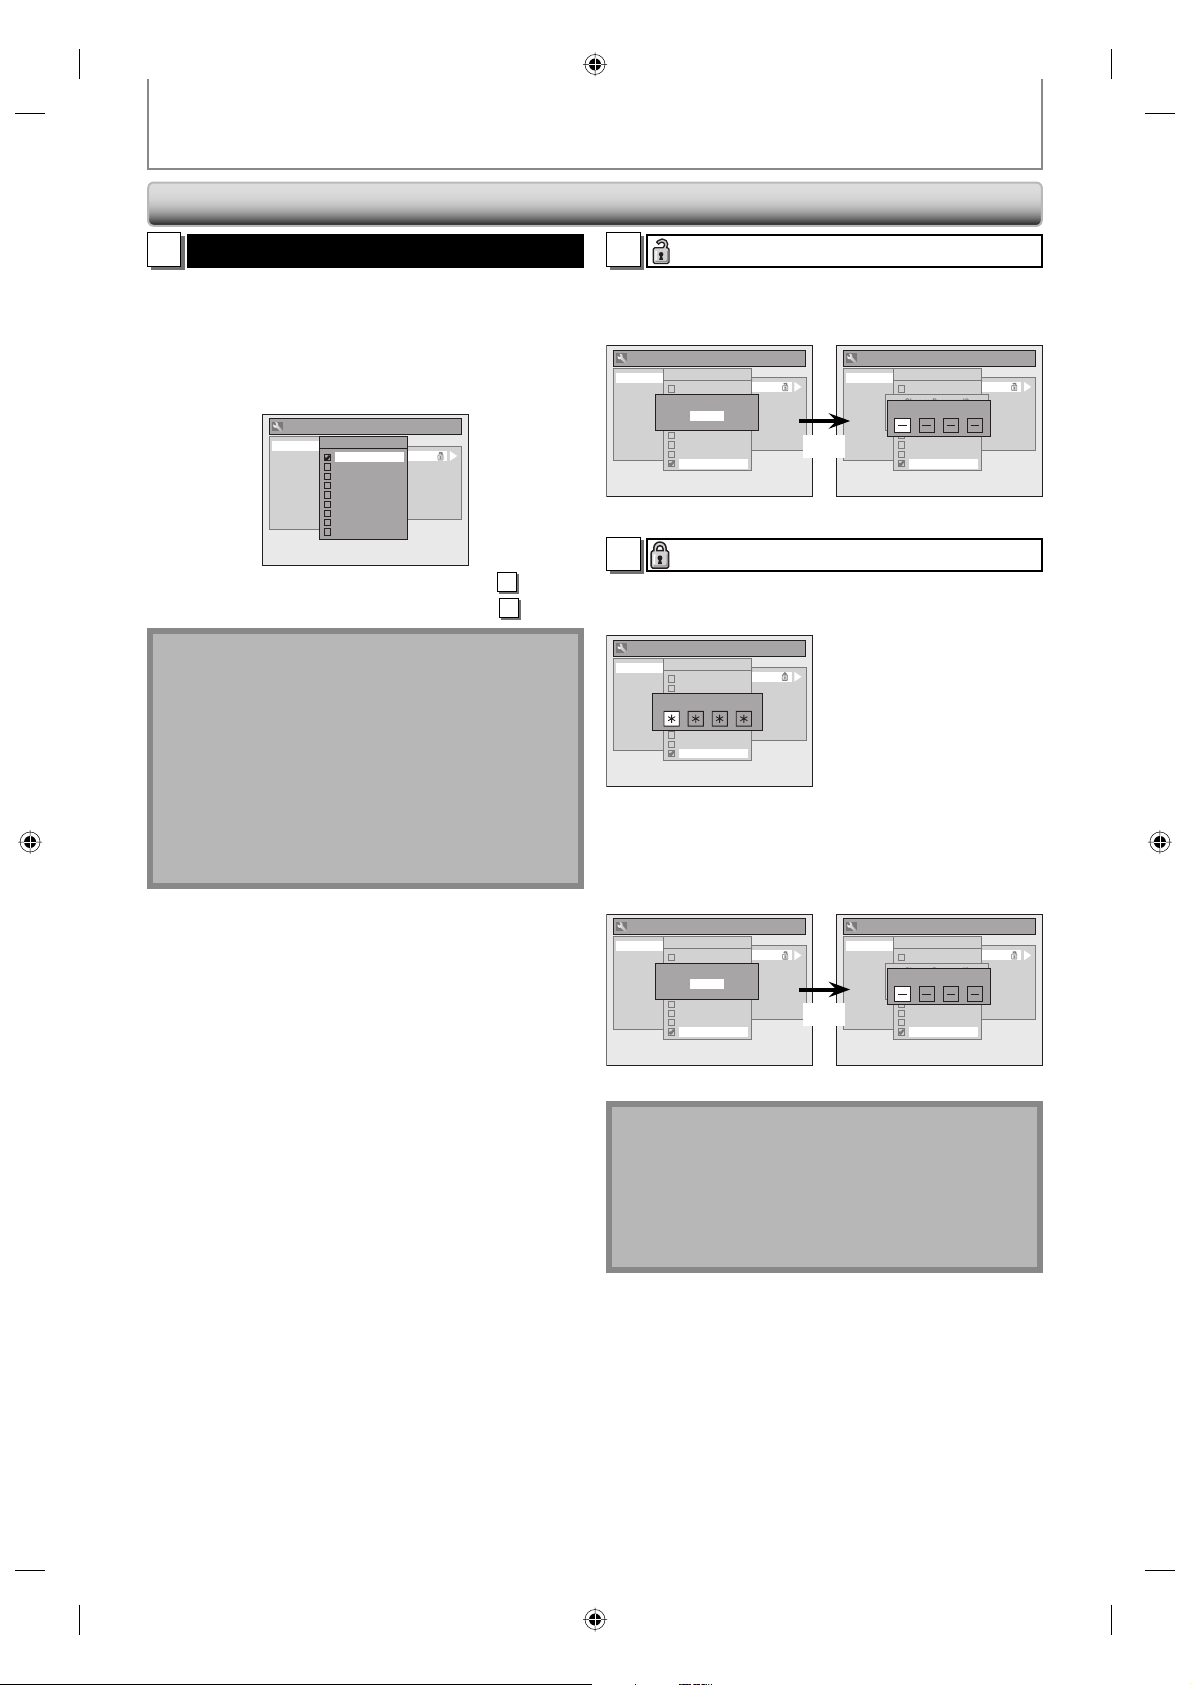
Playback (cont’d)
SETUPS
Parental Lock (Default: OFF)
1
Some DVD-video feature a parental lock level. Playback
will stop if the ratings exceed the levels you set, it will
require you to enter a password before the disc will
playback. This feature prevents your children from
viewing inappropriate material.
Use [K / L] to select the desired level, then press [OK].
General Setting
Parental Lock
Playback
Display
Video
Recording
Clock
Channel
DivX
HDMI
Reset All
Parental Lock
OFF
Audio Out
8 [Adult]
Disc Menu Language
7 [NC 17]
Audio Language
6 [R]
Subtitle Language
5 [PG R]
Angle Icon
4 [PG 13]
Still Mode
3 [PG]
2 [G]
1 [Kid Safe]
If a password has not been set yet, proceed to A.
If a password has been set already, proceed to B.
Note
• Parental lock function may not be available to some
discs.
• With some DVD, it may be difficult to find if they are
compatible with parental lock. Be sure to check if the
parental lock function operates in the way that you
have set.
• Record the password in case you forget it.
• If there is a DVD in the unit when you set up the
parental lock, press [OPEN/CLOSE A] to activate the
parental lock level.
A password has not been set yet.
A
Use [K / L] to select “Yes”. Use [the Number buttons]
to enter a new password except for 4737, then press
[OK].
General Setting
Playback
Display
Video
Recording
Clock
Channel
DivX
HDMI
Reset All
Parental Lock
Parental Lock
OFF
Audio Out
8 [Adult]
Change Password?
Disc Menu Language
7 [NC 17]
Audio Language
Yes
6 [R]
Subtitle Language
No
5 [PG R]
Angle Icon
4 [PG 13]
Still Mode
3 [PG]
2 [G]
1 [Kid Safe]
Yes
General Setting
Playback
Display
Video
Recording
Clock
Channel
DivX
HDMI
Reset All
Parental Lock
Parental Lock
OFF
Audio Out
8 [Adult]
Change Password?
Disc Menu Language
7 [NC 17]
Password Input
Audio Language
Yes
6 [R]
Subtitle Language
No
5 [PG R]
Angle Icon
4 [PG 13]
Still Mode
3 [PG]
2 [G]
1 [Kid Safe]
Your setting will be activated.
A password has been set already.
B
• Use [the Number buttons] to enter the current
password.
General Setting
Parental Lock
Playback
Display
Video
Recording
Clock
Channel
DivX
HDMI
Reset All
Parental Lock
OFF
Audio Out
8 [Adult]
Disc Menu Language
7 [NC 17]
Password Input
Audio Language
6 [R]
Subtitle Language
5 [PG R]
Angle Icon
4 [PG 13]
Still Mode
3 [PG]
2 [G]
1 [Kid Safe]
Your setting will be activated.
• If you want to change password, use [K / L] to select
“Yes”. Use [the Number buttons] to enter a new
password, then press [OK].
<change the password>
Yes
General Setting
Playback
Display
Video
Recording
Clock
Channel
DivX
HDMI
Reset All
Parental Lock
Parental Lock
OFF
Audio Out
8 [Adult]
Change Password?
Disc Menu Language
7 [NC 17]
Password Input
Audio Language
Yes
6 [R]
Subtitle Language
No
5 [PG R]
Angle Icon
4 [PG 13]
Still Mode
3 [PG]
2 [G]
1 [Kid Safe]
General Setting
Playback
Display
Video
Recording
Clock
Channel
DivX
HDMI
Reset All
Parental Lock
Parental Lock
OFF
Audio Out
8 [Adult]
Change Password?
Disc Menu Language
7 [NC 17]
Audio Language
Yes
6 [R]
Subtitle Language
No
5 [PG R]
Angle Icon
4 [PG 13]
Still Mode
3 [PG]
2 [G]
1 [Kid Safe]
Your setting will be activated.
Note
• Press [CLEAR] to erase numbers entered incorrectly.
• When you forget the password or you want to clear
all settings in “Parental Lock” menu, enter 4,7,3,7
using [the Number buttons] in password input
window. Password will be cleared and parental levels
will be set to “OFF”.
88 EN88 EN
E7H42UD_DVDR3506-37_EN.indd 88E7H42UD_DVDR3506-37_EN.indd 88 2007/12/28 10:54:232007/12/28 10:54:23
Page 89
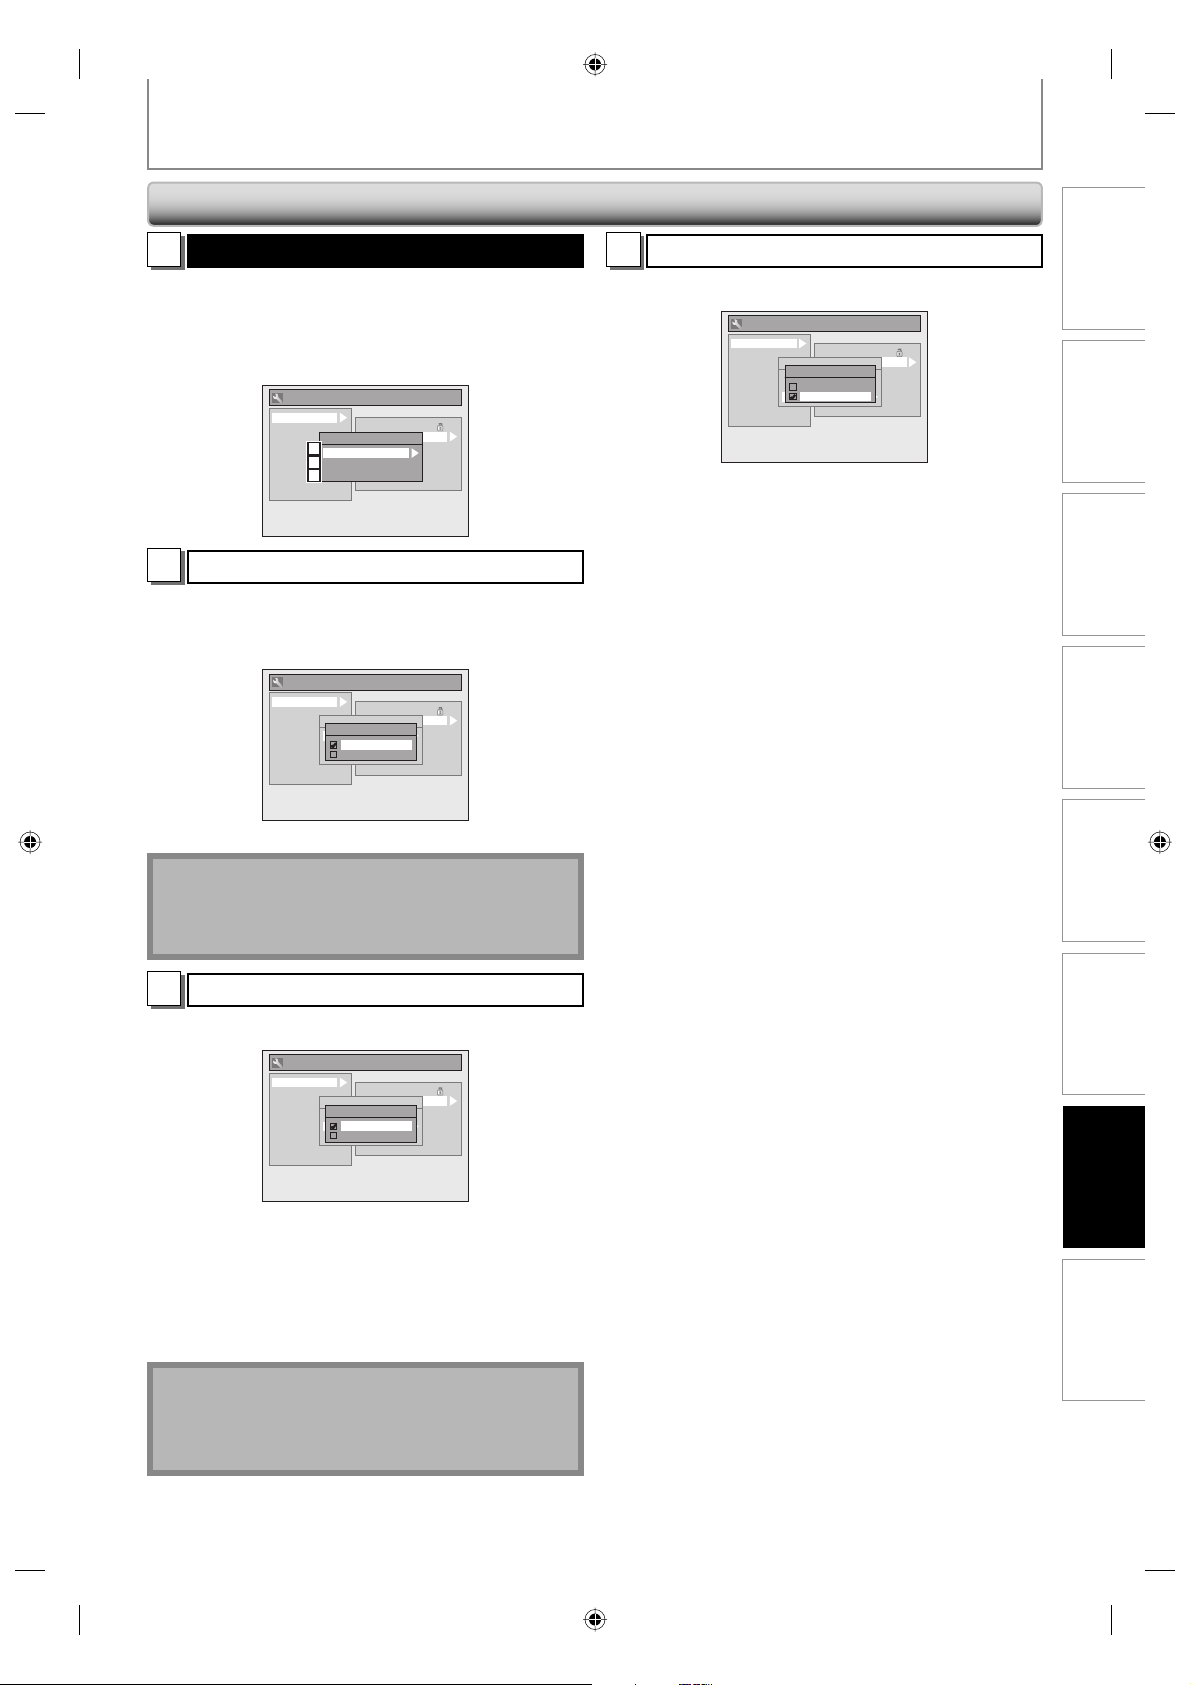
Playback (cont’d)
SETUPS
Disc Audio
2
Choose the appropriate audio setting for your external
device.
It will only affect a disc playback.
Use [K / L] to select a desired item, then press
General Setting
Playback
Display
Video
Recording
Clock
Channel
DivX
HDMI
Reset All
Dynamic Range Control (Default : ON)
A
Disc Audio
A
Dynamic Range Control
PCM
B
Dolby Digital
C
Parental Lock
Audio Out
Disc Menu Language
Audio Language
Subtitle Language
Angle Icon
Still Mode
[OK]
.
Set to “ON” to compress the range between soft and loud
sounds.
Use [K / L] to select a setting, then press [OK].
General Setting
Playback
Display
Video
Recording
Clock
Channel
DivX
HDMI
Reset All
Parental Lock
Audio Out
Disc Audio
Disc Menu Language
Dynamic Range Control
Dynamic Range Control
Audio Language
ON
PCM
Subtitle Language
OFF
Dolby Digital
Angle Icon
Still Mode
Dolby Digital (Default : Stream)
C
Use [K / L] to select a setting, then press [OK].
General Setting
Playback
Display
Video
Recording
Clock
Channel
DivX
HDMI
Reset All
Parental Lock
Audio Out
Disc Audio
Disc Menu Language
Dolby Digital
Dynamic Range Control
Audio Language
PCM
PCM
Subtitle Language
Stream
Dolby Digital
Angle Icon
Still Mode
Your setting will be activated.
PCM : Converts the Dolby Digital into PCM (2 channel).
When your amplifier/decoder is NOT
compatible with Dolby Digital, set to “PCM”.
Stream : Outputs Dolby Digital signals
When your amplifier/decoder is compatible
with Dolby Digital, set to “Stream”.
Recording Playback EditingIntroduction Connections Basic Setup
Your setting will be activated.
Note
• Dynamic range control function is available only on
the discs which are recorded in the Dolby Digital
format.
PCM (Default : 48kHz)
B
Use [K / L] to select a setting, then press [OK].
General Setting
Playback
Display
Video
Recording
Clock
Channel
DivX
HDMI
Reset All
Parental Lock
Audio Out
Disc Audio
Disc Menu Language
PCM
Dynamic Range Control
Audio Language
48kHz
PCM
Subtitle Language
96kHz
Dolby Digital
Angle Icon
Still Mode
Your setting will be activated.
48kHz : If your amplifier/decoder is NOT compatible
with 96kHz PCM, select “48kHz”. 96kHz sound
will be output in 48kHz.
96kHz : If your amplifier/decoder is compatible with
96kHz PCM, select “96kHz”. 96kHz sound will
be output.
Note
When playing back disc with copyright protection
• Even if you select “96kHz”, the sound will be down
sampled at 48kHz.
Function Setup
Others
89EN
89EN
E7H42UD_DVDR3506-37_EN.indd 89E7H42UD_DVDR3506-37_EN.indd 89 2007/12/28 10:54:242007/12/28 10:54:24
Page 90
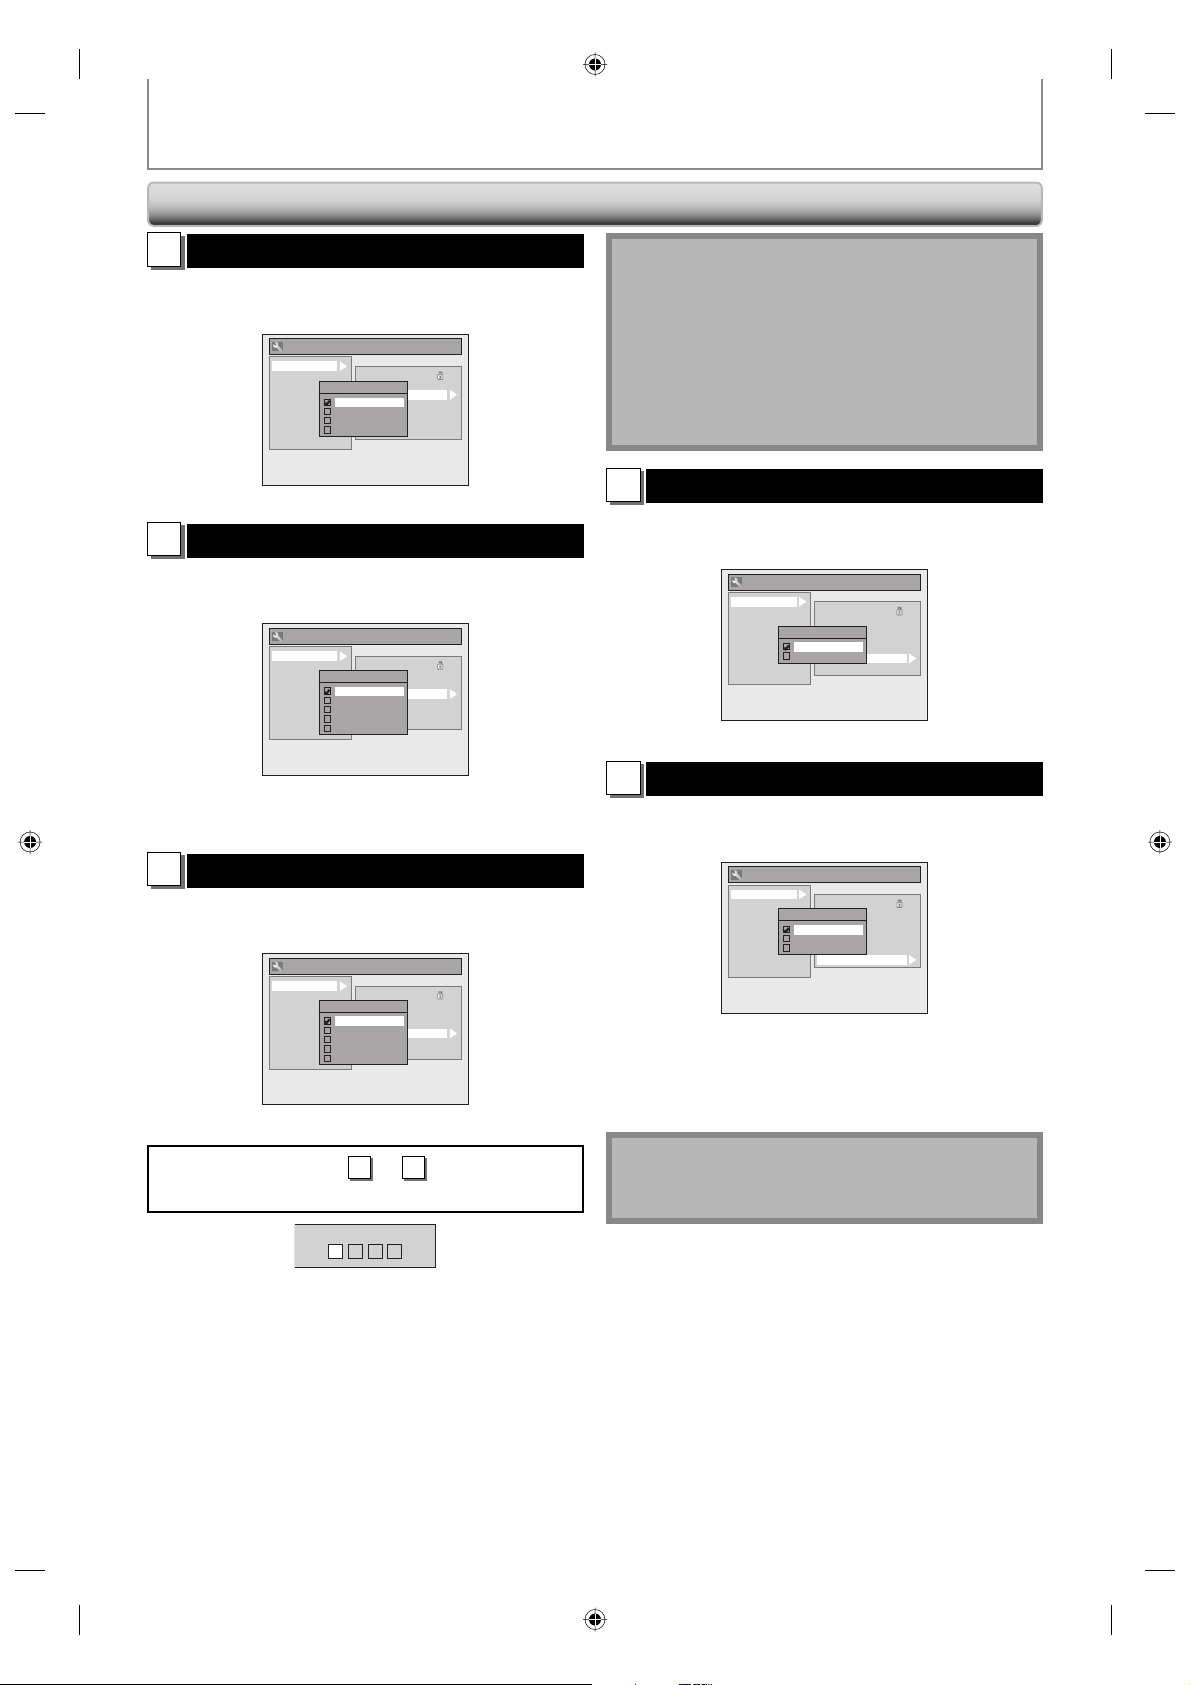
Playback (cont’d)
Disc Menu Language (Default : English)
3
Set the language for disc menu.
Use [K / L] to select a setting, then press [OK].
General Setting
Playback
Display
Video
Recording
Clock
Channel
DivX
HDMI
Reset All
Your setting will be activated.
Audio Language (Default : Original)
4
Set the audio language.
Use [K / L] to select a setting, then press [OK].
General Setting
Playback
Display
Video
Recording
Clock
Channel
DivX
HDMI
Reset All
Parental Lock
Audio Out
Disc Menu Language
Disc Menu Language
English
Audio Language
French
Subtitle Language
Spanish
Angle Icon
Other
Still Mode
Parental Lock
Audio Out
Audio Language
Disc Menu Language
Original
Audio Language
English
Subtitle Language
French
Angle Icon
Spanish
Still Mode
Other
SETUPS
Note
• Only the languages supported by the disc can be
selected.
• Audio language setting may not be available to
some discs.
• You can change or switch off the subtitles on a DVD
also from the disc menu if it is available.
• Press [CLEAR] or [s] to erase numbers entered
incorrectly.
6
Set to “ON” to show the angle icon during the playback.
Use [K / L] to select a setting, then press [OK].
Your setting will be activated.
Angle Icon (Default : ON)
General Setting
Playback
Display
Video
Recording
Clock
Channel
DivX
HDMI
Reset All
Angle Icon
ON
OFF
Parental Lock
Audio Out
Disc Menu Language
Audio Language
Subtitle Language
Angle Icon
Still Mode
Your setting will be activated.
• When “Original” is selected, the audio language will be
in the disc’s default language.
Subtitle Language (Default : OFF)
5
Set the subtitle language.
Use [K / L] to select a setting, then press [OK].
General Setting
Playback
Display
Video
Recording
Clock
Channel
DivX
HDMI
Reset All
Parental Lock
Audio Out
Subtitle Language
Disc Menu Language
OFF
Audio Language
English
Subtitle Language
French
Angle Icon
Spanish
Still Mode
Other
Your setting will be activated.
If “Other” is selected for
to 5, press 4-digit code
3
using [the Number buttons].
Code Input
----
• When you finish entering the code, press [OK]. Refer
to the language code table on page 104.
Still Mode (Default : Auto)
7
Select “Auto” usually.
Use [K / L] to select a setting, then press [OK].
General Setting
Playback
Display
Video
Recording
Clock
Channel
DivX
HDMI
Reset All
Still Mode
Auto
Field
Frame
Parental Lock
Audio Out
Disc Menu Language
Audio Language
Subtitle Language
Angle Icon
Still Mode
Your setting will be activated.
Auto : Optimum resolution setting (“Field” or
“Frame”) will be selected.
Field : Images in the still mode will be stabilized.
Frame : Images in the still mode will be highly defined.
Note
•
Frame is 1 completed video image made up of 2
fields (There are 30 frames per second of NTSC video).
90 EN90 EN
E7H42UD_DVDR3506-37_EN.indd 90E7H42UD_DVDR3506-37_EN.indd 90 2007/12/28 10:54:252007/12/28 10:54:25
Page 91
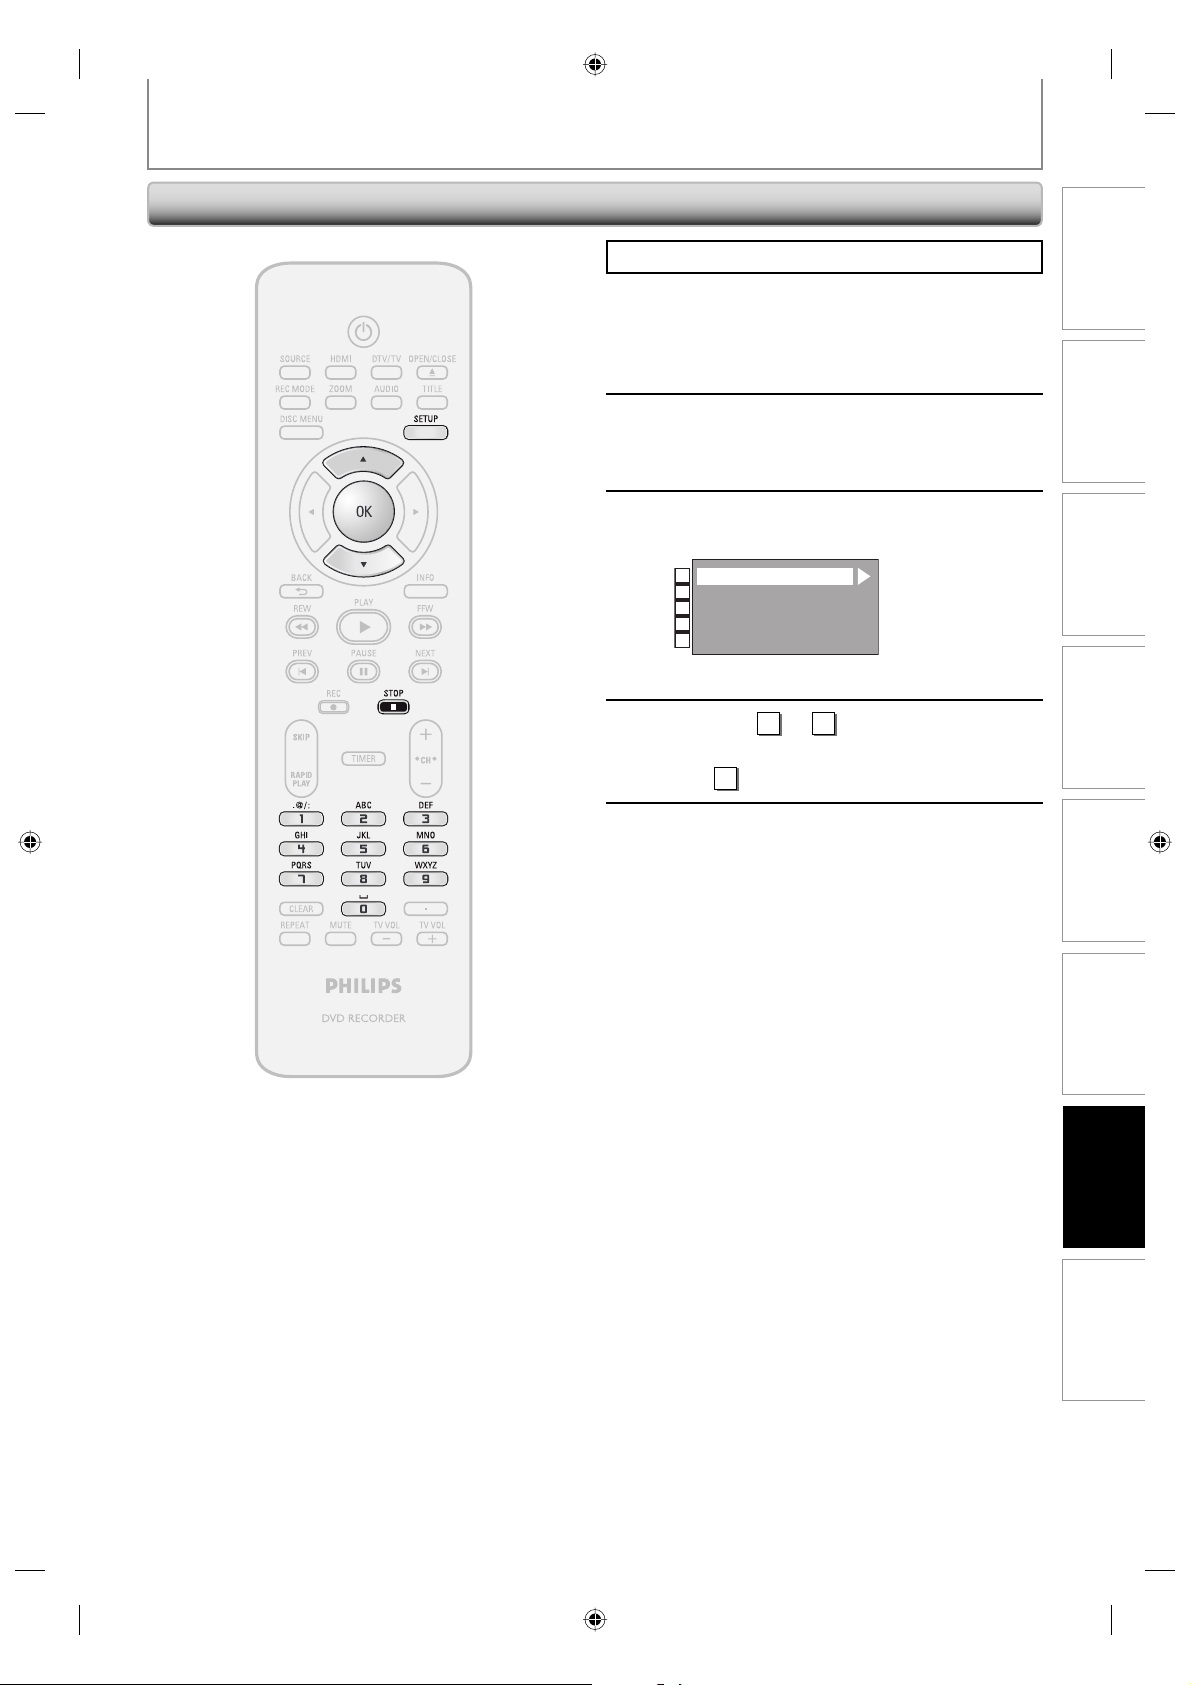
Display
SETUPS
Press [STOP C] if you are playing back a disc.
1
2
3
4
Press [SETUP] and use [K / L] to
select “General Setting”, then press
[OK].
Use [K / L] to select “Display”, then
press [OK].
Use [K / L] to select a desired item,
then press [OK].
OSD Language
1
Screen Saver
2
FL Dimmer
3
CC Style
4
V-Chip
5
Selection menu will appear.
Refer to 1 to 5 on page 92 and set
the selected item.
• For 4 refer to pages 32-34.
Recording Playback EditingIntroduction Connections Basic Setup
When you finish with setting, press
[SETUP] to exit.
5
Function Setup
Others
91EN
91EN
E7H42UD_DVDR3506-37_EN.indd 91E7H42UD_DVDR3506-37_EN.indd 91 2007/12/28 10:54:262007/12/28 10:54:26
Page 92
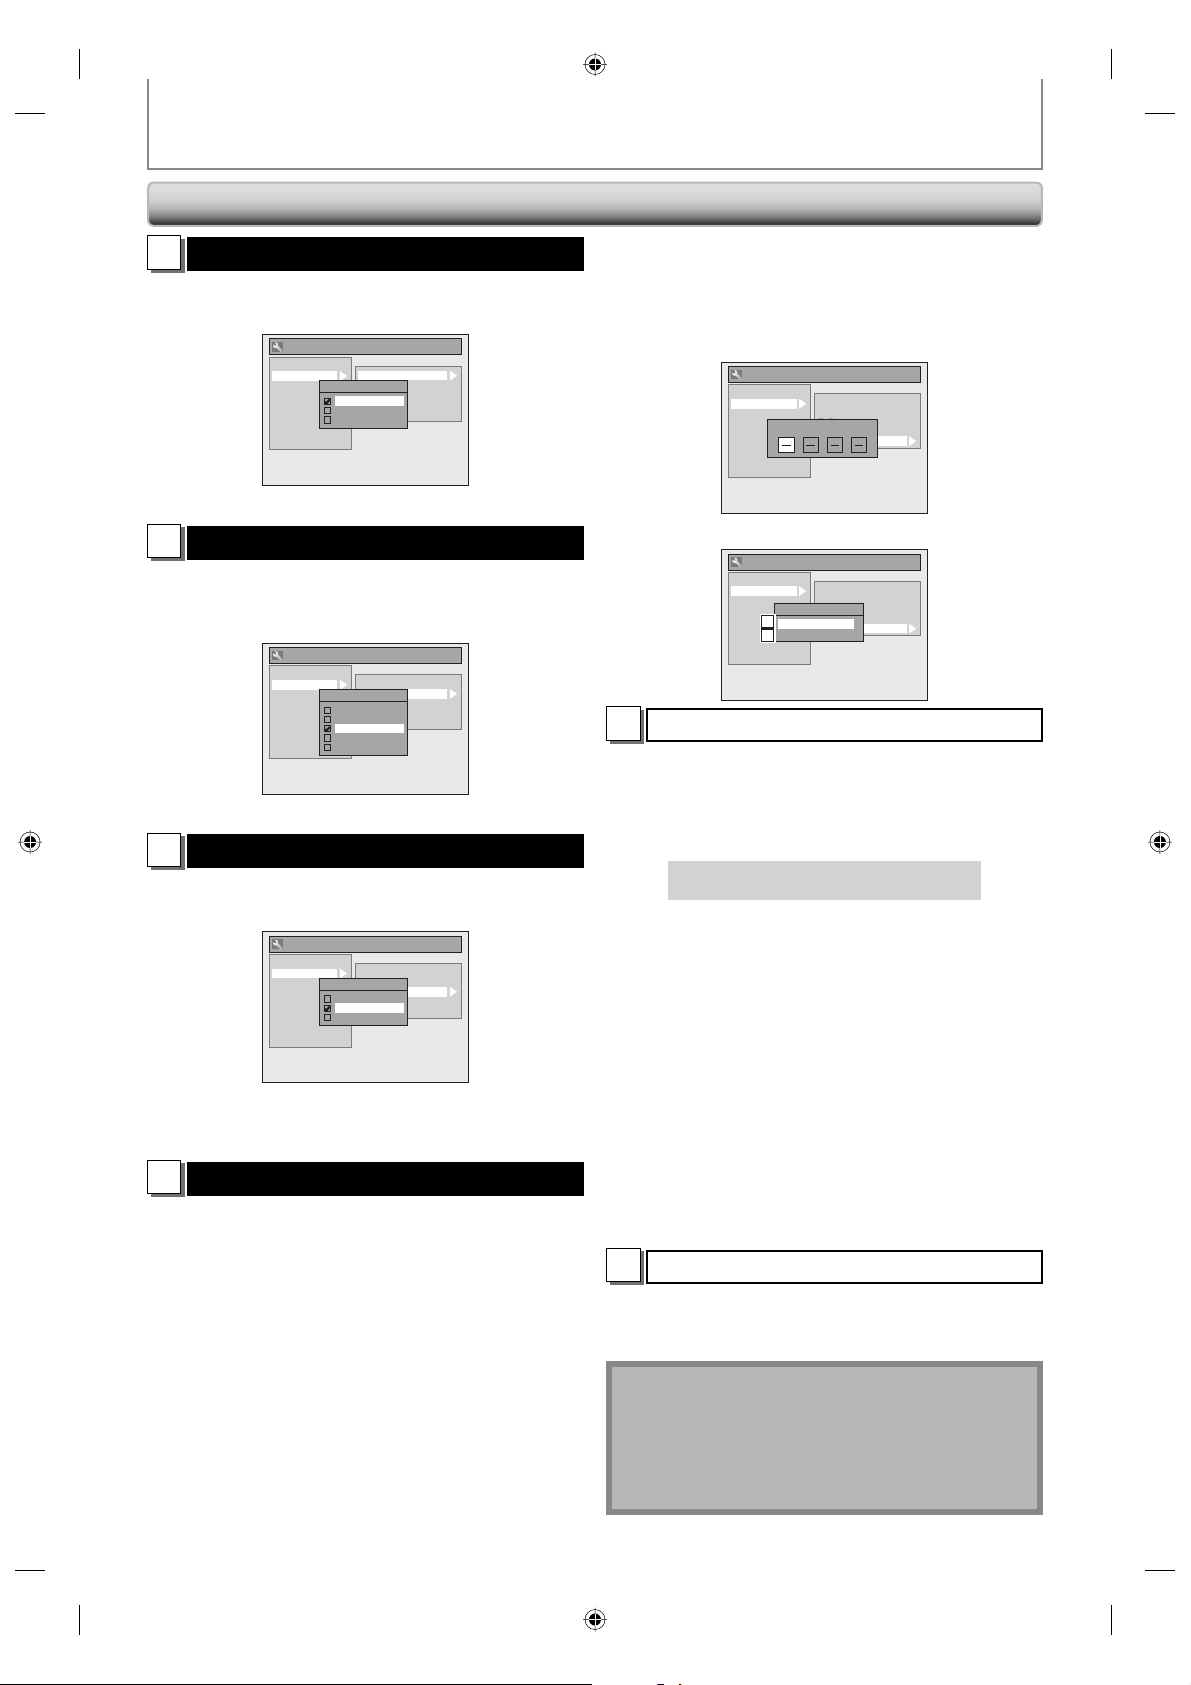
Display (cont’d)
SETUPS
OSD Language (Default : English)
1
Set the language for the on-screen display.
Use [K / L] to select a setting, then press [OK].
General Setting
Playback
Display
Video
Recording
Clock
Channel
DivX
HDMI
Reset All
OSD Language
English
Français
Español
OSD Language
Screen Saver
FL Dimmer
CC Style
V-Chip
Your setting will be activated.
Screen Saver (Default : 10 minutes)
2
Set the time to activate the screen saver function on the
TV screen.
Use [K / L] to select a setting, then press [OK].
General Setting
Playback
Display
Video
Recording
Clock
Channel
DivX
HDMI
Reset All
Screen Saver
OFF
5 minutes
10 minutes
15 minutes
30 minutes
OSD Language
Screen Saver
FL Dimmer
CC Style
V-Chip
Your setting will be activated.
FL Dimmer (Default: Bright)
3
Set the front panel display brightness.
Use [K / L] to select a setting, then press [OK].
General Setting
Playback
Display
Video
Recording
Clock
Channel
DivX
HDMI
Reset All
FL Dimmer
Auto
Bright
Dark
OSD Language
Screen Saver
FL Dimmer
CC Style
V-Chip
You can choose one from “Auto”, “Bright” and “Dark”.
If “Auto” is selected, the display gets dark when the
power is off.
V-Chip
5
You can set the viewing limitation for the digital TV
programs to prevent your children from watching
inappropriate programs.
This feature is available only after the digital TV
ratings have been downloaded.
• The ratings can be downloaded by the unit
automatically if it is available in your area.
1) Use [the Number buttons] to enter the access
password.
If you have not set the password, first, use [the Number
buttons] to set the access password, then press [OK].
The number you entered will be stored as the access
password.
General Setting
Playback
Display
Video
Recording
Clock
Channel
DivX
HDMI
Reset All
OSD Language
Screen Saver
FL Dimmer
Password Input
CC Style
V-Chip
2) Use [K / L] to select a desired item, then press [OK].
General Setting
Downloadable Rating
A
Playback
Display
Video
Recording
Clock
Channel
DivX
HDMI
Reset All
V-Chip
A
Downloadable Rating
Change Password
B
OSD Language
Screen Saver
FL Dimmer
CC Style
V-Chip
Set the rating system via digital broadcasting, or clear the
downloaded ratings.
If the broadcasting signal does not have the
downloadable rating information, the message below
will appear.
Downloadable Rating is currently not available.
• This message will also appear when you try to access
“DOWNLOADABLE RATING” after you have cleared the
downloadable rating information, and the new information has
not been downloaded since.
To set the rating:
Use [K / L] to select “BLOCK SETTING” then press [OK] to
show the various types of ratings. Use [K / L] to select a
desired rating to set, then press [
OK
] to show the levels
for the rating. Use [K / L] to select a level, then press
[
OK
] to switch “VIEW” or “BLOCK”. If you set one level to
“BLOCK”, all the higher levels will be turned to “BLOCK”
automatically.
To clear the downloadable rating information and its
setting:
Use [K / L] to select “CLEAR DOWNLOADABLE
RATING”, then press [OK].
Change Password
B
Change the current password.
Use [the Number Buttons] to enter new access
password.
Note
• When you forget the access password at step 1),
enter 4,7,3,7 using [the Number buttons] in the
password input window. Password will be cleared.
• Depending on the type of rating system, you may set
the levels individually.
92 EN92 EN
E7H42UD_DVDR3506-37_EN.indd 92E7H42UD_DVDR3506-37_EN.indd 92 2007/12/28 10:54:272007/12/28 10:54:27
Page 93
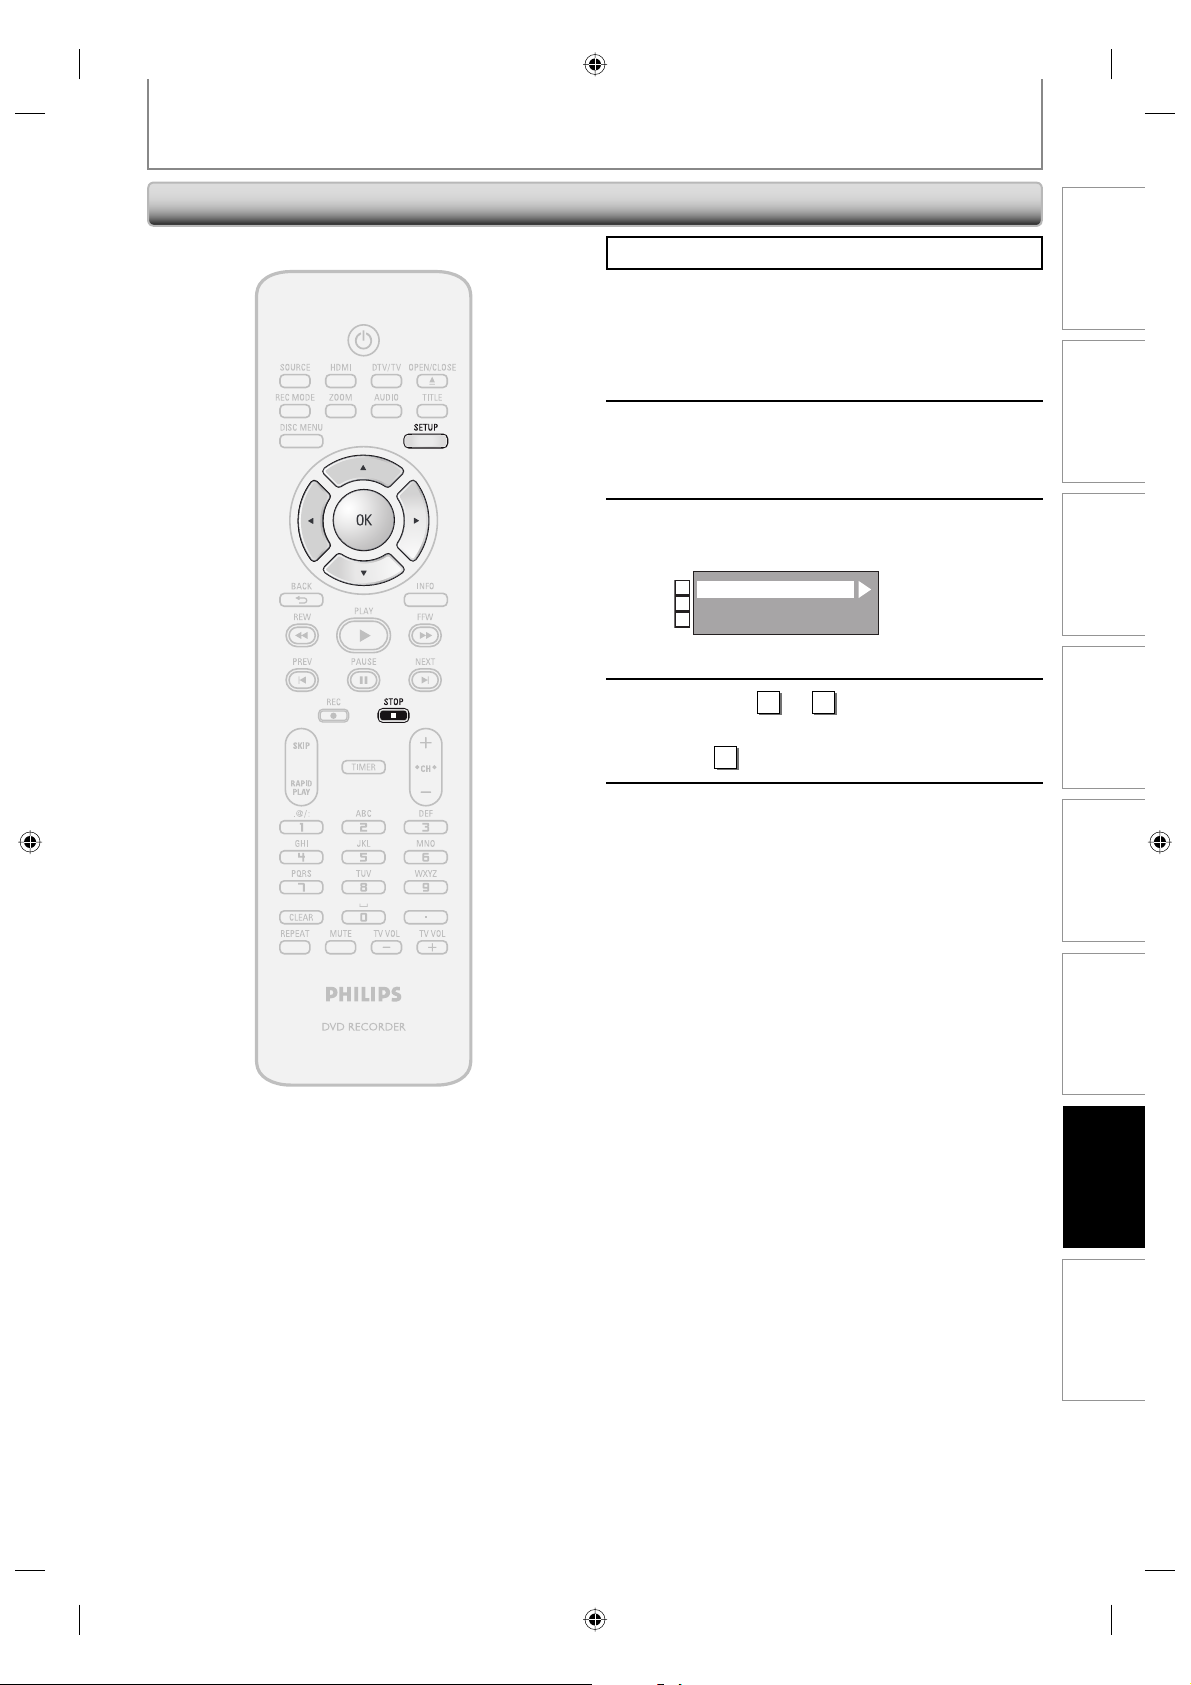
Video
SETUPS
Press [STOP C] if you are playing back a disc.
1
2
3
4
Press [SETUP] and use [K / L] to
select “General Setting”, then press
[OK].
Use [K / L] to select “Video”, then
press [OK].
Use [K / L] to select a desired item,
then press [OK].
Progressive Scan
1
2
TV Aspect
3
Video Input
Submenu will appear.
Refer to 1 to 2 on page 94 and set
the selected item.
• For 3 refer to page 45.
Recording Playback EditingIntroduction Connections Basic Setup
When you finish with setting, press
[SETUP] to exit.
5
Function Setup
Others
93EN
93EN
E7H42UD_DVDR3506-37_EN.indd 93E7H42UD_DVDR3506-37_EN.indd 93 2007/12/28 10:54:292007/12/28 10:54:29
Page 94
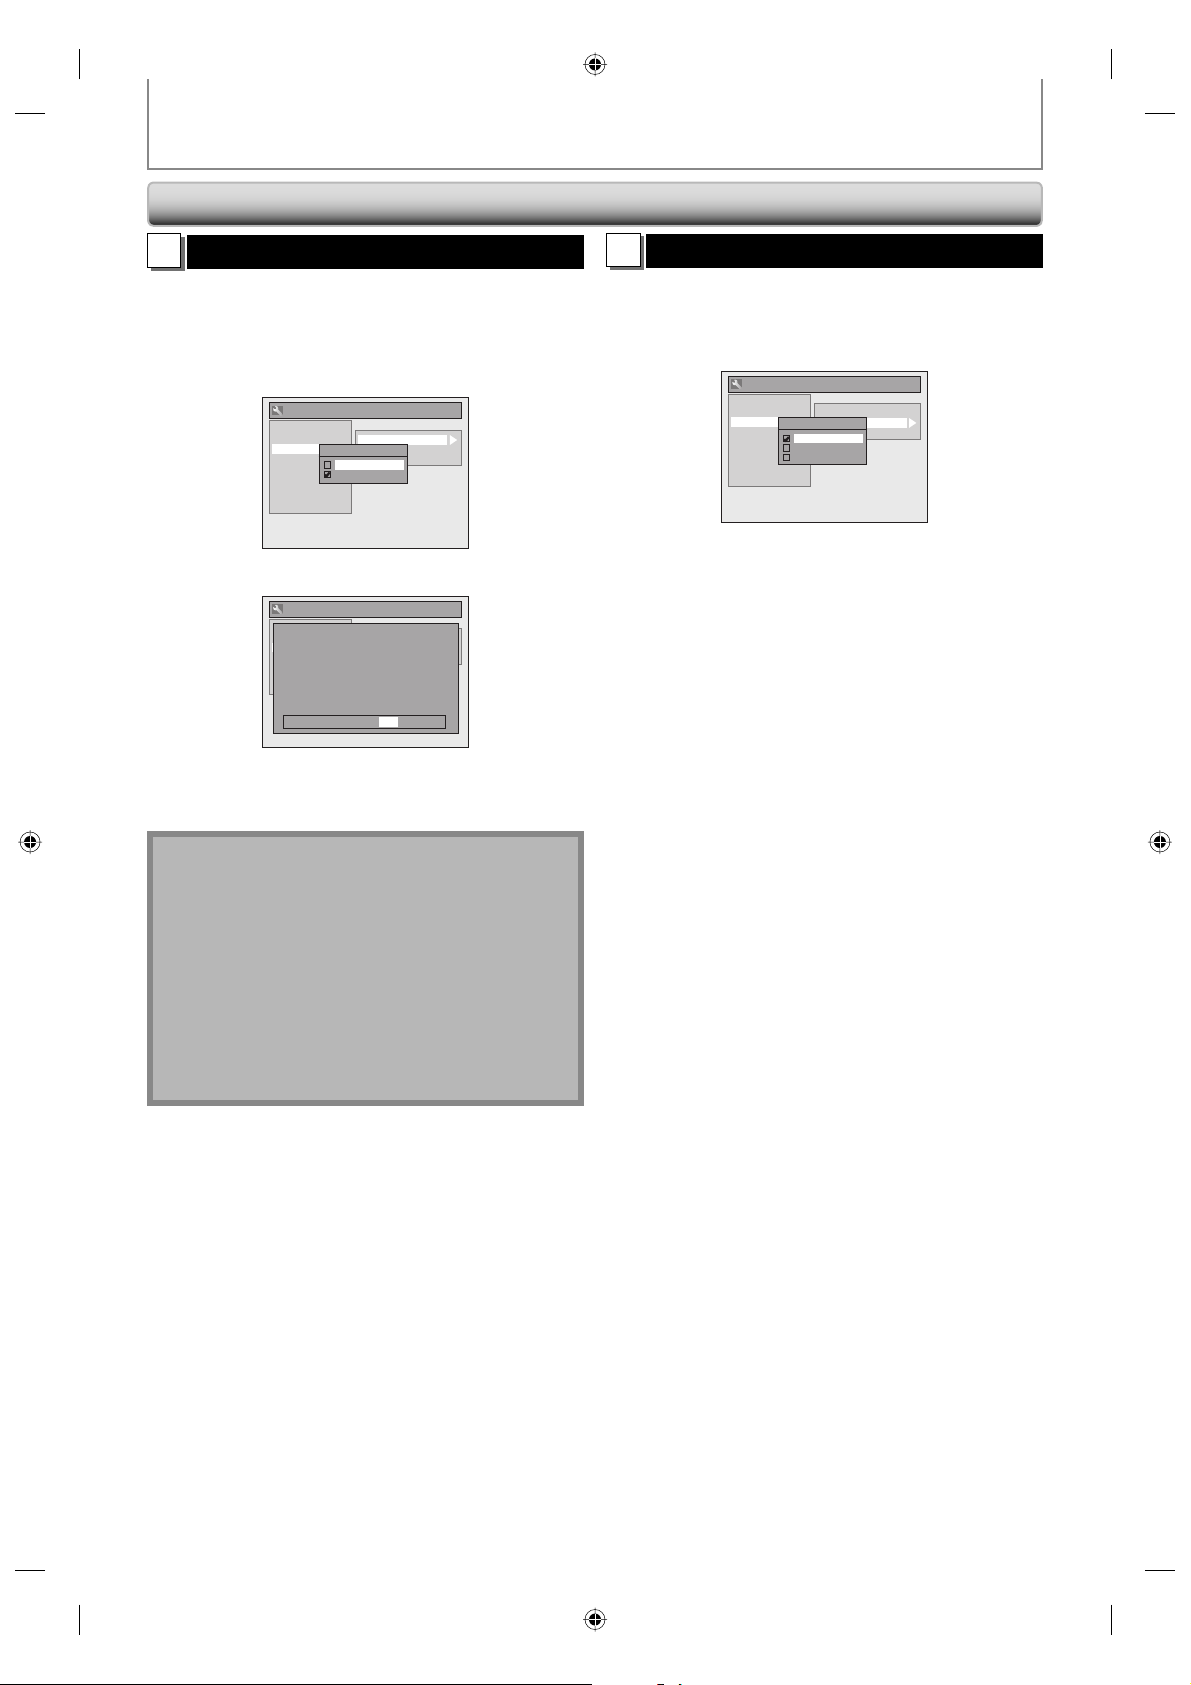
Video (cont’d)
SETUPS
Progressive Scan (Default : OFF)
1
This unit is compatible with the progressive scan system.
The feature provides you with the higher definition
images than the traditional output system does. To utilize
this feature, you must set progressive scan mode to “ON”.
1) Use [K / L] to select “ON“, then press [OK].
General Setting
Playback
Display
Video
Recording
Clock
Channel
DivX
HDMI
Reset All
Progressive Scan
TV Aspect
Progressive Scan
Video Input
ON
OFF
2) Use [{ / B] to select “Yes“, then press [OK].
General Setting
Playback
Activating progressive scan:
Display
Check your TV has progressive scan
Video
and connect with component video cable.
Rcording
Clock
Channel
NOTE :
Reset All
If there is no picture or picture is
distorted after selecting “Yes”,
Wait about 15 seconds for auto recovery.
Activate? Yes No
Progressive
ON
OFF
Progressive
TV Aspect
Select Video
3) Use [K / L] to select “Yes“ within 15 seconds, then
press [OK].
Your setting will be activated.
TV Aspect (Default: 4:3 Letter Box)
2
You can select the TV aspect ratio to match the formats of
what you are playing back with the unit and your TV
screen (4:3 standard or 16:9 widescreen TV).
Use [K / L] to select a setting, then press [OK].
General Setting
Playback
Display
Video
Recording
Clock
Channel
DivX
HDMI
Reset All
TV Aspect
4:3 Letter Box
4:3 Pan & Scan
16:9 Wide
Progressive Scan
TV Aspect
Video Input
If you have a standard TV:
Select “4:3 Letter Box”, so that black bars appear on the
top and bottom of the TV screen when playing back a
wide-screen picture. Select “4:3 Pan & Scan” for a full
height picture with both sides trimmed when playing
back wide-screen picture.
If you have a widescreen TV:
Select “16:9 Wide”.
Note
• If your TV is compatible with progressive scan (525p /
480p), you are recommended to use the HDMI or
component video cable (commercially available) to
connect this unit to the TV. (Refer to “Method 3” or
“Method 4” on pages 16 and 17.) If not, use the RCA
video cable and set the progressive scan to “OFF” or
press and hold [SETUP] for more than 3 seconds
during DVD playback.
• When selecting “No” or not pressing any buttons on
the unit or remote control within 15 seconds at step 3,
progressive scan remains to be “OFF” (interlace scan).
94 EN94 EN
E7H42UD_DVDR3506-37_EN.indd 94E7H42UD_DVDR3506-37_EN.indd 94 2007/12/28 10:54:302007/12/28 10:54:30
Page 95
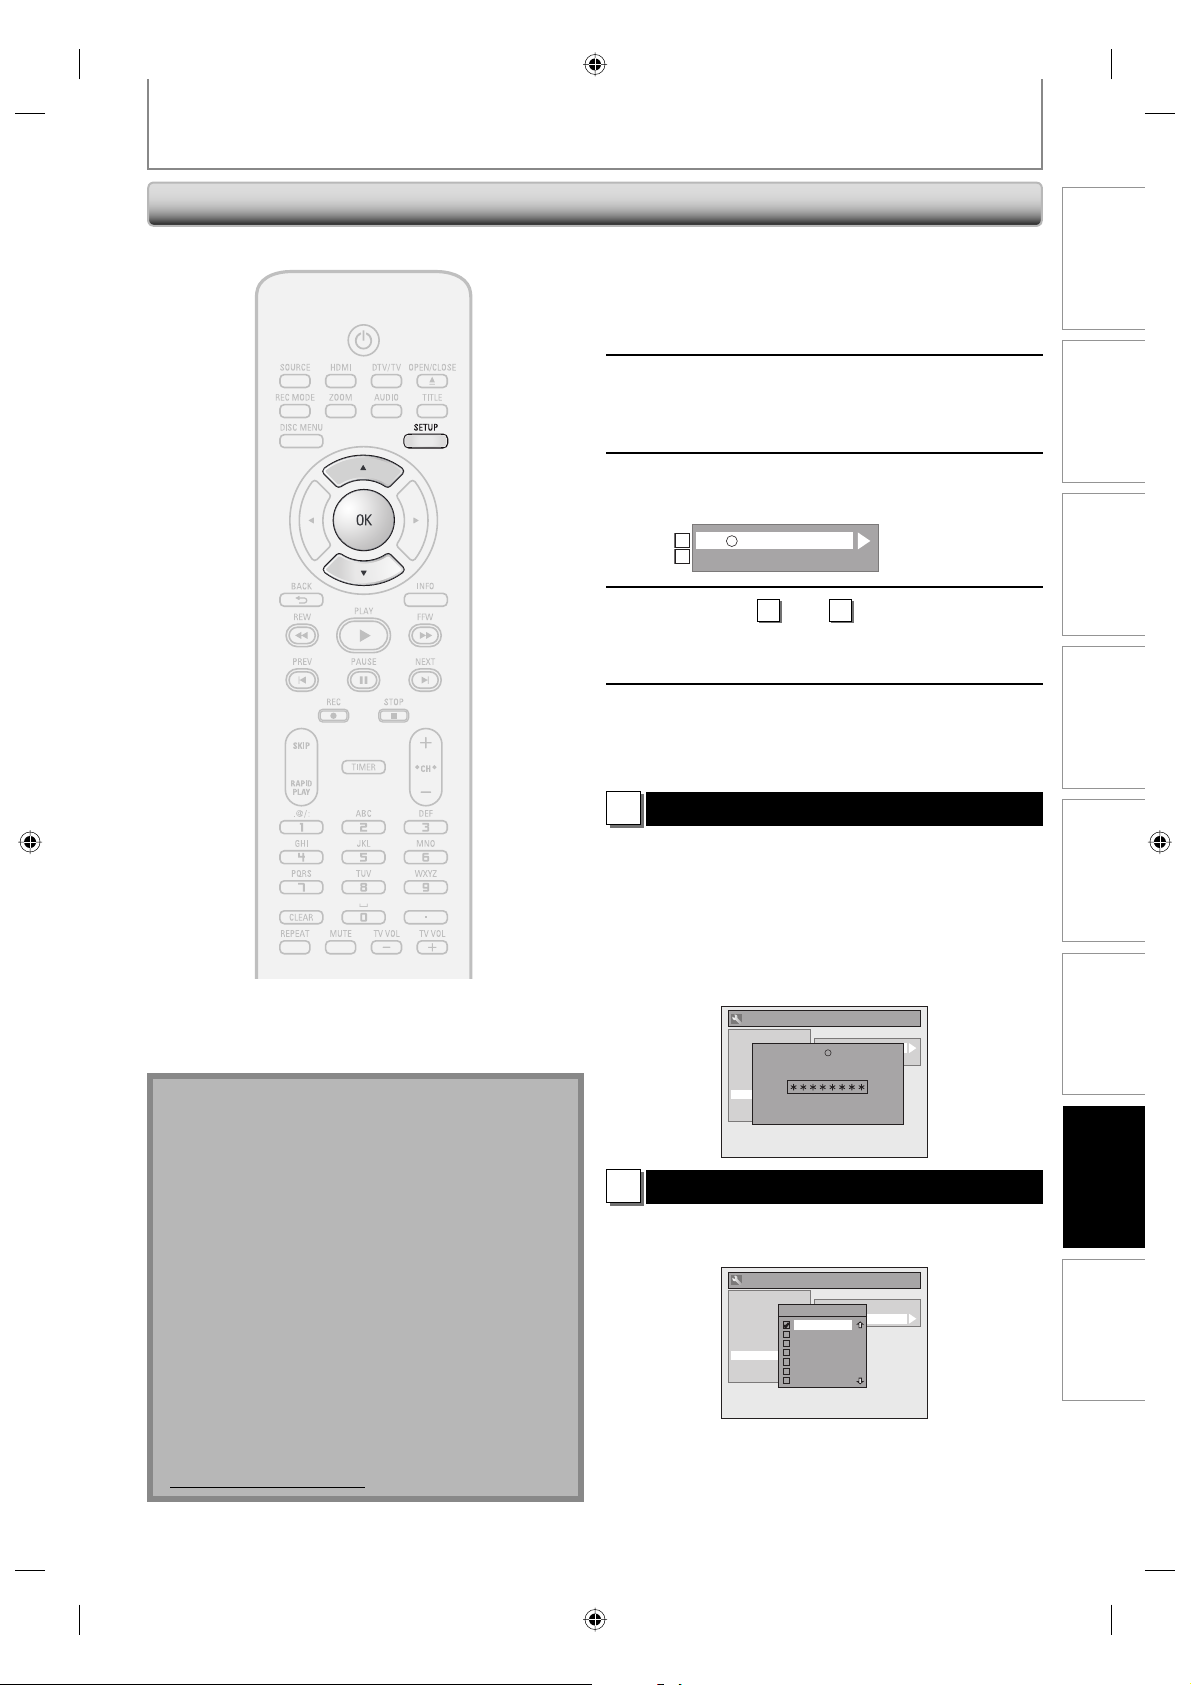
DivX®
SETUPS
1
2
3
4
5
Press [SETUP] and use [K / L] to
select “General Setting”, then press
[OK].
“General Setting” menu will appear.
Use [K / L] to select “DivX”, then
press [OK].
Use [K / L] to select a desired item,
then press [OK].
R
1
DivX
VOD
2
DivX Subtitle
Refer to 1 and 2 on this page and
set the selected item.
When you finish with setting, press
[SETUP] to exit.
Recording Playback EditingIntroduction Connections Basic Setup
Note
• Only the languages supported by the disc can be
selected.
• Audio language setting may not be available to
some discs.
• You can change or switch off the subtitles on a DVD
also from the disc menu if it is available.
• One registration code is only valid for one DivX® VOD
file.
• The registration code will be displayed in 8
characters which consist of numbers between 0 to 9
and capital letters chosen randomly.
• You must first download the file from the internet
and play it back on this unit before you are able to
get another code.
• You must follow this step every time you purchase or
rent a DivX® VOD file from the internet.
• For more information for DivX®, please visit
http://www.divx.com/vod.
DivX® VOD
1
This unit allows you to play back the files purchased or
rented from DivX® VOD (video-on-demand) services. The
files are available on the internet. When you purchase or
rent DivX® VOD files on the internet, you will be asked to
enter an activation/registration code. This menu item
provides you with the activation/registration code.
On how to activate this unit for the DivX® VOD file
playback, visit www.divx.com/vod.
General Setting
Playback
Display
Video
Recording
Clock
Channel
DivX
HDMI
Reset All
DivX Subtitle (Default : OFF)
2
Set the DivX® subtitle.
Use [K / L] to select a setting, then press [OK].
General Setting
Playback
Display
Video
Recording
Clock
Channel
DivX
HDMI
Reset All
Your setting will be activated.
DivX
R VOD
R
DivX
VOD
DivX Subtitle
Your registration code is :
To learn more visit
www.divx.com/vod
DivX
R VOD
DivX Subtitle
DivX Subtitle
OFF
English
French
Spanish
German
Italian
Swedish
Function Setup
Others
95EN
95EN
E7H42UD_DVDR3506-37_EN.indd 95E7H42UD_DVDR3506-37_EN.indd 95 2007/12/28 10:54:312007/12/28 10:54:31
Page 96
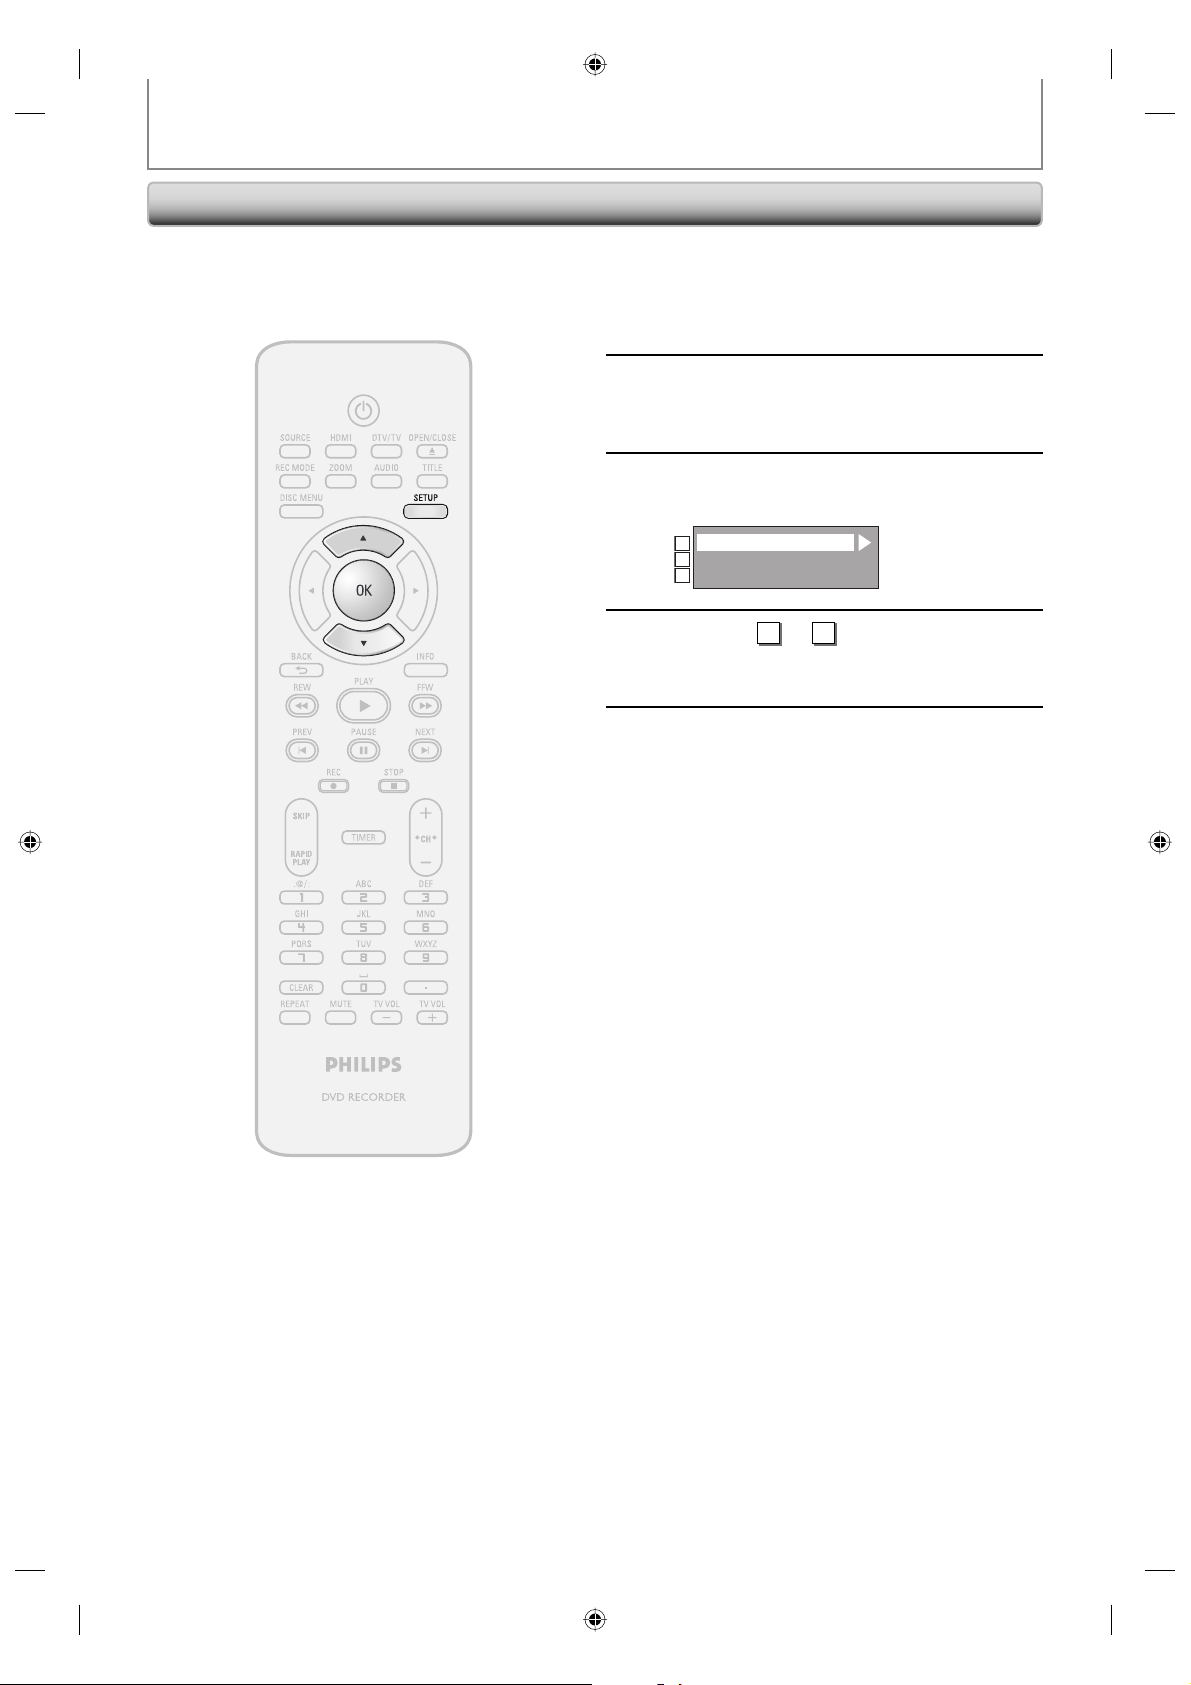
HDMI
SETUPS
1
2
3
4
5
Press [SETUP] and use [K / L] to
select “General Setting”, then press
[OK].
“General Setting” menu will appear.
Use [K / L] to select “HDMI”, then
press [OK].
Use [K / L] to select a desired item,
then press [OK].
Format
1
HDMI Audio
2
RGB Range
3
Refer to 1 to 3 on page 97 and set
the selected item.
When you finish with setting, press
[SETUP] to exit.
96 EN96 EN
E7H42UD_DVDR3506-37_EN.indd 96E7H42UD_DVDR3506-37_EN.indd 96 2007/12/28 10:54:332007/12/28 10:54:33
Page 97
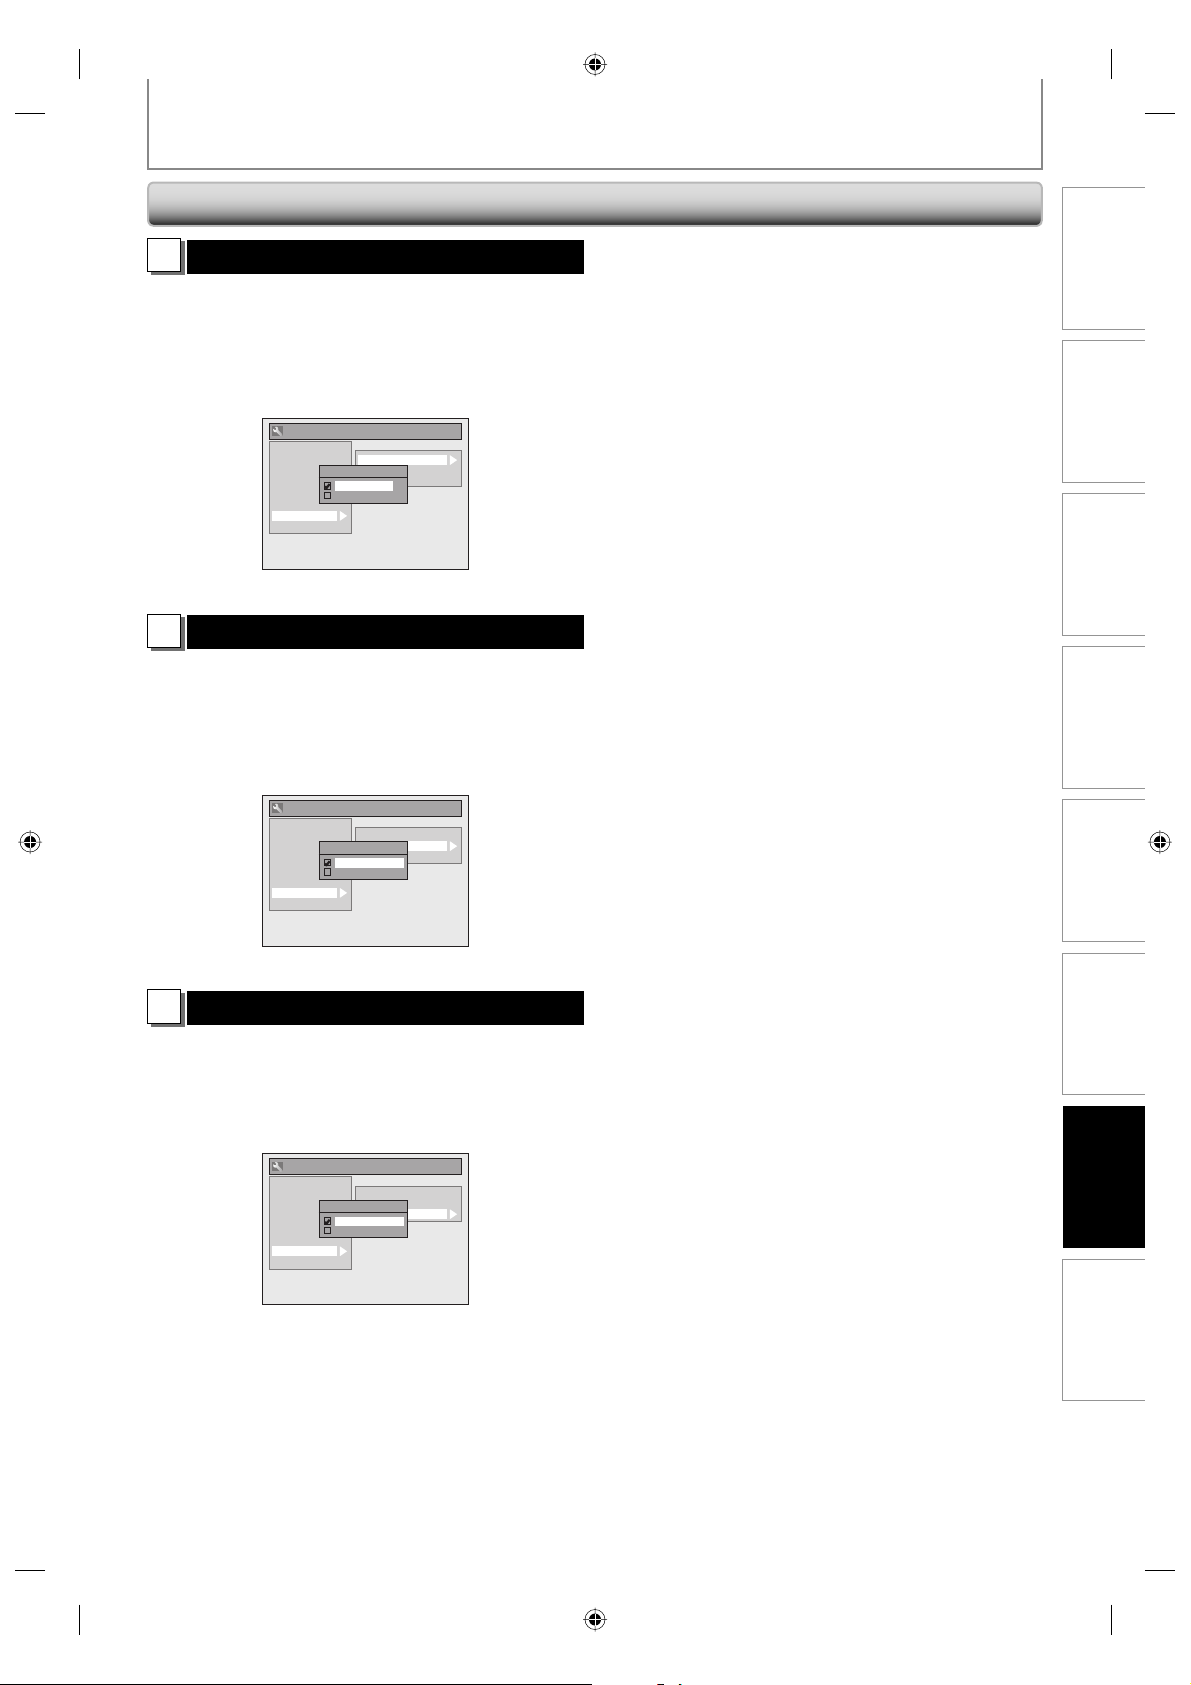
SETUPS
HDMI (cont’d)
Format (Default : RGB)
1
You can select the color space for HDMI output.
Set the appropriate color space for your display device.
Use [K / L] to select a setting, then press [OK].
• When the connected device is not compatible with the
Y/Cb/Cr, HDMI signal is output as RGB regardless of the
setting.
General Setting
Playback
Display
Video
Recording
Clock
Channel
DivX
HDMI
Reset All
Your setting will be activated.
HDMI Audio (Default : ON)
2
If you do not want to output the audio through HDMI
(when you digitally output the audio through the
COAXIAL DIGITAL AUDIO OUTPUT jack to your audio
system, etc.), you can set the HDMI audio output off.
Use [K / L] to select a setting, then press [OK].
• Set to “OFF” when not outputting the HDMI sound.
General Setting
Playback
Display
Video
Recording
Clock
Channel
DivX
HDMI
Reset All
Format
RGB
YCbCr
HDMI Audio
ON
OFF
Format
HDMI Audio
RGB Range
Format
HDMI Audio
RGB Range
Recording Playback EditingIntroduction Connections Basic Setup
Your setting will be activated.
RGB Range (Default : Normal)
3
You can adjust the RGB range to make the dark areas of
the HDMI images brighter.
Use [K / L] to select a setting, then press [OK].
• Select “Enhanced“ if the black-white contrast is not clear.
• This setting is effective only for HDMI RGB output.
General Setting
Playback
Display
Video
Recording
Clock
Channel
DivX
HDMI
Reset All
RGB Range
Normal
Enhanced
Format
HDMI Audio
RGB Range
Your setting will be activated.
Function Setup
Others
97EN
97EN
E7H42UD_DVDR3506-37_EN.indd 97E7H42UD_DVDR3506-37_EN.indd 97 2007/12/28 10:54:342007/12/28 10:54:34
Page 98
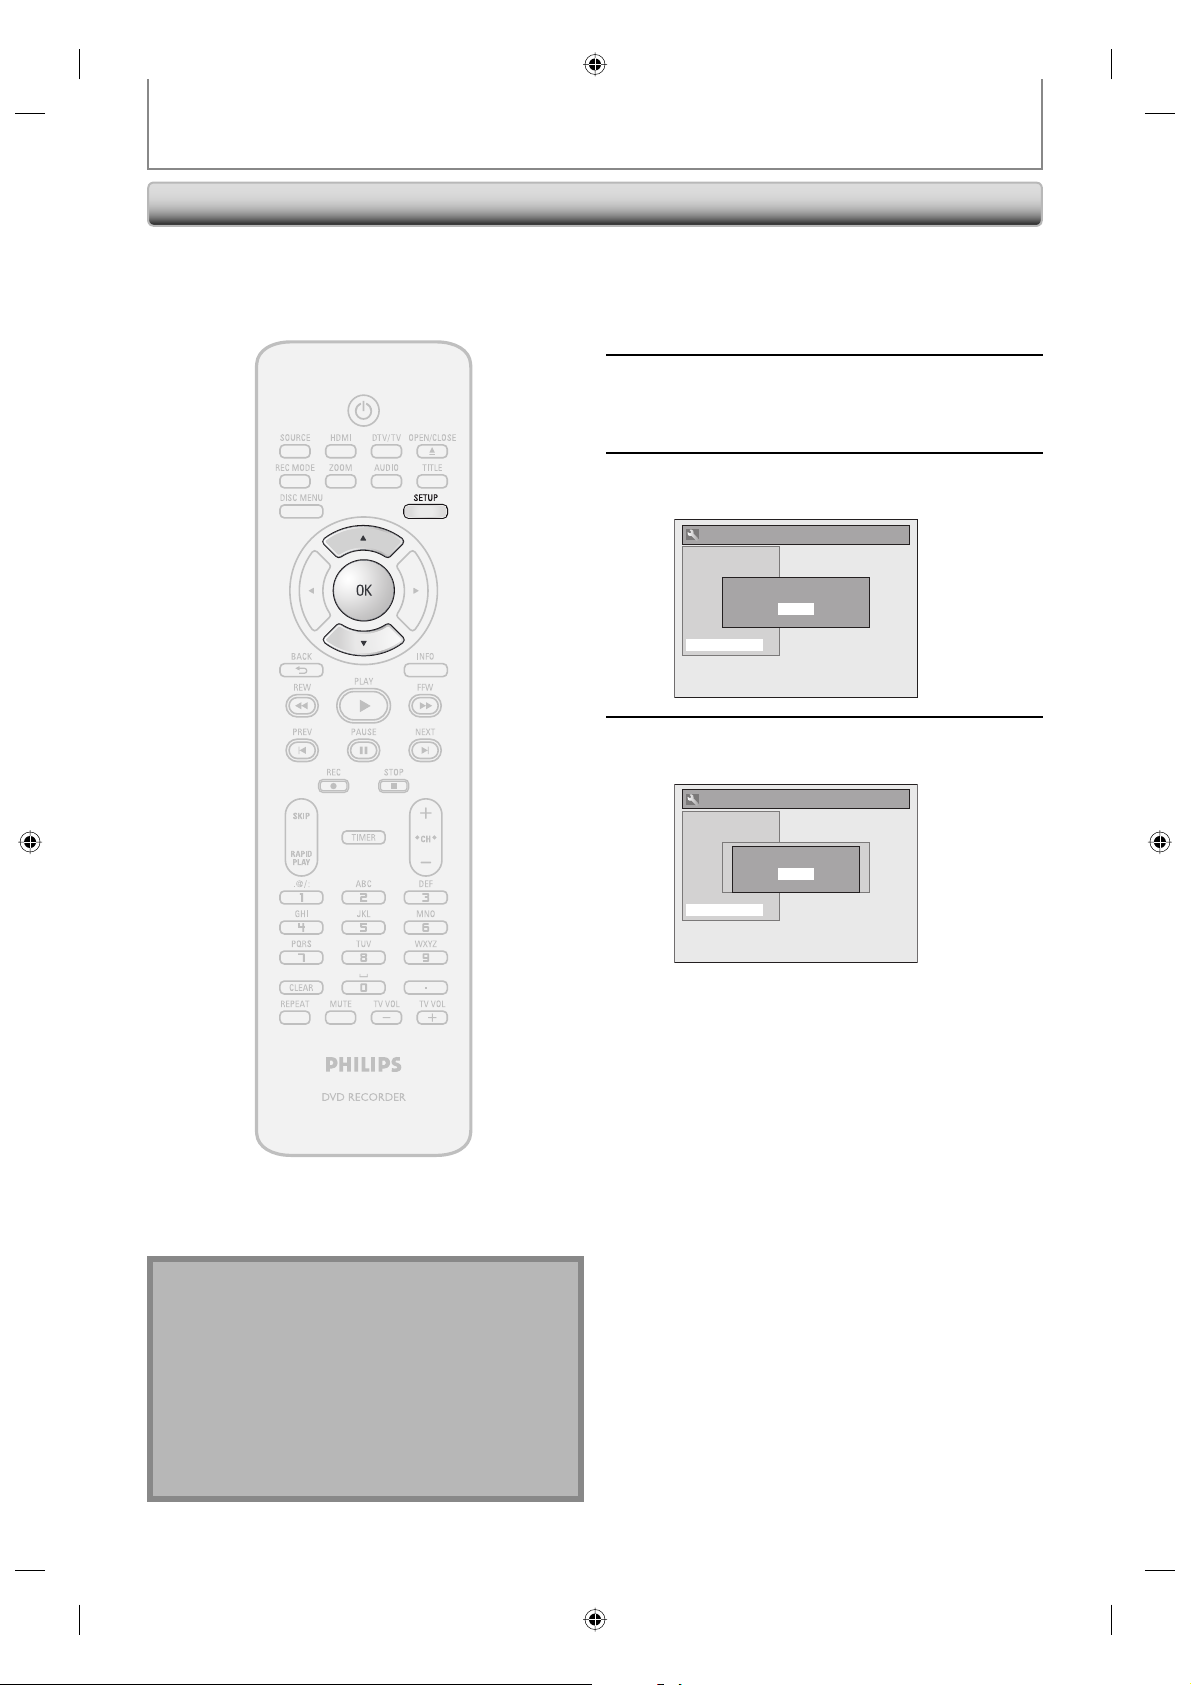
Reset All
SETUPS
Reset the setting to default.
Press [SETUP] and use [K / L] to
select “General Setting”, then press
1
[OK].
“General Setting” menu will appear.
Use [K / L] to select “Reset All”, then
press [OK].
2
Select “Yes” using [K / L] , then press
[OK].
3
4
General Setting
Playback
Display
Video
Recording
Clock
Channel
DivX
HDMI
Reset All
Reset to factory default?
Yes
No
Select “Yes” again using [K / L] ,
then press [OK].
General Setting
Playback
Display
Video
Recording
Clock
Channel
DivX
HDMI
Reset All
Reset to factory defauit?
Are you sure?
Yes
Yes
No
No
Note
• The settings listed below will remain unchanged
even after resetting to the factory default.
– OSD language setting
– Channel setting
– Clock setting
– Parental lock setting
– V-Chip setting
– Timer programming information
– DivX® registration code
98 EN98 EN
Your setting in recording will be initialized.
E7H42UD_DVDR3506-37_EN.indd 98E7H42UD_DVDR3506-37_EN.indd 98 2007/12/28 10:54:342007/12/28 10:54:34
Page 99
TROUBLESHOOTING
Before requesting service for this unit, check the table below for a possible cause of the problem you are experiencing.
Some simple checks or a minor adjustment on your part may eliminate the problem and restore proper operation.
Symptom Remedy
Power
The power does not turn on. • Check that the AC power cord is connected securely.
Picture
There is no picture. • Re-connect the connecting cords securely.
Picture noise appears. • Clean the disc with a cleaning cloth.
Playback picture from the external
devices connected to this unit is
distorted.
TV program reception does not
fill the TV screen.
TV program pictures are
distorted.
TV channels cannot be changed. • Switch the input to TV.
Playback picture is distorted. • Keep the device which may cause electrical disturbances, such as a cellular
No analog TV closed captions are
output.
Sound
There is no sound. • Clean the disc with a cleaning cloth.
Sound is noisy. • Clean the disc with a cleaning cloth.
Remote control
The remote control does not
function.
• Check the breaker (in case of power failure).
• Check if the connecting cords are damaged.
• If the main menu appears on the TV screen, press [BACK
• Check the connection to your TV (pages 16-18).
• Check if the progressive scan mode is set correctly according to your TV
(page 94).
• Switch the input selector on your TV (such as to “E1”) so that the signal from
the unit appears on the TV screen.
• If the picture output signal from the external devices passes through this
unit to get to your TV, the copy protection signal applied to some DVD could
affect the picture quality. Disconnect the playback device in question and
connect it directly to your TV.
• Try to set the channels with “Auto Channel Preset” or “Manual Channel
Preset” in “Channel” menu (pages 24-26).
• Select a channel of any TV program using [CH
• Adjust TV antenna.
• Adjust the picture. (Refer to the TV’s manual.)
• Place the unit and TV farther apart.
• Place the TV and any bunched RF coaxial cables farther apart.
• Connect the RF coaxial cable correctly (pages 13-15).
phone, away.
• If you are using HDMI connection to watch the TV programs through this
unit’s tuner, analog TV closed caption cannot be output. Try using other
connection.
• Re-connect all connections securely.
• Check if the connecting cord is damaged.
• Check the connections to the amplifier input.
• Check if the input device setting on the amplifier is correct.
• When the unit is in pause mode or in slow-motion playback mode, sound is
not output. This is not a malfunction.
• When the unit is in fast forward or fast reverse mode, sound is not output.
This is not a malfunction.
• If you are using COAXIAL DIGITAL AUDIO OUTPUT jack, check the setting in
“Disc Audio” (page 89).
• Batteries are weak.
• There are obstacles between the remote control and the unit.
• The remote control is far from the unit.
• There are no batteries in the remote control.
• Check if the unit is turned on.
• Check if you are pointing the remote control at the recorder and NOT the TV.
If you have a plasma TV, it may interfere with the IR signal. Try the remote
with the plasma off. If the remote works, you may need to move the unit
away from the plasma TV.
/ ].
] to exit.
Recording Playback EditingIntroduction Connections Basic Setup Function Setup
Others
99EN
99EN
E7H42UD_DVDR3506-37_EN.indd 99E7H42UD_DVDR3506-37_EN.indd 99 2007/12/28 10:54:352007/12/28 10:54:35
Page 100
TROUBLESHOOTING
Symptom Remedy
Playback
The disc does not play back. • No disc is inserted.
Discs recorded on this unit
cannot be played back on other
DVD players.
Playback image freezes for a
second.
The disc does not start playback
from the beginning.
The unit starts playing back the
disc automatically.
Some functions such as stop,
search, or slow-motion playback
cannot be performed.
The language for the sound track
cannot be changed.
The subtitle language cannot be
changed or turned off.
The angles cannot be changed. • Multi-angles are not recorded on the DVD-video being played back.
Recording / Timer recording / Editing
The channel cannot be changed
from the channel you are
recording.
Nothing was recorded even
though you set the timer setting
correctly.
Recording does not stop
immediately after you press
[STOP C].
Timer recording is not complete
or did not start from the
beginning.
• A blank disc is inserted.
• The disc is upside down. Insert the disc with the labeled side facing up.
• The disc is not correctly inserted.
• The unit cannot play back certain discs (such as a CD-ROM) (page 53).
• The region code on the DVD-video does not match the unit (page 53).
• Moisture has condensed inside the unit. Remove the disc and leave the unit
turned on for about 2 hours until the moisture evaporates (page 5).
• If the disc was recorded on another recorder, the unit cannot play back the
disc if it was not finalized.
• If you are using DVD+R, DVD-RW/-R disc, please ensure you finalized the disc
after recording (page 51).
• During the playback of 2 layered disc, picture may freeze for a moment when
the 1st layer switches to the 2nd layer. This is not a malfunction.
• Resume playback was activated (page 62). Press [STOP C] twice.
• You have inserted a disc whose title menu or DVD menu automatically
appears on the TV screen when it is first insert.
• The DVD-video features an auto playback function.
• Depending on the disc, you may not be able to do some of the operations.
Refer to the manual supplied with the disc.
• The title does not have the multilingual audio tracks.
• The DVD-video prohibits the changing of the language for the sound track.
• Multilingual subtitle are not recorded on the DVD-video.
• The angle-change operation is whenever possible as long as the disc contains
a multi-angle portion. Actual change will be performed when the portion has
come up.
• The DVD-video prohibits changing angles.
• Try changing the angle using the DVD-video’s menu.
• Set the TV’s input to “TV.”
• There was a power failure during recording.
• The unit’s internal clock stopped due to a power failure that lasted for more
than 30 seconds. Reset the clock (pages 27- 28).
• The program contains copy protection signals that restricts copying.
• The timer setting overlapped with another setting that has priority.
• It may take a few seconds for the unit to input disc data before recording
stops.
• The timer setting overlapped with another setting that has priority (page 42).
• Disc space was not enough.
100 EN100 EN
E7H42UD_DVDR3506-37_EN.indd 100E7H42UD_DVDR3506-37_EN.indd 100 2007/12/28 10:54:352007/12/28 10:54:35
 Loading...