

Page 1

QUICK USE GUIDE
ANTENNA/
CABLE SIGNAL
1
2
AERIAL
RF.OUT
4
3
DVD recorder
back panel
DVDR3320VR
SGP/SL/0512_05
English
DVD VCR
OPEN/CLOSE
TV/VIDEO
DISPLAY
RETURN
LIST/DISC
SYSTEM
MENU
MENU
OK
PLAY
STOP
PAUSE/STEP
2
STANDBY
ON
OPEN
OPEN/CLOSE
VCR
DVD
DIRECT
VCR
DUBBING
DVD
CHANNEL
RECORD PAUSE
SOURCE
DVD
VCR
D.DUBBING REW FWD RECORD
THUMBNAIL
CHAPTER
TIMER REC MODE
REPEAT
TITLE
AUDIO ZOOM
SEARCH MARKER
SHOWVIEW
CLEAR
VIDEOPLUS +
EJECT
REWSTOP
PLAY
F.FWD
OK
3
1
1 3
1 Remove the antenna cable plug from your TV (or Satellite
Receiver/Cable Box). Connect it to the AERIAL input
socket at the back of the DVD recorder.
2 Use the supplied antenna cable to connect the DVD
recorder’s RF.OUT output socket to the antenna input
socket at the back of your TV set.
3 Use the scart cable to connect the DVD recorder’s EURO
AV1 AUDIO/VIDEO socket to the SCART socket at the
back of your TV set.
4 Connect the power cable from the DVD recorder’s
~ MAINS to the power supply.
Helpful Hints:
If your TV does not have the above-mentioned
connectors, please refer to the user manual for more
information on others possible connection to your
TV set.
Prepare the remote control
1 Press STANDBY-ON 2 on the DVD recorder to switch
2 Switch on the TV set and select the correct video in channel.
3 Press SYSTEM MENU to access the setup menu.
● Channel auto search,
● Clock set,
2
3
Start first installation Connect DVD recorder
it on.
NO PICTURE! Press the CHANNEL 3 4 button on the TV to
select the correct video in channel, for example, 'EXT', '0', or 'AV'.
Press 3 4 to select an item in the menu.
Press 2 to access the next level options.
Press 1 to go back previous level options.
When you complete, press OK to confirm your selections
and press SYSTEM MENU to exit.
In {GENERAL} select {Auto Programming}.
Press 2 to start automatic TV channel search.
Once the TV channel search complete, the total number of
channels will be saved in the tuner’s memory.
In {GENERAL} select {Clock Set}.
Press OK to confirm the time and clock setting.
Press 3 4 to change the first digit and press 1 2 to go to the
previous or next digit field.
Once complete, press OK to confirm.
1
2
DVDR3320VR_05_QUG 01/03/06, 5:35 PM1
The DVD recorder is ready for use!
See next page for basic recording and playback.
Page 2
... cont.
ALL
LABEL
ALL
2
LABEL
SUPER VIDEO
STANDBY
ON
OPEN
VCR
DVD
1
6
2
OPEN/CLOSE
DVD
DIRECT
VCR
CHANNEL
DUBBING
DVD VCR
OPEN/CLOSE
OR
TV/VIDEO
RETURN
LIST/DISC
MENU
OK
PLAY
STOP
D.DUBBING REW FWD RECORD
THUMBNAIL
CHAPTER
TIMER REC MODE
REPEAT
TITLE
AUDIO ZOOM
SEARCH MARKER
CLEAR
SYSTEM
PAUSE/STEP
SHOWVIEW
VIDEOPLUS +
DISPLAY
MENU
RECORD PAUSE
SOURCE
DVD
VCR
3 4
PAUSE/STEP
RECORD
REWSTOP
3
5
4
EJECT
PLAY
F.FWD
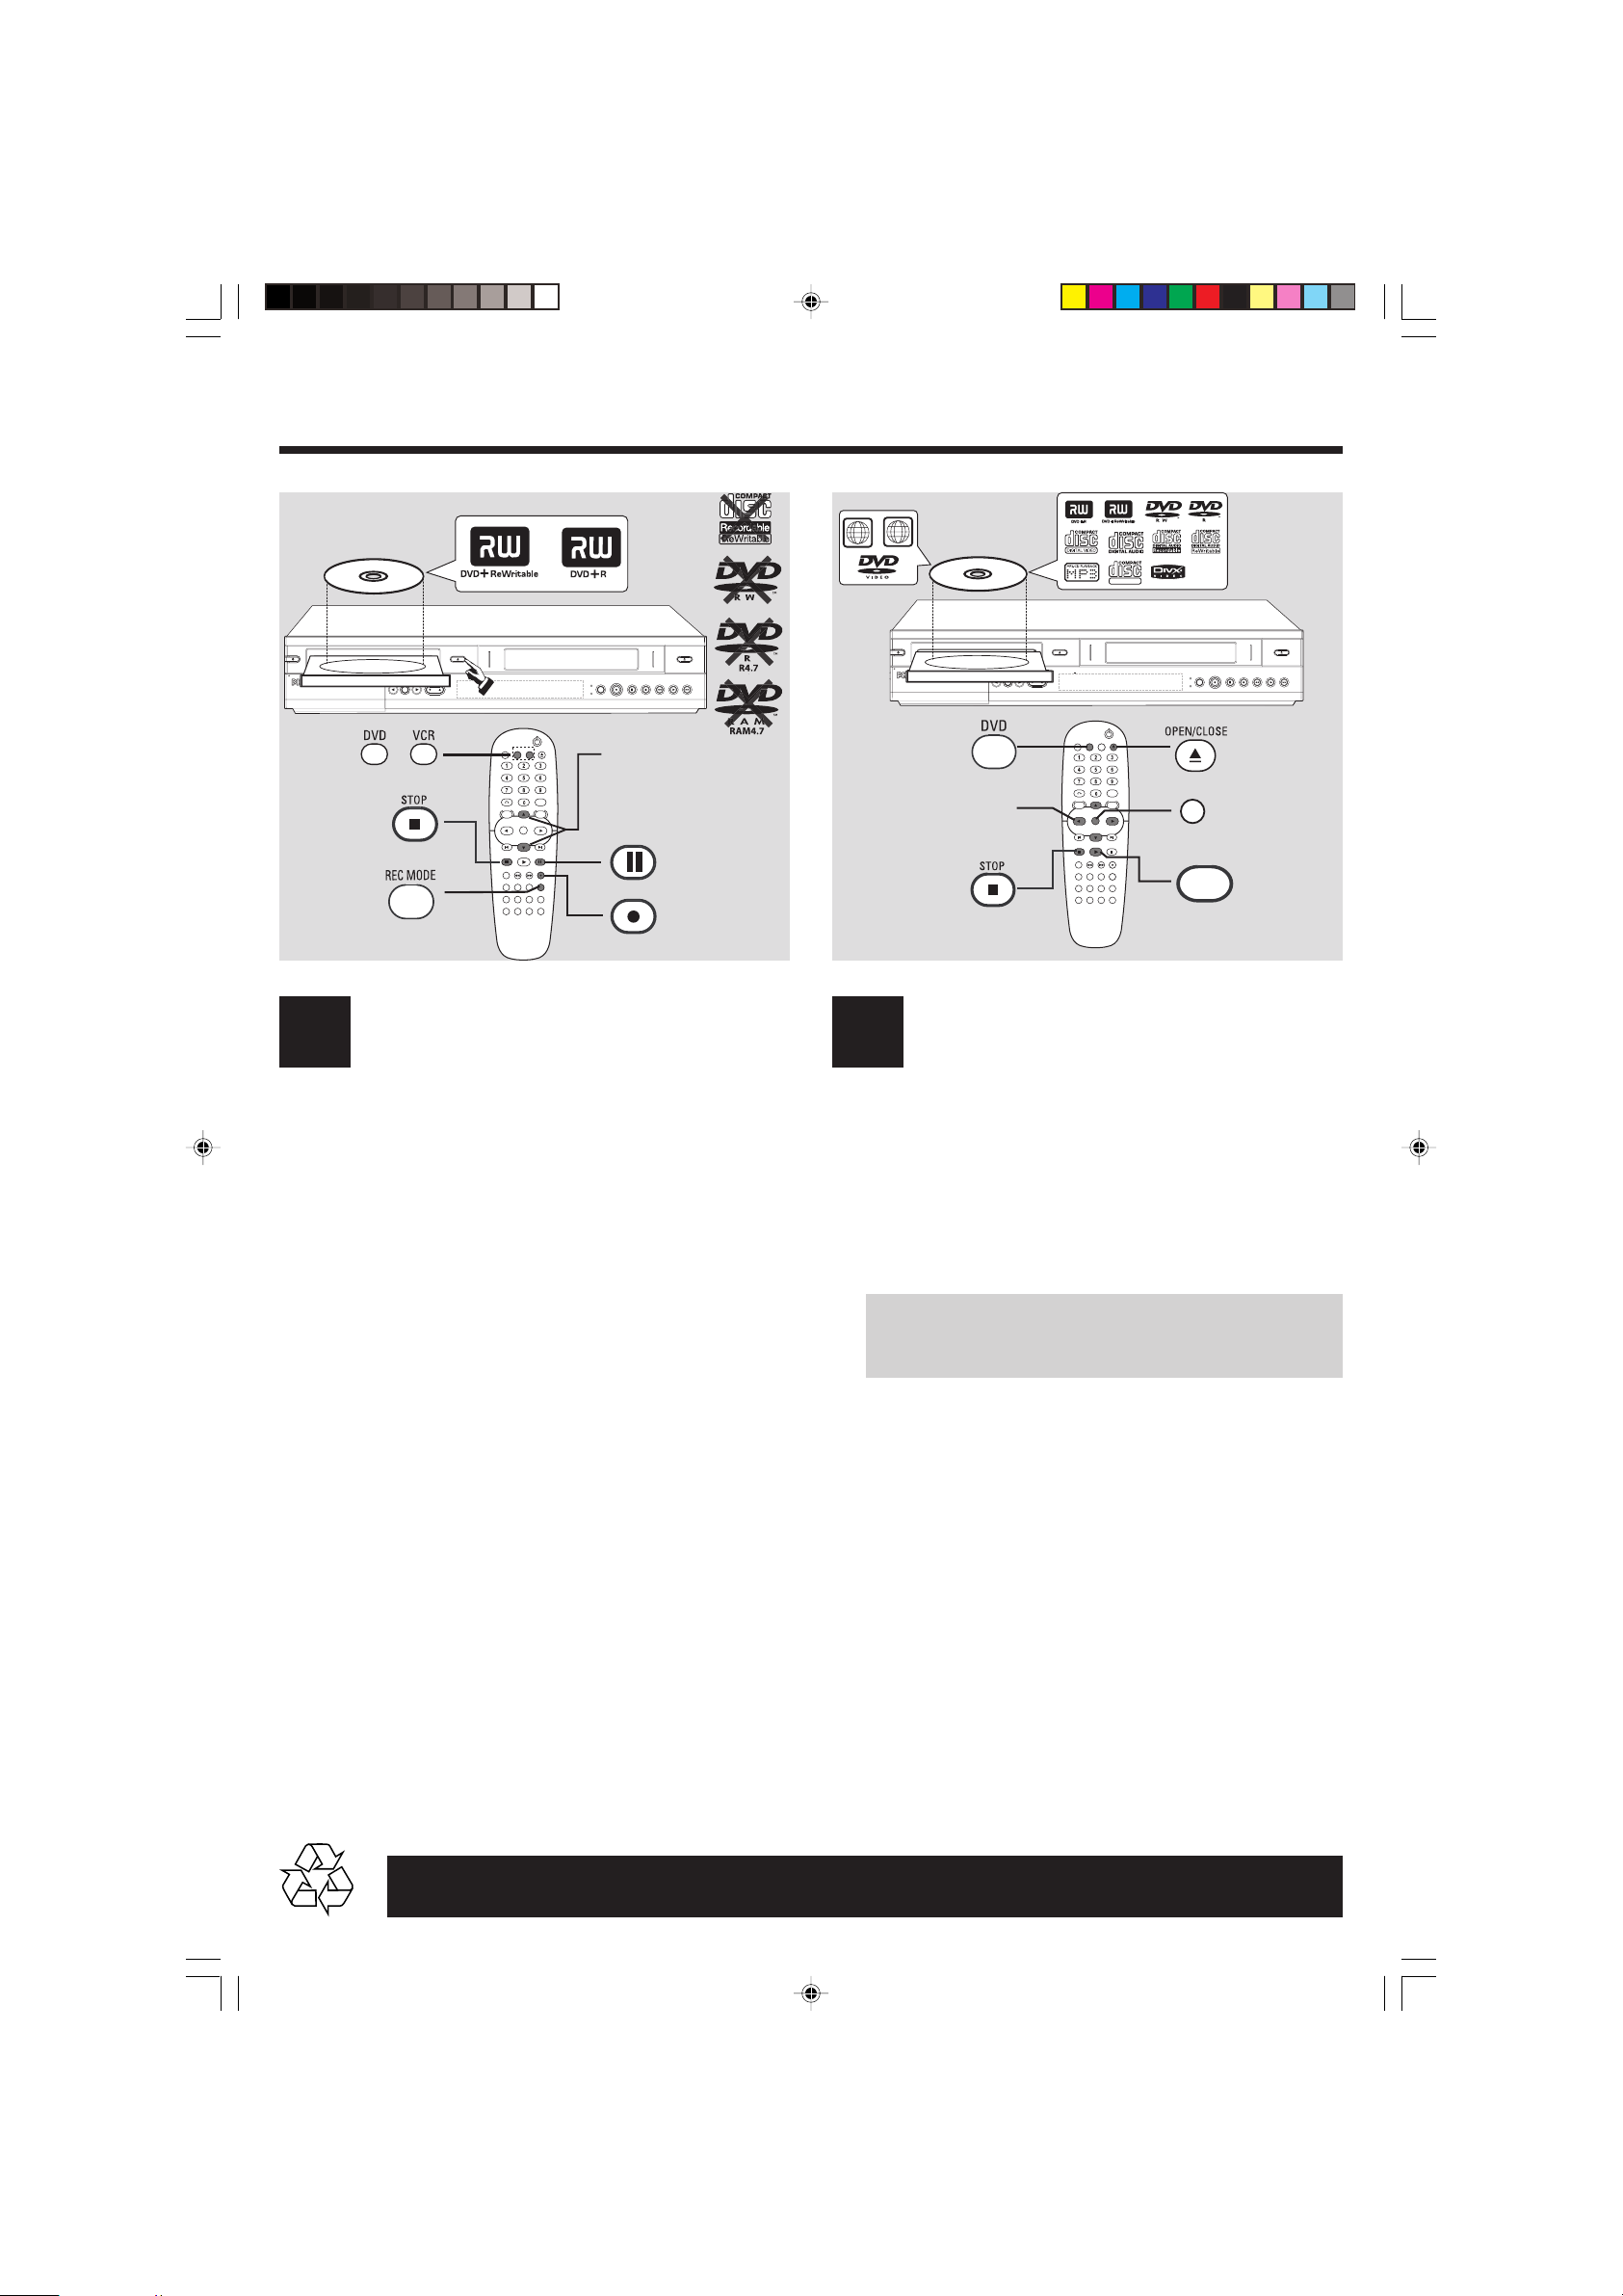
Basic recording from a TV
4
1 Switch on the DVD Recorder, press VCR or DVD button to
select (VCR or DVD) mode for recording. Insert a
recordable DVD+R(W) with the label side facing up.
2 Press REC MODE repeatedly to select a desired recording
mode. It defines the picture quality and the maximum
recording time for a disc.
DVD: SP (Standard quality),
LP (Low quality),
XP (High quality),
EP (Extended quality),
VCR: SP (Standard play),
LP (Long play).
3 Press CHANNEL 3 4 to select the TV programme
number you wish to record.
➜ If you wish to record from additional device (e.g. Video Cassette
Recorder), press 3 4 on the remote control to select the
correspond external input channel.
For example, select { AV2 } if you have connected the VCR to
EURO AV2 DECODER scart socket at the back of the DVD
recorder.
STANDBY
ON
OPEN
VCR
DVD
12
3
1 2 3 4
4
OPEN/CLOSE
DVD
DIRECT
VCR
CHANNEL
DUBBING
OPEN/CLOSE
DVD VCR
TV/VIDEO
DISPLAY
RETURN
LIST/DISC
SYSTEM
MENU
MENU
OK
PLAY
STOP
PAUSE/STEP
D.DUBBING REW FWD RECORD
THUMBNAIL
CHAPTER
TIMER REC MODE
REPEAT
TITLE
AUDIO ZOOM
SHOWVIEW
SEARCH MARKER
CLEAR
VIDEOPLUS +
DVD
VCR
OK
SOURCE
OR
PLAY
2
RECORD PAUSE
3
EJECT
REWSTOP
PLAY
F.FWD
Start Playback a disc
5
1 Press DVD to select DVD mode.
2 Press OPEN/CLOSE / to open the disc tray, then insert a
disc with the label side facing up.
Press OPEN/CLOSE / again to close the disc tray.
3 Playback will start automatically.
➜ If a disc menu appears, press 1 2 3 4 to navigate within the
menu, highlight a title and press OK or PLAY 2 to start playback.
NO SOUND! Connect the AUDIO L/R (red/white) sockets at
the back of the DVD recorder to the correspond AUDIO input
sockets on a TV set, stereo system or receiver. Turn on the
connected system and select the appropriate channel.
4 To stop playback, press STOP 9.
Before using the Remote Control,
● Press DVD on the remote control for DVD functions.
● Press VCR on the remote control for VCR functions.
4 Press RECORD 0 to start recording.
● If required, you can press RECORD 0 repeatedly to
recording time length.
5 During recording, you may press PAUSE/STEP ; to pause
the recording and press RECORD 0 to continue.
6 To stop the recording, press STOP 9.
Detailed playback features and additional functions are described in the
DVDR3320VR_05_QUG 01/03/06, 5:35 PM2
To play the DVD+R on other DVD players,
you must finalise it first
1 Press SYSTEM MENU on the remote control.
2 Press 3 4 to select { Finalise } in the menu and press OK
to start finalising the DVD+R.
Once the DVD+R is finalised, no further recordings
and editings can be made to the disc. Unfinalise a
DVD+R is not possible.
accompanying user manual.
 Loading...