

Page 1
Page 2
Safety instructions
English
All the safety and operating instructions should be read and understood before the receiver is operated.
For safe operation and optimal lifetime
- Position your receiver away from radiators or other heat sources.
- Leave a space of at least 3 cm around the receiver for ventilation making sure that the ventilation
holes are not obstructed.
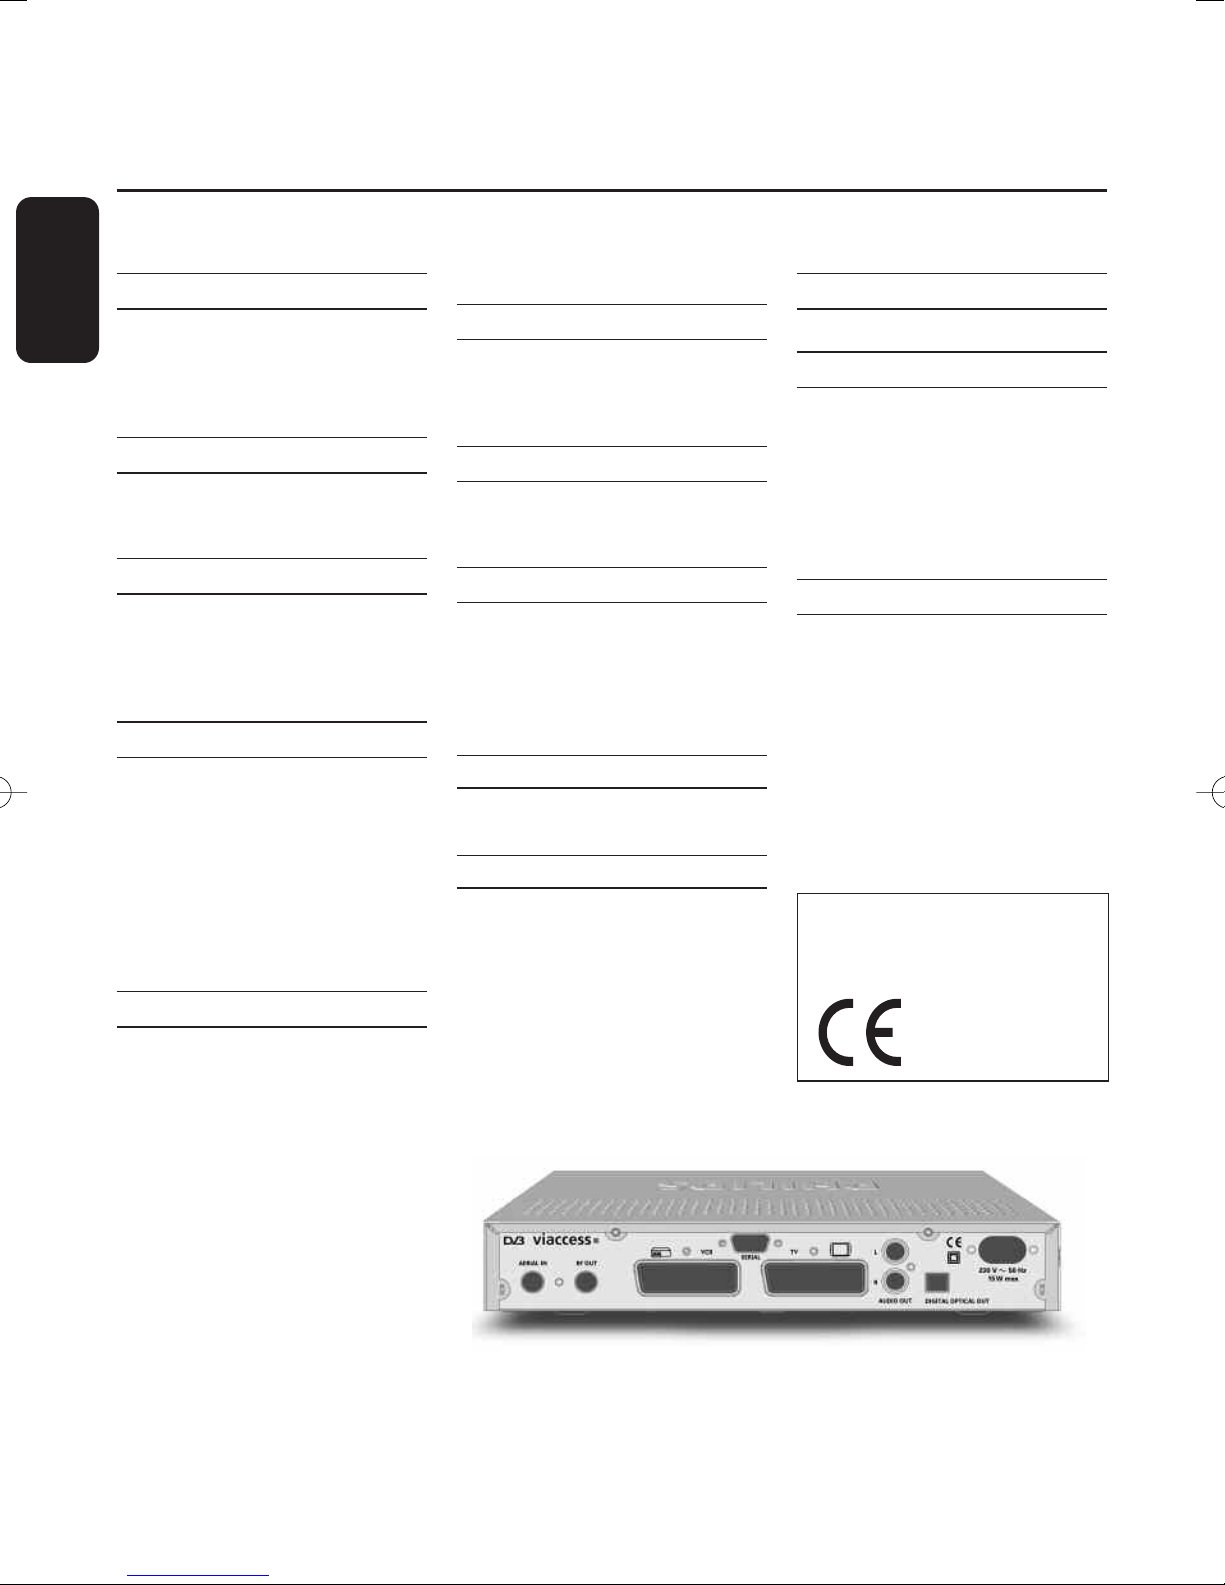
- This receiver is intended for use in a domestic environment only and should never be operated or
stored in excessively hot, humid or damp conditions.
- Make sure no objects or fluids enter the housing through the ventilation slots. Should this happen,
disconnect your receiver from the mains and consult your dealer.
- For cleaning, use a damp chamois leather. Never use any abrasive cloth, sponge or cleaner.
- When connecting or disconnecting cables to the receiver, always ensure the receiver is
disconnected from the mains.
- Do not disassemble the equipment.There are no user serviceable parts.
Mains connection
Before connecting the receiver to the mains, check that the mains supply voltage corresponds to the
voltage printed on the rear of the receiver. If the mains voltage is different, consult your dealer.
If the receiver will not be used for a long time, unplug the power cord from the wall socket.
Please wait before connecting your receiver - read on.
Meaning of symbols
The “Batteries marking symbol” means used batteries must not be disposed together with
your household waste.
Please, inquire about the local regulations regarding disposal of used batteries.
For information: the Philips batteries supplied with your receiver remote do not contain
hazardous substances such as Mercury, Cadmium, or Lead.
The “Material recyclability symbol” means the package cardboard or User manual paper is
recyclable.
The “Material recyclability symbol” affixed on plastic parts means these parts are recyclable.
The “Green point” affixed on cardboard means PHILIPS pays a financial duty to the
“Avoidance and Recovery of Packaging Waste” organization.
This receiver contains a large number of materials that can be recycled. If you are disposing
of an old machine
please tak
,
e it to a recycling centre.
The “Warning” symbol means the recommendations must be read carefully.
2 SAFETY INSTRUCTIONS
Page 3
Quick installation guide
Terrestrial Receiver
to AC outlet
AB
LR
AUDIO
Digital
input
Analogue
input
Audio equipment
PHILIPSPHILIPS
TV set
VCR/DVD
Terrestrial Receiver
IN FROM ANT
to AC outlet
OUT TO ANT
EXT 1
EXT 2
SCART
For optimum configuration
RF Cable
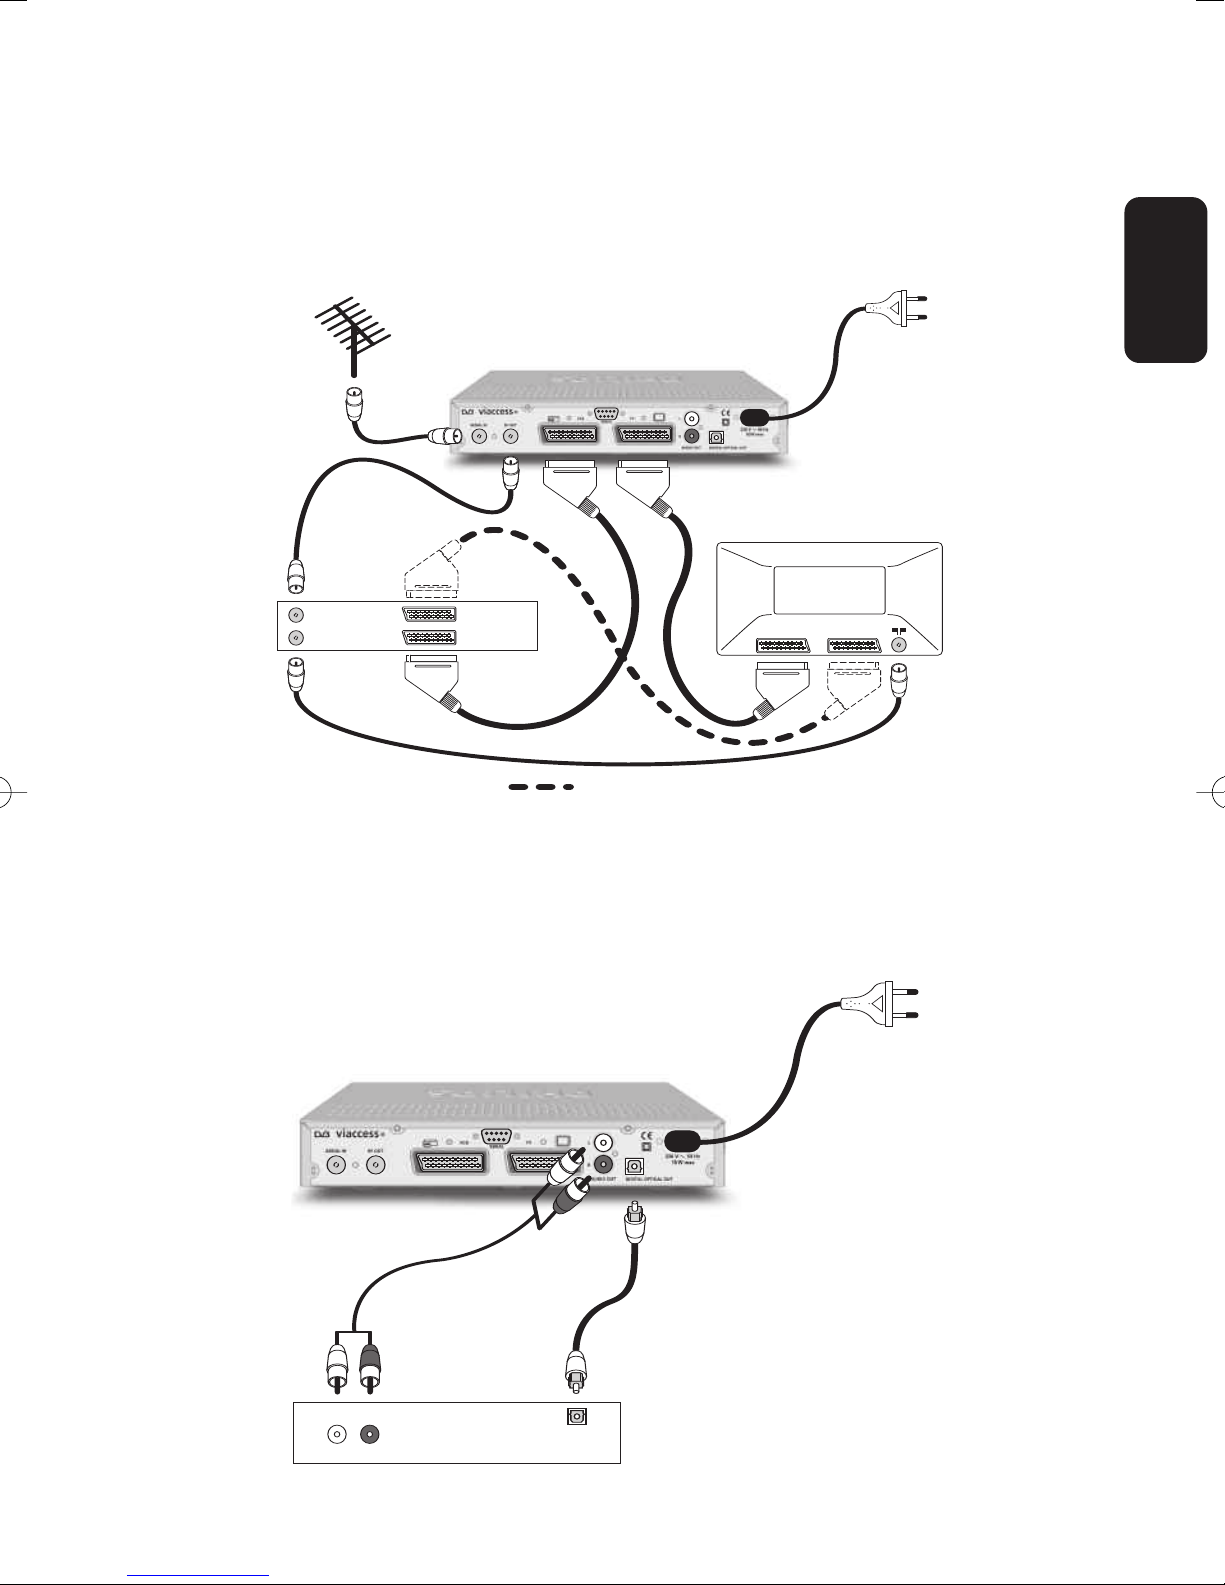
Connecting to TV and VCR/DVD player using SCART Support
English
Note: for optimum DVD/VCR viewing, connect the DVD/VCR SCART EXT 1 directly to a SCART of the TV set.
Connecting to Digital Amplifier/Home Theatre/HiFi set
QUICK
ALLATION GUIDE
INST
3
Page 4
TABLE OF CONTENTS
English
Safety instructions 2
For safe operation and optimal lifetime 2
Mains connection 2
Meaning of symbols 2
Quick installation guide 3
Connecting to TV and VCR/DVD player
using SCART Support 3
Connecting to Digital Amplifier/Home
Theatre/HiFi set 3
1 Introduction 6
2 Product description 7
2.1 Unpacking the product 7
6 First installation 15
6.1 Easy installation 15
6.2 Channel scanning 15
6.3 Scanning failure 16
7 General Viewing Function 17
7.1 Receiver wake up 17
7.2 Channel Information 17
7.3 Channel selection 18
7.3.1 Using <P+/P->
or numeric keys 18
7.3.2 Using the channel list 18
7.4 Channel Lists 18
2.2 Front panel 8
2.3 Rear panel 9
3 Remote control 10
4 Inserting your Smart Card 12
5 Connecting your receiver 12
5.1 Connecting to aerial wall socket
TV 13
and
5.2 Connecting to TV and VCR/DVD
player using SCART support 13
5.3
Connecting to y
equipment 14
our audio
7.5 Previous Channel Recall 18
7.6 TV or Radio Mode selection 19
7.7 Volume & Audio Control 19
7.7.1 Volume control and Mute 19
7.7.2 Audio Control 19
7.7.3 Audio language 19
7.7.4 Subtitles languages 20
7.8 Recording timers 20
7.8.1 To set a timer
from the guide 20
7.8.2 To set or modify a timer
from the Timer menu 20
4 TABLE OF CONTENTS
Page 5

7.8.3 To delete a running timer
while watching digital TV
or listening to digital radio 21
7.8.4 To delete a running timer
set while the receiver was
in standby21
8 Menu 22
8.1 General information 22
8.1.1 Basics about
menu navigation 22
8.6 System Setting 27
8.6.1 Receiver settings 28
8.6.2 Remote Control setting 28
8.7 Installation 29
8.7.1 Add Service 29
8.7.2 Signal Test 30
8.7.3 Product Identifier 30
8.7.4 Factory Default 30
8.7.5 Software update 30
English
8.1.2 Cancel/Store changes 22
8.2 Guide (Electronic Programme
Guide) 22
8.3 Channel Manager 23
8.3.1 Channel Pool 23
8.3.2 Favourites 24
8.4 Parental Control 24
8.4.1 To enable Menu Lock 25
8.4.2 To set the Parental Rate 25
8.4.3 To change your receiver
Pin Code 25
8.5 Timer Manager 25
8.5.1
Recor
ding timer 26
8.8 Conditional Access 31
8.8.1 Authorization 31
8.8.2 Maturity Rating 31
8.8.3 Change Pin Code 32
8.8.4 CA Information 32
9 Menu Tree 33
10 Troubleshooting 34
11 Technical specifications 36
8.5.2 Reminder 27
8.5.3 Sleep timer 27
TABLE OF CONTENTS 5
Page 6
1 Introduction
English
Thank you for buying this product from Philips and congratulations!
The Philips Digital Terrestrial Receiver DTR 2000 allows you to view a wide variety of free-to-air and
scrambled channels with the best digital picture and sound quality.
With this product you can enjoy advanced functions and features including:
- Digital picture and sound quality
- Wide screen format
- TV SCART and VCR/DVD SCART connector
- Up to 500 presets for TV and Radio channels
- Easy installation and use through the well-tested Euphoria User Interface
- Personal channel list and favourite lists
- Electronic programme Guide
This User Manual covers the installation of your receiver and the necessary steps to use the various
functions, so you can optimally enjoy classic as well as unique features.
Lucas Covers
Paris,April 2004
6 INTRODUCTION
Page 7
2 Product description
2.1 Unpacking the product
Unpack the receiver and check to make sure that all of the following items are also included in the
package:
1 x Remote Control Unit
-
- 2 x AA batteries
1 x SCART Cable
1 x RF Cable
1 x Power Cord
1 x User Manual
1 x Worldwide Warranty booklet
-
Plastic bags can be dangerous.To avoid suffocation keep the bag away from babies
and children.
English
PRODUCT DESCRIPTION 7
Page 8
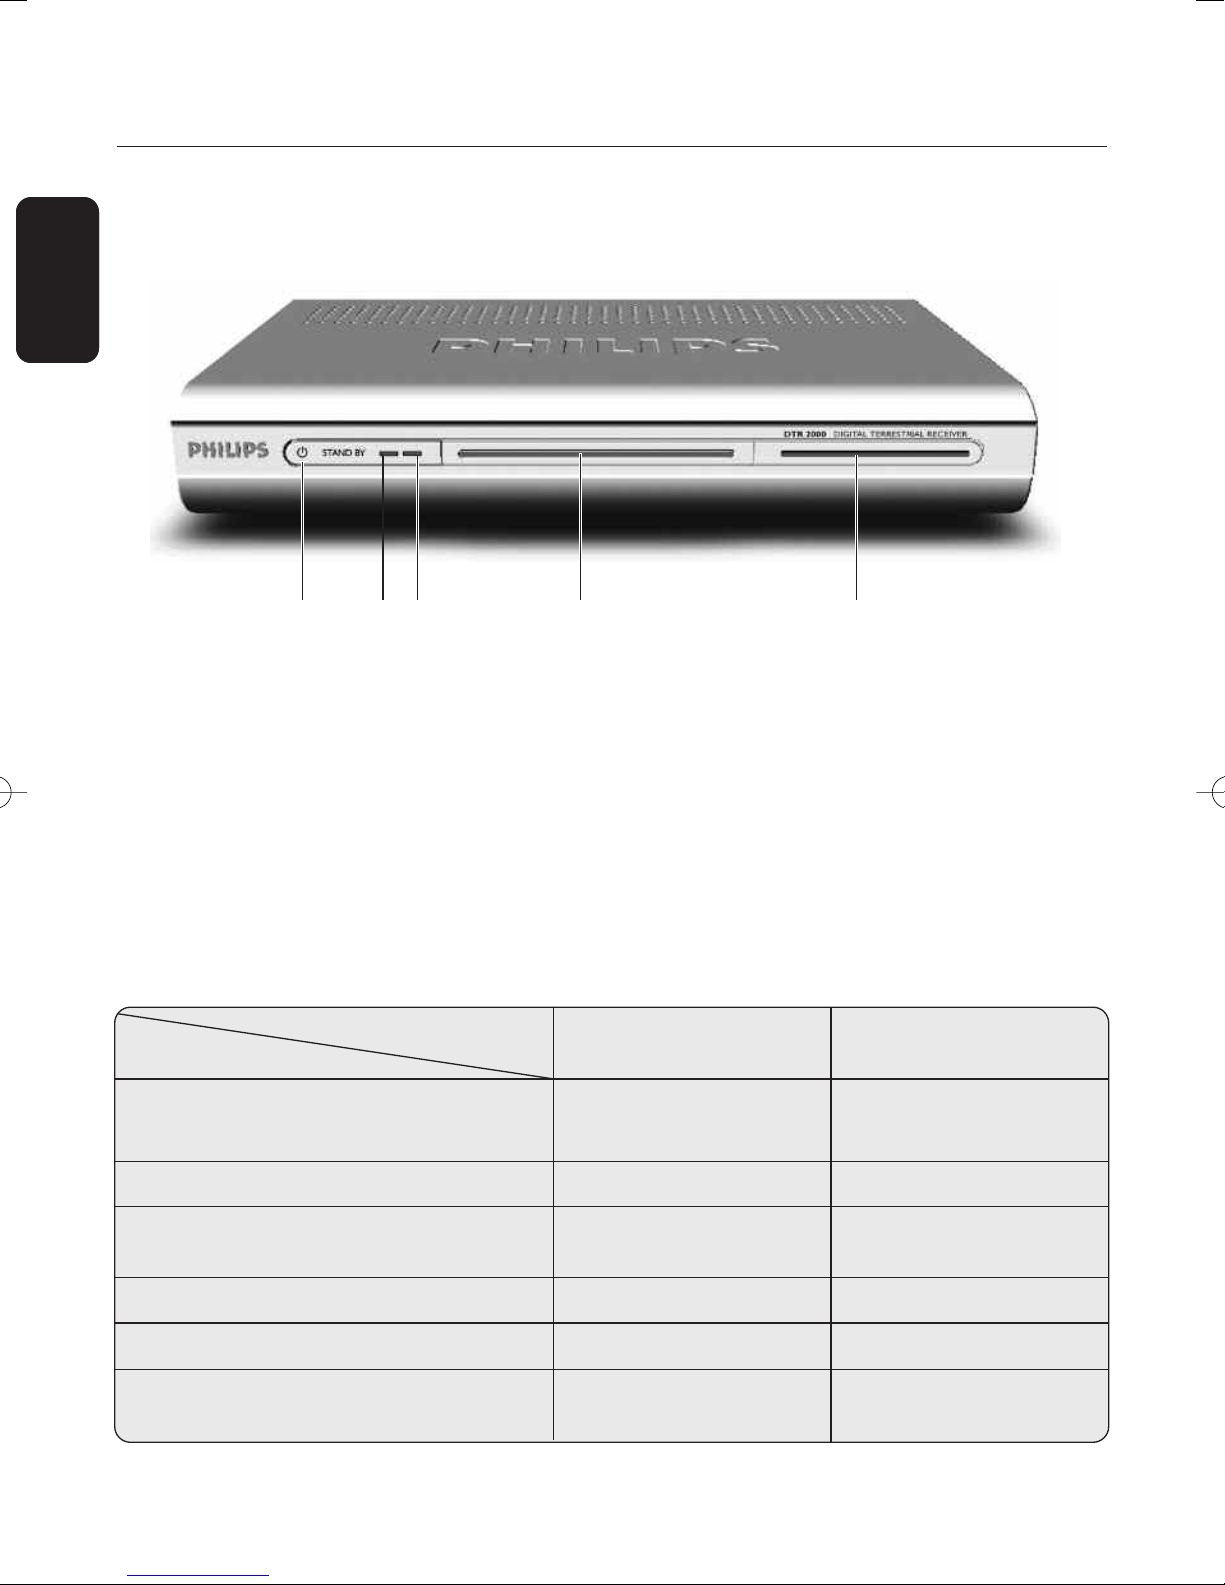
2.2 Front panel
English
Q W E R T
1 STANDBY button: . . . . . . . . . . . . . . . . . . . . . . . . Switch the receiver OFF.
2 Red LED indicator: . . . . . . . . . . . . . . . . . . . . . . . . Display receiver status (see status indicator table).
3 Green LED indicator: . . . . . . . . . . . . . . . . . . . . . Display receiver status (see status indicator table).
4 Remote control receiver window
5 Smart Card slot: . . . . . . . . . . . . . . . . . . . . . . . . . . . . See chapter 4.
Status indicator table
LED Left-hand LED Right-hand LED
Mode (Red) (Green)
Receiver connected to the mains or in
Standby ON OFF
Watching TV or listening to the Radio OFF ON
Pressing a remote control key Fast blinking Depending on
current mode
Timer active ON ON
Timer active in Standby Slow blinking OFF
Software download Depending on Fast blinking
8 PRODUCT DESCRIPTION
cur
r
ent mode
Page 9
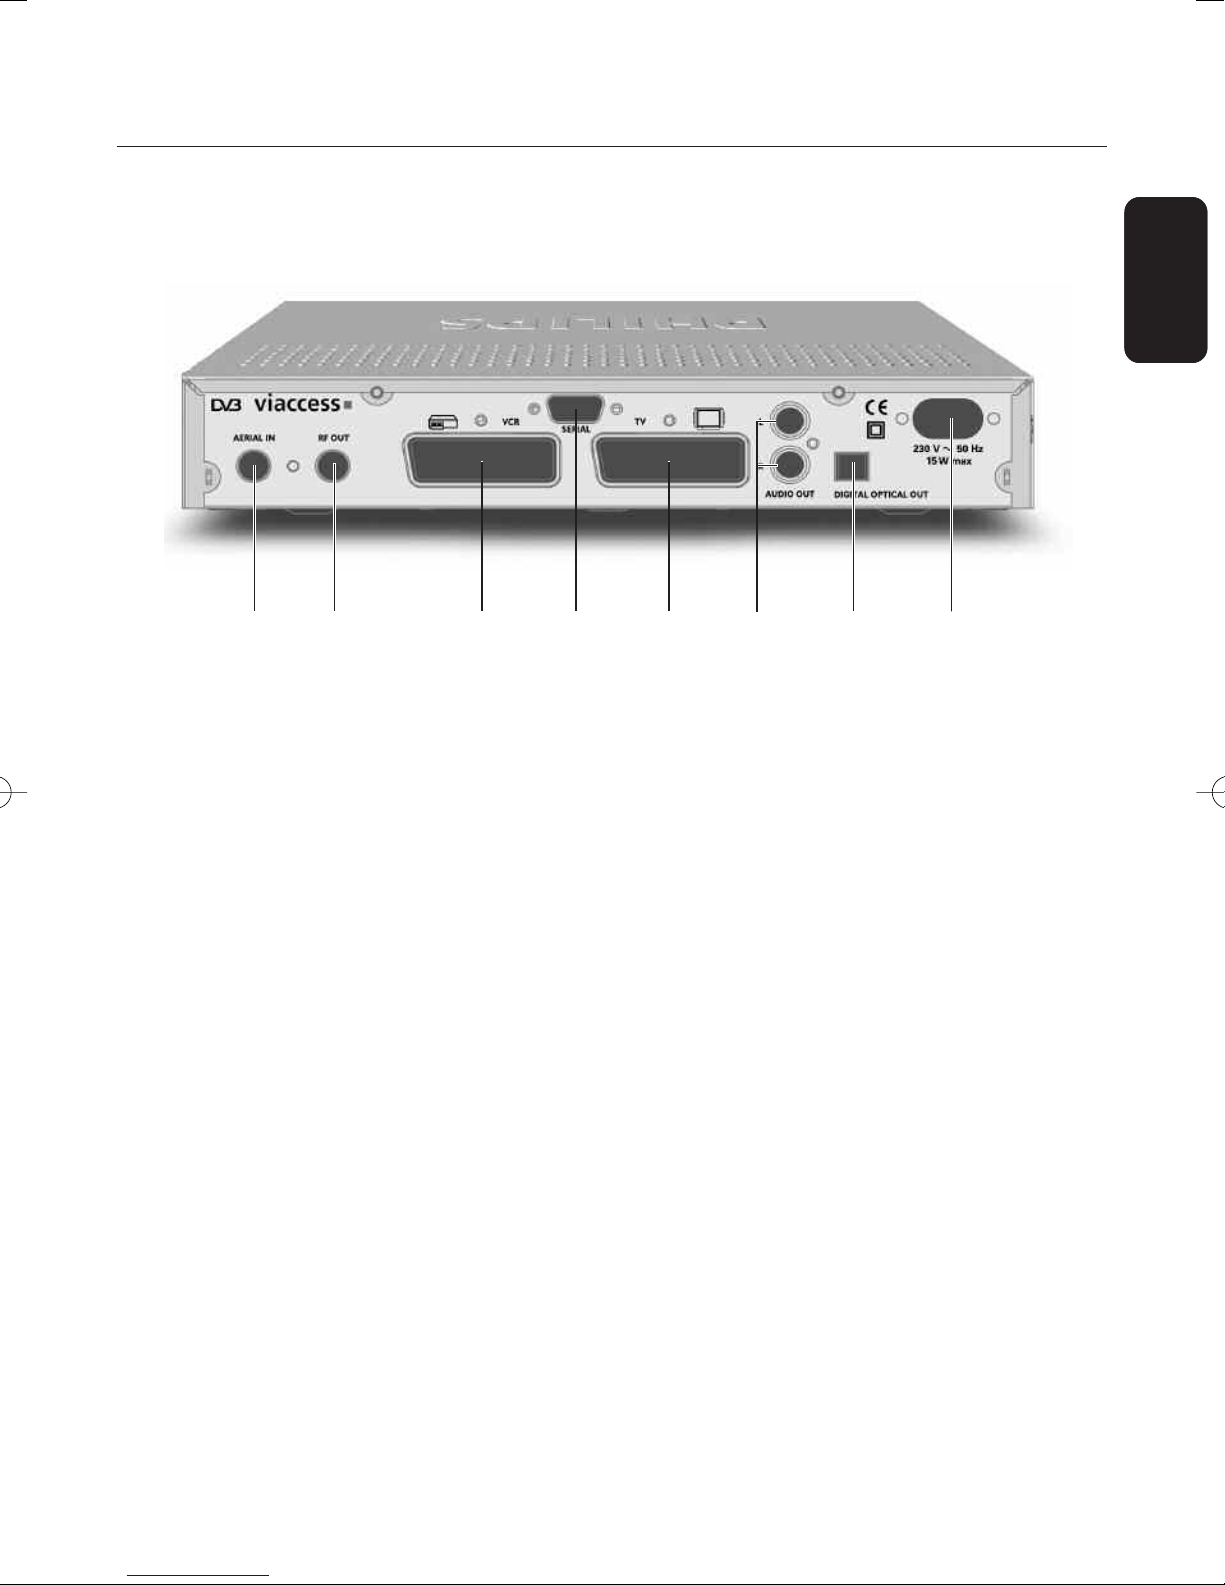
2.3 Rear panel
English
Q E R U
1 AERIAL IN (*): . . . . . . . . . . . . . . . . . . . . . . . . . RF input used to connect the coaxial cable from the cable
2 RF OUT (*): . . . . . . . . . . . . . . . . . . . . . . . . . . . . RF output used to connect your receiver to a VCR/TV set
3 VCR (*): . . . . . . . . . . . . . . . . . . . . . . . . . . . . . . . . . SCART (1) socket used to connect your video recorder or
4 SERIAL (*): . . . . . . . . . . . . . . . . . . . . . . . . . . . . . . RS232 socket used for serial data transfer to a PC or
5 TV (*): . . . . . . . . . . . . . . . . . . . . . . . . . . . . . . . . . . . SCART (1) socket used to connect to your TV set or a
6 L/R AUDIO OUT (*): . . . . . . . . . . . . . . . . . Left/Right outputs used to connect your HiFi /Audio
7 DIGITAL OPTICAL OUT (*): . . . . . . . Digital output used to connect your HiFi /Audio receiver
WI
wall socket.
Refer to chapter 5 for recommended connection diagrams.
to watch analogue channels only, or to connect another
receiver.
DVD player/recorder.
another receiver.
video projector.
receiver system.
system.
T
Y
8 230V~50Hz 15W max (**): . . . . . . . . . Socket used to connect the po
Note: the label showing the type and serial number is underneath the receiver.
1) SCART is also called Euroconnector or Peritel.
(
Voltage
w
ety Extr
* Saf
** Hazardous
a Lo
V
oltage
wer cord.
PRODUCT DESCRIPTION 9
Page 10
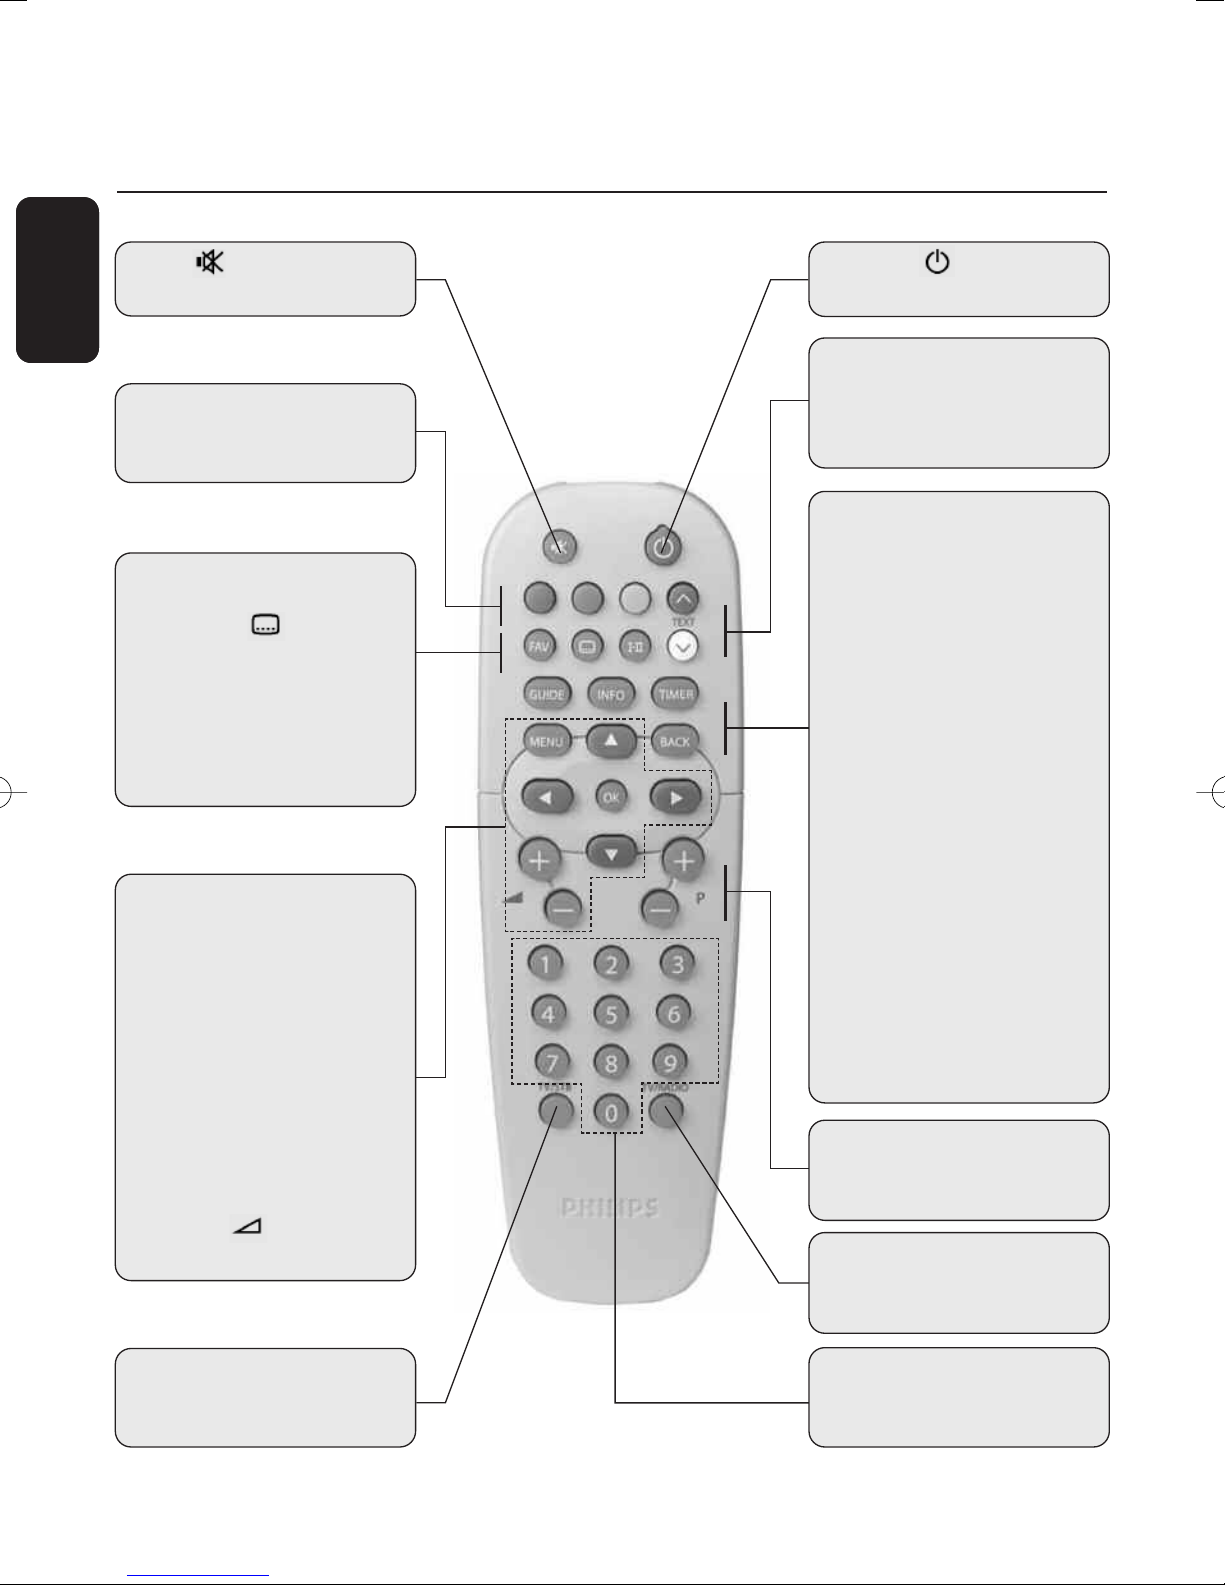
3 Remote control
English
Mute
- Audio mute
RED, GREEN,
YELLOW, BLUE
Colour keys
FAV
- Toggle between favourite lists
SUBTITLE
- Temporarily starts/stops or
change Audio Subtitling
I-II
- Temporary update of audio
language and selection of
audio mode
Standby
- Standby
V
(blue) resp.V (white)
Scrolls one Page Up or one Page
Down in guide or favourite lists
Note: TEXT is not active.
GUIDE
- Open Now & Next Guide.
INFO
- Open info banner.
- Show extended program
information.
- Close banner.
TIMER
- Set a recording timer when
watching Digital TV or from
the GUIDE feature.
MENU
- Open/Close menu in digital
TV / Radio mode
CURSOR keys
- The t and y cursor keys
are used to move within the
menus and lists
u and i cursor keys
- The
are used to select a value in a
menu item
OK
- Select / call up channel
lists / zap
OLUME +/ -
V
- Volume up / down.
TV / STB
- Toggle between Digital and
Analogue
TV/VCR/D
VD.
“TIMER, 0” sequence
The
keystroke deletes the current
running timer.
BACK
- Select the previously watched
digital TV channel.
- In menu mode:
Either exit the menu or bring
selection back one level and
cancel the changes you made.
P+ / P-
- Select next / previous
channel.
TV / RADIO
- Toggle between
TV / Radio mode
0-9
Channel selection in digital
TV mode.
10 REMOTE CONTROL
Page 11
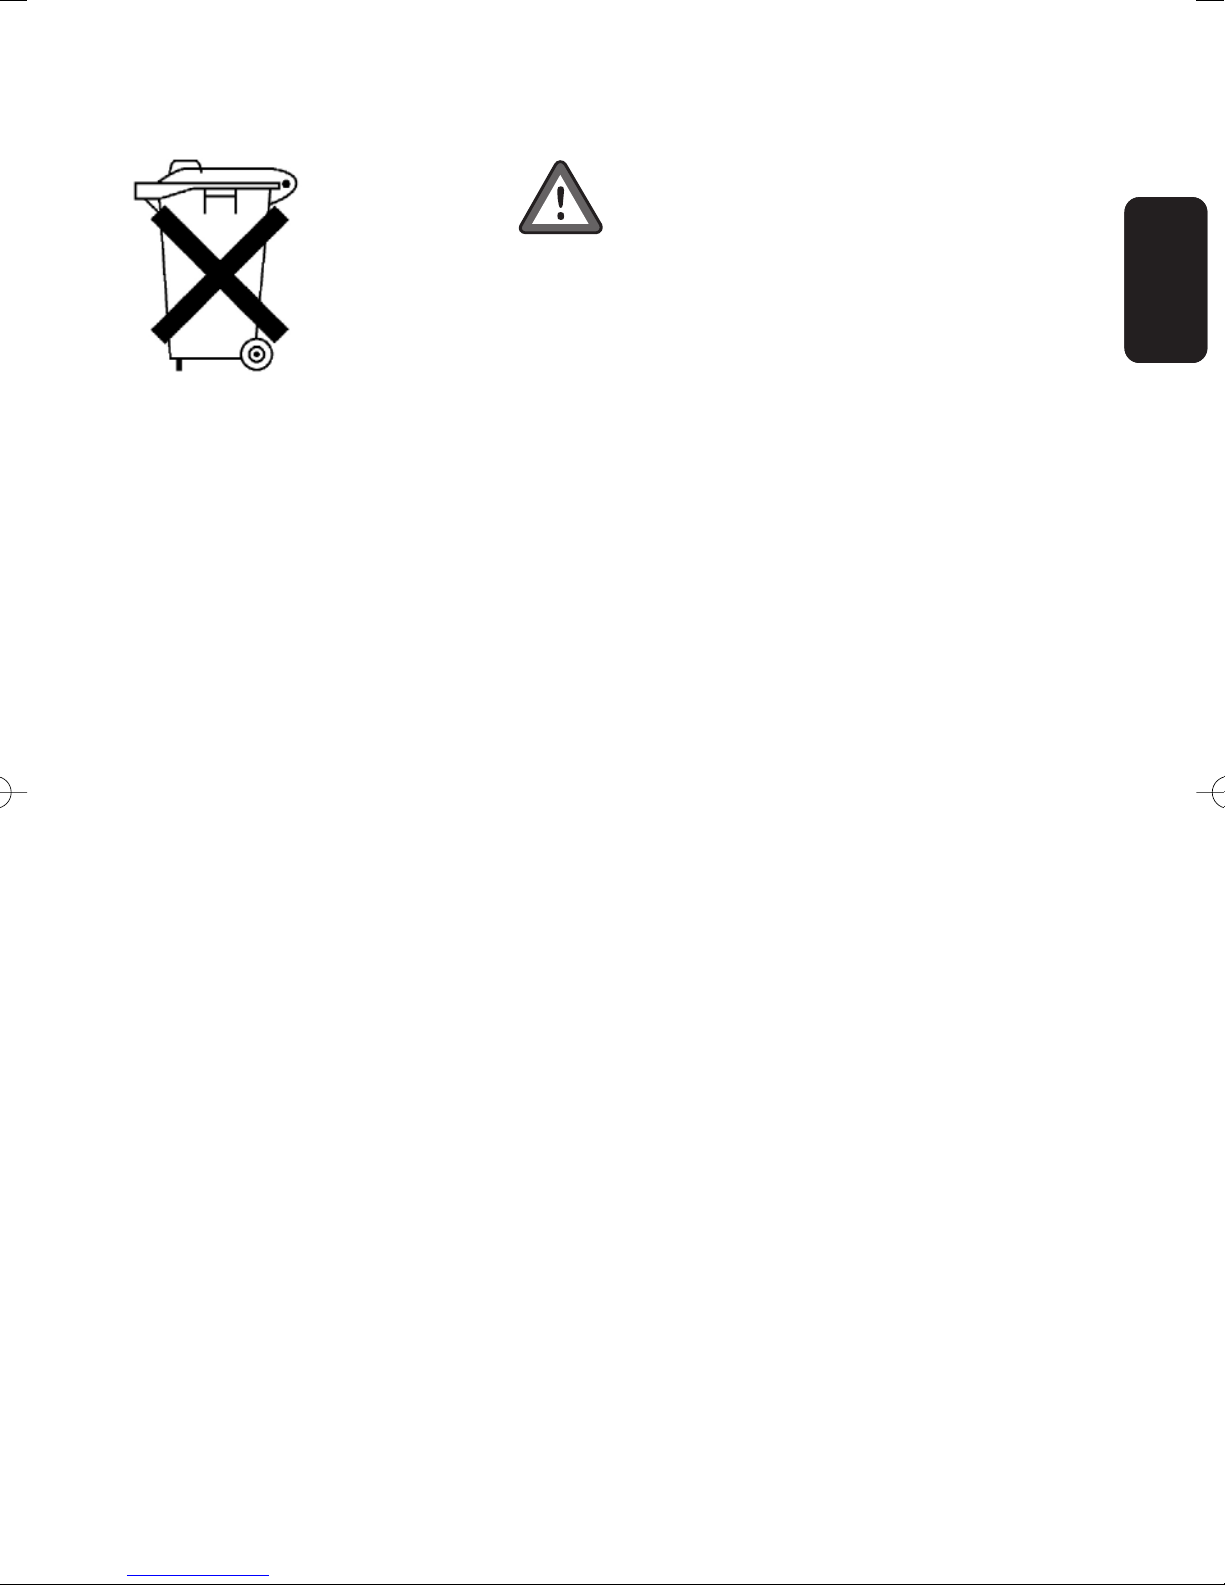
Do not dispose of the batteries with
your household waste.
The Philips batteries supplied with your receiver’s remote do not contain heavy metals such as
Mercury, Lead or Cadmium. Nevertheless, in many countries, exhausted batteries may not be
disposed of with your household waste.
Please enquire about the local regulations regarding the disposal of used batteries.
English
REMOTE CONTROL 11
Page 12
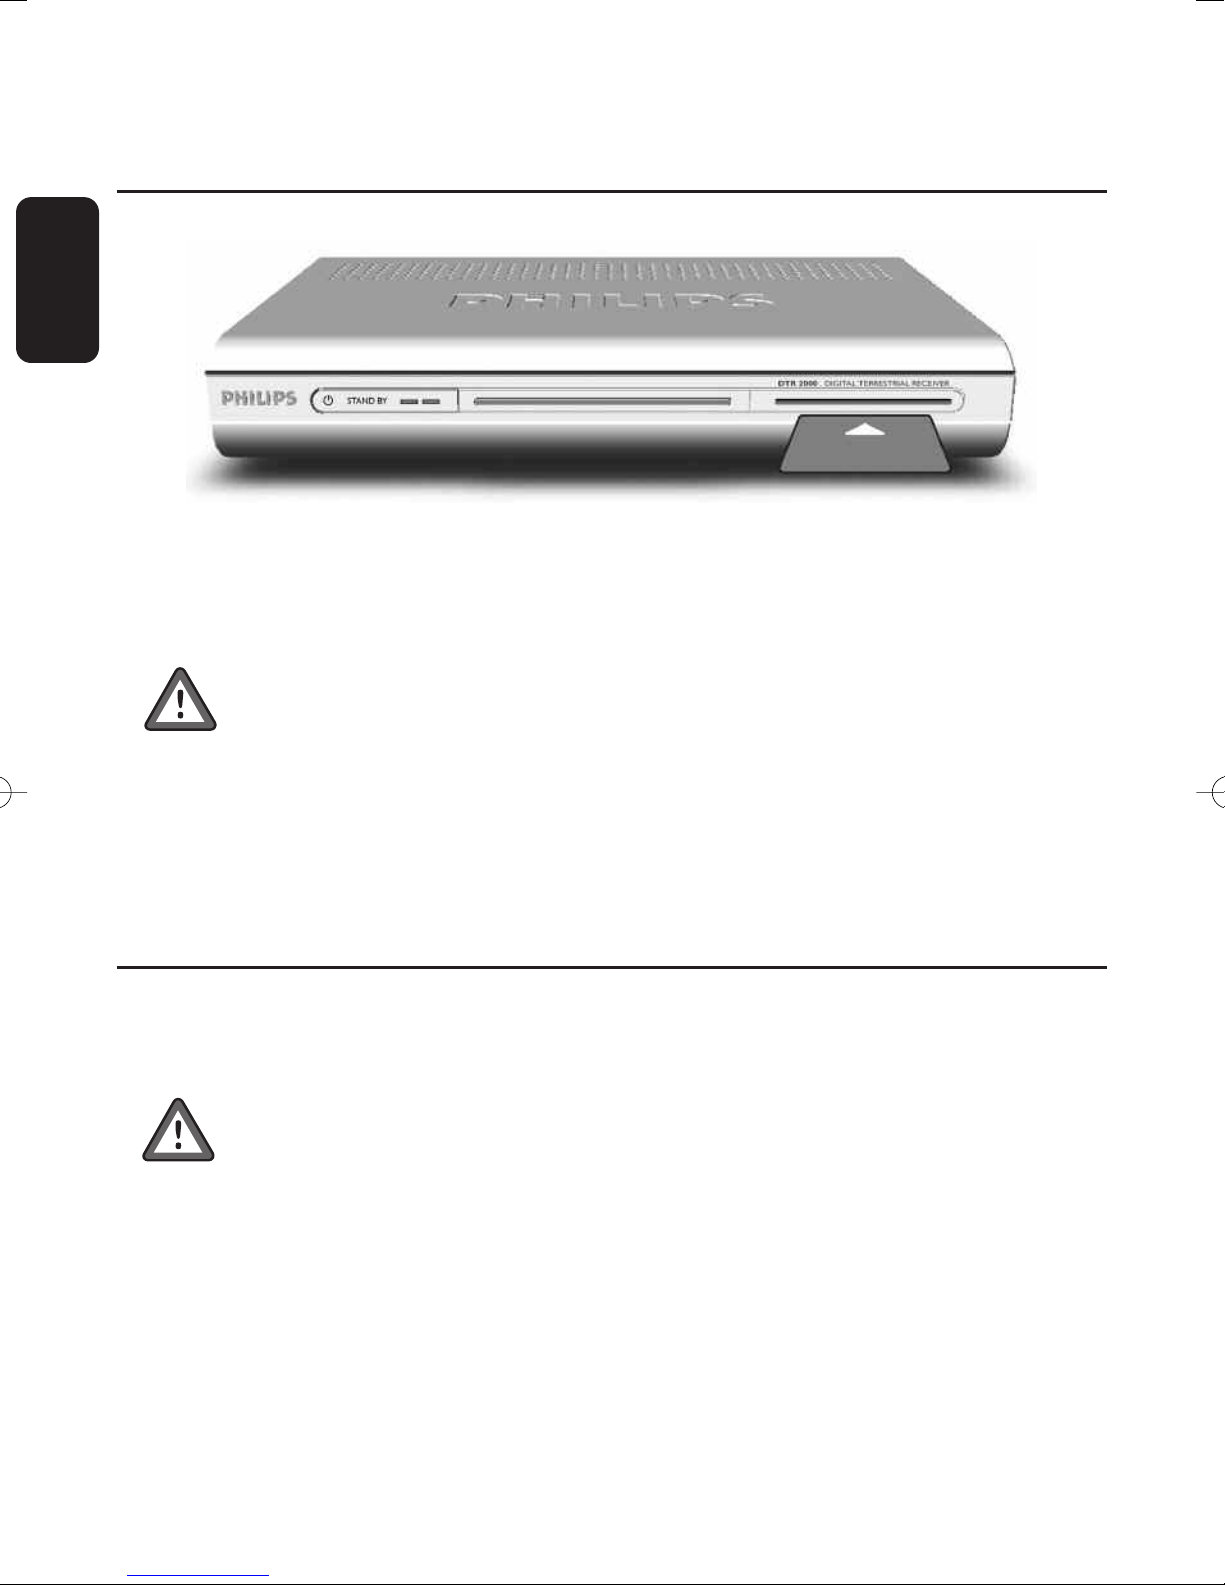
4 Inserting your Smart Card
English
To be able to receive scrambled digital terrestrial channels specific to an operator, you need a smart
card from that operator.Your operator may update it from time to time.
Insert the smart card with the chip facing down.
Push the smart card into the slot as far as it will go.The end of the card will be visible outside the slot.
New and updated information may be downloaded onto the smart card from time to time.
5 Connecting your receiver
There are several ways you can connect and incorporate your digital receiver into your existing
video / audio equipment set up.
Warning!
Before starting to connect:
VCR and / or DVD if required) from the mains.
Unplug all equipment (TV set as w
Do not connect your digital receiver to mains supply now.
-
ent wiring:
Check y
connections if the
- Depending on your exiting set up, choose the best suited connection method for incorporating
your digital receiver into your existing Audio / Video set up. Please read chapters 5.2 and 5.3.
our cur
r
y alr
you may not need to modify your existing Audio / Video set up
eady match the connection diagrams below.
ell as
when adding ne
Note:
12 INSERTING YOUR SMART CARD
w equipment,
be sure to refer to the related installation instructions of the manual.
Page 13
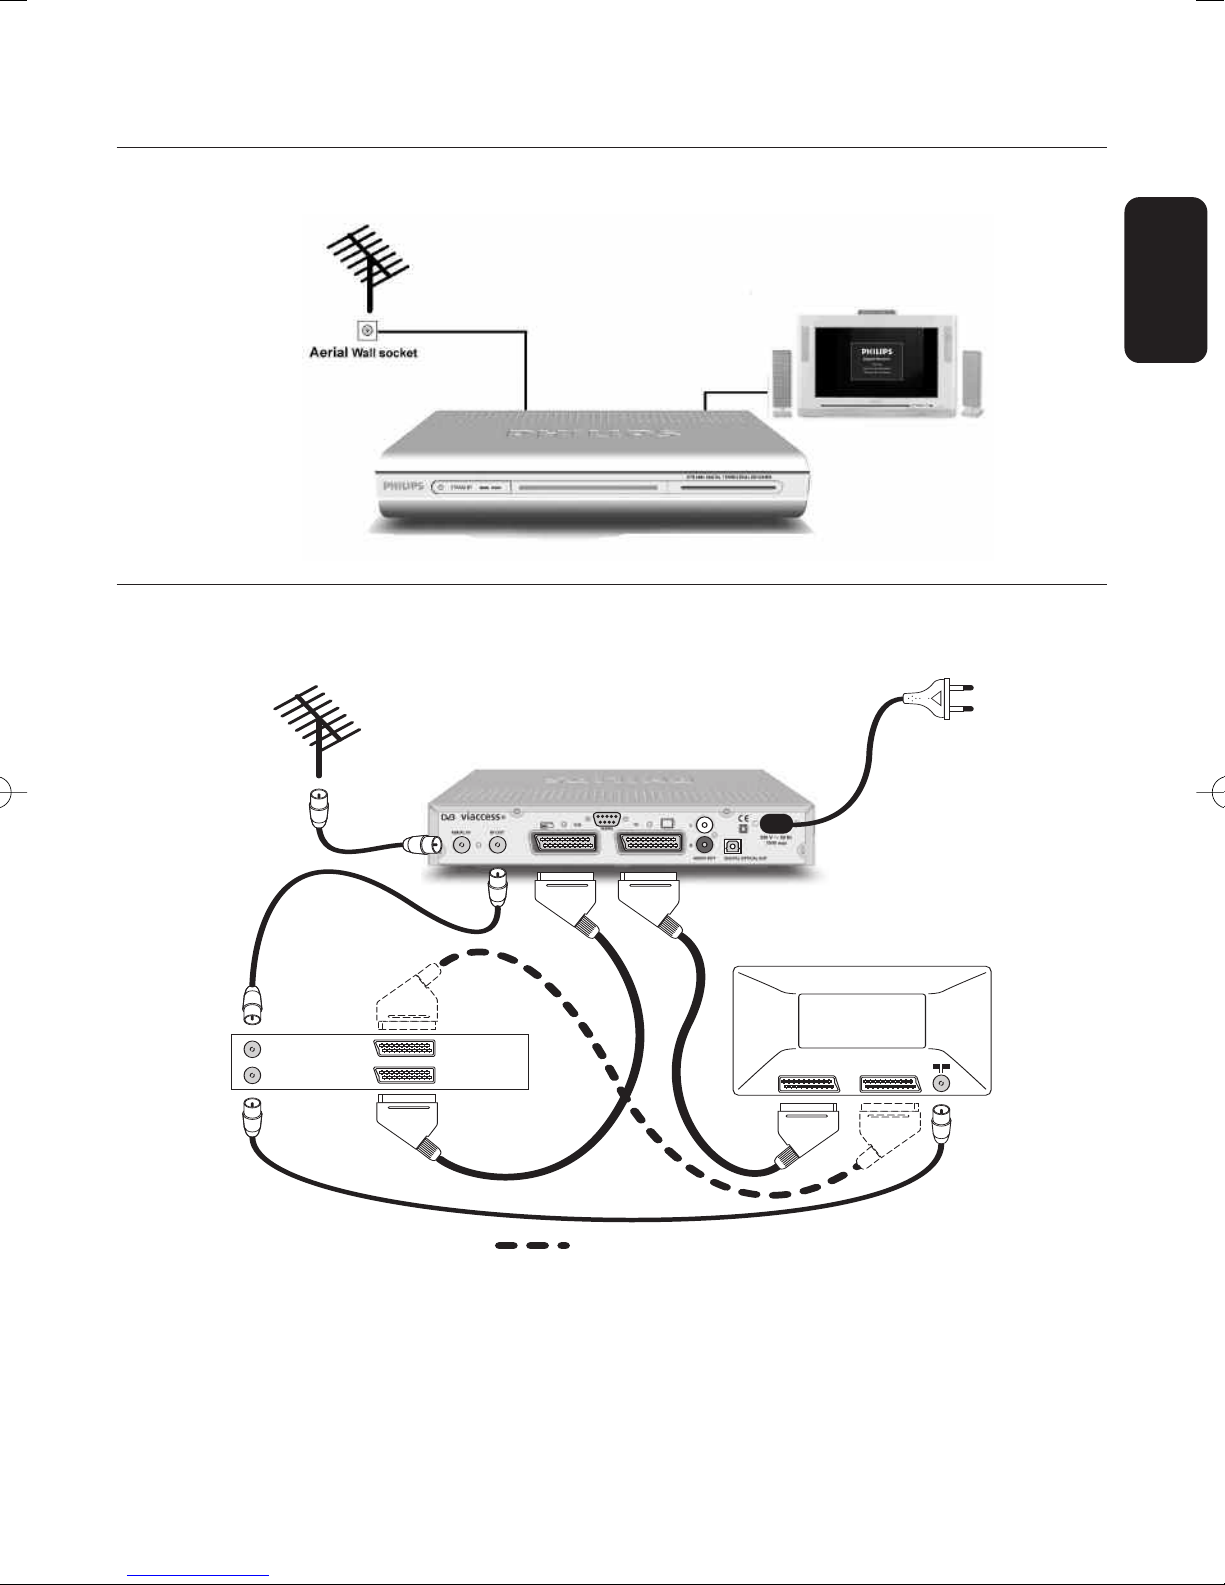
5.1 Connecting to aerial wall socket and TV
PHILIPSPHILIPS
TV set
VCR/DVD
Terrestrial Receiver
IN FROM ANT
to AC outlet
OUT TO ANT
EXT 1
EXT 2
SCART
For optimum configuration
RF Cable
English
5.2
Connecting to TV and VCR/DVD player using SCART support
Use the RF cable to connect your receiver to the aerial wall socket.
Use the SCART cable to connect your receiver to the TV set.
Note: for best DVD/VCR viewing, connect DVD/VCR SCART EXT 1 directly to the TV SCART.
CONNECTING YOUR RECEIVER 13
Page 14
5.3 Connecting to your audio equipment
T
errestrial Receiver
to AC outlet
AB
LR
AUDIO
Digital
input
Analogue
input
Audio equipment
English
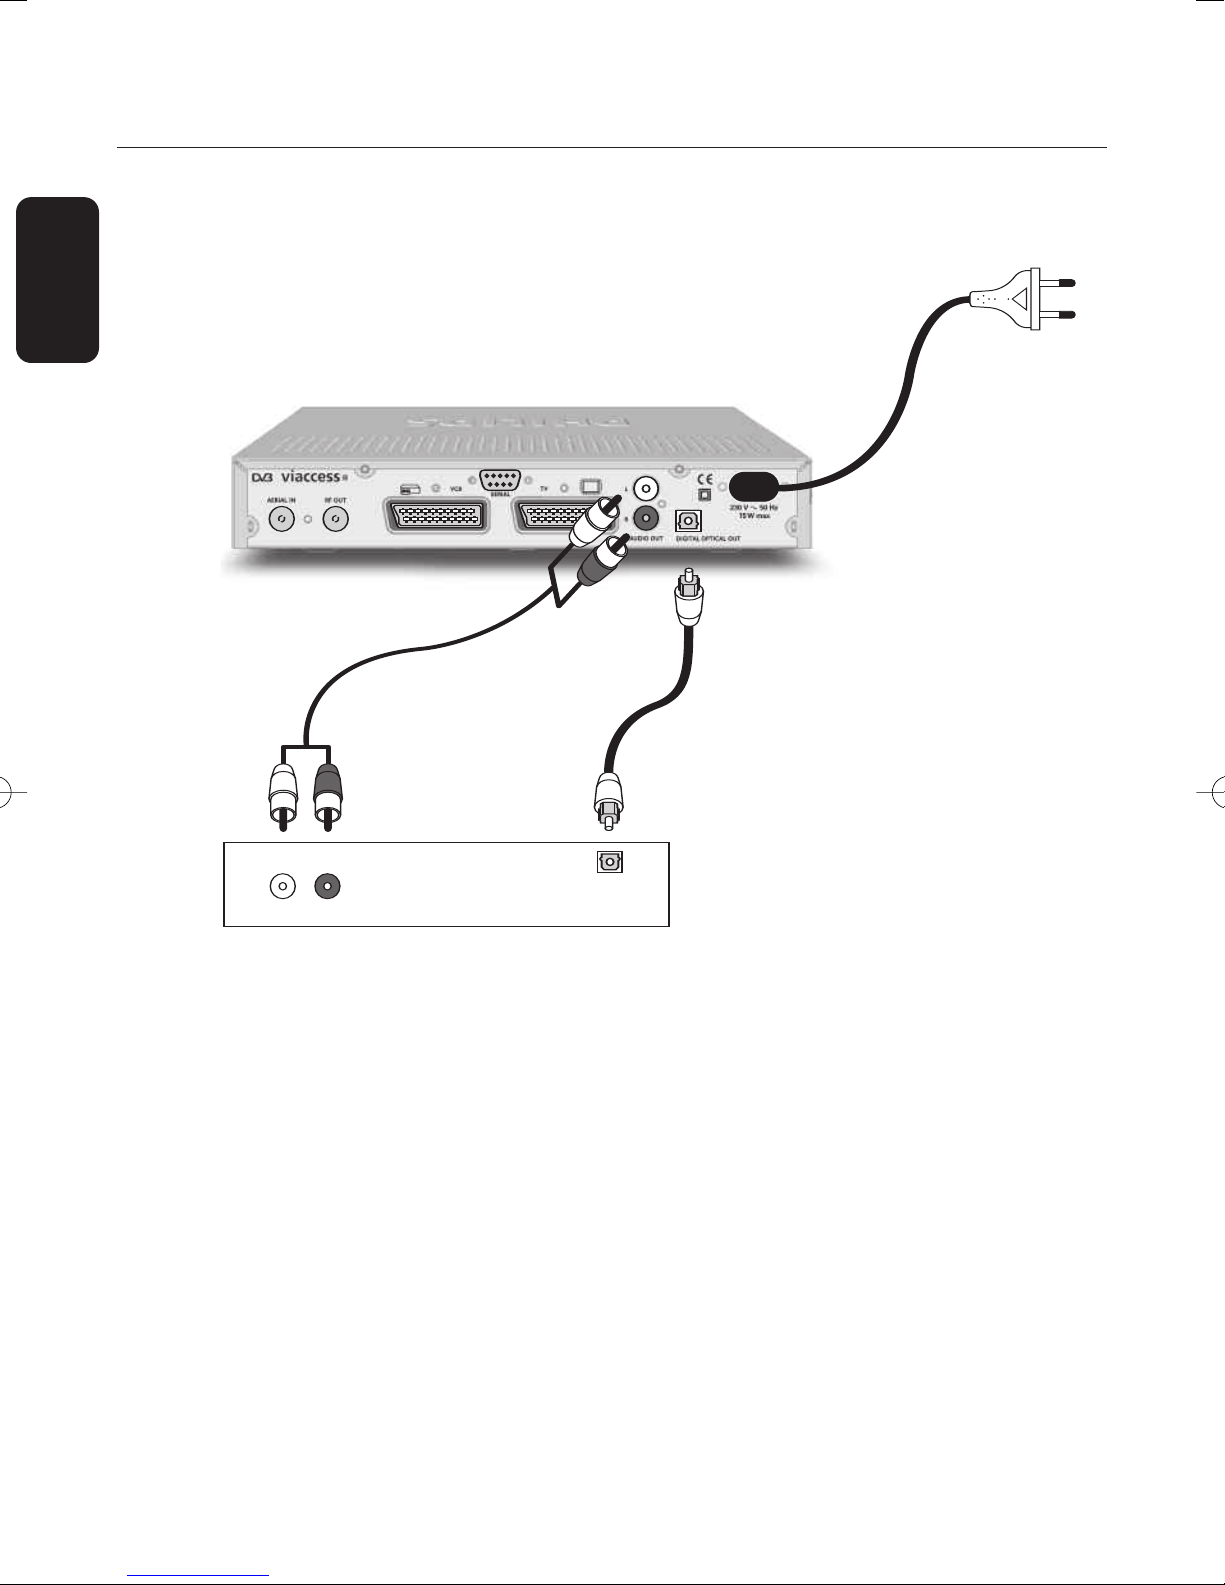
Analogue connection (A)
Connect the L/R audio output sockets to the relevant L/R audio input sockets of your audio
equipment using a double CINCH cable (not supplied). Consult the user manual of your audio
equipment to choose the proper analogue audio inputs.
Digital connection (B)
Connect the audio “DIGITAL” output socket to the relevant digital audio input socket of your audio
equipment using a single CINCH cable (not supplied). Consult the user manual of your audio
equipment to choose the proper digital audio input.
Note:
with this connection set up you can only control the audio volume up/down and mute from your audio
equipment.
14 CONNECTING YOUR RECEIVER
Page 15
6 First installation
For fast and successful start-up, check that your receiver is
connected to the wall socket,TV set and other equipment
according to the diagrams in chapter 5.
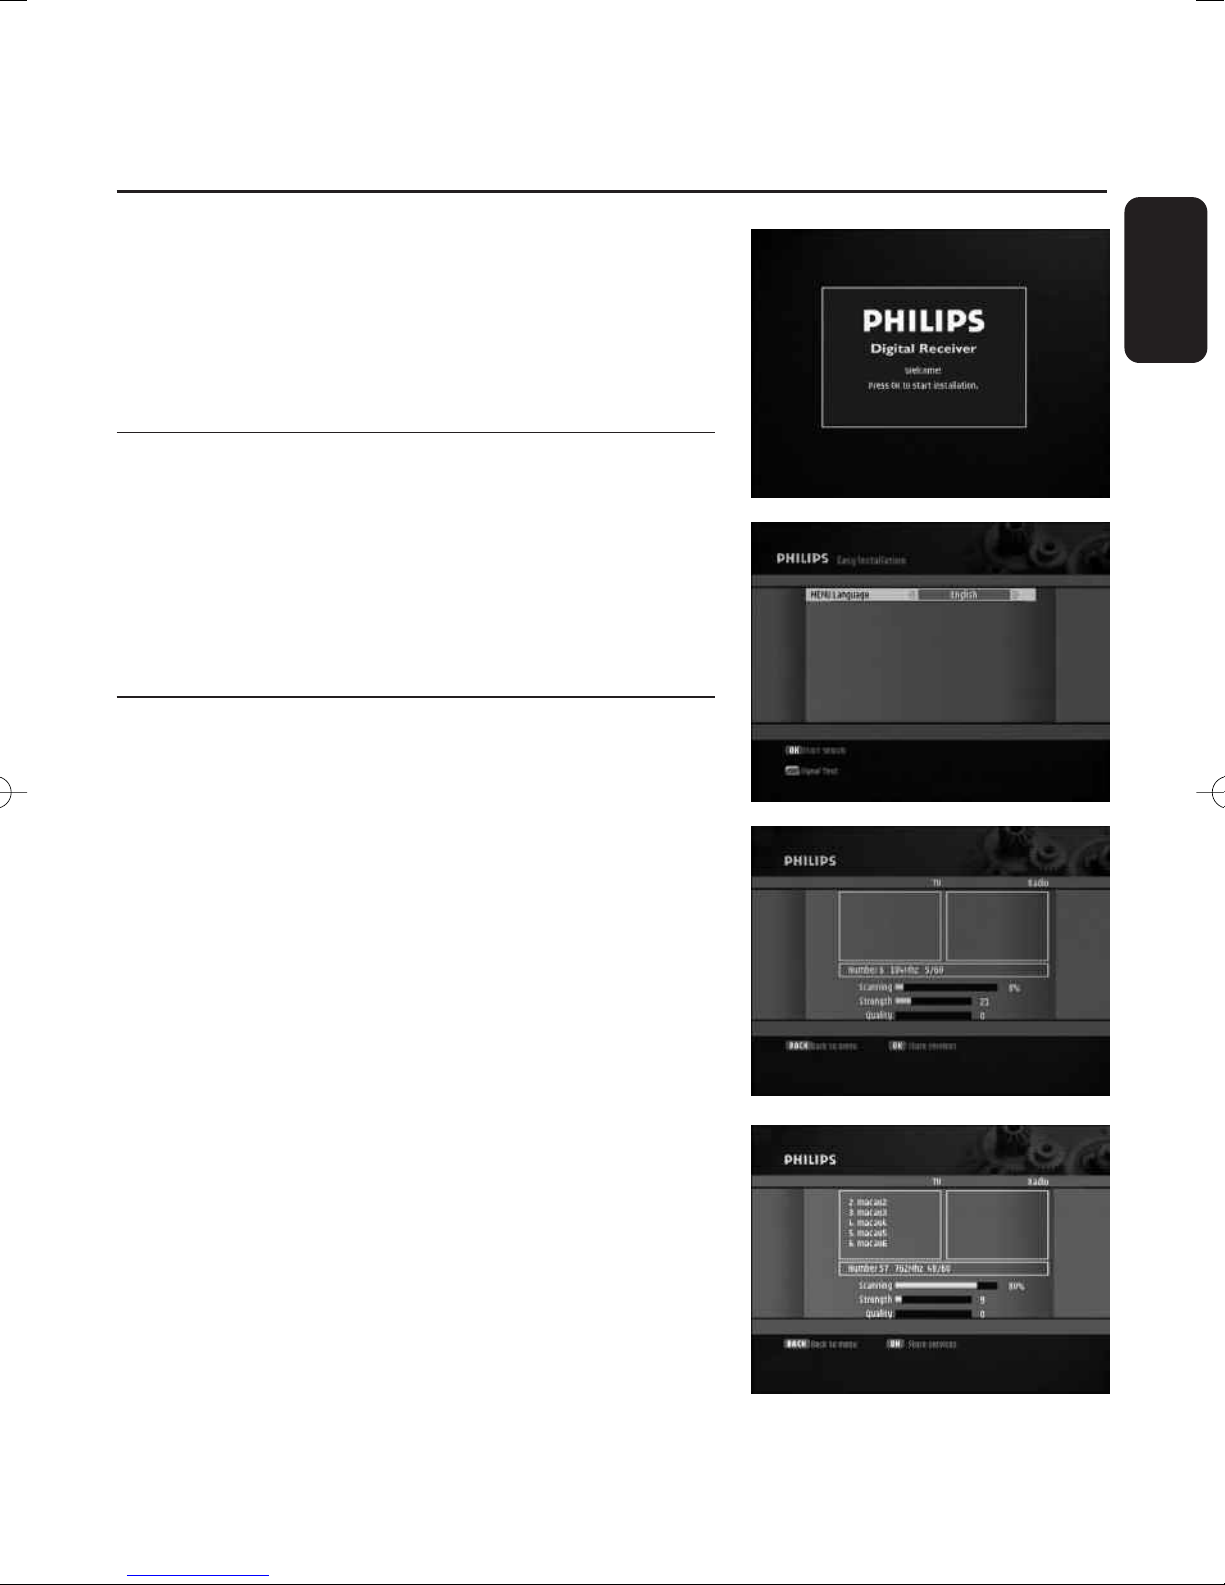
Switch on the receiver and TV set.The welcome screen
appears. Press <OK> to access the Easy installation screen.
6.1 Easy installation
The Easy installation screen prompts you to select your
favourite menu language.
Select your favourite menu language and press <OK> to
store the language setting and start scanning for channels.
6.2 Channel scanning
English
During the scanning process, the following information is
reported on screen:
- the number of TV and Radio channels detected,
- the scanning progress, indicated as a percentage,
- the strength of the signal and the quality of reception.
Note: if you press <BACK> during the scanning process, you
return to the Easy installation screen. In this case, none of
the channels found are stored.
When scanning has been successfully completed, a
completion message is displayed as well as the number of
channels detected.
Press <OK> to store the channels found and tune the
receiver to the first channel in the list.
FIRST INSTALLATION 15
Page 16

6.3 Scanning failure
English
In case of channel scanning failure, a failure message is
displayed.
Before starting a new scan
It is recommended to do the following checks:
- connections to your receiver (see chapter 5),
- signal level (see paragraph 8.7.2),
- antenna installation,
- number of channels available in the region corresponding
to your area.
Press <OK> to start scanning again.
Note: if the same failure message appears after a while, refer to
chapter
10.
16 FIRST INSTALLATION
Page 17
7 General Viewing Function
This section describes the basic functions available while
watching digital TV or listening to digital Radio. For general
menu navigation information, see Basics about menu
navigation.
7.1 Receiver wake up
Your receiver is in standby.To wake it up, press any of the
following on the remote control:
- numerical keys,
- <P->/<P+>,
- <OK>.
Note: be careful the Standby button can only be used to
switch the receiver off.
English
7.2 Channel Information
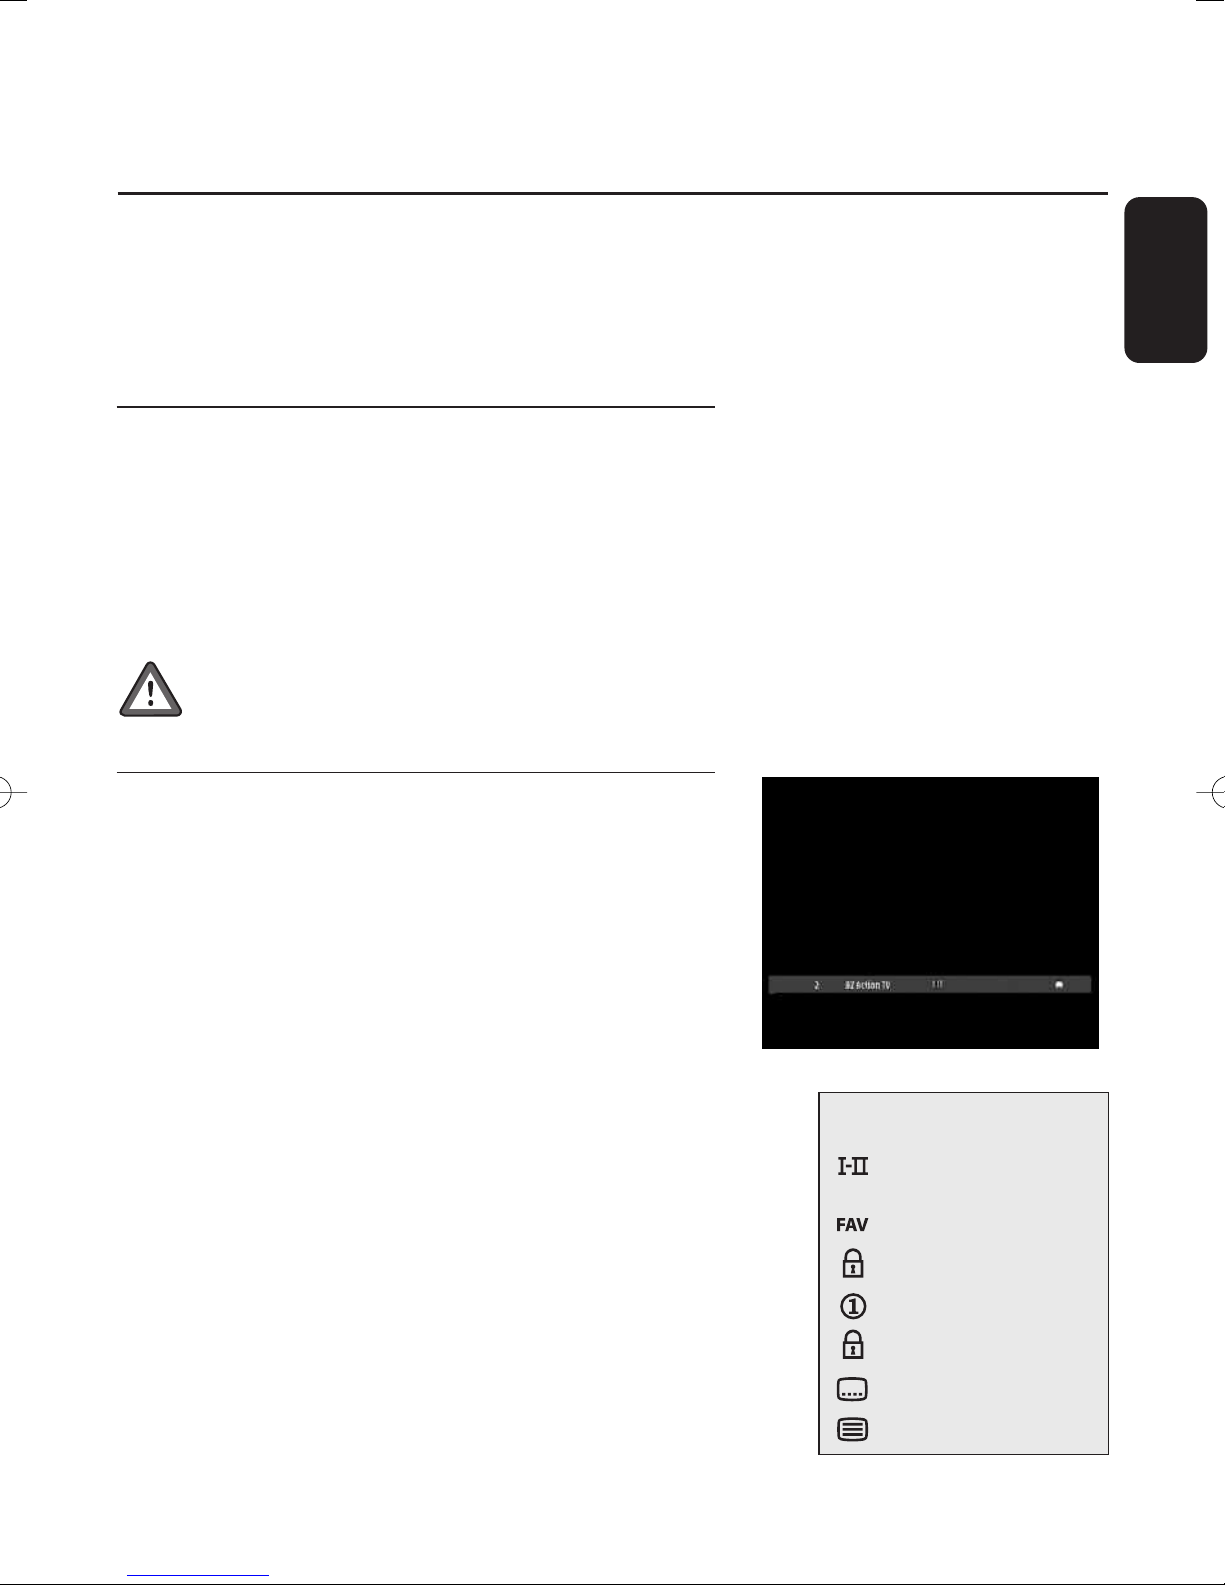
Every time you change channels, programme information
appears on screen, displaying:
- the channel name and number in the current channel list,
- the current programme name,
- icons indicating the channel properties, e.g. channel lock
status,
- a bargraph indicating the start time of the current
programme, the start time of the next programme, and
the current progress.
While watching a channel, you can display the current
channel information at anytime by pressing <INFO> on the
remote control. Press <INFO> again to get more
information about the current programme.
Note: channel information is displayed for 3 seconds as per
default.This can be adjusted from the System Setting screen.
icon description
alternate audio
language/format
rent favourite list
cur
maturity rating locked
scrambled channel
locked channel
subtitles presence
teletext presence
GENERAL VIEWING FUNCTION 17
Page 18
7.3 Channel selection
English
7.3.1 Using <P+/P-> or numeric keys
To switch channels, use <P+>/<P-> or the numerical keys of
the remote control.
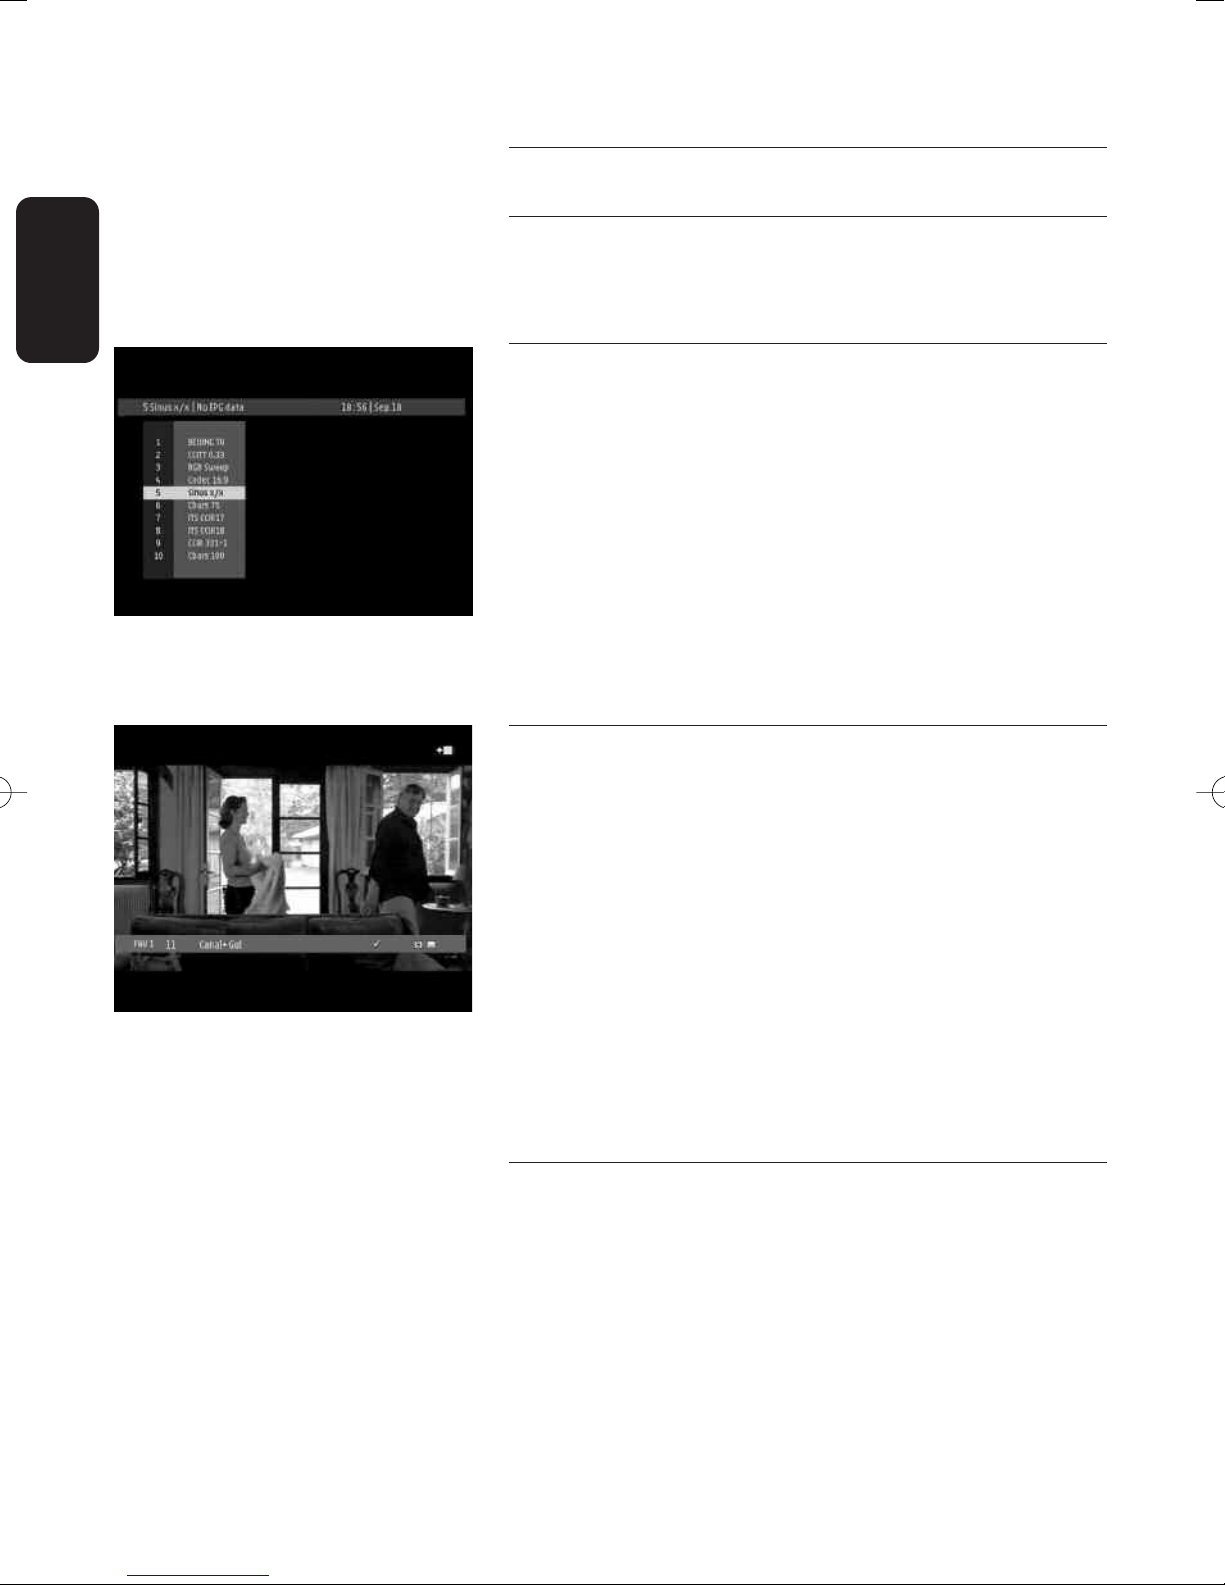
7.3.2 Using the channel list
For a complete overview of the available channels while
watching digital TV or listening to digital radio, press <OK>
on the remote control.The full channel list is displayed on
the left-hand side of the screen.
Note: if you press <BACK>, the full channel list disappears.
To select a channel from the full channel list:
- Scroll up or down to the desired channel.
- Press <OK> to watch it.
7.4 Channel Lists
While watching digital TV or listening to digital radio, you
can access all available channel lists by pressing <FAV> on
the remote control. Successively press <FAV> to toggle
between the favourite lists you created and the full channel
list.The current channel list is indicated on the left-hand side
of the banner.
18 GENERAL VIEWING FUNCTION
When one of the favourite lists is activated, you zap only
through the channels this list contains.
To create and edit your favourite lists, see paragraph 8.3.
7.5 Previous Channel Recall
Press the <B
e
the pr
ACK> key of the remote control to move to
vious channel y
ou watched in the cur
r
ent channel list.
Page 19
7.6 TV or Radio Mode selection
While watching digital TV or listening to digital radio, press
<TV/RADIO> on the remote control to toggle between TV
and Radio modes.
7.7 Volume & Audio Control
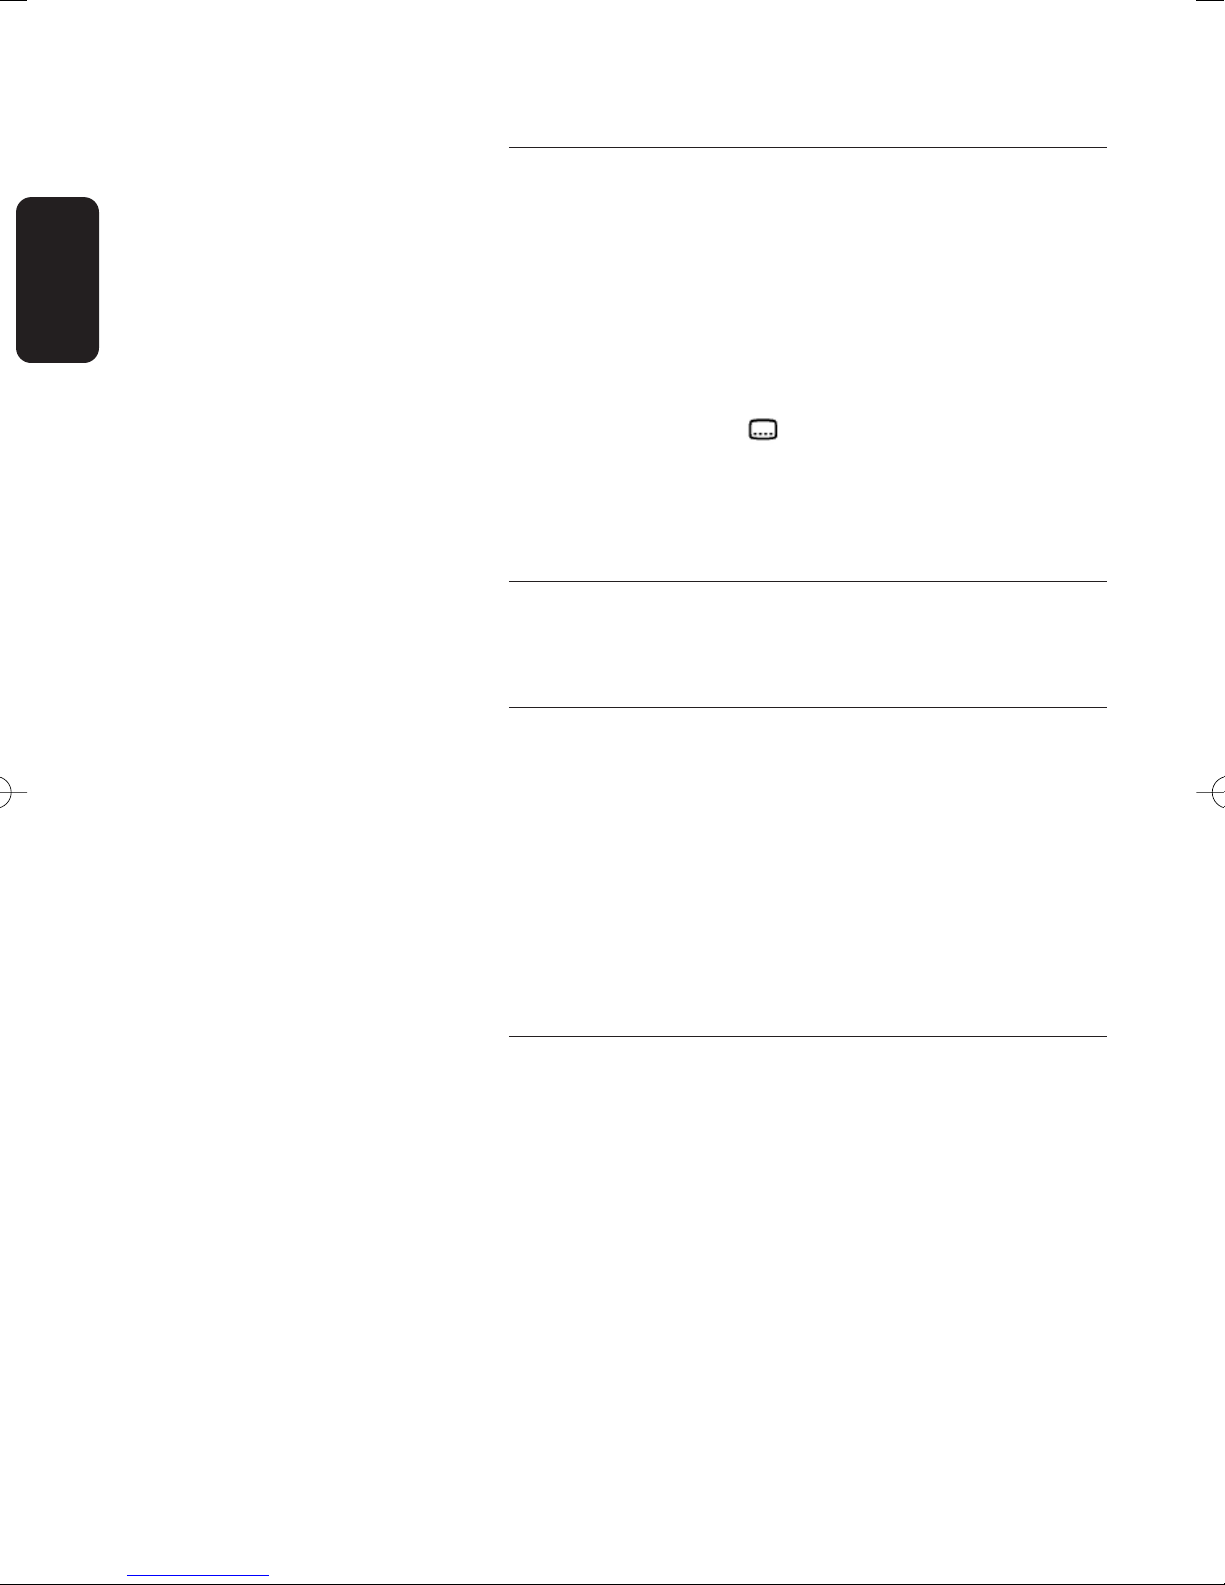
7.7.1 Volume control and Mute
To decrease or increase the volume, use < > on the
remote control.
Note: the volume level can also be controlled from your TV.
To mute the sound, press < > on the remote control
To resume normal sound, press this key once again.
Note: a change of volume is signalled on-screen using a bar graph,
while audio mute is signalled with an icon in the top right
corner of the screen.
English
7.7.2 Audio Control
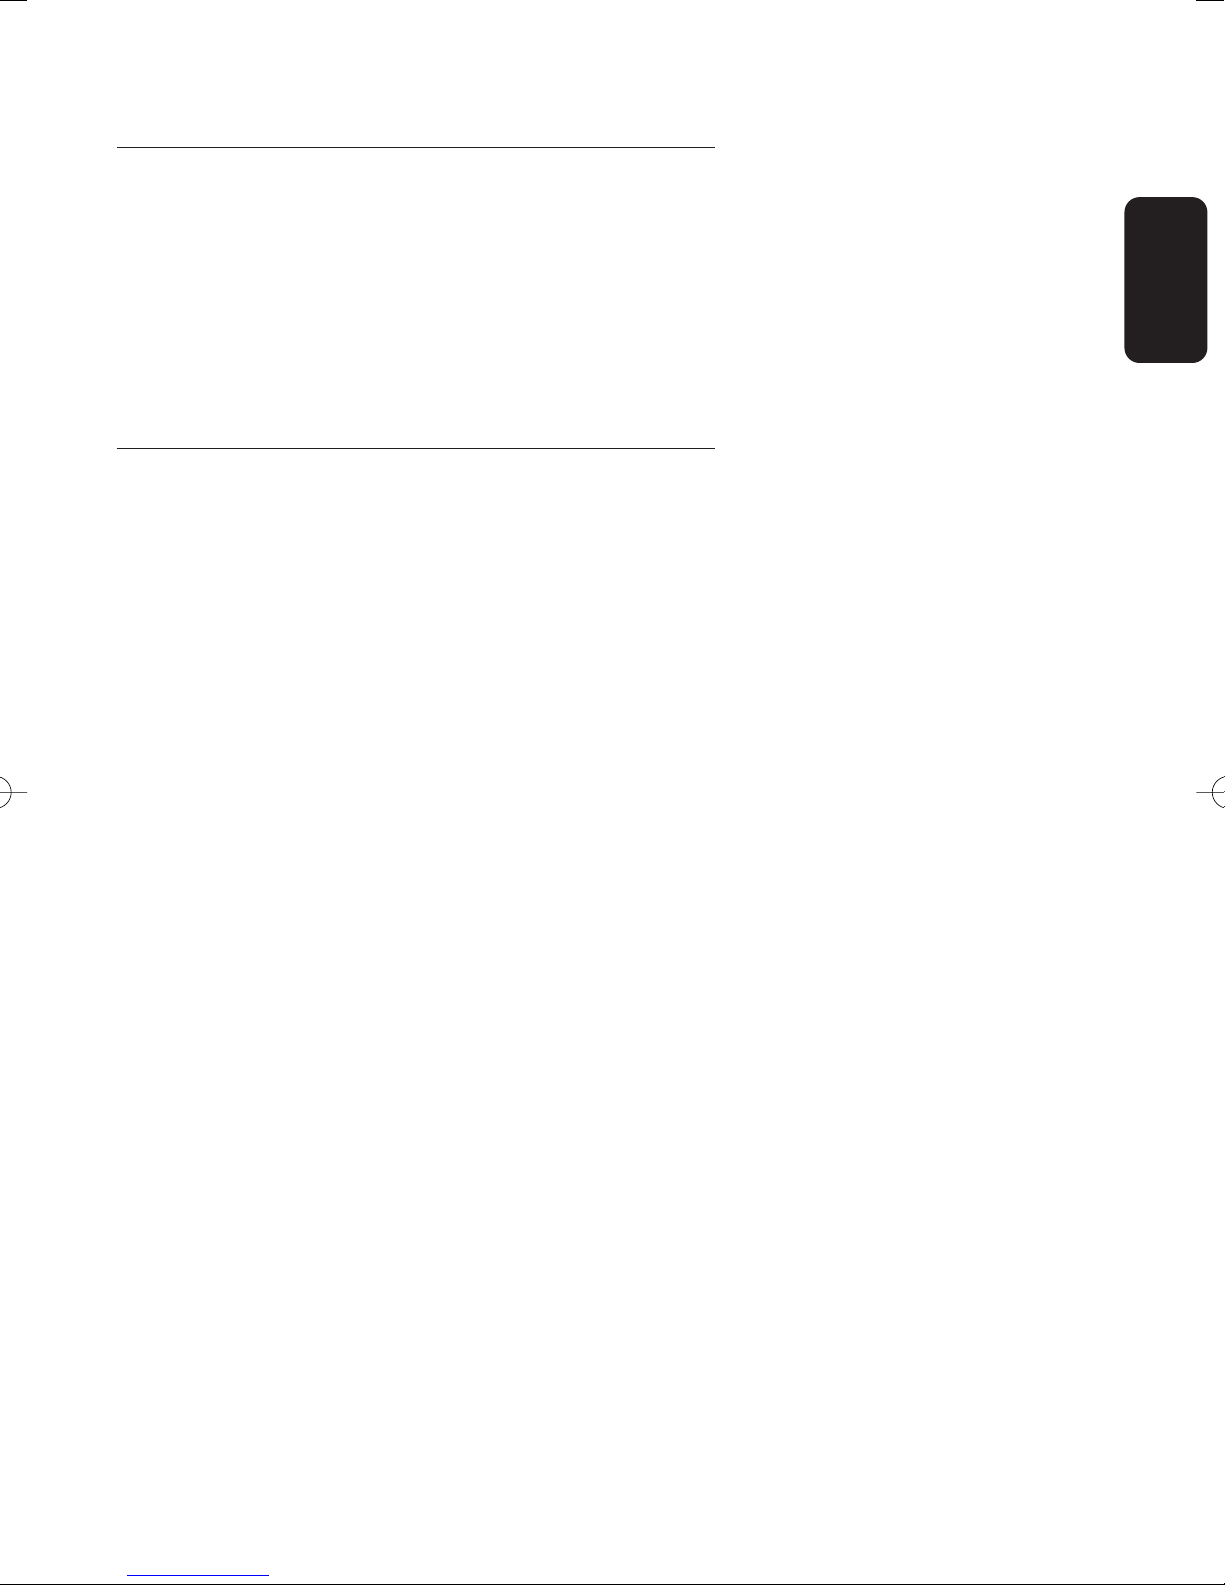
To access audio settings, select System Setting from the main
menu.The System Setting screen appears.
- Scroll to Audio Output. Default setting is Stereo.
- Select the desired value (Left, Right, Mono, Stereo or
AC3).
- Press <OK> to save your changes and exit the screen.
7.7.3 Audio language
To select your preferred audio language, select System
Setting from the main menu.The System Setting screen
appears.
- Scroll to Audio Language, and then select the desired
language
- Press <OK> to save your changes and exit the screen.
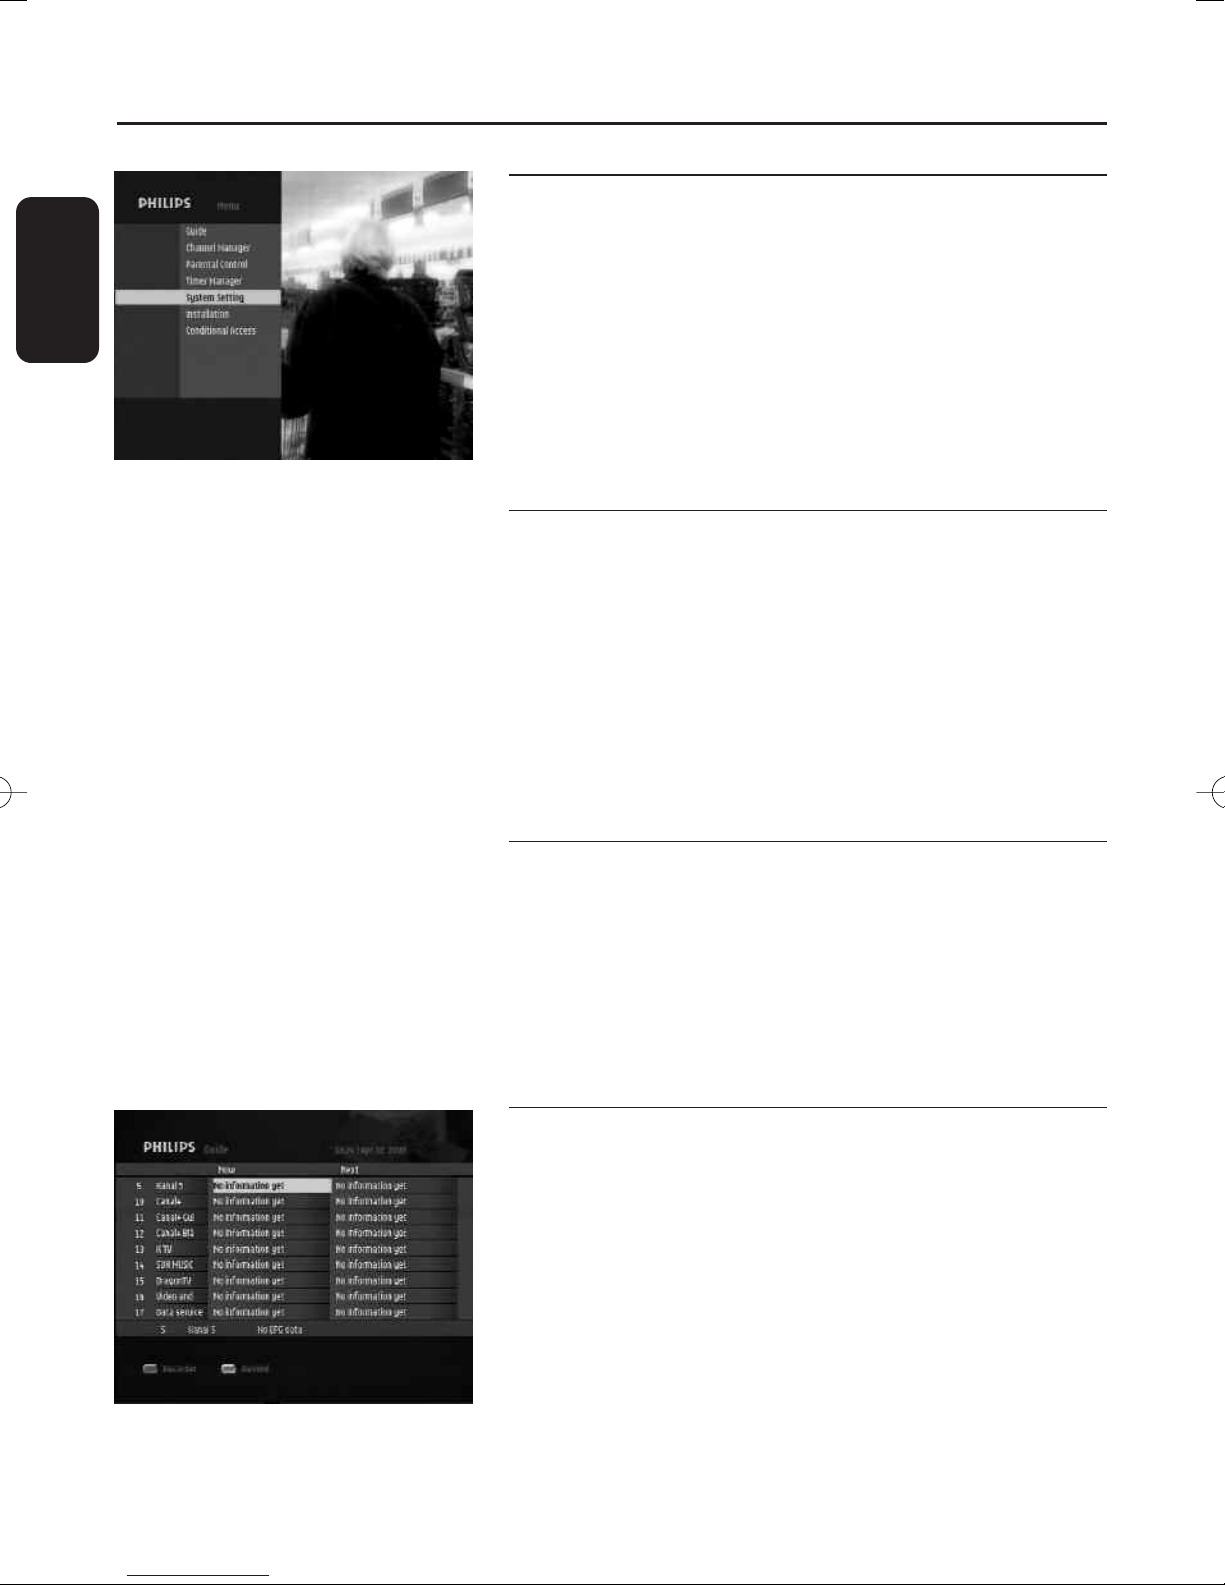
Note: if you want to change the audio language for a particular
.
press <I-II> on the remote control to directly
programme
access the audio language options av
programme. Available languages depend on the audio
content transmitted.
,
le for this
ailab
GENERAL VIEWING FUNCTION 19
Page 20
7.7.4 Subtitles language
To select your preferred Subtitles language, select System
English
Setting from the main menu.The System Setting screen
appears.
- Scroll to Subtitle Language, and then select the desired
language.
- Press <OK> to save your changes and exit the screen.
Note: if you want to change the Subtitle language for a particular
programme, press < > on the remote control to directly
access the Subtitles language options available for this
programme. Available languages depend on the content
transmitted.
7.8 Recording timers
Recording timers are used for VCR or DVD recordings.
7.8.1 To set a timer from the guide
- Select Guide from the main menu to access the Electronic
Programme Guide.
- Move to the desired programme using the arrow keys.
- Press the <Red> colour key to set a recording timer on
the selected programme.Alternatively, press the <Green>
colour key to set a reminder on the programme.
- Enter your PIN code if necessary, and then set the timer
type as appropriate. By default, other settings correspond
to the selected programme.
7.8.2 To set or modify a timer from the Timer
menu
- Select the Record Timer item from the Timer sub-menu
or press the <TIMER> key of the remote control to
access the Recorder screen.
- Select an available Timer Number or select the timer you
want to modify.
ding parameters using the
Set the values of the r
-
ow or numerical keys as appropriate (for more details,
r
ar
er to paragra
ef
r
- Press <OK> to confirm.
ph 8.5.
ecor
1).
20 GENERAL VIEWING FUNCTION
Note: an existing recording timer can be disabled from the
Recorder screen by selecting Disable as Timer Type.
Page 21
7.8.3 To delete a running timer while watching
digital TV or listening to digital radio
A timer is running and you are watching the programme you
are recording. Recording is signalled by two front LEDs, the
right-hand one lit in red and the left-hand one lit in green.
To delete the running timer:
- Press the key sequence “TIMER, 0”.The red light then
switches off and you can change channels.
7.8.4 To delete a running timer enabled while
the receiver was in standby
A timer is running that was enabled while your receiver was
in standby. Recording is signalled by the right-hand red LED,
which is blinking slowly.
- Press the key sequence “TIMER, 0” to delete the running
timer.The red light then switches off and you can change
channels.
Note: when a recording timer is active, you cannot change digital
channels, but you can switch to analogue TV using the
<TV/STB> key and zap through analogue channels.
English
GENERAL VIEWING FUNCTION 21
Page 22
8 Menu
English
8.1 General information
The Menu gives access to all the functions of your receiver:
o Guide
o Channel Manager
o Parental Control
o Timer Manager
o System Setting
o Installation
o Information
8.1.1 Basics about menu navigation
While watching TV or listening to the radio:
- Press <MENU> to display the Menu screen.
- Press
- Press <OK> to display the corresponding sub-items.
- Press
- Press the
t or y to scroll up or down and select the desired
menu item.
t or y to move to the desired sub-item.
u or i button to select a value in a menu item.
Note: press <BACK> to go back one step.
8.1.2 Cancel/Store changes
- Either press <BACK> to go back one step.You may then
be prompted to confirm your changes.
- Or press <OK> to validate changes and exit the screen.
Note: to open a locked menu item, you need to enter your Pin
Code.
8.2 Guide (Electronic Programme Guide)
The TV/Radio Electronic Programme Guide (EPG) provides
an overview of available TV and Radio channels, and
programmes the broadcasters have scheduled, starting with
the current programme.
To view EPG data:
- Press <GUIDE> on your remote control when watching a
channel, or select the Guide item from the Menu and
press <OK>.
22 MENU
Page 23
- Highlight the name of the programme for which you want
more detailed information.
- Press the <INFO> key of the remote control once to get
extended information (programme description) and once
again to close it.
- Press <OK> to view the corresponding channel.
Note: a “No information yet” message is displayed if the selected
channel does not provide EPG data. It may take a few
seconds before data can be displayed.
To set a recording timer from the Guide:
- Press the <Red> colour key once to set a recording timer
for the programme currently highlighted.
To set a reminder from the Guide:
- Press the <Green> colour key to set a reminder for the
programme currently highlighted.
If you want to check the previous or next information of the
channel, please press
u or i on the remote control.
English
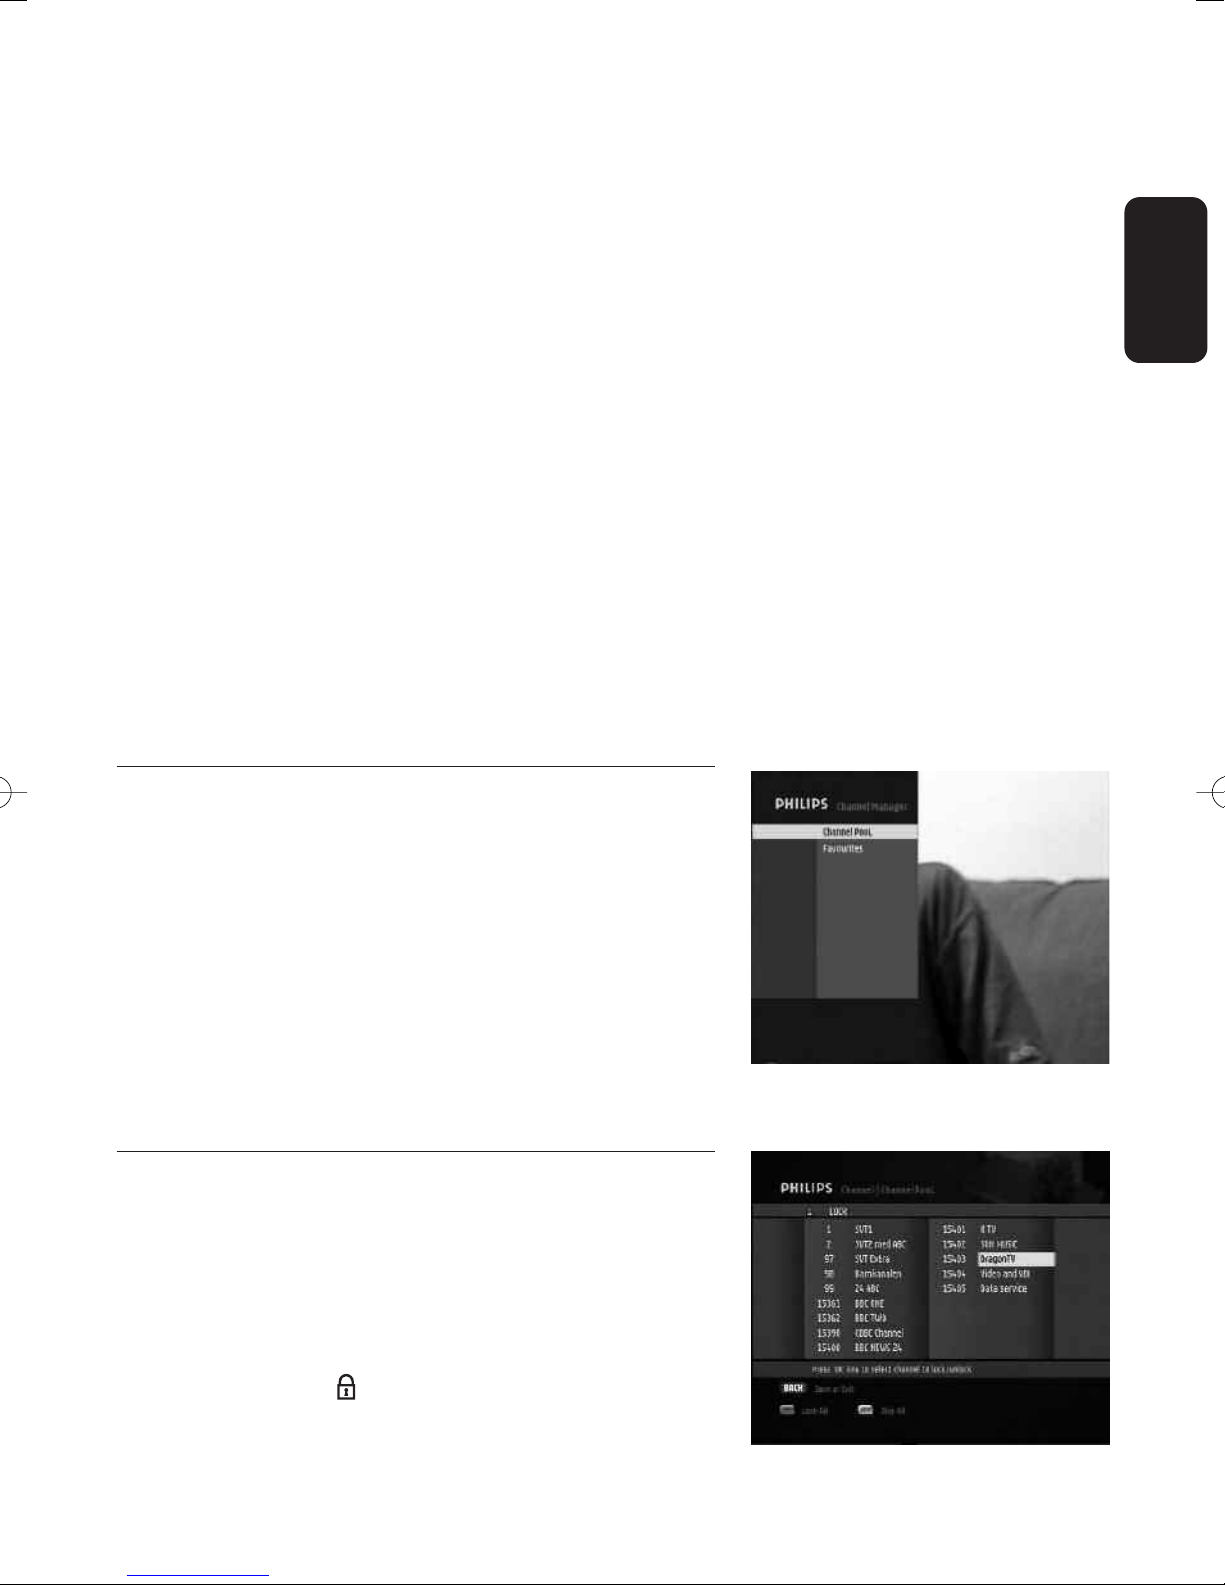
8.3 Channel Manager
The Channel Manager function is used to:
- lock channels (Channel POOL)
- create and edit your favourite lists.
Note: switch from TV channel lists to Radio channel lists by
pressing <TV/RADIO>. Radio Channel Manager has the
same operation as TV channel Manager.
To access the Channel sub-menu, select Channel Manager
from the main menu.
8.3.1 Channel Pool
Select Channel POOL to access the Channel Pool screen.
This screen is used to lock channels.
To lock channels:
- Scroll to the channel you want to lock.
- Lock the channel by pressing <OK>.The selected channel
is marked with this icon. Press <OK> again to cancel
selection.
MENU 23
Page 24
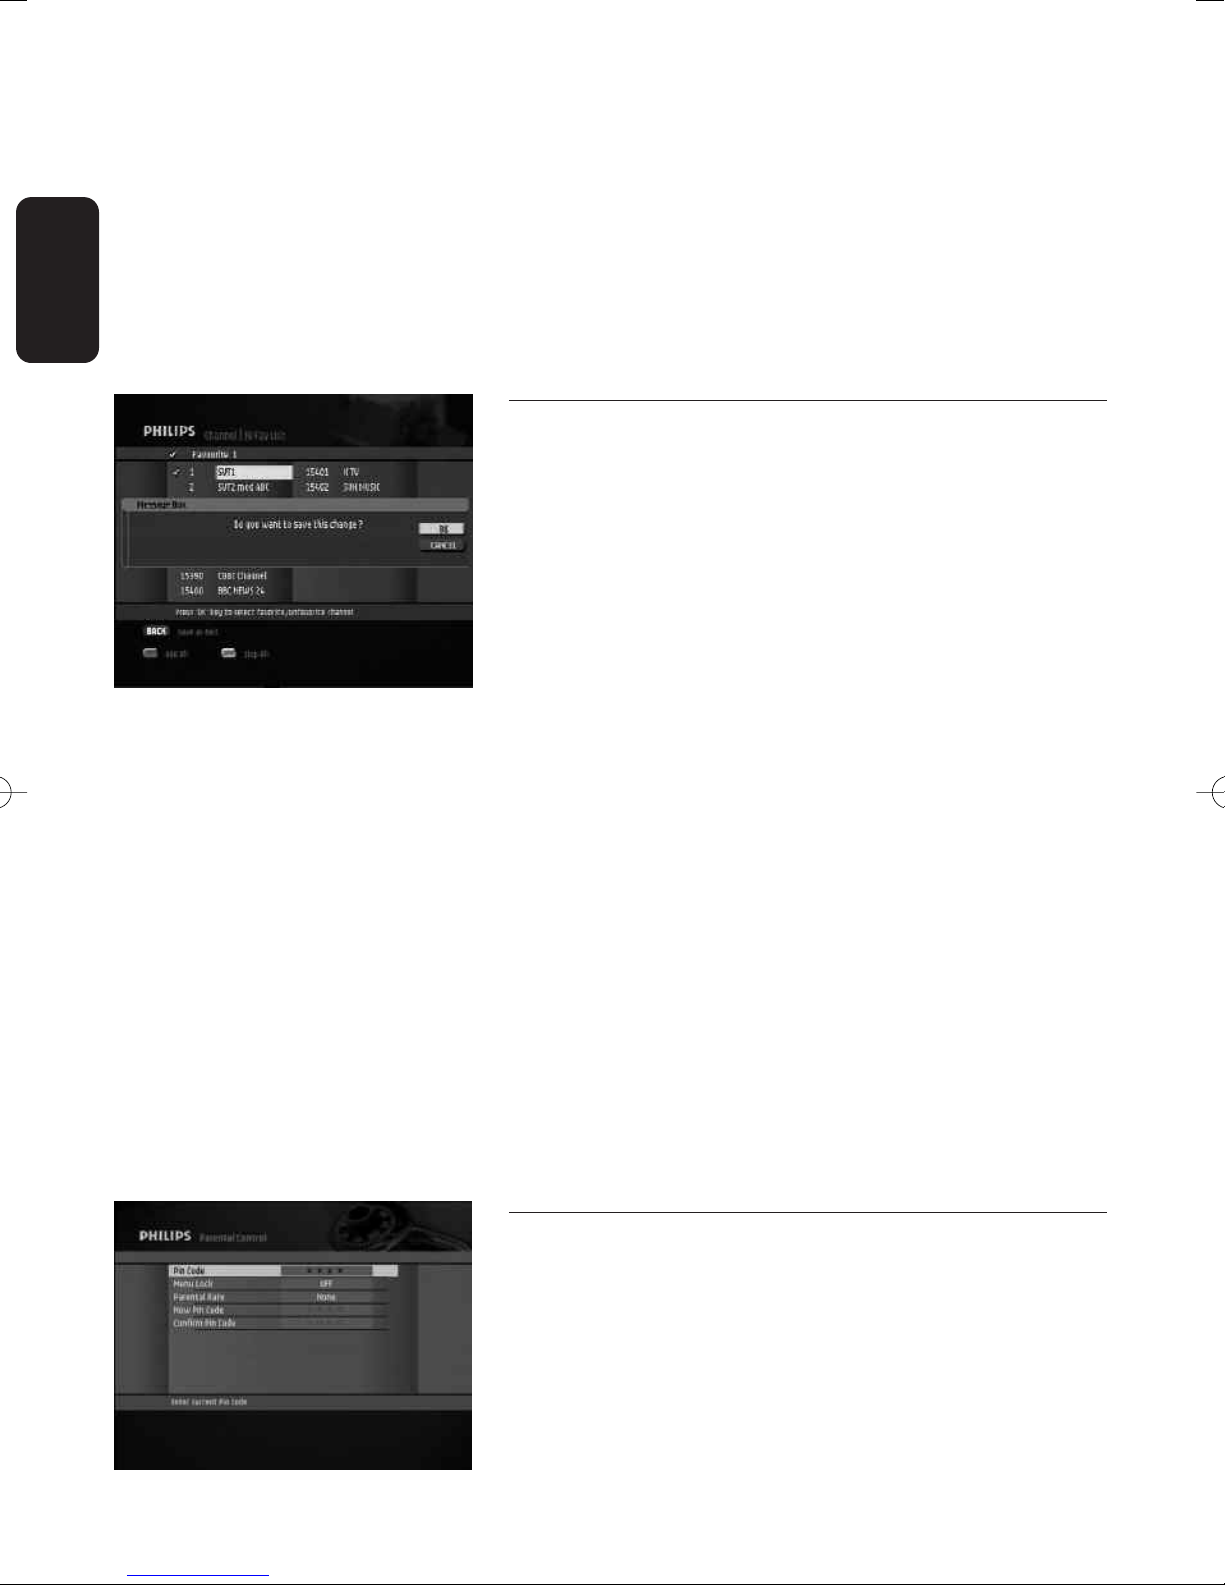
Note: the first time you press <OK>, you are prompted to enter
your Pin Code.
English
- Press <BACK> to exit the screen.
- When prompted, confirm your changes by pressing <OK>.
Note: you can only use this function once you have set up your Pin
Code from the Parental Control screen.
8.3.2 Favourites
Select Favourites from the Channel sub-menu to access the
screen used to create and edit up to three TV and three
Radio channel lists according to your personal preferences.
To create a favourite list:
- Individually select the desired channels from the list by
scrolling to the corresponding channel and pressing
<OK>. Press <OK> again to cancel selection
- Alternatively, use the red colour key to select all channels
or green colour key to deselect all channels.
Note: selected channels are marked with a tick.
To create additional favourite lists:
- Press <FAV> to select the next favourite list (up to
Favourite 3).
- Then proceed as indicated above.
- Press <BACK> to exit the screen.
- When prompted, confirm your changes by pressing <OK>.
When you activate one of the favourite lists by pressing
<FAV> while watching digital TV or listening to digital radio,
the receiver only zaps through your favourite channels.
Press <FAV> to again toggle between your favourite lists and
the full channel list.
8.4 Parental Control
ental Contr
Par
block access to your receiver and its Menu;
-
- provide maturity rating data transmitted with the
programme, indicating whether it is suitable for the age of
our childr
y
ol is used to:
en;
24 MENU
Page 25
- enable channel lock using a Pin Code in order to prevent
children from watching these channels;
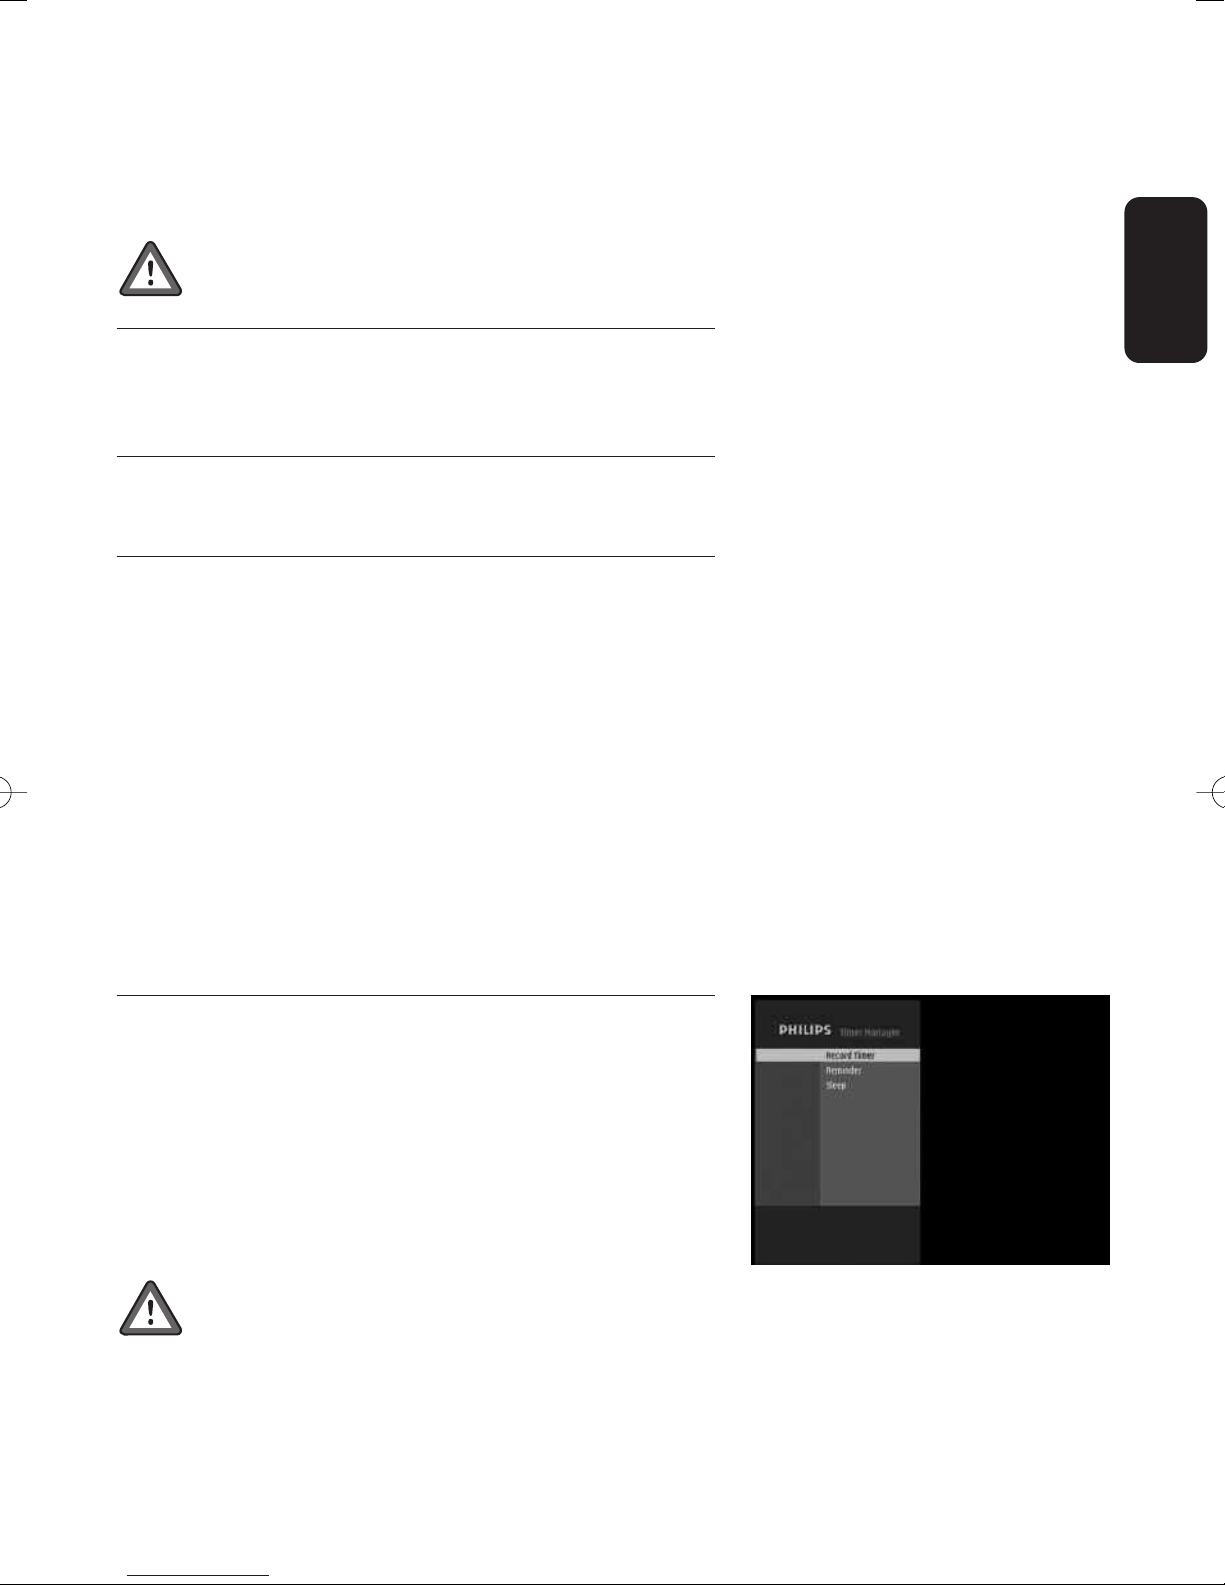
You must enter your 4-digit Pin Code to access the
various settings.
8.4.1 To enable Menu Lock
To lock access to every sub-menu of your receiver, set Menu
Lock to ON.
8.4.2 To set the Parental Rate
Select the desired Parental Rate: from 3 to 18, or None.
8.4.3 To change your receiver's Pin Code
The receiver's Pin Code default value is 1111.
To change your Pin Code:
- Scroll down to New Pin Code and enter your new Pin Code.
- Scroll down to Confirm Pin Code and enter your new Pin
Code again.
English
Note: once you have changed your Pin Code, keep it secret to
prevent others from using it. If you forget or lose your Pin
Code, please refer to the Troubleshooting chapter.
Press <OK> to confirm your changes and exit the screen.
8.5 Timer Manager
The Timer Manager is used to set:
- recording timers for the programmes you want to record
using your VCR or DVD recorder,
- reminders for programmes you want to see in the near
future,
- sleep timers.
o be able to record a digital channel using a VCR or
T
DVD recorder, you must set both your recorder and
:
er
eceiv
r
eceiver.
ust set a timer on y
ou m
Y
-
You must also enable recording on the VCR or DVD
recorder (refer to the VCR or DVD recorder user manual).
our r
MENU 25
Page 26
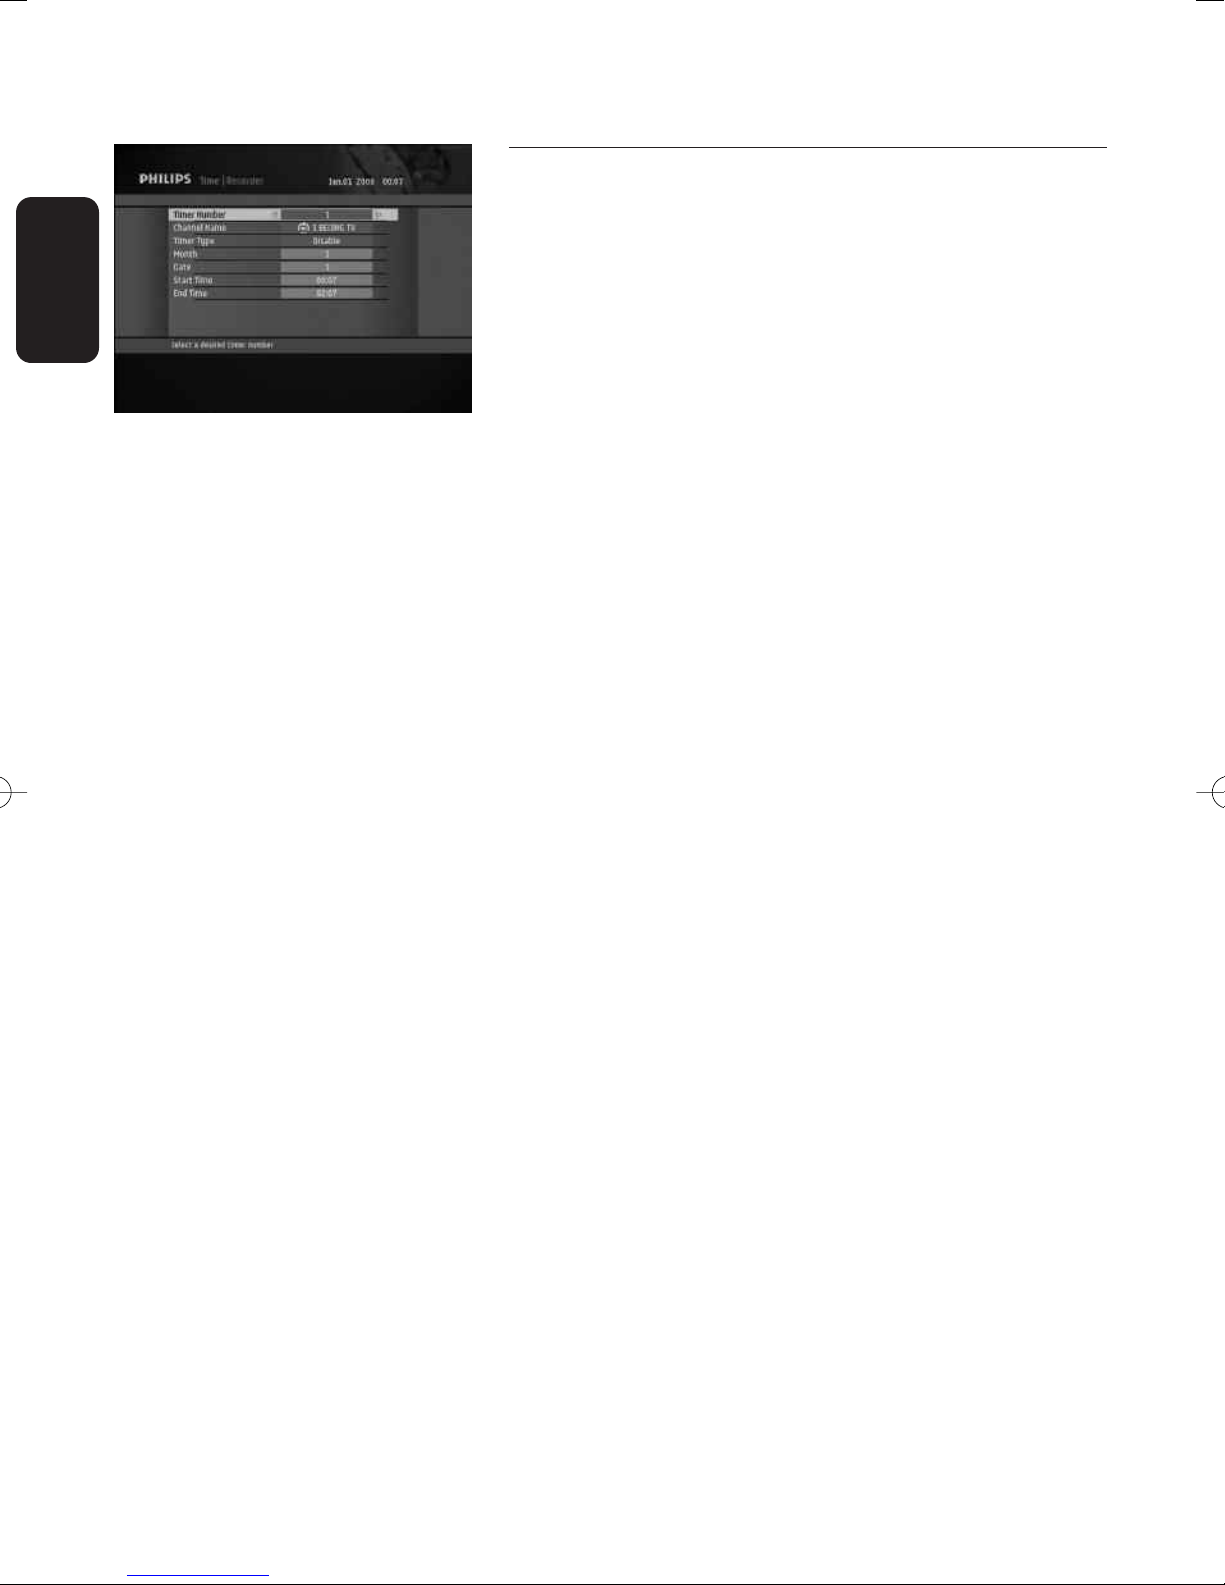
8.5.1 Recording timer
Select the Record Timer item from the Timer sub-menu or
English
press the <TIMER> key of the remote control to access the
Recorder screen.
To activate a recording timer:
- Select values for the following:
• Timer number: used to identify the timer. Select the
number corresponding to the timer you want to use.
• Channel Name: select the channel on which the
programme you want to record is broadcast using the
u or i key.
Note: alternatively, press <OK> when the highlight is on Channel
Name to display the list of available channels.Then scroll to
the desired channel and press <OK> to select it.
• Timer Type: select Daily to record once every day,
Weekly to record once every week, Monthly to record
once every month, or One time for a single recording
at the selected time. Select Disable to cancel the timer.
- Depending on the timer type, proceed with the following:
• Month: select
u or i key for a single recording.
the
• Date: select a date using the
1 for January, 2 for February, etc. using
u or i key for single and
monthly recordings.
• Start time: select a start time using the
modify the default time in steps of
u or i key to
10 minutes or
numerical keys.
• End Time: select a end time using the
modify the default time in steps of
u or i key to
10 minutes or
numerical keys.
- Press <OK> to confirm.
Note: when a recording timer is active, you cannot change digital
but you can switch to analogue TV using the
channels
<TV/STB> k
,
ey and zap through analogue channels
.
26 MENU
Page 27
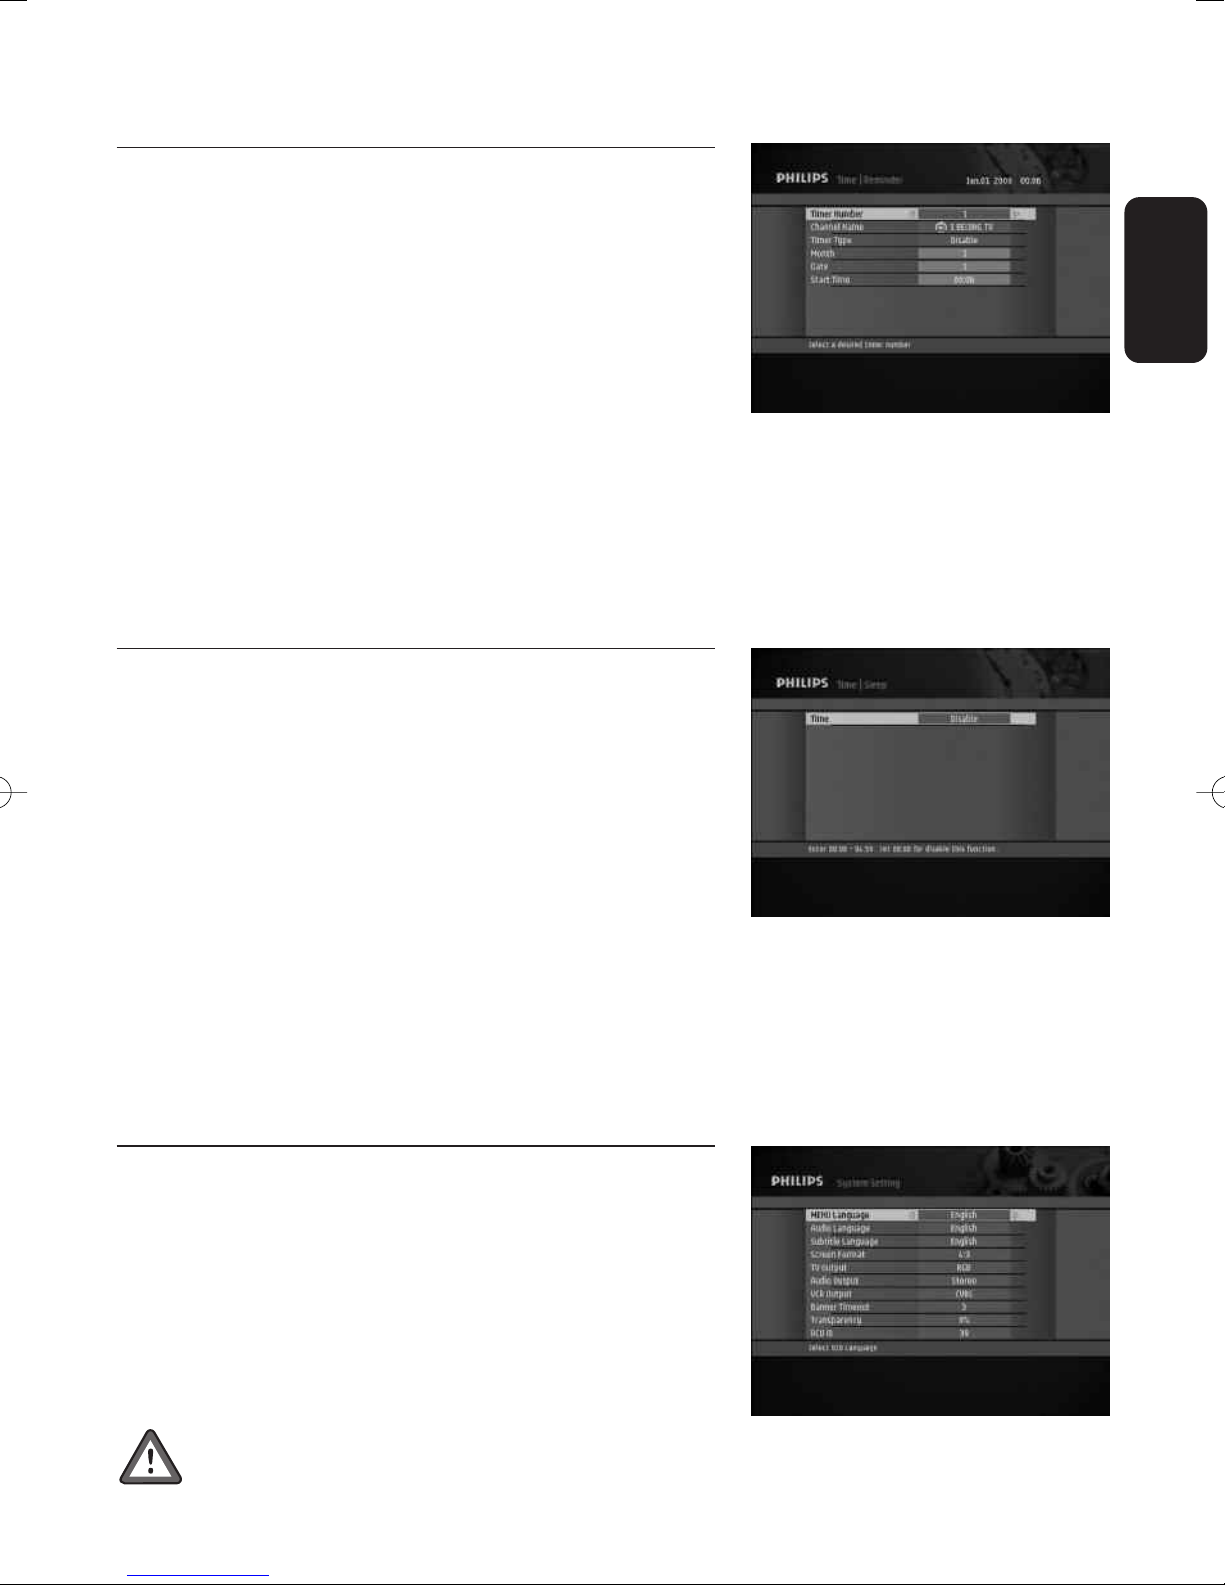
8.5.2 Reminder
When you set a reminder for a particular programme, the
receiver sends a warning at the start of that programme and
switches automatically to the right channel if you accept the
reminder message.
Select the Reminder item from the Timer sub-menu to
access the Reminder screen.
To activate a reminder:
- Set the values of the reminder parameters using the arrow
keys or numerical keys as indicated in the above paragraph.
- Press <OK> to confirm.
Note: an existing reminder can be disabled by selecting Disable as
Timer Type in the Reminder screen.When a timer is already
active (recording in progress), press <TIMER> then <0> to
cancel this timer.
8.5.3 Sleep timer
You can set a sleep timer to automatically switch your
receiver to Standby mode after a given time lapse.
Select the Sleep item from the Timer sub-menu to access
the Sleep screen.
English
To activate a sleep timer:
- Select the time lapse after which the receiver should go to
Standby (up to 4:59) using the
increase the time lapse steps of
u or i key to decrease or
10 minutes or using the
numerical keys of the remote control.
- Press <OK> to confirm.
To disable a sleep timer:
- Select Disable instead of a time lapse for this timer.
- Press <OK> to confirm.
8.6 System setting
Select System Setting from the main menu to access
the System Setting screen.
This screen is used to modify the general settings of your
receiver and your remote control setting.
Note: access to this menu can be protected by Pin Code.
To open the Installation sub-menu, you must enter
our PIN code
y
.
MENU 27
Page 28
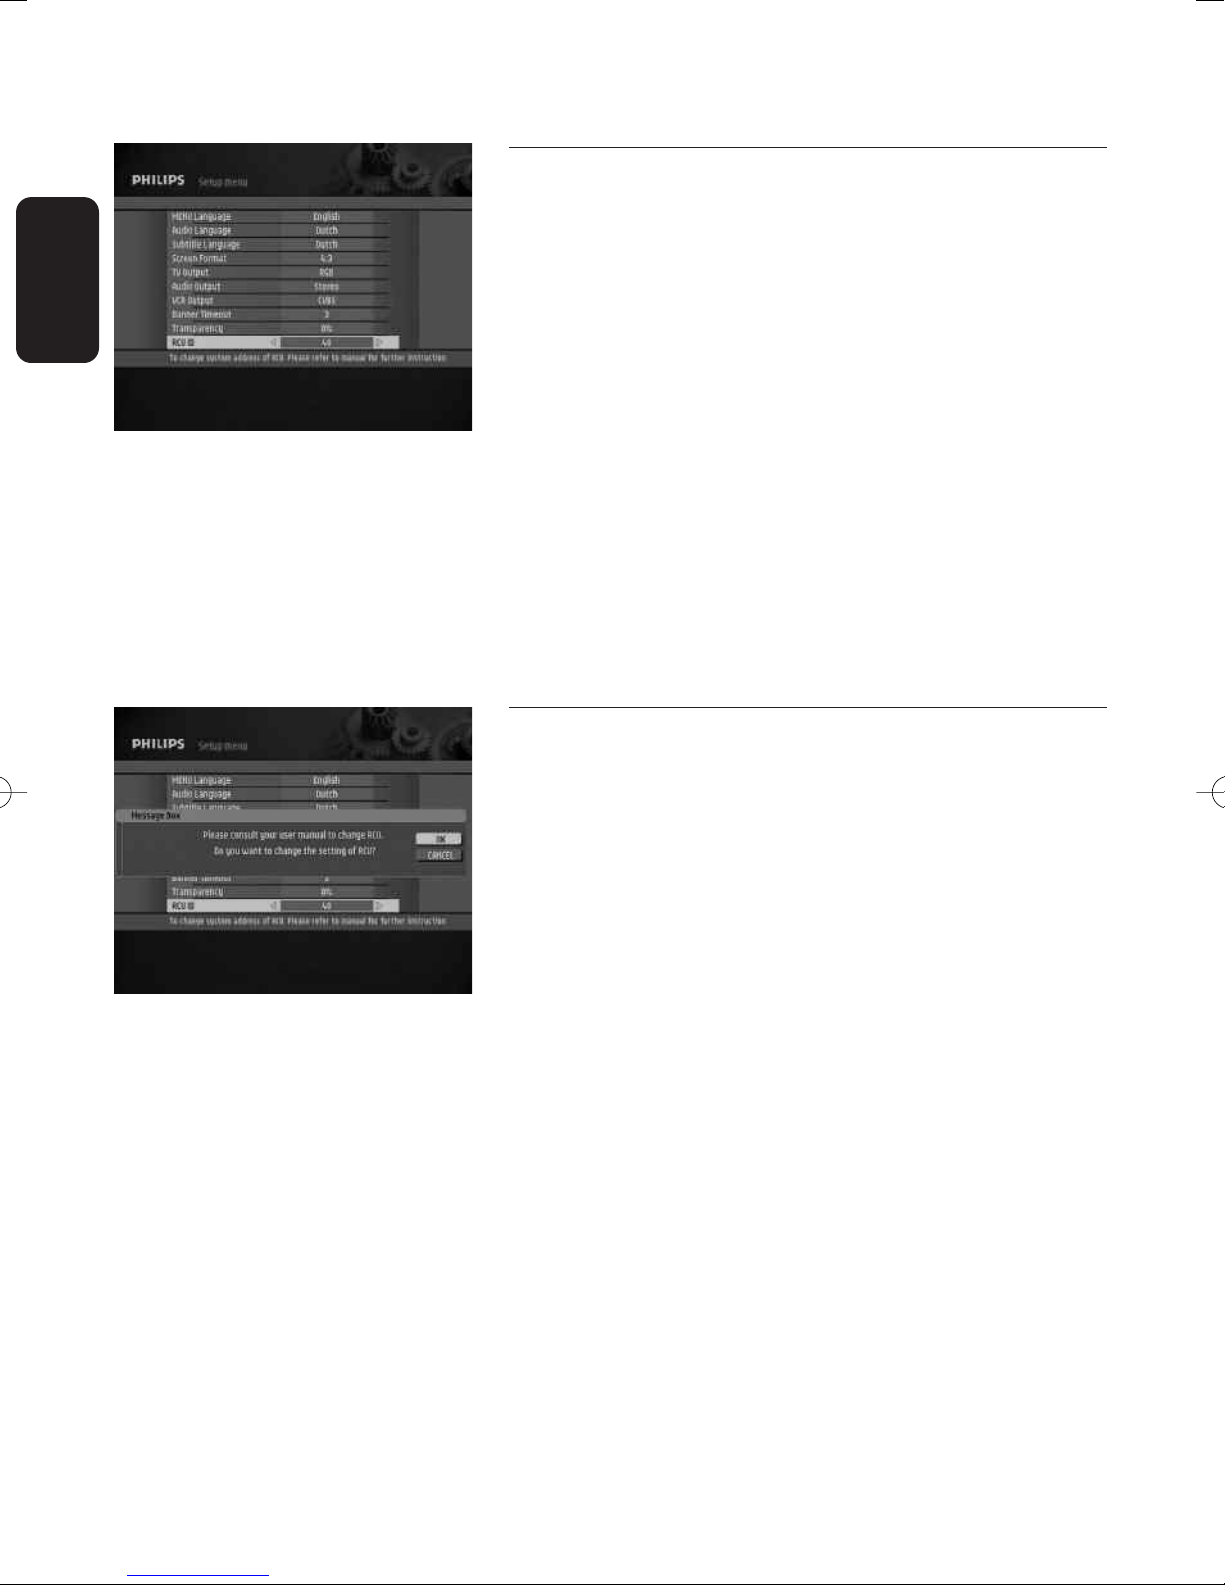
8.6.1 Receiver settings
English
- Select appropriate values for the following:
• Menu Language: Swedish (default value), Finnish, English
• Audio Language: Swedish (default value), Finnish, English
• Subtitle Language: Swedish (default value), Finnish,
English, or OFF
• Screen Format: 4:3 LetterBox, 4:3 Center,
16:9 Full
• TV Video Output: RGB or CVBS
• VCR Video Output: CVBS or Y/C
• Audio Output: Stereo (default value), Left, Right, Mono,
or AC3.
• Banner Timeout: banner display duration, from
1 to
5 seconds
• Transparency: OSD transparency, from 0% to 70%
- Press <OK> to store the settings.
Note: your TV settings will be overwritten by the receiver settings.
8.6.2 Remote Control setting
If you have a Philips TV set equipped with a universal remote
control which in 'STB' mode is able to perform certain
actions like channel up/down, the current setting of your
receiver offers you the possibility to do so.
However, if you have other items of equipment in your home
and the Philips remote control of your receiver interferes
with them, it is recommended to change the setting of both
your receiver and remote control.
To change the setting of your receiver:
- Press
- Change the value from 39 to 40 or 38 using the
y to scroll down to RCU ID.
u or i
key, and then press <OK> to validate the remote control
setting change on the receiver.
- A pop-up message appears, indicating that you must now
change the setting of your remote control.
To change the setting of your remote control:
- Press number keys <
1> and <3> simultaneously and hold
them for at least 5 seconds.
ys.
Release these two k
-
e
28 MENU
Page 29
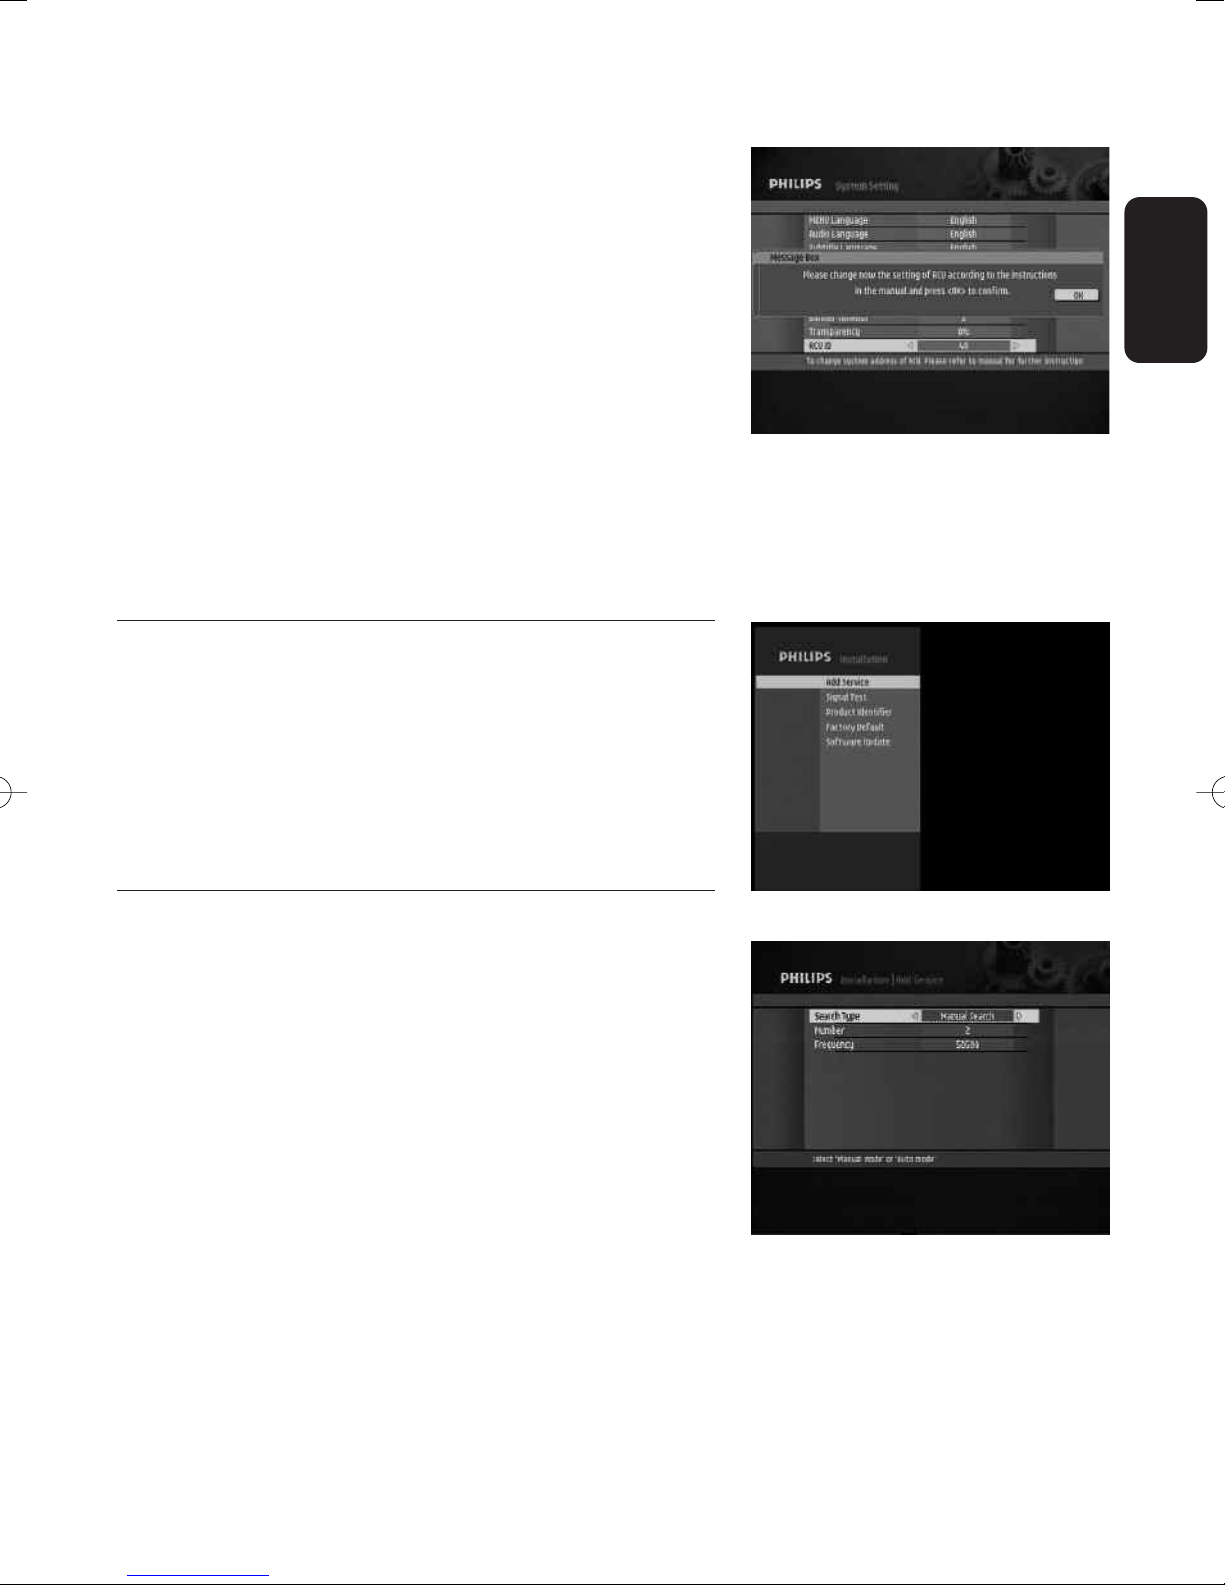
- Enter the new setting according to the remote control
setting value displayed on screen within the next 60 seconds:
1 for code 039
•
• 3 for code 040
• 5 for code 038.
- Press <OK> to confirm the remote control setting change
and return to normal operation.
Note: in case you find you cannot press <OK>, repeat steps 1 to
3 above.
- Press <MENU> or <BACK> to go back to the main menu.
Alternatively you may reset your remote control to its
default setting (039) by removing the batteries and
reinserting them after more than 3 minutes.
8.7 Installation
The Installation sub-menu includes the following items:
o Add Service
o Signal Test
o Product Identifier
o Factory Default
o Software Update.
English
8.7.1 Add Service
This feature is used to search for new channels.
Select Add Service from the Installation menu to access the
Add Service screen.
To launch a search:
- Select values for the following:
• Search type: select Automatic to perform a search for
all channels or Manual for a particular channel to be
selected below.
• Number: select a channel number.
equency: broadcast frequency corresponding to the
Fr
•
selected channel or entered manually using the
ys of the remote control.
umerical k
n
ess <OK> to star
- Pr
e
t scanning.
MENU 29
Page 30
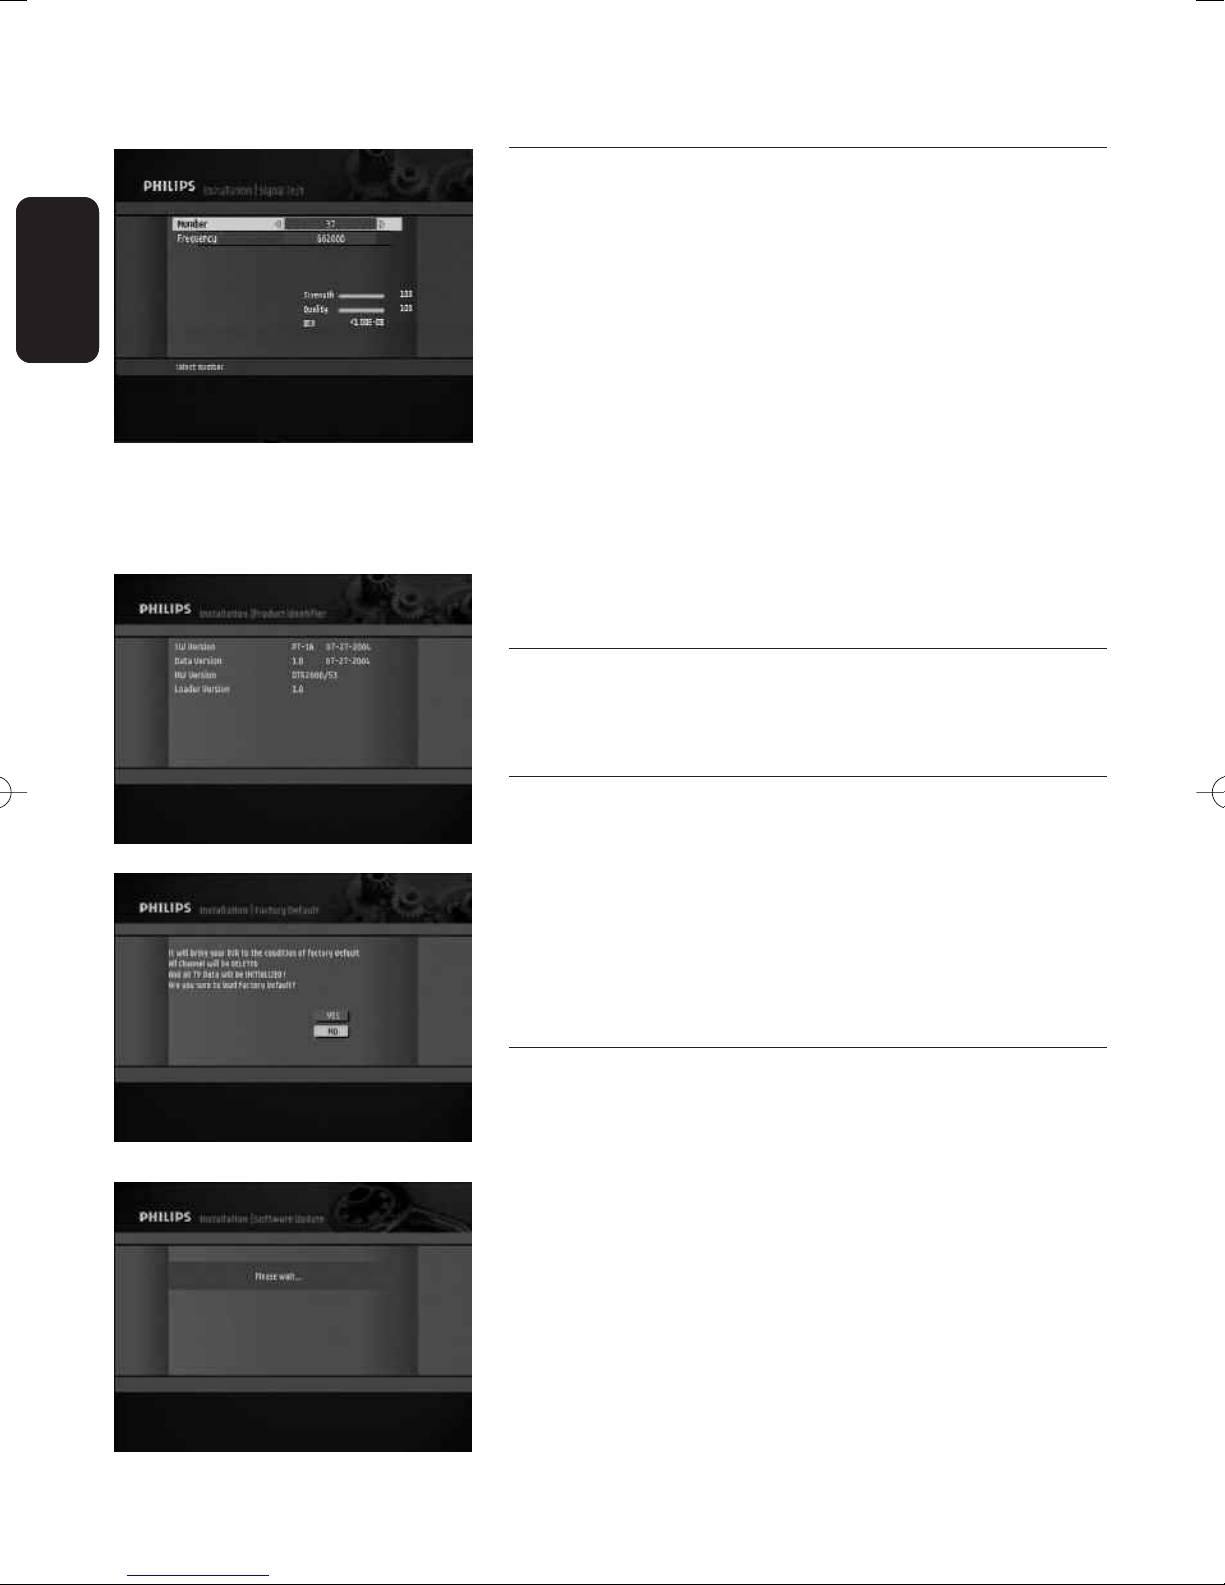
8.7.2 Signal Test
This feature is used to test the signal strength and quality for
English
a given channel.
Select Signal Test from the Installation menu to access the
Signal Test screen.
To test the signal strength:
- Select values for the following:
• Number: select a channel number.
• Frequency: broadcast frequency corresponding to the
selected channel or entered manually using the
numerical keys of the remote control.
As you enter values, the signal strength and quality, and
Bit Error Rate (BER) are displayed on the right-hand side
of the screen.
- Press <BACK> to go back to the Installation menu.
8.7.3 Product Identifier
This feature is used to provide hardware and software
information.
8.7.4 Factory Default
To reset your receiver back to the factory default condition,
select Factory Default from the Installation sub-menu.The
Factory Default screen appears, displaying a warning message.
Press <OK> to confirm (selection is highlighted in yellow).
Note: if you reset your receiver to factory default settings, you lose
all your personal settings which were previously stored.
8.7.5 Software update
This feature is used to set the software download mode and
type.
To manage software downloads:
- Select Software update from the Installation sub-menu.
- Select the appropriate values for the following:
Select mode:Auto Mode or User Mode. It is
•
recommended to set the update mode to Auto Mode
(default setting).
Software, Software+Data or Data
ype:
• Do
wnload
T
30 MENU
Note: data is for example a preset list.
Page 31
- Press <OK> to launch a new software search.The
software search screen appears, displaying the search
progress and the new software version.
If the update mode is automatic, you will receive a warning
message on the screen when new software is detected.
Press <OK> to start the download.A screen appears to
inform you the loading is in progress, followed by a screen to
inform you that the software is stored into memory.After
the automatic download has been finished, the welcome
screen will appear.The receiver will display video
automatically without your interference.
Note: do not unplug the power cable while the loading is in
progress.
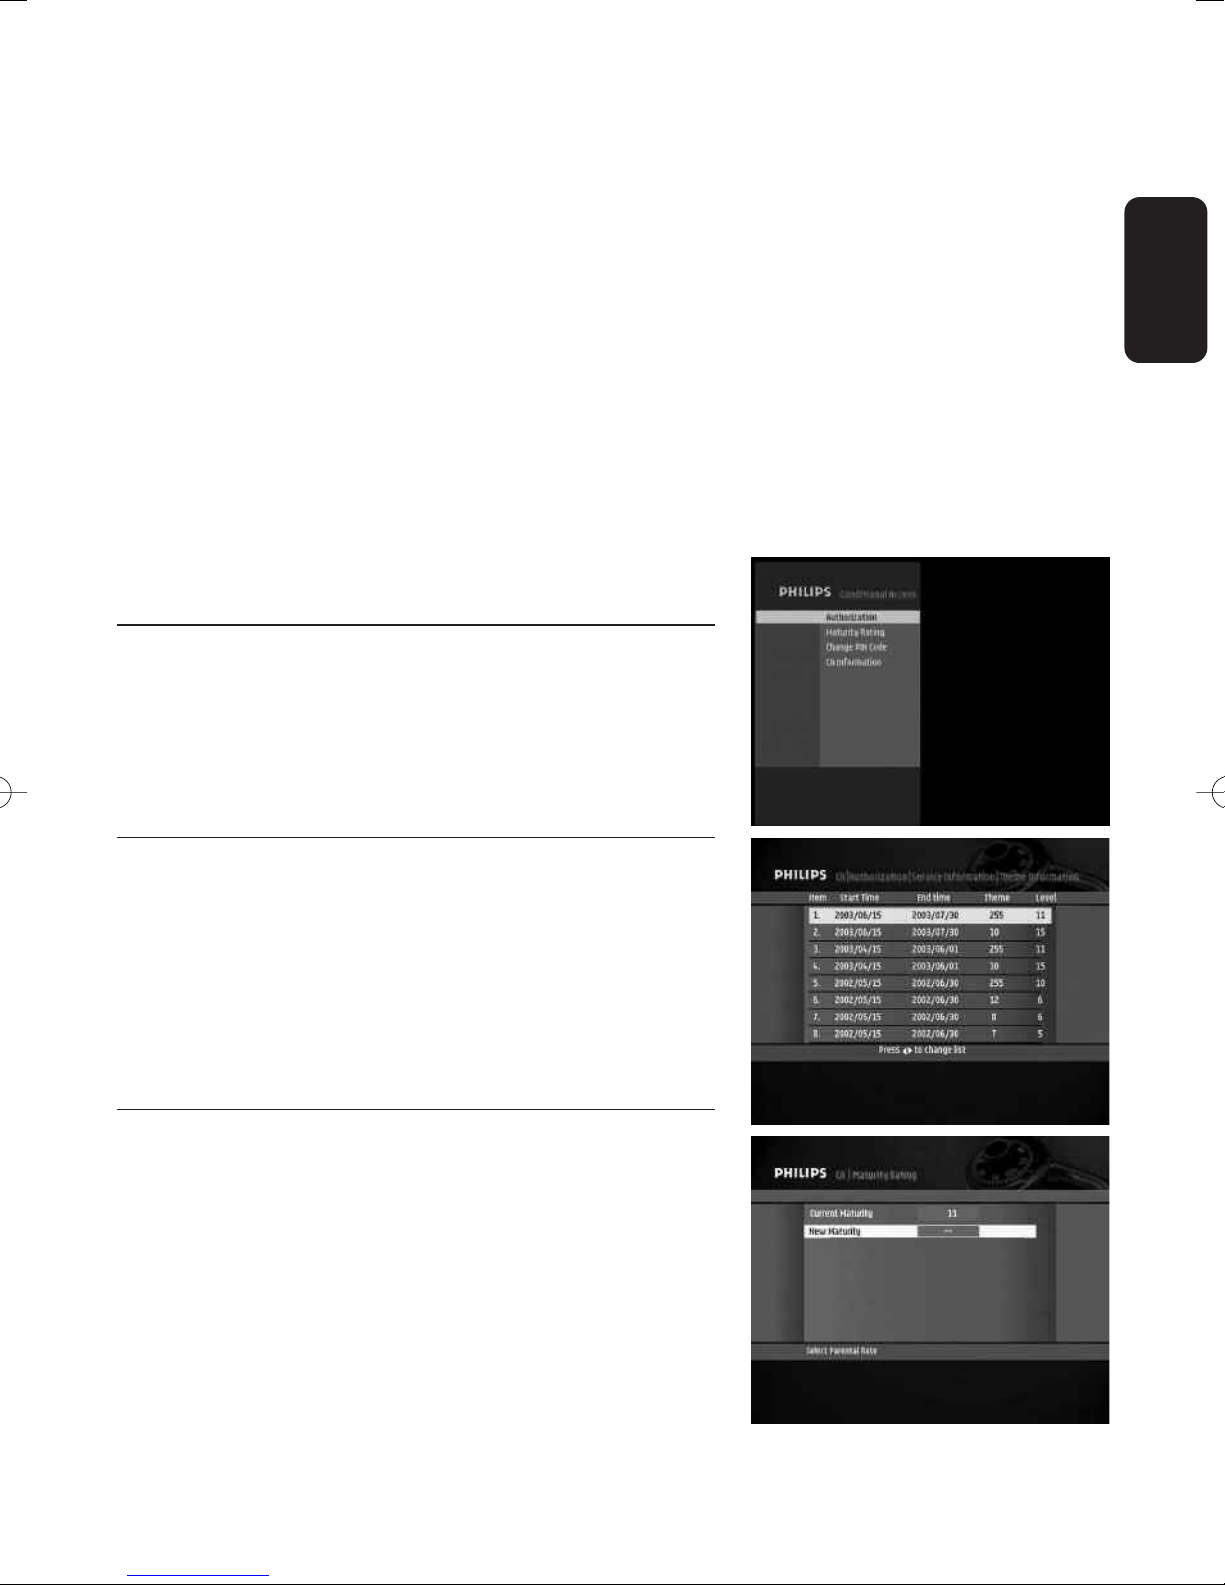
8.8 Conditional Access
This feature is used to:
- view Authorization class information;
- set the maturity rating;
- change your smart card Pin Code.
English
8.8.1 Authorization
Select Authorization from the Conditional Access sub-menu
to access the Authorization screen.
To view Authorization class information:
Select your operator from the list and press <OK>.
Authorization class information for the selected operator is
displayed.
8.8.2 Maturity Rating
Select Maturity Rating from the Conditional
sub-menu to access the Maturity Rating screen.
o modify the maturity rating:
T
- Enter the desired new maturity rating and press <OK> to
confirm.
ou are then prompted to enter your smart card Pin
Y
Code in order for the new rating to be taken into
account.
Access
RUNNING HEADS 31
Page 32
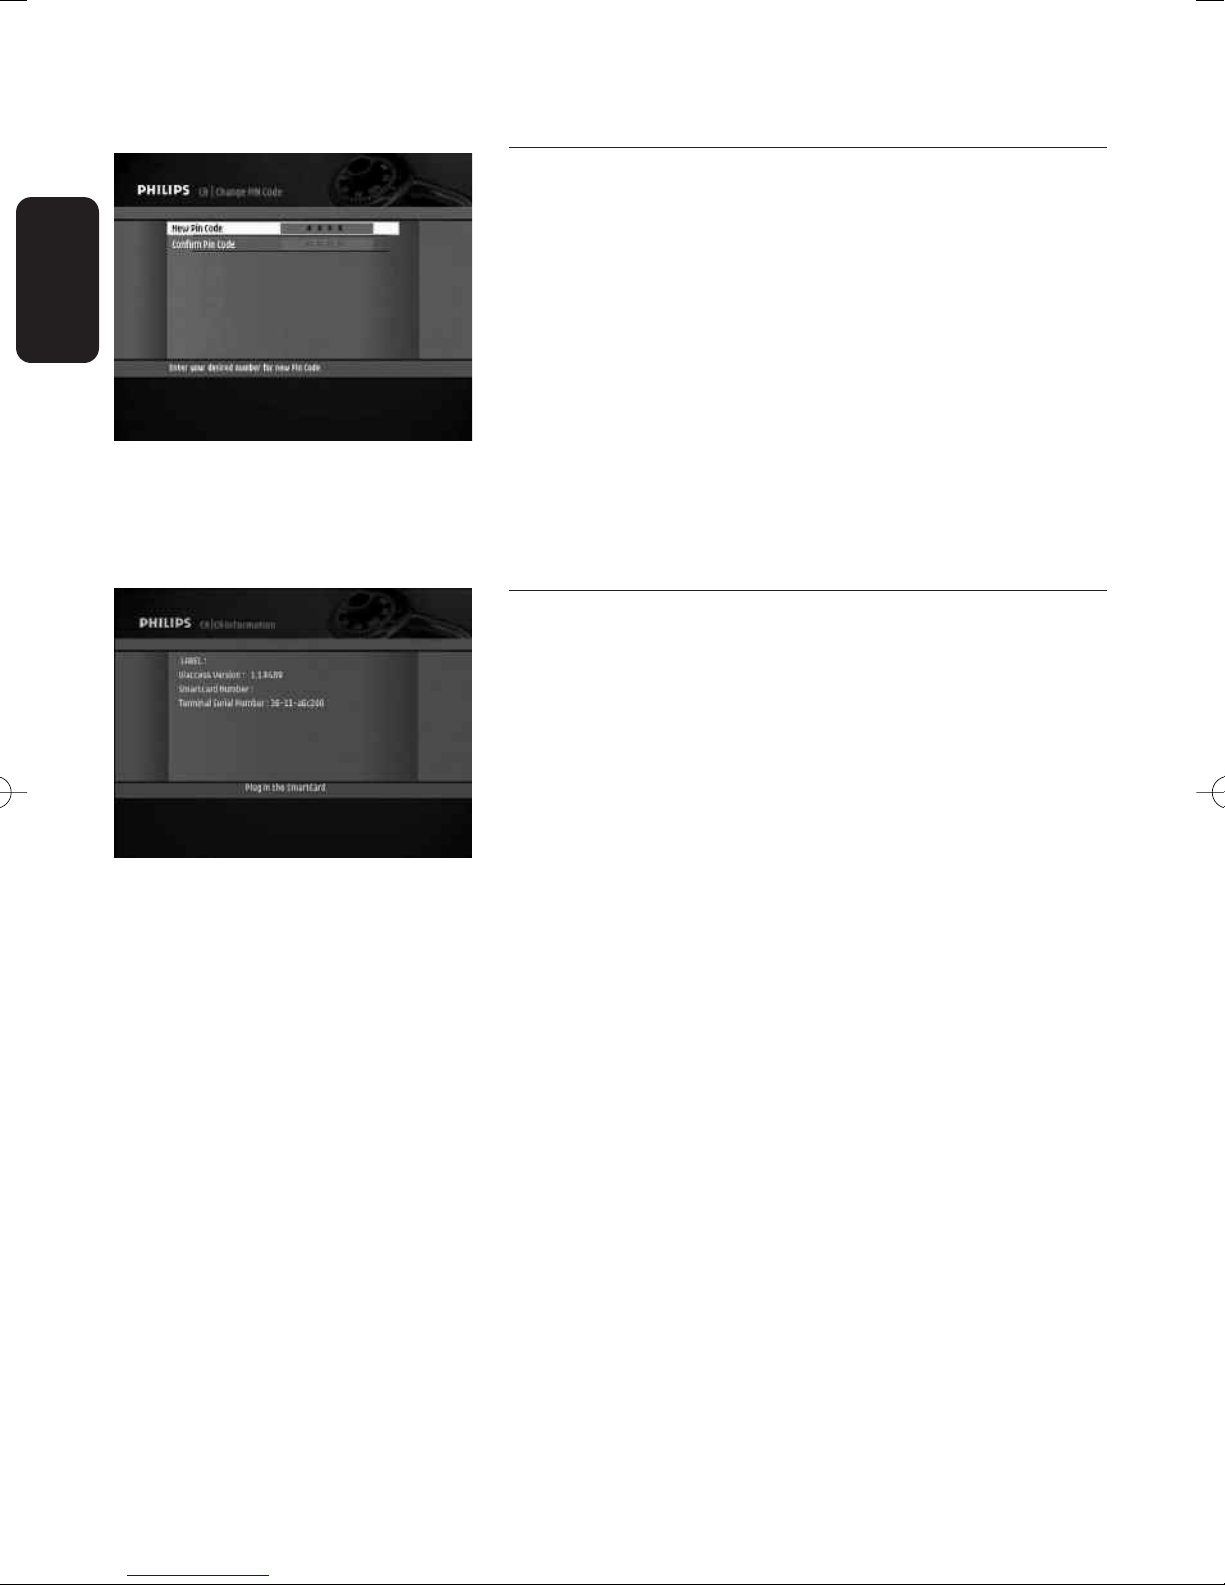
8.8.3 Change Pin Code
Select Change Pin Code from the Conditional Access sub-
English
menu to access the Change Pin Code screen.
To modify your smart card Pin Code:
- Enter your smart card Pin Code.
Note: your smart card Pin Code may be different from your
receiver Pin Code.
- Enter your new smart card Pin Code.
- Enter your new smart card Pin Code again.
- Press <OK> to confirm and exit the screen.
8.8.4 CA Information
Select CA Information from the Conditional Access submenu to access the CA Information screen.
This screen is used to display conditional access information.
32 RUNNING HEADS
Page 33
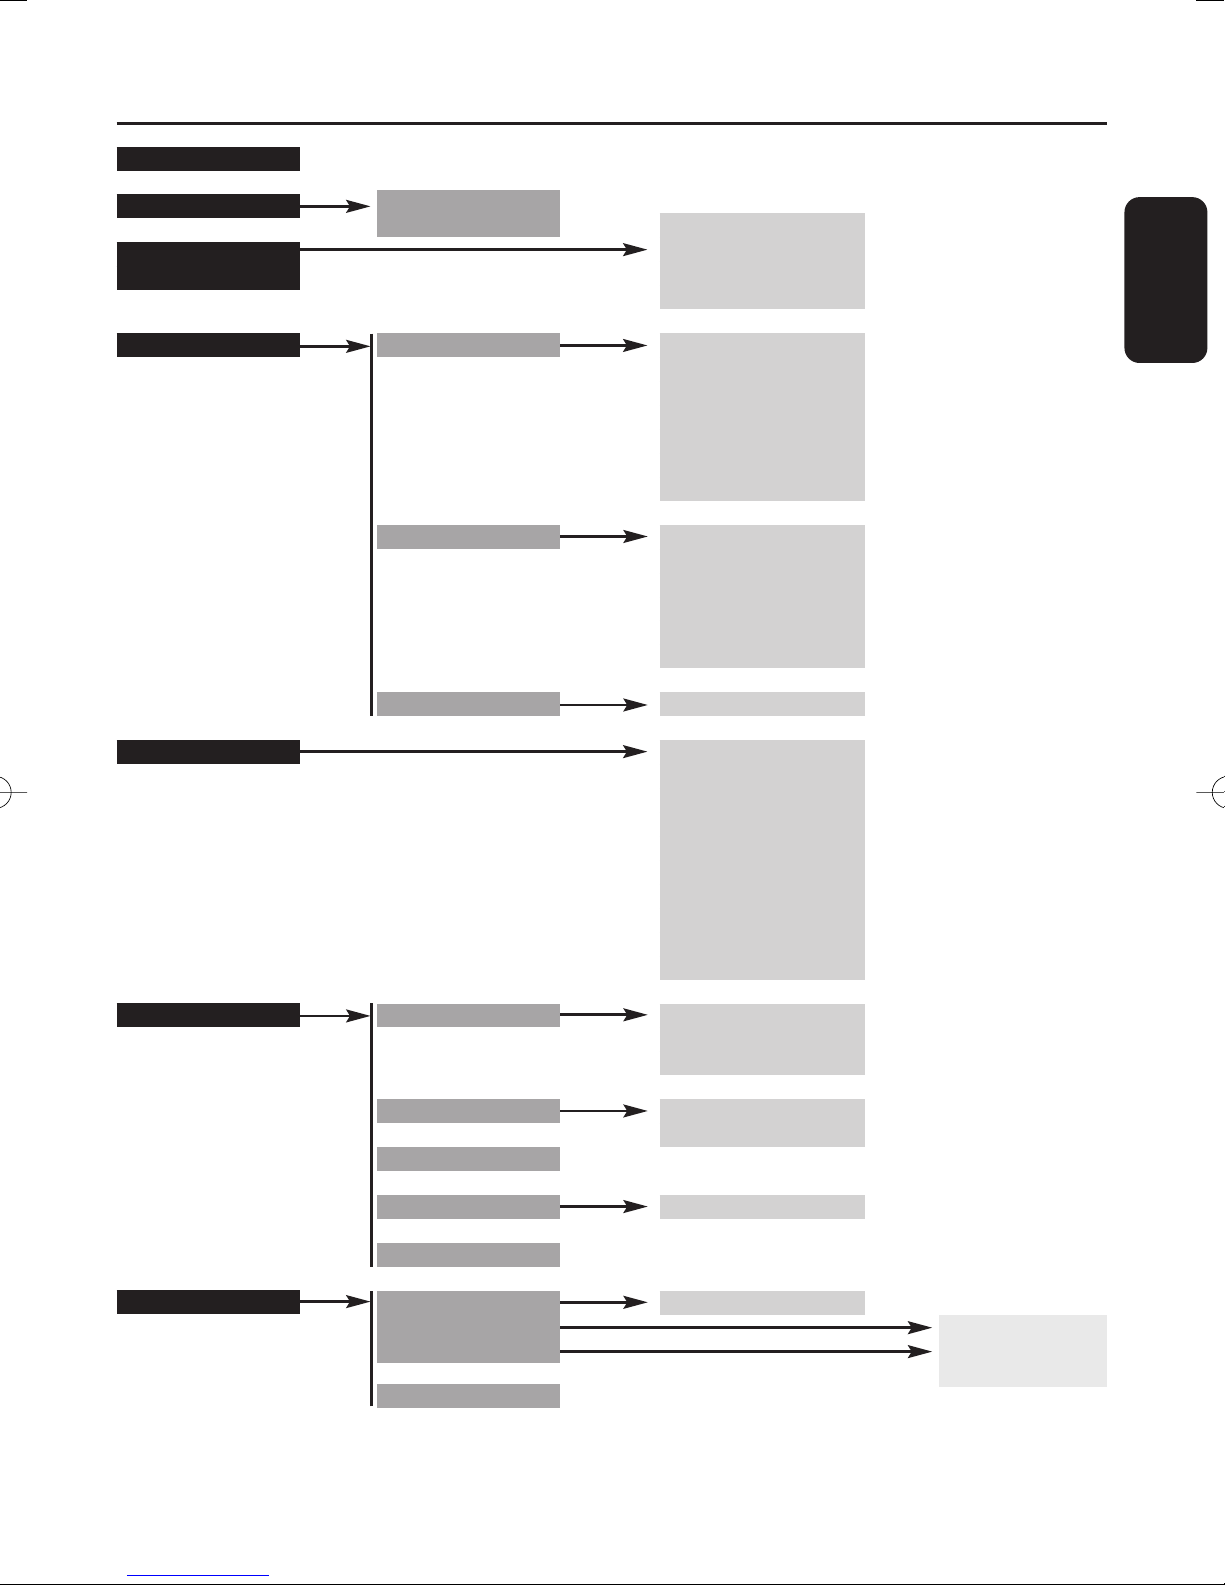
9 Menu tree
Guide
Channel Manager
Parental control
(Pin Code required)
Timer Manager
System Setting
Channel POOL
avourites
F
Record Timer
Reminder
Sleep
enu lock ON/OFF
M
arental Rate
P
ew Pin Code
N
Confirm Pin Code
Timer Number
Channel Name
Timer Type
Month
Date
Start Time
End Time
Timer Number
Channel Name
Timer Type
Month
Date
Start Time
Time
Menu Language
Audio Language
Subtitle language
Screen Format
TV Output
Audio Output
VCR Output
Banner Timeout
Transparency
RCU ID
English
Installation
Conditional access
Add Service
Signal Test
Product Identifier
Factory default
Software Update
Authorization
Maturity Rating
Change Pin Code
CA Information
Search Type
Number
Frequency
Number
Frequency
Yes/no
Service Information
New Maturity
New Pin Code
Confirm Pin Code
MENU TREE 33
Page 34
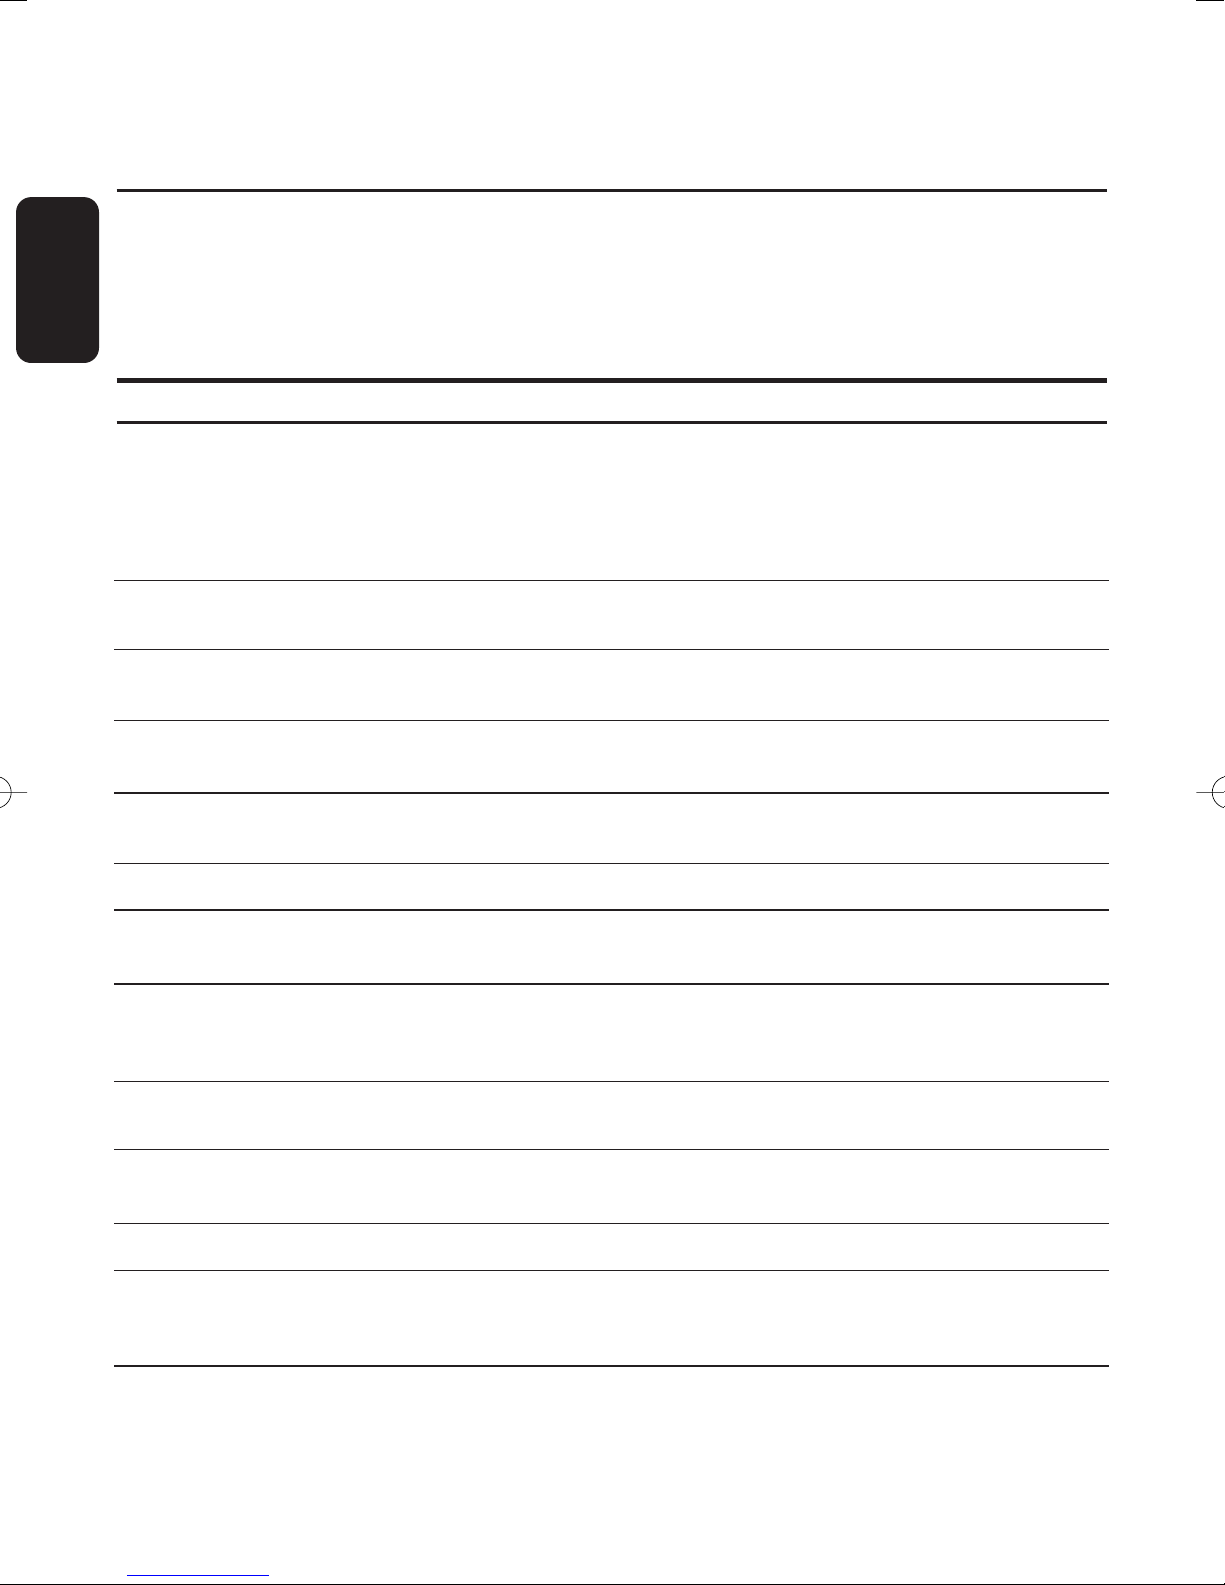
10 Troubleshooting
Please be aware that new software may change the functionality of your receiver.
English
Should you experience any difficulties with the operation of your receiver, please consult the relevant section of
this manual, including this Troubleshooting section. If the problem cannot be solved, call your dealer or a
customer service adviser.
Symptom Cause Remedy
The display on the front panel does
not light up.
No sound or picture but the front
panel red light is on.
No sound or picture but the front
panel green light is on.
The remote control does not
operate your receiver.
Faulty power supply
Receiver in Standby
Poor signal
Receiver in TV mode
Poor SCART connections
Check that the power cord is
correctly connected. Disconnect
this cord and reconnect it to
ensure it is in place.
Check that the power is available
at the wall socket.
Press the Standby button.
Check the connections at the wall
socket and receiver.
Press <TV/STB> on the remote
control once or twice.
Check the SCART connections
Make sure the receiver is on.
Make sure you are pointing the
remote control at the receiver
front panel.
On-screen display working but
there is no reception
Intermittent r
The pictur
een text is difficult to r
scr
eception.
e is not sharp and on-
.
ead.
34 TROUBLESHOOTING
Poor reception/signal
Faulty connections
TV SCART output format not set
to RGB
Check the batteries in your
remote control.
Check the installation.
Check all connections and cable.
Change the setting of the
TV SCART item to RGB from the
System Setting screen.
Page 35
Symptom Cause Remedy
You cannot find all the channels
you think should be available.
The picture on some channels
seems to have been stretched or
squashed.
Even if you use the numerical keys,
you cannot access a particular
channel.
You set a timer but did not record
what you wanted.
TV SCART not connected to the
RGB-capable SCART socket of
your TV set.
Inappropriate TV SCART
The signal to your aerial may be
weak.
The broadcast is probably in wide
screen and the receiver settings
may not be correct.
The parental lock has been
activated on this channel and a
message asks for your parental
code.
The recorder was set incorrectly.
Refer to your TV User Manual.
English
Use the SCART cable supplied
with your receiver.
Try retuning your receiver,
following the relevant steps in
chapter 6. If you are still missing
channels, call your local dealer.
Check the receiver “TV format”
option setting, following the
information in chapter 7.6.2. If you
have a wide screen TV, you may
also need to check the settings on
your TV.
Enter your parental code to access
the channel or remove it as a
locked channel.
Make sure that your recorder is
set for the same time as your
digital receiver.
The order of the channels has
changed.
You have forgotten or lost your Pin
Code.
if you have tried all of the actions suggested above and could not solve the prob
Note:
your dealer or ser
vice pro
They have been re-arranged.
.
vider
Refer to paragraph 8.3.1 to change
the order again.
You must reset it from the Parental
Control screen.To access the
Parental Control screen, use the
following 4-digit code: 3
Keep this code secret to prevent
others from using it.
For detailed information on
Parental Control, refer to
paragraph 8.4.3.
please contact
lem,
141.
TROUBLESHOOTING 35
Page 36
11 Technical specifications
English
This product conforms with European Directives 95/47/EC and 2002/21/EC.
Video decoding
MPEG-2 DVB compliant up to MP@ML
-
- Video bit rate: up to
- Video format: 4:3
letter box if source is in
(
- Resolution: up to 720x576 pixels
Audio decoding
- MPEG layer I / II
- All MPEG bit rates
- Mono and stereo mode
Ease of Installation
- Menu-controlled installation and
operation using On-Screen Display
- Automatic channels installation via
scanning
- Up to 500 presets
Ease of Use
- Channel list editing for personalized
installation (delete, add, move)
- 3 favourite TV channel lists
- 3 favourite Radio channel lists
- Fully remote controlled
- Now & Next ESG / programme
monitoring
- Automatic recording via Timer
programming in ESG
- 2 LEDs
Operation/Features
- Full range RF loop-through
- TV & Radio modes
- 3 Fav list forTV channels
- 3 Fav list for Radio channels
- Automatic channel list update
- Subtitles
- Parental lock with Pin Code
- Child timer
- 8 events VCR timers
e alarm
d Failur
- Recor
d header message
- Recor
w & Next ESG
- No
- Highlight programme coming soon in
ESG
- Software upgrade via over-the-air
download
15 Mbit/sec
:9) and 16:9
16
- Low power mode
Application system resources
- Processor: ST
Processor clock speed: 8
SDRAM-CPU/Video - Graphics: 8 MB
Flash memory: 2 MB
-
Terrestrial antenna interface
- RF input:
169 - 2 female connector
IEC
- RF output (bypass): IEC
Reception-Demodulation
- Demodulation type: COFDM 2K/ 8K
- Network:
Input frequency range:
-
- Loop-through frequency range (MHz):
Conditional Access
- One Smart Card Reader
- Viaccess Conditional Access System
ConnectionsTV SCART
Output: CVBS, controlled audio L / R,
RGB, Slow blanking, Fast blanking,
S-Video (for LCD projector)
VCR SCART
Output:
CVBS, controlled audio L/R,Y/C, RGB
Audio CINCH
Analogue audio output: L / R
Digital audio output: AC-3 over SPDIF
169 - 2 male
MFN / SFN
VHF III & UHF IV/V
47 - 862 MHz
1 M
Hz
Serial interface:
S 232
R
ccessories
A
Remote control
Type RC
-
- RF cable
- User manual
- Worldwide Guarantee booklet
- Batteries: 2 x
- Mains cord
Miscellaneous
- Temperature range (°C):
- Mains: 230 V ~ +/-
- Power consumption:
- Standby:
- Weight: 0.980 kg
- Including packaging:
- Dimensions: 365 x 230 x 62 mm
19336001/01 (“Zappa”)
SCART cable
1.5 V type AA/ R06
Operating: +5 to 40 °C
Storage: -
10 to +70 °C
10% - 50 Hz
15 W max
10 W max
1.780 kg
The product complies with
the following European
council Directives:
- 73/23/EEC
- 93/68/EEC
- 89/336/EEC
ed trademark of Dolb
C-3 ® is a r
A
Due to continued product improvements, this information is subject to change without notice.
egister
36 TECHNICAL SPECIFICATIONS
y Laboratories Licensing Corporation.
Page 37
English
 Loading...