

Page 1

Operating Instructions
Bedienungsanleitung
DVD Recorder
DVD-Recorder
Model No. DMR-EH60
Modellnr. DMR-EH60
HARD DISK DRIVE
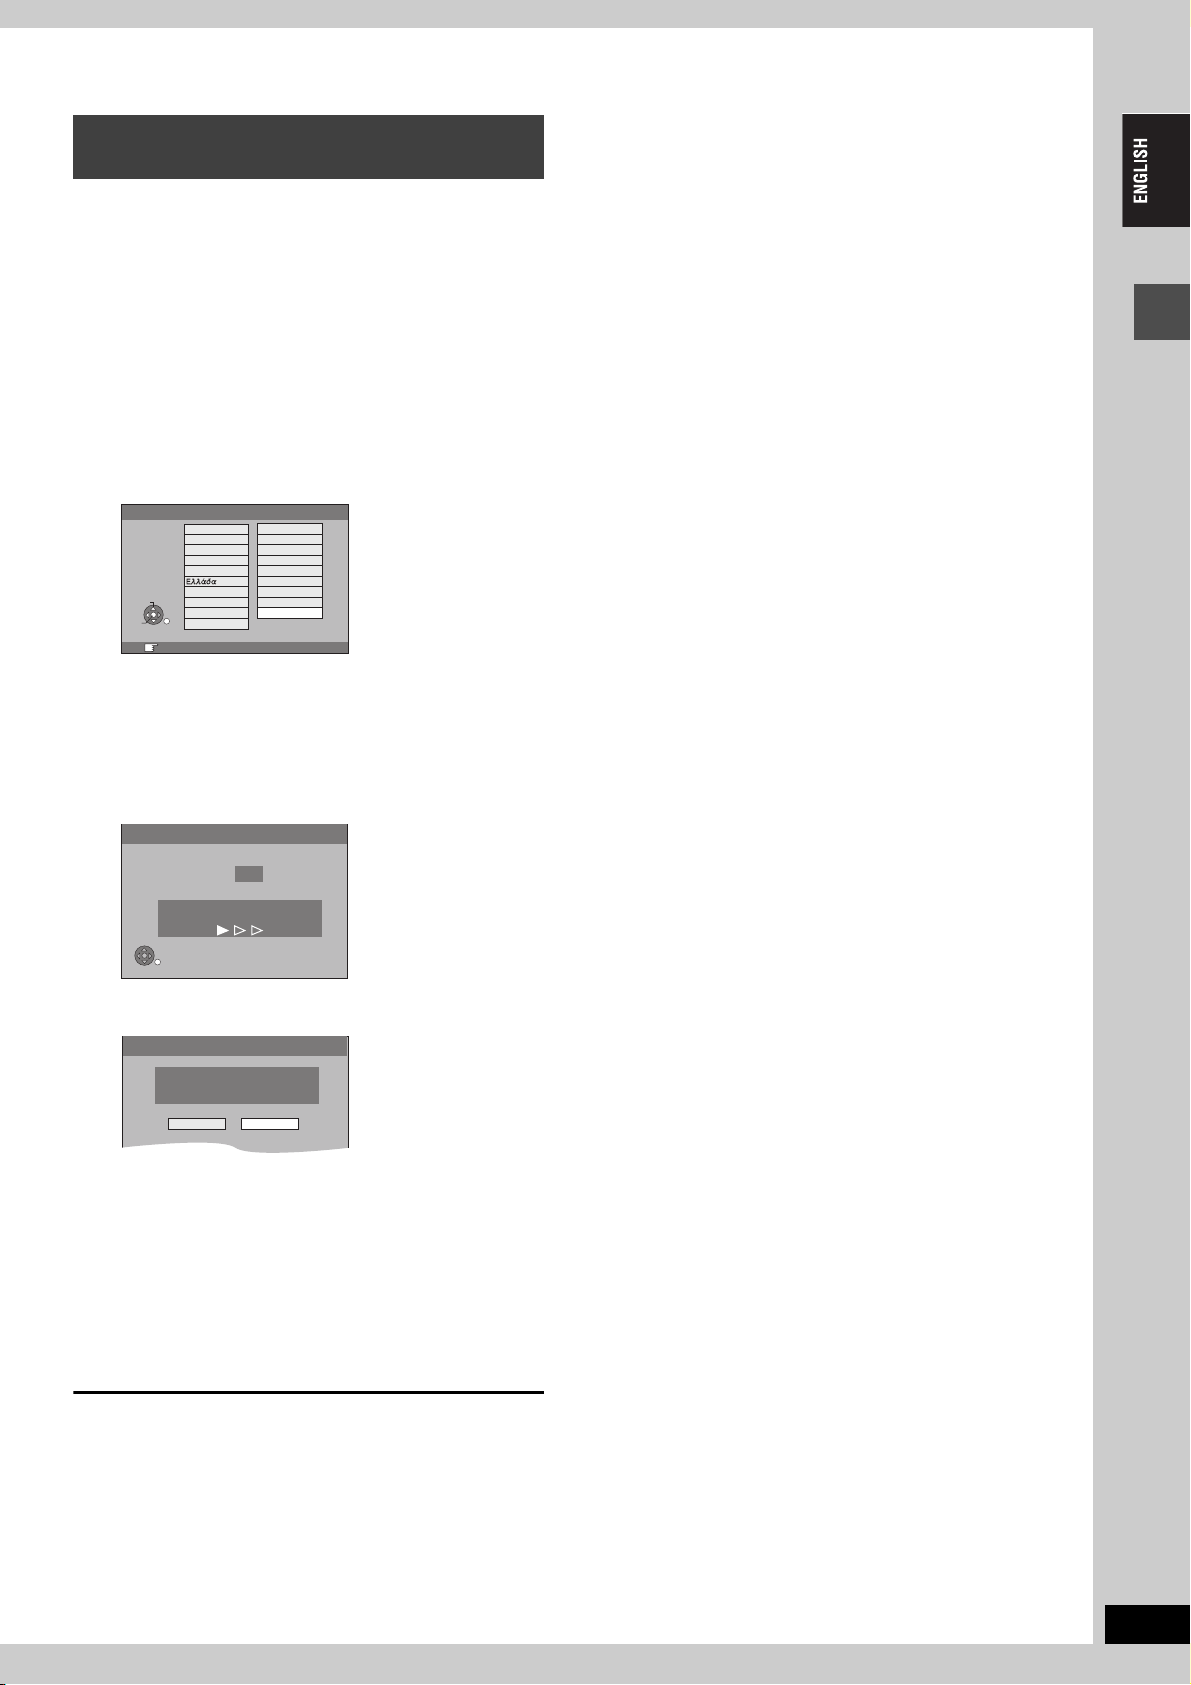
Region number supported by
this unit
Region numbers are allocated to DVD players
and DVD-Video according to where they are sold.
≥The region number of this unit is “2”.
≥The unit will play DVD-Video marked with labels
containing “2” or “ALL”.
Von diesem Gerät unterstützter
Regionalcode
Regionalcodes werden DVD-Playern und DVDVideos entsprechend ihrem Verkaufsgebiet
zugewiesen.
≥Der Regionalcode dieses Gerätes ist “2”.
≥Das Gerät ermöglicht die Wiedergabe von
DVD-Videos, die mit “2” oder “ALL” markiert
sind.
Example:
Beispiel:
2
2 ALL
3
5
Dear customer
Thank you for purchasing this product. For optimum
performance and safety, please read these
instructions carefully.
Before connecting, operating or adjusting this
product, please read the instructions completely.
Please keep this manual for future reference.
Web Site: http://www.panasonic-europe.com
Sehr geehrter Kunde
Wir möchten Ihnen für den Kauf dieses Produkts
danken. Für optimale Leistung und Sicherheit lesen
Sie bitte diese Bedienungsanleitung aufmerksam
durch.
Bitte lesen Sie diese Bedienungsanleitung vor dem
Anschließen, Inbetriebnehmen oder Einstellen
dieses Gerätes vollständig durch. Diese Anleitung
bitte aufbewahren.
The GUIDE Plus+ system is available in the
following countries:
Austria/Belgium/France/Germany/Italy/
Netherlands/Spain/Switzerland
(as of 30th April 2005)
≥This service may not be available in some areas
in the above countries.
≥There may be changes in the service areas.
Das GUIDE Plus+ System steht in folgenden
Ländern zur Verfügung:
Belgien/Deutschland/Frankreich/Holland/
Italien/Schweiz/Spanien/Österreich
(ab dem 30. April 2005)
≥In einigen Regionen der oben aufgeführten
Länder steht dieser Dienst möglicherweise
nicht zur Verfügung.
≥Die versorgten Bereiche können sich
möglicherweise ändern.
Refer to the “User’s manual for the GUIDE Plus+
system” if using the GUIDE Plus+ system.
EG
Einzelheiten zur Verwendung des GUIDE Plus+
Systems finden Sie in der “User’s manual for the
GUIDE Plus+ system”.
RQT8203-1D
Page 2
CAUTION!
THIS PRODUCT UTILIZES A LASER.
USE OF CONTROLS OR ADJUSTMENTS OR
PERFORMANCE OF PROCEDURES OTHER THAN THOSE
SPECIFIED HEREIN MAY RESULT IN HAZARDOUS
RADIATION EXPOSURE.
DO NOT OPEN COVERS AND DO NOT REPAIR YOURSELF.
REFER SERVICING TO QUALIFIED PERSONNEL.
WARNING:
TO REDUCE THE RISK OF FIRE, ELECTRIC SHOCK OR
PRODUCT DAMAGE, DO NOT EXPOSE THIS APPARATUS
TO RAIN, MOISTURE, DRIPPING OR SPLASHING AND THAT
NO OBJECTS FILLED WITH LIQUIDS, SUCH AS VASES,
SHALL BE PLACED ON THE APPARATUS.
CAUTION!
≥DO NOT INSTALL OR PLACE THIS UNIT IN A BOOKCASE,
BUILT-IN CABINET OR IN ANOTHER CONFINED SPACE.
ENSURE THE UNIT IS WELL VENTILATED. TO PREVENT
RISK OF ELECTRIC SHOCK OR FIRE HAZARD DUE TO
OVERHEATING, ENSURE THAT CURTAINS AND ANY
OTHER MATERIALS DO NOT OBSTRUCT THE
VENTILATION VENTS.
≥DO NOT OBSTRUCT THE UNIT’S VENTILATION OPENINGS
WITH NEWSPAPERS, TABLECLOTHS, CURTAINS, AND
SIMILAR ITEMS.
≥DO NOT PLACE SOURCES OF NAKED FLAMES, SUCH AS
LIGHTED CANDLES, ON THE UNIT.
≥DISPOSE OF BATTERIES IN AN ENVIRONMENTALLY
FRIENDLY MANNER.
THIS UNIT IS INTENDED FOR USE IN MODERATE CLIMATES.
This product may receive radio interference caused by mobile
telephones during use. If such interference is apparent, please
increase separation between the product and the mobile
telephone.
The socket outlet shall be installed near the equipment and
easily accessible or the mains plug or an appliance coupler shall
remain readily operable.
SUOMI
VAROITUS!
LAITTEEN KÄYTTÄMINEN MUULLA KUIN TÄSSÄ
KÄYTTÖOHJEESSA MAINITULLA TAVALLA SAATTAA
ALTISTAA KÄYTTÄJÄN TURVALLISUUSLUOKAN 1
YLITTÄVÄLLE NÄKYMÄTTÖMÄLLE LASERSÄTEILYLLE.
VAROITUS:
TULIPALO-, SÄHKÖISKUVAARAN TAI TUOTETTA
KOHTAAVAN MUUN VAHINGON VÄHENTÄMISEKSI EI
LAITETTA SAA ALTISTAA SATEELLE, KOSTEUDELLE,
VESIPISAROILLE TAI ROISKEELLE, EIKÄ NESTETTÄ
SISÄLTÄVIÄ ESINEITÄ, KUTEN ESIMERKIKSI MALJAKOITA,
SAA ASETTAA LAITTEEN PÄÄLLE.
VAROITUS!
≥ÄLÄ ASENNA TAI LAITA TÄTÄ LAITETTA
KABINETTITYYPPISEEN KIRJAKAAPPIIN TAI MUUHUN
SULJETTUUN TILAAN, JOTTA TUULETUS ONNISTUISI.
VARMISTA, ETTÄ VERHO TAI MIKÄÄN MUU MATERIAALI
EI HUONONNA TUULETUSTA, JOTTA VÄLTETTÄISIIN
YLIKUUMENEMISESTA JOHTUVA SÄHKÖISKU- TAI
TULIPALOVAARA.
≥ÄLÄ PEITÄ LAITTEEN TUULETUSAUKKOJA
SANOMALEHDELLÄ, PÖYTÄLIINALLA, VERHOLLA TAI
MUULLA VASTAAVALLA ESINEELLÄ.
≥ÄLÄ ASETA PALAVAA KYNTTILÄÄ TAI MUUTA AVOTULEN
LÄHDETTÄ LAITTEEN PÄÄLLE.
≥HÄVITÄ PARISTOT LUONTOA VAHINGOITTAMATTOMALLA
TAVALLA.
TÄMÄ LAITE ON TARKOITETTU KÄYTETTÄVÄKSI LEUDOSSA
ILMASTOSSA.
Laite tulee asettaa lähelle verkkopistorasiaa ja pistokkeen täytyy
olla sellaisessa asennossa, että siihen on helppo tarttua
ongelman sattuessa.
NORSK
ADVARSEL!
DETTE PRODUKTET ANVENDER EN LASER.
BETJENING AV KONTROLLER, JUSTERINGER ELLER
ANDRE INNGREP ENN DE SOM ER BESKREVET I DENNE
BRUKSANVISNING, KAN FØRE TIL FARLIG BESTRÅLING.
DEKSLER MÅ IKKE ÅPNES, OG FORSØK ALDRI Å
REPARERE APPARATET PÅ EGENHÅND. ALT SERVICE OG
REPARASJONSARBEID MÅ UTFØRES AV KVALIFISERT
PERSONELL.
RQT8203
2
-
VISIBLE AND INVISIBLE LASER RADIATION WHEN OPEN.
DANGER
AVOID DIRECT EXPOSURE TO BEAM.
-
VISIBLE AND INVISIBLE LASER RADIATION WHEN OPEN.
CAUTION
AVOID EXPOSURE TO BEAM.
-
RAYONNEMENT LASER VISIBLE ET INVISIBLE EN CAS D’OUVERTURE.
ATTENTION
EXPOSITION DANGEREUSE AU FAISCEAU.
-
SYNLIG OG USYNLIG LASERSTRÅLING VED ÅBNING.
ADVARSEL
UNDGÅ UDSÆTTELSE FOR STRÅLING.
-
AVATTAESSA OLET ALTTIINA NÄKYVÄÄ JA NÄKYMÄTÖN
VARO !
LASERSÄTEILYLLE. ÄLÄ KATSO SÄTEESEEN.
-
SYNLIG OCH OSYNLIG LASERSTRÅLNING NÄR DENNA DEL
VARNING
ÄR ÖPPNAD. BETRAKTA EJ STRÅLEN.
-
SYNLIG OG USYNLIG LASERSTRÅLING NÅR DEKSEL ÅPNES.
ADVARSEL
UNNGÅ EKSPONERING FOR STRÅLEN.
-
SICHTBARE UND UNSICHTBARE LASERSTRAHLUNG, WENN ABDECKUNG
VORSICHT
GEÖFFNET. NICHT DEM STRAHL AUSSETZEN.
-
-
(FDA 21 CFR)
(IEC60825-1)
(Inside of product)
(Tuotteen sisällä)
(Produktets innside)
RQLS0233
Keep the small memory cards such as the SD
Memory Card out of reach of children. If
swallowed, seek medical advice immediately.
2
ADVARSEL:
FOR Å REDUSERE FAREN FOR BRANN, ELEKTRISK STØT
ELLER SKADER PÅ PRODUKTET, MÅ DETTE APPARATET
IKKE UTSETTES FOR REGN, FUKTIGHET, VANNDRÅPER
ELLER VANNSPRUT. DET MÅ HELLER IKKE PLASSERES
GJENSTANDER FYLT MED VANN, SLIK SOM
BLOMSTERVASER, OPPÅ APPARATET.
ADVARSEL!
≥APPARATET MÅ IKKE PLASSERES I EN BOKHYLLE, ET
INNEBYGGET KABINETT ELLER ET ANNET LUKKET STED
HVOR VENTILASJONSFORHOLDENE ER
UTILSTREKKELIGE. SØRG FOR AT GARDINER ELLER
LIGNENDE IKKE FORVERRER
VENTILASJONSFORHOLDENE, SÅ RISIKO FOR
ELEKTRISK SJOKK ELLER BRANN FORÅRSAKET AV
OVERHETING UNNGÅS.
≥APPARATETS VENTILASJONSÅPNINGER MÅ IKKE
DEKKES TIL MED AVISER, BORDDUKER , GARDINER OG
LIGNENDE.
≥PLASSER IKKE ÅPEN ILD, SLIK SOM LEVENDE LYS, OPPÅ
APPARATET.
≥BRUKTE BATTERIER MÅ KASSERES UTEN FARE FOR
MILJØET.
DETTE APPARATET ER BEREGNET TIL BRUK UNDER
MODERATE KLIMAFORHOLD.
Utstyret bør plasseres i nærheten av AC-stikkontakten, og
støpslet må være lett tilgjengelig hvis det skulle oppstå
problemer.
Page 3

Table of contents
Getting started
Useful features . . . . . . . . . . . . . . . . . . . . . . . . . . . . . . . . . 3
HDD (Hard disk drive) handling care . . . . . . . . . . . . . . . 4
Disc and card handling . . . . . . . . . . . . . . . . . . . . . . . . . . .5
Unit care . . . . . . . . . . . . . . . . . . . . . . . . . . . . . . . . . . . . . . .5
Inserting, Removing the SD card . . . . . . . . . . . . . . . . . . 6
Note to owners of progressive compatible
PAL system televisions . . . . . . . . . . . . . . . . . . . . . . . . . .6
Using DVD-R, DVD-RW and +R on this unit. . . . . . . . . . 7
Included accessories . . . . . . . . . . . . . . . . . . . . . . . . . . . . 8
The remote control information . . . . . . . . . . . . . . . . . . . 8
HDD, disc and card information . . . . . . . . . . . . . . . . . . . 9
Control reference guide. . . . . . . . . . . . . . . . . . . . . . . . . 12
Remote control . . . . . . . . . . . . . . . . . . . . . . . . . . . . . . . . . . . . 12
Main unit . . . . . . . . . . . . . . . . . . . . . . . . . . . . . . . . . . . . . . . . . 13
The unit’s display. . . . . . . . . . . . . . . . . . . . . . . . . . . . . . . . . . . 13
STEP 1
STEP 2
Connection . . . . . . . . . . . . . . . . . . . . . . . . . . . . 14
Channel reception settings . . . . . . . . . . . . . . . 18
Set up to match your television and remote control. . 20
To enjoy progressive video . . . . . . . . . . . . . . . . . . . . . . . . . . . 20
Recording
Recording television programmes . . . . . . . . . . . . . . . . 22
Rec for High Speed dubbing . . . . . . . . . . . . . . . . . . . . . . . . . . 24
Flexible Recording. . . . . . . . . . . . . . . . . . . . . . . . . . . . . . . . . . 24
Playing while you are recording. . . . . . . . . . . . . . . . . . . . . . . . 25
Direct TV Recording . . . . . . . . . . . . . . . . . . . . . . . . . . . . . . . . 25
Recording from digital/satellite receiver or decoder. . . . . . . . . 25
Timer recording . . . . . . . . . . . . . . . . . . . . . . . . . . . . . . . 26
Using the GUIDE Plus+ system to make timer recordings . . . 26
HOWVIEW number to make timer recordings . . . . . . . . 26
Using S
Manually programming timer recordings . . . . . . . . . . . . . . . . . 28
Check, change or delete a programme . . . . . . . . . . . . . . . . . . 29
Making timer recordings on the television . . . . . . . . . . . . . . . . 29
Linked timer recordings with external equipment
(digital/satellite receiver)—EXT LINK . . . . . . . . . . . . . . . . . . 29
Playing back
Playing recorded video contents/
Playing play-only discs . . . . . . . . . . . . . . . . . . . . . . . . 30
Operations during play. . . . . . . . . . . . . . . . . . . . . . . . . . . . . . . 31
Simple editing operations during play . . . . . . . . . . . . . . . . . . . 32
Changing audio during play . . . . . . . . . . . . . . . . . . . . . . . . . . . 32
Using menus to play MP3 . . . . . . . . . . . . . . . . . . . . . . . 33
Playing still pictures (JPEG/TIFF) . . . . . . . . . . . . . . . . . 34
Useful functions during still picture play. . . . . . . . . . . . . . . . . . 35
Using on-screen menus/FUNCTIONS window and Status
message . . . . . . . . . . . . . . . . . . . . . . . . . . . . . . . . . . . . 36
Using on-screen menus. . . . . . . . . . . . . . . . . . . . . . . . . . . . . . 36
FUNCTIONS window. . . . . . . . . . . . . . . . . . . . . . . . . . . . . . . . 37
Status messages . . . . . . . . . . . . . . . . . . . . . . . . . . . . . . . . . . . 37
Editing
Editing titles/chapters . . . . . . . . . . . . . . . . . . . . . . . . . . 38
Editing titles/chapters and playing chapters . . . . . . . . . . . . . . . 38
Title operations . . . . . . . . . . . . . . . . . . . . . . . . . . . . . . . . . . . . . 39
Chapter operations . . . . . . . . . . . . . . . . . . . . . . . . . . . . . . . . . . 39
Creating, editing and playing playlists . . . . . . . . . . . . . 40
Creating playlists . . . . . . . . . . . . . . . . . . . . . . . . . . . . . . . . . . . 40
Editing and playing playlists/chapters. . . . . . . . . . . . . . . . . . . . 41
Playlist operations . . . . . . . . . . . . . . . . . . . . . . . . . . . . . . . . . . 41
Chapter operations . . . . . . . . . . . . . . . . . . . . . . . . . . . . . . . . . . 41
Editing still pictures . . . . . . . . . . . . . . . . . . . . . . . . . . . . 42
Picture and folder operation . . . . . . . . . . . . . . . . . . . . . . . . . . . 42
Transferring (Dubbing)
Transferring (dubbing) titles or playlists . . . . . . . . . . . 43
One Touch Transfer (dubbing) . . . . . . . . . . . . . . . . . . . . . . . . . 44
Transferring (dubbing) using the transferring (dubbing) list . . . 44
Transferring (dubbing) a finalized DVD-R, DVD-RW (DVD-Video
format) and +R . . . . . . . . . . . . . . . . . . . . . . . . . . . . . . . . . . . . 46
Recording from a video cassette recorder. . . . . . . . . . 47
Manual recording . . . . . . . . . . . . . . . . . . . . . . . . . . . . . . . . . . . 47
DV automatic recording (DV AUTO REC) . . . . . . . . . . . . . . . . 47
Transferring (dubbing) still pictures. . . . . . . . . . . . . . . 48
Transferring (dubbing) using the transferring (dubbing) list . . . 48
Transferring (dubbing) all the still pictures on a card—COPY ALL
PICTURES. . . . . . . . . . . . . . . . . . . . . . . . . . . . . . . . . . . . . . . 49
Convenient functions
HDD, disc and card management . . . . . . . . . . . . . . . . . 50
Common procedures . . . . . . . . . . . . . . . . . . . . . . . . . . . . . . . . 50
Setting the protection . . . . . . . . . . . . . . . . . . . . . . . . . . . . . . . . 50
Providing a name for a disc . . . . . . . . . . . . . . . . . . . . . . . . . . . 50
Erasing all titles and playlists—Erase all titles . . . . . . . . . . . . . 51
Erasing all the contents of a disc or card—Format. . . . . . . . . . 51
Enabling discs to be played on other equipment . . . . . . . . . . . 52
Entering text . . . . . . . . . . . . . . . . . . . . . . . . . . . . . . . . . . 53
Child Lock . . . . . . . . . . . . . . . . . . . . . . . . . . . . . . . . . . . . 54
Changing the unit’s settings . . . . . . . . . . . . . . . . . . . . . 54
Common procedures . . . . . . . . . . . . . . . . . . . . . . . . . . . . . . . . 54
Summary of settings. . . . . . . . . . . . . . . . . . . . . . . . . . . . . . . . . 55
Tuning. . . . . . . . . . . . . . . . . . . . . . . . . . . . . . . . . . . . . . . . . . . . 58
Clock settings . . . . . . . . . . . . . . . . . . . . . . . . . . . . . . . . . . . . . . 60
TV System . . . . . . . . . . . . . . . . . . . . . . . . . . . . . . . . . . . . . . . . 61
Reference
Messages. . . . . . . . . . . . . . . . . . . . . . . . . . . . . . . . . . . . . 62
Frequently asked questions . . . . . . . . . . . . . . . . . . . . . 63
Troubleshooting guide. . . . . . . . . . . . . . . . . . . . . . . . . . 64
Glossary. . . . . . . . . . . . . . . . . . . . . . . . . . . . . . . . . . . . . . 68
Specifications . . . . . . . . . . . . . . . . . . . . . . . . . . . . . . . . . 70
Safety precautions . . . . . . . . . . . . . . . . . . . . . . . . . . . . . 71
Index. . . . . . . . . . . . . . . . . . . . . . . . . . . . . . . . . Back cover
Table of contents / Useful features
Useful features
This DVD Recorder records high quality pictures to rapid random access capable HDD (Hard disk drive) and DVD-RAM. This has resulted in
many new features that outperform older tape formats. The following information summarizes a few of these features.
Instant recording
You no longer need to search for empty disc space. By pressing the
recording button, the unit finds available recording space and begins
recording right away. There is no need to worry about overwriting
already recorded content.
1 Sec. Quick Start for Recording & EPG Display
From the power on, recording starts in about 1 second§ after the
REC button is pressed. If the GUIDE button is pressed while the unit
is off, the Electronic Program Guide (EPG) displays in less than 1
second. (Quick Start Mode)
§
Only when recording to the HDD or DVD-RAM
HDD recording
You can keep on recording your favorite programmes to an internal
HDD that is able to record up to 355 hours [EP (8 Hours) mode].
You can also high speed transfer (dub) your favorite programmes to
DVD-RAM, DVD-R, DVD-RW (DVD-Video format) or +R and create a
backup disc.
SD card slot, DV input terminal
≥The SD card slot of this unit lets you play digital camera
photographs and transfer (dub) them from a card to DVD-RAM for
easy storage without using a computer.
≥The DV automatic recording function of this unit lets you easily
transfer (dub) a video to the HDD by connecting only a single DV
cable.
Instant play
There is no need to rewind or search forward. Direct Navigator
guides you to the beginning of the recorded video immediately.
Chasing playback
There is no need to wait until recording is complete. Without
stopping recording, you can play the video currently being recorded
from its beginning.
Simultaneous Recording and Playback
While recording, you can play another video programme that was
recorded previously.
Time Slip
During play, and also while recording, you can jump to the scene you
wish to view by specifying the skip time.
The GUIDE Plus+ system
The GUIDE Plus+ system provides programme information from the
host station displayed on the television like a TV programme
magazine. Setting up to record a broadcast is easy too. Simply
select the desired programme from the displayed list. You can also
search for desired programmes by displaying only the programmes
in a certain category.
≥This service may not be available in some areas.
RQT8203
3
3
Page 4
HDD (Hard disk drive) handling care
The HDD is a high precision recording instrument and because of its long recording capability and high speed operation it is a very special device
that is easily susceptible to damage.
As a basic rule, save important content to a disc as backup.
∫ The HDD is a device that is not built to withstand vibration/shock or dust
Depending on the setup environment and handling of the HDD some content may become damaged and play and recording may no longer be
possible. Especially during operation, do not subject the unit to any vibration, shock, or remove the AC mains lead from the household mains
socket. In the event of a power failure during recording or play, the content may be damaged.
∫ The HDD is a temporary storage device
The HDD is not an everlasting storage device for recorded content. Use the HDD as a temporary storage place for one-off viewing, editing, or
saving recorded content to a disc.
∫ Immediately save (backup) all content as soon as you feel there may be a problem with the HDD
If there is an irregularity within the HDD, repetitive strange sounds or problems with picture (block noise, etc.) may result. Using the HDD in this
condition may worsen the problem and in the worst case the HDD may no longer become usable. As soon as you notice this type of problem,
transfer (dub) all content to disc and request service. Recorded content (data) on a HDD that has become unusable is unrecoverable.
≥When the HDD has been automatically placed in the SLEEP mode (➡ below), or the unit is turned on or off, there may be an unexpected sound.
This does not indicate a problem with this unit.
∫ Setup precautions
≥Do not place in an enclosed area so the rear cooling fan
and the cooling vents on the side are covered up.
≥Place the unit on a surface that is flat and not subject to
vibration or impact.
≥Do not place on anything that
generates heat like a video cassette
recorder, etc.
≥Do not place in an area often subject to
temperature changes.
≥Place in an area where condensation
does not occur. Condensation is a phenomenon where moisture
HDD (Hard disk drive) handling care
forms on a cold surface when there is an extreme change in
temperature. Condensation may cause internal damage to the
unit.
≥Conditions where condensation may occur
–When there is an extreme change in temperature (moving from
a very hot location to a very cold location, or vice versa, or
when subjected to an air conditioner or when cooled air
directly impacts the unit). When the HDD (warms during
operation) is subjected to cold air, condensation may form on
the inside of the HDD and may cause damage to the HDD
heads, etc.
–When there is high humidity or a lot of steam in the room.
–During the rainy season.
In the above situation, without turning the unit on, let the unit
adjust to the room temperature and wait 2–3 hours until
condensation is gone.
This unit
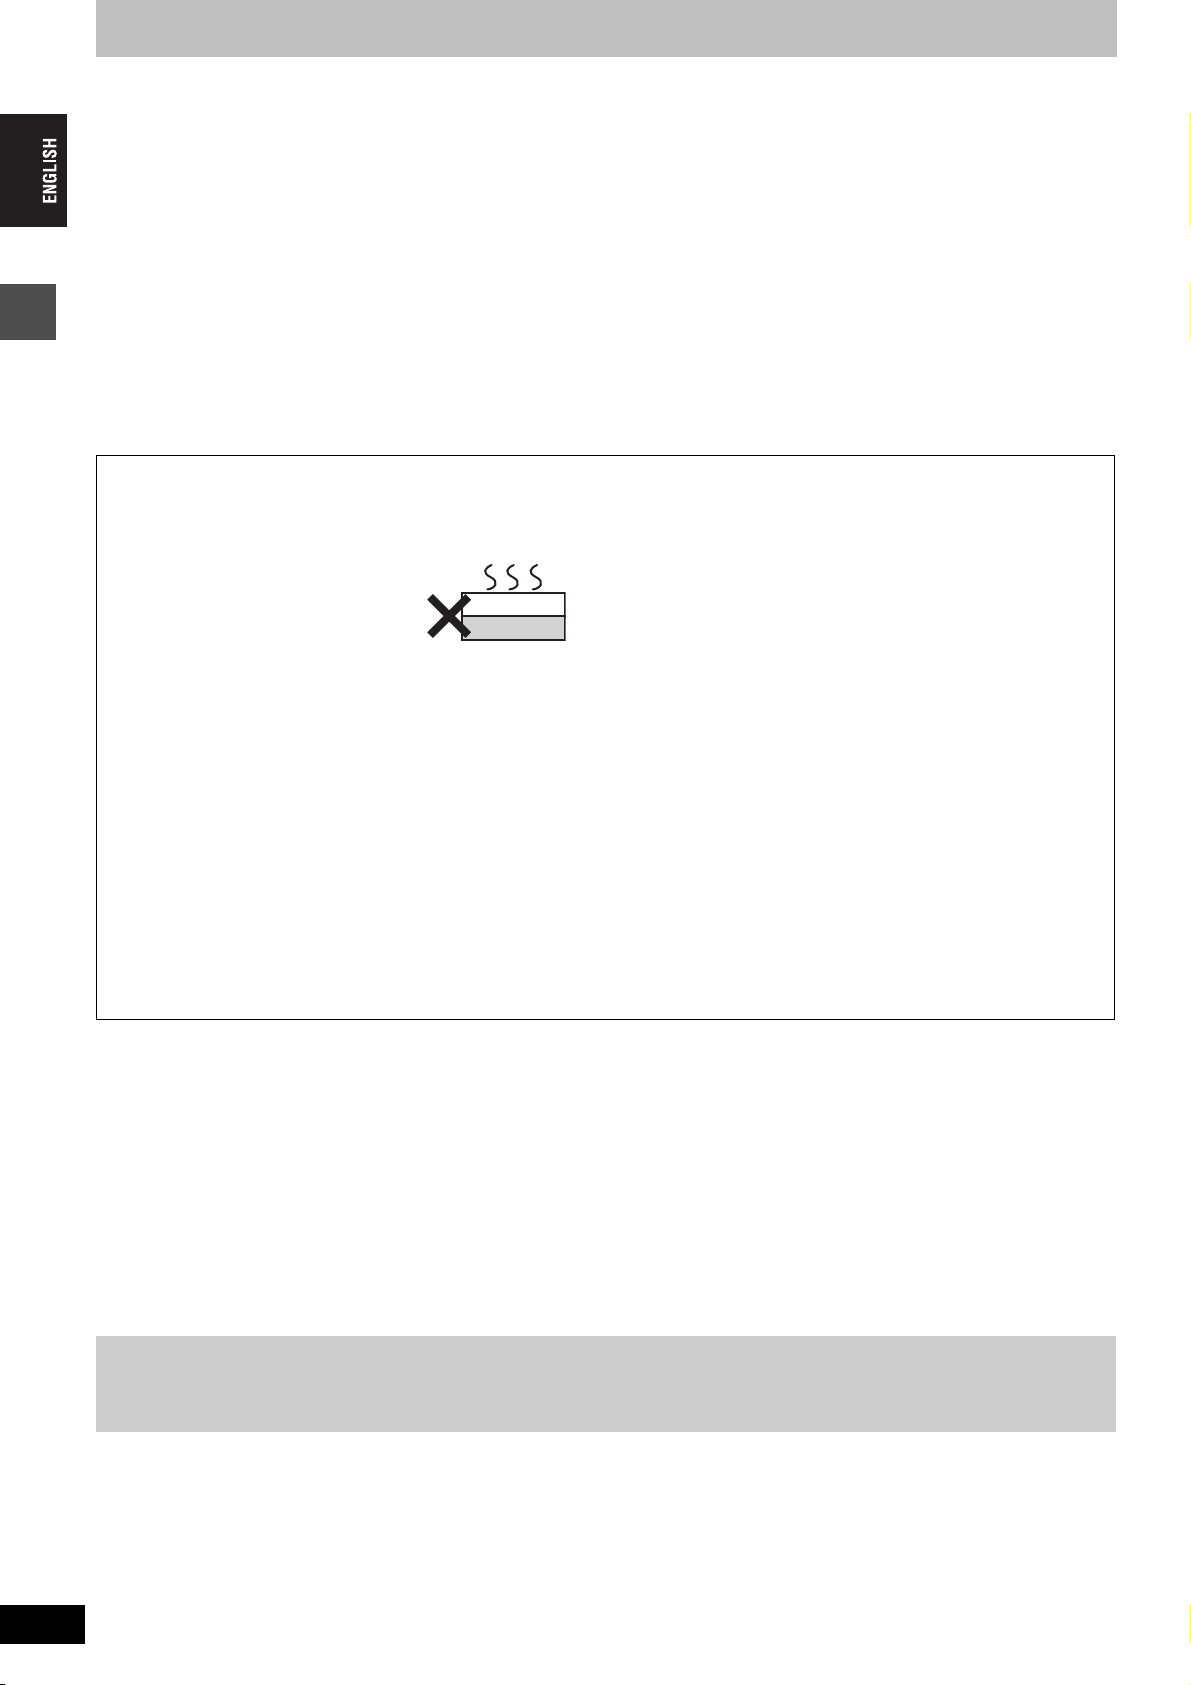
VCR
∫ Cigarette smoke etc. causes malfunction or
breakdown
The unit may breakdown if cigarette smoke or bug spray/vapor,
etc. gets inside the unit.
∫ While operating
≥Do not move the unit or subject to vibration or impact. (The
HDD may become damaged.)
≥Do not remove the AC mains lead from the household mains
socket, or flip the power breaker switch.
While the unit is on, the HDD is rotating at high speed. Sound or
movement due to rotation is normal.
∫ When moving the unit
1 Turn the unit off. (Wait until “BYE” disappears from the
display.)
2 Remove the AC mains lead from the household mains socket.
3 Move only after the unit has come to a complete stop (approx.
2 minutes) in order to avoid subjecting to vibration and shock.
(Even after turning the unit off, the HDD continues operating
for a short time.)
∫ HDD recording time remaining
This unit records using a VBR (Variable bit rate) data compression system to vary recorded data segments to match video data segments which
may cause differences in the displayed amount of time and space remaining for recording.
If the remaining amount of time is insufficient, erase any unwanted titles to create enough space before you start recording. (Erasing a playlist will
not increase the amount of time.)
RQT8203
4
∫ When “HDD SLP (SLEEP)” appears on the unit’s display
The HDD has been automatically placed in the SLEEP mode. (The HDD continues to rotate at high speed while the unit is on. In order to extend
the life of the HDD, the HDD will be placed in the SLEEP mode if no operation has been performed for 30 minutes while there is no disc on the
disc tray.)
≥Press [HDD] to activate.
≥While in SLEEP mode play or recording may not start right away because the HDD takes time to be re-activated.
≥When not using the unit, we recommend removing the disc in the tray in order to set the HDD to the SLEEP mode.
∫ Indemnity concerning recorded content
Panasonic does not accept any responsibility for damages directly or indirectly due to any type of problems that result in loss of recording or
edited content (data), and does not guarantee any content if recording or editing does not work properly. Likewise, the above also applies in a
case where any type of repair is made to the unit (including any other non-HDD related component).
4
Page 5
Disc and card handling
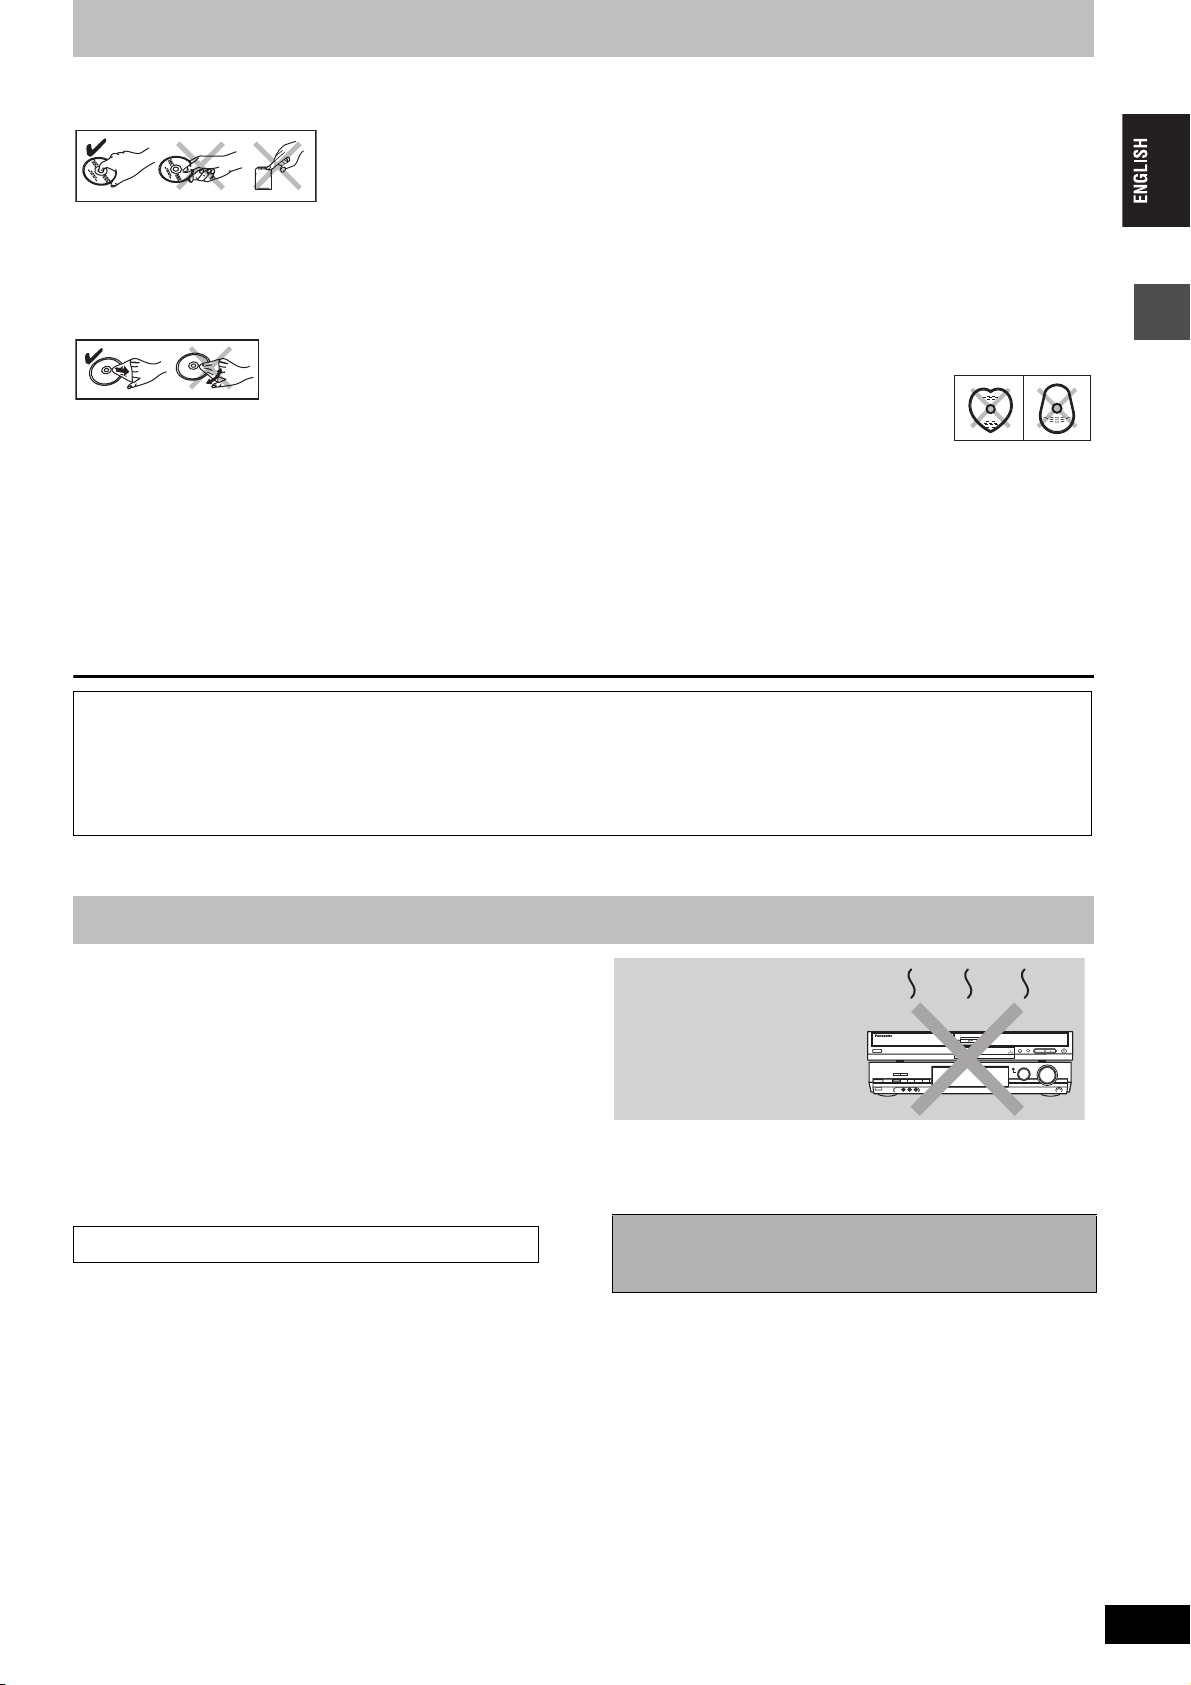
∫ How to hold a disc or card
Do not touch the recorded surface or the terminal surface.
∫ Concerning non-cartridge discs
Be careful about scratches and dirt.
∫ If there is dirt or condensation on the disc
Wipe with a damp cloth and then wipe dry.
∫ Handling precautions
≥Do not attach labels or stickers to discs. (This may cause disc
warping and un-balanced rotation, rendering it unusable.)
≥Write on the label side of the disc only with a soft, oil-based felt
pen. Do not use ballpoint pens or other hard writing implements.
≥Do not use record cleaning sprays, benzine, thinner, static
electricity prevention liquids or any other solvent.
≥Do not use scratch-proof protectors or covers.
≥Do not expose the terminals of the card to water, garbage or other
strange things.
≥Do not drop stack, or impact discs. Do not place objects on them.
≥Do not use the following discs:
–Discs with exposed adhesive from removed stickers or labels
(rental discs, etc.).
–Discs that are badly warped or cracked.
–Irregularly shaped discs, such as heart
shapes.
≥Do not place in the following areas:
–In direct sunlight.
–In very dusty or humid areas.
–Near a heater.
–Locations susceptible to significant difference in temperature
(condensation can occur).
–Where static electricity or electromagnetic waves occur.
≥To protect discs from scratches and dirt, return them to their cases
or cartridges when you are not using them.
The manufacturer accepts no responsibility and offers no compensation for loss of recorded or edited material due to a problem
with the unit or recordable media, and accepts no responsibility and offers no compensation for any subsequent damage caused by
such loss.
Examples of causes of such losses are
≥A disc recorded and edited with this unit is played in a DVD Recorder or computer disc drive manufactured by another company.
≥A disc used as described above and then played again in this unit.
≥A disc recorded and edited with a DVD Recorder or computer disc drive manufactured by another company is played in this unit.
Unit care
The precision parts in this unit are readily affected by the
environment, especially temperature, humidity, and dust.
Cigarette smoke also can cause malfunction or breakdown.
To clean this unit, wipe with a soft, dry cloth.
≥Never use alcohol, paint thinner or benzine to clean this unit.
≥Before using chemically treated cloth, carefully read the
instructions that came with the cloth.
Observe the following points to ensure continued listening and
viewing pleasure.
Dust and dirt may adhere to the unit’s lens over time, making it
impossible to record or play discs.
Use the DVD lens cleaner about once every year, depending on
frequency of use and the operating environment. Carefully read the
lens cleaner’s instructions before use.
DVD lens cleaner: RP-CL720E
Do not place the unit on
amplifiers or equipment
that may become hot.
The heat can damage the unit.
[Note]
Do not obstruct the rear panel’s internal cooling fan.
Before moving the unit, ensure the disc tray is empty.
Failure to do so will risk severely damaging the disc and the
unit.
Disc and card handling / Unit care
RQT8203
5
5
Page 6

Inserting, Removing the SD card
Only insert or remove the SD card after turning the unit off.
When the card indicator (“SD”) on the unit’s display is flashing, the card is being read from or written to. Do not turn off the unit or remove the card.
Such action may result in malfunction or loss of the card’s contents.
Opening the cover Inserting the card
Press down.
≥You can use SD Memory Cards with capacities from 8 MB to 1 GB (➡ 11).
Press on the centre of the
card until it clicks into
place.
Insert the card label up with
the cut-off corner on the right.
(Do not forget to close the cover. ➡ right)
If you are using a
miniSD
into the miniSD
adaptor that comes
with the card.
Insert and remove this
adaptor from the unit.
TM
card, insert it
TM
card
ADAPTER
Removing the card Closing the cover
Press on the centre of
1
the card.
Pull it straight out.
2
Note to owners of progressive compatible PAL system televisions
≥If you have an LCD/plasma television or LCD projector
Using progressive output, you can enjoy high-resolution video
recorded on media such as DVD-Video. Connect this unit’s
component video output terminals to your television and turn on the
progressive output setting (➡ 16, 20).
≥If you have a regular television (CRT: cathode ray tube)
Use component output with progressive “Off” (Factory setting ➡ 57),
even if it is progressive compatible, because progressive output can
cause some flickering. This is the same for multi system televisions
using PAL mode.
Push up.
COMPONENT
VIDEO IN
COMPONENT
VIDEO OUT
Progressive output
COMPONENT
VIDEO IN
COMPONENT
VIDEO OUT
Progressive output
Inserting, Removing the SD card / Note to owners of progressive compatible PAL system televisions
RQT8203
6
6
Page 7
Using DVD-R, DVD-RW and +R on this unit
SETUP
Dynamic Range Compression
Bilingual Audio Selection
Audio Mode for XP Recording
Off
Dolby Digital
Digital Audio Output
Disc
Picture
Sound
Display
Tun in g
Connection
TAB
SELECT
M1
SETUP
Recording time in EP mode
Rec for High Speed dubbing
Disc
Picture
Sound
Tun in g
EP (8 Hours)
Restrictions with DVD-R, etc.
§
≥16:9 aspect programmes are recorded in 4:3 aspect.
≥The main (M 1) or secondary audio (M 2 ) only can be recorded for bilingual broadcasts.
≥Playing the disc on other DVD players is not possible before finalizing.
§
DVD-R, DVD-RW and +R are collectively referred to as “DVD-R, etc.” on this page.
M2
Hallo
Record to DVD-R, etc.
The selected audio only is recorded.
e.g., M 1 only
Hello
e.g.,
M1
Hello
16:9 aspect programme
with main and
secondary audio
4:3 aspect
Therefore, follow the steps below when you use DVD-R, etc.
∫ When recording a bilingual programme to DVD-R, etc.
Select the audio to record before recording or transferring (dubbing).
Some television programmes are broadcast with main (M 1) or secondary audio (M 2 ). You have to select the audio recording type before
recording or transferring (dubbing) them to DVD-R, etc.
≥If you do not connect external equipment
Select “M 1” or “M 2” in “Bilingual Audio
M1
Hello
M2
Hallo
Selection” in the SETUP menu (➡ 56).
Record to DVD-R, etc.
The selected audio only is recorded.
M1
Hello
Using DVD-R, DVD-RW and +R on this unit
≥If you connect external equipment
–Select “M 1” or “M 2” on the external equipment.
∫ When you want to transfer (dub) titles in high speed mode from the HDD to DVD-R, etc.
Set “Rec for High Speed dubbing” to “On” before recording to the HDD (➡ 24).
You can transfer (dub) titles in high speed mode (max. speed is 64k
HDD.
§
Depending on the disc, max. speed may vary.
Set “Rec for High Speed dubbing” to “On” (➡ 24).
Settings for recording
On
§
); however, the following settings are necessary before recording to the
Record to the HDD
High speed transfer (dub) to DVD-R, etc.
HDD
∫ Playing the disc on other DVD players
The disc must be finalized after recording or transferring (dubbing) (➡ 52).
It is necessary to finalize DVD-R, etc. on this unit after recording or transferring (dubbing) titles to them. You can then play them as a commercially
sold DVD-Video. However, the discs become play-only and you can no longer record or transfer (dub).
§
You can record and transfer (dub) again if you format DVD-RW.
Play on other DVD equipment
E
D
O
M
Y
A
L
P
P
U
T
E
S
Í
1
;
∫
Y
A
L
P
S
I
D
U
N
E
M
P
O
T
N
R
U
B
T
U
E
S
R
U
E
N
L
E
T
I
M
T
E
L
G
N
A
O
I
D
U
A
D
N
U
O
R
L
R
E
U
C
S
.
N
A
A
C
3
2
1
0
1
S
6
45
0
89
7
9
:
E
M
5
U
L
O
V
6
E
r
G
A
PP
U
s
O
R
G
H
C
R
A
E
S
R
E
T
N
E
L
O
V
Y
A
L
P
S
I
D
U
N
E
M
P
O
T
N
R
U
T
E
R
N
O
U
N
E
M
F
F
O
Record to DVD-R, etc.
Finalize
G
CH
D
C
I
N
9
V
N
E
P
O
D
N
U
O
R
R
T
U
A
S
.
E
A
P
E
E
R
D
O
M
R
O
T
I
N
O
M
E
D
O
M
E
R
U
T
C
I
P
§
1
Í /I Í
2 3 4 5
CD SEQUENTIAL
DOUBLE RE-MASTER
DISC
;∫1:/65/9
DISC EXCHANGE DISC SKIP<OPEN/CLOSE
RQT8203
7
7
Page 8

Included accessories
Please check and identify the supplied accessories.
(Product numbers correct as of April 2005. These may be subject to change.)
∏
(EUR7729KC0)
1 Remote control 1 AC mains lead
∏∏∏∏
≥For use with this unit only. Do
not use it with other equipment.
Also, do not use cords for other
equipment with this unit.
The remote control information
1 RF coaxial cable 2 Batteries
for remote control
1 Audio/video
cable
∫ Batteries
≥Insert so the poles (i and j) match those in the remote control.
R6/LR6, AA
≥Do not use rechargeable type batteries.
≥Do not mix old and new batteries.
≥Do not use different types at the same time.
Included accessories / The remote control information
≥Do not heat or expose to flame.
≥Do not take apart or short circuit.
≥Do not attempt to recharge alkaline or manganese batteries.
≥Do not use batteries if the covering has been peeled off.
Mishandling of batteries can cause electrolyte leakage which can
damage items the fluid contacts and may cause a fire.
Remove if the remote control is not going to be used for a long
period of time. Store in a cool, dark place.
Remote control operations (➡ 12)
∫ Use
Remote control signal sensor
20
30
20
30
7 m directly in front of the unit
RQT8203
8
[Note]
If you cannot operate the unit or television using the remote control
after changing the batteries, please re-enter the codes (➡ 21).
8
Page 9
HDD, disc and card information
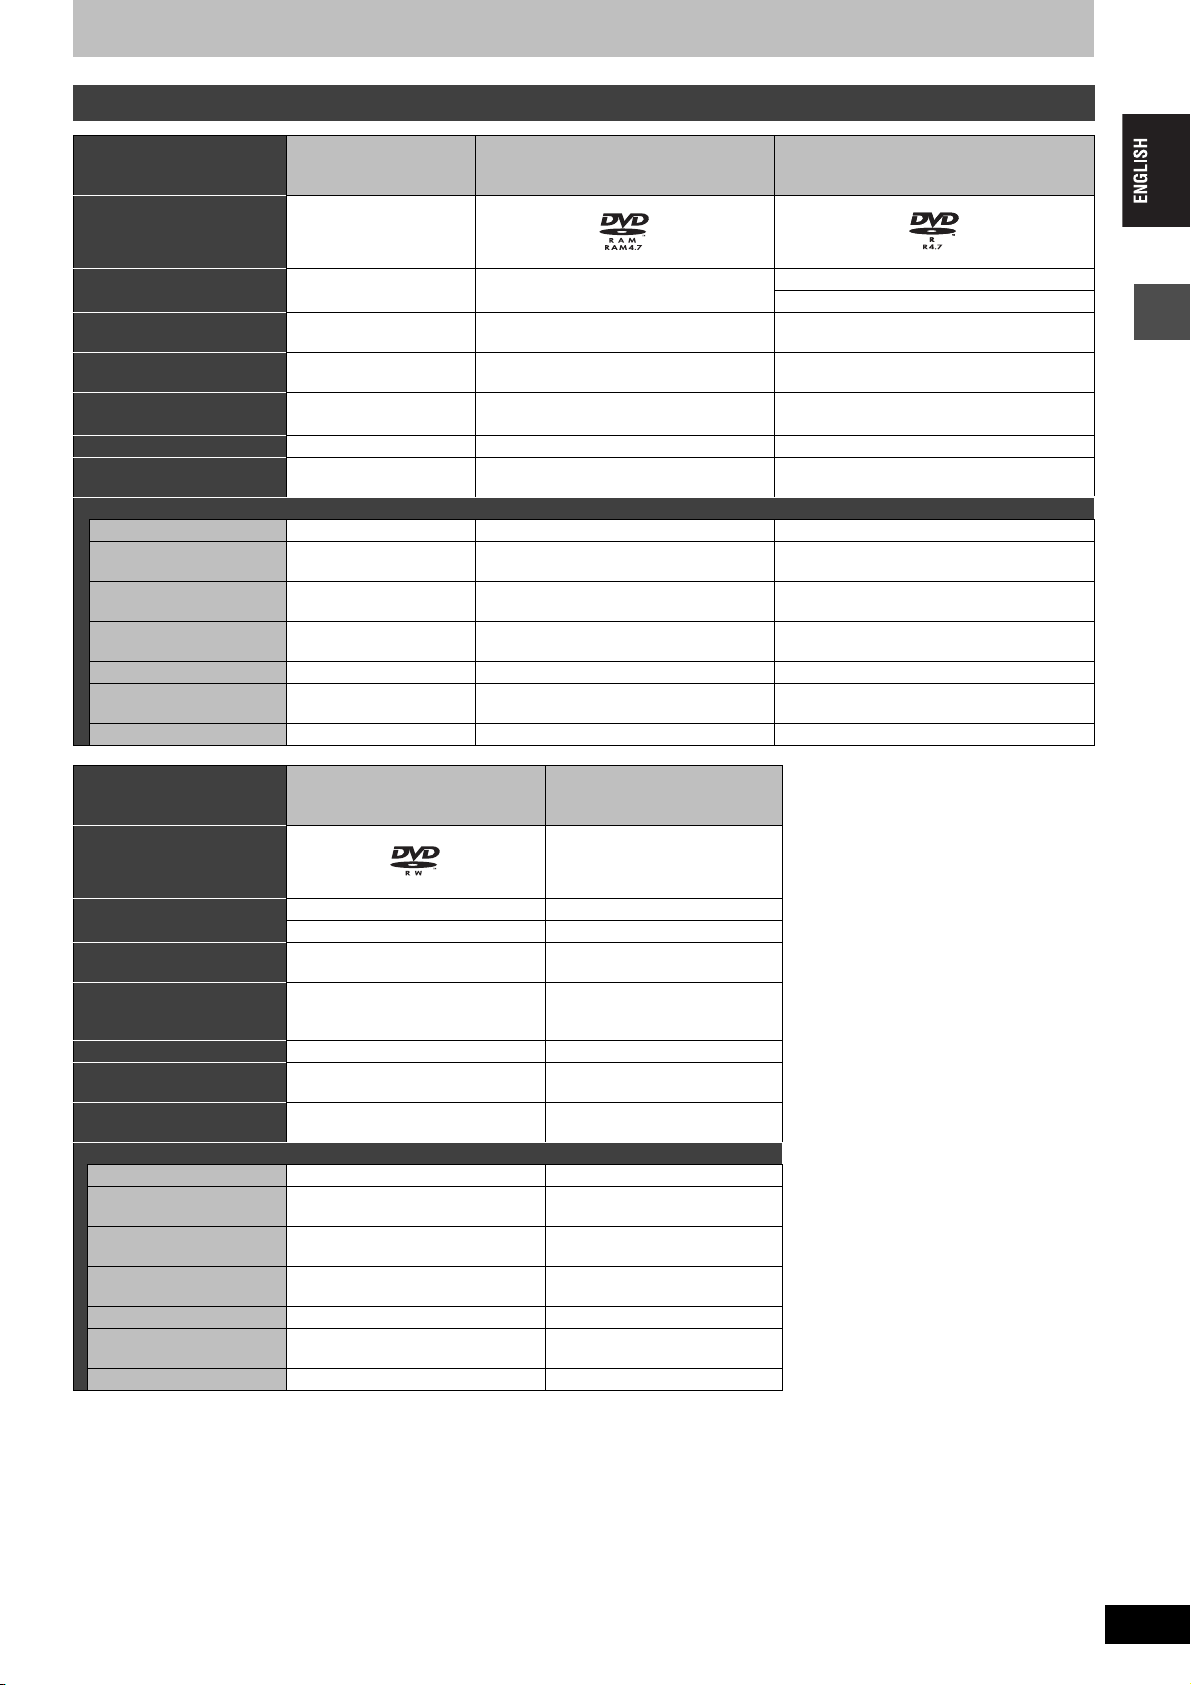
HDD and discs you can use for recording and play
Disc type
Logo –
Indicated in these
instructions by
Data that can be recorded
and played
Main use Temporary storage As re-writable discs for backup use
Maximum recording time
Play on other players – Only on DVD-RAM compatible players. Only after finalizing the disc (➡ 52, 68).
Compatible with high
speed recording
What you can do on this unit (Y: Can do t: Cannot do)
Chasing playback YY t
Recording broadcasts that
allow one copy
Recording both M 1 and
M 2 for bilingual broadcasts
Recording 16:9 aspect
picture
Entering text YY Y
Erasing titles YY
Creating playlists YY t
Hard disk drive (HDD)
≥200 GB
[HDD] [RAM]
Video
Still pictures
Approx. 355 hours
– Up to 5k recording speed discs. Up to 8k recording speed discs.
YY [CPRM (➡ 68) compatible discs only.] t
YY
YY
Approx. 8 hours (Approx. 16 hours on a
DVD-RAM
≥4.7 GB/9.4 GB, 12 cm
≥2.8 GB, 8 cm
Video
Still pictures
double-sided disc
§
)
DVD-R (DVD-Video format)
≥4.7 GB, 12 cm
≥1.4 GB, 8 cm
[-R] before finalization
[DVD-V] after finalization
Video
As one time recording discs for backup use
(recordable until the disc is full)
Approx. 8 hours
t [Only one is recorded.(➡ 56, Bilingual
Audio Selection)]
t (The picture is recorded in 4:3 aspect.)
Y (Available space does not increase after
erasing.)
HDD, disc and card information
DVD-RW (DVD-Video format)
Disc type
Logo –
Indicated in these
instructions by
Data that can be recorded
and played
Main use As re-writable discs for backup use
Maximum recording time Approx. 8 hours Approx. 8 hours
Play on other players Only after finalizing the disc
Compatible with high
speed recording
What you can do on this unit (Y: Can do t: Cannot do)
Chasing playback tt
Recording broadcasts that
allow one copy
Recording both M 1 and
M 2 for bilingual broadcasts
Recording 16:9 aspect
picture
Entering text YY
Erasing titles
Creating playlists tt
≥We recommend using Panasonic discs and cards. We also recommend using DVD-RAM discs with cartridges to protect them from scratches
and dirt.
≥Discs from other manufacturers may not be recorded or played due to the condition of the recording.
≥You may not be able to record to DVD-R, DVD-RW and +R discs on this unit or play them due to the condition of the recording.
≥You cannot record programmes that allow “One time only recording” to CPRM compatible DVD-R and DVD-RW on this unit.You can record other
programmes as DVD-Video format.
≥This unit cannot record to discs containing both PAL and NTSC signals. (However, both types of programmes can be recorded onto the HDD.)
Play of discs recorded with both PAL and NTSC on another unit is not guaranteed.
§
You cannot consecutively record or play both sides.
Up to 4k recording speed discs. Up to 8k recording speed discs.
t [Only one is recorded.(➡ 56,
t (The picture is recorded in 4:3
Y (Disc space increases only when
the last recorded title is erased.)
≥4.7 GB, 12 cm
≥1.4 GB, 8 cm
[-RW‹V›] before finalization [+R] before finalization
[DVD-V] after finalization [DVD-V] after finalization
Video Video
As one time recording discs for
backup use (recordable until the
(➡ 52, 68).
tt
Bilingual Audio Selection)]
aspect.)
Only after finalizing the disc
t [Only one is recorded.(➡ 56,
Bilingual Audio Selection)]
t (The picture is recorded in 4:3
Y ( Available space does not
increase after erasing.)
+R
≥4.7 GB, 12 cm
disc is full)
(➡ 52, 68).
aspect.)
∫ DVD Video Recording
format
This is a recording method which allows
you to record and edit television
broadcasts and so on.
≥Digital broadcasts that allow “One time
only recording” can be recorded to a
CPRM compatible disc. You can record
to the HDD or CPRM compatible DVDRAM on this unit.
≥Play is only possible on a compatible
DVD player.
Use the HDD or a DVD-RAM to record
in DVD Video Recording format.
∫ DVD-Video format
This recording method is the same as
commercially available DVD-Video.
≥Digital broadcasts that allow “One time
only recording” cannot be recorded.
≥These can be played on a DVD player.
However programmes recorded on this
unit must be finalized to be played on
other DVD players.
Use a DVD-R or DVD-RW to record in
DVD-Video format.
[Note]
When “Rec for High Speed dubbing” is set to “On”, the restrictions on secondary audio recording etc. are also applied to DVD-RAM. Turn this
setting “Off” if high speed transfer (dubbing) to DVD-R, etc. is not necessary when recording a programme (➡ 24).
RQT8203
9
9
Page 10
HDD, disc and card information
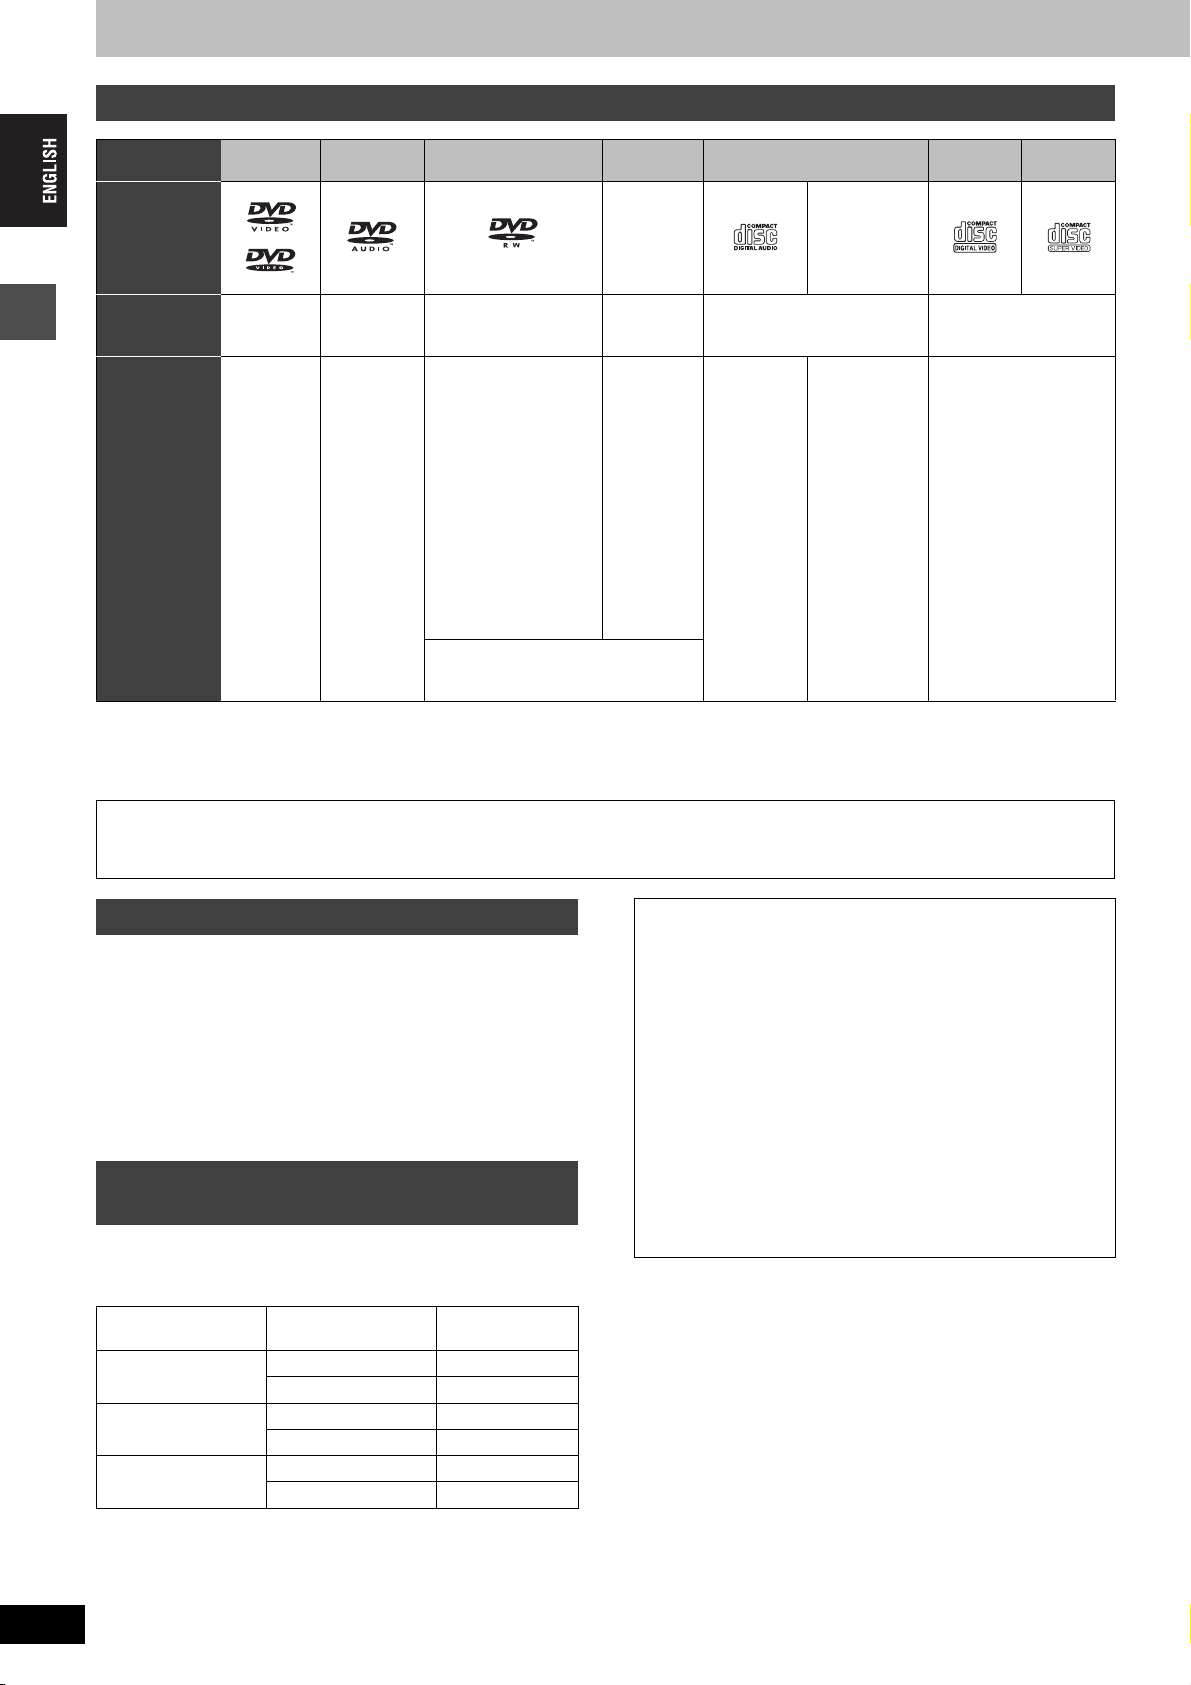
Play-only discs (12 cm/8 cm)
.
Disc type DVD-Video DVD-Audio
Logo ––
Indicated in
these
[DVD-V] [DVD-A] [-RW‹VR›] [DVD-V] [CD] [VCD]
instructions by
Instructions High quality
movie and
music discs
High fidelity
music discs
≥Played on
this unit in 2
channels.
HDD, disc and card information
≥You can play still pictures (JPEG/TIFF), CD-DA, Video CD, SVCD (conforming to IEC62107) and MP3 format data recorded on CD-R/RW. Close
the session or finalize the disc after recording.
≥The producer of the disc can control how discs are played. So you may not always be able to control play as described in these operating
instructions. Read the disc’s instructions carefully.
§
Play may be impossible on some CD-R, CD-RW, DVD-RW or +RW discs due to the condition of the recording.
Regarding DVD-Audio
Some multi-channel DVD-Audio will prevent down-mixing (➡ 68) of all or part of their contents if this is the manufacturer’s intention. Tracks that
are prevented from being down-mixed will not play properly on this unit (e.g. audio is played from the front two channels only). Refer to the
disc’s jacket for more information.
DVD-RW (DVD Video
Recording format)
DVD-RW recorded on
another DVD Recorder
≥You can play
programmes that
+RW CD Video CD SVCD
+RW
§
recorded on
another DVD
Recorder
allow “One time only
recording” if they have
been recorded to a
CPRM compatible
disc.
≥By formatting (➡ 51)
the disc, you can
record to it in DVDVideo format and play
it on this unit.
≥It may be necessary to finalize the
disc on the equipment used for
recording.
§
Recorded
audio and
music
(including
CD-R/RW
CD-R and CD-
§
RW
recorded in
MP3 (➡ 33)
§
)
Still pictures
(JPEG and
TIFF) recorded
on CD-R/RW
with music
§
Recorded music and
video (including CD-R/
§
RW
)
RQT8203
10
Discs that cannot be played
≥2.6 and 5.2 GB DVD-RAM, 12 cm
≥3.95 and 4.7 GB DVD-R for Authoring
≥DVD-R recorded in DVD Video Recording format
≥DVD-R (DVD-Video format), DVD-RW (DVD-Video format), +R
recorded on another unit and not finalized. (➡ 68).
≥DVD-Video with a region number other than “2” or “ALL”
≥Blu-ray
≥DVD-ROM, DVD-R DL, +R DL, +R (8 cm), CD-ROM, CDV, CD-G,
Photo CD, CVD, SACD, MV-Disc, PD, DivX Video Disc,
“Chaoji VCD” available on the market including CVD, DVCD and
SVCD that do not conform to IEC62107, etc.
Types of disc or title recorded on HDD
for the type of connected TV
When you use the discs recorded either PAL or NTSC, or playback a
title recorded on HDD using PAL or NTSC, refer to this table.
(Y: Possible to view, t: Impossible to view)
TV type
Multi-system TV
NTSC TV
PAL TV
§1
If you select “NTSC” in “TV System” (➡ 61), the picture may be
clearer.
§2
Select “NTSC” in “TV System” (➡ 61).
§3
If your television is not equipped to handle PAL 525/60 signals
the picture will not be shown correctly.
≥When playing back a title recorded on the HDD, ensure that you
match the “TV System” setting to the title (➡ 61).
10
Disc/Titles
recorded on HDD
PA L Y
NTSC
PA L t
NTSC
PA L Y
NTSC
§3
Y
Yes/No
§1
Y
§2
Y
(PAL60)
Optional accessories
(Product numbers correct as of April 2005. These may be subject
to change.)
DVD-RAM
9.4 GB, double-sided, type 4 cartridge:
LM-AD240ME (compatible with high speed recording
LM-AD240LE (compatible with high speed recording 3k
4.7 GB, single-sided, type 2 cartridge:
LM-AB120ME (compatible with high speed recording
LM-AB120LE (compatible with high speed recording 3k
4.7 GB, single-sided, non-cartridge:
LM-AF120ME (compatible with high speed recording
LM-AF120LE (compatible with high speed recording 3k
DVD-R
4.7 GB, single-sided, non-cartridge:
LM-RF120ME (compatible with high speed recording
LM-RF120LE (compatible with high speed recording 4k
5k)
)
5k)
)
5k)
)
8k)
)
Page 11
Cards useable on this unit
Type
SD Memory Card
miniSDTM Card
§
MultiMediaCard
Indicated in these instructions
by
Data that can be recorded and
played
Instructions You can insert directly into the SD card slot.
[SD]
Still pictures
§
A miniSDTM card adaptor included with the miniSDTM card is necessary.
≥You can play and transfer (dub) still pictures taken on a digital camera etc. (➡ 34, 48).
≥You can set the DPOF (Digital Print Order Format) for automatic printing on your home printer or at a
photo developing store (➡ 42, 68).
≥Compatible with: FAT 12 or FAT 16
Suitable SD Memory Cards
≥You can use SD Memory Cards with the following capacities (from 8 MB to 1 GB).
8 MB, 16 MB, 32 MB, 64 MB,
128 MB, 256 MB, 512 MB, 1 GB (Maximum)
Please confirm the latest information on the following website.
http://panasonic.co.jp/pavc/global/cs
(This site is in English only.)
≥If the SD Memory Card is formatted on other equipment, the time spent for recording may become longer. Also if the SD Memory Card is
formatted on a PC, you may not be able to use it on this unit. In these cases, format the card on this unit (➡ 51, 68).
≥This unit supports SD Memory Cards formatted in FAT 12 system and FAT 16 system based on SD Memory Card Specifications.
≥We recommend using a Panasonic SD card.
HDD, disc and card information
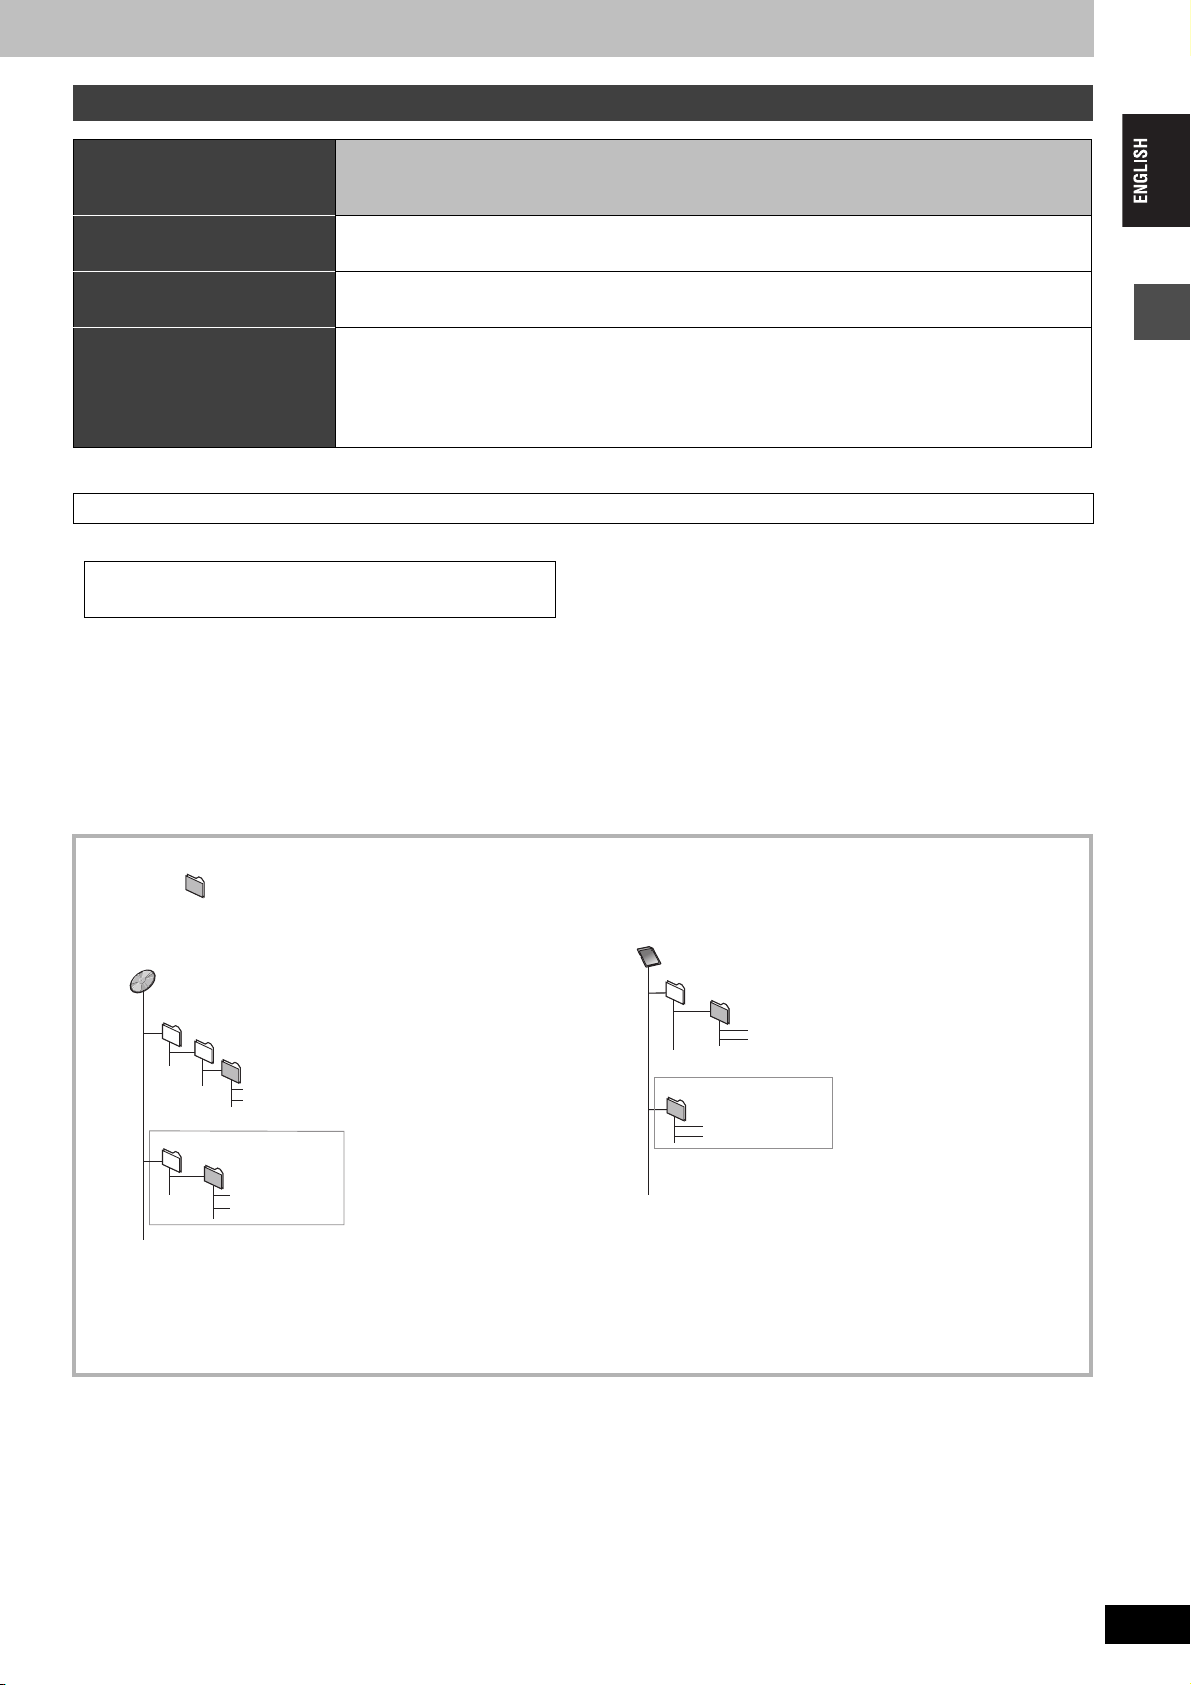
Structure of folders displayed by this unit
The following can be displayed on this unit.
¢¢¢: Numbers XXX: Letters
DVD-RAM
JPEG
DCIM¢¢¢
DCIM
§
Folders can be created on other equipment. However, these folders cannot be selected as a transferring (dubbing) destination.
¢¢¢XXXXX
XXXX
XXXX
¢¢¢XXXXX
XXXX
XXXX
(Higher folder)
(Picture folder)
¢¢¢¢
.JPG
¢¢¢¢
.TIF
¢¢¢¢
.JPG
¢¢¢¢
.TIF
§
≥The folder cannot be displayed if the numbers are all “0” (e.g., DCIM000, etc.).
≥If a folder name or file name has been input using other equipment, the name may not be displayed properly or you may not be able to play
or edit the data.
Card
(Higher folder)
DCIM
¢¢¢XXXXX
IM¢¢CDPF or IMEXPORT
XXXX
XXXX
XXXX
XXXX
¢¢¢¢
¢¢¢¢
(Picture folder)
¢¢¢¢
.JPG
¢¢¢¢
.TIF
§
.JPG
.TIF
RQT8203
11
11
Page 12

Control reference guide
HDD
DVDSDSD
TV
DVD/TV
ENTER
ENTER
Remote control
Instructions for operations are generally described using the remote control.
DVD
TV
Í
Í
AV
HDD
1
DVD
2 3
4 5 6
8
7
CANCEL
0
SKIP
K
C
E
H
C
/
G
O
R
P
R
O
T
A
G
I
V
D
A
N
PAU S E
G
ENTER
STATUS
REC MODE
AUDIO
STOP
T
U
C
N
E
E
R
M
I
P
O
T
S
DISPLAY
REC
TIME SLIP
INPUT SELECT
U
Control reference guide
1
2
3
4
5
6
7
8
9
:
;
<
=
>
?
@
DIRECT TV REC
SUB MENU
A
DVD /TV
∫ Smart Wheel operation
≥Select items on menu screens and set items.
Press [3, 4, 2, 1] (up, down, left or right) to select an item.
You can also turn the wheel to select an item.
CH
9
SLOW/SEARCH
PLAY/x1.3
D
I
E
CREATE
CHAPTER
EXT LINK
DUBBING
VOLUME
PAG E
CH
ShowView
MANUAL SKIP
F
U
N
C
T
I
O
N
S
RETURN
ERASE
TIMER
F Rec
B
C
D
E
F
G
H
I
J
K
L
M
N
O
P
Q
R
1 Turn the unit on (➡ 18, 19)
2 Direct TV recording (➡ 25)
3 Select drive (HDD, DVD or SD) (➡ 22, 30, 34)
4 Select channels and title numbers, etc./Enter numbers
5 Cancel
6 Basic operations for recording and play
Show timer recording programme screen
7
(➡ 28)
8 Smart Wheel (➡ below)
9 Show Top menu/Direct Navigator (➡ 30, 31, 38)
: Show sub menu (➡ 38)
; Show status messages (➡ 37)
< Colour buttons for switching between Video/Picture and Video/
Playlists, selecting character type when entering text, manual
tuning settings and GUIDE Plus+ operations
§
(➡ 30, 45, 53, 58)
= Show on-screen menu (➡ 36)
> Start recording (➡ 22)
? Change recording mode (➡ 22)
@ Skip the specified time/Display the television image as a picture-
in-picture (➡ 25, 32)
A Select audio (➡ 32)
B Transmission window
C Television operations (➡ 21)
D Channel select/Change pages in the GUIDE Plus+ system
§
(➡ 22)
E Show S
HOWVIEW screen (➡ 26)
F Input select (AV1, AV2, AV3, AV4 or DV) (➡ 25, 47)
G Skip 30 seconds forward (➡ 32)
H Show the GUIDE Plus+ screen (➡ 18, 26)
I Show programme information in the GUIDE Plus+ system
§
J Show FUNCTIONS window (➡ 37)
K Return to previous screen
L Create chapter (➡ 32)
M Erase items (➡ 32)
N Timer recording standby/release (➡ 26–28)
O Linked timer recordings with external equipment (➡ 29)
P Flexible Recording (➡ 24)
Q One touch transfer (dubbing) (➡ 44)
R Recording functions
§
Refer to the “User’s manual for the GUIDE Plus+ system” for more
information.
[Note]
≥Buttons such as the [¥ REC] button do not protrude as much as
other buttons to stop them from being pressed accidentally.
≥If you press [EXT LINK] accidentally, the unit turns off and switches
to recording standby mode. Press [EXT LINK] again to cancel
recording standby.
≥The word “button” is not used in these operating instructions so
“Press the [ENTER] button.” is shown as “Press [ENTER].”
≥You can use this remote control to operate your television if you set
the television manufacturer code (➡ 21).
RQT8203
12
ENTER
Press [ENTER] to confirm.
These operations are also possible…..
≥Frame-by-frame (backward/forward/):
While paused, press [2;] or [;1] (left/right)
≥Search (forward/backward):
During play, turn right or turn left
≥Slow-motion (forward/:backward):
While paused, turn right or turn left
[Note]
Press the Smart Wheel lightly when turning it.
If you press it strongly when turning it, [3, 4, 2, 1] may be
mistakenly activated.
12
Page 13
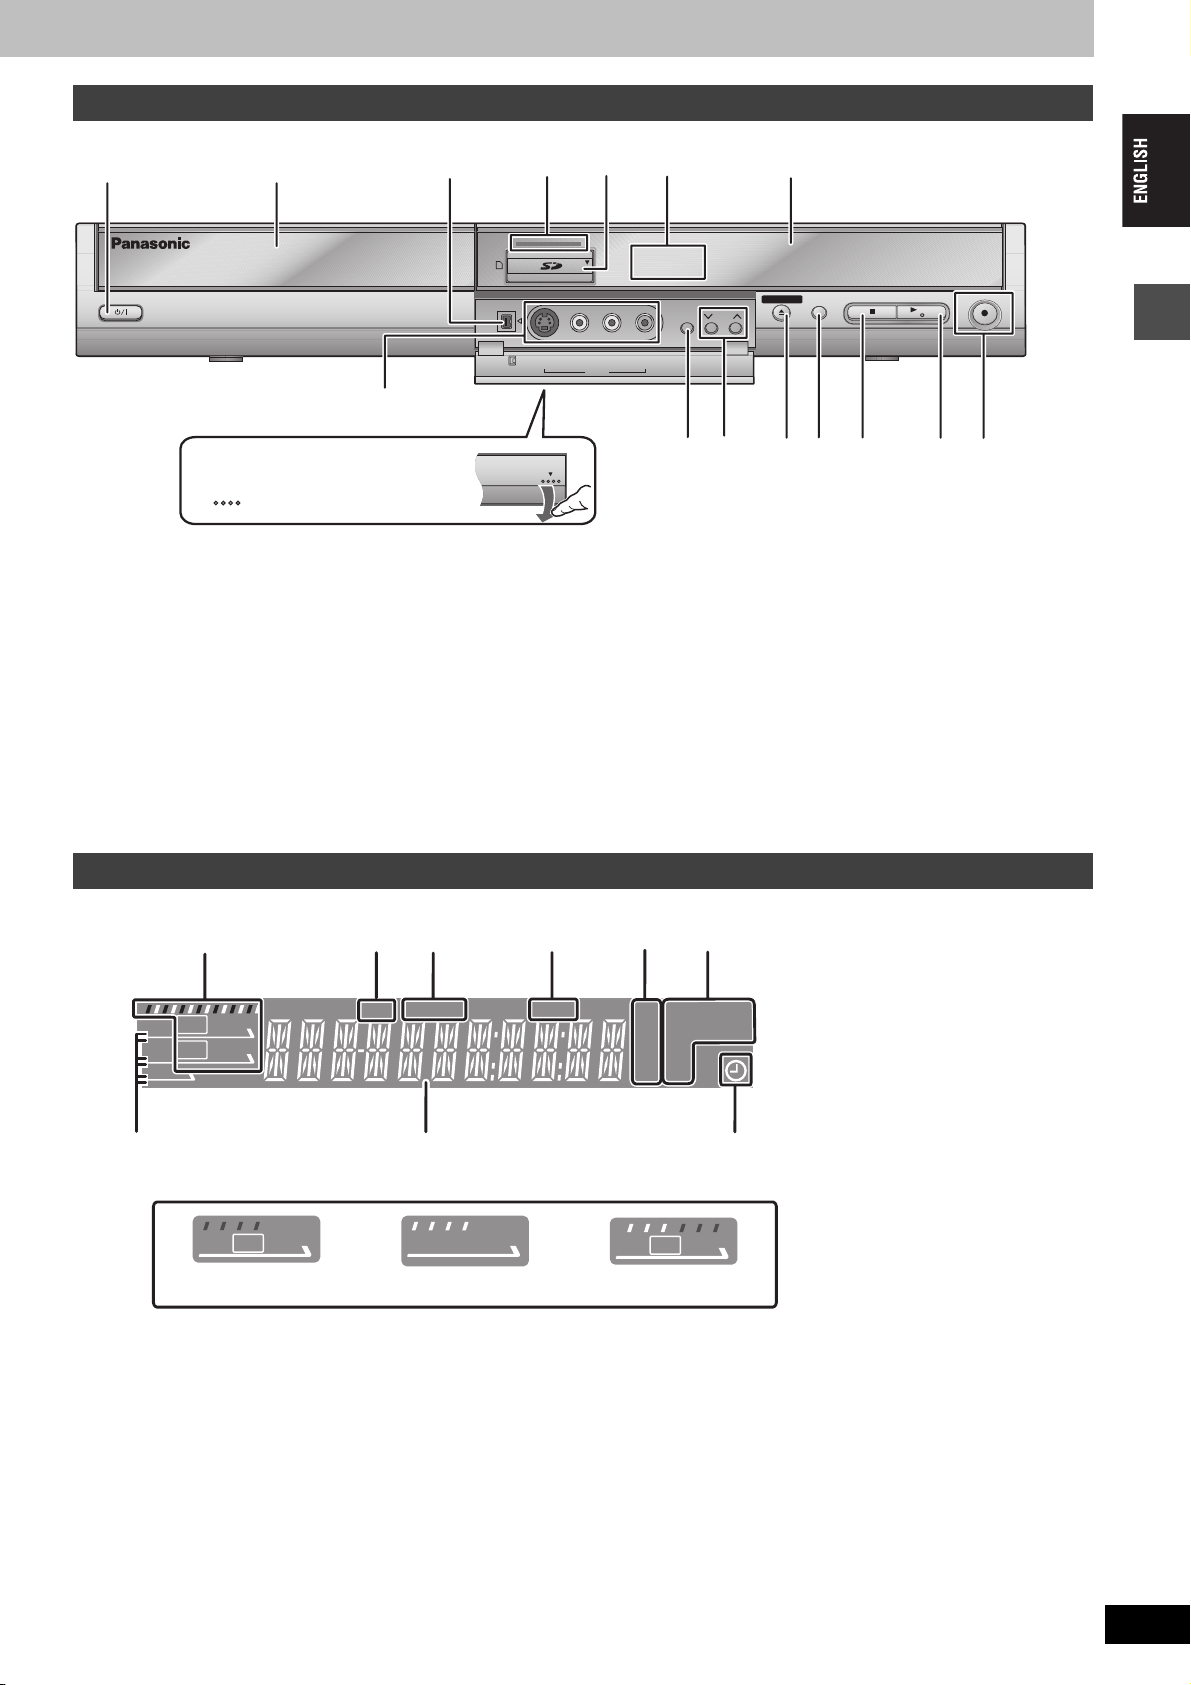
Main unit
1. 3
12
3
8
Opening the front panel
Press down on the
1 Standby/on switch (Í/I) (➡ 18, 19)
Press to switch the unit from on to standby mode or vice versa. In
standby mode, the unit is still consuming a small amount of
power.
2 Disc tray (➡ 22, 30)
3 Connection for digital video (DV) camcorder (➡ 47)
4 Lights when “FL Display” is set to “Bright” (➡ 56)
5 SD card slot (➡ 6)
6 Lights when the HDD, DVD or SD drive is selected
7 Display (➡ below)
8 Connection for camcorder etc. (➡ 47)
9 Linked timer recordings with external equipment (➡ 29)
part with your finger
DV IN
4
S VIDEO IN
6
HDD
DVD SD
EXT LINK
L/MONO
-AUDIO IN-
R
9
:
: Channel select (➡ 22)
; Open/close disc tray (➡ 22, 30)
< Select drive (➡ 22, 30, 34)
Drive changes each time you press [DRIVE SELECT].
= Stop (➡ 22, 31)
> Start play (➡ 30)
? Start recording/Remote control signal sensor (➡ 22)
Specify a time to stop recording (➡ 23)
Rear panel terminals (➡ 15, 16)
7
DRIVE
OPEN/CLOSE
;
SELECT
<
=
CH
VIDEO IN
5
AV3
/k 1.3
>
REC
?
Control reference guide
The unit’s display
123456
HDD
DVD
SD
REC
REC
PLAY
PLAY
CH
78 9
1 e.g.,[HDD]
PLAY
REC
HDD
Recording
2 Transferring (dubbing) indicator
3 Linked timer recordings with external equipment indicator
4 D.MIX (multi-channel DVD-Audio only)
When lit: Down-mixing (➡ 68) is possible.
When off: The disc prevents down-mixing so only the two front channels can be played (➡ 10, Regarding DVD-Audio)
5 Recording mode
6 Disc type
7 Lights when the HDD, DVD or SD drive is selected
8 Main display section
9 Timer recording indicator
DUB
Link
EXT
HDD
Playback
PLAY
D.MIX
Recording/Playback
XP
SP
LP
EP
HDD
DVD
-
+
VR
SD
REC
-
AVCD
RWRAM
PLAY
RQT8203
13
13
Page 14
STEP 1 Connection
STEP
≥The equipment connections described are examples.
≥Before connection, turn off all equipment and read the appropriate operating instructions.
≥Peripheral equipment and optional cables sold separately unless otherwise indicated.
1
Connection
∫ Recommended connection for your television
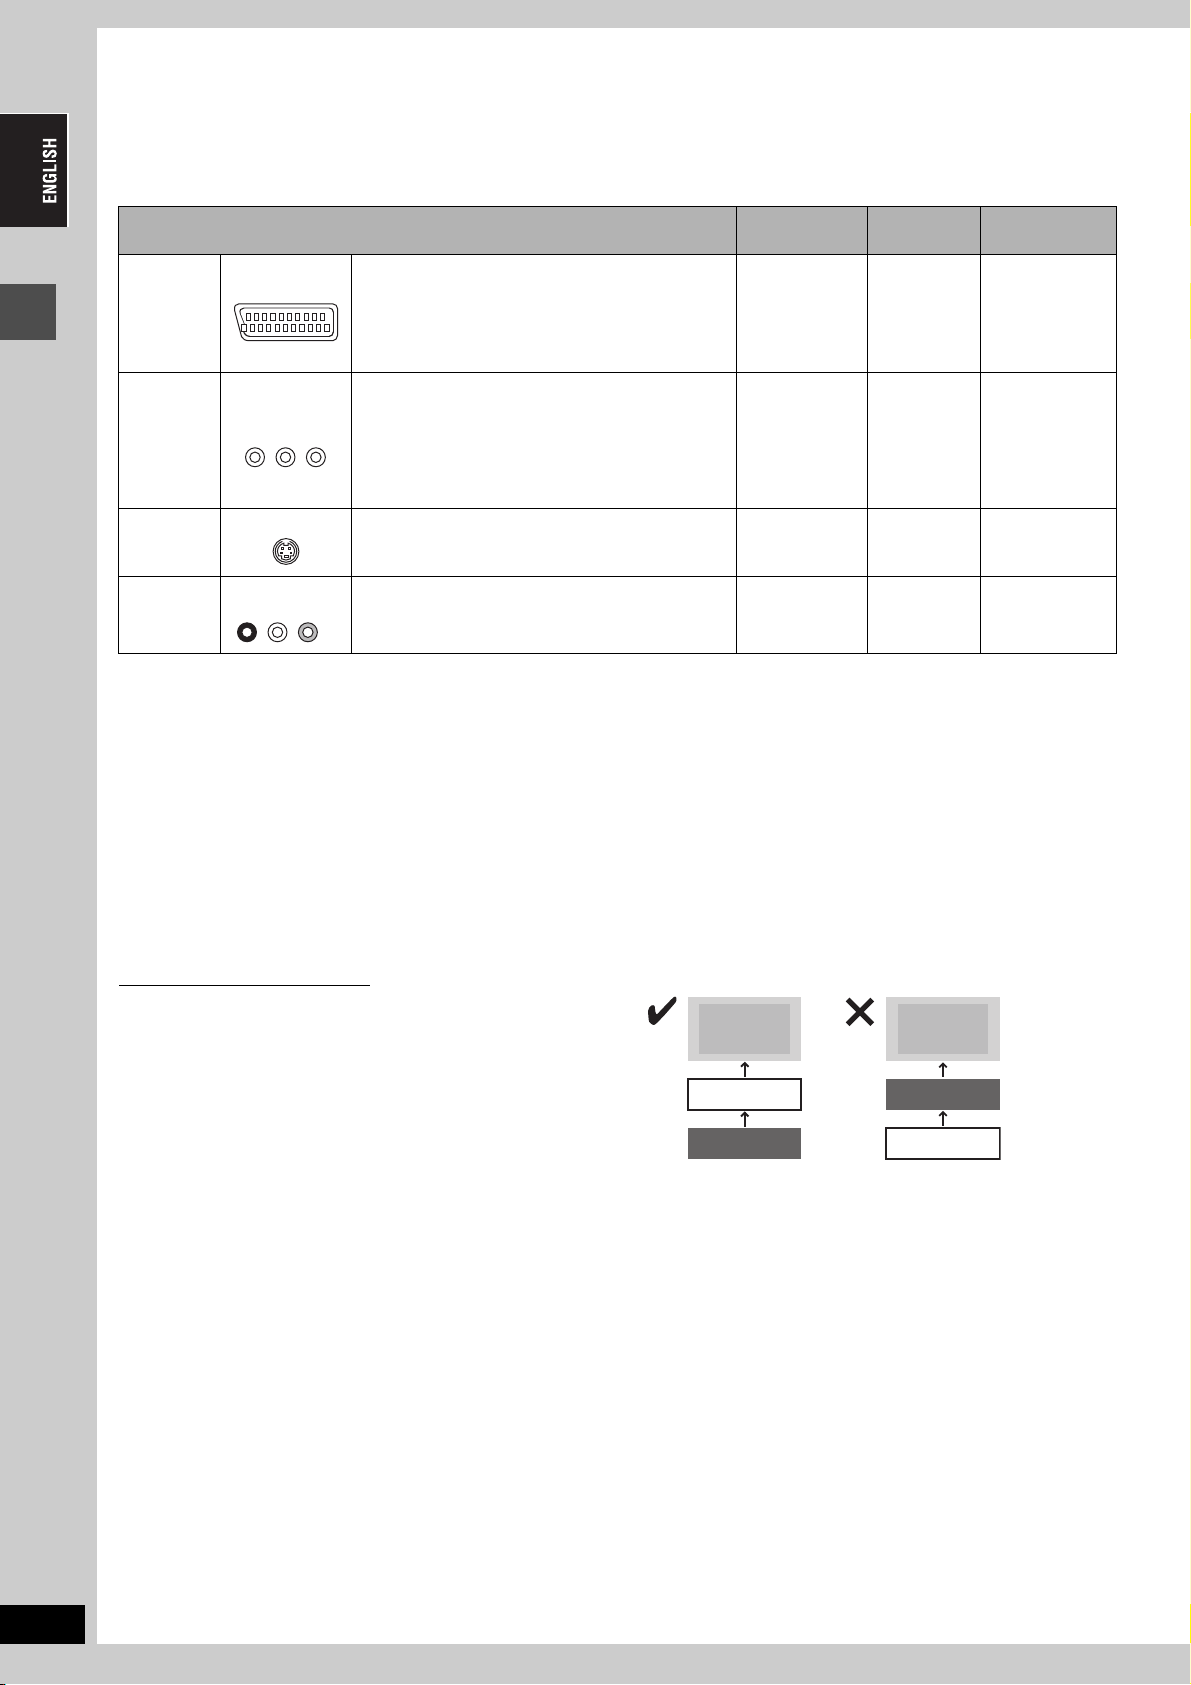
What kind of input terminal does your television have?
Scart Highly recommended connection.
AV IN
Component
video
S Video This terminal achieves a more vivid picture than the
COMPONENT
VIDEO IN
S VIDEO IN
≥You can enjoy high-quality RGB video from this
unit by connecting to an RGB compatible
television.
≥If your television has the Q Link feature, you can
use a variety of useful functions.
These terminals provide a purer picture than the S
Video terminal.
≥If your television is compatible with progressive
scan, you can enjoy high-quality progressive video.
If you have a progressive compatible CRT
television, we cannot recommend this connection
as some flickering may occur.
video terminal.
Required
cable(s)
Fully wired 21pin Scart cable
3 video cables ➡ 16 ➡ 19
S Video cable ➡ 16 ➡ 19
Page No. for
connections
➡ 15
Page No. for TV
settings
➡ 19
≥If it’s a Q Link
television ➡ 18
Audio/Video The most basic connection.
AUDIO IN
R L
VIDEO IN
Audio/Video
cable (included)
➡ 16
➡ 19
Q Link functions
Q Link offers a range of convenient functions (For further details ➡ 69). Make sure to connect a fully wired 21-pin Scart cable to the television
if using the Q Link functions.
The following systems from other manufacturers have similar function to Q Link from Panasonic. For details, refer to your television’s operating
instructions or consult your dealer.
≥Q Link (registered trademark of Panasonic)
≥DATA LOGIC (registered trademark of Metz)
≥Easy Link (registered trademark of Philips)
∫ When the unit is not to be used for a long time
To save power, unplug it from the household mains socket. This
unit consumes a small amount of power, even when it is turned off
[approx. 3 W (Power Save mode)]
When “Power Save” is set to “On”, the “Quick Start” function does
not work.
≥Megalogic (registered trademark of Grundig)
≥SMARTLINK (registered trademark of Sony)
∫ Connect the unit directly to the television
If you connect the unit through an AV selector or video cassette
recorder to the television, video signal will be affected by copyright
protection systems and the picture may not be shown correctly.
Television
This unit
VCR
Television
VCR
This unit
RQT8203
14
≥When connecting to a television with a built-in VCR
Connect to the input terminals on the television side if there are
both television and VCR input terminals.
14
Page 15
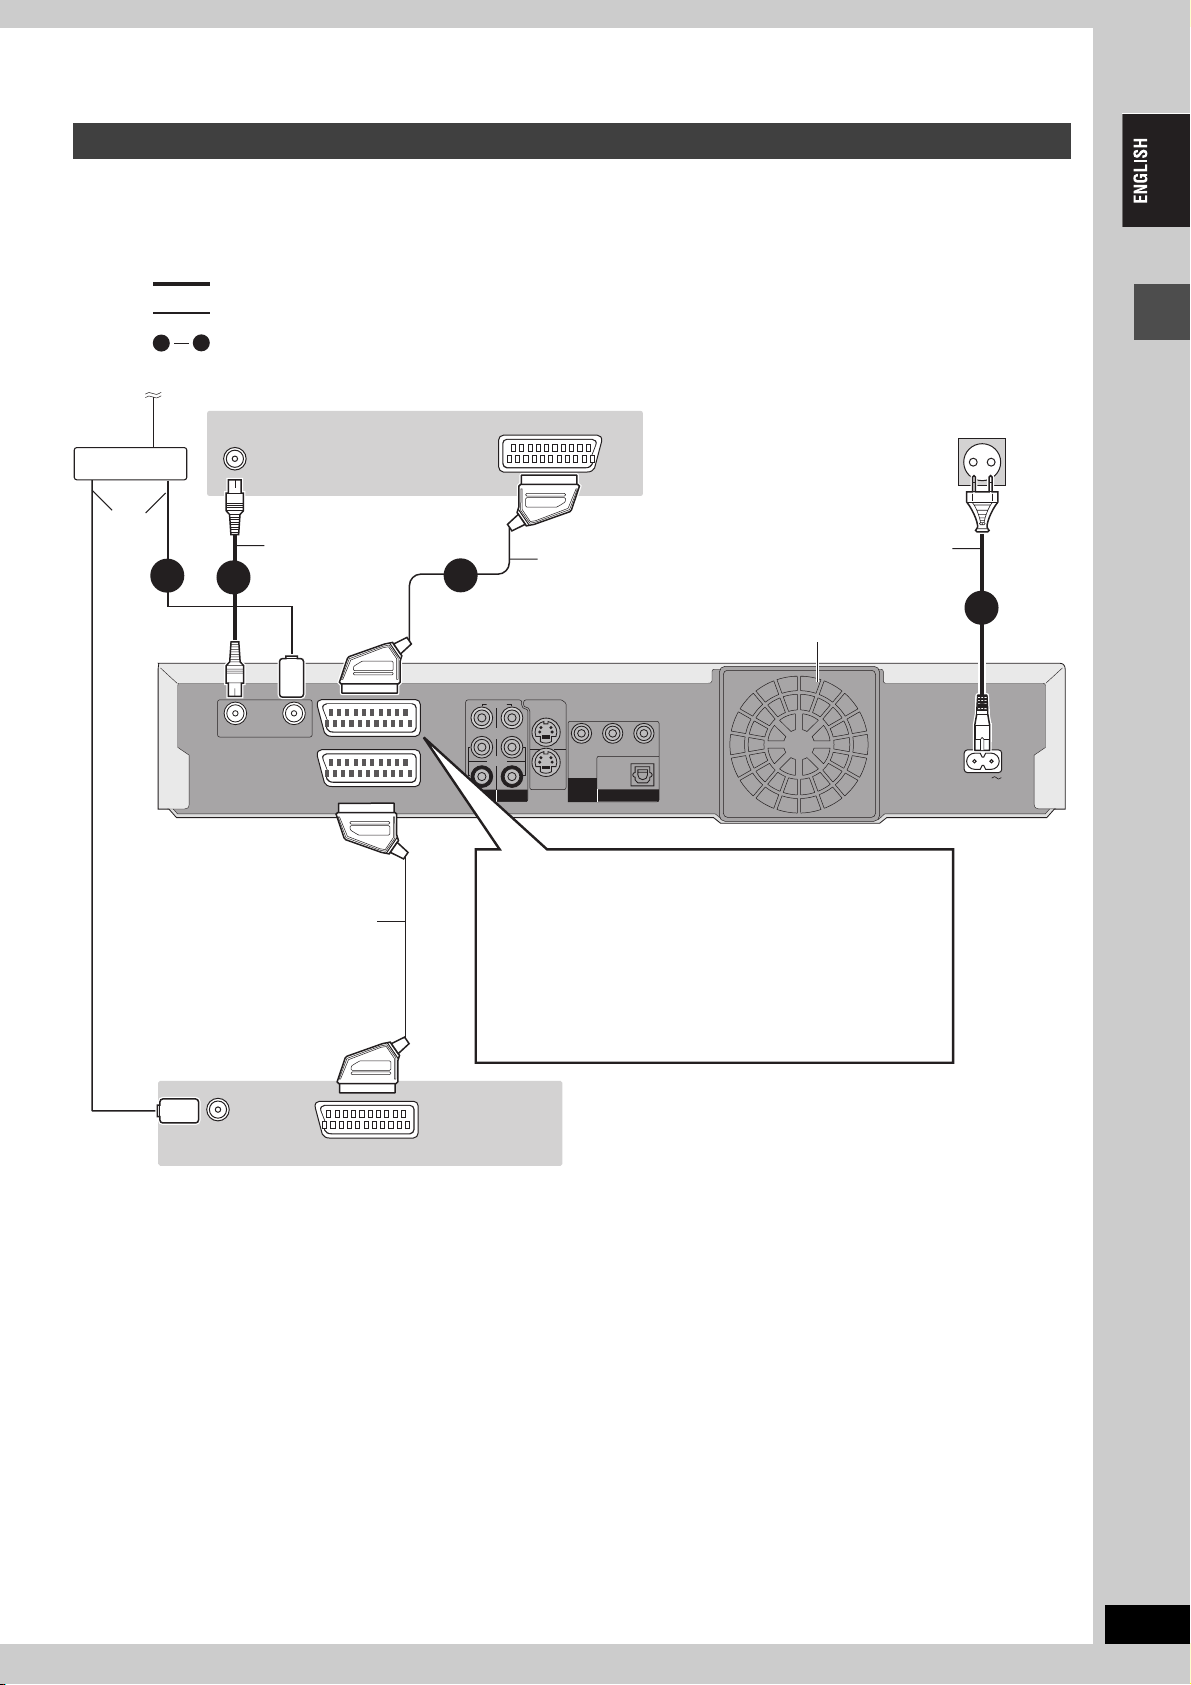
Connecting a television with 21-pin Scart terminal and VCR
RF OUT
RF IN
AV4 IN
OUT
AUDIO
VIDEO
S VIDEO OUT
COMPONENT
VIDEO
OUT
(PROGRESSIVE/
INTERLACE)
OPTICAL
DIGITAL AUDIO OUT
(PCM/BITSTREAM)
S VIDEO
AV4 IN
When there is no 21-pin Scart terminal on the television (➡ 16)
≥This unit is compatible with timer recording using the programme function on television (e.g., a IDTV) (➡ 29).
≥The AV2 or AV4 Scart terminals on Panasonic televisions are compatible with the Q Link functions.
indicates included accessories.
indicates accessories not included.
are required connections. Connect in the numbered order.
4
1
To the aerial
Splitter
Aerial
cable
1
This unit’s rear panel
Use a splitter if you
also want to
connect the aerial
to your VCR.
VHF/UHF
RF IN
RF coaxial cable
2
RF OUT
RF IN
21-pin Scart cable
(TV)
AV1
AV2 (DECODER/EXT)
AV IN
Tel evision ’s
rear panel
Fully wired 21-pin
3
Scart cable
Connect only after all other
connections are complete.
Cooling fan
S VIDEO OUT
VIDEO
L
R
AV4 IN
AUDIO
L
S VIDEO
R
AV4 IN
OUT
Y
COMPONENT
VIDEO
OUT
(PROGRESSIVE/
INTERLACE)
P
B
PR
OPTICAL
DIGITAL AUDIO OUT
(PCM/BITSTREAM)
AV1 terminal
≥If your television is equipped with RGB input capability, by
connecting with a fully wired 21-pin Scart cable you can see
video using RGB output on this unit (➡ below).
To output in RGB select “RGB (without component)” from “AV1
Output” in the SETUP menu (➡ 57) after tuning is completed
(➡ 18, 19).
≥If your television is equipped with Q Link functions, by
connecting with a fully wired 21-pin Scart cable you can use
these functions (➡ 69).
To household mains socket
(AC 220 to 240 V, 50 Hz)
AC mains lead
4
AC IN
STEP 1 Connection
VHF/UHF
RF IN
∫ RGB
This refers to the three primary colours of light, red (R), green (G), and blue (B) and also the method of producing video that uses them. By
dividing the video signal into the three colours for transmission, noise is reduced for even higher quality images.
AV OUT
VCR’s rear panel
RQT8203
15
15
Page 16
STEP
RF OUT
RF IN
COMPONENT
VIDEO
OUT
(PROGRESSIVE/
INTERLACE)
OPTICAL
DIGITAL AUDIO OUT
(PCM/BITSTREAM)
S VIDEO OUT
S VIDEO
AV4 IN
AV4 IN
OUT
AUDIO
VIDEO
Y
P
B
P
R
COMPONENTCOMPONENT
VIDEOVIDEO OUTOUT
(PROGRESSIVE/ (PROGRESSIVE/
INTERLACE)INTERLACE)
OPTICALOPTICAL
DIGITAL AUDIO OUTDIGITAL AUDIO OUT
(PCM/BITSTREAM)(PCM/BITSTREAM)
AV4 IN AV4 IN OUTOUT
AUDIOAUDIO
VIDEOVIDEO
R
L
R
L
S VIDEO OUTS VIDEO OUT
S VIDEOS VIDEO
AV4 INAV4 IN
Y
P
B
PR
COMPONENTCOMPONENT
VIDEOVIDEO OUTOUT
(PROGRESSIVE/ (PROGRESSIVE/
INTERLACE)INTERLACE)
OPTICALOPTICAL
DIGITAL AUDIO OUTDIGITAL AUDIO OUT
(PCM/BITSTREAM)(PCM/BITSTREAM)
AV4 IN AV4 IN OUTOUT
AUDIOAUDIO
VIDEOVIDEO
R
L
R
L
S VIDEO OUTS VIDEO OUT
S VIDEOS VIDEO
AV4 INAV4 IN
1
Connection
Connecting a television with AUDIO/VIDEO terminals and VCR
Connecting to the television using the 21-pin Scart cables (➡ 15)
To the aerial
Splitter
Aerial
cable
1
VHF/UHF
RF IN
indicates included accessories.
indicates accessories not included.
are required connections. Connect in the numbered order.
4
Television’s rear panel
AUDI O IN
R L
Red White Yellow
VIDEO IN
To household mains socket
(AC 220 to 240 V, 50 Hz)
STEP 1 Connection
RF coaxial cable
AC mains lead
Connect only after all other
1
2
connections are complete.
3
Audio/Video cable
S VIDEO OUT
VIDEO
AV4 IN
AUDIO
OUT
Ye ll o w
L
White
Red
S VIDEO
R
AV4 IN
Y
COMPONENT
VIDEO
OUT
(PROGRESSIVE/
INTERLACE)
P
B
PR
OPTICAL
DIGITAL AUDIO OUT
(PCM/BITSTREAM)
AUDI O IN
VIDEO IN
R L
Red White Yellow
Cooling fan
VCR’s rear panel
Television’s rear panel
S VIDEO IN
RF OUT
RF IN
AV1 (TV)
(
AV2
DECODER/EXT)
Yellow
White
Red
L
R
This unit’s rear panel
Use a splitter if you
Audio/Video cable
also want to connect
the aerial to your
VCR.
VHF/UHF
RF IN
Red White Yellow
R L
AUDIO OUT VIDEO OUT
You can also connect with the AV2 terminal
on this unit using the 21-pin Scart cable.
Connecting a television with S VIDEO or COMPONENT VIDEO terminals
Television’s rear panel
AUDI O IN
VIDEO IN
R L
Red White Yellow
S VIDEO IN
COMPONENT
VIDEO IN
AC IN
COMPONENT
VIDEO IN
4
RQT8203
16
Audio/
Video
cable
Ye l l o w
White
Red
S Video
cable
Audio/
Video
cable
Video cable
Yellow
White
Red
COMPONENT VIDEO OUT terminal
S VIDEO OUT terminal
Connect to S VIDEO IN terminal on the television
through a S Video cable.
The S VIDEO OUT terminal achieves a more vivid
picture than the VIDEO OUT terminal. (Actual results
depend on the television.)
Note to owners of progressive compatible PAL system televisions (➡6)
Connect to COMPONENT VIDEO IN terminal on the
television through video cables. These terminals can be used
for either interlace or progressive output (➡ 68) and provide a
purer picture than the S VIDEO OUT terminal.
≥Connect to terminals of the same colour.
For progressive output (➡ 20)
∫ Component video output
Component signal outputs the colour difference signals (PB/PR) and luminance signal (Y) separately in order to achieve high fidelity in
reproducing colours. If the television is compatible with progressive output, a high quality picture can be output because this unit’s component
video output terminal outputs a progressive output signal (➡ 68).
16
Page 17
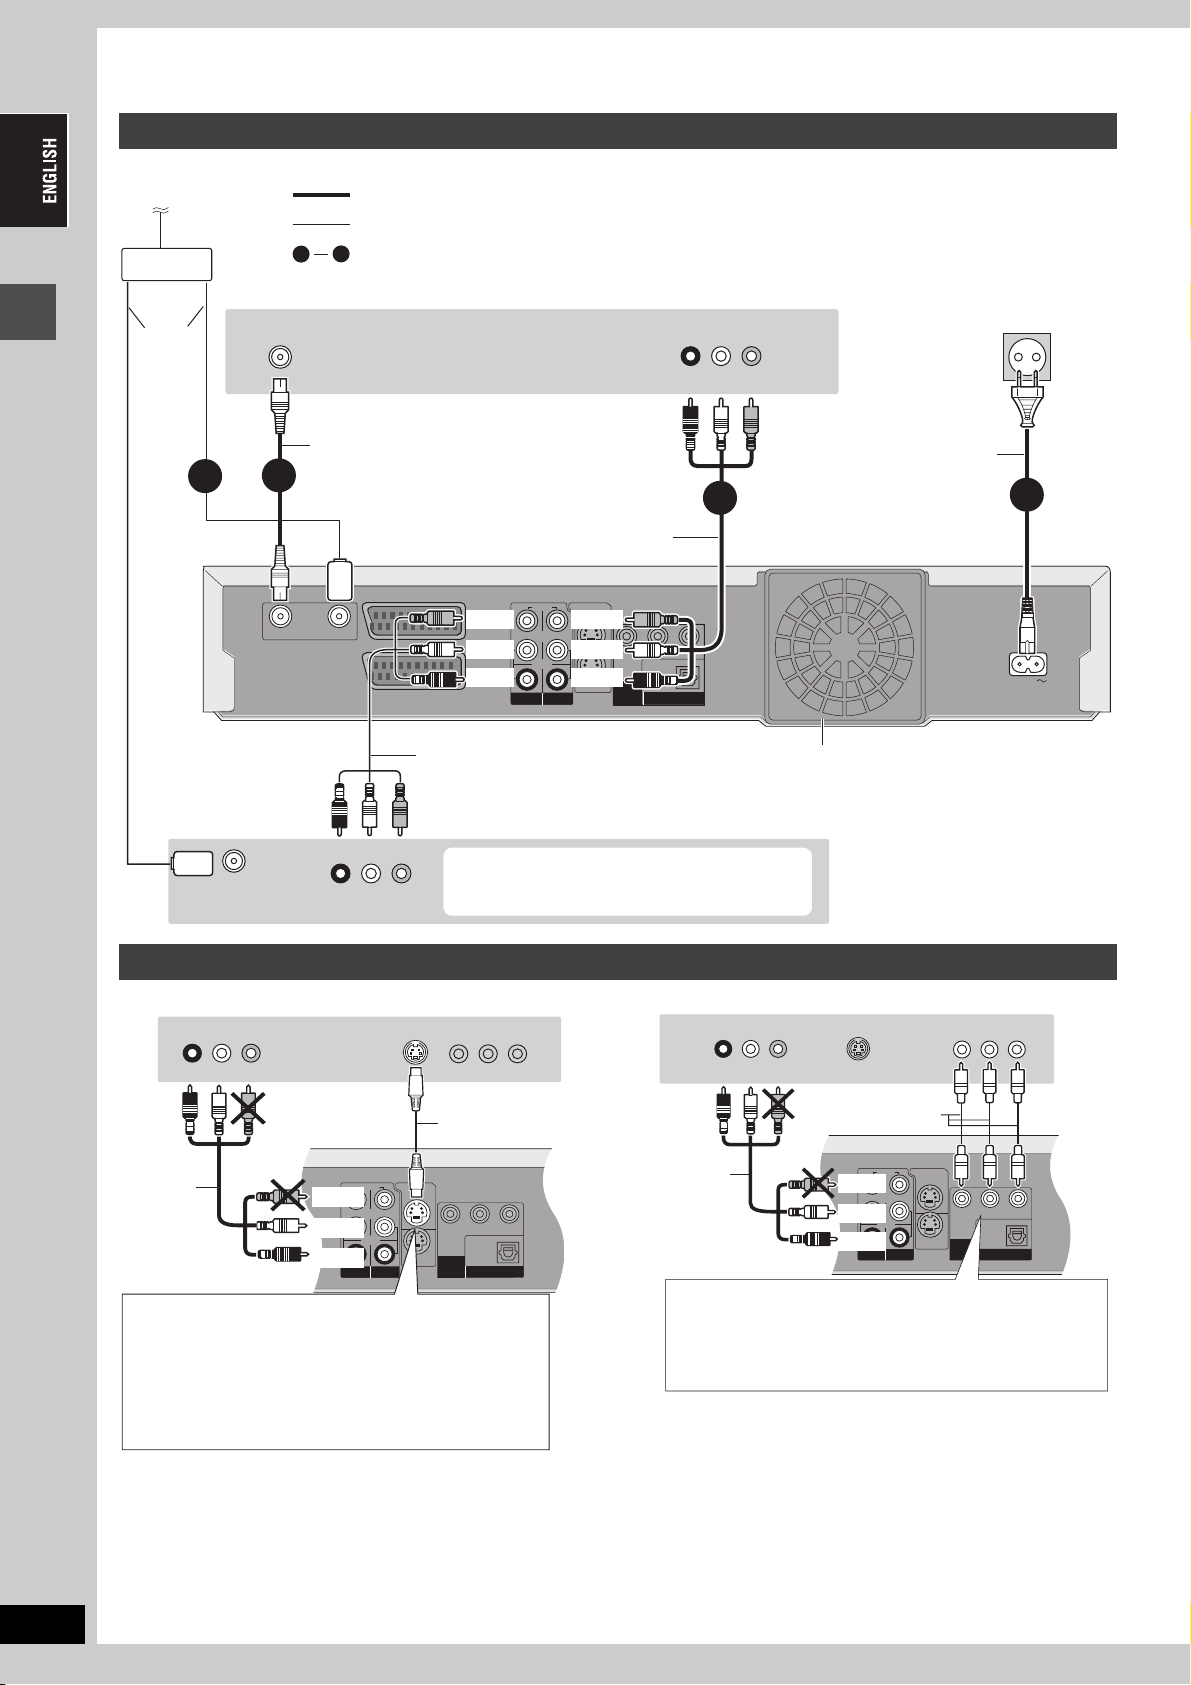
Connecting a digital/satellite receiver or decoder
AV2 (DECODER/EXT)
AV1
(TV)
AV4 IN AV4 IN
AUDAUD
VIDEVIDE
R
L
RF OUTRF OUT
RF INRF IN
P
B
PR
OPTICALOPTICAL
DIGITAL AUDIO OUTDIGITAL AUDIO OUT
(PCM/BITSTREAM)(PCM/BITSTREAM)
Y
P
B
PR
COMPONENTCOMPONENT
VIDEOVIDEO OUTOUT
(PROGRESSIVE/(PROGRESSIVE/
INTERLACE)INTERLACE)
OPTICALOPTICAL
DIGITAL AUDIO OUTDIGITAL AUDIO OUT
(PCM/BITSTREAM)(PCM/BITSTREAM)
AV4 IN AV4 IN OUTOUT
AUDIOAUDIO
VIDEOVIDEO
R
L
R
L
S VIDEO OUTS VIDEO OUT
S VIDEOS VIDEO
AV4 INAV4 IN
≥Decoder here means the device used to decode scrambled broadcasts (Pay TV).
≥Change the “AV2 Input” and “AV2 Connection” settings in the SETUP menu to match the connected equipment (➡ 57) after tuning is
completed (➡ 18, 19).
Viewing video from the decoder on the television while the
Digital receiver,
satellite receiver or
decoder’s rear panel
21-pin Scart cable
AV OUT
This unit’s rear panel
unit is stopped or while recording.
If you connected the television to the AV1 terminal and the decoder
to the AV2 terminal on this unit, press [0]i[ENTER]. (“DVD”
appears on the unit’s display.)
Press again to cancel. (“TV” appears on the unit’s display.)
≥If the television is compatible with RGB input, the RGB output
signal from the decoder can also be output from the main unit the
same way.
STEP 1 Connection
Connecting an amplifier or system component
∫ To enjoy multi-channel surround sound on
DVD-Video
Connect an amplifier with Dolby Digital, DTS and MPEG decoders
using an optical digital audio cable and change the settings in
“Digital Audio Output” (➡ 56) after tuning is completed (➡ 18, 19).
≥Before purchasing an optical digital audio cable (not included),
check the terminal shape of the connected equipment.
≥You cannot use DTS Digital Surround decoders not suited to
DVD.
≥Even if using this connection, output will be only 2 channels when
playing DVD-Audio.
Amplifier’s rear panel
OPTICAL IN
Optical digital audio
cable
Do not bend sharply
when connecting.
Insert fully, with this
side facing up.
∫ Connection to a stereo amplifier
Amplifier’s rear panel
Audio cable
AUDIO IN
R L
Red White
White
Red
This unit’s rear panel
This unit’s rear panel
RQT8203
17
17
Page 18

STEP
1.3
HDD
DVDSDSD
TV
DVD/TV
ENTER
Auto-Setup
Do you want to setup
the GUIDE Plus+ system ?
Yes No
2
Channel reception settings
STEP 2 Channel reception settings
Í/ l
HDD
DVD SD
EXT LINK
S VIDEO IN
VIDEO IN
L/MONO
-AUDIO IN-
DV IN
R
AV3
DRIVE
OPEN/CLOSE
SELECT
CH
REC
/k1.3
X CH W
DVD
Í DVD
3,4,2,1
ENTER
Í
DIRECT TV REC
HDD
1
4 5 6
7
CANCEL
SKIP
STOP
K
C
E
H
C
/
G
O
R
P
R
O
T
U
T
C
A
N
E
E
G
I
R
M
I
V
P
D
A
O
N
T
SUB MENU
S
STATUS
DISPLAY
REC
REC MODE
TIME SLIP
TV
Í
AV
DVD
2 3
8
0
PAU SE
G
ENTER
AUDI O
DVD/ TV
CH
9
INPUT SELECT
SLOW/SEARCH
PLAY/x1.3
D
I
U
E
CREATE
CHAPTER
EXT LINK
DUBBING
VOLUME
PAG E
CH
ShowView
MANUAL SKIP
F
U
N
C
T
I
O
N
S
RETURN
ERASE
TIMER
F Rec
GUIDE
RETURN
Regarding GUIDE Plus+ system
The GUIDE Plus+ system provides programme information
from the host station displayed on the television like a TV
programme magazine. Setting up to record a broadcast is
easy too. Simply select the desired programme from the
displayed list. You can also search for desired programmes by
displaying only the programmes in a certain category.
Preset Download
(Setup with Q Link functions)
When connecting to a television that has the Q Link
functions (➡ 69) with a fully wired 21-pin Scart cable
(➡ 15).
You can download the tuning positions from the television.
This unit’s Auto Clock Setting function synchronizes the time when
the TV channel that is broadcasting time and date information is
tuned.
1 Turn on the television and select the
appropriate AV input to suit the
connections to this unit.
2 Press [Í DVD] to turn the unit on.
Downloading from the television starts.
Download from TV
Pos 4
Checking Broadcaster's data, please wait.
RETURN: to abort
RETURN
≥If the Country setting menu appears on the television,
press [3, 4, 2, 1] to select the country and press
[ENTER].
Country
België
Belgique
Belgien
Danmark
España
France
SELECT
Italia
Nederland
ENTER
Norge
RETURN
RETURN: leave ENTER: access
If you select “Schweiz”, “Suisse” or “Svizzera” in the Country
setting, or when the television tuning setting has been set to
Switzerland, the “Power Save” setting menu appears. Select
“On” or “Off” (➡ 57).
When downloading is complete, the following message
appears.
Deutschland
Österreich
Portugal
Suomi
Sverige
Schweiz
Suisse
Svizzera
Others
RQT8203
18
18
The GUIDE Plus+ system is available in the following
countries:
Austria/Belgium/France/Germany/Italy/Netherlands/Spain/
Switzerland
(as of 30th April 2005)
≥This service may not be available in some areas in the above
countries.
≥There may be changes in the service areas.
[Note]
You will need to complete Preset Download (➡ right) or AutoSetup (➡ 19) to setup the GUIDE Plus+ system.
≥The GUIDE Plus+ system setup will not work if the clock is
not set correctly.
Refer to the “User’s manual for the GUIDE Plus+ system” for
more information.
≥Visit following homepage for more information.
http://www.europe.guideplus.com
(The above message also appears in countries where
GUIDE Plus+ system is not available. However set up is not
possible.)
≥If you want to setup the GUIDE Plus+ system
Press [2, 1] to select “Yes” and press [ENTER].
It takes approx. 2 hours to set up the GUIDE Plus+ system.
(➡ User’s manual for the GUIDE Plus+ system)
≥If you do not want to setup the GUIDE Plus+ system
Press [2, 1] to select “No” and press [ENTER].
Television picture appears. Preset Download is complete.
To stop partway
Press [RETURN].
∫ If the clock setting menu appears
Set the clock manually (➡ 60).
∫ To confirm that stations have been tuned
correctly (➡ 58)
∫ To restart Preset Download (➡ 59)
∫ To restart GUIDE Plus+ system set up
Press [GUIDE] to show the GUIDE Plus+ system set up screen.
(➡ User’s manual for the GUIDE Plus+ system)
Page 19
Auto-Setup
Auto-Setup
Do you want to setup
the GUIDE Plus+ system ?
Yes No
(Setup without Q Link functions)
≥When connecting to a television with the VIDEO OUT,
S VIDEO OUT or COMPONENT VIDEO OUT terminal
(➡ 16).
≥When connecting to a television that does not have Q
Link functions (➡ 69).
This unit’s Auto-Setup function automatically tunes all available TV
stations and synchronizes the time when the TV channel that is
broadcasting time and date information is tuned.
1 Turn on the television and select the
appropriate AV input to suit the
connections to this unit.
2 Press [Í DVD] to turn the unit on.
The Country setting menu appears.
Country
België
Belgique
Belgien
Danmark
España
France
SELECT
Italia
Nederland
ENTER
Norge
RETURN
RETURN: leave ENTER: access
Deutschland
Österreich
Portugal
Suomi
Sverige
Schweiz
Suisse
Svizzera
Others
If you select “Schweiz”, “Suisse” or “Svizzera”, the “Power
Save” setting menu appears. Select “On” or “Off” (➡ 57).
3 Press [3, 4, 2, 1] to select the
country.
∫ If the clock setting menu appears
Set the clock manually (➡ 60).
∫ To confirm that stations have been tuned
correctly (➡ 58)
∫ To restart Auto-Setup (➡ 59)
You can also use the following method to restart Auto-Setup.
When the unit is on and stopped
Press and hold [X CH] and [CH W] on the main unit until the
Country setting screen appears.
≥All the settings except for the ratings level, ratings password and
time settings return to the factory preset. The timer recording
programmes are also cancelled.
∫ To restart GUIDE Plus+ system set up
Press [GUIDE] to show the GUIDE Plus+ system set up screen.
(➡ User’s manual for the GUIDE Plus+ system)
STEP 2 Channel reception settings
4 Press [ENTER].
Auto-Setup starts. This takes about 8 minutes.
Auto-Setup
Ch 1
Auto-Setup in progress, please wait.
RETURN: to abort
RETURN
When Auto-Setup is complete, the following message
appears.
(The above message also appears in countries where
GUIDE Plus+ system is not available. However set up is not
possible.)
≥If you want to setup the GUIDE Plus+ system
Press [2, 1] to select “Yes” and press [ENTER].
It takes approx. 2 hours to set up the GUIDE Plus+ system.
(➡ User’s manual for the GUIDE Plus+ system)
≥If you do not want to setup the GUIDE Plus+ system
Press [2, 1] to select “No” and press [ENTER].
Television picture appears. Auto-Setup is complete.
To stop partway
Press [RETURN].
RQT8203
19
19
Page 20

Set up to match your television and remote control
HDD
DVDSDSD
TV
DVD/TV
ENTER
Numbered
buttons
3,4,2,1
ENTER
DVD
Í
DIRECT TV REC
HDD
1
4 5 6
7
CANCEL
SKIP
STOP
C
E
H
C
/
G
O
R
P
R
O
T
U
T
C
A
N
E
E
G
I
R
M
I
V
P
D
A
O
N
T
SUB MENU
S
DISPLAY
REC
TIME SLIP
TV
Í
AV
DVD
2 3
8
INPUT SELECT
0
PAU SE
I
U
G
K
ENTER
STATUS
REC MODE
AUDI O
DVD/ TV
CH
9
SLOW/SEARCH
PLAY/x1.3
D
E
CREATE
CHAPTER
EXT LINK
DUBBING
VOLUME
PAG E
CH
ShowView
MANUAL SKIP
F
U
N
C
T
I
O
N
S
RETURN
ERASE
TIMER
F Rec
TV operation
buttons
FUNCTIONS
RETURN
4 Press [3, 4] to select “Connection”
and press [1].
5 Press [3, 4] to select “TV Aspect”
and press [ENTER].
6 Press [3, 4] to select the TV aspect
and press [ENTER].
SETUP
Tun in g
Disc
Picture
Sound
Display
Connection
Others
≥16:9: 16:9 widescreen television
≥4:3: 4:3 aspect television
[HDD] [RAM] Titles are recorded as they appear on screen.
[DVD-V] Video recorded for a widescreen is played as Pan
& Scan (unless prohibited by the producer of the
disc) (➡ 68).
≥Letterbox: 4:3 aspect television
Widescreen picture is shown in the letterbox style (➡ 68).
To enjoy progressive video
You can enjoy progressive video by connecting this unit’s
COMPONENT VIDEO OUT terminals to an LCD/plasma television
or LCD projector compatible with progressive scan (➡ 68).
16:9 WIDE TV
4:3 TV
SELECT
ENTER
RETURN
TV Aspect
16:9
4:3
Letterbox
1 While stopped
Selecting television type and aspect
Choose the setting to suit your television and preference.
Set up to match your television and remote control
1 While stopped
Press [FUNCTIONS].
FUNCTIONS
Playback
Recording
Dubbing
EPG
2
3
1
ENTER
RETURN
HDD
HDD
DIRECT NAVIGATOR
GUIDE Plus+
TIMER RECORDING
ShowView
DUBBING
To Others
Disc Remaining
30:00 SP
Press [FUNCTIONS].
2 Press [3, 4] to select “To Others”
and press [ENTER].
3 Press [3, 4] to select “SETUP” and
press [ENTER].
4 Press [3, 4] to select “Connection”
and press [1].
5 Press [3, 4] to select “Progressive”
and press [ENTER].
6 Press [3, 4] to select “On” and
2 Press [3, 4] to select “To Others”
and press [ENTER].
3 Press [3, 4] to select “SETUP” and
press [ENTER].
SETUP
Tuning
Disc
Picture
Sound
Display
Connection
Others
Manual
Auto-Setup Restart
Download from TV
TAB
SELECT
RETURN
press [ENTER].
Output becomes progressive.
[Note]
≥When connected to a regular television (CRT: Cathode ray tube)
or a multi system television using PAL mode, even if it is
progressive compatible, progressive output can cause some
flickering. Turn off “Progressive” if this occurs (➡ 37).
≥There is no output from the COMPONENT VIDEO OUT terminals
if “AV1 Output” in the SETUP menu is set to “RGB (without
component)”. Set this item to either “Video (with component)” or
“S Video (with component)” (➡ 57).
≥If the unit is connected to the television through VIDEO OUT, S
VIDEO OUT or AV1 terminal, output will be interlace irrespective
of the settings.
RQT8203
20
To return to the previous screen
Press [RETURN].
To exit the screen
Press [RETURN] several times.
20
Page 21

Television operation
SETUP
Tun in g
Remote Control
Press “±” and “ENTER” together
for more than 2 seconds on the remote
control.
Disc
Picture
You can configure the remote control TV operation buttons to turn
the television on/off, change the television input mode, select the
television channel and change the television volume.
1 Point the remote control at the television
While pressing [Í TV], enter the
code with the numbered buttons.
e.g., 01: [0] ➡ [1] 10: [1] ➡ [0]
Manufacturer and Code No.
Brand Code Brand Code
Panasonic 01/02/03/04/45NOKIA 25/26/27
When other Panasonic products
respond to this remote control
Change the remote control code on the main unit and the remote
control (the two must match) if you place other Panasonic products
close together.
Use “DVD 1”, the factory set code, under normal circumstances.
1 While stopped
Press [FUNCTIONS].
2 Press [3, 4] to select “To Others”
and press [ENTER].
AIWA 35 NORDMENDE 10
AKAI 27/30 ORION 37
BLAUPUNKT 09 PHILIPS 05/06
BRANDT 10/15 PHONOLA 31/33
BUSH 05/06 PIONEER 38
CURTIS 31 PYE 05/06
DESMET 05/31/33 RADIOLA 05/06
DUAL 05/06 SABA 10
ELEMIS 31 SALORA 26
FERGUSON 10 SAMSUNG 31/32/43
GOLDSTAR/LG 31 SANSUI 05/31/33
GOODMANS 05/06/31 SANYO 21
GRUNDIG 09 SBR 06
HITACHI 22/23/31/40/
41/42
INNO HIT 34 SELECO 06/25
IRRADIO 30 SHARP 18
ITT 25 SIEMENS 09
JVC 17/39 SINUDYNE 05/06/33
LOEWE 07 SONY 08
METZ 28/31 TELEFUNKEN 10/11/12/
MITSUBISHI 06/19/20 THOMSON 10/15/44
MIVAR 24 TOSHIBA 16
NEC 36 WHITE
SCHNEIDER 05/06/29/
30/31
13/14
05/06
WESTINGHOUSE
2 Test by turning on the television and
changing channels.
≥Repeat the procedure until you find the code that allows
correct operation.
≥If your television brand is not listed or if the code listed for
your television does not allow control of your television, this
remote control is not compatible with your television.
[Note]
≥If your television brand has more than one code listed, select the
one that allows correct operation.
3 Press [3, 4] to select “SETUP” and
press [ENTER].
4 Press [3, 4] to select “Others” and
press [1].
5 Press [3, 4] to select “Remote
Control” and press [ENTER].
6 Press [3, 4] to select the code
(“DVD 1”, “DVD 2” or “DVD 3”) and
press [ENTER].
Set up to match your television and remote control
7 To change the code on the remote control
While pressing [ENTER], press and
hold the numbered button ([1], [2] or
[3]) for more than 2 seconds.
8 Press [ENTER].
∫ When the following indicator appears on the
unit’s display
The unit’s remote
control code
Change the code on the remote control to match the main unit’s
(➡ step 7).
[Note]
Executing “Shipping Condition” in the SETUP menu returns the
main unit code to “DVD 1”. Change the remote control code to 1
(➡ step 7).
To return to the previous screen
Press [RETURN].
To exit the screen
Press [RETURN] several times.
RQT8203
21
21
Page 22

Recording television programmes
1.3
HDD
DVDSDSD
TV
ENTER
D.MIX
REC
2
HDD
DVD SD
EXT LINK
CH
S VIDEO IN
VIDEO IN
L/MONO
-AUDIO IN-
DV IN
R
AV3
HDD, DVD indicator
3
DVD
TV
Í
Í
DIRECT TV REC
AV
HDD
2 3
Numbered
buttons
∫
3,4,2,1
ENTER
Recording television programmes
5
AUDIO
1
4 5 6
7
CANCEL
SKIP
STOP
K
C
E
H
C
/
G
O
R
P
R
O
T
U
T
C
A
N
E
E
G
I
R
M
I
V
P
D
A
O
N
T
SUB MENU
S
STATUS
DISPLAY
REC
REC MODE
TIME SLIP
AUDI O
8
0
[HDD]
≥You can record up to 500 titles on HDD. (When continuously
recording for long durations, titles are automatically divided every 8
hours.)
[RAM] [-R] [-RW‹V›]
≥You can record up to 99 titles on one disc.
[+R]
≥You can record up to 49 titles on one disc.
[SD]
≥It is not possible to record onto a card.
See also the notes “Before recording” (➡ 23).
CH
DVD
9
INPUT SELECT
SLOW/SEARCH
PAU SE
D
I
U
E
G
ENTER
CREATE
CHAPTER
EXT LINK
DUBBING
VOLUME
PAG E
CH
ShowView
MANUAL SKIP
PLAY/x1.3
S
RETURN
ERASE
TIMER
F Rec
F
U
N
C
T
I
O
N
OPEN/CLOSE
1
5
3 Press [WXCH] to select the channel.
DCCH BS
DUB
EXT
MPEG4 D.MIX
HDD
DRIVE
SELECT
REC
/k1.3
∫
DVD
SD
To select with the numbered buttons:
e.g., 5: [0] ➡ [5]
Link
NET
-
DVD
AVC D
XP
-
RWRAM
+
SP
VR
LP
SDPC
EP
15: [1] ➡ [5]
4 Press [REC MODE] to select the
recording mode (XP, SP, LP or EP).
DCCH BS
1
3
HDD
DVD
SD
REC
REC
PC
PLAY
PLAY
DUB
≥To record sound using LPCM (XP mode only):
Set the “Audio Mode for XP Recording” to “LPCM” in the
SETUP menu (➡ 56).
EXT
Link
MPEG4 D.MIX
NET
XP
SP
LP
EP
DVD
-
VR
SDPC
-
AVCD
Remaining time
RWRAM
+
on the disc
5 Press [¥ REC] to start recording.
;
HDD
DVD
SD
REC
REC
PC
PLAY
PLAY
Link
MPEG4 D.MI X
NET
XP
SP
LP
EP
-
DVD
-
RWRAM
+
VR
SDPC
AVC D
DCCH BS
DUB
EXT
Recording will take place on open space on the HDD or on
disc. Data will not be overwritten.
≥You cannot change the channel or recording mode during
recording. You can change the channel or recording mode
while paused; however, the recording will then be as a
separate title.
≥[HDD] [RAM] You can change the audio being received by
pressing [AUDIO] during recording. (Does not affect the
recording of audio.)
4
∫ To pause recording
Press [;].
Press again to restart recording.
You can also press [¥ REC] to restart.
(Title is not split into separate titles.)
∫ To stop recording
Press [∫].
≥From the start to the end of the recording is called one title.
≥[-R] [-RW‹V›] [+R] It takes about 30 seconds for the unit to complete
recording management information after recording finishes.
RQT8203
22
Preparation
≥Turn on the television and select the appropriate video input to suit
the connections to this unit.
≥Turn on this unit.
1 Press [HDD] or [DVD] to select the
recording drive.
The HDD or DVD indicator lights up on the unit.
2 If you selected the DVD drive
Press [< OPEN/CLOSE] on the main
unit to open the tray and insert a disc.
≥Press the button again to close the tray.
≥When using 8 cm DVD-RAM, or 8 cm DVD-R, remove the
disc from the cartridge.
Insert label-up.
22
∫ Cartridge disc
Insert with the
arrow facing in.
Insert fully so it clicks into place.
If a station broadcasts Teletext information
The unit automatically records the programme’s and station’s name
if the station’s Title Page is correctly set (➡ 58).
[Note]
The unit may take some time in retrieving titles (up to 30 minutes)
and may fail in some cases.
Quick Start (➡ 57)
1 Sec. Quick Start for Recording & EPG Display
From the power on, recording starts in about 1 second
the REC button is pressed. If the GUIDE button is pressed
while the unit is off, the Electronic Program Guide (EPG)
displays in less than 1 second. (Quick Start Mode)
§
Only when recording to the HDD or DVD-RAM
“Quick Start” is set to “On” at the time of purchase.
[Note]
Startup takes up to a minute when:
–You play a disc or start recording to discs other than DVD-
RAM.
–You want to make other operations.
–The clock has not been set.
§
after
Page 23

Recording modes and approximate recording times
Depending on the content being recorded, the recording times may
become shorter than indicated.
DVD-RAM
Mode
HDD
(200 GB)
Single-
sided
(4.7 GB)
Double-
sided
(9.4 GB)
XP (High quality) 44 1 2 1
SP (Normal) 89 2 4 2
LP (Long play) 177 4 8 4
EP (Extra long
play)
FR (Automatic
mode selection)
355
§2
)
(266
355 hours
maximum
§2
8 (6
) 16 (12§2)8 (6§2)
8 hours
maximum
8 hours
maximum
for one side
§1
It is not possible to record or play continuously from one side of a
double sided disc to the other.
§2
When “Recording time in EP mode” is set to “EP (6 Hours)” in the
SETUP menu (➡ 55).
The sound quality is better when using “EP (6 Hours)” than when
using “EP (8 Hours)”.
≥[RAM] When recording to DVD-RAM using “EP (8 Hours)” mode,
play may not be possible on DVD players that are compatible with
DVD-RAM. Use “EP (6 Hours)” mode if playback may be on other
equipment.
FR (Flexible Recording Mode)
You can set FR (Flexible Recording) mode when transferring
(dubbing) or programming timer recordings.
The unit automatically selects a recording rate between XP and EP
(8 Hours) that will enable the recordings to fit in the remaining disc
space with the best possible recording quality.
For example with a 90 minute recording to an unused DVD-RAM, the
picture quality is adjusted to between “XP” and “SP”.
≥
When recording to the HDD, picture quality is automatically adjusted
to precisely fit a transferred (dubbed) title on a 4.7 GB disc.
≥All the recording modes from XP to EP appear in the
display.
§1
(Unit: hour)
DVD-R
DVD-RW
+R
(4.7 GB)
8 hours
maximum
XP
SP
LP
EP
After recording
≥[-R] [-RW‹V›] [+R] In order to play a disc recorded using this unit on
➡
other playback equipment, the disc must first be finalized (
52).
To specify a time to stop recording—One Touch
Recording
[HDD] [RAM] [-R] [-RW‹V›] [+R]
During recording
Press [¥ REC] on the main unit to select the recording
time.
≥You can specify up to 4 hours later.
≥The unit display changes as shown below.
30 (min.) ""# 60 (min.) ""# 90 (min.) ""# 120 (min.)
^" Counter (cancel) ,"" 240 (min.) ,"" 180 (min.) ,}
≥This does not work during timer recordings (➡ 26) or while using
Flexible Recording (➡ 24).
≥If you change the channel or recording mode while recording is
paused, the time specified to stop recording is cancelled.
≥The unit does not turn off automatically after the time to stop
recording is reached.
To cancel
Press [¥ REC] on the main unit several times until the counter
appears.
≥The time to stop recording is cancelled; however, recording
continues.
To stop recording partway
Press [∫].
When using DVD-RW
When you insert a new DVD-RW or a DVD-RAM/DVD-RW (DVDVideo format) recorded on a computer or other equipment, a format
confirmation screen is displayed. Format the disc to use it. However,
all the recorded contents are erased.
Recording television programmes
Before recording
≥It is not possible to record to both HDD (Hard Disk Drive) and DVD
drive simultaneously.
≥It is not possible to record continuously from one side of a double
sided disc to the other. You will need to eject the disc and turn it
over.
≥It is not possible to record digital broadcasts that allow “One time
only recording” onto DVD-R, DVD-RW, +R or 8 cm DVD-RAM
discs. Use the HDD or CPRM compatible DVD-RAM.
≥When transferring (dubbing) in high speed mode to DVD-R,
DVD-RW (DVD-Video format) and +R, after you have recorded to
the HDD, set “Rec for High Speed dubbing” to “On” before
recording to the HDD (
Refer to the “Using DVD-R, DVD-RW and +R on this unit” for more
information (➡ 7).
Either the main or secondary audio can be recorded for
bilingual broadcasts,
when
≥Recording to DVD-R, DVD-RW (DVD-Video format) and +R
≥Recording sound in LPCM (
Recording)
≥“Rec for High Speed dubbing” is set to “On” (
You have to select the audio recording type before recording.
–If you do not connect external equipment
Select “M 1” or “M 2” in “Bilingual Audio Selection” in the
SETUP menu (
–If you connect external equipment
Select “M 1” or “M 2” on the external equipment.
➡
24).
➡
56, Audio Mode for XP
➡
24)
➡
56).
Format
This disc is not formatted properly.
Format the disc in DISC MANAGEMENT?
SELECT
ENTER
NoYes
RETURN
Press [2] to select “Yes” and press [ENTER].
To format a disc
“Erasing all the contents of a disc or card—Format” (➡ 51)
RQT8203
23
23
Page 24

Recording television programmes
1.3
HDD
DVDSDSD
CH
VOLUME
ENTER
FLEXIBLE REC
Start Cancel
Recording in FR mode.
Set rec. time
8 Hour 00 Min.
Maximum rec. time
8 Hour 00 Min.
Recording television programmes
RQT8203
24
24
HDD
¥ DIRECT
TV REC
Numbered
buttons
HDD, DVD indicator
DIRECT TV REC
AV
HDD
DVD
2 3
1
4 5 6
8
7
INPUT SELECT
CANCEL
0
SKIP
PAG E
CH
ShowView
9
MANUAL SKIP
SLOW/SEARCH
DVD SD
DRIVE
OPEN/CLOSE
SELECT
REC
/k1.3
∫
HDD, DVD
INPUT SELECT
;
PAU SE
D
I
U
G
K
ENTER
STATUS
CHAPTER
REC MODE
AUDI O
PLAY/x1.3
E
CREATE
EXT LINK
DUBBING
F
U
N
C
T
I
O
N
S
RETURN
ERASE
TIMER
F Rec
1
FUNCTIONS
RETURN
REC MODE
F TIMER
F Rec
3,4,2,1
ENTER
DIRECT
NAVIGATOR
STATUS
¥ REC
TIME SLIP
∫
STOP
C
E
H
C
/
G
O
R
P
R
O
T
U
T
C
A
N
E
E
G
I
R
M
I
V
P
D
A
O
N
T
SUB MENU
S
DISPLAY
REC
TIME SLIP
Rec for High Speed dubbing
When transferring (dubbing) in high speed mode to DVD-R,
DVD-RW (DVD-Video format) and +R after you have recorded
to the HDD.
If transferring (dubbing) a title using the high speed mode to a
DVD-R, etc., set “Rec for High Speed dubbing” to “On” before
recording to the HDD.
However, the following restrictions apply:
≥When recording bilingual broadcasts, either the main or
secondary audio can be recorded.
–If you do not connect external equipment
Select “M 1” or “M 2” in “Bilingual Audio Selection” in the
SETUP menu (
–If you connect external equipment
Select “M 1” or “M 2” on the external equipment.
≥Even 16:9 aspect (Widescreen) programmes are recorded in 4:3
aspect.
Refer to the “Using DVD-R, DVD-RW and +R on this unit” for more
information (➡ 7).
1
While stopped
Press [FUNCTIONS].
2 Press [3, 4] to select “To Others” and press
[ENTER].
3 Press [3, 4] to select “SETUP” and press
[ENTER].
4 Press [3, 4] to select “Disc” and press [1].
5 Press [3, 4] to select “Settings for recording”
and press [ENTER].
6 Press [3, 4] to select “Rec for High Speed
dubbing” and press [ENTER].
7 Press [3, 4] to select “On” and press [ENTER].
8 Press [2, 1] to select “Yes” and press [ENTER].
To return to the previous screen
Press [RETURN].
To exit the screen
Press [RETURN] several times.
To start recording
≥Recording television programmes (➡ 22)
≥Timer recording (➡ 26)
≥Recording from a video cassette recorder (➡ 47)
[Note]
If you do not intend to transfer (dub) titles in high speed mode to
DVD-R, DVD-RW (DVD-Video format) and +R, set “Rec for High
Speed dubbing” to “Off”.
➡
56).
Flexible Recording
(Recording that fits the remaining disc space)
[HDD] [RAM] [-R] [-RW‹V›] [+R]
The unit sets the best possible picture quality that fits the recording
within the remaining disc space. The recording mode becomes FR
mode.
∫ Using “FLEXIBLE REC” is convenient in these
kinds of situations.
[RAM] [-R] [-RW‹V›] [+R]
≥When the amount of free space on the disc makes selecting an
appropriate recording mode difficult
≥When you want to record a long programme with the best picture
quality possible
[HDD]
≥When you want to record a title to HDD so that it can then be
transferred (dubbed) to fit one 4.7 GB disc perfectly
≥You do not need to edit the recorded title, or change the recording
mode when transferring (dubbing), to fit the disc space
e.g., Recording a 90 minute programme to disc
If you select XP mode, the programme will not fit one disc.
If you try to record a 90 minute
programme in XP mode, only the
first 60 minutes will fit on the disc
4.7GB
DVD-RAM
4.7GB
DVD-RAM
If you select SP mode, the programme will fit one disc.
4.7GB
DVD-RAM
If you select “FLEXIBLE REC” the programme will fit one
disc perfectly.
4.7GB
DVD-RAM
Necessary space for recording
Preparation
≥Select the channel or the external input to record.
≥Press [HDD] or [DVD] to select the recording drive.
and the 30 minute balance will not
get recorded.
≥Another disc is necessary.
However there will be 30 minutes
remaining disc space.
1 While stopped
Press [F Rec].
Maximum recording time
This is the maximum recording
time in EP mode.
2 Press [2, 1] to select “Hour” and
“Min.” and press [3, 4] to set the
recording time.
≥You can also set the recording time with the numbered
buttons.
≥You cannot record more than 8 hours.
3 When you want to start recording
Press [3, 4, 2, 1] to select “Start”
and press [ENTER].
≥Recording starts.
≥All the recording modes from XP to EP appear in
the display.
To exit the screen without recording
Press [RETURN].
To stop recording partway
Press [∫].
To show the remaining time
Remaining
time of
recording
Press [STATUS].
e.g., HDD
HDD
REC 59
ARD
M 1 / M 2
L R
XP
SP
LP
EP
Page 25
Playing while you are recording
[HDD] [RAM]
Playing from the beginning of the title you are
recording—Chasing playback
Press [1] (PLAY) during recording.
≥There is no sound output while searching forward or backward.
To stop play
Press [∫].
To stop recording
2 seconds after play stops
Press [∫].
To stop timer recording
Press [F TIMER].
≥You can also press and hold [∫] on the main unit for more than 3
seconds to stop recording.
Playing a title previously recorded while recording—
Simultaneous rec and play
≥You can also change the drive and play while recording. Press
[HDD] or [DVD].
1 Press [DIRECT NAVIGATOR] during
recording.
2 Press [3, 4, 2, 1] to select a title
and press [ENTER].
≥There is no sound output while searching forward or backward.
To stop play
Press [∫].
To exit the Direct Navigator screen
Press [DIRECT NAVIGATOR].
To stop recording
After play stops
1 Press [DIRECT NAVIGATOR] to exit screen.
2 If the recording is on the other drive
Press [HDD] or [DVD] to select the recording drive.
3 Press [∫].
To stop timer recording
Press [F TIMER].
≥You can also press and hold [∫] on the main unit for more than 3
seconds to stop recording.
Reviewing the recorded images while recording—
Time Slip
While recording, you can play a scene in the title being recorded or a
previously recorded title. Both the images being played and recorded
are shown.
1 Press [TIME SLIP] during recording.
PLAY
0 min
Play starts from 30
seconds previous.
REC
The image currently being
recorded
≥You will hear the playback audio.
2 Press [3, 4] to select the time and
press [ENTER].
≥Each time you press [3, 4], the time increases [3] or
decreases [4] by 1 minute.
(Press and hold for 10-minute intervals.)
≥Press [TIME SLIP] to show the play images in full. Press
again to show the play and recording images.
To stop play
Press [∫].
To stop recording
2 seconds after play stops
Press [∫].
To stop timer recording
Press [F TIMER].
≥You can also press and hold [∫] on the main unit for more than 3
seconds to stop recording.
[Note]
Chasing play can only be used with programmes of the same
encoding system (PAL/NTSC).
Direct TV Recording
When connected to a television that has the Q Link
function using a fully wired 21-pin Scart cable.
This function allows you to immediately start recording the
programme that you are viewing on the TV.
1 Press [HDD] or [DVD] to select the
recording drive.
The HDD or DVD indicator lights up on the unit.
2 If you selected the DVD drive
Insert a disc. (➡ 22)
3 Press and hold [¥ DIRECT TV REC]
for 1 second.
Recording starts.
To stop recording
Press [∫].
Recording from digital/satellite receiver
or decoder
Preparation
≥Connect a satellite/digital receiver or decoder to this unit’s input
terminals (➡ 17).
≥When recording bilingual programmes
[HDD] [RAM]
When both M 1 and M 2 is selected on the connected equipment,
you can select the audio type in playback.
[-R] [-RW‹V›] [+R]
Select either M 1 or M 2 on the connected equipment. (Only either
one type of M 1 or M 2 can be recorded.)
≥When the output signal from the external equipment is NTSC,
change the “TV System” to “NTSC” in the SETUP menu (➡ 61).
This unit cannot record to discs containing both PAL and NTSC
signals. (However, both types of programmes can be recorded
onto the HDD.)
≥Press [HDD] or [DVD] to select the recording drive.
1 While stopped
Press [INPUT SELECT] to select the
input channel for the equipment you
have connected.
e.g.,If you have connected to AV2 input terminals, select “AV2”.
2 Press [REC MODE] to select the
recording mode.
3 Select the channel on the other
equipment.
4 Press [¥ REC].
Recording starts.
To skip unwanted parts
Press [;] to pause recording. (Press again to restart recording.)
To stop recording
Press [∫].
Recording television programmes
RQT8203
25
25
Page 26

Timer recording
HDD
DVDSDSD
TV
ENTER
1.3
Enter ShowView Number by using 0-9 key.
ShowView
1:58 SP
DVD
30:24 SP
HDDRemain
12:53:00 15. 7. TUE
TIMER
RECORDING
1:58 SP
DVD
30:24 SP
HDDRemain
12:54:00 15. 7. TUE
Mode
StopStartName Date
VPS
PDC
HDD
DVD
20:0019:0015. 7. TUE SP OFFHDD
1 ARD
Programme Name
TIMER
RECORDING
1:58 SP
DVD
30:24 SP
HDDRemain
12:56:00 15. 7. TUE
Mode
StopStart
No.
Date
VPS
PDC
HDD
DVD
Name
Disc
space
SP
OK
20:00
19:00
ARD
15. 7. TUE
01
OFF
New Timer Programme
Timer standby is active. Playback is possible.
HDD
DVD SD
DVD
TV
Í
Timer recording
Numbered
buttons
¢ CANCEL
PROG/CHECK
3,4,2,1
ENTER
EXT LINK
REC MODE
Í
DIRECT TV REC
AV
HDD
2 3
1
4 5 6
8
7
CANCEL
SKIP
∫
STOP
C
E
H
C
/
G
O
R
P
R
O
T
U
T
C
A
N
E
E
G
I
R
M
I
V
P
D
A
O
N
T
SUB MENU
S
DISPLAY
REC
K
STATUS
REC MODE
DVD
INPUT SELECT
0
PAU SE
D
I
U
G
ENTER
CHAPTER
CH
ShowView
9
MANUAL SKIP
SLOW/SEARCH
PLAY/x1.3
E
CREATE
EXT LINK
VOLUME
PAG E
CH
I
O
N
S
RETURN
ERASE
TIMER
[HDD] [RAM] [-R] [-RW‹V›] [+R]
≥[-R] [-RW‹V›] [+R] When recording bilingual broadcasts, only the
audio selected in “Bilingual Audio Selection” (➡ 56) is recorded
(“M 1” or “M 2”).
≥[HDD] If you set “Rec for High Speed dubbing” (➡ 24) to “On” before
recording to the HDD, you can later high speed transfer (dub) the
programme to DVD-R, DVD-RW (DVD-Video format) and +R.
Before recording
≥Refer to the “Using DVD-R, DVD-RW and +R on this unit” for more
information (➡ 7).
≥See also the notes “Before recording” (➡ 23).
Preparation
≥Turn on the television and select the appropriate video input to suit
the connections to this unit.
≥If recording to DVD, insert a disc that you can use for recording
(➡ 22).
≥Make sure that the clock settings are correct (➡ 60).
DRIVE
OPEN/CLOSE
SELECT
F
U
N
C
T
REC
/k1.3
∫
HDD, DVD
ShowView
GUIDE
F TIMER
Using SHOWVIEW number to make timer
recordings
Entering S
can find these numbers in TV listings in newspapers or magazines.
≥You can enter up to 32 programmes up to a month in advance.
HOWVIEW numbers is an easy way of timer recording. You
1 Press [ShowView].
2 Press the numbered buttons to enter
the SHOWVIEW number.
Press [2] to move back to correct a digit.
3 Press [ENTER].
≥Confirm the programme and make corrections if necessary
using [3, 4, 2, 1] (➡ 28, step 3).
≥When “-- ---” appears in the “Name” column, you cannot set
timer recording. Press [3, 4] to select desired programme
position. After you have entered the information of a TV
station, it is kept in the unit’s memory.
≥You can also press [HDD] or [DVD] to select the recording
drive.
When the recording drive is “DVD” and there is not enough
remaining space, recording automatically switches to the
“HDD” (➡ 27, Relief Recording).
≥You can also press [REC MODE] to change the recording
mode.
≥VPS/PDC (➡ 27)
ON!)OFF (– – –)
≥RENEW (Auto Renewal Recording) [HDD] (➡ 28)
ON!)OFF
≥Programme Name
Press [2, 1] to select “Programme Name” and press
[ENTER] (➡ 53, Entering text).
4 Press [ENTER].
The settings are stored.
Using the GUIDE Plus+ system to make
timer recordings
You can perform timer recordings by simply selecting the desired
programme from the television programme list.
Before using the GUIDE Plus+ system
≥The television programme list is not displayed immediately after
purchasing this unit.
≥You must complete initial setup for the GUIDE Plus+ system.
Refer to the “User’s manual for the GUIDE Plus+ system” for more
information.
Press [GUIDE].
The GUIDE Plus+ programme overview is displayed.
(➡ User’s manual for the GUIDE Plus+ system)
[Note]
RQT8203
26
If “NTSC” has been selected for “TV System” (➡ 61), the GUIDE
Plus+ system cannot be used.
26
Check to make sure “OK”
is displayed (➡ 29).
Repeat steps 1–4 to programme other recordings.
5 Press [F TIMER].
The unit turns off and “F” lights on the unit’s display to
indicate timer recording standby has been activated.
≥If you turn on the unit, a
message screen appears.
Recording is not possible
while timer recording is in standby. [Playback is possible
however you cannot play a title recorded using a different
encoding system (PAL or NTSC) from that of the TV system
currently selected on the unit.]
Page 27

∫ To release the unit from recording standby
Press [F TIMER].
“F” goes out.
≥Be sure to press [F TIMER] before the programme start time to
put the unit in recording standby. Timer recording will work only
if “F” is displayed.
∫ To cancel recording when recording has
already begun
Press [F TIMER].
≥You can also press and hold [∫] on the main unit for more than
3 seconds to stop recording.
[Note]
≥Timer recordings are activated regardless of whether the unit is
turned on/off.
≥Timer recordings begin when the set time is reached even
when playing.
≥Timer recordings do not begin while editing or transferring
(dubbing) in normal speed mode (➡ 43).
≥If the unit is turned on when timer recording begins, it remains
turned on after recording finishes. It does not turn off
automatically. You can turn the unit off during timer recording.
≥“F” flashes for about 5 seconds when the unit cannot go to
timer recording standby.
≥If the unit is not put in the timer recording standby mode at the
latest 10 minutes before the programmed timer recording
starting time, the “F” flashes on the unit display. In this case,
press [F TIMER] to put the unit in the timer recording standby
mode.
≥When you programme successive timer recordings to start
immediately one after the other, the unit cannot record the part
at the beginning of the later programmes [a few seconds when
recording with HDD or DVD-RAM and approximately 30
seconds when recording with DVD-R, DVD-RW (DVD-Video
format) and +R].
Programme
Programme
Not recorded
Timer recording
Recorded Recorded
≥(If the GUIDE Plus+ system is set)
Television programme list data is downloaded between AM2:50
and AM5:10. If you want to make timer recordings during this
time, set “Auto Download Priority” in the GUIDE Plus+ system
setup menu to “Timer Prog.” (➡ User’s manual for the GUIDE
Plus+ system)
∫ VPS/PDC function (➡ 69)
As long as a VPS/PDC signal is being broadcast by the TV
station, even if the broadcast programme time changes, the
recording time automatically changes to match the new
broadcast time.
To activate the VPS/PDC function
In step 3 in the VPS/PDC column (➡ 26), press [3, 4] to select
“ON”.
∫ Relief Recording
When the recording drive is “DVD” and there is not enough
remaining space, recording automatically switches to the “HDD”.
If there is no disc in the tray or the disc cannot be recorded on or
when timer recording starts while transferring (dubbing), the
recording drive will be altered to the HDD.
≥The Direct Navigator shows which programmes were relief-
recorded (“ ” is displayed.) (➡ 30).
≥If the time remaining on the HDD is insufficient, as much of the
programme as possible will be recorded onto the HDD.
≥Relief recording is not activated when recording the programme
with VPS/PDC and it is extended so that it no longer fits on the
disc.
RQT8203
27
27
Page 28
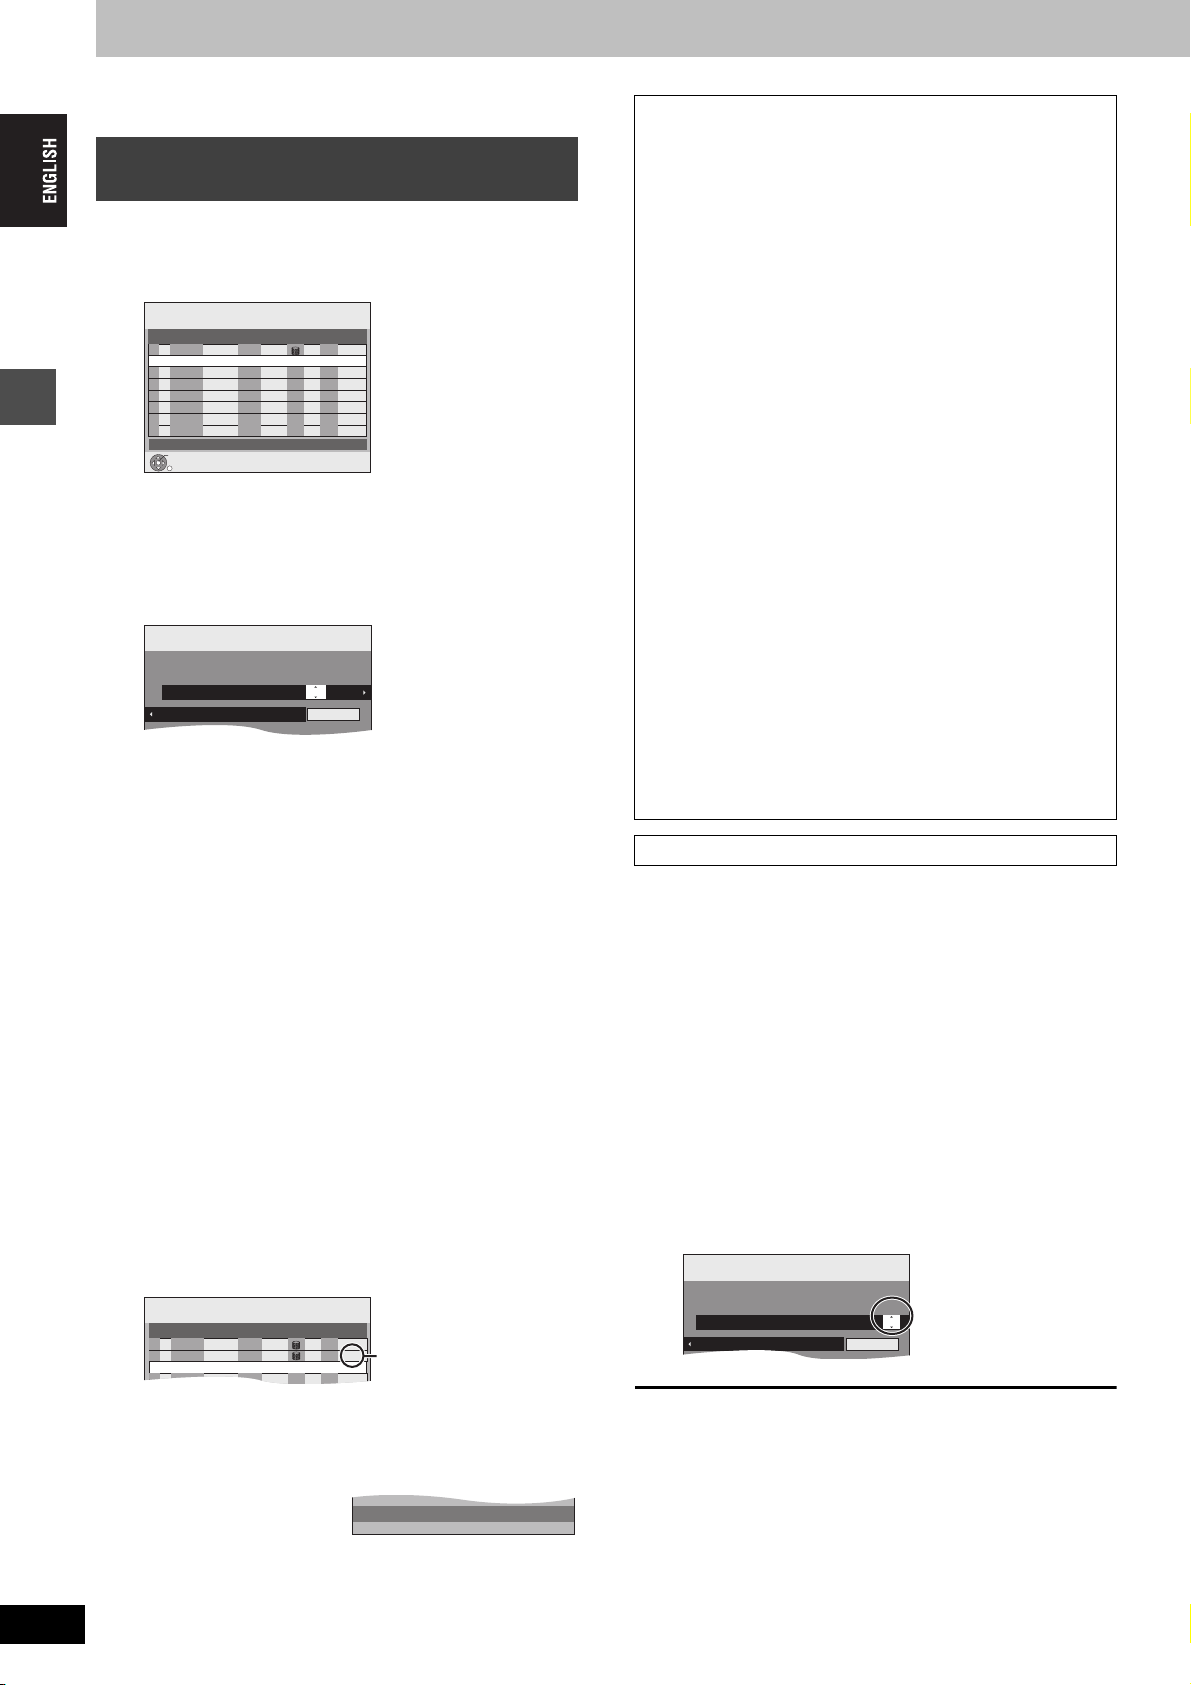
Timer recording
TIMER
RECORDING
1:58 SP
DVD
30:24 SP
HDDRemain
12:54:00 15. 7. TUE
Mode
StopStartName Date
VPS
PDC
HDD
DVD
22:3022:0015. 7. TUE OFFHDD
1 ARD
Programme Name
SP
TIMER
RECORDING
1:58 SP
DVD
30:24 SP
HDDRemain
12:56:00 15. 7. TUE
Mode
StopStart
No.
Date
VPS
PDC
HDD
DVD
Name
Disc
space
SP
OK
20:00
19:00
ARD
15. 7. TUE
01
OFF
New Timer Programme
SP
OK
22:30
22:00
ARD
15. 7. TUE
02
OFF
Timer standby is active. Playback is possible.
TIMER
RECORDING
1:58 SP
DVD
30:24 SP
HDDRemain
12:54:00 15. 7. TUE
Mode
StopStartName Date
VPS
PDC
HDD
DVD
22:3022:00SUN OFFHDD
1 ARD
Programme Name
SP
RENEW
ON
Refer to the control reference on page 26.
Manually programming timer
recordings
You can enter up to 32 programmes up to a month in advance.
(Each daily or weekly programme is counted as one programme.)
1 Press [PROG/CHECK].
TIMER
RECORDING
No.
Name
01
ARD
Press ENTER to store new programme.
ENTER
RETURN
HDDRemain
Date
15. 7. TUE
19:00
New Timer Programme
30:24 SP
StopStart
20:00
DVD
12:56:00 15. 7. TUE
VPS
HDD
Mode
PDC
DVD
OFF
SP
1:58 SP
Disc
space
OK
2 Press [3, 4] to select “New Timer
Programme” and press [ENTER].
3 Press [1] to move through the items
Timer recording
and change the items with [3, 4].
≥Press and hold [3, 4] to alter the Start (Start time) and
Stop (Finish time) in 30-minute increments.
≥You can also set Name (Programme position/TV Station
Name), Date, Start (Start time), and Stop (Finish time) with
the numbered buttons.
≥Date
[.
Date: Current date up to one month later minus
l
l
Daily timer: SUN-SAT>MON-SAT>MON-FRI
l
;:
a.
Weekly timer: SUN>--->SAT
≥You can also press [HDD] or [DVD] to select the recording
drive.
When the recording drive is “DVD” and there is not enough
remaining space, recording automatically switches to the
“HDD” (➡ 27, Relief Recording).
≥You can also press [REC MODE] to change the recording
mode.
≥VPS/PDC (➡ 27)
ON!)OFF (– – –)
≥RENEW (Auto Renewal Recording) [HDD] (➡ right)
ON!)OFF
≥Programme Name
Press [2, 1] to select “Programme Name” and press
[ENTER]. (➡ 53, Entering text)
one day;:
4 Press [ENTER].
∫ To release the unit from recording standby
Press [F TIMER].
“F” goes out.
≥Be sure to press [F TIMER] before the programme start time to
put the unit on recording standby. Timer recording will work only
if “F” is displayed.
∫ To cancel recording when recording has
already begun
Press [F TIMER].
≥You can also press and hold [∫] on the main unit for more than
3 seconds to stop recording.
[Note]
≥Timer recordings are activated regardless of whether the unit is
turned on/off.
≥Timer recordings begin when the set time is reached even
when playing.
≥Timer recordings do not begin while editing or transferring
(dubbing) in normal speed mode (➡ 43).
≥If the unit is turned on when timer recording begins, it remains
turned on after recording finishes. It does not turn off
automatically. You can turn the unit off during timer recording.
≥“F” flashes for about 5 seconds when the unit cannot go to
timer recording standby.
≥If the unit is not put in the timer recording standby mode at the
latest 10 minutes before the programmed timer recording
starting time, the “F” flashes on the unit display. In this case,
press [F TIMER] to put the unit in the timer recording standby
mode.
≥When you programme successive timer recordings to start
immediately one after the other, the unit cannot record the part
at the beginning of the later programmes [a few seconds when
recording with HDD or DVD-RAM and approximately 30
seconds when recording with DVD-R, DVD-RW (DVD-Video
format) and +R].
Auto Renewal Recording
[HDD]
If you record a programme onto HDD repeatedly everyday or every
week using timer recording, the unit will record the new programme
over the old one.
This function can be used only when weekly recording or daily
recording is selected.
1 Press [PROG/CHECK].
2 Press [3, 4] to select the programme
and press [ENTER].
3 Press [2, 1] to select “RENEW”
column.
4 Press [3, 4] to select “ON” and press
[ENTER].
Repeat steps 2–4 to programme other recordings.
Press [F TIMER].
5
The unit turns off and “F” lights on the unit’s display to
indicate timer recording standby has been activated.
≥If you turn on the unit, a
RQT8203
28
28
Check to make sure “OK”
is displayed (➡ 29).
message screen appears.
Recording is not possible
while timer recording is in standby. [Playback is possible
however you cannot play a title recorded using a different
encoding system (PAL or NTSC) from that of the TV system
currently selected on the unit.]
[Note]
≥If a programme set for Auto Renewal Recording is protected or
while play back is taking place from the HDD, or while transferring
(dubbing), the programme will not be overwritten. Instead the
programme set for recording will be saved as a separate
programme, and this programme will be the one to be overwritten
when the next Auto Renewal Recording takes place.
≥Playlists made from programmes that were set for Auto Renewal
Recording are erased along with auto renewal.
≥When there is not enough space on the HDD, the programme may
not be recorded completely.
Page 29
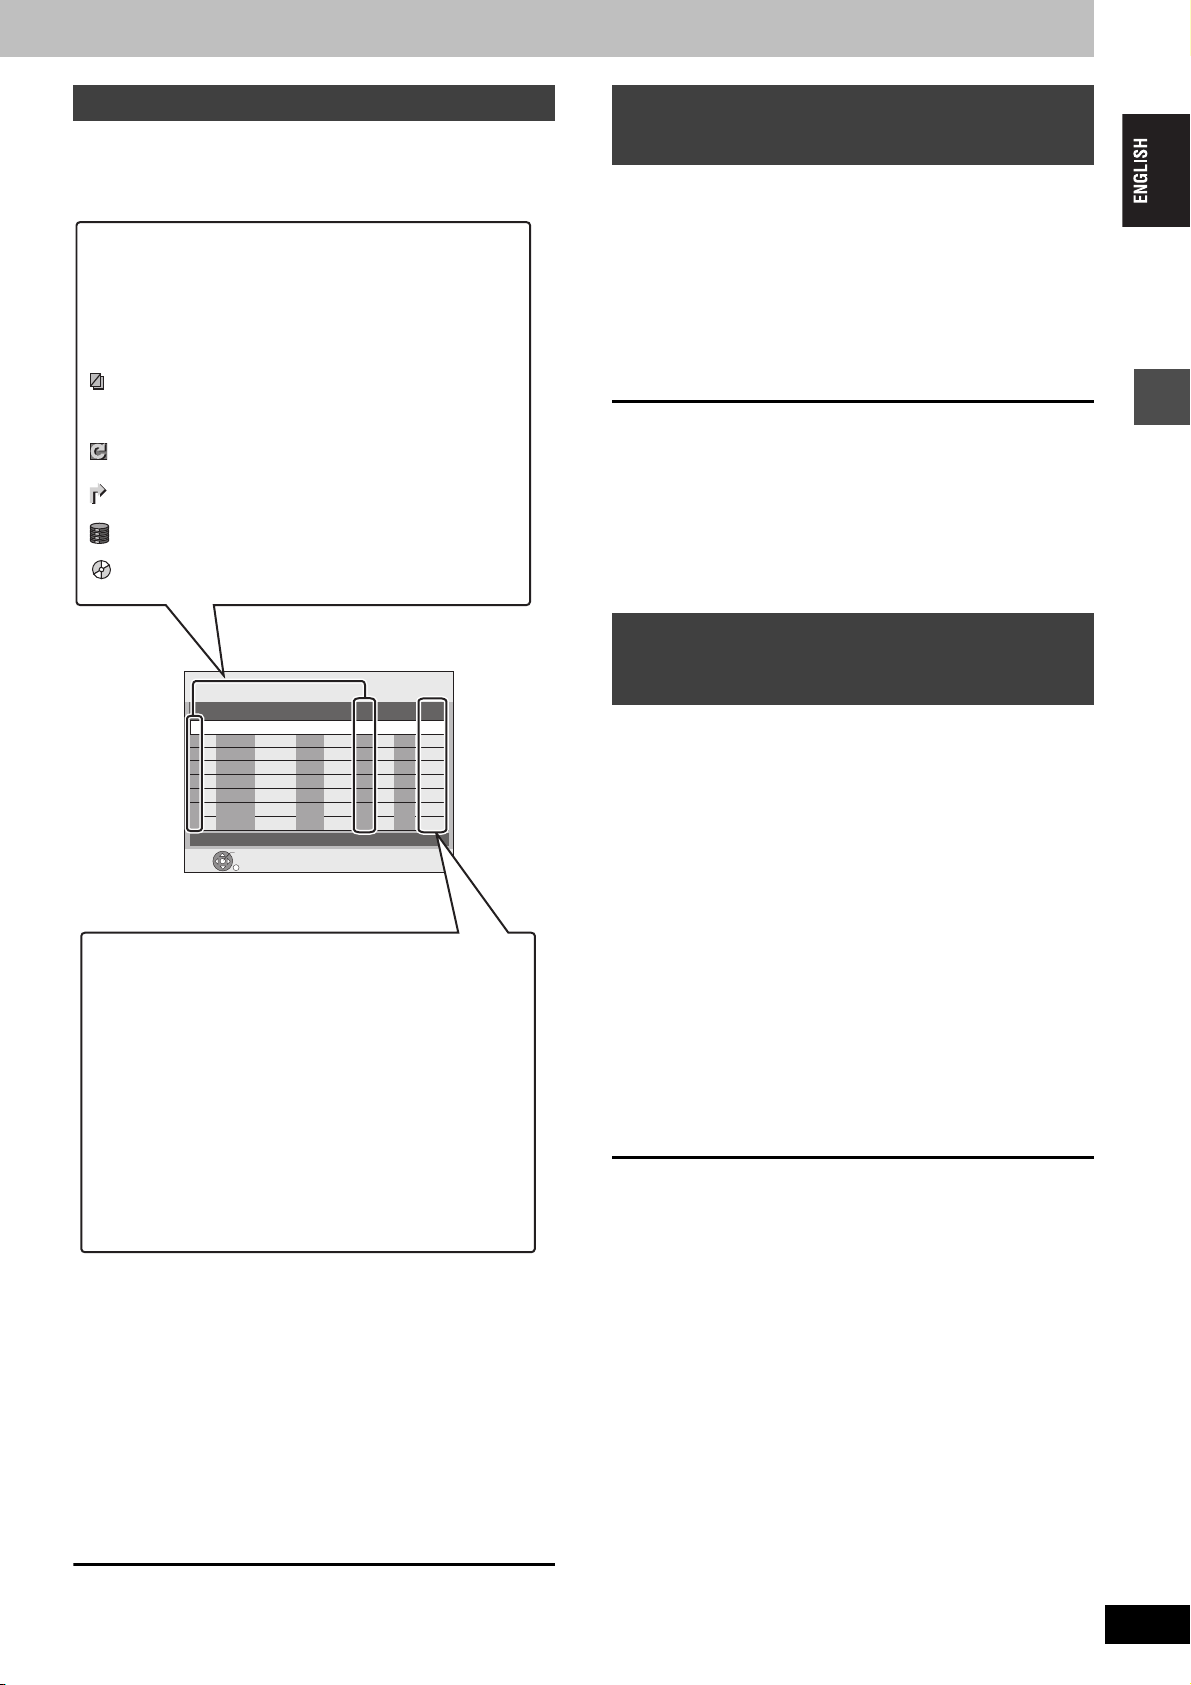
Check, change or delete a programme
≥Even when the unit is turned off, you can display the timer
recording list by pressing [PROG/CHECK].
Press [PROG/CHECK].
Icons
[ This programme is currently recording.
W The times overlap those in another programme.
Recording of the programme with the later start time
starts when the earlier programme finishes recording.
F The disc was full so the programme failed to record.
The material was copy-protected so it was not recorded.
X The programme did not complete recording because the
disc is dirty or some other reason.
Timer programmes set to Auto Renewal Recording
(➡ 28).
Titles that have been rerouted to the HDD
(Displayed while recording.)
Recording drive: HDD
Recording drive: DVD
TIMER
RECORDING
No.
Date
Name
Press ENTER to store new programme.
ENTER
RETURN
30:24 SP
HDDRemain
StopStart
New Timer Programme
Message displayed in the “Disc space” line
OK: Displayed if the recording can fit in the
remaining space.
> (Date): For recordings made daily or weekly, the display
will show until when recordings can be made (up
to a maximum of one month from the present
time) based on the time remaining on the disc.
! : It may not be possible to record because:
≥there is not enough space left
≥the number of possible titles has reached its
maximum.
Relief: Timer programmes that will be relief recorded to
the HDD.
∫ To change a programme
Press [3, 4] to select the programme and press [ENTER].
(➡ 28, step 3)
∫ To delete a programme
Press [3, 4] to select the programme and press [¢ CANCEL].
∫ To exit the timer recording list
Press [PROG/CHECK].
∫ To put the unit on timer recording standby
Press [F TIMER].
“F” lights on the unit’s display to indicate timer recording standby
has been activated.
≥Programmes that failed to record are deleted from the timer
recording list at 4 a.m. two days later.
1:58 SP
DVD
12:56:00 15. 7. TUE
VPS
HDD
Mode
PDC
DVD
Disc
space
Making timer recordings on the
television
(e.g., of digital broadcasts)
[HDD] [RAM] [-R] [-RW‹V›] [+R]
To make a timer recording with your television, connect to a
television with a Q Link function (➡ 69) that you can use for setting
timer recordings using a fully wired 21-pin Scart cable (➡ 15).
1 Make timer programming on the TV.
2 Press [HDD] or [DVD] to select the recording
drive.
If you selected the DVD drive, insert a disc (➡ 22).
3 Turn off this unit.
The start and end of recording is controlled by the TV.
To stop recording
Press [∫].
[Note]
≥When this unit is in timer recording standby or EXT LINK standby
(“F” or “EXT Link” is shown on the unit’s display), recording from
television does not start.
≥Programmes are recorded as one title on this unit when the end
time of the earlier timer recording and the start time of the later
timer recording are close to each other. To divide the titles, go to
“Divide Title” (➡ 39).
Linked timer recordings with external
equipment (digital/satellite receiver) —
EXT LINK
[HDD] [RAM] [-R] [-RW‹V›] [+R]
When an external equipment (e.g., a digital/satellite receiver) with a
timer function is connected to the AV2 terminal of this unit by a
21-pin Scart cable (➡ 17), it is possible to control the recording of
the unit with the equipment.
Preparation
≥Change the “AV2 Input” (➡ 57) in the SETUP menu to match the
connected equipment .
≥Change the “Ext Link” in the SETUP menu to match the connected
equipment (➡ 57).
Ext Link 1: The start and stop time of the recording are controlled
by the signal received from the digital/satellite receiver.
Ext Link 2: As long as a video picture is being transmitted by the
external equipment, the unit will record it.
1 Make timer programming on the external
equipment.
2 Press [HDD] or [DVD] to select the recording
drive.
If you selected the DVD drive, insert a disc (➡ 22).
3 Press [EXT LINK].
The unit turns off and “EXT Link” lights on the unit’s display to
indicate timer recording standby has been activated.
To cancel the external control
Press [EXT LINK] to stop recording or to cancel linked timer
recording standby.
≥In order to prevent accidental operation, press [EXT LINK] to
cancel the setting after recording is finished.
[Note]
≥This function does not work with some equipment. Refer to the
equipment’s operating instructions.
≥The beginnings of recordings may not be recorded correctly in
some cases.
≥When “Ext Link” is set to “Ext Link 2”, this function does not work if
the input signal is NTSC system.
≥When “AV2 Connection” is set to “Decoder”, EXT LINK is not
available (➡ 57).
≥Programmes are recorded as one title on this unit when the end
time of the earlier timer recording and the start time of the later
timer recording are close to each other. To divide the titles, go to
“Divide Title” (➡ 39).
≥When this unit is in EXT LINK standby (“EXT Link” is shown on the
unit’s display), The GUIDE Plus+ data cannot downloaded.
≥While the unit is in EXT LINK standby mode or recording, video
picture is from the AV2 input terminal irrespective of “AV1 Output”
setting (➡ 57).
≥During EXT LINK standby mode or recording, playback is only
available from the drive performing the recording.
Timer recording
RQT8203
29
29
Page 30
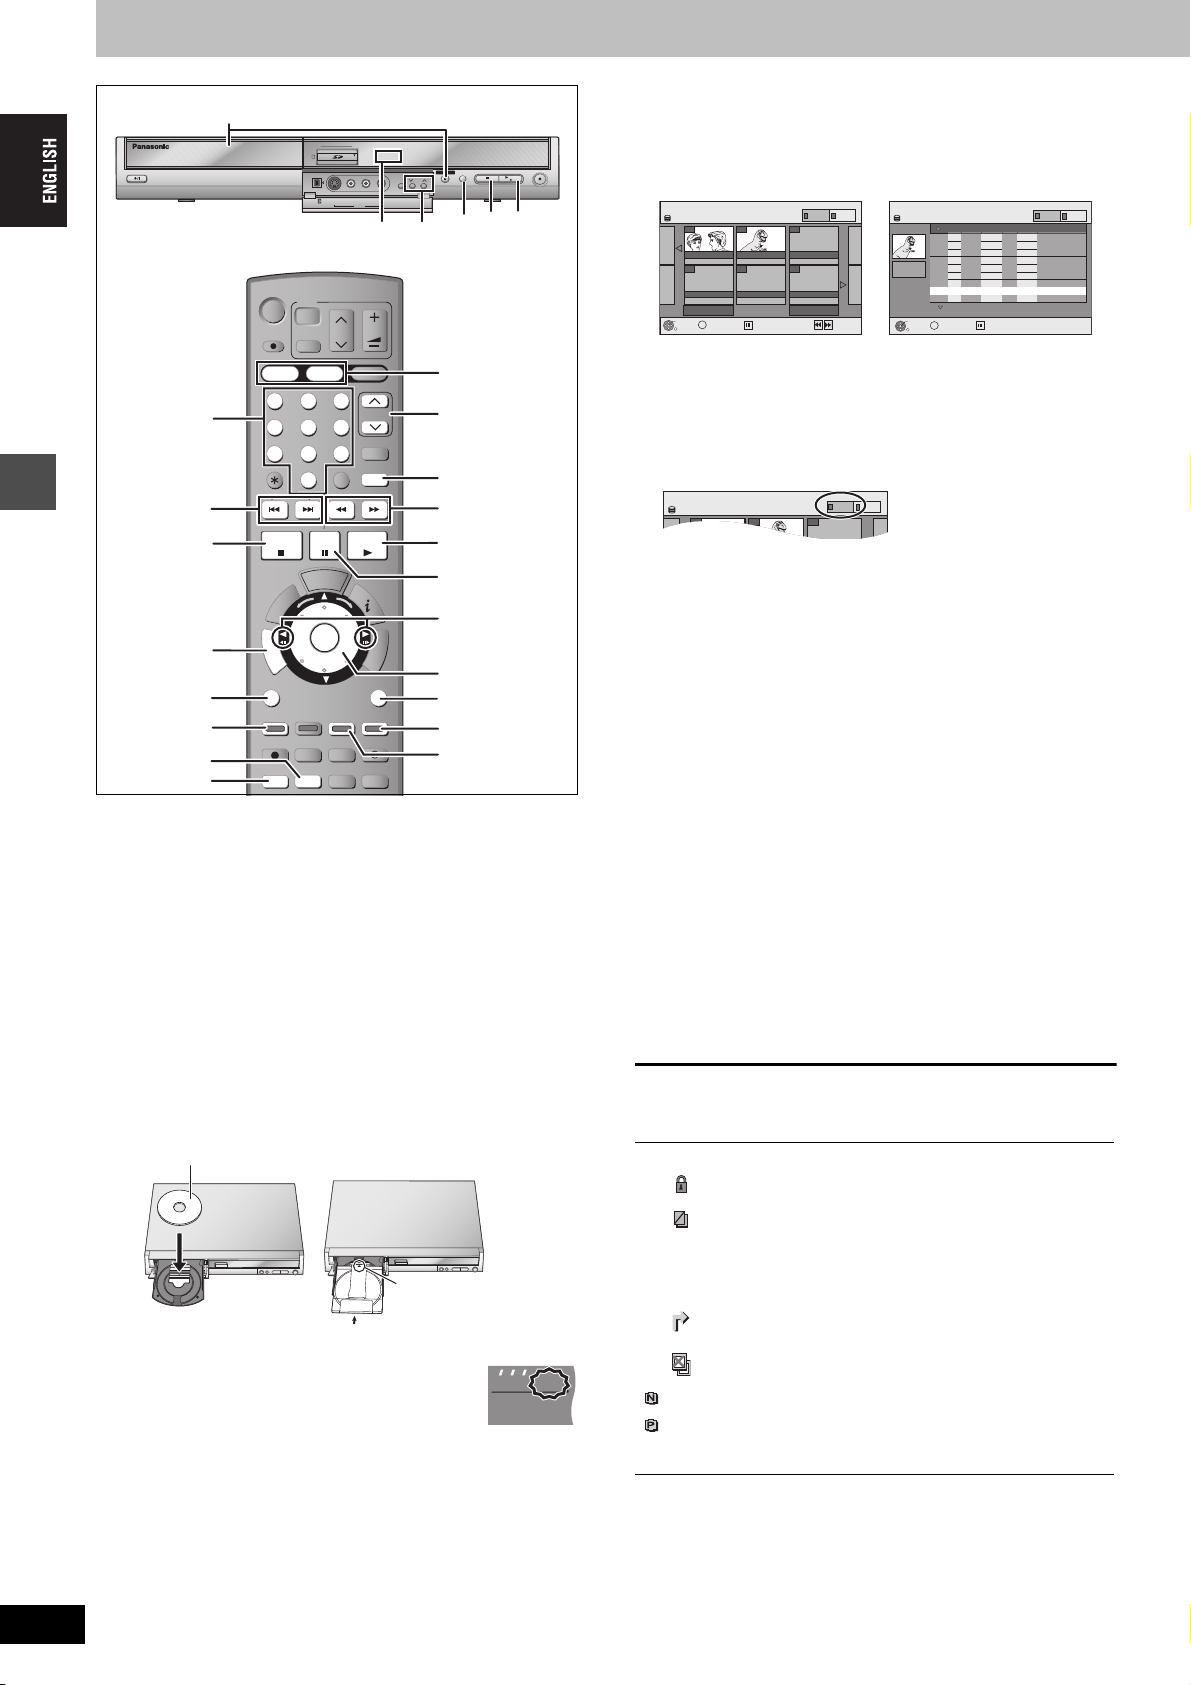
Playing recorded video contents/Playing play-only discs
HDD
DVDSDSD
TV
ENTER
1.3
HDD
PLAY
DVD
SD
DIRECT NAVIGATOR TITLE VIEW
007 008
- - -
HDD
PICTURE
VIDEO
2
HDD
DVD SD
OPEN/CLOSE
EXT LINK
CH
S VIDEO IN
VIDEO IN
L/MONO
-AUDIO IN-
AV3
CH
ShowView
9
MANUAL SKIP
SLOW/SEARCH
PLAY/x1.3
E
CREATE
ERASE
EXT LINK
DUBBING
R
VOLUME
PAG E
CH
F
U
N
C
T
I
O
N
S
RETURN
TIMER
F Rec
X CH W
1
1
W X CH
MANUAL SKIP
6, 5
3
;
2;, ;1
3,4,2,1
ENTER
RETURN
ERASE
CREATE
CHAPTER
Numbered
buttons
:, 9
DIRECT
NAVIGATOR,
TOP MENU
SUB MENU
“Red”
AUDIO
TIME SLIP
HDD, DVD indicator
DVD
Í
DIRECT TV REC
HDD
1
4 5 6
7
CANCEL
∫
STOP
G
O
R
P
R
O
T
U
T
C
A
N
E
E
G
I
R
M
I
V
P
D
O
T
SUB MENU
S
DISPLAY
REC
TIME SLIP
TV
Í
SKIP
K
C
E
H
C
/
A
N
STATUS
REC MODE
AUDI O
DV IN
AV
DVD
2 3
8
INPUT SELECT
0
PAU SE
D
I
U
G
ENTER
CHAPTER
Preparation
≥Turn on the television and select the appropriate video input to suit
the connections to this unit.
≥Turn on this unit.
1 Press [HDD] or [DVD] to select the
playback drive.
The HDD or DVD indicator lights up on the unit.
≥It is possible to watch playback from one drive while
recording on another (editing is not possible).
2 If you selected the DVD drive
Press [< OPEN/CLOSE] on the main
Playing recorded video contents/Playing play-only discs
unit to open the tray and insert a disc.
≥Press the button again to close the tray.
≥When using 8 cm DVD-RAM, or 8 cm DVD-R, remove the
disc from the cartridge.
Insert label-up.
∫ Cartridge disc
Insert with the arrow
facing in.
Insert fully so it clicks into place.
3 Press [1](PLAY).
[HDD] [RAM] [-R] [-RW‹V›] [+R] [-RW‹VR›]
Play starts from the most recently recorded
title.
[DVD-V] [DVD-A] [CD] [VCD]
Play starts from the beginning of the disc.
≥When using cartridge discs with the write-protect tab in the
protect position (➡50), play automatically starts when
inserted in the unit.
∫ Selecting recorded programmes (titles) to play—
Direct Navigator
[HDD] [RAM] [-R] [-RW‹V›] [+R] [-RW‹VR›]
DRIVE
SELECT
REC
/k1.3
∫
3
1 Press [DIRECT NAVIGATOR].
≥Thumbnail Display ≥Table Display
DIRECT NAVIGATOR TITLE VIEW
HDD
007 008
ARD 10.10. FRI ARD 11.10. SAT
Previous Page 02/02 Next
ENTER
RETURN
S
SUB MENU
Select
- - -
- - -- - -- - -
Previous
VIDEO
Next
PICTURE
DIRECT NAVIGATOR TITLE VIEW
HDD
Rec Time
0:52(SP)
ENTER
S
RETURN
001
ARD 26. 9. FRI 13:30
002
ZDF 27. 9. SAT 12:15
003
AV2 3. 10. FRI 20:00
004
ARD 3. 10. FRI 22:05
005
AV2 4. 10. SAT 16:10
006
ZDF 10.10. FRI 9:25
007
ARD 10.10. FRI 13:30
008
ARD 11.10. SAT 21:00
---
SUB MENU
Page 01/01
Select
VIDEO
Name of titleTimeNo. Name Date Day
PICTURE
Switching the Direct Navigator appearance
1 Press [SUB MENU] while Thumbnail Display is displayed.
2 Press [3, 4] to select “Table Display” and press [ENTER].
≥The display appearance last used is saved even after the unit is
turned off.
2 [HDD] [RAM]
Press the “Red” button to select “VIDEO”.
[HDD] To sort Title View for easy searching (Table Display only)
This function is convenient when searching for one title to
playback from many titles.
1Press [SUB MENU].
2Press [3, 4] to select “Sort” and press [ENTER].
3Press [3, 4] to select the item and press [ENTER].
If you select an item other than “No.”
≥The Direct Navigator screen will reappear after playback of the
selected title has finished. (You cannot play titles continuously.)
≥Skip and Time Slip will only function with the title currently being
played back.
≥If you exit the Direct Navigator screen, or switch to “PICTURE”
Direct Navigator screen, the sorted Title View will be cancelled.
3Press [3, 4, 2, 1] to select the title and press
[ENTER].
You can also select titles with the numbered buttons.
e.g., [HDD] [RAM] [-R] [-RW‹V›] [+R] [-RW‹VR›]
5: [0] ➡ [0] ➡ [5] 5: [0] ➡ [5]
15: [0] ➡ [1] ➡ [5] 15: [1] ➡ [5]
115: [1] ➡ [1] ➡ [5]
To show other pages
Press [3,4,2,1] to select “Previous” or “Next” and press
[ENTER]. (Thumbnail Display only)
≥You can also press [:, 9] to show other pages.
To exit the screen
Press [DIRECT NAVIGATOR].
Direct Navigator screen icons
[ Currently recording.
Title protected.
Title that was not recorded due to recording
protection (Digital broadcasts etc.)
t
(NTSC)
(PAL)
Title cannot be played
[When transferring (dubbing) a title to the HDD, or
when data is damaged etc.]
Titles that have been rerouted to the HDD
(➡ 27, Relief Recording)
Title with “One time only recording” restriction
(➡ 68, CPRM)
Title recorded using a different encoding system
from that of the TV system currently selected on the
unit.
≥Alter the “TV System” setting on this unit to suit
(➡ 61).
RQT8203
30
30
Page 31

∫ When a menu screen appears on the television
HDD
RECRECREC
PLAY
PLAY
REC
DVD
SD
PC
C
[DVD-V] [DVD-A]
Press [3, 4, 2, 1] to select the item and press [ENTER].
Some items can also be selected using the numbered buttons.
[VCD]
Press the numbered buttons to select the item.
e.g., 5: [0] ➡ [5] 15: [1] ➡ [5]
≥To return to the menu screen
[DVD-V] Press [TOP MENU] or [SUB MENU]. [DVD-A] Press [TOP MENU]. [VCD] Press [RETURN].
[Note]
≥It is not possible to play continuously from one side of a double sided disc to the other. You will need to eject the disc and turn it over.
≥Depending on the disc, it may take time for the menu screen, pictures, sound, etc. to start.
≥Discs continue to rotate while menus are displayed. Press [∫] when you have finished playback to protect the unit’s motor, your television screen
and so on.
≥When playing back a title recorded on the HDD, ensure that you match the “TV System” setting to the recorded title (➡ 61).
Operations during play
Stop
Pause
Search
Skip
Starting from a selected
title
Quick View
[HDD] [RAM]
Slow-motion
[HDD] [RAM] [-R] [-RW‹V›] [+R] [DVD-V]
[DVD-A] (Motion picture parts only)
[-RW‹VR›] [VCD]
Frame-by-frame
[HDD] [RAM] [-R] [-RW‹V›] [+R] [DVD-V]
[DVD-A] (Motion picture parts only)
[-RW‹VR›] [VCD]
(Continued on the next page)
Press [∫].
The stopped position is memorized.
When stop position is memorized (resume), the indicator on the right appears in the
unit’s display. (Excluding when playing from the Direct Navigator and when playing a
playlist.)
Resume play function
Press [1] (PLAY) to restart from this position.
Stopped position
≥If [∫] is pressed several times, the indicator on the right disappears and the position is cleared.
≥The position is cleared if the unit is turned off or the tray is opened.
Press [;].
Press [;] again or [1] (PLAY) to restart play.
Press [6] or [5].
≥The speed increases up to 5 steps.
≥You can also turn the Smart Wheel left or right for operation (excluding [CD] [VCD]).
≥Press [1] (PLAY) to restart play.
≥Audio is heard during first level search forward.
[DVD-A] (excluding moving picture parts) [CD] Audio is heard during all levels of search.
≥Depending on the disc, Search may not be possible.
During play or while paused, press [:] or [9].
Skip to the title, chapter or track you want to play.
≥Each press increases the number of skips.
Press the numbered buttons.
Play starts from the selected title, chapter or track.
[HDD] [CD] (
e.g., 5: [0] ➡ [0] ➡ [5]
[DVD-A] Selecting groups
While stopped (screen saver is displayed on the television ➡ right)
Input a 1-digit number
e.g., 5: [5]
Other discs (You can select a track with DVD Audio.)
Input a 2-digit number
e.g., 5: [0] ➡ [5]
≥This works only when stopped (screen saver is displayed on the television ➡ above) with some discs.
≥[VCD] (with playback control)
If you press the numbered buttons while stopped (the above screen saver is displayed on the
television) you can cancel PBC. (Elapsed play time appears on the unit’s display.)
discs with MP3 files and JPEG/TIFF
15: [0] ➡ [1] ➡ [5]
15: [1] ➡ [5]
)
Press and hold [1](PLAY/a1.3).
Play speed is quicker than normal.
≥Press again to return to normal speed.
While paused, press [6] or [5].
The speed increases up to 5 steps.
≥You can also turn the Smart Wheel left or right for operation (excluding [VCD]).
≥Press [1] (PLAY) to restart play.
≥[VCD] Forward direction [5] only.
≥The unit will pause if slow-motion play is continued for approximately 5 minutes (excluding [DVD-V]
[DVD-A] [VCD]).
While paused, press [2] (2;) or [1] (;1).
Each press shows the next frame.
≥Press and hold to change in succession forward or backward.
≥Press [1] (PLAY) to restart play.
≥[VCD] Forward direction [1] (;1) only.
Playing recorded video contents/Playing play-only discs
RQT8203
31
31
Page 32

Playing recorded video contents/Playing play-only discs
Refer to the control reference on page 30.
Operations during play
(continued)
Displaying the television
image as a picture-inpicture
[HDD] [RAM] [-R] [-RW‹V›] [+R] [-RW‹VR›]
Press [TIME SLIP].
The unit displays the television image as a picturein-picture.
≥You will hear the playback audio.
≥Press [TIME SLIP] again to cancel.
≥Time Slip does not work when the unit’s “TV
System” settings are different from the title
recorded.
PLAY
Play images
0 min
ARD
Current receiving images
≥You can change the channel being
received by pressing [WXCH].
(You cannot change the channel being
received while recording.)
Skipping the specified
time (Time Slip)
[HDD] [RAM] [-R] [-RW‹V›] [+R] [-RW‹VR›]
1 Press [TIME SLIP].
2 Press [3, 4] to select the time and press [ENTER].
Play skips the specified time.
≥Each time you press [3, 4], the time increases [3] or decreases [4] by
1 minute intervals. (Press and hold for 10-minute intervals.)
≥Press [TIME SLIP] to show the play images in full.
[Note]
Time Slip does not work while timer recording is in standby.
Manual Skip
[HDD] [RAM] [-R] [-RW‹V›] [+R] [-RW‹VR›]
Press [MANUAL SKIP].
Each time you press, play restarts approximately 30 seconds later.
Simple editing operations during play
Erase
[HDD] [RAM] [-R] [-RW‹V›] [+R]
Create Chapter
(➡ 38, Title/Chapter)
[HDD] [RAM]
Erase titles etc. during play
1 Press [ERASE].
2 Press [2, 1] to select “Erase” and press [ENTER].
≥A title cannot be restored once it is erased. Make certain before proceeding.
≥You cannot erase while recording or transferring (dubbing)
≥[-R] [+R] Available space does not increase after erasing.
≥[-RW‹V›] Disc space increases only when the last recorded title is erased.
Press [CREATE CHAPTER].
Chapters are divided at the point pressed.
≥Press [:, 9] to skip to the start of a chapter.
≥Chapters cannot be created during EXT LINK standby.
-
ARD
PLAY
5 min
Playing recorded video contents/Playing play-only discs
RQT8203
32
Changing audio during play
Press [AUDIO].
[HDD] [RAM] [-RW‹VR›] [VCD]
LR>L>R
^---------------}
HDD
PLAY
L R
e.g., “L R” is selected
[Note]
You cannot change the audio type in the following cases.
≥When a DVD-R, DVD-RW (DVD-Video format) or +R disc is in the disc tray while DVD drive is selected.
≥When the recording mode is XP and “Audio Mode for XP Recording” is set to “LPCM” (➡ 56).
≥When “Rec for High Speed dubbing” is set to “On” (➡ 24).
32
[DVD-V] [DVD-A]
You can change the audio channel number each time you press the
button. This allows you to change things like the soundtrack
language (➡ 36, Soundtrack).
Soundtrack
1 ENG Î Digital 3/2.1ch
e.g., English is selected.
Page 33

Using menus to play MP3
HDD
DVDSDSD
TV
DVD/TV
ENTER
[CD]
DVD
TV
Í
Numbered
buttons
DIRECT TV REC
HDD
1
4 5 6
7
CANCEL
SKIP
Í
AV
2 3
8
DVD
INPUT SELECT
0
VOLUME
CH
PAG E
CH
ShowView
9
MANUAL SKIP
SLOW/SEARCH
DVD
:, 9
PAU SE
U
G
K
C
ENTER
STATUS
REC MODE
AUDI O
DVD/ TV
D
I
E
CREATE
CHAPTER
EXT LINK
DUBBING
PLAY/x1.3
RETURN
ERASE
TIMER
F Rec
F
U
N
C
T
I
O
N
S
RETURN
3,4,2,1
ENTER
TOP MENU
STOP
E
H
C
/
G
O
R
P
R
O
T
U
T
C
A
N
E
E
G
I
R
M
I
V
P
D
A
O
N
T
SUB MENU
S
DISPLAY
REC
TIME SLIP
Regarding MP3
≥Compatible formats: ISO9660 level 1 or 2 (except for extended
formats) and Joliet
≥Maximum number of files (tracks) and folders (groups)
recognizable: 999 files (tracks) and 99 folders (groups)
≥This unit is compatible with multi-session but reading or play of
the disc may take time if there are a lot of sessions.
≥Operation may take time to complete when there are many files
(tracks) and/or folders (groups) and some files (tracks) may not
display or be playable.
≥The display order on this unit may differ from how the order is
displayed on a computer.
≥Depending on how you create the disc (writing software), files
(tracks) and folders (groups) may not play in the order you
numbered them.
≥This unit is not compatible with packet-write format.
≥File format: MP3
Files must have the extension “.mp3” or “.MP3”.
≥Bit rates: 32 kbps to 320 kbps
≥Sampling frequency: 16 kHz/22.05 kHz/24 kHz/32 kHz/
44.1kHz/48 kHz
≥This unit is not compatible with ID3 tags.
≥If there is a large amount of still picture data etc. within a MP3
file, play may not be possible.
Structure of MP3 folders
Prefix with 3-digit numbers
in the order you want to play
them.
Order of play
Root
001
003 group
(folder=group)
001
001track.mp3
002track.mp3
003track.mp3
002 group
001track.mp3
002track.mp3
003track.mp3
004track.mp3
001track.mp3
002track.mp3
003track.mp3
(file=track)
Preparation
Press [DVD] to select the DVD drive.
This unit plays MP3 files recorded on CD-R/RW designed for audio
recording that are finalized (➡ 68) on a computer.
The screen shown below is displayed when you insert a disc
containing MP3 files and still pictures (JPEG/TIFF).
Playback mode is set to MP3.
Select "JPEG" from MENU in FUNCTIONS
if you play pictures ( JPEG ).
RETURN
ENTER
Press [ENTER], and follow the steps below.
1 Press [TOP MENU].
Selected group
G: Group No.
T: Track No. in the group
TOTAL: Track No./Total tracks
in all groups
MENU
G 1
T 1
TOTAL
1/111
No.
0 9
Prev.
Next
SELECT
ENTER
–
RETURN
GroupNo.
1 : My favorite
Total Track
001 Both Ends Freezing
1
002 Lady Starfish
2
003 Life on Jupiter
3
004 Metal Glue
4
005 Paint It Yellow
5
006 Pyjamamama
6
007 Shrimps from Mars
7
008 Starperson
8
009 Velvet Cuppermine
9
010 Ziggy Starfish
10
Page 001/024
Tree
≥Files are treated as tracks and folders are treated as groups.
≥When the JPEG Menu is displayed, perform steps 1–4 in “To select
JPEG” on page 34 selecting “MP3” in step 4 to change to the MP3
Menu.
2 Press [3, 4] to select the track and
press [ENTER].
Play starts on the selected track.
≥“0” indicates the track currently playing.
≥You can also select the track with the numbered buttons.
e.g., 5: [0] ➡ [0] ➡ [5]
15: [0] ➡ [1] ➡ [5]
To show other pages
Press [:, 9].
To exit the screen
Press [TOP MENU].
Using the tree screen to find a group
1 While the file list is displayed
Press [1] while a track is highlighted
to display the tree screen.
Selected group No. /Total groups
If the group has no track, “– –” is displayed
as group number.
MENU
G 8
T 14
TOTAL
40/111
No.
–
0 9
SELECT
ENTER
RETURN
Tre e
MP3 music
001 My favorite
001 Brazilian pops
002 Chinese pops
003 Czech pops
004 Hungarian pops
005 Liner notes
006 Japanese pops
007 Mexican pops
008 Philippine pops
009 Swedish pops
001 Momoko
002 Standard number
001 Piano solo
002 Vocal
G 7/25
You cannot select groups
that contain no compatible
files.
2 Press [3, 4, 2, 1] to select a group
and press [ENTER].
The file list for the group appears.
Using menus to play MP3
To return to the previous screen
Press [RETURN].
RQT8203
33
33
Page 34

Playing still pictures (JPEG/TIFF)
HDD
DVDSDSD
TV
ENTER
1.3
HDD, DVD, SD indicator
HDD
DVD SD
OPEN/CLOSE
∫
DRIVE
SELECT
REC
/k1.3
DRIVE SELECT
DVD
TV
Í
Numbered
buttons
DIRECT TV REC
HDD
1
4 5 6
7
CANCEL
SKIP
Í
AV
2 3
8
DVD
INPUT SELECT
0
VOLUME
CH
PAG E
CH
ShowView
9
MANUAL SKIP
SLOW/SEARCH
HDD, DVD,
SD
:,9
PAU SE
3,4,2,1
ENTER
DIRECT
NAVIGATOR
SUB MENU
STATUS
“Green”
∫
STOP
E
H
C
/
G
O
R
P
R
O
T
U
T
C
A
N
E
E
G
I
R
M
I
V
P
D
A
O
N
T
SUB MENU
S
DISPLAY
REC
U
G
K
C
ENTER
STATUS
REC MODE
D
I
E
CREATE
CHAPTER
EXT LINK
PLAY/x1.3
RETURN
ERASE
TIMER
F
U
N
C
T
I
O
N
S
FUNCTIONS
RETURN
ERASE
[HDD] [RAM] [SD] [CD]
≥You can use SD Memory Cards with capacities from 8 MB to 1 GB
(➡ 11).
≥Inserting, Removing the SD card (➡ 6)
4 Press [3, 4, 2, 1] to select the still
picture and press [ENTER].
You can also select still pictures with the numbered buttons.
e.g.,
5: [0] ➡ [0] ➡ [0] ➡ [5] 115: [0] ➡ [1] ➡ [1] ➡ [5]
15: [0] ➡ [0] ➡ [1] ➡ [5] 1115: [1] ➡ [1] ➡ [1] ➡ [5]
≥Press [2, 1] to display the previous or next still picture.
≥Useful functions during still picture play (➡ 35)
To return to the Direct Navigator screen
Press [∫].
To exit the screen
Press [DIRECT NAVIGATOR].
∫ To show the picture properties
Press [STATUS] twice.
18:53:50 11.10.
Folder - Picture No. 103 - 0006
Date 1. 1. 2005 No. 3 / 9
Shooting date
To exit the picture properties screen
Press [STATUS].
[Note]
≥Still pictures cannot be played during recording or transferring
(dubbing).
To select JPEG
[CD] [with MP3 files and still pictures (JPEG/TIFF)]
The screen shown below is displayed when you insert a disc
containing MP3 files and still pictures (JPEG/TIFF).
Playing still pictures (JPEG/TIFF)
RQT8203
34
1 Press [HDD], [DVD] or [SD]
to select the drive.
The indicator lights up on the unit.
≥On the main unit, press [DRIVE SELECT]
several times.
[CD]
The screen shown below is displayed when you insert a disc
containing MP3 files and still pictures (JPEG/TIFF). Select
JPEG menu (➡ right) before performing the steps below.
Playback mode is set to MP3.
Select "JPEG" from MENU in FUNCTIONS
if you play pictures ( JPEG ).
RETURN
ENTER
2 Press [DIRECT NAVIGATOR].
3 [HDD] [RAM]
Press the “Green” button to select
“PICTURE”.
DIRECT NAVIGATOR PICTURE (JPEG) VIEW
HDD
Folder 103__DVD
0001
0002 0003 0004
0005 0006 0007 0008
0009
---- ---- ----
Page 001/001
Previous
ENTER
SUB MENU
S
RETURN
VIDEO
Next
Select
Direct Navigator screen icons
Picture protected.
Picture in which the number of prints is set (DPOF)
(➡ 42, 68).
To show other pages
Press [3,4,2,1] to select “Previous” or “Next” and press
[ENTER].
≥You can also press [:, 9] to show other pages.
To select the still pictures in another folder ➡ 35
34
PICTURE (JPEG) VIEW
PICTURE
screen
e.g.,
SD card drive
Playback mode is set to MP3.
Select "JPEG" from MENU in FUNCTIONS
if you play pictures ( JPEG ).
RETURN
ENTER
1 Press [RETURN].
2 Press [FUNCTIONS].
FUNCTIONS
Playback
Recording
Dubbing
EPG
2
3
1
ENTER
RETURN
DVD
CD (MP3/JPEG)
MENU
GUIDE Plus+
TIMER RECORDING
ShowView
DUBBING
To Others
MP3 Playback mode
3 Press [3, 4] to select “MENU” and
press [ENTER].
Menu
Select file type.
MP3
JPEG
RETURN
ENTER
4 Press [3, 4] to select “JPEG” and
press [ENTER].
Page 35

Useful functions during still picture
DIRECT NAVIGATOR PICT
SD CARD
0001
Folder 103__DV
0002
DIRECT NAVIGATOR PICTURE (JPEG) VIEW
SD CARD
0001
Folder 103__DVD
0002 0003 0004
001 100__DVD
002 101__DVD
003 102__DVD
\DCIM\100__DVD
004 103__DVD
001 100__DVD
002 101__DVD
003 102__DVD
\DCIM\100__DVD
004 103__DVD
Folder
Select folder to access.
\DCIM
Press ENTER to set.
play
Start Slide
Show
Slide Interval
[HDD] [RAM] [SD] [CD]
Rotate
[HDD] [RAM] [SD] [CD]
Zoom in
Zoom out
[HDD] [RAM] [SD] [CD]
Erase
[HDD] [RAM] [SD]
∫ To select the still pictures in another folder
(➡ 11, Structure of folders displayed by this unit)
1 Press [3, 4, 2, 1] to select “Folder” and press [ENTER].
2 Press [3, 4] to select the folder and press [ENTER].
You can display still pictures one by one
with constant interval.
While the PICTURE (JPEG) VIEW screen
is displayed
1 Press
[3, 4, 2, 1] to
select “Folder”
and press
[SUB MENU].
2 Press [3, 4] to
select “Start Slide
Start Slide Show
Slide Interval
Show” and press
[ENTER].
≥To change the display timing
1Press [3, 4] to select “Slide Interval” in
step 2 and press [ENTER].
2Press [2, 1] to select the desired
timing (0–30 seconds) and press
[ENTER].
1 Press
[SUB MENU].
2 Press [3, 4] to
select “Rotate
Rotate RIGHT
Rotate LEFT
ENTER
RETURN
RIGHT” or
“Rotate LEFT” and press
[ENTER].
≥Rotation information will not be stored.
1 Press
[SUB MENU].
2 Press [3, 4] to
select “Zoom in”
Rotate RIGHT
Rotate LEFT
Zoom in
ENTER
RETURN
and press
[ENTER].
≥To return the picture to its original size,
press [3, 4] to select “Zoom out” in step
2 and press [ENTER].
≥When zooming in, the picture may be cut
off.
≥The enlargement information will not be
stored.
≥The “Zoom in/Zoom out” function is only
available for still pictures smaller than
640 a 480 pixels.
1 Press [ERASE].
2 Press [2, 1] to select
“Erase” and press [ENTER].
≥Once erased, the recorded contents
are lost and cannot be restored. Make
certain before proceeding.
PICTURE
Regarding still pictures (JPEG, TIFF)
[HDD] [RAM] [SD]
≥Compatible formats: DCF
digital camera, etc.)
§
Design rule for Camera File system: unified standard
§
compliant (Content recorded on a
established by Japan Electronics and Information Technology
Industries Association (JEITA).
≥File format: JPEG, TIFF (non-compressed RGB chunky format)
≥Number of pixels:34k34 to 6144k4096
(Sub sampling is 4:2:2 or 4:2:0)
≥This unit can handle a maximum of 3000 files and 300 folders
(including higher folders).
≥Operation may take time to complete when playing TIFF format
still pictures, or when there are many files and/or folders, some
files may not display or be playable.
≥MOTION JPEG is not supported.
[CD]
≥Compatible formats: ISO9660 level 1 or 2 (except for extended
formats) and Joliet
≥Maximum number of files and folders recognizable:
999 files and 99 folders
≥This unit is compatible with multi-session but reading or play of
the disc may take time if there are a lot of sessions.
≥Operation may take time to complete when there are many files
and/or folders and some files may not display or be playable.
≥The display order on this unit may differ from how the order is
displayed on a computer.
≥Depending on how you create the disc (writing software), files
and folders may not play in the order you numbered them.
≥This unit is not compatible with packet-write format.
≥File format: JPEG, TIFF (non-compressed RGB chunky format)
≥Files must have the extension “.jpg”, “.JPG”, “.tif” or “.TIF”.
≥Number of pixels: 34 x 34 to 6144 x 4096
(Sub sampling is 4:2:2 or 4:2:0)
≥Operation may take time to complete when playing TIFF format
still pictures.
≥MOTION JPEG is not supported.
≥You can play MP3 and still pictures (JPEG/TIFF) on this unit by
making folders as shown below. However depending on how
you create the disc (writing software), play may not be in the
order you numbered the folders.
≥English alphabet and Arabic numerals are displayed correctly.
Other characters may not be displayed correctly.
≥When the highest level folders are “DCIM” folders, they are
displayed first on the tree.
Structures of still pictures
Files inside a folder are displayed
in the order they were updated or
taken.
Root
Order of play
P0000001.jpg
P0000002.jpg
001
004 Folder
002 Folder
P0000003.jpg
P0000004.jpg
P0000005.jpg
003 Folder
P0000010.jpg
P0000011.jpg
P0000012.jpg
P0000006.jpg
P0000007.jpg
P0000008.jpg
P0000009.jpg
Playing still pictures (JPEG/TIFF)
You can also select folders with the numbered buttons.
e.g., 5: [0] ➡ [0] ➡ [5]
To switch to another higher folder
If there is a multiple number of higher folders recognizable,
while the screen on the right appears
1 Press [SUB MENU].
2 Press [3, 4] to select “Folder” and
press [ENTER].
3 Press [2, 1] to select the higher
folder and press [ENTER].
4 Press [3, 4] to select the desired
folder and press [ENTER].
15: [0] ➡ [1] ➡ [5]
115: [1] ➡ [1] ➡ [5]
RQT8203
35
35
Page 36

Using on-screen menus/FUNCTIONS window and Status message
HDD
DVDSDSD
TV
DVD/TV
ENTER
Disc menu—Setting the disc content
DVD
TV
3,4,2,1
ENTER
DISPLAY
Í
DIRECT TV REC
HDD
1
4 5 6
7
CANCEL
SKIP
STOP
C
E
H
C
/
G
O
R
P
R
O
T
U
T
C
A
N
E
E
G
I
R
M
I
V
P
D
A
O
N
T
SUB MENU
S
DISPLAY
REC
TIME SLIP
Í
AV
DVD
2 3
8
INPUT SELECT
0
PAU SE
D
I
U
G
K
ENTER
STATUS
CHAPTER
REC MODE
AUDI O
CH
ShowView
9
MANUAL SKIP
SLOW/SEARCH
PLAY/x1.3
E
CREATE
EXT LINK
DUBBING
VOLUME
PAG E
CH
F
U
N
C
T
I
O
N
S
RETURN
ERASE
TIMER
F Rec
FUNCTIONS
STATUS
Soundtrack
[HDD] [RAM] [-R] [-RW‹V›] [+R] [-RW‹VR›]
The disc’s audio attributes appear.
[DVD-V] [DVD-A]
Select the audio and language (➡ below, Audio attribute,
Language).
[VCD] (SVCD only)
Select the soundtrack number (1–2).
≥Soundtrack numbers (1–2) are displayed even when there is
only one audio type.
Subtitle
[DVD-V] [DVD-A]
Turn the subtitle on/off and select the language (➡ below,
Language).
[HDD] [RAM] [-R] [-RW‹V›] [+R] [-RW‹VR›] (Only discs that contain
subtitle on/off information)
Turn the subtitle on/off.
≥Subtitle on/off information cannot be recorded using this unit.
[VCD] (SVCD only)
Turn the subtitle on/off and select the subtitle number (1–4).
≥Subtitle numbers (1–4) are displayed even if there are not
multiple subtitles.
Angle
§
§
§
[DVD-V] [DVD-A]
DVD/ TV
Using on-screen menus
Common procedures
1 Press [DISPLAY].
Disc
Play
Picture
Sound
Soundtrack
Subtitle
Audio channel
Other
Menu Item Setting
≥Depending on the condition of the unit (playing, stopped,
etc.) and disc contents, there are some items that you
cannot select or change.
2 Press [3, 4] to select the menu and
Using on-screen menus/FUNCTIONS window and Status message
3 Press [3, 4] to select the item and
press [1].
press [1].
1
Î Digital 2/0 ch
4 Press [3, 4] to select the setting.
≥Some items can be changed by pressing [ENTER].
L R
Change the number to select an angle.
Audio channel [HDD] [RAM] [-RW‹VR›] [VCD]
➡ 32, Changing audio during play
STILL-P (Still picture)
[DVD-A]
Selects the play method for still pictures.
Slide Show: Plays according to the default order on the disc.
Page: Select the still picture number and play.
≥RANDOM: Plays in random order.
≥Return: Returns to the default still picture on the disc.
PBC (Playback control ➡ 68) [VCD]
Off
Indicates whether menu play (playback control) is on or off.
§
With some discs, you may only be able to make changes using the
menus (➡ 31) on the disc.
≥The display changes according to the disc content. You cannot
change when there is no recording.
Audio attribute
LPCM/PPCM/ÎDigital/DTS/MPEG:
k (kHz):
b (bit):
ch (channel):
Signal type
Sampling frequency
Number of bits
Number of channels
Language
ENG: English
FRA: French
DEU: German
ITA: Italian
ESP: Spanish
NLD: Dutch
SVE: Swedish
NOR: Norwegian
DAN: Danish
POR: Portuguese
RUS: Russian
JPN: Japanese
CHI: Chinese
KOR: Korean
MAL: Malay
VIE: Vietnamese
THA: Thai
¢: Others
RQT8203
36
To clear the on-screen menus
Press [DISPLAY].
36
Play menu—Change the play sequence
This function works only when the elapsed play time is displayed.
Select the item for repeat play. Depending on the disc, the items that
can be selected will differ.
Repeat Play
≥All
≥Chapter
≥Group
≥PL (Playlist)
≥Title
≥Tr ac k
Select “Off” to cancel.
[CD] (excluding MP3 discs) [VCD]
[HDD] [RAM] [-R] [-RW‹V›] [+R] [DVD-V] [-RW‹VR›]
[DVD-A] [CD] (MP3 discs only)
[HDD] [RAM]
[HDD] [RAM] [-R] [-RW‹V›] [+R] [DVD-V] [-RW‹VR›]
[DVD-A] [CD] [VCD]
Page 37

Picture menu—Change the picture quality
Playback NR
Reduces noise and picture degradation.
Progressive
Select “On” to enable progressive output.
Select “Off” if the picture is stretched horizontally.
Transfer
Select the method of conversion for progressive output to suit
the type of title being played (➡ 68, Film and video).
When the output signal is PAL
≥Auto:
≥Video:
When the output signal is NTSC
≥Auto1
≥Auto2:
≥Video:
AV-in NR (Only when AV1, AV2, AV3, AV4 or DV is selected)
§
(➡ 68)
§
[When “Progressive” (➡ above) is set to “On”.]
Detects 25 frame-per-second film content and
appropriately converts it.
Select when using “Auto”, and the video
content is distorted.
Detects 24 frame-per-second film content and
(normal):
appropriately converts it.
Compatible with 30 frame-per-second film
content in addition to 24 frame-per-second
film content. (Picture distortion may occur
depending on the content)
Select when using “Auto1” and “Auto2”, and
the video content is distorted.
FUNCTIONS window
By using the FUNCTIONS window you may access the main
functions quickly and easily.
1 While stopped
Press [FUNCTIONS].
Functions displayed depend on the selected drive or type of
disc.
FUNCTIONS
Playback
Recording
Dubbing
EPG
2
3
1
ENTER
RETURN
HDD
HDD
DIRECT NAVIGATOR
GUIDE Plus+
TIMER RECORDING
ShowView
DUBBING
To Others
Disc Remaining
30:00 SP
2 Press [3, 4] to select an item and
press [ENTER].
≥If you select “To Others” and press [ENTER], the following
screen appears.
FUNCTIONS
HDD
HDD
Playback
DIRECT NAVIGATOR
Recording
EPG
GUIDE Plus+
TIMER RECORDING
2
3
1
ShowView
Dubbing
DUBBING
ENTER
RETURN
≥If you select “Return” and press [ENTER], you can return to
the previous screen.
To Others
Disc Remaining
PLAYLISTS
FLEXIBLE REC
DV AUTO REC
SETUP
DISC MANAGEMENT
Return
30:00 SP
Reduces video tape noise while transferring (dubbing).
≥Automatic: Noise reduction only works on picture input
from a video tape.
≥On: Noise reduction works for input video.
≥Off: Noise reduction is off. You can record the input
signal as it is.
§
Only when you have set “Progressive” to “On” in the SETUP menu
(➡ 20).
Sound menu—Change the sound effect
V.S.S.
[HDD] [RAM] [-R] [-RW‹V›] [+R] [DVD-V] [DVD-A] [-RW‹VR›]
(Dolby Digital, MPEG, 2-channel or over only)
Enjoy a surround-like effect if you are using two front speakers
only.
≥Turn V.S.S. off if it causes distortion. (Check the surround
function on the connected equipment.)
≥V.S.S. does not work for bilingual recordings.
Dialog Enhancer
[RAM] [-RW‹V›] [+R] [DVD-V] [DVD-A] [-RW‹VR›]
(Dolby Digital, 3-channel or over only, including a centre channel)
The volume of the centre channel is raised to make dialogue
easier to hear.
Other menu—Change the display position
To exit the FUNCTIONS window
Press [FUNCTIONS].
Status messages
Press [STATUS].
The display changes each time you press the button.
HDD
REC
PLAY
STEREO
L R
DVD REC
Title number and elapsed time during play/
Recording mode
Date and time
18:53:50 11.10.
π T1 0:05.14 XP π T2 0:00.10 XP
Title number and elapsed time during
recording/Recording mode
Selected drive/type of disc
Recording or play status/input channel
TV audio type being received (➡ below)
Selected audio type
Recording drive/
Transfer (dubbing) progress indicator
Available recording time and
recording mode
π
Remain
13:50 XP
Using on-screen menus/FUNCTIONS window and Status message
Position
1–5: The higher the setting the lower the on-screen menu
moves.
No display
≥TV audio type
STEREO: STEREO/NICAM stereo broadcast
M1/M2: Bilingual/NICAM dual-sound broadcast
M1:NICAM monaural broadcast
RQT8203
37
37
Page 38

HDD
DVDSDSD
TV
ENTER
DIRECT NAVIGATOR
CHAPTER VIEW
008 ARD 11.10. SAT
001
--- ---
--- ------ ---
--- ------ ---
---
HDD
PICTURE
VIDEO
0:31.24
Editing titles/chapters
RQT8203
38
Editing titles/chapters
AV
HDD
1
4 5 6
7
CANCEL
SKIP
STOP
K
C
E
H
C
/
G
O
R
P
R
O
T
U
T
C
A
N
E
E
G
I
R
M
I
V
P
D
A
O
N
T
SUB MENU
S
STATUS
DISPLAY
REC
REC MODE
Chapter
DVD
2 3
8
INPUT SELECT
0
PAU SE
I
U
G
ENTER
Title
Title
9
SLOW/SEARCH
PLAY/x1.3
D
E
CREATE
CHAPTER
EXT LINK
PAG E
CH
ShowView
MANUAL SKIP
F
U
N
C
T
I
O
N
S
RETURN
ERASE
TIMER
;
1
RETURN
HDD, DVD
:, 9
3,4,2,1
ENTER
DIRECT
NAVIGATOR
SUB MENU
“Red”
[HDD] [RAM] [-R] [-RW‹V›] [+R]
Title/Chapter
Programmes are recorded as a single title consisting of one
chapter.
Start End
You can divide a title into multiple chapters. [HDD] [RAM]
(➡ 32, 39, Create Chapter)
Chapter
Chapter Chapter Chapter
You can change the order of chapters and create a playlist (➡ 40).
[HDD] [RAM]
≥Titles are divided into about 5-minute chapters after finalizing
(➡ 52). [-R] [-RW‹V›] [+R]
≥The maximum number of items on a disc:
[HDD]
–Titles: 500
–Chapters: Approx. 1000 per title
(Depends on the state of recording.)
[RAM] [-R] [-RW‹V›] [+R]
–Titles: 99 ([+R] 49 titles)
–Chapters: Approx. 1000 ([+R] Approx. 254)
(Depends on the state of recording.)
[Note]
≥Once erased, divided or partially erased, recorded content cannot
be restored to its original state. Make certain before proceeding.
≥You cannot edit during recording or transferring (dubbing), etc.
≥Restricted recording information remains even after editing (e.g.
dividing a title etc).
Editing titles/chapters and playing
chapters
You can modify (remove unnecessary parts, divide, etc.) recorded
programmes.
Preparation
≥Turn on the television and select the appropriate video input to suit
the connection to this unit.
≥Turn the unit on.
≥Press [HDD] or [DVD] to select the drive containing the recorded
title to be edited.
≥[RAM] Release protection (➡ 50).
38
1 During play or while stopped
Press [DIRECT NAVIGATOR].
2 [HDD] [RAM]
Press the “Red” button to select
“VIDEO”.
3 Press [3, 4, 2, 1] to select the title.
DIRECT NAVIGATOR TITLE VIEW
HDD
007 008
ARD 10.10. FRI ARD 11.10. SAT
Previous
ENTER
S
SUB MENU
ENTER
- - -
Page 02/02
Select
- - -
- - -- - -
Previous
Next
To show other pages
Press [3, 4, 2, 1] to select “Previous” or “Next” and
press [ENTER].
≥You can also press [:, 9] to show other pages.
Multiple editing
Select with [3, 4, 2, 1] and press [;]. (Repeat.)
A check mark appears. Press [;] again to cancel.
4
Press [SUB MENU].
5
Press [3,4] to select the operation
and press [ENTER].
≥If you select “Edit”, press [3, 4] to select the operation and
press [ENTER]. (➡ 39)
Enter Name
Set up Protection
Cancel Protection
Erase
Properties
Edit
Chapter View
Table Display
Other View
Partial Erase
Change Thumbnail
Divide Title
Switching the Direct Navigator
appearance ➡ 30
Playing still pictures (JPEG/TIFF)
➡ 34, step 3
∫ If you select “Chapter View”
6
Press [3,4,2,1] to select the chapter.
To start play ➡ Press [ENTER].
To edit ➡ Step 7.
≥To show other pages/Multiple editing (➡ above)
7
Press [SUB MENU], then [3,4] to
select the operation and press [ENTER].
Erase Chapter
Create Chapter
Combine Chapters
Title View
≥You can go back to Title View.
To return to the previous screen
Press [RETURN].
To exit the screen
Press [DIRECT NAVIGATOR].
Refer to “Chapter
operations” (➡ 39).
Title View screen
VIDEO
PICTURE
Next
Chapter View screen
Refer to “Title
operations”
(➡ 39).
Page 39

Title operations
Properties
No.
Name
Date
026
ARD
11.10.2004
Time
Rec time
12:19
0:30 (SP)MON
Dinosaur
DIRECT NAVIGATOR
Change Thumbnail
Change
Exit
0:06.45
0:06.45
Change
HDD
;
008
ENTER
Start play and select the image
of a thumbnail.
DIRECT NAVIGATOR Divide Title
Preview
Exit
0:43.21
PLAY
008
Divide
- -:- -.- -
Divide
HDD
PICTURE
VIDEO
DIRECT NAVIGATOR Create Chapter
Create
Exit
0:43.21
PLAY
008
HDD
PICTURE
VIDEO
After performing steps 1–5 (➡ 38)
Erase
§
[HDD] [RAM] [-R] [-RW‹V›] [+R]
Properties
[HDD] [RAM] [-R] [-RW‹V›] [+R]
[-RW‹VR›]
Press [2, 1] to select “Erase” and press [ENTER].
≥Once erased, the recorded contents are lost and cannot be restored. Make certain before proceeding.
≥The available recording space on DVD-R or +R does not increase when you erase titles.
≥Available recording space on DVD-RW (DVD-Video format) increases only when the last recorded title is
erased. It does not increase if other titles are erased.
Information (e.g., time and date) is shown.
≥Press [ENTER] to exit the screen.
Enter Name
[HDD] [RAM] [-R] [-RW‹V›] [+R]
Set up Protection
Cancel Protection
[HDD] [RAM]
Partial Erase
[HDD] [RAM]
(➡ below, For your reference)
Change Thumbnail
[HDD] [RAM] [-R] [-RW‹V›] [+R]
(➡ below, For your reference)
Divide Title
[HDD] [RAM]
(➡ below, For your reference)
§
Multiple editing is possible.
You can give names to recorded titles.
➡ 53, Entering text
§
If set, this will protect the title from accidental erasure.
Press [2, 1] to select “Yes” and press [ENTER].
§
The lock symbol appears when the title is protected.
You can remove unnecessary part of the recording.
1 Press [ENTER] at the start point and end point of the
section you want to erase.
2 Press [3, 4] to select “Exit” and press [ENTER].
≥Select “Next” and press [ENTER] to erase other sections.
3 Press [2, 1] to select “Erase” and press [ENTER].
You can change an image to be shown as the thumbnail picture in the Title
View.
1 Press [1] (PLAY) to start play.
2 Press [ENTER] when the image you want to use as a
thumbnail is shown.
To change the thumbnail
Restart play and press [3, 4] to select “Change”, then press [ENTER]
at the point you want to change.
3 Press [3, 4] to select “Exit” and press [ENTER].
You can divide a title into two.
1 Press [ENTER] at the point you want to divide the title.
2 Press [3, 4] to select “Exit” and press [ENTER].
3 Press [2, 1] to select “Divide” and press [ENTER].
To confirm the division point
Press [3, 4] to select “Preview” and press [ENTER]. (The unit plays 10
seconds before and after the division point.)
To change the division point
Restart play and press [3, 4] to select “Divide”, then press [ENTER] at the point where you want to divide
the title.
[Note]
≥The divided titles retain the title name and CPRM property (➡ 68) of the original title.
≥Video and audio just before and after the dividing point may momentarily cut out.
DIRECT NAVIGATOR TITLE
HDD
007 008
ARD 10.10. FRI ARD 11.10.
DIRECT NAVIGATOR Partial Erase
HDD
008
ENTER
RETURN
PLAY
Start End
- -:- -.- - - -:- -.- -
Start
End
Next
Exit
0:43.21
VIDEO
VIDEO
PICTURE
PICTURE
Editing titles/chapters
Chapter operations
After performing steps 1–7 (➡ 38)
Erase Chapter
[HDD] [RAM]
Create Chapter
[HDD] [RAM]
(➡ below, For your reference)
Combine Chapters
[HDD] [RAM]
§
Multiple editing is possible.
For your reference
≥Use search (➡ 31), Time Slip (➡ 32) to find the desired point.
≥To find the desired point correctly, use Slow-motion (➡ 31) and Frame-by-frame (➡ 31).
≥Press [:, 9] to skip to the end of a title.
§
Press [2, 1] to select “Erase” and press [ENTER].
≥Once erased, the recorded contents are lost and cannot be restored. Make certain before proceeding.
Select the point where you want to start a new chapter while viewing the
title.
1 Press [ENTER] at the point you want to divide.
≥Repeat this step to divide at other points.
2 Press [3, 4] to select “Exit” and press [ENTER].
Press [2, 1] to select “Combine” and press [ENTER].
≥The selected chapter and following chapter are combined.
RQT8203
39
39
Page 40

Creating, editing and playing playlists
HDD
DVDSDSD
TV
ENTER
Disc Remaining
FUNCTIONS
30:00 SP
HDD
HDD
Playback
DIRECT NAVIGATOR
FLEXIBLE REC
PLAYLISTS
DV AUTO REC
PLAYLISTS PLAYLIST VIEW
- - -
Create
HDD
- - -
- - -
- - -
- - -- - -
DVD
TV
Í
HDD, DVD
3,4,2,1
ENTER
SUB MENU
DIRECT TV REC
HDD
1
4 5 6
7
CANCEL
SKIP
STOP
K
C
E
H
C
/
G
O
R
P
R
O
T
U
T
C
A
N
E
E
G
I
R
M
I
V
P
D
A
O
N
T
SUB MENU
S
Í
AV
DVD
2 3
8
INPUT SELECT
0
PAU SE
D
I
U
G
ENTER
CH
ShowView
9
MANUAL SKIP
SLOW/SEARCH
PLAY/x1.3
E
CREATE
VOLUME
PAG E
CH
F
U
N
C
T
I
O
N
S
RETURN
You can arrange the chapters (➡ 38) to create a playlist.
Title
Chapter
Chapter Chapter Chapter Chapter
Playlist
Chapter
Chapter
Transferring (dubbing) (➡ 43) a playlist will create a title.
≥Playlists are not recorded separately so this doesn’t use much
capacity.
≥Editing chapters in a playlist does not modify the source titles
and source chapters.
[HDD] [RAM]
Creating, editing and playing playlists
≥The maximum number of items on a disc:
–Playlists: 99
–Chapters in playlists: Approx. 1000
(Depends on the state of recording.)
≥If you exceed the maximum numbers of items for a disc, all the
items entered will not be recorded.
Creating playlists
[HDD] [RAM]
Preparation
≥Turn on the television and select the appropriate Video input to suit
the connection to this unit.
≥Turn the unit on.
≥Press [HDD] or [DVD] to select the drive containing the recorded
title to be edited.
≥[RAM] Release disc or cartridge protection (➡ 50).
≥You cannot create or edit a playlist while recording or while
transferring (dubbing).
≥Playlists must be made in accordance with the encoding system
currently selected in “TV System” (➡ 61).
1 While stopped
Press [FUNCTIONS].
FUNCTIONS
RETURN
Title
3 Press [3, 4] to select “PLAYLISTS”
and press [ENTER].
4 Press [3, 4, 2, 1] to select “Create”
and press [ENTER].
5 Press [2, 1] to select the source title
and press [4].
≥Press [ENTER] to select all the chapters in the title, then
skip to step 7.
HDD
001 ARD 11.10. SAT
Source Title
001
Source Chapter
001
Chapters in PLAYLIST
ENTER
S
RETURN
Create
002
002 003
SUB MENU
Page 001/001
------
Page 001/001
---
Page 001/001
------------
Press RETURN to exit.
PLAYLISTS
6 Press [2, 1] to select the chapter you
want to add to a playlist and press
[ENTER].
Press [3] to cancel.
HDD
001 ARD 11.10. SAT
Source Title
001
Source Chapter
001
Chapters in PLAYLIST
ENTER
S
RETURN
Create
002
002 003
SUB MENU
Page 001/001
------
Page 001/001
---
Page 001/001
------------
Press RETURN to exit.
PLAYLISTS
≥You can also create a new chapter from the source title.
Press [SUB MENU] to select “Create Chapter” and press
[ENTER] (➡ 39, Create Chapter)
7 Press [2, 1] to select the position to
insert the chapter and press [ENTER].
HDD
001 ARD 11.10. SAT
Source Title
001 002
Source Chapter
001
Chapters in PLAYLIST
ENTER
RETURN
Create
002 003
Press RETURN to exit.
------
---
------------
Page 001/001
Page 001/001
Page 001/001
PLAYLISTS
≥Press [3] to select other source titles.
≥Repeat steps 6–7 to add other chapters.
8 Press [RETURN].
All the selected scenes become the playlist.
To return to the previous screen
Press [RETURN].
To exit the screen
Press [RETURN] several times.
2 Press [3, 4] to select “To Others”
RQT8203
40
40
and press [ENTER].
Page 41

Editing and playing playlists/chapters
01
Create
- -- -
- -- -- -
12.10. SUN 0:30
HDD
PLAYLISTS PLAYLIST VIEW
PLAYLISTS CHAPTER VIEW
01 ARD 12.10. SUN 0:30
001
--- ---
--- ------ ---
002
HDD
0:10.24
[HDD] [RAM]
[-RW‹VR›] (Play only)
1 While stopped
Press [FUNCTIONS].
2 Press [3, 4] to select “To Others”
and press [ENTER].
3 Press [3, 4] to select “PLAYLISTS”
and press [ENTER].
4 Press [3, 4, 2, 1] to select the
playlist.
To start play ➡ Press [ENTER].
To edit ➡ Step 5.
PLAYLIST View screen
Playlist operations
After performing steps 1–5 (➡ left)
Erase
§
[HDD] [RAM]
Properties
[HDD] [RAM]
[-RW‹VR›]
Create
[HDD] [RAM]
Press [2, 1] to select “Erase” and press
[ENTER].
Once erased, the playlists are lost and
cannot be restored.
Make certain before proceeding.
Playlist information (e.g., total time and date)
is shown.
≥Press [ENTER] to exit the screen.
➡ 40, Creating playlists, Step 5–8
Properties
Dinosaur
No.
Date
Tota l10002
ENTER
12.10.2004 TUE
RETURN
Chapters 0:30.53
≥To show other pages/Multiple editing (➡ 38)
5 Press [SUB MENU], then [3, 4] to
select the operation and press
[ENTER].
≥If you select “Edit”, press [3, 4] to select the operation and
∫ If you select “Chapter View”
6 Press [3, 4, 2, 1] to select the
chapter.
To start play ➡ Press [ENTER].
To edit ➡ Step 7.
≥To show other pages/Multiple editing (➡ 38)
7 Press [SUB MENU], then [3, 4] to
select the operation and press
[ENTER].
≥You can go back to PLAYLIST View.
To return to the previous screen
Press [RETURN].
To exit the screen
Press [RETURN] several times.
press [ENTER].
Erase
Properties
Edit
Chapter View
Add Chapter
Move Chapter
Create Chapter
Combine Chapters
Erase Chapter
PLAYLIST View
Create
Copy
Enter Name
Change Thumbnail
Chapter View screen
Refer to “Chapter
operations”.
Refer to “Playlist
operations”.
§
Copy
[HDD] [RAM]
Press [2, 1] to select “Copy” and press
[ENTER].
≥The copied playlist becomes the newest
one in the playlist view screen.
Enter
Name
You can give names to playlists.
➡ 53, Entering text
[HDD] [RAM]
Change
➡ 39, Change Thumbnail
Thumbnail
[HDD] [RAM]
§
Multiple editing is possible.
Chapter operations
[HDD] [RAM]
After performing steps 1–7 (➡ left)
≥Editing chapters in a playlist does not modify the source titles and
source chapters.
Add
➡ 40, Creating playlists, Step 5–7
Chapter
Move
Chapter
Create
Press [3, 4, 2, 1] to select the position
to insert the chapter and press [ENTER].
PLAYLISTS Move Chapter
HDD
01 12.10. SUN 0:11
001
002
--- ---
--- ------ ---
--- ------ ---
Previous Page 01/01 Next
ENTER
RETURN
➡ 39, Create Chapter
Chapter
Combine
➡ 39, Combine Chapters
Chapters
Erase
Chapter
§
Multiple editing is possible.
➡ 39, Erase Chapter
The playlist itself is erased if you erase all
§
the chapters in it.
Creating, editing and playing playlists
RQT8203
41
41
Page 42

Editing still pictures
HDD
DVDSDSD
TV
ENTER
C
DPOF
Set up DPOF on the picture (JPEG).
Setting on other equipment will be cancelled.
1
Number of prints
DVD
TV
Í
DIRECT TV REC
HDD
1
4 5 6
7
CANCEL
SKIP
Í
AV
2 3
8
DVD
INPUT SELECT
0
VOLUME
CH
PAG E
CH
ShowView
9
MANUAL SKIP
SLOW/SEARCH
HDD, DVD,
SD
:,9
PAU SE
3,4,2,1
ENTER
DIRECT
NAVIGATOR
SUB MENU
“Green”
STOP
E
H
C
/
G
O
R
P
R
O
T
U
T
C
A
N
E
E
G
I
R
M
I
V
P
D
A
O
N
T
SUB MENU
S
DISPLAY
REC
U
G
K
C
ENTER
STATUS
REC MODE
D
I
E
CREATE
CHAPTER
EXT LINK
PLAY/x1.3
RETURN
ERASE
TIMER
;
F
U
N
C
T
I
O
N
S
RETURN
[HDD] [RAM] [SD]
≥You can use SD Memory Cards with capacities from 8 MB to 1 GB
(➡ 11).
Preparation
≥Press [HDD], [DVD] or [SD] to select the drive.
≥[RAM] [SD] Release protection (➡ 50, Setting the protection).
3 Press [3, 4, 2, 1] to select the still
picture.
To show other pages
Press [3, 4, 2, 1] to select “Previous” or “Next” and
press [ENTER].
≥You can also press [:, 9] to show other pages.
Multiple editing
Select with [3, 4, 2, 1] and press [;]. (Repeat.)
A check mark appears. Press [;] again to cancel.
≥To select the still pictures in another folder (➡ 35)
4 Press [SUB MENU], then [3, 4] to
select the operation and press
[ENTER].
Erase Picture
Set up Protection
Cancel Protection
DPOF
Other View
∫ To edit still picture folders
In step 3 (➡ above)
1 Press [3, 4, 2, 1] to select “Folder”
and press [ENTER].
2 Press [3, 4] to select the folder.
≥To show other pages/Multiple editing
(➡ above)
3 Press [SUB MENU], then [3, 4] to
select the operation and press [ENTER].
below
Editing titles/chapters and playing
chapters ➡ 38, step 2
Erase Whole Folder
Folder Name
Set up Protection
Cancel Protection
DPOF
Folder
To switch to another
higher folder ➡ 35
1 Press [DIRECT NAVIGATOR].
Editing still pictures
2 [HDD] [RAM]
Press the “Green” button to select
“PICTURE”.
Picture and folder operation
After performing steps 1–4
Erase Picture
Erase Whole Folder
[HDD] [RAM] [SD]
Folder Name
[HDD] [RAM] [SD]
Set up Protection
Cancel Protection
[HDD] [RAM] [SD]
DPOF
[SD]
§
Multiple editing is possible.
RQT8203
42
42
§
To return to the previous screen
Press [RETURN].
To exit the screen
Press [DIRECT NAVIGATOR].
§
Press [2, 1] to select “Erase” and press [ENTER].
§
≥Once erased, the recorded contents are lost and cannot be restored. Make certain before proceeding.
≥When erasing a folder, the files not containing still pictures will also be erased if they are inside the folder.
(This does not apply to folders under the folder concerned.)
You can give names to still picture folders.
➡ 53, Entering text
≥Folder names input using this unit may not be displayed on other equipment.
§
If set, this will protect the still picture or folder from accidental erasure.
§
Press [2, 1] to select “Yes” and press [ENTER].
The lock symbol appears when the still picture or folder is protected.
DIRECT NAVIGATOR PI
SD CARD
Folder 103__
0001
0002
≥Even if the protection setting is used by this unit to protect a folder, the folder may
be erased by another unit.
You can select a whole folder or individual pictures for printing and specify the number of prints to be made.
Press [2, 1] to select number of print (0 to 9) and
press [ENTER].
The DPOF mark appears. (This appears on the still pictures inside a folder when you make the
DPOF setting for the folder.)
To cancel the print setting
Set the number of print to “0”.
≥Print settings (DPOF) made using this unit may not be viewable on other equipment.
≥When this is set by this unit, any settings established by other units will be released.
≥Settings cannot be made for folders and files not in accordance with DCF standards or if there is no
remaining space on the card.
Page 43

Transferring (dubbing) titles or playlists
High
1
[HDD] [RAM] [-R] [-RW‹V›] [+R]
You can select from a variety of methods to transfer (dub) on this unit.
You cannot transfer (dub) titles which have been treated to prevent copying.
∫ Transferring (dubbing) direction
You can transfer (dub) your favorite titles and playlists to discs.
≥Transferring (dubbing) a playlist will create a title.
High speed mode
HDD
Normal speed mode
RAM
speed mode
HDD
Normal speed mode
§
DVD-R, etc.
§2
≥When you want to play a transferred (dubbed) disc
High speed mode
HDD
DVD-RW (DVD
Video Recording
format)
on other equipment, you must finalize the disc after
transferring (dubbing) (➡ 52, 68).
§1
Before recording to HDD, set “Rec for High Speed
dubbing” to “On” (➡ 24).
§2
DVD-R, DVD-RW (DVD-Video format) and +R
Normal speed mode: Select XP, SP, LP, EP or FR as the recording mode for transferring (dubbing) (➡ 23).
∫ Transferring (dubbing) mode
Transferring (dubbing) a title or a playlist Transferring (dubbing) multiple titles and playlists together
One Touch Transfer (dubbing) (➡ 44) Transferring (dubbing) using the transferring (dubbing) list (➡ 44)
When you want to re-edit finalized content
on a DVD-R, etc.
HDD
Normal speed mode
§
Finalized DVD-R, DVD-RW (DVD-Video
format) and +R or DVD-Video on sale
that are not copy-protected, etc.
DVD-V
§
You can select transferring (dubbing) speed mode and picture quality (➡ below)
∫ Transferring (dubbing) speed mode types and features
High speed Normal speed (XP, SP, LP, EP, FR)
Features You can transfer (dub) in a very short amount
of time. You can transfer (dub) even faster if
you use a high speed recording compatible
disc.
You can record and play using the HDD while
high speed transferring (dubbing).
Transferring (dubbing)
times
➡ below, Approximate transferring (dubbing)
times
Picture quality Original picture quality
Are chapters/thumbnails
Ye s
§2
maintained?
Other operations while
You can record/play using the HDD. No
You can record for a long period of time on 1 disc.
For example, using LP mode, you can record approximately 4
hours on 1 (4.7 GB) disc (➡ 23).
e.g., 1 hour TV drama
XP
LP LP LP LP
Only one episode using XP mode
4 episodes using LP mode
The same amount of time it takes to record the source
Can change
§1
No (One title is recorded as one chapter. Thumbnails return to
the default position.)
transferring (dubbing)
§1
If you select a recording mode with better picture quality than the original, the picture quality does not improve. (However it does prevent
against degradation of picture quality.)
§2
[+R] Up to approx. 100 chapters
When transferring (dubbing) playlists to DVD-R, DVD-RW (DVD-Video format) or +R, the thumbnails may not reflect changes made to them.
∫ Approximate transferring (dubbing) times (Max. speed)
(excludes time required to write data management information)
HDD
Recording mode Recording time
XP
SP Approx. 6 min. Approx. 3.8 min. Approx. 7.5 min. Approx. 3.8 min.
LP Approx. 3 min. Approx. 1.9 min. Approx. 3.8 min. Approx. 1.9 min.
1 hour
EP (6 Hours) Approx. 2 min. Approx. 1.3 min. Approx. 2.5 min. Approx. 1.3 min.
EP (8 Hours) Approx. 1.5 min. Approx. 56 sec. Approx. 1.9 min. Approx. 56 sec.
[Note]
≥When recording or playing while transferring (dubbing), the unit may not use the maximum recording speed.
≥Depending on the condition of the disc, the unit may not transfer (dub) using the maximum speed.
5k high speed
recording compatible
DVD-RAM
8k high speed
recording compatible
DVD-R
4k high speed
recording compatible
DVD-RW
8k high speed
recording compatible
+R
Approx. 12 min. Approx. 8.7 min. Approx. 15 min. Approx. 8.7 min.
1
Transferring (dubbing) titles or playlists
Regarding high speed transfer (dubbing) to DVD-R, etc.
To high speed transfer (dub) titles (or playlists created from those
titles), set “Rec for High Speed dubbing” to “On” before recording to
the HDD (➡ 24).
However in the following cases, transferring (dubbing) to DVD-R,
DVD-RW (DVD-Video format) and +R using the high speed mode
does not work.
≥Playlists created from titles using a variety of recording modes
≥Playlists created from multiple titles using FR recording mode
≥Playlists mixed with a variety of audio types (Dolby Digital and
LPCM, etc.)
≥Titles that contain many erased segments
Regarding transferring (dubbing) of digital broadcasts that
allow “One time only recording”
You can transfer (dub) a recorded title to a CPRM (➡ 68) compatible
DVD-RAM, however, the title is erased from the HDD.
≥Titles or playlists cannot be transferred (dubbed) from DVD-RAM to
the HDD.
≥You cannot use one touch transfer (dubbing). Use the transferring
(dubbing) list (➡ 44).
≥Titles will not be transferred (dubbed) if they are protected (➡ 39).
≥You cannot transfer (dub) playlists created from “One time only
recording” titles.
≥Titles with recording limitations and playlists cannot be registered
on the same transferring (dubbing) list.
RQT8203
43
43
Page 44

Transferring (dubbing) titles or playlists
HDD
DVDSDSD
TV
DVD/TV
ENTER
DUBBING
High Speed mode is selected.
Is it OK to start?
Yes N o
DUBBING
HDD
DVD
1
2
3
Source
Destination
Cancel All
Dubbing Direction
Dubbing Mode
Create List
HDD > DVD
VIDEO High Speed
0
DVD
TV
Í
Í
DIRECT TV REC
AV
HDD
2 3
Numbered
buttons
1
4 5 6
8
7
CANCEL
SKIP
:, 9
∫
3,4,2,1
ENTER
SUB MENU
“Red”
STOP
C
E
H
C
/
G
O
R
P
R
O
T
U
T
C
A
N
E
E
G
I
R
M
I
V
P
D
A
O
N
T
SUB MENU
S
DISPLAY
REC
TIME SLIP
K
STATUS
REC MODE
AUDI O
[Note]
Titles and playlists recorded using a different encoding system (PAL
or NTSC) from the TV system currently selected on the unit cannot
be transferred (dubbed).
Preparation
≥Insert a disc that you can use for recording (➡ 9).
≥Confirm that there is enough remaining disc space.
DVD
INPUT SELECT
0
PAU SE
D
I
U
G
ENTER
CHAPTER
DVD/ TV
CH
ShowView
9
MANUAL SKIP
SLOW/SEARCH
PLAY/x1.3
E
CREATE
EXT LINK
DUBBING
VOLUME
PAG E
CH
F
U
N
C
T
I
O
N
S
RETURN
ERASE
TIMER
F Rec
DVD
;
1
FUNCTIONS
RETURN
STATUS
“Green”
DUBBING
3 Press [2, 1] to select “Yes” and
press [ENTER].
A transferring (dubbing) complete message appears on the
screen for a few seconds when transferring (dubbing) is
completed.
≥The transfer (dubbing) speed and picture quality are set as
follows.
The recording mode changes to FR mode if the remaining disc space
is exceeded using one of the recording modes indicated below.
[HDD]
>
[HDD]
∫ To stop transferring (dubbing) ➡ 45
∫
[HDD]
[-RW‹VR›]
[HDD]
You can order titles and playlists as desired for transfer (dubbing) to
disc.
≥Select the audio type for recording bilingual broadcast from
[RAM]: High speed mode
>
[-R]
[-RW‹V›] [+R] :
Rec for High Speed dubbing setting
On Off
High speed mode Same recording mode used as when
recording the source title (XP–EP, FR).
≥Playlists are transferred (dubbed) in FR
mode.
Recording and playing while transferring
(dubbing)
➡
45
Transferring (dubbing) using the
transferring (dubbing) list
,-.
[RAM]
>
[HDD]
>
[-R] [-RW‹V›] [+R]
“Bilingual Audio Selection” (➡ 56) when:
–Transferring (dubbing) to a DVD-R, DVD-RW (DVD-Video format)
and +R.
–When “Audio Mode for XP Recording” is set to “LPCM” (➡ 56)
and you are transferring (dubbing) in XP mode.
One Touch Transfer (dubbing)
[HDD]
>
[RAM] [-R] [-RW‹V›] [+R]
With one touch transfer (dubbing), the title currently being played is
dubbed without any further setting.
≥
[-R] [-RW‹V›] [+R] Select the audio type for recording bilingual
broadcast from “Bilingual Audio Selection” (➡ 56).
Transferring (dubbing) titles or playlists
1 Play the title or playlist you want to
transfer (dub).
2 Press [DUBBING].
Selecting the DVD drive speed
1 Press [3] to select “DVD drive speed”.
2 Press [2, 1] to select “Maximum” or “Normal (Silent)” and
press [4].
≥Selecting “Normal (Silent)” means the noise generated by
this unit is less than “Maximum”; however, the time required
for transferring (dubbing) will double (approximately).
§
Only when transferring (dubbing) to 5k high speed
recording compatible DVD-RAM, 8k high speed recording
compatible DVD-R or 8k high speed recording compatible
+R in High speed mode
§
1 While stopped
Press [FUNCTIONS].
2 Press [3, 4] to select “DUBBING”
and press [ENTER].
≥If you are not going to change the registered list press [4]
several times (➡ 45, step 6).
3 Set the transfer (dubbing) direction.
≥If you are not going to change the dubbing direction, press
[4] (➡ 45, step 4).
1 Press [3, 4] to select “Dubbing Direction” and press
[1].
2 Press [3, 4] to select “Source” and press [ENTER].
3 Press [3, 4] to select the drive and press [ENTER].
4 Press [3, 4] to select “Destination” and press
[ENTER].
5 Press [3, 4] to select the drive and press [ENTER].
The same drive as the transfer (dubbing) source cannot be
selected.
6 Press [2] to confirm.
RQT8203
44
44
Continued on the next page
Page 45

(Continued)
HDD
Create List
007
008 0:30(XP)
- - -
PLAYLISTS
VIDEO
4 Set the recording mode.
≥If you are not going to change the recording mode, press [4]
(➡ step 5).
1 Press [3, 4] to select “Dubbing Mode” and press [1].
Press
2
3
4
5
[3, 4] to select “Format” and press [ENTER]
Press
[3, 4] to select “VIDEO” and press [ENTER]
Press
[3, 4] to select “Recording Mode” and press
[ENTER]
Press
.
[3, 4]
to select the mode and press
[ENTER]
6 Press [2] to confirm.
5 Register titles and playlists for
transfer (dubbing).
≥If you are going to transfer (dub) a registered list without
making any changes to it (➡ step 6).
1 Press [3, 4] to select “Create List” and press [1].
DUBBING
Cancel All
Dubbing Direction
1
HDD > DVD
Dubbing Mode
2
VIDEO High Speed
Create List
3
Start Dubbing
ENTER
RETURN
2 Press [3, 4] to select “New item” and press [ENTER].
3 Press the “Red” button to select “VIDEO” or press the
“Green” button to select “PLAYLISTS”.
S
SUB MENU
Destination Capacity: 4343MB
Size: 0MB
Name of item
No. Size
New item (Total=0)
Page 01/01
Create dubbing list.
( 0%)
∫ To stop transferring (dubbing)
Press and hold [RETURN] for 3 seconds.
≥If stopped partway, transferring (dubbing) will be up to that
point. However, in high speed mode, only titles that have
completed transferring (dubbing) at the point stopped are
.
.
.
transferred (dubbed). [Even if the title was not transferred
(dubbed) to the DVD-R, DVD-RW (DVD-Video format) or +R,
the amount of remaining writable disc space becomes less.]
∫ To return to the previous screen
Press [RETURN].
∫ Recording and playing while transferring
(dubbing)
You can record and play using the HDD while high speed
transferring (dubbing).
Press [ENTER] to cancel the screen display.
≥To confirm the current progress
Press [STATUS].
[Note]
≥You cannot perform chasing play or edit etc. while transferring
(dubbing).
≥Timer recordings executed while transferring (dubbing) are
recorded to the HDD regardless of the recording drive settings.
≥You cannot play a playlist while transferring (dubbing) titles with
“One time only recording” restriction (➡ 43).
To play DVD-R, DVD-RW (DVD-Video format) and +R on other
players, it is necessary to finalize them after transfer (dubbing).
4 Press [3, 4, 2, 1] to select the titles or playlists and
press [ENTER].
≥When transferring (dubbing) to DVD-R, DVD-RW (DVD-
Video format) or +R using high speed mode, only items
indicated with “ ” can be registered.
≥To select a multiple number of items together, press
[;] to add the check mark and press [ENTER]
(➡right, Multiple editing).
≥To show other pages (➡ right)
≥To edit the transferring (dubbing) list (➡ 46)
You can register a multiple number of titles and
playlists on the transferring (dubbing) list by repeating
steps 2–4.
You cannot start transferring (dubbing ) when the value of
the “Size” (➡ right) exceeds 100% (“Destination Capacity”
is not sufficient).
5 Press [2] to confirm.
6 Press [3, 4] to select “Start
Dubbing” and press [ENTER].
Selecting the DVD drive speed
1 Press [3] to select “DVD drive speed”.
2 Press [2, 1] to select “Maximum” or “Normal (Silent)” and
press [4].
≥Selecting “Normal (Silent)” means the noise generated by
this unit is less than “Maximum”, however the time required
for transferring (dubbing) will double (approximately).
§
Only when transferring (dubbing) to 5k high speed
recording compatible DVD-RAM, 8k high speed recording
compatible DVD-R or 8k high speed recording compatible
+R in High speed mode
§
7 Press [2, 1] to select “Yes” and
press [ENTER] to start transferring
(dubbing).
Transferring (dubbing) list icons and functions
Transferring (dubbing) list indicators
Titles and playlists that can be transferred
(dubbed) in high speed mode to DVD-R, etc.
(➡ 24)
Title with “One time only recording” restriction
Titles erased from the HDD by “One time only
recording” restriction after transferring (dubbing).
Title or playlist contains still picture(s)
≥Still picture(s) cannot be transferred (dubbed).
(NTSC)
(PAL)
Data size of each registered item
Destination Capacity: 4343MB
No. Size
Create dubbing list.
To show other pages
Press [3, 4, 2, 1] to select “Previous” or “Next” and press
[ENTER].
≥You can also press [:, 9] to show other pages.
Multiple editing
Select with [3, 4, 2, 1] and press [;]. (Repeat.)
Press [ENTER] to register to the list.
≥A check mark appears. Press [;] again to cancel.
≥When you switch between the “VIDEO” and “PLAYLISTS” tab,
the check mark is cancelled.
Title or playlist recorded using a different encoding
system from that of the TV system currently
selected on the unit.
≥Titles and playlists displaying these marks
cannot be selected.
Name of item
New item (Total=0)
Data size recorded to the transfer
(dubbing) destination
Size:
(0%)
Size: 0MB
≥When transferring (dubbing) at normal
Page 01/01
speed, the total data size will change
according to the recording mode.
≥The total data size shown may be
larger than the sum of the data sizes
for each registered item, because of
data management information being
written to the transfer (dubbing)
destination, etc.
Transferring (dubbing) titles or playlists
RQT8203
45
45
Page 46

Transferring (dubbing) titles or playlists
DUBBING
Min.
1
2
3
Hour002
Cancel All
Dubbing Direction
Dubbing Mode
Dubbing Time
DVD > HDD
DVD-Video XP
Set the time a few minutes
longer.
My favorite 01/02
01
Chapter 1
03
05
02
04
06
Chapter 2
Chapter 3 Chapter 4
Refer to the control reference on page 44.
∫ To edit the transferring (dubbing) list
Select the item in step 5–4 (➡ 45, left column)
1 Press [SUB MENU].
2 Press [3, 4] to select the operation and press
[ENTER].
Erase All:
Erase all items registered on the transferring (dubbing) list.
Press [2, 1] to select “Yes” and press [ENTER].
Add:
Add new items to the transferring (dubbing) list.
Press [3, 4, 2, 1] to select the playlists and titles to be added and
press [ENTER].
Erase:
Erase the selected items.
Press [2, 1] to select “Yes” and press [ENTER].
You can also erase multiple items (➡ 45, Multiple editing).
Move:
Move selected items or change the order of items on the transferring
(dubbing) list.
Press [3, 4] to select the destination and press [ENTER].
To cancel all registered transferring (dubbing) setting and lists
After performing steps 1–2 (➡ 44, right column)
1 Press [3, 4] to select “Cancel All” and press [ENTER].
2 Press [2, 1] to select “Yes” and press [ENTER].
≥The settings and lists may be cancelled in the following situations.
–When a title, still picture, etc. has been recorded or erased at the
transfer (dubbing) source
–When steps have been taken, for instance, to turn off the unit,
open the tray, change the transfer (dubbing) direction, etc.
Transferring (dubbing) a finalized
DVD-R, DVD-RW (DVD-Video format)
and +R
[DVD-V]
>
[HDD]
You can transfer (dub) the content of finalized DVD-R, DVD-RW (DVDVideo format) and +R etc to the HDD and re-edit.
While playing a disc, the content being played is transferred
(dubbed) to the HDD according to the set time.
Transferring (dubbing) titles or playlists
≥Operations and on screen displays during transfer
(dubbing) are also recorded.
≥Almost all DVD-Video on sale have been treated to prevent
illegal copying, and cannot be transferred (dubbed).
≥The following cannot be transferred (dubbed): DVD-Audio,
Video CD, Audio CD and so on.
Preparation
≥Insert the finalized disc (➡ 30).
≥Press [DVD] to select the DVD drive.
Erase All
Add
Erase
Move
After performing steps 1–4 (“Format” is automatically set to “DVDVideo”) (➡ 44, right column–45, left column)
5 Set “Dubbing Time”.
≥If you are not going to change the setting (➡ step 6).
∫Setting the unit to transferring (dubbing)
according to the set time
1 Press [3, 4] to select “Dubbing Time” and press [1].
2 Press [3, 4] to select “Time setting” and press [ENTER].
≥Setting the unit to transferring (dubbing) all the content on the
disc
3 Press [3, 4] to select “Off” and press [ENTER].
4 Press [2] to confirm.
≥Setting the transferring (dubbing) time
3 Press [3, 4] to select “On” and press [ENTER].
4 Press [3, 4] to select “Dubbing Time” and press
[ENTER].
5 Press [2, 1] to select “Hour” and “Min.” and press [3, 4]
to set the recording time.
6 Press [ENTER].
7 Press [2] to confirm.
≥Set a few minutes longer than the source title, in order to
include the operation time before play begins.
≥You can also set the recording time with the numbered
buttons.
6 Press [3, 4] to select “Start
Dubbing” and press [ENTER].
Press [2, 1] to select “Yes” and press [ENTER] to start
transferring (dubbing).
The disc top menu is displayed.
≥Disc play automatically begins from title 1 when “Title 1” is
selected from the “Auto-Play Select” menu when finalizing
the disc (➡ 52).
7 When the top menu is displayed
Press [3, 4, 2, 1] to select the title
you want to start transferring
(dubbing), and press [ENTER].
While playing in order, all the titles after the selected title are
recorded until the set time. (After the last title on the disc has
finished playing the top menu is recorded until the set time is
reached.)
To return to the previous screen
Press [RETURN].
To stop transferring (dubbing)
Press [∫].
You can also press and hold [RETURN] for 3 seconds to stop
transferring (dubbing).
≥If stopped partway, transferring (dubbing) will be up to that point.
RQT8203
46
46
[Note]
≥The screen saver on the right is recorded at the
beginning.
≥The content is recorded as 1 title from the start of
transfer (dubbing) to the end.
≥If play does not begin automatically or if the top menu does not
display automatically, press [1] (PLAY) to start.
≥Even if you transfer (dub) a high quality video/audio DVD, the
original picture and audio quality cannot be exactly replicated.
Page 47

Recording from a video cassette recorder
HDD
DVDSDSD
ENTER
1.3
AV
HDD
1
4 5 6
7
CANCEL
SKIP
STOP
K
C
E
H
C
/
G
O
R
P
R
O
T
U
T
C
A
N
E
E
G
I
R
M
I
V
P
D
A
O
N
T
SUB MENU
S
STATUS
DISPLAY
REC
REC MODE
TIME SLIP
AUDI O
DVD
2 3
8
INPUT SELECT
0
PAU SE
D
I
U
G
ENTER
CHAPTER
ShowView
9
MANUAL SKIP
SLOW/SEARCH
PLAY/x1.3
E
CREATE
EXT LINK
DUBBING
PAG E
CH
F
U
N
C
T
I
O
N
S
RETURN
ERASE
TIMER
F Rec
INPUT SELECT
;
FUNCTIONS
HDD, DVD
∫
3,4,2,1
ENTER
REC MODE
¥ REC
[HDD] [RAM] [-R] [-RW‹V›] [+R]
e.g., Connecting to the AV3 or DV input terminals on the front
You can also connect to the AV4 input terminals on the rear.
≥Turn off the unit and other video equipment before connecting.
HDD
DVD SD
EXT LINK
S VIDEO IN
VIDEO IN
L/MONO
-AUDIO IN-
S VIDEO IN
AV3
VIDEO IN
R
L/MONO - AUDIO IN - R
DV IN
DV IN
DRIVE
OPEN/CLOSE
SELECT
CH
REC
/k1.3
This unit
Yellow White Red
DV cable
(IEEE 1394, 4-pin)
S Video
cable
§
Audio/Video cable
Other video equipment
2 Press [REC MODE] to select the
recording mode.
3 Start play on the other equipment.
4 When you want to start recording
Press [¥ REC].
Recording starts.
To skip unwanted parts
Press [;] to pause recording. (Press again to restart recording.)
To stop recording
Press [∫].
Almost all videos and DVD-Video on sale have been treated
to prevent illegal copying. Any software that has been so
treated cannot be recorded using this unit.
≥Using Flexible Recording (➡ 24), you can record the content of a
video cassette (approx. 1–8 hours) to a 4.7 GB disc with the best
possible quality of recording without wasting disc space.
DV automatic recording (DV AUTO REC)
[HDD] [RAM]
When the “DV AUTO REC” function is used, programmes are
recorded as a title while at the same time chapters are created at
each break in the images and the play list is created automatically.
Preparation
1 Turn off the main unit and DV equipment, then connect the
equipment with the unit’s DV input terminal (➡ left column).
2 Turn on the main unit and DV equipment.
3 Pause play of the DV equipment at the point you want recording
to start.
4 Press [HDD] or [DVD] to select the recording drive.
≥
When the output signal from the external equipment is NTSC,
change the “TV System” to “NTSC” in the SETUP menu (
➡
61).
1 While stopped
Press [REC MODE] to select the
recording mode.
Connect to Audio/Video output terminals.
If the audio output of the other equipment is monaural
Connect to L/MONO on the AV3 input terminals at the front.
§
The S VIDEO terminal achieves a more vivid picture than the
VIDEO terminal.
When recording from the unit’s DV terminal
Select the type of audio recording from “Audio Mode for DV Input” in
the SETUP menu (➡ 56).
When recording from DV equipment (e.g., digital video camcorder),
you can record audio/video recordings from DV tape only.
Manual recording
Preparation
≥Press [HDD] or [DVD] to select the recording drive.
≥When recording bilingual programmes
[HDD] [RAM]
When both M 1 and M 2 is selected on the connected equipment,
you can select the audio type in playback.
[-R] [-RW‹V›] [+R]
Select either M 1 or M 2 on the connected equipment. (Only either
one type of M 1 or M 2 can be recorded.)
≥When the output signal from the external equipment is NTSC,
change the “TV System” to “NTSC” in the SETUP menu (➡ 61).
This unit cannot record to discs containing both PAL and NTSC
signals. (However, both types of programmes can be recorded
onto the HDD.)
≥To reduce noise in input from a video cassette recorder, set “AV-in
NR” to “On” in the on-screen menu (➡ 37).
≥Check the time on the unit is correct.
1 While stopped
Press [INPUT SELECT] to select the
input channel for the equipment you
have connected.
e.g., If you have connected to AV3 input terminals, select
“AV3”.
2 Press [FUNCTIONS].
3 Press [3, 4] to select “To Others”
and press [ENTER].
4 Press [3, 4] to select “DV AUTO
REC” and press [ENTER].
5 Press [2, 1] to select “Rec” and
press [ENTER].
Recording starts.
When recording finishes
The confirmation screen appears. Press [ENTER] to finish DV
automatic recording.
To stop recording
Press [∫].
[Note]
≥Only one piece of DV equipment (e.g., digital video camcorder) can
be connected to the unit via the DV input terminal.
≥
It is not possible to operate the unit from the connected DV equipment.
≥The DV input on this unit is for use with DV equipment only. (It
cannot be connected to a computer, etc.)
≥The DV equipment name may not be shown correctly.
≥Depending on the DV equipment, the images or audio may not be
input properly.
≥The date and time information on the tape of the DV equipment will
not be recorded.
≥You cannot record and play simultaneously.
If the DV automatic recording function does not work properly,
check the connections and DV equipment settings, and turn the
unit off and back on.
If that does not work, follow the instructions for manual
recording (➡ left column).
Recording from a video cassette recorder
RQT8203
47
47
Page 48

Transferring (dubbing) still pictures
HDD
DVDSDSD
TV
DVD/TV
ENTER
DUBBING
SD CARD
HDD
1
2
3
Source
Destination
Cancel All
Dubbing Direction
Dubbing Mode
Create List
SD CARD > HDD
PICTURE
High Speed
0
DUBBING
Destination Capacity: 4343MB
No. Size
1
Cancel All
Picture
Dubbing Direction
Picture/Folder
SD CARD > HDD
Name of item
New item (Total=0)
Folder
New folder
001 100__DVD
002 101__DVD
003 102__DVD
---
-
New folder
Transferring (dubbing) still pictures
RQT8203
48
DVD
TV
Í
Numbered
buttons
DIRECT TV REC
HDD
1
4 5 6
7
CANCEL
SKIP
Í
AV
DVD
2 3
8
INPUT SELECT
0
VOLUME
CH
PAG E
CH
ShowView
9
MANUAL SKIP
SLOW/SEARCH
SD
:, 9
PAU SE
I
U
G
K
ENTER
STATUS
REC MODE
AUDI O
DVD/ TV
PLAY/x1.3
D
E
CREATE
CHAPTER
EXT LINK
DUBBING
F
U
N
C
T
I
O
N
S
RETURN
ERASE
TIMER
F Rec
;
FUNCTIONS
RETURN
3,4,2,1
ENTER
SUB MENU
STOP
C
E
H
C
/
G
O
R
P
R
O
T
U
T
C
A
N
E
E
G
I
R
M
I
V
P
D
A
O
N
T
SUB MENU
S
DISPLAY
REC
TIME SLIP
[HDD] [RAM] [SD]
≥You can use SD Memory Cards with capacities from 8 MB to 1 GB
(➡ 11).
Transferring (dubbing) using the
transferring (dubbing) list
≥You cannot transfer (dub) still pictures recorded on CD.
1 While stopped
Press [FUNCTIONS].
2 Press [3, 4] to select “DUBBING”
and press [ENTER].
≥If you are not going to change the registered list press [4]
several times (➡ step 6).
3 Set the transfer (dubbing) direction.
≥If you are not going to change the dubbing direction, press
[4] (➡ step 4).
1 Press [3, 4] to select “Dubbing Direction” and press
[1].
2 Press [3, 4] to select “Source” and press [ENTER].
3 Press [3, 4] to select the drive and press [ENTER].
Press [3, 4]
4
[ENTER].
5 Press [3, 4] to select the drive and press [ENTER].
The same drive as the transfer (dubbing) source can be
selected.
6 Press [2] to confirm.
4 Set the recording mode.
≥If you are not going to change the recording mode, press [4]
(➡ step 5).
1 Press [3, 4] to select “Dubbing Mode” and press [1].
Press
2
3
Press
“Recording Mode” is automatically set to “High Speed”.
4 Press [2] to confirm.
48
to select “Destination” and press
[3, 4] to select “Format” and press [ENTER]
[3, 4] to select “PICTURE” and press [ENTER]
5 Register still pictures for transfer
(dubbing).
≥If you are going to transfer (dub) a registered list without
making any changes to it (➡ step 6).
You can register still pictures or still picture folders.
≥Still pictures and folders cannot be registered on the same
list.
DUBBING
Cancel All
Dubbing Direction
1
SD CARD > HDD
Dubbing Mode
2
PICTURE
Create List
3
Start Dubbing
ENTER
RETURN
∫ To register individual still pictures
1 Press [3, 4] to select “Create List” and press [1].
2 Press [3, 4] to select “New item” and press [ENTER].
3 Press [3, 4, 2, 1] to select the still picture and press
[ENTER].
≥To select a multiple number of items together, press
[;] to add the check mark and press [ENTER] (➡ 49,
Multiple editing).
≥To show other pages (➡ 49)
≥To select the still pictures in another folder (➡ 49)
≥To edit the transferring (dubbing) list (➡ 49)
You can register a multiple number of still pictures on
the transferring (dubbing) list by repeating steps
2–3.
4 Press [2] to confirm.
∫ To register on a folder by folder basis
1 Press [3, 4] to select “Create List” and press [1].
Press [3, 4]
2
3 Press [3, 4] to select “Folder” and press [ENTER].
4 Press [3, 4] to select “New item” and press [ENTER].
5 Press [3, 4] to select the folder and press [ENTER].
≥To select a multiple number of items together, press
[;] to add the check mark and press [ENTER] (➡ 49,
Multiple editing).
≥To show other pages (➡ 49)
≥To switch to another higher folder (➡ 49)
≥To edit the transferring (dubbing) list (➡ 49)
You can register a multiple number of folders on the
transferring (dubbing) list by repeating steps 4–5.
6 Press [2] to confirm.
High Speed
S
SUB MENU
Destination Capacity: 4343MB
Picture/Folder
No. Size
New item (Total=0)
Page 01/01
Create dubbing list.
Picture
Name of item
to select “Picture/Folder” and press [ENTER].
6 Press [3, 4] to select “Start
Dubbing” and press [ENTER].
≥For individual still pictures only
When specifying another folder as the transferring (dubbing)
destination, select “Folder”.
7 Press [2, 1] to select “Yes” and
press [ENTER] to start transferring
(dubbing).
.
.
To stop transferring (dubbing)
Press and hold [RETURN] for 3 seconds.
To return to the previous screen
Press [RETURN].
Page 49

To show other pages
DIRECT NAVIGATOR PICTURE (JPEG) VIEW
SD CARD
0001
Folder 103__DVD
0002 0003 0004
001 100__DVD
002 101__DVD
003 102__DVD
\DCIM\100__DVD
004 103__DVD
001 100__DVD
002 101__DVD
003 102__DVD
\DCIM\100__DVD
004 103__DVD
Folder
Select folder to access.
\DCIM
Press ENTER to set.
COPY ALL PICTURES
Copy from
SD CARD
\DCIM
Copy to
HDD
\JPEG\DCIM001
Press [3, 4, 2, 1] to select “Previous” or “Next” and press
[ENTER].
≥You can also press [:, 9] to show other pages.
Multiple editing
Select with [3, 4, 2, 1] and press [;]. (Repeat.)
Press [ENTER] to register to the list.
≥A check mark appears. Press [;] again to cancel.
Transferring (dubbing) all the still
pictures on a card—COPY ALL
PICTURES
[SD] >
[HDD]
or
[RAM]
Preparation
Press [SD] to select the source drive.
∫ To edit the transferring (dubbing) list
Select the item in step 5–3 (for a still picture) or 5–5
(for a folder) (➡ 48, right column)
1 Press [SUB MENU].
2 Press [3, 4] to select the operation and press
[ENTER].
Erase All:
Erase all items registered on the transferring (dubbing) list.
Press [2, 1] to select “Yes” and press [ENTER].
Add:
Add new items to the transferring (dubbing) list.
Press [3, 4, 2, 1] to select the still picture or folder to be added
and press [ENTER].
Erase:
Erase the selected items.
Press [2, 1] to select “Yes” and press [ENTER].
You can also erase multiple items (➡ above, Multiple editing).
To cancel all registered transferring (dubbing) settings and lists
After performing steps 1–2 (➡ 48)
1 Press [3, 4] to select “Cancel All” and press [ENTER].
2 Press [2, 1] to select “Yes” and press [ENTER].
≥The settings and lists may be cancelled in the following situations.
–When a title or still picture has been recorded or erased at the
transfer (dubbing) source
–When steps have been taken, for instance, to turn off the unit,
remove the card, open the tray, change the transfer (dubbing)
direction, etc.
Erase All
Add
Erase
1 While stopped
Press [FUNCTIONS].
2 Press [3, 4] to select “To Others”
and press [ENTER].
3 Press [3, 4] to select “COPY ALL
PICTURES” and press [ENTER].
≥If there is a multiple number of higher folders recognizable,
you can switch them using [2, 1].
4 Press [3, 4] to select “Copy to” and
press [2, 1] to select the drive.
5 Press [3, 4, 2, 1] to select “Copy”
and press [ENTER].
To stop transferring (dubbing)
Press and hold [RETURN] for 3 seconds.
To return to the previous screen
Press [RETURN].
∫ To select another folder
(➡ 11, Structure of folders displayed by this unit)
1 Press [3, 4, 2, 1] to select “Folder” and press [ENTER].
If you want to switch to another higher folder (➡ below).
2 Press [3, 4] to select the folder and press [ENTER].
You can also select folders with the numbered buttons.
e.g., 5: [0] ➡ [0] ➡ [5]
≥The still pictures of different folders cannot be registered on the
same list.
To switch to another higher folder
≥Only when selecting the source folder
If there is a multiple number of higher folders recognizable,
while the screen on the right appears
1 Press [SUB MENU].
2 Press [3, 4] to select “Folder” and
press [ENTER].
3 Press [2, 1] to select the higher
folder and press [ENTER].
4 Press [3, 4] to select the desired
folder and press [ENTER].
15: [0] ➡ [1] ➡ [5]
115: [1] ➡ [1] ➡ [5]
PICTURE
[Note]
≥When transferring (dubbing) the still pictures on a folder by
folder basis (➡ 48) or card by card basis (➡ above, COPY ALL
PICTURES), files other than the still picture files inside the
folder will also be transferred (dubbed). (This does not apply to
the lower folders contained inside the folders.)
≥If still pictures are already contained inside the transfer
(dubbing) destination folder, the new still pictures are recorded
following the existing still pictures.
≥If the space on the destination drive runs out or the number of
files/folders to be transferred (dubbed) exceeds the maximum
(➡ 35), transferring (dubbing) will stop partway through.
≥When a name has not been input for the transfer (dubbing)
source folder, it is possible that this folder’s name will not be the
same on the transfer (dubbing) destination. It is recommended
that you input a folder name before transferring (dubbing)
(➡ 42).
≥Print number setting (DPOF) is not transferred (dubbed).
≥The sequence in which the still pictures are registered on the
transfer (dubbing) list may not be the same at the transfer
(dubbing) destination.
Transferring (dubbing) still pictures
RQT8203
49
49
Page 50

HDD, disc and card management
HDD
DVDSDSD
TV
DVD/TV
ENTER
My favorite 01/02
01
Chapter 1
02
Chapter 2
3,4,2,1
ENTER
DVD
Í
DIRECT TV REC
HDD
1
4 5 6
7
CANCEL
SKIP
STOP
C
E
H
C
/
G
O
R
P
R
O
T
U
T
C
A
N
E
E
G
I
R
M
I
V
P
D
A
O
N
T
SUB MENU
S
DISPLAY
REC
TIME SLIP
TV
Í
AV
DVD
2 3
8
INPUT SELECT
0
PAU SE
D
I
U
G
K
ENTER
STATUS
CHAPTER
REC MODE
AUDI O
DVD/ TV
CH
ShowView
9
MANUAL SKIP
SLOW/SEARCH
PLAY/x1.3
E
CREATE
EXT LINK
DUBBING
VOLUME
PAG E
CH
F
U
N
C
T
I
O
N
S
RETURN
ERASE
TIMER
F Rec
HDD, DVD,
SD
FUNCTIONS
RETURN
Setting the protection
[RAM]
Preparation
≥Press [DVD] to select the DVD drive.
After performing steps 1–3 (➡ left)
4 Press [3, 4] to select “Disc
Protection” and press [ENTER].
5 Press [2, 1] to select “Yes” and
press [ENTER].
DISC
MANAGEMENT
DVD-RAM
SELECT
ENTER
The lock symbol appears closed when the disc is writeprotected.
To return to the previous screen
Press [RETURN].
To exit the screen
Press [RETURN] several times.
RETURN
Title No. 11
Used
0 : 22
Disc Name
Disc Protection
Erase all titles
Format Disc
Remain
5:38 (EP)
On
[HDD] [RAM] [-R] [-RW‹V›] [+R] [-RW‹VR›] [SD]
≥You can use SD Memory Cards with capacities from 8 MB to 1 GB
(➡ 11).
Common procedures
1 While stopped
Press [FUNCTIONS].
2 Press [3, 4] to select “To Others”
and press [ENTER].
FUNCTIONS
HDD, disc and card management
Playback
Recording
Dubbing
EPG
2
3
1
ENTER
RETURN
DVD
DIRECT NAVIGATOR
GUIDE Plus+
TIMER RECORDING
ShowView
DUBBING
DVD-RAM
To Others
Cartridge Protection Off
Disc Protection Off
PLAYLISTS
FLEXIBLE REC
DV AUTO REC
SETUP
DISC MANAGEMENT
Return
3 Press [3, 4] to select “DISC
MANAGEMENT” or “CARD
MANAGEMENT” and press [ENTER].
e.g., [RAM]
DISC
MANAGEMENT
DVD-RAM
SELECT
ENTER
≥When HDD has been selected, “Erase all titles” and “Format
HDD” are displayed.
≥When SD has been selected, “Format Card” only is
displayed.
RETURN
Title No. 11
Used
0 : 22
Disc Name
Disc Protection
Erase all titles
Format Disc
Remain
5:38 (EP)
Off
Cartridge-protection
For a DVD-RAM with a cartridge
≥With the write-protect tab in the protect position,
play automatically starts when inserted in the
unit.
PROTECT
[SD]
Switch the write-protect switch to the “LOCK” position.
LOCK
Providing a name for a disc
[RAM] [-R] [-RW‹V›] [+R]
You can provide a name for each disc.
Preparation
≥Press [DVD] to select the DVD drive.
≥[RAM] Release protection (➡ above).
After performing steps 1–3 (➡ left)
4 Press [3, 4] to select “Disc Name”
and press [ENTER].
➡ 53, Entering text
≥The disc name is displayed in the FUNCTIONS window.
≥With a finalized DVD-R, DVD-RW (DVD-Video format) and +R, the
name is displayed on the Top Menu.
Documentary
DVD
FUNCTIONS
Playback
To return to the previous screen
Press [RETURN].
To exit the screen
Press [RETURN] several times.
Cartridge Protection Off
DVD-RAM
Disc Protection Off
DIRECT NAVIGATOR
RQT8203
50
50
Page 51

Erasing all titles and playlists—Erase
all titles
[HDD] [RAM]
Erasing all the contents of a disc or
card—Format
[HDD] [RAM] [-RW‹V›] [-RW‹VR›] [SD]
Preparation
≥Press [HDD] or [DVD] to select the drive.
≥Release protection (➡ 50).
After performing steps 1–3 (➡ 50)
4 Press [3, 4] to select “Erase all
titles” and press [ENTER].
5 Press [2, 1] to select “Yes” and
press [ENTER].
6 Press [2, 1] to select “Start” and
press [ENTER].
A message appears when finished.
7 Press [ENTER].
To return to the previous screen
Press [RETURN].
To exit the screen
Press [RETURN] several times.
[Note]
≥Once erased, the recorded contents are lost and cannot be
restored. Make certain before proceeding.
≥Erasing all video titles will result in all playlists also being erased.
≥Still picture data (JPEG, TIFF) or computer data cannot be erased.
≥Erase does not work if one or more titles are protected.
Preparation
≥Press [HDD], [DVD] or [SD] to select the drive.
≥Release protection (➡ 50).
[Note]
Formatting erases all contents (including computer data),
and they cannot be restored. Check carefully before
proceeding. The contents are erased when you format a disc or
card even if you have set protection.
After performing steps 1–3 (➡ 50)
4 Press [3, 4] to select “Format HDD”,
“Format Disc” or “Format Card” and
press [ENTER].
5 Press [2, 1] to select “Yes” and
press [ENTER].
6 Press [2, 1] to select “Start” and
press [ENTER].
A message appears when formatting is finished.
[Note]
≥Formatting normally takes a few minutes; however, it may
take up to a maximum of 70 minutes ([RAM]).
≥Do not disconnect the AC mains lead while formatting.
This can render the disc or the card unusable.
7 Press [ENTER].
[Note]
≥When a disc or card has been formatted using this unit, it may not
be possible to use it on any other equipment.
≥Formatting cannot be performed on DVD-R, +R or CD-R/RW.
≥You can format DVD-RW only as DVD-Video format on this unit.
To stop formatting [RAM]
Press [RETURN].
≥You can cancel formatting if it takes more than 2 minutes. The disc
must be reformatted if you do this.
To return to the previous screen
Press [RETURN].
To exit the screen
Press [RETURN] several times.
HDD, disc and card management
RQT8203
51
51
Page 52

HDD, disc and card management
Refer to the control reference on page 50.
Enabling discs to be played on other
equipment
(Top Menu, Auto-Play Select, Finalize)
[-R] [-RW‹V›] [+R]
Preparation
Press [DVD] to select the DVD drive.
After performing steps 1–3 (➡ 50)
∫ Top Menu
You can select the background that will be displayed as the DVDVideo top menu after finalizing.
4 Press [3, 4] to select “Top Menu”
and press [ENTER].
5 Press [3, 4, 2, 1] to select the
background and press [ENTER].
TOP MENU LIST
1
2
3
Display after finalizing
Thumbnail
(Still picture)
≥You can change thumbnails displayed in the top menu. (➡ 39,
Change Thumbnail)
4
7 8
Title Name
5
6
01
9
After finalizing
≥[-R] [+R] The disc becomes play-only and you can no longer
record or edit.
≥[-RW‹V›] You can record and edit the disc after formatting
(➡ 51) although it becomes play-only after finalizing.
≥When transferring (dubbing) in high speed, chapters will be
replicated.
≥Titles are divided into about 5-minute
–the titles were directly recorded to the disc.
–the titles were transferred (dubbed) using any mode other than
the high speed mode.
§
This time varies greatly depending on the condition and mode
of recording.
≥There is a pause of several seconds between titles and
chapters during play.
Disc display on this unit DVD-R
Recording/Editing/Entering name Yt
Play on other players tY
≥You cannot finalize discs recorded on other manufacturer’s
equipment.
≥If you finalize discs recorded on Panasonic equipment other than
this unit, the background selected as “Top Menu” may not be
displayed.
≥Discs finalized on this unit may not be playable on other players
due to the condition of the recording.
§
chapters, if
Before
finalizing
DVD- RW( V)
+R
After
finalizing
DVD-V
HDD, disc and card management
RQT8203
52
∫ Auto-Play Select
You can select whether to show the top menu after finalizing.
6 Press [3, 4] to select “Auto-Play
Select” and press [ENTER].
7 Press [3, 4] to select “Top Menu” or
“Title 1” and press [ENTER].
Top Menu: The top menu appears first.
Title 1: The disc content is played without displaying the
top menu.
∫ Finalize
Make selections from “Top Menu” and “Auto-Play Select” (➡ above)
before finalizing the disc.
8 Press [3, 4] to select “Finalize” and
press [ENTER].
9 Press [2, 1] to select “Yes” and
press [ENTER].
10Press [2, 1] to select “Start” and
press [ENTER].
A message appears when finalizing is finished.
[Note]
≥You cannot cancel finalizing.
≥Finalizing takes up to 15 minutes.
≥Do not disconnect the AC mains lead while finalizing.
This will render the disc unusable.
11Press [ENTER].
[Note]
When finalizing a high-speed recording compatible disc, it may take
longer than displayed on the confirmation screen (approximately four
times).
52
≥Visit Panasonic’s homepage for more information about DVDs.
http://www.panasonic-europe.com
To return to the previous screen
Press [RETURN].
To exit the screen
Press [RETURN] several times.
Page 53

Entering text
HDDHDD
DVDDVD SDSD
TV
ENTER
5
JKL
_
Enter Name
12345
ABC a
DEF d
GH I g
67890
bcij
ef/l %
hifl $
*
&
Title on TOP MENU
1
2
3
4
Standard Characters Other Characters
Chapter 1_
Chapter 1
[HDD] [RAM] [-R] [-RW‹V›] [+R] [SD]
You can give names to recorded titles, etc.
The maximum number of characters:
[Note]
If a name is long, parts of it may not be shown in some screens.
1 Show Enter Name screen.
Name field: shows the text you have entered
Numbered
buttons
¢ CANCEL
2 3
1
4 5 6
8
7
CANCEL
0
SKIP
ShowView
9
INPUT SELECT
MANUAL SKIP
SLOW/SEARCH
PAG E
CH
2 Press [3, 4, 2, 1] to select a
character and press [ENTER].
Repeat this step to enter other characters.
≥To erase a character
:,9
PAU SE
K
STATUS
D
I
U
E
G
ENTER
CREATE
CHAPTER
PLAY/x1.3
RETURN
ERASE
;
≥Using the numbered buttons to enter characters
e.g., entering the letter “R”
1
F
U
N
C
T
I
O
N
S
2 Press [7] twice to highlight
3 Press [ENTER].
≥To enter a space
RETURN
“Green”
3,4,2,1
ENTER
SUB MENU
“Red”
∫
STOP
C
E
H
C
/
G
O
R
P
R
O
T
U
T
C
A
N
E
E
G
I
R
M
I
V
P
D
A
O
N
T
SUB MENU
S
DISPLAY
≥Add/recall names (➡ below)
3 Press [∫] (Set).
[HDD] [RAM] Characters
Title
64 (44
§
)
Playlist 64
Folder of still pictures 36
Disc ([RAM])64
§
Title name for timer recording
[-R] [-RW‹V›] [+R] Characters
Title 44
Disc 40
[SD] Characters
Folder of still pictures 36
Title (timer recording)
Select “Programme Name” in step 3 on page 26, 28.
Title
Select “Enter Name” in step 5 on page 38.
Playlist
Select “Enter Name” in step 5 on page 41.
Disc
Select “Disc Name” in step 4 of “Providing a name for a
disc” on page 50.
Folder of still pictures
Select “Folder Name” in step 3 on page 42, “To edit still
picture folders”.
Enter Name
_
Title on TOP MENU
Erase
;
Add to List
List Names
Set
π
SELECT
ENTER
RETURN
Standard Characters Other Characters
1
12345
2
ABC a
3
DEF d
4
GH INOg
5
JKL j
M
6
PQRSp
7
TUV t
8
WXY Z w
9
.
0
67890
bcij
ef/l %
hifl $
klON@
m
n ]
qrs( )
uv{ }
xyz
,
!?
"
'
Space
o[
:
Press the “Red” button or
“Green” button to select
character type and press
[ENTER].
*
“Standard Characters”:
&
(➡ left, Alphabet characters,
_
etc.)
-
“Other Characters”:
|
\
(➡ below, Umlaut characters,
^
;
`
accented characters, etc.)
1
¢¡£¤¥
2
«¬-
3
µ¶·
4
˚
¿Á
5
ÉÊË
Ó
ÔÕÖ
6
ÝÞßÐ á
7
çèé
8
стуфх
9
û
ü
0
¦§¨©ª
®
¯˚± ²
¸
¹º»¼½
Â
ÃÄÅÆ
НОПАС
Ì
ØÙ
× Ú
вгдеж
ê
ëìí î
ö÷ø ú
þý
ÿ
Space
³
´
¾
Ç
È
Ò
Û
Ü
ð
ï
ù
“Now writing.” appears then the screen returns to the Title
view screen and so on.
To end partway
Press [RETURN].
Text is not added.
∫ To add a name
You can add frequently used names and recall them later.
Maximum number of added names: 20
Maximum number of characters per name: 20
After entering the name (step1–2).
1Press [3, 4, 2, 1] to select “Add to List” and press
[ENTER].
≥You can also press [9] to select
2Press [2, 1] to select “Add” and press [ENTER].
≥Press [RETURN] to cancel.
∫ To recall an added name
1Press [3, 4, 2, 1] to select “List Names” and press
[ENTER].
≥You can also press [:] to select
2Press [3, 4, 2, 1] to select the name to be recalled and
press [ENTER].
∫ To erase an added name
1Press [3, 4, 2, 1] to select “List Names” and press
[ENTER].
≥You can also press [:] to select
2Press [3, 4, 2, 1] to select the name to be erased.
3 Press [SUB MENU] to show “Erase Name” and press
[ENTER].
4Press [2, 1] to select “Erase” and press [ENTER].
5 Press [RETURN].
For your reference
If you enter a long name, only part of it is shown in the Top Menu
after finalization (➡ 52). When entering a title name, the name that
will appear in the Top Menu can be previewed in “Title on TOP
MENU” window.
Press [3, 4, 2, 1] to select the character in the name field
and press [;]. (The selected characters are erased.)
Press [7] to move to the 7th row.
“R”.
Press [¢ CANCEL] and press
[ENTER].
7
“
Add to List
“
List Names
“
List Names
7 7
M
6
7
8
NO
PQR
TUV
”.
”.
”.
Entering text
RQT8203
53
53
Page 54

Child Lock
HDD
DVD SD
1
23
456
TV
DVD/TV
ENTER
1.3
HDD
DVDSDSD
TV
DVD/TV
ENTER
Child Lock / Changing the unit’s settings
ShowView
9
8
7
INPUT SELECT
ENTER
CANCEL
SKIP
STOP
C
E
H
C
/
G
O
R
P
R
O
T
U
T
C
A
N
E
E
G
I
R
M
I
V
P
D
A
O
N
T
SUB MENU
S
DISPLAY
REC
TIME SLIP
K
STATUS
REC MODE
AUDI O
0
PAU SE
I
U
G
ENTER
DVD/ TV
SLOW/SEARCH
PLAY/x1.3
D
E
CREATE
CHAPTER
EXT LINK
DUBBING
MANUAL SKIP
F
U
N
C
T
I
O
N
S
RETURN
ERASE
TIMER
F Rec
Changing the unit’s settings
HDD
DVD SD
OPEN/CLOSE
< OPEN/CLOSE
DVD
TV
Í
Numbered
buttons
3,4,2,1
ENTER
“Red”
“Green”
DIRECT TV REC
HDD
1
4 5 6
7
CANCEL
SKIP
STOP
K
C
E
H
C
/
G
O
R
P
R
O
T
U
T
C
A
N
E
E
G
I
R
M
I
V
P
D
A
O
N
T
SUB MENU
S
DISPLAY
REC
TIME SLIP
Í
AV
2 3
8
0
STATUS
REC MODE
AUDI O
CH
DVD
9
INPUT SELECT
SLOW/SEARCH
PAU SE
D
I
U
E
G
ENTER
CREATE
CHAPTER
EXT LINK
DUBBING
VOLUME
PAG E
CH
ShowView
MANUAL SKIP
PLAY/x1.3
S
RETURN
ERASE
TIMER
F Rec
F
U
N
C
T
I
O
N
FUNCTIONS
RETURN
“Yellow”
RETURN
DRIVE
SELECT
∫
The Child Lock deactivates all buttons on the unit and remote
control. Use it to prevent other people from operating the unit.
Press and hold [ENTER]
and [RETURN]
simultaneously until “X
HOLD” appears on the unit’s display.
If you press a button while the Child Lock is on, “X HOLD” appears
on the unit’s display and operation is impossible.
To cancel the Child Lock
Press and hold [ENTER] and [RETURN] simultaneously until “X
HOLD” disappears.
Common procedures
REC
/k1.3
1 While stopped
Press [FUNCTIONS].
2 Press [3, 4] to select “To Others”
and press [ENTER].
3 Press [3, 4] to select “SETUP” and
press [ENTER].
4 Press [3, 4] to select the tab and
press [1].
Tab s
SETUP
Tun in g
Disc
Picture
Sound
Display
Connection
Others
Menus Options
Remote Control
Clock
Power Save
Quick Start
Language
Shipping Condition
Default Settings
DVD 1
Off
On
English
SELECT
TAB
RETURN
5 Press [3, 4] to select the menu and
press [ENTER].
6 Press [3, 4] to select the option and
press [ENTER].
RQT8203
54
To return to the previous screen
DVD/ TV
Press [RETURN].
To exit the screen
Press [RETURN] several times.
[Note]
54
There may be differences in operation methods. If this happens,
follow the on-screen instructions for the operation.
Page 55

Changing the unit’s settings
Summary of settings
The settings remain intact even if you switch the unit to standby.
Tabs Menus Options (Underlined items are the factory presets.)
Tuning
Disc
Manual (➡ 58)
Auto-Setup Restart (➡ 59)
Download from TV (➡ 59)
Settings for playback
≥Press [ENTER] to show the following settings.
Ratings
Set a ratings level to limit DVD-Video play.
Follow the on-screen instructions. Enter a 4-digit password
with the numbered buttons when the password screen is
shown.
≥Do not forget your password.
DVD-Audio Video mode Playback
Select “On” to play DVD-Video content on some DVD-Audio.
Soundtrack
Subtitle ≥Automatic
Menus ≥English
Settings for recording
≥Press [ENTER] to show the following settings.
Recording time in EP mode
Select the maximum number of hours for recording in EP
mode (➡ 23, Recording modes and approximate recording
times).
Rec for High Speed dubbing
When high speed transferring (dubbing) a title to DVD-R,
DVD-RW (DVD-Video format) and +R, it is necessary to turn
this setting “On” before recording to the HDD; however, the
screen size, etc. is restricted (➡ right). We recommend
turning the setting “Off” if high speed transfer (dubbing) to
DVD-R, etc. is not necessary when recording a programme.
Choose the language for audio, subtitle and
disc menus. [DVD-V]
≥Some discs start in a certain language despite
any changes you make here.
≥In case of English/French/German/Italian/
Spanish/Dutch languages, when you make
download from TV, and Country setting of
Auto-Setup in plug-in, the language
(“Soundtrack”/“Menus”) will be same and
“Subtitle” will set to “Automatic”.
≥Enter a code (➡ 61) with the numbered
buttons when you select “Other ¢¢¢¢”.
When the selected language is not available
on the disc, the default language is played.
There are discs where you can only switch the
language from the menu screen (➡ 31).
≥8 No Limit
≥1 to 7: Prohibits play of DVD-Video with corresponding
≥0 Lock All: Prohibits play of all DVD-Video.
≥Unlock Recorder ≥Change Password
≥Change Level ≥Temporary Unlock
≥On: The setting returns to “Off” when you change the disc or
≥Off
≥English
≥Spanish ≥Dutch
≥Original: The original language of each disc will be selected.
≥Other ¢¢¢¢
≥English ≥French ≥German ≥Italian
≥Spanish ≥Dutch
≥Other ¢¢¢¢
≥Spanish ≥Dutch
≥Other ¢¢¢¢
≥EP (6 Hours):You can record for 6 hours on an unused 4.7 GB
≥EP (8 Hours)
The sound quality is better when using “EP (6 Hours)” than when
using “EP (8 Hours)”.
≥On: Makes high speed mode transferring (dubbing) to DVD-R,
≥Off
: All DVD-Video can be played.
ratings recorded on them.
turn the unit off.
≥French ≥German ≥Italian
: If the language selected for “Soundtrack” is not
available, subtitles of that language will automatically
appear if available on that disc.
≥French ≥German ≥Italian
disc.
:You can record for 8 hours on an unused 4.7 GB
disc.
Changing the unit’s settings
etc. possible. Press [2, 1] to select “Yes” and press
[ENTER]. [“ ” appears in the transferring (dubbing) list
(➡ 45).]
–Pictures are saved in 4:3.
–Select the type of audio in advance from “Bilingual Audio
Selection” (➡ 56).
Picture
Comb Filter
Select the picture sharpness when recording.
The setting is fixed with “On” if you set “TV System” to “NTSC”
(➡ 61).
Still Mode
Select the type of picture shown when you pause play
(➡ 68, Frames and fields).
Seamless Play
Selects the play mode for playlist chapter segments.
≥On: Pictures become clear and vivid. Normally, use this setting.
≥Off: Select it when recording noisy pictures.
≥Automatic
≥Field: Select if jittering occurs when “Automatic” is selected.
≥Frame: Select if small text or fine patterns cannot be seen
≥On
≥Off: The points where chapters in playlists change are played
(The picture is coarser.)
clearly when “Automatic” is selected. (The picture is
clearer and finer.)
: The chapters in playlists are played seamlessly. This does
not work when there are several audio types included on
the playlist and when using Quick View. Additionally, the
positioning of chapter segments may change slightly.
accurately, but the picture may freeze for a moment.
RQT8203
55
55
Page 56

Changing the unit’s settings
Tab s Menus Options (Underlined items are the factory presets.)
Changing the unit’s settings
Sound
Dynamic Range Compression [DVD-V] (Dolby Digital only)
Change the dynamic range for late night viewing.
Bilingual Audio Selection
Select whether to record the main or secondary audio type
when:
–Recording or transferring (dubbing) to a DVD-R, DVD-RW
(DVD-Video format) and +R.
–“Rec for High Speed dubbing” is set to “On” (➡ 24).
–Recording or transferring (dubbing) sound in LPCM (➡ below,
“Audio Mode for XP Recording”).
Digital Audio Output
Change the settings when you have connected equipment through this unit’s DIGITAL AUDIO OUT terminal (➡ 17).
≥Press [ENTER] to show the following settings.
PCM Down Conversion
Select how to output audio with a sampling frequency of 96
kHz or 88.2 kHz.
≥Signals are converted to 48 kHz or 44.1 kHz despite the
settings across if the signals have a sampling frequency
of over 96 kHz or 88.2 kHz, or the disc has copy
protection.
Dolby Digital Select how to output the signal.
DTS ≥Bitstream
Select “Bitstream” if the connected
equipment decodes the signal.
Select “PCM” if this unit decodes the signal
and outputs it as 2 channels.
[Note]
Not making the proper settings may result
in noise or some trouble for digital
MPEG ≥Bitstream: When connected to equipment with a built-in
Audio Mode for XP Recording
Choose the audio type when recording or transferring (dubbing)
with XP mode.
Audio Mode for DV Input
You can select the kind of audio when recording from the unit’s
DV input terminal (➡ 47).
recording.
≥On
≥Off
≥M1
≥M2
You cannot select the audio on this unit when recording from an
external source, such as when transferring (dubbing) from a
video cassette recorder (except from DV equipment connected
to this unit’s DV input terminal). Select on the other equipment.
When recording from the unit’s DV terminal, select the type of
audio recording from “Audio Mode for DV Input” (➡ below).
≥On: Signals are converted to 48 kHz or 44.1 kHz. (Choose
when the connected equipment cannot process signals
with a sampling frequency of 96 kHz or 88.2 kHz.)
: Signals are output as 96 kHz or 88.2 kHz. (Choose when
≥Off
the connected equipment can process signals with a
sampling frequency of 96 kHz or 88.2 kHz.)
≥Bitstream
≥PCM: When connecting to equipment not displaying the Dolby
≥PCM: When connecting to equipment not displaying the DTS
≥PCM
≥Dolby Digital
≥LPCM (➡ 68)
–The picture quality of LPCM recordings may be lower than
–The audio recording becomes Dolby Digital even if you
–When recording a bilingual broadcast, select the type of
≥Stereo 1
≥Stereo 2: Records added audio such as narration (L2, R2)
≥Mix: Records both Stereo 1 and Stereo 2.
When recording bilingual broadcast to a DVD-R, DVD-RW
(DVD-Video format) or +R, or recording in LPCM audio, select
the type of audio in advance from “Bilingual Audio Selection”
(➡ above).
:When connecting to equipment displaying the Dolby
Digital logo.
Digital logo.
: When connecting to equipment displaying the DTS
logo.
logo.
MPEG decoder.
: When connected to equipment without a built-in MPEG
decoder.
(➡ 68)
that of normal XP mode recordings.
selected LPCM when using a recording mode other than XP.
audio in advance from “Bilingual Audio Selection” (➡ above).
: Records audio (L1, R1).
subsequent to original recording.
RQT8203
56
56
Display
On-Screen Messages
Choose whether to show status messages automatically.
Grey Background
Select “Off” if you do not want to have the unit show the grey
background when tuner reception is weak.
FL Display
Changes the brightness of the unit’s display.
This setting is fixed with “Automatic” if you set “Power Save”
(➡ 57) to “On”.
≥Automatic
≥Off
≥On
≥Off
≥Bright
≥Automatic: The display turns dark during play and disappears
≥Dim
when the unit is turned off. It reappears
momentarily if a button is pressed. While using this
mode, the standby power consumption can be
reduced.
Page 57

Tabs Menus Options (Underlined items are the factory presets.)
Connection
TV Aspect (➡ 20) Set to match the type of television
Progressive (➡ 20) ≥On ≥Off
TV System (➡ 61) ≥PA L ≥NTSC
AV1 Output
Selects the output from the AV1 terminal.
Select “RGB (without component)” for RGB output.
Select “Video (with component)” or “S Video (with component)”
for component output.
AV2 Settings
Set to match the connected equipment.
≥Press [ENTER] to show the following settings.
AV2 Input
Set to “RGB/Video” or “RGB” when receiving or recording
RGB output from external equipment.
AV2 Connection
This setting is fixed with “Ext” if you set “TV System” to
“NTSC” (➡ 61).
Ext Link
This setting cannot be made when the “TV System” is set to
“NTSC” (➡ 61).
connected.
≥16:9 ≥4:3 ≥Letterbox
≥Video (with component)
≥S Video (with component)
≥RGB (without component)
≥RGB/Video
≥RGB
≥Video
≥S Video
≥Decoder: When a decoder is connected to descramble the
≥Ext
≥Ext Link 1: When a digital/satellite receiver which transmits a
≥Ext Link 2
scrambled signals (e.g., C+decoder).
: When the VCR or a digital/satellite receiver is
connected.
special control signal recordings via the 21-pin
Scart cable is connected.
: When external equipment with a timer function is
connected.
Others
Remote Control (➡ 21) ≥DVD 1 ≥DVD 2 ≥DVD 3
Clock
Auto Clock Setting (➡ 60)
Manual Clock Setting (➡ 60)
Power Save
≥Refer to the following when “Power Save” is set to “On”.
–“FL Display” is automatically set to “Automatic” (➡ 56).
–The “Quick Start” function does not work. (It is automatically
turned to “Off”.)
–When the unit is off, Pay TV programmes cannot be watched
on the TV because the signal from the connected decoder is
not looped through. To watch them, turn on the unit.
≥If “Quick Start” is set to “On”, “Power Save” is automatically
turned to “Off”.
Quick Start
The Quick Start feature enables this unit to be ready to start
recording as quick as approx. 1 second§ after turning it on. You
can start recording soon after deciding you want to record
something.
§
Only when recording to the HDD or DVD-RAM.
≥If this is set to “On”, “Power Save” is automatically turned to
“Off”.
≥Startup takes up to a minute when:
–You play a disc or start recording to discs other than DVD-
RAM.
–You want to make other operations.
–The clock has not been set.
Language
Choose the language for these menus and on-screen
messages.
Shipping Condition
All the settings except for the ratings level, ratings password and
time settings return to the factory preset. The timer recording
programmes are also cancelled.
Default Settings
All the settings other than the programmed channels, time
settings, country settings, language settings, disc language
settings, ratings level, ratings password, remote control code,
return to the factory presets.
≥On: Power consumption is minimized when the unit is turned
to standby (➡ 70).
≥Off
≥On
≥Off: Standby power consumption is less than when this is
set to “On”.
≥English
≥Español ≥Nederlands
≥Ye s
≥No
≥Ye s
≥No
≥Deutsch ≥Français ≥Italiano
Changing the unit’s settings
RQT8203
57
57
Page 58

Changing the unit’s settings
SETUP
Disc
Tuning
Manual
Auto-Setup Restart
Download from TV
Refer to the control reference at the bottom of page 54.
Tuning
1 While stopped
Press [FUNCTIONS].
2 Press [3, 4] to select “To Others”
and press [ENTER].
∫ To change the tuning settings for individual
programme position
RETURN
RETURN : leave
Pos
Name
Channel
Fine Tuning
Decoder
Video System
Audio Mode
Mono
Title Page
6 Press [3, 4, 2, 1]
to select a
programme position
and press [ENTER].
Manual
Tuning
SELECT
ARD
Auto
Auto
301
1
4
Off
BG
Off
3 Press [3, 4] to select “SETUP” and
press [ENTER].
4 Press [3, 4] to select “Tuning” and
press [1].
Manual
You can add or delete channels, or change programme positions.
5 Press [3, 4] to select “Manual” and
press [ENTER].
Manual Tuning
Pos
Name
1 ARD 4
2 ZDF
3 N3
4 HR3
5 BR3 10
6
SELECT
7
8
ENTER
RETURN
9
10
Delete
Move
Add
To delete a programme position
Press [3, 4, 2, 1] to select a programme position and press the
“Red” button.
To add a blank programme position
Press [3, 4, 2, 1] to select a programme position and press the
“Green” button.
To move a TV station to another programme position
1 Press [3, 4, 2, 1] to select a programme position and press
Changing the unit’s settings
the “Yellow” button.
2 Press [3, 4, 2, 1] to select the new programme position to
which you want to assign the TV station and press [ENTER].
[Note]
If Preset Download (➡ 18) has been performed, only deletion of the
programme position can be performed.
Ch
2
5
8
Pos
Name
Ch
11
12
13
14
15
16
17
18
19
20
Press [3, 4] to select an item and press [1].
Pos To change the programme position in which
the TV stations are assigned
Press [3, 4] or numbered buttons to select the
number of the desired programme position and
press [ENTER].
Name To enter or change the name of a TV station
Press [3, 4, 2, 1] to enter station name and
press [ENTER].
If the station name needs a blank space, select
the blank between “Z” and “¢”.
Channel To enter newly available TV stations or change
the channel number of an already tuned TV
station
Press [3, 4] or the numbered buttons to enter
the channel number of the desired TV station.
Wait a few moments until the desired TV station
has been tuned.
After the desired TV station is tuned, press
[ENTER].
Fine Tuning To obtain the best tuning condition
Press [3, 4] to adjust the best tuning condition
and press [ENTER].
≥Press [1] to return to “Auto”.
Decoder To preset pay TV stations
Press [3, 4] to select “On” and press [ENTER].
Video
System
To select the video system type
Press [3, 4] to select “PAL” or “SECAM” if the
picture lacks colour, and press [ENTER].
Auto: This unit automatically distinguishes
PAL and SECAM signals.
PAL: For receiving PAL signals.
SECAM: For receiving SECAM signals.
Audio Mode To select the audio reception type
If sound quality is poor, press [3, 4] to select
“BG” or “L” and press [ENTER].
BG: PAL B.G.H/SECAM B.G
L: SECAM L, L’/PAL L
Mono To select the type of sound to be recorded
Press [3, 4] to select “On” if the stereo sound is
distorted due to inferior reception conditions, or if
you want to record the normal (mono) sound
during a stereo, bilingual or NICAM broadcast,
and press [ENTER].
Title Page To enter the Teletext title page for a channel
Entering title page number allows the unit to
automatically record programme and station
names.
Press [3, 4] or numbered buttons to enter the
number and press [ENTER].
≥To find the correct title page for the station, refer
to its Teletext TV guide.
RQT8203
58
58
You can make the following two settings by selecting the external
input channel (AV1, AV2, AV3, AV4) in step 5.
≥Video System (Auto/PAL/SECAM)
In order to record properly, make the appropriate settings to match
the connected equipment.
≥Title Page (Auto/Off)
Page 59

Auto-Setup Restart, Download from TV
You can restart auto channel setting if Preset Download or AutoSetup (➡ 18, 19) fails for some reason.
After performing steps 1–4 (➡ 58)
∫ Auto-Setup Restart
5 Press [3, 4] to select “Auto-Setup
Restart” and press [ENTER].
6 Press [2, 1] to select “Yes” and
press [ENTER].
The country setting menu appears.
7 Press [3, 4, 2, 1] to select a
country and press [ENTER].
Auto-Setup starts.
∫ Download from TV
5 Press [3, 4] to select “Download
from TV” and press [ENTER].
6 Press [2, 1] to select “Yes” and
press [ENTER].
Downloading from the television starts.
To return to the previous screen
Press [RETURN].
To exit the screen
Press [RETURN] several times.
When the GUIDE Plus+ system setting message appears.
≥If you want to setup the GUIDE Plus+ system
Press [2, 1] to select “Yes” and press [ENTER].
It takes approx. 2 hours to set up the GUIDE Plus+ system.
(➡ User’s manual for the GUIDE Plus+ system)
≥If you do not want to setup the GUIDE Plus+ system
Press [2, 1] to select “No” and press [ENTER].
Television picture appears. Auto-Setup Restart or Download from
TV is complete.
List of TV Reception Channels
§
TV Channel
Countries
2 – 4
5 – 10, G – J
(172.00 to
220.00 MHz)
(INTER
BANDE)
—
——
B – F
(100.00 to
172.00 MHz)
(INTER
BANDE)
K – Q
(220.00 to
300.00 MHz)
(INTER
BANDE)
S21 – S41
(299.25 to
467.25 MHz)
(INTER
BANDE)
E2 – E12
M2 – M10
U1 – U10
S21 – S41
(Hyperband)
Channel
indication
2 – 4
5 – 10
11 – 12
13 – 20
21 – 69 E21 – E69 E21 – E69 E21 – E69
74 – 78 S01 – S05 — S1 – S5
80 S1 — M1
81 – 89 S2 – S10
90 – 99 S11 – S20
121 – 141
§
Only for 8 MHz channel raster
Germany/Italy France
E2 – E10
E11 – E12
(Germany)
H1 – H2 (Italy)
A – H (Only
Italy)
S21 – S41
(Hyperband)
Other
Changing the unit’s settings
RQT8203
59
59
Page 60

Changing the unit’s settings
Refer to the control reference at the bottom of page 54.
Clock settings
Usually, the unit’s Preset Download or Auto-Setup function (➡ 18, 19) automatically adjusts the clock to correct time. Under some reception
conditions, however, the unit cannot set the clock automatically.
In this case, follow the operation steps below to manually set the clock.
≥In the case of a power failure, the clock setting remains in memory for approximately 60 minutes.
1 While stopped
Press [FUNCTIONS].
2 Press [3, 4] to select “To Others” and press [ENTER].
3 Press [3, 4] to select “SETUP” and press [ENTER].
4 Press [3, 4] to select “Others” and press [1].
5 Press [3, 4] to select “Clock” and press [ENTER].
Auto Clock Setting
If a TV station transmits a time setting signal, and when “Automatic”
in the Clock setting menu is set to “On”, the automatic time
correction function checks the time and if necessary it is adjusted
several times every day.
6 Press [3, 4] to select “On” of
“Automatic” and press [ENTER].
Auto clock setting starts.
The following screen appears when setting is complete.
Clock
On
Time Date
15 : 45 : 39
CHANGE
Automatic clock setting completed.
ENTER: access RETURN: leave
ENTER
RETURN
To stop partway
Press [RETURN].
Changing the unit’s settings
≥If the unit cannot set the clock automatically, set the clock
manually (➡ right, step 6).
To return to the previous screen
Press [RETURN].
To exit the screen
Press [RETURN] several times.
1
Automatic
. 8
.
2005
Manual Clock Setting
6 Press [3, 4] to select “Off” of
“Automatic” and press [ENTER].
Clock
Time Date
15 : 45 : 39
No.
0 9
Please set clock manually.
CHANGE
SELECT
ENTER: store RETURN: leave
ENTER
RETURN
1
Automatic Off
. 8
.
2005
7 Press [2, 1] to select the item you
want to change.
The items change as follows:
Hour!#Minute!#Second!#Day!#Month!#Year
^-----------------------------------------------------------------------------------------J
8 Press [3, 4] to change the setting.
You can also use the numbered buttons for setting.
9 Press [ENTER] when you have
finished the settings.
The clock starts.
RQT8203
60
60
Page 61

TV System
Change the setting to match the equipment you are connecting with, or to match the title when there are both PAL and NTSC titles on the HDD.
1 While stopped
Press [FUNCTIONS].
2 Press [3, 4] to select “To Others” and press [ENTER].
3 Press [3, 4] to select “SETUP” and press [ENTER].
4 Press [3, 4] to select “Connection” and press [1].
5 Press [3, 4] to select “TV System” and press [ENTER].
6 Press [3, 4] to select the TV system and press [ENTER].
ENTER
TV System
PAL
NTSC
SELECT
RETURN
SETUP
Tun in g
Disc
Picture
Sound
Display
Connection
Others
≥PA L (factory preset)
–Select when connecting to a PAL or Multi-system television. Titles recorded using NTSC are played as PAL 60.
–Select to record television programmes and PAL input from other equipment.
–[HDD] Select when playing a PAL input title recorded on the HDD.
≥NTSC
–Select when connecting to a NTSC television. Television programmes cannot be recorded properly.
–Select to record NTSC input from other equipment.
–[HDD] Select when playing a NTSC input title recorded on the HDD.
7 Press [2, 1] to select “Yes” and press [ENTER].
To return to the previous screen
Press [RETURN].
To exit the screen
Press [RETURN] several times.
∫ To change the setting all at once (PAL!#NTSC)
While stopped, keep pressing [∫] and [< OPEN/CLOSE] on the main unit for 5 or more seconds.
[Note]
≥This unit cannot record to discs containing both PAL and NTSC signals. (However, both types of programmes can be recorded onto the HDD.)
≥If “NTSC” has been selected, the GUIDE Plus+ system cannot be used.
Language code list Enter the code with the numbered buttons.
Abkhazian: 6566
Afar: 6565
Afrikaans: 6570
Albanian: 8381
Ameharic: 6577
Arabic: 6582
Armenian: 7289
Assamese: 6583
Aymara: 6589
Azerbaijani: 6590
Bashkir: 6665
Basque: 6985
Bengali; Bangla:
Bhutani: 6890
Bihari: 6672
Breton: 6682
Bulgarian: 6671
Burmese: 7789
Byelorussian: 6669
Cambodian: 7577
Catalan: 6765
Chinese: 9072
Corsican: 6779
Croatian: 7282
Czech: 6783
Danish: 6865
Dutch: 7876
English: 6978
Esperanto: 6979
Estonian: 6984
Faroese: 7079
Fiji: 7074
Finnish: 7073
6678
French: 7082
Frisian: 7089
Galician: 7176
Georgian: 7565
German: 6869
Greek: 6976
Greenlandic: 7576
Guarani: 7178
Gujarati: 7185
Hausa: 7265
Hebrew: 7387
Hindi: 7273
Hungarian: 7285
Icelandic: 7383
Indonesian: 7378
Interlingua: 7365
Irish: 7165
Italian: 7384
Japanese: 7465
Javanese: 7487
Kannada: 7578
Kashmiri: 7583
Kazakh: 7575
Kirghiz: 7589
Korean: 7579
Kurdish: 7585
Laotian: 7679
Latin: 7665
Latvian, Lettish: 7686
Lingala: 7678
Lithuanian: 7684
Macedonian: 7775
Malagasy: 7771
Malay: 7783
Malayalam: 7776
Maltese: 7784
Maori: 7773
Marathi: 7782
Moldavian: 7779
Mongolian: 7778
Nauru: 7865
Nepali: 7869
Norwegian: 7879
Oriya: 7982
Pashto, Pushto: 8083
Persian: 7065
Polish: 8076
Portuguese: 8084
Punjabi: 8065
Quechua: 8185
Rhaeto-Romance:
8277
Romanian: 8279
Russian: 8285
Samoan: 8377
Sanskrit: 8365
Scots Gaelic: 7168
Serbian: 8382
Serbo-Croatian: 8372
Shona: 8378
Sindhi: 8368
Singhalese: 8373
Slovak: 8375
Slovenian: 8376
Somali: 8379
Spanish: 6983
Sundanese: 8385
Swahili: 8387
Swedish: 8386
Tagalog: 8476
Tajik: 8471
Tamil: 8465
Tatar: 8484
Telugu: 8469
Thai: 8472
Tibetan: 6679
Tigrinya: 8473
Tonga: 8479
Turkish: 8482
Turkmen: 8475
Twi: 8487
Ukrainian: 8575
Urdu: 8582
Uzbek: 8590
Vietnamese: 8673
Volapük: 8679
Welsh: 6789
Wolof: 8779
Xhosa: 8872
Yiddish: 7473
Yoruba: 8979
Zulu: 9085
Changing the unit’s settings
RQT8203
61
61
Page 62

Messages
On the television Page
Cannot finish recording
completely.
Cannot playback.
TV system is different from the
setting.
To playback, please change the TV
System in SETUP.
Cannot record on the disc. ≥The disc may be dirty or scratched. 5
Unable to format.
Please check the disc.
Cannot play on this unit. ≥You tried to play a non-compatible image.
Cannot record. Disc is full. ≥[HDD] [RAM] Create space by erasing any unnecessary titles.
Cannot record. Maximum number
of titles exceeded.
Error has occurred. Please press
ENTER.
No Disc ≥The disc may be upside down. —
No folders. ≥There is no compatible folder in this unit. 11
No SD CARD
No valid SD card.
Not enough space on dubbing
destination.
Please change the disc. ≥There may be a problem with the disc. Press [< OPEN/CLOSE] on the main unit to remove
This is a non-recordable disc. ≥The unit cannot record on the disc you inserted. Insert a DVD-RAM or unfinalized DVD-R,
This disc is not properly formatted.
Formatting is necessary using
DISC MANAGEMENT.
$
On the unit’s display
The following messages or service numbers appear on the unit’s display when something unusual is detected during startup and use.
REMOTE DVD
(“∑” stands for a number.)
≥The programme was copy-protected.
≥The HDD or disc may be full.
≥The maximum number of times you can record the program is exceeded.
≥You tried to play a title recorded using a different encoding system from that of the TV system
currently selected on the unit.
Alter the “TV System” setting on this unit to suit.
≥Turn the unit off and re-insert the card.
[Even if you erase recorded content from the DVD-R or +R, there is no increase in disc space.
Available space on DVD-RW (DVD-Video format) increases only when the last recorded title is
erased.]
≥Use a new disc.
≥Press [ENTER] to start recovery process. You cannot operate the unit while it is recovering
(“SELF CHECK” appears on the unit’s display).
≥The card is not inserted. If this message is displayed with a compatible card already
inserted, turn off the unit, remove and then re-insert the card.
≥The card inserted is not compatible or the card format does not match.
≥Create space by erasing any unnecessary items.
≥Erase one or more items registered on the transfer (dubbing) list to ensure that the
“Destination Capacity” is not exceeded.
it and check it for scratches or dirt. (The unit turns off automatically after you open the tray.)
DVD-RW (DVD-Video format), or +R.
≥You inserted an unformatted DVD-RAM or DVD-RW.
≥The operation is prohibited by the unit or disc. —
≥The remote control and main unit are using different codes. Change the code on the remote control.
Press and hold [ENTER] and the indicated number button at the
same time for more than 2 seconds.
—
—
—
61
35
6
32, 39, 51
—
—
6
11
32, 35, 39,
42, 51
46, 49
5
9
51
21
Messages
RQT8203
62
HARD ERR ≥If there is no change after turning the unit on and off, consult the dealer where the unit was
HDD SLP ≥In order to extend HDD life, the HDD is in SLEEP mode. Press [HDD] to activate. 4
NO READ ≥The disc is dirty or badly scratched. The unit cannot record, play, or edit.
PROG FULL ≥There are already 32 timer programmes. Delete unnecessary timer programmes. 29
SELF CHECK ≥There was something unusual detected with the disc while recording, playing or transferring
UNFORMAT ≥You have inserted a DVD-RAM or a DVD-RW that is unformatted or a DVD-RW recorded on another
UNSUPPORT ≥You have inserted a disc the unit cannot play or record on. 9, 10
U59 ≥The unit is hot.
U99 ≥The unit fails to operate properly. Press [Í/I] on the main unit to switch the unit to standby. Now
X HOLD ≥The Child Lock function is activated.
H or F
R:
(e.g., R44:00)
62
purchased.
≥This message may appear when the DVD-RAM lens cleaner has finished cleaning.
Press [< OPEN/CLOSE] on the main unit to eject the disc.
(dubbing), there was a power failure or the AC plug was disconnected while the unit was on. The unit
is carrying out its recovery process. This process restores the unit to normal operation. The unit is
not broken. Wait until the message disappears.
≥If “Quick Start” is set to “On”, “PLEASE WAIT” is displayed while the unit is carrying out its recovery
process. You cannot operate the unit while “PLEASE WAIT” is displayed.
unit.
The unit switches to standby for safety reasons. Wait for about 30 minutes until the message
disappears.
Select a position with good ventilation when installing the unit. Do not block the cooling fan on the
rear of the unit.
press [Í/I] on the main unit again to turn the unit on.
Press and hold [ENTER] and [RETURN] simultaneously until “X HOLD” disappears.
≥
There is something unusual. (The service number displayed after H and F depends on the unit’s condition.)
≥Check the unit using the troubleshooting guide. If the service number does not disappear, do the
following.
1. Disconnect the plug from the household mains socket, wait a few seconds, then reconnect it.
2. Press [Í/I] to turn the power on. (The unit may be fixed.)
If the service number does not disappear despite after doing the above, request service from the
dealer. Inform the dealer of the service number when requesting service
≥
The unit is showing you the remaining time on the HDD or the disc. (This does not indicate a malfunction.)
In the display across the letter “R” means “Remain” and the numbers mean remaining time
(hours:minutes).
.
—
5
5
64
—
—
—
—
54
—
64–67
22
Page 63

Frequently asked questions
Refer to the following items if you have any doubts about unit operations.
Set up Page
What equipment is necessary to play
multi channel surround sound?
Are the headphones and speakers
directly connected to the unit?
The television has a Scart terminal and
component video input terminal. Which
should I connect with?
Is my television progressive output
compatible?
Disc
Can I play DVD-Video, DVD-Audio and
Video CDs bought in another country?
Can a DVD-Video that does not have a
region number be played?
Please tell me about DVD-R, DVD-RW,
+R and +RW compatibility with this unit.
Please tell me about CD-R and CD-RW
compatibility with this unit.
≥DVD-Video:
17
You can play DVD-Video multi channel surround by digitally connecting an amplifier
equipped with a Dolby Digital, DTS or MPEG decoder.
≥DVD-Audio:
—
This unit plays DVD-Audio in 2 channels. You cannot play multi channel surround sound.
≥You cannot directly connect them to the unit. Connect through the amplifier etc. 17
≥If you have a regular television (CRT: cathode ray tube) we recommend using the Scart
15, 16
terminal. You can enjoy high-quality RGB video from this unit by connecting to an RGB
compatible television.
If you have an LCD/plasma television or LCD projector compatible with progressive scan,
connect through the component video terminals for high-quality progressive video.
If you have a CRT television or a multi system television using PAL mode that is
compatible with progressive scan, we cannot recommend progressive output as some
flickering can occur.
≥All Panasonic televisions that have 625 (576)/50i · 50p, 525 (480)/60i · 60p input terminals
—
are compatible. Consult the manufacturer if you have another brand of television.
≥You cannot play DVD-Video if their region number does not include “2” or “ALL”.
Cover
Refer to the disc’s jacket for more information.
≥The DVD-Video region number indicates the disc conforms to a standard. You cannot play
—
discs that do not have a region number. You also cannot play discs that do not conform to
a standard.
≥This unit records and plays DVD-R, DVD-RW (DVD-Video format) and +R, and plays
9, 10
DVD-RW (DVD Video Recording format) and +RW.
≥This unit also records and plays high speed recording compatible DVD-R, DVD-RW, +R
—
discs.
≥This unit plays CD-R/CD-RW discs which have been recorded in one of the following
standards: CD-DA, Video CD, SVCD (conforming to IEC62107), MP3 and still pictures
10, 33,
35
(JPEG/TIFF). Close the session or finalize the disc after recording. This unit can
recognize up to 99 folders (groups) and 999 files (tracks) on a disc with MP3 or still
pictures (JPEG/TIFF).
≥You cannot write to a CD-R or CD-RW with this unit.
—
Recording
Can I record from a commercially
purchased video cassette or DVD?
Can DVD-R, DVD-RW (DVD-Video
format) and +R recorded on this unit be
played on other equipment?
Can I record digital audio signals using
this unit?
Can a digital audio signal from this unit
be recorded to other equipment?
Can I switch to bilingual broadcast
during recording?
Can I high speed transfer (dub) to a
disc?
≥Most commercially sold video cassettes and DVD are copy protected; therefore, recording
is usually not possible.
≥You can play on compatible equipment such as DVD players after finalizing the disc on
this unit. However, depending on the condition of the recording, the quality of the disc and
capabilities of the DVD player, play may not be possible.
≥You cannot record digital signals. The digital audio terminals on this unit are for output
only. (The audio recorded using the unit’s DV input terminal from a digital video
camcorder, for example, is recorded digitally.)
≥You can record if using the PCM signal. When recording DVD, change the “Digital Audio
Output” settings to the following in the SETUP menu.
–PCM Down Conversion: On
–Dolby Digital/DTS/MPEG: PCM
However, only as long as digital recording from the disc is permitted and the recording
equipment is compatible with a sampling frequency of 48 kHz.
≥You cannot record MP3 signals.
≥With HDD and DVD-RAM, you can. Just press [AUDIO].
≥With DVD-R, DVD-RW (DVD-Video format), +R you cannot. Change before recording with
“Bilingual Audio Selection” in the SETUP menu.
≥When using a high speed recording compatible disc, you can transfer (dub) a one hour
programme to:
–DVD-R or +R in approximately 56 seconds
–DVD-RAM in approximately 1.5 minutes
–DVD-RW (DVD-Video format) in approximately 1.9 minutes
§
Quickest possible time
§
§
§
—
—
—
56
Frequently asked questions
—
32
56
43
RQT8203
63
63
Page 64

Troubleshooting guide
Before requesting service, make the following checks. If you are in doubt about some of the check points, or if the solutions indicated in the chart
do not solve the problem, consult your dealer for instructions.
The following do not indicate a problem with this unit:
≥Regular disc rotating sounds.
≥Poor reception due to atmospheric conditions.
≥Image disturbance during search.
≥Interruptions in reception due to periodic satellite broadcasting
breaks.
≥A sound is heard when the HDD goes into SLEEP mode, or
operations are slow to respond in SLEEP mode.
Power Page
No power.
The unit does not turn on
pressing [Í DVD].
The unit switches to standby mode.
Displays
The display is dim. ≥Change “FL Display” in the SETUP menu. 56
“0:00” is flashing on the unit’s
display.
The time recorded on the disc
and the available time shown do
not add up.
The play time shown for MP3
does not agree with the actual
time.
The clock is not correct. ≥Under adverse reception conditions, etc., the automatic time correction function may not
Compared to the actual recorded
time, the elapsed time displayed
is less.
(Only when recording in NTSC)
“SELF CHECK” is displayed and
the disc cannot be ejected.
≥Insert the AC mains lead securely into a known active household mains socket.
≥Linked timer recordings with external equipment is in recording standby (“EXT Link” on the
unit’s display blinks when [Í DVD] is pressed). Press [EXT LINK] to cancel the recording
standby.
≥One of the unit’s safety devices is activated. Press [Í/I] on the main unit to turn the unit on. —
≥Set the clock. 60
≥Times shown may disagree with actual times.
≥Available recording space on DVD-RW (DVD-Video format) increases only when the last
recorded title is erased. It does not increase if other titles are erased.
≥Even if you erase recorded content from the DVD-R or +R, there is no increase in disc space.
≥More disc space than the actual recording time is used after recording or editing the DVD-R
or +R 200 times or more.
≥While searching, the elapsed time may not display correctly.
work. In this case, “Automatic” is automatically turned to “Off”. If re-setting the Auto Clock
Setting does not work, set the time manually.
≥The displayed recording/play time is converted from the number of frames at 29.97 frames
(equal to 0.999 seconds) to one second. There will be a slight difference between the time
displayed and the actual elapsed time (e.g., actual one-hour elapsed time may display as
approximately 59 minutes 56 seconds). This does not affect the recording.
≥The unit is carrying out the recovery process. Do the following to eject the disc.
1 Press [Í/I] on the main unit to switch the unit to standby.
If the unit doesn’t switch to standby, press and hold [Í/I] on the main unit for about 10
seconds. The unit is forcibly switched to standby.
2 While the unit is off, press and hold [∫] and [CH W] on the main unit at the same time for
about 5 seconds. Remove the disc.
≥Operations do not work due to a poor-quality disc. (Try again using
a Panasonic disc.)
≥The unit freezes due to one of its safety devices being activated.
(Press and hold [Í/I] on the main unit for 10 seconds.)
≥When the HDD has been automatically placed in the SLEEP mode
(➡ 4), or the unit is turned on or off, there may be an unexpected
sound. This does not indicate a problem with this unit.
15, 16
29
—
—
—
—
—
60
—
—
Troubleshooting guide
RQT8203
64
TV screen and video
Television reception worsens
after connecting the unit.
Status messages do not appear. ≥Select “Automatic” in “On-Screen Messages” in the SETUP menu. 56
The grey background does not
appear.
Picture does not appear during
timer recording.
The 4:3 aspect ratio picture
expands left and right.
Screen size is wrong.
There is a lot of after-image
when playing video.
When playing DVD-Video using
progressive output, one part of
the picture momentarily appears
to be doubled up.
There is no apparent change in
picture quality when adjusted
with the Picture menu in the onscreen menus.
The images from this unit do not
appear on the television.
Picture is distorted.
64
≥This can occur because the signals are being divided between the unit and other equipment.
It can be solved by using a signal booster, available from audio-visual suppliers. If it is not
solved by using a signal booster, consult the dealer.
≥Select “On” in “Grey Background” in the SETUP menu. 56
≥Timer recordings work regardless whether the unit is on or off. To confirm the timer recording
is going to work properly, turn the unit on.
≥Use the television to change the aspect. If your television does not have that function, set
“Progressive” in the Picture menu to “Off”.
≥Check the settings for “TV Aspect” in the SETUP menu.
≥Set “Playback NR” in the Picture menu to “Off”. 37
≥Set “Progressive” in the Picture menu to “Off”. This problem is caused by the editing method
or material used on DVD-Video, but should be corrected if you use interlace output.
≥The effect is less perceivable with some types of video. —
≥Make sure that the television is connected to the AV1 terminal, VIDEO OUT terminal,
S VIDEO OUT terminal or COMPONENT VIDEO OUT terminals on this unit.
≥Make sure that the television’s input setting (e.g., AV 1) is correct.
≥Progressive output is set to on but the connected television is not progressive compatible.
Press and hold [∫] and [1] (PLAY) on the main unit at the same time for more than 5
seconds to cancel this setting. The setting will change to interlace.
≥The unit’s “TV System” setting differs from the TV system used by the disc now playing. While
stopped, keep pressing [∫] and [< OPEN/CLOSE] on the main unit for 5 or more seconds.
The system switches from PAL to NTSC or vice versa.
—
—
37
20
37
15, 16
—
—
61
Page 65

Sound Page
No sound.
Low volume.
Distorted sound.
Cannot hear the desired audio
type.
≥Check the connections and the “Digital Audio Output” settings. Check the input mode on the
amplifier if you have connected one.
≥Press [AUDIO] to select the audio.
≥Turn off V.S.S. in the following cases.
–When using discs that do not have surround sound effects such as Karaoke discs.
–When playing bilingual broadcast programmes.
≥The disc may have a restriction on the method of audio output. If “D.MIX” does not appear in
the display when playing multi-channel DVD-Audio, only audio for the two front channels will
be output. Refer to the disc’s jacket. [DVD-A]
15–17,
56
32
37
—
Cannot switch audio. ≥You cannot switch the audio in the following cases.
Operation
Cannot operate the television.
The remote control doesn’t work.
The unit is on but cannot be
operated.
HDD activation is slow. ≥The HDD is in SLEEP mode. (“HDD SLP” appears in the unit’s display.) 4
–When a DVD-R, DVD-RW (DVD-Video format) or +R disc is in the disc tray while DVD drive
is selected.
–When the recording mode is XP and “Audio Mode for XP Recording” is set to “LPCM”.
–When “Rec for High Speed dubbing” is set to “On”.
≥When connecting an amplifier using an optical digital cable, you cannot switch the audio if
“Dolby Digital” is set to “Bitstream”. Set “Dolby Digital” to “PCM” or connect using audio
cables.
≥There are discs for which audio cannot be changed because of how the disc was created.
≥Change the manufacturer code. Some televisions cannot be operated even if you change the
code.
≥The remote control and main unit are using different codes. Change the code on the remote
control.
Press and hold [ENTER] and the indicated number button
at the same time for more than 2 seconds.
≥The batteries are depleted. Replace them with new ones.
≥You are not pointing the remote control at the main unit’s remote control signal sensor during
operation.
≥Coloured glass may obstruct the signal reception/transmission.
≥Don’t place the signal sensor in direct sunlight or in areas that may be subject to sunlight
exposure.
≥It may be necessary to set the code on the remote control again after changing the batteries.
≥It may be necessary to set the manufacturer code again after changing the batteries.
≥The child lock function is activated.
≥Recording drive or playback drive has not been selected properly.
≥Some operations may be prohibited by the disc.
≥The unit is hot (“U59” appears on the display). Wait for “U59” to disappear.
≥One of the unit’s safety devices may have been activated.
Reset the unit as follows:
1Press [Í/I] on the main unit to switch the unit to standby.
If the unit doesn’t switch to standby, press and hold [Í/I] on the main unit for about 10
seconds. The unit is forcibly switched to standby.
Alternatively, disconnect the AC mains lead, wait one minute, then reconnect it.
2Press [Í/I] on the main unit to switch it on. If the unit still cannot be operated, consult the
dealer.
—
56
24
17, 56
—
21
21
8
—
—
—
21
21
54
22, 30
—
—
—
Troubleshooting guide
Cannot eject disc. ≥The unit is recording.
Cannot tune channels.
Cannot download channel
presets from the television.
Startup is slow. ≥Make sure that “Quick Start” is set to “On”.
Takes time to read DVD-RAM. ≥It may take time to read a disc if it is being used for the first time in this unit or it has not been
≥Linked timer recordings with external equipment is in recording standby (“EXT Link” on the
unit’s display blinks when [Í DVD] is pressed). Press [EXT LINK] to cancel the recording
standby.
≥The unit may have a problem. While the unit is off, press and hold [∫] and [CH W] on the
main unit at the same time for about 5 seconds. Remove the disc and consult the dealer.
If the Child Lock function is activated, above operation does not work. Cancel the Child Lock
function.
≥Check the connections.
≥You must connect to a television equipped with the Q Link function with a fully wired 21-pin
Scart cable to download channel presets.
≥Startup takes time in the following situations:
–A disc other than a DVD-RAM is inserted.
–The clock is not set.
–Immediately after a power failure or the AC mains lead is connected.
–For a few minutes after 5:15 am due to system maintenance of this unit.
used for a long time.
—
29
54
15, 16
—
57
—
—
RQT8203
65
65
Page 66

Troubleshooting guide
RQT8203
66
Troubleshooting guide
Recording, timer recording and transferring (dubbing) Page
Cannot record. ≥You haven’t inserted a disc or the disc you inserted cannot be recorded on. Insert a disc the
Cannot record from external
equipment.
Timer recording does not work
properly.
HOWVIEW programming does
S
not work properly.
Timer recording does not stop
even when [∫] is pressed.
The timer programme remains
even after recording finishes.
A part or whole of a recorded
title has been lost.
The programme name and the
recorded title do not match.
Cannot transfer (dub) to a DVDR, etc. disc using the high speed
mode.
When transferring (dubbing), it
takes a long time even when
high speed mode is selected.
An unusually loud sound is
coming from the rotating DVD-R,
etc.
The DV automatic recording
function does not work.
Play
Play fails to start even when
[1] (PLAY) is pressed.
Play starts but then stops
immediately.
Audio and video momentarily
pause.
DVD-Video is not played. ≥You have set a ratings level to limit DVD-Video play. Change this setting. 55
Continued on the next page
66
unit can record onto.
≥The disc is unformatted. Format the disc. [RAM] [-RW‹V›]
≥The write-protect tab on the cartridge is set to PROTECT, or the disc is protected with DISC
MANAGEMENT.
≥Some programmes have limitations on the number of times they can be recorded (CPRM).
≥You cannot record when there is not enough space or when the number of titles has reached
its limit. Erase unwanted titles or use a new disc.
≥You cannot record on finalized DVD-R, DVD-RW (DVD-Video format), +R or DVD-RW (DVD
Video Recording format) discs.
≥Due to peculiarities of DVD-R, DVD-RW (DVD-Video format) and +R, you may be unable to
record onto them if you either insert and remove the disc or switch the unit on and off while a
disc is loaded, a total of fifty times.
≥DVD-R, DVD-RW (DVD-Video format) and +R recorded on this unit may not be recordable on
other Panasonic DVD Recorders.
≥This unit cannot record to discs containing both PAL and NTSC signals. (However, both types
of programmes can be recorded onto the HDD.) Play of discs recorded with both PAL and
NTSC on another unit is not guaranteed.
≥Check that the connection is correct.
≥Select the input channel (“AV2”, “AV3”, “AV4” or “DV”) for the equipment you have connected.
≥The timer programme is incorrect or different timer programme times overlap. Correct the
programme.
≥The unit is not on timer recording standby. (“F” on the unit’s display is not on.) Press
[F TIMER].
≥Set the clock.
≥(If the GUIDE Plus+ system is set)
Television programme list data is downloaded between AM2:50 and AM5:10. If you want to
make timer recordings during this time, set “Auto Download Priority” in the GUIDE Plus+
system setup menu to “Timer Prog.” (➡ User’s manual for the GUIDE Plus+ system)
≥While using timer recording, press [F TIMER]. (“F” disappears.)
≥When using the linked timer recording with external equipment, press [EXT LINK]. (“Ext Link”
disappears.)
≥If you start recording immediately after turning on the unit while “Quick Start” is set to “On”,
you cannot then stop recording for a few seconds.
≥The timer programme remains if set to daily or weekly. 28
≥If there is a power failure or the plug is disconnected from the household mains socket while
recording or editing, the title may be lost or the HDD/disc may become unusable.
You will have to format the disc ([HDD] [RAM] [-RW‹V›]) or use a new disc. We cannot offer any
guarantee regarding lost programmes or discs.
≥There was a programme change after timer recording was set but the recorded title still has
the old programme name.
≥When recording to the HDD, set “Rec for High Speed dubbing” to “On” in the SETUP menu. 24
≥Use a disc that is compatible with high speed recording. Even if the disc is high speed
recording compatible, the maximum speed may not be possible due to the condition of the
disc.
≥It takes longer than normal to transfer (dub) many titles.
≥You cannot high speed transfer (dub) to DVD-R, DVD-RW (DVD-Video format) and +R, titles
longer than 6 hours when using other Panasonic DVD Recorders that are not compatible with
EP (8 Hours) mode recording.
≥When recording or high speed transferring (dubbing) to a DVD-R, DVD-RW (DVD-Video
format) and +R, the sound of the disc rotating may be louder than normal, however, this is not
a problem.
≥If images cannot be recorded or if the recording is aborted, check the connections and DV
equipment settings.
≥You cannot start recording until the images from the DV equipment appear on the television.
≥Recording may not be performed as desired if the time codes on the tape in the DV
equipment are not successive.
≥Depending on the equipment, the DV automatic recording may not operate properly.
≥The audio/video recordings are recorded on other than a DV tape.
≥Insert the disc correctly with the label facing up.
≥The disc is dirty.
≥You tried to play a blank disc or disc unplayable on this unit.
≥You tried to play a +RW that needs to finalized on the equipment used for recording.
≥You may be able to transfer (dub) a “One time only recording” title that was recorded to DVD-
RAM using a different Panasonic DVD Recorder to this unit’s HDD, but play is not possible
due to copyright protection.
≥When recording to DVD-RAM using “EP (8 Hours)” mode, play may not be possible on DVD
players that are compatible with DVD-RAM. In this case use “EP (6 Hours)” mode.
≥You cannot play discs during DV automatic recording.
≥This occurs between playlist chapters.
≥This occurs between chapters and with partially deleted titles on finalized DVD-R, DVD-RW
(DVD-Video format) and +R that have been transferred (dubbed) using the high speed mode.
≥This occurs as scenes change during Quick View.
9
51
50
68
32, 39,
51
—
—
—
—
15, 16,
17, 47
—
29
26–28
60
—
26–28
29
—
—
51
—
—
—
—
—
47
—
—
—
47
30
5
9, 10
—
—
55
—
—
—
—
Page 67
Play (Continued) Page
HDD
RECRECREC
PLAY
PLAY
REC
DVD
SD
PC
C
Alternative soundtrack and
subtitles cannot be selected.
≥The languages are not recorded on the disc.
≥You may not be able to use the on-screen menus to change the soundtrack and subtitles on
some discs. Use the disc’s menus to make changes.
31
—
No subtitles. ≥Subtitles are not recorded on the disc.
≥Turn the subtitles on. Set “Subtitle” on the on-screen menu to “On”.
Angle cannot be changed. ≥Angles can only be changed during scenes where different angles are recorded. —
You have forgotten your ratings
password.
You want to cancel the ratings
≥The ratings level returns to the factory preset. While the disc tray is open, press [DVD] then
press and hold [¥ REC] and [1] (PLAY) on the main unit at the same time for 5 or more
seconds (“INIT” will appear on the unit’s display).
level.
Quick View does not work. ≥This does not work when audio is other than Dolby Digital.
≥This does not work when recording is in XP or FR mode.
The resume play function does
not work.
≥This function only works when the indicator on the right appears on the unit
display.
≥Memorized positions are canceled when the unit is turned off or when the
tray is opened. The memorized position on the playlist is also canceled when
the playlist and title are edited.
The Video CD picture does not
display properly.
≥When connecting to Multi-system TV, select “NTSC” in “TV System” in the SETUP menu.
≥When connecting to PAL TV, the lower part of the picture cannot be displayed correctly during
search.
Time Slip does not work. ≥Time Slip does not work when the unit’s “TV System” settings are different from the title
recorded on the disc.
Edit
Cannot format. ≥The disc is dirty. Wipe with a damp cloth and then wipe dry.
≥You tried formatting a disc that you may not be able to use in this unit.
Cannot create chapters.
≥The unit writes the chapter division information to the disc when you turn it off or remove the
disc. The information is not written if there is an interruption to the power before this.
Cannot mark the start point or
the end point during “Partial
Erase” operation.
≥These operations are not possible with still pictures.
≥You cannot set points if they are too close to each other. You cannot set an end point before a
start point.
Cannot erase chapters. ≥When the chapter is too short to erase, use “Combine Chapters” to make the chapter longer. 39
—
36
—
—
—
—
—
61
—
61
5
9, 10
—
—
—
The available recording time
doesn’t increase even after
erasing recordings on the disc.
≥Available recording space on the DVD-R and +R does not increase even after erasing
previously recorded titles.
≥Disc space on a DVD-RW (DVD-Video format) increases only when the last recorded title is
erased. It does not increase if other titles are erased.
Cannot create a playlist. ≥You cannot select all the chapters at once in a title if the title also includes still pictures. Select
them individually.
Still pictures
Cannot display Direct Navigator
screen.
≥This screen cannot be displayed during recording or transfer (dubbing) or while the unit is
standing by for linked timer recording with external equipment.
Cannot edit or format a card. ≥Release the card’s protection setting. (With some cards, the “Write Protection Off” message
sometimes appears on the screen even when protection has been set.)
The contents of the card cannot
be read.
≥The card format is not compatible with the unit. (The contents on the card may be damaged.)
Format using FAT 12 or FAT 16 with other equipment or format the card with this unit.
≥The card contains a folder structure and/or file extensions that are not compatible with this
unit.
≥Turn off and then turn on the unit again.
Transferring (dubbing), erasing
and setting protection takes a
long time.
≥When there are a lot of folders and files, it may sometimes take a few hours.
≥When repeating transferring (dubbing) or erasing, it may sometimes take a long time. Format
the disc or card.
To reset this unit
To return all the settings other
than the main ones to the factory
preset
≥Select “Yes” in “Shipping Condition” in the SETUP menu. All the settings except for the
ratings level, ratings password and time settings return to the factory preset. The timer
recording programmes are also cancelled.
≥Select “Yes” in “Default Settings” in the SETUP menu. All the settings other than the
programmed channels, time settings, country settings, language settings, disc language
settings, ratings level, ratings password, remote control code, return to the factory presets.
≥Press and hold [X CH] and [CH W] on the main unit until the Country setting screen appears.
All the settings except for the ratings level, ratings password and time settings return to the
factory preset. The timer recording programmes are also cancelled.
To reset the ratings level
settings
To restore the unit if it freezes
≥While the disc tray is open, press [DVD] then press and hold [¥ REC] and [1] (PLAY) on the
main unit at the same time for 5 or more seconds.
≥Press and hold [Í/I] on the main unit for 10 seconds. (The settings remain.) —
due to one of the safety devices
being activated
—
—
—
—
Troubleshooting guide
50
11, 35
51
11
—
—
51
57
57
—
—
RQT8203
67
67
Page 68

Glossary
Glossary
RQT8203
68
Bitstream
This is the digital form of multi-channel audio data (e.g., 5.1 channel)
before it is decoded into its various channels.
CPRM (Content Protection for Recordable Media)
CPRM is technology used to protect broadcasts that are allowed to
be recorded only once. Such broadcasts can be recorded only with
CPRM compatible recorders and discs.
Decoder
A decoder restores the coded audio signals on DVDs to normal. This
is called decoding.
Dolby Digital
This is a method of coding digital signals developed by Dolby
Laboratories. Apart from stereo (2-channel) audio, these signals can
also be multi-channel audio. A large amount of audio information can
be recorded on one disc using this method.
When recording on this unit Dolby Digital (2 channel) is the default
audio.
Down-mixing
This is the process of remixing the multi-channel audio found on
some discs into two channels. It is useful when you want to listen to
the 5.1-channel audio recorded on DVDs through your television’s
speakers. Some discs prohibit down-mixing and this unit can then
only output the front two channels.
DPOF (Digital Print Order Format)
DPOF is the standard printing format for still picture data taken by a
digital camera, etc. It is used for automatic printing at a photo
developing store or on your home printer.
Drive
In the instance of this unit, this refers to the hard disk (HDD), disc
(DVD) and SD card (SD). These perform the reading and writing of
data.
DTS (Digital Theater Systems)
This surround system is used in many movie theaters. There is good
separation between the channels, so realistic sound effects are
possible.
Dynamic range
Dynamic range is the difference between the lowest level of sound
that can be heard above the noise of the equipment and the highest
level of sound before distortion occurs.
Dynamic range compression means reducing the gap between the
loudest and softest sounds. This means you can listen at low
volumes but still hear dialogue clearly.
Electronic Programme Guide (EPG)
This is a system used to display the television programme list on
televisions, computers and cellular phones. Data is transmitted using
the internet or television waves. This unit is compatible with the
method using television waves. You can use the television
programme list for functions such as timer recording.
Film and video
DVD-Videos are recorded using either film or video. This unit can
determine which type has been used, then uses the most suitable
method of progressive output.
For PAL
Film is 25 frames per second.
Video is 50 fields per second (two fields making up one frame).
For NTSC
Film is 24 or 30 frames per second, with motion picture film generally
being 24 frames per second.
Video is 60 fields per second (two fields making up one frame).
Finalize
A process that makes play of a recorded CD-R, CD-RW, DVD-R, etc.
possible on equipment that can play such media. You can finalize
DVD-R, DVD-RW (DVD-Video format), +R on this unit.
After finalizing, the disc becomes play-only and you can no longer
record or edit. However, finalized DVD-RW can be formatted to
become recordable.
Folder
This is a place on the hard disk or memory card where groups of
data are stored together. In the case of this unit, it refers to the place
where still pictures (JPEG, TIFF) are stored.
Formatting
Formatting is the process of making media such as DVD-RAM
recordable on recording equipment.
You can format the HDD, DVD-RAM, DVD-RW (only as DVD-Video
format) and SD Memory Card on this unit. Formatting erases
irrevocably all contents.
68
Frames and fields
Frames refer to the single images that constitute the video you see
on your television. Each frame consists of two fields.
u
Frame Field Field
≥A frame still shows two fields, so there may be some blurring, but
picture quality is generally better.
≥A field still shows less picture information so it may be rougher, but
there is no blurring.
HDD (Hard disk drive)
This is a mass data storage device used in computers, etc. A disk
with a surface that has been treated with magnetic fluid is spun and
a magnetic head is brought in close proximity to facilitate the reading
and writing of large amounts of data at high speed.
JPEG (Joint Photographic Experts Group)
This is a system used for compressing/decoding colour still pictures.
If you select JPEG as the storage system on digital cameras, etc.,
the data will be compressed to 1/10–1/100 of its original size. The
benefit of JPEG is less deterioration in picture quality considering
the degree of compression.
LPCM (Linear PCM)
These are uncompressed digital signals, similar to those found on
CDs. LPCM sound is available when recording in XP mode.
MP3 (MPEG Audio Layer 3)
An audio compression method that compresses audio to
approximately one tenth of its size without any considerable loss of
audio quality. You can play MP3 you have recorded onto CD-R and
CD-RW.
Pan&Scan/Letterbox
In general, DVD-Video are produced with the intention that they be
viewed on a widescreen television (16:9 aspect ratio), so images
often don’t fit regular (4:3 aspect ratio) televisions. Two styles of
picture, “Pan & Scan” and “Letterbox”, deal with this problem.
Pan & Scan: The sides are cut off so the picture
fills the screen.
Letterbox: Black bands appear at the top and
bottom of the picture so the picture
itself appears in an aspect ratio of
16:9.
Playback control (PBC)
If a Video CD has playback control, you can select scenes and
information with menus.
(This unit is compatible with version 2.0 and 1.1.)
Progressive/Interlace
The PAL video signal standard has 625 (or 576) interlaced (i) scan
lines, whereas progressive scanning, called 625p (or 576p), uses
twice the number of scan lines. For the NTSC standard, these are
called 525i (or 480i) and 525p (or 480p) respectively.
Using progressive output, you can enjoy the high-resolution video
recorded on media such as DVD-Video.
Your television must be compatible to enjoy progressive video.
Panasonic televisions with 625 (576)/50i · 50p, 525 (480)/60i · 60p
input terminals are progressive compatible.
Protection
You can prevent accidental erasure by setting writing protection or
erasure protection.
Sampling frequency
Sampling is the process of converting the heights of sound wave
(analog signal) samples taken at set periods into digits (digital
encoding). Sampling frequency is the number of samples taken per
second, so larger numbers mean more faithful reproduction of the
original sound.
Thumbnail
This refers to a miniature representation of a picture used to display
multiple pictures in the form of a list.
TIFF (Tag Image File Format)
This is a system used for compressing/decoding colour still pictures,
a common format for storing high quality images on digital cameras
and other devices.
r
Page 69

Q Link
This function works only if the unit is connected via a fully wired 21pin Scart cable to a TV featuring the Q Link or similar function.
Q Link offers the following functions:
≥Download from the TV
§
When you connect the unit to a TV, the station list data is
automatically copied from the TV to the unit, and the TV stations
are assigned to the programme positions on the unit in the same
order as on the TV.
≥Direct TV Recording
By simply pressing [¥ DIRECT TV REC], you can at once record
the same programme that you are watching on the TV.
≥TV/DVD Auto On
§
Even if the TV and the unit are off (standby mode), pressing
[1] (PLAY), [DIRECT NAVIGATOR, TOP MENU], [GUIDE],
[ShowView] or [PROG/CHECK] automatically turns on both the TV
and the unit.
If the TV is off (standby mode) and the unit is on, when you press
[FUNCTIONS] or [1] (PLAY), or insert the disc [except DVD-RAM,
DVD-R, DVD-RW (DVD-Video format) and +R], the TV is
automatically turned on.
≥DVD Auto Standby
§
When you turn the TV off, the unit is turned off as well. However,
this function works in the stop mode.
This function does not work during the following operations: Preset
Download, Auto-Setup, Auto Clock Setting, Child Lock and Manual
Tuning.
≥On-Screen Messages
§
When you are watching a TV programme, the following messages
appear on the TV screen to inform you of the unit’s condition:
Message Message appears when:
This programme has
A timer recording has just started.
already started
Set DVD to timer
standby mode
The unit is not in the timer standby mode
10 minutes before the programmed
recording start time (message appears
every minute during these 10 minutes).
DVD is in timer
recording mode
[¥ REC] on the main unit or [ShowView]
was pressed while the unit is in the timer
recording mode.
Depending on the type of TV used, the above messages may not
appear correctly.
§
These operations are only available if the unit is connected to a TV
featuring the Q Link function.
≥If you have an IDTV with electronic programme guide function for
digital broadcasts, you can perform timer recording using the
electronic programme guide function. Refer to the television’s
operating instructions for further information.
VPS (Video Programme System)/PDC (Programme Delivery Control)
VPS or PDC is a very convenient system which records exactly from
beginning to end of the TV programmes set in timer recording, even
if the actual broadcasting time differs from the scheduled time due to
delayed start or extension of the programme duration. Also, if a
programme is interrupted, for example, some special news is
inserted, the recording will be paused automatically and resumed
when the programme continues.
Depending on the signals sent from the TV stations, the VPS/PDC
system may not work properly even when “VPS/PDC” has been set
to “ON”.
Please check with the broadcasters in your area for details.
≥In the case of VPS/PDC recording, use the correct time (VPS/PDC
time) for recording the TV programmes.
Set “VPS/PDC” to “OFF” when the recording time is not the correct
time (VPS/PDC time).
VPS/PDC recording is not performed when the time (VPS/PDC
time) is incorrect, even if only by one minute. To find out the correct
time (VPS/PDC time), consult Teletext, a newspaper or magazine,
or other source.
≥If the actual broadcasting times of timer recordings overlap
(regardless of whether they are VPS/PDC controlled), the
recording that starts first always has priority, and the recording of
the later programme will start only after the first timer recording has
finished.
When SHOWVIEW
programming
≥When the VPS/PDC signal drops out because the broadcast signal
is weak, or when a TV station does not transmit a regular VPS/
PDC signal, the timer recording will be performed in the normal
mode (without VPS/PDC) even if it was programmed for VPS/PDC.
In this case, even if the timer recording is performed, whatever has
been programmed will not be cancelled at that particular time but
at 4 a.m. two days later.
≥The start times of scheduled programmes listed in the newspaper
or magazine may be changed at a later date. Set “VPS/PDC” to
“OFF” when programming a programme whose start time has
been subsequently changed. Particular care must be taken in this
respect with S
HOWVIEW programming since “VPS/PDC” is
automatically set to “ON” in some countries (➡ below).
≥If a programme listed in a newspaper or magazine has two
HOWVIEW numbers, use the SHOWVIEW number for VPS/PDC if
S
you wish to proceed with VPS/PDC recording using S
HOWVIEW
programming.
≥The default settings for “VPS/PDC” differ depending on the country
concerned. Refer to the following table.
When the SHOWVIEW programming
start time is changed
When programming
manually
Glossary
Belgium, Netherlands, Sweden,
Denmark, Finland, Norway, France
ON OFF OFF
Germany, Switzerland, Austria ON ON ON
Italy, Spain, Portugal, Greece,
Other Countries
OFF OFF OFF
≥If the broadcasting station is not transmitting VPS/PDC signals, “jjj” appears in the menu for timer programming under “VPS/PDC”.
≥The beginnings of recordings may not be recorded correctly in some cases.
RQT8203
69
69
Page 70

Specifications
Recording system DVD Video Recording format (DVD-RAM),
DVD-Video format (DVD-R),
DVD-Video format (DVD-RW)
Recordable discs
DVD-RAM: Ver. 2.0
Ver. 2.1/3k-SPEED DVD-RAM Revision 1.0
Ver.2.2/5k-SPEED DVD-RAM Revision 2.0
DVD-R: for General Ver. 2.0
for General Ver. 2.0/4k-SPEED DVD-R Revision 1.0
for General Ver.2.x/8k-SPEED DVD-R Revision 3.0
DVD-RW: Ver. 1.1
Ver. 1.1/2k-SPEED DVD-RW Revision 1.0
Ver. 1.2/4k-SPEED DVD-RW Revision 2.0
+R: Ver. 1.0
Recording time Maximum 8 hours (with 4.7 GB disc)
XP: Approx. 1 hour, SP: Approx. 2 hours
LP: Approx. 4 hours, EP: Approx. 6 hours/8 hours
Maximum 355 hours (EP 8 Hour mode, with built-in 200 GB HDD)
Playable discs
DVD-RAM, DVD-R, DVD-RW, +R, +RW
DVD-Video, DVD-Audio, CD-Audio (CD-DA), Video CD, SVCD
CD-R/CD-RW (CD-DA, Video CD, SVCD
§
1
, MP3, JPEG formatted discs)
Internal HDD capacity 200 GB
LASER specification
Class I LASER Product (Pickup)
Wave length:
CD 795 nm wave length
DVD 662 nm wave length
Laser power:
No hazardous radiation is emitted with the safety protection
NORSK
Bølgelengde:
CD 795 nm
DVD 662 nm
Laserstyrke: Ingen farlig stråling sendes ut
Audio
Recording system: Dolby Digital 2ch, Linear PCM (XP mode)
Audio in: AV1/AV2 (21 pin), AV3/AV4 (pin jack)
Input level: Standard: 0.5 Vrms, Full scale: 2.0 Vrms at 1 kHz
Input impedance: More than 10 k≠
Specifications
Audio out: AV1/AV2 (21 pin), Audio Out (pin jack)
Output level: Standard: 0.5 Vrms, Full scale: 2.0 Vrms at 1 kHz
Output impedance: Less than 1 k≠
Digital audio out: Optical terminal (PCM, Dolby Digital, DTS, MPEG)
Ver. 1. 1
Ver. 1. 2
Video
Video system:
SECAM (only input)/PAL colour signal, 625 lines, 50 fields
NTSC colour signal, 525 lines, 60 fields
Recording system: MPEG2 (Hybrid VBR)
Video in (SECAM/PAL/NTSC):
AV1/AV2 (21 pin), AV3/AV4 (pin jack) 1 Vp-p 75 ≠, termination
S-Video in (SECAM/PAL/NTSC):
AV2 (21 pin), AV3/AV4 (S terminal) 1 Vp-p 75 ≠, termination
RGB in (PAL): AV2 (21 pin) 0.7 Vp-p (PAL) 75 ≠, termination
Video out (PAL/NTSC):
AV1/AV2 (21 pin), Video Out (pin jack) 1 Vp-p 75 ≠, termination
S-Video out (PAL/NTSC):
AV1 (21 pin), S-Video Out (S terminal) 1 Vp-p 75 ≠, termination
RGB out (PAL/NTSC):
AV1 (21 pin) 0.7 Vp-p (PAL) 75 ≠, termination
Component video output (NTSC 480p/480i, PAL 576p/576i)
Y: 1.0 Vp-p 75 ≠, termination
B: 0.7 Vp-p 75 ≠, termination
P
P
R: 0.7 Vp-p 75 ≠, termination
Television system
Tuner system Channel coverage
§1
PA L -B G H
SECAM-BG
(CCIR)
VHF: E2–E12, A–H2 (Italy)
UHF: 21–69
CATV: S01–S05 (S1–S3),
S1–S20 (M1–U10), S21–S41
SECAM-L, L’
(France)
VHF: 2–10
UHF: 21–69
CATV: B–Q (100.5 to 299.5 MHz),
S21–S41 (299.5 to 467.25 MHz)
RF converter output: Not provided
SD card slot
Still picture (JPEG, TIFF) SD Memory Card slot: 1 pc
Compatible media: SD Memory Card
§2
, MultiMediaCard
Format: FAT12, FAT16
Image file format:
JPEG conforming DCF (Design rule for Camera File system),
(sub sampling; 4:2:2 or 4:2:0)
TIFF (Uncompressed RGB chunky), DPOF Compatible
Number of pixels: 34 a 34 to 6144 a 4096
Thawing time: Approx. 7 sec (2 M pixels)
DV input (PAL/NTSC) IEEE 1394 Standard, 4 pin
Others
Region code:
‚ 2
Operating temperature: 5 to 40 oC
Operating humidity range: 10 to 80 % RH (no condensation)
Power supply: AC 220 to 240 V, 50 Hz
Power consumption: 35 W
Dimensions (WkDkH): Approx. 430 mmk350.5 mmk63 mm
Mass: Approx. 4.5 kg
RQT8203
70
Power consumption in standby mode:
Approx. 3 W (Power Save mode)
[Note]
Specifications are subject to change without notice.
Mass and dimensions are approximate.
§1
Conforming to IEC62107
§2
Includes miniSDTM cards. (A miniSDTM adaptor needs to be
inserted.)
70
Page 71

Safety precautions
Placement
Set the unit up on an even surface away from direct sunlight, high
temperatures, high humidity, and excessive vibration. These
conditions can damage the cabinet and other components, thereby
shortening the unit’s service life.
Do not place heavy items on the unit.
Volt age
Do not use high voltage power sources. This can overload the unit
and cause a fire.
Do not use a DC power source. Check the source carefully when
setting the unit up on a ship or other place where DC is used.
AC mains lead protection
Ensure the AC mains lead is connected correctly and not
damaged. Poor connection and lead damage can cause fire or
electric shock. Do not pull, bend, or place heavy items on the lead.
Grasp the plug firmly when unplugging the lead. Pulling the AC
mains lead can cause electric shock.
Do not handle the plug with wet hands. This can cause electric
shock.
Foreign matter
Do not let metal objects fall inside the unit. This can cause electric
shock or malfunction.
Do not let liquids get into the unit. This can cause electric shock or
malfunction. If this occurs, immediately disconnect the unit from the
power supply and contact your dealer.
Do not spray insecticides onto or into the unit. They contain
flammable gases which can ignite if sprayed into the unit.
Service
Do not attempt to repair this unit by yourself. If sound is
interrupted, indicators fail to light, smoke appears, or any other
problem that is not covered in these instructions occurs, disconnect
the AC mains lead and contact your dealer or an authorized service
centre. Electric shock or damage to the unit can occur if the unit is
repaired, disassembled or reconstructed by unqualified persons.
Extend operating life by disconnecting the unit from the power
source if it is not to be used for a long time.
Manufactured under license from Dolby Laboratories.
“Dolby” and the double-D symbol are trademarks of Dolby
Laboratories.
“DTS” and “DTS 2.0iDigital Out” are trademarks of Digital
Theater Systems, Inc.
MPEG Layer-3 audio decoding technology licensed from
Fraunhofer IIS and Thomson multimedia.
This product incorporates copyright protection technology that is
protected by U.S. patents and other intellectual property rights.
Use of this copyright protection technology must be authorized
by Macrovision, and is intended for home and other limited
consumer uses only unless otherwise authorized by
Macrovision. Reverse engineering or disassembly is prohibited.
≥SD logo is a trademark.
≥Portions of this product are protected under copyright law and
are provided under license by ARIS/SOLANA/4C.
GUIDE Plus+, SHOWVIEW are (1) registered trademarks or
trademarks of, (2) manufactured under license from and (3)
subject of various international patents and patent applications
owned by, or licensed to, Gemstar-TV Guide International, Inc.
and/or its related affiliates.
GEMSTAR-TV GUIDE INTERNATIONAL, INC. AND/
OR ITS RELATED AFFILIATES ARE NOT IN ANY
WAY LIABLE FOR THE ACCURACY OF THE
PROGRAM SCHEDULE INFORMATION PROVIDED
BY THE GUIDE PLUSi SYSTEM. IN NO EVENT
SHALL GEMSTAR-TV GUIDE INTERNATIONAL, INC.
AND/OR ITS RELATED AFFILIATES BE LIABLE FOR
ANY AMOUNTS REPRESENTING LOSS OF
PROFITS, LOSS OF BUSINESS, OR INDIRECT,
SPECIAL, OR CONSEQUENTIAL DAMAGES IN
CONNECTION WITH THE PROVISION OR USE OF
ANY INFORMATION, EQUIPMENT, OR SERVICES
RELATING TO THE GUIDE PLUSi SYSTEM.
Safety precautions
RQT8203
71
71
Page 72

Index
Angle. . . . . . . . . . . . . . . . . . . . . . . . . . . 36
Aspect . . . . . . . . . . . . . . . . . . . . . . . . . . 20
Audio
Attribute . . . . . . . . . . . . . . . . . . . . . . 36
Language . . . . . . . . . . . . . . . . . . . . . . 36
Playback. . . . . . . . . . . . . . . . . . . . . . 32
Receiving . . . . . . . . . . . . . . . . . . . . . 37
Auto Renewal Recording . . . . . . . . . . 28
Change Thumbnail . . . . . . . . . . . . . . . 39
Channel
Audio. . . . . . . . . . . . . . . . . . . . . . . . . 36
Auto-Setup . . . . . . . . . . . . . . . . . 19, 59
Preset Download . . . . . . . . . . . . 18, 59
Chapter . . . . . . . . . . . . . . . . . . . . . . 32, 38
Chasing playback . . . . . . . . . . . . . . . . 25
Child Lock . . . . . . . . . . . . . . . . . . . . . . 54
Cleaning
Disc. . . . . . . . . . . . . . . . . . . . . . . . . . . 5
Lens . . . . . . . . . . . . . . . . . . . . . . . . . . 5
Main unit. . . . . . . . . . . . . . . . . . . . . . . 5
Clock settings . . . . . . . . . . . . . . . . . . . 60
Connection
Aerial. . . . . . . . . . . . . . . . . . . . . . 15, 16
Amplifier, system component . . . . . . 17
Digital receiver, satellite receiver,
decoder. . . . . . . . . . . . . . . . . . . . . . . 17
DV input terminal . . . . . . . . . . . . . . . . 47
Television . . . . . . . . . . . . . . . . . . 15, 16
Video cassette recorder . . . . . . . 15, 16
Copy (playlist) . . . . . . . . . . . . . . . . . . . 41
Country setting . . . . . . . . . . . . . . . 18, 19
CPRM . . . . . . . . . . . . . . . . . . . . . . . . . . 68
Create Chapter. . . . . . . . . . . . . . . . 32, 39
Create playlists . . . . . . . . . . . . . . . . . . 40
Default Settings . . . . . . . . . . . . . . . . . . 57
Dialog Enhancer . . . . . . . . . . . . . . . . . 37
Direct Navigator. . . . . . . . . 30, 34, 38, 42
Direct TV Recording . . . . . . . . . . . . . . 25
Divide Title . . . . . . . . . . . . . . . . . . . . . . 39
DPOF. . . . . . . . . . . . . . . . . . . . . . . . 42, 68
DV automatic recording . . . . . . . . . . . . 47
DVD-RAM, DVD-R, DVD-RW, +R. . . . . . 9
Index
Enabling discs to be played on other
equipment – Finalize . . . . . . . . . . . . . . 52
Erase
All titles . . . . . . . . . . . . . . . . . . . . . . . . 51
Chapter. . . . . . . . . . . . . . . . . 32, 39, 41
Folder . . . . . . . . . . . . . . . . . . . . . . . . 42
Playlist . . . . . . . . . . . . . . . . . . . . 32, 41
Still picture . . . . . . . . . . . . . . . . . . . . 42
Title. . . . . . . . . . . . . . . . . . . . . . . 32, 39
Ext Link . . . . . . . . . . . . . . . . . . . . . . 29, 57
Finalize . . . . . . . . . . . . . . . . . . . . . . . 52, 68
Flexible Recording. . . . . . . . . . . . . . . . 24
Format. . . . . . . . . . . . . . . . . . . . . . . 51, 68
FR (Flexible Recording Mode) . . . . . . 23
FUNCTIONS window . . . . . . . . . . . . . . 37
GUIDE Plus+. . . . . . . . . . . . . . . . . . . 18, 26
JPEG . . . . . . . . . . . . . . . . . . . . . . . . . 35, 68
Language
Audio . . . . . . . . . . . . . . . . . . . . . . . . . 55
Code list. . . . . . . . . . . . . . . . . . . . . . . 61
On-screen . . . . . . . . . . . . . . . . . . . . . 57
Soundtrack . . . . . . . . . . . . . . . . . 36, 55
Subtitle. . . . . . . . . . . . . . . . . . . . . 36, 55
LPCM . . . . . . . . . . . . . . . . . . . . . . . . 56, 68
Manual Skip. . . . . . . . . . . . . . . . . . . . . . 32
Menu
MP3 . . . . . . . . . . . . . . . . . . . . . . . . . . 33
On-screen . . . . . . . . . . . . . . . . . . . . . 36
SETUP. . . . . . . . . . . . . . . . . . . . . . . . 54
Mode
Recording . . . . . . . . . . . . . . . . . . . . . 23
Still Mode. . . . . . . . . . . . . . . . . . . . . . 55
MP3 . . . . . . . . . . . . . . . . . . . . . . . . . . . . 33
Name
Disc . . . . . . . . . . . . . . . . . . . . . . . . . . 50
Entering text . . . . . . . . . . . . . . . . . . . 53
Folder . . . . . . . . . . . . . . . . . . . . . . . . 42
Playlist . . . . . . . . . . . . . . . . . . . . . . . . 41
Title . . . . . . . . . . . . . . . . . . . . 26, 28, 39
Noise reduction (NR)
AV-in NR . . . . . . . . . . . . . . . . . . . . . . 37
Playback NR . . . . . . . . . . . . . . . . . . . 37
One Touch Transfer (dubbing) . . . . . . 44
On-screen
Language. . . . . . . . . . . . . . . . . . . . . . 57
Menus . . . . . . . . . . . . . . . . . . . . . . . . 36
Status messages . . . . . . . . . . . . . . . . 37
Partial Erase . . . . . . . . . . . . . . . . . . . . . 39
PCM Down Conversion . . . . . . . . . . . . 56
Picture settings. . . . . . . . . . . . . . . . 37, 55
Playlist . . . . . . . . . . . . . . . . . . . . . . . . . . 40
Playback NR . . . . . . . . . . . . . . . . . . . . . 37
Power Save . . . . . . . . . . . . . . . . . . . . . . 57
Progressive . . . . . . . . . . . 6, 20, 37, 57, 68
Properties
Playlist . . . . . . . . . . . . . . . . . . . . . . . . 41
Still picture. . . . . . . . . . . . . . . . . . . . . 34
Title . . . . . . . . . . . . . . . . . . . . . . . . . . 39
Protection
Card . . . . . . . . . . . . . . . . . . . . . . . . . . 50
Cartridge . . . . . . . . . . . . . . . . . . . . . . 50
Disc . . . . . . . . . . . . . . . . . . . . . . . . . . 50
Folder . . . . . . . . . . . . . . . . . . . . . . . . 42
Still picture. . . . . . . . . . . . . . . . . . . . . 42
Title . . . . . . . . . . . . . . . . . . . . . . . . . . 39
Q Link. . . . . . . . . . . . . . . . . . . . . . . . 14, 69
Quick Start. . . . . . . . . . . . . . . . . . . . . . . 22
Quick View. . . . . . . . . . . . . . . . . . . . . . . 31
Ratings level . . . . . . . . . . . . . . . . . . . . 55
Rec for High Speed dubbing . . . . . 24, 55
Recording. . . . . . . . . . . . . . . . . . . . . . . 22
Auto Renewal . . . . . . . . . . . . . . . . . . 28
Direct TV Recording . . . . . . . . . . . . . 25
DV automatic recording . . . . . . . . . . . 47
External Link. . . . . . . . . . . . . . . . . . . 29
Flexible Recording . . . . . . . . . . . . . . 24
Mode. . . . . . . . . . . . . . . . . . . . . . . . . . 23
Relief . . . . . . . . . . . . . . . . . . . . . . . . 27
Timer . . . . . . . . . . . . . . . . . . . . . 26–29
Relief Recording . . . . . . . . . . . . . . . . . 27
Remote control code. . . . . . . . . . . . . . 21
Repeat Play . . . . . . . . . . . . . . . . . . . . . 36
Resume play function . . . . . . . . . . . . . 31
RGB
Input . . . . . . . . . . . . . . . . . . . . . . . . . 57
Output. . . . . . . . . . . . . . . . . . . . . 15, 57
SD card. . . . . . . . . . . . . . . . . . . . . . . . 6, 11
SETUP menu . . . . . . . . . . . . . . . . . . . . 54
Shipping Condition . . . . . . . . . . . . . . . 57
HOWVIEW . . . . . . . . . . . . . . . . . . . . . . . 26
S
Simultaneous rec and play. . . . . . . . . 25
Soundtrack. . . . . . . . . . . . . . . . . . . . . . 36
Status messages . . . . . . . . . . . . . . . . . 37
Still picture
Edit . . . . . . . . . . . . . . . . . . . . . . . . . . 42
Play. . . . . . . . . . . . . . . . . . . . . . . . . . . 34
Transferring (dubbing) . . . . . . . . . . . 48
Subtitle . . . . . . . . . . . . . . . . . . . . . . . . . 36
Teletext. . . . . . . . . . . . . . . . . . . . . . . . . 22
TIFF . . . . . . . . . . . . . . . . . . . . . . . . . . 35, 68
Time Slip. . . . . . . . . . . . . . . . . . . . . 25, 32
Timer recording . . . . . . . . . . . . . . . 26–29
Transfer . . . . . . . . . . . . . . . . . . . . . . . . 37
Transferring (dubbing)
Still picture . . . . . . . . . . . . . . . . . . . . 48
Title/Playlist . . . . . . . . . . . . . . . . . . . 43
Tuning
Auto-Setup . . . . . . . . . . . . . . . . . 19, 59
Manual . . . . . . . . . . . . . . . . . . . . . . . 58
Preset Download . . . . . . . . . . . . 18, 59
TV System (PAL/NTSC). . . . . . . . . . . . 61
TV type . . . . . . . . . . . . . . . . . . . . . . . . . 20
V.S.S. . . . . . . . . . . . . . . . . . . . . . . . . . . 37
VPS/PDC. . . . . . . . . . . . . . . . . . . . . 27, 69
RQT8203
72
72
Page 73

MEMO
RQT8203
73
Page 74

WARNUNG!
DIESES PRODUKT ERZEUGT LASERSTRAHLUNG.
DURCHFÜHRUNG ANDERER VORGÄNGE ALS DER HIER
ANGEGEBENEN KANN ZU GEFÄHRLICHER STRAHLUNG
FÜHREN.
REPARATUREN DÜRFEN NUR VON QUALIFIZIERTEM
FACHPERSONAL DURCHGEFÜHRT WERDEN.
WARNUNG:
ZUR REDUZIERUNG DER GEFAHR VON BRAND,
ELEKTRISCHEM SCHLAG UND BESCHÄDIGUNG IST
DIESES GERÄT SORGFÄLTIG VOR NÄSSE, FEUCHTIGKEIT,
SPRITZ- UND TROPFWASSER ZU SCHÜTZEN; STELLEN SIE
KEINE FLÜSSIGKEITEN ENTHALTENDEN BEHÄLTER, Z.B.
BLUMENVASEN, AUF DAS GERÄT.
WARNUNG!
≥UM AUSREICHENDE BELÜFTUNG ZU GEWÄHRLEISTEN,
DARF DIESES GERÄT NICHT IN EINEM BÜCHERREGAL,
EINBAUSCHRANK ODER EINEM SONSTIGEN ENGEN
RAUM INSTALLIERT ODER AUFGESTELLT WERDEN.
SORGEN SIE DAFÜR, DASS DER BELÜFTUNGSZUSTAND
NICHT DURCH VORHÄNGE ODER ANDERE MATERIALIEN
BEHINDERT WIRD, UM STROMSCHLAG- ODER
FEUERGEFAHR DURCH ÜBERHITZUNG ZU VERMEIDEN.
≥ACHTEN SIE DARAUF, DIE ENTLÜFTUNGSSCHLITZE DES
GERÄTES NICHT DURCH GEGENSTÄNDE AUS PAPIER
ODER STOFF ZU BLOCKIEREN, Z.B. ZEITUNGEN,
TISCHDECKEN UND VORHÄNGE.
≥STELLEN SIE KEINE QUELLEN OFFENER FLAMMEN, Z.B.
BRENNENDE KERZEN, AUF DAS GERÄT.
≥BEACHTEN SIE BEI DER ENTSORGUNG VERBRAUCHTER
BATTERIEN DIE EINSCHLÄGIGEN
UMWELTSCHUTZBESTIMMUNGEN.
DIESES GERÄT IST FÜR DEN BETRIEB IN LÄNDERN MIT
GEMÄSSIGTEM KLIMA BESTIMMT.
Dieses Gerät kann beim Betrieb Hochfrequenzstörungen
auffangen, die von einem in der Nähe verwendeten Handy
verursacht werden. Falls eine solche Störbeeinflussung
festgestellt wird, sollte das Handy in größerer Entfernung von
diesem Gerät betrieben werden.
Das Gerät sollte in der Nähe der Netzsteckdose so aufgestellt
werden, dass im Störungsfall jederzeit ein unbehinderter Zugang
zum Netzstecker gewährleistet ist.
-
VISIBLE AND INVISIBLE LASER RADIATION WHEN OPEN.
DANGER
AVOID DIRECT EXPOSURE TO BEAM.
-
VISIBLE AND INVISIBLE LASER RADIATION WHEN OPEN.
CAUTION
AVOID EXPOSURE TO BEAM.
-
RAYONNEMENT LASER VISIBLE ET INVISIBLE EN CAS D’OUVERTURE.
ATTENTION
EXPOSITION DANGEREUSE AU FAISCEAU.
-
SYNLIG OG USYNLIG LASERSTRÅLING VED ÅBNING.
ADVARSEL
UNDGÅ UDSÆTTELSE FOR STRÅLING.
-
AVATTAESSA OLET ALTTIINA NÄKYVÄÄ JA NÄKYMÄTÖN
VARO !
LASERSÄTEILYLLE. ÄLÄ KATSO SÄTEESEEN.
-
SYNLIG OCH OSYNLIG LASERSTRÅLNING NÄR DENNA DEL
VARNING
ÄR ÖPPNAD. BETRAKTA EJ STRÅLEN.
-
SYNLIG OG USYNLIG LASERSTRÅLING NÅR DEKSEL ÅPNES.
ADVARSEL
UNNGÅ EKSPONERING FOR STRÅLEN.
-
SICHTBARE UND UNSICHTBARE LASERSTRAHLUNG, WENN ABDECKUNG
VORSICHT
GEÖFFNET. NICHT DEM STRAHL AUSSETZEN.
-
-
(FDA 21 CFR)
(IEC60825-1)
RQLS0233
(Im Inneren des
Gerätes)
RQT8203
2
Halten Sie kleine Speicherkarten wie die
SD-Speicherkarte außerhalb der Reichweite von
Kindern. Konsultieren Sie sofort einen Arzt,
wenn ein Kind die Karte verschluckt hat.
74
Page 75

Inhaltsverzeichnis
Die ersten Schritte
Nützliche Funktionen . . . . . . . . . . . . . . . . . . . . . . . . . . . .3
Vorsichtsmaßnahmen zur Festplatte . . . . . . . . . . . . . . . .4
Handhabung von Disc und Karte . . . . . . . . . . . . . . . . . . .5
Pflege des Geräts . . . . . . . . . . . . . . . . . . . . . . . . . . . . . . .5
Einsetzen und Herausnehmen der SD-Karte . . . . . . . . .6
Hinweis zu PAL-progressiv-tauglichen Fernsehern
. . . . . .6
Verwendung einer DVD-R, DVD-RW oder +R
in diesem Gerät . . . . . . . . . . . . . . . . . . . . . . . . . . . . . . . .7
Mitgeliefertes Zubehör . . . . . . . . . . . . . . . . . . . . . . . . . . .8
Informationen zur Fernbedienung . . . . . . . . . . . . . . . . . .8
Festplatten-, Disc- und Karten-Information . . . . . . . . . . .9
Anordnung der Bedienungselemente . . . . . . . . . . . . . .12
Fernbedienung. . . . . . . . . . . . . . . . . . . . . . . . . . . . . . . . . . . . . 12
Gerät . . . . . . . . . . . . . . . . . . . . . . . . . . . . . . . . . . . . . . . . . . . . 13
Display am Gerät. . . . . . . . . . . . . . . . . . . . . . . . . . . . . . . . . . . 13
SCHRITT 1
SCHRITT 2
Einrichten von Fernseher und Fernbedienung
Für ein progressives Videobild . . . . . . . . . . . . . . . . . . . . . . . . 20
Anschluss . . . . . . . . . . . . . . . . . . . . . 14
Einstellen der Empfangskanäle . . . 18
. . . 20
Aufnahme
Aufnehmen von Fernsehprogrammen . . . . . . . . . . . . . .22
Aufn. für High-Speed-Kopieren . . . . . . . . . . . . . . . . . . . . . . . . 24
Flexible Aufnahme . . . . . . . . . . . . . . . . . . . . . . . . . . . . . . . . . 24
Wiedergabe während der Aufnahme . . . . . . . . . . . . . . . . . . . 25
TV-Direktaufnahme . . . . . . . . . . . . . . . . . . . . . . . . . . . . . . . . . 25
Beim Aufnehmen von einem Digital-/Satellitenreceiver oder
Decoder. . . . . . . . . . . . . . . . . . . . . . . . . . . . . . . . . . . . . . . . . 25
Timeraufnahme . . . . . . . . . . . . . . . . . . . . . . . . . . . . . . . .26
Timeraufnahmen mit dem GUIDE Plus+ System . . . . . . . . . . 26
Verwendung der S
Manuelle Programmierung von Timeraufnahmen . . . . . . . . . 28
Überprüfen, Ändern und Löschen von Programmen . . . . . . . 29
Timeraufnahme mit dem Fernseher . . . . . . . . . . . . . . . . . . . . 29
Mit externem Geräte gekoppelte Timeraufnahme
(Digital-/Satellitenreceiver) – EXT LINK . . . . . . . . . . . . . . . . 29
HOWVIEW-Nummer für Timeraufnahmen . . 26
Wiedergabe
Wiedergabe von Videoaufzeichnungen/
Wiedergabe von “Nur-Wiedergabe”-Discs . . . . . . . . .30
Bedienungsvorgänge während der Wiedergabe . . . . . . . . . . 31
Einfache Editiervorgänge während der Wiedergabe . . . . . . . 32
Umschalten des Tons während der Wiedergabe . . . . . . . . . . 32
Menügesteuerte Wiedergabe von MP3-Discs . . . . . . . .33
Wiedergabe von Standbildern (JPEG/TIFF) . . . . . . . . .34
Nützliche Funktionen bei der Standbildwiedergabe . . . . . . . . 35
Bildschirmmenüs/FUNCTIONS-Fenster und
Statusmeldungen . . . . . . . . . . . . . . . . . . . . . . . . . . . . .36
Verwendung der Bildschirmmenüs . . . . . . . . . . . . . . . . . . . . . 36
FUNCTIONS-Fenster . . . . . . . . . . . . . . . . . . . . . . . . . . . . . . . 37
Statusmeldungen . . . . . . . . . . . . . . . . . . . . . . . . . . . . . . . . . . 37
Editieren
Editieren von Titeln/Kapiteln . . . . . . . . . . . . . . . . . . . . . 38
Editieren von Titeln/Kapiteln und Wiedergabe von Kapiteln . . 38
Titel-Einstellungen . . . . . . . . . . . . . . . . . . . . . . . . . . . . . . . . . . 39
Kapitel-Einstellungen . . . . . . . . . . . . . . . . . . . . . . . . . . . . . . . . 39
Erstellen, Editieren und Wiedergeben von Playlisten . . . 40
Playlisten erstellen . . . . . . . . . . . . . . . . . . . . . . . . . . . . . . . . . .40
Editieren und Wiedergeben von Playlisten/Kapiteln . . . . . . . . . 41
Playlisten-Funktionen . . . . . . . . . . . . . . . . . . . . . . . . . . . . . . . . 41
Kapitel-Einstellungen . . . . . . . . . . . . . . . . . . . . . . . . . . . . . . . . 41
Editieren von Standbildern . . . . . . . . . . . . . . . . . . . . . . 42
Bild- und Ordnereinstellvorgänge . . . . . . . . . . . . . . . . . . . . . . .42
Kopieren
Kopieren von Titeln und Playlisten . . . . . . . . . . . . . . . . 43
Überspielen auf Tastendruck . . . . . . . . . . . . . . . . . . . . . . . . . .44
Überspielen mit der Überspielliste . . . . . . . . . . . . . . . . . . . . . .44
Überspielen einer finalisierten DVD-R, DVD-RW (DVD-
Videoformat) oder +R . . . . . . . . . . . . . . . . . . . . . . . . . . . . . . 46
Aufnehmen von einem Videocassettenrecorder
Manuelles Aufnehmen. . . . . . . . . . . . . . . . . . . . . . . . . . . . . . . . 47
Automatische DV-Aufnahme (DV AUTO REC) . . . . . . . . . . . . . 47
. . . . . . . 47
Überspielen von Standbildern . . . . . . . . . . . . . . . . . . . . 48
Überspielen mit der Überspielliste . . . . . . . . . . . . . . . . . . . . . .48
Überspielen aller Standbilder der Karte — COPY ALL
PICTURES . . . . . . . . . . . . . . . . . . . . . . . . . . . . . . . . . . . . . . . 49
Nützliche Funktionen
Festplatten-, Disc- und Karten-Management . . . . . . . . 50
Allgemeine Bedienungsverfahren . . . . . . . . . . . . . . . . . . . . . .50
Einstellen des Löschschutzes . . . . . . . . . . . . . . . . . . . . . . . . .50
Benennen einer Disc . . . . . . . . . . . . . . . . . . . . . . . . . . . . . . . . 50
Löschen aller Titel und Playlisten—Alle Titel löschen . . . . . . . 51
Löschen des ganzen Disc- oder Karteninhalts—Formatieren
So wird eine Wiedergabe der Disc in einem anderen Gerät ermöglicht
. . 51
. . 52
Text eingeben . . . . . . . . . . . . . . . . . . . . . . . . . . . . . . . . . 53
Kindersicherung . . . . . . . . . . . . . . . . . . . . . . . . . . . . . . . 54
Ändern der Geräteeinstellungen . . . . . . . . . . . . . . . . . . 54
Allgemeine Bedienungsverfahren . . . . . . . . . . . . . . . . . . . . . .54
Übersicht über die Einstellungen . . . . . . . . . . . . . . . . . . . . . . .55
Sendertabelle . . . . . . . . . . . . . . . . . . . . . . . . . . . . . . . . . . . . . . 58
Uhreinstellung . . . . . . . . . . . . . . . . . . . . . . . . . . . . . . . . . . . . . 60
TV System . . . . . . . . . . . . . . . . . . . . . . . . . . . . . . . . . . . . . . . . 61
Sonstiges
Meldungen . . . . . . . . . . . . . . . . . . . . . . . . . . . . . . . . . . . . 62
Häufig gestellte Fragen . . . . . . . . . . . . . . . . . . . . . . . . . 63
Fehlersuche . . . . . . . . . . . . . . . . . . . . . . . . . . . . . . . . . . 64
Glossar . . . . . . . . . . . . . . . . . . . . . . . . . . . . . . . . . . . . . . 68
Technische Daten . . . . . . . . . . . . . . . . . . . . . . . . . . . . . . 70
Sicherheitsmaßnahmen . . . . . . . . . . . . . . . . . . . . . . . . . 71
Stichwortverzeichnis . . . . . Rückwärtige Umschlagseite
Inhaltsverzeichnis / Nützliche Funktionen
Nützliche Funktionen
Dieser DVD-Recorder verwendet eine Festplatte (HDD) und eine DVD-RAM und ermöglicht hochqualitative Bildaufnahmen und einen schnellen, freien Zugriff. Das
Gerät ist mit vielen neuen, den älteren Bandaufnahmeformaten überlegenen Funktionen ausgestattet. Im Folgenden sind einige dieser Funktionen zusammengestellt.
Sofortiges Aufnehmen
Vor dem Aufnehmen brauchen Sie keine leere Stelle auf der Disc zu
suchen. Nach Drücken der Aufnahmetaste sucht das Gerät
automatisch eine freie Stelle und beginnt mit der Aufnahme. Es
besteht keine Gefahr, dass existierende Aufnahmen überschrieben
werden.
Schnelles Starten der Aufnahme und Abrufen der EPGAnzeige in nur 1 Sekunde
Wennn Sie die REC-Taste bei eingeschaltetem Gerät drücken,
beginnnt nach ca. 1 Sekunde
Taste bei ausgeschaltetem Gerät drücken, erscheint innerhalb einer
Sekunde der elektronische Programmführer (EPG). (SchnellstartModus)
§
Nur beim Aufnehmen auf die Festplatte oder eine DVD-RAM
§
die Aufnahme. Wenn Sie die GUIDE-
Aufnahme auf Festplatte
Auf die interne Festplatte kann 355 Stunden [EP (8 Stunden)-Modus]
aufgenommen werden.
Darüber hinaus können Sie Ihre Lieblingsprogramme schnell auf
DVD-RAM, DVD-R, DVD-RW (DVD-Videoformat) oder +R
überspielen, um sie zu archivieren.
SD-Kartenschacht, DV-Eingangsbuchse
≥
Dank dem SD-Kartenschacht können die mit einer Digitalkamera
aufgenommenen Bilder direkt wiedergeben und von der Speicherkarte bequem
auf eine DVD-RAM kopiert werden. Ein Computer ist nicht erforderlich.
≥Die automatische DV-Aufnahmefunktion dieses Geräts lässt Sie
einfach ein Video auf HDD überspielen, indem Sie einfach ein
einziges DV-Kabel anschließen.
Sofortiges Wiedergeben
Sie brauchen nicht zurück- oder vorzuspulen. Direct Navigator leitet
Sie direkt zum Anfang der Videoaufnahme.
Zeitversetztes Wiedergeben
Während das Gerät noch aufnimmt, kann bereits die Wiedergabe
gestartet werden. Ohne die laufende Aufnahme zu stoppen, können
Sie sich die Aufzeichnung von Anfang an ansehen.
Simultanes Aufnehmen und Wiedergeben
Während der Aufnahme können Sie ein anderes Videoprogramm,
das Sie zuvor aufgenommen haben, wiedergeben.
Zeitsprung
Sowohl während der Wiedergabe als auch der Aufnahme können Sie
durch Eingabe eines Zeitabschnitts zu einer gewünschten Szene springen.
Das GUIDE Plus+-System
Das GUIDE Plus+ System zeigt die vom Host-Sender empfangenen
Programminformationen auf dem Fernsehschirm in Form einer TV-Programmzeitschrift
an. Das System erleichtert die Aufnahme-Programmierung: Sie brauchen lediglich das
gewünschte Programm aus der angezeigten Liste auszuwählen. Darüber hinaus bietet
das System auch die Möglichkeit, nur eine bestimmte Programmkategorie aufzulisten.
≥
In einigen Gebieten steht dieser Dienst möglicherweise nicht zur Verfügung.
RQT8203
3
75
Page 76

Vorsichtsmaßnahmen zur Festplatte
Die Festplatte ist ein Speichermedium großer Kapazität, das aufgrund der Präzisionsbauteile und der hohen Drehzahl sehr empfindlich ist und
leicht beschädigt werden kann.
Grundsätzlich ist es ratsam, von wichtigen Aufnahmen eine Sicherungskopie auf einer Disc anzulegen.
∫ Die Festplatte darf keinen Vibrationen/Stößen und keinem Staub ausgesetzt werden
Bei ungünstiger Aufstellung oder unsachgemäßer Handhabung der Festplatte kann das aufgezeichnete Material beschädigt werden. Es kann
dann möglicherweise nicht mehr wiedergegeben oder aufgenommen werden. Insbesondere während des Betriebs ist darauf zu achten, dass die
Festplatte keinen Vibrationen oder Stößen ausgesetzt und das Netzkabel nicht abgetrennt wird. Bei einem Stromausfall während der Aufnahme
oder Wiedergabe können die Daten beschädigt werden.
∫ Die Festplatte ist als Zwischenspeicher konzipiert
Die Festplatte eignet sich nicht zur Langzeitspeicherung. Verwenden Sie sie als Zwischenspeicher zum einmaligen Ansehen der Aufnahme, zum
Editieren oder zum Sichern auf eine Disc.
∫ Bei Problemen mit der Festplatte umgehend eine Sicherungskopie von allen Aufzeichnungen anlegen
Störgeräusche und Bildstörungen (Raster im Bild usw.) sind Anzeichen dafür, dass die Festplatte nicht richtig arbeitet. Bei weiterem Betrieb der
Festplatte kann sich das Problem verschlimmern, und Sie haben evtl. keinen Zugriff mehr auf die Aufzeichnungen. Kopieren Sie bei Problemen
umgehend das ganze Material auf eine Disc und wenden Sie sich an den Kundendienst. Beschädigte Aufnahmen (Daten) der Festplatte sind
unwiderruflich verloren.
≥Wenn die Festplatte automatisch in den SLEEP-Modus schaltet (➡ unten) sowie beim Ein- und Ausschalten des Geräts kann ein kurzes
Tonsignal zu hören sein. Dies ist kein Anzeichen einer Störung.
Vorsichtsmaßnahmen zur Festplatte
∫ Wichtige Hinweise zur Aufstellung
≥Stellen Sie das Gerät so auf, dass der Lüfter auf der
Rückseite und die Kühlöffnungen an der Seite frei sind.
≥Stellen Sie das Gerät auf eine ebene Fläche, die keinen
Vibrationen oder Stößen ausgesetzt ist.
≥Stellen Sie das Gerät nicht auf einen
Videorecorder oder ein anderes
Wärme abgebendes Gerät.
≥Stellen Sie das Gerät nicht an einen Platz
mit häufigen Temperaturschwankungen.
≥Stellen Sie das Gerät an einem Platz auf,
an dem sich kein Kondenswasser bildet. Kondenswasser bildet
sich beispielsweise auf einer kalten Fläche, die einer plötzlichen
starken Temperaturänderung ausgesetzt ist. Durch
Kondenswasser können Teile im Inneren des Geräts beschädigt
werden.
≥Situationen und Orte, an denen sich Kondenswasser bilden
kann
– Bei einer extremen Temperaturänderung (wenn das Gerät von
einem sehr warmen an einen sehr kalten Ort gebracht wird
oder umgekehrt, wenn das Zimmer durch eine Klimaanlage
gekühlt wird oder wenn das Gerät dem direkten Luftstrahl
einer Klimaanlage ausgesetzt ist). Ist die Festplatte (die sich
beim Betrieb erwärmt) kalter Luft ausgesetzt, kann sich
Kondenswasser in der Festplatte bilden und die Köpfe usw.
beschädigen.
– Räume mit hoher Luftfeuchtigkeit oder Wasserdampf.
– In tropischen Ländern während der Regenzeit.
Lassen Sie das Gerät in solchen Fällen ausgeschaltet und
warten Sie etwa 2 bis 3 Stunden ab, bis die Feuchtigkeit
verdunstet ist.
Dieses Gerät
Videorecorder
∫ Zigarettenrauch usw. kann Fehlfunktionen
und Störungen verursachen
Achten Sie darauf, dass kein Zigarettenrauch, kein
Insektenspray und keine anderen Dämpfe in das Gerät
gelangen, da es sonst zu Störungen kommen kann.
∫ Während des Betriebs
≥Das Gerät darf nicht bewegt und keinen Vibrationen oder
Stößen ausgesetzt werden. (Ansonsten kann die Festplatte
beschädigt werden.)
≥Das Netzkabel darf nicht abgetrennt und die Sicherung nicht
unterbrochen werden.
Bei eingeschaltetem Gerät dreht sich die Festplatte mit hoher
Geschwindigkeit. Gewisse Laufgeräusche und Schwingungen
sind kein Anzeichen einer Störung.
∫ Bevor Sie das Gerät bewegen
1 Schalten Sie das Gerät aus. (Warten Sie, bis “BYE” im
Display erlischt.)
2 Trennen Sie das Netzkabel von der Steckdose ab.
3 Bewegen Sie das Gerät erst, wenn es vollkommen zum
Stillstand gekommen ist (nach ca. 2 Minuten). Vorher kann es
durch Vibrationen oder Stöße zu Schäden kommen. (Nach
dem Ausschalten des Geräts läuft die Festplatte noch kurze
Zeit weiter.)
RQT8203
4
∫ Restliche Festplatten-Aufnahmezeit
Das Gerät arbeitet mit einer VBR-Datenkompression (Variable Bit Rate), die die aufgenommenen Datensegmente entsprechend den
Videodatensegmenten variiert. Dadurch kann es vorkommen, dass Differenzen zwischen der angezeigten Zeit und der Aufnahmerestzeit
auftreten.
Reicht die Restzeit nicht aus, löschen Sie nicht mehr benötigte Titel, um Platz zu schaffen, bevor Sie mit der Aufnahme beginnen. (Durch
Löschen einer Playliste erhöht sich die verfügbare Zeit nicht.)
∫ Wenn “HDD SLP (SLEEP)” im Display des Geräts erscheint
Die Festplatte wurde automatisch in den SLEEP-Modus geschaltet. (Bei eingeschaltetem Gerät dreht sich die Festplatte ständig mit hoher
Drehzahl. Um die Lebensdauer der Festplatte zu verlängern, wird sie in den SLEEP-Modus geschaltet, wenn keine Disc eingelegt und 30
Minuten lang keine Bedienung vorgenommen wurde.)
≥Drücken Sie [HDD], um sie wieder zu aktivieren.
≥Wird die Wiedergabe oder Aufnahme aus dem SLEEP-Modus heraus gestartet, dauert es einige Zeit, bis die Festplatte wieder hochgefahren
ist.
≥Bei Nichtverwendung des Geräts empfehlen wir, die Disc aus der Lade herauszunehmen, damit die Festplatte in den SLEEP-Modus schaltet.
∫ Haftung für Aufnahmematerial
Panasonic übernimmt keine Haftung für Schäden, die bei Problemen direkt oder indirekt durch den Verlust von Aufnahmen oder
Editiermaterial (Daten) entstanden sind, und leistet keinen Ersatz für verlorenes Material, wenn die Aufnahme oder das Editieren nicht richtig
ausgeführt werden konnte. Gleiches gilt auch bei einer Reparatur des Geräts (auch wenn es sich um ein nicht mit der Festplatte in
Zusammenhang stehendes Bauteil handelt).
76
Page 77

Handhabung von Disc und Karte
∫ Korrektes Halten einer Disc oder Karte
Berühren Sie die Oberfläche der Disc und die Anschlusskontakte
der Karte nicht.
∫ Hinweis zu Discs ohne Cartridge
Achten Sie darauf, dass die Disc nicht verkratzt oder schmutzig wird.
∫ Falls sich Schmutz oder Kondenswasser auf der
Disc befindet
Wischen Sie die Disc mit einem feuchten Tuch ab und wischen Sie
sie dann trocknen.
∫ Vorsichtshinweise zur Handhabung
≥Bringen Sie keine Etiketten oder Aufkleber auf den Discs an. (Die
Disc kann sich dadurch verziehen, sich nicht mehr richtig drehen
und unbrauchbar werden.)
≥Nur die Label-Seite der Disc darf beschriftet werden. Verwenden
Sie einen weichen Ölbasis-Filzstift. Verwenden Sie keine
Kugelschreiber oder sonstigen harten Schreibstifte.
≥Verwenden Sie keine Schallplatten-Reinigungssprays, kein Benzin,
keinen Verdünner, keine Antistatikflüssigkeiten und keine anderen
Lösungsmittel.
≥Verwenden Sie keine kratzfesten Schutzhüllen oder Abdeckungen.
≥Achten Sie darauf, dass die Anschlusskontakte nicht mit Wasser,
Schmutz usw. in Berührunge kommen.
≥Lassen Sie die Discs nicht fallen, legen Sie sie nicht aufeinander
und stoßen Sie sie nirgends an. Und legen Sie auch nichts auf die
Discs.
≥Die folgenden Discs sollten nicht verwendet werden:
–Discs mit Kleberesten von entfernten Aufklebern oder Etiketten
(Leih-Discs usw.).
–Stark verzogene oder gerissene Discs.
–Discs mit ungewöhnlicher Form, z.B.
Herzform.
≥Legen Sie die Discs nicht an folgende
Plätze:
–In direktes Sonnenlicht.
–An sehr staubige oder feuchte Plätze.
–In die Nähe einer Heizung.
–Plätze, die starken Temperaturschwankungen ausgesetzt sind
(es kann sich Kondenswasser bilden).
–An Plätze, an denen statische Elektrizität oder
elektromagnetische Wellen vorhanden sind.
≥Setzen Sie die Disc bei Nichtgebrauch in ihre Hülle oder Cartridge
ein, damit sie nicht verkratzt oder verschmutzt.
Der Hersteller übernimmt keine Verantwortung und bietet keinerlei Kompensation für den Verlust von aufgezeichnetem oder
bearbeitetem Material sowie für Folgeschäden eines solchen Verlustes, der auf einen Defekt des Geräts oder des bespielbaren
Datenträgers zurückzuführen ist.
Einige Beispiele für Ursachen solcher Verluste
≥Eine mit diesem Gerät bespielte und bearbeitete Disc wird in einem DVD-Recorder oder Computer-Disclaufwerk eines anderen Herstellers
abgespielt.
≥Eine Disc wird wie oben beschrieben benutzt und dann wieder in diesem Gerät abgespielt.
≥Eine mit einem DVD-Recorder oder Computer-Disclaufwerk eines anderen Herstellers bespielte und bearbeitete Disc wird in diesem Gerät
abgespielt.
Pflege des Geräts
Die Präzisionsteile in diesem Gerät reagieren empfindlich auf
Umgebungseinflüsse, insbesondere Temperatur,
Luftfeuchtigkeit und Staub. Zigarettenrauch kann ebenfalls eine
Funktionsstörung oder einen Ausfall verursachen.
Wischen Sie dieses Gerät zum Reinigen mit einem weichen,
trockenen Tuch ab.
≥Verwenden Sie zum Reinigen dieses Geräts auf keinen Fall
Alkohol, Lackverdünner oder Benzin.
≥Bevor Sie ein chemisch behandeltes Tuch benutzen, lesen Sie
bitte die Gebrauchsanweisung des Tuchs sorgfältig durch.
Für ungetrübten Hör- und Sehgenuss beachten Sie die
folgenden Punkte.
Staub und Schmutz können sich im Laufe der Zeit auf der Linse des
Geräts ansammeln, wodurch die Aufnahme oder Wiedergabe von
Discs unmöglich wird.
Verwenden Sie den DVD-Linsenreiniger ungefähr einmal jährlich,
je nach der Häufigkeit des Gebrauchs und der Betriebsumgebung.
Lesen Sie die Gebrauchsanweisung des Linsenreinigers vor
Gebrauch sorgfältig durch.
DVD-Linsenreiniger: RP-CL720E
Stellen Sie dieses Gerät
nicht auf einen
Verstärker oder auf ein
anderes, sich stark
erwärmendes Gerät.
Ansonsten kann das Gerät
beschädigt werden.
[Hinweis]
Blockieren Sie den Kühlungslüfter auf der Rückseite nicht.
Nehmen Sie vor einem Transport des Geräts die Disc
heraus.
Ansonsten können die Disc oder das Gerät beschädigt
werden.
Handhabung von Disc und Karte / Pflege des Geräts
RQT8203
5
77
Page 78

Einsetzen und Herausnehmen der SD-Karte
Schalten Sie das Gerät stets aus, bevor Sie die SD-Karte einsetzen oder herausnehmen.
Wenn die Kartenanzeige (“SD”) im Display des Geräts blinkt, wird von der Karte gelesen oder auf die Karte geschrieben. Schalten Sie das Gerät
dann nicht aus und nehmen Sie die Karte nicht heraus. Ansonsten kann es zu Fehlfunktionen oder zum Verlust der Kartendaten kommen.
Öffnen der
Abdeckung
Nach unten drücken.
≥SD Memory Cards mit Kapazitäten von 8 MB bis 1 GB können verwendet werden (➡ 11).
Einsetzen der Karte Herausnehmen der Karte Schließen der
Drücken Sie auf die
Mitte der Karte, bis sie
einrastet.
Etikett nach oben und
abgeschrägte Ecke nach rechts.
(Vergessen Sie nicht, die Abdeckung zu schließen. ➡ rechts)
Eine miniSD
muss in den bei der
Karte mitgelieferten
miniSD
Kartenadapter
eingesetzt werden.
Einsetzen und
Herausnehmen dieses
Adapters.
TM
-Karte
TM
-
ADAPTER
Hinweis zu PAL-progressiv-tauglichen Fernsehern
≥LCD-/Plasma-Fernseher oder LCD-Projektor
Über den Progressiv-Ausgang können Sie Videos einer DVD-VideoDisc mit hoher Auflösung wiedergeben. Verbinden Sie die
Komponenten-Videoausgänge dieses Geräts mit Ihrem Fernseher
und aktivieren Sie den Progressivausgabemodus (➡ 16, 20).
≥Herkömmlicher Röhrenfernseher
Leiten Sie dem Fernseher ein Komponentensignal zu und schalten
Sie den Progressivmodus auf “Aus” (werksseitige
Standardeinstellung ➡ 57), selbst wenn der Fernseher progressivtauglich ist. Progressivsignale können bei solchen Fernsehern
Bildzittern verursachen. Das gleiche gilt für Mehrnormen-Fernseher
im PAL-Modus.
1
Drücken Sie auf die
Mitte der Karte.
2
Ziehen Sie sie gerade heraus.
Abdeckung
Nach oben drücken.
COMPONENT
VIDEO IN
Progressive Ausgabe
Progressive Ausgabe
Einsetzen und Herausnehmen der SD-Karte / Hinweis zu PAL-progressiv-tauglichen Fernsehern
COMPONENT
VIDEO OUT
COMPONENT
VIDEO IN
COMPONENT
VIDEO OUT
RQT8203
6
78
Page 79

Verwendung einer DVD-R, DVD-RW oder +R in diesem Gerät
SETUP
Dynamikbereich-Kompression
Sprachauswahl
Audiomodus für XP-Aufnahme
Aus
Dolby Digital
Digital Audio Ausgang
Disc
Video
Audio
Display
Sendartabelle
Connection
TAB
SELECT
M1
SETUP
Aufnahmezeit im EP-Modus
Aufn. für High-Speed-Kopieren
Disc
Video
Audio
Sendartabelle
EP (6 Stunden)
Einschränkungen bei DVD-Rs usw.
§
≥16:9-Format-Programme werden im 4:3-Format aufgenommen.
≥Bei Zweikanalton-Programmen kann nur der Hauptton (M 1) oder nur der Zusatzton (M 2) aufgenommen werden.
≥Auf anderen DVD-Playern kann die Disc erst nach dem Finalisieren wiedergegeben werden.
§
DVD-R, DVD-RW und +R werden auf dieser Seite als “DVD-R usw.” bezeichnet.
M2
Hello
Aufnahme auf DVD-R usw.
Nur der gewählte Ton wird aufgenommen.
z.B.: nur M 1
Hallo
z.B.:
M1
Hallo
16:9-Format-Programm
mit Haupt- und Zusatzton
4:3-Format
Führen Sie deshalb bei Verwendung einer DVD-R usw. die folgenden Schritte aus.
∫ Wenn ein Zweikanalton-Programm auf DVD-R usw. aufgenommen wird
Wählen Sie den aufzunehmenden oder zu kopierenden Ton.
Einige Fernsehsender strahlen einen Hauptton (M 1) und einen Zusatzton (M 2) aus. Vor dem Aufnehmen oder Kopieren auf eine DVD-R usw.
muss der gewünschte Ton gewählt werden.
≥Wenn kein externes Gerät angeschlossen ist
Nur der gewählte Ton wird
aufgenommen.
M1
Hallo
M1
Hallo
M2
Hello
Wählen Sie im SETUP-Menü für “Sprachauswahl”
die Option “M 1” oder “M 2” (➡ 56).
Aufnahme auf DVD-R usw.
≥Wenn ein externes Gerät angeschlossen ist
–Wählen Sie am externen Gerät Tonkanal “M 1” oder “M 2”.
∫ Zum Kopieren von Titeln von der Festplatte im Hochgeschwindigkeitsmodus auf eine DVD-R usw.
Stellen Sie “Aufn. für High-Speed-Kopieren” auf “Ein”, bevor Sie auf die Festplatte aufnehmen (➡ 24).
Titel können im Hochgeschwindigkeitsmodus (mit max. 64k
folgenden Einstellungen erforderlich.
§
Je nach Disc kann die Maximalgeschwindigkeit unterschiedlich sein.
Stellen Sie “Aufn. für High-Speed-Kopieren” auf “Ein” (➡ 24).
Aufnahmeeinstellungen
Ein
§
) kopiert werden. Jedoch sind hierzu vor der Aufnahme auf die Festplatte die
Aufnahme auf Festplatte
Kopieren mit hoher Geschwindigkeit
auf DVD-R usw.
Festplatte
∫ Wiedergabe der Disc auf anderen DVD-Playern
Nach dem Aufnahme- oder Kopiervorgang muss die Disc finalisiert werden (➡ 52).
Nachdem Sie Titel auf eine DVD-R usw. aufgenommen oder kopiert haben, müssen Sie die Disc mit diesem Gerät finalisieren. Anschließend
können Sie sie wie eine handelsübliche DVD-Video wiedergeben. Die Disc kann jedoch nur noch wiedergegeben werden, ein nochmaliges
Kopieren oder Überspielen ist nicht mehr möglich.
§
Nach dem Formatieren der DVD-RW können Sie sie wieder zum Aufnehmen und Kopieren verwenden.
Aufnahme auf DVD-R usw.
§
Finalisierung
Wiedergabe auf anderem DVD-Gerät
E
D
O
M
Y
A
L
P
P
U
T
E
S
Í
1
;
∫
Y
A
L
P
S
I
D
U
N
E
M
P
O
T
N
R
U
B
T
U
E
S
R
U
E
N
L
E
T
I
M
T
E
L
G
N
A
O
I
D
U
A
D
N
U
O
R
L
R
E
U
C
S
.
N
A
A
C
3
2
1
0
1
S
6
45
0
9
8
7
9
:
E
M
5
U
L
O
V
6
E
r
G
A
PP
U
s
O
R
G
G
H
C
H
C
R
A
E
S
R
E
T
N
E
L
O
V
Y
A
L
P
S
I
D
U
N
E
M
P
O
T
N
R
U
T
E
R
N
O
U
N
E
M
F
F
D
C
I
N
9
V
U
S
.
A
O
N
E
P
O
D
N
U
O
R
R
T
A
E
P
E
E
R
D
O
M
R
O
T
I
N
O
M
E
D
O
M
E
R
U
T
C
I
P
Í /I Í
CD SEQUENTIAL
DOUBLE RE-MASTER
DISC
Verwendung einer DVD-R, DVD-RW oder +R in diesem Gerät
1
2 3 4 5
;∫1:/65/9
DISC EXCHANGE DISC SKIP<OPEN/CLOSE
RQT8203
7
79
Page 80

Mitgeliefertes Zubehör
Überprüfen Sie, ob die folgenden Teile mitgeliefert sind.
(Produktnummern Stand April 2005. Die Nummern können Änderungen unterliegen.)
∏
(EUR7729KC0)
1 Fernbedienung 1 Netzkabel
∏∏∏∏
≥Nur für dieses Gerät bestimmt.
Verwenden Sie das Netzkabel
nicht für andere Geräte und
verwenden Sie auch kein
Netzkabel eines anderen
Geräts.
Informationen zur Fernbedienung
1 HF-Koaxialkabel 2 Batterien
für Fernbedienung
1 Audio/Video-
Kabel
∫ Batterien
≥Legen Sie die Batterien mit richtiger Polarität (i und j) in die
Fernbedienung ein.
R6/LR6, AA
≥Keine Akkus verwenden.
≥Verwenden Sie keine alten zusammen mit neuen Batterien.
≥Verwenden Sie keine unterschiedlichen Batterietypen.
≥Setzen Sie die Batterien keiner Hitze und keinem Feuer aus.
Mitgeliefertes Zubehör / Informationen zur Fernbedienung
≥Nehmen Sie die Batterien nicht auseinander und schließen Sie sie
nicht kurz.
≥Versuchen Sie nicht, Alkali- oder Manganbatterien zu laden.
≥Verwenden Sie keine Batterien, deren Mantel sich teilweise
abgelöst hat.
≥Verbrauchte Batterien sachgerecht entsorgen.
Bei unsachgemäßer Handhabung von Batterien kann Elektrolyt
auslaufen und Gegenstände beschädigen oder einen Brand
verursachen.
Nehmen Sie die Batterien heraus, wenn die Fernbedienung längere
Zeit nicht benutzt werden soll. Lagern Sie die Batterien an einem
kühlen, dunklen Ort.
Fernbedienungsbetrieb (➡ 12)
∫ Gebrauch
30
Fernbedienungssensor
20
20
30
7 m frontal vor dem Gerät
RQT8203
8
[Hinweis]
Falls sich dieses Gerät oder das Fernsehgerät nach dem
Auswechseln der Batterien nicht mit der Fernbedienung steuern
lässt, geben Sie die Codes neu ein (➡ 21)
80
Page 81

Festplatten-, Disc- und Karten-Information
Für Aufnahme und Wiedergabe verwendbare Festplatten und Discs
Disctyp
Logo –
In der Anleitung
gekennzeichnet mit
Aufnehm- und wiedergebbare
Daten
Hauptverwendung Zwischenspeicherung
Maximale Aufnahmezeit
Wiedergabe auf anderem Player
Geeignet für die Aufnahme
mit hoher Geschwindigkeit
Möglichkeiten mit diesem Gerät (Y: Möglich, t: Nicht möglich)
Zeitversetztes Wiedergeben
Einmaliges Aufnehmen
geschützter Sendungen
Sowohl M 1 als auch M 2 einer
Zweikanalton-Sendung aufnehmen
Aufnehmen im 16:9-Format YY
Text eingeben YY Y
Titel löschen YY
Playlisten erstellen YY t
Disctyp
Logo –
In der Anleitung
gekennzeichnet mit
Aufnehm- und wiedergebbare
Daten
Hauptverwendung
Maximale Aufnahmezeit ca. 8 Stunden ca. 8 Stunden
Wiedergabe auf anderem
Player
Geeignet für die Aufnahme
mit hoher Geschwindigkeit
Möglichkeiten mit diesem Gerät (Y: Möglich, t: Nicht möglich)
Zeitversetztes Wiedergeben tt
Einmaliges Aufnehmen
geschützter Sendungen
Sowohl M 1 als auch M 2
einer Zweikanalton-Sendung
aufnehmen
Aufnehmen im 16:9-Format
Text eingeben YY
Titel löschen
Playlisten erstellen tt
≥Wir empfehlen die Verwendung von Panasonic-Discs und -Karten. Wir empfehlen die Verwendung von DVD-RAM-Discs mit Cartridges, da
diese gegen Verkratzen und Verschmutzen geschützt sind.
≥Je nach dem Zustand der Aufnahme können Discs anderer Hersteller möglicherweise nicht bespielt oder wiedergegeben werden.
Je nach dem Zustand der Aufnahme können DVD-R-, DVD-RW- und +R-Discs nicht mit diesem Gerät aufgenommen oder wiedergegeben werden.
≥
≥Auf “einmaliges Aufnehmen” beschränkte Programme können mit diesem Gerät nicht auf eine CPRM-kompatible DVD-R oder DVD-RW
aufgenommen werden. Andere Programme können als DVD-Videoformat aufgenommen werden.
Dieses Gerät kann keine Discs bespielen, die sowohl PAL- als auch NTSC-Signale enthalten. (Auf die Festplatte können dagegen beide Signaltypen
≥
aufgenommen werden.) Discs, die auf einem anderen Gerät mit PAL- und NTSC-Signalen bespielt wurden, lassen sich möglicherweise nicht wiedergeben.
§
Beide Seiten können nicht durchgehend bespielt oder wiedergegeben werden.
Festplatte (HDD)
≥200 GB
[HDD] [RAM]
Video
Standbilder
Wiederbeschreibbare Discs für
ca.
355 Stunden
– Nur auf DVD-RAM-kompatiblen Playern. Nur nach Finalisierung der Disc (➡ 52, 68).
–
YY t
Y
YY
DVD-RW (DVD-Videoformat)
≥4,7 GB, 12 cm
≥1,4 GB, 8 cm
[-RW‹V›] Vor dem Finalisieren [+R] Vor dem Finalisieren
[DVD-V] Nach dem Finalisieren [DVD-V] Nach dem Finalisieren
Video Video
Wiederbeschreibbare Discs für
Sicherungskopien
Nur nach Finalisierung der Disc
Aufnahmegeschwindigkeit von bis
t (Das Bild wird im 4:3-Format
Y
(Der verfügbare Platz auf der Disc erhöht
sich nur, wenn der letzte Titel gelöscht wird.)
(➡ 52, 68).
Discs mit einer
zu 4k.
tt
t [Nur ein Kanal wird
aufgenommen. (➡ 56,
Sprachauswahl)]
aufgenommen.)
ca. 8 Stunden (ca. 16 Stunden auf
Discs mit einer Aufnahmegeschwindigkeit
Y [Nur CPRM-kompatible (➡ 68) Discs.]
DVD-RAM
≥4,7 GB/9,4 GB, 12 cm
≥2,8 GB, 8 cm
Video
Standbilder
Sicherungskopien
§
zweiseitige Disc
von bis zu 5k.
Einmal bespielbare Discs für
Sicherungskopien (es kann so lange
aufgenommen werden, bis die Disc voll ist)
Nur nach Finalisierung der Disc
Aufnahmegeschwindigkeit von
t [Nur ein Kanal wird
aufgenommen. (➡ 56,
t (Das Bild wird im 4:3-Format
Y (Nach dem Löschen nimmt
der verfügbare Platz nicht zu.)
)
+R
≥4,7 GB, 12 cm
(➡ 52, 68).
Discs mit einer
bis zu 8k.
Sprachauswahl)]
aufgenommen.)
[Hinweis]
Wenn “Aufn. für High-Speed-Kopieren” auf “Ein” eingestellt ist, bestehen die Beschränkungen bezüglich Sekundäraudioaufnahme usw. für die DVD-RAM
ebenfalls. Wenn eine Hochgeschwindigkeits-Überspielung auf DVD-R usw. nicht erforderlich ist, wählen Sie die Einstellung “Aus” (
DVD-R (DVD-Videoformat)
≥4,7 GB, 12 cm
≥1,4 GB, 8 cm
[-R] Vor dem Finalisieren
[DVD-V] Nach dem Finalisieren
Video
Einmal bespielbare Discs für
Sicherungskopien (es kann so lange
aufgenommen werden, bis die Disc voll ist)
ca. 8 Stunden
Discs mit einer Aufnahmegeschwindigkeit
t [Nur ein Kanal wird aufgenommen. (➡ 56,
Y (Nach dem Löschen nimmt der
von bis zu 8k.
t
Sprachauswahl)]
t (Das Bild wird im 4:3-Format
aufgenommen.)
verfügbare Platz nicht zu.)
∫ DVD-Video-Aufnahmeformat
Dieses Format ermöglicht es,
Fernsehsendungen usw. aufzunehmen
und wiederzugeben.
≥Auf “einmaliges Aufnehmen”
beschränkte Digitalsendungen können
auf eine CPRM-kompatible Disc
aufgenommen werden. Mit diesem Gerät
kann auf eine Festplatte oder CPRMkompatible DVD-RAM aufgenommen
werden.
≥Eine Wiedergabe ist nur mit einem
kompatiblen DVD-Player möglich.
Zum Aufnehmen im DVD-VideoAufnahmeformat verwenden Sie die
Festplatte oder eine DVD-RAM.
∫ DVD-Videoformat
Dieses Aufnahmeformat entspricht dem
von handelsüblichen DVD-Videos.
≥Digitalsendungen, die auf “einmaliges
Aufnehmen” beschränkt sind, können
nicht aufgenommen werden.
≥Eine Wiedergabe auf einem DVD-Player
ist möglich. Allerdings müssen die mit
diesen Gerät aufgenommenen
Programme finalisiert werden, bevor sie
auf anderen DVD-Playern
wiedergegeben werden können.
Verwenden Sie zum Aufnehmen im
DVD-Videoformat eine DVD-R oder
DVD-RW.
➡
24).
RQT8203
81
Festplatten-, Disc- und Karten-Information
9
Page 82

Festplatten-, Disc- und Karten-Information
“Nur-Wiedergabe”-Discs (12 cm/8 cm)
.
Disctyp DVD-Video DVD-Audio
Logo ––
DVD-RW (DVD-Video-
Aufnahmeformat)
+RW CD Video-CD SVCD
Festplatten-, Disc- und Karten-Information
RQT8203
10
In der Anleitung
gekennzeichnet
[DVD-V] [DVD-A] [-RW‹VR›] [DVD-V] [CD] [VCD]
mit
Verwendung Filme mit
hoher
Bildqualität
und
Musikdiscs
HiFiMusikdisc
Wird in
≥
diesem
Gerät im 2Kanalmodus
wiedergegeben.
Eine mit einem anderen
DVD-Recorder
aufgenommene DVD-
§
RW
≥Auf “einmaliges
Aufnehmen”
beschränkte
Programme können
wiedergegeben werden,
falls sie auf eine CPRMkompatible Disc
aufgenommen wurden.
≥Wenn Sie die Disc
formatieren (➡ 51),
Mit einem
anderen
DVDRecorder
bespielte
§
+RW.
Ton und
Musik
(einschließlich CD-R/
§
RW
)
CD-Rs und
CD-RWs
mit MP3Musikaufnahmen
(➡ 33)
Auf CD-R/
§
aufge-
RW
nommene
Standbilder
(JPEG und
TIFF)
Musik und Video
§
(einschließ-lich CD-R/
RW
§
)
können Sie sie mit
diesem Gerät im DVDVideoformat bespielen
und wiedergeben.
Möglicherweise muss die Disc mit dem
Gerät, mit dem sie bespielt wurde,
finalisiert wurden.
≥Sie können Standbilder (JPEG/TIFF), CD-DA, Video-CD, SVCD (die IEC62107 entsprechen) und Daten im MP3-Format, die auf CD-R/RW
aufgezeichnet sind, wiedergeben.Nach der Aufnahme muss die Session beendet oder die Disc finalisiert werden.
≥Der Hersteller der Disc kann die Wiedergabemöglichkeiten der Disc festlegen. Aus diesem Grund kann manchmal die Wiedergabe nicht gemäß
der Beschreibung in dieser Bedienungsanleitung gesteuert werden. Lesen Sie die Anleitung der Disc sorgfältig durch.
§
Je nach dem Zustand der Aufnahme ist bei einigen CD-R-, CD-RW-, DVD-RW- oder +RW-Discs manchmal keine Wiedergabe möglich.
Hinweis zu DVD-Audio
Einige DVD-Audio mit Mehrkanalton sind vom Hersteller so konzipiert, dass sie ein Heruntermischen (➡ 68) auf der ganzen Disc oder an
bestimmten Teilen verhindern. Tracks, bei denen ein Heruntermischen verhindert wird, können mit diesem Gerät nicht richtig wiedergegeben
werden (beispielsweise werden nur die beiden Frontkanäle wiedergegeben). Weitere Informationen finden auf Sie der Hülle der Disc.
§3
Nicht abspielbare Discs
≥2,6- und 5,2-GB-DVD-RAM, 12 cm
≥3,95- und 4,7-GB-DVD-R for Authoring
≥Im DVD Video-Aufnahmeformat bespielte DVD-R
≥Auf einem anderen Gerät bespielte, aber nicht finalisierte DVD-R
(DVD-Videoformat), DVD-RW (DVD-Videoformat), +R (➡ 68).
DVD-Video mit einem von “2” oder “ALL” abweichenden Regionalcode
≥
≥Blu-ray
≥DVD-ROM, DVD-R DL, +R DL, +R (8 cm), CD-ROM, CDV, CD-G,
Photo CD, CVD, SACD, MV-Disc, PD, DivX Video-Disc “Chaoji
”
, die im Handel erhältlich sind, einschließlich CVD, DVCD und
VCD
SVCD, die nicht IEC62107 entsprechen, usw.
Wenn Ihr Fernsehgerät nicht in der Lage ist, PAL 525/60-Signale
zu verarbeiten, wird das Bild nicht richtig angezeigt.
≥Bei der Wiedergabe eines auf Festplatte aufgezeichneten Titels
muss “TV System” entsprechend des Titels eingestellt werden
(➡ 61).
Optionales Zubehör
(Produktnummern Stand April 2005. Die Nummern können
Änderungen unterliegen.)
DVD-RAM
9,4 GB, doppelseitig, Cartridge Typ 4:
LM-AD240ME (mit Hochgeschwindigkeitsaufnahme kompatibel 5k
LM-AD240LE (mit Hochgeschwindigkeitsaufnahme kompatibel
Fernsehtypen und wiedergebbare Discund Festplattentitel-Formate
Der folgenden Tabelle können Sie entnehmen, ob eine Disc mit PALoder NTSC-Aufzeichnung bzw. ein auf Festplatte aufgezeichneter
PAL- oder NTSC-Titel auf Ihrem Fernseher wiedergegeben werden
kann.
(Y: Wiedergabe möglich, t: Wiedergabe nicht möglich)
Fernsehtyp
Mehrnormen-TV
NTSC-TV
PAL-TV
§1
Wenn Sie “TV System” auf “NTSC” einstellen (➡ 61), erhalten
Sie ein klareres Bild.
§2
Stellen Sie “TV System” auf “NTSC” ein (➡ 61).
82
Disc/Titel auf
Festplatte
PA L Y
NTSC
PA L t
NTSC
PA L Y
NTSC
Ja/Nein
§3
Y
§1
Y
§2
Y
(PAL60)
4,7 GB, einseitig, Cartridge Typ 2:
LM-AB120ME (mit Hochgeschwindigkeitsaufnahme kompatibel
LM-AB120LE (mit Hochgeschwindigkeitsaufnahme kompatibel
4,7 GB, einseitig, ohne Cartridge:
LM-AF120ME (mit Hochgeschwindigkeitsaufnahme kompatibel
LM-AF120LE (mit Hochgeschwindigkeitsaufnahme kompatibel
DVD-R
4,7 GB, einseitig, ohne Cartridge:
LM-RF120ME (mit Hochgeschwindigkeitsaufnahme kompatibel 8k
LM-RF120LE (mit Hochgeschwindigkeitsaufnahme kompatibel
)
3k)
5k)
3k)
5k)
3k)
)
4k)
Page 83

Mit diesem Gerät verwendbare Karten
Typ
SD Memory Card
miniSDTM-Karte
§
MultiMediaCard
In der Anleitung
gekennzeichnet mit
Aufnehm- und wiedergebbare
Daten
Verwendung Kann direkt in den SD-Kartenschacht eingesetzt werden.
[SD]
Standbilder
§
Der bei der miniSDTM-Karte mitgelieferte miniSDTM-Kartenadapter wird benötigt.
≥Mit einer Digitalkamera usw. aufgenommene Standbilder können wiedergegeben und überspielt
werden (➡ 34, 48).
≥Die Reihenfolge für das automatische Ausdrucken (DPOF, Digital Print Order Format) auf Ihrem
Drucker oder in einem Fotoladen kann eingestellt werden (➡ 42, 68).
≥Kompatibel mit: FAT12 oder FAT16
Geeignete SD Memory Cards
≥SD Memory Cards mit folgenden Kapazitäten können verwendet werden (von 8 MB bis 1 GB).
8 MB, 16 MB, 32 MB, 64 MB,
128 MB, 256 MB, 512 MB, 1 GB (Maximum)
Lesen Sie bitte die die neuesten Informationen auf der folgenden Website:
http://panasonic.co.jp/pavc/global/cs
(Nur auf Englisch.)
≥Wenn die SD Memory Card auf einem anderen Gerät formatiert wird, kann sich die erforderliche Aufnahmezeit verlängern. Beachten Sie
außerdem, dass die SD Memory Card möglicherweise nicht in diesem Gerät verwendet werden kann, wenn sie mit einem PC formatiert wurde.
Formatieren Sie die Disc mit diesem Gerät (➡ 51, 68).
≥Dieses Gerät unterstützt SD Memory Cards, die in den Formaten FAT 12 und FAT 16 nach den SD Memory Card-Spezifikationen formatiert
wurden.
≥Wir empfehlen die Verwendung einer SD-Karte von Panasonic.
Festplatten-, Disc- und Karten-Information
Struktur der von diesem Gerät angezeigten Ordner
Dieses Gerät kann folgende anzeigen.
¢¢¢: Ziffern XXX: Buchstaben
DVD-RAM
JPEG
DCIM¢¢¢
DCIM
§
Ordner können auf anderem Gerät erstellt werden. Diese Ordner können jedoch nicht als Ziel eines Kopiervorgangs gewählt werden.
(Übergeordneter Ordner)
¢¢¢XXXXX
XXXX
XXXX
¢¢¢XXXXX
XXXX
XXXX
¢¢¢¢
¢¢¢¢
¢¢¢¢
¢¢¢¢
(Bildordner)
.JPG
.TIF
.JPG
.TIF
§
≥Ein Ordner, bei dem alle Ziffern “0” sind (z.B. DCIM000), kann nicht angezeigt werden.
≥Wenn ein Ordner- oder Dateiname mit einem anderen Gerät eingegeben wurde, wird der Name möglicherweise nicht richtig angezeigt und
die Daten können möglicherweise nicht wiedergegeben oder editiert werden.
Karte
(Übergeordneter Ordner)
DCIM
¢¢¢XXXXX
IM¢¢CDPF oder IMEXPORT
XXXX
XXXX
XXXX
XXXX
¢¢¢¢
¢¢¢¢
(Bildordner)
¢¢¢¢
.JPG
¢¢¢¢
.TIF
.JPG
.TIF
§
RQT8203
11
83
Page 84

Anordnung der Bedienungselemente
HDD
DVDSDSD
TV
DVD/TV
ENTER
ENTER
Fernbedienung
Die Erläuterung der Bedienung erfolgt im Allgemeinen anhand der Fernbedienung.
DVD
1
2
3
4
5
DIRECT TV REC
TV
Í
Í
AV
HDD
1
DVD
2 3
4 5 6
8
7
CANCEL
INPUT SELECT
0
SKIP
VOLUME
CH
PAG E
CH
ShowView
9
MANUAL SKIP
SLOW/SEARCH
6
PAU S E
D
I
U
E
G
ENTER
CREATE
CHAPTER
EXT LINK
DUBBING
PLAY/x1.3
O
N
S
RETURN
ERASE
TIMER
F Rec
F
U
N
C
T
I
Anordnung der Bedienungselemente
7
8
9
:
;
<
=
>
?
@
STOP
T
U
C
N
E
E
R
M
I
P
D
O
T
SUB MENU
S
DISPLAY
REC
TIME SLIP
K
C
E
H
C
/
G
O
R
P
R
O
T
A
G
I
V
A
N
STATUS
REC MODE
AUDIO
A
DVD /TV
∫ Verwendung des Smart Wheel
≥Wählen Sie einen Parameter aus dem Menü und stellen Sie
ihn ein.
Wählen Sie mit [3, 4, 2, 1] (oben, unten, links oder rechts) die
Position.
Zur Wahl des Parameters kann auch das Rad gedreht werden.
B
C
D
E
F
G
H
I
J
K
L
M
N
O
P
Q
R
1 Einschalten des Geräts (➡ 18, 19)
2 TV-Direktaufnahme (➡ 25)
3 Laufwerkwahl (HDD, DVD oder SD) (➡ 22, 30, 34)
4 Wahl von Kanälen, Titelnummern usw./Zifferneingabe
5 Abbrechen
6 Steuern der Aufnahme- und Wiedergabe-Grundfunktionen
Anzeigen des Timeraufnahme-Bildschirms
7
(➡ 28)
8 Smart Wheel (➡ unten)
9 Anzeigen des Top-Menüs/Direct Navigator (➡ 30, 31, 38)
: Anzeigen von Untermenüs (➡ 38)
; Anzeigen der Statusmeldungen (➡ 37)
< Farbtasten zum Umschalten zwischen Video/Bild und Video/
Playlisten, zur Wahl des Zeichentyps bei der Texteingabe, zum
manuellen Abstimmen und zum Steuern von GUIDE Plus+
§
.
(➡ 30, 45, 53, 58)
= Anzeigen des Bildschirmmenüs (➡ 36)
> Starten der Aufnahme (➡ 22)
? Ändern des Aufnahmemodus (➡ 22)
@ Sprung zu einem bestimmten Zeitpunkt/Anzeigen des
Fernsehbildes als Bild-im-Bild (➡ 25, 32)
A Audiowahl (➡ 32)
B Übertragungsfenster
C Steuern des Fernsehers (➡ 21)
D Kanalwahl/Ändern der Seiten im GUIDE Plus+ System
E Anzeigen des S
HOWVIEW-Menüs (➡ 26)
§
(➡ 22)
F Eingangswahl (AV1, AV2, AV3, AV4 oder DV) (➡ 25, 47)
G 30 Sekunden vorspringen (➡ 32)
H Anzeigen des GUIDE Plus+ Schirms (➡ 18, 26)
Anzeigen der Programminformationen des GUIDE Plus+ Systems§
I
J Anzeigen des FUNCTIONS-Fensters (➡ 37)
K Rückkehr zum vorherigen Bildschirm
L Kapitel erstellen (➡ 32)
M Löschen (➡ 32)
N Bereitschaft/Freigabe der Timeraufnahme (➡ 26–28)
O Mit externen Geräten gekoppelte Timeraufnahme (➡ 29)
P Flexible Aufnahme (➡ 24)
Q Überspielen auf Tastendruck (➡ 44)
R Aufnahmefunktionen
§
Weitere Einzelheiten entnehmen Sie bitte der “User’s manual for
the GUIDE Plus+ system”.
[Hinweis]
≥Tasten wie [¥ REC] stehen weniger hervor als andere, um ein
versehentliches Drücken zu verhindern.
≥Wenn [EXT LINK] versehentlich gedrückt wird, schaltet sich das
Gerät aus; es befindet sich dann in Aufnahme-Bereitschaft.
Drücken Sie [EXT LINK] erneut, um die Aufnahme-Bereitschaft
abzuschalten.
≥Bei den Erläuterungen wird das Wort “Taste” weggelassen. So
wird beispielsweise statt “Drücken Sie die [ENTER]-Taste” lediglich
“Drücken Sie [ENTER]” verwendet.
≥Wenn Sie den Herstellercode Ihres Fernsehers eingeben, können
Sie den Fernseher von der Fernbedienung aus steuern (➡ 21).
RQT8203
12
ENTER
Drücken Sie zur Bestätigung [ENTER].
Weitere Bedienungsvorgänge ...
≥Einzelbild-Weiterschaltung (rückwärts/vorwärts):
Drücken Sie im Pausenmodus auf [2;] oder [;1] (links/rechts).
≥Suchlauf (vorwärts/rückwärts):
Drehen Sie während der Wiedergabe nach rechts oder links.
≥Zeitlupe (vorwärts/rückwärts):
Drehen Sie im Pausenmodus nach rechts oder links.
[Hinweis]
Drücken Sie auf das Smart Wheel, während Sie es drehen.
Wenn Sie beim Drehen fest drücken, wird möglicherweise
[3, 4, 2, 1] aktiviert.
84
Page 85

Gerät
1. 3
12
3
8
Öffnen der Frontabdeckung
Drücken Sie mit den Fingern auf den mit
1 Bereitschafts-/Ein-Schalter (Í/I) (➡ 18, 19)
Drücken Sie diesen Schalter, um das Gerät aus dem
Bereitschaftszustand einzuschalten und umgekehrt. Auch im
Bereitschaftsmodus verbraucht das Gerät etwas Strom.
2 Disc-Fach (➡ 22, 30)
3 Anschluss für DV-Camcorder (Digital Video) (➡ 47)
4 Leuchtet, wenn “Helligkeit des Anzeigefeldes
eingestellt ist (➡ 56).
5 SD-Kartenschacht (➡ 6)
6 Leuchtet, wenn das Festplatten-, DVD- oder SD-Laufwerk
gewählt ist.
7 Display (➡ unten)
8 Anschluss für Camcorder usw. (➡ 47)
9 Mit externen Geräten gekoppelte Timeraufnahme (➡ 29)
markierten Teil.
”
auf “Hell”
DV IN
4
S VIDEO IN
6
HDD
DVD SD
EXT LINK
L/MONO
-AUDIO IN-
R
9
:
: Kanalwahl (➡ 22)
; Öffnen/Schließen der Disc-Lade (➡ 22, 30)
< Laufwerkwahl (➡ 22, 30, 34)
Bei jedem Drücken von [DRIVE SELECT] wird das Laufwerk
umgeschaltet.
= Stopp (➡ 22, 31)
> Starten der Wiedergabe (➡ 30)
? Aufnahmestart/Fernbedienungssensor (➡ 22)
Angabe der Aufnahme-Stoppzeit (➡ 23)
Anschlüsse auf der Rückseite (➡ 15, 16)
7
DRIVE
OPEN/CLOSE
;
SELECT
<
=
CH
VIDEO IN
5
AV3
/k 1.3
>
REC
?
Anordnung der Bedienungselemente
Display am Gerät
123456
HDD
DVD
SD
REC
REC
PLAY
PLAY
CH
78 9
1 z.B.: [HDD]
PLAY
REC
HDD
Aufnahme
2 Überspielanzeige
3 Anzeige für Timeraufnahme mit externen Geräten
4 D.MIX (nur Mehrkanal-DVD-Audio)
Ein: Heruntermischen ist möglich (➡ 68).
Erloschen: Disc ermöglicht kein Heruntermischen; deshalb können nur die beiden Frontkanäle wiedergegeben werden (➡ 10, Hinweis zu
DVD-Audio).
5 Aufnahmemodus
6 Disctyp
7 Leuchtet, wenn das Festplatten-, DVD- oder SD-Laufwerk gewählt ist.
8 Hauptdisplay
9 Timeraufnahmeanzeige
DUB
Link
EXT
HDD
Wiedergabe
PLAY
D.MIX
HDD
Aufnahme/Wiedergabe
XP
SP
LP
EP
REC
DVD
-
RWRAM
+
VR
SD
PLAY
-
AVCD
RQT8203
13
85
Page 86

SCHRITT 1 Anschluss
SCHRITT
≥Die hier beschriebenen Geräteanschlüsse sind Beispiele.
≥Schalten Sie vor dem Anschluss alle Geräte aus, und lesen Sie die betreffenden Bedienungsanleitungen durch.
≥Peripheriegeräte und optionale Kabel sind getrennt erhältlich, wenn nicht anders angegeben.
1
Anschluss
∫ Empfohlener Fernseher-Anschluss
Welche Anschlussbuchse besitzt der Fernseher?
Scart Optimale Anschlussart.
AV IN
Komponenten
Video
S-Video Die Buchse liefert ein klareres Bild als die
-
COMPONENT
VIDEO IN
S VIDEO IN
≥Mit einem RGB-kompatiblen Fernseher erhalten
Sie ein hochwertiges RGB-Videobild.
≥Besitzt der Fernseher eine Q Link-Funktion,
stehen verschiedene nützliche Zusatzfunktionen
zur Verfügung.
Diese Buchsen liefern ein besseres Bild als die SVideobuchse.
≥Wenn Ihr Fernseher Progressive Scan-tauglich ist,
erhalten Sie ein hochwertiges ProgressivVideobild.
Bei einem Progressive Scan-tauglichen
Röhrenfernseher raten wir von dieser Anschlussart
ab, da es zu Flimmern kommen kann.
Videobuchse.
Erforderliche
Kabel
21-poliges
Scart-Kabel
mit kompletter
Belegung
3 Videokabel ➡ 16 ➡ 19
S-Videokabel ➡ 16 ➡ 19
Anschluss
siehe Seite
➡ 15
Einstellung des
Fernsehers
siehe Seite
➡ 19
≥Bei einem
Fernseher mit
Q Link ➡ 18
Audio/Video Häufig verwendeter Standardanschluss.
AUDI O IN
R L
VIDEO IN
Audio/VideoKabel
(mitgeliefert)
➡ 16
➡ 19
Q Link-Funktionen
Q Link bietet eine Reihe praktischer Funktionen (Einzelheiten siehe ➡ 69). Wenn Sie die Q Link-Funktionen verwenden wollen, muss ein 21poliges Scart-Kabel verwendet werden, bei dem alle Kontakte verbunden sind.
Die folgenden Geräte anderer Hersteller besitzen eine ähnliche Funktion wie Q Link von Panasonic. Für Einzelheiten schlagen Sie bitte in der
Bedienungsanleitung Ihres Fernsehers nach oder fragen Sie Ihren Händler.
≥Q Link (eingetragenes Warenzeichen von Panasonic)
≥DATA LOGIC (eingetragenes Warenzeichen von Metz)
≥Easy Link (eingetragenes Warenzeichen von Philips)
∫ Wenn das Gerät längere Zeit nicht verwendet
wird
Trennen Sie es von der Netzsteckdose ab, um Strom zu sparen.
Auch im ausgeschalteten Zustand verbraucht das Gerät eine
geringe Menge Strom.
ca. 3 W (im Stromsparmodus)
Wenn “Power Save” auf “Ein” eingestellt ist, arbeitet die
“Schnellstart” -Funktion nicht.
≥Megalogic (eingetragenes Warenzeichen von Grundig)
≥SMARTLINK (eingetragenes Warenzeichen von Sony)
∫ Direkter Anschluss des Geräts an einen
Fernseher
Wenn Sie das Gerät über eine AV-Schalteinheit oder einen
Videocassettenrecorder an den Fernseher anschließen, wird das
Videosignal vom Kopierschutzsystem kontrolliert und das Bild
möglicherweise nicht korrekt angezeigt.
Fernseher
Dieses Gerät
Fernseher
Videorecorder
RQT8203
14
Videorecorder
≥Nur bei Anschluss an einen Fernseher mit eingebautem
Videocassettenrecorder
Nehmen Sie den Anschluss an die Eingangsbuchsen des
Fernsehers vor, wenn sowohl Fernseher- als auch
Videocassettenrecorder-Eingangsbuchsen vorhanden sind.
86
Dieses Gerät
Page 87

Anschluss an einen Fernseher mit 21-poliger Scart-Buchse und an einen
RF OUT
RF IN
AV4 IN
OUT
AUDIO
VIDEO
S VIDEO OUT
COMPONENT
VIDEO
OUT
(PROGRESSIVE/
INTERLACE)
OPTICAL
DIGITAL AUDIO OUT
(PCM/BITSTREAM)
S VIDEO
AV4 IN
Videocassettenrecorder
Wenn der Fernseher keine 21-polige Scart-Buchse besitzt (➡ 16)
≥Dieses Gerät ermöglicht Timeraufnahmen unter Verwendung der Programmierfunktion des Fernsehers (z.B. IDTV) (➡ 29).
≥Die AV2- und AV4-Scartbuchsen an Panasonic-Fernsehern sind mit der Q Link-Funktion kompatibel.
mitgeliefertes Zubehör.
nicht mitgeliefertes Zubehör.
erforderliche Anschlüsse. Gehen Sie in der nummerierten Reihenfolge vor.
4
1
An Antenne
Verteiler
Antennen-
kabel
1
Rückseite dieses Geräts
Wenn Sie die
Antenne auch an
Ihren
Videocassettenrecorder
anschließen
wollen, verwenden
Sie einen Verteiler.
VHF/UHF
RF IN
VHF/UHF
RF IN
HF- Koaxialkabel
2
RF OUT
RF IN
(TV)
AV1
AV2 (DECODER/EXT)
21-poliges
Scart-Kabel
AV OUT
An Netzsteckdose
AV IN
Rückseite des
(Netzstrom 220 bis 240 V, 50 Hz)
Fernsehers
21-poliges Scart-Kabel
3
mit kompletter Belegung
Erst anschließen, wenn alle
anderen Kabel bereits
angeschlossen sind.
Netzkabel
SCHRITT 1 Anschluss
4
Lüfter
S VIDEO OUT
VIDEO
L
R
AV4 IN
AUDIO
L
S VIDEO
R
AV4 IN
OUT
Y
COMPONENT
VIDEO
OUT
(PROGRESSIVE/
INTERLACE)
P
B
PR
OPTICAL
DIGITAL AUDIO OUT
(PCM/BITSTREAM)
AC IN
Buchse AV1
≥
Wenn Ihr Fernseher mit RGB-Eingangssignalen kompatibel ist, können
Sie ihn über ein 21-poliges Scart-Kabel mit kompletter Belegung an
den RGB-Videoausgang dieses Geräts anschließen (
Zum Aktivieren des RGB-Ausgangs wählen Sie im SETUP-Menü
➡
57) unter “AV1 Ausgang (Scart)” die Option “RGB (ohne
(
Component)”, wenn der Abstimmvorgang beendet ist (
≥
Wenn Ihr Fernseher mit Q-Link-Funktionen ausgestattet ist und
Sie ihn über ein 21-poliges Scart-Kabel mit kompletter Belegung
anschließen, stehen Ihnen diese Funktionen zur Verfügung
Rückseite des
Videocassettenrecorders
➡
unten).
➡
18, 19).
(➡69).
∫ RGB
Bei RGB-Video werden für die Primärfarben des Lichtes [Rot (R), Grün (G) und Blau (B)] getrennte Signale verwendet. Dank der getrennten
Übertragung der drei Farbsignale werden Störungen reduziert und man erhält eine noch bessere Bildqualität.
RQT8203
15
87
Page 88

SCHRITT
RF OUT
RF IN
COMPONENT
VIDEO
OUT
(PROGRESSIVE/
INTERLACE)
OPTICAL
DIGITAL AUDIO OUT
(PCM/BITSTREAM)
S VIDEO OUT
S VIDEO
AV4 IN
AV4 IN
OUT
AUDIO
VIDEO
Y
P
B
PR
COMPONENTCOMPONENT
VIDEOVIDEO OUTOUT
(PROGRESSIVE/ (PROGRESSIVE/
INTERLACE)INTERLACE)
OPTICALOPTICAL
DIGITAL AUDIO OUTDIGITAL AUDIO OUT
(PCM/BITSTREAM)(PCM/BITSTREAM)
AV4 IN AV4 IN OUTOUT
AUDIOAUDIO
VIDEOVIDEO
R
L
R
L
S VIDEO OUTS VIDEO OUT
S VIDEOS VIDEO
AV4 INAV4 IN
Y
P
B
P
R
COMPONENTCOMPONENT
VIDEOVIDEO OUTOUT
(PROGRESSIVE/ (PROGRESSIVE/
INTERLACE)INTERLACE)
OPTICALOPTICAL
DIGITAL AUDIO OUTDIGITAL AUDIO OUT
(PCM/BITSTREAM)(PCM/BITSTREAM)
AV4 IN AV4 IN OUTOUT
AUDIOAUDIO
VIDEOVIDEO
R
L
R
L
S VIDEO OUTS VIDEO OUT
S VIDEOS VIDEO
AV4 INAV4 IN
1
Anschluss
Anschluss eines Fernsehers mit AUDIO/VIDEO-Buchsen und eines Videocassettenrecorder
Anschluss des Fernsehers über das 21-polige Scart-Kabel (➡ 15)
An Antenne
Verteiler
Antennen-
kabel
1
VHF/UHF
RF IN
mitgeliefertes Zubehör
nicht mitgeliefertes Zubehör
erforderliche Anschlüsse. Gehen Sie in der nummerierten Reihenfolge vor.
4
Rückseite des Fernsehers
AUDIO IN
VIDEO IN
R L
Rot Weiß Gelb
An Netzsteckdose
(Netzstrom 220 bis 240 V,
50 Hz)
SCHRITT 1 Anschluss
HF- Koaxialkabel
1
2
3
Erst anschließen, wenn alle
anderen Kabel bereits
angeschlossen sind.
Netzkabel
Audio/Video-Kabel
S VIDEO OUT
VIDEO
RF OUT
RF IN
AV1 (TV)
AV2
(
DECODER/EXT)
Gelb
Weiß
Rot
L
R
AV4 IN
AUDIO
Gelb
L
Weiß
Rot
S VIDEO
R
AV4 IN
OUT
Y
COMPONENT
VIDEO
OUT
(PROGRESSIVE/
INTERLACE)
P
B
PR
OPTICAL
DIGITAL AUDIO OUT
(PCM/BITSTREAM)
Rückseite dieses Geräts
Wenn Sie die Antenne auch
an Ihren
Audio/Video-Kabel
Lüfter
Videocassettenrecorder
anschließen wollen,
verwenden Sie einen Verteiler.
Rot Weiß Gelb
VHF/UHF
RF IN
R L
AUDIO OUT VIDEO OUT
Anschluss auch über ein 21-poliges Scart-Kabel an
die Buchse AV2 dieses Geräts möglich.
Rückseite des
Videocassettenrecorders
Anschluss eines Fernsehers mit S VIDEO- oder COMPONENT VIDEO-Buchsen
Rückseite des Fernsehers
S VIDEO IN
COMPONENT
VIDEO IN
AUDI O IN
R L
VIDEO IN
Rückseite des Fernsehers
S VIDEO IN
COMPONENT
VIDEO IN
AUDI O IN
R L
VIDEO IN
4
AC IN
RQT8203
16
Rot Weiß Gelb
Audio/
Video-
Kabel
S-Videokabel
Gelb
Weiß
Rot
Rot Weiß Gelb
Audio/
Video-
Kabel
Videokabel
Gelb
Weiß
Rot
Buchse COMPONENT VIDEO OUT
Buchse S VIDEO OUT
Verbinden Sie diese Buchse über ein S-Videokabel mit
der Buchse S VIDEO IN des Fernsehers.
Die Buchse S VIDEO OUT liefert eine bessere
Bildqualität als die Buchse VIDEO OUT. (Die mögliche
Bildqualität hängt auch vom Fernseher ab.)
Verbinden Sie diese Buchsen über Videokabel mit den
COMPONENT VIDEO IN-Buchsen des Fernsehers.
Buchsen liefern wahlweise ein Zeilensprung- oder ein Progressiv-Ausgangssignal
➡
68) für eine noch bessere Bildqualität als mit der Buchse S VIDEO OUT.
(
≥Beachten Sie beim Anschließen die Farben.
Für Progressiv-Ausgangssignal (➡ 20)
Hinweis zu PAL-progressiv-tauglichen Fernsehern (➡ 6)
∫ Komponenten-Videoausgang
Die Komponenten-Videobuchsen übertragen Farbdifferenzsignal (PB/PR) und Luminanzsignal (Y) getrennt und gewährleisten eine exzellente
Farbreproduktion. Besitzt der Fernseher eine Progressiv-Anschlussbuchse, verbinden Sie sie mit der Progressiv-Ausgangsbuchse dieses
Geräts, um eine hohe Bildqualität zu erhalten (➡ 68).
88
Die
Page 89

Anschluss eines Digital-/Satellitenreceivers oder Decoders
AV2 (DECODER/EXT)
AV1
(TV)
AV4 IN AV4 IN
AUDAUD
VIDEVIDE
R
L
RF OUTRF OUT
RF INRF IN
P
B
PR
OPTICALOPTICAL
DIGITAL AUDIO OUTDIGITAL AUDIO OUT
(PCM/BITSTREAM)(PCM/BITSTREAM)
Y
P
B
PR
COMPONENTCOMPONENT
VIDEOVIDEO OUTOUT
(PROGRESSIVE/(PROGRESSIVE/
INTERLACE)INTERLACE)
OPTICALOPTICAL
DIGITAL AUDIO OUTDIGITAL AUDIO OUT
(PCM/BITSTREAM)(PCM/BITSTREAM)
AV4 IN AV4 IN OUTOUT
AUDIOAUDIO
VIDEOVIDEO
R
L
R
L
S VIDEO OUTS VIDEO OUT
S VIDEOS VIDEO
AV4 INAV4 IN
≥Ein Decoder ist ein Gerät zum Decodieren von verschlüsselten Sendungen (Pay TV).
≥Nehmen Sie eine Anpassung an das angeschlossene Gerät vor (➡ 57), indem Sie “AV2 Eingang” und “AV2 Buchse” im Menü SETUP
einstellen, nachdem Sie abgestimmt haben (➡ 18, 19).
So können Sie Videosignale vom Decoder auf dem Fernseher
wiedergeben, während sich das Gerät im Stopp- oder
Rückseite des
Digitalreceivers,
Satellitenreceivers
oder Decoders
AV OUT
Aufnahmemodus befindet
Wenn der Fernseher an der Buchse AV1 und der Decoder an der
Buchse AV2 dieses Geräts angeschlossen ist, drücken Sie
[0]i[ENTER]. (“DVD” erscheint im Display des Geräts.)
Zum Abschalten drücken Sie die Tasten erneut. (“TV” erscheint im
Display des Geräts.)
≥Ist der Fernseher für RGB-Eingangssignale ausgelegt, können
21-poliges Scart-Kabel
die RGB-Ausgangssignale des Decoders auf gleiche Weise von
diesem Gerät ausgegeben werden.
Rückseite dieses
Geräts
Anschluss eines Verstärkers oder einer Systemanlage
∫ Wiedergabe von Mehrkanalton einer DVD-
Video
Schließen Sie einen mit Dolby Digital-, DTS- und MPEG-Decoder
ausgestatteten Verstärker über ein optisches Digitalkabel an und
ändern Sie die Einstellung von “Digital Audio Ausgang” (➡ 56),
nachdem Sie abgestimmt haben (➡ 18, 19).
≥Vergewissern Sie sich vor dem Kauf eines optischen Digital-
Audiokabels (nicht mitgeliefert), dass der Stecker in das
betreffende Gerät passt.
≥Nur DVD-taugliche DTS Digital-Surrounddecoder können
verwendet werden.
≥Auch bei dieser Anschlussart erhält man bei der Wiedergabe von
DVD-Audio nur 2 Kanäle.
Rückseite des Verstärkers
OPTICAL IN
∫ Anschluss eines Stereoverstärkers
Rückseite des Verstärkers
AUDIO IN
R L
SCHRITT 1 Anschluss
Optisches DigitalAudiokabel
Das Kabel nicht
knicken.
Rot Weiß
Den Stecker mit
dieser Seite nach
Audiokabel
oben ganz
einstecken.
Weiß
Rot
Rückseite dieses Geräts
Rückseite dieses Geräts
RQT8203
17
89
Page 90

SCHRITT
1.3
HDD
DVDSDSD
TV
DVD/TV
ENTER
2
Einstellen der Empfangskanäle
SCHRITT 2 Einstellen der Empfangskanäle
RQT8203
18
Í/ l
HDD
DVD SD
EXT LINK
CH
S VIDEO IN
VIDEO IN
L/MONO
-AUDIO IN-
DV IN
R
AV3
X CH W
DVD
Í DVD
3,4,2,1
ENTER
Í
DIRECT TV REC
HDD
1
4 5 6
7
CANCEL
SKIP
STOP
C
E
H
C
/
G
O
R
P
R
O
T
U
T
C
A
N
E
E
G
I
R
M
I
V
P
D
A
O
N
T
SUB MENU
S
DISPLAY
REC
TIME SLIP
TV
Í
AV
DVD
2 3
8
INPUT SELECT
0
PAU SE
D
I
U
G
K
ENTER
STATUS
CHAPTER
REC MODE
AUDI O
DVD/ TV
CH
ShowView
9
MANUAL SKIP
SLOW/SEARCH
PLAY/x1.3
E
CREATE
EXT LINK
DUBBING
VOLUME
PAG E
CH
F
U
N
C
T
I
O
N
S
RETURN
ERASE
TIMER
F Rec
Das GUIDE Plus+ System
Das GUIDE Plus+ System zeigt die vom Host-Sender
empfangenen Programminformationen auf dem
Fernsehschirm in Form einer TV-Programmzeitschrift an. Das
System erleichtert die Aufnahme-Programmierung: Sie
brauchen lediglich das gewünschte Programm aus der
angezeigten Liste auszuwählen. Darüber hinaus bietet das
System auch die Möglichkeit, nur eine bestimmte
Programmkategorie aufzulisten.
Das GUIDE Plus+ System steht in folgenden Ländern zur
Verfügung:
Belgien/Deutschland/Frankreich/Holland/Italien/Schweiz/
Spanien/Österreich
(ab dem 30. April 2005)
≥In einigen Regionen der oben aufgeführten Länder steht
dieser Dienst möglicherweise nicht zur Verfügung.
≥Die versorgten Bereiche können sich möglicherweise
ändern.
[Hinweis]
Bevor das GUIDE Plus+ System eingerichtet werden kann,
muss eine Sender-Übernahme (➡ rechts) oder ein
automatischer Einstellvorgang (➡ 19) ausgeführt werden.
≥Das GUIDE Plus+ System arbeitet nur einwandfrei, wenn die
Uhr richtig eingestellt ist.
Weitere Einzelheiten entnehmen Sie bitte dem “User’s manual
for the GUIDE Plus+ system”.
≥Weitere Informationen finden Sie auch auf der folgenden
Homepage:
http://www.europe.guideplus.com
90
OPEN/CLOSE
DRIVE
SELECT
GUIDE
RETURN
Sender-Übernahme (Setup mit Q LinkFunktionen)
REC
/k1.3
Wenn ein mit Q Link-Funktion ausgestatteter (➡ 69)
Fernseher über ein komplett belegtes 21-poliges ScartKabel angeschlossen ist (➡ 15).
Die Belegungspositionen können vom Fernseher heruntergeladen werden.
Wenn der Sender Uhrzeit- und Datumsinformationen aussendet,
stellt das Gerät die Uhr automatisch ein.
1 Schalten Sie den Fernseher ein und
wählen Sie je nach Anschlussart den
richtigen AV-Eingang.
2 Drücken Sie [Í DVD], um das Gerät
einzuschalten.
Das Herunterladen vom Fernseher beginnt.
Datenübernahme von TV
Pos 4
Übernahme der TV-Daten, bitte warten.
RETURN:
abbrechen
RETURN
≥Wenn das Ländereinstellmenü erscheint, wählen Sie mit
[3, 4, 2, 1] das Land und drücken Sie dann [ENTER].
Country
België
Belgique
Belgien
Danmark
España
France
SELECT
Italia
Nederland
ENTER
Norge
RETURN
RETURN:
Wenn Sie im Ländereinstellmenü “Schweiz”, “Suisse” oder
“Svizzera” wählen oder wenn die TV-Abstimmung auf
Schweiz eingestellt ist, erscheint das “Power Save”Einstellmenü. Wählen Sie “Ein” oder “Aus” (➡ 57).
Wenn das Herunterladen beendet ist, erscheint folgende
Meldung.
Autom. Einstellung
Möchten Sie das
GUIDE Plus+ System initialisieren ?
Ja Nein
SELECT
(Die obige Meldung erscheint auch in Ländern, in denen
das GUIDE Plus+ System nicht zur Verfügung steht. Das
System kann jedoch nicht eingerichtet werden.)
≥Wenn Sie das GUIDE Plus+ System einrichten wollen
Wählen Sie mit [2, 1] die die Option “Ja”, und
drücken Sie [ENTER].
Das Einrichten des GUIDE Plus+ Systems dauert etwa 2
Stunden.
(➡ User’s manual for the GUIDE Plus+ system)
Wenn Sie das GUIDE Plus+ System nicht einrichten wollen
≥
Wählen Sie mit [2, 1] die die Option “Nein”, und
drücken Sie [ENTER].
Das Fernsehbild erscheint. Die Sender-Übernahme ist
beendet.
So wird der Vorgang abgebrochen
Drücken Sie [RETURN].
∫ Wenn das Uhreinstellmenü erscheint
Stellen Sie die Uhr manuell ein (➡ 60).
∫ Um zu prüfen, ob die Sender korrekt eingestellt
worden sind (➡ 58)
∫ Um den Sender-Übernahme-Vorgang erneut zu
starten (➡ 59)
∫ So wird das GUIDE Plus+ System erneut
eingerichtet
Drücken Sie [GUIDE], um den Einrichtungsbildschirm des GUIDE
Plus+ Systems anzuzeigen.
(➡ User’s manual for the GUIDE Plus+ system)
leave
ENTER:
Deutschland
Österreich
Portugal
Suomi
Sverige
Schweiz
Suisse
Svizzera
Others
access
Page 91

Autom. Einstellung
(Setup ohne Q Link-Funktionen)
≥Bei Anschluss an einen Fernseher mit VIDEO OUT-, S
VIDEO OUT- oder COMPONENT VIDEO OUT-Buchsen
(➡ 16).
≥Bei Anschluss eines Fernsehers ohne Q Link-
Funktion (➡ 69).
Die Funktion Autom. Einstellung speichert automatisch alle empfangbaren
TV-Sender. Wenn der Sender Zeit- und Datumsinformationen aussendet,
stellt das Gerät die Uhr automatisch ein.
1 Schalten Sie den Fernseher ein und
wählen Sie je nach Anschlussart den
richtigen AV-Eingang.
2 Drücken Sie [Í DVD], um das Gerät
einzuschalten.
Das Länderauswahlmenü erscheint.
Country
België
Belgique
Belgien
Danmark
España
France
SELECT
Italia
Nederland
ENTER
Norge
RETURN
RETURN:
Wenn Sie “Schweiz”, “Suisse” oder “Svizzera” wählen,
erscheint das “Power Save”-Einstellmenü. Wählen Sie “Ein”
oder “Aus” (➡ 57).
leave
ENTER:
Deutschland
Österreich
Portugal
Suomi
Sverige
Schweiz
Suisse
Svizzera
Others
access
3 Drücken Sie [3, 4, 2, 1] zur Wahl
des Landes.
4 Drücken Sie [ENTER].
Der Autom. Einstellung-Vorgang beginnt. Dieser Vorgang
dauert etwa 8 Minuten.
Autom. Einstellung
∫ Wenn das Uhreinstellmenü erscheint
Stellen Sie die Uhr manuell ein (➡ 60).
∫ Um zu prüfen, ob die Sender korrekt eingestellt
worden sind (➡ 58)
∫ Zum erneuten Ausführen der Autom.
Einstellung (➡ 59)
Die Autom. Einstellung kann auch wie folgt neu ausgeführt werden.
Das Gerät muss eingeschaltet sein und sich im Stoppmodus befinden.
Halten Sie [X CH] und [CH W] am Gerät gedrückt, bis das
Ländereinstellmenü erscheint.
≥Alle Einstellungen außer Passwort, Uhrzeit und Sicherungsstufe
werden auf die werksseitigen Voreinstellungen zurückgesetzt.
Auch die Timeraufnahmeprogramme werden gelöscht.
∫ So wird das GUIDE Plus+ System erneut
eingerichtet
Drücken Sie [GUIDE], um den Einrichtungsbildschirm des GUIDE
Plus+ Systems anzuzeigen.
(➡ User’s manual for the GUIDE Plus+ system)
SCHRITT 2 Einstellen der Empfangskanäle
Kan 1
Suche Sender, bitte waren.
RETURN: abbrechen
RETURN
Wenn der automatische Einstellvorgang beendet ist,
erscheint folgende Meldung.
Autom. Einstellung
Möchten Sie das
GUIDE Plus+ System initialisieren ?
Ja Nein
SELECT
(Die obige Meldung erscheint auch in Ländern, in denen
das GUIDE Plus+ System nicht zur Verfügung steht. Das
System kann jedoch nicht eingerichtet werden.)
≥Wenn Sie das GUIDE Plus+ System einrichten wollen
Wählen Sie mit [2, 1] die die Option “Ja”, und
drücken Sie [ENTER].
Das Einrichten des GUIDE Plus+ Systems dauert etwa 2
Stunden.
(➡ User’s manual for the GUIDE Plus+ system)
Wenn Sie das GUIDE Plus+ System nicht einrichten wollen
≥
Wählen Sie mit [2, 1] die die Option “Nein”, und
drücken Sie [ENTER].
Das Fernsehbild erscheint. Der automatische
Einstellvorgang ist beendet.
So wird der Vorgang abgebrochen
Drücken Sie [RETURN].
RQT8203
19
91
Page 92

Einrichten von Fernseher und Fernbedienung
HDD
DVDSDSD
TV
DVD/TV
ENTER
DVD
4 Wählen Sie mit [3, 4] die Option
TV
Zifferntasten
3,4,2,1
ENTER
Í
DIRECT TV REC
HDD
1
4 5 6
7
CANCEL
SKIP
STOP
K
C
E
H
C
/
G
O
R
P
R
O
T
U
T
C
A
N
E
E
G
I
R
M
I
V
P
D
A
O
N
T
SUB MENU
S
DISPLAY
REC
TIME SLIP
Í
AV
DVD
2 3
8
INPUT SELECT
0
PAU SE
D
I
U
G
ENTER
CREATE
STATUS
CHAPTER
REC MODE
EXT LINK
AUDI O
DUBBING
DVD/ TV
VOLUME
CH
PAG E
CH
ShowView
9
MANUAL SKIP
SLOW/SEARCH
PLAY/x1.3
E
RETURN
ERASE
TIMER
F Rec
F
U
N
C
T
I
O
N
S
TVSteuertasten
FUNCTIONS
RETURN
Wahl des Fernsehtyps und des
Einrichten von Fernseher und Fernbedienung
Seitenverhältnisses
Nehmen Sie die Einstellung entsprechend Ihres Fernsehers und
Ihrer persönlichen Vorliebe vor.
1 Im Stoppmodus
Drücken Sie [FUNCTIONS].
FUNCTIONS
Wiedergabe
Aufnahme
Kopieren
ENTER
RETURN
HDD
DIRECT NAVIGATOR
EPG
GUIDE Plus+
TIMER RECORDING
2
3
1
ShowView
DUBBING
HDD
Weit. Funktionen
Verfügbarer Platz
30:00 SP
2 Wählen Sie mit [3, 4] die Option
“Weit. Funktionen”, und drücken Sie
[ENTER].
3 Wählen Sie mit [3, 4] die Option
“SETUP”, und drücken Sie [ENTER].
SETUP
Sendertabelle
Disc
Video
Audio
Display
Anschluss
Sonstige
Ändern
Neu erstellen
Datenübernahme von TV
SELECT
TAB
RETURN
“Anschluss”, und drücken Sie [1].
5 Wählen Sie mit [3, 4] die Option “TV
Bildschirmformat”, und drücken Sie
[ENTER].
6 Wählen Sie das Seitenverhältnis mit
[3, 4], und drücken Sie [ENTER].
SETUP
Sendertabelle
Disc
Video
Audio
Display
Anschluss
Sonstige
≥16:9: 16:9-Breitbildfernseher
≥4:3: Fernseher mit 4:3-Format
[HDD] [RAM] Titel werden so aufgenommen, wie sie auf
[DVD-V] Im Breitbildformat aufgezeichnete Videos werden
≥Letterbox: Fernseher mit 4:3-Format
Ein Breitbild wird im Letterbox-Format angezeigt (➡ 68).
TV Bildschirmformat
16:9-Breitbild-TV
16:9
4:3-TV
4:3
Letterbox
SELECT
ENTER
RETURN
dem Schirm angezeigt werden.
im Pan & Scan-Format wiedergegeben (außer bei
Sperrung durch den Disc-Hersteller) (➡ 68).
Für ein progressives Videobild
Um die Vorteile von Progressive Video genießen zu können,
müssen Sie die COMPONENT VIDEO OUT-Buchsen dieses
Geräts mit einem Progressive Scan-tauglichen LCD-/PlasmaFernseher oder LCD-Projektor verbinden (➡ 68).
1 Im Stoppmodus
Drücken Sie [FUNCTIONS].
2 Wählen Sie mit [3, 4] die Option
“Weit. Funktionen”, und drücken Sie
[ENTER].
3 Wählen Sie mit [3, 4] die Option
“SETUP”, und drücken Sie [ENTER].
4 Wählen Sie mit [3, 4] die Option
“Anschluss”, und drücken Sie [1].
5 Wählen Sie mit [3, 4] die Option
“Progressive”, und drücken Sie
[ENTER].
6 Wählen Sie mit [3, 4] die Option
“Ein”, und drücken Sie [ENTER].
Ein Progressivsignal wird ausgegeben.
[Hinweis]
≥Wenn ein herkömmlicher Röhrenfernseher oder ein in den PAL-
Modus geschalteter Mehrnormen-Fernseher an den
Progressivausgang angeschlossen wird, kann das Bild flimmern,
selbst wenn der Fernseher progressivtauglich ist. Schalten Sie in
einem solchen Fall “Progressive” aus (➡ 37).
≥Die COMPONENT VIDEO OUT-Buchsen liefern kein
Ausgangssignal, wenn “AV1 Ausgang (Scart)” im SETUP-Menü
auf “RGB (ohne Component)” eingestellt ist. Stellen Sie diesen
Parameter auf “Video (mit Component)” oder “S Video (mit
Component)” ein (➡ 57).
≥Wird das Gerät über die Buchsen VIDEO OUT, S VIDEO OUT
oder AV1 an den Fernseher angeschlossen, liefert der Ausgang
unabhängig von der Einstellung ein Zeilensprung-Videobild.
RQT8203
20
So kehren Sie zum vorhergehenden Bildschirm zurück
Drücken Sie [RETURN].
So wird das Menü verlassen
Drücken Sie wiederholt [RETURN].
92
Page 93

Steuern des Fernsehers
SETUP
Sendertabelle
Fernbedienung
Drücken Sie auf der Fernbedienung
gleichzeitig “±” und “ENTER” länger als
2 Sekunden.
Disc
Video
Die TV-Steuertasten der Fernbedienung können so programmiert
werden, dass mit ihnen der Fernseher ein-/ausgeschaltet, der
Eingangsmodus des Fernsehers umgeschaltet, der Fernsehkanal
gewählt und die Lautstärke eingestellt werden kann.
1 Die Fernbedienung auf den Fernseher richten
Während Sie [Í TV] gedrückt halten,
geben Sie den Code mit den
Zifferntasten ein.
z.B.: 01: [0] ➡ [1] 10: [1] ➡ [0]
Hersteller und Code
Marke Code Marke Code
Panasonic 01/02/03/04/45NOKIA 25/26/27
AIWA 35 NORDMENDE 10
AKAI 27/30 ORION 37
BLAUPUNKT 09 PHILIPS 05/06
BRANDT 10/15 PHONOLA 31/33
BUSH 05/06 PIONEER 38
CURTIS 31 PYE 05/06
DESMET 05/31/33 RADIOLA 05/06
DUAL 05/06 SABA 10
ELEMIS 31 SALORA 26
FERGUSON 10 SAMSUNG 31/32/43
GOLDSTAR/LG 31 SANSUI 05/31/33
GOODMANS 05/06/31 SANYO 21
GRUNDIG 09 SBR 06
HITACHI 22/23/31/40/
41/42
INNO HIT 34 SELECO 06/25
IRRADIO 30 SHARP 18
ITT 25 SIEMENS 09
JVC 17/39 SINUDYNE 05/06/33
LOEWE 07 SONY 08
METZ 28/31 TELEFUNKEN 10/11/12/
MITSUBISHI 06/19/20 THOMSON 10/15/44
MIVAR 24 TOSHIBA 16
NEC 36 WHITE
SCHNEIDER 05/06/29/
30/31
13/14
05/06
WESTINGHOUSE
Wenn andere Panasonic-Geräte auf
die Fernbedienung ansprechen
Wenn mehrere Panasonic-Geräte dicht beieinander stehen,
ändern Sie den Fernsteuercode an diesem Recorder und an der
Fernbedienung (die Codes müssen identisch sein).
Im Normalfall verwenden Sie den werksseitig voreingestellten
Code “DVD 1”.
1 Im Stoppmodus
Drücken Sie [FUNCTIONS].
2 Wählen Sie mit [3, 4] die Option
“Weit. Funktionen”, und drücken Sie
[ENTER].
3 Wählen Sie mit [3, 4] die Option
“SETUP”, und drücken Sie [ENTER].
4 Wählen Sie mit [3, 4] die Option
“Sonstige”, und drücken Sie [1].
5 Wählen Sie mit [3, 4] die Option
“Fernbedienung”, und drücken Sie
[ENTER].
6 Wählen Sie mit [3, 4] den Code
(“DVD 1”, “DVD 2” oder “DVD 3”) und
drücken Sie [ENTER].
Einrichten von Fernseher und Fernbedienung
7 Ändern des Codes an der Fernbedienung
Während Sie [ENTER] drücken,
drücken Sie die Zifferntaste ([1], [2]
oder [3]) mindestens 2 Sekunden
lang.
8 Drücken Sie [ENTER].
2 Testen Sie die Fernbedienung, indem
Sie das Fernsehgerät einschalten
und die Kanäle umschalten.
≥Wiederholen Sie den Vorgang, bis Sie den Code finden,
der eine korrekte Bedienung ermöglicht.
≥Falls die Marke Ihres Fernsehgeräts nicht aufgelistet ist
oder der für Ihr Fernsehgerät angegebene Code keine
Steuerung Ihres Fernsehgeräts gestattet, dann ist diese
Fernbedienung nicht mit Ihrem Fernsehgerät kompatibel.
[Hinweis]
≥Wenn für Ihre Fernsehermarke mehr als ein Code aufgeführt ist,
wählen Sie den Code, der ein korrektes Steuern ermöglicht.
∫ Wenn folgende Anzeige im Display des Geräts
erscheint
Fernbedienungscode
des Geräts
Stellen Sie an der Fernbedienung denselben Code ein wie am
Gerät (➡ Schritt 7).
[Hinweis]
Wenn Sie “Daten löschen” im SETUP-Menü ausführen, wird das
Gerät auf den Code “DVD 1” zurückgestellt. Ändern Sie den
Fernsteuercode zu 1 (➡ Schritt 7).
So kehren Sie zum vorhergehenden Bildschirm zurück
Drücken Sie [RETURN].
So wird das Menü verlassen
Drücken Sie wiederholt [RETURN].
RQT8203
21
93
Page 94

Aufnehmen von Fernsehprogrammen
1.3
HDD
DVDSDSD
TV
ENTER
D.MIX
REC
Aufnehmen von Fernsehprogrammen
RQT8203
22
2
HDD
Festplatten-, DVD-Anzeige
Zifferntasten
DVD
Í
DIRECT TV REC
HDD
1
4 5 6
7
CANCEL
SKIP
S VIDEO IN
DV IN
TV
Í
AV
DVD
2 3
8
0
VIDEO IN
L/MONO
-AUDIO IN-
AV3
CH
ShowView
9
INPUT SELECT
MANUAL SKIP
SLOW/SEARCH
DVD SD
EXT LINK
R
VOLUME
PAG E
CH
3
DRIVE
OPEN/CLOSE
SELECT
CH
∫
1
1
3
;
PAU SE
I
U
G
K
ENTER
STATUS
REC MODE
AUDI O
PLAY/x1.3
D
E
CREATE
CHAPTER
EXT LINK
DUBBING
F
U
N
C
T
I
O
N
S
RETURN
ERASE
TIMER
F Rec
4
3,4,2,1
ENTER
5
AUDIO
∫
STOP
C
E
H
C
/
G
O
R
P
R
O
T
U
T
C
A
N
E
E
G
I
R
M
I
V
P
D
A
O
N
T
SUB MENU
S
DISPLAY
REC
TIME SLIP
[HDD]
≥Auf die Festplatte können bis zu 500 Titel aufgezeichnet werden.
(Bei langem durchgehendem Aufnehmen erfolgt nach jeweils 8
Stunden eine Titelunterteilung.)
[RAM] [-R] [-RW‹V›]
≥Auf eine Disc können bis zu 99 Titel aufgezeichnet werden.
[+R]
≥Auf eine Disc können bis zu 49 Titel aufgezeichnet werden.
[SD]
≥Es kann nicht auf eine Karte aufgenommen werden.
Siehe auch die Hinweise unter “Vor dem Aufnehmen” (➡ 23).
Vorbereitung
≥Schalten Sie den Fernseher ein und wählen Sie je nach
Anschlussart den richtigen Videoeingang.
≥Schalten Sie das Gerät ein.
1 Drücken Sie [HDD] oder [DVD], um
das Aufnahme-Laufwerk zu wählen.
Die Festplatten- oder DVD-Anzeige am Gerät leuchtet auf.
2 Wenn das DVD-Laufwerk gewählt wurde
Drücken Sie [< OPEN/CLOSE] am
Gerät, um die Lade auszufahren und
eine Disc einzulegen.
≥Drücken Sie die Taste erneut, um die Lade zu schließen.
≥Bei einer 8 cm DVD-RAM oder 8 cm DVD-R muss die Disc
aus der Cartridge herausgenommen werden.
Mit Etikett nach
oben einlegen.
94
∫ Disc mit Cartridge
Mit dem Pfeil nach
innen.
Richtig einlegen, so dass
ein Klicken zu hören ist.
5
REC
/k1.3
zu wählen.
DCCH BS
DUB
EXT
MPEG4 D.MIX
HDD
DVD
SD
Zur Wahl mit den Zifferntasten:
z.B.: 5: [0] ➡ [5]
15: [1] ➡ [5]
Link
NET
-
DVD
AVC D
XP
-
RWRAM
+
SP
VR
LP
SDPC
EP
4 Drücken Sie [REC MODE] zur Wahl
3 Drücken Sie [WXCH], um den Kanal
des Aufnahmemodus (XP, SP, LP oder
EP).
DCCH BS
HDD
DVD
SD
REC
REC
PC
PLAY
PLAY
DUB
≥Tonaufnahme mit LPCM (nur XP-Modus):
Stellen Sie “Audiomodus für XP-Aufnahme” im SETUPMenü auf “LPCM” (➡ 56).
EXT
Link
MPEG4 D.MIX
NET
XP
SP
LP
EP
-
DVD
-
RWRAM
+
VR
SDPC
AVCD
Restzeit der
Disc
5 Drücken Sie [¥ REC], um die
Aufnahme zu starten.
DCCH BS
DUB
EXT
MPEG4 D.MI X
HDD
DVD
SD
REC
REC
PC
PLAY
PLAY
Link
Die Aufnahme erfolgt auf eine freie Stelle der Festplatte oder
der Disc. Es werden keine Daten überschrieben.
≥Kanal und Aufnahmemodus können während der Aufnahme
nicht geändert werden. Im Pausenmodus kann der Kanal
oder der Aufnahmemodus umgeschaltet werden, es wird
dann jedoch ein neuer Titel aufgenommen.
≥[HDD] [RAM] Durch Drücken von [AUDIO] können Sie
während der Aufnahme den Empfangston umschalten. (Auf
den aufgenommenen Ton hat dies keinen Einfluss.)
∫ So unterbrechen Sie die Aufnahme
Drücken Sie [;].
Drücken Sie die Taste erneut, um die Aufnahme fortzusetzen.
Wahlweise können Sie die Aufnahme auch durch Drücken von
[¥ REC] fortsetzen.
(Der Titel wird nicht unterteilt.)
∫ So stoppen Sie die Aufnahme
Drücken Sie [∫].
≥Das Segment vom Start- bis zum Endpunkt der Aufnahme wird als
ein Titel bezeichnet.
≥[-R] [-RW‹V›] [+R] Nach dem Ende der Aufnahme benötigt das Gerät
etwa 30 Sekunden, um Aufnahmeverwaltungsdaten
aufzuzeichnen.
Wenn ein Sender Videotext ausstrahlt
Das Gerät zeichnet automatisch den Namen des Programms und
des Senders auf, vorausgesetzt, TV Guide ist richtig eingestellt
(➡ 58).
[Hinweis]
Es kann einige Zeit (bis zu 30 Minuten) dauern, bis der Name
empfangen wird. Manchmal wird auch kein Name empfangen.
Schnellstart (➡ 57)
Schnelles Starten der Aufnahme und Abrufen der EPGAnzeige in nur 1 Sekunde
Wennn Sie die REC-Taste bei eingeschaltetem Gerät drücken,
beginnnt nach ca. 1 Sekunde
GUIDE-Taste bei ausgeschaltetem Gerät drücken, erscheint
innerhalb einer Sekunde der elektronische Programmführer (EPG).
(Schnellstart-Modus)
§
Nur beim Aufnehmen auf die Festplatte oder eine DVD-RAM
Im Auslieferungszustand ist “Schnellstart” auf “Ein” eingestellt.
[Hinweis]
Das Hochstarten kann bis zu einer Minute dauern, wenn:
–die Wiedergabe oder die Aufnahme auf eine andere Disc als
eine DVD-RAM gestartet wird.
–andere Vorgänge ausgeführt werden.
–die Uhr nicht eingestellt ist.
§
die Aufnahme. Wenn Sie die
NET
XP
SP
LP
EP
-
DVD
-
RWRAM
+
VR
SDPC
AVC D
Page 95

Aufnahmemodi und ungefähre Aufnahmezeiten
Je nach dem Aufnahmeinhalt können die Aufnahmezeiten kürzer als
angegeben sein.
(Einheit: Stunden)
DVD-RAM DVD-R
Modus
XP (Hohe Qualität)
Festplatte
(200 GB)
Einseitig
(4,7 GB)
Zweiseitig
(9,4 GB)
44121
§1
DVD-RW
+R
(4,7 GB)
SP (Normal) 89242
LP (Long Play) 177 4 8 4
EP (Extra Long
Play)
FR
(Automatische
Wahl des Modus)
§1
Kontinuierliches Aufnehmen oder Wiedergeben beider Seiten
einer doppelseitigen Disc ist nicht möglich.
§2
Wenn “Aufnahmezeit im EP-Modus” im SETUP-Menü auf “EP (6
355
§2
(266
355
Stunden
maximal
)
§2
8 (6
) 16 (12§2)8 (6§2)
8 Stunden
maximal
8 Stunden
maximal pro
Seite
8 Stunden
maximal
Stunden)” gestellt ist (➡ 55).
Bei “EP (6 Stunden)” erhält man eine bessere Tonqualität als bei
“EP (8 Stunden)”.
≥[RAM] Wenn im Modus “EP (8 Stunden)” auf DVD-RAM
aufgenommen wird, ist möglicherweise mit einem DVD-RAMkompatiblen DVD-Player keine Wiedergabe möglich. Wenn Sie
vorhaben, die Aufnahme auf einem anderen Gerät wiederzugeben,
nehmen Sie im “EP (6 Stunden)”-Modus auf.
FR (Flexible Recording-Modus)
Der Modus FR (Flexible Recording) steht beim Überspielen und bei
der Timeraufnahme zur Verfügung.
Das Gerät wählt automatisch eine Aufnahmerate zwischen XP und
EP (8 Stunden), um die Aufnahme in der bestmöglichen
Aufnahmequalität auf dem verfügbaren Platz unterzubringen.
So wird beispielsweise bei einer 90-Minuten-Aufnahme auf eine
neue DVD-RAM eine Bildqualität zwischen “XP” und “SP”
eingestellt.
Beim Aufnehmen auf die Festplatte wird die Bildqualität automatisch
≥
so eingestellt, dass der
kopierte
Titel genau auf eine 4,7-GB-Disc
passt.
≥Alle Aufnahmemodi von XP bis EP erscheinen im Display.
XP
SP
LP
EP
Vor dem Aufnehmen
≥Es kann nicht gleichzeitig auf die Festplatte und auf eine DVD
aufgenommen werden.
≥Kontinuierliches Aufnehmen auf beide Seiten einer doppelseitigen
Disc ist nicht möglich. Sie müssen die Disc auswerfen und
umdrehen.
≥Digitalsendungen, die auf “einmaliges Aufnehmen” beschränkt
sind, können nicht auf DVD-R-, DVD-RW-, +R- oder 8-cm-DVDRAM-Discs aufgenommen werden. Nehmen Sie auf die Festplatte
oder eine CPRM-kompatible DVD-RAM auf.
≥Beim Überspielen im Hochgeschwindigkeitsmodus auf eine DVD-R
DVD-RW (DVD-Videoformat) und +R: Stellen Sie “Aufn. für HighSpeed-Kopieren” auf “Ein”, bevor Sie auf die Festplatte aufnehmen
➡
24).
(
Weitere Einzelheiten entnehmen Sie bitte dem Abschniff
“Verwendung einer DVD-R, DVD-RW oder +R in diesem Gerät”
(➡ 7).
Nach dem Aufnehmen
≥[-R] [-RW‹V›] [+R] Wenn Sie eine mit diesem Gerät bespielte Disc auf
einem anderen Wiedergabegerät abspielen wollen, müssen Sie
➡
die Disc zuvor finalisieren (
52).
Festlegen der Aufnahmedauer—Aufnahme auf
Tastendruck
[HDD] [RAM] [-R] [-RW‹V›] [+R]
Während der Aufnahme
Drücken Sie [¥ REC] am Gerät, um die Aufnahmedauer
zu wählen.
≥Die längste Aufnahmedauer beträgt 4 Stunden.
≥Die Anzeige im Display ändert sich wie folgt.
30 (Min.) ""# 60 (Min.) ""# 90 (Min.) ""# 120 (Min.)
^" Zähler
,"" 240 (Min.) ,"" 180 (Min.) ,}
(abgeschaltet)
≥Bei der Timeraufnahme (➡ 26) und bei der flexiblen Aufnahme
(➡ 24) kann der obige Vorgang nicht ausgeführt werden.
≥Wenn im Aufnahmepausenmodus der Kanal oder der
Aufnahmemodus geändert wird, wird die eingegebene Zeitdauer
gelöscht.
≥Das Gerät schaltet sich am Ende der Aufnahme nicht automatisch
aus.
Zum Abschalten
Drücken Sie mehrmals [¥ REC] am Gerät, bis der Zähler angezeigt
wird.
≥Die Zeitdauer wird gelöscht, die Aufnahme wird jedoch fortgesetzt.
So unterbrechen Sie die Aufnahme
Drücken Sie [∫].
Bei einer DVD-RW
Wenn Sie eine neue DVD-RW oder eine DVD-RAM / DVD-RW
(DVD-Videoformat), die mit einem Computer oder einem anderen
Gerät bespielt wurde, einlegen, erscheint der
Formatbestätigungsschirm. Formatieren Sie in diesem Fall die Disc.
Dabei werden jedoch alle gespeicherten Daten gelöscht.
Formatieren
Diese Disc ist nicht richtig formatiert.
Möchten Sie die Disc in DISC MANAGEMENT
formatieren ?
SELECT
ENTER
Wählen Sie mit [2] die Option “Ja”, und drücken Sie [ENTER].
Formatieren einer Disc
“Löschen des ganzen Disc- oder Karteninhalts—Formatieren”
(➡ 51)
NeinJa
RETURN
Aufnehmen von Fernsehprogrammen
Wahlweise kann der Haupt- oder Zusatzton eines
Zweikanalton-Programms aufgenommen werden
≥Beim Aufnehmen auf DVD-R, DVD-RW (DVD-Videoformat) und
+R
≥Bei einer LPCM-Tonaufnahme (➡ 56, Audiomodus für XP-
Aufnahme)
≥Wenn “Aufn. für High-Speed-Kopieren” auf “Ein” eingestellt ist
(➡ 24)
Vor dem Aufnehmen muss der Ton gewählt werden:
–Wenn kein externes Gerät angeschlossen ist
Wählen Sie im SETUP-Menü mit “Sprachauswahl” die Option
“M 1” oder “M 2” (➡ 56).
–Wenn ein externes Gerät angeschlossen ist
Wählen Sie am externen Gerät die Option “M 1” oder “M 2”.
RQT8203
23
95
Page 96

Aufnehmen von Fernsehprogrammen
1.3
HDD
DVDSDSD
CH
VOLUME
ENTER
HDD
DVD SD
OPEN/CLOSE
Festplatten-, DVD-Anzeige
DIRECT TV REC
¥ DIRECT
TV REC
Zifferntasten
AV
HDD
DVD
2 3
1
4 5 6
8
7
CANCEL
0
SKIP
ShowView
9
INPUT SELECT
MANUAL SKIP
SLOW/SEARCH
PAG E
HDD, DVD
CH
INPUT SELECT
;
PAU SE
G
K
C
ENTER
STATUS
REC MODE
AUDI O
D
I
U
E
CREATE
CHAPTER
EXT LINK
DUBBING
PLAY/x1.3
RETURN
ERASE
TIMER
F Rec
1
F
U
N
C
T
I
O
N
S
FUNCTIONS
RETURN
REC MODE
F TIMER
3,4,2,1
ENTER
DIRECT
NAVIGATOR
STATUS
¥ REC
TIME SLIP
∫
STOP
E
H
C
/
G
O
R
P
R
O
T
U
T
C
A
N
E
E
G
I
R
M
I
V
P
D
A
O
N
T
SUB MENU
S
DISPLAY
REC
TIME SLIP
Aufn. für High-Speed-Kopieren
DRIVE
SELECT
F Rec
[Hinweis]
REC
/k1.3
∫
Wenn Sie nicht beabsichtigen, die Titel im
Hochgeschwindigkeitsmodus auf eine DVD-R, DVD-RW (DVDVideoformat) oder +R zu überspielen, stellen Sie “Aufn. für HighSpeed-Kopieren” auf “Aus”.
Flexible Aufnahme
(Aufnahme wird so ausgeführt, dass sie in den verfügbaren
Disc-Platz passt)
[HDD] [RAM] [-R] [-RW‹V›] [+R]
Unter Berücksichtigung des noch verfügbaren Platzes auf der Disc
wählt das Gerät selbsttätig die bestmögliche Bildqualität. Das Gerät
wählt automatisch den Aufnahmemodus FR.
∫
In folgenden Situationen ist “FLEXIBLE REC” praktisch.
[RAM] [-R] [-RW‹V›] [+R]
≥Wenn es schwierig ist, den Aufnahmemodus so zu wählen, dass
der freie Platz optimal genutzt wird.
Wenn Sie ein langes Programm mit bestmöglicher Bildqualität aufnehmen wollen.
≥
[HDD]
≥Wenn Sie einen Titel so auf die Festplatte aufnehmen wollen, dass
sie ihn optimal passend auf eine 4,7-GB-Disc kopieren können
≥Vor dem Überspielen (Kopieren) eines Titels auf den freien Disc-
Platz ist es nicht erforderlich, den aufgenommenen Titel zu
bearbeiten oder den Aufnahmemodus zu ändern.
z.B.: Aufnehmen eines 90-Minuten-Programms auf Disc
Im XP-Modus passt das Programm nicht auf eine Disc.
Beim Versuch, ein 90-Minuten-Programm
im XP-Modus aufzunehmen, werden nur
die ersten 60 Minuten des Programms
4.7GB
DVD-RAM
4.7GB
DVD-RAM
Im SP-Modus passt das Programm auf eine Disc.
aufgenommen. Die restlichen 30 Minuten
passen nicht mehr auf die Disc.
≥Es ist eine weitere Disc erforderlich.
Aufnehmen von Fernsehprogrammen
RQT8203
24
Wenn nach der Aufnahme auf die Festplatte im
Hochgeschwindigkeitsmodus auf eine DVD-R, DVD-RW (DVDVideoformat) oder +R überspielt werden soll
Soll ein Titel später von der Festplatte im Hochgeschwindigkeitsmodus auf
eine DVD-R usw. überspielt werden, müssen Sie “Aufn. für High-SpeedKopieren” vor dem Aufnehmen auf die Festplatte auf “Ein” stellen.
Es bestehen jedoch die folgenden Einschränkungen:
≥Beim Aufnehmen einer Zweikanalton-Sendung kann nur der
Haupt- oder nur der Zusatzton aufgenommen werden.
– Wenn kein externes Gerät angeschlossen ist
Wählen Sie im SETUP-Menü mit “Sprachauswahl” die Option
“M 1” oder “M 2” (➡ 56).
– Wenn ein externes Gerät angeschlossen ist
Wählen Sie am externen Gerät die Option “M 1” oder “M 2”.
≥Auch 16:9-Format-Programme (Breitbild) werden im 4:3-Format
aufgenommen.
Weitere Einzelheiten entnehmen Sie bitte dem Abschniff “Verwendung
einer DVD-R, DVD-RW oder +R in diesem Gerät”
1
Im Stoppmodus
(➡ 7).
Drücken Sie [FUNCTIONS].
2 Wählen Sie mit [3, 4] die Option “Weit.
Funktionen”, und drücken Sie [ENTER].
3Wählen Sie mit [3, 4] die Option “SETUP”, und
drücken Sie [ENTER].
4 Wählen Sie mit [3, 4] die Option “Disc”, und
drücken Sie [1].
5 Wählen Sie mit [3, 4] die Option
“Aufnahmeeinstellungen”, und drücken Sie
[ENTER].
6 Wählen Sie mit [3, 4] die Option “Aufn. für
High-Speed-Kopieren”, und drücken Sie
[ENTER].
7 Wählen Sie mit [3, 4] die Option “Ein”, und
drücken Sie [ENTER].
8 Wählen Sie mit [2, 1] die Option “Ja”, und
drücken Sie [ENTER].
So kehren Sie zum vorhergehenden Bildschirm zurück
Drücken Sie [RETURN].
So wird das Menü verlassen
Drücken Sie wiederholt [RETURN].
So Starten Sie die Aufnahme
≥Aufnehmen von Fernsehprogrammen (➡ 22)
≥Timeraufnahme (➡ 26)
≥Aufnehmen von einem Videocassettenrecorder (➡ 47)
96
Allerdings bleibt ein Teil von 30 Minuten auf
der Disc unbespielt.
4.7GB
DVD-RAM
Im “FLEXIBLE REC”-Modus passt das Programm optimal
auf eine Disc.
4.7GB
DVD-RAM
Erforderlicher Platz für die Aufnahme
Vorbereitung
≥Wählen Sie den aufzunehmenden Kanal oder externen Eingang.
Drücken Sie [HDD] oder [DVD], um das Aufnahme-Laufwerk zu wählen.
≥
1 Im Stoppmodus
Drücken Sie [F Rec].
FLEXIBLE REC
Aufnahmen im FR-Modus.
Max. Au
fnahmezeit
Aufnahmezeit einst.
Start Abbrechen
SELECT
8 Std. 00 Min.
8 Std. 00 Min.
Maximale Aufnahmezeit
Die maximale Aufnahmezeit im
EP-Modus wird angezeigt.
2 Wählen Sie mit [2, 1] zwischen
“Std.” und “Min.” und stellen Sie die
Zeit mit [3, 4] ein.
≥
Sie können die Aufnahmezeit auch mit den Zifferntasten einstellen.
≥Es kann nicht länger als 8 Stunden aufgenommen werden.
3 Zum Starten der Aufnahme
Wählen Sie mit [3, 4, 2, 1]
“Start”, und drücken Sie [ENTER].
≥Die Aufnahme beginnt.
≥Alle Aufnahmemodi von XP bis EP erscheinen
im Display.
So verlassen Sie das Fenster ohne
aufzunehmen
Drücken Sie [RETURN].
So unterbrechen Sie die Aufnahme
Drücken Sie [∫].
So zeigen Sie die Restzeit an
Drücken Sie [STATUS].
verfügbare
Aufnahmezeit
die Option
z.B.: Festplatte
Noch
REC 59
M 1 / M 2
HDD
ARD
L R
XP
SP
LP
EP
Page 97

Wiedergabe während der Aufnahme
[HDD] [RAM]
Wiedergabe ab dem Titelanfang während der
Aufnahme—Zeitversetzte Wiedergabe
Drücken Sie während der Aufnahme [1](PLAY).
≥
Während der Vorwärts- oder Rückwärtssuche wird kein Ton ausgegeben.
So stoppen Sie die Aufnahme
2 Sekunden nach dem Stoppen der Wiedergabe:
Drücken Sie [∫].
So stoppen Sie die Timeraufnahme
Drücken Sie [F TIMER].
≥Sie können die Aufnahme auch stoppen, indem Sie [∫] am Gerät
länger als 3 Sekunden lang drücken.
[Hinweis]
Zeitversetztes Wiedergeben ist nur möglich, wenn dasselbe
Signalsystem (PAL/NTSC) verwendet wird.
So stoppen Sie die Wiedergabe
Drücken Sie [∫].
So stoppen Sie die Aufnahme
2 Sekunden nach dem Stoppen der Wiedergabe:
Drücken Sie [∫].
So stoppen Sie die Timeraufnahme
Drücken Sie [F TIMER].
≥Sie können die Aufnahme auch stoppen, indem Sie [∫] am Gerät
länger als 3 Sekunden lang drücken.
Wiedergabe eines zuvor aufgenommenen Titels
während der Aufnahme—Simultanes Aufnehmen
und Wiedergeben
≥Während der Aufnahme können Sie das Laufwerk umschalten und
wiedergeben. Drücken Sie [HDD] oder [DVD].
1 Drücken Sie während der Aufnahme
[DIRECT NAVIGATOR].
2 Wählen Sie mit [3, 4, 2, 1] einen
Titel, und drücken Sie [ENTER].
≥Während der Vorwärts- oder Rückwärtssuche wird kein Ton
ausgegeben.
So stoppen Sie die Wiedergabe
Drücken Sie [∫].
So wird das DIRECT NAVIGATOR-Menü verlassen
Drücken Sie [DIRECT NAVIGATOR].
So stoppen Sie die Aufnahme
Nach dem Stoppen der Wiedergabe:
1 Drücken Sie [DIRECT NAVIGATOR], um den Schirm zu
verlassen.
2 Wenn sich die Aufnahme auf dem anderen Laufwerk befindet
Drücken Sie [HDD] oder [DVD], um das Aufnahme-Laufwerk zu
wählen.
3 Drücken Sie [∫].
So stoppen Sie die Timeraufnahme
Drücken Sie [F TIMER].
≥Sie können die Aufnahme auch stoppen, indem Sie [∫] am Gerät
länger als 3 Sekunden lang drücken.
Überprüfen der aufgenommenen Szenen während
der Aufnahme — Zeitsprung
Während der Aufnahme können Sie gleichzeitig eine bestimmte
Szene des Titels, der gerade aufgenommen wird, oder einen zuvor
aufgenommenen Titel wiedergeben. Sowohl das Wiedergabe- als
auch das Aufnahmebild wird angezeigt.
1 Drücken Sie während der Aufnahme
[TIME SLIP].
PLAY
0 min
Die Wiedergabe beginnt
30 Sekunden
REC
zurückversetzt.
Momentan
aufgenommenes Bild
≥Der Wiedergabeton ist zu hören.
2 Wählen Sie mit [3, 4] die Zeit, und
drücken Sie [ENTER].
≥Bei jedem Drücken von [3, 4] erhöht [3] oder verringert
[4] sich die Zeit um 1 Minute.
(Wenn Sie die Taste gedrückt halten, ändert sich die Zeit in
10-Minuten-Schritten.)
≥Drücken Sie [TIME SLIP], um das Wiedergabebild
bildschirmfüllend anzuzeigen. Drücken Sie die Taste erneut,
um das Wiedergabe- und Aufnahmebild anzuzeigen.
So stoppen Sie die Wiedergabe
Drücken Sie [∫].
TV-Direktaufnahme
Wenn ein mit Q Link-Funktion ausgestatteter Fernseher
über ein komplett belegtes 21-poliges Scart-Kabel
angeschlossen ist.
Die Aufnahme des momentan auf dem Fernseher zu sehenden
Programms kann sofort gestartet werden.
1 Drücken Sie [HDD] oder [DVD], um
das Aufnahme-Laufwerk zu wählen.
Die Festplatten- oder DVD-Anzeige am Gerät leuchtet auf.
2 Wenn das DVD-Laufwerk gewählt wurde
Legen Sie eine Disc ein. (➡ 22)
3 Halten Sie [¥ DIRECT TV REC] 1
Sekunde lang gedrückt.
Die Aufnahme beginnt.
So stoppen Sie die Aufnahme
Drücken Sie [∫].
Beim Aufnehmen von einem
Digital-/Satellitenreceiver oder Decoder
Vorbereitung
≥Schließen Sie einen Digital-/Satellitenreceiver oder Decoder an die
Eingangsbuchsen dieses Geräts an (➡ 17).
≥Beim Aufnehmen von Zweikanalton-Programmen
[HDD] [RAM]
Wenn am angeschlossenen Gerät sowohl M 1 als auch M 2
aktiviert ist, können Sie bei der Wiedergabe den gewünschten Ton
wählen.
[-R] [-RW‹V›] [+R]
Wählen Sie am angeschlossenen Gerät entweder M 1 oder M 2.
(Es wird entweder Ton M 1 oder M 2 aufgenommen.)
≥Wenn das externe Gerät ein NTSC-Signal ausgibt, ändern Sie die
“TV System”-Einstellung im SETUP-Menü zu “NTSC” (➡ 61).
Dieses Gerät kann keine Discs bespielen, die sowohl PAL- als
auch NTSC-Signale enthalten. (Auf die Festplatte können dagegen
beide Signaltypen aufgenommen werden.)
≥Drücken Sie [HDD] oder [DVD], um das Aufnahme-Laufwerk zu
wählen.
1 Im Stoppmodus
Drücken Sie [INPUT SELECT], um den
Eingangskanal für das
angeschlossene Gerät zu wählen.
Beispiel:Bei Anschluss an die AV2-Eingangsbuchsen wählen
Sie “AV2”.
2 Drücken Sie [REC MODE] zur Wahl
des Aufnahmemodus.
3 Wählen Sie den Kanal am anderen
Gerät.
4 Drücken Sie [¥ REC].
Die Aufnahme beginnt.
So überspringen Sie unerwünschte Abschnitte
Drücken Sie [;], um die Aufnahme zu unterbrechen. (Drücken Sie
die Taste erneut, um die Aufnahme fortzusetzen.)
So stoppen Sie die Aufnahme
Drücken Sie [∫].
Aufnehmen von Fernsehprogrammen
RQT8203
25
97
Page 98

Timeraufnahme
HDD
DVDSDSD
TV
ENTER
1.3
ShowView Nummer eingeben ( Tasten 0-9 ).
ShowView
1:58 SP
DVD
30:24 SP
HDDRestzeit
12:53:00 15. 7. Do
TIMER
RECORDING
1:58 SP
DVD
30:24 SP
HDDRestzeit
12:54:00 15. 7. Do
Mode
StopStartName
Datum
VPS
PDC
HDD
DVD
20:0019:0015. 7. Do SP AusHDD
1 ARD
Titel Eingabe
TIMER
RECORDING
1:58 SP
DVD
30:24 SP
HDDRestzeit
12:56:00 15. 7. Do
Mode
StopStart
Nr. Datum
VPS
PDC
HDD
DVD
Name Platz
SP
OK
20:00
19:00
ARD
15. 7. Do
01
Aus
Weitere Timerprogramme
Standby-Modus für Timer-Aufnahme aktiv. Wiedergabe ist möglich.
DIRECT TV REC
Zifferntasten
¢ CANCEL
∫
PROG/CHECK
3,4,2,1
ENTER
Timeraufnahme
EXT LINK
REC MODE
[HDD] [RAM] [-R] [-RW‹V›] [+R]
≥[-R] [-RW‹V›] [+R] Bei einem Zweikanalton-Programm wird nur der
mit “Sprachauswahl” (➡ 56) gewählte Ton (“M 1” oder “M 2”)
aufgenommen.
≥[HDD] Wenn “Aufn. für High-Speed-Kopieren” (➡ 24)vor dem
Aufnehmen auf die Festplatte auf “Ein” eingestellt wird, können Sie
das Material später im Hochgeschwindigkeitsmodus auf eine DVDR, DVD-RW (DVD-Videoformat) oder +R kopieren.
Vor dem Aufnehmen
≥Weitere Einzelheiten entnehmen Sie bitte dem Abschniff
“Verwendung einer DVD-R, DVD-RW oder +R in diesem Gerät”
(➡ 7).
≥Siehe auch die Hinweise unter “Vor dem Aufnehmen” (➡ 23).
Vorbereitung
≥Schalten Sie den Fernseher ein und wählen Sie je nach
Anschlussart den richtigen Videoeingang.
≥Wenn Sie auf eine DVD aufnehmen wollen, achten Sie darauf,
dass die Disc beschreibbar ist (➡ 22).
≥Vergewissern Sie sich, dass die Uhr richtig eingestellt ist (➡ 60).
Timeraufnahmen mit dem GUIDE Plus+ System
Um ein Programm mit dem Timer aufzunehmen, brauchen Sie es
lediglich aus der TV-Programmliste auszuwählen.
Vor Verwendung des GUIDE Plus+ Systems
≥Bei der ersten Inbetriebnahmen nach dem Kauf des Geräts wird
die TV-Programmliste noch nicht gleich angezeigt.
≥Das GUIDE Plus+ System muss zunächst initialisiert werden.
Weitere Einzelheiten entnehmen Sie bitte der Anleitung “User’s
manual for the GUIDE Plus+ system”.
Drücken Sie [GUIDE].
Die GUIDE Plus+ Programmübersicht erscheint.
(➡ User’s manual for the GUIDE Plus+ system)
]Hinweis\
Wenn “TV System” auf “NTSC” (➡ 61) eingestellt ist, steht das
GUIDE Plus+ System nicht zur Verfügung.
RQT8203
26
98
DVD
Í
HDD
1
4 5 6
7
CANCEL
SKIP
STOP
K
C
E
H
C
/
G
O
R
P
R
O
T
U
T
C
A
N
E
E
G
I
R
M
I
V
P
D
A
O
N
T
SUB MENU
S
STATUS
DISPLAY
REC
REC MODE
TIME SLIP
AUDI O
TV
Í
AV
DVD
2 3
8
0
PAU SE
U
G
ENTER
HDD
DVD SD
CH
ShowView
9
INPUT SELECT
MANUAL SKIP
SLOW/SEARCH
PLAY/x1.3
D
I
E
CREATE
CHAPTER
ERASE
EXT LINK
DUBBING
VOLUME
PAG E
CH
F
U
N
C
T
I
O
N
S
RETURN
TIMER
F Rec
OPEN/CLOSE
DRIVE
SELECT
REC
/k1.3
∫
HDD, DVD
ShowView
GUIDE
F TIMER
Verwendung der SHOWVIEW-Nummer für
Timeraufnahmen
Durch Eingabe der S
programmiert werden. Diese Nummern finden Sie im Fernsehteil
von Zeitungen und Zeitschriften.
≥Sie können bis zu 32 Programme bis zu einem Monat im Voraus
eingeben.
HOWVIEW-Nummer kann der Timer bequem
1 Drücken Sie [ShowView].
2 Geben Sie die SHOWVIEW-Nummer mit
den Zifferntasten ein.
Mit [2] können Sie zurückgehen, um eine Ziffer zu
korrigieren.
3 Drücken Sie [ENTER].
≥Überprüfen Sie das Programm, und nehmen Sie
erforderliche Korrekturen mit [3, 4, 2, 1] vor (➡ 28,
Schritt 3).
≥Wenn “-- ---” in der “Name”-Spalte erscheint, kann der Timer
nicht programmiert werden. Drücken Sie [3, 4] zur Wahl
der Programmposition. Die eingegebene
Fernsehsenderinformation bleibt im Gerät gespeichert.
≥Durch Drücken von [HDD] oder [DVD] können Sie das
Aufnahme-Laufwerk wählen.
Wenn als Aufnahme-Laufwerk “DVD” gewählt ist und der
Platz nicht ausreicht, wird automatisch auf “HDD”
umgeschaltet (➡ 27, Ersatz-Aufnahme).
≥Falls erwünscht, können Sie durch Drücken von
[REC MODE] den Aufnahmemodus ändern.
≥VPS/PDC (➡ 27)
Ein!)Aus (– – –)
≥RENEW (Auto Erneuerung-Aufnahme) [HDD] (➡ 28)
Ein!)Aus
≥Titel Eingabe
Wählen Sie mit [2, 1] die Option “Titel Eingabe”, und
drücken Sie [ENTER] (➡ 53, Text eingeben).
4 Drücken Sie [ENTER].
Die Einstellungen sind gespeichert.
Disc
Vergewissern Sie sich,
dass “OK” angezeigt wird
(➡ 29).
Wiederholen Sie die Schritte 1 bis 4, um noch weitere
Aufnahmevorgänge zu programmieren.
5 Drücken Sie [F TIMER].
Das Gerät schaltet sich aus, und die Anzeige “F” im Display
weist darauf hin, dass es sich in Timeraufnahme-Bereitschaft
befindet.
≥Wenn Sie das Gerät
einschalten, erscheint eine
Meldung. Während der
Timeraufnahme-Bereitschaft kann mit dem Gerät nicht
aufgenommen werden. [Es kann wiedergegeben werden,
allerdings kann kein Titel wiedergegeben werden, der ein
anderes Codiersystem (PAL oder NTSC) verwendet als das
momentan am Gerät gewählte Fernsehsystem.]
Page 99

∫ So schalten Sie den Aufnahme-
Bereitschaftsbetrieb aus
Drücken Sie [F TIMER].
“F” erlischt.
≥Denken Sie daran, [F TIMER] vor der Programm-Startzeit zu
drücken, um das Gerät wieder auf Aufnahme-Bereitschaft zu
schalten. Die Timeraufnahme funktioniert nur, wenn “F”
angezeigt wird.
∫ So brechen Sie die Aufnahme nach dem Start
ab
Drücken Sie [F TIMER].
≥Sie können die Aufnahme auch stoppen, indem Sie [∫] am
Gerät länger als 3 Sekunden lang drücken.
[Hinweis]
≥Die Timeraufnahme wird unabhängig davon, ob das Gerät ein-
oder ausgeschaltet ist, ausgeführt.
≥Die Timeraufnahme beginnt auch dann, wenn Sie gerade mit
dem Gerät wiedergeben.
≥Beim Editieren und Überspielen mit Normalgeschwindigkeit
beginnt die Timeraufnahme nicht (➡ 43).
≥Wenn das Gerät am Timerstartzeitpunkt eingeschaltet ist, bleibt
es auch am Ende der Timeraufnahme eingeschaltet. Es
schaltet sich nicht automatisch aus. Während der
Timeraufnahme kann das Gerät ausgeschaltet werden.
≥Ein 5-sekündiges Blinken von “F” zeigt an, dass das Gerät
nicht auf Aufnahme-Bereitschaft schalten kann.
≥Wird das Gerät nicht spätestens 10 Minuten vor der
programmierten Timeraufnahme-Startzeit auf TimeraufnahmeBereitschaft geschaltet, blinkt “F” im Display des Geräts.
Drücken Sie in diesem Fall [F TIMER], um das Gerät auf
Timeraufnahme-Bereitschaft zu schalten.
≥Wenn Sie mehrere unmittelbar aufeinander folgende
Timeraufnahmen programmieren, kann das Gerät den Anfang
der späteren Programme nicht aufnehmen [ein paar Sekunden
bei Aufnahme auf die Festplatte oder eine DVD-RAM und
ungefähr 30 Sekunden bei Aufnahme auf eine DVD-R, DVDRW (DVD-Videoformat) und +R].
Programm Programm
Wird nicht
aufgenommen
Timeraufnahme
Aufnahme
≥(Bei Verwendung des GUIDE Plus+ Systems)
Die TV-Programmliste wird nachts zwischen 2:50 und 5:10 Uhr
heruntergeladen. Wenn Sie während dieser Zeit aufnehmen
wollen, stellen Sie “Auto-Download-Priorität” im Setup-Menü
des GUIDE Plus+ Systems auf “Timer-Prog.” ein. (➡ User’s
manual for the GUIDE Plus+ system)
Aufnahme
∫ VPS/PDC-Funktion (➡ 69)
Wenn der Fernsehsender ein VPS/PDC-Signal ausstrahlt, wird
die Timeraufnahme auch bei einer eventuellen Änderung der
Sendezeit richtig ausgeführt.
So aktivieren Sie die VPS/PDC-Funktion
Wählen Sie im Schritt 3 mit [3, 4] in der Spalte VPS/PDC
(➡ 26) die Option “Ein”.
∫ Ersatz-Aufnahme
Wenn als Aufnahme-Laufwerk “DVD” gewählt ist und der Platz
nicht ausreicht, wird automatisch auf “HDD” umgeschaltet.
Wenn keine Disc eingelegt ist oder nicht auf die Disc
aufgenommen werden kann oder wenn die Timeraufnahme
während des Überspielens beginnt, schaltet das Gerät
automatisch auf die Festplatte um.
≥Der Direct Navigator zeigt an, bei welchen Programmen eine
Ersatz-Aufnahme ausgeführt wurde (“ ” erscheint.) (➡ 30).
≥Wenn die Restzeit auf der Festplatte nicht ausreicht, wird so
viel des Programms wie möglich auf die Festplatte
aufgenommen.
≥Die Ersatz-Aufnahme wird jedoch nicht aktiviert, wenn ein
Programm mit VPS/PDC aufgenommen wird und das
Programm aufgrund einer Sendezeitverlängerung nicht auf die
Disc passt.
RQT8203
27
99
Page 100

Timeraufnahme
TIMER
RECORDING
1:58 SP
DVD
30:24 SP
HDDRestzeit
12:54:00 15. 7. Do
Mode
StopStart
Name
Datum
VPS
PDC
HDD
DVD
22:3022:0015. 7. TUE AusHDD
1 ARD
Titel Eingabe
SP
TIMER
RECORDING
1:58 SP
DVD
30:24 SP
HDDRestzeit
12:56:00 15. 7. Do
Mode
StopStart
Nr.
Datum
VPS
PDC
HDD
DVD
Name Platz
SP
OK
20:00
19:00
ARD
15. 7. Do
01
Aus
Weitere Timerprogramme
SP
OK
22:30
22:00
ARD
15. 7. Do
02
Aus
Standby-Modus für Timer-Aufnahme aktiv. Wiedergabe ist möglich.
TIMER
RECORDING
1:58 SP
DVD
30:24 SP
HDDRestzeit
12:54:00 15. 7. Do
Mode
StopStartName Datum
VPS
PDC
HDD
DVD
22:3022:00So OFFHDD
1 ARD
Titel Eingabe
SP
RENEW
Ein
Siehe Bedienungselemente auf Seite 26.
Manuelle Programmierung von
Timeraufnahmen
Sie können bis zu 32 Programme bis zu einem Monat im Voraus
eingeben.
(Jede tägliche oder wöchentliche Timeraufnahme wird als ein
Programm gezählt.)
1 Drücken Sie [PROG/CHECK].
TIMER
RECORDING
Nr. Datum
Name
01
ARD
Neue Programme über ENTER speichern.
ENTER
RETURN
HDDRestzeit
15. 7. Do
19:00
Weitere Timerprogramme
30:24 SP
StopStart
20:00
DVD
12:56:00 15. 7. Do
VPS
HDD
Mode
PDC
DVD
Aus
SP
1:58 SP
Disc
Platz
OK
2 Wählen Sie mit [3, 4] die Option
“Weitere Timerprogramme”, und
drücken Sie [ENTER].
3 Drücken Sie [1], um die einzelnen
Timeraufnahme
Positionen anzufahren, und [3, 4],
um die Positionen zu ändern.
≥Wenn Sie [3, 4] gedrückt halten, ändert sich Start
(Startzeit) und Stop (Stoppzeit) in 30-Minuten-Schritten.
≥Name (Programmposition/Name des Fernsehsenders),
Datum, Start (Startzeit) und Stop (Stoppzeit) können auch
mit den Zifferntasten eingegeben werden.
≥Datum
[.
Datum: Momentanes Datum bis einen Monat später
l
l
Tägliche
l
Timeraufnahme:
;:
l
Wöchentliche
a.
Timeraufnahme:
≥Durch Drücken von [HDD] oder [DVD] können Sie das
Aufnahme-Laufwerk wählen.
Wenn als Aufnahme-Laufwerk “DVD” gewählt ist und der
Platz nicht ausreicht, wird automatisch auf “HDD”
umgeschaltet (➡ 27, Ersatz-Aufnahme).
≥Falls erwünscht, können Sie durch Drücken von
[REC MODE] den Aufnahmemodus ändern.
≥VPS/PDC (➡ 27)
Ein!)Aus (– – –)
≥RENEW (Auto Erneuerung-Aufnahme) [HDD] (➡ rechts)
Ein!)Aus
≥Titel Eingabe
Wählen Sie mit [2, 1] die Option “Titel Eingabe”, und
drücken Sie [ENTER]. (➡ 53, Text eingeben)
minus einen Tag;:
Täglich>Mo bis Sa>Mo bis Fr
So>--->Sa
4 Drücken Sie [ENTER].
∫ So schalten Sie den Aufnahme-
Bereitschaftsbetrieb aus
Drücken Sie [F TIMER].
“F” erlischt.
≥Denken Sie daran, [F TIMER] vor der Programm-Startzeit zu
drücken, um das Gerät wieder auf Aufnahme-Bereitschaft zu
schalten. Die Timeraufnahme funktioniert nur, wenn “F”
angezeigt wird.
∫ So brechen Sie die Aufnahme nach dem Start
ab
Drücken Sie [F TIMER].
≥Sie können die Aufnahme auch stoppen, indem Sie [∫] am
Gerät länger als 3 Sekunden lang drücken.
[Hinweis]
≥Die Timeraufnahme wird unabhängig davon, ob das Gerät ein-
oder ausgeschaltet ist, ausgeführt.
≥Die Timeraufnahme beginnt auch dann, wenn Sie gerade mit
dem Gerät wiedergeben.
≥Beim Editieren und Überspielen mit Normalgeschwindigkeit
beginnt die Timeraufnahme nicht (➡ 43).
≥Wenn das Gerät am Timerstartzeitpunkt eingeschaltet ist, bleibt
es auch am Ende der Timeraufnahme eingeschaltet. Es
schaltet sich nicht automatisch aus. Während der
Timeraufnahme kann das Gerät ausgeschaltet werden.
≥Ein 5-sekündiges Blinken von “F” zeigt an, dass das Gerät
nicht auf Aufnahme-Bereitschaft schalten kann.
≥Wird das Gerät nicht spätestens 10 Minuten vor der
programmierten Timeraufnahme-Startzeit auf TimeraufnahmeBereitschaft geschaltet, blinkt “F” im Display des Geräts.
Drücken Sie in diesem Fall [F TIMER], um das Gerät auf
Timeraufnahme-Bereitschaft zu schalten.
≥Wenn Sie mehrere unmittelbar aufeinander folgende
Timeraufnahmen programmieren, kann das Gerät den Anfang
der späteren Programme nicht aufnehmen [ein paar Sekunden
bei Aufnahme auf die Festplatte oder eine DVD-RAM und
ungefähr 30 Sekunden bei Aufnahme auf eine DVD-R, DVDRW (DVD-Videoformat) und +R].
Auto Erneuerung-Aufnahme
[HDD]
Bei einer täglich oder wöchentlich wiederholten Timeraufnahme auf
Festplatte wird die alte Aufzeichnung jeweils überschrieben.
Diese Funktion steht nur zur Verfügung, wenn der Timer auf
wöchentliche oder tägliche Aufnahme geschaltet ist.
1 Drücken Sie [PROG/CHECK].
2 Wählen Sie das Programm mit [3, 4]
aus, und drücken Sie [ENTER].
3 Wählen Sie mit [2, 1] die Spalte
“RENEW”.
4 Wählen Sie mit [3, 4] die Option
“Ein”, und drücken Sie [ENTER].
Wiederholen Sie die Schritte 2 bis 4, um noch weitere
Aufnahmevorgänge zu programmieren.
5 Drücken Sie [F TIMER].
Das Gerät schaltet sich aus, und die Anzeige “F” im Display weist
darauf hin, dass es sich in Timeraufnahme-Bereitschaft befindet.
≥
Wenn Sie das Gerät
einschalten, erscheint eine
Meldung. Während der
Timeraufnahme-Bereitschaft kann mit dem Gerät nicht
aufgenommen werden.
RQT8203
28
100
allerdings kann kein Titel wiedergegeben werden, der ein
anderes Codiersystem (PAL oder NTSC) verwendet als das
momentan am Gerät gewählte Fernsehsystem.]
Disc
Vergewissern Sie sich,
dass “OK” angezeigt wird
(➡ 29).
[Es kann wiedergegeben werden,
[Hinweis]
≥Wenn ein Auto Erneuerung-Aufnahmeprogramm geschützt ist,
wenn ein Programm gerade von der Festplatte wiedergegeben
wird oder wenn editiert wird, wird das Programm nicht
überschrieben. Stattdessen erfolgt die Aufzeichnung separat. Bei
der nächsten Auto Erneuerung-Aufnahme wird das separat
aufgezeichnete Programm dann überschrieben.
≥Playlisten mit Programmen, die für Auto Erneuerung-Aufnahme
vorgesehen wurden, werden beim Auto Erneuerung-Vorgang
gelöscht.
≥Wenn der Platz auf der Festplatte nicht ausreicht, wird das
Programm möglicherweise nicht vollständig aufgenommen.
 Loading...