

Page 1
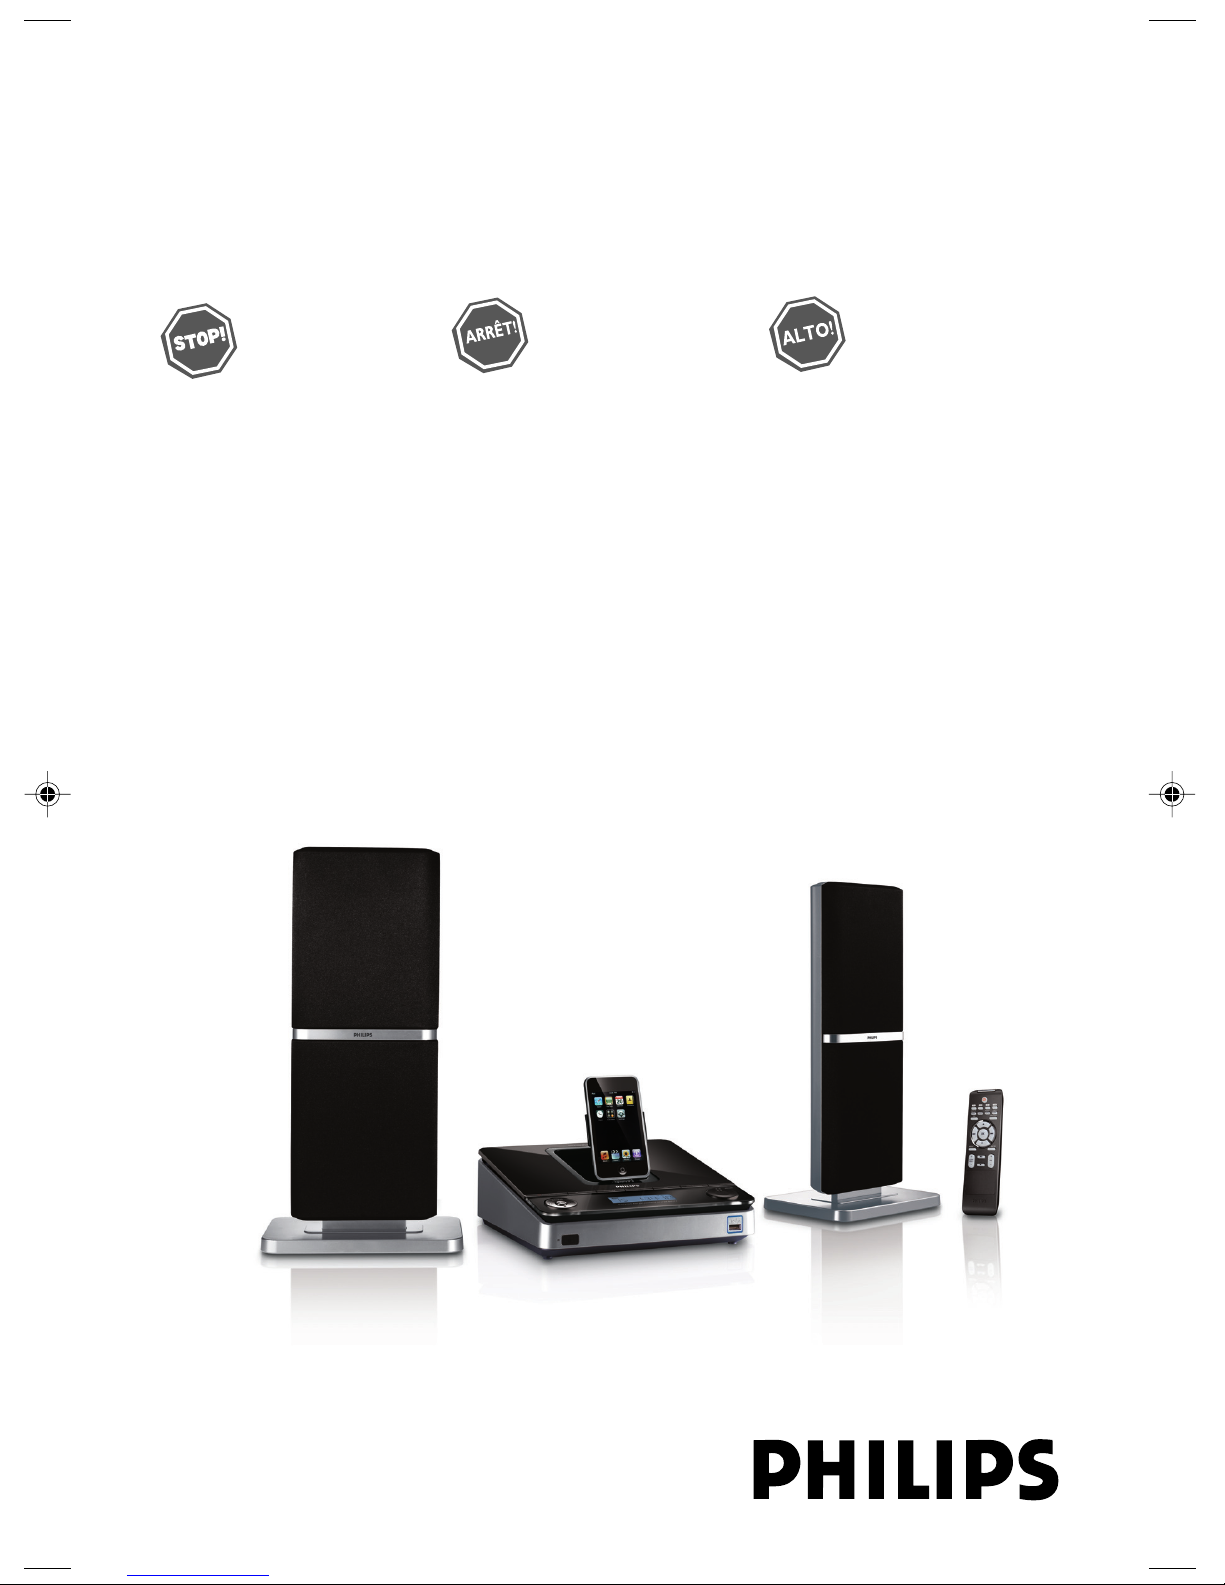
Docking Entertainment System
Register your product and get support at
www.philips.com/welcome
DC177
Thank you for choosing Philips.
Need help fast?
Read your Quick Use Guide and/or
Owner's Manual first for quick tips
that make using your Philips product
more enjoyable.
If you have read your instructions
and still need assistance,
you may access our online help at
www.philips.com/usasupport
or call
1-888-PHILIPS (744-5477)
while with your product.
(and Model / Serial number)
Philips vous remercie de
votre confiance.
Besoin d'une aide
rapide?
Les Guide d'utilisation rapide et Manuel de
l'utilisateur regorgent d'astuces destinées à
simplifier l'utilisation de votre produit Philips.
Toutefois, si vous ne parvenez pas à résoudre
votre probléme, vous pouvez accéder à
notre aide en ligne à l'adresse
www.philips.com/usasupport
ou formez le
1-800-661-6162 (Francophone)
1-888-PHILIPS (744-5477) (English speaking)
Veillez à avoir votre produit à
portée de main.
(et model / serial nombre)
Gracias por escoger Philips
Necesita ayuda
inmediata?
Lea primero la Guía de uso rápido o el
Manual del usuario, en donde encontrará
consejos que le ayudarán a disfrutar
plenamente de su producto Philips.
Si después de leerlo aún necesita ayuda,
consulte nuestro servicio de
asistencia en línea en
www.philips.com/usasupport
o llame al teléfono
1-888-PHILIPS (744-5477)
y tenga a mano el producto.
(y número de model / serial)
Page 2

Note : This equipment has been tested and found to comply with the limits for a Class B digital device,
pursuant to part 15 of the FCC Rules. These limits are designed to provide reasonable protection against
harmful interference in a residential installation. This equipment generates, uses, and can radiate radio
frequency energy and, if not installed and used in accordance with the instruction manual, may cause
harmful interference to radio communications. However, there is no guarantee that interference will not
occur in a particular installation. If this equipment does cause harmful interference to radio or television
reception, which can be determined by turning the equipment off and on, the user is encouraged to try to
correct the interference by one or more of the following measures :
– Relocate the receiving antenna.
– Increase the separation between the equipment and receiver
– Connect the equipment into an outlet on a circuit different from that to which the receiver is connected.
– Consult the dealer or an experienced radio/TV technician for help.
IMPORTANT !
modifications not authorized by the manufacturer may void users authority to operate this device.
Remarque : Cet équipement a été testé et a été certifié conforme aux limites imposées pour un
appareil numérique de Classe B, conformément à la partie 15 des réglements FCC. Ces limites sont
définies aux fins d'assurer une protection raisonnable contre les interférences nuisibles dans une
installation résidentielle. Cet équipement génère, utilise et émet des fréquences radio qui, en cas d'une
mauvaise installation ou d'une utilisation non-conforme aux instructions de ce manuel d'utilisation
peuvent causer des interférences nuisibles aux communications radio. Il n'y a toutefois aucune garantie
que des interférences nuisibles ne se produiront pas dans une installation donnée. Si cet équipement
cause des interférences nuisibles avec votre poste radio ou de télévision, ce que vous pouvez déterminer
en éteignant et en rallumant votre équipement, il est conseillé à l'utilisateur d'essayer de pallier à ces
interférences nuisibles en prenant l'une ou l'autre des mesures suivantes:
– Changez la position de l'antenne de réception.
– Augmentez la séparation entre l'équipement et le récepteur.
– Branchez l'équipement sur une source d'alimentation différente de celle sur laquelle le récepteur est
branché.
– Consultez votre distributeur ou un technicien qualifié en la matière pour assistance.
IMPORTANTE !
las modificaciones no autorizadas por el fabricante pueden anular la autoridad de los usuarios para
utilizar este aparato.
Nota : Este aparato ha sido probado y cumple con los límites correspondientes a un aparato digital de Clase
B, según la parte 15 de las Normas FCC. Estos límites han sido diseñados para facilitar suficiente protección
.
frente a interferencias perjudiciales en una instalación residencial. Este aparato genera, utiliza y puede emitir
energía de frecuencias de radio y, si no se instala y utiliza según el manual de instrucciones, puede provocar
interferencias perjudiciales en las comunicaciones de radio. Sin embargo, no existe garantía de que las
interferencias no ocurrirán en una instalación particular. Si este aparato provoca interferencias perjudiciales en
la recepción de radio o television, que se puede identificar encendiendo y apagando el aparato,
recomendamos al usuario que intente solucionar las interferencias siguiendo una o más de las siguientes
medidas:
– Cambie la posición de la antena receptora.
– Aumente la separación entre el aparato y el receptor.
– Conecte el aparato a una toma de un circuito diferente al que está conectado el receptor.
– Consulte con el distribuidor o un técnico de radio/TV con experiencia para que le ayuden.
¡IMPORTANTE!
modificações não autorizadas pelo fabricante, podem causar danos na operação deste aparelho.
2
Page 3

1
2
3
4
5
6
7
8
9
0
213456789
DISPLAY
CLOCK
DSC
MENU
PROGRAM
REPEAT
SHUFFLE
DBB
MUTE
TIMER
SLEEP
LOUD
%
$
#
@
!
!
0
3
Page 4
Return your Product Registration Card or register online at
www.philips.com/welcome today to get the very most from your purchase.
Registering your model with PHILIPS makes you eligible for all of the valuable benefits listed below, so
don't miss out. Complete and return your Product Registration Card at once, or register online at
www.philips.com/welcometo ensure:
*Proof of Purchase
Returning the enclosed card
guarantees that your date of
purchase will be on file, so no
additional paperwork will be
required from you to obtain
warrranty service.
*Product Safety
Notification
By registering your product,
you'll receive notification directly from the manufacturer
- in the rare case of a product
recall or safety defect.
Congratulations on your purchase,
and welcome to the “family!”
Dear PHILIPS product owner:
Thank you for your confidence in PHILIPS.
You’ve selected one of the best-built, bestbacked products available today.We’ll do
everything in our power to keep you happy
with your purchase for many years to come.
As a member of the PHILIPS “family,” you’re
entitled to protection by one of the most
comprehensive warranties and outstanding
service networks in the industry.What’s
more, your purchase guarantees you’ll
receive all the information and special offers
for which you qualify, plus easy access to
accessories from our convenient home
shopping network.
Most importantly, you can count on our
uncompromising commitment to your total
satisfaction.
All of this is our way of saying welcome and thanks for investing in a PHILIPS product.
*Additional Benefits
Registering your product guarantees that you'll receive all of
the privileges to which you're
entitled, including special
money-saving offers.
Know these
safety
CAUTION: TO REDUCE THE RISK OF ELECTRIC SHOCK, DO NOT
REMOVE COVER (OR BACK). NO USER-SERVICEABLE PARTS
INSIDE. REFER SERVICING TO QUALIFIED SERVICE PERSONNEL.
This “bolt of lightning” indicates unin-
sulated material within your unit may
cause an electrical shock. For the safety of
everyone in your household, please do not
remove product covering.
The “exclamation point” calls attention
to features for which you should read
the enclosed literature closely to prevent
operating and maintenance problems.
WARNING: To r educe the risk of fire or
electric shock, this apparatus should not be
exposed to rain or moisture and objects
filled with liquids, such as vases, should not
be placed on this apparatus.
CAUTION: To prevent electric shock, match
wide blade of plug to wide slot, fully insert.
ATTENTION:Pour éviter les choc électriques, introduire la lame la plus large de la
fiche dans la borne correspondante de la
prise et pousser jusqu’au fond.
symbols
CAUTION
RISK OF ELECTRIC SHOCK
DO NOT OPEN
P. S. To get the most from your PHILIPS
purchase, be sure to complete and
return your Product Registration Card
at once, or register online at:
www.philips.com/welcome
Visit our World Wide Web Site at http://www.philips.com/welcome
4
For Customer Use
Enter below the Serial No. which is located
on the rear of the cabinet. Retain this
information for future reference.
Model No. __________________________
Serial No. __________________________
Page 5
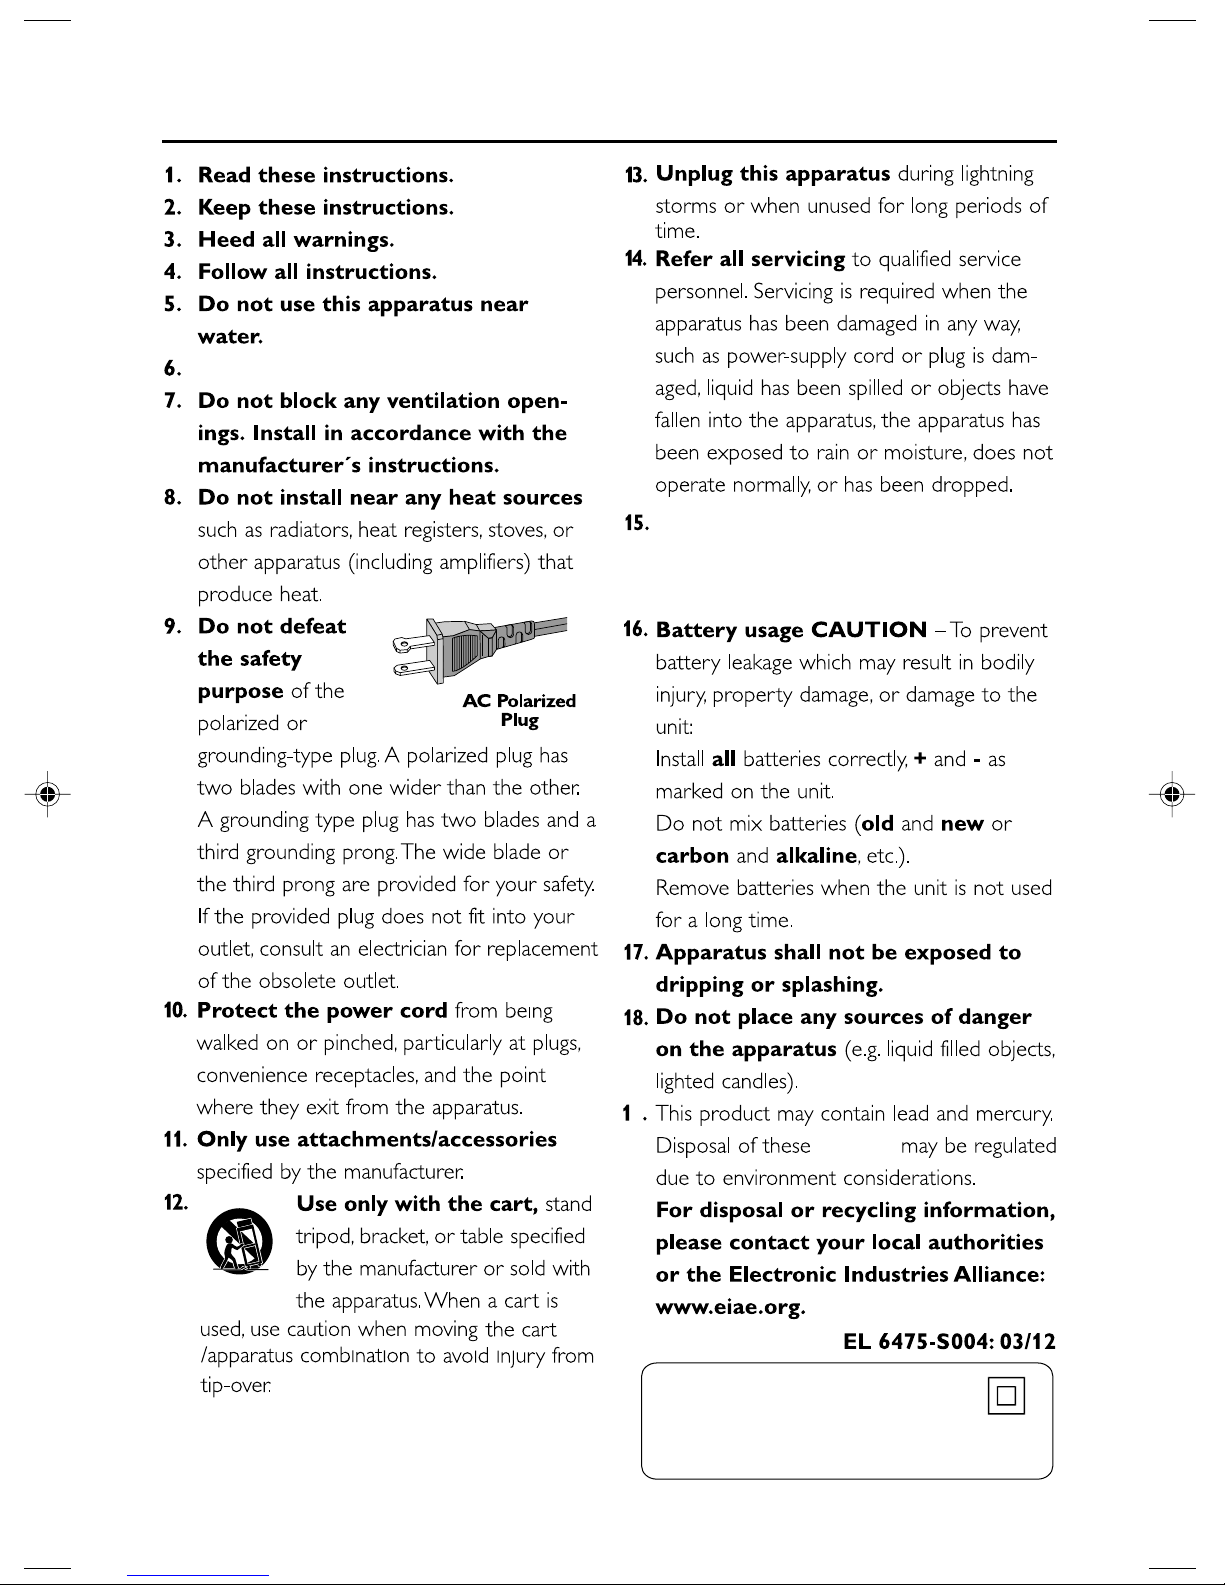
IMPORTANT SAFETY INSTRUCTIONS
Clean only with dry cloth.
Where the MAINS plug or an appliance
coupler is used as the disconnet device,
the disconnet device shall remain
readily operable.
9
materials
Class II equipment symbol
This symbol indicates that the unit has
a double insulation system
5
Page 6
Canada
English:
This digital apparatus does not exceed
the Class B limits for radio noise
emissions from digital apparatus as set
out in the Radio Interference
Regulations of the Canadian
Department of Communications.
Français:
Cet appareil numérique n'emet pas de
bruits radioélectriques dépassant les
limites applicables aux appareils
numériques de Class B prescrites dans
le Règlement sur le Brouillage
Radioélectrique édicté par le Ministère
des Communications du Canada.
CAUTION
Use of controls or adjustments or
performance of procedures other
than herein may result in hazardous
radiation exposure or other unsafe
operation.
ATTENTION
L’utilisation des commandes ou
réglages ou le non respect des
procédures ci-incluses peuvent se
traduire par une exposition
dangereuse à l’irradiation.
ATENCIÓN
El uso de mando o ajustes o la
ejecucción de métodos que no sean
los aquí descritos puede ocasionar
peligro de exposición a radiación.
6
Page 7
Index
English ------------------------------------------------ 8
Français -------------------------------------------- 27
Español --------------------------------------------- 48
English
Français
Español
7
Page 8
Contents
English
General Information
Supplied accessories ............................................ 9
Environmental information ................................ 9
Safety information .......................................... 9-10
Hearing Safety ..................................................... 10
USB Operation
Different play modes: SHUFFLE and REPEAT 19
Programming track numbers ........................... 19
Reviewing the programme ............................... 19
Erasing the programme ..................................... 19
Preparations
Rear connections ............................................... 11
Before using the remote control... ................. 12
Replacing battery (lithium CR2025) into the
remote control... ................................................ 12
Controls
Controls on the system .................................... 13
Controls on the remote control .............. 13-14
Basic Functions
Plug and play (for tuner installation) .............. 15
Switching the system on ................................... 16
Power-saving automatic standby ..................... 16
Adjusting volume and sound............................ 16
Radio Reception
Tuning to radio stations .................................... 17
Programming radio stations ............................. 17
Automatic programming
Manual programming
Tuning to preset radio stations ....................... 17
USB Connection
Using USB connectivity .............................. 20–21
AUX
Listening to an external source ...................... 21
Clock/Timer
Viewing clock ...................................................... 22
Setting the clock ................................................. 22
Setting the timer................................................. 22
Activating and deactivating TIMER ................. 22
Activating and deactivating SLEEP .................. 22
Specifications ........................................... 23
Maintenance.............................................. 23
Tr oubleshooting .............................. 24-25
iPod Operation
Compatible iPod players ................................... 18
Selecting the correct dock adaptor ............... 18
Playing an iPod portable player ....................... 18
Basic playback controls ..................................... 18
Charging iPod battery using the dock ........... 18
8
Page 9
General Information
Congratulations on your purchase and welcome
to Philips!
To fully benefit from the support that Philips
offers, register your product at www.philips.com/
welcome.
This set complies with the FCC rules,
Part 15 and with 21 CFR 1040.10.
Operation is subject to the following two
conditions:
– This device may not cause harmful
interference, and
– This device must accept any interference
received, including interference that may
cause undesired operation.
Supplied accessories
–1 X certified AC/DC 18V adaptor
Brand name: PHILIPS,
Model: GFP451-1825BX-1,
Input: 100-240V~ 50-60Hz 1.2A,
Output: 18.0V 2.5A
–2 speaker boxes
– remote control
– FM antenna
–4 x iPod dock adaptors
Environmental Information
All unnecessary packaging has been omitted. We
have tried to make the packaging easy to
separate into three materials: cardboard (box),
polystyrene foam (buffer) and polyethylene (bags,
protective foam sheet).
Your system consists of materials which can be
recycled and reused if disassembled by a
specialized company. Please observe the local
regulations regarding the disposal of packaging
materials, exhausted batteries and old
equipment.
Disposal of your old product
Your product is designed and
manufactured with high quality
materials and components, which
can be recycled and reused.
When this crossed-out wheeled
bin symbol is attached to a
product it means the product is covered by the
European Directive 2002/96/EC
Please inform yourself about the local separate
collection system for electrical and electronic
products.
Please act according to your local rules and do
not dispose of your old products with your
normal household waste. The correct disposal of
your old product will help prevent potential
negative consequences for the environment and
human health.
Safety Information
● Before operating the system, check that the
operating voltage indicated on the typeplate (or
the voltage indication beside the voltage
selector) of your system is identical with the
voltage of your local power supply. If not, please
consult your dealer.
● Place the system on a flat, hard and stable
surface.
● Where the MAINS plug or an appliance coupler
is used as the disconnet device, the disconnet
device shall remain readily operable.
● The apparatus shall not be exposed to
dripping or splashing.
● Install the unit near the AC outlet and where the
AC power plug can be easily reached.
● Place the system in a location with adequate
ventilation to prevent internal heat build-up in
your system. Allow at least 10 cm (4 inches)
clearance from the rear and the top of the unit
and 5 cm (2 inches) from each side.
● The ventilation should not be impeded by
covering the ventilation openings with items,
such as newspapers, table-cloths, curtains, etc.
● Do not expose the system, batteries or discs to
excessive moisture, rain, sand or heat sources
caused by heating equipment or direct sunlight.
● No naked flame sources, such as lighted candles,
should be placed on the apparatus.
● No objects filled with liquids, such as vases, shall
be placed on the apparatus.
● If the system is brought directly from a cold to a
warm location, or is placed in a very damp room,
moisture may condense on the lens of the disc
unit inside the system. Should this occur, the CD
player would not operate normally. Leave the
power on for about one hour with no disc in the
system until normal playback is possible.
● The mechanical par ts of the set contain self-
lubricating bearings and must not be oiled or
lubricated.
English
9
Page 10
General Information
English
● Batteries (battery pack or batteries installed)
shall not be exposed to excessive heat such as
sunshine, fire or the like.
● When the system is switched to Standby
mode, it is still consuming some power.
To disconnect the system from the
power supply completely, remove the AC
power plug from the wall socket.
Hearing Safety
Listen at a moderate volume.
● Using headphones at a high volume can impair
your hearing. This product can produce sounds
in decibel ranges that may cause hearing loss for
a normal person, even for exposure less than a
minute. The higher decibel ranges are offered
for those that may have already experienced
some hearing loss.
● Sound can be deceiving. Over time your hearing
"comfort level" adapts to higher volumes of
sound. So after prolonged listening, what sounds
"normal" can actually be loud and harmful to
your hearing. To guard against this, set your
volume to a safe level before your hearing
adapts and leave it there.
Be sure to observe the following
guidelines when using your headphones.
● Listen at reasonable volumes for reasonable
periods of time.
● Be careful not to adjust the volume as your
hearing adapts.
● Do not turn up the volume so high that you
can't hear what's around you.
● You should use caution or temporarily
discontinue use in potentially hazardous
situations.
● Do not use headphones while operating a
motorized vehicle, cycling, skateboarding, etc.; it
may create a traffic hazard and is illegal in many
areas.
To establish a safe volume level:
● Set your volume control at a low setting.
● Slowly increase the sound until you can hear it
comfortably and clearly, without distortion.
Listen for reasonable periods of time:
● Prolonged exposure to sound, even at normally
"safe" levels, can also cause hearing loss.
● Be sure to use your equipment reasonably and
take appropriate breaks.
10
Page 11
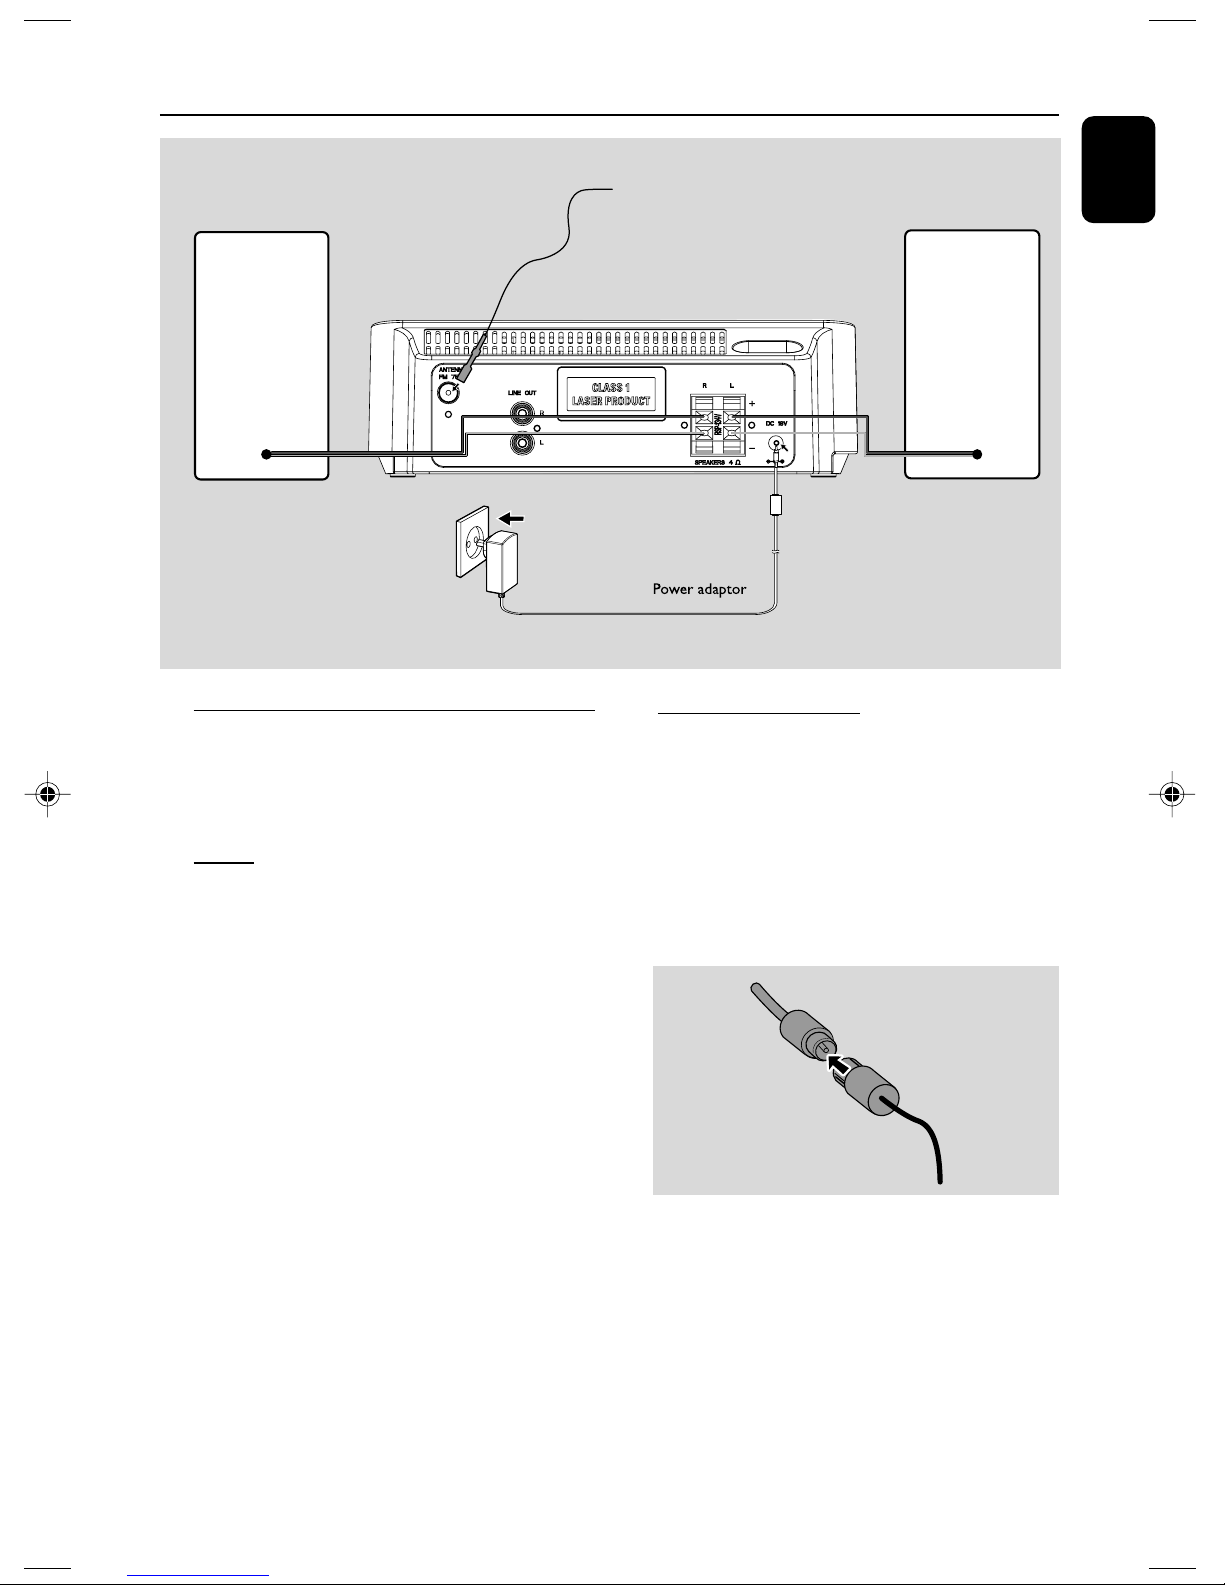
Preparations
speaker
(right)
Rear connections
The type plate is located at the rear of the
system.
A Power
– Before connecting the AC power adaptor to
the wall outlet, ensure that all other connections
have been made.
FM wire antenna
speaker
(left)
B Antenna Connection
FM Antenna
The wire antenna supplied can only be used to
receive nearby stations. For better reception we
recommend using a cable antenna system or an
outdoor antenna.
1 Extend the wire antenna and fit it to FM
ANTENNA as shown below.
English
WARNING!
–For optimal performance, use only the
original power cable.
–Never make or change any connections
with the power switched on.
To avoid overheating of the system, a safety
circuit has been built in. Therefore, your
system may switch to Standby mode
automatically under extreme conditions. If
this happens, let the system cool down
before reusing it (not available for all versions).
Note: If you are using a cable antenna system or
an outdoor antenna, fit the antenna plug, instead of
the wire antenna, to FM ANTENNA .
2 Move the antenna in different positions for
optimal reception (as far away as possible from
the TV, VCR or other radiation sources).
3 Fix the antenna’s end to the wall.
11
Page 12
Preparations
English
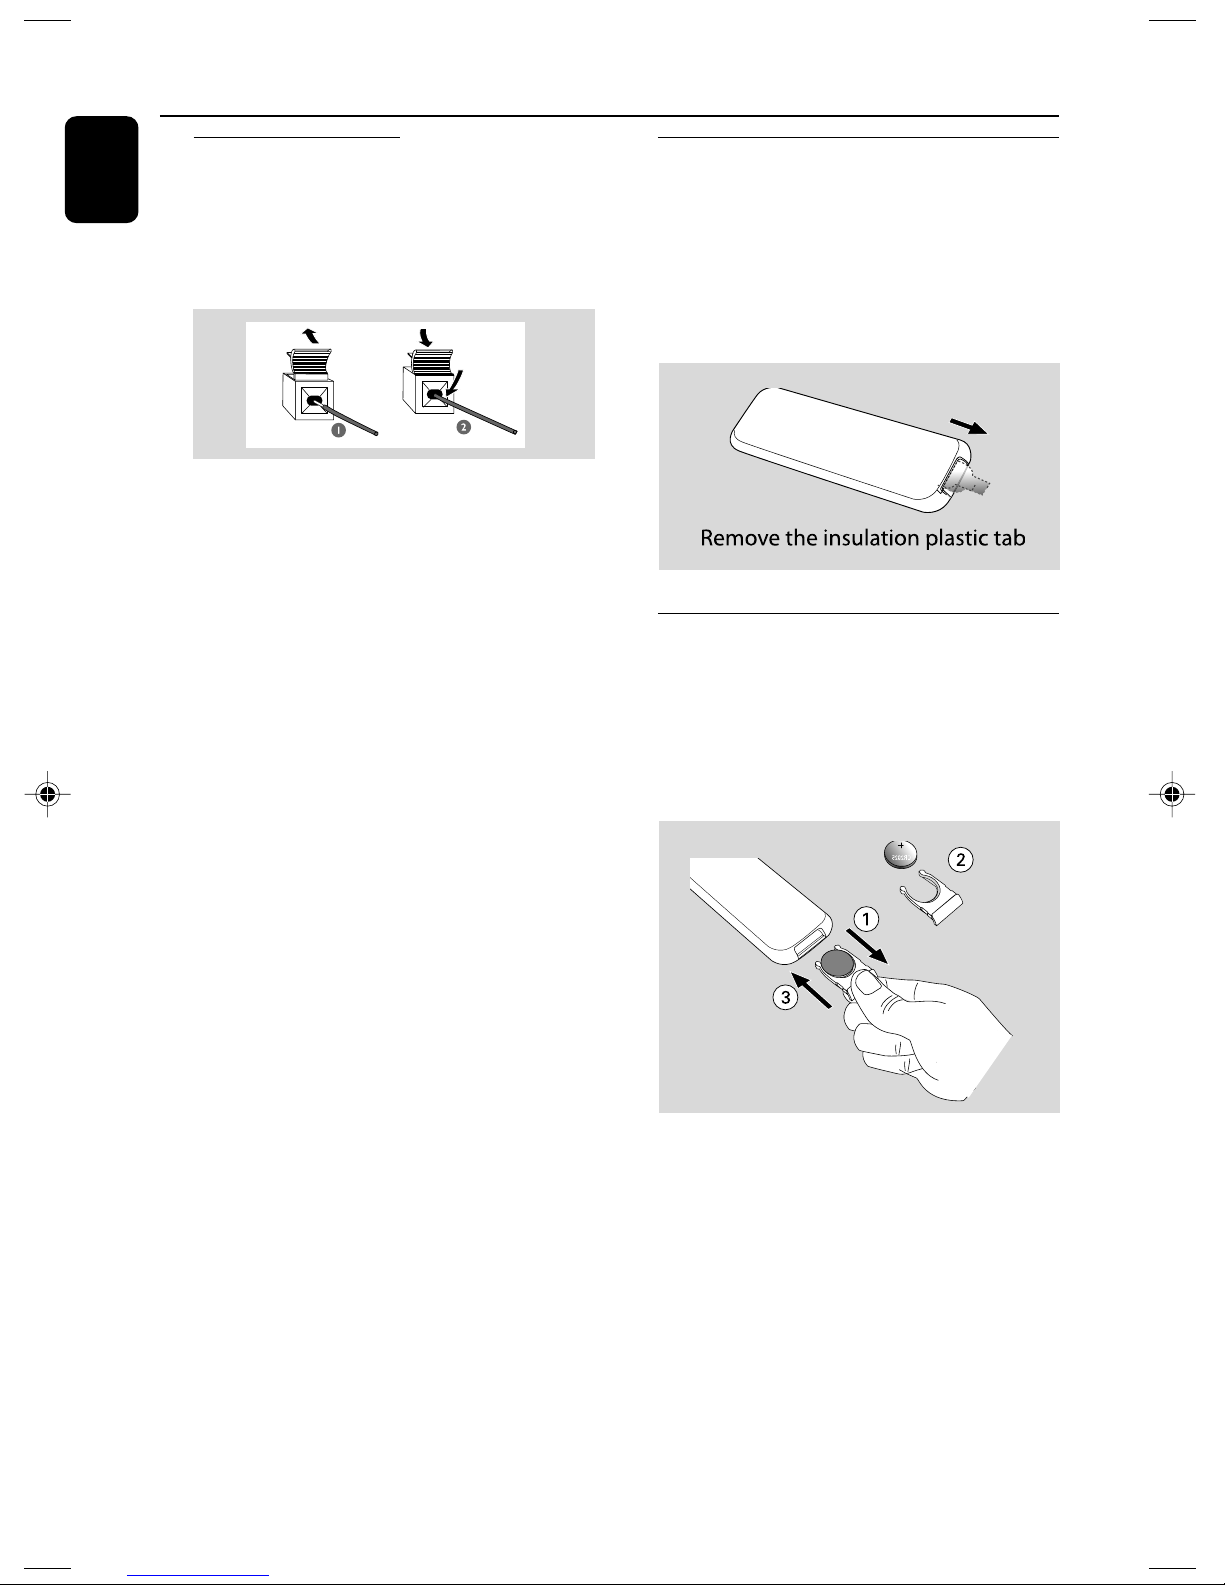
C Speakers Connection
Before using the remote control
Front Speakers
Connect the speaker wires to the SPEAKERS
terminals, right speaker to "R" and left speaker to
"L", coloured (marked) wire to "+" and black
(unmarked) wire to "-".
● Fully insert the stripped portion of the speaker
wire into the terminal as shown.
Notes:
–For optimal sound performance, use the
supplied speakers.
– Do not connect more than one speaker to any
one pair of +/- speaker terminals.
– Do not connect speakers with an impedance
lower than the speakers supplied. Please refer to
the SPECIFICATIONS section of this manual.
1 Pull out the plastic protective sheet.
2 Select the source you wish to control by
pressing one of the source select keys on the
remote control (for example iPod, FM).
3 Then select the desired function (for example
É, í, ë).
Replacing battery (lithium
CR2025) into the remote control
1 Push to open the battery tray.
2 Replace a new battery according to the
indicated polarity.
3 Push the battery tray back to close it.
12
CAUTION!
– Remove battery if they are exhausted or
will not be used for a long time.
– Batteries contain chemical substances, so
they should be disposed of properly.
– Perchlorate Material-special handling
may apply. See www.dtsc.ca.gov/
hazardouswaste/perchlorate.
Page 13
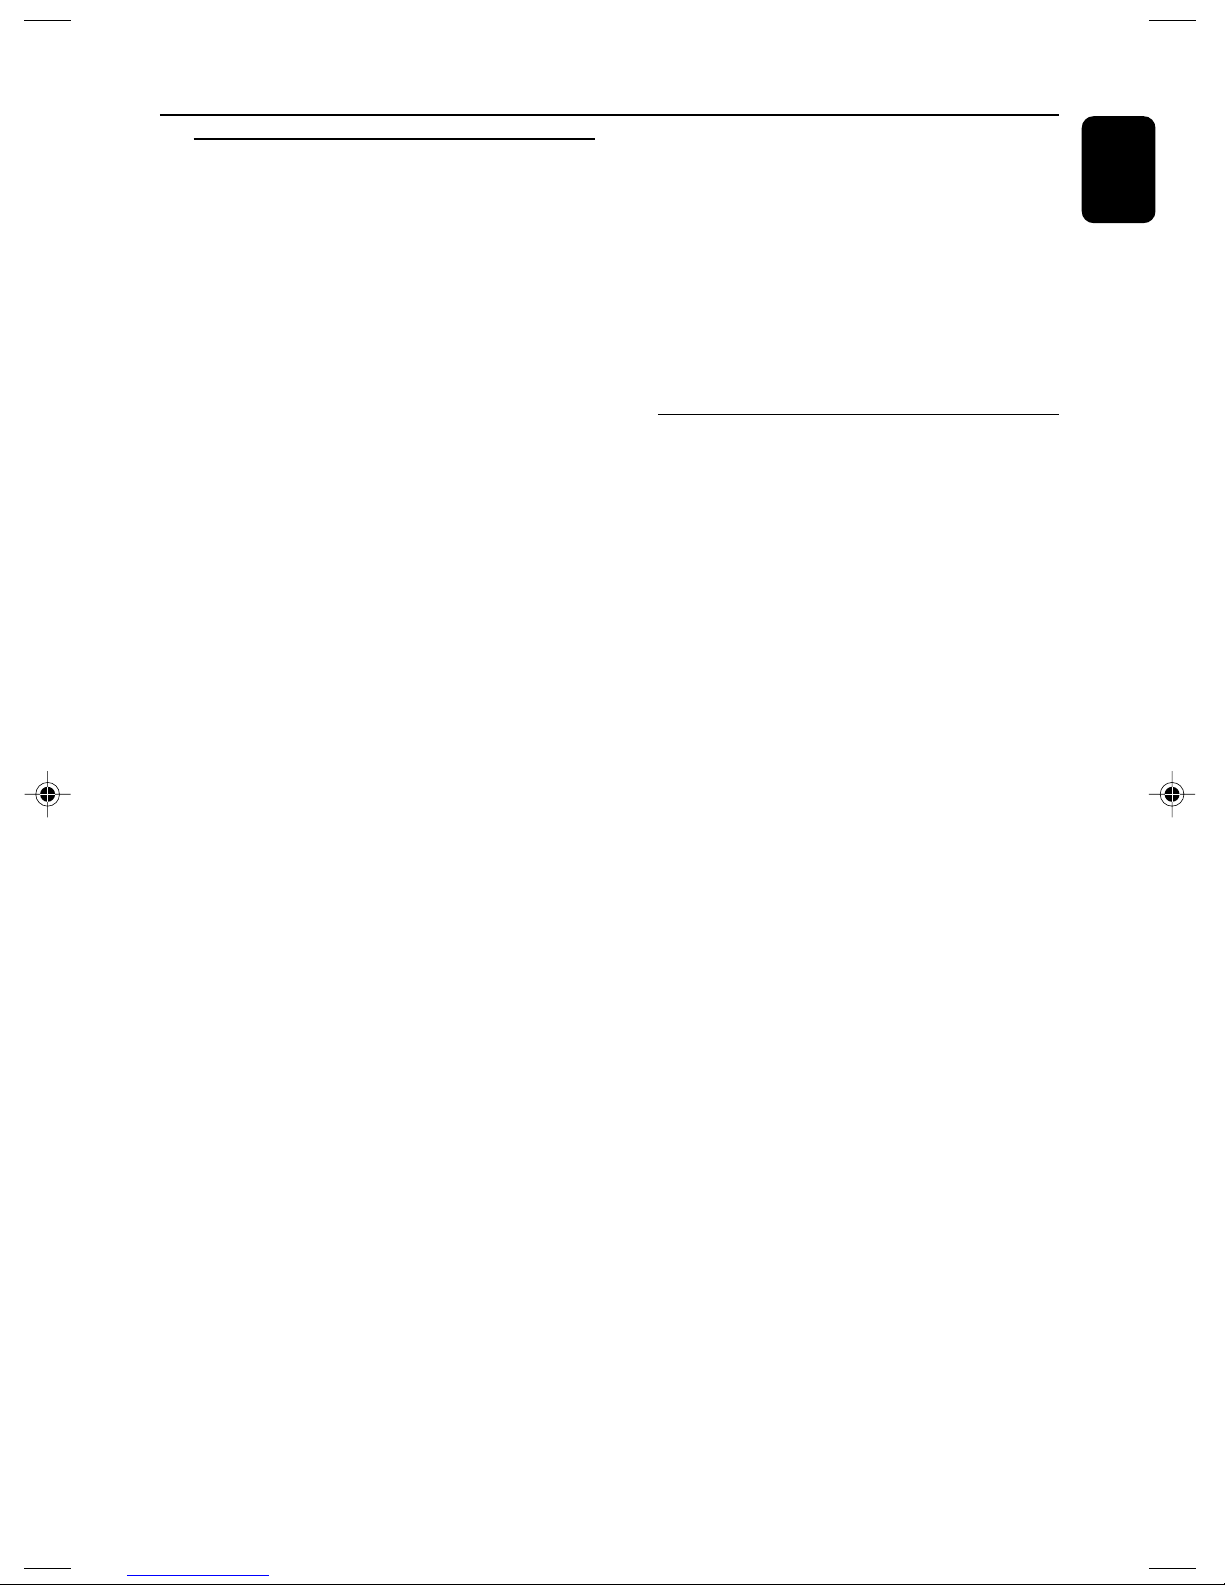
Controls (illustrations on page 3)
Controls on the system
1 STANDBY ON (2)
–switches the system to standby/Eco-power
standby/on.
2 SOURCE
– selects the respective sound source for iPod/FM/
AUX1/AUX2/USB.
– switches on the system.
2; ........................... starts or interrupts iPod/USB
playback.
9 ............................. stops iPod/USB playback or
erases a iPod/USB programme.
í/ ë
for radio .............. selects a preset radio station.
for iPod/USB .... skips to the beginning of the
current/previous/subsequent
track.
for clock/timer adjusts the minutes for the clock/
timer function
3 TUNING à / á
for Tuner ............. tunes to radio stations.
for iPod/USB
................................. fast searches back and forward
within a track/iPod/USB.
for clock/timer adjusts the hours for the clock/
timer function
4 DSC (Digital Sound Control)
– selects sound characteristics: POP/JAZZ
CLASSIC/ROCK.
5 DBB (Dynamic Bass Boost)
– enhances the bass.
6 DISPLAY/CLOCK
for USB
................................. displays the current track
remaining time and total
remaining time during playback.
for clock .............. sets the clock function
7 VOLUME
– adjusts the volume level.
8 iPod
– selects the iPod dock mode.
9 Dock connector
– connects iPod player.
0 USB port
– connects to external USB mass storage device.
! iR SENSOR
– infrared sensor for remote control.
LINE OUT (R) jack (located on the back
panel)
– connects an external source (3.5 mm socket)
LINE OUT (L) jack (located on the back
panel)
– connects an external source using audio cables
(white/red)
HEADPHONE (located on the back panel)
–connects headphones
Controls on the remote control
1 2
–switches the system to standby/Eco-power
standby/on.
2 Source buttons
– selects the respective sound source for iPod/
USB/FM/AUX1/AUX2.
– switches on the system.
3 DISPLAY/CLOCK
for USB
................................. displays the current track
remaining time and total
remaining time during playback.
for clock .............. sets the clock function
4 PROGRAM
for USB ............... programmes tracks and reviews
the programme.
for Tuner ............. programmes tuner stations
manually or automatically.
for clock .............. selects between 12 hour and 24
hour display
5 DSC (Digital Sound Control)
– selects sound characteristics: POP/JAZZ
CLASSIC/ROCK.
6 OK
– confirms a selection.
4 / 3
– selects an item in a menu
S / T
for Tuner ............. tunes to radio stations.
for iPod/USB .... skips to the beginning of a
current/previous/subsequent
track.
................................. fast searches back and forward
within a track/iPod/USB.
for clock/timer adjusts the hours for the clock/
timer function
English
13
Page 14

Controls (illustrations on page 3)
English
7 MENU
–enters the iPod menu.
8 2;
– starts or interrupts iPod/USB playback.
9 ALBUM/PRESET +/-
for radio .............. selects a preset radio station.
for MP3/WMA...............selects an album.
for clock/timer adjusts the minutes for the clock/
timer function
0 9
– stops USB playback or erases a USB programme.
! VOLUME
– adjusts the volume level.
@ MUTE
– interrupts and resumes sound reproduction
# LOUD/DBB
– enables or disables automatic loudness
adjustment.
– enables or disables bass enhancement.
$ TIMER/SLEEP
– activates/deactivates or selects the sleep timer.
– activates/deactivates or sets the wake-up timer.
– sets the timer function
% REPEAT/SHUFFLE
– selects different play modes: REPEAT or
SHUFFLE (random order).
14
Page 15
Basic Functions
To reinstall Plug and Play
IMPORTANT:
Before you operate the system, complete
the preparation procedures.
Plug and Play (for tuner installlation)
Plug and Play allows you to store all available
radio stations automatically.
First time setup/power up
1 When you turn on the main supply, "AUTO
INSTALL - PLEASE PRESS PLAY, STOP
CANCEL" is displayed.
2 Press ÉÅ on the system to start installation.
➜ "PLUG AND PLAY" .... "INSTALL" is
displayed, followed by "TUNER" and "AUTO".
➜ PROG starts flashing.
➜ The system will automatically store the radio
stations (FM only ) with sufficient signal strength.
➜ When all the available radio stations are
stored or the memory for 40 presets are used,
the last preset radio station will be played.
1 In standby mode, press and holdÉÅ on the
system until "AUTO INSTALL - PLEASE
PRESS PLAY, STOP CANCEL" is displayed.
2 Press ÉÅ again to start installation.
➜ All previously stored radio stations will be
replaced.
To exit without storing the Plug and Play
● Press 9 on the system.
➜ If you do not complete the Plug and Play
installation, the function will be restarted when
you next turn on the main supply again.
Notes:
– If no stereo frequency is detected during Plug
and Play, "CHECK ANTENNA" will be displayed.
English
15
Page 16
Basic Functions
English
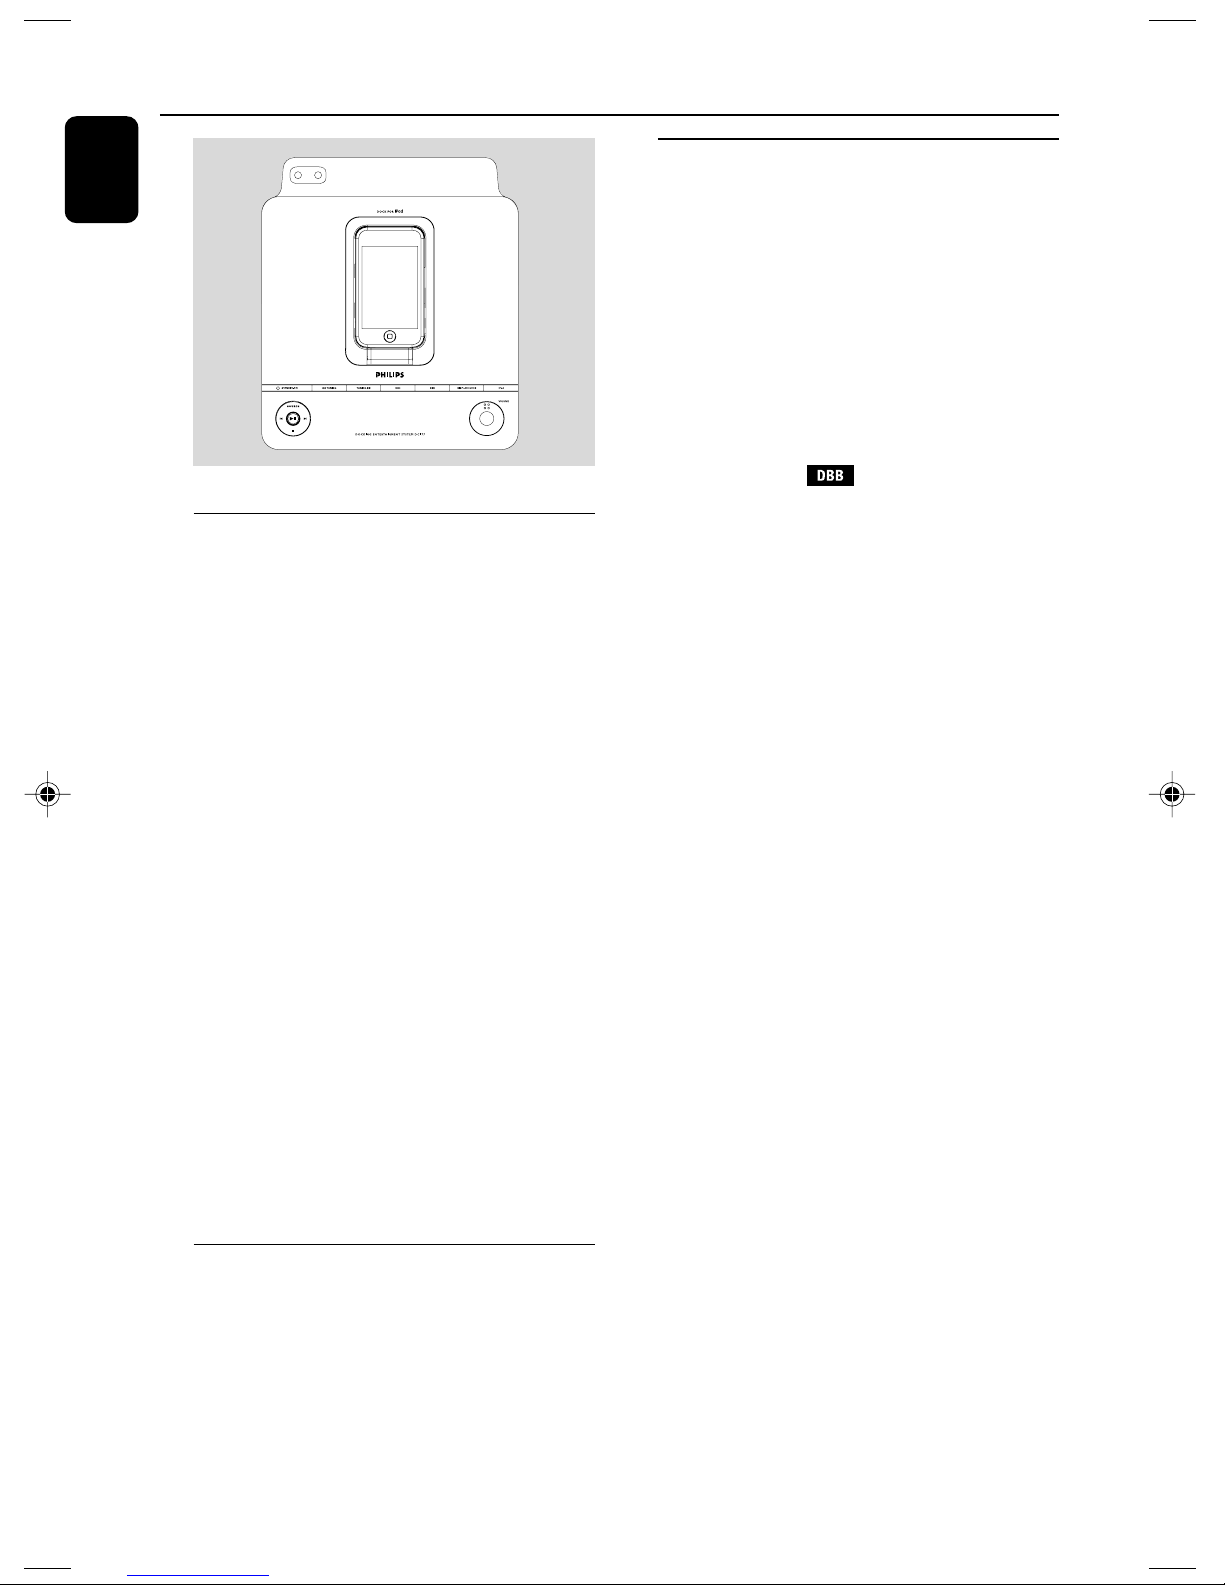
Switching the system on
● Press STANDBY ON or SOURCE (or 2on
the remote control).
➜ The system will switch to the last selected
source.
● Press iPod, USB, FM or AUX on the remote
control.
➜ The system will switch to the selected source.
To switch the system to standby mode
● Press STANDBY ON on the system (or 2on
the remote control).
➜ The display displays clock time, or --: -- is
displayed if clock time is not set.
➜ The volume level (up to a maximum volume
level of 12 and up to a minimum level of 4),
interactive sound settings, last selected source
and tuner presets will be retained in the player's
memory.
Adjusting volume and sound
1 Tu rn the VOLUME control anti-clockwise to
decrease or clockwise to increase volume on the
system (or press VOL -/+ on the remote
control).
➜ Display shows the volume level VOL and a
number from MIN, 1-31, MAX.
2 Press DSC repeatedly to select the desired
sound effect: POP / JAZZ / CLASSIC / ROCK.
3 Press DBB (or DBB/LOUD on the remote
control) to switch bass enhancement on or off.
➜ Display shows if the DBB is activated.
4 Press and hold DBB/LOUD on the remote
control to enable/disable LOUDNESS feature.
● LOUDNESS feature enables the system to
automatically increase the treble and bass sound
effect at low volume (the higher the volume, the
lower the treble and bass increase).
5 Press MUTE on the remote control to
interrupt sound reproduction instantly.
➜ Playback will continue without sound.
● To activate sound reproduction you can:
– press MUTE again;
– adjust the volume controls;
– change source.
To switch the system to Eco-power
standby mode
● Press and hold STANDBY ON (y on the
remote control) for more than 2 seconds.
➜ The display will go blank.
➜ The Eco power light will be on.
Power-saving automatic standby
The power-saving feature automatically switches
to standby 15 minutes after a USB playback has
ended and no control is operated.
16
Page 17
Radio Reception
Tuning to radio stations
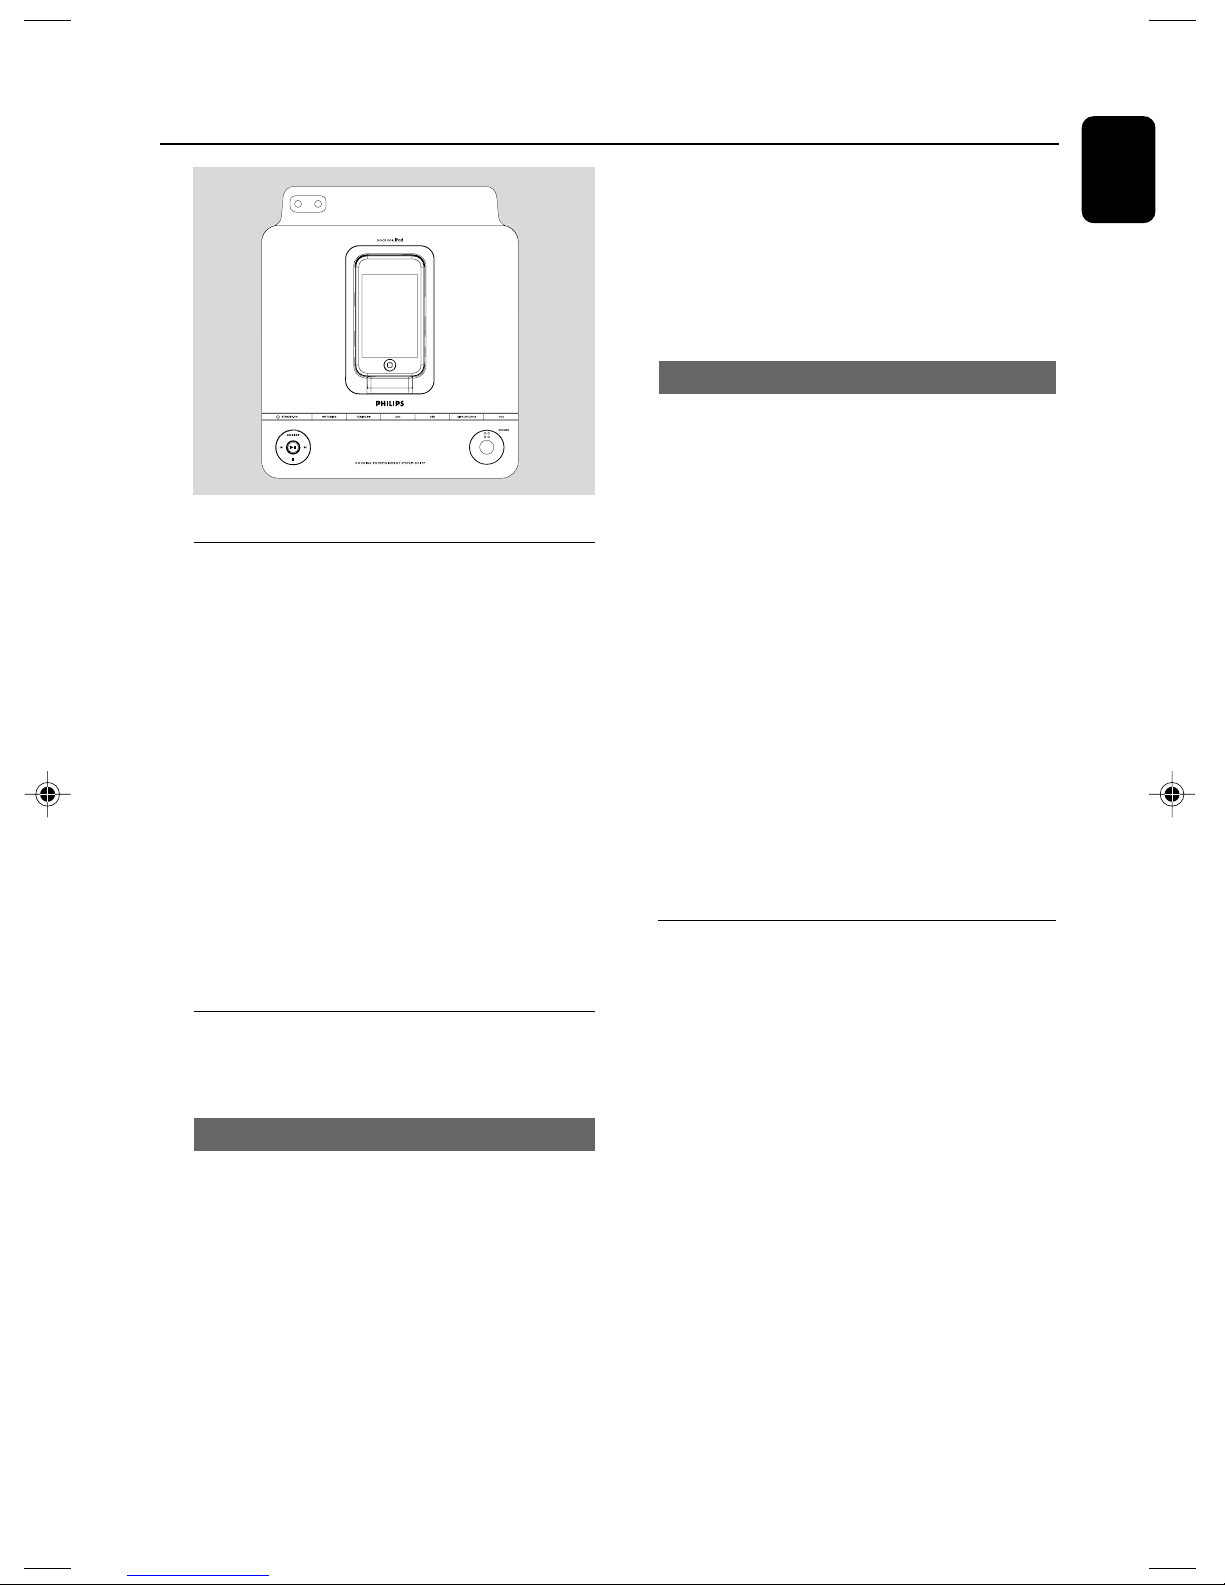
1 Press SOURCE on the set (or FM on the
remote control ) repeatedly until FM is displayed.
2 Press down on TUNING à / á (or S /
T on the remote control) and release the
button.
➜ The radio automatically tunes to a station
with sufficient reception. Display indication during
automatic tuning: SEARCH.
3 Repeat step 2 if necessary until you find the
desired station.
● To tune to a weak station, press TUNING à /
á (or S / T on the remote control) briefly
and repeatedly until you have found optimal
reception.
Programming radio stations
You can store up to a total of 40 radio stations
in the memory.
2 Press PROGRAM on the remote control for
more than 2 seconds to activate programming.
➜ FM AUTO is displayed and available stations
are programmed in order of waveband
reception strength. The first preset automatically
stored will then be played.
Manual programming
1 Tune to your desired station (see Tuning to radio
stations).
2 Press PROGRAM on the remote control to
activate programming.
➜ PROG flashes in the display.
3 Press í/
the remote control) to allocate a number from
1 to 40 to this station.
ë (or ALBUM/PRESET +/- on
4 Press PROGRAM on the remote control again
to confirm the setting.
➜ PROG disappears, the preset number and the
frequency of the preset station are shown.
5 Repeat the above four steps to store other
stations.
● You can override a preset station by storing
another frequency in its place.
Tuning to preset radio stations
● Press í/ ë (or ALBUM/PRESET +/- on
the remote control) until the desired preset
station is displayed.
English
Automatic programming
Automatic programming will start with a chosen
preset number. From this preset number
upwards, former programmed radio stations will
be overridden. The system will only programme
stations which are not in the memory already.
1 Press í/
the remote control) to select the preset
number where programming should start.
Note:
– If no preset number is selected, default is preset
(1) and all your presets will be overridden.
ë (or ALBUM/PRESET +/- on
17
Page 18
iPod Operation
English
Compatible iPod players
● The docking entertainment system is compatible
with all the existing Apple iPod models with 30pin connector.
Selecting the correct dock
adaptor
● Four adaptors are included to fit different iPod
models including iPod touch (8GB, 16GB), iPod
classic (80GB, 160GB), iPod nano 3rd generation
(4GB, 8GB), iPod the 5th generation (30GB,
60GB, 80GB), iPod nano 2nd generation (2GB,
4GB, 8GB) and iPod nano 1st generation (1GB,
2GB, 4GB ).
Playing an iPod portable player
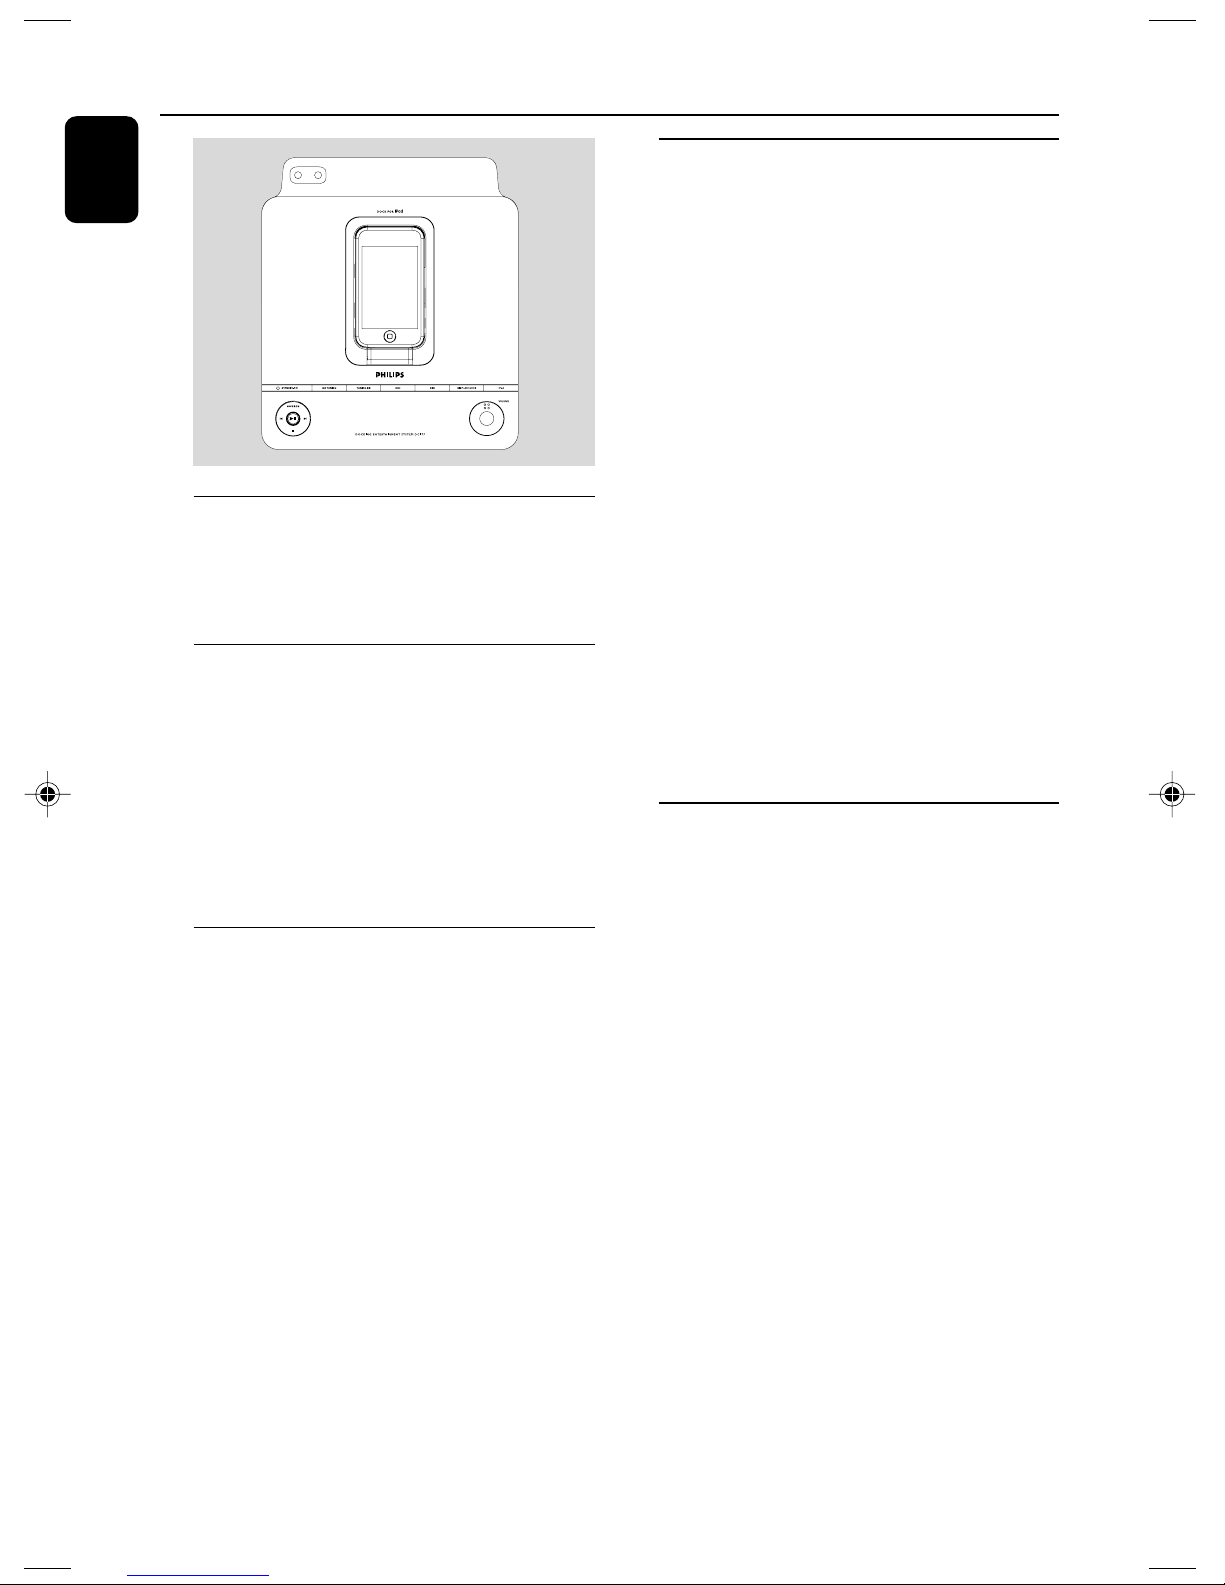
1 Correctly dock your iPod portable player in the
cradle. Make sure the dock adaptor is
compatible.
● Make sure that you have powered on your iPod
player before selecting iPod source.
➜ On the display, "iPod" is displayed if iPod is
connected.
2 Press SOURCE on the system repeatedly or
iPod on the remote control to select iPod
source.
3 Playback starts automatically. You can select
available features (such as play/pause, skip track,
fast forward/backward) during playback.
Basic playback controls
To play an iPod
● Press 2; to star t playback, if the iPod is in sleep
mode or pause mode.
➜ “iPod” is displayde.
To select a different track
● Press í/ ë(on the remote control S / T).
To find a passage within a track
1 Press and hold down on TUNING à / á
(on the remote control S / T).
➜ The iPod is played at high speed and low
volume.
2 When you recognise the passage you want,
release TUNING à / á (on the remote
control S / T ).
➜ Normal playback continues.
To interrupt playback
● Press 2; during playback.
➜ To resume, press 2; again.
Charging iPod battery using the
dock
● In iPod mode, directly dock your iPod portable
player on the cradle for charging.
Note:
–For the purpose of SAVING POWER, recharging
of your iPod is NOT SUPPORTED when the main
set is in the Eco-power standby mode.
18
Page 19
USB Operation
Different play modes: SHUFFLE
and REPEAT
You can select and change the various play
modes before or during playback. The play
modes can also be combined with
PROGRAMME.
SHUF ................tracks are played in random
order
REP ALL ........... repeats the programme
REP ................... plays the current track
continuously
1 To select your play mode, press REPEAT/
SHUFFLE on the remote control before or
during playback until the display shows the
desired function.
2 Press 2; to start playback if in the STOP
position.
➜ If you have selected SHUFFLE, playback starts
automatically.
3 To return to normal playback, press REPEAT/
SHUFFLE on the remote control until the
various SHUFFLE/ REPEAT modes are no longer
displayed.
● You can also press 9 to cancel your play mode.
Note:
– The SHUFFLE and REPEAT functions cannot be
used simultaneously.
Programming track numbers
Programme in the STOP position to select and
store your tracks in the desired sequence. If you
like, store any track more than once. Up to 40
tracks can be stored in the memory.
1 In the stop position, use the í/
your desired track number.
● For MP3, you may press TUNING à / á
(or ALBUM/PRESET +/- on the remote
control) to select a desired album, then select
your desired track.
ë to select
2 Press PROGRAM on the remote control to
store.
➜ Display: PROG flashes, and PR 01 is displayed
briefly, then the selected track number.
3 Repeat steps 1-2 to select and store all desired
tracks.
➜ PROGRAM FULL is displayed if you attempt
to programme more than 40 tracks.
4 To start playback of your programme, press 2;.
Reviewing the programme
● Stop playback and press PROGRAM on the
remote control repeatedly.
● To exit review mode, pressÇ.
Erasing the programme
You can erase the programme by:
● pressing 9 once in the STOP mode;
● pressing 9 twice during playback;
English
19
Page 20

USB Connection
English
Using USB connectivity
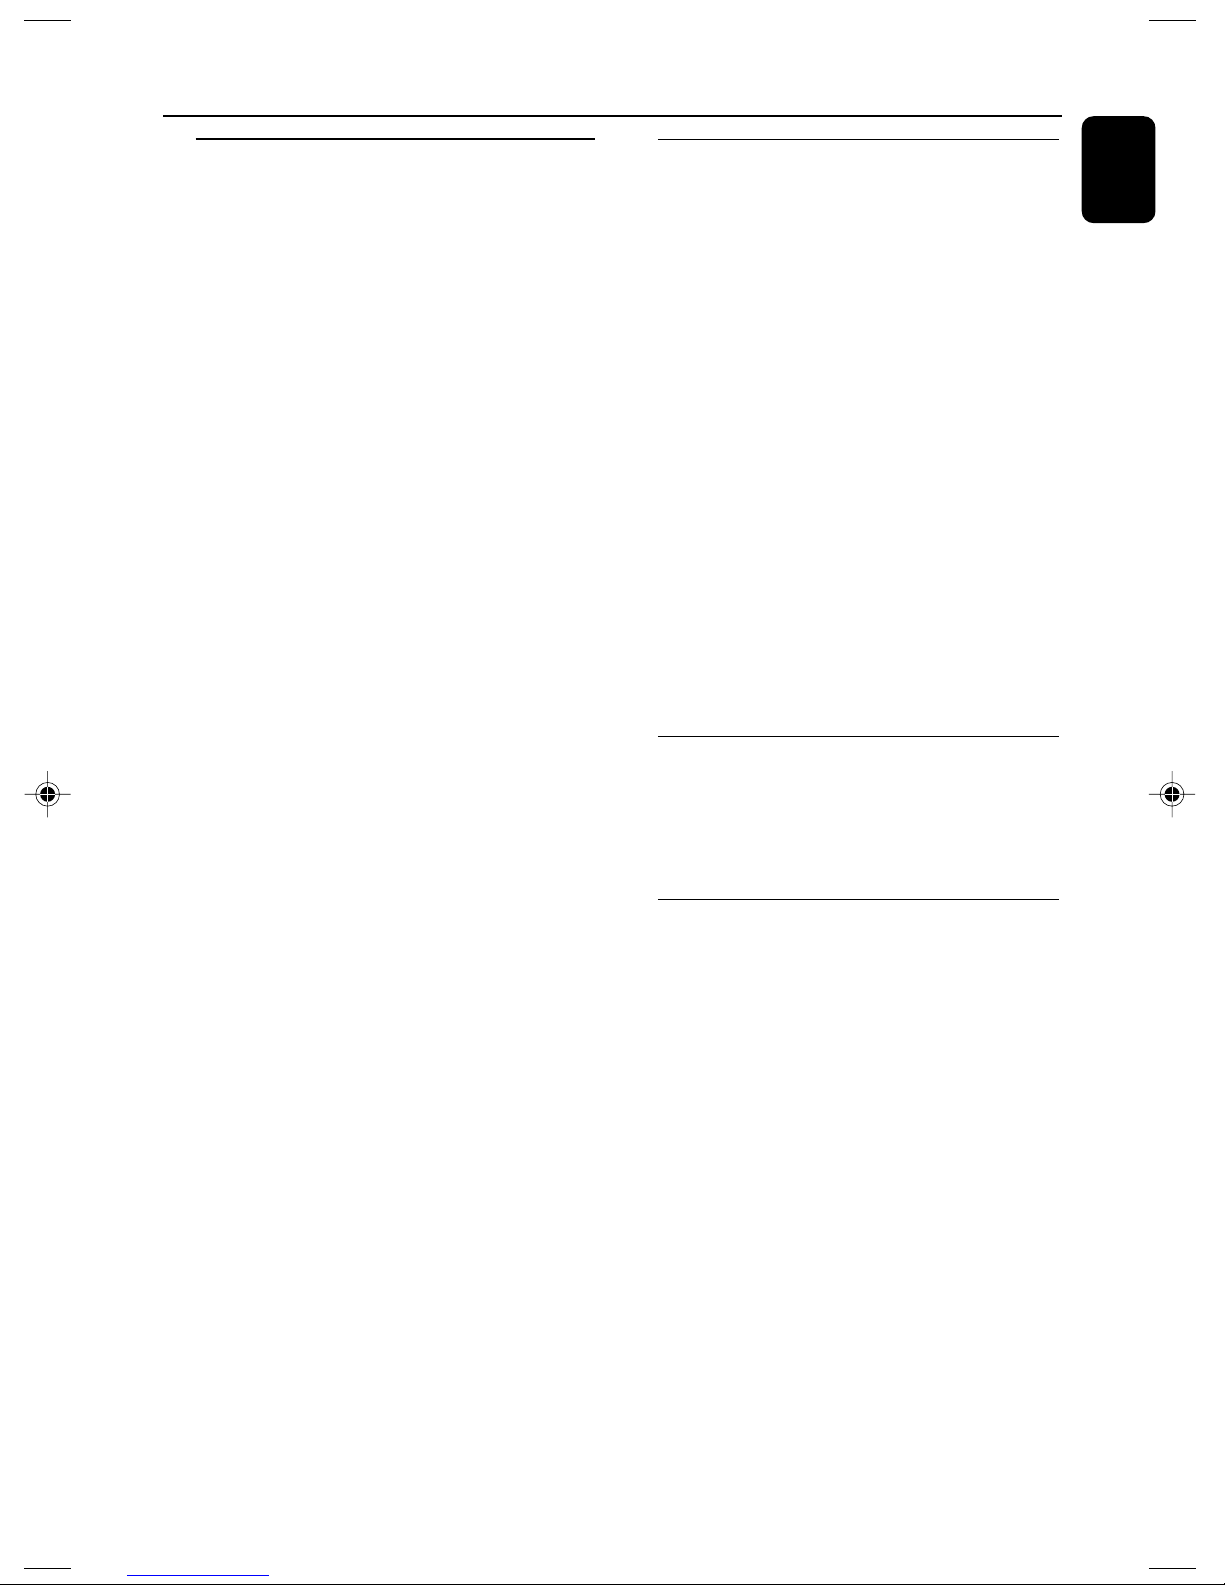
● DC177 is fitted with a USB port in the front
panel, offering a plug and play feature which
allows you to play, from your DC177 , digital
music and spoken contents stored on a USB
mass storage device.
● Using a USB mass storage device, you can also
enjoy all the features offered by DC177 which
are explained and instructed in the sections of
iPod/USB operation.
Compatible USB mass storage devices
With the DC177 , you can use
– USB flash memor y (USB 2.0 or USB 1.1)
– USB flash player (USB 2.0 or USB 1.1)
• USB device which requires driver
installation under Windows XP is not
supported.
Note:
– In some USB flash players (or memory devices),
the stored contents are recorded using copyright
protection technology. Such protected contents will
be unplayable on any other devices (such as
MCM204 device).
Supported formats:
– USB or memory file format FAT12, FAT16,
FAT32 (sector size: 512 - 4096 bytes)
– MP3 bit rate (data rate): 32-320 kbps and
variable bit rate
– WMA v9 or earlier
– Directory nesting up to a maximum of 8
levels
–Number of albums: maximum 99
– Number of tracks: maximum 800
– ID3 tag v2.0 or later
– File name in Uicode UTF8 (maximum length:
128 bytes
Playing a USB mass storage device
1 Make sure that your DC177 is being powered
on.
2 Plug a compatible USB mass storage device to
DC177 ’s USB port marked . If needed, use
a suitable USB cable to connect between the
device and DC177 ’s USB port.
➜ The device will automatically power on.
● If the device is not powered on, turn on the
power manually, then re-connnect it.
3 Press SOURCE repeatedly (or USB on the
remote) to enter USB mode.
➜ NO AUDIO appears if no audio file is found
in the USB device.
4 Press 2; on your DC177 to start play.
● To use other playback features, see the section
of iPod Operation.
Helpful hints:
– Make sure that file names of MP3 files end
with .mp3. and the file names of WMA files end
with .wma.
–For DRM protected WMA files, use Windows
Media Player 10 (or later) for conversion. Visit
www.microsoft.com for details about Windows
Media Player and WM DRM (Windows Media
Digital Rights Management).
–For USB device playing, if the display shows
"OL", it means that the USB device is
electrically overloading DC177. You need to change
a USB device.
The system will not play or support the
following:
•Empty albums: an empty album is an album
that does not contain MP3/WMA files, and
will not be shown in the display.
• Non-suppor ted file formats are skipped. This
means that e.g.: Word documents .doc or
MP3 files with extension. dlf are ignored and
will not be played.
•AAC , WAV, PCM. NTFS audio files
• DRM protected WMA files
• WMA files in Lossless format
20
Page 21

USB Connection AUX
INFORMATION REGARDING USB DIRECT:
1. Compatibility of the USB connection on this
micro system:
a) This micro system supports most USB Mass
storage devices (MSD) that these devices are
compliant to the USB MSD standards.
i) Most common Mass storage class
devices are flash drives, memory sticks, jump
drives and etc.
ii) If you see a "Disc Drive" showing up on
your computer after you have plugged the mass
storage device into your computer, most likely it
is MSD compliant and it will work with this
micro system.
b) If your Mass storage device requires a
battery/power source, please make sure you
have a fresh battery in it or charge the USB
device first and then plug it into the micro
system again.
2. Supported Music type:
a) This device only supports unprotected music
with file extension: .mp3 .wma
b) Music bought from on-line music stores are
not supported because they are secured by
Digital Rights Management protection (DRM).
c) File name extensions that ended with the
following are not supported: .wav; .m4a; .m4p;
.mp4; .aac and etc.
3. No Direct connection can be made from a
Computer USB port to the micro system even
you have either or both mp3 or wma file in your
computer.
Listening to an external source
You can listen to the sound of the connected
external device through your system’s speakers.
Using AUX IN (3.5 mm jack )
1 Use a cinch cable (not supplied) to connect
AUX IN jack of the main unit (3.5 mm, located
on the back panel) to an AUDIO OUT or
headphone jack on an external equipment (such
as CD player, or VCR).
2 Press SOURCE (or AUX on the remote
control) repeatedly until “AUX 1” is displayed.
Using AUX IN 2 (white/red jacks)
1 Use the audio cables (white/red, not supplied) to
connect AUX IN 2 (L/R) jacks of the main unit
(located on the back panel ) to the
corresponding AUDIO OUT jacks on an
external device (such as TV or VCR).
2 Press SOURCE (or AUX on the remote
control) repeatedly until “AUX 2” is displayed.
English
21
Page 22
Clock/Timer
English
Viewing clock
● The clock (if it is set) is shown in normal standby
mode.
To view the clock in any sound source
(ccor FM for example )
● Press briefly DISPLAY/CLOCK.
Setting the clock
1 In standby mode, press and hold DISPLAY/
CLOCK for 2 seconds.
➜ 12 hour or 24 hour mode is displayed.
2 Press PROGRAM on the remote control to
select between 12 hour and 24 hour display.
➜ The clock digits flash.
3 Press TUNING à / á (or S / T on the
remote control) to set the hours.
Notes:
– Timer is not available in AUX mode.
– If iPod/USB source is selected and no compatible
iPod/USB device is plugged, FM will be selected
automatically.
Activating and deactivating
TIMER
● In standby or during playback, press
TIMER/SLEEP on the remote control once.
➜ Display shows if activated, and disappears if
deactivated.
Activating and deactivating
SLEEP
The sleep timer enables the system to switch off
by itself after a set period of time.
4 Press í/
+/- on the remote control) to set the minutes.
ë on the set (or ALBUM/PRESET
5 Press DISPLAY/CLOCK to confirm the time.
Setting the timer
● The system can be used as an alarm clock,
whereby the iPod or FM or USB is switched on
at a set time. The clock time needs to be set first
before the timer can be used.
1 In standby mode, press and hold TIMER/
SLEEP about 2 seconds on the remote control.
2 Press SOURCE (or iPod/USB/FM on the
remote control) to select sound source.
3 Press TIMER/SLEEP to confirm your desired
mode.
➜ The clock digits flash.
4 Press TUNING à / á (or S / T on the
remote control) to set the hours.
5 Press í/
+/- on the remote control) to set the minutes.
ë on the set (or ALBUM/PRESET
● Press TIMER/SLEEP on the remote control
once or more.
➜ Display shows and one of the sleep time
options in sequence: 60, 45, 30,15, 0, 60... if
you have selected a time.
● To deactivate, press TIMER/SLEEP on the
remote control once or more until “ 0“ is shown,
or press STANDBY ON on the system (or
2on the remote control).
➜ disappears from the display.
6 Press TIMER/SLEEP to confirm the time.
➜ The timer is now set and activated.
22
Page 23
Specifications
AMPLIFIER
Output power ........................................ 2 x 10W RMS
Signal-to-noise ratio .......................... ≥ 60 dBA (IEC)
Frequency response ....................... 125 – 16000 Hz
Impedance loudspeakers ........................................... 4Ω
USB PLAYER
USB ................................................................... 12Mb/s, V1.1
......................................... support MP3 and WMA files
Number of albums/folders ................. maximum 99
Number of tracks/titles ...................... maximum 400
TUNER
FM wave range ................................... 87.5 – 108 MHz
Sensitivity at 75 Ω
– FM 26 dB sensitivity .......................................... 20 µV
Total harmonic distortion ..................................... ≤ 5%
SPEAKERS
Bass reflex system
Dimensions (w x h x d) . 160 x 250 x 180 (mm)
GENERAL INFORMATION
AC Power ................................. 100 – 240 V, 50/60 Hz
Dimensions (w x h x d) ..... 232 x 85 x 275 (mm)
Weight (with speakers) .......................... approx. 5 kg
Power consumption
Active .......................................................................... 30 W
Standby .................................................................... < 5 W
Eco Power Standby ........................................... < 1 W
Specifications and external appearance are
subject to change without notice.
English
Cleaning the Cabinet
● Use a soft cloth slightly moistened with a mild
detergent solution. Do not use a solution
containing alcohol, spirits, ammonia or abrasives.
Maintenance
23
Page 24
Troubleshooting
English
WARNING
Under no circumstances should you try to repair the system yourself, as this will invalidate the
warranty. Do not open the system as there is a risk of electric shock.
If a fault occurs, first check the points listed below before taking the system for repair. If you
are unable to remedy a problem by following these hints, consult your dealer or Philips for
help.
Problem
Radio reception is poor.
The system does not react when buttons
are pressed.
Sound cannot be heard or is of poor
quality.
The left and right sound outputs are
reversed.
Solution
✔ If the signal is too weak, adjust the antenna or
connect an external antenna for better
reception.
✔ Increase the distance between the Mini HiFi
System and your TV or VCR.
✔ Remove and reconnect the AC power plug and
switch on the system again.
✔ Adjust the volume.
✔ Disconnect the headphones.
✔ Check that the speakers are connec ted
correctly.
✔ Check if the stripped speaker wire is clamped.
✔ Check the speaker connections and location.
24
Page 25
Tr oubleshooting
Problem
The remote control does not function
properly.
The time is not working.
The Clock/Timer setting is erased.
The USB device doesn’t play on my
DC177
Solution
✔ Select the source (iPod or FM, for example)
before pressing the function button.
✔ Reduce the distance between the remote
control and the system.
✔ Insert the batteries with their polarities
(+/– signs) aligned as indicated.
✔ Replace the batteries.
✔ Point the remote control directly towards the IR
sensor.
✔ Set the clock correctly.
✔ Press TIMER/SLEEP to switch on the timer.
✔ If recording or tape dubbing is in progress, stop
recording.
✔ Power has been interrupted or the power cord
has been disconnected. Reset the clock/timer.
✔ It is not set in the USB mode. Select USB mode.
✔ The device is not securely connected to
DC177’s USB port. Re-connect the device, and
make sure that the device is powered on.
✔ The device is not supported by DC177, or the
audio file format stored on the device is not
supported by DC177. Use a compatible device/
playable audio file format.
English
25
Page 26

English
PHILIPS LIMITED WARRANTY
ONE (1) YEAR
WARRANTY COVERAGE:
PHILIPS warranty obligation is limited to the terms set forth
below.
WHO IS COVERED:
Philips warrants the product to the original purchaser or the person receiving the product as a gift against defects in materials and
workmanship as based on the date of original purchase
(“Warranty Period”) from an Authorized Dealer. The original
sales receipt showing the product name and the purchase date
from an authorized retailer is considered such proof.
WHAT IS COVERED:
The Philips warranty covers new products if a defect in material
or workmanship occurs and a valid claim is received by Philips
within the Warranty Period. At its option, Philips will either (1)
repair the product at no charge, using new or refurbished
replacement parts, or (2) exchange the product with a product
that is new or which has been manufactured from new, or serviceable used parts and is at least functionally equivalent or most
comparable to the original product in Philips current inventory,
or (3) refund the original purchase price of the product.
Philips warrants replacement products or parts provided under
this warranty against defects in materials and workmanship from
the date of the replacement or repair for ninety (90) days or for
the remaining portion of the original product’s warranty,
whichever provides longer coverage for you. When a product or
part is exchanged, any replacement item becomes your property
and the replaced item becomes Philips’ property. When a refund
is given, your product becomes Philips’ property.
Note: Any product sold and identified as refurbished or
renewed carries a ninety (90) day limited warranty.
Replacement product can only be sent if all warranty
requirements are met. Failure to follow all requirements
can result in delay.
WHAT IS NOT COVERED - EXCLUSIONS AND LIMITATIONS:
This Limited Warranty applies only to the new products manufactured by or for Philips that can be identified by the trademark,
trade name, or logo affixed to it. This Limited Warranty does not
apply to any non-Philips hardware product or any software, even
if packaged or sold with the product. Non-Philips manufacturers,
suppliers, or publishers may provide a separate warranty for their
own products packaged with the bundled product.
Philips is not liable for any damage to or loss of any programs,
data, or other information stored on any media contained within
the product, or any non-Philips product or part not covered by
this warranty. Recovery or reinstallation of programs, data or
other information is not covered under this Limited Warranty.
This warranty does not apply (a) to damage caused by accident,
abuse, misuse, neglect, misapplication, or non-Philips product, (b)
to damage caused by service performed by anyone other than
Philips or Philips Authorized Service Location, (c) to a product or
a part that has been modified without the written permission of
Philips, or (d) if any Philips serial number has been removed or
defaced, or (e) product, accessories or consumables sold “AS IS”
without warranty of any kind by including refurbished Philips
product sold “AS IS” by some retailers.
This Limited Warranty does not cover:
• Shipping charges to return defective product to Philips.
• Labor charges for installation or setup of the product, adjustment of customer controls on the product, and installation or
repair of antenna/signal source systems outside of the product.
• Product repair and/or part replacement because of improper
installation or maintenance, connections to improper voltage
supply, power line surge, lightning damage, retained images or
screen markings resulting from viewing fixed stationary content for extended periods, product cosmetic appearance items
due to normal wear and tear, unauthorized repair or other
cause not within the control of Philips.
• Damage or claims for products not being available for use, or
for lost data or lost software.
• Damage from mishandled shipments or transit accidents when
returning product to Philips.
•A product that requires modification or adaptation to enable
it to operate in any country other than the country for which
it was designed, manufactured, approved and/or authorized, or
repair of products damaged by these modifications.
•A product used for commercial or institutional purposes
(including but not limited to rental purposes).
• Product lost in shipment and no signature verification receipt
can be provided.
• Failure to operate per Owner’s Manual.
TO OBTAIN ASSISTANCE IN THE U.S.A., PUERTO
RICO, OR U.S. VIRGIN ISLANDS…
Contact Philips Customer Care Center at:
1-888-PHILIPS (1-888-744-5477)
TO OBTAIN ASSISTANCE IN CANADA…
1-800-661-6162 (French Speaking)
1-888-PHILIPS (1-888-744-5477) - (English or Spanish
Speaking)
REPAIR OR REPLACEMENT AS PROVIDED UNDER THIS
WARRANTY IS THE EXCLUSIVE REMEDY FOR THE CONSUMER. PHILIPS SHALL NOT BE LIABLE FOR ANY INCIDENTAL OR CONSEQUENTIAL DAMAGES FOR BREACH OF
ANY EXPRESS OR IMPLIED WARRANTY ON THIS PRODUCT. EXCEPT TO THE EXTENT PROHIBITED BY APPLICABLE
LAW, ANY IMPLIED WARRANTY OF MERCHANTABILITY OR
FITNESS FOR A PARTICULAR PURPOSE ON THIS PRODUCT
IS LIMITED IN DURATION TO THE DURATION OF THIS
WARRANTY.
Some states do not allow the exclusions or limitation of incidental or consequential damages, or allow limitations on how long an
implied warranty lasts, so the above limitations or exclusions may
not apply to you.
This warranty gives you specific legal rights. You may have other rights which vary from state/province to state/province.
26
Philips, P.O. Box 671539, Marietta, GA. 30006-0026
3121 233 48802
Page 27
English
Français
Français
Español
Español
Deutsch
Nederlands
Meet Philips at the Internet
http://www.philips.com
Italiano
Svenska
Dansk
Suomi
Por tuguês
Polski
DC177
CLASS 1
LASER PRODUCT
Printed in China
PDCC-ZC-0809
Page 28
Notes for iPod connection
1. The docking entertainment system is compatible with all the existing Apple iPod models with 30-pin
English Français Español
connector.
2. Four adaptors are included to fit different iPod models including iPod touch (8GB, 16GB), iPod
classic (80GB, 160GB), iPod nano 3rd generation (4GB, 8GB), iPod the 5th generation (30GB, 60GB,
80GB), iPod nano 2nd generation (2GB, 4GB, 8GB) and iPod nano 1st generation (1GB, 2GB, 4GB ).
Remarques relatives à la connexion d'un iPod
1. La station d'accueil pour baladeur est compatible avec tous les modèles d'iPod Apple existants avec
connecteur 30 broches.
2. Inclus: quatre adaptateurs pour les différents modèles d'iPod, notamment iPod touch (8 Go, 16 Go),
iPod classic (80 Go, 160 Go), iPod nano 3ème génération (4 Go, 8 Go), iPod 5ème génération (30
Go, 60 Go, 80 Go), iPod nano 2ème génération (2 Go, 4 Go, 8 Go) et iPod nano 1ère génération (1
Go, 2 Go, 4 Go).
Notas acerca de la conexión del iPod
1. El sistema de base de entretenimiento es compatible con todos los modelos existentes de iPod de
Apple que tengan conectores de 30 patillas.
2. Se incluyen cuatro adaptadores para que encajen los diferentes modelos de iPod, incluidos el iPod
touch (8 GB, 16 GB), iPod classic (80 GB, 160 GB), iPod nano de tercera generación (4 GB, 8 GB),
iPod de quinta generación (30 GB, 60 GB, 80 GB), iPod nano de segunda generación (2 GB, 4 GB, 8
C
GB) y iPod nano de primera generación (1 GB, 2 GB, 4 GB).
M
Y
CM
MY
CY
K
 Loading...