

Philips Dampfbügelstation User Manual [en, de, es, fr, it]
GC8280

2
3
MAX
E
F
A
CB
D
H
I
J
K
L
U
T
S
P
R
Q
O
G
N
M
1
2

4

ENGLISH 6
DANSK 20
DEUTSCH 34
48
ESPAÑOL 64
SUOMI
FRANÇAIS 92
ITALIANO
NEDERLANDS 122
NORSK 137
PORTUGUÊS
SVENSKA
TÜRKÇE
79
107
151
161
179
GC8280

6
ENGLISH
Introduction
Congratulations on your purchase and welcome to Philips! To fully benet
from the support that Philips offers, register your product at www.philips.
com/welcome.
The Philips GC8280 is a powerful pressurised ironing system that produces
non-stop steam to make ironing easier. Thanks to the large water tank,
you can iron without interruption. When the water tank is empty, you can
detach it and rell it immediately.
The Philips GC8280 is equipped with a sophisticated display that gives you
more control over the ironing process. It gives feedback on the selected
temperature setting and has precise preprogrammed temperature settings
for 12 different fabrics. It also informs you about the steam setting and the
water level and warns you when the iron needs to be rinsed. The iron is
very safe thanks to the automatic iron-off function. Last but not least, it is
the only ironing system on the market with an integrated drip stop.
We hope you enjoy using the Philips GC8280.
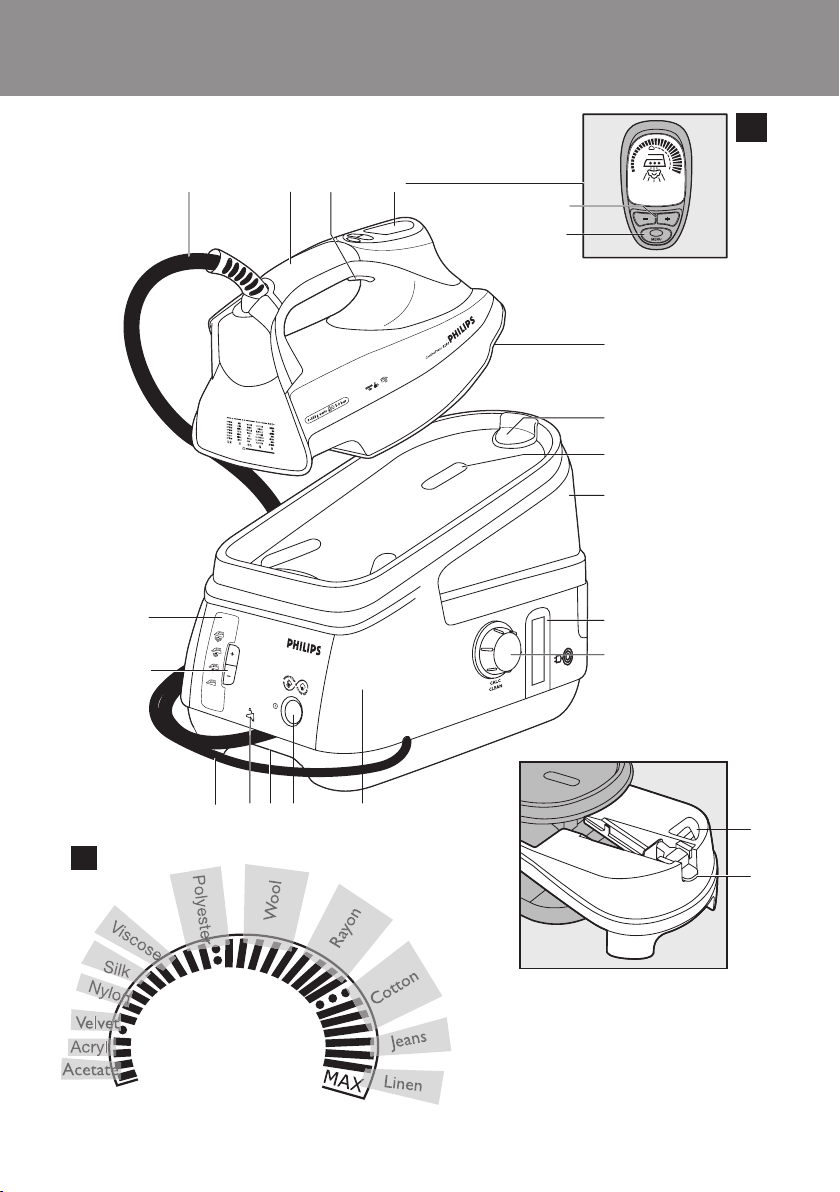
General description (Fig. 1)
A Supply hose
B Handle with soft grip
C Steam trigger
D Display
E Temperature buttons (+/-)
F Menu button
G Soleplate
H Safe storage lock
I Iron stand
J Detachable water tank
K Cord & hose storage hook
L Calc-Clean rinsing cap
M Filling opening
N Water tank release lever
O Steam generator
P On/off button with power-on light
Q Transport handgrip
R Water tank rell light
S Mains cord
T Steam buttons (+/-)
U Steam generator control panel with steam light
p = maximum steam
[ = moderate steam
] = minimum steam
a = no steam
-
Important
Read this user manual carefully before you use the appliance and save it for
future reference.
Danger
Never immerse the iron or the steam generator in water.
-

ENGLISH 7
Warning
Check if the voltage indicated on the type plate corresponds to the
local mains voltage before you connect the appliance.
Do not use the appliance if the plug, the mains cord, the supply hose or
the appliance itself shows visible damage, or if the appliance has been
dropped or leaks.
If the mains cord or the supply hose is damaged, you must have it
replaced by Philips, a service centre authorised by Philips or similarly
qualied persons in order to avoid a hazard.
Never leave the appliance unattended when it is connected to the
mains.
This appliance is not intended for use by persons (including children)
with reduced physical, sensory or mental capabilities, or lack of
experience and knowledge, unless they have been given supervision or
instruction concerning use of the appliance by a person responsible for
their safety.
Children should be supervised to ensure that they do not play with the
appliance.
Do not let the mains cord and supply hose come into contact with the
soleplate when it is hot.
If steam escapes from under the Calc-Clean rinsing cap when the
appliance heats up, switch off the appliance and tighten the Calc-Clean
rinsing cap. If steam continues to escape when the appliance heats up,
switch off the appliance and contact a service centre authorised by
Philips.
Never remove the Calc-Clean rinsing cap when the steam generator
is hot.
Do not use any other cap on the steam generator than the Calc-Clean
rinsing cap that has been supplied with the appliance, as this cap also
functions as a safety valve.
Caution
Only connect the appliance to an earthed wall socket.
Check the mains cord and the supply hose regularly for possible
damage.
Always place and use the iron and the steam generator on a stable,
-
level and horizontal surface.
The soleplate of the iron can become extremely hot and may cause
burns if touched.
When you have nished ironing, when you clean the appliance, when
-
you ll or empty the water tank and also when you leave the appliance
even for a short while: put the iron on the iron stand, switch off the
appliance and remove the mains plug from the wall socket.
Rinse the steam generator regularly according to the instructions in
chapter ‘Cleaning and maintenance’.
This appliance is intended for household use only.
-
This Philips appliance complies with all standards regarding electromagnetic
elds (EMF). If handled properly and according to the instructions in this
user manual, the appliance is safe to use based on scientic evidence
available today.
ENGLISH8
Note: The iron may give off some smoke when you use it for the rst time. This
is normal and stops after a short while.
Note: Some particles may come out of the soleplate when you use the iron for
the rst time. This is normal; the particles are harmless and stop coming out of
the iron after a short while.
Note: When you switch on the appliance, the steam generator may produce a
pumping sound. This is normal; the sound tells you that water is pumped into
the steam generator.
1 Remove any sticker or protective foil from the soleplate and clean
the soleplate with a soft cloth.
2 Check the hardness of the tap water with the test strip supplied.
y = soft water
u = moderately hard water
i = hard water
o = very hard water
Preparing for use
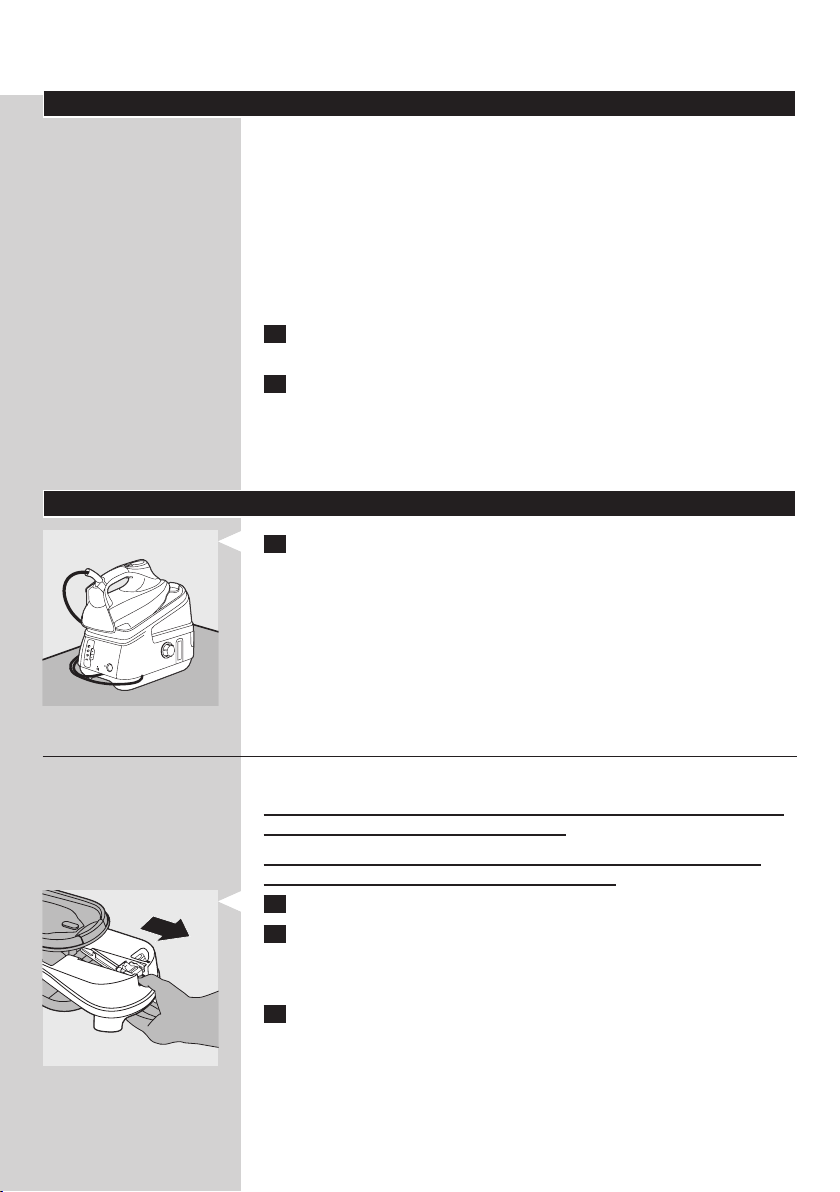
1
Place the steam generator on a stable and level surface, e.g. on the
hard part of the ironing board or on a table.
Filling the detachable water tank
You can rell the water tank at any time during use.
Do not put hot water, perfume, vinegar, starch, descaling agents, ironing
aids or other chemicals in the water tank.
Do not overll the water tank, otherwise water may spill out of the
lling opening when you reinsert the water tank.
1 Remove the detachable water tank from the steam generator.
2 Fill the water tank with tap water up to the MAX indication.
Note: If the tap water in your area is very hard, we advise you to mix it with an
equal amount of distilled water.
3 Slide the water tank back into the steam generator (‘click’).
Note: If the water tank is not properly placed, the iron does not produce any
steam.
When the water tank is almost empty, the message ‘WATER LOW, REFILL
WATER TANK’ is shown on the display and you hear two short beeps.
OnOn
MAXMAX
ENGLISH 9
The water tank rell light ashes and steam ironing is no longer possible.
1 Remove the water tank and ll it.
2 Put the water tank back into the steam generator.
The iron is ready for steam ironing again.
,
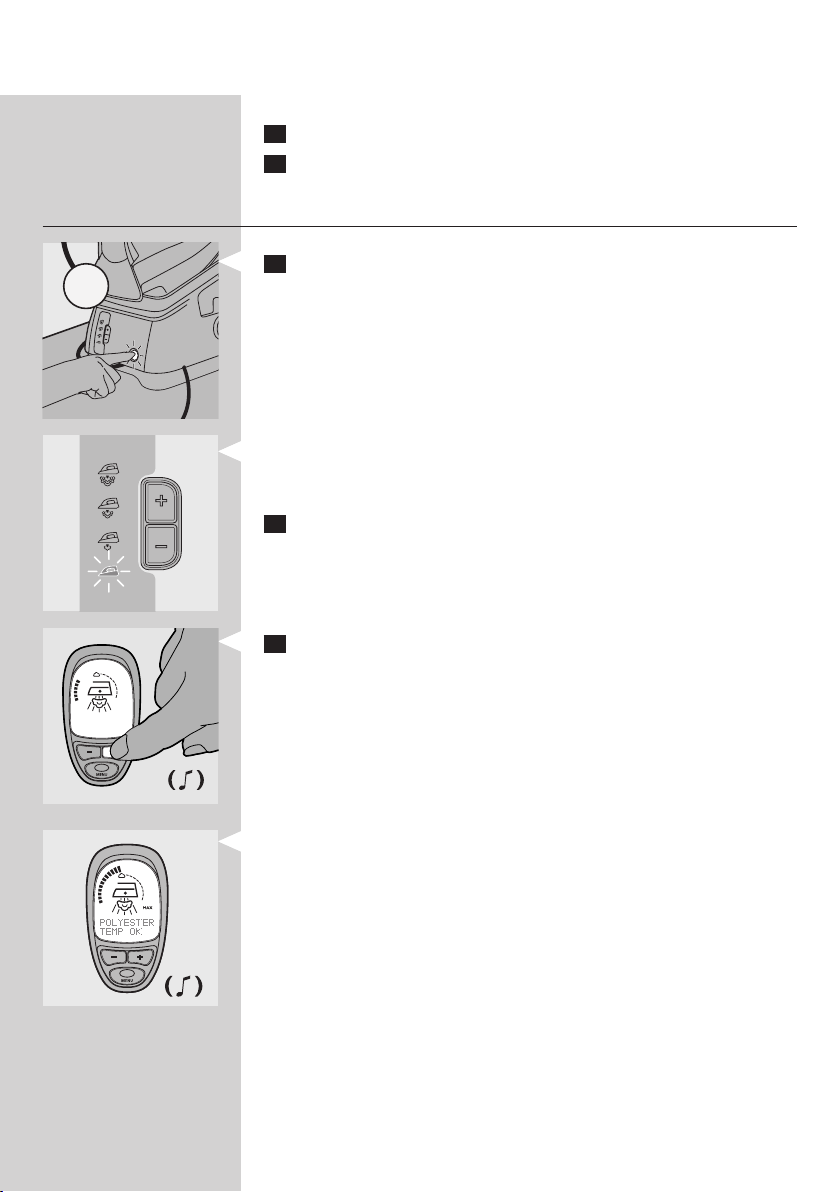
Setting the temperature
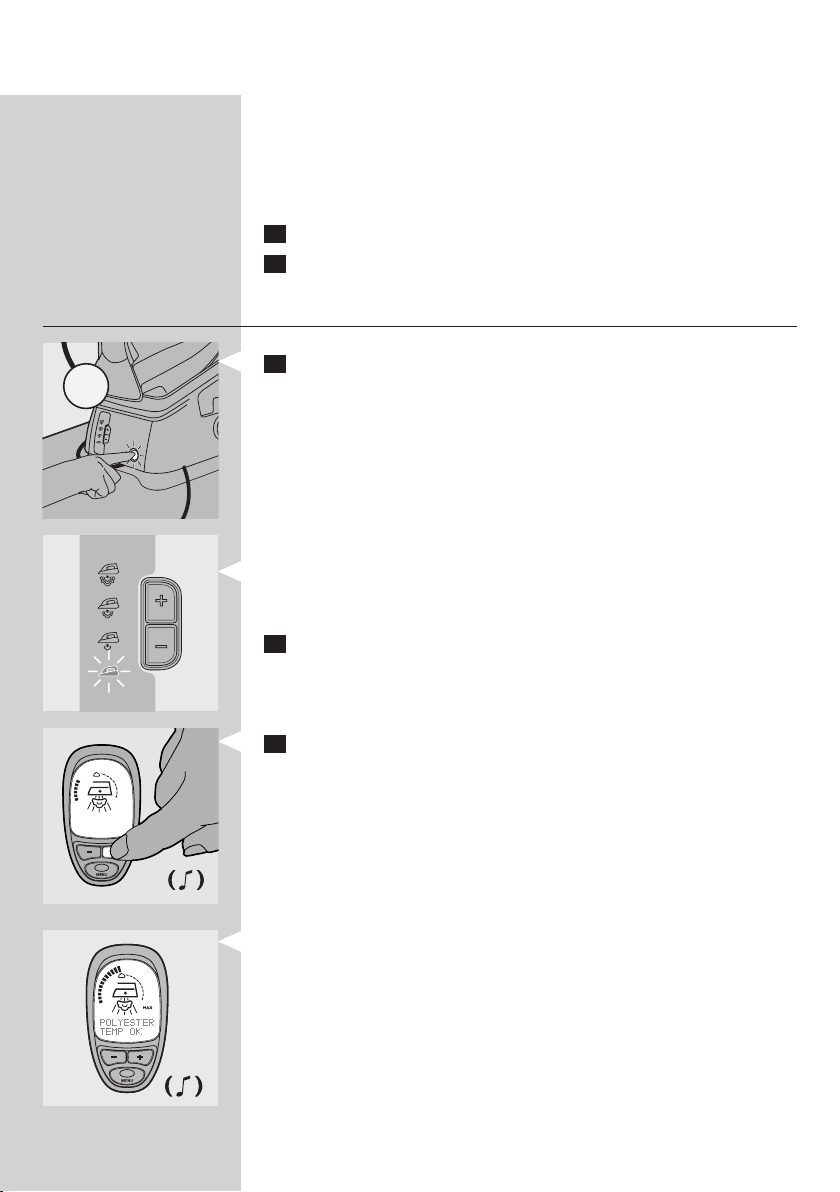
1 Put the mains plug in an earthed wall socket and press the on/off
button once.
Note: When you switch on the appliance, it automatically heats up to the last
used temperature setting.
The power-on light of the on/off button goes on.
,
The display lights up and you hear a short beep. The following
,
message moves across the display:
’WELCOME TO PHILIPS - CHECKING SENSORS - CHECKING WATER
- WARMING UP’.
The steam light on the steam generator ashes.
,
After approx. 2 minutes, the steam light stays on continuously to indicate
that the steam generator is ready for steam ironing.
2 Check the laundry care label of the article to be ironed to determine
the required ironing temperature.
3 Use the + and - temperature buttons to set the required ironing
temperature or fabric type.
The display shows the fabric type for which the selected
,
temperature setting is most suitable (see chapter ‘Iron display guide’).
The display indicates that the iron heats up or cools down to the
,
selected temperature.
A double beep and a message on the display indicate that the soleplate has
reached the selected temperature.
Tips
If you do not know what kind or kinds of fabric an article is made of,
determine the right ironing temperature by ironing a part that is not
visible when you wear or use the article.
If the fabric consists of various kinds of bres, always select the
-
temperature required by the most delicate bre, i.e. the lowest
temperature. For example: if a fabric consists of 60% polyester and 40%
cotton, it must be ironed at the temperature indicated for polyester (
1) and without steam.
Start ironing the articles that require the lowest ironing temperature,
i.e. those made of synthetic materials.
OnOn
ENGLISH10
If you set a lower temperature during ironing, wait until the iron has
cooled down to the set temperature before you continue ironing. To
make the iron cool down faster, simply press the steam trigger or iron
a piece of cloth.
Display menu
The GC8280 offers 5 functions that allow you to adjust the settings of the
appliance to your own preferences.
These functions are listed in a menu. Press the menu button and the +
and - buttons on the iron to use the menu.
The menu structure of these functions is the following (the default
settings are shown between brackets):
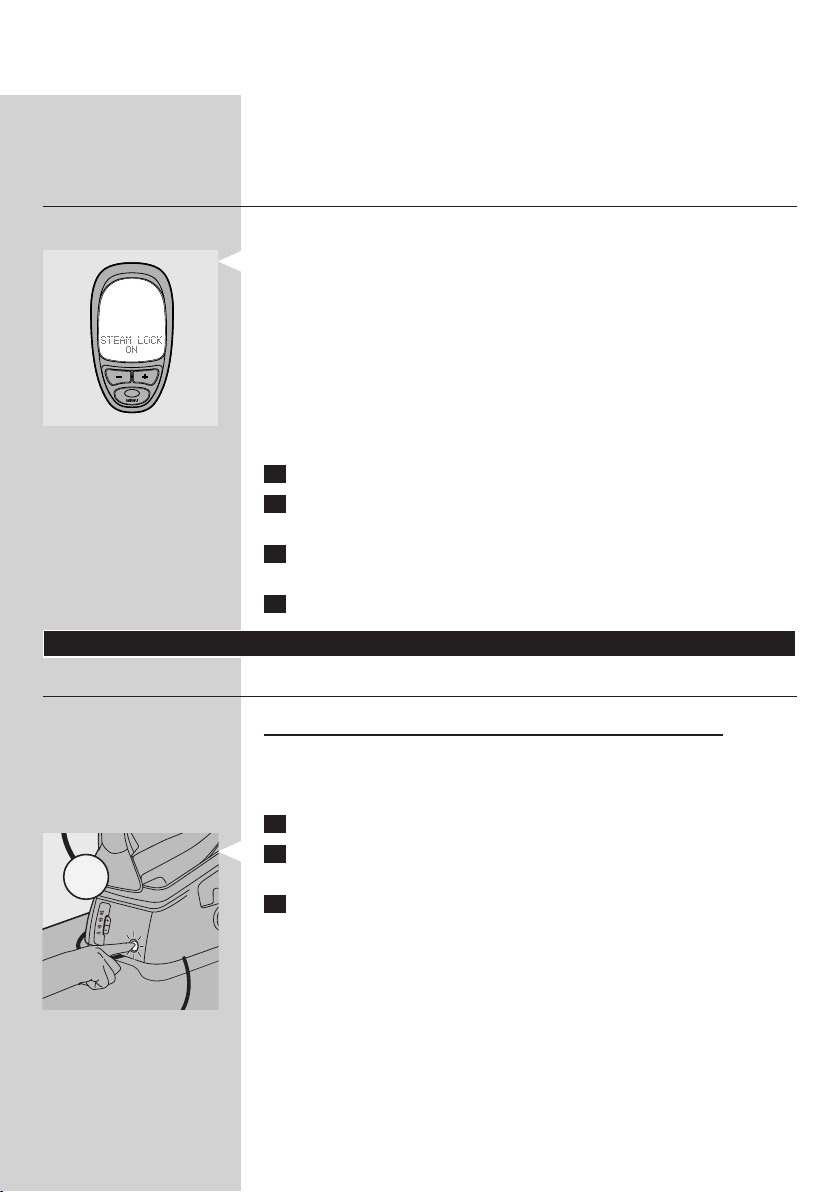
1 Steam lock (on)/off
2 Iron off: 5/10/20/(30) minutes
3 Sound: (on)/off
4 Language: (English)/Dutch/French/German/Italian/Spanish/Portuguese
5 Water hardness: soft/(medium)/hard
To select your preferred settings:
1 Press the menu button for 1 second.
2 Use the + and - buttons on the iron to scroll through the available
settings.
3 When you have reached the setting of your choice, press the menu
button again. The message ‘CONFIRMED’ appears on the display.
4 To exit the menu, wait 3 seconds.
Using the appliance
Steam ironing
The supply hose may become hot during a long ironing session.
Note: The system may occasionally produce a pumping sound during steam
ironing. This is normal and tells you that water is pumped into the steam
generator.
1 Make sure there is enough water in the water tank.
2 Put the mains plug in an earthed wall socket and press the on/off
button once.
3 Set the required ironing temperature (see chapter ‘Preparing for
use’).
Steam ironing is only possible at ironing temperatures higher than 2. The
steam function is automatically disabled at ironing temperatures lower than
2.
ENGLISH 11
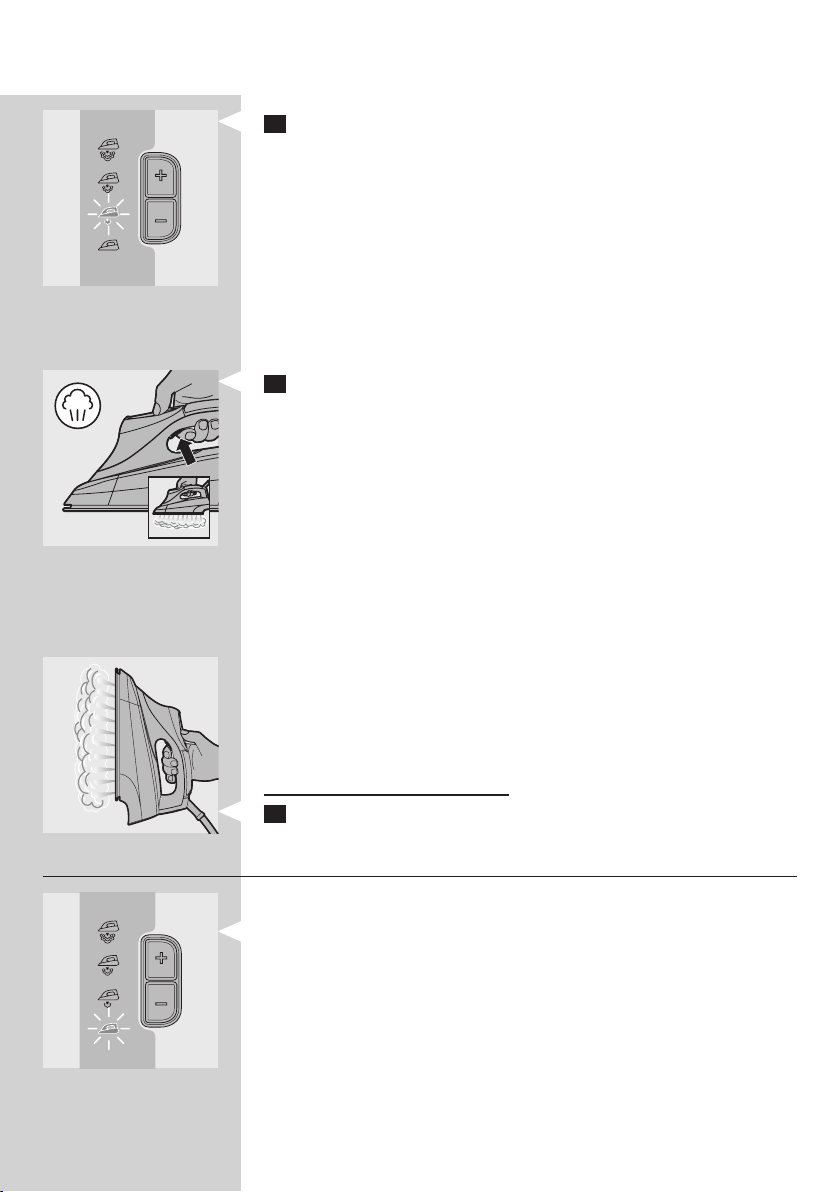
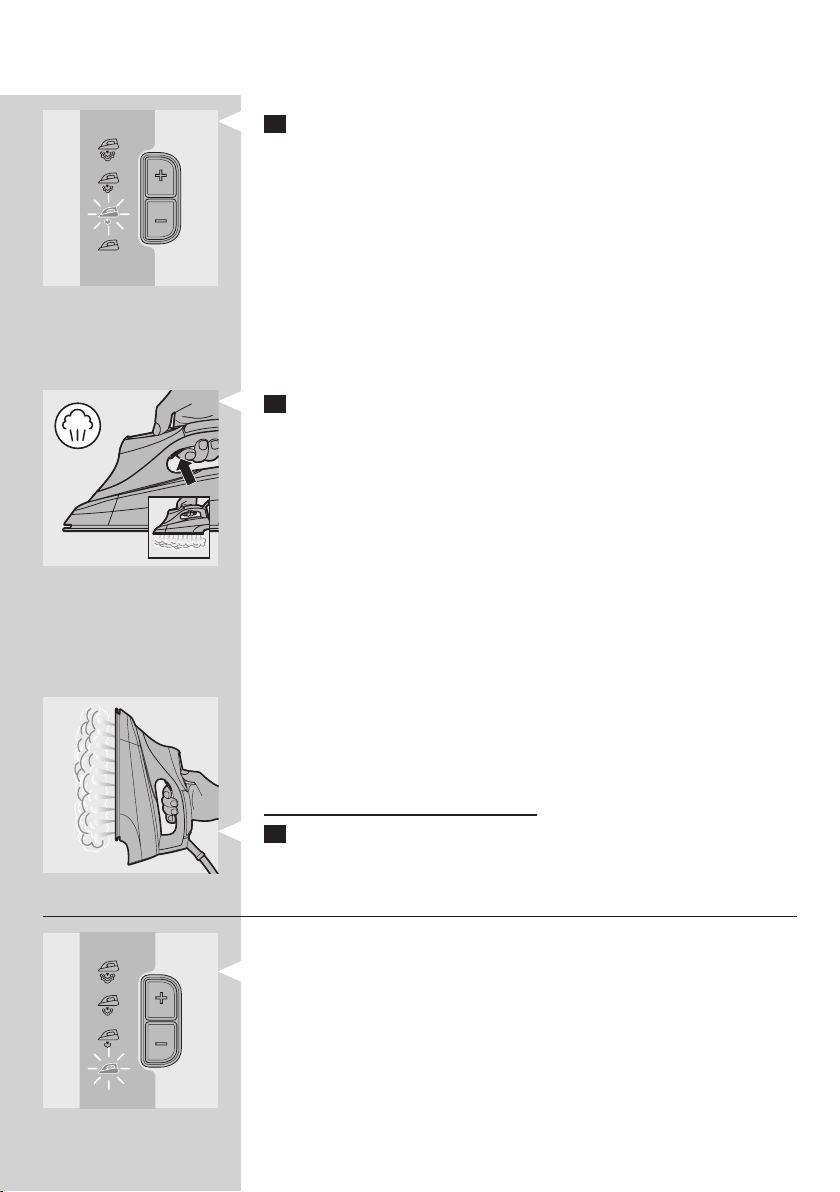
4 Set the required steam setting with the + and - buttons on the steam
generator control panel.
p for maximum steam (temperature setting MAX).
[ for moderate steam (temperature settings 3 to MAX).
] for minimum steam (temperature settings 2 to MAX).
a for no steam (temperature settings 1 to MAX).
The steam light ashes to indicate that the steam generator is
,
heating up.
After approx. 2 minutes, the steam light stays on continuously to
,
indicate that the steam generator is ready for steam ironing.
Note: During ironing, you can adjust the steam setting with the + and - steam
buttons. It takes a few moments before the amount of steam is adjusted.
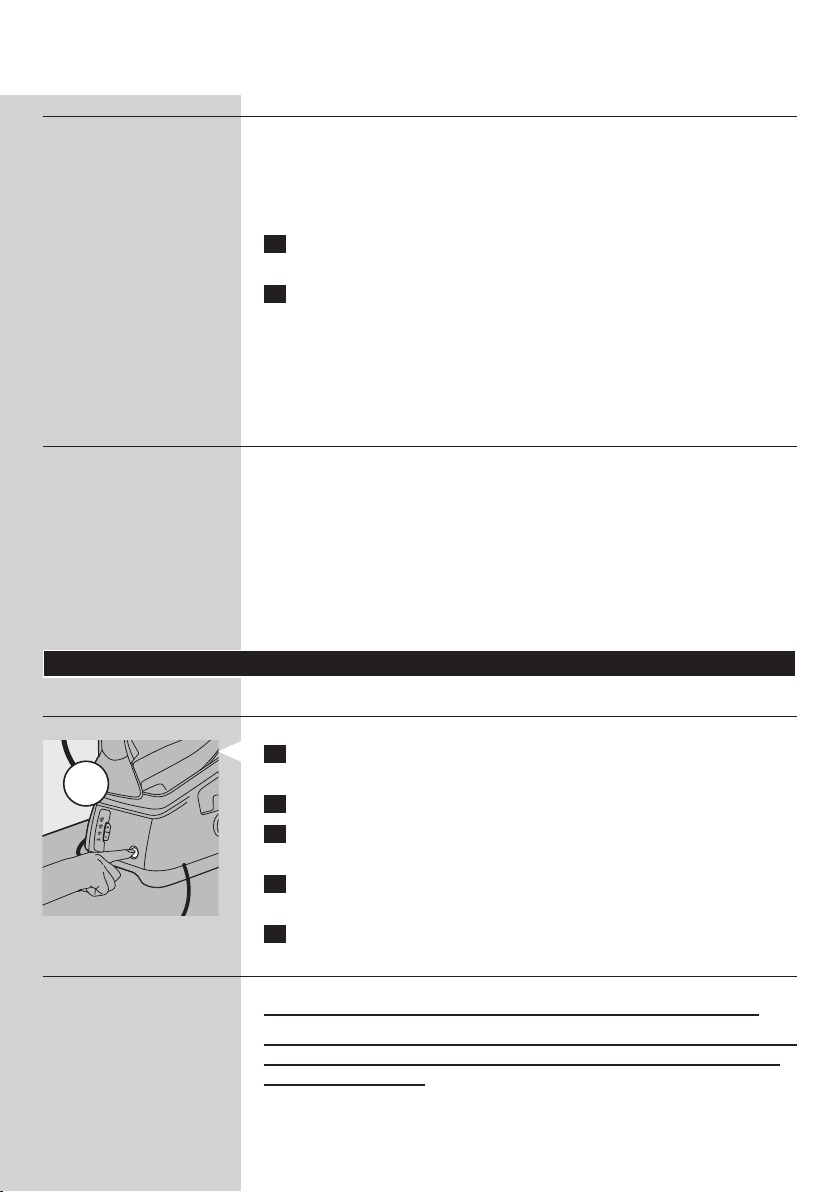
5 Press the steam trigger to start steam ironing.
When you put down the iron during ironing, put it on its heel or on the
iron stand.
The opening and closing of the steam valve in the steam generator
,
causes a clicking sound. This is normal.
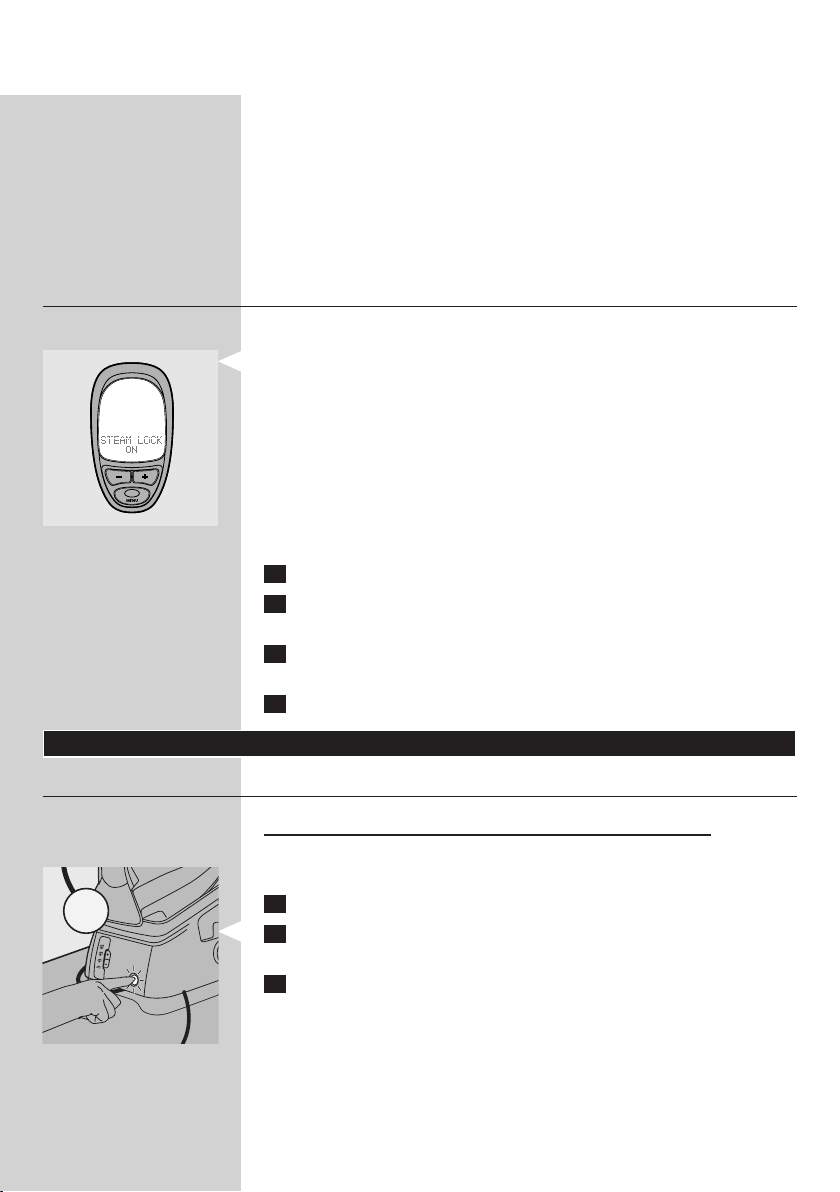
Steam lock function
The steam lock allows you to steam iron non-stop without having to press
the steam trigger continuously.
When the steam lock function is set to ‘on’ (the default setting in the
display menu), the iron produces steam continuously when you press
the steam trigger once. To stop steaming, press the steam trigger once
again.
When the steam lock function is set to ‘off’ (see section ‘Display
menu’), the iron only produces steam when you press the steam trigger.
Note: Release the steam lock when you put the iron on its heel or on the iron
stand. This prevents that hot steam escapes from the iron or that the iron
stand gets wet.
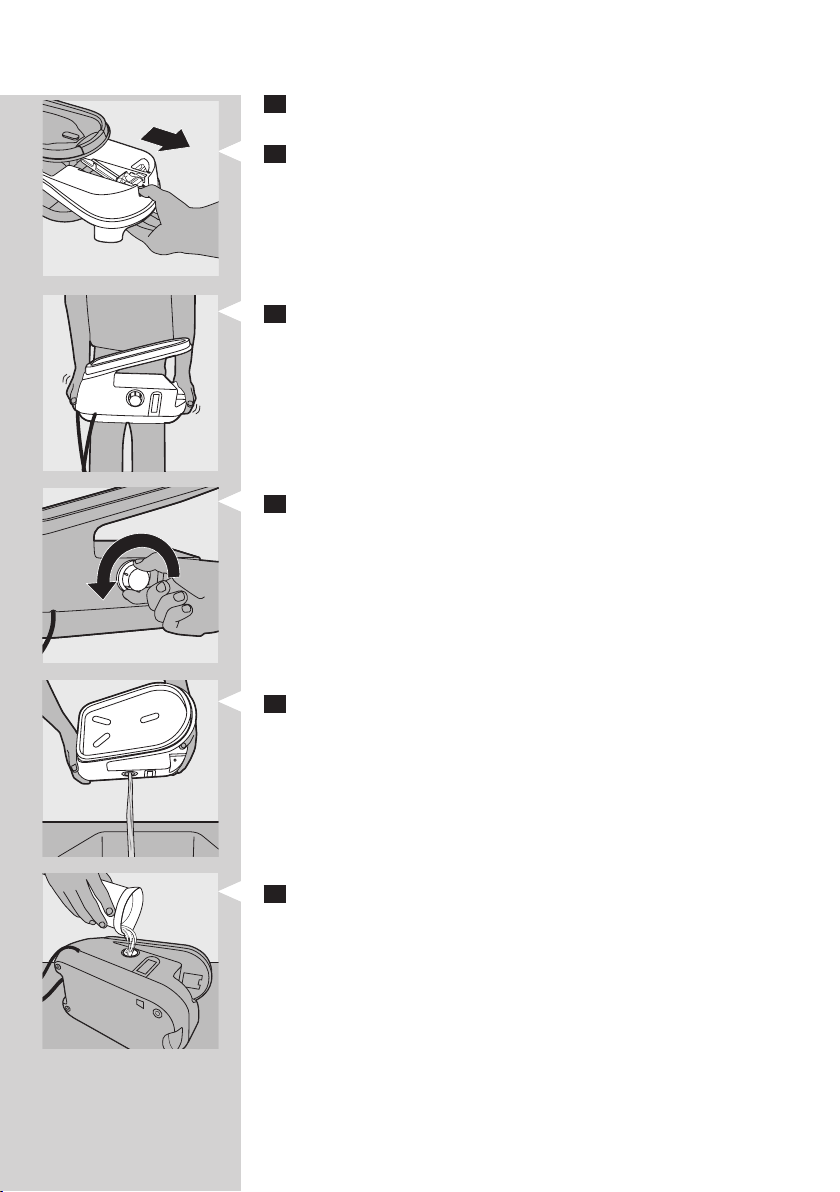
Vertical steaming
Never direct the steam at people.
1 Hold the iron in vertical position and press the steam trigger to
steam iron hanging curtains and clothes (jackets, suits, coats).
Ironing without steam
There are two ways to iron without steam:
Simpy start ironing without pressing the steam trigger.
Select steam setting a (no steam) and start ironing.
-
OffOff
ENGLISH12
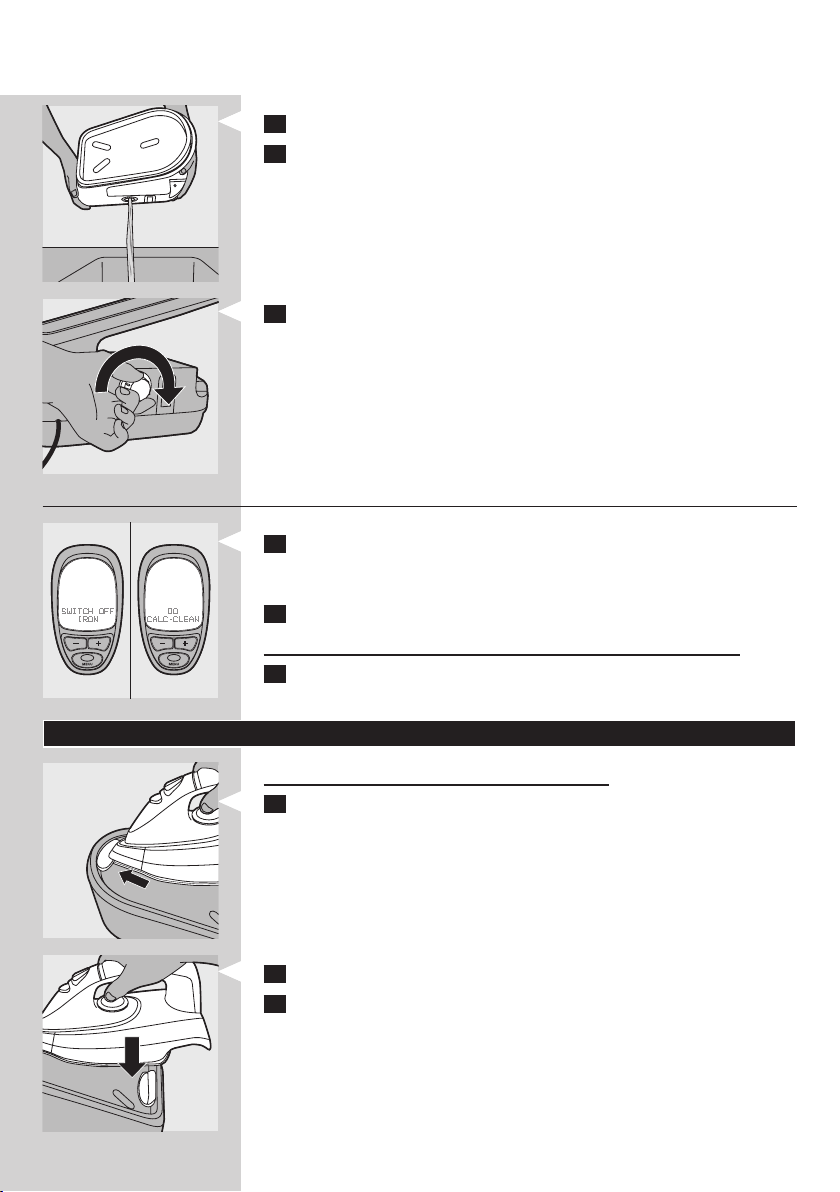
Iron-off function
The iron-off function automatically switches off the soleplate when you
have not pressed the steam trigger for a particular number of minutes. The
number of minutes depends on the iron-off time you have selected.
You can select an iron-off time of 5, 10, 20 or 30 minutes (see section
‘Display menu’).
1 The display shows the text ‘IRON OFF’ and you hear an intermittent
beep.
2 If you want to iron again, press any button on the iron.
The soleplate heats up again.
,
Note: The iron-off function switches off the soleplate but does not switch
off the steam generator. If you intend to stop ironing, switch off the appliance
and unplug it.
Tips
When you steam iron woollen fabrics, shiny patches may occur. To
prevent this, use a dry pressing cloth or turn the article inside out and
iron the reverse side.
Silk, woollen and synthetic materials: iron the reverse side of the fabric
to prevent shiny patches.
Iron velvet and other fabrics that tend to acquire shiny patches in one
direction only (along with the nap) while you apply very little pressure.
Do not use steam when you iron coloured silk. This could cause stains.
-
Cleaning and maintenance
After ironing
1 Put the iron on the iron stand (see chapter ‘Storage’) and switch off
the appliance.
2 Remove the mains plug from the wall socket and let the appliance
cool down.
3 Wipe scale and any other deposits off the soleplate with a damp
cloth and a non-abrasive (liquid) cleaner.
4 Clean the upper part of the iron and the outside of the steam
generator with a moist cloth.
5 Empty the water tank after cleaning.
Calc-Clean function
Never remove the Calc-Clean rinsing cap when the steam generator is
hot.
VERY IMPORTANT: Rinse the steam generator once a month or after
every 10 times of use to prevent damage to the appliance and for
optimal steaming performance.
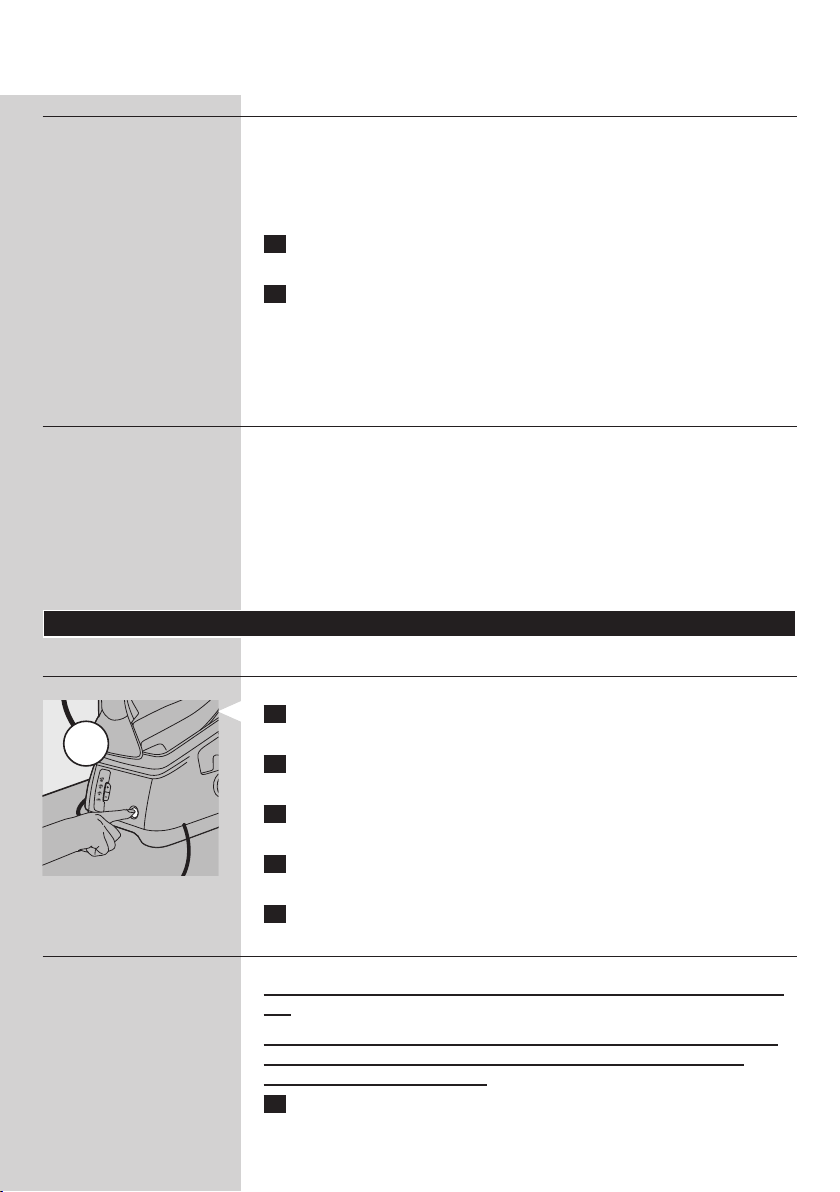
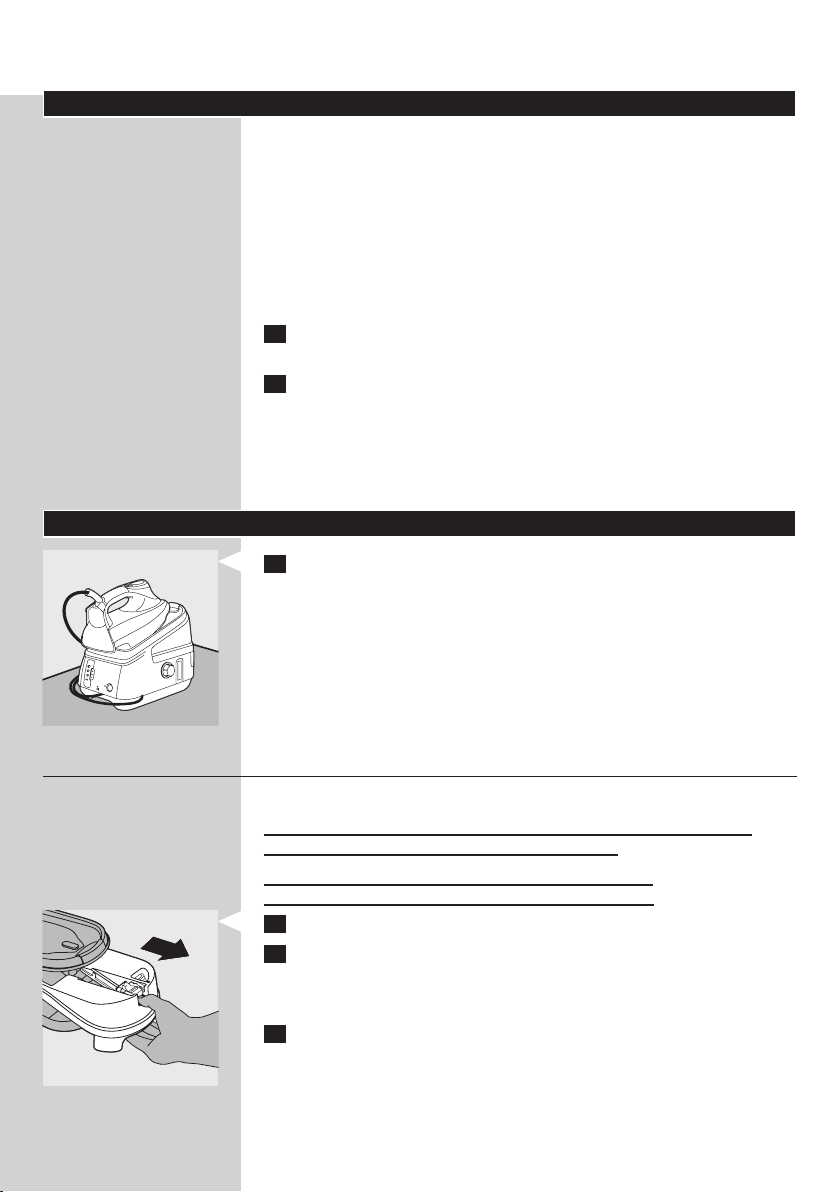
1 Unplug the appliance and let it cool down for at least 2 hours.

ENGLISH 13
2 Remove the detachable water tank.
3 Hold the steam generator with both hands and shake well.
4 Turn the steam generator on its side with the Calc-Clean rinsing cap
facing upwards, and remove the Calc-Clean rinsing cap
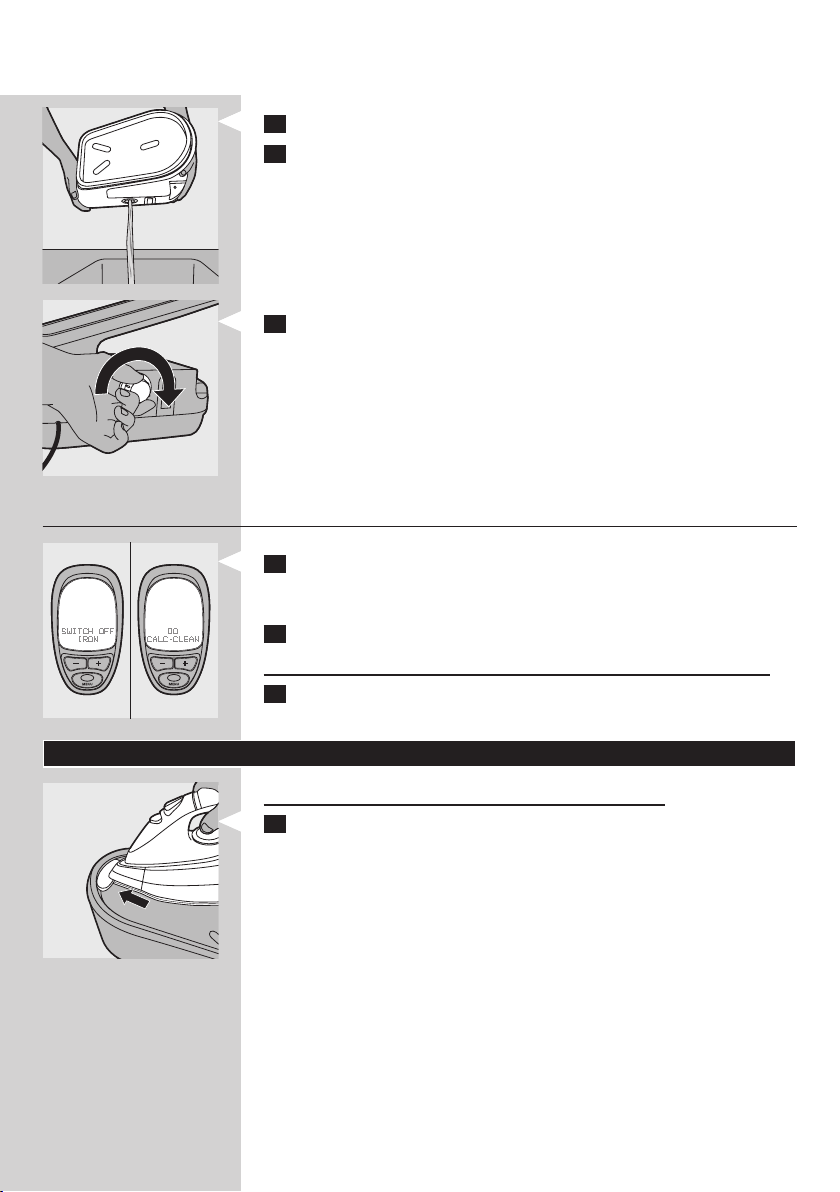
5 Empty the steam generator into the sink.
6 Fill the steam generator with fresh water and shake again.
ENGLISH14
7 Empty the steam generator into the sink again.
8 Repeat steps 6 & 7 twice to obtain the best result.
9 Screw the Calc-Clean rinsing cap tightly back onto the steam
generator.
Calc-Clean reminder
1 When the display shows the message ‘SWITCH OFF IRON - DO
CALC CLEAN’, too much scale has built up inside the appliance and
you have to rinse the steam generator.
2 Switch off the appliance immediately and let it cool down.
Do not use the Calc-Clean function when the steam generator is hot.
3 Use the Calc-Clean function as described above.
Storage
Always let the appliance cool down before you store it.
1 Insert the tip of the iron into the safe storage lock on the stand.
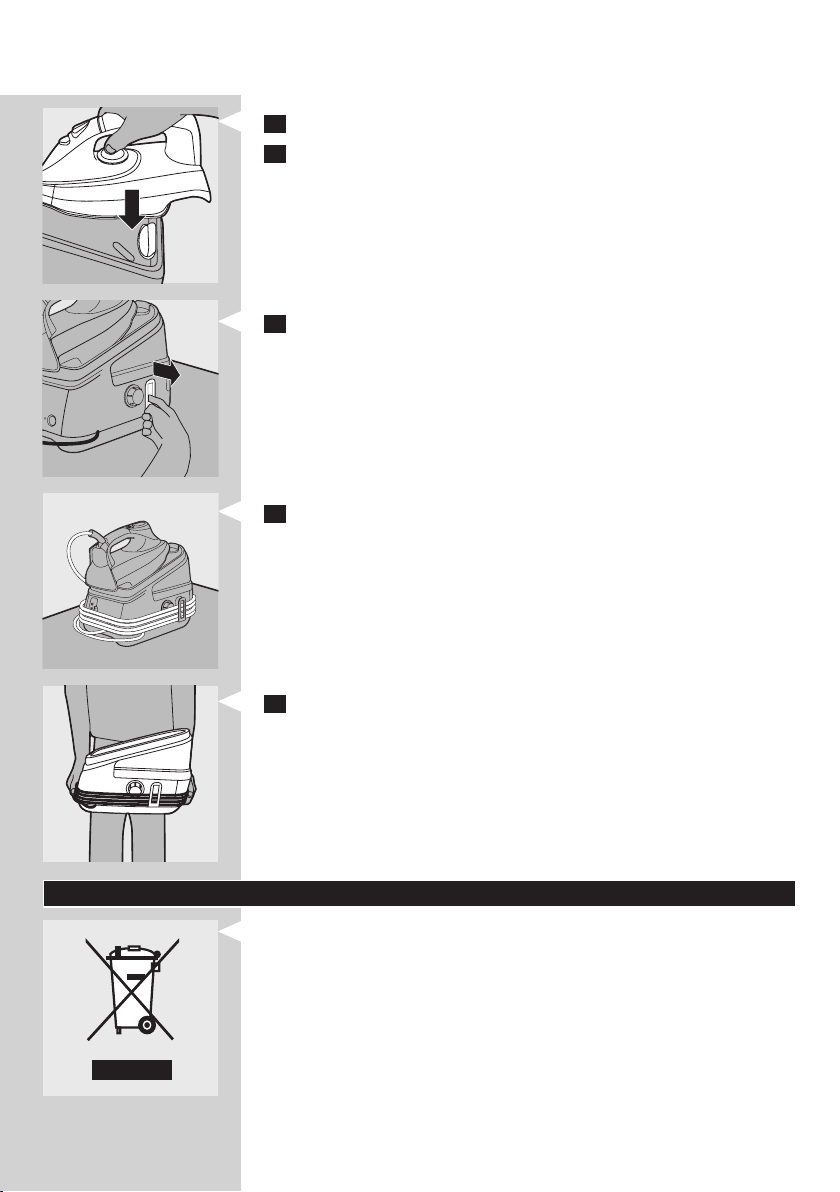
2 Press down the back of the iron rmly (‘click’).
3 Empty the water tank.
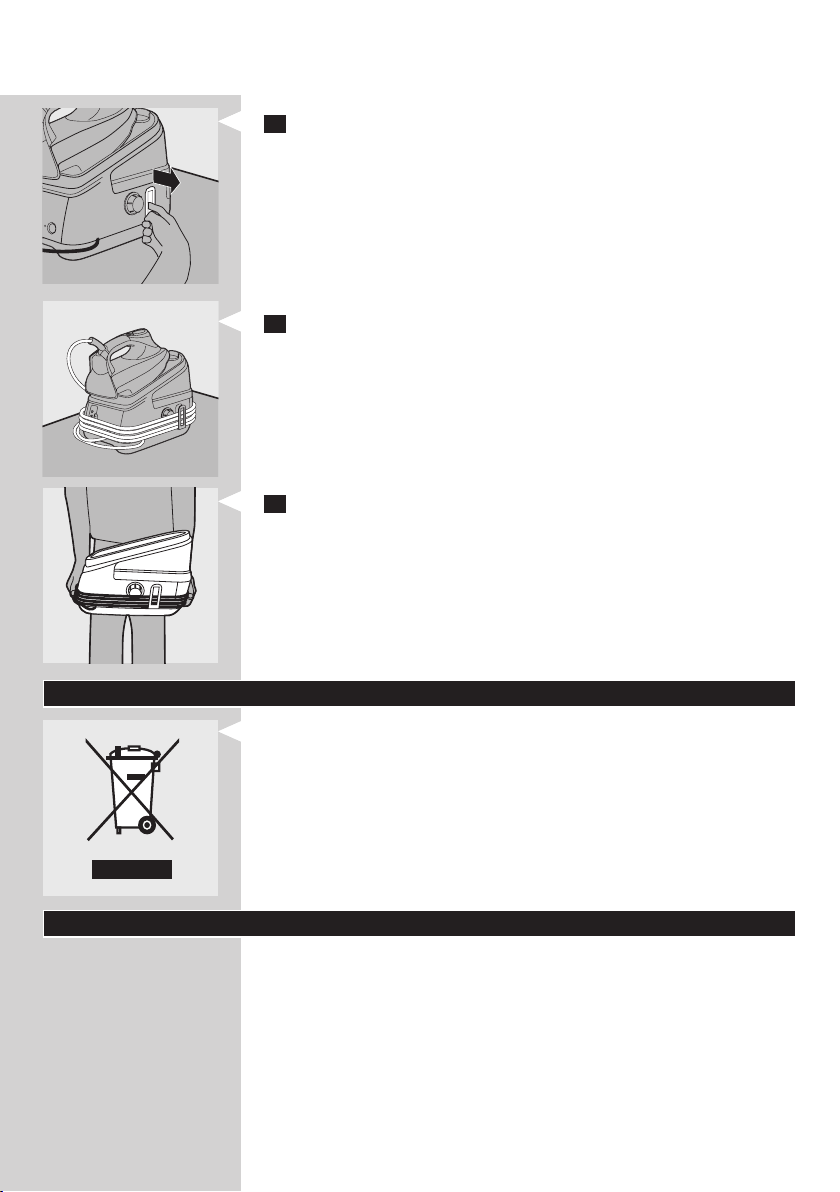
4 Pull out the cord & hose storage hook.
5 Secure the supply hose and mains cord.
ENGLISH 15
6 To move the appliance, carry it by the handgrips on either side of the
steam generator.
Environment
Do not throw away the appliance with the normal household waste
-
at the end of its life, but hand it in at an ofcial collection point for
recycling. By doing this, you help to preserve the environment.

ENGLISH16
Guarantee & service
If you need information or if you have a problem, please visit the Philips
website at www.philips.com or contact the Philips Customer Care Centre
in your country (you nd its phone number in the worldwide guarantee
leaet). If there is no Customer Care Centre in your country, go to your
local Philips dealer or contact the Service Depar tment of Philips Domestic
Appliances and Personal Care BV.
Troubleshooting
This chapter summarises the most common problems you could
encounter with the appliance. If you are unable to solve the problem with
the information below, contact the Customer Care Centre in your country.
Problem Cause Solution
The appliance does
not become hot.
Smoke comes out
of my new iron
when I switch it on.
The iron does not
produce any steam.
Water droplets
come out of the
soleplate.
There is a connection problem. Check the mains cord, the plug and
the wall socket.
You have not switched on the appliance. Press the on/off button.
The set temperature is too low. Set a higher temperature.
Some parts of the appliance have been
lightly greased in the factory and may
initially give off some smoke when heated.
There is not enough water in the water
tank.
The steam generator has not heated up
sufciently.
The set ironing temperature is too low for
steam ironing.
You have set steam setting a (no steam). Set steam setting ] (minimum
You have not placed the water
tank properly in the steam generator.
When the iron is set to a very high
temperature, the steam produced is
dry and hardly visible. It is even less
visible when the ambient temperature is
relatively high and it is entirely invisible
when the temperature is set to MAX.
The set temperature is too low for steam
ironing.
This phenomenon is normal and
ceases after a short while.
Fill the water tank. See chapter
‘Preparing for use’, section ‘Filling the
detachable water tank’.
Wait approx. 2 minutes until the
steam light stays on continuously.
Set a temperature of 2 or higher.
steam), [ (moderate steam) or p
(maximum steam).
Place the water tank properly in the
steam generator (‘click’).
Set the iron to a lower temperature,
e.g. 2, to check if the iron actually
produces steam.
Set a temperature of 2 or higher.

Problem Cause Solution
ENGLISH 17
Flakes and
impurities come out
of the soleplate or
the soleplate is dirty.
’ERROR’ has
appeared on the
display and the iron
beeps continuously
The appliance
produces a pumping
sound.
Dirty water comes
out of the soleplate.
The iron produces
steam continuously.
Steam escapes from
under the CalcClean rinsing cap
while the appliance
heats up.
The iron does not
produce enough
steam/the amount
of steam decreases
and increases during
steam ironing.
When you start steam ironing and when
you stop steam ironing for a while, the
steam still present in the supply hose
cools down and condenses into water. This
causes water droplets to come out of the
soleplate.
Impurities or chemicals present in the
water have deposited in the steam vents
and/or on the soleplate.
A sensor failure has been detected. Contact an authorised Philips
Water is pumped into the steam
generator.
The pumping sound does not stop. Unplug the iron immediately and
Too much scale and minerals have
accumulated inside the steam generator.
The steam lock is set to ‘on’ and you have
pressed the steam trigger once. The iron
then produces steam continuously until
you press the steam trigger again.
You have not tightened the Calc-Clean
rinsing cap properly.
When the appliance pumps water into
the steam generator, the steam amount
sometimes decreases. This is probably
when you think that the iron does not
produce enough steam. However, this is
a normal phenomenon and the steam
output normalises within a few seconds.
This is normal. When you start
ironing or continue ironing after an
interruption, hold the iron over an
old cloth and press the steam trigger.
Wait until steam instead of water
comes out of the soleplate.
Clean the soleplate with a damp
cloth.
service centre.
This is normal.
contact an authorised Philips service
centre.
Rinse the steam generator. See
chapter ‘Cleaning and maintenance’.
To stop the steam production, press
the steam trigger again. If you only
want the iron to produce steam
as long as you press the steam
trigger, set the steam lock function
to ‘off ’ in the display menu. See
chapter ‘Using the appliance’, section
‘Steam lock function’.
Switch off the appliance, tighten the
Calc-Clean rinsing cap and switch
on the appliance again. If steam
continues to escape when the
appliance is heating up, switch off
the appliance and contact a service
centre authorised by Philips.
To optimise the steam output,
release the steam lock when you do
not need steam and when you put
down the iron.

ENGLISH18
Problem Cause Solution
Wet spots appear
on the fabric during
ironing.
Action Option Message in English
Switching on the appliance WELCOME TO PHILIPS - CHECKING
Using the menu button (see
section ‘Display menu’)
The iron switches off after the
iron-off time has elapsed (see
section ‘Iron-off function’)
Pressing the + and - buttons
(see section ‘Setting the
temperature’)
The wet spots that appear on the fabric
after you have steam ironed for some
time may be caused by steam that has
condensed onto the ironing board. Iron
the wet spots without steam for some
time to dry them. If the underside of the
ironing board is wet, wipe it with a piece
of dry cloth.
Iron display guide (Fig. 2)
Temperature settings suitable for specic fabric types.
-
Switching the steam lock
on or off
Setting the iron-off time IRON OFF - 5 MIN - 10 MIN - 20 MIN
Switching the sound on
or off
Choosing a language LANGUAGE - ENGLISH - DUTCH
Setting the water hardness WATER HARDNESS - SOFT - MEDIUM
Choosing the fabric type ACETATE - ACRYLIC - VELVET - NYLON
The iron heats up because
you have selected a
different fabric type
The iron cools down
because you have selected
a different fabric type
The iron has reached the
correct temperature for
selected fabric type
To prevent steam from condensing
onto the ironing board, use an
ironing board with a wire mesh top.
SENSORS - CHECKING WATER -
WARMING UP
STEAM LOCK - ON - OFF CONFIRMED
- 30 MIN - CONFIRMED
SOUND - ON - OFF - CONFIRMED
- FRENCH - GERMAN - PORTUGUESE
- SPANISH - ITALIAN - CONFIRMED
- HARD - CONFIRMED
IRON OFF - STANDBY - PRESS ANY
KEY TO RESUME
- SILK - VISCOSE - POLYESTER - WOOL
- RAYON - COTTON - JEANS - LINEN
WARMING UP
COOLING
TEMP OK

Action Option Message in English
ENGLISH 19
The water tank is empty, has
not been placed properly or
has not been placed at all
(see section ‘Water tank rell
light’)
You have to rinse the iron
(see section ‘Calc-Clean
function’)
Do not use the iron (see
chapter ‘Guarantee &
service’)
WATER LOW - REFILL WATER TANK
SWITCH OFF IRON - DO CALC
CLEAN
ERROR 01

20
DANSK
Introduktion
Tillykke med dit køb og velkommen til Philips! For at få fuldt udbytte af
den støtte, Philips tilbyder, skal du registrere dit produkt på www.philips.
com/welcome.
Det kraftfulde Philips GC8280-strygesystem med tryk producerer konstant
damp, hvilket gør strygningen lettere. Takket være den store vandtank kan
du stryge uden afbrydelse. Når vandtanken er tom, tages den blot af og
fyldes igen.
Philips GC8280 er udstyret med et avanceret display, der giver dig kontrol
over strygeprocessen. Displayet viser den valgte temperaturindstilling og
har præcise, forprogrammerede temperaturindstillinger til 12 forskellige
materialer. Det informerer dig tillige om dampindstilling og vandstand og
husker dig på, når strygejernet skal rengøres. Strygejernet er meget sikkert
at anvende takket være autosluk-funktionen. Sidst men ikke mindst, er det
det eneste strygesystem på markedet med integreret drypstopfunktion.
Vi håber, at du vil nyde brugen af Philips GC8280.
A Dampslange
B Håndtag med soft grip
C Dampudløser
D Display
E Temperatur-taster (+/-)
F Menu-tast
G Str ygesål
H Lås til sikker opbevaring
I Holder til strygejernet
J Aftagelig vandtank
K Krog til opbevaring af ledning og slange
L Calc-Clean-dæksel
M Påfyldningsåbning
N Udløser til vandtank
O Damptank
P On/off-kontakt med lys
Q Transporthåndtag
R Indikator for påfyldning af vandtank
S Netledning
T Damp-taster (+/-)
U Betjeningspanel på dampgeneratoren med lysindikator for damp
p = maksimal dampmængde
[ = moderat dampmængde
] = minimal dampmængde
a = ingen damp
-
Vigtigt
Læs denne brugsvejledning omhyggeligt igennem, inden apparatet tages i
brug, og gem den til eventuelt senere brug.
Fare
Hverken strygejern eller damptank må kommes ned i vand.
-

DANSK 21
Advarsel
Kontrollér, om spændingsangivelsen på typeskiltet svarer til den lokale
netspænding, før du tilslutter apparatet.
Brug ikke apparatet, hvis stik, netledning, dampslange eller selve
apparatet viser tegn på beskadigelse, eller hvis apparatet er blevet tabt,
eller det er utæt.
Hvis ledningen eller dampslangen beskadiges, må de kun udskiftes af
-
Philips, et autoriseret Philips-serviceværksted eller af en kvaliceret
fagmand for at undgå enhver risiko ved efterfølgende brug.
Hold altid apparatet under opsyn, når det er sluttet til lysnettet.
Dette apparat er ikke beregnet til at blive brugt af personer (herunder
børn) med nedsatte fysiske og mentale evner, nedsat følesans eller
manglende erfaring og viden, medmindre de er blevet vejledt eller
instrueret i apparatets anvendelse af en person, der er ansvarlig for
deres sikkerhed.
Apparatet bør holdes uden for børns rækkevidde for at sikre, at de ikke
kan komme til at lege med det.
Netledning og dampslange må ikke komme i kontakt med strygesålen,
når denne er varm.
Hvis der slipper damp ud af Calc-Clean-dækslet, mens
apparatet varmer op, skal du slukke for apparatet og stramme CalcClean dækslet. Slipper der fortsat damp ud under opvarmningen, skal
du slukke for apparatet og kontakte din Philips-forhandler for eftersyn/
reparation.
Calc-Clean-dækslet må aldrig fjernes, når dampgeneratoren er varm.
Brug ikke andre låg til dampgeneratoren end det medfølgende Calc-
Clean-dæksel, da dette samtidig fungerer som sikkerhedsventil.
Forsigtig
Apparatet må kun sluttes til en stikkontakt med jordforbindelse.
-
Kontrollér med jævne mellemrum, at netledningen og dampslangen er
hel og ubeskadiget.
Placér og brug altid strygejern og dampgenerator på et stabilt, plant og
vandret underlag.
Strygesålen kan blive utrolig varm og forårsage brandsår ved berøring.
Når du er færdig med at stryge, når du rengør apparatet, når du fylder
eller tømmer vandtanken, og når du forlader apparatet – selv om det
kun er i et kort øjeblik – skal du placere strygejernet i holderen, slukke
for apparatet og tage stikket ud af stikkontakten.
Rengør dampgeneratoren regelmæssigt ifølge anvisningerne i afsnittet
“Rengøring og vedligeholdelse”.
Dette apparat er kun beregnet til almindelig husholdningsbrug.
-
Elektromagnetiske felter (EMF)
Dette Philips-apparat overholder alle standarder for elektromagnetiske
felter (EMF). Ved korrekt anvendelse i overensstemmelse med
instruktionerne i denne brugsvejleding, er apparatet sikkert at anvende,
ifølge den videnskabelige viden, der er tilgængelig i dag.
DANSK22
Før apparatet tages i brug første gang
Bemærk: Der kan komme lidt røg fra strygejernet, når det tændes første gang.
Dette er helt normalt og forsvinder hurtigt.
Bemærk: Når strygejernet bruges første gang, kan der drysse lidt partikler ud
fra strygesålen. Det er helt normalt. Partiklerne er uskadelige og forsvinder
efter et kort øjeblik.
Bemærk: Når apparatet tændes, høres der måske en pumpelyd fra
dampgeneratoren. Det er helt normalt. Lyden indikerer, at der pumpes vand ind
i dampgeneratoren.
1 Fjern eventuelle mærkater eller beskyttelseslm fra strygesålen, og
rengør den med en blød klud.
2 Kontrollér hårdhedsgraden af vandet i din vandhane med den
medfølgende teststrimmel.
y = blødt vand
u = moderat hårdt vand
i = hårdt vand
o = meget hårdt vand
Klargøring
1
Placér dampgeneratoren på et stabilt, jævnt underlag, f.eks. på den
hårde del af strygebrættet eller et bord.
Påfyldning af den aftagelige vandtank
Vandtanken kan påfyldes når som helst under brug.
Kom aldrig varmt vand, parfume, eddike, stivelse, afkalkningsmiddel,
strygemiddel eller andre kemikalier i vandtanken.
Overfyld ikke vandtanken, da der kan løbe vand ud af
påfyldningsåbningen, når du sætter vandtanken tilbage.
1 Tag den aftagelige vandtank af dampgeneratoren.
2 Fyld vandtanken med vand fra vandhanen op til MAX-markeringen.
Bemærk: Er vandet i dit område meget hårdt, anbefales det at anvende lige
dele postevand og lige dele destilleret vand.
3 Sæt vandtanken tilbage på dampgeneratoren (“klik”).
Bemærk: Hvis vandtanken ikke er isat korrekt, kan strygejernet ikke producere
damp.
OnOn
MAXMAX
DANSK 23
Indikator for påfyldning af vandtank
Når vandtanken er ved at være tom, ses beskeden “WATER LOW, REFILL
WATER TANK” (Lav vandstand, fyld vandtanken) i displayet, og du hører to
korte bip.
Indikatoren for påfyldning af vandtank blinker, og dampstrygning er ikke
længere mulig.
1 Tag vandtanken af, og fyld den.
2 Sæt vandtanken tilbage på dampgeneratoren.
Strygejernet er klar til at stryge igen.
,
Temperaturindstilling
1 Sæt stikket i en jordet stikkontakt, og tryk en gang på on/off-
kontakten.
Bemærk: Når strygejernet tændes, varmer det automatisk op til den sidst
anvendte temperaturindstilling.
Lyset i on/off-knappen tændes.
,
Displayet lyser, og du hører et kort bip. Følgende meddelelse ruller
,
hen over displayet:
”WELCOME TO PHILIPS - CHECKING SENSORS - CHECKING
WATER - WARMING UP” (Velkommen til Philips - kontrollerer sensorer
- kontrollerer vand - varmer op).
Dampindikatoren på dampgeneratoren blinker.
,
Efter ca. 2 minutter lyser dampindikatoren konstant for at indikere, at
dampgeneratoren er klar til dampstrygning.
2 Kontrollér vaskemærket på det tøj/stof, der skal stryges, for at nde
den rette strygetemperatur.
3 Brug temperaturknapperne “+” og “-” for at indstille den ønskede
strygetemperatur eller materialetype.
Displayet viser den materialetype, som den valgte
,
temperaturindstilling er mest velegnet til (se kapitlet “Vejledning til
strygejernets display”).
Displayet indikerer, om strygejernet varmer op eller køler ned til den
,
valgte temperatur.
Et dobbelt bip og en meddelelse i displayet indikerer, at strygesålen har
nået den valgte temperatur.
Gode råd
Er du i tvivl om, hvilket materiale et stykke tøj er fremstillet af, må du
-
nde den rette strygetemperatur ved at prøve dig frem et sted, som
ikke er synligt, når du har tøjet på.
Hvis stoffet er fremstillet af ere slags bre, skal du altid vælge den
-
temperatur, som passer til den mest sarte bertype, dvs. den laveste
OnOn
DANSK24
temperatur. Hvis et stykke tøj f.eks. består af 60 % polyester og 40 %
bomuld, skal det stryges ved den temperatur, som passer til polyester (
1), og uden damp.
Stryg først det tøj, der kræver den laveste temperatur, f.eks. syntetiske
materialer.
Hvis du indstiller en lavere temperatur under strygningen, skal du vente,
indtil strygejernet er kølet ned til den indstillede temperatur, før du
fortsætter med at stryge. For at få strygejernet til at køle hurtigere af
kan du trykke på dampudløseren eller stryge på et stykke stof.
Display-menu
GC8280 har 5 funktioner, der giver mulighed for at justere apparatets
indstillinger efter eget ønske.
Funktionerne står i en menu. Tryk på menu-knappen samt knapperne
“+” og “-” på strygejernet for at anvende menuen.
Menustrukturen i disse funktioner er følgende (standardindstillingerne
vises i parentes):
1 Damplås (on)/off
2 Autosluk: 5/10/20/(30) minutter
3 Lyd: (on)/off
4 Sprog: (Engelsk)/hollandsk/fransk/tysk/italiensk/spansk/por tugisisk
5 Vandets hårdhed: blød/(middel)/hård
Valg af ønskede indstillinger:
1 Tryk på menu-tasten i 1 sekund.
2 Brug “+”- og “-” tasterne på strygejernet til at rulle igennem de
forskellige indstillingsmuligheder.
3 Når du når den ønskede indstilling, trykkes på menu-tasten igen.
Meddelelsen “CONFIRMED” (Bekræftet) ses i displayet.
4 Vent 3 sekunder for at komme ud af menuen.
Sådan bruges apparatet
Dampstrygning
Dampslangen kan blive varm under en længere strygeperiode.
Bemærk: Under dampstrygning høres evt. en pumpelyd fra tid til anden. Det er
normalt og betyder blot, at der pumpes vand ind i dampgeneratoren.
1 Sørg for, at der er tilstrækkeligt med vand i vandtanken.
2 Sæt stikket i en jordet stikkontakt, og tryk en gang på on/off-
kontakten.
3 Indstil den ønskede strygetemperatur (se afsnittet “Klargøring”).
Det er kun muligt at dampstryge ved temperaturer over 2.
Dampfunktionen deaktiveres automatisk ved strygetemperaturer under
2.
DANSK 25
4 Vælg den ønskede dampindstilling ved hjælp af knapperne “+” og “-”
på dampgeneratorens betjeningspanel.
p maksimal dampmængde (temperaturindstilling MAX).
[ moderat dampmængde (temperaturindstillinger 3 til MAX).
] minimum dampmængde (temperaturindstillinger 2 til MAX).
a ingen damp (temperaturindstillinger 1 til MAX).
Dampindikatoren blinker for at vise, at dampgeneratoren er ved at
,
varme op.
Efter ca. 2 minutter lyser dampindikatoren konstant for at indikere, at
,
dampgeneratoren er klar til dampstrygning.
Bemærk: Under strygningen kan du justere dampindstillingen ved hjælp af
dampknapperne + og -. Det tager et par sekunder, inden dampmængden er
justeret.
5 Tryk på dampudløseren for at begynde dampstrygning.
Når du stiller strygejernet fra dig, skal det enten stilles på højkant eller i
holderen.
Når dampventilen i dampgeneratoren åbnes og lukkes, høres en
,
klikkende lyd. Det er helt normalt.
Damplåsfunktion
Damplåsen gør det muligt at dampstryge uden hele tiden at skulle trykke
på dampudløseren.
Når damplåsefunktionen er sat på “on” (standardindstillingen i
displaymenuen), producerer strygejernet damp konstant, når du trykker
på dampudløseren én gang. Hvis du vil afslutte dampproduktionen, skal
du trykke på dampudløseren igen.
Når damplåsefunktionen er sat på “off ” (se afsnittet “Displaymenu”),
producerer strygejernet kun damp, når du trykker på dampudløseren.
Bemærk: Slip damplåsen, når du stiller strygejernet på hælen eller i holderen.
Det forhindrer, at der slipper varm damp ud fra strygejernet, eller at holderen
til strygejernet bliver våd.
Lodret damp
Ret aldrig dampstrålen mod personer.
1 Hold strygejernet i lodret stilling, og tryk på dampudløseren for
at dampstryge gardiner og tøj (jakker, jakkesæt og frakker), der er
hængt op.
Tørstrygning (uden damp)
Du kan stryge uden damp på to måder :
Begynd at stryge uden at trykke på dampudløseren.
-
Vælg dampindstillingen a (ingen damp), og begynd at stryge.
-
OffOff
DANSK26
Autosluk-funktion
Autosluk-funktionen afbryder automatisk strygesålen, når du ikke
har trykket på dampudløseren i et vist antal minutter. Antallet af
minutter afhænger af den tid, du har valgt for autosluk-funktionen.
Du kan vælge aktivering af autosluk-funktionen efter 5, 10, 20 eller 30
minutter (se afsnittet “Display menu”).
1 Displayet viser teksten “IRON OFF” (Autosluk), og du hører et
periodisk bip.
2 Ønsker du at stryge igen, trykkes blot på en vilkårlig knap på
strygejernet.
Strygesålen varmer op igen.
,
Bemærk: Autosluk-funktionen afbryder strygesålen, men slukker ikke
for dampgeneratoren. Hvis du ønsker at afslutte strygningen, skal du
slukke apparatet og tage stikket ud.
Gode råd
Når du stryger uldstoffer, kan der opstå blanke skjolder. For at undgå
dette skal du bruge en tør klud til at lægge imellem eller vende vrangen
ud på tøjet og stryge det på bagsiden.
Silke, uld eller kunststof: Stryg tøjet på vrangen for at undgå blanke
skjolder.
Fløjl og andre stoffer, som har tendens til at få blanke skjolder, bør kun
-
stryges i én retning (med luven) og kun med et let tryk.
Undlad at bruge damp ved strygning af indfarvede silkestoffer, da det
kan give skjolder på tøjet.
Rengøring og vedligeholdelse
Efter brug
1 Placer strygejernet i holderen (se afsnittet “Opbevaring”) , og sluk
for apparatet.
2 Tag stikket ud af stikkontakten, og lad apparatet køle af.
3 Tør strygesålen af med en fugtig klud med lidt ikke-ridsende
(ydende) rengøringsmiddel.
4 Tør strygejernets overdel og ydersiden af dampgeneratoren af med
en fugtig klud.
5 Tøm vandtanken efter rengøring.
Calc-Clean-funktion
Calc-Clean-dækslet må aldrig fjernes, når dampgeneratoren er varm.
MEGET VIGTIGT: Skyl dampgeneratoren én gang om måneden eller efter
10 ganges brug for at forhindre, at apparatet beskadiges og for at sikre
optimal dampfunktion.
DANSK 27
1 Tag stikket ud af stikkontakten, og lad apparatet køle af i mindst 2
timer.
2 Løft den aftagelige vandtank af.
3 Tag fat om dampgeneratoren med begge hænder, og ryst den godt.
4 Læg dampgeneratoren på siden, så Calc-Clean-dækslet vender opad,
og fjern dækslet
5 Tøm dampgeneratoren i vasken.
6 Fyld dampgeneratoren med frisk vand, og ryst den igen.
DANSK28
7 Tøm dampgeneratoren ud i vasken igen.
8 Gentag trin 6 og 7 to gange for at opnå det bedste resultat.
9 Skru Calc-Clean-dækslet ordentligt fast på dampgeneratoren.
Calc-Clean-påmindelse
1 Når displayet viser beskeden “SWITCH OFF IRON - DO CALC
CLEAN” (Sluk for strygejernet - udfør afkalkning), er der aejret for
meget kalk i apparatet, og du skal rengøre dampgeneratoren.
2 Sluk for apparatet med det samme, og lad det køle af.
Brug aldrig Calc-Clean-funktionen, når dampgeneratoren er varm.
3 Brug Calc-Clean-funktionen, som beskrevet ovenfor.
Opbevaring
Lad altid apparatet køle af, inden det stilles væk.
1 Sæt spidsen af strygejernet i låsen til sikker opbevaring i holderen.
2 Tryk den bageste del af strygejernet ordentligt ned (“klik”).
3 Tøm vandtanken.
DANSK 29
4 Træk krogen til opbevaring af ledning og slange ud.
5 Fastgør dampslangen og netledningen.
6 Tag fat i apparatets håndtag på hver side af dampgeneratoren for at
ytte det.
Miljøhensyn
Apparatet må ikke smides ud sammen med det almindelige
-
husholdningsaffald, når det til sin tid kasseres. Aevér det i stedet på
en kommunal genbrugsstation. På den måde er du med til at beskytte
miljøet.
Reklamationsret og service
For alle yderligere oplysninger eller ved eventuelle problemer med
apparatet henvises til Philips’ hjemmeside på adressen www.philips.com
eller det lokale Philips Kundecenter (telefonnumre ndes i vedlagte
“World-Wide Guarantee”-folder). Hvis der ikke ndes et kundecenter
i dit land, bedes du venligst kontakte din lokale Philips-forhandler eller
Serviceafdelingen i Philips Domestic Appliances and Personal Care BV.

DANSK30
Dette kapitel opsummerer de mest almindelige problemer, du kan støde
på ved brug af apparatet. Hvis du ikke kan løse problemet ved hjælp af
nedenstående oplysninger, bedes du kontakte dit lokale Philips Kundecenter.
Problem Årsag Løsning
Apparatet bliver
ikke varmt.
Det ryger fra mit
nye strygejern, når
jeg tænder det.
Strygejernet
producerer ingen
damp.
Der drypper vand
ud fra strygesålen.
Der kan være problemer med
tilslutningen.
Du har ikke tændt for apparatet. Tryk på on/off-knappen.
Den indstillede temperatur er for lav. Indstil til en højere temperatur.
Nogle af de indre dele i strygejernet er
smurt med olie fra fabrikkens side, og
det kan afgive lidt røg, når det bruges
første gang.
Der er ikke nok vand i vandtanken. Fyld vandtanken. Se kapitlet
Dampgeneratoren er ikke varmet
tilstrækkeligt op.
Den indstillede strygetemperatur er for
lav til dampstrygning.
Du har valgt dampindstillingen a (ingen
damp).
Du har ikke sat vandtanken rigtigt i
dampgeneratoren.
Når strygejernet er indstillet på
en meget høj temperatur, er den
producerede damp tør og næsten
usynlig. Dampen bliver mere usynlig, jo
højere den omgivende temperatur er
- og helt usynlig, når temperaturvælgeren
står på MAX
Den indstillede temperatur er for lav til
dampstrygning.
Når du begynder at dampstryge og
holder en pause, bliver den damp, der
stadig var i dampslangen, kølet ned og
omdannet til kondensvand, som kan
dryppe ud fra strygesålen.
Kontrollér netledning, stik og
stikkontakt.
Det er normalt og ophører efter kort
tid.
“Klargøring” under afsnittet “Påfyldning
af den aftagelige vandtank”.
Vent i ca. 2 minutter, indtil
dampindikatoren lyser konstant.
Vælg en temperatur på 2 eller
højere.
Vælg dampindstilling ] (minimum
damp), [ (moderat damp) eller p
(maksimal damp).
Sæt vandtanken korrekt i
dampgeneratoren (“klik”).
Vælg en lavere temperatur, f.eks. 2,
for at kontrollere, om strygejernet
producerer damp.
Vælg en temperatur på 2 eller
højere.
Det er normalt. Når du begynder
at stryge eller fortsætter med at
stryge efter en pause, skal du holde
strygejernet hen over en gammel klud
og trykke på dampudløseren. Vent,
indtil der kommer damp i stedet for
vand ud fra strygesålen.
 Loading...