

Page 1

SmartLine D750
User’s Guide:
Basic Functions
Page 2

Menu operation:
Display with the functions which
can be selected
Confirm selection with OK key
(here: activating telephone directory)
Operation can be stopped or
cancelled using the STOP key
Display where it is possible to call up
further menu items using cursor keys
The functions of the unit are collected together in a menu.
They are shown in ”plain text” in the display:
Menu operation is performed easily and conveniently using these 4 keys:
The SmartLine D750 at a glanceThe SmartLine D750 at a glance
4
7
123
56
A
Announc 1 Closing Announc 2 ADAD Timer
2 lines for displaying up to
24 characters (numbers, letters,
special characters)
The numbers indicate which data /
speech channel of the dial-up line
is currently in use
Symbols for activated telephone
functions
Symbols for answering machine
Numerals I and II indicate which
speech/data channel of the
dialup line is being used.
Hot line is activated.
Open listening or hands-free
operation is switched on.
Muting is activated.
The changeover key for the
name keys was actuated:
2nd memory level is activated.
A call diversion is switched on.
Handset is on-hook
Lift handset
Replace handset
Keyboard input
You are making a call
Example: Possibilities after selecting the menu item :
Stop
O.K.
The controls
The menu control
Pictograms of the user’s guide
Display
Loudspeaker
Labelling
area for
name keys
Name keys
Changeover key
for name keys
Push button
(numbers, asterisk
and square)
Announc 1 Closing Announc 2 ADAD Timer
F
1
23
ABC.:? DEF
45
GHI JKL MNO
789
PQRS TUV WXYZ
6
0
+ - !
INT
Display
Keys for the
answering
device
Appointment
key
with display
Hands free
microphone
Disconnect
key
MENU
+
–
Stop
R
O.K.
Mute key
“Menu“-key
Adjustment
keys + and Number
re-dial
Stop-key
Cursor key
for menu
selection
OK key
Consultation
hold key
Listen in /
hands free
function
No function
Page 3

Foreword: Your new telephone: Possibilities for useForeword: Your new telephone: Possibilities for use
Important calls: A SmartLine D750 speciality
When you are waiting for an important call, the following situations always
seem to occur:
Situation 1:
It would have to be at this moment that you have to leave the house or the
firm because of an important appointment. What can you do? Cancel the
appointment? Or ask someone else to “guard” the telephone and then call
you?
Solution: With the SmartLine D750 you can divert calls for one (or even all)
telephone numbers of your line to another number. In this way you are
always available.
Situation 2:
Whilst you are waiting for an important call, lots of other calls come in, for
which you don’t really have time...
Solution: For this case (and for others, too) your SmartLine D750 has a call
filter. Using this, you can specify up to 3 telephone numbers, whose calls
should be accepted or barred. This applies to calls from an ISDN line telephone number transfer.
You will find these functions in the following sections of part A:
Call diversion: chapter 4.5; call filter: chapter 5.9
Telephone No. display: Communication even before the handset is lifted
In the case of a call from another ISDN line, the telephone number of the caller
can be shown to you in the display. This means that even at the first ring a
caller hands over his ”calling” card at the SmartLine D750. If you have already
entered his/her telephone number in the telephone directory or in a name key
memory of you telephone, even the accompanying name is displayed.
If you can’t take a call (with transfer of the telephone number), the
SmartLine D750 stores the telephone number in the call list (max. 10
positions). You can then select the telephone number from this list when
you call back.
Your own telephone number can be transferred ...
1. ... When you call a party with an ISDN line.
2. ... If you are called: Your telephone number is also transferred to the
caller. In this way he can be sure that he has reached the right party.
You can also prevent the transfer of your own telephone number, the socalled ”identification”. This way you remain anonymous from the start.
Continuous or temporary suppression of the telephone number is possible.
You will find these functions in the following sections of part A:
Telephone directory chapter 4.3; call list: chapter 4.1; identification:
chapter 2.9
Call diversion
Call filter
Telephone
directory
Name keys
Call list
Identification
In the following pages you will be shown a small selection of the possibilities for using your new ISDN telephone. However, the SmartLine series
models offer a far wider range of features.
Please note that the availability of certain functions depends on the type of
ISDN telephone line and on additional services and features which must be
ordered from your national telephone network provider.
This user’s guide is based on the Euro ISDN standard which is compatible
with the DSS1 standard of most European countries.
SmartLine D750: T wo comfortable connections to the telephone network
The Euro ISDN basic access (line) connects the telephone with the telephone network. It offers two so-called ”B-channels”, via which two external
calls can be made simultaneously. With the SmartLine D750 you can use
this possibility to the full:
Does this sound familiar? ... You are in the middle of telephone call and
suddenly the telephone at the connection rings. You tell the first party
(i.e. the person you are talking to on the phone) what has happened and put
the handset to one side. You then dash to the other telephone.
Once you are there, you take the second call (hopefully you remembered to
press the “mute” key on the first telephone ...). Now you must decide
which call you wish to terminate, perhaps you will decide to ”jump” from
one telephone to the other... As we said: Does this sound familiar? ...
Using your SmartLine D750, this works far more easily:
An new incoming call during an existing call is signalled by the “camp-on
busy” tone in the handset. If the caller has an ISDN connection, your telephone number can be displayed. You can decide whether you wish to
accept or reject the 2nd call.
You can accept the second call without ending the first one. The first party
cannot listen in to this consultation call. After that you can resume the first
call.
Or: You can speak alternately with both parties (brokering).
Perhaps you would even like to talk to both parties at the same time: To do
this, simply switch on the conference function.
You can also connect both parties with each other (transferring).
By the way: You do not have to wait for a second party to call. You can also
set up the calls for consultation, brokering, conference and transferring
yourself.
You will find these functions explained in the following sections of
part A:
Camp-on busy: chapter 2.10; consultation, brokering, conference and
transfer: chapter 3
Camp-on busy
tone
Accepting or
rejecting
Consultation
Brokering
Conference
Transferring
Page 4

1Table of contents
Table of contents: A – Telephone operation
1 Start up: Overview..........................................................................4
1.1 Connecting the telephone.................................................................4
1.2 Operating overview...........................................................................6
1.3 Initial installation................................................................................8
1.3.1 Setting up the connection....................................................8
1.3.2 Telephonig..........................................................................10
1.3.3 Entering additional sharacters............................................11
1.4 Changing the display language .......................................................11
2 Telephoning: Basic functions.......................................................12
2.1 The first steps ................................................................................12
2.1.1 Initiating a call ....................................................................12
2.1.2 Dialing preparation.............................................................12
2.1.3 Accepting calls...................................................................12
2.1.4 Ending the call....................................................................12
2.2 Open listening and hands-free operation........................................13
2.3 Number redialing.............................................................................14
2.4 Muting ...........................................................................................14
2.5 Handset volume..............................................................................15
2.6 Ringer .............................................................................................15
2.7 DTMF signalling ..............................................................................15
2.8 Keypad information.........................................................................15
2.9 Identifying ......................................................................................16
2.9.1 Basic setting ......................................................................16
2.9.2 Temporary identification changeover.................................17
About this User’s Guide
The present user’s guide is in two sections:
Part A: Basic telephone functions:
In part A of the user’s guide the common basic functions of the SmartLine
D750 telephone are explained. .
Part B: Using the answering device:
Part B explains the functions of the answering device as a part of the
telephone.
Notes
Notes
When choosing the location for your telephone you should think about the
following:
• Avoid the direct vicinity of CD players, video recorders, televisions,
computers and microwave equipment.
• Avoid installation in locations with heavy concentrations of smoke or
dust, exposure to direct sunlight or humidity or in the direct vicinity of
heat sources.
• Place the unit on a non-slip mat so that the plastic feet of the unit are not
damaged by the furniture coating, leaving undesirable marks on the
furniture surface.
You can adapt the telephone to suit your personal requirements. Please
note that changed function settings are stored by the unit approx.
10 seconds after entry. Only after this time are the changes effective.
Euro ISDN is the new European standard for digital telecommunication. The
connection to conventional (national) ISDN and to the analogue telephone
network is performed easily via the existing exchanges. In this User’s
Guide, ”ISDN” refers to Euro ISDN in conjunction with the SmartLine D750.
The SmartLine D750 is designed for the Euro ISDN multi-device line.
Please note that whether functions can be used or not depends on the type
of ISDN connection ordered:
The following line access types are available, for example, in Germany:
Simple, standard and comfort access. You can extend the range of features
by ordering new features from your telephone network provider
(in Germany, Deutsche Telekom AG).
In most other other European countries ISDN features are offered as
extendible modules. If you do not exactly know which features are
obtainable from your network provider, please always use the ”comfort”
line access type. The features are then used depending on the network. Of
all the possible ISDN features, only ”closed user group” (CUG) and
”subaddressing” (SUB) are not supported.
The ”exchange connection” function is at present in planning.
It can currently only be used at one SmartLine D750 line with a PABX
(Private Automatic Branch Exchange).
The use of certain functions assumes that the caller/person you are calling
has an ISDN line and has activated the corresponding functions. Example:
Display of a caller’s telephone number is only possible if he/she has an ISDN
line and has not suppressed his/her telephone number display. The same
applies correspondingly for the transfer of message texts, for example.
Choice of
location
Settings
Functions
of the ISDN
line
Page 5

3
2
Table of contents
A – Telephone operation
2.10 Camp-on busy (COB)......................................................................17
2.11 Automatic callback when busy .......................................................18
2.12 Intercepting a telephone number....................................................18
3 Telephoning: During a call............................................................19
3.1 Notepad ..........................................................................................19
3.2 Consultation....................................................................................19
3.3 Transfer...........................................................................................19
3.4 Brokering.........................................................................................20
3.5 Conference .....................................................................................20
3.6 Parking ............................................................................................20
4 Comfort functions.........................................................................21
4.1 Call list ...........................................................................................21
4.2 Entering characters.........................................................................22
4.3 Telephone directory.........................................................................23
4.4 Name keys......................................................................................24
4.5 Call diversion...................................................................................27
4.5.1 External diversion...............................................................27
4.5.2 Forwarding to pager...........................................................27
4.5.3 Switching off all diversions................................................27
4.6 Messages .......................................................................................28
4.7 Barriers ...........................................................................................29
4.7.1 Hot line...............................................................................29
4.7.2 Dial bar...............................................................................30
4.7.3 Program bar .......................................................................30
4.7.4 “Free” telephone numbers................................................30
4.7.5 Barred numbers.................................................................31
4.8 Charges (call costs).........................................................................31
4.9 Charge accounts .............................................................................32
4.10 Appointment call.............................................................................34
5 Set-up menu: Overview ...............................................................35
5.1 Setting time and date......................................................................35
5.2 Changing the PIN............................................................................35
5.3 Exchange line seizure .....................................................................35
5.4 Change of prefix..............................................................................36
5.5 Entering and changing MSNs .........................................................36
5.6 Allocation of users to MSNs ...........................................................37
5.7 Language ........................................................................................37
5.8 Automatic dialing – setting the pause between dialing ..................37
5.9 Call filters ........................................................................................38
5.10 Call delay.........................................................................................39
5.11 Resetting the unit ...........................................................................39
5.12 Entering connection type and additional features...........................40
B – Answering device: Start up
1 Start up:.........................................................................................41
1.1 Answering device controls..............................................................41
1.2 Overview/Startup...........................................................................42
Table of contents
1.3 Recording announcements.............................................................43
1.4 Switching the answering device on and off....................................43
B – Answering device
2 Operation.......................................................................................44
2.1 Recording a message .....................................................................44
2.2 Listening-in and taking over calls ....................................................44
2.3 Manual recording of calls................................................................45
2.4 Replaying new messages...............................................................45
2.5 Replaying all recordings ..................................................................46
2.6 Erasing recordings ..........................................................................46
2.7 Info text...........................................................................................47
2.8 Dictations........................................................................................47
2.9 ADAD operation .............................................................................47
2.10 VIP function.....................................................................................49
2.11 Room functions...............................................................................49
3 Programming.................................................................................50
3.1 Operating mode..............................................................................50
3.2 Automatic listening-in .....................................................................50
3.3 Timer ...........................................................................................50
3.4 Setting switch-on............................................................................51
3.5 Time limit for recordings.................................................................51
4 Remote control/Remote polling.................................................51
4.1 Remote control / Overview.............................................................51
4.2 Remote switch-on of a switched off answering device..................52
4.3 Initiating remote control (answering device is switched on)...........52
4.4 Codes for remote operation............................................................53
Appendix
Index – CE label – Certification Cleaning – Technical data – Settings on
delivery
Page 6
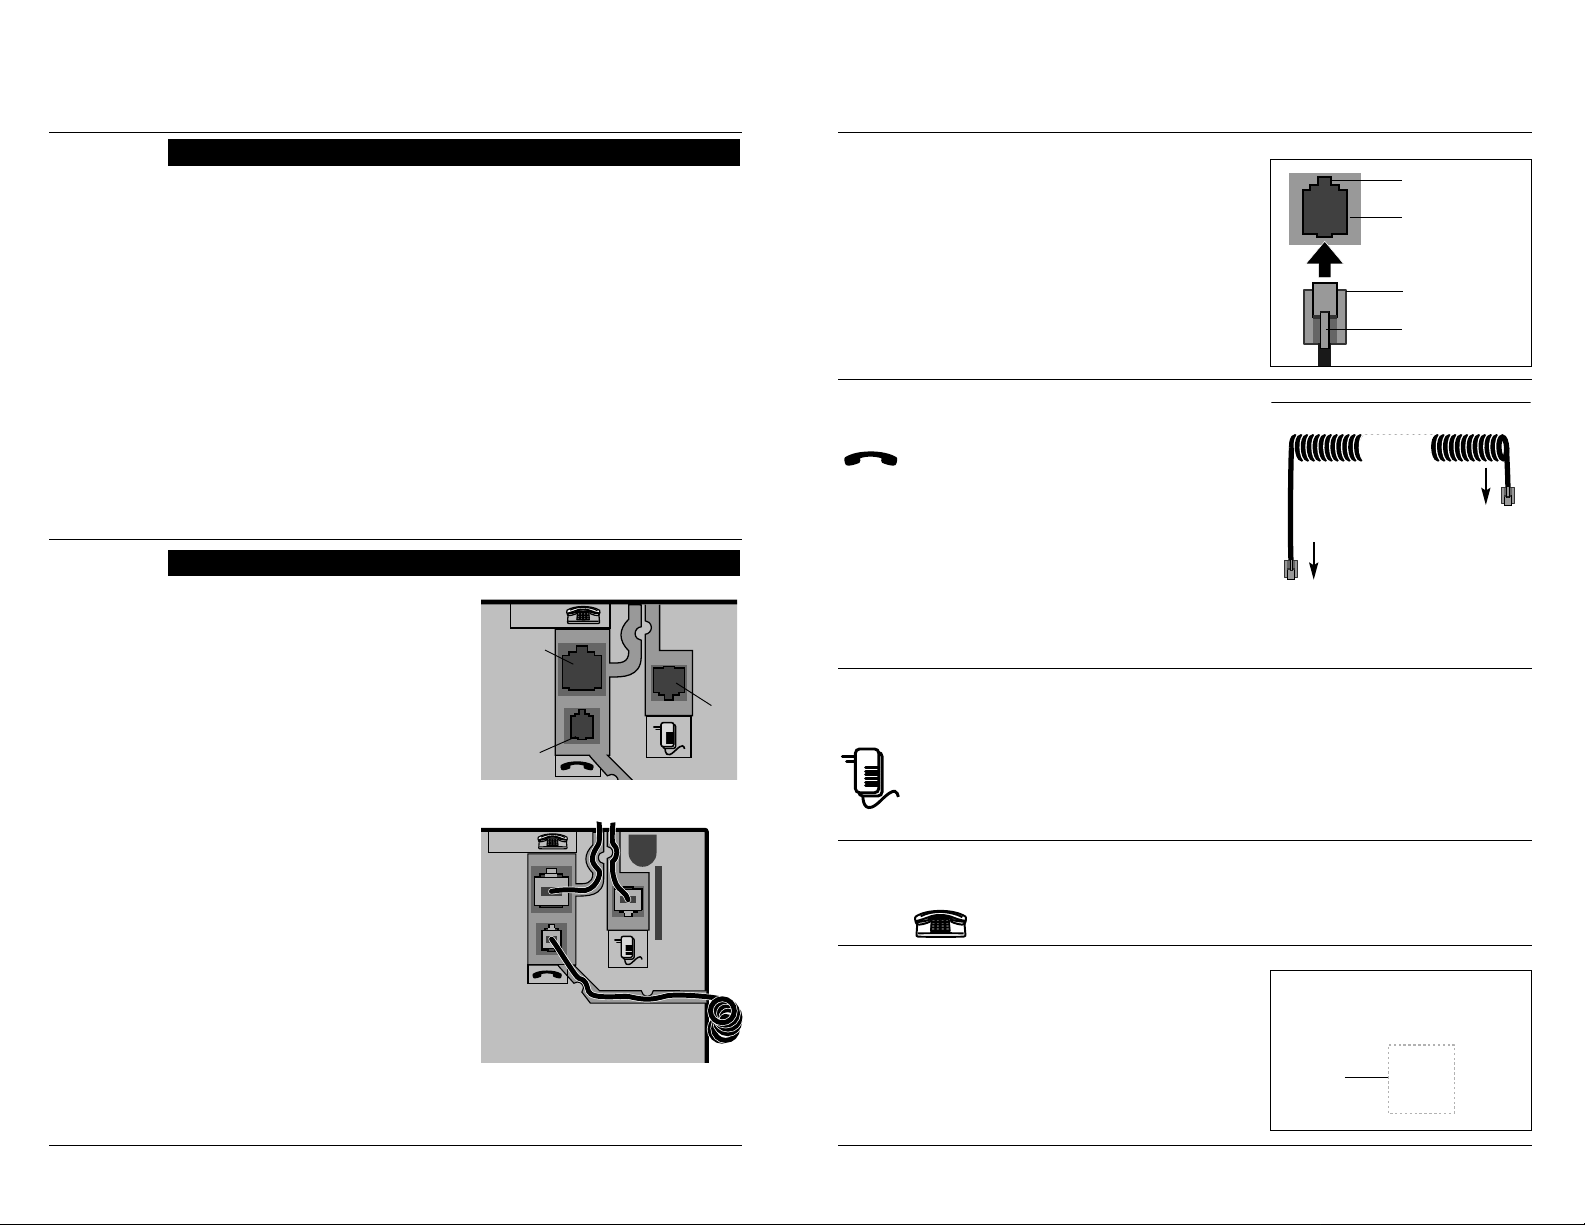
5A – Telephone operation: 1 Start up
Insertion is performed in the same
way for all three sockets:
•
Insert the plug into the socket so
that the locking catch points in
the direction of the corresponding cut-out in the socket.
•
Push the plug into the socket
until it locks.
You will find the handset and the
spiral cable in the packaging.
•
Connect the plug of the cable
end with the longer straight
piece with the corresponding
socket on the underside of the
telephone
(refer to sketch on
previous page).
•
Connect the other plug of the
cable with the
socket of handset.
•
Route the cable through the cable guide.
Now insert the appropriate plug of the plug-in power supply unit into the
corresponding socket (see sketch on previous page). For safety reasons, the
telephone must only be operated using the plug-in power supply unit supplied with it. Insert the plug-in power supply unit into the 220/ 230 volt
socket.
Caution: Your telephone will not operate if the plug-in power supply is
not inserted or in the case of a power failure.
The connection cable for the ISDN line has two identical plugs.
Insert one of them into the telephone socket. Connect the other one with
the socket of the telephone connection (ISDN socket).
First of all, pull the
plug-in power
supply unit out of the power socket.
Releasing a plug-in connection:
❶
Press the locking catch towards
the plug.
❷
Pull out the plug, holding it on
both sides (keep locking catch
depressed).
❶
❷
To the handset
socket
Spiral cable for
telephone
handset
To the telephone
Cut-out
Locking catch
Socket
Socket
Plug
Plug-in
connections
Telephone
handset
Power
supply
Telephone
connection
Releasing
the plug-in
connections
ISDN
4
A – Telephone operation: 1 Start up
1.1 Connecting the telephone
Prior to initial operation, you must
carry out some connections.
The necessary cables and the plugin power unit are included in the
telephone’s scope of delivery. For
safety reasons, the telephone must
only be operated using the plug-in
power supply unit supplied with it.
The connection sockets are on the
underside of the telephone. They
can be distinguished by their different sizes and are marked by symbols (refer to sketch).
Refer to the following page for the
connections.
Once you have established the
plug-in connections, you must route
the cable through the accompanying cable guides. This ensures a
correct setting up of the telephone.
Carefully press the cable into the
recesses (refer to sketch).
ISDN
ISDN
Telephone
connection
to ISDN
network
Handset
Underside of unit
Underside of unit
Power
supply
Cables
Connection
sockets
Cable guides
1 Start up: Overview
The SmartLine D750 offers you a large range of functions – yet it is simple and
quick to use: You can use your telephone after only three preparatory steps!
❍
Step 1: Connecting the telephone (1.1)
Here you will be shown the necessary connections.
❍
Step 2: Operating overview (1.2)
The SmartLine D750 supports you in all operations through information
in the display. This section provides you with an overview of basic
displays and operations.
❍
Step 3: Connecting the telephone (1.3)
Your telephone requires some information about your ISDN line. Polling
is performed automatically during initial operation.
You will find further basic settings in chapters 4 and 5.
●
Now you can use the telephone:
Telephoning: The first steps (2.1)
Page 7

–
– –
Depiction of operating sequences:
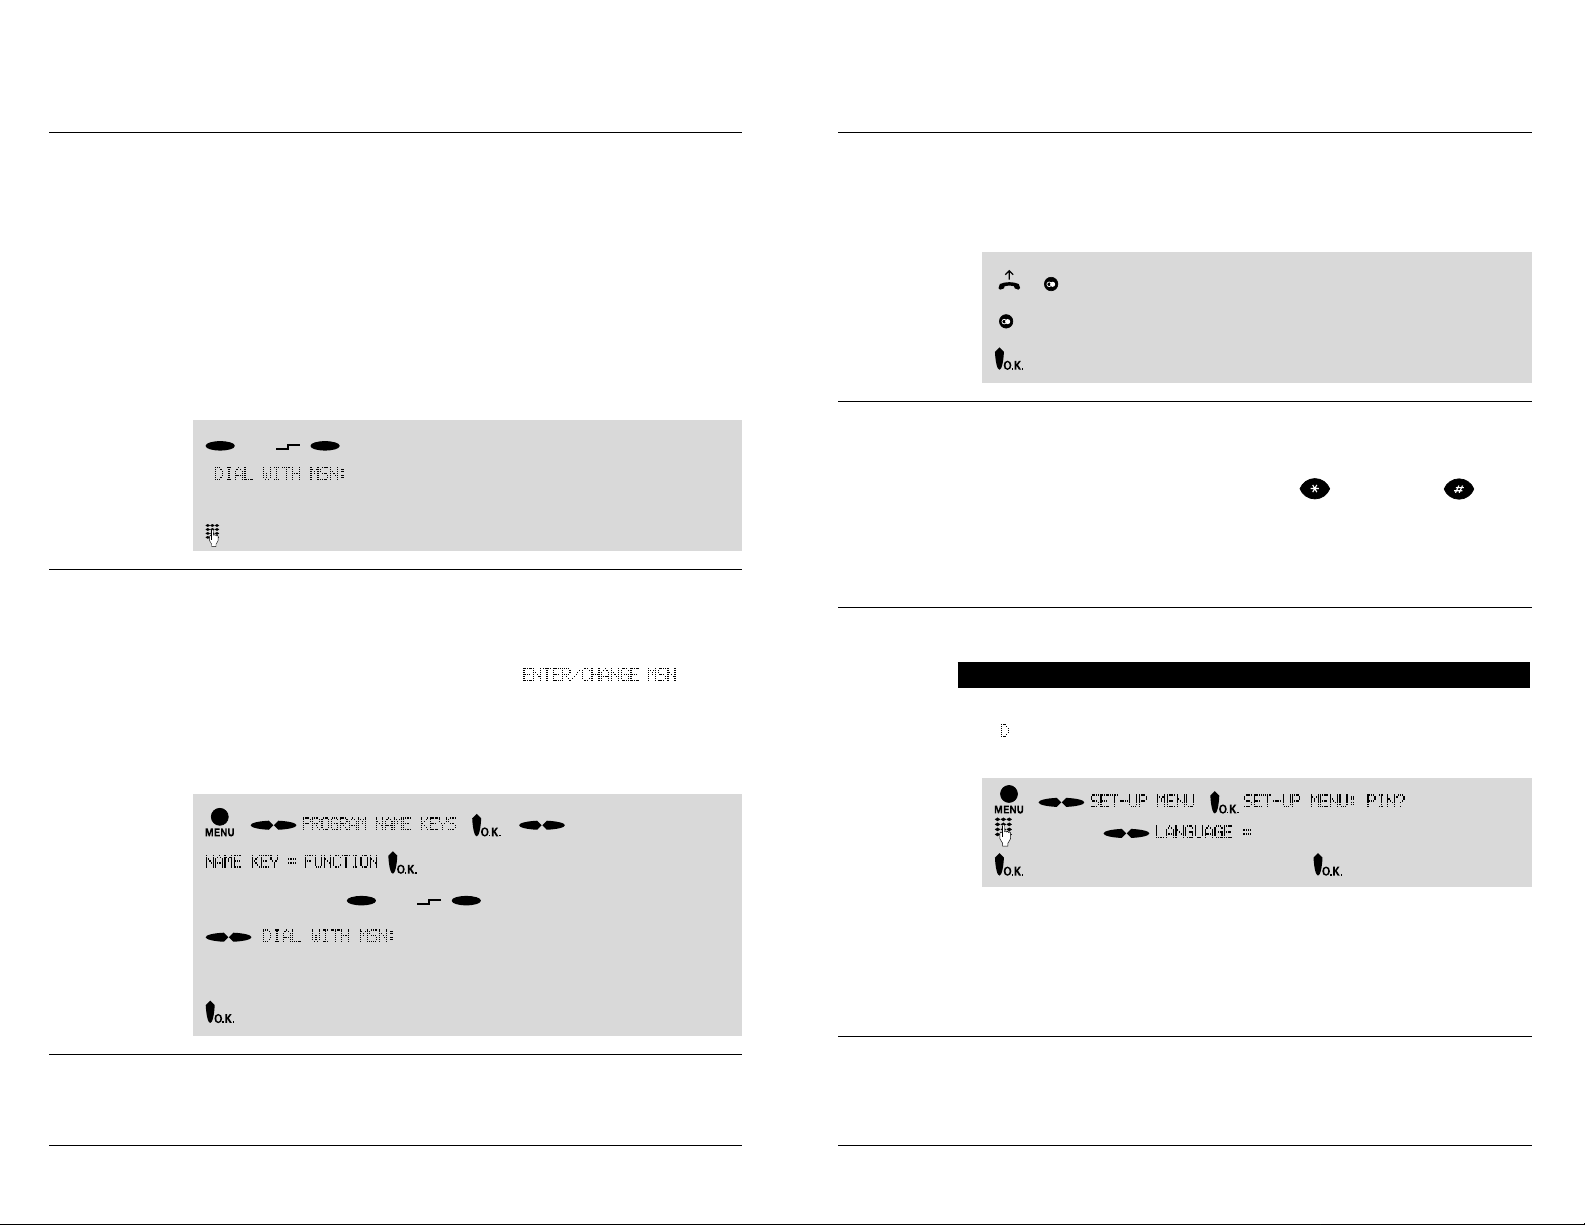
In the User’s Guide, the selection of a menu item is depicted in simplified
form:
This corresponds to the sequence:
•
Press the ”menu” key, to start selection from the menu.
•
Using the cursor-keys, select the menu item .
•
Press the O.K. key , to confirm the selection.
The menu item
is offered.
•
Press the O.K. key to confirm selection.
Acoustic signals
Acoustic signals when telephoning:
•
You can hear the dial tone when you lift the handset.
•
The ring tone sounds when the called connection is available.
•
The busy tone sounds when the connection you are ringing is busy.
•
The camp-on busy tone advises you of another pending call.
•
The normal ringer tone signals calls.
•
The appointment tone signals the arrival of a set appointment date/time.
7A – Telephone operation: 1 Start up
Currently usable functions
In the 2nd line, the currently usable functions are offered; (e. g. in ready-todial condition or during a call). In this way, it is possible to activate rejection
of a call by pressing the O.K. key.
The display of these functions depends, for example, on the programming
and connection conditions. They are not elements of the function menu. If
several such function are available, the symbol selection is displayed by
means of the cursor keys (
). The desired function can then be selected
using the cursor keys.
Since the sequence of these functions can differ, the desired function for
operation may have to be selected using the cursor keys. This is depicted as
follows:
( )
Enter PIN
Some functions are protected by the need to enter a PIN number. The PIN
(Personal Identification Number) is a 4-number code. On delivery, the PIN is:
”0000”.
If an incorrect PIN is entered, operation is aborted. If you make a mistake
when entering the PIN: Press the O.K. key and enter the PIN again .
6
Acknowledge tones: During operation you are informed by tones in
addition to the display texts. These so-called acknowledge tones
are
depicted in the appendix in the section ”Acoustic signals”.
A – Telephone operation: 1 Start up
1.2 Operating overview
Basic displays
Idle condition: The handset is onhook. There is no actual call.
Time and date are shown in the top
display line. The display is automatically set after the first outgoing
connection. At every the outgoing call the display is synchronised.
If no key is pressed for 30 seconds during an operating sequence, the unit
returns to the idle condition in almost all cases!
The handset was lifted or the
function open listening/hands-free
operation switched on. The
telephone is ready to dial a
telephone number.
Idle condition
Ready-to-dialcondition
Display contrast
The display contrast can be altered in the idle condition of the telephone
using the adjustment keys (”+” and ”–”) in 8 levels. To increase the
contrast, press the “+” key, to reduce it, the “–” key.
Selecting functions
During operation, you are assisted by user prompting with display messages:
Press ”Menu” key to begin selection from the menu. You can now select
functions. These are displayed to you in the top menu line.
By pressing the ”menu” key again, you can exit the function menu.
Stop key: End operation or abort. You can return to the previous menu
level by pressing the key once or, by repeated pressing, back to the idle
condition. Menu
Cursor keys: Selection from the menu. You can “page” forwards (right) or
backwards (left) through the menu. Using the left cursor key, you can also
delete letters and digits. The right cursor key can generate blank
spaces.
O.K. key: Confirmation of a selection or setting
=
=
=
Page 8

9A – Telephone operation: 1 Start up
8
A – Telephone operation: 1 Start up
Ringing tone
Dialling tone
Engaged tone
Positive acknowledge tone
Negative acknowledge tone
(421 Hz, repeated)
(1333 Hz, once)
(1333 Hz, einmal)
0.5 0.5
Camp-on busy tone
(421 Hz, once)
each 0.1
Audible tones (When phoning and programming, in handset/loudspeaker)
(421 Hz, continuous tone)
(421 Hz, repeated)
0.6
Tone
Depiction of the tones
Pause
(Values in seconds)
Request tone
(1333 Hz, once)
0.3 0.3 0.3
0.2 0.6
1 4
30.2 0.2 0.6 0.2
External call:
Appointment calls:
All tones
3.5
0.5 0.50.5
each 0.1
(repeated)
(800 Hz, once
Continuous tone
Acoustic signals during operation and programming:
•
The positive acknowledge tone confirms correct input (e. g. after
dictating an announcement text).
•
The negative acknowledge tone indicates an incorrect operation.
•
The request tone requests you to perform an input or operation (e. g.
during remote control of the answering machine).
1.3 Initial installation
1.3.1 Setting up the connection
Having connected the telephone as
described, you can use it without
further actions.
• The multiple subscriber numbers (MSN’s) are not specified.
The ISDN-switch sends the default MSN to the called party. The phone
answers to all MSN.
• The connection type is pre-set to „Comfort“which includes a set of
additional ISDN features.
• All additional ISDN-features are enabled („ON“). Accordingly, you can
utilize all features that actually have been released for your connection by
the network operator. ISDN-functions that have not yet been implemented in your network or are disabled, will simply be ignored on causing a
short error message in some cases. (In cases, where the problems are
bigger depending on your ISDN network, please refer to chapter 5.12 in
order to disable the additional features)
If your telephone shall only react to calls for a specific MSN:
Proceed as outlined in section 5 („Setup menu“). Please note the following
changes:
•
A MSN can consist of max. 10 digits.
•
The complete MSN does not have to be entered anymore. Entering the
last digit of the MSN will do.
For instance: the MSN’s: 87431, 87469 and 87432 have been allocated
to your ISDN-connection. If you enter „1“ by programming the function
„
“, the telephone will only react to calls for subscri-
ber number 87431.
Recomendation for entering the MSNs
• when you want to set up a call forwarding function, you set it according
to a specific MSN
• if you want to associate your
incoming and outgoing calls to a
specific MSN
Page 9
10
Telephone operation: 1 Start up 11Telephone operation: 1 Start up
Changeover
language
-
-
Input PIN -
change over to the other language - store setting
1.3.2 Telephoning
Initiating a call: a specified MSN identifies the call
When calling, you can now specify which multiple subscriber number (MSN) that will be the transferred to the called party as identification. In order to do this the corresponding function must be assigned to a name key; on pressing the name key the desired MSN is
entered. This specific MSN will then be transferred to the called
party when making the next call; having made this call, the setting
will be reset to the default value.
or Press the name key with the function
„
“
(for the assigment of the function to the name key, see below)
enter the MSN
Prerequisites for the application:
•
The MSN’s of your ISDN-connection must have been completely speci-
fied in the setup menu by the menu item „
“.
•
The name key must have been properly programmed (:applied as function key). Accordingly you perform the following steps (section 4 of the
Operating Instructions):
- - Confirm selection
Select name key:
or
(display of a multiple subscriber number)
Select the function with the desired multiple subscriber number.
Store input
Number redialling with lifted handset
The subscriber number is now selected by the cursor and OK keys.
- Press the redial key
Select the number to be redialled; pressing the redial key again.
Confirm your selection
1.3.3 Entering additional characters
Entering the DTMF characters „asterisk“
and „square“
Applies for keypad functions as well as for the programming of name keys
and telephone directory: additionally, DTMF-sequences can be entered,
applying also the „asterisk“ and „square“ buttons.
1.4 Changing the display language
2 language variants are available for the display texts: The standard setting
is
=German. You can change over to the other language:
Please notice: Changing to english language causes that the national prefix
will be erased due to requirements in several countries (please refer to
chapter 5.4).
Page 10
13
12
A – Telephone operation: 2 Telephoning: Basic functions
2.1.3 Accepting calls
The tone caller signals a call. During the call the volume can be set using the
adjustment keys (+/–) the changed setting also applies to the following
calls).
With a call from an ISDN connection, the telephone number of the caller is
displayed. ”
”: Display is suppressed by the ISDN
connection or the call is from an analogue line.
If telephone number and the name of the caller are stored in the telephone
directory or in a name key memory of your telephone name is displayed.
Lift the handset: You are connected with the caller.
Tone caller
Display
2.1 The first steps ...
With calls, the active B-channel of the dialup line is displayed. An ISDN
basic access connection has two B-channels.
2.1.1 Initiating a call
You initiate calls by entering a telephone number. Instead of manual dialing,
you can also use the telephone number memories from the telephone
directory, last number redial or name keys.
By pressing the disconnect key, you can reject a call during signalling by the
tone caller: This switches off the tone caller. If the answering device is
switched on, it takes the call.
Depending on the ISDN access type (or the additional features ordered), the
charge amount is displayed to you either during, or, (for few seconds) after
ending a call.
2.1.2 Dialing preparation
The telephone number can also be entered before lifting the handset.
Advantage: Incorrectly input digits can be deleted using the left cursor key.
The telephone number is dialed once you have lifted the handset.
Lift handset - dial telephone number -
make call
2.1.4 Ending the call
End the call by replacing the handset. The call charges are displayed, if the
function is available.
A – Telephone operation: 2 Telephoning: Basic functions
Accepting and ending calls
Press key for open listening/hands-free operation. This corresponds to lifting
the handset. The symbol appears in the display. The volume can be set
using the adjustment keys (+ = louder, – = quieter). The basic volume is not
changed by this.
Press key for open listening/hands-free operation again. This corresponds to
replacing the handset.
Switching on open listening during a call The call is made using the
handset. It should also be able to be heard via the loudspeaker.
Switch on open listening: Press key for open listening/hands-free operation.
You continue to talk using the handset.
Switch off open listening again: Press key for open listening again.
Switching on hands-free operation during a call
The call is made using the handset. Additionally, the hands-free operating
mode is to be switched on.
Press key for open listening/hands-free operation and keep it pressed.
With the key depressed: Replace handset Hands-free operation is switched
on. The key must no longer be pressed.
Continuing a call using the handset
The call is being made using hands-free operation and is to be continued
using the handset: Lift handset
2.2 Open listening and hands-free operation
Open listening: You hear the other party via the loudspeaker.
Hands-free operation: You talk using the microphone of the telephone and
hear the other party via the loudspeaker.
1. You can make calls using open listening and hands-free operation.
2. You can also just switch on the open listening function, so that others can
listen as well. Tell the other party what you are doing.
Open listening and hands-free operation are possible at any time. For this
reason, no special mention will be made of this when explaining the
individual functions. Each time, the sequence used when lifting the
handset is described.
Accept
End
Key:
Display:
Loudspeaker volume
You can preset the volume of the loudspeaker for open listening.
– - - - input PIN
-
Adjust volume: 1 (quiet) to 8 (loud) - store
Page 11

15
14
A – Telephone operation: 2 Telephoning: Basic functions
2.3 Number redialing
Number redial – history function
Using the number redial function, the last three (manually) dialed telephone
numbers are stored automatically = history function. The telephone number
dialed last overwrites the oldest entry in the telephone number redial
memory.
With some programming operations, you can transfer a telephone number
from one of the number redial memory (display:
). To do this, press the
number redial key.
Telephone in idle condition:
Keep pressing the number redial key, until the desired telephone number is
selected.
The telephone number is dialed after lifting the handset (or after switching
on open listening/hands-free operation).
Number redial – automatic dial
Using this function you can have the telephone numbers of the number
redial memory dialed automatically up to 10 times (if the line is currently
“busy”). The interval between dialing can be adjusted (see 5.8). The
function cannot be used if ”automatic callback” or a charge account is
switched on. If the ”automatic dial” function is active, then the name and
function keys are disababled.
Telephone number is selected (see above): In the display the
function is offered.
Switch on autodial. (For premature termination: Press the O.K. key.)
As soon as the party you are calling answers, you hear an advisory tone:
Open listening/hands-free operation are switched on automatically.
The call can be continued via the handset: For this, lift the handset.
2.4 Muting
The handset or hands-free microphone can be switched off during a
telephone call using the mute key. The other party cannot hear you any
more.
During a call: Press the mute key. The symbol appears in the display. You
can then talk to someone else without the party on the telephone being
able to hear what you are saying.
Press the mute key again to switch the microphone on again.
A – Telephone operation: 2 Telephoning: Basic functions
2.6 Ringer
The ringer signals calls. Melody, tone sequence and volume can be changed
(on delivery: Volume: 6, tone sequence: 5, melody: 1).
Volume
melody
-
- -
Set volume: Off to 8 (= loud) -
Changing tone
caller sequence
-
- -
Set tone caller sequence: 1 to 10 –
Changing melody
-
- -
Set tone caller melody: 1 to 10 -
2.5 Handset volume
The handset volume can be changed in two levels: ”normal” and ”loud”.
Press the “menu” key followed by the “#” key. Using the same procedure
you can switch back to normal volume.
2.8 Keypad information
Keypad information (keypads) can be used at an ISDN telephone system for
controlling functions. Keypads can be sent before, during and after dialing,
during a call and during calling itself.
You can allocate keypad information (keypads) to name keys (see 4.4).
- ( dial tel. number) - -
Input keypad information
2.7 DTMF signalling
So-called DTMF (dual-tone multifrequency) signals can be transmitted in idle
condition, after dialing and during a call using the digit keys as well the
asterisk and “square” (“#”)keys. In this way, you can interrogate the
answering device or use special services .
The character sequences can also be called up from the telephone directory
or by means of a name key.
Page 12

17
16
Identification
with outgoing
calls
Identification
with incoming
calls
A – Telephone operation: 2 Telephoning: Basic functions
-
or
switch on or off – store setting
-
-
or
switch on or off - store setting
2.9 Identifying
”Identifying” is the transfer and display of your own telephone number on
the telephone of the other party. Y
our telephone number can be transferred:
1. If you call someone yourself (identification with outgoing calls).
2. If you are called, as soon as you accept the call (identification for
incoming calls). The caller can read your telephone number in his/her
display (assuming the caller’s telephone has a display). This can be very
important in cases where the call has been diverted.
When ordering an ISDN line, you can specify whether the telephone
number display transfer should always be suppressed or not.
Prerequisite for changing over the identification:
1. Telephone number transfer must be available for your ISDN line.
2. The ISDN function ”selective identification changeover” must be
available as a feature for your line. This changeover facility must then be
activated as an additional feature at your SmartLine D750 (see 5.12:
Additional function”Identification changeover”).
Once you have performed the settings, you can use the changeover facilities described here (identification off = suppression of telephone number
transfer). The changeovers can be used differently for incoming and outgoing calls.
2.9.1 Basic setting
You can set the transfer of your telephone number (= identification) to be
always on or off (on delivery: switched on). For the prerequisites for this
feature, please refer to the previous section. The menus described here are
only offered when these prerequisites are fulfilled.
A – Telephone operation: 2 Telephoning: Basic functions
Camp-on busy:
Switching
authorisation
on and off
The caller hears the a ringing tone. If the answering device is switched on, it
takes the call
You are in the middle of a call. A 2nd call is signalled:Rejecting
a call
-
call is offered
-
Rejecting a call
You can also end the 1st call by replacing the handset. The camp-on call is
then signalled as a normal telephone call.
Accepting
a call
- call is offered -
Accept call
You are connected with the caller, the 1st call is put on hold.
End the 2nd call:
press the disconnect key
You are reconnected with the first party.
2.10 Camp-on busy (COB)
Another incoming call during a telephone call is signalled to you acoustically
by the camp-on busy tone. You can accept or reject the call. You can switch
the authorisation for camp-on busy on or off (on delivery: on).
You are in the middle of a call. A 2nd call is signalled:
-
-
or
Switch on or off – store setting
2.9.2 Temporary identification changeover
Identification can be changed over temporarily (for the following call). The
basic setting (see 2.9.1) is not altered by this.
The above mentioned prerequisites also apply for temporary identification
changeover.
You receive a call: Switch over before taking the call.
You wish to make a call: Switch over before dialing the telephone number.
The following is offered in the display (if necessary, select using the cursor
keys):
•
” ” with basic setting identification = On. or:
•
” ” with basic setting identification = Off.
Press the O.K. key to temporarily change over identification.
If identification was changed over prior to manual dialing, this changeover is
also transferred to the number redial memory.
Page 13

19
18
A – Telephone operation: 3 Telephoning: During a call
2.11 Automatic callback when busy
When the connection you are calling is busy, you can activate the
”automatic callback when busy” function. As soon as the busy connection
is free again, the callback is signalled to you. The party being called must be
external with a Euro ISDN line!
The function can only be used if it has been made available by the local
ISDN exchange of the telephone network operator. When ”Call back” is
activ, then the name and function keys are disabled.
The connection you are calling is busy: You hear the busy tone.
Accepting automatic callback
As soon as the party you are calling has finished his/her call, the callback is
signalled to you. In the display:
+ display of the tel. number
Lift the handset: The person you were calling is automatically called again.
When the person you are calling answers: Make the call. The callback is
then deleted.
If you are in the middle of a call when the callback occurs, this is signalled
by the camp-on tone and display of the telephone number (see “Camp-on
busy”).
This ISDN function can only be used if it is available for your line.
”Automatic callback when busy” cannot be used, when ”autodial” is
activated.
Request
callback
Notes
( ) - activate function
2.12 Intercepting a telephone number
If you are being pestered by a caller, you can have his number stored =
”intercepted”. This possible up to 20 seconds after the call has ended.
Intercept is also possible, when the caller has activated telephone number
suppression! The “intercepted” telephone number can be obtained from
the local office of you telephone network provider.
The ISDN function must have been previously ordered from your telephone
network provider. Additionally this ISDN service must be activated at your
SmartLine D750: See part A, section 5.12.
( ) - switch on function -
A – Telephone operation: 2 Telephoning: Basic functions
3.1 Notepad
During a call, you transfer the telephone number of a caller into the notepad
memory, so that you can call him/her later on.
Call with telephone number display (from an ISDN line with telephone
number transfer): The telephone number can be transferred directly.
Call without telephone number display: A telephone number dictated
by the caller can be entered manually – once the number redial memory
has been selected.
- Press number redial key once or several times, to select a
memory
Take over the telephone number of the caller -
3.2 Consultation
You can set up a 2nd call during a telephone call. During this consultation, the
1st party is put ”on hold”. He/she cannot hear the consultation call. After
that you can continue the first conversation.
You are in the middle of a telephone call:
- Dial telephone number - make the consultation call
End consultation:
disconnect key - Continue the 1st call
3.3 Transfer
You can set up a 2nd call during a telephone call so that you can
subsequently connect both parties with each other.
You are in the middle of a telephone call:
After transferring, the call charges will continue to be charged to the
person who set up the respective connection.
The ”exchange connection” function can only be made available at present
with one line of the telephone at a PABX (Private Automatic Branch
Exchange).
Notes
- dial tel. number - announce the transfer
-
Page 14

21
20
3.6 Parking
You can “park” a call. The connection still remains.
There are two ways to resume the call:
1. You pull the plug of the telephone at the telephone connection socket in
order to plug it into another socket (of the same multi-device line). You
can then resume the call there.
2. You can also resume the call at another SmartLine D750 operating at the
same ISDN line.
A – Telephone operation: 4 Comfort functions
3.4 Brokering
You can set up a 2nd call during a telephone call so that you can talk
alternately with both of the other parties (= brokering). During brokering, the
party that you are not talking to at that moment is put ”on hold”. He/she
cannot hear the other conversation.
You are in the middle of a telephone call:
- Dial telephone number - When you are connected with
the 2nd party:
By repeatedly pressing the consultation key, you
can switch between the two connections.
End brokering:
press disconnect key
You are reconnected with the party you previously put on hold
Note
3.5 Conference
You can set up a 2nd call during a telephone call so that you can
subsequently talk with both parties at the same time. For this, the ISDN
function ”three-party conference” must be available for your line.
You are in the middle of a telephone call:
If one of the parties you are talking to ends the call, you remain connected
with the other one.
- Dial tel. number - When you are connected with the 2nd
party:
-
end conference:
A – Telephone operation: 3 Telephoning: During a call
Viewing the call list / deleting an entry
If list entries are available,
is displayed in idle condition:
Viewing the list
Deleting an entry
4.1 Call list
Certain calls with transfer of the telephone number can be automatically
stored in the call list:
1. Not accepted calls (also applies when the capacity of the
answering device has been reached).
2. Camp-on busy calls which were refused.
A maximum of 10 calls are stored along with telephone number and the
message sent. With more than 10 calls the oldest entry is replaced by the
next incoming call.
( )
- -
display of the last caller
select input
read : date, time, number of calls
Select display of a Message (if present), or called MSN
Confirm
Or: - Confirm erase
The parking period must not exceed 3 minutes.
Resumption of the call can also be performed without previously lifting the
handset. The unit then automatically switches hands-free operation on.
Parking a call
You are in the middle of a call ( )
-
You can input a code (maximum 2 digits) for the connection .
The input is, however, not necessary.
Confirm storage
You can resume the call connection within 3 minutes.
Resuming the call
Notes
– ( )
–
Only if parking was performed using a code number:
Enter code (maximum 2 digits) ,
Confirm storage
Page 15

23
22
Next character: After a character has been selected, press the key for the
next character.
Pressing the cursor right key shifts the input marker one place to the right:
You can now select another character. Pressing the right cursor key again
generates a blank.
Delete character: press left cursor key
Selecting
characters:
Example key 2
Example: Inputting of a name
4.2 Entering characters
Letters, punctuation marks and numbers are available as characters. Entry is
performed using the number keys. Every key has several characters
allocated to it. These are printed on the unit’s housing.
The current input position is indicated by a flashing square.
Entry of texts (names) is, for example necessary in the case of the
”telephone directory” and ”message” functions. Text input is possible if
”
” is displayed in the 2nd line.
In many programming operations, digits also have to be entered (in display
e. g. ”
”). Digits and letters can be deleted using the left cursor key (in
display ”
“).
– – –
(the digit of the key follows the last
letter of the key
) – (the 1st character appears again)
Name ”OTTO”: – – -
A – Telephone operation: 4 Comfort functions
The entry is deleted automatically after a successful call.
( )
- –
select entry - confirm
more -
confirm call back - telephone number is dialed
Selecting a telephone number from the call list
A – Telephone operation: 4 Comfort functions
Programming the telephone directory
Alternatives
4.3 Telephone directory
Using the telephone directory
The integrated telephone directory has 20 memory locations for entering
telephone numbers with names. If a caller is stored there with his/her
name, this is displayed to you in the case of a call (applies to calls with
transfer of the telephone number). The telephone can be called in the following conditions: In idle condition, in ready-to-dial condition or during a call.
Before lifting the handset: Correcting the telephone number
After selecting an entry: Confirm the
using the
O.K. key:
The telephone number can be corrected
(deletion using the left cursor key).
You can add further digits. Dialing is performed after lifting the handset or
after switching on open listening / hands-free operation.
Dialing a telephone directory number in ready-to dial condition
After lifting the handset or after switching on open listening / hands-free
operation, select the desired entry from the telephone directory. Confirm
with the O.K. key: The telephone number is dialed.
You can add further digits.
During selection, the name keys programmed with telephone numbers are
displayed in addition to the entries in the telephone directory. It is thus
possible to make a selection out of a maxium of 40 entries.
Viewing
entries
Autodialing
telephone
numbers
- – -
Select memory location (name display):
Enter the fisrst letter of the name using the keyboard (4.2)
Or:
View memories one after the other using the cursor keys
View telephone number
Once you have selected the desired entry:
Telephone number is dialed after lifting the handset
New entry
- -
-
Enter name (see 4.2; entry absolutely necessary) Enter telephone number -
Page 16

- -
-
Select name key memory: or
Enter name (see 4.2) - - enter telephone number -
25
24
or
4.4 Name keys
Using name keys
The telephone has 10 name keys. Two memory allocations are available per
key. You can allocate telephone numbers, functions or keypads to these 20
memory locations. After programming, you can write a corresponding name
for it on the relevent label.
During selection, the name keys programmed with telephone numbers are
displayed in addition to the entries in the telephone directory. If a caller is
stored there with his/her name, this is displayed to you in the case of a call
(applies to calls with transfer of the telephone number).
Selecting the name key memory:
1st memory level: Simply press the name key.
2nd memory level: By pressing the changeover key, the 2nd memory level
is activated. The corresponding symbol appears in the display
.
Subsequently press the desired name key. By pressing the changeover key
again, you can change back to the 1st memory level.
A – Telephone operation: 4 Comfort functions
Changing an
entry
Erasing an entry
- -
-
Select entry: or:
Confirm change
Delete name - input new name Delete tel. number – input new telephone number -
- -
-
Select entry or:
Confirm erase
You can change the telephone number without changing the name by
pressing the O.K. key. In this way the telephone number is changed.
A – Telephone operation: 4 Comfort functions
Name key =
telephone
number
Name key =
Keypad
Programming name keys
After programming, the telephone number can be dialed by pressing the
key. The memory location can be selected before lifting the handset. The
telephone number is displayed and can be corrected or extended. Dialing is
performed after lifting the handset.
Keypads (keypad information) are used for operation at an ISDN PABX to
control system functions (refer to the operating instructions of your system
for this). The name keys can be programmed with these control signals.
- -
-
Select name key memory (see 4.4.1): or
Enter name - - enter keypad -
Name key =
function
Changing the programming
After that, you can continue in the same way as with the programming:
After selecting a name key memory, the existing programming is displayed:
Confirm ”
“ and subsequently make the new entries.
After programming a function, this can be called up via the corresponding
name key (e. g. switching on the call diversion function). This saves you
having to go through the menu.
- –
Select name key memory: or
Select function (* = only if available):
”
”*, ” ”*, ”
”, ” ”, ” ”, ”
”, ” ”, ” ”,
”
”, ” ”
Confirm selection
Page 17

27
26
A – Telephone operation: 4 Comfort functions
Removing the
cover
Refitting
the cover
Tip
Deleting the programming of a name key
- -
-
Select name key memory: or
Confirm delete
Labels for the name keys
The labels for the name keys are inserted into the back of this guide. You
can write on them and insert them. Insert the labels straight away so that
you cannot lose them.
❶
Press down on the top edge of the cover and
❷
then push it downwards. This frees it at the top end.
You can now remove the cover for labelling. Two labelling areas are
available for each name key.
Reinsert the cover so that the matt side faces upwards. When doing this,
note the position of the insert edge (see diagram).
❶
Insert the cover first of all at the bottom end,
❷
and then let it click into place at the top.
A – Telephone operation: 4 Comfort functions
4.5.2 Forwarding to pager
You can forward calls with transfer of the telephone number (i.e. identification) to a pager. The telephone number of the caller is transferred.
4.5.3 Switching off all diversions
Using this function, you can switch off all set up diversions (“external”, and
”forward to pager”) at the same time.
4.5 Call diversion
4.5.1 External diversion
Using the external diversion, you can divert calls to another telephone number.
For external diversion you specify:
1. The MSN, which is to be diverted.
2. The type of calls (= service), which are to be diverted:
”
” for ”normal” calls or all calls.
3. The condition, when the diversion is to be executed: ”
”
(= without delay), delayed (
) or nonly when the telephone is busy
(
) . In the case of delayed diversion, the call is signalled for 15
seconds and then diverted. During this time you can answer the call.
4. The external telephone number for the diversion destination.
- -
-
Select MSN - - select service:select operating mode: fixed, busy
or delayed -
A check is made of the existing diversions. The procedure takes a
few seconds (existing destination number is displayed).
Confirm change- ( erase a possible existing telephone number)
Enter destination telephone number
Switch diversion on (or off): Saving takes a few seconds
- -
-
select MSN -
Confirm change– ( delete a possibly existing telephone number)
Enter destination number– switch diversion on (or off)
- - -
-
Confirm cancel
Programming
the diversion
Note see below
Display:
Programming
the diversion
Display:
Note, see
below
NOTE:
Since not all exchanges are able to support new ISDN features at the
moment, you should not yet use the items: “EXTERNAL FOR MSN: ALL”
and “CANCEL ALL DIVERSIONS”!
12
Narrow
edge
Wide edge
12
Page 18

29
28
A – Telephone operation: 4 Comfort functions
Existing message texts can be changed (maximum length: 32 characters).
Entry/depiction of special characters: e.g. Ä, Ö, Ü =
, , .
4.6 Messages
Message texts can be sent between telephones connected to the ISDN
network. The function can only be used if it is available for your ISDN line!
Additionally, this ISDN service must be activated at your SmartLine D750:
See part A, section 5.12.
A received message is shown in the display after ending the call. In the
case of texts longer than 24 characters, you can view ”more” of it in the
display by pressing the O.K. key.
Receiving
messages
- –
- /
Switch on or off -
-
Select message - View more of the message -
–- - -
Select message - confirm change
Delete current text - enter new text - Store
If the selection described above is performed during a call, the text is
transferred at the end of the call.
The message can also be selected before the call. This is then transferred at
the next call that you make.
The selection of a text can be deleted again. Deletion of the selection is only
offered where a message has been previously selected.
Sending
a message
Leaving
messages
for callers
Changing
message
texts
- Select message - View more of the message -
- - -
A – Telephone operation: 4 Comfort functions
4.7 Barriers
You can specify the possibilities for outgoing calls and for programming by
setting up barriers. Y ou can find out how to restrict incoming calls in the
section ”Call filters”.
The setting up of barriers is protected by a PIN (Personal Identification
Number).
4.7.1 Hot line
With the hot line function activated, only the automatic dialing of one single
telephone number is possible (e. g. in an emergency). The telephone number is dialed after lifting the handset and subsequently pressing any key.
Manual dialing is not possible. Telephone number memories cannot be
used. The telephone can, however, continue to be called.
The hot line has priority over all other set-up barriers: This means that it is
also performed with the dial bar activated, for example.
Hot line is switched on: The corresponding symbol is displayed.
When switching off, the handset must be on hook!
Switch on
hot line
Switch off
hot line
- -
Enter PIN - -
Switch on hot line - store setting
- - –
Enter PIN-
Switch off hot line - store setting
Entering/
changing
the hot line
number
-
-
Enter PIN - -
-
( delete a possibly existing hot line number)
Input tel. number - store input
Page 19

31
30
A – Telephone operation: 4 Comfort functions
Switching dial bar
on and off
Switching on
program bar
Switching off
program bar
4.7.2 Dial bar
With the dial bar active, dialing of telephone numbers is not possible. This
applies to the keyboard and to all telephone number memories. The
telephone can, however, continue to be called. An activated hot line has
priority over the dial bar function.
4.7.3 Program bar
With the program bar activated, the menu can no longer be called up. In this
way, all programming via the menu is barred.
- -
Enter PIN – - or
Switch on or off - store setting
- -
Enter PIN – -
Switch on- store
-
–
- enter PIN
- switch off - store
A – Telephone operation: 4 Comfort functions
Entering /
changing deleting
telephone numbers
- -
Enter PIN - - - -
( delete a poosibly existing telephone number)
Enter “free” telephone numbers:
Form of entry:
tel. number - right cursor key -
next number – right cursor key - etc. max.24 characters
Store entry
4.7.4 “Free” telephone numbers
You can enter ”free telephone numbers”: These can be dialed in spite of an
activated dial bar or programmed barred numbers.
“Free” telephone numbers must be entered completely when programmed: Additional digits are ignored when dialing. For operation at a PABX, the
code digit for line seizure must be entered, too.
Charge counters
Viewing
call charges
Erasing the call
charge counters
- - -
Using the cursor keys, you can select between the display for
telephone ”
”, the answering device ” ” or the total counter for all
external calls ”
”
Each time the sum total ”
” is displayed and to the right of it, the sum
for the last call.
- - - -
- enter PIN
Using the cursor keys, select the counters - confirm erase
4.8 Charges (call costs)
The charge information for calls is transferred from the ISDN network to
your phone. You can view the charge counters (charges = call costs). For
the charge display you can use the abbreviation of your currency. Under
certain conditions, you can switch between display of units or charges.
4.7.5 Barred numbers
By entering ”barred numbers”, you can prevent certain numbers from being
dialed. Entire telephone numbers or parts of numbers can be barred: By
using the digits ”00” as a barred number, you can, for example bar all
international calls. The barred numbers apply to manual dialing and all
telephone number memories. “Free” telephone numbers are dialed in spite
of barred numbers. For operation at a PABX, the code digit for line seizure
must be entered, too.
Entering /
changing deleting
telephone numbers
- -
Enter PIN - - - -
( delete possibly existing telephone numbers)
Enter barred numbers: A maximum of 16 digits.
Form of entry:
Tel. number - right cursor key -
next tel. number - right cursor key - etc.
Store entry
Page 20

4.9 Charge accounts
You can allocate separate amounts of money to up to 4 users for external
calls. This so-called charge account is protected by an account code.
Accounts can have names allocated to them.
So that amounts can be entered it is necessary – if the charge information is
transferred in units – to program a factor (see 4.8).
Charge accounts can only be used if the ISDN ”advice of charge” (AOC)
function is available. Set-up is protected by the PIN.
Charge display: Units or amount
In ISDN, charge information can be transferred as units or as amounts of
money.
1. When transfer is performed in units for your ISDN line:
The charge display can be in units (= status on delivery)
or in amounts.
For the display of amounts, the set factor for a unit is used (factor on
delivery: 0.12 DM).
2. If transfer of the charges is performed in amounts, units cannot be
displayed.
Changing over
display
- - - or
- change over display - store settings
- - - -
- enter PIN
Delete factor - enter new factor: maximum 4 digits and a comma
(as decimal point). For the comma:
asterisk key - store entry
Changing the
factor
(on delivery:
0.12 DM)
33
32
A – Telephone operation: 4 Comfort functions
Charge display: Currency
Changing the
abbreviation
for the currency
(on delivery:
”DM”)
- - - Delete the abbreviation for the currency - enter abbreviation
store input
A – Telephone operation: 4 Comfort functions
Further accounts
Changing
accounts
Using the same procedure, you can set up a maximum of 4 charge
accounts. To do this, use the cursor keys to select the next unused account.
The accounts can be changed in the same way (e. g. by entering a new
amount).
Switching charge accounts on and off
- Enter account code - dial telephone number
- - - -
- Enter PIN
- (possible display of an amo-
unt)(
delete the possibly existing amount)
Enter account amount: maximum 4 digits and a comma (as decimal
point).
For the comma:
asterisk key - store entry
Enter account name - store entry
Enter account code - store entry
- - - -
- enter PIN
or
Switch on or off - store setting
Setting up charge accounts
Initiating a call for a charge account
With the charge account function switched on, a four-digit account code
must first be entered.
If the account is at zero, no further outgoing external calls are possible. An
existing call can be completed. You can then enter a new amount.
Page 21

34
A – Telephone operation: 4 Comfort functions 35A – Telephone operation: 5 Set-up menu
Changing
appointment
Appoiontment
has arrived
Change
appointment
The current date is automatically offered each time. You can press the O.K.
key to transfer it.
You can terminate input after setting the date by pressing the O.K. key.
”
” is then entered as text.
4.10 Appointment call
You can enter up to 5 appointments with date and time. Additionally a
telephone number and a text can be entered as reminders. The telephone
number is checked by the barred numbers function (see ”Barriers”).
Entering an
appointment
Alternatives
An appointment is signalled by the appointment tone and the lamp of the
key.
With handset on hook:
-
Press appointment key- - ( ) –– ––
input time: 4 digits between
00:00 and 23:59
-
set date: delete existing digits
Enter date: 4 digits between 01.01. and 31.12. -
Enter text for appointment (see 4.2). maximal of 16 digits input tel. number: max. 20 digits (input not necessary) -
With the handset on-hook: Press appointment key
- - Display of the first appointment
View the entered appointments and texts
When the appointment is selected:
confirm change
When making changes, proceed as with making a new entry. Prior to
making a new entry, delete each of the existing entries using the left
cursor key. After that, make the new entry.
Press appointment key: Time + display of an entered text or
- telephone number is dialed
With the headset on hook: press appointment key -
- - display of the first appointment
View the entered appointments and texts
When the appointment is selected:
confirm erasure
5.3 Exchange line seizure
Exchange line seizure is only necessary with operation at a PABX. Please
refer to the system manual to check whether this is necessary. You will also
find the line seizure codes there. The digits are automatically placed before
the telephone numbers from last number redial and call list.
- - - - enter PIN
-
Enter exchange line seizure code: maximum 8 digits - store entry
5.2 Changing the PIN
You can change the PIN (4 digits, on delivery: ”0000”) in order to protect
your telephone. Keep a note of the PIN in a safe palce.
If you have forgotten the PIN, resetting can only be perfomed by the
Service department and will be charged for.
5 Set-up menu: overview
Settings for telephone operation are collected together in the set-up menu.
Operation is protected by a PIN (on delivery: ”0000”).
5.1 Setting time and date
Time and date are shown in the top display line. The display is automatically
set after the first outgoing connection. At every the outgoing call the display
is synchronised.
However, you can also set time and date manually. This may be necessary
in the case of operation at a PABX.
- - - - enter PIN
-
Enter time: 4 digits between 00:00 and 23:59 -
-
Enter date: 2 digits each for day, month and year -
- - - - enter PIN
- - enter new PIN: 4 digits
Repeat new PIN: 4 digits - confirm entry
Page 22

36
A – Telephone operation: 5 Set-up menu
5.4 Change of prefix
In Germany the national prefix begins with „0“ and the international prefix
with „00“. This corresponds to the factory setting for your telephone.
In some countries this may differ. With the function described below, you
can accordinglychange the factory setting. Such a change will be necessary,
in order to ensure a proper call setup when using numbers recalled from the
call list or notepad
Change of national prefix
Change of international prefix
- - - - enter PIN -
-
Confirm change - Enter prefix digit - Store input
- - - - enter PIN -
-
Confirm change - Enter prefix digits - Store input
5.5 Entering and changing MSNs
You can enter up to 3 multiple subscriber numbers (MSNs). In this way your
telephone will react to calls from all three telephone numbers. The allocation can be changed at any time.
37
5.8 Automatic dialing – setting the pause between dialing
Redial numbers can be dialed automatically. The pause between the dialing
operations is adjustable (on delivery): 30 seconds).
A busy line is called up to 10 times.
5.7 Language
2 language variants are available for the display texts: You can change over
to the other language. For this, see to section 1.4 in part A.
- - - - enter PIN
-
Select pause time: 30 – 60 – 120 – 180 seconds -
- - - - enter PIN
- MSNs are displayed
Select memory location for the MSN -
( delete possibly existing MSN)
Enter MSN - store entry
A – Telephone operation: 5 Set-up menu
5.6 Allocation of users to MSNs
The settings are fixed, please do not change them. If subscriber 8 is
removed from the allocation, the answering device cannot be switched on.
- - - - enter PIN
-
Select MSN: Subscribers 1 and 8 are displayed -
- - - - enter PIN -
-
Confirm change - Enter prefix digits - Store input
Page 23

38 A – Telephone operation: 5 Set-up menu
Selecting the
filter type
Switching on
the filter
Switch off
call filter
You can delete a telephone number again. To do this, select the corresponding filter and confirm ”
”. Subsequently, delete the number using
the left cursor key and confirm using the O.K. key.
Using the same sequence you can program up to 3 telephone numbers.
5.9 Call filter
Using the call filter, you can specify up to 3 external telephone numbers
(= filters
to ), whose signalling can be enabled or disabled (= type of
filter). Enable or disable each apply to all entered telephone numbers.
Telephone number disabled: Calls from a connection with this telephone
number will not be signalled via the tone caller.It is
only indicated in the
display.
Allowing calls: Calls from a connection with this telephone number will be
signalled via the tone caller. All other calls will simply be shown in the
display.
Deleting telephone numbers
Entering telephone numbers
- - - - enter PIN
-
-
Select memory: to - confirm change
input tel. number: maximum 16 digits
Store entry
- - - - enter PIN
- - confirm change
Select filter type wählen: or
Store setting: The selected filter is switched on.
- - - - enter PIN
- - confirm change
- store setting
39
Name key allocation...........................n. c.
Telephone directory............................n. c.
Appointment register .........................n. c.
Number redial memory ......................n. c.
Autodial.................................................on
Pause...........................................30 secs.
Call list................................................n. c.
Dial bar..................................................off
Hot line .................................................off
Hot line number..................................n. c.
Program bar..........................................off
Free telephone numbers....................n. c.
Barred numbers..................................n. c.
Outgoing ID...........................................on
Incoming ID...........................................on
Camp-on busy.......................................on
PIN ....................................................n. c.
Exchange line seizure.........................n. c.
MSNs .................................................n. c.
Language........................default language
Call filter................................................off
Numbers for call filter.........................n. c.
Call delay for MSN................................off
Connection type.................................n. c.
Additional ISDN functions ..................n. c.
Loudspeaker volume...............................4
Settings after
reset
(n. c. = no change)
Switching on
call delay for
one MSN
Switching off
call delay
5.10 Call delay
With the call delay switched on, signalling of the call by the tone caller is
delayed (a ”still” call). The call is shown in the display.
You can accept the call. After the call delay time the call is signalled by the
tone caller.
In this way you can have calls signalled immediately at another telephone
(with the same ISDN line) so that they can be answered there beforehand.
This means that you can set up a kind of executive / secretary function.
- - - - enter PIN
(display of the current setting) -
Select
MSN (1. to 3. MSNs), whose call is to be delayed
Store setting
- - - - enter PIN
(display of the current setting) -
-
Store setting
Please note!
5.11 Resetting the unit
You can only reset all individual settings. Memory contents such as
telephone numbers remain unchanged. After resetting, it may be necessary
to reenter all individual settings again.
You cannot undo the effects of resetting. For security reasons, the PIN
is not reset.
- - - - enter PIN
- - confirm reset
A – Telephone operation: 5 Set-up menu
Page 24

40 A – Telephone operation: 5 Set-up menu
Tone caller volume..................................6
Tone caller sequence ..............................5
Tone caller melody..................................1
Display contrast.......................................3
Charge counter...................................n. c.
Factor.................................................0.12
Charge display...................................units
Currency.............................................n. c.
Charge accounts ...................................on
Account names ..................................n. c.
Account amounts...............................n. c.
Account codes. c.
External diversion..................................on
Forwarding to pager..............................off
Telephone number for forwarding
to pager..............................................n. c.
Answering machine..............................off
Operating mode..........................n. c.
Text recordings............................n. c.
VIP function...................................off.
VIP code.............................................n. c.
ADAD operation.............................off
ADAD tel. number.......................n. c.
Automatic listening-in ....................on
Room functions.............................off
Switch on delay .....................3rd ring
Timer..............................................off
Times for timer............................n. c.
Recording............................unlimited
Message texts....................................n. c.
Leave message.....................................on
Settings after
reset
(n. c. = no change)
- - - - Enter PIN
-
Select connection type:
simple, standard- or comfort -
-
Select additional ISDN features:
• External diversion (only with simple or standard connection).
• Call charge display (only with simple or standard connection).
• Changeover of identification for outgoing calls
• Changeover of identification for incoming calls
• Sending messages
• Intercept
• Call Diversion
• Transfer connection
Activate feature for use (” ”) or deactivates (” ”)
Complete setting changes- Store
5.12 Entering connection type and additional features
You can change the set connection type of your ISDN connection (simple,
comfort, standard). After that, all the additional features that you have
ordered have to be activated or deactivated, so that they can be used.
Deactivation is only offered if a feature is not already included in the connection type.
Display of the recording capacity
With the answering device switched on, you have the following display with
the telephone in idle condition (instead of the date/time display):
”ADD”: Number of calls received. ”REC”: Number of messages recorded
since the last time the answering device was switched on.
”REST”: Remaining recording capacity in minutes and seconds.
41
Functions are active when the corresponding symbol is visible in the display:
1. You can see at a glance which announcements are activated:
1 = Announcement 1, E = Closing announcement or 2 = Announcement 2.
2. ADAD function
3. Timer
Displays for the answering device
4
7
123
56
A
Symbols for answering device operation
2E1
Answering device is
active.
Idle condition
Indicates that an info text is
there for you.
A Lamp for key on/off
•
Lamp lights up: Answering device is switched on and ready.
•
Lamp is off: Answering device is switched off.
1.1 Answering device controls
Keys and lamps (LEDs) of the answering device
B – Answering device: 1 Start up
Switch on/off
Playback new messages
Function key ”F” (menu)
F
AB
B Lamp for playback key
• Lamp lights up: New messages
were recorded. Lamp goes out again,
when all new messages have been heard.
Page 25

42 B – Answering device: 1 Start up
Note
1.2 Overview/starting up
Start up
To be able to use the answering device you have to record at least one
announcement text and switch the answering device on.
On delivery, the operating mode ”announcement 1 + closing announcement” is set. Without changing this operating mode, you can switch on the
answering device after recording ”announcement 1”.
The functions at a glance:
•
Digital recording
•
Recording capacity of approx. 15 minutes.
•
Up to 4 announcemet texts and one info text can be recorded.
•
The answering device can be used as a dictation machine.
•
The number of rings before the answering device switches on can be set.
•
The recording time for messages can be restricted.
•
Recordings are automatically allocated date and time.
•
During recording, you can listen-in and take over the call.
•
Using the VIP function the caller can “avoid” the answering device
function. The call is then immediately signalled via the tone caller.
•
Conversations can be recorded.
•
The answering device can be used and polled remotely.
•
Room functions can be used remotely.
•
Using the ADAD function, each of the newly recorded messages can be
forwarded to a telephone number determined by you.
•
Using the timer, you can determine when the answering device
automatically switches on or off.
•
In the case of power failure, the messages stored in the answering
device are not lost (storage longer than 10 years). No battery is required
for this.
Answering device and multiple subscriber numbers
The answering device reacts to calls for all the multiple subscriber
numbers that you have entered into your telephone.
43
Recording
-
Function key-
-
- lift handset
Select announcement: , or
Start recording: Remaining time is displayed (minutes/ seconds).
End recording
1.4 Switching the answering device on and off
With handset on hook: Press the switch on key of the answering device.
• The lamp over the key lights up if the answering device is switched on
and ready for incoming calls.
• The lamp is off: If the answering device is switched off. Or: When
recording or playback are being performed.
Notes
1.3 Recording announcements
To achieve a high recording quality, please speak your anouncement
text loudly and clearly!
Announcement 1: Announcement with the request to leave a message.
Example: ”We cannot be reached at the moment. Please leave a message
after the tone.”). Possible length of the announcement: 6 to 180 seconds.
Announcement 2: Announcement without requiring a spoken answer (no
signal tone). Example: After giving the name: ”You can reach us from ... to
...”. Possible length: 6 to 180 seconds.
Closing announcement: This announcement is played back once the
message is recorded. Example: ”Your message has been recorded.”).
Recording the closing announcement is not absolutely necessary. Possible
length: 0 to 20 seconds.
The announcement must be made via the telephone handset. If the
remaining memory time is shorter than 30 seconds, recording is not
possible. Erase recordings in order to obtain free memory space.
If an announcement is too short, this is indicated to you in the display.
PIN: For answering device functions protected by a PIN, the PIN set for
telephone operation also applies.
Aborting operation: The ”menu” key is blocked after calling up the
answering device menu (using the ”F” key). A complete exit from the menu
is possible at any time by pressing the function key “F”.
B – Answering device: 1 Start up
Notes
Notes
Page 26

44 B – Answering device: 2 Operation
2.2 Listening-in and taking over calls
1. With the handset on-hook, listening-in to the recording of a message is
performed via the loudspeaker. You can terminate it using the stop key.
2. Listening-in can be continued via the handset. You can terminate it by
replacing the handset.
During listening-in, you can take over the call:
Confirm
using the O.K. key.
Automatic listening-in
With the function ”automatic listening” switched on, the loudspeaker is
activated automatically during recording (see 3.2 in part B). Automatic
listening-in only switches on when the telephone is in idle condition (not
during a call a call).
Manual listening-in
If the automatic listening-in function is not switched on, you can activate
manually by pressing the O.K. key: The loudspeaker is
switched on.
2.1 Recording a message
A call is signalled:
1. The answering device switches itself on after an adjustable number of
rings. Before switching on occurs, you can accept the call as usual (on
delivery: 3 calls = 15 seconds).
2. Once the announcement has been played back, (with the request to
leave a message = announcement 1) the signal tone occurs.
3. The message is recorded. If the caller leaves no message, his/her call is
transferred to the call list of the telephone (precondition: telephone
number is transferred). Whilst the caller is talking, you can listen-in and, if
necessary, take over the call.
4. The recording ends when ...
... the caller is silent for longer than 8 seconds or hangs up
(speech control).
... the maximum recording time for message has been reached.
... the recording capacity of the answering device has been reached.
5. After the recording, a possible closing announcement is played back.
After that the call is terminated.
45
2.4 Replaying new messages
After pressing the playback key, you can listen to new recordings
(new = messages you have not yet played back). Recordings are
automatically allocated date and time.
Additional functions: A telephone number, when transferred, is also
stored. This you can then view and use for the callback (as with the
“call list” of the telephone).
Replaying
messages
Viewing
callers
Request
Erasing
recordings
With the headset on-hook: playback key: Playback of the
first message (display of number, date and time)
Next messge
Listen to message again
Back to the previous message: Within the first 2 seconds of
playback, press the left cursor key
Additional functions:
When playing back a message press O.K. key (” ”)
(only when the telephone number was
transferred)
Display of the tel. number
Confirm callback: Number is dialed automatically.
or:
- confirm erase
2.3 Manual recording of calls
You can record manual calls externally using the answering device.
Inform the other party that the call is being recorded. If the recording
capacity is less than 30 seconds, manual recording is not offered.
You are in the middle of a call:
-
The consecutive number of the manual recording and the remaining
recording capacity are displayed.
Terminate and save the recording
B – Answering device: 2 Operation
Page 27

46 B – Answering device: 2 Operation
2.5 Replaying all recordings
Using this menu item, you can have all existing recordings replayed.
Playback can be via the handset or the loudspeaker. Between recordings
you hear the positive acknowledge tone.
You can erase recordings of messages as described in 2.4 for the playback
of new messages. Dictations and manual recordings can also be specifically
erased on playback.
With the headset on-hook: Function key
-
- Select recoording
The available recording types are offered
•
New recordings
•
All recordings
•
Manual recordings of telephone calls
•
Dictations
•
Announcement 1
•
Closing announcement
•
Announcement 2
•
Info text
•
ADAD announcement
Confirm selection: The recording is played back
With the headset on-hook: Function key
- - select recording
The available recording types are offered
•
Old recordings (= ones you have already heard)
•
All manual recordings of telephone calls
•
All dictations
•
Announcement 1
•
Closing announcement
•
Announcement 2
•
Info text
•
ADAD announcement
Confirm erase: The recording is erased
Erasing
recordings
during playback
2.6 Erasing recordings
Existing recordings can be erased. If an attempt is madse to erase
announcements required forthe set operating mode, you willl see the note
”
”. You can abort the function.
47
2.8 Dictations
The answering device can be used as a dictation machine. Recording is via
the microphone of the handset.
2.7 Info text
An info text can be recorded using the answering device. You can use this
function as an acoustic “notepad”. An existing info text is signaled by the
flashing of the corresponding symbol. The function can also be used
externally via the remote control (see 4.4).
Recording
info text
With handset on-hook: function key -
-
Lift handset - select recording:
Start recording: Remaining time is displayed (minutes/ seconds).
End recording
With handset on-hook: function key -
–
Lift handset - select recording:
Start recording: Remaining time is displayed (minutes/ seconds).
End recording
2.9 ADAD operation
Using the ADAD (”automatic dialing and answering device”), you can have
the recorded messages of the answering device forwarded to a specified
telephone number (”ADAD telephone number”).
Advantage: You do not have to repeatedly check via remote polling
whether new messages are there or not, but rather you are informed
automatically.
Necessary input: Prior to switching to ADAD operation, the ADAD
announcement must be recorded and the telephone number entered.
Continued on the next page
B – Answering device: 2 Operation
Page 28

48 B – Answering device: 2 Operation
ADAD function, operation
(once you have set up and switched on the ADAD function):
1. The answering device records a message.
2. The telephone calls the telephone number specified by you.
After accepting the ADAD call:
3. The recorded ADAD message is played back
(e. g.: ”There is a new message. Please enter your PIN.”).
4. The answering device now waits 90 seconds for entry of the correct
PIN. The “square” (#) key must be pressed before and after the PIN
(Entry: # – PIN – #). If the PIN is not entered or is incorrectly entered
the connection is broken after 90 seconds. After 5 minutes another
attempt is made (a total of 3 attempts).
5. After recognising the correct PIN the answering device plays back all
messages not yet heard (as with remote polling).
ADAD test call
You can set up ADAD operation via the remote control (see 4.4). You can
check the setup by means of a test call:
The test call must originate from the connection which has also been
programmed as the destination of the ADAD telephone number
(ADAD tel. number). After starting the test call via the remote control code,
you can replace the handset. The programmed ADAD telephone number is
now called automatically. The ADAD announcement is played back as part
of the check.
With handset on-hook: function key -
-
Lift handset - select recording:
Start recording: Start recording:
End recording
- - - -
-
( delete a possibly existing telephone number)
input tel. number: maximum 20 digits - store
- - -
or
Switch on or off - store setting
Recording the
ADAD
announcement
Entering/
changing ADAD/
telephone numbers
Switching ADAD
operation on and
off
49
2.11 Room functions
The room functions can be switched on via the remote control (see 4.4). On
delivery the function is switched off. The activation of the room functions is
indicated at the telephone by the display text
.
If a caller switches the ”Room supervision” on, the microphone of the
telephone is activated. The caller can hear what is being said in the room.
The function is very useful for checking that everything is “OK” at home
when you are not there.
When the ”Room announcement” function is activated the microphone
and the loudspeaker of the telephone is switched on. The caller can talk to
anyone in the room.
By switching off the room functions, you are protected from unnoticed
eavesdropping due to ”room supervision”. The room function cannot then
be activated by a caller.
Important
note
Switching
rooms functions
on and off
2.10 VIP function
Using the VIP function, the caller can “avoid” the switched on answering
device of the SmartLine D750. The call is then signalled by the tone caller
(on delivery:VIP function is switched off; VIP code=”0000”).
To be able to use remote control and VIP function, the PIN and VIP
codes must be different.
Whilst the announcement is running, a “VIP caller” must make the following entries. To this he/she requires a telephone with dual tone multifrequency signalling (DTMF) or a code transmitter (as with the remote control):
Press “square” key (#) – enter VIP code – press (#) again.
- - - -
or
Switch on or off - store setting
- - -
or
- switch off or on - store setting
- - - -
- - Enter PIN
Enter new VIP code: 4 digits - store setting
Switching
the VIP function
on and off
Changing
the VIP code
B – Answering device: 2 Operation
Important
note
Page 29

50 B – Answering device: 3 Programming
3.3 Timer
You can specify a period of time in which the is automatically switched on.
To do this, you specify a switch on and a switch off time as with any other
timer.
3.1 Operating mode
1. Operating mode – announcement 1 + closing announcement
• Announcement 1 with the request to leave a message
• Signal tone, followed by recording of the message
• After recording the message: closing announcement (optional).
2. Operating mode – announcement 2
• Announcement 2, without the possibility of leaving a message.
3. Operating mode – combination of modes 1 and 2:
•With sufficient recording capacity: announcement 1 + closing
announcement
•if the remaining recording capacity is less than 30 seconds:
announcement 2
3.2 Automatic listening-in
With automatic listening in switched on, the loudspeaker is switched on
during recording (on delivery: switched on).
- - -
Select operation mode: see above - store setting
- -
or
Switch on or off - store setting
- - -
or
- Switch on or off -
Now you enter the time period:
(display of time) -
Enter switch on time: 4 digits between 00:00 and 23:59 -
(display of time) -
Enter switch off time: 4 digits between 00:00 and 23:59 -
4.1 Remote control: Overview
Remote polling of recorded messages and remote control of answering
device functions is possible from anywhere in the world using the public
telephone network. It is performed by dialing DTMF tones (dual tone multifrequency) with a suitable telephone or a code transmitter. For this purpose,
the code transmitter is held against the microphone of the handset.
Advisory tones during remote operation:
When using remote control you are informed by tones. There are three
tones or tone sequences:
1 long tone: Positive acknowledgement successful input
2 short tones: Request tone: Request for the input of code digits or for
the start of voice input.
4 short tones: Negative acknowledgement: Incorrect input or function
is not possible (e. g. function is barred).
51
3.5 Time limit for recordings
The recording time for leaving messages can be limited (30, 60, 120, 180
seconds). The limitation can also be switched off. The recording ends when
the caller is silent for longer than 8 seconds or hangs up (on delivery, off).
3.4 Setting switch on
The announcement of the answering device begins after an adjustable
number of rings (tone caller). Before the announcement starts, you can
accept the call as usual. The delay can be adjusted between 1 and 5 rings
(on delivery: 3 rings).
- -
(...) -
Enter the number of rings: 1 to 5 rings -
- -
-
Select a time limit: 30, 60, 120, 180 seconds
or: ”
” for unlimited recording (speech control) -
B – Answering device: 4 Remote control / remote polling
Page 30

Function: Code You hear:
Playback
new messages
13
message(s)
Playback of all messages 14 message(s)
Next message
#
message(s)
Previous message
*
message(s)
Erase current message 2 message(s)
End playback 0
Playback ADAD announcement 15 ADAD announcm.
Playback info text 16 info text
Playback announcement text 1 17 announcem. text 1
Playback closing text 18 closing text
Playback announcement text 2 19 announcem. text 2
Erase all heard messages
24
Erase all ADAD messages 25
Erase info text 26
Erase announcement text 1 27
Erase closing text 28
Erase announcement 2 29
Record ADAD announcement 35 request tone
Record info text 36 request tone
Record announcement text 1 37 request tone
Record closing text 38 request tone
Record announcement text 2 39 request tone
Terminate recording 0
52 B – Answering device: 4 Remote control / remote polling
4.3 Initiating remote control (answering device is switched on)
4.2 Remote switch on of a switched off answering device
Subsequently: Enter the codes for the individual remote control operations
(see list).
After approx.
Tel. number
90 seconds:
Request tone Square key PIN Square key Positive
enter ACK tone
Subsequently:
Code for switch on Pos. ACK tone Announc. text(s)
Enter Announce., entry Square key PIN Square key Pos
tel. number must start ACK tone
4.4 Codes for remote operation
In the following table the right hand column lists what you will hear after the
input (texts, tones etc.).
To be able to use remote control and VIP functions, the PIN and VIP
codes must be different.
Important
note
• to switch on your AD from remote, you have to record the announcements first.
• switching the operating mode to ”announce 1 + closing with changeover to announce 2”. When no recording space is available, then you
switch off the ADAD-function.
53B – Answering device: 4 Remote control / remote polling
Notice
Page 31

55
Index
ADAD operation . . . . . . . . . . . . . 47
Announcement. . . . . . . . . . . . . . 43
Answering device. . . . . . . . . . . . 41
Appointment call. . . . . . . . . . . . . 34
Autodial. . . . . . . . . . . . . . . . . 12, 37
Automatic callback when busy. . 18
Barred numbers . . . . . . . . . . . . . 31
Barriers . . . . . . . . . . . . . . . . . . . . 29
Basic access. . . . . . . . . . . . . . . . . 9
Brokering . . . . . . . . . . . . . . . . . . 20
Cable guides. . . . . . . . . . . . . . . 4, 5
Cables. . . . . . . . . . . . . . . . . . . . . . 4
Call . . . . . . . . . . . . . . . . . . . . . . . . .
accept. . . . . . . . . . . . . . . 12, 17
end . . . . . . . . . . . . . . . . . . . . 12
park. . . . . . . . . . . . . . . . . . . . 21
initiating . . . . . . . . . . . . . . . . 12
rejecting . . . . . . . . . . . . . . . . 17
take over. . . . . . . . . . . . . . . . 44
Call delay. . . . . . . . . . . . . . . . . . . 39
Call diversions. . . . . . . . . . . . . . . 27
Call filter . . . . . . . . . . . . . . . . . . . 38
Call list . . . . . . . . . . . . . . . . . . . . 21
Callback. . . . . . . . . . . . . . . . . . . . 18
Camp-on busy. . . . . . . . . . . . . . . 17
Changing the PIN . . . . . . . . . . . . 35
Charge accounts. . . . . . . . . . . . . 32
Charge counter. . . . . . . . . . . . . . 32
Charge display: . . . . . . . . . . . . . . .
units or amount. . . . . . . . . . . 32
currency . . . . . . . . . . . . . . . . 32
Charges. . . . . . . . . . . . . . . . . . . . 31
Code digits . . . . . . . . . . . . . . . . . 53
Comfort connection . . . . . . . . . . . 9
Conference. . . . . . . . . . . . . . . . . 20
Connection sockets . . . . . . . . . . . 4
Connection type . . . . . . . . . . . 9, 40
Consultation . . . . . . . . . . . . . . . . 19
Cursor keys. . . . . . . . . . . . . . . . . . 6
Date . . . . . . . . . . . . . . . . . . . . 6, 35
Dial bar . . . . . . . . . . . . . . . . . . . . 30
Dialing pause . . . . . . . . . . . . . . . 37
Dialing preparation . . . . . . . . . . . 12
Dictations . . . . . . . . . . . . . . . . . . 47
Display contrast . . . . . . . . . . . . . . 6
Displays . . . . . . . . . . . . . . . . . 6, 41
DTMF signalling . . . . . . . . . . . . . 15
Entering characters. . . . . . . . . . . 22
Erasing . . . . . . . . . . . . . . . . . . . . 46
Exchange line seizure. . . . . . . . . 35
External diversion . . . . . . . . . . . . 27
Factor . . . . . . . . . . . . . . . . . . . . . 32
Features . . . . . . . . . . . . . . . . . 8, 40
Filters . . . . . . . . . . . . . . . . . . . . . 38
Forwarding to pager . . . . . . . . . . 27
“Free” telephone numbers . . . . 30
Hands-free operation . . . . . . . . . 13
Handset volume . . . . . . . . . . . . . 15
History function . . . . . . . . . . . . . 14
Hot line . . . . . . . . . . . . . . . . . . . . 29
Identification. . . . . . . . . . . . . . . . 16
Idle condition . . . . . . . . . . . . . . . . 6
Info text . . . . . . . . . . . . . . . . . . . 47
Intercept . . . . . . . . . . . . . . . . . . . 18
ISDN functions. . . . notes, 9, 39, 40
ISDN line. . . . . . . . . . . . . . . . . . 5, 9
Keypad information. . . . . . . . . . . 15
Labelling . . . . . . . . . . . . . . . . . . . 26
Language . . . . . . . . . . . . . 8, 11, 37
Listening in . . . . . . . . . . . . . . 44, 50
Loudspeaker volume . . . . . . . . . 13
Manual recording . . . . . . . . . . . . 45
Melody . . . . . . . . . . . . . . . . . . . . 15
Menu key . . . . . . . . . . . . . . . . . . . 6
Message texts . . . . . . . . . . . . . . 28
Messages (answering device) . . 44
MSNs . . . . . . . . . . . . . . . . 9, 36, 37
Multi-device line. . . . . . . . . . . notes
Multiple subscriber numbers . 9, 36
Muting . . . . . . . . . . . . . . . . . . . . 14
Name key = function . . . . . . . . . 25
Name key = keypad . . . . . . . . . . 25
Name key = telephone number . 25
Name keys . . . . . . . . . . . . . . . . . 24
Notepad . . . . . . . . . . . . . . . . . . . 19
Number redialing . . . . . . . . . . . . 14
O.K. key . . . . . . . . . . . . . . . . . . . . 6
Open listening/hands-
free operation . . . . . . . . . . 6, 13
Open lsitening. . . . . . . . . . . . . . . 13
Operating mode . . . . . . . . . . . . . 50
Operating prompt . . . . . . . . . . . . . 6
Operating sequences . . . . . . . . . . 8
Pager. . . . . . . . . . . . . . . . . . . . . . 27
Park. . . . . . . . . . . . . . . . . . . . . . . 20
PIN . . . . . . . . . . . . . . . . . . . . . . . . 8
Playback . . . . . . . . . . . . . . . . 45, 46
Plug-in connections. . . . . . . . . . . . 5
Appendix: Index
Function: Code You hear:
Switch off answering device
*
00
*
Operating mode: ann. 1 + closing*11
*
announcem. text
Operating mode: announc. 2
*
12
*
announcem. text
Operating mode: ann. 1 + closing
*
13
*
announcem. text
with switch to announc. 2
Remaining memory query
*2 *
1 tone per 3 min.
Switch on room supervision /
*
60
*
room
continue
Switch on room supervision /
*
61
*
room
continue
Room supervision / 0
-switch off
announcement
ADAD operation = OFF
*
30
*
ADAD operation = ON
*
31
*
ADAD ann.
ADAD telephone number *4 ADAD tel. number
*
Listen to ADAD call Call ADAD anounce
#
PIN
#
Message
Start ADAD test call
*5 *
Hook on
ADAD call ADAD announce
54
B – Answering device: 4 Remote control / remote polling
Page 32

Telephone operation:
• Multiple subscriber numbers:
none
• Connection type not entered
• Operator prompting: German
• Exch. line seizure: none
• Call diversion: off
• Camp-on busy: allowed
• Incoming ID: allowed
• Outgoing ID: allowed
• Telepone barring off: off
• Automatische Wahl: off
• Call filter: none
• Call delay for MSN: off
• Volume level: level 4
• Tone caller: volume 6, tone
sequence: 5, tone melody: 1
• Display contrast: level 3
• Charge display: units
• Charge factor: 0,12
• Hot line number: none
• PIN: ”0000”
Answering device:
• Operation: switched off
• Announcements: none
• Operating mode: announce 1 +
closing
• Recording length: unlimited
• Automatic listening: switched on
• Room functions: disabled
• ”Rings” before switching on: 3
• Timer: off
• ADAD function: off
• VIP function: code = ”0000”
Settings on delivery
Technical data
Power supply . . . . . . . Plug-in power unit SNG 042 W
Input . . . . . . . . . . . . 198 ... 253 V
Output. . . . . . . . . . . 10.7 V; 350 mA
Power consumption < 9 VA
ISDN
Connection . . . . . . . basic access line: 2 x B-, 1 x D-channel
Protocol. . . . . . . . . . DSS1 (Euro ISDN)
Ambient conditions . . i.a.w. DIN IEC 721
Operation . . . . . . . . +5 ... +45°C
Transport. . . . . . . . . -25 ... +70°C
Storage . . . . . . . . . . -25 ... +55°C
Dimensions (W x H x D)270 x 55 x 210 mm
Weight . . . . . . . . . . . . . 970 g
Connections
ISDN . . . . . . . . . . . . Western 8/8; 3m long
Power supply . . . . . Western 6/6; 3m long (at least)
Handset . . . . . . . . . Western 4/4; coiled
Answering device
Recording system. . fully digital; with data compression
Recording time . . . . typically 15 minutes (with speech pause recognition)
Number of recordings ...........max. 59
Data storage in the case of power failure ≥ 10 years (no battery
necessary)
Appendix: Technical Data/Settings on deliveryAppendix: Index
Cleaning
Simply wipe off the unit with slightly damp cloth or with an antistatic cloth;
please do not use a completely dry cloth. Please avoid the use of cleaning
and scouring agents.
CE label
The product corresponds to the basic requirements of all applicable
regulations of the
*)
Council of the European Union. The prescribed
conformity evaluation procedures have been implemented (CE 0188 X).
*)
At present, these are: 89 /336/EWG changed by 92/31/EWG: ”Council guidelines, dated
03 May 1989, for the harmonising of laws of member states concerning electromagnetic
compatibility” which became the ”Law governing the electromagnetic compatibility of
devices”, dated 09 November 1992.
73/23/EC: ”Guideline of the Council, dated 19 February 1973, for the harmonising of
laws of member states concerning the electrical resources for use within certain voltage
limits”, which became the 1st decree to the law covering technical resourcesdated
11.06.1979
Certification
The SmartLine D750 is approved and certified under the following numbers:
BZT D 122 464 H BAKOM No.: 96.0183.T.N
Power supply . . . . . . . . . . . . . . . . 5
Prefix
international . . . . . . . . . . . . . . .
national . . . . . . . . . . . . . . . . . . .
Program bar . . . . . . . . . . . . . . . . 30
Ready-to-dial condition . . . . . . . . . 6
Recording . . . . . . . . . . . . . . . . . . 44
Recording . . . . . . . . . . . . . . . . . . 46
Recording capacity . . . . . . . . . . . 41
Recordings . . . . . . . . . . . . . . . . . 51
Remote control. . . . . . . . . . . . . . 53
Resetting . . . . . . . . . . . . . . . . . . 39
Room functions . . . . . . . . . . . . . 49
Set-up menu. . . . . . . . . . . . . . . . 35
Standard connection. . . . . . . . . . . 9
Start up. . . . . . . . . . . . . . . . . . . . . 4
Status on delivery . . . . . . Appendix
Stop key . . . . . . . . . . . . . . . . . . . . 6
Switch on . . . . . . . . . . . . . . . . . . 51
Switching off diversions . . . . . . . 27
Technical data . . . . . . . . . Appendix
Telephone connection. . . . . . . . . . 5
Telephone directory . . . . . . . . . . 23
Telephone handset . . . . . . . . . . . . 5
Telephone number display . . . . . 19
Telephone number transfer. . . . . 16
Time . . . . . . . . . . . . . . . . . . . . 6, 35
Time limit . . . . . . . . . . . . . . . . . . 51
Timer. . . . . . . . . . . . . . . . . . . . . . 50
Tone caller. . . . . . . . . . . . . . . . . . 15
Tone caller sequence . . . . . . . . . 15
Transfer. . . . . . . . . . . . . . . . . . . . 19
Unit reset . . . . . . . . . . . . . . . . . . 39
Users . . . . . . . . . . . . . . . . . . . . . 37
VIP function . . . . . . . . . . . . . . . . 49
Volume . . . . . . . . . . . . . . . . . . . . 15
Page 33

Subject to technical modifications
Philips Nederland B.V.
User’s Guide Basic functions SmartLine D750
Postbus 90050 Part-No.:
9600 082 06000
5600 PB Eindhoven
Edition 09|99
This device fulfils the requirements of the EU regulations:
89/336/EC ”Electromagnetic compatibility”
73/23/EC ”Electrical resources for use within
certain voltage limits”
This is designated by the CE label.
Mat. Nr.: 3101.672
 Loading...