

Page 1
Register your product and get support at
www.philips.com/welcome
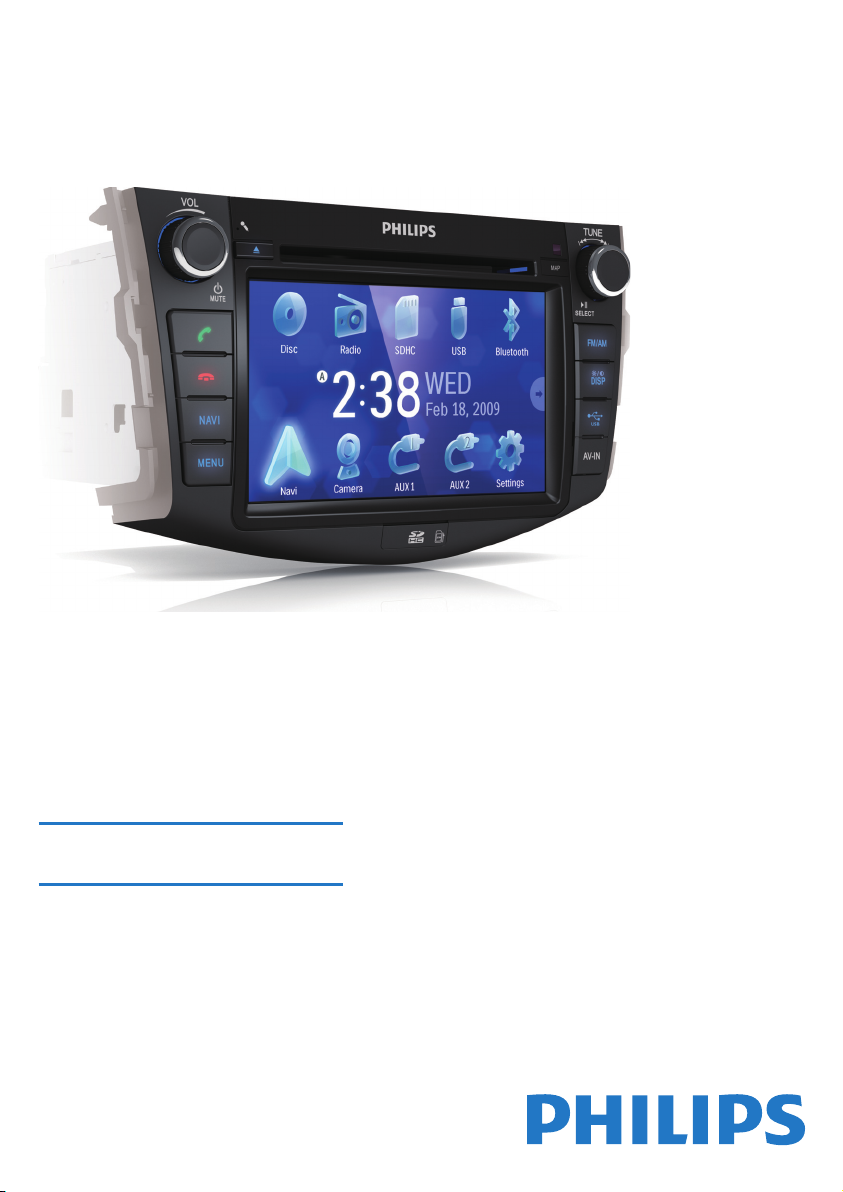
CID3685
ENG Quick Start Guide
Page 2
1
Yellow Green Blue
Black
Touch controller
Red
Black
Black
Red
White
Yellow
Yellow
Red
1
1
Yellow
White
Rear screen
Red
Amplifier
White
Red
Brown
White
Page 3
2
3
Page 4
b
4
a
Page 5
5
6
Page 6
Install the car audio
These instructions are for a typical installation.
However, if your car has different requirements,
make the corresponding adjustment. If you have
any questions regarding installation kits, consult your
Philips car audio dealer.
Caution
•
This unit is designed for negative ground
(earth) 12 V DC operation only.
•
Always install this unit in the car dashboard.
Other locations can be dangerous as the rear
of the unit heats up during use.
•
To avoid short-circuit: before you connect,
ensure that the ignition is off.
•
Ensure that you connect the yellow and red
power supply leads after all other leads are
connected.
•
Ensure that all loose leads are insulated with
electrical tape.
•
Ensure that the leads do not get caught under
screws orin parts that will move (e.g. seat rail).
•
Ensure that all ground (earth) leads are run to
a common ground (earth) point.
•
Use only the supplied mounting hardware for
a safe and secure installation.
•
Improper fuses can cause damage or fi re.
When you need to change the fuse, consult
a professional.
Note on the power supply lead (yellow)
When you connect other devices to this •
system, ensure that the rating of the car
circuit is higher than the total fuse value
of all the connected devices.
Notes on speaker connection
Never connect speaker wires to the metal •
body or chassis of the car.
Never connect speaker wires with stripes •
to one another.
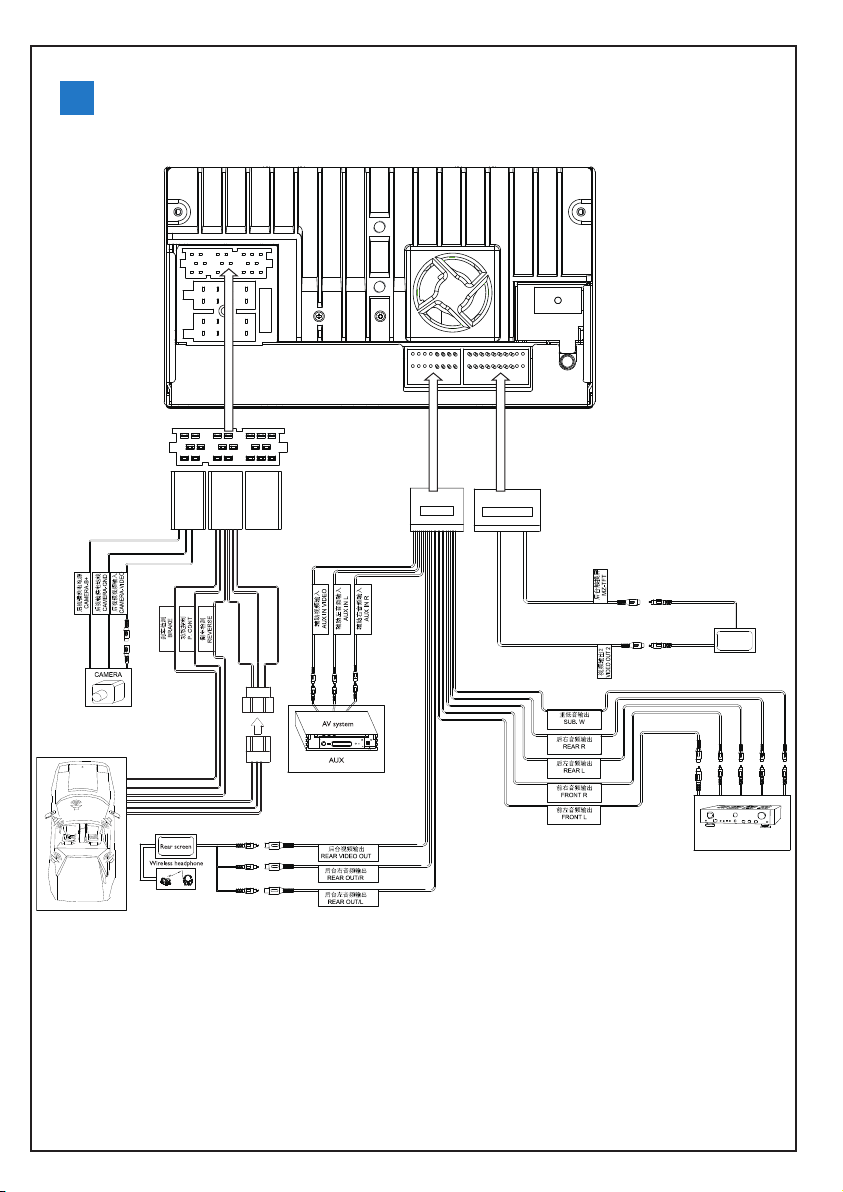
Connect wires
Caution
•
Ensure that all loose leads are insulated with
electrical tape.
Check the car's wiring carefully, then do the
2
other connections.
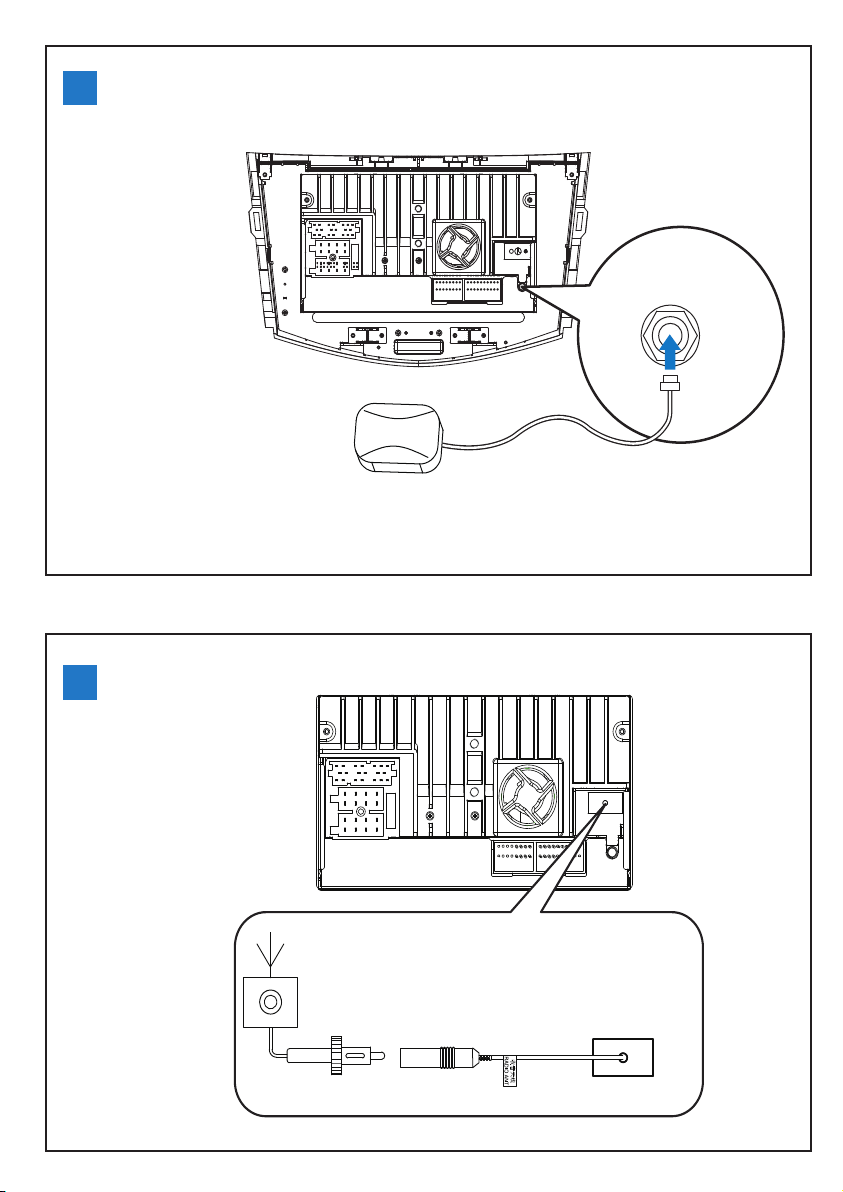
Connect GPS antenna
To receive signal from satelite, you need to connect
the supplied GPS antenna to your car and the
system.
Connect the supplier GPS antenna to the
1
system fi rst.
Stick the other end of the GPS antenna to a
2
surface for signal reception.
Connect radio antenna
If your car has built-in radio antenna, connect it to
the radio antenna of the system for better radio
signal.
Connect the radio antenna to the car
1
antenna.
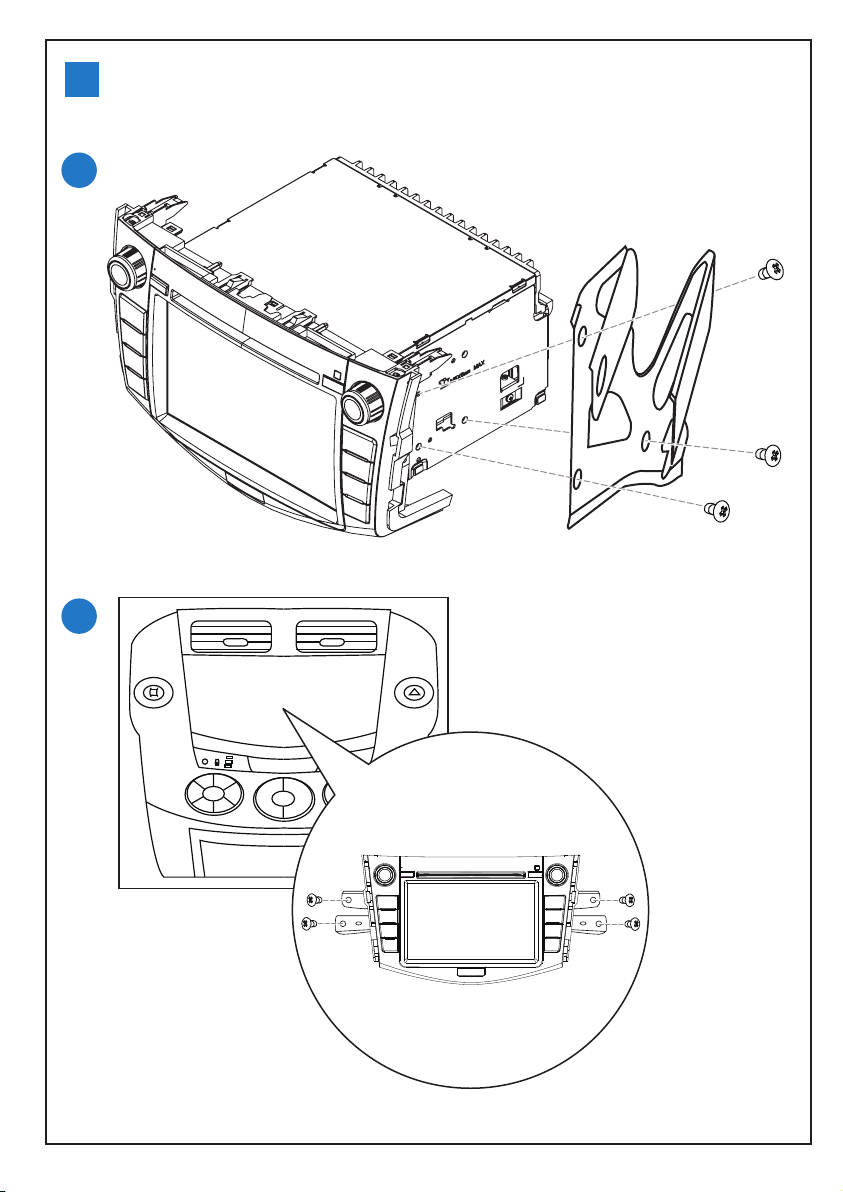
Mount in the dashboard
Note
•
Check wire connection before you mount the
unit into a car.
Take off the trim plate of the car.
1
Screw off the host car audio.
2
Fix the mounting brackets to CID3685 with
3
screws (supplied by the car manufacturer).
Fix the unit to the dashboard with screws
4
(supplied by the car manufacturer).
1
2
3
4
a
b
5 Attach the trim plate.
6 Reconnect the negative terminal of the car
battery.
Page 7
Turn on
Caution
•
Risk of road accidents! Never watch video or
adjust settings while you drive.
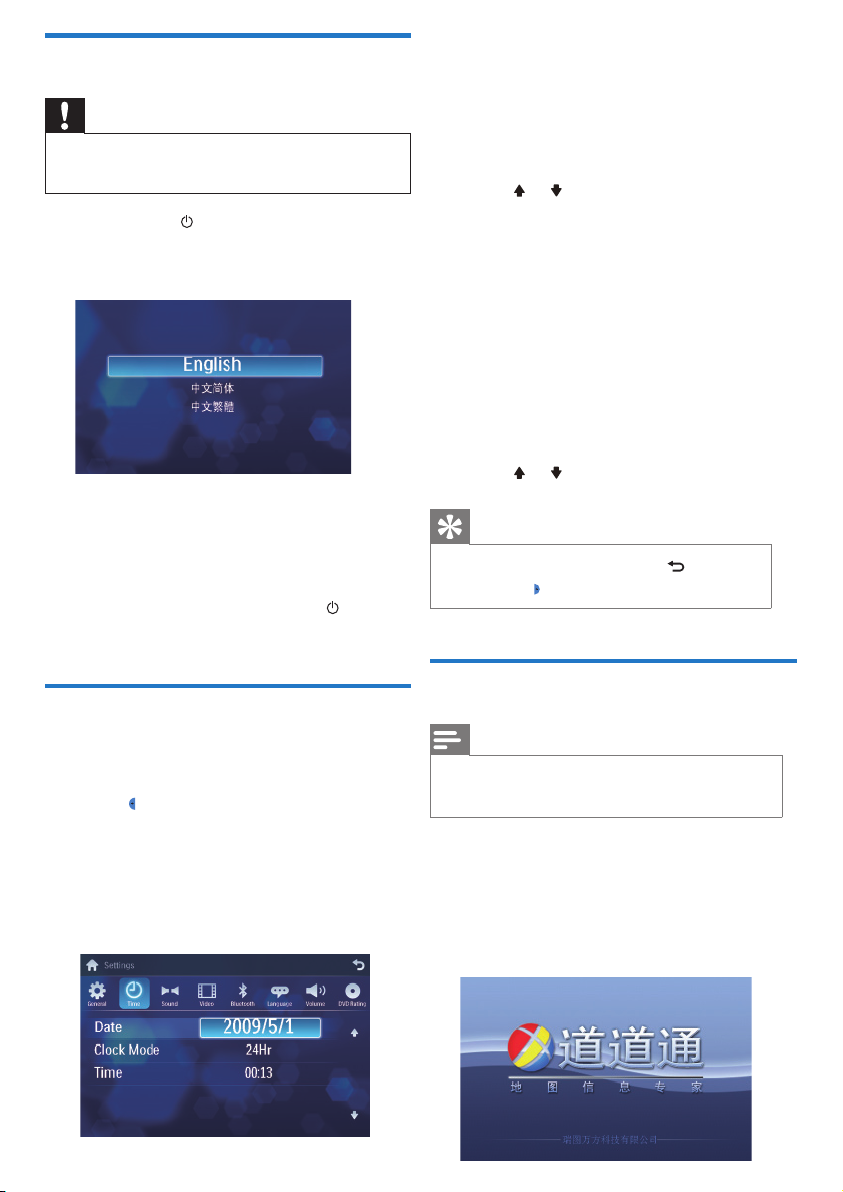
1 Press and hold /MUTE/VOL to turn on the unit.
The available OSD (On-Screen Display)
»
languages are displayed.
Set date
Touch [Date] .
1
Touch on the displayed date information.
2
A submenu is displayed.
»
3 Touch or to set year, month and day.
Set clock mode
1 Touch [Clock mode] .
2 Touch on [12Hr] or [24Hr] to select clock
mode.
Set time
Touch [Time] .
1
Touch on the displayed time.
2
A submenu is displayed.
»
3 Touch or to set hour and minute.
2 Touch a language to select.
The OSD language is changed to the
»
selected language immediately.
To turn off the unit, press and hold •
VOL.
/MUTE/
Set date and time
Touch the upper left corner to display main
1
menu.
2 Touch in the middle right side of the screen.
The second main menu is displayed.
»
3 Touch [Settings] .
Touch [Time] .
4
The date/time setup menu is displayed.
»
Tip
•
When date/time is set, touch
then touch
to return to main menu.
fi rst and
Use map
Note
•
You may need to upgrade the map before
using it (see “Upgrade the map” section)
1 Touch the upper left corner to display home
menu.
2 Touch [Navigation] .
The navigation menu is displayed in a few
»
seconds.
Page 8
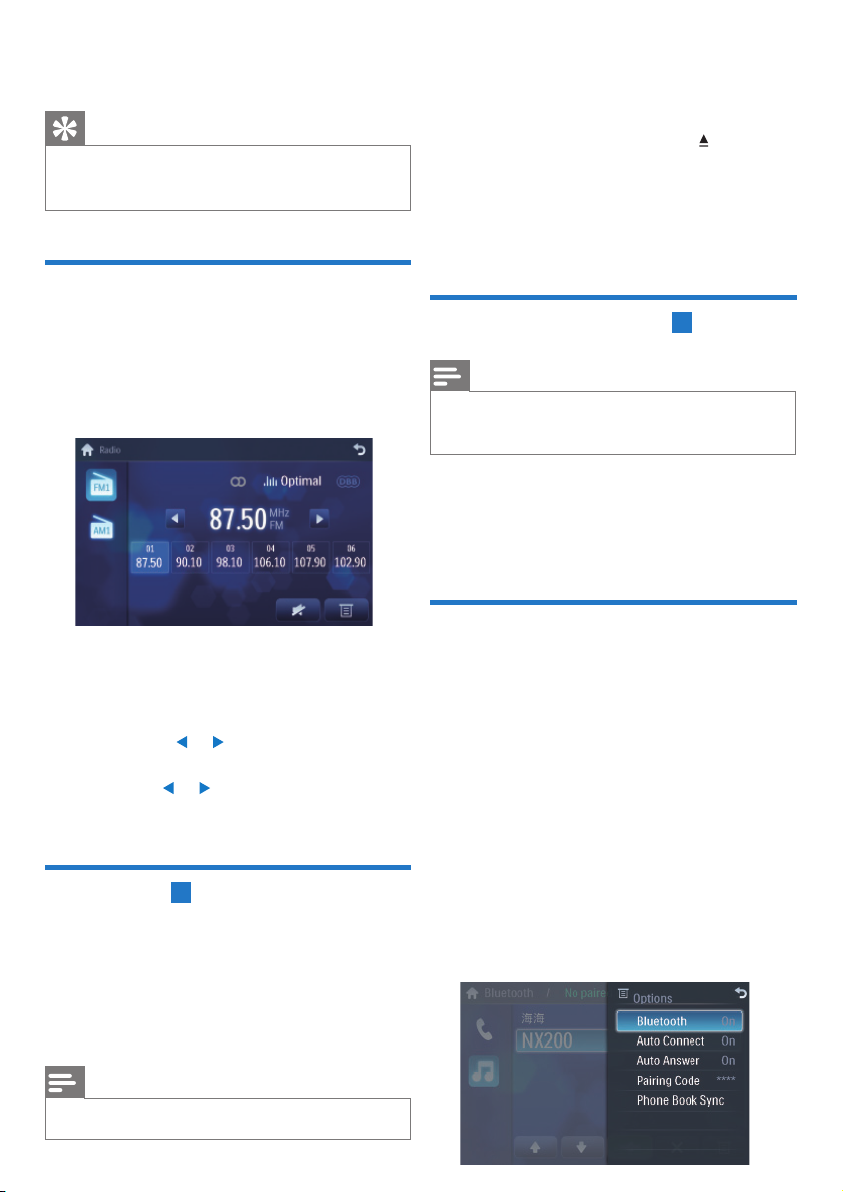
3 Refer to the map manual (in Chinese) to
operate the navigation tool.
Tip
You can press •NAVI to enter/exit the
navigation system.
Tune to a radio station
Touch the upper left corner to display home
1
menu.
2 Touch [Radio] .
Band and frequency information is displayed.
»
3 Touch on FM or AM to select band:
FM band options: • FM1, FM2, FM3
AM band options: • AM1, AM2
4 Briefl y touch or to tune to a radio station
by step.
Touch •
to a radio station automatically.
or for over 1 seconds to tune
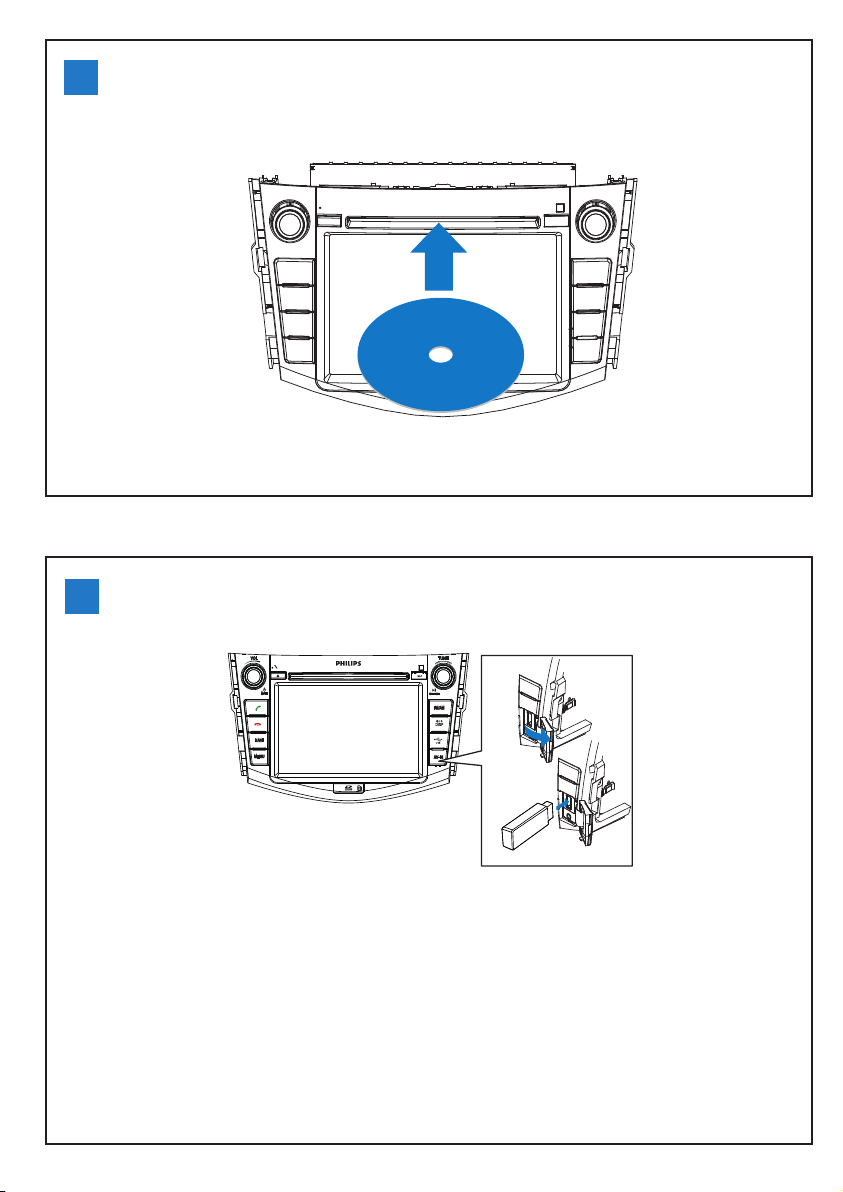
1 Inser t the disc into the disc slot with label
side facing up.
Play starts automatically.
»
To remove the disc, press the
»
When the disc is ejected, the unit
»
switches to the previous source, if
connected. Otherwise, the unit switches to
[Radio] mode automatically.
Connect USB device
Note
•
Ensure that the device contains playable
content.
button.
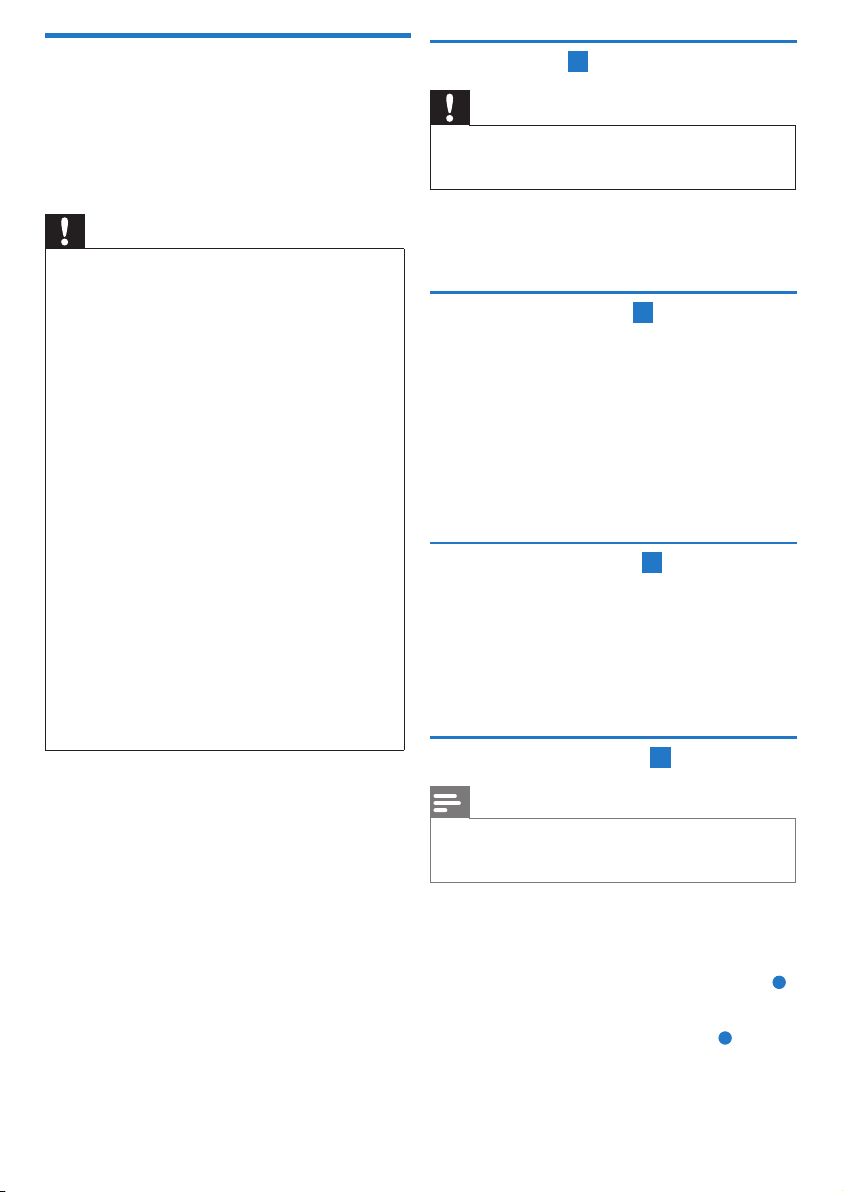
6
1 Open the USB door.
2 Inser t your USB device to the USB socket.
Play starts automatically.
»
Pair the Bluetooth-enabled
devices
To connect your Buetooth device to the unit, you
need to pair the device to the unit. Pairing needs
only to be done once. You can pair up to eight
devices.
1 Turn on the Bluetooth function on the device.
2 Search for Bluetooth device with the device.
Load discs
You can play video, audio or images stored on the
following discs:
DVD video, DVD-R , DVD-RW•
VCD•
Audio CD, CD-R, CD-RW•
Note
Ensure that the disc contains playable content. •
5
3 Select “CID3685” in the pairing list.
4 Enter default password “0000”.
If pairing succeeds. phone call record is
»
displayed.
Page 9
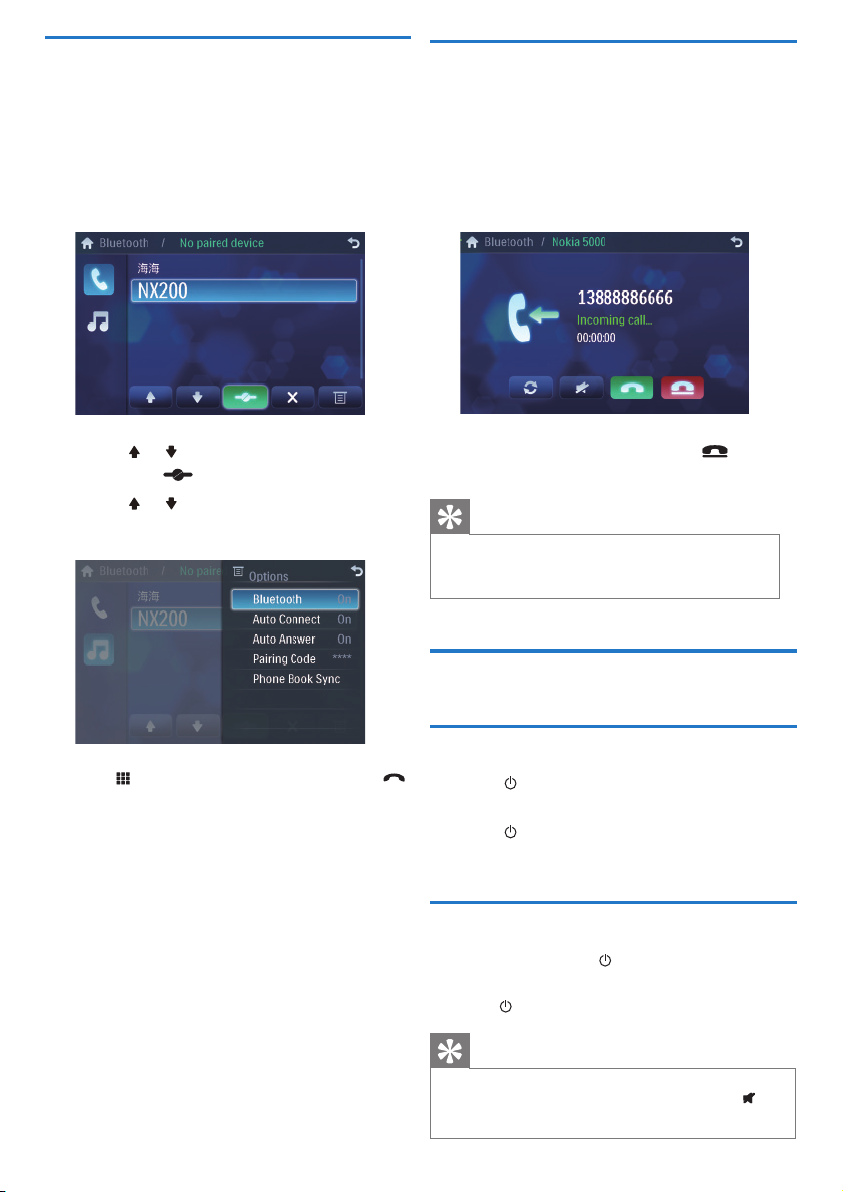
Make a call
1 Pair the phone with the unit.
2 Touch the upper left corner to display the
home menu.
3 Touch [Bluetooth] .
The Bluetooth menu is displayed.
»
Receive call
By default, all incoming calls are received
automatically.
1 If there is incoming call, [Incoming call...]
fl ashes on the screen. Speak into the
Bluetooth microphone.
4 Touch or to select the paired phone,
then touch
.
5 Touch or to search for phone number
from the following list:
Or touch to dial number directly, then touch
to dial.
2 When conversation ends, touch (red) to
terminate the call.
Tip
•
You can select to receive calls manually by
set [Auto answer] to [Off] status.
Adjust sound
Adjust volume
1 Turn /MUTE/VOL clockwise to increase
volume.
Turn • /MUTE/VOL anti-clockwise to reduce
volume.
Mute
1 During play, press /MUTE/VOL .
To turn the sound back on, press •
/MUTE/VOL again.
Tip
You can also turn off sound by touching • on
the screen.
Page 10
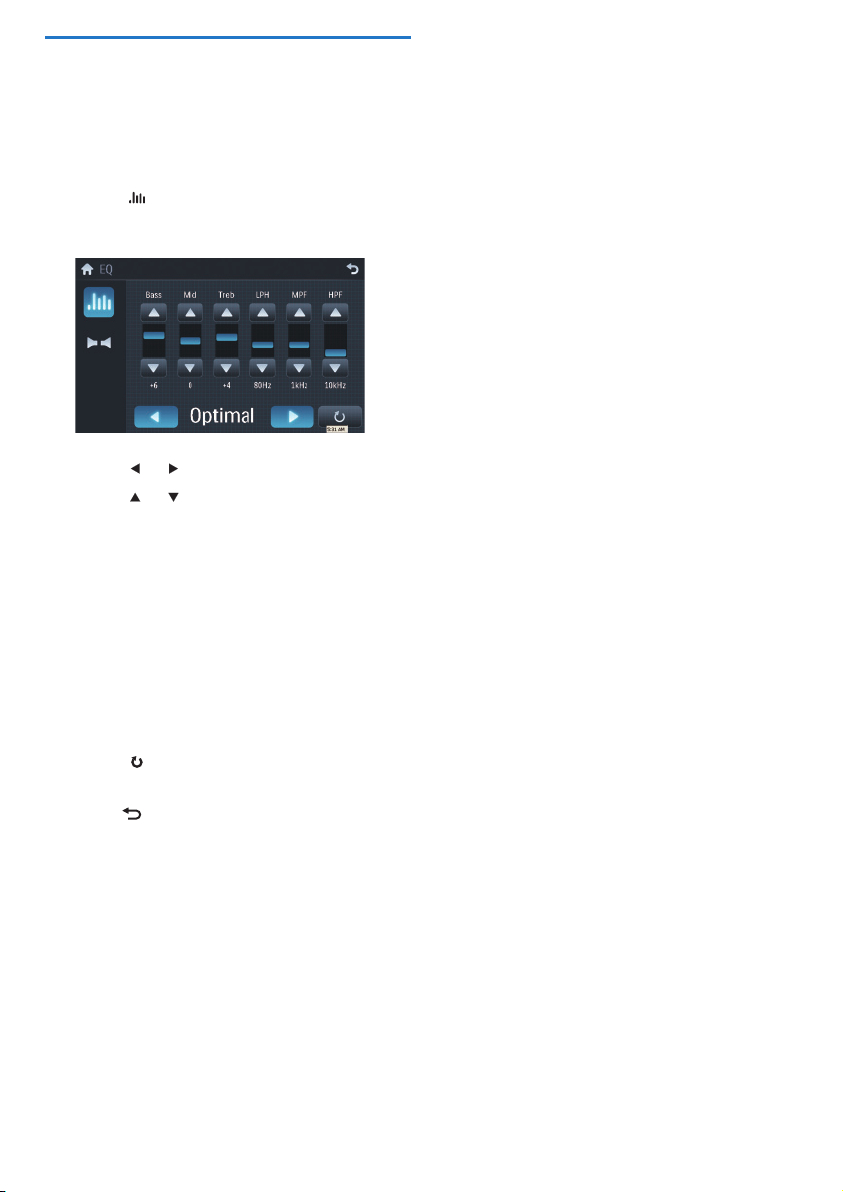
Select preset equalizer
You can select preset equalizer:
Touch anywhere except for the upper left
1
corner to display menu on the screen, if
necessary.
2 Touch .
The current Equalizer setting is displayed.
»
3 Touch or to select an EQ.
4 Touch or to adjust below settings:
• [Bass] bass range: -14 to +14.
• [Mid] middle range: -14 to +14.
• [Treb] treble range: -14 to +14.
• [LPH] low pass fi lter range:
60, 80, 100, 200.
• [MPF] middle pass fi lter range:
500, 1K, 1.5K, 2.5K.
• [HPF] high pass fi lter range:
10K, 12.5K, 15K, 17.5K.
5 Touch to restore the above settings into
default settings.
6 Press to exit.
Page 11

© Royal Philips Electronics N.V. 2009
All rights reserved.
Specifi cations are subject to change without notice.Trademarks
are the property of Koninklijke Philips Electronics N.V. or their
respective owners.
CID3685_93_QSG_V1.0
 Loading...