

Page 1
for questions about the set-up or performance of this product
call our help line, toll free
800-53l-0039Jv
/
Page 2

Page 3

(us^ English
V
_______________________________________
r
r
..............................................................
Français
...............................
£
page 4
____________________
_<2
"o)
c
Ш
(Л
o>
c
(0
Li.
d) Español........................................
(0
a
(/)
Ш
Page 4
Please Follow These Three Important
Steps To Get The Most From Your Product.
PHILIPS
RETURN YOUR OWNER’S
REGISTRATION CARD WITHIN 10 DAYS.
Registering your purchase is an essential step
to guarantee that you'll receive all of the
benefits you're entitled to as a PHILIPS
product owner.
Complete and mail your Owner's Registration
Card today to ensure your right to warranty
verification, owner confimation, model
registration, plus a wide variety of special
services and savings.
KNOW THESE SAFETY
SYMBOLS.
CAUTION
A
CAUTION: TO REDUCE THE RISK OF ELECTRIC SHOCK. DO NOT
REMOVE COVER (OR BACK). NO USER-SERVICEABLE PARTS
INSIDE. REFER SERVICING TO QUALIFIED SERVICE PERSONNEL
RISK OF ELECTRIC SHOCK
DO NOT OPEN
Congratulations On Your New
Purchase ... And Welcome To The
PHILIPS Family!
Dear PHILIPS Family Member;
Thank you for your confidence in PHILIPS.
You've selected one of the best-built, best-backed
products available today.
We appreciate your support, and we'll do everything we
can do to keep you happy with your purchase for many
years to come. After all, you're the reason we're in
business!
As a PHILIPS family member, you're entitled to a world
of special privileges - and our uncompromising
commitment to your total satisfaction.
Your PHILIPS product is protected by one of the most
comprehensive warranties and outstanding service
networks in the industry.
What's more, your purchase qualifies you to receive
advance information on exciting new products from
PHILIPS, convenient access to our home shopping
network for special products and accessories, plus
factory-direct rebates and discounts on your future
PHILIPS purchases.
A
This "bolt of lightning" indicates
uninsulated material within your unit may
cause an electrical shock. For the safety of
everyone in your household, please do not
remove product covering.
A
This "exclamation point" calls attention
to features for which you should read the
enclosed literature closely to prevent operating
and maintenance problems.
READ OPERATING
INSTRUCTIONS CAREFULLY.
The information in this manual can help you
take full advantage of your product's many
features, and ensure years of safe, reliable
operation. So don't miss out. Read the
enclosed instructions, safety tips and warranty
information today.
All of this is our way of saying 'thanks' for joining the
PHILIPS family.
To start taking advantage of these great benefits, just
remember to return your PHILIPS Owner's Registration
Card.
Simply complete, detach and mail us your Owner's
Registration Card today. And enjoy your new purchase
with our best wishes!
Sincerely,
/vV?
President and Chief Executive Officer
For Customer Use:
Enter below the Serial No. which is located on the
rear of the cabinet.
Retain this information for future reference.
Model No. CPC 916/926_______________________
Serial No.
Page 5
SAFETY INSTRUCTIONS - Read before operating equipment
This product was designed and manufactured to meet strict quality
and safety standards. There are, however, some installation and
operation precautions which you should be particularly aware of.
1. Read Instructions - All the safety and operating instructions
should be read before the appliance is operated.
2. Retain Instructions - The safety and operating instructions
should be retained for future reference.
Heed Warnings - All warnings on the appliance and in the
3.
operating instructions should be adhered to.
Follow Instructions - All operating instructions should be
followed.
Water and Moisture - The appliance should not be used near
5,
water - for example, near a bathtub, washbowl, kitchen sink,
laundry tub, or swimming pool, or in a wet basement, etc.
6. Carts and Stands - The appliance should be used only with
a cart or stand that is recommended by the manufacturer.
6A. An appliance and cart combination should be
7. Wall or Ceiling Mounting - The appliance should be
mounted to a wall or ceiling only as recommended by the
manufacturer.
8. Ventilation - The appliance should be situated so that its
location or position does not interfere with its proper
ventilation. For example, the appliance should not be
situated on a bed, sofa, rug, or similar surface that may
block the ventilation openings, or placed in a built-in
installation, such as a bookcase or cabinet that may impede
the flow of air through the ventilation openings.
9. Heat - The appliance should be situated away from heat
sources such as radiators, heat registers, stoves, or other
appliances (including amplifiers) that produce heat.
10. Power Sources - The appliance should be connected to a
power supply only of the type described in the operating
instructions or as marked on the appliance.
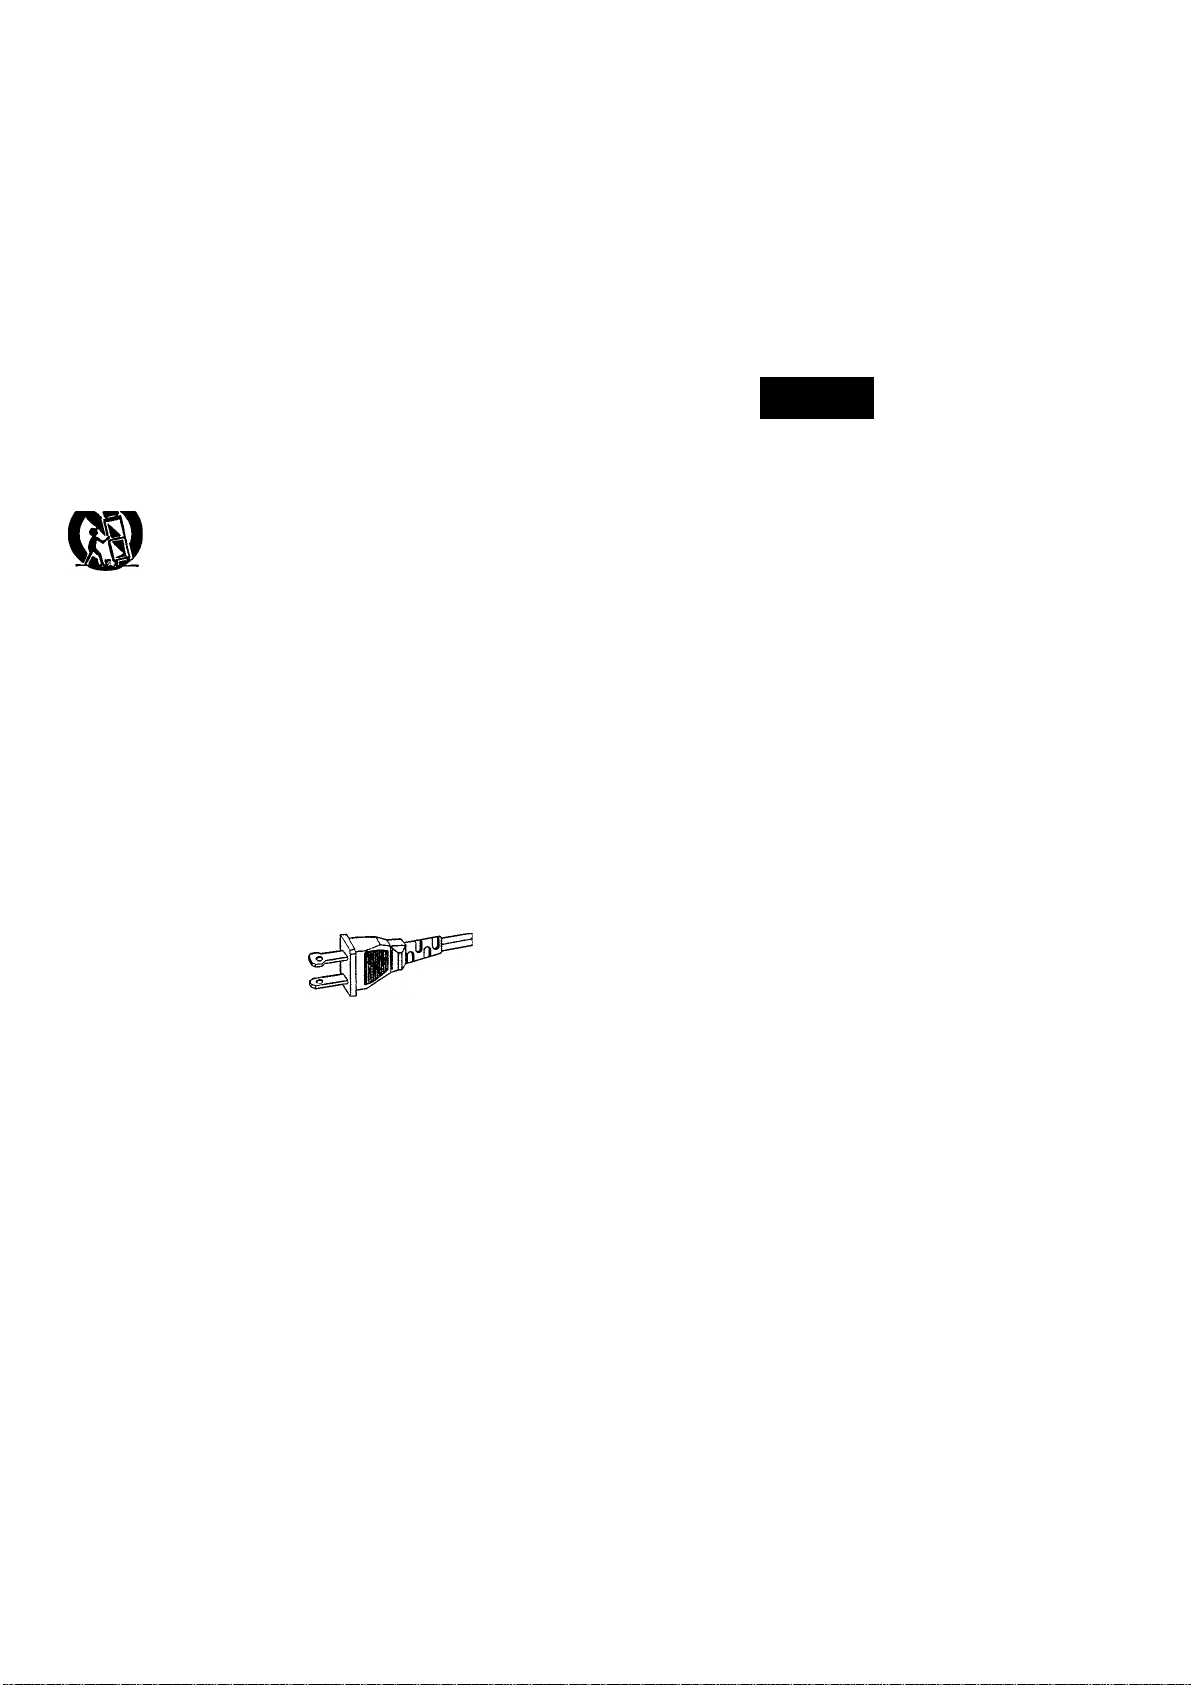
11. Grounding or Polarization -
Precautions should be taken
so that the grounding or
polarization means of an
appliance is not defeated.
CAUTION: To prevent electric shock, do not use this
(polarized) plug with an extension cord, receptacle or other
outlet unless the blades can be fully inserted to prevent
blade exposure.
CAUTION: To prevent electric shock, match wide blade of
plug to wide slot and fully insert.
11. Power-Cord Protection - Power supply cords should be
routed so that they are not likely to be walked on or pinched
b'y items placed upon or against them, paying particular
attention to cords and plugs, convenience receptacles, and
the point where they exit from the appliance.
12. Cleaning - The appliance should be cleaned only as
recommended by the manufacturer.
13. Power Lines - An outdoor antenna should be located away
from power lines.
14. Non-use Periods - The power cord of the appliance should
be unplugged from the outlet when left unused for a long
period of time.
15. Object and Liquid Entry - Care should be taken so that
objects do not fall and liquids are not spilled into the
enclosure through openings.
16. Damage Requiring Service - The appliance should be
serviced by qualified service personnel when:
A. The power supply cord or the plug has been damaged; or
B. Objects have fallen or liquid has spilled into the
appliance: or
moved with care. Quick stops, excessive
force, and uneven surfaces may cause the
appliance and cart combination to overturn.
AC Polarized Plug
C.The appliance has been exposed to rain; or
□.The appliance does not appear to operate normally or
exhibits a marked change in performance; or
E.The appliance has been dropped, or the enclosure
damaged.
17. Servicing - The user should not attempt to service the
appliance beyond as described in the operating
instructions. All other servicing should be referred to
qualified service personnel.
AVIS
A
Risque de chocs électriques
Ne pas ouvrir
A
ATTENTION
Afin de prévenir le risque de chocs électriques,
ne pas retirer les vis.
Toute réparation devrait être confiée
à un personnel qualifié.
Ce symbole indique la présence d'une
tension suffisamment élevée pour engendrer
un risque de chocs électriques.
A
Ce symbole indique que le manuel
d'installation fourni avec l'appareil contient
d'importantes recommandations quant au
A
TO REDUCE THE RISK OF FIRE OR ELECTRIC SHOCK, DO
NOT EXPOSE THIS APPLIANCE TO RAIN OR MOISTURE.
USE OF CONTROLS OR ADJUSTMENTS OR PERFOR
MANCE OF PROCEDURES OTHER THAN THOSE
SPECIFIED HEREIN MAY RESULT IN HAZARDOUS
RADIATION EXPOSURE.
This set complies with 21 CFR 1040.10 and with the
FCC-Ruies, Part 15
@) Canada
This digital apparatus does not exceed the Class B limits for
radio noise emissions from digital apparatus as set out in
the Radio Interference Regulations of the Canadian
Department of Communications.
fonctionnement et à l'entretien de ce dernier.
WARNING
CAUTION
D)
c
111
Page 6

® CONTENTS
INTRODUCTION
m
3
(£.
SAFETY INSTRUCTIONS.......................................
w'
3"
INTRODUCTION
INSTALLATION
Power supply setting
Siting the Compact Disc Changer
Connections.............................................................
Connecting headphones (CDC 926 only)................
FUNCTIONAL OVERVIEW
Front of changer......................................................
Remote control (CDC 926 only)
Display.....................................................................
PLAYBACK
Inserting CDs...........................................................
Normal playback......................................................
Selecting another track during play
Selecting another CD during play............................
Searching for a passage during play
Starting with a particular CD....................................
Starting with a particular track
Scanning CDs..........................................................
Playing in random order
Repeating play
Calling up other information on the display
Activating the fade-in and fade-out function
Searching for the loudest passage
Adjusting the sound level (CDC 926 only)
.....................................................
......................................................
...............................................
...........................
....................................
..............................
............................................................
.........................
.................................
..........................................
........................................................
..........................
.......................
.............
............
...............
PAGE
................
................
................
................
................
................
................
.............
................
................
................
.........
10-12
..............
..............
..............
..............
..............
..............
..............
..............
..............
..............
..............
..............
..............
..............
8-9
10
10
11
11
11
11
11
11
11
12
12
12
12
12
Thank you for selecting the Philips CDC 916/926
Compact Disc Changer.
5
A Compact Disc Changer of the state-of-the-art Philips 900
series, the CDC 916/926 combines supreme playback quality
6
with a high degree of user-friendliness by offering the
following possibilities:
- changing CDs during play;
7
- quick access to a particular CD by means of QUICK PLAY;
7
- storing 30 tracks from different CDs in any desired order in
7
7
7
8
9
9
the changer memory;
- storing the required recording time and playing time in the
EDIT mode;
- full integration in ESI remote-controllable HiFi systems of the
Philips 900 series.
PROGRAMMING
Storing a programme...............................................
Checking the programme
Playing the programme
Erasing a programme..............................................
Erasing a track from a programme..........................
EDIT.........................................................................
Before recording......................................................
Recording
SYSTEM ASPECTS................................................
Enhanced System Intelligence (ESI).......................
CD dubbing (synchronized recording)
Automatic source selection......................................
Automatic stop.........................................................
Standby
Timer........................................................................
ADDITIONAL INFORMATION
Maintenance............................................................
Recycling.................................................................
Technical data
TROUBLESHOOTING
...................................................................
....................................................
........................................
...........................................
................................................................
.....................
................................
.........................................................
............................................
..............
..............
..............
..............
..............
..............
..............
..............
..............
..............
..............
..............
..............
..............
..............
..............
..............
..............
..............
..............
..............
13
13
13
13
13
13
14
14
14
15
15
15
15
15
15
15
16
16
16
16
17
LIMITED WARRANTY
............................................
..............
18
Page 7

INSTALLATION ©
POWER SUPPLY SETTING
• Check that the type plate on the rear of your changer
indicates the correct power voltage.
• If your power supply voltage is different, consult your dealer
or a Philips Authorized Service Center.
Certain versions of this changer are equipped with a voltage
selector 5, which enables you to set the player to the correct
power supply voltage yourself. When changing the voltage
setting, it is also necessary to change the main fuse 4 to one of
the correct rating: T200 mA {slow blow fuse) for 110/127 V;
T80 mA (slow blow fuse) for 220 V - 230 V/ 230 V - 240 V.
SITING THE COMPACT DISC CHANGER
Free standing
• Always position the changer horizontally on a flat, firm surface.
• Allow a free space of at least 3 cm above the changer so as
not to interfere with the cooling of the changer.
In an audio rack
• The changer can be sited in any desired position.
Stacked
• Site the changer preferably at the bottom or at the top.
• Never position the changer directly on top of a high-power
amplifier/receiver, as such an amplifier/receiver gives off a
substantial amount of heat.
________________
CONNECTIONS
DIGITAL OUT
This output supplies a digital signal and can therefore only
be connected to an input which is suitable for this signal.
Use here a cord with one phono plug on either end.
/Vever connect this jack to a non-digital input of an
amplifier/receiver, such as AUX, CD, TAPE, PHONO, etc!
ANALOG OUT
For the connection cord to the amplifier/receiver.
• Insert a red plug into the 'R' jack and the other plug into the
'L' jack.
• Insert the two other plugs into the corresponding jacks of
the CD or AUX input of your amplifier/receiver.
You can also use the TUNER or TAPE IN connection, but
neverthe PHONO input!
3 ESI BUS (Enhanced System Intelligence)
For connecting the equipment when you are incorporating
the changer in a HiFi system with an ESI BUS connection
(e.g. the PHILIPS 900 series) or its own remote control
system.
4 Power fuse holder (not all versions)
See 'POWER SUPPLY SETTING'.
5 Voltage selector (not all versions)
See 'POWER SUPPLY SETTING'.
CONNECTING HEADPHONES (CPC 926 only)
• Connect headphones
with a 6.3 mm jack plug to the
PHONES jack 27.
• The sound level is adjusted with the
LEVEL control 22.
Page 8

® FUNCTIONAL OVERVIEW
FRONT OF CHANGER
1 POWER STANDBY/OFF - Switching on and off.
2 1-0 digit buttons
- Selecting another track during play.
- Selecting a track with which to start play.
- Selecting tracks when compiling a program.
- Selecting the recording time when making a tape recording
(EDIT).
3 PRG (program) - Opening and closing the memory when
compiling a program.
4 CLR (clear)
- Erasing a program.
- Erasing track numbers from a program.
5 Display - Informs you about the functioning of the player.
6 DISC SELECT
- Selecting another CD during play.
- Selecting a CD to start play with.
- Selecting CDs when compiling a program.
7 OPEIM/CLOSE - Opening and closing the CD compartment.
8 l(nfra) R(ed) SENSOR (CDC 926 only) - Receives the
signals from the remote control.
9 REVIEW - Checking a programme.
10 EDIT -Activating the EDIT function when making a tape
recording.
11 DISPLAY - Selecting the information you want to see on
the display.
12
- Selecting another track during play.
- Selecting a track with which to start play.
- Fast search to a particular passage during play.
- Selecting the recording mode when making a tape recording.
- Selecting the recording time when making a tape recording.
13 STOP/CP
- Stopping play.
- Erasing a program (CP = Clear Program).
14 PLAY/REPLAY
- Starting play.
- Returning to the beginning of a track.
15 PAUSE - Interrupting play.
16 SHUFFLE - Playing in random order.
17 REPEAT - Repeating play.
18 SCAN - Automatically playing the beginning of each track.
19 PEAK SEARCH - Searching for the loudest passage (peak)
on a CD or in a program when making a tape recording.
20 FADER - Fading in and out during play.
21 PHONES (CDC 926 only) - Connecting headphones.
22 LEVEL (CDC 926 only) - Adjusting the volume when
listening with headphones.
23 QUICK PLAY - Immediate playing of a particular CD,
24 LOAD - Rotating the turntable in the CD compartment
when inserting CDs.
Page 9

FUNCTIONAL OVERVIEW @)
REMOTE CONTROL (CPC 926 only)
2 X 1.5 V
R03 / UM4 /AAA
1-0 digit buttons
Selecting another track during play.
Selecting a track with which to start play.
Selecting tracks when compiling a program.
Selecting the recording time when making a tape recording
(EDIT).
DISPLAY - Selecting the information you want to see on
the display,
PAUSE - Interrupting play.
STOP - Stopping play.
DISPLAY
TRACK TOTAL REM TRACK TIME
•4 5 6 7 » -9 -10 11 12 13 -14 IS +15
SHUFFLE - Lights up when the tracks are played in random order.
(((O (CDC 926 only) - Lights up when the changer receives a
command from the remote control.
- Flashes when a program is being compiled.
- Lights up when a program is being played.
REPEAT DISC - Lights up when you repeat a CD.
REPEAT - Lights up when you repeat all CDs or a program
from them.
1 - 5 CD number indicator
- Flashes when you switch the changer on.
- Indicates the number of CDs in the CD compartment.
- Indicates what CD is being played.
TRACK - Indicates:
- what track is being played;
- the number of tracks on a CD or in a program.
TRACK TIME - Indicates the elapsed playing time of the track
being played.
REM(aining) TRACK TIME - Indicates the remaining playing
time of the track being played.
TOTAL REM(aining) TIME - Indicates the remaining playing
time of a CD.
TOTAL TIME - Indicates the total playing time of a CD.
PAUSE - Lights up when play is interrupted.
Him - Lights up when the player is put into the EDIT mode.
1-15 track number Indicator - Shows the number of tracks
on a CD.
+15 - Lights up when there are more than 15 tracks on a CD.
Display messages:
Lights up when a CD's contents list is being scanned.
.c
.!2
"o)
u
c
Selecting another track during play.
Selecting a track to start play with.
Fast search to a particular passage during play.
Selecting the recording mode when making a tape recording.
Selecting the recording time when making a tape recording.
DISC
Selecting another CD during play.
Selecting a CD to start play with.
Selecting CDs when compiling a program.
- VOLUME + - Adjusting the sound level when the changer
Is connected via the ANALOG OUT output or the DIGITAL
OUT output to an amplifier or HiFi system
remote control.
8
PLAY - Starting play.
9
SHUFFLE - Playing in random order.
- The life of the batteries of the remote control is around one
year. For replacement use only batteries of the type R03,
UM4 or AAA.
- When the changer is incorporated in a HiFi system with ESI
BUS connection, the changer can then be operated with the
remote control of the system.
without its own
Lights up when there are no CDs in the CD compartment.
Lights up when you insert a non-audio CD (CD-ROM, CD-I or
CDV).
Lights up when you select a non existent track number.
Lights up if you try to activate a function for which you must
first start play.
Lights up if you try to activate a function for which you must
first stop play.
Page 10

<H) PLAYBACK
INSERTING THE CDs
m
3
NOTE! Use only audio CDs; no CD-ROM, CD-1 or CDV.
• Press POWER STANDBY/OFF 1 to switch the changer on.
- The changer will now start CD detection to check how many CDs there are in the CD compartment. The
turntable will rotate slowly until all positions (1 - 5) in the CD compartment have been checked.
- The position which is being checked is always shown on the display (DISCXj.
- After CD detection the 1-5 CD number indicator will show the number of CDs in the CD compartment.
• Open the CD compartment by pressing OPEN/CLOSE 7.
- OPEN lights up.
• Insert the CDs, printed side up; use the LOAD button 24 to rotate the turntable in the CD compartment.
• Close the compartment by pressing OPEN/CLOSE 7.
- CLOSE lights up. The changer will start CD detection again.
NOTE!
- CD detection may never be interrupted. If, during detection, you press any button, then the changer will stop
detection and the display will give an incorrect indication of the number of CDs in the CD compartment.
- Always remove all CDs from the CD compartment if you want to transport the changer.
NORMAL PLAYBACK (PLAY/REPLAY)
- The display shows the number of the current disc.
• Press PLAY/REPLAY 74 to start playback.
- READ lights up and play starts from the first available CD.
- The CD number indicator (1-5) always shows what CD is being played (► X) and the track number indicator (1-15)
shows how many tracks are on the CD; when a track has been played, its number disappears.
The track being played and its elapsed playing time are shown under TRACK and TRACK TIME
See 'CALLING UP INFORMATION ON THE DISPLAY' on page 12 if you wish to see other information on the
, display.
^ ^ rPACK TfucK me
I U-dU
- Play will stop after all CDs have been played.
• Press POWER STANDBY/OFF 7 to switch the changer off.
NOTE!
- You can also press PLAY/REPLAY 74 immediately after inserting the CDs; the compartment then closes
automatically.
- Use the PREFERRED POSITION in the CD compartment if you wish to insert only one CD and then start play by
pressing the QUICK PLAY button 23. Play will then start immediately with the inserted CD.
- You can interrupt playback by pressing PAUSE 75; PAUSE then lights up. Press PLAY/REPLAY or PAUSE to
restart.
- If you press PLAY/REPLAY during play, the current track will start again from the beginning.
- You can stop playback by pressing STOP/CP 13.
- if you press OPEN/CLOSE 7 during play, the CD compartment will open while play continues. The three CDs
outside the changer may now be changed without playback being interrupted.
10
Page 11

PLAYBACK @)
M «3^ H-
1 Г T
SELECTING ANOTHER TRACK DURING PLAY (1-0)
• Key in the desired track number (on the current CD);
numbers consisting of two figures must be keyed in within
2 seconds.
- The music stops and a moment later the selected track
begins to play.
NOT POSSIBLE lights up if you select a non existent number.
You can also select the number by using or 12
(press less than 0.5 seconds).
SELECTING ANOTHER CD DURING PLAY (DISC SELECT)
• Key in the desired CD number.
- The music stops and a moment later the selected CD begins
to play.
NOT POSSIBLE lights up if you select a non existent number.
You can also select the number by using the DISC button 6 on
the remote control (CDC 926 only).
SEARCHING FOR A PASSAGE DURING PLAY (!◄◄ ►►!)
• Hold 72 down to search backwards to the beginning.
• Hold 72 down to search forwards to the end.
The searching speed is determined by how long a key is
pressed:
- the first 2 seconds fairly slowly, with sound;
- then at the maximum speed, with no sound.
If you reach the end of the last track and release ►», play will
resume a few seconds before the end of the CD.
STARTING WITH A PARTICULAR CD (DISC SELECT)
• Key in the required CD number.
- If the CD compartment was open, it will now close.
- Play starts from the selected CD.
NOT POSSIBLE lights up if you select a non existent number.
You can also select the number by using the DISC button 6 on
the remote contro (CDC 926 only).
STARTING WITH A PARTICULAR TRACK (1-0)
• First select the number of the required CD using DISC
SELECT бог DISC 6 on the remote control (CDC926 only).
• Then key in the required track number (numbers consisting
of two figures must be keyed in within 2 seconds).
- If the CD compartment was open, it will now close.
- Play starts from the selected track.
(press less than 0.5 seconds) and then pressing
PLAY/REPLAY74.
NOT POSSIBLE lights up if you select a non existent (track)
number.
SCANNING CDs (SCAN)
All CDs;
• Press SCAN 18 before or during play.
- If the CD compartment was open, it will now close.
- SCAN lights up and the first 10 seconds of each track are
played in turn (starting from the current track). 10 seconds
are counted down each time under REM(aining) TRACK
TIME.
______________________________
___________
orYou can also select the (track) number by using
ipa®i ,-, SiUBaal^
4 5 -e 7
• When the player reaches a track which you wish to hear in
full, press SCAN again or PLAY/REPLAY 74.
One CD:
• Select the number of the required CD using DISC SELECT 6
or DISC 6 (on the remote control - CDC 926 onl^.
• Press SCAN 18, within the time the CD number is flashing
on the display.
- Now only the first 10 seconds of each track on the selected
CD will be played in turn.
uT№t..,
REU TRACK ТШе
PLAYING IN RANDOM ORDER (SHUFFLE)________________
All CDs:
• Press SHUFFLE 76before or during play.
- If the CD compartment was open, it will now close.
- SHUFFLE lights up and all the tracks are now played in a
random order.
34$47-«'«t0
- If you press 72, you will select any one of the following
tracks.
• Press SHUFFLE again if you wish to return to normal play.
NOTE!
If, during play, you open the CD compartment to change CDs
(see 'NORMAL PLAYBACK' on page 10) then playback in
random order will be cancelled. Playback will stop as soon as
the last track of the current CD has been played (in normal
order).
One CD:
• Select the number of the required CD using DISC SELECT 6
or DISC 6 (on the remote control - CDC 926 onl^.
• Press SHUFFLE 16, within the time the CD number is
flashing on the display.
- DISC and SHUFFLE light up; the tracks of the selected CD
will now be played in a random order.
- If you press 72, you will select any one of the following
72
tracks.
If you press REPEAT 77, the tracks will be repeated in a
different order each time, although the first track will always
be the same.
- When all tracks of the selected CD have been played,
playback stops.
• Press SHUFFLE again if you wish to return to normal play.
у 1^
£
.i2
"o)
c
Ш
11
Page 12

<i|) PLAYBACK
REPEATING PLAY (REPEAT)
m
Repeating a CD:
3
ÍQ.
• Press REPEAT 77 before or during playback of the CD.
55'
- REPEAT DISC lights up; the CD will now be repeated
3"
continuously.
ffPCATOtSC
7 10 41
• Press REPEAT twice to stop the CD being repeated.
Repeating all CDs:
• Press REPEAT 77 twice before or during playback.
- REPEAT lights up; all CDs will now be repeated continuously.
$ 7 10
• Press REPEAT again to stop the CDs being repeated.
CALLING UP INFORMATION ON THE DISPLAY (DISPLAY) In STOP mode:
Text display
- After loading the CDs and closing the CD compartment, the
display shows the number of the CD to be played (= default
display in STOP mode).
ACTIVATING THE FADE- IN AND FADE-OUT FUNCTION
(FADER)
_____________________________________________
NOTE!
The FADER function can be used if the changer is connected to
the amplifier or the system via the ANALOG OUT output or the
DIGITAL OUT output.
• During play press FADER 77.
- The sound level will now gradually decrease (FADE OUT),
after which the changer will go into the PAUSE mode.
FBdE
Rot = I- R d E
• Press FADER again.
- Play continues and the sound level will increase again to the
originally set level (FADE IN).
FRdE _
SEARCHING FOR THE LOUDEST PASSAGE
(PEAK SEARCH)_______________________________________
• In STOP mode, press PEAK SEARCH 19.
- SELECT D/SC lights up.
• Select the number of the required CD using DISC SELECT 6
or DISC 6 (on the remote control - CDC926 only).
- The CD will now be scanned for the loudest passage (the
peak).
- The display shows the track being scanned and its elapsed
' playing time.
During play:
7.Time display
- When you start play (from STOP mode), the display shows
the elapsed playing time of the current track (= default
display in PLAY mode).
S 4 7 4 ■* 10
• Press DISPLAY 7 7 whenever you want to know the
remaining playing time of the current track (REM TRACK
TIME).
TRACK ROI TRACK TBK
• Press DISPLAY again if you wish to know the remaining
playing time of the entire CD (TOTAL REM TIME).
vlv
O ^ TRACK TOTAL ntM TSK
7^ 2 Hu-Sb
2r4S4744 19 4l
/Vote -TOTAL REM(aining) TIME indication is not available in
SHUFFLE mode.
• If you wish to know the total playing time of the CD, you
must go back to STOP mode first and then press DISPLAY.
- The display now shows the number of tracks and the total
playing time of the current CD (TOTAL TIME).
TRACK TOTAL
4 4 7«
2.Text display
• If you press DISPLAY again, you will switch to text display;
the display shows the number of the current CD.
- When the loudest passage has been found, it will be
repeated continuously (from 2 seconds before the peak until
2 seconds after the peak)
• You can now adjust your recording device.
• You can stop the scan by pressing STOP/CP 73; if you press
PLAY/REPLAY 74, the CD will be played from the beginning.
NOTE!
- When searching for the loudest passage in a programme,
(from one or more CDs) there is no need to enter the CD
number(s).
- If you wish to record tracks from different CDs, you have to
repeat peak search for each CD.
ADJUSTING THE SOUND LEVEL
(- VOLUME + - CPC926 on!y)
_____________________________
NOTE!
- Use the - VOLUME + keys (on the remote control - CDC
926 only) only if the player is connected via the ANALOG
OUT output or the DIGITAL OUT output to an amplifier or
HiFi system without its own control.
- The setting chosen with - VOLUME + will be cancelled
when the player is switched off.
• Hold - VOLUME 7 (on the remote control) pressed down.
- The output signal from the player will now decrease
gradually.
- The successive steps are shown on the display.
UOLEE
UDLEz
LIDL5_
UDLE
UDL =
• Release the key as soon as the required sound level is obtained.
• Hold VOLUME + 7 (on the remote control) pressed down.
- The output signal will now increase again gradually to the
maximum level.
UDL- UnL =
UULE 1
U0LE_
U D L r r
U '-i
12
Release the key as soon as the required sound level is obtained.
Page 13

PROGRAMMING ®
STORING A PROGRAM IPRG and 1-0)
- By programming the changer, you can play up to 30 tracks in any required sequence.
- FULL lights up if you exceed the maximum of 30 tracks.
- NOT POSSIBLE lights up if you select a non-existent CD number.
- USE 0-9 lights up if you press or 12 while programming.
• In STOP mode, press PRG (program) 3to open the memory.
- SELECT DISC lights up and liiiiaaiiaAl starts flashing.
• Select the number of the first required CD using DISC SELECT 6 or DISC 6 (on the remote control - CDC926
onl^.
• Key in the required track numbers of the selected CD using the 1-0 digit buttons 2.
- Every track number you enter in this way will be included immediately in the program.
- The display always shows the number of tracks and the playing time of your program.
• If you wish to store tracks from another CD, you should first enter the number of the CD.
• Press PRG to quit the PROGRAM mode.
• Press PLAY/REPLAY 74 to play the program.
D)
c
LU
CHECKING THE PROGRAM (REVIEW)
• Press REVIEW 9 prior to, during or after programmed play.
- HEYlights up and all CD and track numbers appear in the
programmed sequence on the display.
- Under TRACK TIME you will see the playing time of each
track.
TRACK TRACK Twe
•riD
NO PROG will light up if no track numbers have been stored.
With REVIEW you can proceed more rapidly to the next block
of information.
_________________
PLAYING THE PROGRAM (PLAY/REPLAY)________________
• Press PLAY/REPLAY 14.
- Playback starts with the first number of the program.
The EDIT 10, PRG Sand CLR 4and PEAK SEARCH 79 buttons
cannot be used during programmed play.
Searching for a particular passage is only possible within the
track being played.
ERASING A PROGRAM (STOP/CP, CLR or OPEN/CLOSE)
In PLAY mode:
• Press OPEN/CLOSE 7 or STOP/CP 13 (twice).
In STOP mode:
• Press OPEN/CLOSE 7, CLR 4 or STOP/CP 13
ERASING A TRACK FROM A PROGRAM (CLR)
• Press REVIEW 9 before or after programmed play (STOP
mode).
- All CD and track numbers appear in the programmed
sequence on the display.
• Press CLR (clear) 4 as soon as the number you wish to erase
appears.
- The number has now been erased.
- The display shows the remaining number of tracks and the
remaining programme time for a few seconds.
TRACK TOTAL
NO PROG will light up if no track numbers have yet been
stored and if you have not pressed REVIEW first before
cancelling.
___________
- The program has now been erased.
13
Page 14

(H) EDIT
The EDIT function has two recording modes in which you can store the recording time of the tape in the changer
m
memory.
3
(O
EDIT NORMAL - The changer will determine which tracks fit on each side of the tape and will stop after the last
track. The tracks will be recorded in the order in which they appear on the CD(s).
EDIT OPTIMAL - The changer now calculates the combination of tracks that will optimize the use of available
recording time.
- The EDIT function cannot he used for CDs containing more than 30 tracks.
- The - VOLUME + keys on the remote control (CDC926 only),may not be used during recording, as they affect
the strength of the signal from the changer.
NOTE!
BEFORE RECORDING
Preparation:
• A program to be recorded must be stored in advance. See
'PROGRAMMING' on page 13.
• If necessory, you can search for the loudest passage and
adjust your recording device. See 'SEARCHING FOR THE
LOUDEST PASSAGE (PEAK SEARCH)' on page 12.
This can also be done after selecting the recording mode
and the recording time. See below.
• Press EDIT 10 to activate the EDIT mode.
- lEtB lights up and SELECT DISC appears on the display.
• Select the number of the required CD using DISC SELECT 6
or DISC 6 (on the remote control - CDC 926 only).
When recording a program there is no need to enter the CD
number(s).
Selecting the recording mode:
- The display shows EDIT(= EDIT NORMAL which is the
default setting).
• With 12, you can now select OPT(imal), CANCEL
or EDIT (NORMAL) again.
- The display shows OPT(imal), CANCEL, or EDIT again.
• Press EDIT 10 to store the required recording mode
(NORMAL or OPTIMAL).
If you select CANCEL, the EDIT mode will be cancelled and
the changer will go back to STOP mode.
- As soon as you have stored the recording mode the display
shows C30 (default setting).
Selecting the recording time:
- As soon as you have stored the recording mode the display
shows C30 (default setting).
• With (◄◄ 12 you can now select the required
recording time:
C ¡00, C IDS, C ISO, C30, CHE, CEO, C15 or C90.
• Other recording times can be selected using the 1-0 digit
buttons 2 ; in EDIT NORMAL mode the recording time must
be at least equal to the playing time of the first track on the
first CD or in the program.
In EDIT OPTIMAL mode-the recording time must be at least
equal to the playing time of the shortest track on the CD(s) or
in the program.
- NOT POSSIBLE lights up if you select a 'wrong' time.
• Press EDIT 10 to store the required recording time.
- The CD changer will now go back to STOP mode.
• You can now record the CD or the program.
RECORDING
• Press PLAY/REPLAY 14.
- Playback starts with the selected CD (or with the first track
of the program).
- The display shows the elapsed playing time of the current
track for 5 seconds, followed by the number of the current
CD (= text display).
• Press DISPLAY 11 to switch to time display information.
- The number of tracks for side A and their playing time are
shown on the display.
After the last track that fits on side A of the tape, the CD
changer will go into PAUSE mode.
PAUSE lights up.
The track number indicator shows which tracks fit onto side
B of the tape. Under TRACK you will see the number of the
first track to be recorded.
• Turn the tape over or select the tape travel direction for side B.
• Press PLAY/REPLAY 14.
- The remaining tracks will now be played.
- After the last track play will stop; EDIT CANCELLED lights
up.
NOTE!
- As soon as you press P AY/REP AY 14 the other changer
functions will temporarily be switched off to prevent the
recording being interfered with; EDIT ACTIVE lights up if
you press one of the other buttons during recording.
- You can quit the EDIT mode by pressing STOP/CP 77; EDIT
CANCELLED then lights up.
- EDIT NOT POSSIBLE lights up if you try to record a CD
containing more than 30 tracks.
- Should the CD or the program be longer than the total
recording time of the tape, play will stop after the last track
that fits onto side B of the tape.
- Should the first track of the first CD or the program be
longer than one side of the tape (= the entered recording
time divided by two), then EDIT NOT POSSIBLE will light up.
You will now have to enter another recording time.
- The EDIT function will be cancelled if the CD changer (or the
system) is set to STANDBY mode.
14
Page 15

SYSTEM ASPECTS
ENHANCED SYSTEM INTELLIGENCE (ESI)
If the changer is connected via the ESI BUS sockets to the ESI BUS sockets of a HiFi system (e.g. the PHILIPS 900
series), the changer can be operated via the remote control of the system. In addition, the functions mentioned
below are then accessible (if available in the system):
O)
c
m
CD DUBBING (synchronized recording)
• Set the changer to the STOP mode.
• Press CD SYNC. (CD DUBBING) on the cassette deck.
- SELECT DISC appears on the display.
• Select the number of the required CD using DISC SELECT 6
or DISC 6 (on the remote control - CDC 926 only).
When recording a program there is no need to enter the CD
number(s).
- Peak search starts (for the CD that Is indicated on the display
or for the program) but nothing is being recorded yet.
• After the peak level has been detected, you can adjust the
recording level.
• Press PLAY on the deck.
- Recording starts, and after 6 seconds play starts again at the
beginning of the CD which has just been playing.
- If you record a program from different CDs, the cassette
deck will go into PAUSE mode when the CD changer selects
a new CD in the CD compartment. As soon as playback of
the new CD starts, the deck continues recording.
- At the end of side A of the tape, synchronized recording will
stop, except when the CD (auto reverse) mode has been
selected on the cassette deck; the CD changer will then go
into PAUSE mode. The tape travel direction for side B will be
selected automatically and the current track will be recorded
again on side B of the tape.
- After the last track, synchronized recording will stop.
Synchronized recording in combination with EDiT;
• Set the changer to the EDIT mode.
• Select the required recording mode and recording time (see
'EDIT' on page 14).
• Select the “5 (auto reverse) mode (if available) on the
C3ss0tto d3cl^
• Press CD SYNC. (CD DUBBING) on the deck.
- Peak search starts but nothing is being recorded yet.
• After the peak level has been detected you can adjust the
recording level.
• Press PLAY on the deck.
- Recording starts, and after 6 seconds play starts again at the
beginning of the CD or the programme.
- If you record a program from different CDs, the cassette
deck will go into PAUSE mode every time the CD changer
selects a new CD in the CD compartment. As soon as
playback of the new CD starts, the deck will continue the
recording.
- After the last track that fits on side A of the tape, the CD
changer will go into PAUSE mode. A blank section will be
recorded until the end of side A.
- At the end of side A of the tape, synchronized recording will
stop, except when the (auto reverse) mode has been
selected on the cassette deck; the tape travel direction for
side B will be selected automatically, and synchronized
recording will continue on side B of the tape.
- Synchronized recording will stop after the last track of the CD
or the program.
_________________
AUTOMATIC SOURCE SELECTION
If the AUTO SELECT button on the amplifier is pressed, the CD
changer will automatically be activated as soon as you press
QUICK PLAY 23 or PLAY/REPLAY 14.
AUTOMATIC STOP
If the AUTO SELECT button on the amplifier is pressed, the CD
changer will automatically go into the PAUSE mode as soon as
another source in the system is selected (except when CD
DUBBING is active).
STAND BY
• With the STAND BY button on the remote control of the
system you can set the changer to STAND BY mode.
The changer will go to STANDBY mode automatically if the
whole system is set to STANDBY mode.
- If the CD compartment was open, it will now close.
- Any programme present will be erased.
• Press any of the following buttons to cancel the STANDBY
mode:
DISC SELECT 6. PLAY/REPLAY 14, STOP/CP 13, SCAN 18,
SHUFFLE 16,1-0 2, EDIT 10, OPEN/CLOSE 7,
72 or PRG 3.
TIMER
• Using the TIMER function you can have playback of a CD
started at a particular time; for this refer to the operating
instructions of the tuner (e.g FT930).
- NO D/SC will light up if there is no CD in the CD
compartment at the moment playback is supposed to start.
NOTE!
- As soon as you start recording, the other changer functions
will temporarily be switched off to prevent the recording
being interfered with. CD DUBBING ACTIVE Wghts up if you
press one of the other buttons during play/recording.
- You can stop playback/recording by pressing STOP/CP 13.
- The CD DUBBING function will be cancelled if the CD changer
(or the system) is set to STANDBY mode.
15
Page 16

@> ADDITIONAL INFORMATION
MAINTENANCE
m
The CDs
3
(£_
• Never write on the printed side of a CD.
3»'
• Do not attach any stickers to the CD.
3"
• Keep the shiny surface of the disc clean.
Use a soft, lint-free cloth, and always wipe
the disc in a straight line from centre to
edge.
• Never use cleaning agents for
conventional records.
• Detergents or abrasive cleaning agents
should not be used either.
The changer
• A chamois leather, slightly moistened with water, is
sufficient for cleaning the changer.
• Do not use cleaning agents containing alcohol, spirits,
ammonia or abrasives.
RECYCLING
Please observe the local regulations regarding the disposal of
packing materials, exhausted batteries and old equipment.
1. All unnecessary packaging material has been omitted. We
have done our utmost to make the packaging easily
separable into three single materials:
- cardboard (box)
- expandable polystyrene (buffer)
- polyethylene (bags, protective foam sheet)
2. Your set consists of materials which can be recycled if dis
assembled by a company that specializes in that area.
3. Do not dispose of exhausted batteries with your household
waste.
4. Note: Switching off the standby mode overnight will save
energy.
TECHNICAL DATA
Typical Audio Performance
Frequency range;..................................................2 Hz - 20 kHz
Amplitude linearity:
Dynamic range:................................................>100dB(1 kHz)
Signal-to-noise ratio:........................................>100 dB (1 kHz)
Channel separation:.........................................>100 dB (1 kHz)
Total harmonic distortion:
D/A conversion; Bitstream conversion (256 x oversampling,
1 bit), in differential mode
Audio output level:
Impedance PHONES socket (CDC 926 only): 8 -1000 ohms
Power supply
Main voltage and frequency:
see the type plate on the rear of the changer
Power consumption:
Safety requirements;..............................................UL and CSA
Cabinet
Material/finish: ...metal and polystyrene with decorative trim
Dimensions (w x h x d);
..............................17“x 4 >/8"x 14 e/8'7435 X 106 X 380 mm)
Weight:
.................................................
Specifications are subject to change without notice.
_______________________________
...............................
...................................
..........................................................
.......................................................
0,2 dB (20 Hz - 20 kHz)
- 90 dB (1 kHz)
15.44 lbs (7 kg) approx.
2
<10 W
16
Page 17

TROUBLESHOOTING @)
If a fault occurs, run through the points listed below before taking your changer for repair. If the fault remains, try to clear it by
switching the changer off and on again. If this also fails to help, consult your dealer or an Authorized Philips Cervice Center.
Under no circumstances shouid you repair the changer yourseif, as this wiii invaiidate the warranty!
SYMPTOM
POSSIBLE CAUSE
REMEDY
G>
C
LU
- Playback does not start or
interruption of playback occurs.
- Sound skips (at the same part). - The current CD is dirty.
- The current CD skips tracks. - The CD is damaged or dirty.
- Playback does not start from the
first track (of the current CD).
- No sound or bad sound.
- The current CD has been loaded
upside down.
- No CD inserted.
- The current CD is badly scratched or
dirty.
- Moisture condensation on the lens.
- PRG (program) or SHUFFLE
activated.
- Loose or wrong connections.
- Strong magnetic fields near the CD
changer.
• Reload the CD, label side up.
• Insert the CDs, label side up.
• Clean the CD with a soft, lint-free
cloth.
• Leave the CD changer in a warm
environment until the moisture
evaporates.
• Clean the CD with a soft, lint-free
cloth.
• Replace or clean the CD.
• Switch off SHUFFLE or clear
program.
• Check connections.
• Find another place for the unit or
change connections.
- No sound or bad sound on
headphones (CDC 926 oniy).
~ Volume is too low. - Sound level has been adjusted too
- Remote control does not function
(CDC 926 oniy).
- Remote control commands are not
properly received (CDC 926 oniy).
- Level control set to - position.
- Headphones plug is dirty.
low with the -VOLUME + keys on
the remote control (CDC 926 oniy).
- Batteries are empty.
- The distance between remote
control and CD changer is larger
than 10 metres.
• Set level control.
• Clean plug.
• Adjust sound level.
• Replace the batteries.
• Use remote control receiver EM
2200/2201.
• Reduce the distance between
remote control and CD changer.
17
Page 18

(Q
LIMITED WARRANTY
Philips Audio Systems
m
3
* For purchases outside the U.S.A. and Canada, see applicable warranty from country of purchase.
• One (1) Year Carry-In Labor Warranty
One (1) Year Carry-In Service Parts Warranty
Replacement Parts and Service Labor:
For one (1) year from the date of purchase an Authorized
Service Center v\/ill replace any part found defective and will
repair any product defect without charge to you for parts or
labor.
Replacement parts installed during the warranty period are
warranted only for the balance of the original warranty.
Who is protected? ... Where?
This warranty is extended to the original retail purchaser for
products purchased and used in the U.S.A., Puerto Rico, the
Virgin Islands and Canada. If you move within these areas an
Authorized Service Center in your area will honor this warranty
for the remainder of the original warranty period.
What the Purchaser Must Do:
Before delivering your unit for service, check your operating
instruction booklet. A slight adjustment of the customer
controls discussed in your instruction booklet may save you a
service call.
Warranty Exclusions - Your Warranty Does Not Cover:
Labor charges for installation or set up, adjustment of
customer or preference controls and installation or repair of
audio antenna systems outside the unit.
Product repair and/or part replacement because of misuse,
accident, unauthorized repair or other cause not within the
control of Philips Consumer Electronics Company.
Reception problems caused by signal conditions or antenna
systems outside the unit.
A unit purchased, used or serviced outside the U.S.A., Puerto
Rico, the Virgin Islands and Canada, or used for commercial or
institutional purposes (included but not limited to products
used for rental purposes).
Incidental or consequential damages resulting from the
product or use of the product. Some states do not allow the
exclusion of incidental or consequential damages, so the
above exclusion may not apply to you.
IMPORTANT REMINDER:
Please fill out and mail your Warranty Registration Card
promptly. It will be easier for us to notify you if it should ever
be required.
For product purchased in the U.S.A., Puerto Rico, or the
Virgin Islands
How To Get Warranty Service:
To obtain warranty service you must deliver your unit, with
evidence of the purchase date, to an Authorized Service
Center (see enclosed listing) for repair if service is required
during the warranty period. When repair is completed you
must pick up the unit at the Service Center.
In the U.S.A., Puerto Rico or the Virgin Islands, all implied
warranties including implied warranties of merchantability and
fitness for a particular purpose, are limited in duration to the
duration of this express warranty. Some states do not allow
limitations on how long an implied warranty lasts, so the
above limitation may not apply to you.
This warranty gives you specific legal rights, and you may
have other rights which vary from state to state.
Philips Service Company - ^ (615) 475-8869
401 East Old Andrew Johnson Highway
Jefferson City, Tennessee, USA 37760
Please write in your Model and Serial numbers below. The numbers are located on your unit. Keep this manual nearby for easy
reference.
For product purchased in Canada
How To Get Warranty Service:
To obtain warranty service, the product must be delivered
(carried-in) to a Philips Consumer Service Branch (see
enclosed listing). Philips Self-Servicing Dealer or Authorized
Service Depot.
These warranties are given in lieu of all other warranties. No
other guarantees or warranties are expressed or implied,
including any implied warranties of merchantability or fitness
for purpose. Philips shall not be liable under any
circumstances for any direct, indirect, special, incidental or
consequential damages, howsoever incurred, even if notified
of the possibility of same.
All that's required to validate your original factory warranty is
to present your bill of sale as proof of purchase.
Philips Electronics Ltd.
601 Milner Avenue
Scarborough, Ontario, Canada M1B 1M8
O (416)292-5161
Model No. Serial No.
EL4575-E001 92/4
18
Page 19

Page 20

CDC 916/926
310411521441
1В7136Т001ЯС Text RR 0594/1
 Loading...