

Page 1
CONSUMER ELECTRONICS
PHILIPS
fFJ
(NL)
( I )
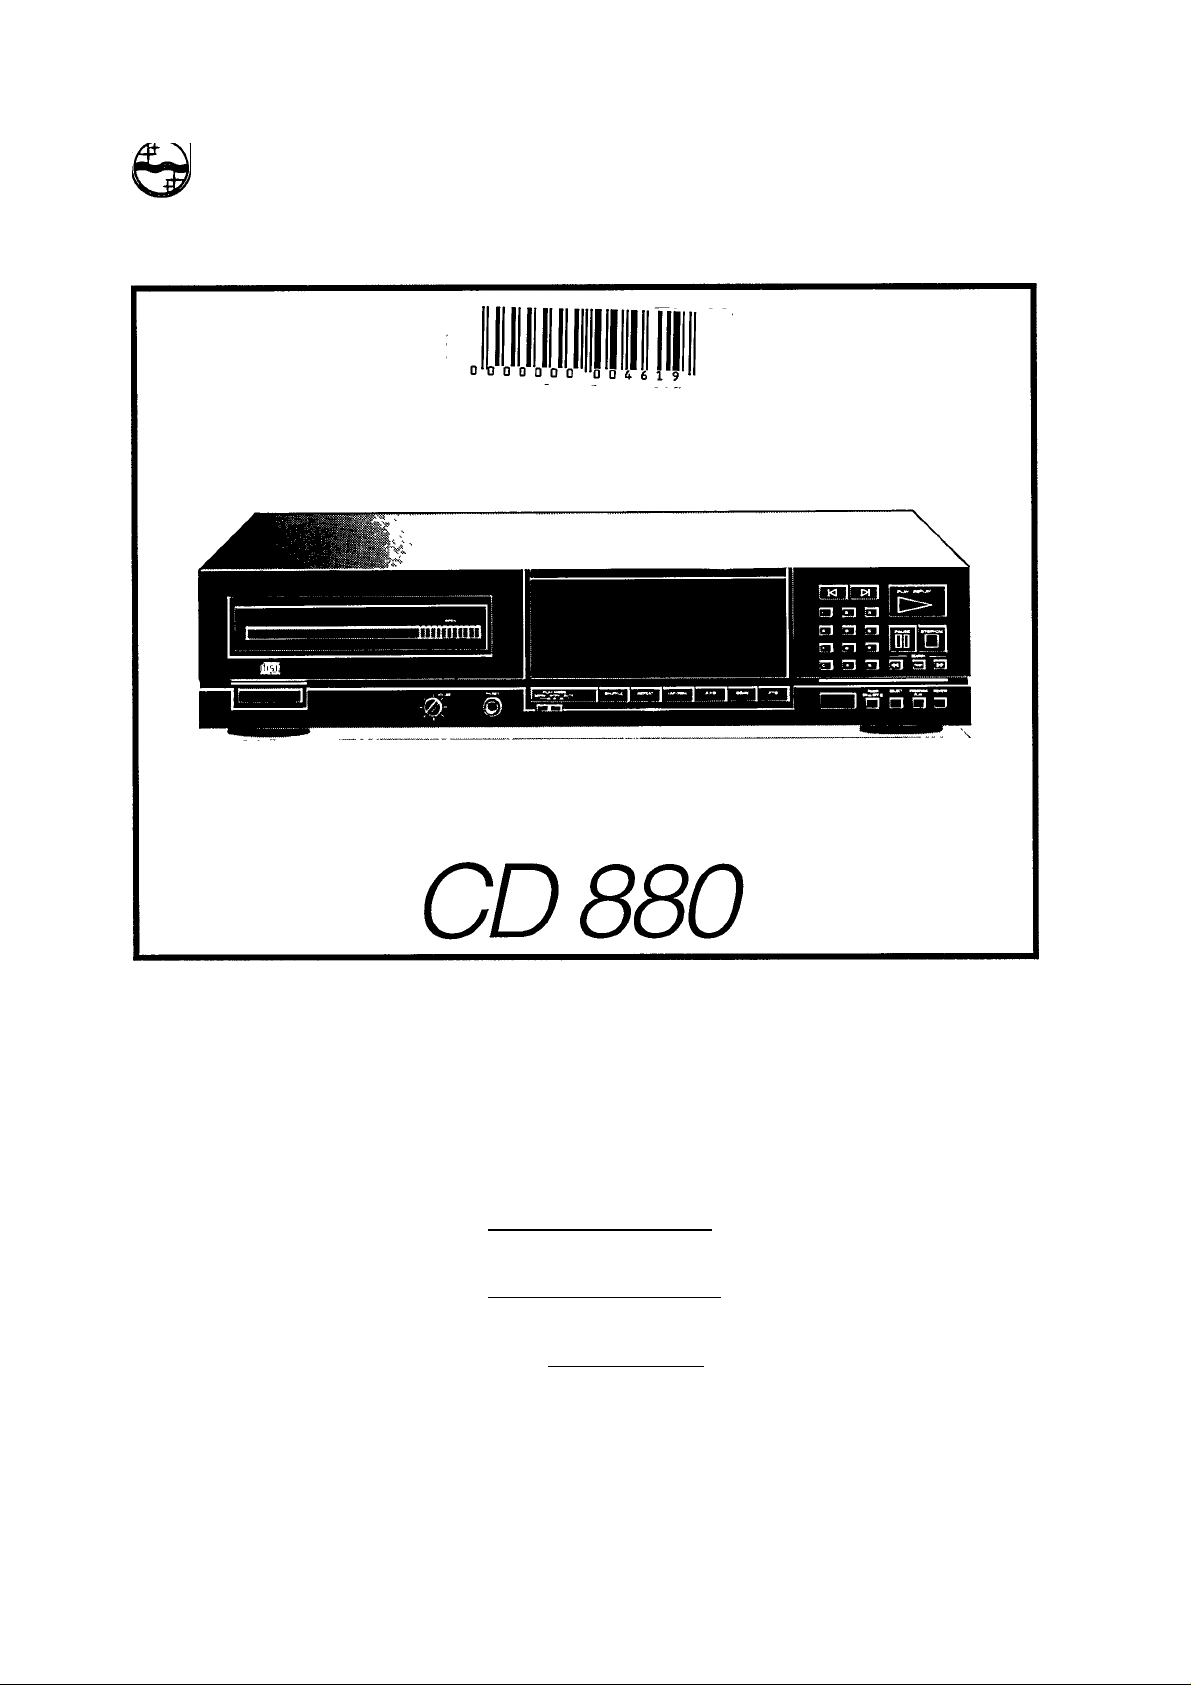
Compact Disc Player
Lecteur ’Compact Disc’
Compact-Disc-Spieler
Compact Disc-Speler
Lettore Compact Disc
Page 2

English
Figures
page 1
page 50
Français
Figures
9
Deutsch
Abbildungen
Nederlands
Figuren
Italiano
Figure
page 10
page 50
Seite 20
Seite 50
pagina 30
pagina 50
pagina 39
pagina 50
Page 3

English
CONTENTS
2. SUMMARY OF CONTROLS ETC.
Open the flap at the back of this booklet to see the labelled
illustrations referred to in the text.
1. Introduction
2. Summary of controls etc.
3. Precautions
4. Installation
5. Connections
6. Using the player
-A. Playing a complete disc
- B. Special features during play
- C. Possible ways of starting play
- D. Programming
- E. FTS (Favourite Track Selection)
- F. Other possibilities
7. Additional information
-A. Listening with headphones
- B. Using the remote control handset
- C. Replacing batteries in the remote control handset
- D. Using a timer
- E. Maintenance
8. Technical data
9. Before calling the repairman
1. INTRODUCTION
Welcome to the new sound experience of Compact Disc digital
audio.
The Compact Disc player
This Compact Disc player not only offers excellent sound quality,
ease of use and extensive display facilities, it also has a number
of unique features, such as rapid access to any point on a disc
(’Direct Track Access’) and the possibility of direct programming
(’Direct Program’).
In addition, the tracks on the disc or in a program can be played
in random order. This player also has various repeat functions
and has the facility for connecting a timer.
Favourite Track Selection (FTS) allows you to store yourfavourite
selection of music for each of your discs in the player’s
permanent memory. When playing a disc you can then, if you
wish, listen to your previously chosen selection forthat particular
disc.
When making recordings of your Compact Discs, it is possible to
automatically insert 3-second pauses between tracks. This is
useful if your cassette player has track-seeking facilities.
Furthermore, this player is fully prepared forfuture developments
in digital signal processing and CD-I and has both wired
(electrical) and optical digital outputs.
The Compact Disc
Each separate piece of music on a compact disc is called a
TRACK. Some new discs, mostly of classical music, also have
INDEX numbers which show divisions within tracks. The track
and index numbers for a disc are listed, together with the titles,
on the card in the disc holder.
All Compact Discs are made so that they contain track and time
information as well as the music; this is called the table of
contents. The player shows all this information on the display so
you can immediately see which track is being played and either
the elapsed or remaining time for that track or the remaining
playing time of the disc or program. The number of tracks and
their playing times are also recorded in the table of contents on
the compact disc. This information is read by the player at
start-up.
Front of player (Fig. la)
1 Disc tray on which the OPEN button is situated; the tray closes
when the front is pressed briefly.
2 Display: gives information about the number of tracks on the
disc, the playing time, the state of play at any given moment
and about the special functions of the player, it also indicates
when no disc has been inserted or when you make a mistake
in operating the player.
3 CLEAR button: for cancelling mistakes when compiling a
program, for deleting an item from a program or for erasing
a favourite selection.
4 1-0 digit buttons: for moving on to a particular position on the
disc or for compiling a program.
5 M TRACK W buttons: for selecting a previous or a later track,
both before and during play and when programming.
6 STORE button: for storing details when compiling a program.
7 PLAY/REPLAY button: for starting play (PLAY) and returning
to the beginning of a track (REPLAY).
8 PAUSE button: for holding play at the start of a track or
passage, or interrupting play.
9 STOP/CM button: for stopping play; press twice to erase a
program from the temporary memory (CM = Clear Memory).
10 a SEARCH ►► buttons: for fast forwards or backwards
search for a particular passage. When used in conjunction
with FAST, the search speed is increased and the sound
switched off.
11 ON/OFF button: for switching the player on and off. The blue
lights above the button and on the right-hand side serve as
on/off indicators.
12 VOLUME control: for adjusting the volume when listening with
headphones.
13 PHONES socket: for connecting headphones.
14 PLAY MODE switch with three positions: NORM, COPY and
AUTO.
15 SHUFFLE button: for playing the tracks on a disc or in a
program in random order.
16 REPEAT button: for repeating a disc or program.
17 LAP/REM button: for selecting which time information you
want to appear on the display: ’REM TOTAL’ - the total
remaining playing time (’REM’= remaining), ’REM TRACK’ the remaining playing time of the current track, or ’TRACK
LAP’ - the elapsed playing time of the current track (’LAP’ =
elapsed). The TIME button on the remote control handset has
the same function.
18 A > B button: for setting the start and stop point of a
continuous play loop.
19 SCAN button: for automatically playing the beginning of each
track on the disc.
20 FTS button: for activating the Favourite Track Selection
circuit.
21 IR receiver: for receiving infrared signals from the remote
control handset.
22 TIMER ON/OFF: for making the player automatically begin
playing when a timer is used. If there is an FTS program of the
disc in the memory then this will be played.
23 SELECT button: for selecting the SELECT setting to enter
data when searching or programming.
24 PROGRAM PLAY button: permits direct selection and play
(PLAY) or direct programming (PROGRAM) of tracks.
25 REVIEW button: for reviewing and checking a program. The
contents of the program are displayed one by one.
This booklet explains how to install, use and program your
Compact Disc player. Read it carefully and you will soon get used
to the player and all its possibilities.
Page 4

Note: Most of the controls also appear on the remote control
handset (Fig. 1b). The two functions below can only be operated
using the remote control handset:
26 l< INDEX button: for returning to a previous index number
during play.
INDEX W button: for moving on to a later index number during
play.
27 — VOLUME + buttons: for adjusting the level of the signal
sent out from the ANALOGUE OUT VAR sockets. When the
player is switched off and then switched back or again, the last
selected volume level will still be set.
Display (Fig. 2)
The display lights up when the player is switched on.
- ’OUTPUT LEVEL’: indicates the level of the signal sent out from
the ANALOGUE OUT VAR sockets.
- ’PAUSE’ lights up when play is temporarily stopped.
- ’DISC’ flashes immediately after loading a disc.
- ’ERROR’ lights up briefly if you make a mistake when operating
or programming.
- ’DISC’ and ’ERROR’ both light up briefly if the disc is loaded
upside down or if the disc is missing or damaged.
- ’PROGRAM’ lights up when a program is stored in the player
memory and whenever it is played.
-’A->B’ lights up whenever a passage is played without
interruption from start point A to stop point B. ’A-^B’ flashes until
the stop point is set.
- ’FTS’ lights up when a program from the permanent memory of
the player is played. ’FTS’ flashes briefly when a disc has been
stored in the permanent memory. ’FTS’ flashes after the R'S
button has been pressed.
- ’REPEAT’ lights up when a disc or program is repeated.
- ’SCAN’ lights up after you have pressed the SCAN button so
that the player plays the beginning of each track on the disc.
- ’REVIEW’ lights up when you review a program.
- ’SHUFFLE’ lights up when the tracks on the disc or in a program
are played in random order.
- ’TRACK’: The number shows the total number of tracks on the
disc, or the track which is being played or selected at that
moment.
- ’INDEX’: The number only changes if a track contains different
index numbers.
- ’MIN’ and ’SEC’: The numbers indicate in minutes and seconds
the remaining playing time of a disc, a program or track, the
elapsed playing time of a track or a selected time position. When
in the STOP mode, the total playing time of the disc is shown.
-Under ’TIME’ you can see what is being shown, the total
remaining playing time (’REM TOTAL’ lights up), the elapsed
playing time of a track (’TRACK LAP’ lights up) or the remaining
playing time of a track (’REM TRACK’ lights up).
- ’PLAY’ lights up together with ’MODE’ when the player is set to
the direct play mode.
- ’PROG’ lights up together with ’MODE’ when the player is set
to the direct programming mode.
- ’1-20’ track number indicator lights up as soon as the table of
contents of the player has been traced. As many of these
numbers as there are tracks on the disc remain alight. The
progression of play can be followed as the track numbers go out
one by one.
- ’-1-20’ lights up if there are more than 20 tracks on the disc.
- ’(((O’ next to ’IR’ lights up when the IR receiver receives signals
from the remote control.
Rear of player (Fig. 3a)
a OPTICAL: output for digital signal processing via an optical
cable.
b DIGITAL OUT ON/OFF: for switching off the DIGITAL OUT
sockets in case they disturb the signal from the analogue
sockets.
c ELECTRICAL: output for digital signal processing or future
applications such as CD-I.
d ANALOGUE OUT FIX: these analogue outputs produce a
uniform signal.
e ANALOGUE OUT VAR: these analogue outputs produce a
variable signal, the strength of which is determined by the
— VOLUME -F buttons on the remote control handset.
f SYSTEM REMOTE CONTROL IN/OUT: connection for ex
ternal signal receiver for the remote control or for the remote
control system of a HIFi system.
g Connection for the mains lead.
h FUSE (fuse holder): contains the main fuse for the player. If this
should become defective, a new fuse of the same type must be
used.
3. PRECAUTIONS
- CAec/f that your mains supply voltage is the same as that given
on the type plate on the rear of the player. If not, contact your
dealer.
Certain versions of this player are equipped with a voltage
selector on the rear panel. If you need to change the setting from
220/240 V to 110/120 V, you must at the same time replace the
200 mA fuse in FUSE holder with a 400 mA type.
- Wever place the player directly on top of an amplifier which may
produce considerable heat.
- Always stand the player horizontally on a flat, firm base. Allow
space around it for ventilation.
- Never place the player in a hot sunny position.
- Never allow the player to get damp.
- Keep the player free from dust as far as possible.
- Never attempt to repair the player yourself. This will make the
guarantee void.
- Do not place audio or video cassettes on top of the player
because of the magnetic fields created by the transformer in the
player.
- U.K. only: If you have to fit a mains plug, refer to 7F - 'Fitting a
mains plug’.
4. INSTALLATION
The following are supplied with your Compact Disc player:
- mains lead
- optical connecting lead with ’Tos-Link’ plugs
- analogue connecting lead with two cinch plugs at each end
- remote control handset
- batteries for remote control handset.
Do not forget to remove these from the box.
Remove all packing material from the player and the accessories.
1. Remove the two red transit clamps. These are situated on the
underside of the player (Fig. 4). Turn them in an anti-clockwise
direction and withdraw them from the player.
Always store the two transit clamps in a safe place.
Always refit them before transporting the player.
2. Position the player as required, bearing in mind the precau
tions given above.
3. Lift back the cover at the rear of the remote control handset
and insert the batteries as indicated in the battery compartment
(Fig. 5). Then close the cover again.
Page 5

5, CONNECTIONS
6. USING THE PLAYER
This Compact Disc player can be connected in various ways.
With the exception of OPTICAL, all connection sockets have a
gold coating in order to minimize the contact resistance between
sockets and leads. To maintain the quality of these connections
we recommend that you use the connection ieads supplied, the
plugs of which also have a gold coating.
Connection via the OPTICAL socket
This output supplies a digital signal via an optical path; for this
reason it can only be connected to a Digital Analog Converter, an
amplifier with an optical digital input or a digitai sound processor.
For this the optical lead is used.
1. Remove the protective caps from the piugs (fig. 3b).
2. Pull out the protective piug from the OPTiCAL socket of the
piayer (fig. 3b).
Note; Store the protective caps in a safe place. If the lead is
disconnected, these caps must be refitted. The same appiies to
the protective piug; this serves to keep the input free from dust
when there is no plug in it, e.g. during transportation.
3. Connect one end of the lead to the OPTICAL socket on the
Compact Disc player.
4. Connect the other end to the optical input of the D/A converter
or of another piece of equipment.
Press in the piugs untii you hear a click.
Important: Ensure that there are no foids in the opticai iead
because this will hinder the conduction of light.
Connection via the ELECTRICAL socket
This output also supplies a digitai signal and can therefore only
be connected to an inputwhich is suitabie forthis signal. Use here
a lead with one cinch plug on either end.
1, Connect one end of the iead to the ELECTRiCAL socket on the
player.
2. Connect the other end to the digital input of a D/A converter
or other piece of equipment.
Important; Never connect the DIGITAL OUT ELECTRICAL
socket to a non-digital input of an amplifier, such as AUX, CD,
TAPE, or PHONO. This can damage the amplifier and the
loudspeakers.
Connection via the ANALOGUE OUT FIX sockets to the am
plifier
Here you use the lead which has two cinch plugs on either end.
1. Push both plugs on one end (white or L=left channel, red or
R = right channel) into the ANALOGUE OUT FIX sockets on the
player.
2. Push the plugs on the other end of the lead into the
corresponding sockets of the CD or AUX input on your amplifier
(or pre-amplifier, tuner-amplifier etc). If this is already in use, you
can also use the TUNER or TAPE IN input, but under no
circumstances should you use the PHONO input. This is not
suitable for a Compact Disc player.
Connection via the ANALOGUE OUT VAR sockets to the
amplifier
These sockets supply a variable signal, the strength of which is
determined by the - VOLUME -l- buttons on the remote control
handset.
After the player has been switched off and then back on again,
the last selected volume level will automatically remain set.
Connection takes place in the same way as via
ANALOGUE OUT FIX.
Connection to the mains supply
1. Press the plug of the mains lead supplied into the terminal
socket.
2. Push the plug Into the wall socket.
Your Compact Disc player is now ready for use.
The following items are described in this section:
A. Playing a complete disc
B. Special features during play
C. Possible ways of starting play
D. Programming
E. FTS (Favourite Track Selection)
F. Other possibilities
- When using this Compact Disc player, various indications in the
display explain what is happening. These are given below.
- A description is also given of what could go wrong and what you
should then do.
- The names used in the text to refer to the buttons are the same
as those used on the player.
6A Playing a complete disc
1. Press ON/OFF.
-The display and the on/off indicators light up.
If the display does not light up;
Is the mains lead connected properly at both ends?
Is power available at the mains socket?
2. Press OPEN.
- The disc tray opens.
- ’DISC’ lights up.
3. With your hand open and thumb and fingers extended, take the
disc out of its holder, holding it by the edges and fit it, label side
up, into the cradle in the disc tray (Fig. 6-7).
4. Close the disc tray by pressing gently on the front side.
- ’DISC’ flashes on the display.
-The disc spins for a moment and then stops.
- ’DISC’ goes out.
- The total number of tracks and total playing time of the disc are
shown on the display.
if ’DISC ERROR’ appears briefly on the display:
Has the disc been inserted correctly?
Is the disc dirty or damaged in any way? (See Section 7E - Maintenance)
5. Press PLAY/REPLAY.
- The disc starts to spin and play begins.
-The track number indicator shows how many tracks there are
on the disc. Each time atrack has been played, the number of that
track goes out.
-The numbers above ’TRACK’ and ’INDEX’ always indicate
which track and index number are being played at that moment,
starting with track 1, index 1.
- ’TRACK LAP’ appears on the display.
-The elapsed playing time of each track is shown above ’MIN’
and ’SEC’.
You can go directly from step 3 to step 5.
If no sound (or distorted sound) is heard:
Is the disc dirty or damaged in anyway? (See Section 7E - Maintenance)
Is the correct source selected on the amplifier?
Is the volume control on the amplifier still set to zero?
Is the Compact Disc player connected to your amplifier correctly? (See
Section 5 - Connections)
Is the player positioned horizontally?
If play stops or if a set pause of 3 seconds is inserted between tracks:
Is the PLAY MODE switch on NORM?
6. Press LAP/REM (or TIME on the remote control handset)
whenever you want to know the remaining time of the track.
- ’REM TRACK’ then appears on the display.
-The remaining playing time of the track is shown above ’MIN’
and ’SEC’.
7. Press LAP/REM again (or TIME on the remote control
handset) if you wish to know the remaining playing time of the
entire disc.
- ’REM TOTAL’ appears on the display. Above ’MIN’ and ’SEC’
you will see the total remaining playing time.
-When the last track has been played, the player will stop
automatically. The display again shows the total number of tracks
and the total playing time of the disc.
Page 6

8. Press OPEN.
-The disc tray opens.
-The information disappears from the display.
-The entire track number indicator lights up.
9. Take the disc from the disc tray.
10. Close the disc tray.
- ’DISC’ appears briefly on the display, indicating there is no disc
in the disc tray.
11. Press ON/OFF.
-The display and the on/off indicators go out.
- The player is now switched off.
6B Special features during play
Moving back to a previous index number
Press M INDEX on the remote control handset.
- Play stops for a moment, then restarts at the beginning of the
previous index number.
If the current track has no earlier index number:
- ’ERROR’ appears briefly on the display.
- Play starts again from the first index number of the current track.
You can move back to an index number which is closer to the
beginning of the track by quickly and repeatedly pressing
M INDEX.
If you want to move back to an index number in an earlier track,
you must first select the required track number using M TRACK
and then the required index number using INDEX >I.
Short interruption of play
1. Press PAUSE.
- ’PAUSE’ appears on the display.
-The music stops but the disc continues to spin.
PLAY/REPLAY, SEARCH, FAST, SEARCH ►►, M TRACK and
TRACK W may be used during pause to move to any particular
location.
2. Press PAUSE again to restart play from where it was
interrupted.
Stopping play
Press STOP/CM.
-The disc stops spinning.
-The display again shows the total number of tracks and total
playing time.
Returning to the beginning of the current track
Press PLAY/REPLAY.
- Play stops for a moment, then restarts at the beginning of the
track.
Moving to the next track (or any later track)
Key in the desired track number using the 1-0 digit buttons.
You can also repeatedly press TRACK t>l until the desired number
appears on the display.
- The music stops, ’TRACK’ flashes briefly on the display and a
moment later the following track starts playing.
If there is no following track on the disc:
- ’ERROR’ appears briefly on the display.
- Play continues with the current track.
Moving back to a previous track
Key in the desired track number using the 1-0 digit buttons.
You can also repeatedly press M TRACK until the desired number
appears on the display.
- The music stops, ’TRACK’ flashes briefly on the display and a
moment later the following track starts playing.
If there is no previous track on the disc:
- ’ERROR’ appears briefly on the display.
- Play continues with the first track.
Moving to the next (or any iater) index number
Press INDEX W on the remote control handset. /-
- Play stops for a moment, then restarts at the beginning of the
next index number (of the current track).
If the current track has no further index number:
- ’ERROR’ appears briefly on the display.
- Play starts again from the first index number of the current track.
You can move forw'ard to an index number which is further
towards the end of the track by quickly and repeatedly pressing
INDEX W.
If you want to move forward to an index number in a later track,
you must first select the required track number using TRACK W
and then the required index number using INDEX W.
Searching for a passage
1. Press SEARCH ►► for a forward search.
2. Press ^ SEARCH for a reverse search.
Keep the button pressed until you reach the required piece of
music. At this searching speed the sound remains audible. This
makes it possible to find the exact passage.
If you try searching past either end of the disc:
- ’ERROR’ appears briefly on the display.
If you reach the end of the disc and release SEARCH play starts
several seconds before the end.
Rapid search for a passage
1. Press FAST.
- ’FASt’ appears on the display above ’MIN’ and ’SEC’.
2. Press SEARCH ►► or SEARCH within 1 second.
Hold the SEARCH button pressed down; if you release the button
for a moment, search will recommence at the slowest speed.
At this searching speed no sound is audible. This enables you to
move quickly towards the passage you are looking for.
Repeating a disc
1. Press REPEAT.
- ’REPEAT’ appears on the display.
-The whole disc is repeated over and over.
2. To stop repeat, press REPEAT again.
- ’REPEAT’ goes out.
- Play stops at the end of the disc.
Playing the tracks on the disc in a random order
Press SHUFFLE.
- ’SHUFFLE’ appears on the display.
- If the tray is open, it will now close.
-A ’P’appears above ’MIN’; above ’SEC’ a two-second pause
is counted down, whilst and indicator can be seen moving above
it. This is repeated each time before a new track or program
section is played.
- The tracks on the disc are now played in an entirely random
order, not the order in which they appear on the disc. If there is
a program in the memory, this will be played in a random order,
not corresponding to the order in the program.
If you also press REPEAT, the disc will be played repeatedly and
each time all tracks will be played in a different random order.
During playback in random order, you can use the M TRACK >1
buttons.
Setting up a continuous play loop
Whilst a disc or program is playing you can set up a continuous
play loop.
1. During play, press A > B at the required start point.
- ’A-^B’ starts flashing on the display.
-The start point of the play loop is set.
2. Press A > B again at the required stop point.
- ’A->-B’ lights up continuously.
-The stop point of the play loop is set.
-The laser pick-up immediately moves back to point A and
everything between this point and point B will now be played. The
laser pick-up then returns to point A and so on.
Page 7

To quickly find the required start and stop points, you can use the
SEARCH ►► and TRACK W buttons.
3. To break out ofthe continuous piayioop, press’A > B’forthe
third time.
- 'A-^B' goes out.
-The continuous piay ioop is broken, piay continues as normal.
6C Possible ways of starting play
Starting with a particular track (Go to track...)
1. Place the disc on the disc tray.
2. Close the disc tray.
3. Enter the desired track number using the 1-0 digit buttons.
- The selected track number is shown on the display.
- TRACK’ flashes on the display for 1 second and then remains
lit up.
Two-digit numbers must be keyed in within this one second.
If you make a mistake you can press CLEAR within this time and
then key in the correct number.
- Play starts at the beginning of the selected track.
If you select a track which does not exist:
- ’ERROR’ appears briefly on the display.
Starting at a particular index number (Go to track.../index...)
Note: Make sure that no more than 7 seconds elapse between
pressing buttons or the display will again show the total number
of tracks and the total playing time.
If you make a mistake, provided that you have not yet pressed
PLAY/REPLAY, you can press CLEAR at any time and start
again.
1. Enter the required track number.
2. Press SELECT.
- ’INDEX’ flashes on the display.
3. Enter the required index number.^
-The selected index number is shown on the display.
4. Press PLAY/REPLAY.
- Play starts at the beginning of the selected index number.
If you select an Index number which does not exist:
- ’ERROR' appears briefly on the display.
- Play starts at the beginning of the selected track.
You can also start with a particular index number by calling up the
required track and index number on the display by using the
TRACK W and INDEX W buttons and by then pressing PLAY/
REPLAY.
Starting at a selected time within a track (Go to track.../time...)
Note: Make sure that no more than 7 seconds elapse between
pressing buttons or the display will again show the total number
of tracks and the total playing time.
If you make a mistake, provided that you have not yet pressed
PLAY/REPLAY, you can press CLEAR at any time and start
again.
1. Enter the required track number.
2. Press SELECT twice.
- ’MIN’ flashes on the display.
3. Enter the minutes of the desired start time.
4. Press SELECT once more.
- ’SEC’ flashes on the display.
5. Enter the seconds of the desired start time.
6. Press PLAY/REPLAY.
- Play starts at the selected time.
If you select a time position which does not exist:
- ’ERROR’ appears briefly on the display.
- Play starts at the beginning of the selected track.
Scanning a disc
1. Press SCAN.
- ’SCAN’ appears on the display.
- If the tray is open, it will now close.
-The first 10 seconds of each track are played in turn.
- The track number indicates the track being played.
- At the end of the scan, the disc stops and the display again
shows the total number of tracks and total playing time of the
disc.
During the scan, it is possible to use the 1-0 digit buttons and the
M TRACK W buttons.
2. When the player reaches a track which you wish to hear in full,
press SCAN again.
- ’SCAN’ goes out.
- The remainder of the disc is now played, starting at the current
point.
6D Programming
You can set up and store a program to determine what parts of
a disc are to be played and in what order. Your program can
contain any combination of:
-track numbers
-index numbers
- start and stop times within a track.
Such a combination is referred to as a ’program block’.
However, you are limited to 20 ’memory blocks’. Each track
number takes up 1 block, each index number takes up 2 blocks
and each time position takes up 5 blocks. If you try to use more
than 20 blocks, ’ERROR’ appears on the display.
Before setting up a program, insert the disc and close the disc
tray. It is also possible to set up a program before inserting the
disc and closing the tray. If you then press PLAY/REPLAY the tray
will close and the program will be played.
Note: If you make a mistake, provided that you have not yet
pressed STORE, you can press CLEAR at any time and start
again.
Storing a track number
1. First press PROGRAM PLAY.
- ’PROGRAM’ appears on the display next to ’MODE’. The player
is now in the direct programming mode; you can now enter track
numbers directly into a program.
2. Enter the required track number, using the 1-0 digit buttons.
- ’TRACK’ flashes briefly on the display.
-The track number is shown on the track number indicator and
briefly on the display.
- ’PROGRAM’ appears on the display.
- The track number is now stored in the player memory.
3. Repeat step 2 for each track number you want to store.
- The number of tracks and playing time of your program are
shown on the display.
If ’ERROR’ appears on the display:
Does the selected track number exist?
Are all 20 memory blocks already full?
You can also begin with step 2 and then press STORE to store
the track number.
Storing an index number
Note: Make sure that no more than 7 seconds elapse between
pressing buttons or the display will again show the total number
of tracks and the total playing time.
1. Enter the required track number.
2. Press SELECT.
- ’INDEX’ flashes on the display.
3. Enter the required index number.
-The index number is shown on the display.
4. Press STORE.
- ’PROGRAM’ appears on the display.
-The index number is now stored.
Page 8

When storing an index number, since the playing time of index
numbers is not inciuded in the tabie of contents recorded on the
Compact Disc, this time wiil not be added to the totai piaying time
of the stored program. ’
-------
’ then appears on the dispiay.
5. Repeat steps 1-4 for each index number you want to store.
You can also store a particular index number by calling up the
required track and index number on the display using the
TRACK l>l and INDEX t>I buttons and then pressing STORE.
Storing a specific start and stop time within a track
Note: Make sure that no more than 7 seconds elapse between
pressing buttons or the display will again show the total numbe-
of tracks and the total playing time.
1. Enter the required track number.
2. Press SELECT twice.
- 'MIN’ flashes on the display.
3. Enter the minutes of the start time.
4. Press SELECT again.
- ’SEC’ flashes on the display.
5. Enter the seconds of the start time.
6. Press STORE.
-The start time is now stored.
- ’MIN’ flashes again.
7. Enter the minutes of the stop time.
8. Press SELECT once more.
- ’SEC’ flashes again.
9. Enter the seconds of the stop time.
10. Press STORE.
- The stop time is now stored.
11. Repeat steps 1-10 for all start and stop times you want to
store.
If ’ERROR’ appears on the display:
You have entered a time which does not exist or too high a stop time
You can also store only a start time. To do so, follow steps 1-6
and then press STORE again.
- The rest of the track will then be stored as part of the program.
Storing track numbers using SCAN
This method of programming can only be used if you want to
store track numbers in the same order as they appear on the
disc.
1. Press SCAN.
- ’SCAN’ appears on the display.
- If the tray is open, it will now close.
-The first 10 seconds of each track are played in turn.
- Above ’TRACK’ and on the track number indicator the trade
being played is always shown.
2. Whenever a track which you want to store is played, press
STORE.
- ’PROGRAM’ appears on the display.
-The track number is now stored.
- The player immediately starts to scan the next track.
3. Repeat step 2 for each track you want to program.
Reviewing a program
1. Press REVIEW.
- ’REVIEW’ appears on the display.
- The content of the program is shown on the display in the order
in which it is stored.
If ’ERROR’ appears on the display:
The memory is empty and nothing is stored.
2. Press REVIEW again to interrupt reviewing.
- ’REVIEW’ will then go out.
You can review a program prior to or during programmed play.
During reviewing you can use the M TRACK >1 buttons to move to
a particular program block.
Erasing a track number, index number or start and stop times
from a program
1. Press REVIEW.
- Each item of the program is displayed in the sequence in which
it was stored.
2. Press CLEAR as soon as the number which you want to erase
appears.
-The number you have erased disappears from the display.
Programmed play
Press PLAY/REPLAY.
- Play begins with the first item of your program.
All other buttons (except SCAN) can also be used but now the
tracks will be played in the order in the program instead of the
order on the disc (except when using SHUFFLE). Fast forward or
backward search can only be used in the program block v/hich
is playing.
During play it is possible to add to the program.
Returning to the start of a program block
Press PLAY/REPLAY.
- Play stops for a moment, then restarts at the beginning of that
program block.
To erase the program
Press STOP/CM twice, or if the disc has already stopped, just
once.
You can also press OPEN straight away.
- ’PROGRAM’ goes out.
- ’PLAY MODE’ lights up.
The program has now been erased.
6E Favourite Track Selection (FTS)
If a program contains your favourite selection from a disc, which
you always want to play, you can keep it by transferring it to the
FTS memory. Such a selection can then be called up again at any
desired time.
Note: When using FTS, the FTS button must alv/ays be used in
conjunction with other buttons. Do not allow more than 5 se
conds to elapse before pressing the next button, otherwise the
player assumes you have changed your mind, if this happens,
’FTS’ stops flashing. Press the FTS button again to restart the
command.
Storing a program In the FTS memory
1. Set up a program as described in section 6D - Programming.
2. Press FTS.
- ’FTS’ flashes on the display.
3. Press STORE.
- ’FTS’ stops flashing.
-The display shows ’FtS’ and the ranking number of this
program for a few moments.
-The program is stored in the FTS memory under this ranking
number and can be recalled whenever you insert this disc.
If ’ERROR’ appears on the display:
The FTS memory is full orthe ranking number is higher than 195. You must
erase some old FTS programs to make room to store this new program.
No program has been set up.
4. Stick the FTS sticker with the ranking number on the spine of
the disc holder.
FTS programmed play
1. Press FTS.
- ’FTS’ flashes on the display.
2. Press PLAY/REPLAY.
- ’FTS’ now stays lit up.
- Your favourite selection for this disc is now recalled and played
automatically.
Page 9

If 'ERROR' appears on the display:
There Is no I^S program stored in the memory for this disc.
You can revert to normal play by pressing STOP/CM twice.
The instructions for playing a program also apply to the functions
of the player during playback of an FTS program.
The FTS memory
The FTS memory will accept 1775 entries. Eight of these are used
for the identification of each disc that you store in the FTS
memory. In addition, 1 entry is used for each track in the program.
The number of discs that you can store is thus dependent on the
number of tracks per disc that you programme. If, for example,
you programme an average of 5 tracks per disc, there is enough
room for 109 discs - 1775:(8+5).
Each disc stored in the FTS memory is allocated a 3-digit ranking
number, which is automatically shown on the display as ’001’,
’002’ etc. There are 195 ranking numbers available. A sheet with
self-adhesive numbered stickers is supplied so that you can
easily distinguish the discs with an FTS program. The sheet also
contains a quantity of un-numbered stickers so that you can
correct any mistakes.
A disc always retains the originally allocated ranking number,
even when you erase the original selection by storing a new one.
A ranking number will only be cancelled if you erase the disc
completely from the FTS memory. This ranking number can then
be allocated to another disc.
By erasing selections, space is made free in the memory. This
also happens if you make a new selection for an already stored
disc; this new selection is in fact stored in a different location from
the old selection.
Where possible the space which is thus made available will be
used for storing new selections, unless the size of the new
selection does not correspond to the resulting free space. As
soon as the memory becomes full, it is reorganized, i.e. the
remaining free space is made available.
This reorganization is indicated by accelerated flashing of the
FTS indication, and can take up to 10 seconds. The player should
definitely not be switched off during this accelerated flashing,
otherwise the entire FTS memory will be erased when it is
switched on again I
Note: Storing a disc in the FTS memory does not mean that you
can only play the selected tracks. You can just as easily play the
complete disc, or compile another, temporary program. The brief
flashing of the ’FTS’ indication after the disc is loaded reminds
you, however, that this disc has an FTS program. If you then wish
to play that program, press PLAY/REPLAY while ’FTS’ is still
flashing.
To erase an FTS program for one single disc
1. Press FTS.
- ’FTS’ flashes on the display.
2. Press TRACK >l or M TRACK repeatedly until the ranking
number to be erased appears on the display behind ’FtS’.
3. Then press CLEAR immediately.
- 'FtS CLr' will briefly appear on the display.
The selection in question has now been erased from the memory.
If you do not know the ranking number of a selection, you must
first Insert the disc.
1. First press FTS, then REVIEW.
- ’FfS’and the required ranking number appear on the display.
2. Then follow steps 2 and 3.
Erasing all FTS programs at once.
Note: Only use this to erase the FTS programs for af/your discs,
for example If you wish to start anew.
1. Press FTS and then REVIEW oroneoftheM TRACK N buttons.
- 'FfS'appears on the display together with a ranking number.
2. Whilst this is still being shown on the display, immediately
press REPEAT and CLEAR simultaneously.
- 'FfS ALL'will appear briefly on the display.
-The FTS memory has now been erased completely.
6F Other possibilities
PLAY MODE switch
This switch can be set to one of three positions:
-NORM: for normal use - each track is played one after the
other.
- COPY: a 3-second pause is inserted after each track before the
next track is played.
- AUTO: stops play at the end of a track until you press PAUSE.
Recording from your Compact Disc piayer*
You can of course make recordings on a cassette recorder, tape
recorder or DAT recorder from your Compact Disc player. You
can either connect the recorder directly to one of the analogue
sockets of the Compact Disc player or via your Hi-Fi system.
When recording, you may find it useful to set the PLAY MODE
switch to COPY or AUTO.
- COPY is useful if your cassette recorder has track-seeking
facilities where the gaps between tracks are detected.
- AUTO enables you to determine the size of the gaps between
tracks yourself. At a later stage, you can record material from
another source in this gap.
* Note for users In U.K. - Recording of material may require
consent. See Copyright Act 1956 and The Performers’ Protection
Acts 1958 to 1972.
7. ADDITIONAL INFORMATION
7A Listening with headphones
With headphones connected to the PHONES socket, you can
listen to discs without having to use an amplifier.
The headphones must have a 6.3 mm jack plug and an
impedance between 8 and 2000 ohms.
You adjust the sound level with the VOLUME control.
7B Using the remote control handset
When the player is switched on and the disc is in place, virtually
all functions can also be operated using the remote control
handset.
When the player receives a remote control signal, the IR
indication ’(((O’ lights up.
If, because of the siting of the player, it is difficult for the beam
from the remote control handset to reach the player directly, or
if the distance between the player and the place where you want
to use the handset is too great, you can connect a separate
receiver to one of the SYSTEM REMOTE CONTROL IN/OUT
sockets. This receiver is available as an accessory under type
number EM 2200.
If the player is part of a HiFi system which as its own remote
control system, whether this is built-in or separately connected,
you can also operate it using this system by connecting the
SYSTEM REMOTE CONTROL IN/OUT sockets of the player to
those of the HiFi system.
Although the signals of the remote control handset can also be
received via reflection, you are recommended to aim the remote
control handset directly at the IR reciever.
7C Replacing batteries in the remote control handset
The remote control handset runs on three R03, UM4 or AAA
1.5 volt batteries. The life of a set of batteries is normally about
one year.
Remove the batteries as soon as they are flat or if you are not
going to use the remote control handset for any length of time,
in order to prevent damage by possible battery leakage.
Page 10

7D Using a timer
By using a timer you can make the player automatically start
playing a disc at a particular time. To do this, your player must be
switched on.
Press TIMER ON OFF.
When the timer switches on the power supply to the player again,
the following takes place:
- ’PAUSE’ appears on the display.
- Above ’MIN’ a ’P’appears and above ’SEC’ a 10 second pause
is counted down.
- Play begins.
If there is an FTS program for this disc in the memory, this will be
played when the power supply is switched on.
7E Maintenance
Discs
Although Compact Discs are covered with a protective layer, it
is still advisable to treat them carefully.
As long as you always pick up discs by the edge, and put them
back in their holders immediately after use, cleaning will not
normally be necessary.
However, should fingerprints, dust or dirt appear, you can wipe
them off with a soft, lint-free cloth. Wipe the disc in a straight line
from centre to edge.
Never use detergent, abrasive cleaning agents or cleaning
agents used for conventional records!
The player
The player mechanism is fitted with self-lubricating bearings, and
must not be oiled or greased.
Only use a damp cloth to clean the outside of the player. Do not
use cleaning agents containing alcohol, spirits, ammonia or
abrasives.
The disc tray should be kept free of dust.
8. TECHNICAL DATA
Typical audio performance
- Number of channels: 2
- Frequency range: 2-20 000 Hz
-Amplitude linearity: ±0.01 dB (20-20 000 Hz)
-Phase linearity: ±0.2° (20-20 000 Hz)
- Dynamic range: > 96 dB (20-20 000 Hz)
-Signal-to-noise ratio: > 103 dB (20-20 000 Hz)
-Channel separation: > 103dB (1 kHz)
-Total harmonic distortion: < 0.002% (1 kHz)
- Wow and flutter: quartz crystal precision
-D/A conversion: quadruple oversampling (176.4 kHz) \vith
digital filter and two 16-bit D/A converters
-Error correction system: Cross Interleaved Reed Solomon
Code (CIRC)
Outputs
-ELECTRICAL: 0.5 Vpp
- ANALOGUE OUT FIX: 2
-ANALOGUE OUT VAR: 2 64 steps of 1 dB
-Impedance PHONES: 8-2000 ohms.
Optical readout system (laser pick-up)
- Laser: semi-conductor AIGaAs
-Wavelength: 780 nm
Signal format
-Sampling frequency: 44.1 kHz
-Quantization: 16 bit linear/channel
Power supply
- Mains voltage: see type plate at rear of player
- Mains frequencies: 50 and 60 Hz
- Power consumption: 30 W approx.
-Safety requirements: lEC
Cabinet, general
-Material/finish: metal and polystyrene with decorative trim
-Dimensions (wxhxd): 420x 104 x 363mm
-Weight: 10.3 kg approx.
Disc
- Diameter: 120 mm
-Thickness: 1.2 mm
- Direction of rotation (seen from reading side): anti-clockwise
-Scanning velocity: 1.2-1.4m/s
- Rotation speed: 500-200 rpm
- Playing time (theoretical): 74 min (stereo)
-Track pitch: 1.6 pm
-Material: plastic
The right is reserved to change data if necessary
This Compact Disc piayer compiies with the radio interference
requirements as iaid down in EC (European Community)
regulations.
Page 11

8. BEFORE CALLING THE REPAIRMAN
If you suspect that your player is faulty, first consult this checkiist.
You may find you have overlooked something quite simpie.
Under no circumstances shouid you open up the piayer; this wiil
invalidate all rights under the guarantee.
1. After pressing the ON/OFF switch, the display does not light.
-The button is not pressed in far enough.
- One of the plugs of the mains lead is not connected or is not
making contact.
-There is no supply at the mains socket. Plug in another
electrical appliance and check if that works.
6. The sound is poor or distorted, or you can hear only one
channel.
- The player is not connected to the CD, AUX, TUNER or TAPE IN
input of the amplifier but to the PHONO input.
-One of the plugs of the connection cable is either not
connected or not properly connected.
-The headphone jack is not plugged in properly.
- The disc is dirty or badly scratched. See if cleaning the disc or
using another, clean or scratch-free disc improves the situation.
-There is an unwanted object in the disc tray.
-The amplifier or the loudspeakers connected to it are not
working properly. Check with another sound source to see if this
is the case.
2. After pressing OPEN, the disc tray does not slide out.
-The transit ciamps have not been removed.
-The player is not switched on. Check that the display and the
on/off Indicators light up.
-The microprocessor has not received the command properly.
Check If the disc tray opens if you switch the player off and on
again, and then press CPEN once more.
- The disc tray drive is not functioning. You cannot rectify this
yourself.
3. After pressing the front of the tray, PLAY/REPLAY, SCAN or
SHUFFLE, the disc tray does not slide in.
-The rriains supply has been interrupted. Check if the display is
lit.
-The microprocessor has not received the command correctly.
Check if the disc tray closes if you switch the player off and on
again.
- The disc tray drive is not functioning. You cannot rectify this
yourself. If a disc is in position, remove it, then push the disc tray
In carefully to close it.
4. After closing the disc tray, ’DISC’ and ’ERROR’ light briefly.
-The disc is not inserted with the label upwards or there is no
disc In the disc tray.
- The disc Is dirty. See if cleaning the disc, or using another, clean
disc, clears the fault.
-The disc is defective. Try another disc.
- There Is an unwanted object in the disc tray.
5. The disc is being played (indicated by the track number orthe
elapsed time indication moving on regularly) but there is no
sound.
-The amplifier is not switched on.
- The position of the amplifier source selector switch does not
correspond with the input to which the player is connected.
-The amplifier or the loudspeakers connected to it are not
working. Check with another sound source to see if this is the
case.
-The microprocessor has not received the command correctly.
Check if switching the player off and on again, and then restarting
clears the fault.
- The headphone jack is not plugged in, or the VOLUME control
Is still set to minimum.
- The connection between the player and the amplifier is broken.
- The input to which the player is connected is defective. Check
this by connecting the player to another input socket.
7. Programming is not working properly.
-You must set the player to the direct programming mode by
pressing PROGRAM/PLAY.
-The disc is dirty or badly scratched. See if cleaning the disc
helps or try programming another disc.
-The microprocessor has not processed the commands
properly. Erase the program by pressing STOP/CM and store it
again; restart play and check if the fault has cleared.
-All 20memory blocks are already occupied and you have
missed ’ERROR’ which indicates this.
-The FTS memory is full.
8. The following faults can be caused by the same circum
stances:
Playback does not begin with the first track on the disc or of the
program, but with another.
Playback stops before the end of the disc or the program has
been reached.
-The PLAY MODE switch is not in the NORM position.
-The microprocessor has not processed the command cor
rectly. Check if switching the player off and on again, and then
restarting clears the fault.
- The disc is dirty or badly scratched. See if cleaning the disc or
using another, clean or scratch-free disc clears the fault.
-The disc is defective. Try another disc.
- There is an unwanted object in the disc tray.
9. The player does not react to commands from the remote
control handset.
-The distance to the player was too great, or you did not aim
accurately enough in the direction of the player.
- The batteries are weak or flat.
Page 12

Page 13

3104106 91151
Printed in Belgium
1187/1
 Loading...