

Page 1
PHILIPS
CONSUMER ELECTRONICS
PHILIPS
6 8 6
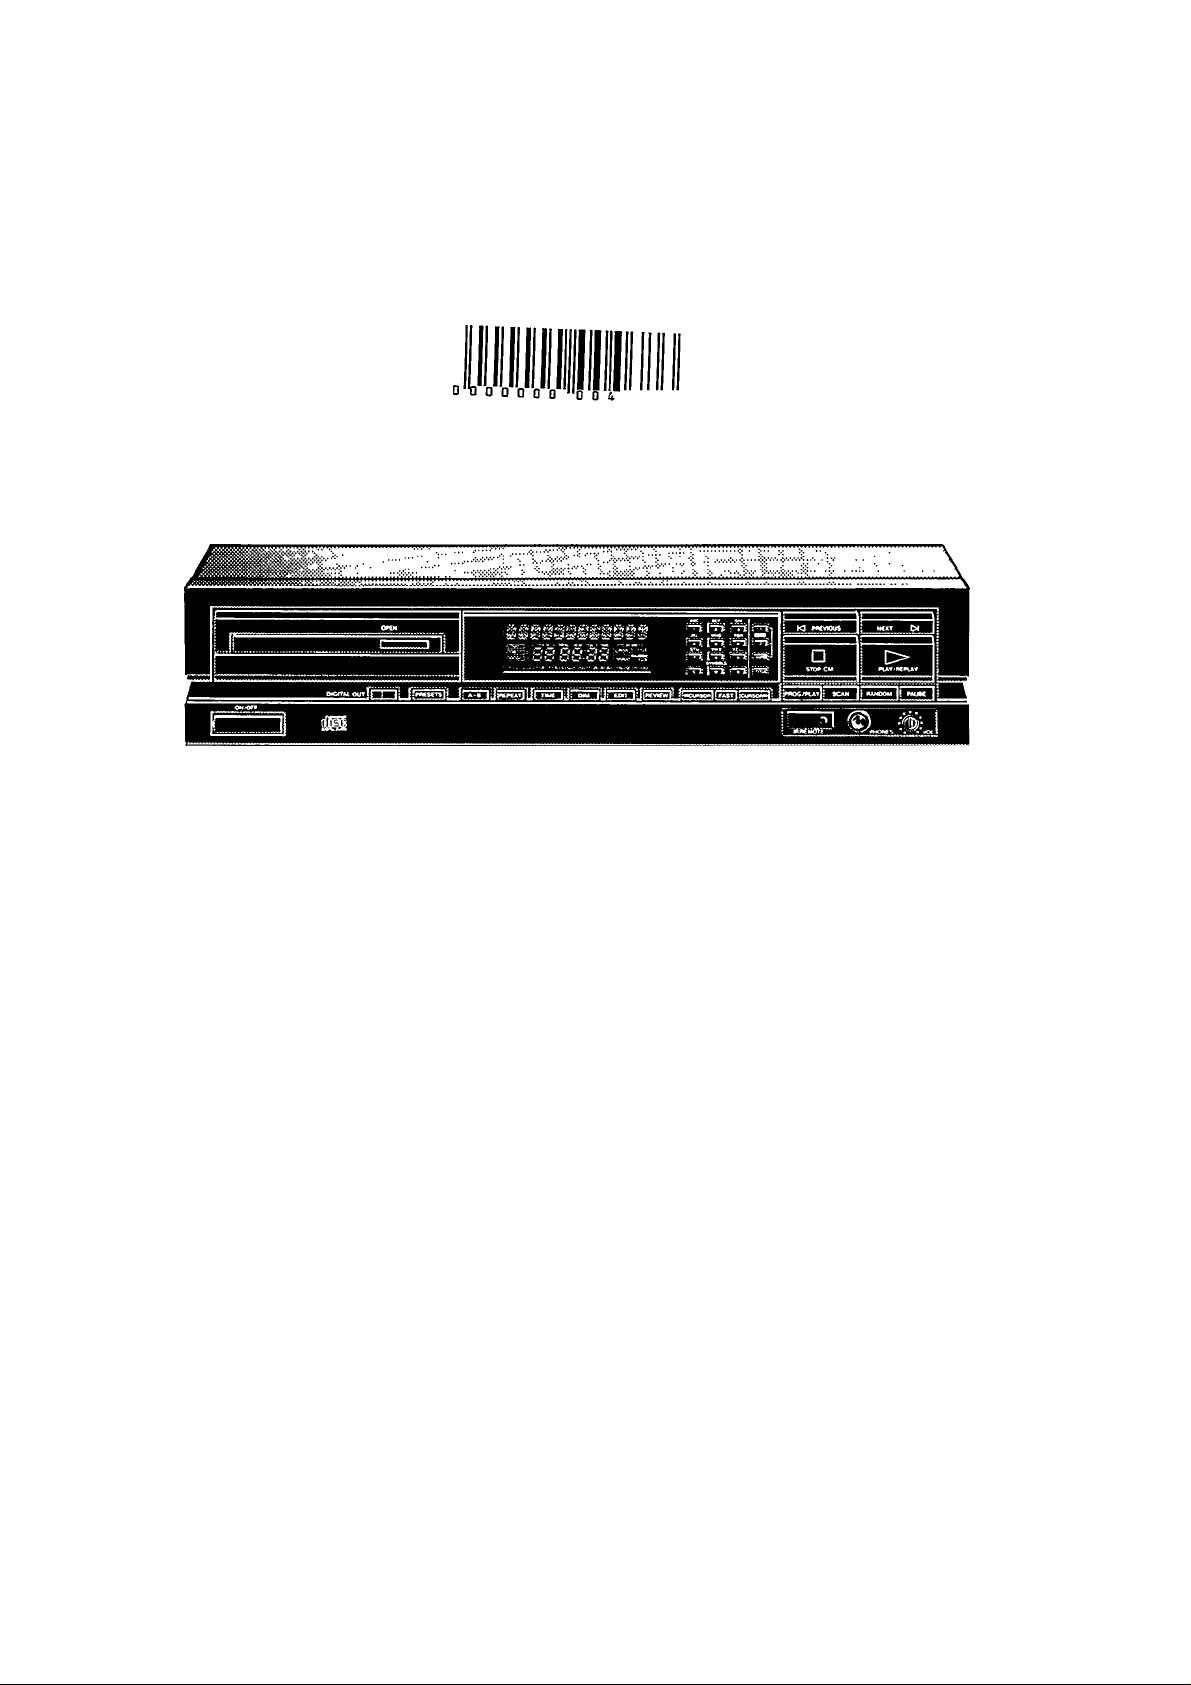
CD 840
Compact Disc Player
Page 2

WARNING
TO REDUCE THE RISK OF
FIRE OR ELECTRIC SHOCK,
DO NOT EXPOSE THIS APPLIANCE
TO RAIN OR MOISTURE.
CAUTION
RISK OF ELECTRIC SHOCK |
AI
DO NOT OPEN
CAUTION
CONTENTS
SAFETY INSTRUCTIONS
INSTALLATION
OPERATION
PROGRAMMING
FAVORITE TRACK SELECTION
OTHER POSSIBILITIES
ADDITIONAL INFORMATION
TECHNICAL DATA
SYMPTOMS AND THEIR LIKELY CAUSES
ILLUSTRATIONS
LIMITED WARRANTY
Page
1
2
3-6
6-7
7
8-9
9
9
9
10
11
TO REDUCE THE RISK OF ELECTRIC SHOCK,
DO NOT REMOVE COVER {OR BACK).
NO USER-SERVICEABLE PARTS INSIDE.
REFER SERVICING
TO QUALIFIED SERVICE PERSONNEL
This symbol Is Intended to alert the user
of the presence of uninsulated
"dangerous voltage" within the product's
A
enclosure, that may be of sufficient
magnitude to constitute a risk of electric
shock to persons.
This symbol is intended to alert the user
of the presence of important operating
and maintenance (servicing) instructions
in the literature accompanying the
appliance.
The Model and Serial Number of your Compact Disc player will be
found on the back of the instrument.
Piease record these numbers in the space provided below:
Model Number:
Serial Number:
CAUTION
USE OF CONTROLS OR ADJUSTMENTS OR PER
FORMANCE OF PROCEDURES OTHER THAN
THOSE SPECIFIED HEREIN MAY RESULT IN HA
ZARDOUS RADIATION EXPOSURE.
Page 3
SAFETY INSTRUCTIONS
Read before operating equipment
This product was designed and manufactured to meet strict quality and safety standards. There are. however,
some installation and operation precautions which you should be particularly aware of.
1. Read Instructions - All the safety and operating
instructions should be read before the appliance
is operated.
2. Retain Instructions - The safety and operating
instructions should be retained for future refer
ence.
3. Heed Warnings - All warnings on the appliance
and in the operating instructions should be
adhered to.
4. Follow Instructions - All operating and use
instructions should be followed.
5. Water and Moisture - The appliance should not
be used nearwater-forexample, nearabathtub,
washbowl, kitchen sink, laundry tub, in a wet
basement or near a swimming pool, etc.
6. Carts and Stands - The appliance should be
usedonlywithacartor stand that is recommend
ed by the manufacturer.
An appliance and cart combination
should be moved with care. Quick
stops, excessive force, and uneven
surfaces may cause the appliance and
cart combination to overturn.
7. Wali or Ceiiing Mounting - The appliance shouid
be mounted to a wali or ceiiing only as recom
mended by the manufacturer.
8. Ventilation - The appliance should be situated so
that its location or position does not interfere with
its proper ventilation. For example, the appliance
should not be situated on a bed, sofa, rug, or
similar surface that may block the ventilation
openings: or, placed in a built-in installation, such
as a bookcase or cabinet that may impede the
flow of air through the ventilation openings.
9. Heat - The appliance should be situated away
from heat sources such as radiators, heat
registers, stoves, or other appliances (including
amplifiers) that produce heat.
10. Power Sources - The appliance should be
connected to a power supply only of the type
described in the operating instructions or as
marked on the appliance.
11. Grounding or Polarization - The precautions that
should be taken so that the grounding or
polarization means of an appliance is not
defeated.
12. Power-Cord Protection - Power supply cords
should be routed so that they are not likely to be
walked on or pinched by items placed upon or
against them, paying particular attention to cords
and plugs, convenience receptacles, and the
point where they exit from the appliance.
13. Cleaning - The appliance should be cleaned only
as recommended by the manufacturer.
14. Power Lines - An outdoor antenna should be
located away from power lines.
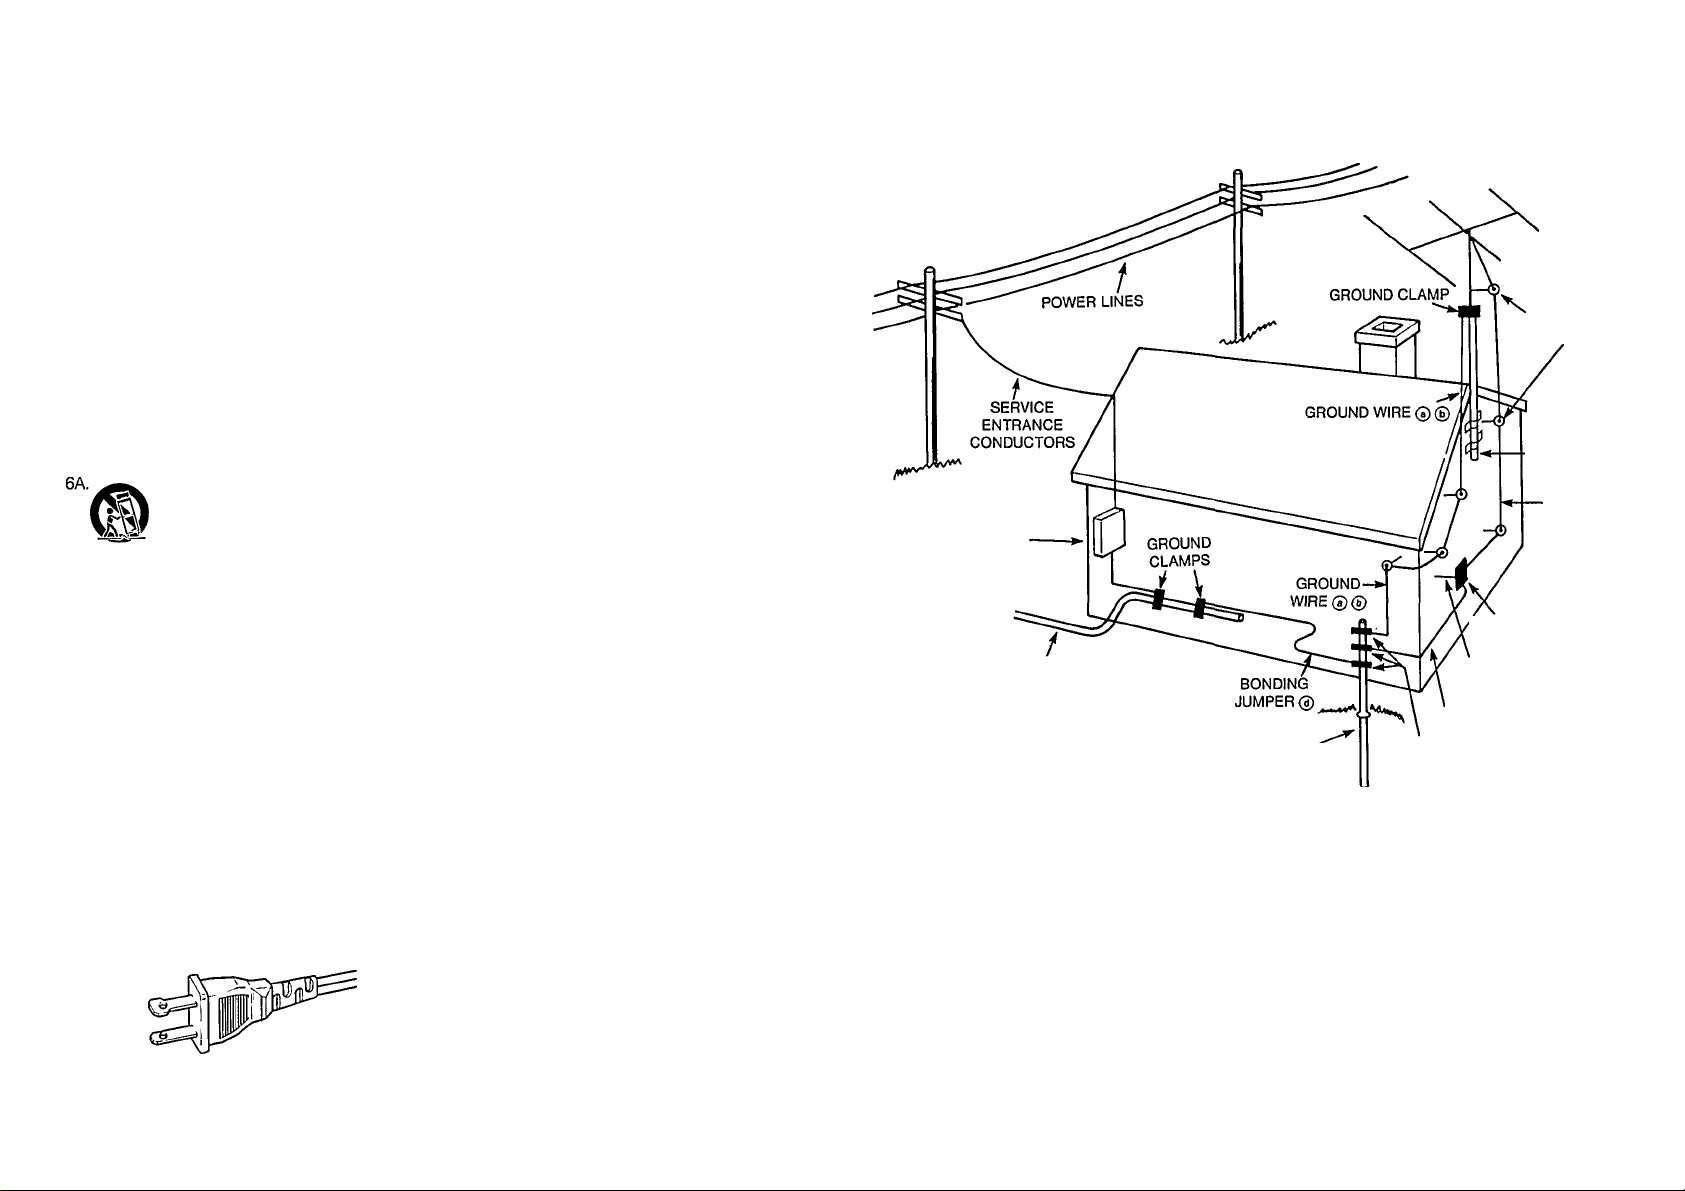
15. Outdoor Antenna Grounding - If an outside
antenna is connected to the receiver, be sure the
antenna system is grounded so as to provide
some protection against voltage surges and built
up static charges.
Section 810 of the National Electric Code,
ANSI/NFPA No, 70-1984, provides information
with respect to proper grounding of the mast and
supporting structure, grounding of the lead-in
wire to an antenna discharge unit, size of
grounding connectors, location of antenna-di
scharge unit, connection to grounding elec
trodes, and requirements for the grounding
electrode. See Rg. A
16. Nonuse Periods - The power cord of the appli
ance should be unplugged from the outlet when
left unused for a long period of time.
17. Object and Liquid Entry - Care should be taken
so that objects do not fall and liquids are not
spilled into the enclosure through openings.
18. Damage Requiring Service - The appliance
should be serviced by qualified service person
nel when:
A. The power-supply cord or the plug has been
damaged; or
B. Objects have fallen, or liquid has spilled into
the appliance; or
C. The appliance has been exposed to rain; or
□.The appliance does not appear to operate
normally or exhibits a marked change in
performance; or
E.The appliance has been dropped, or the
enclosure damaged.
19. Servicing -The user should not attempt to service
the appliance beyond that described in the
operating instructions. All other servicing should
be referred to qualified sen/ice personnel.
EXAMPLE OF ANTENNA GROUNDING
ACCORDING TO THE NATIONAL ELECTRIC CODE INSTRUCTIONS
CONTAINED IN ARTICLE 810 - ’RADIO AND TELEVISION EQUIPMENT’
SERVICE ENTRANCE
EQUIPMENT
POWER SERVICE
GROUNDING ELECTRODE SYSTEM
(e.g. interior metal water pipe)
OPTIONAL ANTENNA GROUNDING ELECTRODE
DRIVEN 8 ft (2.44 m) INTO THE EARTH
IF REQUIRED BY LOCAL CODES.
SEE NEC SECTION 810-21 (f).
© Use No. 10 AWG (5.3 mm^) copper.
No. 8 AWG (8.4 mm^) aluminum.
No. 17 AWG (1.0 mm2) copper-clad steel or
bronze wire, or larger, ground wire.
© Seoure the antenna lead-in and ground wires to
the house with stand-off insuiators spaced from
4-6 feet (1.22-1.83 m) apart.
FIG.A
STAND-OFF
INSULATORS ®
MAST
ANTENNA
LEAD-IN WIRE
ANTENNA DISCHARGE
UNIT©
TO EXTERNAL ANTENNA
TERMINALS OF PRODUCT
GROUND WIRE®®
GROUND CLAMPS
© Mount the antenna discharge unit as cióse as
possibie to where the lead-in wire enters the
house.
@ Use jumper wire not smalier than No. 6 AWG
(13.3 mm2) copper, or the equivaient, when a
separate antenna-grounding electrode is used.
See NEC Section 810-21 (J).
AC POLARIZED PLUG
NOTE TO THE CATV SYSTEM INSTALLER:
This reminder is provided to oail the CATV system installer's attention to Article 820-22 of the NEC that provides
guidelines for proper grounding and, in particular, specifies that the cable ground shall be connected to the
grounding system of the building, as close to the point of cable entry as practical.
Page 4

Operating Instructions
INTRODUCTION
The Compact Disc system is a major step forward in audio
technoiogy. By empioying the most sophisticated digitai and
opticai technologies, Compact Disc not only produces the ul
timate in sound reproduction, it also offers unprecedented ease
of operation, with rapid access to every track on the disc and the
possibility of programming._________________________________________________
INSTALLATION
PLACING THE COMPACT DISC PLAYER
Free-Standing
• Always position the player horizontally on a flat, firm surface.
• Allow a free space of at least 1V4" above the player so as not to
interfere with the cooling of the player.
In an audio rack
• The player can be placed in any desired position.
Stacked
• Place the player preferably at the bottom or at the top.
• Never position the player directly on top of a high-power
amplifier, as such an amplifier gives off a substantial amount of
heat.
CHECKING THE POWER SUPPLY
The type plate on the back of your player indicates the power
voltage for which it is set.
Important!
Certain versions of this player are equipped with a voltage
selector (f), which enables you to set the player to the correct
voltage yourself. When changing the voltage setting from 220/
240 Vto 110/127 Vor vice versa, it is also necessary to change the
fuse to one of the correct rating.
Replacing the fuse
• Using a screwdriver, remove the fuse holder (g).
• Remove the old fuse and replace with a fuse of the correct
rating (300 mA for 110/127 V; 160 mA for 220/240 V).
• Replace the fuse holder.________________________________________________
REMOVING THE TRANSIT CLAMPS (Fig. 1-2)
The two red transit clamps on the bottom of the unit lock the play
mechanism to protect it during transportation.
• Turn the player upside down.
• Turn the clamps counter-clockwise and remove them from the
player.
• Store them in the recesses provided.
Replace the clamps if you wish to transport the player. To do this,
turn the player upside down, insert the clamps in the holes
provided and rotate them clockwise until they lock in position.
INSERTING AND REPLACING THE BATTERIES IN THE REMOTE
CONTROL (Fig. 3)
• Open the battery compartment.
• Insert the two batteries according to the diagram in the
compartment.
• Replace the cover.
The life of the batteries is around one year. Remove them when
they are exhausted or when you are not intending to use the
remote control for some time.
In this way you will prevent damage to the remote control by
possible battery leakage.
For replacement only use batteries of the AAA type.
* •
__________________________
Important!
Never allow the player to stand for long periods in direct sunlight
or near a heat source._____________________________________________________
CONNECTIONS (Fig. 4)
a Socket for the power cord
b DIGITAL OUTPUT COAX: for digital signal processing or future
applications such as CD-I. This output supplies a digital signal
and can therefore only be connected to an input which is
suitable for this signal. This cord will use one cinch plug on
either end.
Important!
Never connect this jack to a non-digital input of an amplifier,
such as AUX, CD, TAPE, PHONO, etc. This can damage the
amplifier and the speakers.
c REMOTE CONTROL OUT IN: for a remote control system.
Use these jacks for connecting up the equipment when you are
incorporating the player in a PHILIPS HiFi system with com
patible RC5 remote jacks and its own remote control system,
d DIGITAL OUTPUT OPTICAL: this output supplies a digital signal
via an optical path; for this reason it can only be connected to
a Digital Analog Converter, an amplifier with an optical digital
input or a digital sound processor. For this use the optical cord
supplied.
This output is covered with a little cap which should only be
removed when the output is in use.
e ANALOGUE OUTPUT FIXED: for connection to the amplifier.
• Insert a red plug into the ’R’ jack (right channel) and the other
plug into the ’L’ jack (left channel).
• Insert the two other plugs into the corresponding jacks of the
CD or AUX input of your amplifier.
You can also use the TUNER or TAPE IN connection, but never
the PHONO input. This is not suitable for Compact Disc
reproduction.
f VOLTAGE SELECTOR: see ’Checking the power supply’.
g FUSE HOLDER: see ’Replacing the fuse’.
___________________________________
Page 5

OPERATION
EXPLANATION OF BUTTON ETC, (Fig. 5)
1 ON/OFF
> For switching on and off.
2 Disc tray on which the OPEN button is iocated; the tray cioses
when the front is pressed briefiy.
3 DISPLAY
> Informs you about the functioning of the player.
> Displays details from the disc’s track list.
See also: 'The indications on the display’.
4 C(LEAR)
> For erasing track numbers from a program.
> For erasing ’names’ and Favorite Track Seiections from the
FTS memory.
5 DIgIt/alphabet buttons
> For selecting another track during play.
> For selecting a track number to start play with.
> For selecting track numbers when compiling a program.
> For entering the recording time when making a tape recording.
> For naming discs and track numbers.
6 S(TORE)
> For storing track numbers in a program.
> For storing a program in the FTS memory.
> For storing ’names’ in the FTS memory.
> For storing personal presets.
7 FTS
■1’and ’2’
> For activating the Favorite Track Selection circuit.
INFO
> For checking the FTS memory.
8 TITLE
> For naming discs and track numbers.
> For calling up a ’name’ you have entered.
9 STOP/CM
> For stopping play (STOP).
> For erasing a program (CM = Clear Memory).
10 PREVIOUS and NEXT
> For selecting another track during play.
> For selecting a track number to start piay.
> For selecting track numbers when compiling a program.
(PREVIOUS from high to low and NEXT from low to high.)
11 PLAY/REPLAY
> For starting play (PLAY).
> For returning to the beginning of a track (REPLAY).
12 DIGITAL OUT
> For switching the DIGITAL OUT output on and off.
Only use this button if you connect the player to other digital
equipment via the DIGITAL OUT output.
When the DIGITAL OUT output has been switched on, the red
indicator to the left of the button lights up.
13 PRESETS
> Selection of the PRESETS mode for entering and storing
personal preferred settings.
14’A-B’
> For setting the starting and stopping point of a passage to be
repeated.
15 REPEAT
> For repeating a disc or a program.
16 TIME
> For selecting the time information you want to see:
- TRACK TIME: the elapsed playing time of the track being
played.
- REM TRACK TIME: the remaining playing time of the track
being played.
- TOTAL REM TIME: the remaining playing time of a disc or a
program.
17 DIM
> For adjusting the brightness of the display.
18 EDIT
> For selecting EDIT mode to enter the recording time when
making a tape recording.
19 REVIEW
> For checking a program.
20 « CURSOR and CURSOR 1»
> For fast search to a particular passage during play
(<<] CURSOR backwards and CURSOR W> forwards).
When used in conjunction with FAST, the search speed is
increased.
> For moving the cursor on the display when naming a disc or
track number.
21 PROG(RAM)/PLAY
> For direct programming (PROGRAM) or immediate selection
and playback (PLAY) of track numbers.
22IR REMOTE
> Receives the signals from the remote control.
23 SCAN
> For automatically playing the beginning of each track.
24 PHONES
> For connection of headphones.
See also: ’Listening with headphones’.
.25 RANDOM
> For playing in random order.
26VOL(UME)
> For adjusting the volume when listening with headphones.
27 PAUSE
> For interrupting play.
> For holding play at the start of a disc, track or passage.
REMOTE CONTROL
The following buttons have a different label on the remote control:
- PROG(RAM) PLAY = DIRECT PR(OGRAM)/PLAY
- STOP/CM = STOP
- PLAY/REPLAY = PLAY
- PREVIOUS = O TRACK
- NEXT = TRACK O
- « CURSOR = O SEARCH
- CURSOR 1» = SEARCH [>
- ’A-B’ = 'MB’
The remote control also has the following extra buttons:
OPEN/CLOSE
> For opening and closing the disc tray.
<] INDEX O
- For selecting another index number during play.
- For selecting an index number to start play with.
(<] from high to low and [> from low to high.)
For the best reception of the signals from the remote control you
should aim it as directly as possible at the IR REMOTE eye.
The eye lights up when it receives a signal from the remote control.
Page 6

THE INDICATIONS ON THE DISPLAY (Fig. 6)
Each Compact Disc has, along with the music, a list detailing the
numbers of the tracks, the playing time of each track and the total
playing time of the disc. The player always scans this first and
stores it in its memory in order to provide information via the
display.
PLAY
> Lights up above DIRECT when the player is put in the direct play
mode.
PROGR
> Lights up under DIRECT when the player is put in the direct
programming mode.
TRACK
Under this indication you will see:
> What track is being played.
> The number of tracks on the disc after it has stopped.
> The number of tracks in a program.
TRACK TIME
Under this indication you will see:
> The elapsed playing time of the track being played.
> The total playing time of a disc or program.
REM TRACK TIME
> Indicates the remaining playing time of the track being played.
TOTAL REM TIME
> Indicates the remaining playing time of a disc or program.
MODE
Indicates the following functions:
- FTS MEMO 1 or FTS MEMO 2
> Flashes after FTS 1 or FTS 2 has been pressed.
> Lights up when a program from the FTS memory is played.
- TITLE
> Lights up after the TITLE button has been pressed.
- RANDOM
> Lights up when the tracks on the disc are played in random
order.
- REPEAT
> Lights up when you repeat a disc or program.
- REPEAT A-B
> Lights up when a passage is repeated.
’1-20’ track number indicator
> Shows the number of tracks on the disc after the track list has
been scanned.
’ + 20’
> Lights up when there are more than 20 tracks on a disc.
READING
> Lights up when you switch the player on and when the disc’s
track list is being scanned.
8 CM DISC
> Lights up when a 8-cm disc is loaded.
12 CM DISC
> Lights up when a 12-cm disc is loaded.
PLAY
> Lights up while a disc Is playing.
GO INTO STOP
> Lights up if you try to activate afunction for which you must first
stop play.
GO INTO PLAY
> Lights up if you try to activate afunction for which you must first
start play.
ERROR
> Lights up if you make a mistake when operating the player.
PLAYING THE ENTIRE DISC (PLAY/REPLAY)
• Press ON/OFF to switch the player on.
> READING lights up, followed by INSERT DISC.
• Press OPEN or OPEN/CLOSE (on the remote control) to open
the disc tray.
> ТЯАУ ОРЕЛ/lights up, followed by INSERT DISC.
• Load a disc into the tray with the printed side facing upwards
(Fig. 7-9) and close the tray.
> TRAY CLOSE lights up, followed by READING.
> P/>\y lights up and playback starts.
You can also press PLAY/REPLAY immediately after inserting
the disc; the tray then closes automatically.
> The number indicator shows how many tracks are on the disc.
When a track has been played its number disappears.
> Under TRACK is always shown what track is being played.
> Under TRACK TIME the elapsed playing time ofthe track being
played is always shown.
> After the last track play stops.
> 8 CM DISC or 12 CM DISC lights up, followed by DISC READY.
> The display shows the number of tracks and the playing time of
the disc._____________________________________________________________
ADJUSTING THE BRIGHTNESS OFTHE DISPLAY (DIM)
• Hold DIM pressed down.
> BP/GHTA/ESS lights up.
> The brightness ofthe display will now decrease gradually from
the set (maximum) level.
> The successive steps are shown on the display (from ’8’ to ’1 ’).
• Release the button as soon as the required brightness level is
obtained.
• Press DIM again.
> The brightness will now increase up to the maximum level (’8’).
The brightness set using DIM is cancelled again if the player is
switched off.
____________________________________________________________
CALLING UP OTHER TIME INFORMATION (TIME)
• Press TIME whenever you want to know the remaining playing
time of a track.
> REM TRACK TIME lights up.
• Press TIME again if you wish to knowthe remaining playing time
of the entire disc.
> TCTAL REM TIME lights up.
• Press TIME again if you wish to return to the elapsed playing
time indication.
> TRACK TIME lights up again.
____________________________________________
GOING BACK TO THE BEGINNING OF A TRACK
(PLAY/REPLAY)
• Press PLAY/REPLAY.
> The track starts again from the beginning.
__________________________________
Page 7

SELECTING ANOTHER TRACK DURING PLAY
C1-0’, NEXTor PREVIOUS)
• Put the player in the direct play mode using PROGRAM/PLAY.
> PLAY iights up above DiRECT.
• Key in the desired number (numbers consisting of two figures
must be keyed in within 2 seconds) or press NEXT or
PREVIOUS until the number appears under TRACK.
> The music stops and a moment later the selected track begins
to play.
DISC END will light up if you press NEXT while playing the last
track.
DISCBEGINwWl light up if you press PREVIOUS while playing the
first track.
WRONG TRACK will light up if you select a non-existent number
with the ’1-0’ digit buttons.__________________________________________________
SELECTING ANOTHER INDEX NUMBER DURING PLAY
(O INDEX O)
importanti
Index numbers are not Indicated specifically on the display. If the
parts of a track have index numbers, this will be specified in the
track list in the disc holder.
• Press INDEX D or <3 INDEX until the required index number
appears under INDEX.
> The music stops and a moment later the selected index number
begins to play.
If the index number selected does not exist, play will start again at
the beginning of the current index number._____________________________________
SEARCHING FOR A PARTICULAR PASSAGE DURING PLAY
(<!<] CURSOR and CURSOR I»)
• Hold <kl CURSOR down to search backwards to the beginning.
• Hold CURSOR » down to search forwards to the end.
As soon as the button is released play restarts at once. As soon
as you reach the beginning of the first track, a ’P’appears on the
display: then, following a two-second pause, D/SCSEG/A/lights
up and play will resume there as soon as you release the button.
If you reach the end of the last track, D/SCEWD will light up. If you
then release the button, play will resume afew seconds before the
end of the disc.
At this search speed sound is audible.
________________________________________
FAST SEARCH FOR A PASSAGE
(FAST and <kl CURSOR or CURSOR I»)
• Press FAST.
> FASriights up.
• Now press <M CURSOR or CURSOR !» within 2 seconds.
• Hold the button down; if you release the button briefly, sear
ching will resume at the lowest speed.
At this search speed no sound is audible.______________________________________
SCANNING A DISC (SCAN)
• Press SCAN before or during play.
> SCANNING lights up.
> If the tray was open, it will now close.
> The first 20 seconds of each track are played in turn.
• When the player reaches a track which you wish to hear in full,
press PLAY/REPLAY.
• Press SCAN again to end the scanning.
> SCANNING then goes out and play continues as normal.
During scanning the digit buttons ’1-0’, NEXT and PREVIOUS can
be used.
BEGINNING WITH A PARTICULAR TRACK NUMBER
With the digit buttons ’1-0’
• Put the player in the direct play mode using PROGRAM/PLAY.
> PLAY lights up above DIRECT.
• Key in the required number (numbers consisting of two figures
must be keyed in within 2seconds).
> The number appears under TRACK.
> On the number indicator the selected track number and those
following it light up.
> PMYlights up and play starts from the selected track.
WRONG TRACK lights up if you select a non-existent number.
With NEXT or PREViOUS
• Press NEXT or PREVIOUS until the required number appears
underTRACK. If you wish to begin with the highest number, you
must still press PREVIOUS once.
• Press PLAY/REPLAY within 7 seconds.
> On the number indicator the selected track number and those
following it light up.
> PMYlights up and play starts from the selected track.__________________________
BEGINNING WITH A PARTICULAR INDEX NUMBER
(O INDEX [> and PLAY/REPLAY)
Important!
Before selecting an index number you must first select a track
number. If you select the track number with the digit buttons ’1-0’,
then no more than 2 seconds may elapse between the pressing
of the different buttons. If you select the track number with NEXT
or PREVIOUS, then no more than /seconds may elapse between
the pressing of the different buttons.
• Select the track number you wish to start with.
> Then press INDEX OorO INDEXuntilthedesiredindexnumber
appears on the display.
• Press PLAY/REPLAY.
> PLA/lights up and play starts from the selected index number.
If you select a non-existent index number, playback starts with the
selected track.
* •
PLAYING THE DISC IN RANDOM ORDER (RANDOM)
• Before or during play press RANDOM.
> The RANDOM indication lights up.
> If the tray was open, it will now close.
> All the tracks on the disc are now played in a sequence to be
determined by the player.
> Press RANDOM again if you wish to return to normal play.
If during play you press PREVIOUS you will return to a track which
has already been played. If you press NEXT you are selecting any
one ofthe following tracks. If you press PREVIOUS during the first
track or NEXT during the last track, ERROR will light up.
By pressing REPEAT you can repeat random-order play. The
player then always begins with the same track, but otherwise
changes the sequence every time the disc is repeated.
The digit buttons ’1-0’ cannot be used during random-order play.
If you only wish to hear the firsHlTsfeconds:
• Press FAST and then SCAN.
> FAST SCA/V Iights up.
> The first 10 seconds of each track are played in turn.
• When the player reaches a track which you wish to hear in full,
press PLAY/REPLAY.
• Press SCAN again to end the scanningr
> FAST SCAN then goes out and play continues as normal.
Page 8

BRIEFLY INTERRUPTING PLAYBACK/HOLDING PLAY AT THE
START OF A DISC, TRACK OR PASSAGE (PAUSE)
To briefly interrupt playback
• Press PAUSE.
> The PAUSE indication lights up.
> The sound stops but the disc continues to spin.
• Press PAUSE again to restart.
> The PAUSE indication now goes out.
> Play restarts at the point where it was interrupted.
Holding play at the start of a disc, track or passage
You can go to any place on the disc and hold it by pressing PAUSE
before:
- starting to play the disc;
- going back to the beginning of a track;
- selecting another track or index number ;
- searching for a particular passage;
- beginning with a particular track or index number;
- playing the disc in random order.
Press PAUSE again to start play at the chosen place.
REPEATING A PASSAGE {’A-B’)
• During play press ’A-B’ at the required starting point.
> The REPEAT A indication lights up, while ’B’ flashes.
• Press ’A-B’ again at the required stopping point.
> The ’B’ indication now lights up continuously.
> The passage between points A and B will now be replayed
continuously. .
• Press ’A-B’ again to stop repeat.
> The REPEAT A-B indication goes out and play continues as
normal.
To find the starting and stopping points quickly, you can use the
CURSOR W> button.
The repeating of a passage can also be stopped by pressing
STOP/CM, OPEN or OPEN/CLOSE.
REPEATING THE DISC (REPEAT)
• Press REPEAT before or during playback.
> The REPEAT indication lights up.
> The disc will now be repeated continuously.
• Press REPEAT again to stop repeating.
> The REPEAT indication goes out.
> The disc will play on to the end and then stop.
Repeating can also be stopped by pressing STOP/CM, OPEN or
OPEN/CLOSE.__________________________________________________________
STOPPING PLAYBACK
(STOP/CM, OPEN or OPEN/CLOSE)
• Press STOP/CM if you merely wish to stop.
> The PM Yindication goes out, the indication 8 CM DISC or 12
_________________________________________
___________________________
CM DISC lights up, followed a few moments later by DISC
READY.
> The display shows the number of tracks and the total playing
time of the disc.
• Press OPEN or OPEN/CLOSE if you wish to stop and take out
the disc.
> TRAY OPENWghXs up, followed afew moments later by INSERT
DISC.
PROGRAMMING
By programming the player you can play up to 30 tracks of a disc
in any required sequence. If you exceed the maximum of
30 tracks, ERROR lights up. Index numbers cannot be stored.
STORING A PROGRAM
Before play
• Press PROGRAM/PLAY.
> PROGR lights up under DIRECT; the player is now in the direct
programming mode. Every track number you now key in is
directly included in the program.
• Key in the first number you wish to program.
> The number appears under TRACK.
> The number lights up on the number indicator; it has now been
stored.
• Store each ofthe remainingtracknumbers required in the same
way.
> Every time you store a track number, you will see the number of
tracks under TRACK and the playing time of your program
under TRACK TIME. If the program is longer than 99 minutes
and 59 seconds, then ’—: —’ lights up. The number indicator
always shows what numbers have been stored.
During play
• Put the player in the direct programming mode using
PROGRAM/PMY.
> PROGR lights up under DIRECT.
> Every track number which you now key in is directly included in
the program.
> The number indicator always shows what numbers have been
stored.
Note!
As soon as you have entered the first number, PROGRAM PLAY
lights up and play continues with the programmed track numbers.
STORING TRACK NUMBERS USING SCAN
• Press SCAN before or during play.
> SCANNING lights up.
> If the tray is open, it will now close.
> The first 20 seconds of each track are played in turn.
• Press STORE at each track you wish to include in the program.
> The number appears on the track number indicator; it has now
been stored.
> The player immediately starts to play the first 20 seconds of the
next track.
Here too, you can first press FAST if you only want to hearthe first
10 seconds of each track.__________________________________________________
CHECKING THE PROGRAM
• Press REVIEW.
> The PROG REWEWindication lights up.
> All the numbers appear in the programmed sequence under
TRACK.
If NO PROGRAM Wghts up, this means that no track numbers have
yet been stored.
You can check a program prior to, during or after programmed
play-
__________________________________________________________________
•
ERASING A TRACK NUMBER FROM THE
PROGRAM OR THE ENTIRE PROGRAM
• Press REVIEW before or after programmed play.
> The PROG REWEWindication lights up.
> All the numbers appear in the programmed sequence under
TRACK.
• Press CLEAR as soon as the number you wish to erase
appears.
> The number disappears from the number indicator.
• Press STOP/CM if you wish to erase the entire program.
Page 9

PLAYING THE PROGRAM
• Press PLAY/REPLAY.
> PROGRAM FLAY lights up and playback starts with the first
number of the program.
All buttons can be used during programmed play. Search for a
particular passage is only possible within the track being played.
As soon as you reach the beginning of the track, BEGIN OF NR
lights up; when you reach the end the track, END OF NR lights up.
As long as the player is in the direct programming mode you can
continue to add to the program during playback. When STOP/CM
is pressed or when the program has been played, the disc stops,
but the program remains stored. The program will be erased when
you open the tray or if you press STOP/CM twice in succession
during playback.
FAVORITE TRACK SELECTIONS (FTS)
FTS PROGRAMMED PLAY
• Press FTS 1 or FTS 2.
> FTS MEMO 1 or FTS MEMO 2 starts fiashing.
• Press PLAY/REPLAY.
> FTS MEMO 1 or FTS MEMO 2 now lights up continuously.
> PFOGFAM FLA Ylights up and the chosen selection will now be
played.
If NOTIN FTS 1, NOTIN FTS 2 or NO FTS FOUND appears, no
favorite selection has been stored.
• Press STOP/CM twice if you wish to revert to normal play.
All buttons can be used while a favorite selection is being played.
Search for a passage is only possible in the track which is being
played. As soon as you reach the beginning of the track, BEGIN
OF NR lights up; when you reach the end the track, END OF NR
lights up.
As long as the player is in the direct programming mode you can
continue to add to the program during playback.
________________________________
For each disc you can store two programs in the player’s
permanent (FTS) memory.
Your Favorite Track Selections of a given disc can then be called
up and played whenever you wish.
The selections will remain stored in the FTS memory even if you
play the entire disc or compile a different program from it.
The number of discs which can be stored in the FTS memory
depends on the number of tracks in each program.
STORING A FAVORITE TRACK SELECTION
• Compile your program as described in the PROGRAMMING
section.
• Press FTS 1.
> FTS MEMO 1 starts flashing.
• Press STORE.
> STORED lights up, followed by the ranking number of this
program.
> The selection is now stored in the FTS 1 memory under this
ranking number.
______________________________
If you wish to store a further selection from the same disc:
• Press STOP/CM. (If you have stored the first program during
playback you must press STOP/CM twice.)
• Compile your program as described in the PROGRAMMING
section.
• Press FTS 2.
> FTS MEMO 2 starts flashing.
• Press STORE.
> STORED lights up, followed by the ranking number of this
program.
> The selection is now stored in the FTS 2 memoryojnder this
ranking number.
Note!
- If a selection of a particular disc had already been stored, then
it is automatically erased and the new selection is stored under
the old ranking number.
- If A/0 SPACEappears afteryou have pressed STORE, then the
FTS memory is full: you must erase one or more old FTS
programs to make room to store the new program.
- \t NO PROGRAM appears afteryou have pressed STORE, then
no program has been compiled first.
CHECKING THE FTS MEMORY
• Press INFO.
> FTS INFO lights up.
> The following information appears on the display in this order:
- The number of discs in the FTS 1 and FTS 2 memory. For
example: ’FTS1 04 DISC and ’FTS2 05 DISC.
If the FTS memory is empty, then you will see ’FTS 1 EMPTY'
and/or ’FTS 2 EMPTY’.
- The number of spaces available in the memory. For example:
’112 SPACE’.
- The number of times that the discs in the FTS 1 and FTS 2
memory have been played: FTS1 INFO, followed by, for exam
ple, ’NR 01 03 PL’, ’NR 02 05 PL’, etc.
FTS2 INFO, followed by, for example, ’NR 01 04 PL’,
’NR 02 06 PL’, etc.
- Then T/TLE/WEMOFYappears.Youarenowgiveninformation
on the ’names’ which you have given to discs and/or track
numbers. For this refer to ’NAMiNG DISCS ANI>’TRACK
NUMBERS’ under ’OTHER POSSIBILITIES’.
With NEXT you can proceed more rapidly to the next block of
information._____________________________________________________________
ERASING A FAVORITE TRACK SELECTION
• Press INFO.
> FTS/A/FO lights up.
• Press NEXT until the ranking number appears on the display:
for example ’NR 02 01 PL’.
• Hold CLEAR pressed down until DELETED lights up.
> The selection has now been erased.
If you do not know the ranking number:
• Load the disc and close the tray.
• Press FTS 1 or FTS 2.
> FTS MEMO 1 or FTS MEMO 2 starts flashing.
• Hold CLEAR pressed down until DELETED lights up.
> The selection has now been erased.
_______________________________________
ERASING THE ENTIRE FTS MEMORY
• Press FTS 1.
> FTS MEMO 1 starts flashing.
• Hold CLEAR and REPEAT pressed down.
> CLEARING ALLWghts up, followed a few moments later by ALL
CLEARED.
> The entire FTS memory has now been erased.
Page 10

OTHER POSSIBILITIES
LISTENING WITH HEADPHONES (PHONES)
• Connect headphones with a 6.3 mm jack plug and an imped
ance between 8 and 2000 ohms to the PHONES jack.
• The sound level is adjusted with the VOLUME control._________________________
PERSONAL PRESETS
NAMING DISCS AND TRACK NUMBERS (TITLE)
Using the digit/alphabet buttons you can give all discs and track
numbers a ’name’.
A ’name’ can consist of a maximum of 12 characters (letters,
digits and/or symbols). Each button has marked on it what digit
and what letters can be entered with it. With button ’9’ you can
I. With button ’0’ you can enter the symbols I,+,enter a space (■.
<, -, >, _ and *.
Important!
- When setting allow no more than TsecondsXo elapse between
pressing the various buttons, otherwise DISC READYvj\\\ light
up again and the display will again show the number of tracks
and the playing time of the disc.
- As soon as you press STORE, the next function to be set will
automatically appear on the display. You must therefore store
the functions in the order in which they appear on the display.
- The settings will remain stored in the player’s memory, even if
you switch it off.
- You can set the following in this order:
The brightness of the display
• Press PRESETS.
> PP(= Personal Presets) lights up with above it SR/GHTWESS;
afterthis you will seethe level at which brightness has been set.
• Press <M CURSOR or CURSOR 1» until you obtain the desired
brightness.
• Press STORE.
> The brightness has now been set.
The play mode (AUTO)
Depending on what play mode you select, after switching on the
player or closing the tray by hand, play will automatically begin
with:
- the whole disc (AUTO-PLAY);
- the FTS 1 program of the disc (AUTO-FTS 1);
- the FTS 2 program of the disc (AUTO-FTS 2) or
- the tracks of the disc in a random order (AUTO-RANDOM).
If you select AUTO-STOP, then you must start play yourself with
PLAY/REPLAY, RANDOM or SCAN.
> AUTO-STOPlightsupabove ’PP’
• Press « CURSOR or CURSOR !» until the required play mode
appears on the display.
• Press STORE.
> The play mode has now been set._________________________________________
Naming a disc
• Press TITLE.
> TITLE lights up.
> ’0’ appears under TRACK.
> The cursor begins to flash on the display.
• You can now enter the required ’name’; after each character
thatyou key in press CURSOR W> to pass on to the next position
on the display (with « CURSOR you return to the previous
position).
• Press STORE as soon as you have entered the complete
’name’.
> The ’name’ disappears and STORED lights up.
> The ’name’ appears again. The first character flashes; you can
still change the ’name’ if you wish.
• Press TITLE if there is nothing you wish to change.
> The ’name’ has now been stored in the permanent (FTS)
memory of the player.
Naming a track number
• Press TITLE.
> TITLE lights up.
> ’0’ appears under TRACK.
• Select the required number with NEXT or PREVIOUS.
> The number appears under TRACK.
• Now enter the ’name’ and store it using STORE.
Track numbers can still be named even if a ’name’ has already
been stored for the entire disc.
Note!
If NO SPACE lights up after you have pressed STORE, then the
memory is full: you will have to erase one or more ’names’ to make
space for the new one.
____________________________________________________
CHANGING A ’NAME’
• Press TITLE.
> The ’name’ appears on the display; the first character flashes.
• Enter the new ’name’ and store it again using STORE.
________________________
CHECKING THE TITLE MEMORY
• Press INFO.
> FTS/WFO lights up.
• Press NEXT until TITLE MEMORY appears on the display.
> You will now receive the information on the ’names’ entered.
You will see in succession: TITLE NR 1 followed by the ’name’,
TITLE NR 2to\\owed by the ’name’ etc.
If no names have been stored in the FTS memory, then NO
TITLE lights up.
With NEXT you can proceed more rapidiy to the next block of
information.
ERASING A ’NAME’
• Press INFO.
> FTS/WFO lights up.
• Press NEXT until the number of the name appears on the
display; for example TITLE NR 02.
• Hold CLEAR pressed down until DELETED lights up.
> The name has now been erased.
Page 11

RECORDING FROM YOUR COMPACT DISC PLAYER (EDIT)
If you wish to make a tape recording of a disc or a program, it can
be useful to store the recording time of the tape in the player’s
memory.
Should the disc or the program be longer than one side of the
tape, a pause will then be inserted automatically afterthe lasttrack
which fits onto that side. This will prevent the disc or the program
continuing to play when the tape has already stopped.
• Press EDIT.
> CASSETTE lights up with beneath it ’C 0 0 O’.
• Press NEXT or PREVIOUS until the required recording time
appears on the display (you will see successively: ’C 30’, ’C 45’,
’C 60’, ’C 90’ and ’C120’) orkey inthe recordingtime ofthetape
using the ’1-0’ digit buttons. For a 60-minute tape you should
key in ’060’.
> The recording time is now stored in the player’s memory; you
can now record the disc or the program.
• Press PLAY/REPLAY.
> CASSETTE SIDE A lights up, followed by PLAY or PROGRAM
PLAY. The track number indicator shows which tracks can be
recorded on side A of the tape; these numbers will be played
one after the other.
> Play will stop after the last track.
> CASSETTE SIDE B lights up and the track number indicator
shows which tracks can be recorded on side B of the tape.
• Press PAUSE.
> The track numbers shown on the number indicator are played
in that order.
PLAYER MAINTENANCE
A chamois leather slightly moistened with water is sufficient for
cleaning the piayer. Do not use cleaning agents containing
alcohol, spirits, ammonia or abrasives.
The disc tray should be kept free of dust with a dry cloth.__________________________
TECHNICAL DATA
Typical Audio Performance
Frequency range: 2-20,000 Hz
Amplitude linearity: 0.035 dB (20-20,000 Hz)
Phase linearity: 0.2° (20-20,000 Hz)
Dynamic range: 97 dB
Signal-to-noise ratio: 100 dB (20-20,000 Hz, A weighted)
Channel separation: 100 dB (1 kHz)
Total harmonic distortion: 0.002% (1 kHz)
Wow and flutter: quartz crystal precision
D/A conversion: Bitstream conversion (256 x oversampling,
1 bit), in differential mode
Audio output level: 2 V„ns
Impedance PHONES jack: 8-1000 ohms
Power supply
Mains voltage and frequency: see the type plate on the rear of the
player
Power consumption: 15 W approx.
Safety requirements: UL
Hotel
- You can also start playback with RANDOM; the numbers will
then be recorded in a different order than on the disc or in the
program.
- As soon as you press PLAY/REPLAY or RANDOM, the other
player functions (except TIME and DIM) will temporarily be
switched off to prevent the recording being interfered with.
EDIT ACTIVE lights up if you press one of the other buttons
during playback.
ADDITIONAL INFORMATION
CARE OF THE DISCS
Although both sides of a disc are protected by a special coating,
it is still advisable to treat the discs with care:
• Never leave discs lying around, put them back in their holders
Immediately after use.
• Never write on the printed side!
• Do not attach any stickers on the disc.
• Keep the shiny surface of the disc clean. Use a soft lint-free
cloth and always wipe the disc in a straight line from center to
edge. You may breath lightly on the disc first.
The cleaning set SBC 3540 A01, available separately, is a useful
accessory for cleaning your discs. It contains a protective sup
port, a special disc cleaning cloth and a bottle of cleaning fluid.
If your local dealer does not carry the accessory, it may be
ordered direct from Philips Consumer Electronics Company.
Call Toll Free: 1-800-255-5122
In Tennessee, Call: 1-800-824-2567
Or write:
Philips Consumer Electronics Company
Accessories Marketing Department
P.O. Box 1597
Greensville, TN 37744-9983
Cabinet
Material/finish: metal and polystyrene with decorative trim
Dimensions (w x h x d) :
161%2" X 3%'' X m" (420 X 90 X 280 mm)
Weight: 8.82 lbs (4 kg) approx.
Specifications are subject to change without notice
SYMPTOMS AND THEIR LIKELY CAUSES
Insufficient familiarity with the combination of a new product and
new discs may lead to faults arising during use. These are
generally caused by simple errors in operation or external factors.
It is perhaps useful to check the points listed below and where
possible remedy these before taking your player for repair.
- The transit clamps have not been removed.
- Condensation has formed on the lens of the laser due to a
dramatic change in temperature. This will disappear automati
cally after some time.
- There is a foreign object in the disc tray.
- The disc has not been inserted with the printed side up orthere
is no disc in the tray.
- The disc is dirty, badly scratched or warped.
- The player has been connected to the PHONO jack of the
amplifier.
If the fault remains, try to clear it by switching the player off and on.
If this also fails to help, do not continue experimenting, but remove
the plug from the outlet and consult your dealer.
Certain faults may be caused by a disc. In order to help determine
the precise cause, take the disc with which the fault occurred with
you when you take the player for repair.
Under no circumstances should you repair the player yourself,
as this will invalidate the guarantee!
_____________________________________
ImportantI - Cleaning agents for conventional records are not
suitable for cleaning a Compact Disc. Nor may detergents or
abrasive cleaning agents be used.
____________________
Page 12

4 5 6 7 89 10
12 13 14 15 16 17 18 19 20 21 22 23 24 25 26 27
m M M M M !>'// iyi M M Ilf/ / Ivf// l\i/l
/i!il lEl iMl lEl Mil Mil Mil Mil Mil Mil Mil Mil
I FLAY 1-. r-TRACK TOTAL REM TRACK TIME r^MEMOlZ
IoKectI ^ O O O O • O O f
I PROGR 1-^ /
______
/ !_/ (_/ I REKAT A-t
:i1i2i3i4iSi«iM •!« Il0i11i12i13f Mfl5<fCiirttCtlti20
8
I ,vww«vv' f yvwnnn^ ; f innnnnni
j yvw¥vi^ I Jjnnnnnn^; « mniirwio^
*20
iPni !Pn'
10
Page 13

Page 14

LIMITED WARRANTY
PHILIPS COMPACT DISC DIGITAL AUDIO PLAYER
• Two (2) Year Carry-In Labor Warranty
• Three (3) Year Carry-in Service Parts Warranty
• Four (4) Year Laser Warranty
* For purchases outside the U.S., see applicable warranty from country of purchase.
This warranty gives you specific iegai rights, and you may aiso have other rights which vary from state to state.
Parts and Labor During First 2 Years
For two (2) years from the date of purchase, an Authorized Service
Center will replace any part found defective and will repair any product
defect without charge to you for parts or labor.
Replacement Parts After 2 Years
If within three (3) years after the date of purchase, four (4) years on the
laser, a part Is found defective and needs to be replaced, an Authorized
Sen/ice Center will supply to you a new or, at your option, rebuiit part
without charge to you for the replacement part. After two years from the
date of purchase, you must pay for all labor, transportation and service
charges.
Replacement parts installed during the warranty period are warranted
oniy for the balance of the original warranty period.
Who is Protected? ... Where?
This warranty is extended to the original retail purchaser for products
purchased and used in the U.S.A., Puerto Rico and the Virgin Islands.
If you move within these areas, an Authorized Service Center in your
area will honor this warranty for the remainder of the original warranty
period.
What the Purchaser Must Do
Before you call for service, check your operating instruction booklet. A
slight adjustment of the customer controls discussed inyour instruction
booklet may save you a service call.
How to Get Warranty Service
To obtain Warranty Service, tou must deliver the Compact Disc Player
to an Authorized Compact Disc Player Service Center for repair,
together with evidence of the purchase date and description of the
problem. You must arrange pick-up following repair.
Warranty Exclusions
Your Warranty Does Not Cover:
- Labor charges for player installation or set-up, adjustment of custom
er or preference controls.
- Product repair and/or part replacement because of misuse, accident,
unauthorized repair or other cause not within the control of Philips
Consumer Electronics Company.
- A Compact Disc Player purchased, used or serviced outside the
U.S.A., Puerto Rico and the Virgin Islands, or used for commercial or
institutional purposes (included, but not limited to products used for
rental purposes).
- Incidental or consequential damages resulting from the product.
Some states do not allow the exclusion of incidental or consequential
damages, so the above exclusion may not apply to you. This includes,
but is not limited to pre-recorded material (copyright or non-copyright).
ALL IMPLIED WARRANTIES INCLUDING IMPLIED WARRANTIES OF
MERCHANTABILITY AND FITNESS FOR A PARTICULAR PURPOSE,
ARE LIMITED IN DURATION TO THE DURATION OF THIS E<PRESS
WARRANTY. Some states do not allow limitations on how long an
implied warranty lasts, so the above limitation may not apply to you.
Important Reminder
Please fill out and mail your Warranty Registration Card promptly. It will
be easier for us to notify you if it should ever be required. The return of
the Warranty Registration Card is not a condition to Warranty Coverage.
Philips Service Company
P.O. Box 55 - Jefferson City - Tennessee TN 37760
S (615) 475-0317
How To Get Service On Your Compact Disc Digital Audio Player Through Philips Factory Service
To obtain expedient IN or OUT-of-warranty repair: Philips Factory Service Centers
1. Contact the nearest Philips Factory Senrice Center, listed to the right, Atlanta - 1898 Leland Drive,
to obtain the cost of out-of-warranty repair foryour model product. * Marietta, GA 30067 .............................................................® (404) 952-3279
2. Pack your Compact Disc Player In a suitable carton for safe Boston - 41 Second Avenue,
shipment. Burlington, MA 01803
3. Mail the product to the nearest Factory Service Center along with a Chicago -500 East Touhy Avenue,
letterinsidethecartondescribingtheproblem.Besurethattheletter
includes your name, address and telephone number. Enclose your ^enue - Hear, cx onn on in
check or money order in the amount quoted you by the Factory Westlake, OH 44145
cpruif-p rpntpr Connectrcut - 77 Grassmere Avenue,
oBiv.ue wBiuei ....... ..... ... West Hartford, CT 06110....................................................@(203)233-5151
4. When your product is received, it will be repaired in a manner that Dallas -1413 Bradlev Lane
meets Philips’high qualify standards and returned to you by prepaid Carrollton TX 75007 ' @(214)323-8335
transportation. Angeles -12889 Moore Street,
* IN or OUT-of-warranty service can also be obtained by delivering the _ Cerritos, CA 90701 ...........................................................................................................@(213)637-7293
Compact Disc Player to a Service Center in your area. Miami - 2099 West Atlantic Boulevard,
Pompano Beach, FL 33069
New Jersey -178 Manor Road,
East Rutherford, NJ 07073 ................................................@ (201) 935-0600
New York -116 Charlotte Avenue.
Hicksville, NY 11801 .........................................................@(516) 933-1780
Philadelphia - 3599 Meadow Lane,
Cornwell Heights. PA 19020
Tennessee -112 Polk Street,
Greeneville, TN 37743 .......................................................@ (615) 636-5802
EL 4026-4_______________________________________________________________________________89/10
........................................................
.
..............A....................
............................................
..............................................
.............................................
^ (/Ub) 827-94U5
S (216)899-2040
@ (305) 978-0467
@ (215) 638-7500
©(617)272-4825
Philips Consumer Electronics Company
A Division of North American Philips Corporation
3104106 98381 Printed in Belgium 1B5876-1 290/1
 Loading...