

Page 1
PHILIPS
CONSUMER ELECTRONICS
PHILIPS
□ '^aaoaa oa378i
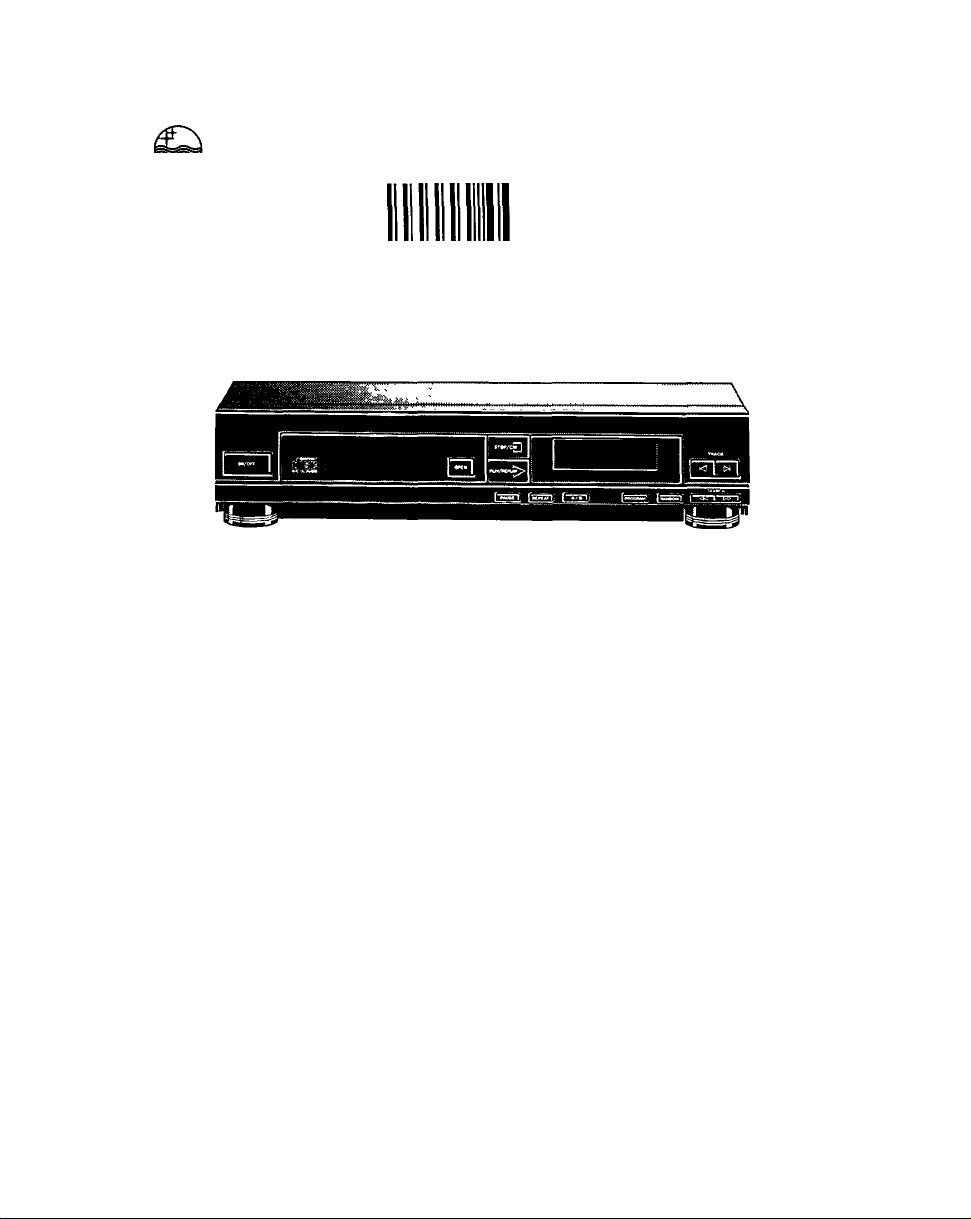
CD 210
Compact Disc Player
Page 2

Operating Instructions
INTRODUCTION
The Compact Disc system is a major step forward in
the sphere of audio technology. By employing the
most sophisticated digital and optical technologies,
Compact Disc not oniy produces the ultimate in
sound reproduction, it also offers unprecedented
ease of operation, with rapid access to every track
on the disc and the possibiiity of programming.
Remote control
This Compact Disc player can be operated remotely
if it is connected to a PHILIPS HIFi system with
remote control.
CONTENTS Page
INSTALLATION 2
OPERATION 3-5
PROGRAMMING 6-7
ADDITIONAL INFORMATION 7
FAULTS AND THEIR LIKELY CAUSES 7
ILLUSTRATIONS 8
INSTALLATION
CHECKING THE POWER SUPPLY SETTING
(Fig. 1)
• Check that the type plate on the rear of your
player Indicates the correct supply voltage.
• If your mains supply voltage is different, consult
your dealer or our Service Organisation.
SITING THE COMPACT DISC PLAYER
Free-standing
• Always position the player horizontally on a flat,
firm surface.
• Allow a free space of at least 3 cm above the
player so as notto interfere with the cooling of the
player.
In an audio rack
• The player can be sited in any desired position.
Stacked
• Site the player preferably at the bottom or at the
top.
• Never position the player directly on top of a
high-power amplifier, as such an amplifier gives
off a substantial amount of heat.
Warning
Never allow the player to stand for long periods in
direct sunlight or near a heat source.______________
CONNECTIONS (Fig. 4)
a Connection for the mains lead,
b OUTLR: for the connecting cable to the am
plifier.
• Insert a red plug into the ’R’ socket (right-hand
channel) and the other plug into the ’L’ socket
(left-hand channel).
• Insertthetwo other plugs into the corresponding
sockets of the CD or AUX input of your amplifier.
You can also use the TUNER orTAPE IN connec
tion, but never the PHONO input. This is not
suitable for Compact Disc reproduction.
c RC5IN/OUT: for a remote control system.
Use these sockets for connecting up the equip
ment when you are incorporating the player in a
PHILIPS HiFi-system v,/ith its own remote control
system.
REMOVING THE TRANSIT CLAMPS (Fig. 2-3)
The two red transit ciamps on the bottom iock the
piay mechanism to protect it during transportation.
• Turn the piayer upside down.
• Turn the clamps anti-clockwise and remove them
from the player.
• Store them in the recesses provided.
Repiace the clamps if you wish to transport the
piayer. To do this, turn the piayer upside down,
insert the clamps In the holes provided and rotate
them clockwise until they lock in position.
Fitting a Mains Plug
The wires in the mains lead are coloured:
Blue - Neutral Brown - Live
As these colours may not correspond with the
colour markings identifying the terminals in your
plug proceed as follows:
The Brown wire must be connected to the terminal
which is marked with the letter L or coloured Red.
The Blue wire must be connected to the terminal
which is marked with the letter N or coloured Black.
Wofe.'This apparatus must be protected by a3 amp
fuse if a 13 amp plug is used, or, if any other type of
plug is used, by a 5 amp fuse either in the plug or
adapter, or at the distribution board. If in doubt
consult a qualified electrician.
Page 3

OPERATION
EXPLANATION OF KEYS ETC. (Fig. 5)
1 ON/OFF
> For switching on and off.
2 OPEN
> For opening the disc tray.
3 PLAY/REPLAY
> For starting piay (PLAY).
> For returning to the beginning of a track
(REPLAY).
4 STOP/CM
> For stopping play (STOP).
> For erasing a programme (CM = Clear Memory).
5 DISPLAY
> Informs you about the functioning of the player.
> Displays details from the disc’s track list.
See also; ’The indications on the display’.
6 MTRACKW
> For selecting another track during play.
> For selecting the track number you want play to
begin with.
> For selecting track numbers when compiling a
programme.
(’M’ from high to low and ’W from low to high.)
7 PAUSE
> For briefly interrupting play.
> For holding play at the start of a disc, track or
passage.
8 REPEAT
> For repeating a disc or a programme.
9 A/B
> For setting the starting and stopping point of a
passage to be repeated.
10 PROGRAM
> For storing track numbers in a programme.
> For erasing track numbers from a programme.
> For checking a programme.
11 RANDOM
> For playing in random order.
12 <M SEARCH M>
> For fast search to a particular passage during
play.
(’«’ backwards, ’!>>’forwards.)
THE INDICATIONS ON THE DISPLAY (Fig. 6)
Each Compact Disc has, along with the music, a list
detailing the numbers of the tracks, the playing time
of each track and the total playing time of the disc.
The player always scans this first and stores it in its
memory in order, for instance, to provide informa
tion via the display.
________________
> Light up when you switch the player on.
TRACK
Under this indication you will see:
> The number of the track which is playing.
> The number of tracks on the disc after it has
stopped.
>
> Lights up when you close the tray.
> Flashes when the player is in the pause mode.
MiNSEC
Under these indications you will see:
> The elapsed playing time of the track which is
playing.
> The total playing time of the disc after it has
stopped.
1-20/+20
> Shows the number of tracks on the disc after the
track list has been scanned.
> Gives information on how play proceeds.
ERROR
> Lights up briefly when you make an error in
operating.
S<S>
> Flashes during the scanning of the disc’s track
list.
> Lights up when a 8-cm disc is played.
> Flashes during the scanning of the disc’s track
list.
> Lights up when a 12-cm disc is played.
A-B
> ’A-’lights up when the starting point of a passage
to be repeated is set.
> 'B' lights up when the stopping point of that
passage is set.
REPEAT
> Lights up when you repeat a disc or programme.
REViEW
> Lights up when you check a programme.
RANDOM
> Lights up when you play a disc in random order.
PROGRAM
> Lights up when you store thefirsttrack number of
a programme._______________________________
SWITCHING ON AND OFF (ON/OFF)
Switching on
• Press ON/OFF.
> The display lights up.
Switching off
• Press ON/OFF again.
> The display is extinguished.
Page 4

LOADING AND UNLOADING THE DISC
(OPEN)
Loading (Fig. 7-9)
• Open the disc tray by pressing OPEN.
• Insert the disc into the tray printed side up.
• Close the tray in the manner indicated in the
various sections.
If ’ERROR’ lights up after the tray is closed, this
means that you have loaded the disc upside down
or it is dirty, badly scratched or faulty, for example
warped. ’ERROR’ also lights up if you close an
empty tray.
Unloading
• Open the tray by pressing OPEN.
• Hold the disc in same way as when loading.
• Store the disc immediately in its holder. This
prevents soiling and damage.
• Close an empty tray by pushing it lightly.
Avoid leaving the tray open, to prevent dust from
entering.
_____________________________________
PLAYING THE ENTIRE DISC (PLAY/REPLAY) '
• Close the tray by pushing it lightly or by pressing
PLAY/REPLAY.
> The indication lights up.
> The ’8CS>’ and ’12<^S>’ indications flash
alternately until the disc’s track list has been
scanned.
> Dependentonthesizeofthedisc,the ’S<S>’or
’i2<S>’indication lights up.
> On the track number matrix ’i-20’asmanynum-
bers remain lit as there are tracks on the disc.
> ’/’appears under’TRAC/C’.
> Play starts as soon as the elapsed playing time of
the first track number is shown.
> At the end of each track its number disappears
from the track number matrix and the number of
the next track appears under TRACK’.
) The display of the playing time starts again at
'O.’OO’after any preceding pause has been count
ed off.
> After the last track the disc stops.
The indication goes out.
The display shows the number of tracks and the
total playing time of the disc.
Importanti
If a disc with more than twenty tracks is played, the
’•f 20’indication remains lit afterthe twentieth track
has ended to show that there is still a number of
tracks to follow. However, their numbers are no
longer shown on the track number matrix, but
appear under ’TRACK’.
________________________
GOING BACK TO THE BEGINNING OF A TRACK
(PLAY/REPLAY)
• Press PLAY/REPLAY.
> The track starts again from the beginning.
SELECTING ANOTHER TRACK DURING PLAY
(M TRACK W)
• Press TRACK W or M TRACK until the required
track number appears under TRACK’.
> The playing time indication disappears.
> Play is interrupted when selecting is finished.
> As soon as the playing time indication returns, the
selected track begins to play.
If you press TRACK W during the last track or
M TRACK during the first track, then ’ERROR’will
light up and play will continue as normal.
__________
SEARCHING FOR A PARTICULAR PASSAGE
DURING PLAY (<M SEARCH M>)
• Hold <M SEARCH down to search backwards to
the beginning.
• Hold SEARCH » down to search forwards to the
end.
As soon as the key is released play restarts at once.
The length of time for which you hold the key down
determines the search speed:
- the first three seconds relatively slowly;
- after approx, four seconds slightly faster;
- the highest speed is reached after approx, seven
seconds.
Atthefirsttwo speedsthe sound of the disc remains
audible, although accelerated. When searching by
ear it is therefore advisable to release the key as
soon as the sound disappears. If you have pressed
PAUSE before you started the search, you will hear
nothing.
As soon as you reach the beginning of the first
track, 'ERROR’lights up. Play will resume there as
soon as you release the key. If you reach the end of
the last track, ’ERROR’will also light up. if you then
release the key, play will resume a fev/ seconds
before the end of the disc.
______________________
BEGINNING WITH A TRACK NUMBER OTHER
THAN THE FIRST (TRACK W and PLAY/REPLAY)
• Place the disc in the tray, but do not close it yet!
• Press TRACK W until the required track number
appears under TRACK’.
• Close the tray by pushing it lightly or by pressing
PLAY/REPLAY.
> The indications ’!>’ and ’8<S>’ or
light up.
> On the track number matrix ’/-20’the numbers
preceding the selected track number go out.
> As soon as the elapsed playing time appears,
play starts from the selected track.
Important!
If you have selected too high a track number,
’ERROR’will light up after the track list has been
scanned and play will not start.
Page 5

PLAYING THE DISC IN RANDOM ORDER
(RANDOM)
• Close the tray by pressing RANDOM.
> The ’RANDOM’, ’>’and ’SCS>’or ’12<S>’
indications light up.
> On the track number matrix ’1-20’as many num
bers remain lit as there are tracks on the disc.
> All the tracks on the disc are played in a sequence
to be determined by the player. The number under
'TRACK'jumps on each time, but on the track
number matrix all the numbers remain lit.
> When ail the tracks have been played the disc
stops.
The ’RANDOM’and '/>'indications go out.
The display shows the number of tracks and the
total playing time of the disc.
During play you can return to a track which has
already been played by pressing M TRACK. If you
press TRACK W you are selecting any one of the
following tracks.
You can stop random order play at any time by
pressing RANDOM again. The remainder of the
disc, from the track which is playing onwards, is
then played in the normal sequence.
By pressing REPEAT you can repeat random order
play. The player then always begins with the same
track, but otherwise changes the sequence every
time the disc is repeated.
_______________________
BRIEFLY INTERRUPTING PlAYBACK/HOLDING
PLAY AT THE START OF A DISC, TRACK OR
PASSAGE (PAUSE)
To briefly Interrupt playback
• Press PAUSE.
> The '/>'indication begins to flash.
> The sound stops but the disc continues to spin.
• Press PAUSE again to restart.
> The '/>'indication lights up continuousiy again.
> Play restarts atthe point where it was interrupted.
REPEATING A PASSAGE DURING PLAY (A/B)
• Press A/B at the required starting point.
> The 'A-'indication lights up.
• Press A/B again at the required stopping point.
> The 'S'indication now aiso lights up.
> The passage between the starting and stopping
point will now be replayed continuously.
• Press A/B again to stop repeat.
> The 'A-S'indication goes out.
> The disc continues playing as normal to the end
and then stops.
To find the required stopping point quickly you can
use the <M SEARCH » keys.
The repeating of a passage can also be stopped by
pressing STOP/CM or OPEN.
REPEATING THE DISC (REPEAT)
• Press REPEAT before or during playback.
> The REPEATindication lights up.
• Press REPEAT again to stop repeating.
> The REPEATindication goes out.
> The disc will play on to the end and then stop.
Repeating can also be stopped by pressing STOP/
CM or OPEN.__________________________________
STOPPING PLAYBACK (STOP/CM or OPEN)
• Press STOP/CM if you merely wish to stop.
> The ’/>'indication goes out.
> The display shows the number of tracks and the
total playing time of the disc.
• Press OPEN if you wish to stop and take out the
disc.
> The ’t>’and 'SCS^'or 'f2CS>'indications go
out.
> All numbers on the track number matrix and the
'—'indications light up.
Holding play at the start of a disc, track or passage
You can go to any place on the disc and hold it by
pressing PAUSE before:
- starting to play the disc;
- going back to the beginning of a track;
- selecting another track;
- searching for a particular passage;
- beginning with a track other than the first one;
- playing the disc in random order.
Press PAUSE again to start play at the chosen
place.
Important!
An open tray is closed when PAUSE is pressed.
Page 6

PROGRAMMING
By programming the player you can play up to
20 tracks of a disc in any required sequence. Each
track can however only be selected once. If you
exceed the maximum of 20 tracks, ’ERROR’lights
up^
_________________________________________
STORING A PROGRAMME
• Place the disc in the tray, but do nof close it yet!
• Press TRACK W until the first track number you
wish to programme appears under TRACK’.
> After the number appears a flashing dash.
• While the dash is flashing press PROGRAM.
> The dash will be replaced by ’P’(for Programme).
> All the numbers disappearfrom the track number
matrix apart from the one selected.
> At the same time the PROGRAM indication will
light up.
> That number has been stored.
• Display each of the other track numbers required
usingM TRACK orTRACK Wand store them in the
same way. They will appear successively on the
track number matrix.
RECTIFYING A MISTAKE
• Go to another track number by pressing
TRACK W or M TRACK.
• Return to the wrong one.
• PressPROGRAMwhilethe ’P’after the number is
flashing.
> The ’P’is replaced by a ’O’(for Clear).
> The number disappears from the track number
matrix.
• Store the correct number.
In our example: you have stored ’4’ instead of ’5’. Go
to ’3’ using l< TRACK, return to ’4’ using TRACK W
and press PROGRAM. Now proceed to store ’5’.
CHECKING THE PROGRAMME
• Press PROGRAM if you wish to see the sequence
in which you have stored the track numbers.
> The ’REWEW’indication lights up.
> Ail the track numbers appear in the programmed
sequence under ’TRACK’.
> The ’REWEIV’indication goes out again.
In our example; ’7’ ’3’ ’9’ ’5’ ’12’ ’10’ ’10 P’.
If ’ERROR’ lights up, this means that no track
numbers have yet been stored.
Important - The dash will flash for approx. 8 sec.
each time. If youfail to press PROGRAM within that
time, flashing will stop. You can then no longer store
the number: instead of the ’P’you will see ’ERROR’
light up - or the numbers already stored will appear
if you press PROGRAM too late. You can however
still store such a missed number by returning to it
from the previous or the following number.
For example:
On a disc you wish to listen to the numbers 7,3,9,
5,12 and 10 in that sequence.
• Place the disc in the tray, but do nof close it yet!
• Press TRACK W until ’7- appears under
’TRACK’.
0 Press PROGRAM.
> The PROGRAM indication will light up and under
TRACK'you will now see ’7P’ and on the track
number matrix ’7’.
0 Gobackto ’3-’using M TRACK.
• Press PROGRAM again.
> You will now see ’SP’under ’TRACK’andonthe
track number matrix ’3’and ’7’.
0 Display the numbers 9, 5, 12 and 10 in turn by
pressing TRACK W or M TRACK.
• Store them by pressing PROGRAM after each
one.
> When the last number has been stored ’iOP’will
be shown continuously under ’TRACK’. On the
track number matrix you will read: ’3”5”7”9”10’
’12’.
ERASING A TRACK NUMBER FROM THE PROGRAMME OR THE ENTIRE PROGRAMME
• Press TRACK W or M TRACK until the track num
ber you wish to erase appears under TRACK’.
0 PressPROGRAMwhilethe ’P’after the number is
flashing.
> The ’P’is replaced by a ’C’(for Clear).
> The number disappears from the track number
matrix.
• Press STOP/CM if you wish to erase the entire
program.
> All numbers on the track number matrix and the
'—’indications light up again.
PLAYING THE PROGRAMME
• Close the tray by pushing it lightly or by pressing
PLAY/REPLAY.
> The first number of the programme appears
under TRACK’; in our example: ’7’.
> The indications ’[>’ and ’8<S>’ or ’12<S>’
light up.
> Play begins as soon as the elapsed playing time
of the first track is shown.
> As play continues the following numbers in the
sequence appear.
> The entire programme can be displayed in the
programmed sequence by pressing PROGRAM.
The ’REWEW’indication will meanwhile be lit.
All keys, apart from RANDOM and A/B, can also be
used while a programme is playing.
Searching for a particular passage is limited to
within the track being played. When either end of the
track is reached ’ERROR’lights up.
Once play has started the programme can no
longer be changed.
Page 7

When STOP/CM is pressed orwhen all the tracks of
the programme have been played, the disc stops,
but the programme remains stored: the track num
ber matrix again shows all the numbers stored.
The programme will be erased when you open the
tray, it will also be erased if you press STOP/CM
twice in succession during playback.
ADDITIONAL INFORMATION
CARE OF THE DISCS
Although both sides of a disc are protected by a
special coating, it is still advisable to treat the discs
with care:
• Never leave discs lying around, put them back in
their holders immediately after use.
• Never write on the printed side!
• Do not attach any stickers on the disc.
• Keep the shiny surface of the disc clean. Use a
soft lint-free cloth and always wipe the disc in a
straight line from centre to edge. You may breath
lightly on the disc first.
The cleaning set SBC 3540, available separately, is
a useful accessory for cleaning your discs. It
contains a protective support, a special disc clean
ing cloth and a bottle of cleaning fluid.
Warning - Cleaning agents for conventional rec
ords are not suitable for cleaning a Compact Disc.
Nor may detergents or abrasive cleaning agents be
used.
PLAYER MAINTENANCE
A chamois leather slightly moistened with water is
sufficient for cleaning the player. Do not use clean
ing agents containing alcohol, spirits, ammonia or
abrasives.
The disc tray should be kept free of dust with a dry
cloth.
________________________________________
TECHNICAL DATA
Typical Audio Performance
Frequency range: 2-20,000 Hz
Amplitude linearity: ±0.02 dB (20-20,000 Hz)
Phase linearity: ±0.5° (20-20,000 Hz)
Dynamic range: >90 dB (20-20,000 Hz)
Signal-to-noise ratio: > 100 dB (20-20,000 Hz)
Channel separation: 100 dB (1 kHz)
Total harmonic distortion: 0.015% (1 kHz)
Wow and flutter: quartz crystal precision
D/A conversion: quadruple (176.4 kHz) oversamp
ling with digital filter and two 16-bit D/A-converters
Audio output level: 2
Power supply
Mains voltage and frequency: see the type plate on
the rear of the player
Power consumption: 18 W approx.
Safety requirements: lEC 65
Cabinet
Material/finish: metal and polystyrene with decora
tive trim
Dimensions (w X h X d) : 360 X 86 X 300 mm
Weight: 3.5 kg approx.
Subject to modiiication
This Compact Disc player complies with radio
interference requirements as laid down in EC
regulations.
FAULTS AND THEIR LIKELY CAUSES
Insufficient familiarity with the combination of a new
product and new discs may lead to faults arising
during use. These are generally caused by simple
errors in operation or external factors.
It is perhaps useful to check the points listed below
and where possible remedy these before taking
your player for repair.
- The transit clamps have not been removed.
- Condensation has formed on the lens of the laser
due to a dramatic change in temperature. This will
disappear automatically after some time.
- There is a foreign object in the disc tray.
- The disc has not been inserted with the printed
side up or there is no disc in the tray.
- The disc is dirty, badly scratched or warped.
- The player has been connected to the PHONO
socket of the amplifier.
If the fault remains, try to clear it by switching the
player off and on.
If this also fails to help, do not continue experiment
ing, but remove the plug from the socket and
consult your dealer.
Certain faults may be caused by a disc. In order to
help determine the precise cause, take the disc with
which the fault occurred with you when you take the
player for repair.
Under no circumstances should you repair the
player yourself, as this will invalidate the guaran
tee!
Page 8

2 3 4
JL..L--L
7 8 9 10 11 12
Page 9

3104106 96721
Printed in Belgium
489/1
Page 10

 Loading...