

Page 1
EN
User manual
Charge the handset(s) for 24 hours
before use !
Page 2
EN
Welcome mode
Before using your CD 130, you need to configure it according to the country of
use. Install the batteries. After a few minutes of charge, the Welcome screen
appears.
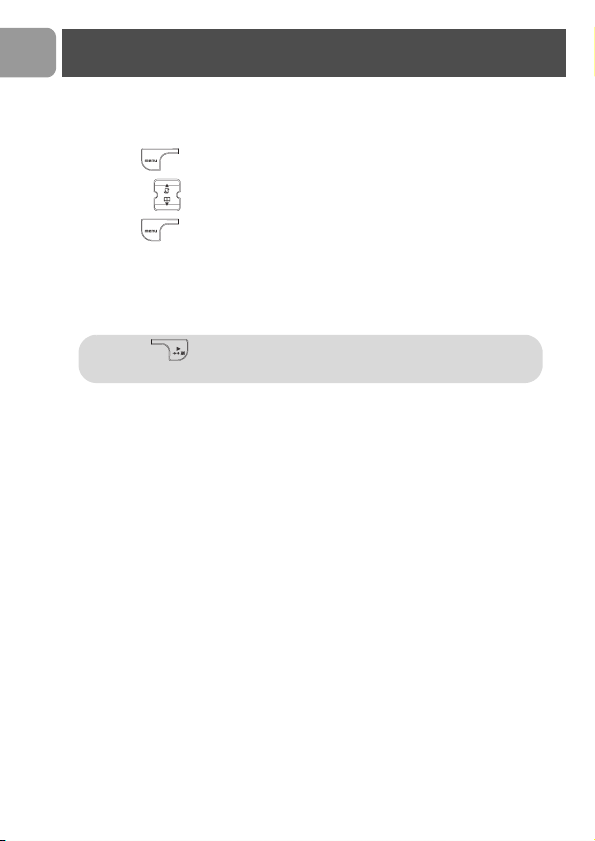
1. Press .
2. Browse through the different countries.
3. Press to confirm the country that suits you.
Your phone is ready to be used.
If you need to re-configurate your CD 130, see page 32.
Note: If BACK is pressed, the handset will show the country
selection screen again.
Page 3

EN
Welcome mode
Before using your CD 130, you need to configure it according to the country of
use. Install the batteries. After a few minutes of charge, the Welcome screen
appears.
1. Press .
2. Browse through the different countries.
3. Press to confirm the country that suits you.
Your phone is ready to be used.
If you need to re-configurate your CD 130, see page 32.
Note: If BACK is pressed, the handset will show the country
selection screen again.
Page 4

Contents
Welcome mode ...................................................2
Contents ..............................................................3
Important information .......................................4
What’s in the box ................................................5
Handset and base station ...................................6
Icons on the handset display ..............................8
Installing the base station ...................................9
Installing the batteries ......................................10
Using GAP standard compliance ....................10
Menu structure ..................................................12
Handset power OFF and ON ...........................13
Keypad lock / unlock .........................................13
Text or number entry ......................................13
Call ......................................................................14
Redial list ............................................................16
Phonebook .........................................................18
Call log ...............................................................21
Using the Intercom ...........................................23
Other functions .................................................24
Paging ...........................................................................24
Chain Dialing ..............................................................24
Clock and Alarm Settings .......................................24
Personal settings ...............................................25
To set the handset ringer volume
or silence mode (Ringer OFF) ...............................25
To select the handset ring melody .......................26
To activate / deactivate the key tone ..................26
To rename the handset ...........................................26
To activate / deactivate the auto answer mode 27
To change the display language .............................27
Advanced settings .............................................27
To change the recall time .......................................27
To change the dial mode ........................................28
Local area code setting ............................................28
To set or change Call Barring ................................28
To activate / deactivate Call Barring ....................29
To set or deactivate the prefix number ..............29
To set or change an SOS number ........................30
To register a handset ...............................................30
To unregister a handset ..........................................31
To change the PIN code .........................................31
To reset to default settings (base station
and handset) ...............................................................31
Country selection .....................................................32
Default settings (after Reset Unit) ........................32
Troubleshooting ................................................33
Informations ......................................................35
EN
3
Page 5

EN
Important information
For your safety
Before installing your CD 130, carefully read the following informations:
Power requirements
> This product requires an electrical supply of 220-240 volts, alternating monophased
power, excluding IT installations defined in standard EN 60950. In case of power
failure, the communication can be lost.
Warning ! The electrical network is classified as hazardous according to criteria
in the standard EN 60950. The only way to power down this product is to unplug
the power supply unit from the electrical outlet. Ensure the electrical outlet is located close to the apparatus and is always easily accessible.
Telephone connection
>
Always use the line cable provided with the product otherwise you may not have a
dialling tone.
>
If you have a broadband DSL Internet connection, please make sure you have one
DSL filter plugged directly on each line socket used in the house and check the
modem and the phone are plugged in the correct filter slot (one specific for each).
Need help ?
More troubleshooting and FAQ’s :
Online help: www.p4c.philips.com
Troubleshooting : page 33 and page 34
4
Page 6

One CD 130 base
station
What’s in the box
One CD 130 handset
-
+
+
-
2 NiMh AAA
550 mAh rechar-
geable batteries
EN
A power supply unit
A line cord*
One belt clip
(Country dependent)
User manual
*Note : You may find in the box the line adaptor delivered separately from the
line cable. In this case, please connect the line adaptor to the line cable
before connecting it to the line socket.
Note : In CD 130 multi handset packs, you will also find one or more additional
handsets, chargers with power supply units and additional rechargeable batteries.
Guarantee Quick Start Guide
5
Page 7

EN
12
11
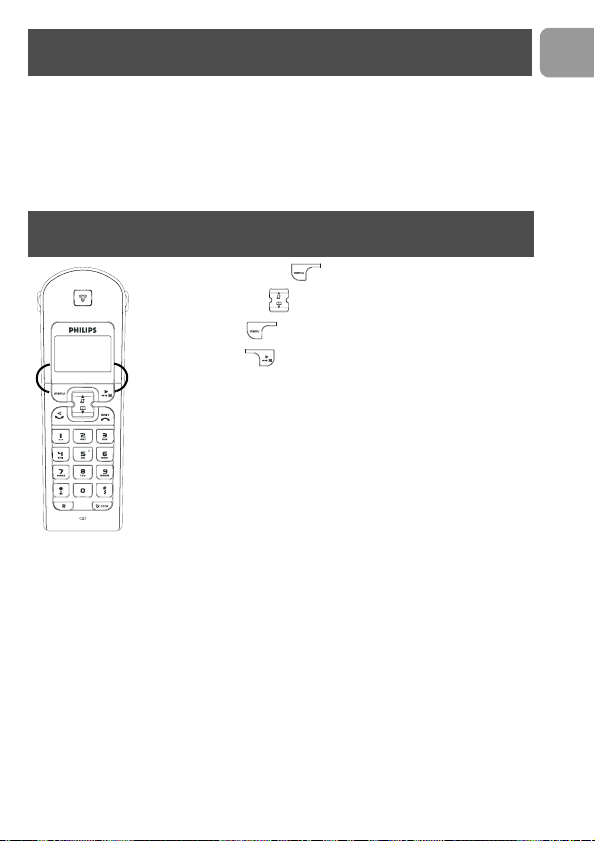
Handset and base station
CD 130 Handset
1 Earpiece
2Display
Icons see page 8
1
3 Menu key & Softkey OK
- In idle mode, short press to access
the main menu.
- Short press to select next menu level.
- In Edit & Phonebook mode, short press
2
3
4
5
6
7
8
9
10
to confirm OK.
- In Call log or Redial list to save the
selected record in the phonebook.
4 Redial list, mute key & Softkey Back
- In idle mode, short press to access the
Redial list.
- In talk mode, to mute/ unmute the
handset microphone.
- In edit mode, to cancel last digit.
- In phonebook mode, to view number
and name.
- In Call log to switch from name/number
to time/date.
5 Navigation keys
- Scroll up/down to move to the next or
previous record in the Call log, Redial
list or Phonebook.
- Scroll up to access the Call log from idle
mode.
- Scroll down to access the Phonebook
from idle mode.
6 Hang-up key
- A short press to hang-up the line or to
exit (return to idle mode).
- A long press to power off the handset.
- To exit Edit & Phonebook mode, Redial
list & Call log.
7 Ringer ON/OFF & Insert #
- Short press to insert #.
- Long press to insert a pause (P) when
dialling.
- Long press to turn the ringer ON/OFF.
6
Page 8
Handset and base station
8 Intercom
- Short press to initiate an internal call.
9 Recall key
- In idle mode, long press to switch from handset name display to Date/Time display.
- To insert R for operator services when on line.
10 Microphone
11 Keypad lock & insert
- Short press to insert
- Long press to lock/unlock the keypad in idle mode.
12 Pick-up key
- In idle mode, press to take the line and answer a call.
- In Phonebook mode, Redial list and Call log press to dial the selected number.
- Handset loudspeaker* ON/OFF (press 2 times to activate the handsfree mode).
*Warning ! Handsfree activation could suddenly increase the volume in the
loudspeaker to a very high level. Make sure the handset is not too close to your ear.
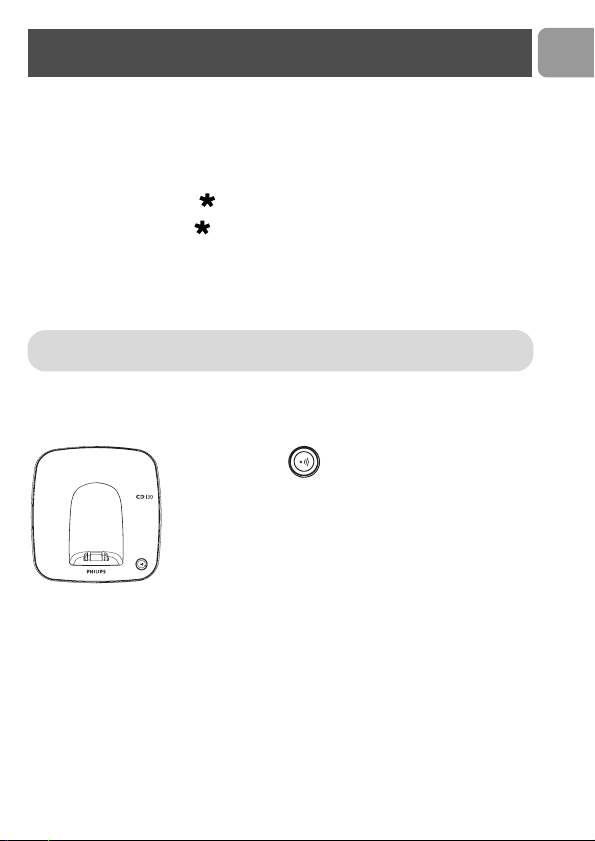
CD 130 base station
Paging key
The paging key enables you to locate a missing handset if the
handset is in range and has charged batteries. Press the key
until the handset starts to ring. Once retrieved, press paging
key again to end paging.
EN
7
Page 9
EN
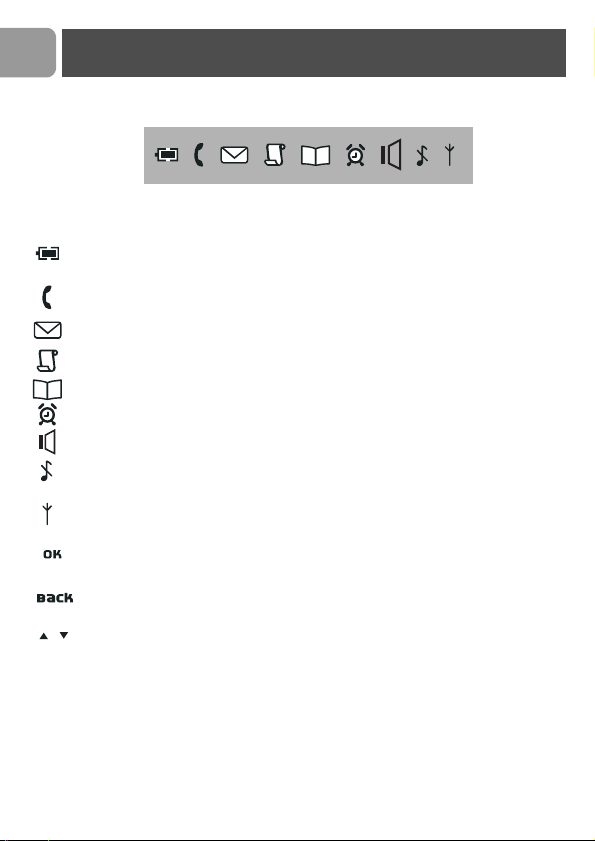
Icons on the handset display
The display gives information about the operation of your telephone. Following
icons can be shown in the headline of the display:
When being used for the first time, it is sometimes necessary to wait until the
battery is sufficiently charged before the icons appear on the display.
When ON the battery is fully charged. When blinking, this symbol indicates
that the battery needs to be charged.
An external call is in progress. When blinking, this symbol indicates that there
is an internal call in progress or that the line is already busy.
New message(s) on your voice mailbox.
New Call log records or Call log records are being reviewed.
Phonebook is accessed.
The alarm clock is activated.
The handset loudspeaker is activated.
The ringtone is deactivated.
The handset is registered and in range of the base. When blinking, this symbol
indicates that the handset is not registered to the base or out of range.
Turn ON when entering Menu mode. In Phonebook mode to enter next menu
level.
Turn ON when entering Menu mode. In Phonebook mode to return to higher
menu level. In editing mode to delete the last digit/character entered.
Indicates further options are available.
8
Page 10
Installing the base station
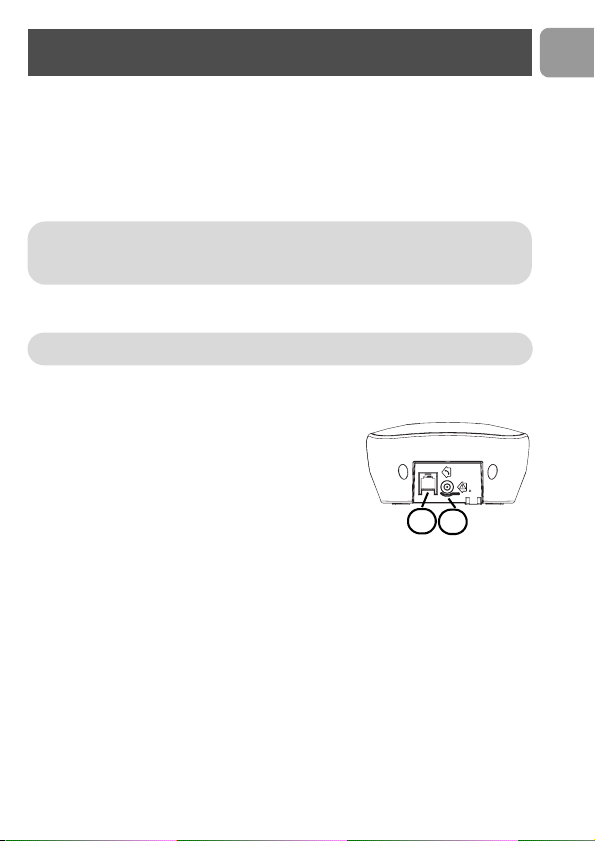
Installing the base station
Place your product close enough to the telephone and mains power sockets so that the
cables will reach. To properly install the base station, plug the line cord and the power
cable into the base station. Plug the cord and the cable into the wall. If you have a
broadband DSL Internet connection, please make sure you have one DSL filter plugged
directly on each line socket used in the house and check the modem and the phone are
plugged in the correct filter slot (one specific for each).
Warning ! The electrical network is classified as hazardous according to criteria in
the standard EN 60-950. The only way to power down this product is to unplug the
power supply from the electrical outlet. Ensure the electrical outlet is located close
to the apparatus and is always easily accessible.
Please take care that the power supply and telephone line are connected to the correct
sockets as incorrect placement could damage your equipment.
Warning ! Always use the line cable provided with the product otherwise you may
not have a dialling tone.
1 Connect the telephone line cord delivered with the
product.
2 Connect the power supply.
1
2
EN
9
Page 11

EN
Installing the batteries
Installing and replacing the batteries in the handset
To insert the batteries, open the battery cover, place the batteries as
indicated and then replace the battery cover. When the battery icon is
blinking, charge is needed. Allow 24 hours for the batteries to fully charge.
On first use it may be necessary to wait for a few minutes before seeing
symbols on the display.
Warning : the base station must always be plugged into the mains
when charging or when in use. Always use rechargeable batteries.
The warranty does not apply to the batteries and any other components
which have a limited lifetime or are exposed to wear.
Warning ! Always use the line cable provided with the product
otherwise you may not have a dialling tone.
Batteries should not be disposed of with general household waste.
Battery life and range
Optimal battery life is reached after 3 cycles of complete charging & discharging. When
reaching the range limit and the conversation becomes crackly, move closer to the base.
To reach optimal range, place the base station away from electrical appliances.
Battery life in talk
time
up to 12 hours up to 150 hours up to 50 metres up to 300 metres
Battery life in
standby mode
Indoor range Outdoor range
Using GAP standard compliance
TM
The GAP standard guarantees that all DECT
with a minimum operating standard irrespective of their make. Your CD 130 handset and
base station are GAP compliant, which means the minimum guaranteed functions are :
register a handset, take the line, receive a call and dial. The advanced features may not be
available if you use another handset than a CD 130 with your base station.
To register and use your CD 130 handset with a GAP standard base station of a different
make, first follow the procedure described in the manufacturer’s instructions, then follow
the procedure described on page 30.
GAP handsets and base stations comply
10
Page 12
Using GAP standard compliance
To register a handset of another make to the CD130 base station, place the base station
into registration mode (page 30), then follow the procedure in the manufacturer’s
instructions.
TM
is a Trade Mark of ETSI registered for the benefit of the implementers of the
DECT
DECT technology.
Using the menus
From idle mode, press to enter the menu. Use the
Navigation keys to go up or down in the menu list.
Press Softkey OK to confirm the selection.
OK BACK
Press Softkey BACK to exit the menu or to go back to the
previous menu level.
EN
11
Page 13

EN
Menu structure
PHONEBOOK
CLOCK/ALARM
PERSONAL SET
ADVANCE SET
12
ADD NUMBER
EDIT NUMBER
DEL.NUMBER
DELETE LIST
DATE & TIME
SET ALARM
ALARM TONE
HANDSET TONE
HANDSET NAME
AUTO ANSWER
LANGUAGE
RECALL TIME
DIAL MODE
AREA CODE
CALL BARRING
PREFIX
SOS NUMBER
REGISTRATION
UNREGISTER
PIN
RESET UNIT
COUNTRY SEL.
OFF/ON ONCE/ON DAILY
MELODY 1/2/3
RING VOLUME
RING MELODY
KEY TONE
ON/OFF
Language list
SHORT/LONG
TONE/PULSE
BARR MODE
BARR NUMBER
NUMBER 1/2/3
HIGH/MEDIUM/
LOW/RINGER OFF
MELODY 1 - 10
ON/OFF
ON/OFF
NUMBER 1/2/3/4
Page 14

Text or number entry
You can enter the names of your phonebook entries character by character, pressing the
corresponding key as many times as necessary to reach the desired character.
Press under the label to delete a character.
Example to write “Peter”
Press once : P
Press twice : PE
Press once : PET
Press twice : PETE
Press three times : PETER
Keypad
Keys
1 [space] 1 _ < > *
2 A B C 2
3 D E F 3
4 G H I 4
5 J K L 5
6 M N O 6
7 P Q R S 7
8 T U V 8 ?
9 W X Y Z 9
0 0 - / \ # +
Multi-tap Sequence
Handset power OFF and ON
To power the handset OFF or ON long press the key.
Keypad lock / unlock
Long press the key to lock/unlock the keypad in idle mode.
KEYS LOCKED is displayed on the screen.
EN
13
Page 15

EN
Call
Answering a call / Hanging up
1. When the phone rings, press to answer the call.
flashes on an incoming call.
2. To end the conversation, press key or replace the handset on the base
station.
Note: If you have activated the Auto Answer Mode (see page 27) simply lift-up
the handset from the base or charger to answer a call.
WARNING : When the handset rings during an incoming call, please do not hold
the handset too close to your ear as the volume of the ringing tone may damage
your hearing.
Making a call
Calling directly
1. Press .
2. Dial the phone number .
Predialling the number before calling
1. Dial the phone number .
2. Press .
Note: To correct entries use .
Calling from the phonebook
1. Press Down .
2. Browse through the list to select a name.
3. Press .
14
Page 16

Call
To switch the handset loudspeaker ON / OFF (call handsfree)
Note: 5 loudspeaker volumes are available. indicates the loudspeaker is ON.
1. Press 2 times to activate the handset loudspeaker.
2. Press again to deactivate the loudspeaker.
Warning : Handsfree activation could suddenly increase the volume in the
loudspeaker to a very high level. Make sure the handset is not too close to your
ear.
Adjusting the earpiece and loudspeaker volume during a call
Press (3 earpiece volumes and 5 loudspeaker volumes are available).
To mute the handset microphone during a call
Press to mute/unmute the handset microphone.
Call duration counter
After you have taken the line (dial a number or answer a call) the call duration counter
appears on the handset display (HH-MM-SS).
EN
15
Page 17

EN
The redial list contains the 5 most recently dialled numbers.
Redial list
Accessing / exiting the redial list
1. Press .
2. Scroll through the redial list .
3. Press to exit.
Calling a number from the redial list
1. Press .
2. Scroll through the redial list .
3. Press .
Saving redial list numbers into the phonebook
1. Press and scroll to select an entry.
2. Press , SAVE NUMBER is shown.
3. Press , ENTER NAME is shown.
4. Enter the name and press , SAVED is shown.
Note: To delete a character use . Text and number entry see page 13.
Editing a number from the redial list
1. Press and scroll to select an entry.
2. Press and press Down to reach EDIT NUMBER.
3. Press , modify the number and press .
16
Page 18

Redial list
Deleting a number from the redial list
1. Press and scroll to select an entry.
2. Press and press Down to reach DEL. NUMBER.
3. Press , DELETE? is shown, press to confirm. You will hear a long
confirmation beeptone.
Deleting all numbers from the redial list
1. Press , then and press Down to reach DELETE LIST.
2. Press , DELETE? is shown, press to confirm. You will hear a long
confirmation beeptone.
EN
17
Page 19

EN
30 names and numbers can be stored in the built-in phonebook of the handset. The names
are stored in alphabetical order.
Phonebook
Adding a new entry
1. In idle mode, press , PHONEBOOK is shown.
2. Press , ADD NUMBER is shown.
3. Press , ENTER NAME is shown.
4. Enter the name and press , ENTER NUMBER is shown.
5. Enter the number and press to confirm.
Note: To delete a character use . Press for spacing.
Text and number entry see page 13.
Note: Press or to return to idle mode.
You can also create an entry from the redial list and the call log (subscription
dependent).
Changing a phonebook name or number
1. In idle mode, press , PHONEBOOK is shown.
2. Press and press Down to reach EDIT NUMBER.
3. Press , scroll to select an entry and press to view the name.
4. Enter the new name and press to view the number.
5. Enter the new number and press to confirm.
18
Page 20

Phonebook
Viewing the phonebook list
1. In idle mode, press Down and scroll Up/Down in the list,
OR
Enter the first letter of the wanted name (e.g., 3 for “D” or 33 for “E”). The first
entry starting with this letter is selected in the list.
2. To view the details : Press .
Edit a number when browsing phonebook list
1. In idle mode, press Down and scroll to select an entry.
2. Press and press Down to reach EDIT NUMBER.
3. Press to view the current name and enter the new name .
4. Press to view the current number, enter the new number and press
to confirm.
Delete an entry when browsing phonebook list
1. In idle mode, press Down and scroll to select an entry.
2. Press and press Down to reach DEL. NUMBER.
3. Press , DELETE? is shown, press to confirm. You will hear a long
confirmation beeptone.
Delete whole phonebook list when browsing phonebook list
EN
1. In idle mode, press Down and press .
2. Press Down to reach DELETE LIST.
3. Press , DELETE? is shown, press to confirm. You will hear a long
confirmation beeptone.
19
Page 21

EN
Phonebook
Delete a phonebook entry when in idle mode
1. In idle mode, press , PHONEBOOK is shown.
2. Press and press Down to reach DEL. NUMBER.
3. Press to view the list and scroll to select an entry.
4. Press , DELETE? is shown, press to confirm. You will hear a long
confirmation beeptone.
Delete whole phonebook list when in idle mode
1. In idle mode, press , PHONEBOOK is shown.
2. Press and press Down to reach DELETE LIST.
3. Press , DELETE? is shown, press to confirm. You will hear a long
confirmation beeptone.
20
Page 22

Call log
This feature is available if you have registered to the caller identification service with your
operator.
The call log stores the last 20 external calls received :
- network message service information (subject to a subscription with your operator).
Accessing / exiting the call log
1. Press Up and scroll to select an entry.
2. Press to view the details.
3. Press to exit the call log.
Consulting the call log
The screen can either display :
• the caller’s number*
• the caller’s name (if known in the phonebook)*
• UNKNOWN CALL if it is an unidentified call**
* Subject to a subscription with your operator.
** Unlisted numbers, withheld caller identification.
You can display, the phone number, the time and date of the call by pressing . Time
and date depends on the network.
Calling a number from the call log
1. Press Up and scroll to select an entry.
2. Press .
Saving a Call log number into the phonebook
EN
1. Press Up and scroll to select an entry.
2. Press , SAVE NUMBER is shown.
3. Press , ENTER NAME is shown.
4. Enter the name and press , SAVED is shown.
21
Page 23

EN
Call log
Deleting a Call log entry
1. Press Up and scroll to select an entry.
2. Press and press Down to reach DEL NUMBER.
3. Press , DELETE? is shown, press to confirm.
Deleting all the Call log entries
1. Press Up and press .
2. Press Down to reach DELETE LIST.
3. Press to confirm.
22
Page 24

Using the Intercom
This function can only be used with a multi-handset configuration. It allows you to make
free internal calls, transfer external calls from one handset to another and to use the
conference option.
Note: Intercom & call transfer is only possible with handsets registered to the
same base station.
Internal call
1. Press .
2. Enter the handset number (up to 5 handsets can be registered to the same
base station [handset number 1 - 5])
OR
press to call all handsets.
3. Press to answer and to end an internal call.
Note: If the handset does not belong to the Philips CD 130 range, this function
may not be available.
Call transfer to a specific handset when on line
During a call in progress you can transfer the external call to a specific handset :
1. Long press and enter the handset number .
2. Press .
Switch between internal and external call
1. Long press and enter the handset number .
2. Long press to switch between internal/external call.
Conference call via the in-call options
EN
1. Long press and enter the handset number .
2. Long press , CONFERENCE is shown. The 3 people can share the
conversation.
23
Page 25

EN
Other functions
Paging
This feature allows you to locate the handset(s).
Press on the base station. All the subscribed handsets ring. Press any key on the
handset to stop ringing once relocated.
Chain Dialing
If you have entered in your phonebook for example only the main number of a company
without the extension, this feature allows you to add the subnumber (extension) of a
particular person and to dial out this number.
1. Take the line and press to open phonebook list.
2. Scroll to select an entry and press to dial first part.
3. Enter the extension , each digit blinks to indicate dialed out.
Clock and Alarm Settings
To set the Date and Time
1. Press and press Down to reach CLOCK/ALARM.
2. Press , DATE &TIME is shown.
3. Press and enter the date .
4. Press , enter the time and press to confirm.
5. Long press to display the date and time.
Note: If you are connected to an ISDN line, the date & time may be updated after
each call. Please check the date & time settings in your ISDN system.
To set or change the alarm clock settings
1. Press and press Down to reach CLOCK/ALARM.
2. Press and press Down to reach SET ALARM.
24
Page 26

Other functions
3. Press , scroll to select the appropriate setting (OFF or ON ONCE or
ON DAILY).
4. Press to confirm.
If you select ON ONCE or ON DAILY :
Enter the time and press to confirm.
The alarm rings for at most 1 minute and is shown in idle mode.
Note: When the alarm rings, press any key to stop the alarm.
To set the alarm tone
1. Press and press Down to reach CLOCK/ALARM.
2. Press and press Down to reach ALARM TONE.
3. Press , scroll to select the appropriate setting (MELODY 1 or
MELODY 2 or MELODY 3).
4. Press to confirm.
Personal settings
To set the handset ringer volume or silence mode (Ringer OFF)
EN
1. Press and press Down to reach PERSONAL SET.
2. Press , HANDSET TONE is shown, press , RING VOLUME is
shown.
3. Press , scroll to select the appropriate setting (HIGH or MEDIUM or
LOW or RINGER OFF). The current ring melody is played.
4. Press to confirm.
25
Page 27

EN
WARNING : When the handset rings during an incoming call, please do not hold
the handset too close to your ear as the volume of the ringing tone may damage
your hearing.
Personal settings
To select the handset ring melody
1. Press and press Down to reach PERSONAL SET.
2. Press , HANDSET TONE is shown, press and scroll Down to
reach RING MELODY.
3. Press , scroll to select one of the available melodies 1- 10. The current
ring melody is played.
4. Press to confirm.
To activate / deactivate the key tone
1. Press and press Down to reach PERSONAL SET.
2. Press , HANDSET TONE is shown, press and scroll Down to
reach KEY TONE.
3. Press , scroll to select ON or OFF and press to confirm.
To rename the handset
The default name is : PHILIPS. You can enter 10 characters for the handset name.
1. Press and press Down to reach PERSONAL SET.
2. Press and press Down to reach HANDSET NAME.
3. Press , enter the name and press to confirm.
26
Page 28

Personal settings
To activate / deactivate the auto answer mode
If ON you take the line by lifting the handset from the charge cradle.
1. Press and press Down to reach PERSONAL SET.
2. Press and press Down to reach AUTO ANSWER.
3. Press , scroll to select ON or OFF and press to confirm.
To change the display language
1. Press and press Down to reach PERSONAL SET.
2. Press and press Down to reach LANGUAGE.
3. Press , scroll to select your language and press to confirm.
Advanced settings
To change the recall time
This option is helpful when using operator services. The default value of recall time that is
preset in your CD 130 should be the best suited for your country network and therefore
you should not need to change it.
1. Press and press Down to reach ADVANCE SET.
2. Press , RECALL TIME is shown.
EN
3. Press , scroll to select SHORT or LONG and press to confirm.
27
Page 29

EN
Advanced settings
To change the dial mode* *Country dependent
The default value of dial mode that is preset in your CD 130 should be the best suited for
your country network and therefore you should not need to change it.
1. Press and press Down to reach ADVANCE SET.
2. Press and press Down to reach DIAL MODE.
3. Press , scroll to select TONE or PULSE and press to confirm.
Local area code setting* *Country dependent
If your local PSTN sends the CID with local area code attached, it is necessary to filter out
the local area code when dial back from call log. The AREA CODE function allows you to
remove the local area code from the call log entries. The local area code can be set from
1 to 4 digits. The default setting is blank.
1. Press and press Down to reach ADVANCE SET.
2. Press and press Down to reach AREA CODE.
3. Press to view the current setting.
4. Enter the new area code (the maximums for the area code is 4 digits) and
press to save.
To set or change Call Barring
This menu allows you to limit the use of your phone to specific calls by barring parts
(prefix) of outgoing numbers. You can set 4 different barring numbers.
1. Press and press Down to reach ADVANCE SET.
2. Press and press Down to reach CALL BARRING.
3. Press and enter the PIN code (by default the PIN code is 0000).
4. Press , press Down to reach BARR NUMBER and press .
28
Page 30

Advanced settings
5. Scroll to select the barring number location 1, 2, 3 or 4 and press .
6. Enter the barring number (the maximums for the barring number is 4 digits)
and press to confirm.
Note: For example if you want to bar international calls, enter the barring
number 00.
To activate / deactivate Call Barring
1. Press and press Down to reach ADVANCE SET.
2. Press and press Down to reach CALL BARRING.
3. Press and enter the PIN code (by default the PIN code is 0000).
4. Press , scroll to select ON or OFF and press to confirm.
To set or deactivate the prefix number
This feature allows you to set the phone to use the cheapest operator prefix. The
maximum length of the prefix is 5 digits. Once the prefix number is set, it is automatically
inserted at the beginning of each number dialed out.
1. Press and press Down to reach ADVANCE SET.
2. Press and press Down to reach PREFIX.
3. To set the prefix number : Enter the prefix number (max. 5 digits) and
press to confirm.
OR
To deactivate the prefix number : Delete the current prefix number by pressing
until „-----“ (blank prefix number) is shown on the screen and press
to confirm.
EN
29
Page 31

EN
Advanced settings
To set or change an SOS number
The SOS number feature allows you to enter 3 SOS phone numbers, which can be dialed
out although the call barring is activated. The maximum length of an SOS number is 4
digits. The PIN code is required when modify the SOS number.
1. Press and press Down to reach ADVANCE SET.
2. Press and press Down to reach SOS NUMBER.
3. Press and enter the PIN code (by default the PIN code is 0000).
4. Press , scroll to select the SOS number location 1, 2 or 3 and press
.
5. Enter the SOS number (max. 4 digits) and press to confirm.
To register a handset
Up to 5 handsets can be registered to the base station.
If you have inadvertently unregistered your handset, you can register it again. Additional
handsets must be registered to the base before use.
Warning : If you wish to register non Philips handsets to the CD 130 base station,
make sure that this handset is GAP compliant otherwise it will not operate properly
(see page 10).
To register a handset, first press the paging key on the base for approx. 5 seconds
when the base is in idle mode. Then carry out the following steps on the handset within
one minute :
1. Press and press Down to reach ADVANCE SET.
2. Press and press Down to reach REGISTRATION.
3. Press , enter the PIN code (by default the PIN code is 0000) and press
If the registration was successfull, a long confirmation tone is heard and the handset
number (1 to 5) will be assigned by the base automatically.
to confirm.
30
Page 32

Advanced settings
To unregister a handset
1. Press and press Down to reach ADVANCE SET.
2. Press and press Down to reach UNREGISTER.
3. Press , enter the PIN code (by default the PIN code is 0000) and press
.
4. Scroll to select the handset number and press . UNREGISTERED
appears on the screen.
Note: If you have your handset serviced, please make sure it is unregistered from
the base station before taking it back to the repair centre.
To change the PIN code
The default PIN code is “0000”. We advise you to personalize it. The maximum length for
the PIN code is 8 digits.
1. Press and press Down to reach ADVANCE SET.
2. Press and press Down to reach PIN.
3. Press , enter the current PIN code and press .
4. Enter the new PIN code and press to confirm.
To reset to default settings (base station and handset)
You can reset your phone to the default settings (see page 32) at any time. Note that after
a reset all your personal settings and the call log will be deleted, however your phonebook
entries remain unchanged.
EN
1. Press and press Down to reach ADVANCE SET.
2. Press and press Down to reach RESET UNIT.
3. Press , CONFIRM? is shown. Press to confirm.
31
Page 33

EN
Advanced settings
Country selection
Use this feature if you need to re-configurate your CD 130.
1. Press and press Down to reach ADVANCE SET.
2. Press and press Down to reach COUNTRY SEL..
3. Browse through the different countries and press to select the country
that suits you.
4. CONFIRM? is shown, press to confirm.
Default settings (after Reset Unit)
Handset Ringer volume :
Handset Ringtone :
Handset earpiece volume :
Handset speakerphone volume :
Handset key tone :
Battery low tone :
Menu language (Handset) :
Auto answer :
Handset name :
Time/Date (Handset) :
Dialling mode :
Flash time :
PIN code :
Alarm :
Alarm tone :
Area code :
Call barring :
SOS number :
Redial list :
Phonebook memory :
Call log :
Prefix :
32
MEDIUM
MELODY 1
VOLUME 2
VOLUME 3
ON
ON
Country dependent
OFF
PHILIPS
00:00 01-01
Country dependent
Country dependent
0000
OFF
MELODY 1
Empty
Empty
Empty
Empty
Remain unchanged
Empty
Empty
Page 34

Troubleshooting
Telephone troubleshooting
PROBLEMS CAUSES SOLUTIONS
The battery icon is not
blinking when the handset is
placed on the base.
No dialling tone. • No power.
No ring tone. • The ring tone is
The range icon does not
appear.
The range icon is blinking. • Handset not registered to
Crackling on the line. • You are too far from the
• Bad battery contact.
• Dirty contact.
• Battery is full.
• Batteries are empty.
• You are too far from the
base station.
• Wrong line cable.
• Line adaptor (when
needed) not connected to
the line cord.
deactivated.
•No mains power.
• The handset is too far
from the base station.
the base station.
base station.
• The base station is too
close to electrical
appliances, reinforced
concrete walls or metal
doorframes.
• Move the handset slightly.
• Clean the contact with a
cloth moistened with
alcohol.
• No need to charge.
• Check the connections.
Reset the phone : unplug
and plug back in the
mains.
• Charge the batteries at
least 24 hours.
• Move closer to the base
station.
• Always use the line cable
provided.
• Connect the line adaptor
(when needed) to the line
cord
• Increase the volume
(page 25)
• Check connections.
• Move closer to the base
station.
• Register the handset to
the base (page 30).
• Move closer to the base
station.
• Move the base station to
find a better place (the
higher the better).
EN
33
Page 35

EN
PROBLEMS CAUSES SOLUTIONS
The handset displays „not
available“ :
• when attempting to add
another handset to the
base station,
• when using a handset.
Noise interference on your
radio or television
Caller Line Identification
(CLI) service does not
work.
A phonebook entry cannot
be stored.
Troubleshooting
• The procedure to add a
handset has failed, try
again.
• Maximum number of
handsets (5) has been
reached.
• Base station is already
busy with another
handset.
• The CD 130 base station
or mains power pack are
too close to electrical
appliances.
• The service is not
activated.
• The phonebook is full. • Delete an entry to free
• Disconnect and connect
the base station power
supply.
• Remove and place back
the handset batteries.
• Follow the procedure to
register a handset
(page 30).
• Unregister a handset.
• Wait until it is available.
• Move the power pack or
base station as far away as
possible.
• Check your subscription
with your network
operator.
memory.
34
Page 36

Informations
Safety information
This equipment is not designed to make emergency calls when the power fails. An
alternative has to be made available to allow emergency calls.
Conformity
Hereby, Philips declares that the CD 130 is in compliance with the essential requirements
and other relevant provisions of Directive 1999/5/EC. This product can only be connected
to the analogue telephone networks of the countries mentioned on the packaging.
The Declaration of conformity is available on www.p4c.philips.com.
Safety precautions
Do not allow the handset to come into contact with water. Do not open the handset or
the base station. You could be exposed to high voltages. Do not allow the charging
contacts or the batteries to come into contact with conductive materials. Never use any
battery type other than the one supplied : risk of explosion.
Environmental care
Please remember to observe the local regulations regarding the disposal of your packaging
materials, exhausted batteries and old phone and, where possible, promote their recycling.
Recycling & disposal
Disposal instructions for old products :
The purpose of the WEEE directive (Waste Electrical and Electronic Equipment; 2002/96/
EC) is to ensure that products are recycled using best available treatment, recovery and
recycling techniques to ensure human health and high environmental protection.
Your product is designed and manufactured with high quality materials and components,
which can be recycled and reused.
Do not dispose of your old product in your general household waste bin.
Inform yourself about the local separate collection system for electrical and
electronic products marked by this symbol :
Use one of the following disposal options :
1. Dispose of the complete product (including its cables, plugs and accessories) in the designated WEEE collection facilities.
2. If you purchase a replacement product, hand your complete old product back to the
retailer. He should accept it as required by the WEEE directive.
Philips has marked the packaging with standard symbols designed to promote
the recycling and appropriate disposal of your eventual waste.
A financial contribution has been paid to the associated national recovery & recycling
system.
The labelled packaging material is recyclable.
EN
35
Page 37

EN
Notes
36
Page 38

Page 39

Trademarks are the property of Koninklijke Philips Electronics N.V. or their respective owners.
Specifications are subject to change without notice.
2006 © Koninklijke Philips Electronics N.V. All rights reserved.
www.philips.com
3111 285 28152
 Loading...